
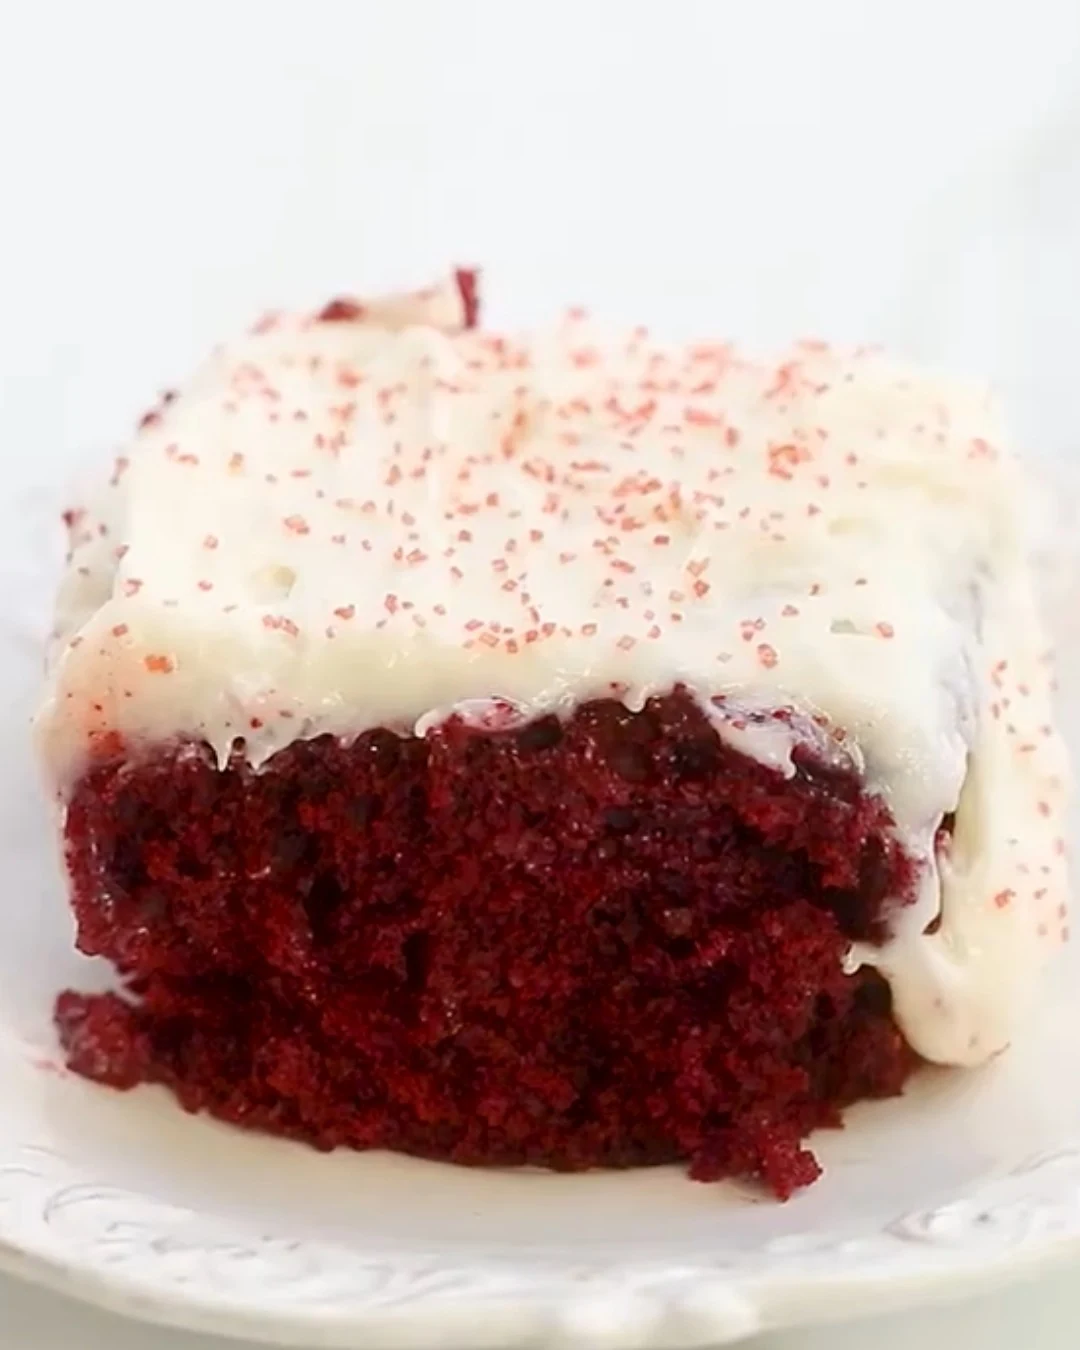
Red Velvet Dream Poke Cake is a delightful dessert that combines the rich flavors of red velvet cake with a luscious strawberry filling and creamy frosting. This cake is not only visually stunning but also incredibly delicious, making it a perfect treat for any occasion.
Why You’ll Love This Recipe
- Decadent Flavor: The combination of red velvet and strawberry creates a unique taste that is both rich and refreshing.
- Easy to Prepare: With simple steps, this cake is perfect for both novice and experienced bakers.
- Perfect for Any Occasion: Whether it’s a birthday, holiday, or just a sweet craving, this cake fits right in.
- Make-Ahead Option: Refrigerating the cake enhances its flavor and allows for easy serving later.
- Impressive Presentation: The vibrant colors and garnished strawberries make this cake a showstopper.
Tools and Equipment
Having the right tools can make your baking experience enjoyable and efficient.
Essential Tools
- 9×13 inch baking dish
- Mixing bowls
- Wooden spoon
- Electric mixer
- Measuring cups and spoons
- Spatula
- Refrigerator
Why These Tools Matter
- 9×13 inch baking dish: Ideal size for even baking and serving.
- Electric mixer: Saves time and effort when mixing the cream cheese and frosting.
- Spatula: Ensures even spreading of the frosting for a professional finish.
Ingredients for Red Velvet Dream Poke Cake
Cake Base
- 1 box red velvet cake mix
- Ingredients required by cake mix (usually water, oil, eggs)
Filling
- 1 can (14 oz) sweetened condensed milk
- 1 jar (12 oz) strawberry jam
Frosting
- 1 package (8 oz) cream cheese, softened
- 1/2 cup powdered sugar
- 1 tub (8 oz) whipped topping
- 1 teaspoon vanilla extract
Garnish
- Fresh strawberries for garnish
How to Make Red Velvet Dream Poke Cake Step-by-Step
Step 1: Prep the Base
Follow the instructions on the red velvet cake mix to bake the cake in a 9×13 inch baking dish. Ensure the cake is baked until a toothpick comes out clean. Allow it to cool slightly after baking.
Step 2: Poke Holes
Using the handle of a wooden spoon, poke holes all over the top of the cooled cake. This step is crucial as it allows the filling to soak in, enhancing the flavor.
Step 3: Prepare Filling
In a small bowl, combine the sweetened condensed milk and strawberry jam. Mix well until combined. Pour this mixture over the cake, ensuring it fills the holes for maximum flavor infusion.
Step 4: Make Frosting
In another bowl, beat the softened cream cheese until smooth. Gradually add the powdered sugar and vanilla extract, continuing to beat until creamy. Gently fold in the whipped topping until well combined, creating a light and fluffy frosting.
Step 5: Frost the Cake
Spread the cream cheese frosting evenly over the top of the cake. Ensure that the frosting covers the entire surface for a beautiful finish.
Step 6: Garnish and Chill
Garnish the cake with fresh strawberries on top. Refrigerate for at least 4 hours before serving to allow the flavors to meld and the cake to set perfectly.
Enjoy your Red Velvet Dream Poke Cake, a dessert that promises to impress and satisfy with every bite!
How to Serve Red Velvet Dream Poke Cake
Red Velvet Dream Poke Cake can be enjoyed in various delightful ways. Here are some creative serving ideas:
Individual Servings
Consider cutting the cake into squares and serving them in dessert cups. This not only enhances presentation but also makes it easier for guests to enjoy without the need for plates.
Ice Cream Topping
Serve slices of the Red Velvet Dream Poke Cake warm and top them with a scoop of vanilla or strawberry ice cream. The cold ice cream complements the richness of the cake, creating a delightful contrast.
Layered Parfaits
Layer pieces of the poke cake with whipped topping and fresh strawberries in a glass to create a stunning layered parfait. This adds an elegant touch to your dessert presentation and is perfect for gatherings.
Pro Tips for the Best Red Velvet Dream Poke Cake
To achieve the perfect Red Velvet Dream Poke Cake, follow these expert tips:
-
Use Fresh Ingredients: Always use fresh eggs and high-quality vanilla extract to enhance the flavor of your cake.
-
Cool Completely: Ensure the cake cools completely before poking holes. This prevents the filling from leaking out and ensures a moist cake.
-
Chill Before Serving: Allow the cake to chill for at least 4 hours after frosting. This not only helps the flavors meld but also makes slicing easier.
-
Customize the Toppings: Feel free to experiment with different fruits or even nuts for garnish to add a personal touch to your cake.
-
Store Properly: Keep any leftovers covered in the refrigerator to maintain freshness and texture.
Best Side Dishes and Pairings
Pairing the Red Velvet Dream Poke Cake with the right sides can elevate your dessert experience. Here are some excellent options:
-
Vanilla Ice Cream: The classic pairing with its creamy texture perfectly complements the richness of the cake.
-
Fruit Salad: A refreshing fruit salad adds a light and bright contrast to the sweetness of the poke cake.
-
Coffee: A warm cup of coffee balances the sweetness of the cake, making it a delightful end to a meal.
-
Chocolate Mousse: For chocolate lovers, pairing this cake with a rich chocolate mousse creates a decadent dessert experience.
-
Sparkling Water: A crisp sparkling water with lemon or lime enhances the flavors of the cake while cleansing the palate.
Common Mistakes to Avoid
- Overbaking the Cake: Ensure you follow the baking time as specified on the cake mix package to prevent a dry cake.
- Not Poking Enough Holes: Make sure to poke holes all over the cake so that the filling can seep in properly.
- Skipping Chilling Time: Allowing the cake to chill for at least 4 hours is crucial for the flavors to meld.
- Using Cold Ingredients: Bring cream cheese and whipped topping to room temperature for a smoother frosting texture.
Storage & Reheating Instructions
Refrigerator Storage
Store the Red Velvet Dream Poke Cake in an airtight container in the refrigerator. It will stay fresh for up to 5 days.
Freezing Instructions
To freeze, cut the cake into individual slices and wrap each slice tightly in plastic wrap, then place them in a freezer-safe container. The cake can be frozen for up to 2 months. Thaw in the refrigerator before serving.
Reheating Tips
- Oven: Preheat to 350°F (175°C). Place slices in a baking dish and cover with foil. Heat for 10-15 minutes.
- Microwave: Place a slice on a microwave-safe plate. Heat for 15-20 seconds, checking for warmth.
- Stovetop: Use a skillet over low heat. Place the slice in the skillet and cover. Heat for 5-7 minutes or until warm.
Frequently Asked Questions
Can I make the Red Velvet Dream Poke Cake ahead of time?
Yes, this cake can be made up to a day in advance. Just make sure to cover it well and refrigerate.
What can I substitute for whipped topping?
You can use homemade whipped cream as a substitute for whipped topping in this recipe.
How do I enhance the flavor of the filling for the Red Velvet Dream Poke Cake?
You can add a splash of vanilla extract or a bit of almond extract to the filling for extra flavor.
Can I use a different cake mix for this recipe?
Absolutely! While red velvet is traditional, you can experiment with other flavors like chocolate or vanilla.
What should I do if my frosting is too thick?
If your frosting is too thick, you can add a little milk, one tablespoon at a time, until you reach your desired consistency.
Final Thoughts
This Red Velvet Dream Poke Cake is an indulgent treat that will impress your guests and satisfy your sweet tooth. We encourage you to try this recipe for your next gathering and leave a comment below with your feedback or any modifications you made.
Desserts
PrintRed Velvet Dream Poke Cake

This Red Velvet Dream Poke Cake is a delightful dessert that combines the rich flavor of red velvet cake with a creamy strawberry filling and frosting. Perfect for any occasion, this cake is sure to impress with its vibrant color and delicious taste.
- Prep Time: 20 mins
- Cook Time: 30 mins
- Total Time: 4 hours 50 mins
- Yield: 12 servings 1x
- Category: Desserts
- Method: No bake
- Cuisine: American
Ingredients
- 1 tub (8 oz) whipped topping
- 1/2 cup powdered sugar
- 1 package (8 oz) cream cheese, softened
- 1 can (14 oz) sweetened condensed milk
- Fresh strawberries for garnish
- 1 jar (12 oz) strawberry jam
- 1 box red velvet cake mix
- Ingredients required by cake mix (usually water, oil, eggs)
- 1 teaspoon vanilla extract
Instructions
- Prepare the Cake: Follow the instructions on the red velvet cake mix to bake the cake in a 9×13 inch baking dish. Allow it to cool slightly after baking.
- Poke Holes: Using the handle of a wooden spoon, poke holes all over the top of the cake.
- Prepare Filling: In a small bowl, combine sweetened condensed milk and strawberry jam. Pour this mixture over the cake, making sure it fills the holes.
- Make Frosting: In another bowl, beat cream cheese until smooth. Add powdered sugar and vanilla extract, then continue beating until creamy. Fold in whipped topping until well combined.
- Frost the Cake: Spread the cream cheese frosting evenly over the cake.
- Garnish and Chill: Garnish with fresh strawberries, then refrigerate for at least 4 hours before serving.
Nutrition
- Calories: 450
- Sugar: 41g
- Sodium: 340mg
- Fat: 22g
- Saturated Fat: 10g
- Carbohydrates: 58g
- Fiber: 1g
- Protein: 5g
- Cholesterol: 40mg