Category: Desserts

  • Indulge in Luxurious German Chocolate Poke Cake Today

    Indulge in Luxurious German Chocolate Poke Cake Today

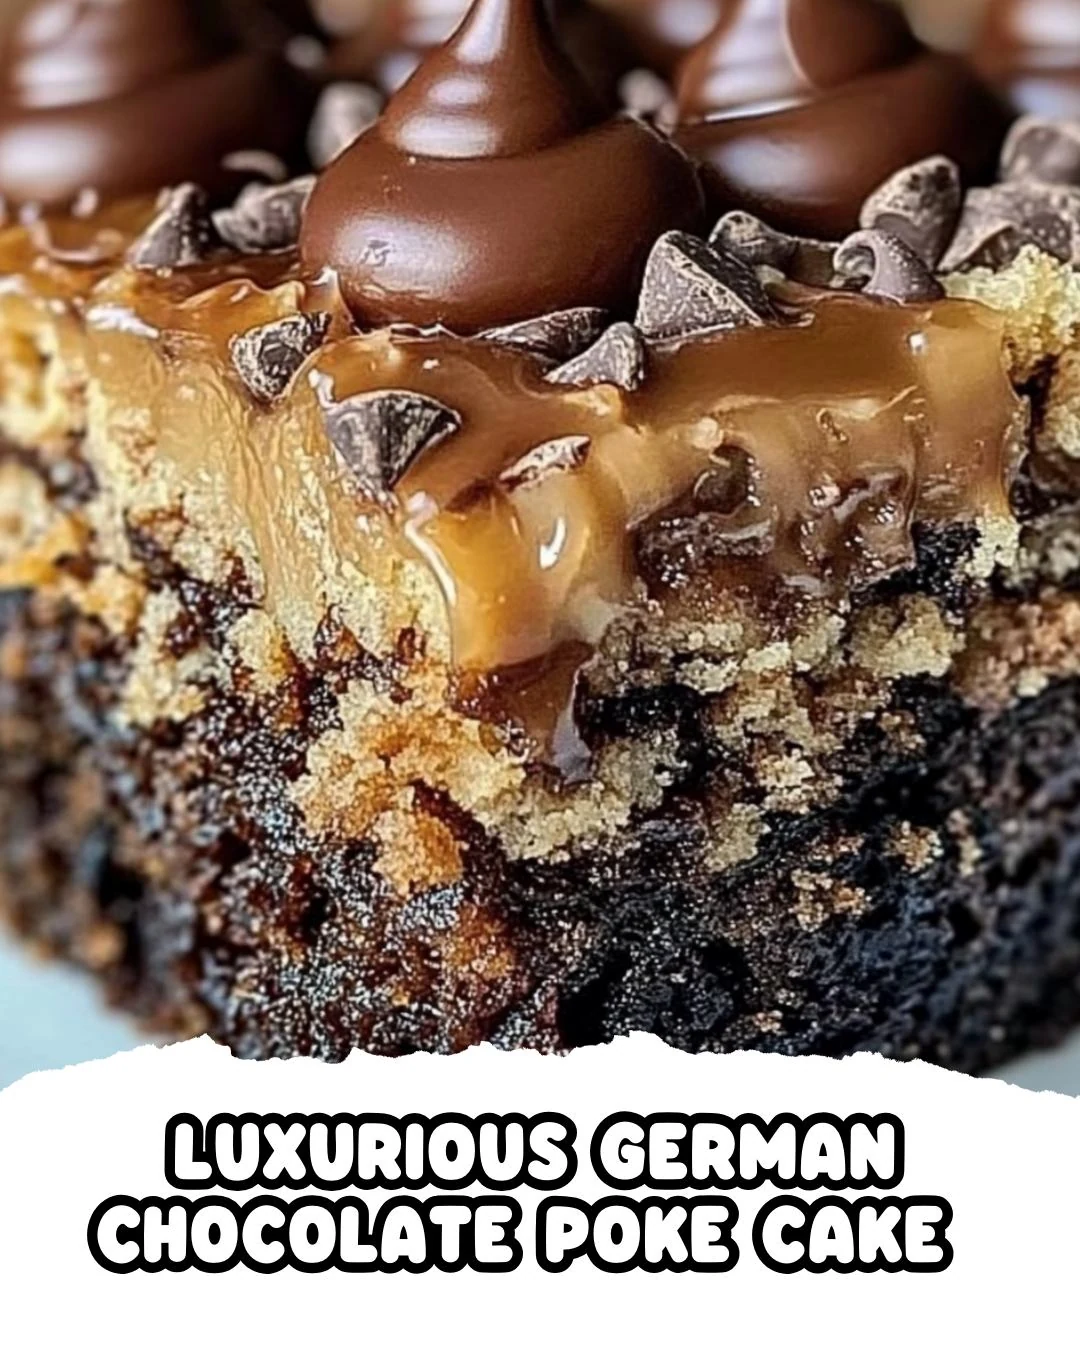
    Luxurious German Chocolate Poke Cake is an indulgent dessert that combines rich chocolate flavor with sweet caramel and coconut. This cake is perfect for celebrations or as a delightful treat to satisfy your cravings. Its layers of flavor and texture make it an unforgettable choice for any occasion.

    Why You’ll Love This Recipe

    • Decadent Flavor: The combination of chocolate, caramel, and coconut creates a taste experience that is simply irresistible.
    • Moist & Soft Texture: The poke cake method ensures every bite is infused with flavor and moisture.
    • Easy to Customize: Feel free to adjust the toppings or add your favorite nuts for a personal touch.
    • Perfect for Any Occasion: Whether it’s a birthday party or a casual gathering, this cake will impress your guests.
    • Quick Prep Time: With a total time of just one hour, you can whip up this luxurious dessert in no time.

    Tools and Equipment

    To make this luxurious cake, you will need some essential kitchen tools.

    Essential Tools

    • Mixing bowls
    • Electric mixer
    • 9×13 inch baking pan
    • Wooden spoon
    • Medium saucepan
    • Measuring cups and spoons

    Why These Tools Matter

    • Electric mixer: Saves time and ensures a smooth batter for the cake.
    • 9×13 inch baking pan: Perfect size for even baking and easy serving.
    • Medium saucepan: Ideal for making the decadent topping without spills.

    Ingredients for Luxurious German Chocolate Poke Cake

    For the Cake

    • 1 box German chocolate cake mix
    • 1 1/3 cups water
    • 1/2 cup vegetable oil
    • 3 large eggs

    For the Filling

    • 1 can (14 ounces) sweetened condensed milk
    • 1 jar (12 ounces) caramel topping

    For the Topping

    • 1 cup sweetened shredded coconut
    • 1 cup chopped pecans
    • 1 can (12 ounces) evaporated milk
    • 1/2 cup unsalted butter
    • 1/2 cup granulated sugar
    • 1/2 cup light brown sugar, packed
    • 1 1/2 cups semi-sweet chocolate chips
    • 3 large egg yolks, lightly beaten
    • 1 teaspoon vanilla extract

    How to Make Luxurious German Chocolate Poke Cake Step-by-Step

    Step 1: Prepare the Cake

    1. Preheat your oven to 350°F (175°C). Grease a 9×13 inch baking pan.
    2. In a large bowl, combine 1 box of German chocolate cake mix, 1 1/3 cups water, 1/2 cup vegetable oil, and 3 large eggs. Beat on medium speed for about 2 minutes.
    3. Pour the batter into the prepared pan and bake for 25-30 minutes, or until a toothpick inserted into the center comes out clean.
    4. Allow the cake to cool for 10 minutes.

    Step 2: Make the Filling

    1. Using the handle of a wooden spoon, poke holes all over the cake.
    2. In a medium bowl, mix together 1 can (14 ounces) sweetened condensed milk and 1 jar (12 ounces) caramel topping.
    3. Pour the mixture evenly over the cake, ensuring it fills the holes.

    Step 3: Prepare the Topping

    1. In a medium saucepan over medium heat, combine 1 can (12 ounces) evaporated milk, 1/2 cup unsalted butter, 1/2 cup granulated sugar, 1/2 cup light brown sugar, and 3 large egg yolks.
    2. Cook, stirring constantly, until the mixture thickens and turns golden brown, about 10-12 minutes.
    3. Remove from heat and stir in 1 teaspoon vanilla extract, 1 cup chopped pecans, and 1 cup sweetened shredded coconut.
    4. Spread this mixture evenly over the cake.

    Step 4: Add the Chocolate

    1. Sprinkle 1 1/2 cups semi-sweet chocolate chips over the warm topping. Allow the chocolate to melt, then spread it out evenly.

    Step 5: Cool and Serve

    1. Let the cake cool completely before serving.

    Preparation Time: 20 minutes | Cooking Time: 40 minutes | Total Time: 1 hour

    Nutritional Information (per serving):
    – Calories: 480 kcal
    – Carbohydrates: 62g
    – Proteins: 6g
    – Fats: 23g
    – Sugars: 47g
    – Fiber: 2g

    Enjoy this indulgent poke cake with layers of caramel, chocolate, and coconut. It is truly an irresistible treat for any occasion!

    How to Serve Luxurious German Chocolate Poke Cake

    This cake is as versatile as it is delicious, making it a fantastic option for a variety of occasions.

    Individual Servings

    Serve slices of the Luxurious German Chocolate Poke Cake on individual dessert plates, garnished with a dollop of whipped cream and a sprinkle of toasted coconut for an elegant touch.

    Cake Pops

    Transform leftovers into cake pops by crumbling the cake, mixing it with a bit of frosting, and forming small balls. Dip them in chocolate and roll in crushed pecans for a fun, bite-sized treat.

    À La Mode

    Top each slice with a scoop of vanilla ice cream. The cold ice cream paired with the warm cake creates a delightful contrast that enhances the flavors of the cake.

    Pro Tips for the Best Luxurious German Chocolate Poke Cake

    To ensure your cake turns out perfectly, consider these expert tips.

    • Use Quality Ingredients: Opt for high-quality chocolate and fresh eggs to enhance the flavors of your poke cake.

    • Don’t Overbake: Keep an eye on your cake while it bakes. Overbaking can lead to a dry texture, so check for doneness a few minutes early.

    • Cool Before Serving: Allow the cake to cool completely to let the flavors meld and to make slicing easier.

    • Experiment with Fillings: Feel free to mix up the filling by adding crushed candies or flavor extracts to customize the cake to your taste.

    • Store Properly: Keep leftover cake in an airtight container in the refrigerator to maintain its freshness for up to a week.

    Best Side Dishes and Pairings

    Pairing your Luxurious German Chocolate Poke Cake with complementary side dishes and drinks can elevate your dessert experience.

    1. Coffee: A rich cup of coffee balances the sweetness of the cake and enhances its chocolate flavor.

    2. Milk: Classic and comforting, a glass of cold milk is the perfect accompaniment for this indulgent dessert.

    3. Vanilla Ice Cream: The creaminess of vanilla ice cream adds a refreshing contrast to the rich, chocolatey layers of the cake.

    4. Fresh Berries: The tartness of fresh berries, like raspberries or strawberries, provides a nice balance to the sweetness of the cake.

    5. Chocolate Milkshake: For chocolate lovers, a thick chocolate milkshake can intensify the dessert experience, making it even more decadent.

    Common Mistakes to Avoid

    • Not Poking Enough Holes: Ensure you poke enough holes in the cake to allow the filling to soak in.
    • Skipping the Cooling Step: Don’t rush the cooling process; letting the cake cool completely enhances the flavors.
    • Overcooking the Topping: Watch the topping closely while cooking; overcooking can result in a grainy texture.
    • Using Cold Ingredients: Make sure your eggs and other ingredients are at room temperature for better mixing and texture.

    Storage & Reheating Instructions

    Refrigerator Storage

    Store the Luxurious German Chocolate Poke Cake in an airtight container in the refrigerator. It stays fresh for up to five days.

    Freezing Instructions

    To freeze, cut the cake into portions and wrap each piece tightly in plastic wrap, then place in a freezer-safe container. The cake can be frozen for up to three months. Thaw it overnight in the refrigerator before serving.

    Reheating Tips

    • Oven: Preheat the oven to 350°F (175°C) and heat the cake for about 10-15 minutes until warm.
    • Microwave: Microwave individual slices for 20-30 seconds on medium power.
    • Stovetop: Place a slice in a skillet on low heat, covering it with a lid, and warm for 5-7 minutes.

    Frequently Asked Questions

    Can I use a different cake mix for the Luxurious German Chocolate Poke Cake?

    Yes, you can substitute with other chocolate cake mixes, but the flavor will differ from the traditional German chocolate.

    How can I make this Luxurious German Chocolate Poke Cake gluten-free?

    To make it gluten-free, use a gluten-free chocolate cake mix and ensure all other ingredients are certified gluten-free.

    Can I make this cake in advance?

    Absolutely! The Luxurious German Chocolate Poke Cake can be made a day ahead and stored in the refrigerator.

    What can I substitute for pecans in the topping?

    If you have nut allergies, you can omit the pecans or replace them with sunflower seeds or pumpkin seeds for a similar crunch.

    How do I ensure my cake stays moist?

    Poking sufficient holes and pouring the filling evenly will help keep the Luxurious German Chocolate Poke Cake moist and flavorful.

    Final Thoughts

    This Luxurious German Chocolate Poke Cake is a decadent treat that is sure to impress at any gathering. With its rich layers of caramel, chocolate, and coconut, it’s an indulgence worth making. Try it out, and don’t forget to leave a comment with your feedback!

    Desserts

    Luxurious German Chocolate Poke Cake


    5.0 from 24 reviews

    This indulgent German Chocolate Poke Cake features layers of rich chocolate, creamy caramel, and toasted coconut, making it a perfect dessert for any occasion. Each bite is a delightful combination of flavors and textures that will satisfy your sweet tooth.
    Author: Munch Twist
    Prep Time: 20 minutes
    Cook Time: 40 minutes
    Total Time: 1 hour
    Yield: 12 servings
    Category: Desserts
    Method: No bake
    Cuisine: American

    Luxurious German Chocolate Poke Cake

    SCALE:
    1x
    2x
    3x
    Cook Mode: Prevent your screen from going dark

    Ingredients

    • 1 box German chocolate cake mix
    • 1 1/3 cups water
    • 1/2 cup vegetable oil
    • 3 large eggs
    • 1 can (14 ounces) sweetened condensed milk
    • 1 jar (12 ounces) caramel topping
    • 1 cup sweetened shredded coconut
    • 1 cup chopped pecans
    • 1 can (12 ounces) evaporated milk
    • 1/2 cup unsalted butter
    • 1/2 cup granulated sugar
    • 1/2 cup light brown sugar, packed
    • 1 1/2 cups semi-sweet chocolate chips
    • 3 large egg yolks, lightly beaten
    • 1 teaspoon vanilla extract

    Instructions

    1. Preheat your oven to 350°F (175°C). Grease a 9×13 inch baking pan. In a large bowl, combine the cake mix, water, vegetable oil, and eggs. Beat on medium speed for about 2 minutes. Pour the batter into the prepared pan and bake for 25-30 minutes, or until a toothpick inserted into the center comes out clean. Allow the cake to cool for 10 minutes.
    2. Using the handle of a wooden spoon, poke holes all over the cake. In a medium bowl, mix together the sweetened condensed milk and caramel topping. Pour the mixture evenly over the cake, making sure it fills the holes.
    3. In a medium saucepan over medium heat, combine the evaporated milk, unsalted butter, granulated sugar, light brown sugar, and egg yolks. Cook, stirring constantly, until the mixture thickens and turns golden brown, about 10-12 minutes. Remove from heat and stir in the vanilla extract, chopped pecans, and shredded coconut. Spread this mixture evenly over the cake.
    4. Sprinkle the semi-sweet chocolate chips over the warm topping. Allow the chocolate to melt, then spread it out evenly.
    5. Let the cake cool completely before serving.
    Nutrition Facts

    Serving Size: 1 serving
    Calories: 480 kcal
    Sugar: 47g
    Sodium: 200mg
    Fat: 23g
    Saturated Fat: 10g
    Carbohydrates: 62g
    Fiber: 2g
    Protein: 6g
    Cholesterol: 70mg

  • Easy No-Bake Mini Banana Cream Pies Recipe

    Easy No-Bake Mini Banana Cream Pies Recipe

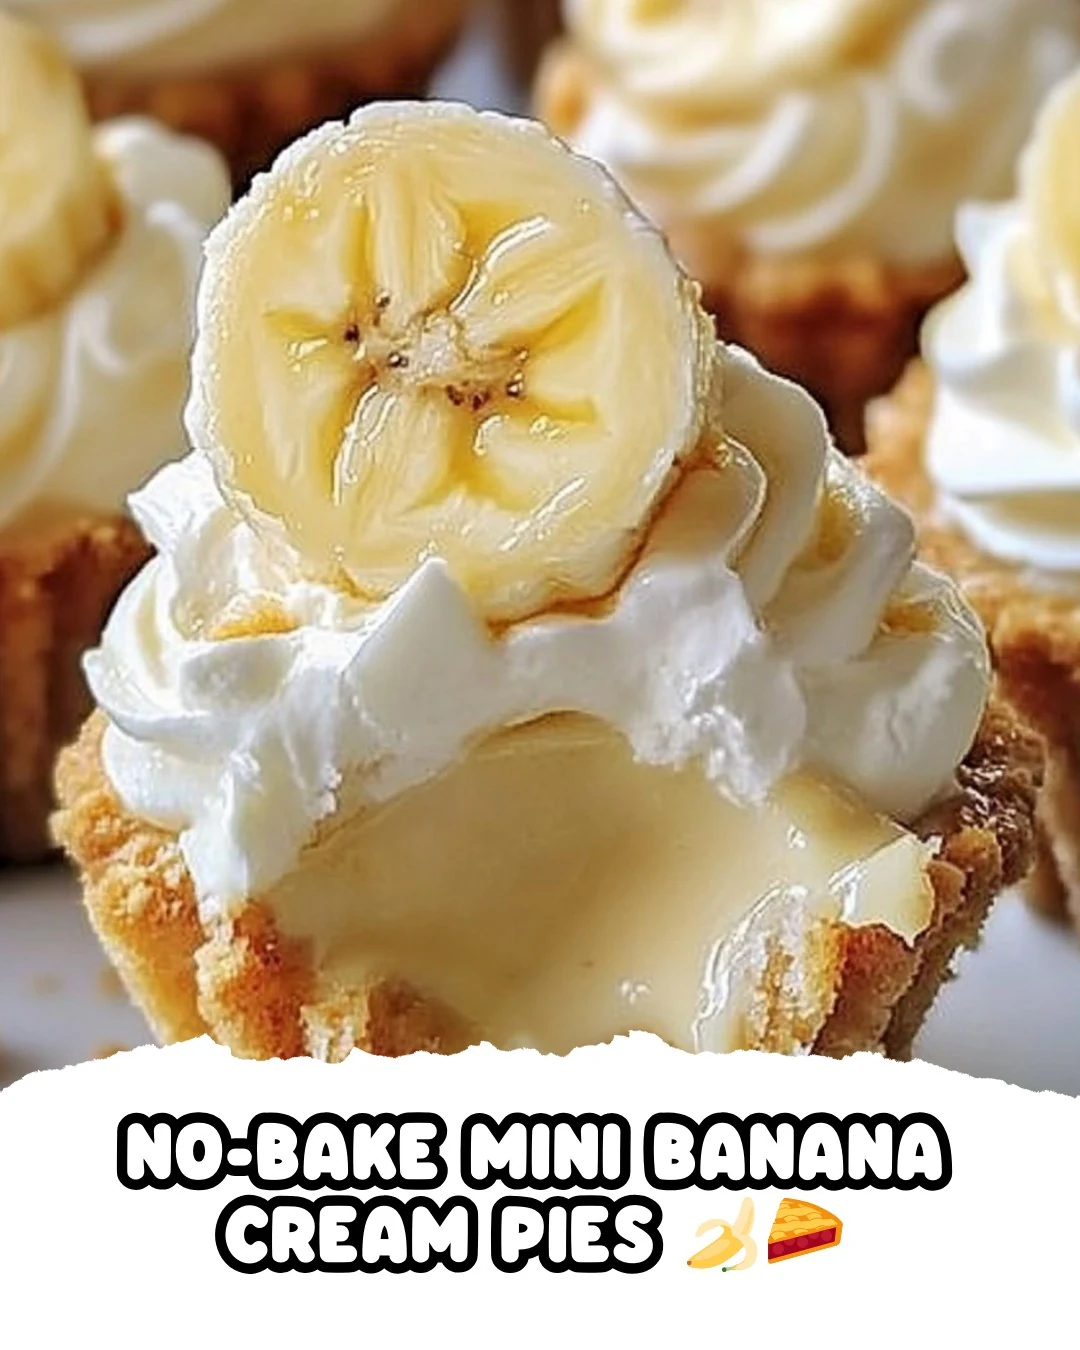
    No-Bake Mini Banana Cream Pies are a delightful treat that combines the rich flavors of banana and creamy pudding. This dessert is not only simple to prepare but also a guaranteed crowd-pleaser that will have everyone reaching for seconds.

    Why You’ll Love This Recipe

    • Quick & Easy: Ready in under 30 minutes, plus chilling time.
    • No Baking Required: Perfect for warm days when you want a cool dessert without the oven.
    • Customizable: Add your favorite toppings or mix-ins for a personal touch.
    • Kid-Friendly: Fun for kids to help make and enjoy.
    • Perfect Portions: Mini pies are great for parties or snacks, allowing for easy serving.

    Tools and Equipment

    To prepare these delicious pies, you’ll need a few essential tools.

    Essential Tools

    • A muffin tin
    • Mixing bowls
    • Whisk
    • Rubber spatula
    • Measuring cups and spoons

    Why These Tools Matter

    • Muffin tin: This creates the perfect mini pie shape for serving.
    • Mixing bowls: Essential for combining ingredients without mess.
    • Whisk: Makes it easy to achieve the right consistency for pudding and whipped cream.

    Ingredients for No-Bake Mini Banana Cream Pies

    For the Crust

    • 1 1/2 cups graham cracker crumbs
    • 1/2 cup melted butter
    • 1/4 cup sugar

    For the Banana Pudding

    • 1 package (3.4 oz) instant banana cream pudding mix
    • 2 cups cold milk

    For the Whipped Cream

    • 1 cup heavy cream
    • 2 tablespoons powdered sugar
    • 1 teaspoon vanilla extract

    For Garnishing

    • 2 ripe bananas, sliced
    • Whipped cream, for topping
    • Honey, for drizzling

    How to Make No-Bake Mini Banana Cream Pies Step-by-Step

    Step 1: Prepare the Crust

    In a medium bowl, combine 1 1/2 cups graham cracker crumbs, 1/2 cup melted butter, and 1/4 cup sugar. Mix until everything is well combined. Press this mixture firmly into the bottom and up the sides of a muffin tin to form mini pie crusts. Refrigerate the crusts for at least 1 hour to set.

    Step 2: Make the Banana Pudding

    In a large bowl, whisk together 1 package (3.4 oz) instant banana cream pudding mix and 2 cups cold milk until the mixture thickens. Place the bowl in the refrigerator for about 5 minutes to allow the pudding to firm up.

    Step 3: Whip the Cream

    In a separate bowl, whip 1 cup heavy cream with 2 tablespoons powdered sugar and 1 teaspoon vanilla extract until stiff peaks form. This will give the pies their light and airy texture.

    Step 4: Combine Pudding and Whipped Cream

    Gently fold half of the whipped cream into the banana pudding mixture. This step adds a lightness to the pudding.

    Step 5: Fill the Crusts

    Spoon the banana pudding into the chilled mini pie crusts, filling each one generously.

    Step 6: Top with Whipped Cream

    Use the remaining whipped cream to top each mini pie with a dollop, adding a beautiful finish.

    Step 7: Garnish

    Finally, garnish each mini pie with slices of banana and a drizzle of honey for extra sweetness and visual appeal.

    Enjoy these delightful no-bake mini banana cream pies that are as easy to make as they are delicious!

    How to Serve No-Bake Mini Banana Cream Pies

    These delightful desserts are perfect for various occasions. Here are some creative serving ideas to elevate your mini banana cream pies.

    Individual Dessert Cups

    Serve the mini pies in clear dessert cups for an elegant presentation. This allows guests to see the layers of banana pudding and whipped cream, making them even more enticing.

    Party Platter

    Arrange the mini pies on a vibrant platter alongside fresh fruit. This not only adds color but also makes it easy for guests to grab a pie while mingling.

    Kids’ Birthday Party Treat

    These mini pies are a hit with children. Serve them on a fun-themed table with colorful plates and napkins for a delightful birthday treat.

    Pro Tips for the Best No-Bake Mini Banana Cream Pies

    To ensure your no-bake mini banana cream pies turn out perfectly, follow these essential tips.

    • Use Fresh Bananas: Opt for ripe bananas to achieve the best flavor and sweetness in your pies.

    • Chill Thoroughly: Make sure to refrigerate the crusts and pudding long enough for them to set, enhancing the overall texture.

    • Avoid Browning: To prevent banana slices from browning, consider tossing them in a little lemon juice before garnishing.

    • Texture Matters: For a creamier filling, fold the whipped cream into the pudding gently to maintain its lightness.

    • Customize Toppings: Feel free to add your favorite toppings such as chocolate shavings, crushed nuts, or a sprinkle of cinnamon for extra flavor.

    Best Side Dishes and Pairings

    These no-bake mini banana cream pies pair wonderfully with a variety of side dishes and drinks. Here are some excellent options.

    1. Fresh Fruit Salad: A mix of seasonal fruits complements the sweetness of the pies and adds a refreshing element.

    2. Vanilla Ice Cream: The creaminess of vanilla ice cream pairs perfectly with the banana flavor, creating a delightful contrast.

    3. Iced Tea: A glass of chilled iced tea, whether sweetened or unsweetened, adds a refreshing balance to the rich flavors of the pies.

    4. Chocolate Milk: This classic pairing enhances the dessert experience, especially for children and chocolate lovers.

    5. Coffee: A cup of rich coffee contrasts nicely with the sweetness of the pies, making it a great choice for adults.

    6. Lemonade: The tartness of lemonade pairs beautifully with the creamy sweetness, providing a pleasant balance.

    Common Mistakes to Avoid

    • Skipping the Chilling Time: Not allowing the crusts or the pudding to chill properly can affect the texture and flavor.
    • Overmixing the Whipped Cream: Whipping the cream too long can lead to a grainy texture; stop when stiff peaks form.
    • Using Overripe Bananas: While ripe bananas are essential, overly brown bananas can alter the taste and texture negatively.
    • Neglecting to Fold Gently: When combining the whipped cream with the pudding, fold gently to maintain the airy texture.

    Storage & Reheating Instructions

    Refrigerator Storage

    Store the mini banana cream pies in airtight containers in the refrigerator. They will stay fresh for up to 3 days.

    Freezing Instructions

    These mini pies can be frozen, but it’s best to freeze them before adding the whipped cream topping. Wrap each pie tightly in plastic wrap and then in aluminum foil. They can be stored in the freezer for up to 2 months.

    Reheating Tips

    • Oven: Preheat the oven to 350°F (175°C) and bake for about 10 minutes until slightly warm.
    • Microwave: Heat on medium power for 20-30 seconds.
    • Stovetop: Place in a saucepan over low heat, stirring gently until warmed through.

    Frequently Asked Questions

    How long do No-Bake Mini Banana Cream Pies last in the fridge?

    These pies can be stored in the refrigerator for up to 3 days, maintaining their freshness and flavor.

    Can I make No-Bake Mini Banana Cream Pies ahead of time?

    Yes, you can prepare the crust and filling ahead of time. Assemble the pies just before serving for the best texture.

    What can I use instead of bananas in this recipe?

    You can substitute bananas with other fruits like strawberries or blueberries, but the flavor will differ from the classic banana cream pie.

    Can No-Bake Mini Banana Cream Pies be frozen?

    Yes, they can be frozen before adding whipped cream. Wrap them tightly and store for up to 2 months.

    How do I ensure my whipped cream stays fluffy?

    Make sure to whip the cream just until stiff peaks form and avoid overmixing to maintain its airy texture.

    Final Thoughts

    These No-Bake Mini Banana Cream Pies are a delightful treat that combines ease and flavor. I encourage you to try this recipe and share your experience in the comments below.


    Desserts

    No-Bake Mini Banana Cream Pies


    5.0 from 24 reviews

    These No-Bake Mini Banana Cream Pies are a delightful and easy dessert that combines creamy banana pudding with a crunchy graham cracker crust. Perfect for any occasion, they are sure to impress your guests with their delicious flavor and beautiful presentation.

    Author: Munch Twist
    Prep Time: 20 minutes
    Cook Time: 0 minutes
    Total Time: 80 minutes
    Yield: 12 servings
    Category: Desserts
    Method: Baking
    Cuisine: American

    No-Bake Mini Banana Cream Pies

    SCALE:
    1x
    2x
    3x
    Cook Mode: Prevent your screen from going dark

    Ingredients

    • 1 package (3.4 oz) instant banana cream pudding mix
    • 1/4 cup sugar
    • 1 1/2 cups graham cracker crumbs
    • 2 cups cold milk
    • 2 ripe bananas, sliced
    • 1 cup heavy cream
    • 1 teaspoon vanilla extract
    • 2 tablespoons powdered sugar
    • 1/2 cup melted butter
    • Whipped cream, for topping
    • Honey, for drizzling

    Instructions

    1. In a medium bowl, mix graham cracker crumbs, melted butter, and sugar until well combined. Press into muffin tin to form mini pie crusts and refrigerate for at least 1 hour.
    2. In a large bowl, whisk banana cream pudding mix with cold milk until thickened. Refrigerate for 5 minutes.
    3. In another bowl, whip heavy cream with powdered sugar and vanilla extract until stiff peaks form.
    4. Fold half of the whipped cream into the banana pudding mixture.
    5. Spoon the banana pudding into the chilled pie crusts.
    6. Top each mini pie with a dollop of the remaining whipped cream.
    7. Garnish with banana slices and a drizzle of honey.

    Nutrition Facts

    Serving Size: 1 serving
    Calories: 290 kcal
    Sugar: 23g
    Sodium: 150mg
    Fat: 17g
    Saturated Fat: 10g
    Carbohydrates: 34g
    Fiber: 1g
    Protein: 3g
    Cholesterol: 60mg

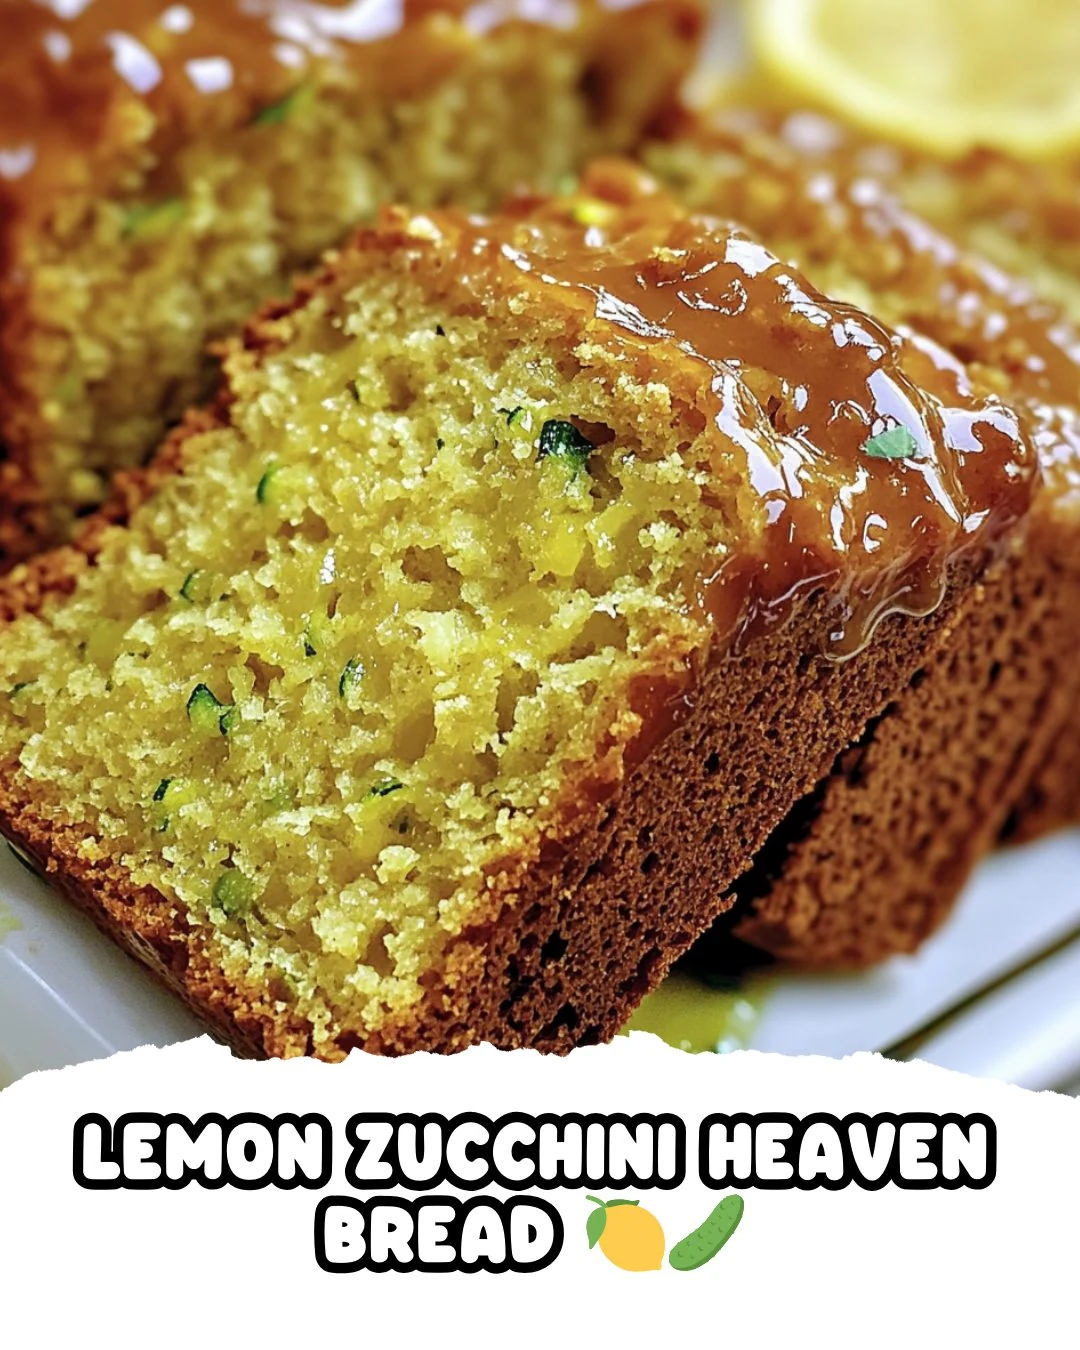
  • Indulge in Lemon Zucchini Heaven Bread Today

    Indulge in Lemon Zucchini Heaven Bread Today

    Lemon Zucchini Heaven Bread is a delightful treat that perfectly balances the tangy zest of lemon with the moistness of zucchini. This quick bread is not only delicious but also incredibly versatile, making it a wonderful addition to any meal or occasion.

    Why You’ll Love This Recipe

    • Bright Flavor: The combination of lemon and zucchini creates a refreshing taste that is sure to please.
    • Moist Texture: Grated zucchini ensures the bread stays moist without being heavy.
    • Easy to Make: With simple steps and readily available ingredients, this recipe is beginner-friendly.
    • Perfect for Any Occasion: Whether for breakfast, a snack, or dessert, this bread fits perfectly on any table.
    • Delicious Glaze: The lemon glaze adds an extra layer of sweetness and brightness.

    Tools and Equipment

    To create the perfect Lemon Zucchini Heaven Bread, you will need a few essential kitchen tools.

    Essential Tools

    • 9×5 inch loaf pan
    • Mixing bowls (medium and large)
    • Whisk
    • Measuring cups and spoons
    • Rubber spatula
    • Wire rack

    Why These Tools Matter

    • Loaf Pan: A standard size allows for even baking and proper rise of the bread.
    • Mixing Bowls: Having two sizes helps separate dry and wet ingredients efficiently.
    • Wire Rack: Cooling the bread on a rack prevents sogginess and maintains its texture.

    Ingredients for Lemon Zucchini Heaven Bread

    For the Bread

    • 1/2 teaspoon salt
    • 1 1/2 cups all-purpose flour
    • 1 cup grated zucchini
    • 1/2 teaspoon baking powder
    • 3/4 cup granulated sugar
    • 1 teaspoon vanilla extract
    • 2 large eggs
    • Juice of 1 lemon
    • 1/2 cup buttermilk
    • 1/2 teaspoon baking soda
    • 1/2 cup vegetable oil
    • Zest of 1 lemon

    For the Glaze

    • 1 cup powdered sugar
    • Zest of 1 lemon
    • 2 tablespoons lemon juice

    How to Make Lemon Zucchini Heaven Bread Step-by-Step

    Step 1: Preheat the Oven

    Preheat your oven to 350°F (175°C). Grease and flour a 9×5 inch loaf pan to prepare for baking.

    Step 2: Mix Dry Ingredients

    In a medium bowl, whisk together 1 1/2 cups all-purpose flour, 1/2 teaspoon baking powder, 1/2 teaspoon baking soda, and 1/2 teaspoon salt. Set this mixture aside for later use.

    Step 3: Prepare Wet Ingredients

    In a large bowl, beat together 2 large eggs, 1/2 cup vegetable oil, and 3/4 cup granulated sugar until well combined and smooth.

    Step 4: Combine Wet Mixture

    Add 1/2 cup buttermilk, 1 teaspoon vanilla extract, 1 cup grated zucchini, zest of 1 lemon, and juice of 1 lemon to the egg mixture. Stir until everything is mixed well.

    Step 5: Incorporate Dry Ingredients

    Gradually add the dry ingredients to the wet ingredients. Mix just until combined; avoid overmixing to keep the bread light and fluffy.

    Step 6: Bake the Bread

    Pour the batter into the prepared loaf pan. Bake for 50-55 minutes, or until a toothpick inserted into the center comes out clean.

    Step 7: Cool the Bread

    Allow the bread to cool in the pan for 10 minutes. Then, transfer it to a wire rack to cool completely.

    Step 8: Prepare the Glaze

    In a small bowl, whisk together 1 cup powdered sugar, zest of 1 lemon, and 2 tablespoons lemon juice until smooth and free of lumps.

    Step 9: Glaze the Bread

    Once the bread is completely cool, drizzle the glaze over the top. Allow it to set before slicing.

    This Lemon Zucchini Heaven Bread is not only a delightful treat but also a fantastic way to incorporate zucchini into your baking. Enjoy this moist and flavorful bread any time of day!

    How to Serve Lemon Zucchini Heaven Bread

    Lemon Zucchini Heaven Bread can be enjoyed in various delightful ways.

    With Fresh Berries

    Serve slices of Lemon Zucchini Heaven Bread alongside a medley of fresh berries. The tartness of the berries complements the citrus notes in the bread, enhancing its refreshing flavor.

    Cream Cheese Spread

    Spread a layer of cream cheese on top of each slice for a rich and tangy contrast. This addition adds creaminess that balances the bread’s sweetness and makes it even more indulgent.

    Toasted with Butter

    Lightly toast individual slices and spread a pat of butter on top. The warmth of the toast combined with the melted butter brings out the bread’s flavors, making for a comforting treat.

    Pro Tips for the Best Lemon Zucchini Heaven Bread

    For optimal results, consider these helpful tips.

    • Use Fresh Zucchini: Always use fresh, firm zucchini for the best texture and moisture in your bread.

    • Don’t Overmix: Mix the batter just until the dry ingredients are incorporated to keep the bread light and fluffy.

    • Adjust Sugar to Taste: If you prefer a less sweet bread, feel free to reduce the sugar slightly without sacrificing flavor.

    • Room Temperature Ingredients: Ensure your eggs and buttermilk are at room temperature for better emulsification and a smoother batter.

    • Check for Doneness: Use a toothpick to test for doneness, and be careful not to overbake, as this can lead to a dry loaf.

    Best Side Dishes and Pairings

    Enjoy Lemon Zucchini Heaven Bread with these complementary dishes and drinks.

    1. Herbal Tea – A soothing cup of herbal tea enhances the lemony flavors and provides a calming experience.

    2. Greek Yogurt with Honey – The creaminess of Greek yogurt paired with a drizzle of honey adds a delightful contrast to the bread.

    3. Mixed Green Salad – A light salad with a citrus vinaigrette complements the bread’s flavors and adds freshness.

    4. Lemonade – A refreshing glass of lemonade echoes the citrus notes in the bread, making for a perfect pairing.

    5. Vanilla Ice Cream – Serve a slice with a scoop of vanilla ice cream for a delightful dessert that balances tangy and sweet flavors.

    6. Fruit Compote – A warm fruit compote can be drizzled over the bread, adding a sweet and fruity element that enhances each bite.

    Common Mistakes to Avoid

    • Not Grating the Zucchini Properly: Ensure the zucchini is finely grated for even moisture distribution.
    • Skipping the Zest: The lemon zest is crucial for enhancing the bread’s flavor profile.
    • Overmixing the Batter: Mix just until combined to prevent a dense loaf; a few lumps are okay.
    • Not Checking for Doneness: Use a toothpick to check if the bread is fully baked; underbaking can lead to a soggy center.

    Storage & Reheating Instructions

    Refrigerator Storage

    Store the Lemon Zucchini Heaven Bread in an airtight container in the refrigerator. It will stay fresh for up to one week.

    Freezing Instructions

    For best results, wrap the cooled bread tightly in plastic wrap and then in aluminum foil. This method helps prevent freezer burn. The bread can be frozen for up to three months.

    Reheating Tips

    • Oven: Preheat to 350°F (175°C) and heat for about 10-15 minutes until warm.
    • Microwave: Heat individual slices for about 15-20 seconds on high.
    • Stovetop: Place slices in a skillet over low heat, covering with a lid for a few minutes until warmed through.

    Frequently Asked Questions

    Can I use whole wheat flour instead of all-purpose flour in Lemon Zucchini Heaven Bread?

    Yes, you can substitute up to half of the all-purpose flour with whole wheat flour for a healthier option. The texture may be denser but still delicious.

    How can I make this Lemon Zucchini Heaven Bread dairy-free?

    To make it dairy-free, substitute buttermilk with a non-dairy milk mixed with a teaspoon of lemon juice or vinegar. This will mimic the acidity of buttermilk.

    What can I serve with Lemon Zucchini Heaven Bread?

    This bread pairs wonderfully with a cup of tea or coffee. You can also serve it with a dollop of whipped cream cheese for added richness.

    How should I slice the bread for serving?

    Use a serrated knife for clean slices. This helps prevent squishing the soft texture of the bread.

    Can I add nuts or chocolate chips to the Lemon Zucchini Heaven Bread?

    Absolutely! Adding walnuts or chocolate chips can provide an extra layer of flavor and texture. Just fold them into the batter before pouring into the loaf pan.

    Final Thoughts

    This Lemon Zucchini Heaven Bread is a refreshing and delightful treat that is sure to impress. We encourage you to try this recipe and share your thoughts in the comments below. Your feedback helps us create more delicious recipes for everyone to enjoy.


    Desserts

    Lemon Zucchini Heaven Bread


    5.0 from 24 reviews

    This Lemon Zucchini Heaven Bread is a delightful fusion of tangy lemon and moist zucchini, making it a perfect treat for any occasion.

    Author: Munch Twist
    Prep Time: 15 minutes
    Cook Time: 55 minutes
    Total Time: 70 minutes
    Yield: 10 servings
    Category: Desserts
    Method: No bake
    Cuisine: American

    Lemon Zucchini Heaven Bread

    SCALE:
    1x
    2x
    3x
    Cook Mode: Prevent your screen from going dark

    Ingredients

    • 1/2 teaspoon salt
    • 1 1/2 cups all-purpose flour
    • 1 cup grated zucchini
    • 1/2 teaspoon baking powder
    • 3/4 cup granulated sugar
    • 1 teaspoon vanilla extract
    • 2 large eggs
    • Juice of 1 lemon
    • 1/2 cup buttermilk
    • 1/2 teaspoon baking soda
    • 1/2 cup vegetable oil
    • Zest of 1 lemon
    • 1 cup powdered sugar (for glaze)
    • Zest of 1 lemon (for glaze)
    • 2 tablespoons lemon juice (for glaze)

    Instructions

    1. Preheat your oven to 350°F (175°C). Grease and flour a 9×5 inch loaf pan.
    2. In a medium bowl, whisk together flour, baking powder, baking soda, and salt. Set aside.
    3. In a large bowl, beat eggs, vegetable oil, and granulated sugar until well combined.
    4. Add buttermilk, vanilla extract, grated zucchini, lemon zest, and lemon juice to the egg mixture. Mix well.
    5. Gradually add the dry ingredients to the wet ingredients, mixing just until combined.
    6. Pour the batter into the prepared loaf pan and bake for 50-55 minutes, or until a toothpick inserted into the center comes out clean.
    7. Let the bread cool in the pan for 10 minutes, then transfer it to a wire rack to cool completely.
    8. For the glaze, whisk together powdered sugar, lemon zest, and lemon juice in a small bowl until smooth.
    9. Drizzle the glaze over the cooled bread and let it set before slicing.

    Nutrition Facts

    Serving Size: 1 serving
    Calories: 280 kcal
    Sugar: 25g
    Sodium: 150mg
    Fat: 12g
    Saturated Fat: 1.5g
    Carbohydrates: 40g
    Fiber: 1g
    Protein: 4g
    Cholesterol: 40mg

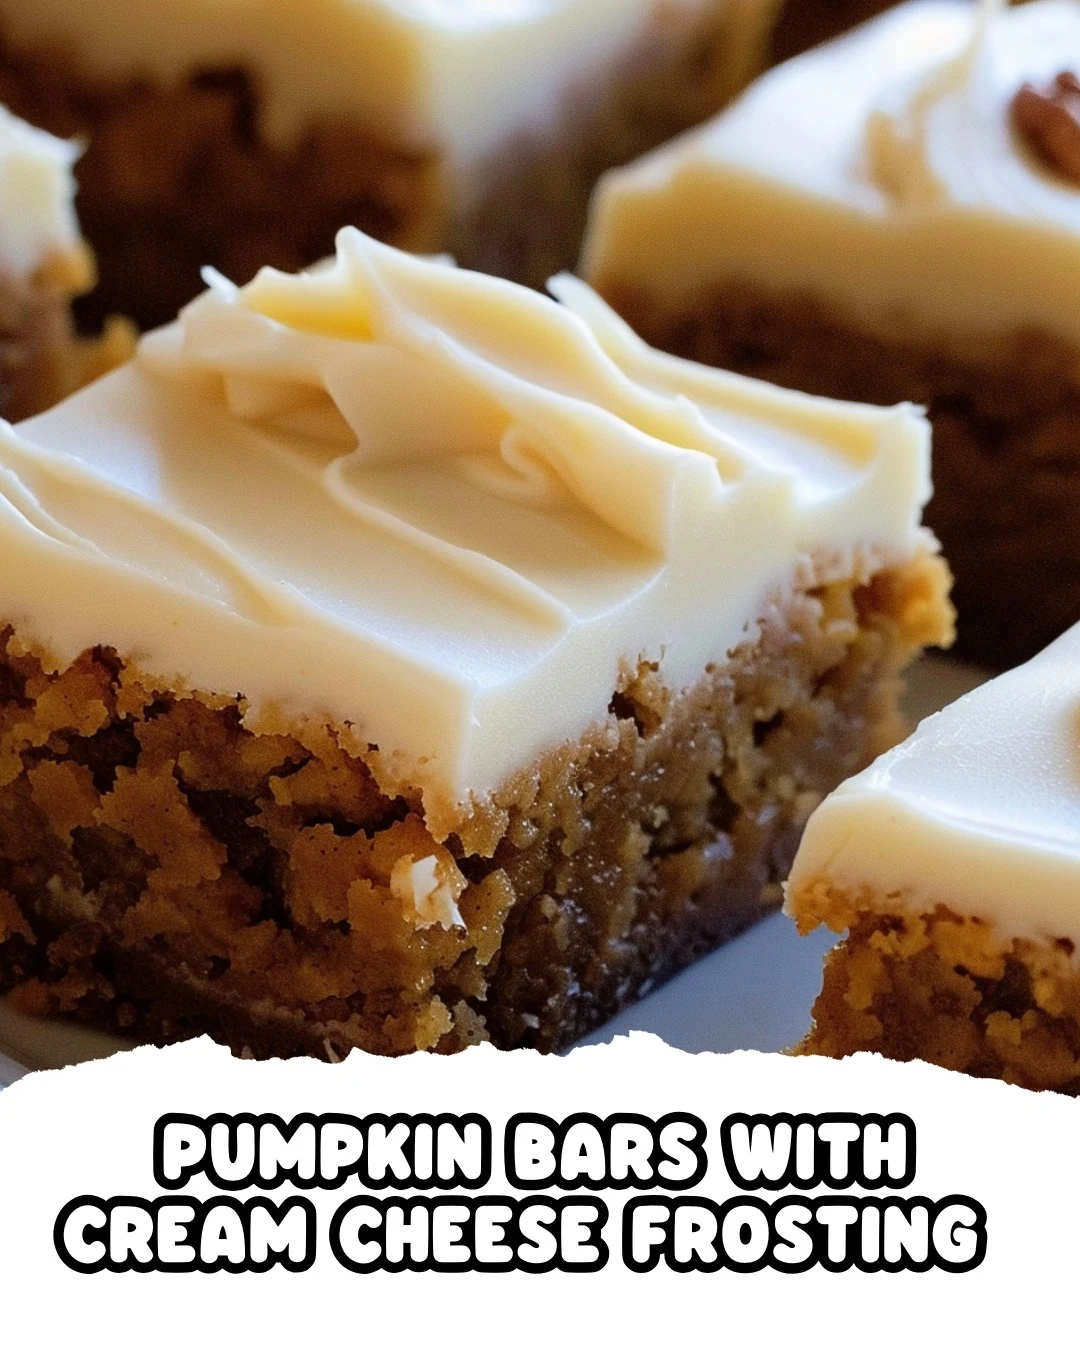
  • Irresistible Pumpkin Bars with Cream Cheese Frosting Recipe

    Irresistible Pumpkin Bars with Cream Cheese Frosting Recipe

    Pumpkin Bars with Cream Cheese Frosting are a delightful treat that perfectly blend warm spices and creamy sweetness. These bars are moist, flavorful, and topped with a luscious cream cheese frosting that makes them irresistible. Whether for a fall gathering or a cozy afternoon snack, this recipe will quickly become a favorite.

    Why You’ll Love This Recipe

    • Irresistibly Moist: The pumpkin puree keeps these bars tender and moist, perfect for any occasion.
    • Deliciously Spiced: The combination of cinnamon, ginger, and cloves adds a warm, inviting flavor that pairs beautifully with the cream cheese frosting.
    • Easy to Make: With simple ingredients and straightforward steps, these bars are perfect for bakers of all levels.
    • Perfect for Sharing: These bars are great for potlucks, parties, or as a sweet treat to share with friends and family.
    • Customizable Topping: Feel free to add nuts or chocolate chips for a personal touch.

    Tools and Equipment

    Having the right tools makes baking easier and more enjoyable. Here are the essentials for this recipe.

    Essential Tools

    • Mixing bowls
    • Baking pan
    • Whisk or electric mixer
    • Measuring cups and spoons
    • Spatula

    Why These Tools Matter

    • Mixing Bowls: A large bowl is essential for combining wet ingredients, while a medium bowl is perfect for the frosting.
    • Baking Pan: A good-quality baking pan ensures even baking and easy release of the pumpkin bars.
    • Whisk or Electric Mixer: These tools make it easier to achieve a smooth batter and fluffy frosting.

    Ingredients for Pumpkin Bars with Cream Cheese Frosting

    For the Pumpkin Bars

    • 1 cup all-purpose flour
    • ½ can pumpkin puree
    • 2 eggs
    • ½ cup oil
    • 1 cup sugar
    • 1 tsp baking powder
    • ½ tsp baking soda
    • ¼ tsp salt
    • ¼ tsp ground ginger
    • ¼ tsp cloves
    • 1 tsp cinnamon
    • ½ cup unsalted butter, softened
    • 1 tsp vanilla

    For the Cream Cheese Frosting

    • 1 package cream cheese, softened
    • ½ cup unsalted butter, softened
    • Confectioner’s sugar (to taste, as needed for consistency)
    • 1 tsp vanilla

    How to Make Pumpkin Bars with Cream Cheese Frosting Step-by-Step

    Step 1: Prep the Base

    1. Preheat the oven to 350°F (175°C). Grease a baking pan to prevent sticking.
    2. In a large bowl, combine the eggs, oil, pumpkin puree, and sugar. Mix until well combined and smooth.

    Step 2: Combine Dry Ingredients

    1. Gradually stir in the flour, baking powder, baking soda, salt, ground ginger, cinnamon, and cloves. Mix until the batter is smooth and free of lumps.

    Step 3: Bake the Pumpkin Bars

    1. Pour the batter into the greased baking pan, spreading it out evenly.
    2. Place the pan in the center rack of your preheated oven. Bake for 25 to 27 minutes.
    3. Check for doneness by inserting a toothpick into the center; it should come out clean.

    Step 4: Prepare the Cream Cheese Frosting

    1. While the bars are baking, prepare the frosting. In a medium bowl, beat together the butter and cream cheese until creamy and well blended.
    2. Add the vanilla extract and mix well.
    3. Gradually sift in the confectioner’s sugar and mix until the frosting is smooth and fluffy.

    Step 5: Frost and Serve

    1. Once the pumpkin bars are finished baking, remove them from the oven and let them cool completely.
    2. Spread the cream cheese frosting evenly over the cooled bars.
    3. Decorate with whole pecans for an appealing finish.

    Enjoy these delightful pumpkin bars with cream cheese frosting—a perfect treat for any occasion!

    How to Serve Pumpkin Bars with Cream Cheese Frosting

    These pumpkin bars with cream cheese frosting are versatile and can be served in various delightful ways.

    Dessert Platter

    Arrange the pumpkin bars on a decorative platter and cut them into bite-sized squares. This makes them perfect for sharing at gatherings or parties.

    Coffee Companion

    Serve the pumpkin bars alongside a warm cup of coffee or a spiced latte. The rich flavors of the bars complement the warmth of the beverage, enhancing the overall experience.

    Fall Festivity Treat

    For Halloween or Thanksgiving, present the bars on a themed table with autumn décor. Decorate with additional pecans or a dusting of cinnamon for a seasonal touch.

    Pro Tips for the Best Pumpkin Bars with Cream Cheese Frosting

    Follow these expert tips to elevate your pumpkin bars to perfection.

    • Use Fresh Pumpkin Puree: For the best flavor, consider using homemade pumpkin puree instead of canned. It adds a rich, natural taste to the bars.

    • Don’t Overmix the Batter: Mix the batter just until combined; overmixing can lead to dense bars. A light hand ensures a soft and fluffy texture.

    • Cool Completely Before Frosting: Allow the bars to cool fully before adding the cream cheese frosting. This prevents melting and ensures a beautiful presentation.

    • Add Spices to Taste: Feel free to adjust the spices according to your preference. A pinch of nutmeg or allspice can add an extra layer of warmth and depth.

    • Store Properly: Keep any leftovers in an airtight container in the refrigerator. These bars taste even better the next day as the flavors meld.

    Best Side Dishes and Pairings

    Enhance your enjoyment of pumpkin bars with cream cheese frosting by pairing them with these delightful options.

    1. Vanilla Ice Cream: The creamy sweetness of vanilla ice cream contrasts beautifully with the spiced bars, creating a delightful dessert experience.

    2. Hot Apple Cider: The warm, spiced notes of apple cider complement the pumpkin flavors, making it a comforting drink choice for fall gatherings.

    3. Cheese Platter: A selection of mild cheeses, such as brie or goat cheese, can balance the sweetness of the bars, providing a savory contrast.

    4. Spiced Chai Tea: The aromatic spices in chai tea enhance the pumpkin flavor, creating a cozy pairing perfect for chilly evenings.

    5. Maple Syrup Drizzle: A light drizzle of maple syrup over the bars adds an extra touch of sweetness and a hint of autumn flavor that pairs perfectly with the cream cheese frosting.

    Common Mistakes to Avoid

    • Not Measuring Ingredients Accurately: Precision is key in baking; mismeasuring can lead to a denser texture.
    • Overmixing the Batter: Mixing too much can make the bars tough instead of light and fluffy.
    • Skipping the Cooling Time: Frosting warm bars can cause the frosting to melt and slide off.
    • Using Cold Cream Cheese: Ensure the cream cheese is softened for a smooth frosting consistency.

    Storage & Reheating Instructions

    Refrigerator Storage

    Store pumpkin bars with cream cheese frosting in an airtight container in the refrigerator. They will stay fresh for up to 5 days.

    Freezing Instructions

    To freeze, wrap the pumpkin bars tightly in plastic wrap and then in aluminum foil. They can be stored in the freezer for up to 2 months. Thaw in the refrigerator overnight before serving.

    Reheating Tips

    • Oven: Preheat to 350°F (175°C) and warm the bars for about 10 minutes.
    • Microwave: Heat a single serving for 15-20 seconds on medium power.
    • Stovetop: Place in a skillet over low heat, covering with a lid for a few minutes until warmed through.

    Frequently Asked Questions

    How do I know when the pumpkin bars are done?

    Check for doneness by inserting a toothpick into the center. If it comes out clean, your pumpkin bars with cream cheese frosting are ready.

    Can I use homemade pumpkin puree for this recipe?

    Yes, homemade pumpkin puree works well. Just ensure it is well-drained to avoid excess moisture in the batter.

    What can I substitute for cream cheese in the frosting?

    You can use mascarpone cheese or Greek yogurt as alternatives, but the flavor and texture will vary.

    How can I make these pumpkin bars gluten-free?

    Substitute all-purpose flour with a gluten-free flour blend that includes xanthan gum for better texture.

    Can I add nuts or chocolate chips to the batter?

    Absolutely! Feel free to mix in chopped nuts or chocolate chips for added flavor and texture.

    Final Thoughts

    These pumpkin bars with cream cheese frosting are sure to impress at any gathering or simply as a delightful treat at home. I encourage you to try this recipe and share your experiences in the comments below; your feedback is always appreciated!


    Desserts

    Pumpkin Bars with Cream Cheese Frosting


    5.0 from 24 reviews

    These pumpkin bars are moist and flavorful, topped with a rich cream cheese frosting. Perfect for fall gatherings or any time you crave a sweet treat, they combine the warm spices of cinnamon and ginger with the creamy texture of the frosting, making them a delightful dessert.

    Author: Munch Twist
    Prep Time: 15 minutes
    Cook Time: 27 minutes
    Total Time: 42 minutes
    Yield: 12 servings
    Category: Desserts
    Method: No bake
    Cuisine: American

    Pumpkin Bars with Cream Cheese Frosting

    SCALE:
    1x
    2x
    3x
    Cook Mode: Prevent your screen from going dark

    Ingredients

    • 1 cup all-purpose flour
    • 1 package of cream cheese, softened
    • ½ can pumpkin puree
    • 1 tsp baking powder
    • ¼ tsp cloves
    • 2 eggs
    • ½ cup oil
    • 1 tsp cinnamon
    • ½ cup butter, unsalted and softened
    • 1 tsp vanilla
    • 1 cup sugar
    • ¼ tsp salt
    • ¼ tsp ground ginger
    • ½ tsp baking soda
    • Whole pecans for decorating

    Instructions

    1. Preheat the oven to 350°F (175°C). Grease a baking pan.
    2. In a large bowl, combine the eggs, oil, pumpkin puree, and sugar until well mixed.
    3. Gradually stir in the flour, baking powder, baking soda, salt, ginger, cinnamon, and cloves until the batter is smooth.
    4. Pour the batter into the greased baking pan, spreading it evenly.
    5. Place the pan on the center rack of the oven and bake for 25 to 27 minutes. Check for doneness by inserting a toothpick into the center; it should come out clean.
    6. While the bars are baking, prepare the frosting. In a medium-sized bowl, beat together the butter and cream cheese until creamy.
    7. Add the vanilla extract and mix well.
    8. Sift the confectioner’s sugar into the bowl and mix until the frosting is smooth and fluffy to your desired consistency.
    9. Once the pumpkin bars are done, let them cool completely before frosting.
    10. Spread the cream cheese frosting evenly over the cooled bars and decorate with whole pecans.

    Nutrition Facts

    Serving Size: 1 serving
    Calories: 320 kcal
    Sugar: 20g
    Sodium: 180mg
    Fat: 18g
    Saturated Fat: 10g
    Carbohydrates: 35g
    Fiber: 1g
    Protein: 4g
    Cholesterol: 40mg

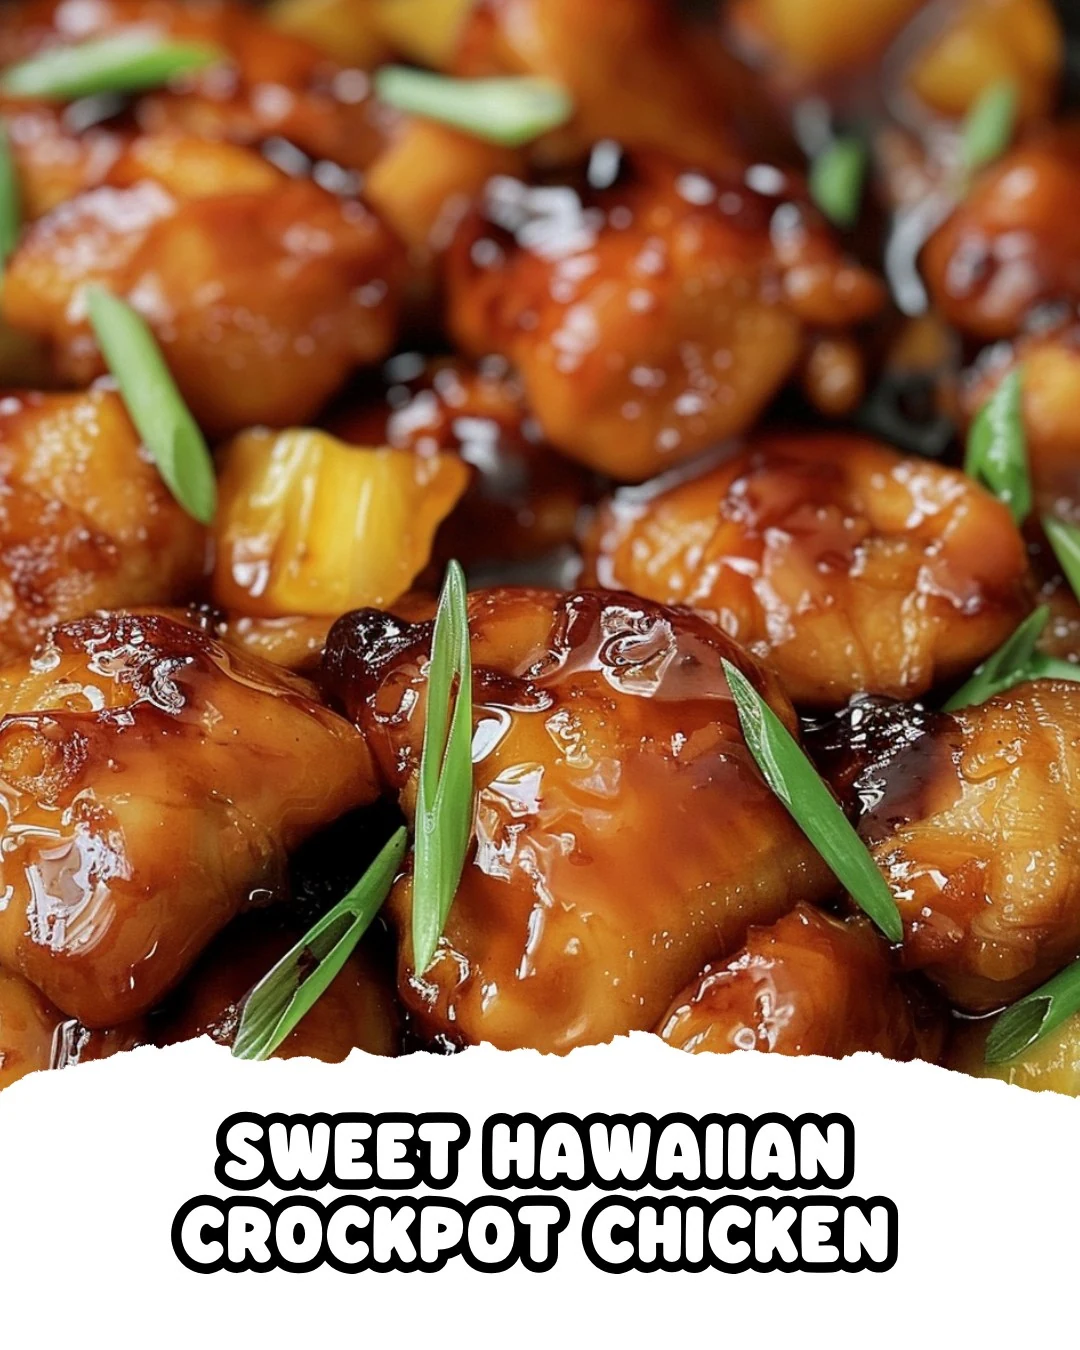
  • Effortless Sweet Hawaiian Crockpot Chicken Recipe

    Effortless Sweet Hawaiian Crockpot Chicken Recipe

    Sweet Hawaiian Crockpot Chicken is a delightful dish that combines sweet and savory flavors effortlessly. This recipe offers a tropical twist that will transport your taste buds to a sunny paradise, making it a perfect choice for busy weeknights or casual gatherings.

    Why You’ll Love This Recipe

    • Effortless Preparation: With only five ingredients, this dish is incredibly easy to prepare.
    • Flavorful Satisfaction: The combination of sweet pineapple juice and savory soy sauce creates a mouthwatering flavor profile.
    • Versatile Serving Options: Serve this dish over rice, in wraps, or as part of a festive buffet.
    • Crowd-Pleaser: Its sweet and tangy taste appeals to both adults and children alike.
    • Time-Saving Cooking: Let the Crockpot do the work while you enjoy your day with minimal kitchen fuss.

    Tools and Equipment

    Having the right tools can make your cooking experience smoother and more enjoyable.

    Essential Tools

    • Slow Cooker (Crockpot)
    • Measuring cups
    • Mixing spoon
    • Serving dish

    Why These Tools Matter

    • Slow Cooker: Allows for hands-off cooking, perfect for busy lifestyles.
    • Measuring cups: Ensure accurate ingredient portions for consistent results.
    • Mixing spoon: Helps in evenly distributing the ingredients for maximum flavor.

    Ingredients for Sweet Hawaiian Crockpot Chicken

    Main Ingredients

    • 1/2 cup brown sugar
    • 2 lb. (0.9 kg) chicken tenderloin chunks
    • 1/3 cup soy sauce
    • 1 cup pineapple juice

    How to Make Sweet Hawaiian Crockpot Chicken Step-by-Step

    Step 1: Prep the Base

    In your Crockpot, add the chicken tenderloin chunks. This will serve as the main protein in your dish.

    Step 2: Assemble the Ingredients

    Pour the pineapple juice over the chicken. This will infuse the dish with sweetness and moisture.

    Step 3: Add Sweetness

    Sprinkle the brown sugar evenly over the chicken and pineapple juice. This will enhance the overall flavor profile.

    Step 4: Incorporate Flavor

    Drizzle the soy sauce over the mixture. This adds a savory depth that balances the sweetness.

    Step 5: Cook to Perfection

    Cover the Crockpot and cook on low for 6-8 hours. Stir occasionally if possible to combine flavors.

    Step 6: Serve and Enjoy

    Once cooked, serve the Sweet Hawaiian Chicken warm. Pair it with rice or fresh vegetables for a complete meal.

    This Sweet Hawaiian Crockpot Chicken is a simple yet delicious dish, perfect for those busy days when you need a hearty meal with minimal effort!

    How to Serve Sweet Hawaiian Crockpot Chicken

    This dish offers versatility in serving options that enhance its tropical flavors.

    Hawaiian Chicken Tacos

    Shred the cooked chicken and serve it in warm corn tortillas topped with fresh pineapple salsa and avocado for a fun twist.

    Over Coconut Rice

    Serve the chicken over a bed of coconut rice to complement the sweet and savory flavors, creating a tropical experience with every bite.

    With a Fresh Salad

    Pair the chicken with a light salad featuring mixed greens, mandarin oranges, and a sesame dressing for a refreshing contrast.

    Pro Tips for the Best Sweet Hawaiian Crockpot Chicken

    To elevate your Sweet Hawaiian Crockpot Chicken, consider these expert tips.

    • Quality Ingredients: Use high-quality chicken and fresh pineapple juice for the best flavor.
    • Adjust Sweetness: Feel free to adjust the amount of brown sugar based on your sweetness preference.
    • Add Vegetables: Consider adding bell peppers or carrots for added nutrition and flavor.
    • Store Leftovers Properly: Refrigerate leftovers in an airtight container for up to 3 days for optimal freshness.
    • Reheat Gently: When reheating, do so on low heat to maintain the chicken’s tenderness.

    Best Side Dishes and Pairings

    To create a well-rounded meal, here are some excellent side dishes and beverages to serve alongside your Sweet Hawaiian Crockpot Chicken.

    1. Steamed Broccoli: The slight bitterness of steamed broccoli balances the sweetness of the chicken beautifully.
    2. Garlic Bread: The buttery, garlicky flavor of garlic bread complements the dish perfectly, making for a satisfying meal.
    3. Quinoa Salad: A light quinoa salad with diced vegetables and a citrus dressing adds a nutritious and refreshing element.
    4. Mango Smoothie: A chilled mango smoothie enhances the tropical theme and provides a sweet, creamy beverage option.
    5. Fried Rice: Serve with fried rice for a hearty side that absorbs the delicious juices from the chicken.

    Common Mistakes to Avoid

    • Using the Wrong Cut of Chicken: Ensure you use chicken tenderloin chunks for optimal tenderness.
    • Skipping the Stirring: Occasionally stirring helps to evenly distribute flavors and prevent sticking.
    • Not Measuring Ingredients: Accurate measurements are crucial for achieving the right balance of sweetness and flavor.
    • Overcooking: Cooking for too long can lead to dry chicken; stick to the recommended cooking time.

    Storage & Reheating Instructions

    Refrigerator Storage

    Store Sweet Hawaiian Crockpot Chicken in airtight containers for up to 3-4 days in the refrigerator. Make sure the chicken has cooled to room temperature before sealing.

    Freezing Instructions

    To freeze, place the cooled chicken in freezer-safe containers or heavy-duty freezer bags. It can be stored for up to 3 months. Thaw in the refrigerator overnight before reheating.

    Reheating Tips

    • Oven: Preheat to 350°F (175°C) and heat in an oven-safe dish covered with foil for about 15-20 minutes.
    • Microwave: Place in a microwave-safe dish, cover, and heat on medium power in 1-minute increments until warmed through.
    • Stovetop: Heat in a skillet over medium heat, stirring occasionally until hot.

    Frequently Asked Questions

    Can I use chicken breast instead of tenderloin for Sweet Hawaiian Crockpot Chicken?

    Yes, you can use chicken breast, but be mindful of the cooking time to prevent it from becoming dry.

    How can I make Sweet Hawaiian Crockpot Chicken spicier?

    Add a splash of hot sauce or red pepper flakes to the sauce mixture before cooking for an extra kick.

    Can I use fresh pineapple juice in this recipe?

    Absolutely! Fresh pineapple juice will enhance the flavor of the Sweet Hawaiian Crockpot Chicken and make it taste even better.

    How do I serve Sweet Hawaiian Crockpot Chicken?

    This dish pairs well with rice, quinoa, or a fresh salad, allowing the sweet sauce to complement the sides beautifully.

    Is Sweet Hawaiian Crockpot Chicken suitable for meal prep?

    Yes, this recipe is perfect for meal prep! It stores well and can be easily reheated throughout the week.

    Final Thoughts

    Sweet Hawaiian Crockpot Chicken is an effortless dish that packs a flavorful punch, making it an ideal choice for any busy weeknight. We encourage you to try this recipe and share your thoughts in the comments below.


    Dinner

    Sweet Hawaiian Crockpot Chicken


    5.0 from 24 reviews

    This Sweet Hawaiian Crockpot Chicken is a simple yet delicious dish, perfect for those busy days when you need a hearty meal with minimal effort.

    Author: Munch Twist
    Prep Time: 5 minutes
    Cook Time: 420 minutes
    Total Time: 425 minutes
    Yield: 4 servings
    Category: Desserts
    Method: No bake
    Cuisine: American

    Sweet Hawaiian Crockpot Chicken

    SCALE:
    1x
    2x
    3x
    Cook Mode: Prevent your screen from going dark

    Ingredients

    • 1/2 cup brown sugar
    • 2 lb. chicken tenderloin chunks
    • 1/3 cup soy sauce
    • 1 cup pineapple juice

    Instructions

    1. In a Crockpot, add the chicken tenderloin chunks.
    2. Pour the pineapple juice over the chicken.
    3. Sprinkle the brown sugar evenly over the chicken and pineapple juice.
    4. Drizzle the soy sauce over the mixture.
    5. Cover the Crockpot and cook on low for 6-8 hours. Stir occasionally if possible.
    6. Once cooked, serve the sweet Hawaiian chicken warm, and enjoy!

    Nutrition Facts

    Serving Size: 1 serving
    Calories: 260 kcal
    Sugar: 22g
    Sodium: 800mg
    Fat: 5g
    Saturated Fat: 1g
    Carbohydrates: 24g
    Fiber: 0g
    Protein: 28g
    Cholesterol: 75mg

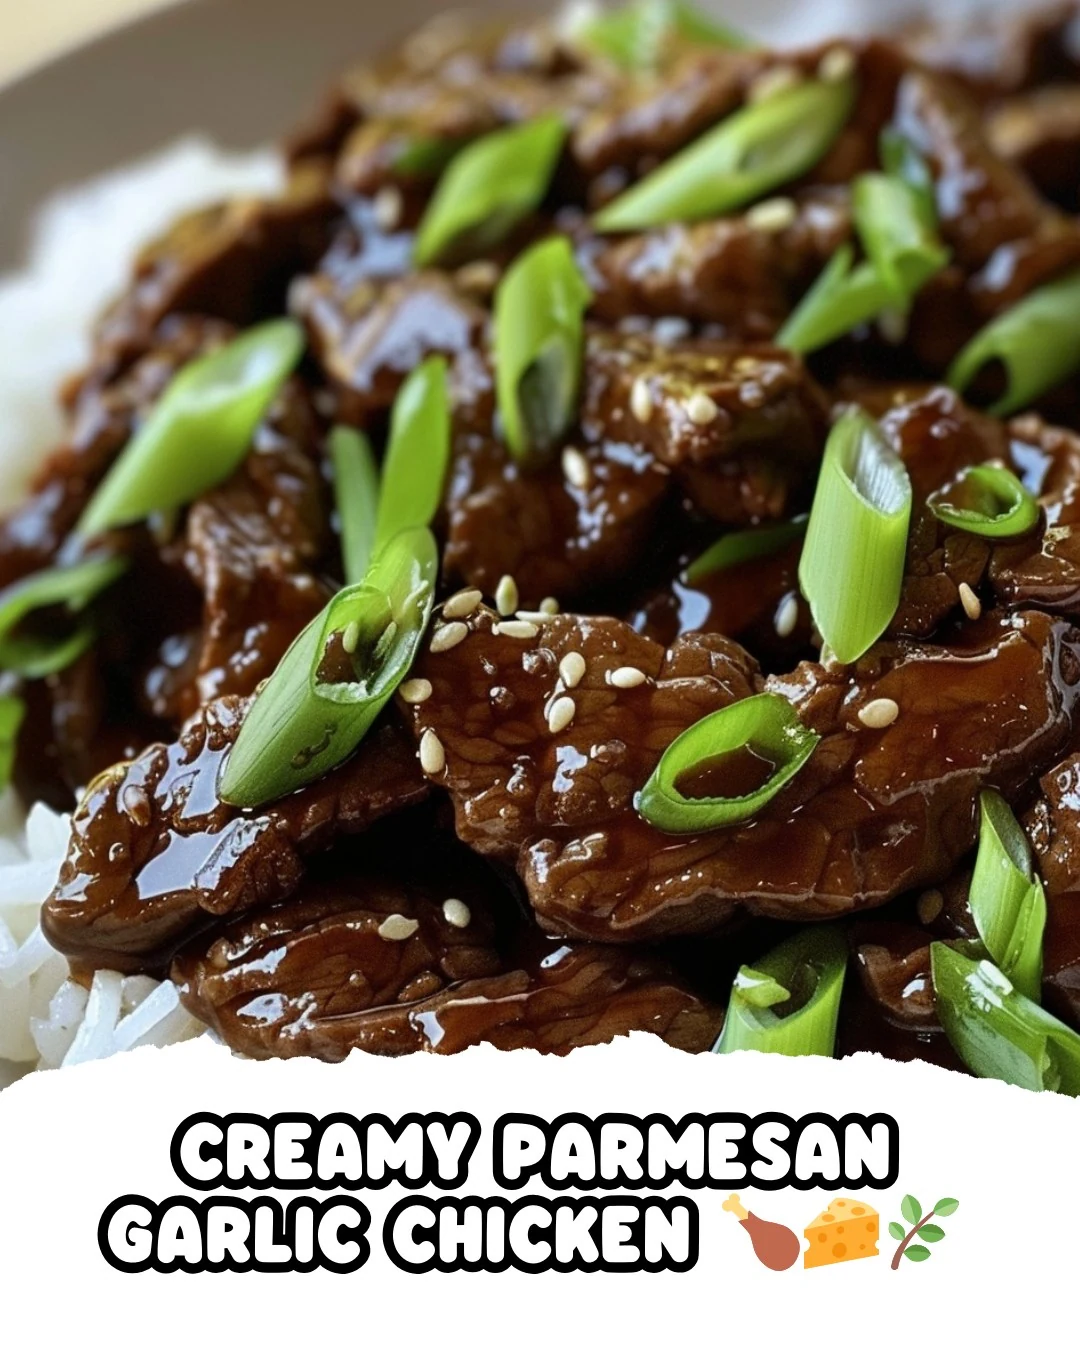
  • Quick & Easy Mongolian Beef Recipe

    Quick & Easy Mongolian Beef Recipe

    Mongolian Beef is a delicious stir-fry dish that combines tender beef with a sweet and savory sauce. The flavors are bold and satisfying, making it a favorite among many. This recipe is not only easy to follow but also delivers restaurant-quality results right in your kitchen.

    Why You’ll Love This Recipe

    • Quick & Easy: Ready in under 30 minutes, perfect for busy weeknights.
    • Flavorful Sauce: The combination of soy sauce and brown sugar creates a rich flavor profile.
    • Tender Beef: Flank steak is sliced thinly, ensuring it cooks quickly and remains tender.
    • Customizable: Feel free to add vegetables like bell peppers or broccoli for added nutrition.
    • Impressive Dish: Serve it to guests, and they’ll think you spent hours preparing it.

    Tools and Equipment

    Having the right tools can streamline your cooking process. Here are some essentials for making Mongolian Beef.

    Essential Tools

    • Sharp knife
    • Cutting board
    • Large skillet or wok
    • Measuring cups and spoons
    • Tongs or spatula

    Why These Tools Matter

    • Sharp knife: Essential for slicing the flank steak evenly against the grain.
    • Large skillet or wok: Provides ample space for cooking the beef in batches without overcrowding.
    • Tongs or spatula: Makes it easy to stir and flip the beef, ensuring even cooking.

    Ingredients for Mongolian Beef

    Beef and Aromatics

    • 1 lb flank steak
    • 2 tsp ginger, minced
    • 3 garlic cloves, minced
    • 1/4 cup green onions, sliced

    Sauce Ingredients

    • 1/2 cup soy sauce
    • 1/2 cup brown sugar
    • 1/2 cup water

    Coating and Cooking Ingredients

    • 1/4 cup cornstarch
    • 1/3 cup vegetable oil

    How to Make Mongolian Beef Step-by-Step

    Step 1: Prepare Beef

    Slice the flank steak against the grain into 1/4-inch thick pieces. Toss the slices with 1/4 cup cornstarch to coat evenly. Allow the beef to sit for 10 minutes to absorb the cornstarch.

    Step 2: Cook Beef

    In a large skillet, heat 1/3 cup vegetable oil over medium-high heat. Cook the beef in batches until it is browned and crispy. Remove the cooked beef from the skillet and set it aside.

    Step 3: Sauté Aromatics

    In the same skillet, add 2 tsp minced ginger and 3 minced garlic cloves. Sauté for about 30 seconds until fragrant, taking care not to burn the garlic.

    Step 4: Make Sauce

    Add 1/2 cup soy sauce, 1/2 cup water, and 1/2 cup brown sugar to the skillet. Stir the mixture until the sugar dissolves and the sauce thickens slightly.

    Step 5: Combine Beef and Sauce

    Return the cooked beef to the skillet. Toss it in the sauce, allowing it to coat evenly. Cook for an additional 2 minutes until the beef is heated through and the sauce thickens to your liking.

    Step 6: Garnish and Serve

    Garnish the Mongolian Beef with sliced green onions before serving. This dish pairs perfectly with steamed rice for a complete meal. Enjoy your homemade Mongolian Beef!

    Nutritional Information (per serving, assuming 4 servings)

    • Calories: Approximately 380 kcal
    • Total Fat: 17g
    • Saturated Fat: 4g
    • Cholesterol: 80mg
    • Sodium: 1100mg
    • Total Carbohydrates: 31g
    • Dietary Fiber: 1g
    • Sugars: 25g
    • Protein: 29g

    Preparation time: 15 minutes | Cooking time: 10 minutes

    How to Serve Mongolian Beef

    Mongolian Beef is a versatile dish that can be enjoyed in several delightful ways.

    Over Steamed Rice

    Serving Mongolian Beef over a bed of steamed rice allows the flavorful sauce to soak into the grains, making for a satisfying meal.

    In a Stir-Fry

    For a more dynamic dish, toss the Mongolian Beef with a mix of your favorite stir-fried vegetables, such as bell peppers and broccoli, to add color and nutrients.

    In Lettuce Wraps

    For a lighter option, serve Mongolian Beef in crisp lettuce leaves. This provides a refreshing crunch and an enjoyable way to eat the dish without rice.

    Pro Tips for the Best Mongolian Beef

    To ensure your Mongolian Beef turns out perfect every time, consider these expert tips.

    • Slice Against the Grain: Cutting the flank steak against the grain makes the beef more tender and easier to chew.
    • Let the Beef Rest: Allow the coated beef to sit for at least 10 minutes to ensure the cornstarch adheres properly, which helps in achieving a crispy texture.
    • Use High Heat: Cooking at medium-high heat is essential for achieving that perfect sear on the beef, enhancing its flavor and texture.
    • Adjust the Sauce: Feel free to adjust the sweetness or saltiness of the sauce by adding more brown sugar or soy sauce according to your taste preferences.
    • Fresh Ingredients Matter: Always use fresh ginger and garlic for maximum flavor impact in the dish.

    Best Side Dishes and Pairings

    Pairing Mongolian Beef with complementary sides enhances the overall dining experience.

    1. Steamed Jasmine Rice: Its fragrant and slightly sticky texture perfectly absorbs the rich sauce of the Mongolian Beef.
    2. Garlic Broccoli: This simple vegetable dish adds a nutritious crunch, balancing the richness of the beef.
    3. Egg Fried Rice: A classic that can absorb the flavors well while adding a satisfying element to the meal.
    4. Cucumber Salad: A refreshing cucumber salad with a light dressing can cut through the richness of the beef, bringing balance to your plate.
    5. Hot and Sour Soup: This flavorful soup provides a warm contrast to the dish, enhancing the overall meal experience.

    Common Mistakes to Avoid

    • Not Slicing Against the Grain: Failing to slice the flank steak against the grain can result in tough, chewy meat.
    • Skipping the Cornstarch Coating: Not coating the beef in cornstarch can lead to a less crispy texture and a sauce that doesn’t adhere well.
    • Overcrowding the Skillet: Cooking too much beef at once can lower the skillet’s temperature, preventing proper browning.
    • Neglecting to Adjust Seasoning: Not tasting the sauce before serving can result in a dish that lacks the desired balance of flavors.

    Storage & Reheating Instructions

    Refrigerator Storage

    Store Mongolian Beef in an airtight container in the refrigerator for up to 3 days. Ensure it cools down to room temperature before sealing to maintain freshness.

    Freezing Instructions

    For best results, freeze Mongolian Beef in a freezer-safe container or heavy-duty freezer bag. It can be stored for up to 3 months. Thaw it in the refrigerator overnight before reheating.

    Reheating Tips

    • Oven: Preheat the oven to 350°F (175°C). Place the Mongolian Beef in an oven-safe dish, cover with foil, and heat for about 15-20 minutes, or until warmed through.
    • Microwave: Place a serving in a microwave-safe dish, cover with a damp paper towel, and heat on medium power for 1-2 minutes, stirring halfway through.
    • Stovetop: Heat a skillet over medium heat, add a splash of water or oil, and warm the Mongolian Beef for about 5 minutes, stirring frequently.

    Frequently Asked Questions

    What is Mongolian Beef?

    Mongolian Beef is a popular dish known for its tender strips of beef stir-fried with green onions and a sweet soy sauce glaze.

    Can I use a different cut of beef for Mongolian Beef?

    Yes, while flank steak is traditional, you can also use sirloin or ribeye for a different flavor and texture.

    How can I make Mongolian Beef spicier?

    To add heat, consider incorporating red pepper flakes or fresh chili peppers when sautéing the ginger and garlic.

    Is Mongolian Beef a healthy meal option?

    While it contains protein and some nutrients, Mongolian Beef is higher in sugar and sodium. It can be enjoyed in moderation as part of a balanced diet.

    Can I make Mongolian Beef ahead of time?

    Yes, you can prepare Mongolian Beef in advance. Just store it in the refrigerator and reheat it when ready to serve.

    Final Thoughts

    Mongolian Beef is a delightful dish that combines savory and sweet flavors, making it a perfect meal for any night of the week. Give this recipe a try and experience the deliciousness for yourself. Don’t forget to leave a comment with your thoughts and any variations you tried!

    Dinner

    Mongolian Beef


    5.0 from 24 reviews

    Mongolian Beef is a savory and slightly sweet dish featuring tender slices of flank steak coated in a rich sauce made from soy sauce, brown sugar, and aromatic ginger and garlic. It's quick to prepare and perfect for a weeknight dinner, served over steamed rice.

    Author: Munch Twist
    Prep Time: 15 minutes
    Cook Time: 10 minutes
    Total Time: 25 minutes
    Yield: 4 servings
    Category: Desserts
    Method: No bake
    Cuisine: American

    Mongolian Beef

    SCALE:
    1x
    2x
    3x
    Cook Mode: Prevent your screen from going dark

    Ingredients

    • 1/4 cup green onions, sliced
    • 1/4 cup cornstarch
    • 1/2 cup soy sauce
    • 1/2 cup brown sugar
    • 1 lb flank steak
    • 2 tsp ginger, minced
    • 3 garlic cloves, minced
    • 1/3 cup vegetable oil
    • 1/2 cup water

    Instructions

    1. Slice the flank steak against the grain into 1/4-inch thick pieces. Toss with 1/4 cup cornstarch to coat. Let sit for 10 minutes.
    2. Heat 1/3 cup vegetable oil in a large skillet over medium-high heat. Cook the beef in batches until browned and crispy. Remove from the skillet and set aside.
    3. In the same skillet, add 2 tsp minced ginger and 3 minced garlic cloves. Cook for about 30 seconds until fragrant.
    4. Add 1/2 cup soy sauce, 1/2 cup water, and 1/2 cup brown sugar to the skillet. Stir until the sugar dissolves and the sauce thickens slightly.
    5. Return the beef to the skillet and toss to coat in the sauce. Cook for another 2 minutes, until the beef is heated through and the sauce has thickened.
    6. Garnish with sliced green onions and serve immediately with steamed rice.

    Nutrition Facts

    Serving Size: 1 serving
    Calories: 380 kcal
    Sugar: 25g
    Sodium: 1100mg
    Fat: 17g
    Saturated Fat: 4g
    Carbohydrates: 31g
    Fiber: 1g
    Protein: 29g
    Cholesterol: 80mg

  • Sweet Potato Pecan Pie: A Delicious Twist on Tradition

    Sweet Potato Pecan Pie: A Delicious Twist on Tradition

    Sweet Potato Pecan Pie is a delightful twist on a classic dessert. This pie combines the creamy texture of sweet potatoes with the rich crunch of pecans, creating a treat that is both comforting and indulgent. Perfect for holidays or any special occasion, this recipe is sure to impress.

    Why You’ll Love This Recipe

    • Delicious Flavor Combination: The blend of sweet potatoes and pecans offers a unique and satisfying taste.
    • Perfect for Any Occasion: This pie is ideal for holidays, potlucks, or family gatherings.
    • Simple to Make: With straightforward steps, even novice bakers can enjoy success.
    • Nutritious Twist: Sweet potatoes add fiber and nutrients, making this dessert a bit healthier.
    • Beautiful Presentation: The golden crust and toasted pecans create an eye-catching dessert.

    Tools and Equipment

    Having the right tools can simplify your baking experience.

    Essential Tools

    • Mixing bowl
    • Electric mixer or whisk
    • 9-inch pie dish
    • Measuring cups
    • Measuring spoons
    • Rubber spatula

    Why These Tools Matter

    • Mixing bowl: A large bowl allows you to combine all ingredients thoroughly.
    • Electric mixer or whisk: These tools ensure a smooth filling without lumps.
    • Pie dish: A sturdy pie dish supports the crust and filling during baking.

    Ingredients for Sweet Potato Pecan Pie

    Filling Ingredients

    • 1 cup light brown sugar
    • 1 teaspoon ground cinnamon
    • 1 teaspoon vanilla extract
    • 1/2 cup unsalted butter, melted
    • 2 cups mashed sweet potatoes (about 2 medium sweet potatoes)
    • 1/2 teaspoon ground nutmeg
    • 1/4 teaspoon salt
    • 3 large eggs

    Crust Ingredients

    • 1 pie crust (store-bought or homemade)

    Topping Ingredients

    • 1/2 cup granulated sugar
    • 1 cup pecan halves

    How to Make Sweet Potato Pecan Pie Step-by-Step

    Step 1: Preheat the Oven

    Preheat your oven to 350°F (175°C). Fit the pie crust into a 9-inch pie dish and set it aside.

    Step 2: Prepare the Filling

    In a large bowl, blend the 2 cups mashed sweet potatoes, 1 cup light brown sugar, 1/2 cup granulated sugar, 1/2 cup melted butter, 3 large eggs, 1 teaspoon vanilla extract, 1 teaspoon ground cinnamon, 1/2 teaspoon ground nutmeg, and 1/4 teaspoon salt until smooth. This mixture will create a creamy filling.

    Step 3: Fill the Crust

    Pour the sweet potato mixture into the prepared pie crust. Ensure it is evenly distributed for even baking.

    Step 4: Bake the Base

    Bake the pie for 30 minutes. This initial baking allows the filling to set slightly.

    Step 5: Add Pecans

    Remove the pie from the oven and evenly sprinkle 1 cup pecan halves over the top. This adds a tasty crunch and enhances presentation.

    Step 6: Finish Baking

    Return the pie to the oven and bake for an additional 25-30 minutes, or until the filling is set and the pecans are toasted. The pie should be golden brown and fragrant.

    Step 7: Cool

    Allow the pie to cool completely before slicing and serving. This cooling time helps the filling firm up for easier slicing.

    Enjoy your homemade Sweet Potato Pecan Pie as a delightful dessert that is sure to please all who taste it.

    How to Serve Sweet Potato Pecan Pie

    Serving Sweet Potato Pecan Pie can elevate your dessert experience. Here are a few creative ideas to enhance its presentation and flavor.

    Whipped Cream Topping

    Add a dollop of freshly whipped cream on top of each slice for a light and airy contrast to the rich filling.

    Ice Cream à la Mode

    Serve warm slices with a scoop of vanilla or caramel ice cream. The melting ice cream complements the pie’s sweetness and adds a delightful creaminess.

    Drizzle of Maple Syrup

    A light drizzle of pure maple syrup over the pie enhances the natural sweetness and adds an extra layer of flavor, making it perfect for autumn gatherings.

    Pro Tips for the Best Sweet Potato Pecan Pie

    To ensure your Sweet Potato Pecan Pie turns out perfectly, consider these helpful tips.

    • Use Fresh Sweet Potatoes: Freshly cooked and mashed sweet potatoes yield a richer flavor compared to canned alternatives.

    • Blind Bake the Crust: For a crispier crust, pre-bake the pie crust for about 10 minutes before adding the filling. This helps prevent sogginess.

    • Adjust Spices to Taste: Feel free to experiment with the spice ratios; some may prefer more cinnamon or nutmeg for a bolder flavor.

    • Check for Doneness: The filling should be set and slightly puffed. A knife inserted in the center should come out clean to ensure it is fully baked.

    • Cool Before Slicing: Allow the pie to cool completely before slicing to achieve clean, defined edges without the filling spilling out.

    Best Side Dishes and Pairings

    Complement your Sweet Potato Pecan Pie with these delightful side dishes and drinks that enhance its flavors.

    1. Fresh Fruit Salad – A light and refreshing fruit salad can balance the sweetness of the pie and add a burst of freshness.

    2. Sautéed Green Beans – The slight bitterness of sautéed green beans contrasts beautifully with the sweet pie, providing a savory balance.

    3. Spiced Apple Cider – Warm spiced apple cider is a comforting drink that pairs well with the flavors of sweet potatoes and pecans.

    4. Cheese Platter – A selection of cheeses, such as sharp cheddar or creamy brie, can provide a savory counterpoint to the dessert.

    5. Pumpkin Spice Latte – This seasonal favorite enhances the fall flavors present in the pie, making it a perfect beverage pairing.

    Common Mistakes to Avoid

    • Using Cold Ingredients: Ensure all ingredients, especially eggs and butter, are at room temperature for better incorporation.
    • Overmixing the Filling: Blend just until smooth; overmixing can lead to a dense texture.
    • Not Pre-baking the Crust: Skipping this step may result in a soggy bottom crust.
    • Skipping Cooling Time: Allowing the pie to cool completely helps the filling set properly for easier slicing.

    Storage & Reheating Instructions

    Refrigerator Storage

    Store the Sweet Potato Pecan Pie in an airtight container in the refrigerator. It will stay fresh for up to 4 days.

    Freezing Instructions

    For freezing, wrap the cooled pie tightly in plastic wrap and then in aluminum foil. It can be frozen for up to 3 months. Thaw in the refrigerator overnight before reheating.

    Reheating Tips

    • Oven: Preheat to 350°F (175°C). Cover the pie with foil and heat for about 15-20 minutes, or until warmed through.
    • Microwave: Place a slice on a microwave-safe plate and heat for 30-60 seconds, checking periodically to avoid overheating.
    • Stovetop: Use a skillet over low heat. Cover and warm for about 10 minutes, checking frequently.

    Frequently Asked Questions

    What makes Sweet Potato Pecan Pie different from regular pecan pie?

    Sweet Potato Pecan Pie combines the creamy sweetness of sweet potatoes with the nutty flavor of pecans, creating a unique and delicious twist.

    Can I use canned sweet potatoes for this recipe?

    Yes, you can use canned sweet potatoes. Just ensure they are well-drained and mashed before mixing with the other ingredients.

    How do I know when the Sweet Potato Pecan Pie is done?

    The pie is done when the filling is set and the pecans are toasted. A knife inserted into the center should come out clean or with a few moist crumbs.

    Can I make Sweet Potato Pecan Pie ahead of time?

    Absolutely! This pie can be made a day in advance and stored in the refrigerator until ready to serve.

    What can I serve with Sweet Potato Pecan Pie?

    This pie pairs beautifully with whipped cream, vanilla ice cream, or a drizzle of caramel sauce.

    Final Thoughts

    Sweet Potato Pecan Pie is a delightful dessert that combines the best of both worlds: the rich sweetness of sweet potatoes and the crunch of pecans. We encourage you to try this recipe and share your thoughts in the comments below. Happy baking!


    Desserts

    Sweet Potato Pecan Pie


    5.0 from 24 reviews

    This Sweet Potato Pecan Pie combines the natural sweetness of mashed sweet potatoes with the rich flavor of pecans, creating a delightful dessert perfect for any occasion. The pie features a smooth filling spiced with cinnamon and nutmeg, all encased in a flaky crust. It's a comforting treat that will impress your guests.

    Author: Munch Twist
    Prep Time: 15 minutes
    Cook Time: 60 minutes
    Total Time: 75 minutes
    Yield: 8 servings
    Category: Desserts
    Method: No bake
    Cuisine: American

    Sweet Potato Pecan Pie

    SCALE:
    1x
    2x
    3x
    Cook Mode: Prevent your screen from going dark

    Ingredients

    • 1 cup light brown sugar
    • 1 teaspoon ground cinnamon
    • 1 teaspoon vanilla extract
    • 1/2 cup unsalted butter, melted
    • 2 cups mashed sweet potatoes
    • 1/2 teaspoon ground nutmeg
    • 1/4 teaspoon salt
    • 3 large eggs
    • 1 pie crust
    • 1/2 cup granulated sugar
    • 1 cup pecan halves

    Instructions

    1. Preheat your oven to 350°F (175°C). Fit the pie crust into a 9-inch pie dish and set aside.
    2. In a large bowl, blend 2 cups mashed sweet potatoes, 1 cup light brown sugar, 1/2 cup granulated sugar, 1/2 cup melted butter, 3 large eggs, 1 teaspoon vanilla extract, 1 teaspoon ground cinnamon, 1/2 teaspoon ground nutmeg, and 1/4 teaspoon salt until smooth.
    3. Pour the sweet potato mixture into the prepared pie crust.
    4. Bake the pie for 30 minutes.
    5. Remove the pie from the oven and evenly sprinkle 1 cup pecan halves over the top.
    6. Return the pie to the oven and bake for an additional 25-30 minutes, or until the filling is set and the pecans are toasted.
    7. Allow the pie to cool completely before slicing and serving.

    Nutrition Facts

    Serving Size: 1 serving
    Calories: 400 kcal
    Sugar: 36g
    Sodium: 150mg
    Fat: 22g
    Saturated Fat: 8g
    Carbohydrates: 51g
    Fiber: 3g
    Protein: 5g
    Cholesterol: 75mg

  • Indulge in Delightful Raspberry Cream Cheese Bites

    Indulge in Delightful Raspberry Cream Cheese Bites

    Delightful Raspberry Cream Cheese Bites offer a perfect balance of creamy sweetness and tartness. These mini desserts are not only visually appealing but also a delightful treat for any occasion. Their bite-sized nature makes them ideal for parties or casual gatherings.

    Why You’ll Love This Recipe

    • Quick & Easy: Ready in under 30 minutes, making them perfect for last-minute desserts.
    • Irresistibly Creamy: The cream cheese filling provides a rich and smooth texture that complements the raspberries.
    • Fresh & Fruity: Fresh raspberries add a burst of flavor that elevates each bite.
    • Beautiful Presentation: Their vibrant colors make these bites a show-stopper on any dessert table.
    • Customizable Toppings: Feel free to add your favorite garnishes, such as chocolate shavings or mint leaves.

    Tools and Equipment

    Having the right tools makes preparation straightforward and efficient.

    Essential Tools

    • Mini muffin tin
    • Mixing bowls
    • Electric mixer or whisk
    • Rubber spatula
    • Measuring cups and spoons

    Why These Tools Matter

    • Mini muffin tin: Perfect for creating uniform, bite-sized portions that are easy to serve.
    • Electric mixer or whisk: Ensures the cream cheese mixture is smooth and well-combined, saving you time and effort.
    • Rubber spatula: Ideal for transferring the mixture into muffin liners without making a mess.

    Ingredients for Delightful Raspberry Cream Cheese Bites

    For the Crust

    • 1 cup graham cracker crumbs
    • 1/4 cup melted butter

    For the Filling

    • 1 (8 oz) package cream cheese, softened
    • 1/4 cup powdered sugar
    • 1 tablespoon lemon juice
    • 1 teaspoon vanilla extract
    • 1/4 cup honey

    For the Topping

    • 1 pint fresh raspberries
    • White chocolate shavings for garnish (optional)
    • Fresh mint leaves for garnish (optional)

    How to Make Delightful Raspberry Cream Cheese Bites Step-by-Step

    Step 1: Preheat the Oven

    Start by setting your oven to 350°F (175°C). Line a mini muffin tin with paper liners to prepare for the crust.

    Step 2: Prepare the Crust

    In a mixing bowl, combine 1 cup graham cracker crumbs with 1/4 cup melted butter. Mix until well combined. Press about 1 tablespoon of this mixture into the bottom of each mini muffin liner to form a crust.

    Step 3: Make the Filling

    In a large bowl, beat 1 (8 oz) package of softened cream cheese until smooth. Gradually blend in 1/4 cup powdered sugar, 1 teaspoon vanilla extract, 1 tablespoon lemon juice, and 1/4 cup honey until creamy and well combined.

    Step 4: Assemble the Bites

    Spoon the cream cheese mixture over the crusts in the mini muffin liners, filling each about 3/4 full.

    Step 5: Add the Raspberries

    Gently press a fresh raspberry into the center of each cream cheese-filled cup. This adds a lovely pop of color and flavor.

    Step 6: Bake and Cool

    Bake the bites in the preheated oven for 10-12 minutes, or until the edges are set and the cream cheese is slightly puffed. Allow them to cool in the pan for 10 minutes, then transfer to a wire rack to cool completely.

    Step 7: Chill

    Once completely cooled, refrigerate the bites for at least 1 hour before serving. This helps the flavors meld together.

    Step 8: Garnish and Serve

    If desired, garnish with white chocolate shavings and fresh mint leaves. Enjoy your delightful raspberry cream cheese bites!

    These treats not only satisfy your sweet tooth but also bring a touch of elegance to any gathering.

    How to Serve Delightful Raspberry Cream Cheese Bites

    These delightful bites are versatile and can be served in various creative ways.

    Elegant Dessert Platter

    Arrange the raspberry cream cheese bites on a beautiful dessert platter with fresh raspberries and mint leaves for an eye-catching presentation at any gathering.

    Tea Party Treats

    Serve these bites alongside a selection of tea options for a charming afternoon tea experience, complementing the flavors of the cream cheese and raspberries with delicate pastries.

    Birthday Celebration Favors

    Package individual bites in decorative boxes as sweet favors for birthdays or special occasions, making them a memorable treat for guests to take home.

    Pro Tips for the Best Delightful Raspberry Cream Cheese Bites

    Achieving the perfect raspberry cream cheese bites requires a few key techniques.

    • Room Temperature Ingredients: Always ensure that your cream cheese is at room temperature for a smoother filling and easier mixing.

    • Quality Raspberries: Use fresh, ripe raspberries for the best flavor. Avoid overripe or mushy berries, as they can affect the texture.

    • Don’t Overbake: Keep a close eye on the baking time. Overbaking can lead to a dry texture, so remove them from the oven as soon as the edges are set.

    • Chill Thoroughly: Allow the bites to chill for at least one hour after baking, as this helps the flavors meld and enhances the overall texture.

    • Customize the Toppings: Feel free to experiment with different toppings, such as crushed nuts or a drizzle of chocolate, to create your unique twist on these bites.

    Best Side Dishes and Pairings

    These delightful raspberry cream cheese bites pair wonderfully with a variety of dishes and beverages.

    1. Mint-Infused Iced Tea: The refreshing notes of mint complement the creamy sweetness of the bites, creating a harmonious balance.

    2. Lemonade Spritzer: A sparkling lemonade adds a zesty contrast to the richness of the cream cheese, making it a perfect pairing for warm weather.

    3. Cheese and Charcuterie Board: Include these bites on a cheese board for an elegant appetizer that combines sweet and savory elements.

    4. Fruit Salad: A light and refreshing fruit salad can enhance the berry flavor, adding a fresh element to your dessert table.

    5. Chocolate-Covered Strawberries: The rich chocolate pairs well with the tartness of the raspberries, providing a complementary flavor experience.

    Common Mistakes to Avoid

    • Using Cold Cream Cheese: Make sure to soften the cream cheese for a smooth filling.
    • Overfilling the Cups: Fill each cup only 3/4 full to prevent overflow while baking.
    • Skipping the Chilling Step: Refrigerating the bites allows the flavors to meld and improves texture.
    • Using Stale Graham Crackers: Fresh graham cracker crumbs ensure a better crust and flavor.

    Storage & Reheating Instructions

    Refrigerator Storage

    Store the Delightful Raspberry Cream Cheese Bites in an airtight container in the refrigerator. They will stay fresh for up to 5 days.

    Freezing Instructions

    To freeze, place the bites in a single layer on a baking sheet until firm, then transfer them to an airtight container or freezer bag. They can be frozen for up to 2 months. Thaw in the refrigerator before serving.

    Reheating Tips

    • Oven: Preheat to 350°F (175°C), place bites on a baking sheet, and heat for about 5-7 minutes.
    • Microwave: Heat on a microwave-safe plate for 10-15 seconds, checking to avoid overheating.
    • Stovetop: Place bites in a skillet over low heat, cover, and warm for 2-3 minutes, checking frequently.

    Frequently Asked Questions

    How can I make the Delightful Raspberry Cream Cheese Bites healthier?

    You can use low-fat cream cheese and substitute honey with a sugar alternative to reduce calories.

    Can I use frozen raspberries instead of fresh?

    Yes, frozen raspberries can be used, but they may release more moisture. Thaw and drain them before adding to the bites.

    How do I achieve a firmer crust for my Delightful Raspberry Cream Cheese Bites?

    Ensure the graham cracker mixture is well combined with the melted butter and press the mixture firmly into the muffin liners.

    Can I make these bites ahead of time?

    Absolutely! You can prepare and bake the bites a day in advance. Just chill them and garnish right before serving.

    What other toppings can I use for the Delightful Raspberry Cream Cheese Bites?

    Consider using crushed nuts, a drizzle of chocolate, or a sprinkle of coconut for added flavor and texture.

    Final Thoughts

    These Delightful Raspberry Cream Cheese Bites are a perfect treat for any occasion. Their creamy texture and burst of raspberry flavor are sure to impress your guests. We encourage you to try making this recipe and share your feedback in the comments!


    Desserts

    Delightful Raspberry Cream Cheese Bites


    5.0 from 24 reviews

    Delightful Raspberry Cream Cheese Bites are a deliciously creamy dessert featuring a graham cracker crust, a rich cream cheese filling, and fresh raspberries. Perfect for parties or a sweet treat at home, these bites are easy to make and sure to impress your guests.

    Author: Munch Twist
    Prep Time: 20 minutes
    Cook Time: 12 minutes
    Total Time: 1 hour 32 minutes
    Yield: 24 servings
    Category: Desserts
    Method: No bake
    Cuisine: American

    Delightful Raspberry Cream Cheese Bites

    SCALE:
    1x
    2x
    3x
    Cook Mode: Prevent your screen from going dark

    Ingredients

    • 1 cup graham cracker crumbs
    • 1/4 cup melted butter
    • 1 (8 oz) package cream cheese, softened
    • 1/4 cup powdered sugar
    • 1 tablespoon lemon juice
    • 1 teaspoon vanilla extract
    • 1/4 cup honey
    • 1 pint fresh raspberries
    • White chocolate shavings for garnish (optional)
    • Fresh mint leaves for garnish (optional)

    Instructions

    1. Preheat the oven to 350°F (175°C) and line a mini muffin tin with paper liners.
    2. Mix graham cracker crumbs with melted butter until well combined and press into the bottom of each mini muffin liner.
    3. In a large bowl, beat softened cream cheese until smooth, then blend in powdered sugar, vanilla extract, lemon juice, and honey until creamy.
    4. Spoon the cream cheese mixture over the crusts in the mini muffin liners, filling each about 3/4 full.
    5. Gently press a fresh raspberry into the center of each cream cheese-filled cup.
    6. Bake for 10-12 minutes, or until the edges are set and the cream cheese is slightly puffed. Allow to cool in the pan for 10 minutes, then transfer to a wire rack to cool completely.
    7. Once cooled, refrigerate the bites for at least 1 hour before serving.
    8. Garnish with white chocolate shavings and fresh mint leaves if desired.

    Nutrition Facts

    Serving Size: 1 serving
    Calories: 120 kcal
    Sugar: 8g
    Sodium: 70mg
    Fat: 8g
    Saturated Fat: 5g
    Carbohydrates: 10g
    Fiber: 0g
    Protein: 2g
    Cholesterol: 30mg

  • Indulge with No Bake Turtle Mini Cheesecakes Today

    Indulge with No Bake Turtle Mini Cheesecakes Today

    No Bake Turtle Mini Cheesecakes are a delightful dessert that combines creamy cheesecake with rich chocolate and sweet caramel. These mini treats are perfect for satisfying your sweet tooth without turning on the oven. Their layered flavors and textures make them an irresistible choice for any occasion.

    Why You’ll Love This Recipe

    • Decadent Flavor: The combination of chocolate, caramel, and pecans creates a rich and indulgent taste.
    • No Baking Required: Enjoy the ease of a no-bake recipe while still impressing your guests.
    • Perfect for Parties: These mini cheesecakes are easy to serve and make for a stunning dessert display.
    • Customizable Toppings: Feel free to get creative with toppings like whipped cream or extra nuts.
    • Quick Preparation: With only 20 minutes of prep time, you can whip these up in no time.

    Tools and Equipment

    Having the right tools makes the preparation process smooth and enjoyable.

    Essential Tools

    • Mixing bowls
    • Electric mixer or whisk
    • Mini cheesecake pans or cupcake liners
    • Rubber spatula
    • Measuring cups and spoons
    • Refrigerator

    Why These Tools Matter

    • Electric mixer or whisk: Ensures the cream cheese is blended smoothly, creating a creamy filling.
    • Rubber spatula: Perfect for folding in whipped cream without deflating it, yielding a light texture.
    • Mini cheesecake pans or cupcake liners: Help shape the cheesecakes while making them easy to serve.

    Ingredients for No Bake Turtle Mini Cheesecakes

    Crust

    • 1 1/2 cups graham cracker crumbs
    • 1/4 cup granulated sugar
    • 1/2 cup unsalted butter, melted

    Filling

    • 8 oz cream cheese, softened
    • 1 cup powdered sugar
    • 1 tsp vanilla extract
    • 1 cup heavy cream

    Toppings

    • 1/2 cup semisweet chocolate chips
    • 1/2 cup caramel sauce
    • 1/4 cup chopped pecans

    How to Make No Bake Turtle Mini Cheesecakes Step-by-Step

    Step 1: Prepare the Crust

    In a medium bowl, combine 1 1/2 cups graham cracker crumbs, 1/4 cup granulated sugar, and 1/2 cup melted butter. Mix until well combined. Press this mixture into the bottoms of mini cheesecake pans or cupcake liners. Chill the crust in the refrigerator while you prepare the filling.

    Step 2: Make the Filling

    In a large bowl, beat 8 oz softened cream cheese until smooth. Gradually add 1 cup powdered sugar and 1 tsp vanilla extract, beating until the mixture is fully combined and creamy.

    Step 3: Whip the Cream

    In a separate bowl, whip 1 cup heavy cream until stiff peaks form. Gently fold the whipped cream into the cream cheese mixture until smooth and fluffy, taking care not to deflate the whipped cream.

    Step 4: Assemble the Cheesecakes

    Spoon the cheesecake filling over the chilled crusts, smoothing the tops with a spatula. Refrigerate for at least 4 hours or until the cheesecakes are set.

    Step 5: Add Toppings

    Once set, drizzle 1/2 cup caramel sauce over the cheesecakes. Melt 1/2 cup semisweet chocolate chips and drizzle over the caramel. Finally, sprinkle with 1/4 cup chopped pecans for added crunch.

    Step 6: Serve

    Enjoy these indulgent No Bake Turtle Mini Cheesecakes as a perfect sweet treat for any occasion. The combination of flavors will surely impress!

    Nutritional Information (per mini cheesecake, assuming 12 servings):
    – Calories: Approximately 350 kcal
    – Total Fat: 24g
    – Saturated Fat: 12g
    – Cholesterol: 60mg
    – Sodium: 150mg
    – Total Carbohydrates: 31g
    – Dietary Fiber: 1g
    – Sugars: 23g
    – Protein: 4g

    Preparation time: 20 minutes | Chilling time: 4 hours.

    How to Serve No Bake Turtle Mini Cheesecakes

    These delightful mini cheesecakes can be served in various creative ways to enhance your dessert experience.

    Individual Dessert Cups

    Serve each mini cheesecake in a small dessert cup topped with additional caramel and chocolate drizzle. This presentation adds a touch of elegance and makes it easy for guests to enjoy.

    Cheesecake Platter

    Arrange the mini cheesecakes on a large platter, garnished with additional chopped pecans and drizzles of caramel and chocolate. This visually appealing display is perfect for parties or gatherings.

    Accompanied by Fresh Berries

    Serve the mini cheesecakes alongside a medley of fresh berries such as strawberries, raspberries, or blueberries. The tartness of the berries balances the richness of the cheesecake, creating a delightful contrast.

    Pro Tips for the Best No Bake Turtle Mini Cheesecakes

    To ensure your mini cheesecakes turn out perfectly every time, consider these essential tips.

    • Use Quality Ingredients: Opt for high-quality chocolate and caramel sauce for a richer flavor in your cheesecakes.

    • Chill Thoroughly: Allow the cheesecakes to set in the refrigerator for a minimum of 4 hours to achieve the desired firmness.

    • Room Temperature Ingredients: Ensure your cream cheese is at room temperature for easy mixing, resulting in a smoother filling.

    • Whip Cream Properly: Whip the heavy cream until stiff peaks form to maintain a light and airy texture in your cheesecake filling.

    • Customize Toppings: Feel free to get creative with toppings; consider adding sea salt, crushed toffee, or different nuts for a unique twist.

    Best Side Dishes and Pairings

    These mini cheesecakes pair well with a variety of side dishes and drinks, enhancing their indulgent flavor.

    1. Coffee: A rich, dark roast coffee complements the sweetness of the cheesecakes, providing a perfect contrast.

    2. Vanilla Ice Cream: The creamy texture of vanilla ice cream adds a delightful contrast to the mini cheesecakes while enhancing the overall dessert experience.

    3. Chocolate Covered Strawberries: These decadent treats add a fruity and chocolatey element that complements the flavors of the cheesecakes.

    4. Mint Tea: A refreshing cup of mint tea can cleanse the palate and balance the richness of the dessert.

    5. Sparkling Water with Lime: The effervescence and citrus notes of sparkling water with lime provide a refreshing counterpoint to the heavy sweetness of the cheesecakes.

    Common Mistakes to Avoid

    • Not Chilling Enough: Failing to refrigerate the cheesecakes for at least 4 hours can result in a softer texture that’s hard to serve.
    • Overmixing the Cream: Be careful not to overmix the whipped cream, as this can lead to a dense filling instead of a light and airy texture.
    • Using Warm Ingredients: Ensure that the cream cheese is softened but not warm, as this can affect the consistency of the filling.
    • Skipping the Topping: Neglecting the caramel, chocolate, or pecans takes away from the classic turtle cheesecake experience.

    Storage & Reheating Instructions

    Refrigerator Storage

    Store the No Bake Turtle Mini Cheesecakes in airtight containers in the refrigerator. They will remain fresh for up to 5 days.

    Freezing Instructions

    For freezing, place the mini cheesecakes in a single layer on a baking sheet until firm, then transfer them to an airtight container. They can be frozen for up to 2 months. Thaw in the refrigerator before serving.

    Reheating Tips

    • Oven: Preheat to 350°F (175°C), place cheesecakes in a baking dish, cover with foil, and heat for about 10-15 minutes.
    • Microwave: Heat individual servings on low power for 15-20 seconds, checking frequently.
    • Stovetop: Place a cheesecake in a pan over low heat, cover, and warm for about 5 minutes, checking often.

    Frequently Asked Questions

    How can I make No Bake Turtle Mini Cheesecakes gluten-free?

    You can use gluten-free graham cracker crumbs to replace the regular graham cracker crumbs in the crust.

    Can I use a different type of nut for the topping?

    Yes, feel free to substitute chopped walnuts or almonds if you prefer a different flavor.

    How long do No Bake Turtle Mini Cheesecakes take to set?

    They typically need at least 4 hours in the refrigerator to set properly, so plan accordingly.

    What is the best way to serve No Bake Turtle Mini Cheesecakes?

    Serve them chilled, directly from the refrigerator, and consider adding fresh fruit or additional chocolate drizzle for extra flair.

    Can I prepare No Bake Turtle Mini Cheesecakes in advance?

    Absolutely, they can be made a day or two in advance, making them perfect for parties or gatherings.

    Final Thoughts

    No Bake Turtle Mini Cheesecakes are a delightful treat that combines rich flavors and textures without the hassle of baking. We encourage you to try this recipe and share your thoughts in the comments. Your feedback is invaluable!


    Desserts

    No Bake Turtle Mini Cheesecakes


    5.0 from 24 reviews

    These No Bake Turtle Mini Cheesecakes are a delightful treat that combines creamy cheesecake filling with a crunchy graham cracker crust, topped with rich caramel, chocolate, and pecans. Perfect for any occasion, they are easy to make and require no baking.

    Author: Munch Twist
    Prep Time: 20 minutes
    Cook Time: 0 minutes
    Total Time: 240 minutes
    Yield: 12 servings
    Category: Desserts
    Method: Baking
    Cuisine: American

    No Bake Turtle Mini Cheesecakes

    SCALE:
    1x
    2x
    3x
    Cook Mode: Prevent your screen from going dark

    Ingredients

    • 1 cup heavy cream
    • 1/4 cup granulated sugar
    • 1/2 cup semisweet chocolate chips
    • 1/2 cup caramel sauce
    • 1 1/2 cups graham cracker crumbs
    • 1/4 cup chopped pecans
    • 1/2 cup unsalted butter, melted
    • 8 oz cream cheese, softened
    • 1 cup powdered sugar
    • 1 tsp vanilla extract

    Instructions

    1. In a medium bowl, mix graham cracker crumbs, granulated sugar, and melted butter until well combined. Press the mixture into the bottoms of mini cheesecake pans or cupcake liners. Chill in the refrigerator while preparing the filling.
    2. Beat softened cream cheese in a large bowl until smooth. Add powdered sugar and vanilla extract, beating until fully combined.
    3. In a separate bowl, whip heavy cream until stiff peaks form. Gently fold the whipped cream into the cream cheese mixture until smooth and fluffy.
    4. Spoon the cheesecake filling over the chilled crusts, smoothing the tops. Refrigerate for at least 4 hours or until set.
    5. Drizzle caramel sauce over the set cheesecakes. Melt semisweet chocolate chips and drizzle over the caramel. Sprinkle with chopped pecans.
    6. Serve and enjoy these indulgent mini cheesecakes.

    Nutrition Facts

    Serving Size: 1 serving
    Calories: 350 kcal
    Sugar: 23g
    Sodium: 150mg
    Fat: 24g
    Saturated Fat: 12g
    Carbohydrates: 31g
    Fiber: 1g
    Protein: 4g
    Cholesterol: 60mg

  • Irresistible Reese’s Peanut Butter Cup Roll Cake Recipe

    Irresistible Reese’s Peanut Butter Cup Roll Cake Recipe

    Reese’s Peanut Butter Cup Roll Cake is a delightful dessert that combines rich chocolate and creamy peanut butter in an irresistible way. This cake features a light, airy texture that rolls up perfectly, making it a showstopper at any gathering. With each bite, you experience the classic flavors of Reese’s in a new and exciting form.

    Why You’ll Love This Recipe

    • Decadent Flavor: The combination of chocolate and peanut butter creates a rich taste that satisfies any sweet tooth.
    • Impressive Presentation: The rolled cake looks stunning when sliced, making it perfect for parties or special occasions.
    • Easy to Make: With simple ingredients and straightforward steps, this cake is accessible for bakers of all skill levels.
    • Customizable: You can add extra toppings or adjust the filling to suit your preferences, making it a versatile dessert.
    • Deliciously Fun: Chopping up Reese’s Peanut Butter Cups to incorporate into the frosting adds a playful twist to the traditional roll cake.

    Tools and Equipment

    Having the right tools can make the baking process smoother and more enjoyable.

    Essential Tools

    • Large mixing bowls
    • Jelly roll pan (15×10-inch)
    • Whisk
    • Electric mixer or hand whisk
    • Clean kitchen towel
    • Parchment paper

    Why These Tools Matter

    • Jelly roll pan: This specific size is essential for achieving the right thickness and shape for your roll cake.
    • Electric mixer: It simplifies the process of whipping cream and mixing ingredients, ensuring a smooth batter and frosting.
    • Clean kitchen towel: This helps in rolling the cake without sticking, allowing for a perfect shape once unrolled.

    Ingredients for Reese’s Peanut Butter Cup Roll Cake

    For the Cake

    • 1 cup granulated sugar
    • 1 cup all-purpose flour
    • 1/2 cup unsweetened cocoa powder
    • 1 teaspoon baking powder
    • 1/2 teaspoon baking soda
    • 4 large eggs
    • 1/2 cup milk
    • 1/4 cup vegetable oil
    • 1 teaspoon vanilla extract

    For the Filling

    • 1 cup creamy peanut butter
    • 1/2 cup powdered sugar

    For the Frosting

    • 1/2 cup heavy cream
    • 6 Reese’s Peanut Butter Cups, chopped

    How to Make Reese’s Peanut Butter Cup Roll Cake Step-by-Step

    Step 1: Preheat the Oven

    Preheat your oven to 350°F (175°C). Line a 15×10-inch jelly roll pan with parchment paper and lightly grease it.

    Step 2: Mix Dry Ingredients

    In a large bowl, whisk together 1 cup all-purpose flour, 1 cup granulated sugar, 1/2 cup unsweetened cocoa powder, 1 teaspoon baking powder, 1/2 teaspoon baking soda, and 1/4 teaspoon salt until evenly combined.

    Step 3: Prepare Wet Ingredients

    In a separate bowl, beat 4 large eggs with 1/2 cup milk, 1/4 cup vegetable oil, and 1 teaspoon vanilla extract until the mixture is smooth and well combined.

    Step 4: Combine Ingredients

    Gradually add the wet mixture to the dry ingredients. Stir gently until the batter is smooth. Pour the batter into the prepared pan and spread it evenly.

    Step 5: Bake the Cake

    Bake the cake for 10-12 minutes, or until a toothpick inserted into the center comes out clean. Let the cake cool in the pan for about 5 minutes.

    Step 6: Prepare the Filling

    While the cake cools, mix 1 cup creamy peanut butter with 1/2 cup powdered sugar in a bowl. Stir until the mixture is smooth and creamy.

    Step 7: Roll the Cake

    Carefully transfer the cake to a clean kitchen towel. Roll the cake up with the towel, starting from the short end. Allow it to cool completely in this rolled position.

    Step 8: Make the Frosting

    In a separate bowl, whip 1/2 cup heavy cream until stiff peaks form. Gently fold in the chopped Reese’s Peanut Butter Cups until well combined.

    Step 9: Assemble the Cake

    Unroll the cooled cake carefully and spread the peanut butter mixture evenly over the surface. Re-roll the cake without the towel, placing it seam side down on a serving platter.

    Step 10: Frost and Serve

    Spread the peanut butter cup frosting over the top and sides of the cake. Slice and serve to enjoy this rich, indulgent dessert.

    This Reese’s Peanut Butter Cup Roll Cake is sure to impress your friends and family with its delightful flavors and stunning presentation. Enjoy!

    How to Serve Reeses Peanut Butter Cup Roll Cake

    Serving your Reese’s Peanut Butter Cup Roll Cake can elevate the dessert experience. Here are a few creative ideas.

    Garnished with Whipped Cream

    Top each slice with a generous dollop of whipped cream for an extra layer of richness. This addition complements the peanut butter flavor beautifully.

    Chocolate Drizzle

    Drizzle melted chocolate over the rolled cake just before serving. This adds a decadent touch and enhances the overall presentation.

    Sliced Strawberries

    Serve alongside fresh sliced strawberries. Their tartness balances the sweetness of the cake and adds a refreshing contrast.

    Pro Tips for the Best Reeses Peanut Butter Cup Roll Cake

    To ensure your Reese’s Peanut Butter Cup Roll Cake turns out perfectly, consider these expert tips.

    • Use Fresh Ingredients: Always use fresh eggs and high-quality peanut butter for the best flavor and texture.
    • Cool the Cake Completely: Make sure the cake is completely cool before adding the filling to prevent it from melting.
    • Roll Tightly: When rolling the cake, do so tightly to maintain its shape, but be careful not to crack the cake.
    • Chill Before Serving: Refrigerate the assembled roll cake for at least 30 minutes before slicing. This helps it set and makes cutting easier.
    • Experiment with Fillings: Feel free to mix in crushed cookies or different types of candy with the peanut butter filling for added texture.

    Best Side Dishes and Pairings

    Pairing the Reese’s Peanut Butter Cup Roll Cake with complementary dishes enhances the overall dining experience. Here are some great options.

    1. Vanilla Ice Cream – Creamy vanilla ice cream provides a cool contrast to the rich flavors of the cake.
    2. Coffee – A cup of robust coffee balances the sweetness and enhances the chocolate and peanut butter notes.
    3. Chocolate Milkshake – A thick chocolate milkshake offers a fun, indulgent pairing that chocolate lovers will appreciate.
    4. Fruit Salad – A light fruit salad adds freshness and cuts through the richness of the cake.
    5. Caramel Sauce – Drizzling caramel sauce over the cake adds an extra layer of flavor and sweetness.

    Common Mistakes to Avoid

    • Not Preheating the Oven: Ensure your oven is preheated to 350°F (175°C) before baking for even cooking.
    • Overmixing the Batter: Mix just until combined to maintain a light and airy texture.
    • Skipping the Cooling Step: Allow the cake to cool properly before rolling to prevent cracking.
    • Using Cold Ingredients: Bring eggs and milk to room temperature for better incorporation and a smoother batter.

    Storage & Reheating Instructions

    Refrigerator Storage

    Store any leftover Reese’s Peanut Butter Cup Roll Cake in an airtight container in the refrigerator. It will stay fresh for up to 4 days.

    Freezing Instructions

    For best results, wrap the roll cake tightly in plastic wrap, then place it in an airtight container or freezer bag. It can be frozen for up to 3 months. Thaw in the refrigerator overnight before serving.

    Reheating Tips

    • Oven: Preheat the oven to 350°F (175°C). Wrap the cake in aluminum foil and heat for 10-15 minutes.
    • Microwave: Place a slice on a microwave-safe plate and heat for 20-30 seconds, checking for desired warmth.
    • Stovetop: Use a skillet over low heat, covering it with a lid for 5-7 minutes until warmed through.

    Frequently Asked Questions

    How do I make my Reese’s Peanut Butter Cup Roll Cake more chocolatey?

    To enhance the chocolate flavor, consider adding a tablespoon of espresso powder to the batter or using dark cocoa powder instead of regular cocoa powder.

    Can I substitute ingredients in the Reese’s Peanut Butter Cup Roll Cake?

    Yes, you can use almond milk instead of regular milk or substitute the all-purpose flour with a gluten-free blend. Adjust baking times as necessary.

    How can I make the filling for my Reese’s Peanut Butter Cup Roll Cake richer?

    For a richer filling, blend in cream cheese with the peanut butter and powdered sugar mixture. This will add creaminess and depth to the flavor.

    What is the best way to decorate my Reese’s Peanut Butter Cup Roll Cake?

    Consider drizzling melted chocolate over the frosted cake and topping with additional chopped Reese’s Peanut Butter Cups for an appealing presentation.

    Can I make the Reese’s Peanut Butter Cup Roll Cake ahead of time?

    Absolutely! This cake can be made a day in advance. Just store it in the refrigerator and allow it to sit at room temperature for a short time before serving.

    Final Thoughts

    The Reese’s Peanut Butter Cup Roll Cake is a delightful dessert that will impress your family and friends. Its rich flavors and unique presentation make it perfect for any occasion. I encourage you to try this recipe and share your thoughts in the comments below.


    Desserts

    Reeses Peanut Butter Cup Roll Cake


    5.0 from 24 reviews

    This Reeses Peanut Butter Cup Roll Cake is a delightful dessert that combines rich chocolate cake with a creamy peanut butter filling and frosting, topped with chopped Reese's Peanut Butter Cups. Perfect for any occasion, this cake is sure to satisfy your sweet tooth.

    Author: Munch Twist
    Prep Time: 20 minutes
    Cook Time: 12 minutes
    Total Time: 32 minutes
    Yield: 10 servings
    Category: Desserts
    Method: No bake
    Cuisine: American

    Reeses Peanut Butter Cup Roll Cake

    SCALE:
    1x
    2x
    3x
    Cook Mode: Prevent your screen from going dark

    Ingredients

    • 1 cup granulated sugar
    • 1 cup all-purpose flour
    • 1/2 cup unsweetened cocoa powder
    • 1/2 cup heavy cream
    • 1 teaspoon baking powder
    • 4 large eggs
    • 1/2 cup milk
    • 1/2 teaspoon baking soda
    • 1/4 cup vegetable oil
    • 1 teaspoon vanilla extract
    • 1 cup creamy peanut butter
    • 1/2 cup powdered sugar
    • 6 Reese's Peanut Butter Cups, chopped

    Instructions

    1. Preheat your oven to 350°F (175°C). Line a 15×10-inch jelly roll pan with parchment paper and lightly grease it.
    2. In a large bowl, whisk together the flour, sugar, cocoa powder, baking powder, baking soda, and salt.
    3. In a separate bowl, beat the eggs with the milk, vegetable oil, and vanilla extract until well combined.
    4. Gradually add the wet mixture to the dry ingredients, stirring until smooth. Pour the batter into the prepared pan and spread it evenly.
    5. Bake for 10-12 minutes, or until a toothpick inserted into the center comes out clean. Let the cake cool for 5 minutes.
    6. While the cake cools, mix the peanut butter with the powdered sugar in a bowl until smooth.
    7. Carefully transfer the cake to a clean kitchen towel. Roll the cake up with the towel, starting from the short end. Let it cool completely.
    8. Whip the heavy cream until stiff peaks form. Gently fold in the chopped Reese's Peanut Butter Cups.
    9. Unroll the cooled cake and spread the peanut butter mixture evenly over it. Re-roll the cake without the towel and place it seam side down on a serving platter.
    10. Spread the peanut butter cup frosting over the top and sides of the cake.

    Nutrition Facts

    Serving Size: 1 serving
    Calories: 500 kcal
    Sugar: 36g
    Sodium: 200mg
    Fat: 35g
    Saturated Fat: 13g
    Carbohydrates: 45g
    Fiber: 2g
    Protein: 7g
    Cholesterol: 100mg