Category: Desserts

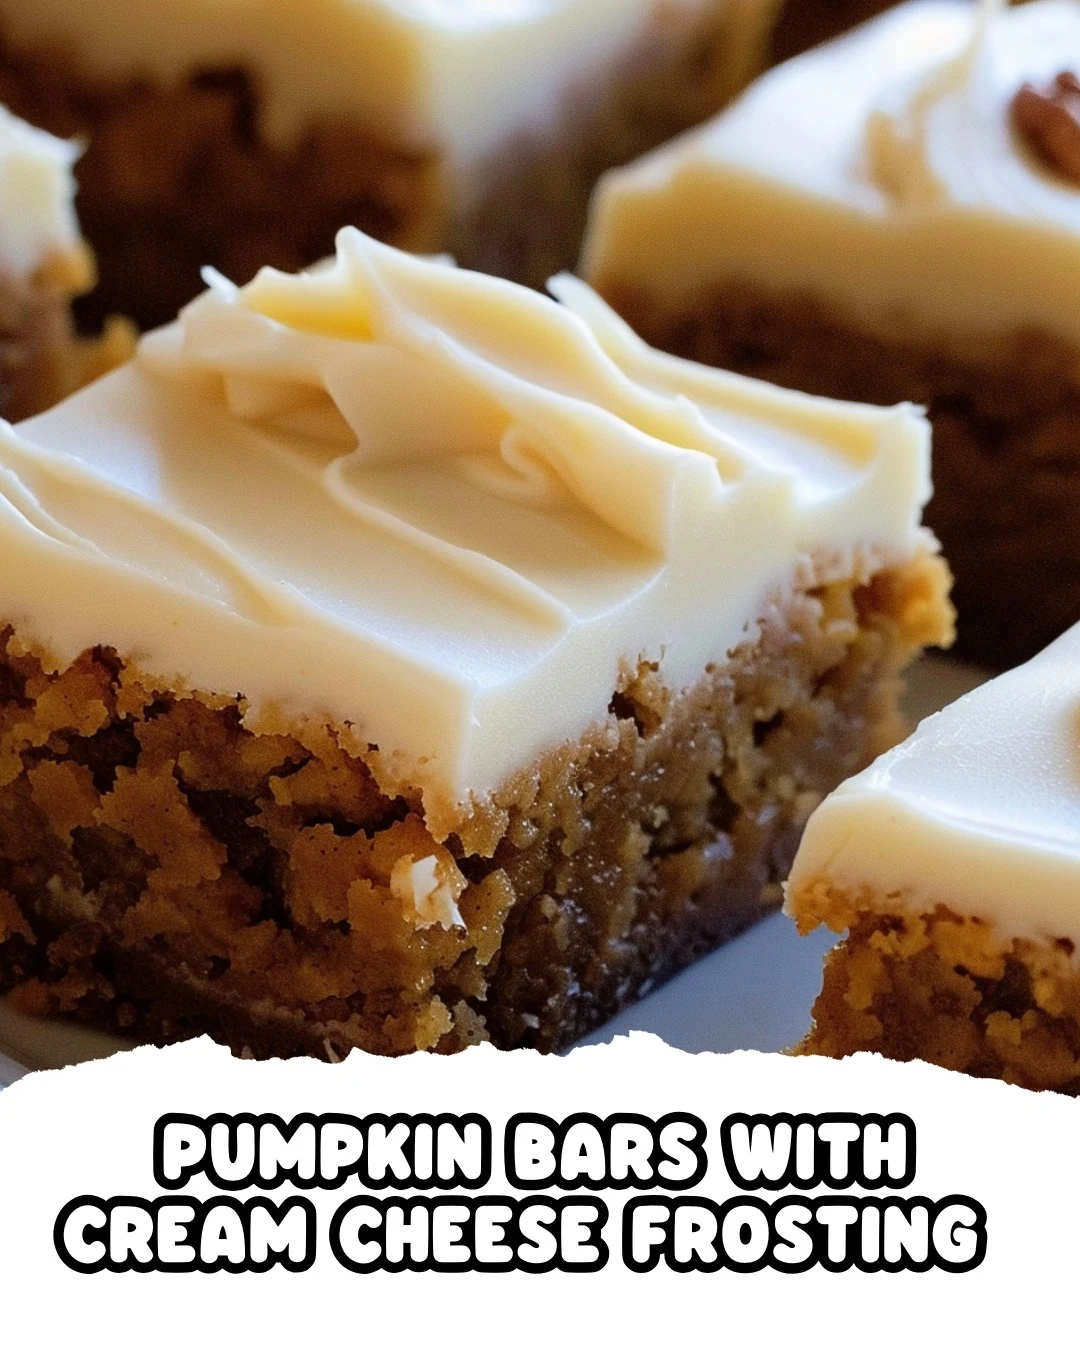
  • Irresistible Pumpkin Bars with Cream Cheese Frosting Recipe

    Irresistible Pumpkin Bars with Cream Cheese Frosting Recipe

    Pumpkin Bars with Cream Cheese Frosting are a delightful treat that perfectly blend warm spices and creamy sweetness. These bars are moist, flavorful, and topped with a luscious cream cheese frosting that makes them irresistible. Whether for a fall gathering or a cozy afternoon snack, this recipe will quickly become a favorite.

    Why You’ll Love This Recipe

    • Irresistibly Moist: The pumpkin puree keeps these bars tender and moist, perfect for any occasion.
    • Deliciously Spiced: The combination of cinnamon, ginger, and cloves adds a warm, inviting flavor that pairs beautifully with the cream cheese frosting.
    • Easy to Make: With simple ingredients and straightforward steps, these bars are perfect for bakers of all levels.
    • Perfect for Sharing: These bars are great for potlucks, parties, or as a sweet treat to share with friends and family.
    • Customizable Topping: Feel free to add nuts or chocolate chips for a personal touch.

    Tools and Equipment

    Having the right tools makes baking easier and more enjoyable. Here are the essentials for this recipe.

    Essential Tools

    • Mixing bowls
    • Baking pan
    • Whisk or electric mixer
    • Measuring cups and spoons
    • Spatula

    Why These Tools Matter

    • Mixing Bowls: A large bowl is essential for combining wet ingredients, while a medium bowl is perfect for the frosting.
    • Baking Pan: A good-quality baking pan ensures even baking and easy release of the pumpkin bars.
    • Whisk or Electric Mixer: These tools make it easier to achieve a smooth batter and fluffy frosting.

    Ingredients for Pumpkin Bars with Cream Cheese Frosting

    For the Pumpkin Bars

    • 1 cup all-purpose flour
    • ½ can pumpkin puree
    • 2 eggs
    • ½ cup oil
    • 1 cup sugar
    • 1 tsp baking powder
    • ½ tsp baking soda
    • ¼ tsp salt
    • ¼ tsp ground ginger
    • ¼ tsp cloves
    • 1 tsp cinnamon
    • ½ cup unsalted butter, softened
    • 1 tsp vanilla

    For the Cream Cheese Frosting

    • 1 package cream cheese, softened
    • ½ cup unsalted butter, softened
    • Confectioner’s sugar (to taste, as needed for consistency)
    • 1 tsp vanilla

    How to Make Pumpkin Bars with Cream Cheese Frosting Step-by-Step

    Step 1: Prep the Base

    1. Preheat the oven to 350°F (175°C). Grease a baking pan to prevent sticking.
    2. In a large bowl, combine the eggs, oil, pumpkin puree, and sugar. Mix until well combined and smooth.

    Step 2: Combine Dry Ingredients

    1. Gradually stir in the flour, baking powder, baking soda, salt, ground ginger, cinnamon, and cloves. Mix until the batter is smooth and free of lumps.

    Step 3: Bake the Pumpkin Bars

    1. Pour the batter into the greased baking pan, spreading it out evenly.
    2. Place the pan in the center rack of your preheated oven. Bake for 25 to 27 minutes.
    3. Check for doneness by inserting a toothpick into the center; it should come out clean.

    Step 4: Prepare the Cream Cheese Frosting

    1. While the bars are baking, prepare the frosting. In a medium bowl, beat together the butter and cream cheese until creamy and well blended.
    2. Add the vanilla extract and mix well.
    3. Gradually sift in the confectioner’s sugar and mix until the frosting is smooth and fluffy.

    Step 5: Frost and Serve

    1. Once the pumpkin bars are finished baking, remove them from the oven and let them cool completely.
    2. Spread the cream cheese frosting evenly over the cooled bars.
    3. Decorate with whole pecans for an appealing finish.

    Enjoy these delightful pumpkin bars with cream cheese frosting—a perfect treat for any occasion!

    How to Serve Pumpkin Bars with Cream Cheese Frosting

    These pumpkin bars with cream cheese frosting are versatile and can be served in various delightful ways.

    Dessert Platter

    Arrange the pumpkin bars on a decorative platter and cut them into bite-sized squares. This makes them perfect for sharing at gatherings or parties.

    Coffee Companion

    Serve the pumpkin bars alongside a warm cup of coffee or a spiced latte. The rich flavors of the bars complement the warmth of the beverage, enhancing the overall experience.

    Fall Festivity Treat

    For Halloween or Thanksgiving, present the bars on a themed table with autumn décor. Decorate with additional pecans or a dusting of cinnamon for a seasonal touch.

    Pro Tips for the Best Pumpkin Bars with Cream Cheese Frosting

    Follow these expert tips to elevate your pumpkin bars to perfection.

    • Use Fresh Pumpkin Puree: For the best flavor, consider using homemade pumpkin puree instead of canned. It adds a rich, natural taste to the bars.

    • Don’t Overmix the Batter: Mix the batter just until combined; overmixing can lead to dense bars. A light hand ensures a soft and fluffy texture.

    • Cool Completely Before Frosting: Allow the bars to cool fully before adding the cream cheese frosting. This prevents melting and ensures a beautiful presentation.

    • Add Spices to Taste: Feel free to adjust the spices according to your preference. A pinch of nutmeg or allspice can add an extra layer of warmth and depth.

    • Store Properly: Keep any leftovers in an airtight container in the refrigerator. These bars taste even better the next day as the flavors meld.

    Best Side Dishes and Pairings

    Enhance your enjoyment of pumpkin bars with cream cheese frosting by pairing them with these delightful options.

    1. Vanilla Ice Cream: The creamy sweetness of vanilla ice cream contrasts beautifully with the spiced bars, creating a delightful dessert experience.

    2. Hot Apple Cider: The warm, spiced notes of apple cider complement the pumpkin flavors, making it a comforting drink choice for fall gatherings.

    3. Cheese Platter: A selection of mild cheeses, such as brie or goat cheese, can balance the sweetness of the bars, providing a savory contrast.

    4. Spiced Chai Tea: The aromatic spices in chai tea enhance the pumpkin flavor, creating a cozy pairing perfect for chilly evenings.

    5. Maple Syrup Drizzle: A light drizzle of maple syrup over the bars adds an extra touch of sweetness and a hint of autumn flavor that pairs perfectly with the cream cheese frosting.

    Common Mistakes to Avoid

    • Not Measuring Ingredients Accurately: Precision is key in baking; mismeasuring can lead to a denser texture.
    • Overmixing the Batter: Mixing too much can make the bars tough instead of light and fluffy.
    • Skipping the Cooling Time: Frosting warm bars can cause the frosting to melt and slide off.
    • Using Cold Cream Cheese: Ensure the cream cheese is softened for a smooth frosting consistency.

    Storage & Reheating Instructions

    Refrigerator Storage

    Store pumpkin bars with cream cheese frosting in an airtight container in the refrigerator. They will stay fresh for up to 5 days.

    Freezing Instructions

    To freeze, wrap the pumpkin bars tightly in plastic wrap and then in aluminum foil. They can be stored in the freezer for up to 2 months. Thaw in the refrigerator overnight before serving.

    Reheating Tips

    • Oven: Preheat to 350°F (175°C) and warm the bars for about 10 minutes.
    • Microwave: Heat a single serving for 15-20 seconds on medium power.
    • Stovetop: Place in a skillet over low heat, covering with a lid for a few minutes until warmed through.

    Frequently Asked Questions

    How do I know when the pumpkin bars are done?

    Check for doneness by inserting a toothpick into the center. If it comes out clean, your pumpkin bars with cream cheese frosting are ready.

    Can I use homemade pumpkin puree for this recipe?

    Yes, homemade pumpkin puree works well. Just ensure it is well-drained to avoid excess moisture in the batter.

    What can I substitute for cream cheese in the frosting?

    You can use mascarpone cheese or Greek yogurt as alternatives, but the flavor and texture will vary.

    How can I make these pumpkin bars gluten-free?

    Substitute all-purpose flour with a gluten-free flour blend that includes xanthan gum for better texture.

    Can I add nuts or chocolate chips to the batter?

    Absolutely! Feel free to mix in chopped nuts or chocolate chips for added flavor and texture.

    Final Thoughts

    These pumpkin bars with cream cheese frosting are sure to impress at any gathering or simply as a delightful treat at home. I encourage you to try this recipe and share your experiences in the comments below; your feedback is always appreciated!


    Desserts

    Pumpkin Bars with Cream Cheese Frosting


    5.0 from 24 reviews

    These pumpkin bars are moist and flavorful, topped with a rich cream cheese frosting. Perfect for fall gatherings or any time you crave a sweet treat, they combine the warm spices of cinnamon and ginger with the creamy texture of the frosting, making them a delightful dessert.
    Author: Munch Twist
    Prep Time: 15 minutes
    Cook Time: 27 minutes
    Total Time: 42 minutes
    Yield: 12 servings
    Category: Desserts
    Method: No bake
    Cuisine: American

    Pumpkin Bars with Cream Cheese Frosting

    SCALE:
    1x
    2x
    3x
    Cook Mode: Prevent your screen from going dark

    Ingredients

    • 1 cup all-purpose flour
    • 1 package of cream cheese, softened
    • ½ can pumpkin puree
    • 1 tsp baking powder
    • ¼ tsp cloves
    • 2 eggs
    • ½ cup oil
    • 1 tsp cinnamon
    • ½ cup butter, unsalted and softened
    • 1 tsp vanilla
    • 1 cup sugar
    • ¼ tsp salt
    • ¼ tsp ground ginger
    • ½ tsp baking soda
    • Whole pecans for decorating

    Instructions

    1. Preheat the oven to 350°F (175°C). Grease a baking pan.
    2. In a large bowl, combine the eggs, oil, pumpkin puree, and sugar until well mixed.
    3. Gradually stir in the flour, baking powder, baking soda, salt, ginger, cinnamon, and cloves until the batter is smooth.
    4. Pour the batter into the greased baking pan, spreading it evenly.
    5. Place the pan on the center rack of the oven and bake for 25 to 27 minutes. Check for doneness by inserting a toothpick into the center; it should come out clean.
    6. While the bars are baking, prepare the frosting. In a medium-sized bowl, beat together the butter and cream cheese until creamy.
    7. Add the vanilla extract and mix well.
    8. Sift the confectioner’s sugar into the bowl and mix until the frosting is smooth and fluffy to your desired consistency.
    9. Once the pumpkin bars are done, let them cool completely before frosting.
    10. Spread the cream cheese frosting evenly over the cooled bars and decorate with whole pecans.
    Nutrition Facts

    Serving Size: 1 serving
    Calories: 320 kcal
    Sugar: 20g
    Sodium: 180mg
    Fat: 18g
    Saturated Fat: 10g
    Carbohydrates: 35g
    Fiber: 1g
    Protein: 4g
    Cholesterol: 40mg

  • Sweet and Simple Caramel Apple Jam Recipe

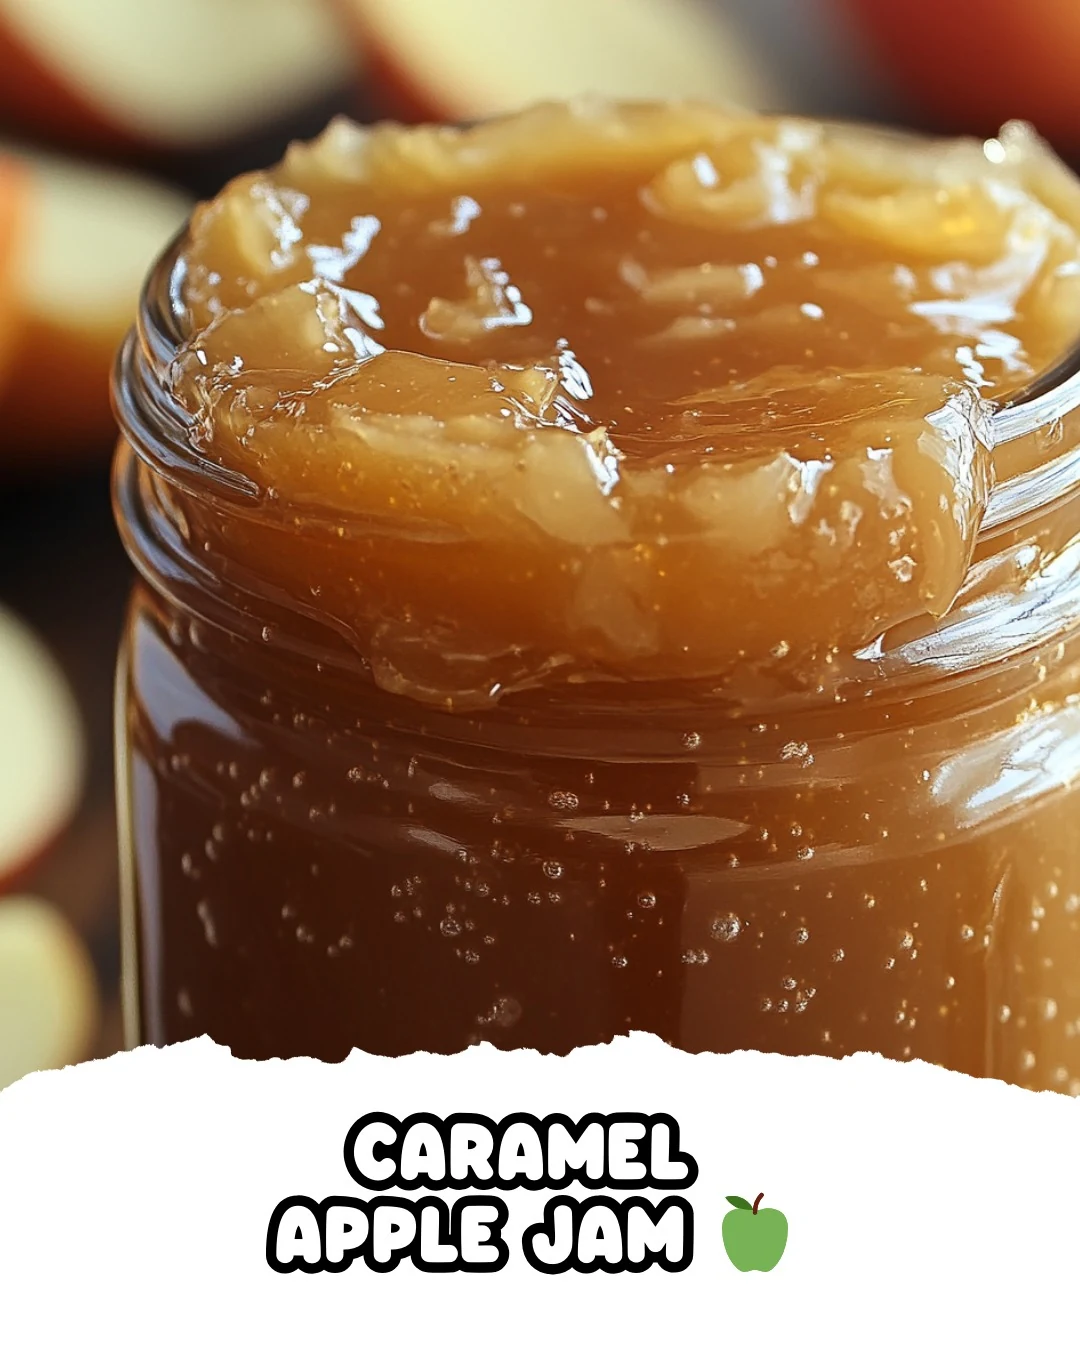
    Sweet and Simple Caramel Apple Jam Recipe

    Caramel Apple Jam is a delightful blend of sweet and spiced flavors that captures the essence of autumn in a jar. This homemade jam boasts a rich caramel undertone, perfectly complementing the tartness of fresh apples. It’s a versatile treat that can elevate your breakfast or dessert.

    Why You’ll Love This Recipe

    • Irresistibly Sweet: The combination of caramel and apples creates a rich, sweet flavor that is hard to resist.
    • Perfect for Gifting: This jam makes a thoughtful homemade gift, packaged beautifully for friends and family.
    • Versatile Use: Enjoy it on toast, pancakes, or as a filling in pastries; the possibilities are endless.
    • Seasonal Delight: Captures the flavors of fall, making it a seasonal favorite that can be enjoyed year-round.
    • Simple Ingredients: Made with easy-to-find ingredients, this recipe is accessible for any home cook.

    Tools and Equipment

    To create your Caramel Apple Jam, you will need some essential kitchen tools.

    Essential Tools

    • Large stockpot
    • Wooden spoon or spatula
    • Measuring cups and spoons
    • Ladle
    • Half-pint or pint jars
    • Canning lids and rings
    • Boiling water canner

    Why These Tools Matter

    • Large stockpot: Provides enough space for the apples to cook down without spilling over.
    • Ladle: Helps transfer hot jam into jars safely and efficiently.
    • Canning lids and rings: Ensure a proper seal, keeping your jam fresh and safe for storage.

    Ingredients for Caramel Apple Jam

    For the Jam

    • 1 cup packed brown sugar
    • 1/2 tsp. ground cinnamon (heaping)
    • 1/4 tsp. ground nutmeg
    • 4 cups sugar
    • 1 package Sure-Jell (powdered fruit pectin)
    • 6 cups finely diced peeled apples (about 4 medium-large Honey Crisp apples)
    • 1/2 cup water
    • 1/2 tsp. butter

    How to Make Caramel Apple Jam Step-by-Step

    Step 1: Prepare the Apples

    In a large stockpot, combine the diced apples, water, and butter. Cook over low heat, stirring occasionally, until the apples are tender, which should take about 10 minutes.

    Step 2: Add Pectin

    Stir in the powdered fruit pectin and bring the mixture to a rolling boil. Stir constantly to ensure it integrates well.

    Step 3: Add Sugars and Spices

    Once boiling, add the granulated sugar, brown sugar, ground cinnamon, and ground nutmeg. Return to a rolling boil and cook for 1 minute while stirring constantly.

    Step 4: Process the Jam

    Remove the pot from heat. Skim off any foam from the surface. Carefully ladle the hot jam into hot half-pint or pint jars, leaving a 1/4-inch headspace. Remove air bubbles using a knife or spatula, wipe the rims of the jars, and adjust the lids.

    Step 5: Seal and Process

    Process the jars in a boiling water bath for 10 minutes. After processing, gently twist the jars from side to side while cooling to help evenly distribute the apple pieces throughout the jam.

    Step 6: Cool and Store

    Allow the jars to cool completely. Ensure they are sealed properly before storing them in a cool, dark place.

    By following these steps, you can successfully create a delicious batch of Caramel Apple Jam that will delight anyone who tries it. Enjoy the flavors of fall in every spoonful!

    How to Serve Caramel Apple Jam

    Caramel Apple Jam can elevate a variety of dishes and snacks. Here are some creative serving ideas:

    Spread on Toast

    Spread a generous layer of Caramel Apple Jam on warm, toasted bread or bagels for a delightful breakfast or snack.

    Drizzle Over Cheesecake

    Enhance the flavor of plain cheesecake by drizzling Caramel Apple Jam on top, adding a sweet and fruity twist that complements the creamy texture.

    Pair with Cheese

    Serve Caramel Apple Jam alongside a cheese platter. It pairs beautifully with sharp cheeses like cheddar or creamy varieties like brie, creating a perfect balance of flavors.

    Pro Tips for the Best Caramel Apple Jam

    To achieve the best results with your Caramel Apple Jam, consider these expert tips:

    • Use Fresh Apples: Opt for fresh, high-quality Honey Crisp apples to ensure the best flavor and texture in your jam.

    • Measure Accurately: Precision in measuring ingredients, especially sugars and pectin, is crucial for achieving the right consistency.

    • Avoid Overcooking: Pay attention to cooking times; overcooking can lead to a jam that’s too thick or caramelized beyond the desired flavor.

    • Check Seals: After processing, ensure each jar is sealed correctly by pressing the center of the lid. If it pops back, the jar is not sealed.

    • Store in a Cool Place: Store your jars of Caramel Apple Jam in a cool, dark place to maintain freshness and flavor for longer.

    Best Side Dishes and Pairings

    Caramel Apple Jam pairs wonderfully with various side dishes and beverages. Here are some great options:

    1. Brie Cheese: The creamy texture and mild flavor of brie complement the sweetness of the jam perfectly.

    2. Oatmeal: Stir in a spoonful of Caramel Apple Jam into your morning oatmeal for a sweet and warming breakfast.

    3. Pork Chops: The rich flavors of caramelized apple jam enhance grilled or roasted pork chops, offering a sweet-savory balance.

    4. Plain Yogurt: Swirl some jam into plain yogurt for a quick and delicious snack or breakfast option.

    5. Tea: Enjoy a cup of herbal or black tea alongside a slice of toast topped with Caramel Apple Jam for a comforting afternoon treat.

    Common Mistakes to Avoid

    • Not Using Fresh Apples: Older apples may not provide the best flavor or texture for your Caramel Apple Jam.
    • Skipping the Foam Skimming: Failing to skim off foam can affect the appearance and consistency of your jam.
    • Incorrect Pectin Usage: Make sure to use the right amount of pectin; too little can result in runny jam, while too much can make it too firm.
    • Improper Sealing: Ensure jars are sealed correctly to prevent spoilage and maintain freshness.

    Storage & Reheating Instructions

    Refrigerator Storage

    Store your Caramel Apple Jam in airtight containers in the refrigerator. It will stay fresh for up to three weeks.

    Freezing Instructions

    For freezing, ladle the jam into freezer-safe containers, leaving headspace for expansion. It can be frozen for up to a year. To thaw, place the container in the refrigerator overnight before using.

    Reheating Tips

    • Oven: Preheat to 350°F (175°C) and warm in a covered dish until heated through.
    • Microwave: Heat in short intervals (15-30 seconds), stirring in between until warm.
    • Stovetop: Gently heat in a saucepan over low heat, stirring frequently until warmed.

    Frequently Asked Questions

    Can I use other types of apples for Caramel Apple Jam?

    Yes, while Honey Crisp apples are recommended for their sweetness and texture, you can use other varieties such as Granny Smith or Fuji for a different flavor profile.

    How long does Caramel Apple Jam last?

    When stored properly in the refrigerator, Caramel Apple Jam can last up to three weeks. If frozen, it can maintain quality for about a year.

    Can I adjust the sweetness of the Caramel Apple Jam?

    Absolutely! You can reduce the amount of sugar if you prefer a less sweet jam. Just be mindful that this may affect the jam’s setting properties.

    Is it possible to make this recipe without pectin?

    While pectin is recommended for a firmer jam, you can make a version without it, though it will result in a softer consistency.

    Can I add other spices to the Caramel Apple Jam?

    Certainly! Feel free to experiment with spices like allspice or cloves to create a unique flavor that suits your taste.

    Final Thoughts

    Making your own Caramel Apple Jam is a rewarding experience that captures the essence of fall in every jar. I encourage you to try this recipe and share your results in the comments below. Your feedback not only helps me improve but also inspires others in their culinary journey.


    Desserts

    Caramel Apple Jam


    5.0 from 24 reviews

    This Caramel Apple Jam combines the rich flavors of caramel and the sweetness of apples, creating a delightful spread perfect for toast or as a topping for desserts. Made with fresh Honey Crisp apples and a blend of spices, this jam is a delicious way to preserve the taste of fall.

    Author: Munch Twist
    Prep Time: 20 minutes
    Cook Time: 15 minutes
    Total Time: 35 minutes
    Yield: 16 servings
    Category: Desserts
    Method: No bake
    Cuisine: American

    Caramel Apple Jam

    SCALE:
    1x
    2x
    3x
    Cook Mode: Prevent your screen from going dark

    Ingredients

    • 1 cup packed brown sugar
    • 1/2 tsp. ground cinnamon (heaping)
    • 1/4 tsp. ground nutmeg
    • 4 cups granulated sugar
    • 1 package Sure-Jell (powdered fruit pectin)
    • 6 cups finely diced peeled apples (about 4 medium-large Honey Crisp apples)
    • 1/2 cup water
    • 1/2 tsp. butter

    Instructions

    1. In a large stockpot, combine the diced apples, water, and butter. Cook over low heat, stirring occasionally, until the apples are tender (about 10 minutes).
    2. Stir in the powdered fruit pectin and bring the mixture to a rolling boil, stirring constantly.
    3. Once boiling, add the granulated sugar, brown sugar, ground cinnamon, and ground nutmeg. Return to a rolling boil and cook for 1 minute, continuing to stir constantly.
    4. Remove the pot from heat. Skim off any foam from the surface. Carefully ladle the hot jam into hot half-pint or pint jars, leaving a 1/4-inch headspace. Remove air bubbles with a knife or spatula, wipe the rims, and adjust the lids.
    5. Process the jars in a boiling water bath for 10 minutes. After processing, gently twist the jars from side to side while cooling to help evenly distribute the apple pieces throughout the jam.
    6. Let the jars cool completely. Ensure they are sealed properly before storing.

    Nutrition Facts

    Serving Size: 1 serving
    Calories: 70 kcal
    Sugar: 16g
    Sodium: 1mg
    Fat: 0g
    Saturated Fat: 0g
    Carbohydrates: 18g
    Fiber: 0g
    Protein: 0g
    Cholesterol: 0mg

  • Indulge in Salted Caramel Butter Bars Today

    Indulge in Salted Caramel Butter Bars Today

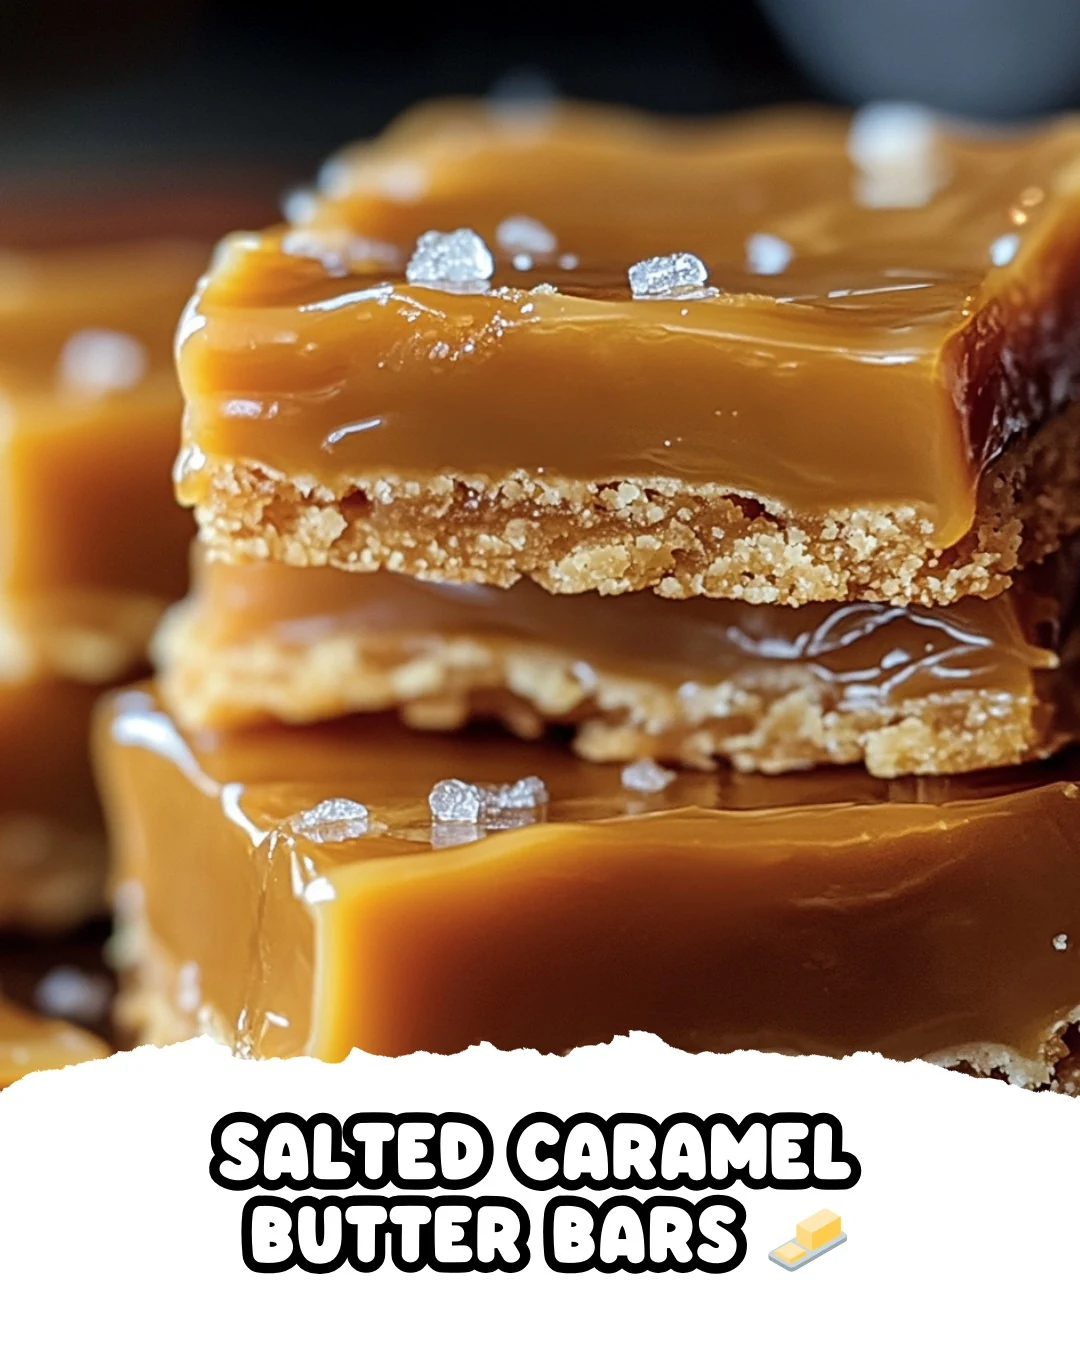
    Salted Caramel Butter Bars offer an irresistible combination of buttery crust and rich caramel filling, topped with a sprinkle of flaky sea salt. These bars are a perfect indulgence for any occasion, delivering a sweet and salty flavor that is hard to resist.

    Why You’ll Love This Recipe

    • Decadent Flavor: The blend of buttery crust and gooey caramel creates a delightful taste experience.
    • Crowd-Pleaser: These bars are perfect for parties, potlucks, or just a cozy night in.
    • Make Ahead: Prepare them in advance and enjoy them throughout the week.
    • Simple Ingredients: You likely have most of the ingredients at home already.
    • Versatile Treat: Great for dessert, snack time, or even as a coffee companion.

    Tools and Equipment

    To make these Salted Caramel Butter Bars, you will need a few essential kitchen tools.

    Essential Tools

    • 9×13-inch baking dish
    • Parchment paper
    • Mixing bowls
    • Medium saucepan
    • Whisk
    • Rubber spatula
    • Wire rack

    Why These Tools Matter

    • Baking Dish: The 9×13-inch size is perfect for even baking and portion control.
    • Parchment Paper: It allows for easy removal of the bars from the pan without sticking.
    • Medium Saucepan: Ideal for melting ingredients and ensuring even heat distribution while making the caramel.

    Ingredients for Salted Caramel Butter Bars

    For the Crust and Topping

    • 3 cups all-purpose flour
    • 1 cup unsalted butter, softened
    • 2 tablespoons vanilla extract
    • 1 cup granulated sugar
    • 1 1/2 cups powdered sugar

    For the Caramel Filling

    • 1 can (14 oz) sweetened condensed milk
    • 1 cup unsalted butter
    • 1 cup granulated sugar
    • 4 tablespoons light corn syrup
    • 2 tablespoons vanilla extract
    • 1 tablespoon flaky sea salt

    How to Make Salted Caramel Butter Bars Step-by-Step

    Step 1: Preheat the Oven

    Preheat your oven to 325°F (165°C). Grease a 9×13-inch baking dish and line it with parchment paper, leaving an overhang for easy removal.

    Step 2: Prepare the Dough

    In a large bowl, cream together the softened butter, granulated sugar, and powdered sugar until smooth. Mix in the vanilla extract. Gradually add the flour, mixing until a soft dough forms.

    Step 3: Bake the Crust

    Press half of the dough evenly into the bottom of the prepared baking dish. Bake for 15-20 minutes, or until the edges are lightly golden. Let it cool slightly.

    Step 4: Make the Caramel Filling

    In a medium saucepan, melt the butter over medium heat. Stir in the granulated sugar, light corn syrup, and vanilla extract. Cook, stirring constantly, until the mixture begins to boil. Reduce the heat to low and mix in the sweetened condensed milk. Cook for about 5-7 minutes, stirring constantly, until the caramel thickens and turns a golden color.

    Step 5: Assemble the Bars

    Pour the caramel filling evenly over the baked crust. Sprinkle the flaky sea salt over the caramel.

    Step 6: Add the Topping

    Crumble the remaining dough over the caramel layer, pressing lightly to adhere.

    Step 7: Bake the Bars

    Return the pan to the oven and bake for an additional 25-30 minutes, or until the top is lightly golden.

    Step 8: Cool and Serve

    Allow the bars to cool completely in the pan on a wire rack. Once cooled, lift the bars out of the pan using the parchment paper overhang. Cut into squares and enjoy!

    These Salted Caramel Butter Bars are sure to become a favorite. With their perfect balance of sweet and salty flavors, they are a delightful treat for any dessert lover.

    How to Serve Salted Caramel Butter Bars

    Salted Caramel Butter Bars provide a delightful treat that can be served in various creative ways.

    Warm with Ice Cream

    Serve the bars warm, topped with a scoop of vanilla ice cream. The contrast of the warm, gooey caramel with the cold ice cream creates a delicious harmony.

    Drizzled with Chocolate Sauce

    Add an indulgent touch by drizzling melted chocolate sauce over the cut bars. This extra layer of flavor enhances the overall taste and presentation.

    With Fresh Berries

    Pair the bars with a side of fresh berries such as strawberries or raspberries. The tartness of the berries balances the sweetness of the bars, creating a refreshing complement.

    Pro Tips for the Best Salted Caramel Butter Bars

    To achieve the perfect Salted Caramel Butter Bars, follow these expert tips.

    • Use Room Temperature Ingredients: Ensure your butter and eggs are at room temperature for a smoother dough and better incorporation.

    • Don’t Overmix the Dough: Mix the dough just until combined to keep the bars tender and avoid a tough texture.

    • Monitor Caramel Consistency: Pay close attention while making the caramel; it should be thick but pourable. Overcooking can lead to a hard filling.

    • Chill Before Cutting: Allow the bars to cool completely before cutting them. This helps the layers set, making it easier to achieve clean, even slices.

    • Store Properly: Keep the bars in an airtight container at room temperature for up to a week to maintain their freshness.

    Best Side Dishes and Pairings

    These Salted Caramel Butter Bars pair excellently with a variety of side dishes and drinks.

    1. Coffee: A strong cup of coffee balances the sweetness of the bars and enhances the caramel flavor.

    2. Herbal Tea: A soothing herbal tea, such as chamomile or mint, provides a calming contrast to the rich bars.

    3. Chocolate Milk: The creaminess of chocolate milk offers a nostalgic pairing that complements the buttery caramel.

    4. Ice Cream Sundae: Create a mini sundae with a scoop of ice cream and a drizzle of caramel sauce for a decadent dessert experience.

    5. Fruit Salad: A light fruit salad adds a refreshing touch, cutting through the richness of the bars with its natural sweetness.

    Common Mistakes to Avoid

    • Not Measuring Accurately: Ensure you measure your ingredients correctly to achieve the desired texture and flavor.
    • Overmixing the Dough: Mix the dough just until it comes together to prevent tough bars.
    • Skipping the Cooling Step: Allow the crust to cool slightly before adding the caramel; this helps with layering.
    • Not Using Parchment Paper: Line your baking dish with parchment for easy removal and cutting.

    Storage & Reheating Instructions

    Refrigerator Storage

    Store your Salted Caramel Butter Bars in an airtight container in the refrigerator. They will stay fresh for up to one week.

    Freezing Instructions

    To freeze, wrap the bars tightly in plastic wrap and then place them in an airtight container. They can be frozen for up to three months. Thaw in the refrigerator overnight before serving.

    Reheating Tips

    • Oven: Preheat to 350°F (175°C). Place bars on a baking sheet and heat for about 10 minutes.
    • Microwave: Heat individual bars for 15-20 seconds or until warm.
    • Stovetop: Place bars in a skillet over low heat, covered, for a few minutes until warmed through.

    Frequently Asked Questions

    How do I make the Salted Caramel Butter Bars gluten-free?

    You can substitute all-purpose flour with a gluten-free flour blend. Ensure all other ingredients are gluten-free as well.

    Can I use a different type of caramel for the filling?

    Yes, you can use homemade caramel or store-bought caramel sauce, but be sure to adjust the cooking time accordingly.

    How long do Salted Caramel Butter Bars last?

    When stored properly in the refrigerator, they can last up to one week. For longer storage, consider freezing them.

    Can I add nuts to the Salted Caramel Butter Bars?

    Certainly! Chopped pecans or walnuts can be added to the caramel layer for extra texture and flavor.

    What is the best way to cut the bars?

    For clean cuts, use a sharp knife and wipe it clean between cuts, especially if the caramel is sticky.

    Final Thoughts

    These Salted Caramel Butter Bars are a delicious treat that combines rich flavors and a satisfying texture. We encourage you to try this recipe and share your thoughts in the comments section below. Your feedback is invaluable and helps others discover this delightful dessert.


    Desserts

    Salted Caramel Butter Bars


    5.0 from 24 reviews

    These Salted Caramel Butter Bars feature a buttery crust topped with a rich caramel filling and a sprinkle of flaky sea salt. Perfect for dessert lovers, they offer a delightful combination of sweet and salty flavors in every bite.

    Author: Munch Twist
    Prep Time: 20 minutes
    Cook Time: 45-50 minutes
    Total Time: 65-70 minutes
    Yield: 24 servings
    Category: Desserts
    Method: No bake
    Cuisine: American

    Salted Caramel Butter Bars

    SCALE:
    1x
    2x
    3x
    Cook Mode: Prevent your screen from going dark

    Ingredients

    • 3 cups all-purpose flour
    • 1 cup unsalted butter, softened
    • 2 tablespoons vanilla extract
    • 1 cup granulated sugar
    • 1 1/2 cups powdered sugar
    • 1 can (14 oz) sweetened condensed milk
    • 1 cup unsalted butter
    • 1 cup granulated sugar
    • 4 tablespoons light corn syrup
    • 2 tablespoons vanilla extract
    • 1 tablespoon flaky sea salt

    Instructions

    1. Preheat your oven to 325°F (165°C). Grease a 9×13-inch baking dish and line it with parchment paper.
    2. In a large bowl, cream together the softened butter, granulated sugar, and powdered sugar until smooth. Mix in the vanilla extract and gradually add the flour.
    3. Press half of the dough into the bottom of the prepared baking dish and bake for 15-20 minutes until lightly golden. Let cool slightly.
    4. In a medium saucepan, melt the butter over medium heat. Stir in granulated sugar, light corn syrup, and vanilla extract. Cook until boiling, then reduce heat and mix in sweetened condensed milk, cooking until thickened.
    5. Pour the caramel filling over the baked crust and sprinkle with flaky sea salt.
    6. Crumble the remaining dough over the caramel layer and press lightly.
    7. Bake for an additional 25-30 minutes until the top is lightly golden.
    8. Allow to cool completely in the pan on a wire rack before cutting into squares.

    Nutrition Facts

    Serving Size: 1 serving
    Calories: 400 kcal
    Sugar: 30g
    Sodium: 150mg
    Fat: 22g
    Saturated Fat: 14g
    Carbohydrates: 50g
    Fiber: 0g
    Protein: 3g
    Cholesterol: 60mg

  • Indulge in Overnight Crème Brûlée French Toast Today

    Indulge in Overnight Crème Brûlée French Toast Today

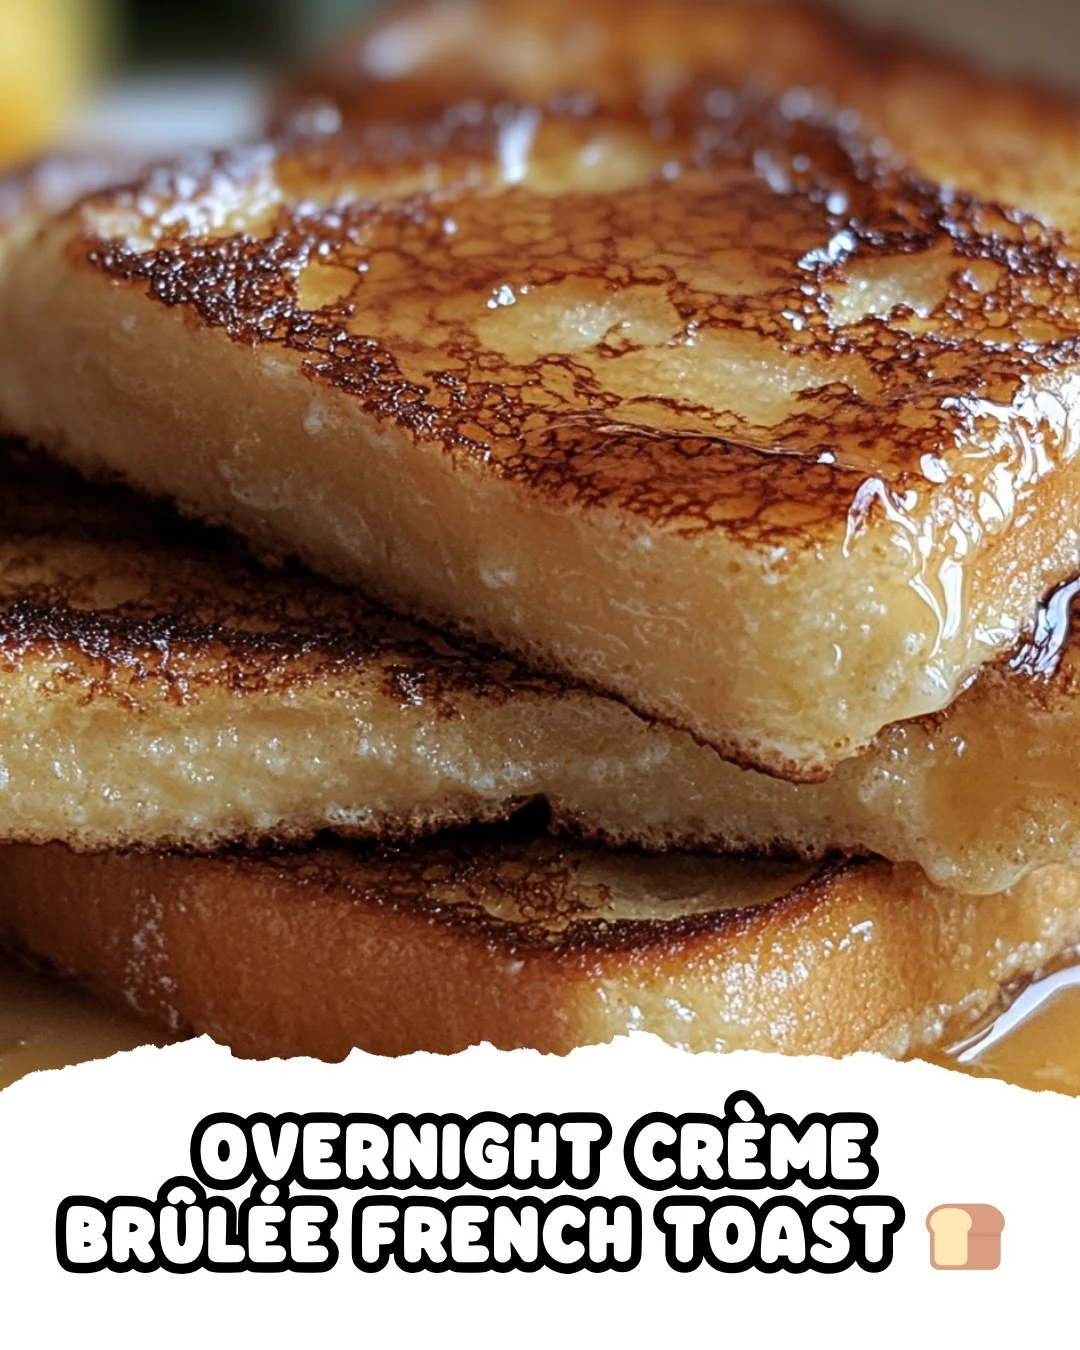
    Overnight Crème Brûlée French Toast is the perfect blend of rich flavors and comforting textures. This dish transforms simple ingredients into a luxurious breakfast that feels indulgent yet is easy to prepare. The creamy custard, combined with the crispy, caramelized sugar topping, makes every bite a delightful experience.

    Why You’ll Love This Recipe

    • Make-Ahead Convenience: Prepare it the night before, saving time in the morning.
    • Decadent Flavor: The combination of creamy custard and caramelized sugar offers a gourmet taste.
    • Perfect for Gatherings: Serve it at brunch or family gatherings to impress your guests.
    • Customizable: Add your favorite fruits or spices to tailor it to your taste.
    • Easy Clean-Up: The one-dish preparation simplifies cooking and cleaning.

    Tools and Equipment

    Having the right tools makes this recipe straightforward and enjoyable.

    Essential Tools

    • 9×13-inch baking dish
    • Mixing bowl
    • Whisk
    • Measuring cups and spoons
    • Plastic wrap
    • Oven mitts

    Why These Tools Matter

    • Baking Dish: The size ensures even cooking and allows for easy serving.
    • Whisk: Essential for blending the custard mixture smoothly.
    • Plastic Wrap: Keeps the bread moist while soaking overnight, enhancing flavor.

    Ingredients for Overnight Crème Brûlée French Toast

    Custard Base

    • 5 large eggs
    • 1 cup half-and-half
    • 1 cup whole milk
    • 1 teaspoon vanilla extract
    • 2/3 cup granulated sugar
    • 1/4 teaspoon ground cinnamon
    • 1/4 teaspoon ground nutmeg

    Bread and Topping

    • 1 loaf of French bread, sliced into 1-inch thick pieces
    • 1/4 cup unsalted butter
    • Extra granulated sugar for topping
    • Maple syrup, for serving

    How to Make Overnight Crème Brûlée French Toast Step-by-Step

    Step 1: Prepare the Baking Dish

    Generously butter a 9×13-inch baking dish. Arrange the sliced French bread in a single layer, allowing for slight overlap if necessary.

    Step 2: Make the Custard Mixture

    In a large mixing bowl, whisk together the eggs, half-and-half, whole milk, vanilla extract, 2/3 cup sugar, ground cinnamon, and ground nutmeg until well combined.

    Step 3: Soak the Bread

    Pour the custard mixture evenly over the bread slices. Ensure all pieces are soaked by gently pressing down on the bread. Cover with plastic wrap and refrigerate overnight.

    Step 4: Bake the French Toast

    Preheat your oven to 350°F (175°C) the next morning. Remove the plastic wrap from the dish. Dot the top of the soaked bread with small pieces of butter and sprinkle with a bit of extra sugar. Bake for 35-40 minutes, until puffed and golden brown.

    Step 5: Caramelize the Sugar Topping

    Allow the French toast to cool for a couple of minutes. Sprinkle additional sugar on top and briefly broil until the sugar caramelizes, creating a crisp brûlée-like crust.

    Step 6: Serve and Enjoy

    Serve the French toast warm with maple syrup. Consider adding fresh berries or whipped cream for an extra touch.

    This Overnight Crème Brûlée French Toast will surely become a favorite in your breakfast repertoire. Enjoy the delightful combination of flavors and the joy of sharing it with loved ones.

    How to Serve Overnight Crème Brûlée French Toast

    Overnight Crème Brûlée French Toast can be served in various delightful ways to enhance its rich flavors. Consider these creative serving ideas:

    Classic Maple Syrup Drizzle

    Drizzle warm maple syrup over the French toast for a traditional sweet touch that complements the custard’s creamy texture.

    Fresh Berry Medley

    Top with a mix of fresh strawberries, blueberries, and raspberries to add a burst of tartness and color, balancing the sweetness of the dish.

    Whipped Cream and Toasted Nuts

    Finish with a dollop of freshly whipped cream and a sprinkle of toasted almonds or pecans for an added crunch and indulgent creaminess.

    Pro Tips for the Best Overnight Crème Brûlée French Toast

    To achieve the perfect Overnight Crème Brûlée French Toast, keep these expert tips in mind:

    • Use Stale Bread: For the best texture, opt for slightly stale French bread, as it absorbs the custard mixture better without becoming mushy.

    • Chill Overnight: Allowing the bread to soak overnight ensures that it fully absorbs the flavors and results in a custardy center.

    • Monitor Baking Time: Ovens can vary, so keep an eye on the French toast as it bakes, aiming for a golden-brown finish.

    • Broil Carefully: When caramelizing the sugar topping, watch it closely to prevent burning; it only takes a minute or two.

    • Experiment with Flavors: Feel free to add spices like cardamom or vanilla bean for unique flavor variations that can elevate this dish.

    Best Side Dishes and Pairings

    Enhance your meal with these delicious side dishes and drinks that pair wonderfully with Overnight Crème Brûlée French Toast:

    1. Crispy Bacon: The salty, savory flavor of crispy bacon contrasts beautifully with the sweetness of the French toast.

    2. Sautéed Spinach: Lightly sautéed spinach adds a healthy green element, balancing the richness of the dish.

    3. Fresh Fruit Salad: A refreshing fruit salad offers a light and vibrant counterpart to the indulgent French toast.

    4. Coffee or Espresso: A strong cup of coffee or espresso complements the sweetness and richness, rounding out the breakfast experience.

    5. Chai Latte: The warm spices of a chai latte echo the flavors in the French toast, creating a cozy pairing.

    6. Yogurt Parfait: A yogurt parfait layered with granola and fresh fruit provides a tangy and creamy contrast to the French toast.

    Common Mistakes to Avoid

    • Skipping the Overnight Soak: This step is crucial for allowing the bread to fully absorb the custard mixture, ensuring a rich flavor and creamy texture.
    • Not Using Day-Old Bread: Fresh bread can become too soggy. Day-old French bread is ideal for achieving the perfect balance of moisture and structure.
    • Overcooking the French Toast: Keep an eye on your oven temperature and cooking time to avoid a dry texture. The French toast should be puffed and golden brown.
    • Neglecting the Sugar Topping: For that classic crème brûlée finish, don’t skip the caramelized sugar topping. It adds a delightful crunch and enhances the overall presentation.

    Storage & Reheating Instructions

    Refrigerator Storage

    Store any leftover Overnight Crème Brûlée French Toast in an airtight container in the refrigerator. It will remain fresh for up to 3 days.

    Freezing Instructions

    To freeze, wrap individual portions securely in plastic wrap and then place them in a freezer-safe bag. The French toast can be frozen for up to 2 months. Thaw overnight in the refrigerator before reheating.

    Reheating Tips

    • Oven: Preheat your oven to 350°F (175°C). Place the French toast in an oven-safe dish, cover with foil, and heat for about 15-20 minutes until warmed through.
    • Microwave: Place a serving on a microwave-safe plate and heat for 30-60 seconds, checking for doneness. Be cautious not to overheat, as it can become rubbery.
    • Stovetop: Heat a skillet over medium heat and add a little butter. Place the French toast in the skillet and cook for about 2-3 minutes on each side until warmed.

    Frequently Asked Questions

    Can I use a different type of bread for Overnight Crème Brûlée French Toast?

    Yes, while French bread is ideal, you can substitute with challah, brioche, or even sourdough for different flavors and textures.

    How long does the custard need to soak the bread?

    For the best results, the bread should soak in the custard mixture overnight, or at least for 6-8 hours, to fully absorb the flavors.

    Can I make Overnight Crème Brûlée French Toast ahead of time?

    Absolutely! This recipe is designed to be made ahead. Prepare it the night before and bake it in the morning for a delicious breakfast option.

    What can I serve with Overnight Crème Brûlée French Toast?

    This dish pairs wonderfully with maple syrup, fresh berries, whipped cream, or even a dusting of powdered sugar for an elevated presentation.

    How do I achieve the perfect caramelized sugar topping?

    Sprinkle an even layer of granulated sugar on top of the baked French toast and broil it for a few minutes until the sugar melts and turns golden brown. Keep an eye on it to prevent burning.

    Final Thoughts

    Overnight Crème Brûlée French Toast is a decadent treat that will impress your family and friends. The rich flavors and delightful texture make it perfect for any occasion. Try making it yourself, and don’t forget to leave a comment with your thoughts and variations!


    Desserts

    Overnight Crème Brûlée French Toast


    5.0 from 24 reviews

    This Overnight Crème Brûlée French Toast is a delightful breakfast dish that combines the rich flavors of custard with the comforting texture of French bread. Perfect for a special occasion or a weekend brunch, it is prepared the night before and baked to perfection in the morning, resulting in a warm, golden treat topped with a caramelized sugar crust.

    Author: Munch Twist
    Prep Time: 20 minutes
    Cook Time: 40 minutes
    Total Time: 60 minutes
    Yield: 8 servings
    Category: Desserts
    Method: Baking
    Cuisine: American

    Overnight Crème Brûlée French Toast

    SCALE:
    1x
    2x
    3x
    Cook Mode: Prevent your screen from going dark

    Ingredients

    • 1 teaspoon vanilla extract
    • 1 loaf of French bread, sliced into 1-inch thick pieces
    • 1 cup whole milk
    • 5 large eggs
    • 1/4 teaspoon ground nutmeg
    • 2/3 cup granulated sugar, plus extra for the topping
    • 1 cup half-and-half
    • 1/4 teaspoon ground cinnamon
    • 1/4 cup unsalted butter
    • Maple syrup, for serving

    Instructions

    1. Generously butter a 9×13-inch baking dish and arrange the French bread slices in a single layer, slightly overlapping if needed.
    2. In a large bowl, whisk together the eggs, half-and-half, whole milk, vanilla extract, 2/3 cup sugar, ground cinnamon, and ground nutmeg until well combined.
    3. Pour the custard mixture evenly over the bread slices, ensuring all the bread is soaked. Gently press down on the bread to ensure it is fully immersed. Cover with plastic wrap and refrigerate overnight.
    4. The next morning, preheat your oven to 350°F (175°C). Remove the plastic wrap from the dish, dot the top of the soaked bread with small pieces of butter, and sprinkle with a bit of extra sugar. Bake for 35-40 minutes, until the French toast is puffed and golden brown.
    5. Let the French toast cool for a couple of minutes, then sprinkle additional sugar on top and briefly broil until the sugar caramelizes, creating a crisp brûlée-like crust.
    6. Serve warm with maple syrup and optional sides like fresh berries or whipped cream.

    Nutrition Facts

    Serving Size: 1 serving
    Calories: 420 kcal
    Sugar: 24g
    Sodium: 300mg
    Fat: 22g
    Saturated Fat: 12g
    Carbohydrates: 50g
    Fiber: 1g
    Protein: 12g
    Cholesterol: 300mg

  • Refreshing Pickle Slushy Recipe for Hot Days

    Refreshing Pickle Slushy Recipe for Hot Days

    Pickle Slushy Recipe

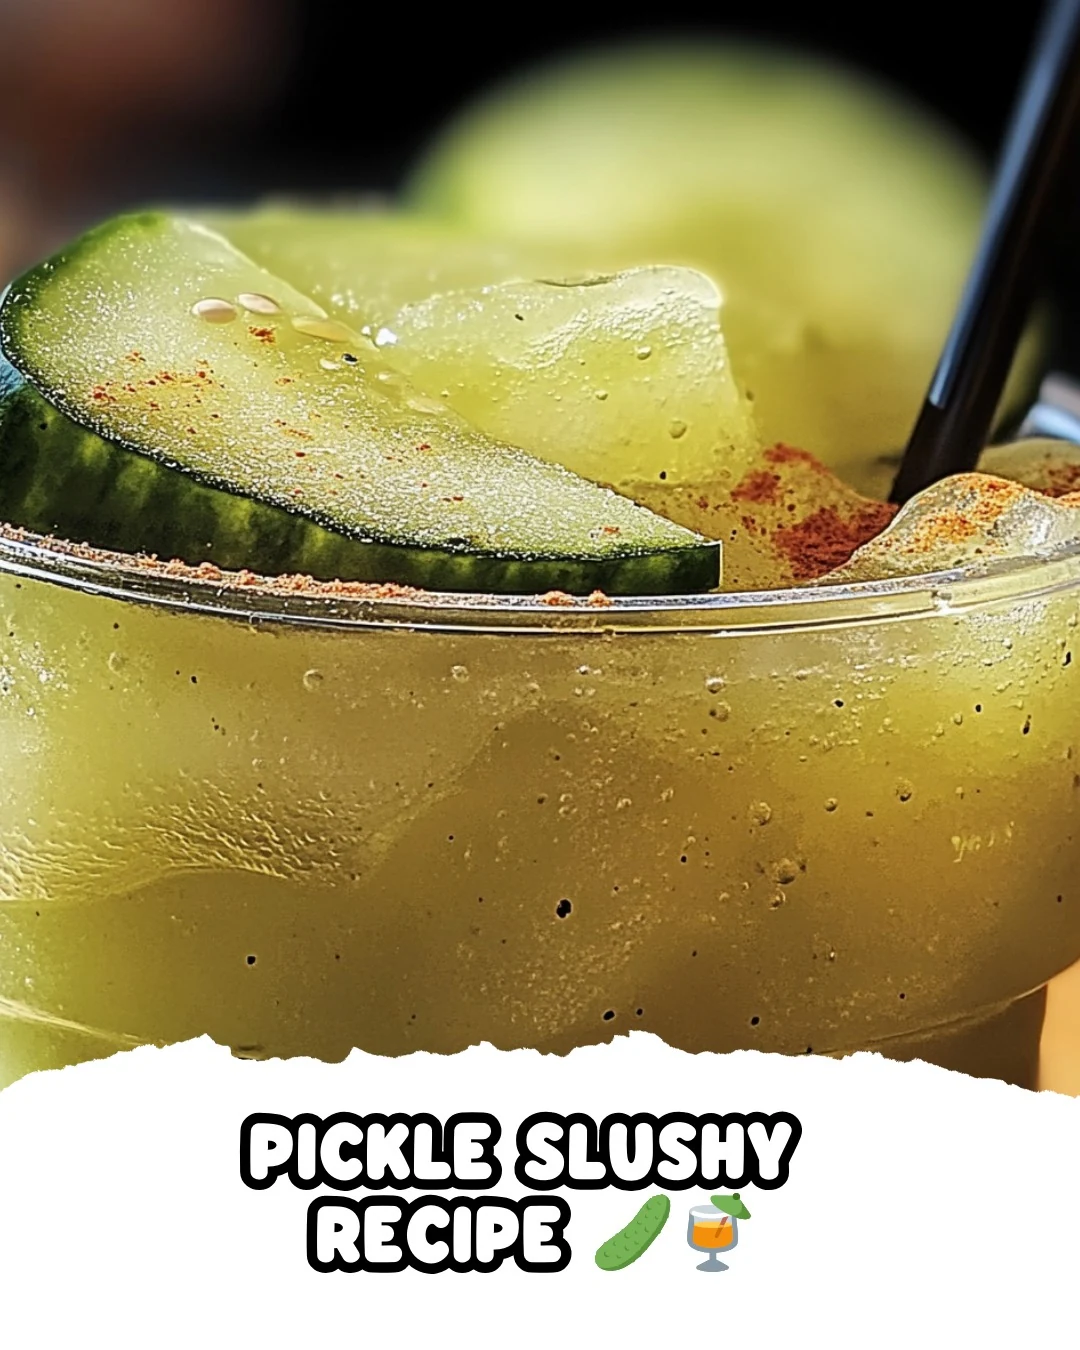
    Summer days call for refreshing drinks, and this Pickle Slushy Recipe delivers a unique twist. Combining the tangy flavor of pickle juice with fruity sweetness creates a delightfully cool beverage that will surprise your taste buds.

    Why You’ll Love This Recipe

    • Unique Flavor Combination: The unexpected blend of pickle juice and fruit punch creates a refreshing and tangy slushy.
    • Quick & Easy: Ready in just 10 minutes, this recipe is perfect for impromptu gatherings.
    • Customizable Sweetness: Adjust the sugar to your taste, making it as sweet or tangy as you prefer.
    • Fun Garnish Options: Add a sprinkle of Tajín or sugar for an extra flavor kick and visual appeal.
    • Perfect for Parties: Serve this drink at your next barbecue or picnic to impress your guests with something different.

    Tools and Equipment

    Having the right tools makes creating this slushy a breeze.

    Essential Tools

    • Blender
    • Measuring cups
    • Tablespoon
    • Cups for serving
    • Knife (for slicing pickles)

    Why These Tools Matter

    • Blender: A powerful blender ensures a smooth and slushy consistency, making the drink enjoyable.
    • Measuring Cups: Accurate measurements are crucial for achieving the right flavor balance.
    • Knife: A sharp knife makes slicing pickles quick and safe, enhancing your presentation.

    Ingredients for Pickle Slushy Recipe

    For the Slushy Base

    • 2 cups ice
    • 1 cup pickle juice
    • 2-3 tablespoons sugar (to taste)
    • 1 packet fruit punch Kool-Aid

    For Garnish

    • Pickle slices (for garnish)
    • Tajín or additional sugar (for garnish)

    How to Make Pickle Slushy Recipe Step-by-Step

    Step 1: Prepare the Ingredients

    Start by measuring out 1 cup of pickle juice and filling 2 cups with ice. Have your packet of fruit punch Kool-Aid ready. Optionally, slice a few pickles for garnish and set them aside.

    Step 2: Blend the Slushy

    In a blender, combine the pickle juice and ice. Add the packet of fruit punch Kool-Aid. Blend until smooth and slushy, ensuring the mixture is well combined.

    Step 3: Sweeten the Slushy

    Taste the slushy mixture. If desired, stir in 2-3 tablespoons of sugar, adjusting to taste. Blend again to ensure the sugar is fully incorporated and evenly distributed.

    Step 4: Serve the Slushy

    Pour the slushy mixture into cups, filling them generously. Garnish with pickle slices for that extra touch of flavor and visual appeal.

    Step 5: Add Garnish

    Sprinkle Tajín or additional sugar on top of the pickle slices for an extra burst of flavor, if desired. This step enhances the overall taste and presentation.

    Step 6: Enjoy

    Serve immediately and savor your unique and refreshing Pickle Slushy! Enjoy this delightful drink on a hot day or as a fun party treat.

    Nutritional Information (per serving):
    – Calories: 120
    – Carbohydrates: 30g
    – Proteins: 0g
    – Fats: 0g
    – Sugar: 25g

    Preparation time: 10 minutes | Cooking time: 0 minutes

    How to Serve Pickle Slushy Recipe

    This unique slushy can be enjoyed in several fun and creative ways.

    Garnished with Pickle Chips

    Serve your slushy with a few crunchy pickle chips on the side for added texture and flavor contrast.

    Spicy Twist

    For those who enjoy a kick, consider adding a few dashes of hot sauce to the slushy before serving, enhancing the flavor profile with heat.

    Party Pitcher

    Double or triple the recipe and serve in a large pitcher at your next gathering, allowing guests to help themselves and enjoy a refreshing treat.

    Pro Tips for the Best Pickle Slushy Recipe

    To elevate your pickle slushy experience, keep these tips in mind.

    • Use Fresh Ice: For the best texture, use fresh, well-frozen ice to achieve the perfect slushy consistency.
    • Chill the Pickle Juice: Pre-chill your pickle juice in the refrigerator for a more refreshing slushy.
    • Experiment with Flavors: Feel free to try different flavors of Kool-Aid or even other fruit juices to customize your slushy.
    • Adjust Sweetness: Start with less sugar, tasting as you go, to find the perfect balance of sweetness and tartness.
    • Blend Thoroughly: Ensure you blend the mixture until smooth for a delightful slushy experience without any ice chunks.

    Best Side Dishes and Pairings

    Pair your pickle slushy with complementary dishes for a truly enjoyable meal.

    1. Grilled Cheese Sandwich: The gooey, cheesy goodness pairs perfectly with the tangy slushy, creating a delightful contrast.
    2. Potato Chips: The salty crunch of chips balances the sweet and sour notes of the slushy, making for a satisfying snack.
    3. Hot Dogs: This classic summer food complements the pickle flavor, making it an ideal pairing for a picnic or barbecue.
    4. Deviled Eggs: The rich, creamy texture of deviled eggs pairs well with the refreshing slushy, enhancing your meal experience.
    5. Coleslaw: A cool, creamy coleslaw offers a crunchy texture that contrasts nicely with the slushy, providing a balanced meal option.

    Common Mistakes to Avoid

    • Using Too Much Ice: Adding excessive ice can dilute the flavor and texture of your Pickle Slushy.
    • Not Adjusting Sweetness: Skipping the taste test before adding sugar may result in an overly sweet or bland slushy.
    • Skipping the Blend: Failing to blend thoroughly can lead to an uneven texture, making the slushy less enjoyable.
    • Ignoring Garnishes: Neglecting to add the optional Tajín or sugar garnish can lessen the overall flavor experience.

    Storage & Reheating Instructions

    Refrigerator Storage

    Store any leftover Pickle Slushy in an airtight container in the refrigerator. It remains fresh for up to 2 days. However, it is best consumed immediately for optimal texture and flavor.

    Freezing Instructions

    For longer storage, pour the Pickle Slushy into freezer-safe containers. It can be frozen for up to 1 month. To enjoy again, thaw it in the refrigerator overnight before serving.

    Reheating Tips

    • Oven: Not recommended, as slushies are best served cold.
    • Microwave: Heat in short intervals (10-15 seconds) if you prefer a less icy texture, but be cautious not to melt it completely.
    • Stovetop: This method is not suitable for slushies, as they are intended to be enjoyed frozen.

    Frequently Asked Questions

    How can I customize my Pickle Slushy Recipe?

    You can customize your Pickle Slushy by trying different flavored Kool-Aid packets or adding fresh herbs like mint for an additional layer of flavor.

    Can I use homemade pickle juice for the Pickle Slushy Recipe?

    Absolutely! Homemade pickle juice can enhance the taste and freshness of your slushy.

    Is the Pickle Slushy Recipe suitable for kids?

    While this recipe contains pickle juice, which may not appeal to all children, you can reduce the pickle juice and increase the Kool-Aid for a sweeter slushy that kids may enjoy.

    How long does the Pickle Slushy last in the freezer?

    The Pickle Slushy can last in the freezer for up to 1 month, but for the best flavor and texture, consume it sooner.

    What are some variations of the Pickle Slushy Recipe?

    You can create variations by adding fruit like watermelon or pineapple, or even incorporating a splash of soda for a fizzy twist.

    Final Thoughts

    This unique Pickle Slushy Recipe is a fun way to enjoy a refreshing treat that stands out from traditional slushies. We encourage you to try making it and share your experiences in the comments. Your feedback is invaluable!


    Desserts

    Pickle Slushy Recipe


    5.0 from 24 reviews

    This unique and refreshing Pickle Slushy combines the tangy flavor of pickle juice with the sweetness of fruit punch Kool-Aid, creating a delightful frozen treat. Perfect for hot days or as a fun party drink, this slushy is sure to surprise and please your taste buds.

    Author: Munch Twist
    Prep Time: 10 minutes
    Cook Time: 0 minutes
    Total Time: 10 minutes
    Yield: 2 servings
    Category: Desserts
    Method: No bake
    Cuisine: American

    Pickle Slushy Recipe

    SCALE:
    1x
    2x
    3x
    Cook Mode: Prevent your screen from going dark

    Ingredients

    • 2 cups ice
    • 1 cup pickle juice
    • 2-3 tablespoons sugar
    • 1 packet fruit punch Kool-Aid
    • Pickle slices (for garnish)
    • Tajín or additional sugar (for garnish)

    Instructions

    1. Measure out 1 cup of pickle juice and fill 2 cups with ice. Have your packet of fruit punch Kool-Aid ready. Optionally, slice a few pickles for garnish and set them aside.
    2. In a blender, combine the pickle juice and ice. Add the packet of fruit punch Kool-Aid and blend until smooth and slushy.
    3. Taste the slushy mixture. If desired, stir in 2-3 tablespoons of sugar, adjusting to taste. Blend again to ensure the sugar is fully incorporated.
    4. Pour the slushy mixture into cups and garnish with pickle slices.
    5. Sprinkle Tajín or additional sugar on top of the pickle slices for an extra burst of flavor, if desired.
    6. Serve immediately and savor your unique and refreshing Pickle Slushy!

    Nutrition Facts

    Serving Size: 1 serving
    Calories: 120 kcal
    Sugar: 25g
    Sodium: 800mg
    Fat: 0g
    Saturated Fat: 0g
    Carbohydrates: 30g
    Fiber: 0g
    Protein: 0g
    Cholesterol: 0mg

  • Indulge in Decadent Cinnamon Swirl Cheesecake Squares

    Indulge in Decadent Cinnamon Swirl Cheesecake Squares

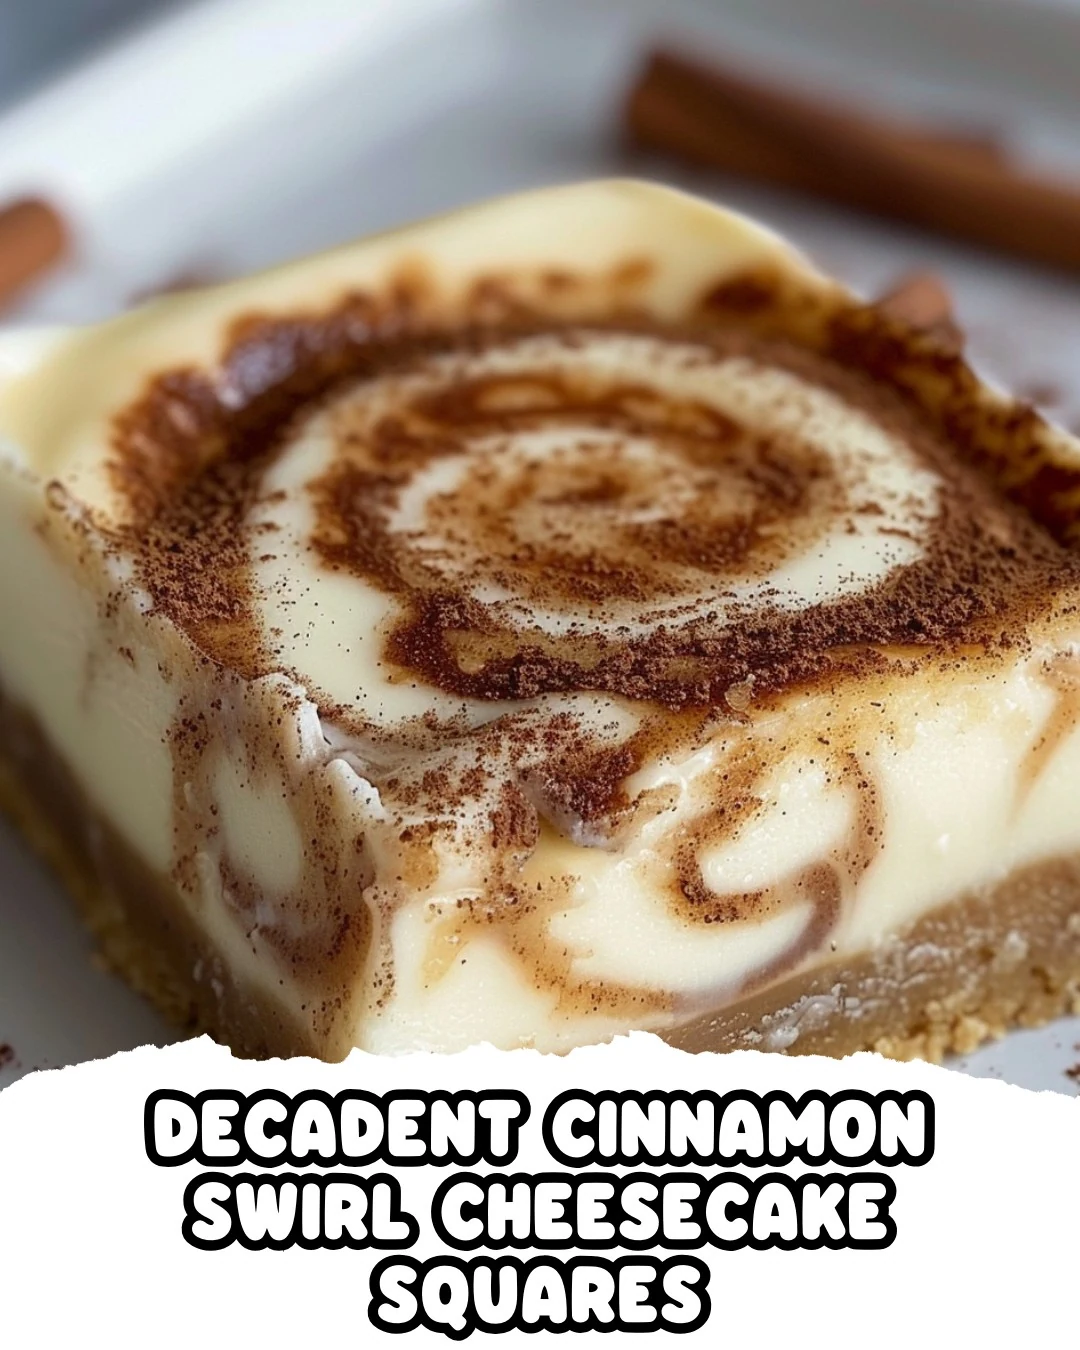
    Decadent Cinnamon Swirl Cheesecake Squares are a delightful treat that combines creamy cheesecake with a rich cinnamon swirl. This recipe offers a perfect balance of flavors and textures, making it an irresistible dessert for any occasion.

    Why You’ll Love This Recipe

    • Irresistible Flavor: The combination of creamy cheesecake and warm cinnamon creates a delectable taste experience.
    • Perfect for Sharing: These squares are ideal for gatherings, bringing joy to friends and family.
    • Easy to Make: With straightforward steps, even novice bakers can succeed.
    • Versatile Dessert: Enjoy them at parties, or as a sweet finish to any meal.
    • Satisfying Texture: The combination of a crunchy crust and smooth filling provides a delightful contrast.

    Tools and Equipment

    Having the right tools will streamline your baking process and ensure consistent results.

    Essential Tools

    • 8-inch square baking dish
    • Mixing bowls
    • Electric mixer
    • Rubber spatula
    • Measuring cups and spoons

    Why These Tools Matter

    • Electric Mixer: Ensures the cream cheese is perfectly smooth, making for a creamy filling.
    • Baking Dish: The right size helps achieve even baking and allows for easy slicing.
    • Rubber Spatula: Ideal for scraping down the sides of bowls and folding in mixtures.

    Ingredients for Decadent Cinnamon Swirl Cheesecake Squares

    For the Crust:

    • 6 tablespoons butter, melted
    • 1/4 cup light brown sugar
    • 1/2 teaspoon salt
    • 1 1/2 cups graham cracker crumbs

    For the Filling:

    • 16 oz cream cheese, softened
    • 2 large eggs, at room temperature
    • 1/2 cup sour cream, at room temperature
    • 3/4 cup granulated sugar
    • 2 teaspoons vanilla extract

    For the Cinnamon Swirl:

    • 1 teaspoon cinnamon
    • 1 cup dark brown sugar
    • 1/4 cup all-purpose flour
    • 6 tablespoons butter, melted

    How to Make Decadent Cinnamon Swirl Cheesecake Squares Step-by-Step

    Step 1: Preheat the Oven

    Preheat your oven to 350°F (175°C) to prepare for baking.

    Step 2: Prepare the Crust

    In a medium bowl, combine 6 tablespoons melted butter, 1 1/2 cups graham cracker crumbs, 1/4 cup light brown sugar, and 1/2 teaspoon salt. Mix until well combined. Press this mixture firmly into the bottom of an 8-inch square baking dish. Bake for 8 minutes, then set aside to cool.

    Step 3: Make the Filling

    Lower the oven temperature to 325°F (163°C). Beat 16 oz softened cream cheese until smooth. Add 3/4 cup granulated sugar and 2 teaspoons vanilla extract; mix until well combined. Incorporate 1/2 cup sour cream until smooth, then add 2 large eggs one at a time, blending thoroughly after each addition. Set aside.

    Step 4: Prepare the Cinnamon Swirl

    In a small bowl, mix 6 tablespoons melted butter, 1 cup dark brown sugar, 1 teaspoon cinnamon, and 1/4 cup all-purpose flour until smooth and combined.

    Step 5: Assemble the Bars

    Pour half of the cheesecake filling over the cooled crust. Dot with half of the cinnamon swirl mixture and use a knife to swirl it into the filling. Add the remaining cheesecake filling, followed by the rest of the cinnamon swirl mixture. Swirl again for a marbled effect.

    Step 6: Bake

    Bake for 35-40 minutes, or until the center is mostly set.

    Step 7: Chill and Serve

    Let the bars cool, then refrigerate for at least 2 hours before slicing into squares.

    Preparation time: 20 minutes | Cooking time: 48 minutes

    Enjoy these rich and creamy Cinnamon Swirl Cheesecake Bars, perfect for any occasion!

    How to Serve Decadent Cinnamon Swirl Cheesecake Squares

    These cheesecake squares are not only delicious but also versatile in their presentation. Here are some creative serving ideas:

    Individual Dessert Cups

    Layer the cheesecake squares in small dessert cups with whipped cream and a sprinkle of cinnamon on top for an elegant touch. This allows for easy serving and adds a beautiful visual element.

    Festive Garnish

    Serve the squares topped with a drizzle of caramel sauce and a sprinkle of crushed nuts. This adds texture and enhances the overall flavor profile, making the dessert even more indulgent.

    Coffee Pairing

    Pair the cheesecake squares with a strong cup of coffee or espresso. The rich flavors of the cheesecake complement the bitterness of the coffee, creating a delightful balance.

    Pro Tips for the Best Decadent Cinnamon Swirl Cheesecake Squares

    To ensure your cheesecake squares turn out perfectly every time, consider these practical tips:

    • Room Temperature Ingredients: Always make sure your cream cheese, eggs, and sour cream are at room temperature for a smooth filling.

    • Don’t Overmix: When incorporating the eggs, mix just until combined to prevent the cheesecake from cracking during baking.

    • Swirl Technique: For the best marbled effect, use a knife to make gentle swirling motions. Avoid overdoing it to maintain distinct layers.

    • Chill Thoroughly: Allow the cheesecake squares to chill for at least two hours, as this helps them set properly and enhances the flavor.

    • Use a Sharp Knife: When cutting the squares, use a sharp knife for clean edges. Wipe the knife with a damp cloth between cuts for a professional look.

    Best Side Dishes and Pairings

    To elevate your enjoyment of Decadent Cinnamon Swirl Cheesecake Squares, consider these delightful pairings:

    1. Fresh Berries
      The tartness of fresh berries like raspberries or strawberries offers a refreshing contrast to the rich cheesecake.

    2. Vanilla Ice Cream
      A scoop of vanilla ice cream adds a creamy element that complements the cinnamon flavor perfectly.

    3. Spiced Tea
      A warm cup of spiced tea enhances the cinnamon notes and provides a cozy pairing for this dessert.

    4. Chocolate Drizzle
      Adding a chocolate drizzle on top can introduce another layer of richness that pairs beautifully with the cheesecake.

    5. Whipped Cream
      A dollop of lightly sweetened whipped cream adds an airy touch that balances the dense texture of the cheesecake squares.

    Common Mistakes to Avoid

    • Not Allowing Ingredients to Reach Room Temperature: Using cold cream cheese or eggs can result in a lumpy filling.
    • Skipping the Chilling Time: Failing to chill the cheesecake squares can lead to a messy presentation when cutting.
    • Overmixing the Filling: Overmixing can incorporate too much air, causing cracks in the cheesecake as it bakes.
    • Not Swirling Enough: Insufficient swirling of the cinnamon mixture can lead to uneven flavor distribution throughout the squares.

    Storage & Reheating Instructions

    Refrigerator Storage

    Store the Decadent Cinnamon Swirl Cheesecake Squares in an airtight container in the refrigerator. They will stay fresh for up to one week.

    Freezing Instructions

    To freeze, wrap the cheesecake squares tightly in plastic wrap and then place them in an airtight container. They can be frozen for up to three months. Thaw in the refrigerator before serving.

    Reheating Tips

    • Oven: Preheat to 350°F (175°C), place squares in a baking dish, cover with foil, and heat for about 10-15 minutes.
    • Microwave: Heat individual squares on a microwave-safe plate for about 15-20 seconds.
    • Stovetop: Use a skillet over low heat, placing the squares in a covered skillet for about 5 minutes, checking frequently to avoid burning.

    Frequently Asked Questions

    How can I make these Decadent Cinnamon Swirl Cheesecake Squares gluten-free?

    Use gluten-free graham cracker crumbs for the crust and ensure that your other ingredients are gluten-free.

    Can I substitute the cream cheese in this recipe?

    Yes, you can use Neufchâtel cheese for a lighter option, but the texture and flavor may vary slightly.

    How do I know when the cheesecake squares are done baking?

    The center should be mostly set but slightly jiggly. It will firm up as it cools.

    Can I add other flavors to the filling?

    Absolutely! Consider adding chocolate chips, pumpkin puree, or a hint of orange zest for a unique twist on the classic recipe.

    What’s the best way to cut the cheesecake squares?

    Use a sharp knife dipped in hot water, wiping it clean between cuts for neat slices.

    Final Thoughts

    These Decadent Cinnamon Swirl Cheesecake Squares are a delightful treat that balances rich flavors with a creamy texture. Don’t hesitate to try this recipe and impress your friends and family. We love hearing your feedback, so please leave a comment below sharing your experience!


    Desserts

    Decadent Cinnamon Swirl Cheesecake Squares


    5.0 from 24 reviews

    These rich and creamy Cinnamon Swirl Cheesecake Squares feature a buttery graham cracker crust and a luscious cheesecake filling swirled with a sweet cinnamon mixture. Perfect for any occasion, these bars are sure to impress with their delightful flavors and textures.

    Author: Munch Twist
    Prep Time: 20 minutes
    Cook Time: 48 minutes
    Total Time: 68 minutes
    Yield: 12 servings
    Category: Desserts
    Method: No bake
    Cuisine: American

    Decadent Cinnamon Swirl Cheesecake Squares

    SCALE:
    1x
    2x
    3x
    Cook Mode: Prevent your screen from going dark

    Ingredients

    • 6 tablespoons butter, melted
    • 1/4 cup light brown sugar
    • 1/2 teaspoon salt
    • 1 1/2 cups graham cracker crumbs
    • 16 oz cream cheese, softened
    • 2 large eggs, at room temperature
    • 1/2 cup sour cream, at room temperature
    • 3/4 cup granulated sugar
    • 2 teaspoons vanilla extract
    • 1 teaspoon cinnamon
    • 1 cup dark brown sugar
    • 1/4 cup all-purpose flour
    • 6 tablespoons butter, melted

    Instructions

    1. Preheat your oven to 350°F (175°C).
    2. In a medium bowl, combine melted butter, graham cracker crumbs, brown sugar, and salt. Mix until well combined. Press the mixture firmly into the bottom of an 8-inch square baking dish. Bake for 8 minutes, then set aside to cool.
    3. Lower the oven temperature to 325°F (163°C). Beat the cream cheese until smooth. Add granulated sugar and vanilla extract; mix until well combined. Incorporate sour cream until smooth, then add eggs one at a time, blending thoroughly after each addition. Set aside.
    4. In a small bowl, mix melted butter, dark brown sugar, cinnamon, and flour until smooth and combined.
    5. Pour half of the cheesecake filling over the cooled crust. Dot with half of the cinnamon swirl mixture and use a knife to swirl it into the filling. Add the remaining cheesecake filling, followed by the rest of the cinnamon swirl mixture. Swirl again for a marbled effect.
    6. Bake for 35-40 minutes, or until the center is mostly set.
    7. Let cool, then refrigerate for at least 2 hours before slicing into squares.

    Nutrition Facts

    Serving Size: 1 serving
    Calories: 480 kcal
    Sugar: 40g
    Sodium: 200mg
    Fat: 24g
    Saturated Fat: 14g
    Carbohydrates: 60g
    Fiber: 1g
    Protein: 6g
    Cholesterol: 80mg

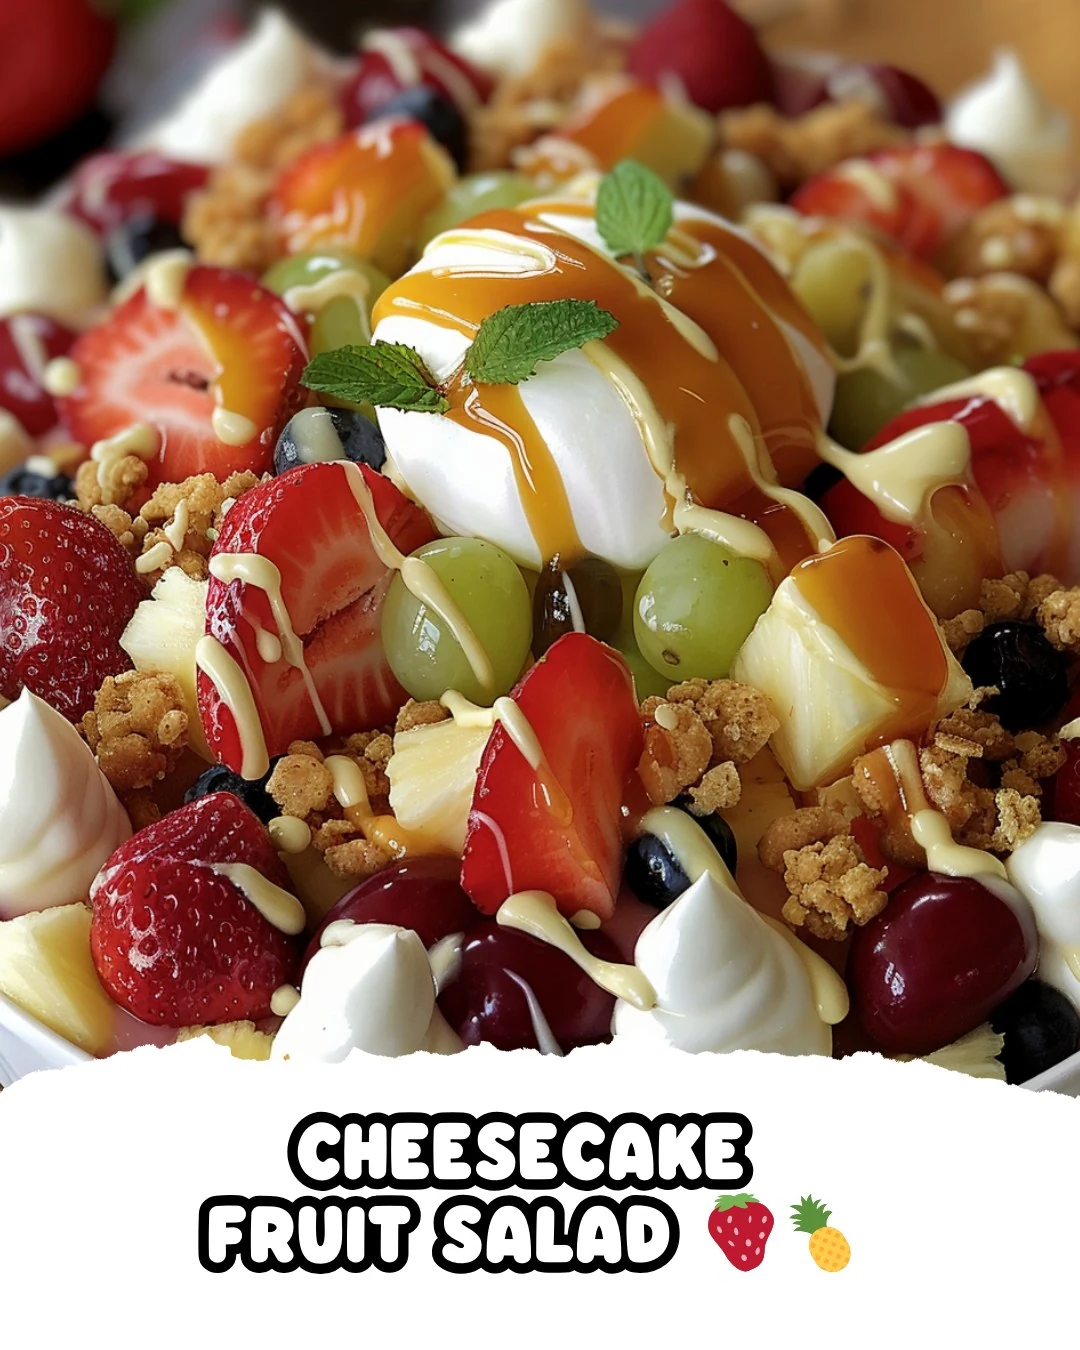
  • Creamy Cheesecake Fruit Salad Recipe to Delight

    Creamy Cheesecake Fruit Salad Recipe to Delight

    Cheesecake Fruit Salad is a delightful and refreshing dish that combines the sweetness of fresh fruits with the rich creaminess of cheesecake. This vibrant salad is perfect for gatherings, picnics, or simply as a light dessert. The blend of flavors and textures makes it a standout treat that everyone will love.

    Why You’ll Love This Recipe

    • Delicious Flavor Combination: The mix of sweet fruits and creamy dressing creates a delightful taste that’s hard to resist.
    • Versatile Ingredients: You can customize the fruit selection based on what you have on hand or your favorites.
    • Perfect for Any Occasion: This Cheesecake Fruit Salad is ideal for parties, barbecues, or holiday celebrations.
    • No Cooking Required: With just a few steps, you can whip up this dessert without turning on the oven.
    • Make-Ahead Friendly: Prepare it in advance and chill for a refreshing treat that’s ready when you are.

    Tools and Equipment

    Having the right tools makes preparation a breeze.

    Essential Tools

    • Mixing bowls
    • Electric mixer
    • Whisk
    • Measuring cups and spoons
    • Cutting board
    • Sharp knife

    Why These Tools Matter

    • Mixing bowls: Allow you to combine ingredients easily without spills.
    • Electric mixer: Ensures the cream cheese is whipped to a smooth consistency quickly.
    • Cutting board and knife: Provide a safe surface and sharp tools for prepping fruits efficiently.

    Ingredients for Cheesecake Fruit Salad

    For the Fruit Salad:

    • 2 cups diced pineapple (fresh or canned, drained)
    • 2 cups blueberries
    • 2 cups diced mango
    • 2 cups grapes, halved
    • 2 cups strawberries, hulled and sliced
    • 1 large banana, sliced (optional)

    For the Cheesecake Dressing:

    • 1/2 cup granulated sugar
    • 1/2 cup sour cream
    • 8 oz cream cheese, softened
    • 1/2 cup heavy cream
    • 1 tsp vanilla extract

    How to Make Cheesecake Fruit Salad Step-by-Step

    Step 1: Prepare the Fruit

    Wash and slice all the fruit as needed. In a large mixing bowl, combine the pineapple, blueberries, mango, grapes, strawberries, and banana (if using). Gently mix to ensure even distribution.

    Step 2: Make the Cheesecake Dressing

    In a medium bowl, beat the softened cream cheese with an electric mixer until smooth. Gradually add the granulated sugar and vanilla extract, mixing until well combined and creamy.

    Step 3: Combine Sour Cream and Whipped Cream

    Mix the sour cream into the cream cheese mixture until fully incorporated. In a separate bowl, whip the heavy cream until soft peaks form. Carefully fold the whipped cream into the cream cheese mixture until smooth and fluffy.

    Step 4: Combine Fruit and Dressing

    Gently fold the cheesecake dressing into the fruit mixture, taking care to keep the fruit intact. Ensure all the fruit is well coated with the dressing for maximum flavor.

    Step 5: Chill and Serve

    Cover the salad with plastic wrap and refrigerate for at least 1 hour. This allows the flavors to meld beautifully. Serve chilled and enjoy the delightful taste of your Cheesecake Fruit Salad.

    Preparation time: 15 minutes | Cooking time: 0 minutes

    Nutritional Information

    (per serving, based on 6 servings):
    * Calories: 220 kcal
    * Carbohydrates: 28 g
    * Proteins: 3 g
    * Fats: 11 g

    Enjoy this refreshing and creamy Cheesecake Fruit Salad as a perfect treat for any occasion!

    How to Serve Cheesecake Fruit Salad

    Serving Cheesecake Fruit Salad can be as creative as you want it to be. Here are a few delightful serving ideas to enhance your presentation.

    Individual Cups

    Serve the fruit salad in individual cups or mason jars for a charming and portable option. This is perfect for parties or picnics, allowing guests to enjoy their own portion.

    Cheesecake Fruit Salad Parfaits

    Layer the Cheesecake Fruit Salad with granola or crushed graham crackers in a tall glass. This not only adds texture but also visual appeal, making it an eye-catching dessert.

    Festive Platter

    Arrange the fruit salad on a large serving platter, garnished with fresh mint leaves. This is an excellent centerpiece for gatherings, inviting guests to help themselves.

    Pro Tips for the Best Cheesecake Fruit Salad

    To ensure your Cheesecake Fruit Salad is a hit, consider these helpful tips.

    • Use Fresh Fruit: Fresh, ripe fruit enhances the flavor and texture of the salad, making it more enjoyable.
    • Adjust Sweetness: Feel free to modify the amount of sugar in the dressing based on the sweetness of your fruit selection.
    • Chill Before Serving: Allowing the salad to chill for at least an hour helps the flavors meld together, resulting in a more delicious dish.
    • Add Nuts for Crunch: Consider adding chopped nuts, such as pecans or walnuts, for an extra layer of flavor and crunch.
    • Experiment with Fruit: Don’t hesitate to switch up the fruit mix based on seasonal availability or your personal preferences.

    Best Side Dishes and Pairings

    Pairing your Cheesecake Fruit Salad with complementary dishes can elevate your meal. Here are some excellent options.

    1. Grilled Chicken Skewers
      The savory flavor of grilled chicken complements the sweetness of the fruit salad, creating a balanced meal.

    2. Quinoa Salad
      A fresh quinoa salad adds a healthy grain component, making your meal more filling and nutritious.

    3. Pancakes
      Fluffy pancakes drizzled with maple syrup provide a delightful contrast to the creamy fruit salad, perfect for brunch.

    4. Cheese Platter
      A selection of cheeses, such as brie or goat cheese, pairs wonderfully with the sweetness of the fruit, enhancing the overall tasting experience.

    5. Sparkling Water
      A refreshing sparkling water or flavored seltzer is an excellent drink option that complements the richness of the Cheesecake Fruit Salad without overwhelming it.

    Common Mistakes to Avoid

    • Not Using Fresh Fruit: Always opt for fresh fruit when possible to enhance flavor and texture.
    • Overmixing the Dressing: Gently fold the dressing into the fruit to keep the fruit intact and maintain a pleasant texture.
    • Skipping the Chill Time: Allow the salad to chill for at least an hour for the flavors to meld beautifully.
    • Ignoring Ingredient Temperature: Ensure the cream cheese is softened to room temperature for a smooth dressing.

    Storage & Reheating Instructions

    Refrigerator Storage

    Store the Cheesecake Fruit Salad in an airtight container in the refrigerator. It will stay fresh for up to 3 days. However, for the best taste and texture, consume it within 1-2 days.

    Freezing Instructions

    Freezing is not recommended for this Cheesecake Fruit Salad, as the fruit can become mushy upon thawing. If you must freeze it, do so without the dressing, and add it after thawing.

    Reheating Tips

    • Oven: Not applicable, as this recipe is served cold.
    • Microwave: Not applicable, as this recipe is served cold.
    • Stovetop: Not applicable, as this recipe is served cold.

    Frequently Asked Questions

    Can I make Cheesecake Fruit Salad ahead of time?

    Yes, you can prepare the salad a day in advance. Just ensure you cover it well and refrigerate to keep it fresh.

    What fruits work best in Cheesecake Fruit Salad?

    While the recipe includes a variety of fruits, you can customize it with your favorites like kiwi, raspberries, or peaches.

    Is Cheesecake Fruit Salad suitable for a crowd?

    Absolutely! This recipe is perfect for gatherings and can easily be doubled or halved based on your needs.

    How long does Cheesecake Fruit Salad last in the fridge?

    When stored properly in an airtight container, it lasts about 3 days in the refrigerator.

    Can I use low-fat cream cheese in the dressing?

    Yes, using low-fat cream cheese can reduce calories, but it may affect the creaminess and flavor of the dressing.

    Final Thoughts

    This Cheesecake Fruit Salad is a delightful way to enjoy fresh fruit with a creamy twist. It’s perfect for any occasion, from casual gatherings to special celebrations. We encourage you to try this recipe and share your thoughts in the comments below.


    Desserts

    Cheesecake Fruit Salad


    5.0 from 24 reviews

    This refreshing Cheesecake Fruit Salad combines a variety of fresh fruits with a creamy cheesecake dressing, making it a perfect treat for any occasion. It's easy to prepare and offers a delightful mix of flavors and textures that everyone will enjoy.

    Author: Munch Twist
    Prep Time: 15 minutes
    Cook Time: 0 minutes
    Total Time: 1 hour 15 minutes
    Yield: 6 servings
    Category: Desserts
    Method: No bake
    Cuisine: American

    Cheesecake Fruit Salad

    SCALE:
    1x
    2x
    3x
    Cook Mode: Prevent your screen from going dark

    Ingredients

    • 2 cups diced pineapple (fresh or canned, drained)
    • 2 cups blueberries
    • 2 cups diced mango
    • 2 cups grapes, halved
    • 2 cups strawberries, hulled and sliced
    • 1 large banana, sliced (optional)
    • 1/2 cup granulated sugar
    • 1/2 cup sour cream
    • 8 oz cream cheese, softened
    • 1/2 cup heavy cream
    • 1 tsp vanilla extract

    Instructions

    1. Wash and slice all fruit as needed. In a large mixing bowl, combine pineapple, blueberries, mango, grapes, strawberries, and banana (if using).
    2. In a medium bowl, beat the softened cream cheese with an electric mixer until smooth. Add granulated sugar and vanilla extract, mixing until well combined.
    3. Mix sour cream into the cream cheese mixture until smooth. In a separate bowl, whip heavy cream until soft peaks form, then gently fold into the cream cheese mixture.
    4. Carefully fold the cheesecake dressing into the fruit mixture, ensuring the fruit remains intact.
    5. Cover the salad and refrigerate for at least 1 hour to allow flavors to meld. Serve chilled.

    Nutrition Facts

    Serving Size: 1 serving
    Calories: 220 kcal
    Sugar: 18g
    Sodium: 80mg
    Fat: 11g
    Saturated Fat: 6g
    Carbohydrates: 28g
    Fiber: 3g
    Protein: 3g
    Cholesterol: 30mg

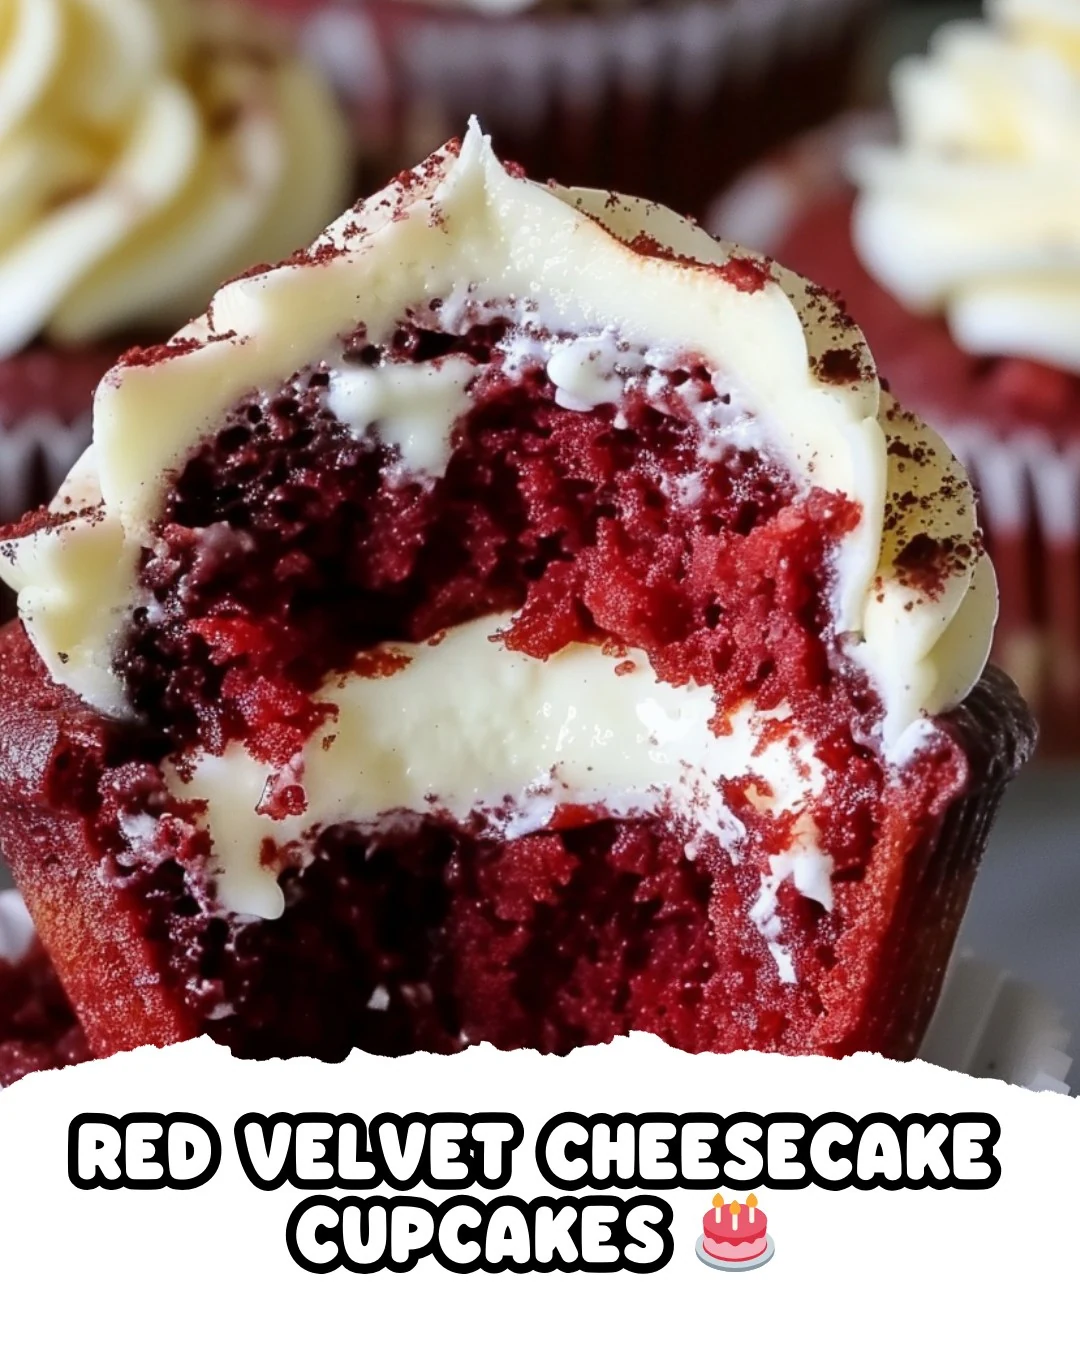
  • Delicious Red Velvet Cheesecake Cupcakes Recipe

    Delicious Red Velvet Cheesecake Cupcakes Recipe

    Red Velvet Cheesecake Cupcakes combine the rich, velvety flavor of red velvet cake with a creamy cheesecake filling. These delightful treats are perfect for any occasion, offering a unique twist on traditional cupcakes. The combination of textures and flavors will surely impress your guests.

    Why You’ll Love This Recipe

    • Decadent Flavor: The rich red velvet pairs beautifully with the creamy cheesecake center.
    • Eye-Catching Presentation: The vibrant red color makes these cupcakes a showstopper at any gathering.
    • Perfect for Celebrations: Ideal for birthdays, holidays, or any special occasion, they are sure to be a hit.
    • Easy to Customize: Add your favorite toppings or flavors to personalize each cupcake.
    • Fun to Make: Baking these cupcakes is an enjoyable activity for both beginners and seasoned bakers.

    Tools and Equipment

    Having the right tools makes baking simpler and more enjoyable.

    Essential Tools

    • Muffin tin
    • Cupcake liners
    • Mixing bowls
    • Whisk
    • Electric mixer
    • Measuring cups and spoons
    • Sifter
    • Cooling rack

    Why These Tools Matter

    • Muffin tin: Ensures uniform baking and perfect cupcake shapes.
    • Electric mixer: Saves time and effort in mixing ingredients until fluffy.
    • Sifter: Guarantees a light and airy batter by removing lumps from dry ingredients.

    Ingredients for Red Velvet Cheesecake Cupcakes

    For the Cupcakes

    • 1 cup vegetable oil
    • 1 teaspoon white vinegar
    • 1 teaspoon baking soda
    • 1 teaspoon salt
    • 2 tablespoons red food coloring
    • 1 teaspoon vanilla extract
    • 1 cup buttermilk, at room temperature
    • 1 1/2 cups all-purpose flour
    • 1 teaspoon cocoa powder
    • 2 large eggs, at room temperature
    • 1/2 cup granulated sugar

    For the Cheesecake Filling

    • 8 oz cream cheese, softened
    • 1 teaspoon vanilla extract
    • 1 large egg
    • 1/4 cup granulated sugar

    For the Frosting

    • 1 cup unsalted butter, softened
    • 2-3 tablespoons heavy cream
    • 1/4 cup powdered sugar
    • 1 teaspoon vanilla extract

    How to Make Red Velvet Cheesecake Cupcakes Step-by-Step

    Step 1: Preheat the Oven

    Set your oven to 350°F (175°C) and line a muffin tin with cupcake liners. This preparation ensures even baking.

    Step 2: Mix Dry Ingredients

    In a large bowl, sift together the all-purpose flour, cocoa powder, granulated sugar, baking soda, and salt. This step helps to combine the ingredients and aerate the flour.

    Step 3: Combine Wet Ingredients

    In another bowl, whisk the vegetable oil, buttermilk, eggs, red food coloring, vanilla extract, and white vinegar until well blended. This mixture creates a moist base for the cupcakes.

    Step 4: Create Cupcake Batter

    Gradually add the wet mixture to the dry ingredients, mixing until just combined. Be careful not to overmix. Fill each cupcake liner about 2/3 full with this batter.

    Step 5: Prepare Cheesecake Filling

    In a separate bowl, beat the cream cheese, granulated sugar, egg, and vanilla extract until smooth. This filling adds a creamy layer to the cupcakes.

    Step 6: Add Cheesecake Filling

    Drop a spoonful of the cheesecake mixture into the center of each cupcake batter. This will create a delicious surprise inside each cupcake.

    Step 7: Bake

    Place the tin in the preheated oven and bake for 18-20 minutes. A toothpick inserted into the red velvet part should come out clean. Let the cupcakes cool completely on a wire rack.

    Step 8: Make the Frosting

    While the cupcakes are cooling, beat the softened unsalted butter until creamy. Gradually add powdered sugar, mixing until smooth. Add vanilla extract and heavy cream, continuing to beat until fluffy.

    Step 9: Frost the Cupcakes

    Once the cupcakes are completely cooled, frost them with the prepared frosting. For an extra touch, garnish with crumbs of red velvet cake if desired.

    Enjoy your delicious Red Velvet Cheesecake Cupcakes, perfect for any celebration or sweet craving!

    How to Serve Red Velvet Cheesecake Cupcakes

    Red Velvet Cheesecake Cupcakes are versatile and can be enjoyed in various ways. Here are some creative serving ideas.

    With a Scoop of Ice Cream

    Pair your cupcakes with a scoop of vanilla ice cream for a delightful contrast of temperatures and textures that enhances the rich flavor of the cheesecake.

    Drizzled with Chocolate Sauce

    A drizzle of warm chocolate sauce over the frosted cupcakes adds an extra layer of indulgence, making each bite even more decadent.

    Garnished with Fresh Berries

    Top the cupcakes with fresh raspberries or strawberries. The tartness of the berries complements the sweetness of the cupcakes, adding a refreshing touch.

    Pro Tips for the Best Red Velvet Cheesecake Cupcakes

    To elevate your Red Velvet Cheesecake Cupcakes, consider these expert tips.

    • Use High-Quality Cocoa Powder: Opt for a premium cocoa powder to enhance the chocolate flavor in the cupcakes.
    • Don’t Overmix the Batter: Mix until just combined to ensure light and fluffy cupcakes; overmixing can lead to a dense texture.
    • Chill the Cheesecake Filling: For a smoother consistency, chill the cheesecake mixture for 15 minutes before adding it to the cupcakes.
    • Test for Doneness: Use a toothpick to check for doneness in the cakes, ensuring it emerges clean from the red velvet portion.
    • Store Properly: Keep leftovers in an airtight container in the refrigerator to maintain freshness, ideally for up to three days.

    Best Side Dishes and Pairings

    Enhance your cupcake experience with these delightful pairings.

    1. Coffee: A strong cup of coffee balances the sweetness of the cupcakes and enhances their rich flavor.
    2. Milkshake: A thick vanilla or chocolate milkshake provides a creamy companion that complements the cupcakes perfectly.
    3. Fruit Salad: A light fruit salad adds a refreshing contrast to the richness of the cupcakes and is a great palate cleanser.
    4. Chocolate Milk: For a nostalgic touch, serve with chocolate milk, adding a fun twist to the dessert experience.
    5. Sparkling Water: A chilled sparkling water with a slice of lemon offers a refreshing counterpoint to the sweetness of the cupcakes.

    Common Mistakes to Avoid

    • Not Measuring Ingredients Accurately: Use proper measuring cups for dry and liquid ingredients to ensure the right texture and flavor.
    • Overmixing the Batter: Mix just until combined to prevent cupcakes from becoming dense and tough.
    • Skipping the Cooling Step: Allowing the cupcakes to cool completely before frosting prevents the frosting from melting.
    • Using Cold Ingredients: Make sure all ingredients, especially eggs and cream cheese, are at room temperature for better mixing and texture.

    Storage & Reheating Instructions

    Refrigerator Storage

    Store the Red Velvet Cheesecake Cupcakes in an airtight container in the refrigerator. They will remain fresh for up to 5 days.

    Freezing Instructions

    To freeze, place the cupcakes in a single layer in an airtight container or wrap them tightly in plastic wrap. They can be stored in the freezer for up to 3 months. Thaw in the refrigerator overnight before serving.

    Reheating Tips

    • Oven: Preheat to 350°F (175°C), place cupcakes on a baking sheet, and heat for about 10 minutes.
    • Microwave: Heat individually for 10-15 seconds until just warm, being careful not to overheat.
    • Stovetop: Use a skillet over low heat, covering with a lid to gently warm for a few minutes.

    Frequently Asked Questions

    How do I know when my Red Velvet Cheesecake Cupcakes are done baking?

    The cupcakes are done when a toothpick inserted into the red velvet portion comes out clean.

    Can I make the cheesecake filling ahead of time?

    Yes, the cheesecake filling can be prepared a day in advance. Just store it in an airtight container in the refrigerator until you are ready to use it.

    What can I use instead of buttermilk in this recipe?

    You can substitute buttermilk with a mixture of milk and vinegar or lemon juice. Use 1 cup of milk with 1 tablespoon of vinegar or lemon juice, letting it sit for about 5 minutes before using.

    Can I use a different frosting for these cupcakes?

    Absolutely! Feel free to experiment with different frostings such as cream cheese frosting or chocolate ganache to complement the flavors of the Red Velvet Cheesecake Cupcakes.

    How should I garnish my Red Velvet Cheesecake Cupcakes?

    You can garnish with crumbs from the red velvet cake, chocolate shavings, or fresh berries to enhance presentation.

    Final Thoughts

    These Red Velvet Cheesecake Cupcakes are a delightful treat that combine the rich flavors of red velvet with creamy cheesecake filling. I encourage you to try making this recipe at home and share your feedback in the comments. Your thoughts and experiences will inspire others to enjoy this delicious dessert.

    Desserts

    Red Velvet Cheesecake Cupcakes


    5.0 from 24 reviews

    These Red Velvet Cheesecake Cupcakes combine the rich flavors of red velvet cake with a creamy cheesecake filling, topped with a luscious buttercream frosting. Perfect for any celebration or as a delightful treat, these cupcakes are sure to impress with their vibrant color and delicious taste.

    Author: Munch Twist
    Prep Time: 20 minutes
    Cook Time: 20 minutes
    Total Time: 40 minutes
    Yield: 12 servings
    Category: Desserts
    Method: No bake
    Cuisine: American

    Red Velvet Cheesecake Cupcakes

    SCALE:
    1x
    2x
    3x
    Cook Mode: Prevent your screen from going dark

    Ingredients

    • 1 cup vegetable oil
    • 1 teaspoon white vinegar
    • 1 teaspoon baking soda
    • 1 teaspoon salt
    • 2 tablespoons red food coloring
    • 1 teaspoon vanilla extract
    • 1 cup buttermilk, at room temperature
    • 1 1/2 cups all-purpose flour
    • 1 teaspoon cocoa powder
    • 2 large eggs, at room temperature
    • 1/2 cup granulated sugar
    • 8 oz cream cheese, softened
    • 1 teaspoon vanilla extract
    • 1 large egg
    • 1/4 cup granulated sugar
    • 1 cup unsalted butter, softened
    • 2-3 tablespoons heavy cream
    • 1/4 cup powdered sugar
    • 1 teaspoon vanilla extract

    Instructions

    1. Preheat the oven to 350°F (175°C) and line a muffin tin with cupcake liners.
    2. In a large bowl, sift together the flour, cocoa powder, sugar, baking soda, and salt.
    3. In another bowl, whisk the oil, buttermilk, eggs, food coloring, vanilla extract, and vinegar until blended.
    4. Gradually add the wet mixture to the dry ingredients, mixing until just combined. Fill each cupcake liner about 2/3 full with this batter.
    5. In a separate bowl, beat the cream cheese, sugar, egg, and vanilla extract until smooth.
    6. Drop a spoonful of the cheesecake mixture into the center of each cupcake batter.
    7. Place the tin in the preheated oven and bake for 18-20 minutes, or until a toothpick inserted into the red velvet part comes out clean. Let the cupcakes cool completely on a wire rack.
    8. While the cupcakes are cooling, beat the softened butter until creamy. Gradually add powdered sugar, mixing until smooth. Add vanilla extract and heavy cream, continuing to beat until fluffy.
    9. Once the cupcakes are completely cooled, frost with the prepared frosting. Garnish with crumbs of red velvet cake if desired.

    Nutrition Facts

    Serving Size: 1 serving
    Calories: 350 kcal
    Sugar: 22g
    Sodium: 260mg
    Fat: 20g
    Saturated Fat: 10g
    Carbohydrates: 40g
    Fiber: 0g
    Protein: 4g
    Cholesterol: 40mg

  • Irresistible Slow Cooker Cracker Barrel Fried Apples Recipe

    Irresistible Slow Cooker Cracker Barrel Fried Apples Recipe

    Slow Cooker Cracker Barrel Fried Apples offer a delightful blend of sweetness and warmth, reminiscent of classic comfort food. This recipe captures the essence of home-cooked goodness, making it a perfect treat for any occasion.

    Why You’ll Love This Recipe

    • Irresistibly Sweet: The combination of brown sugar and cinnamon creates a warm, inviting flavor profile.
    • Simple Preparation: With minimal ingredients and easy steps, this recipe is beginner-friendly.
    • Versatile Serving Options: Enjoy these apples alone or over ice cream for a special dessert.
    • Effortless Cooking: The slow cooker does all the work, allowing you to focus on other tasks.
    • Family Favorite: This dish is sure to please both kids and adults alike, making it a perfect family treat.

    Tools and Equipment

    Having the right tools can make your cooking experience smoother and more enjoyable.

    Essential Tools

    • Slow Cooker
    • Mixing Bowl
    • Apple Slicer
    • Measuring Cups and Spoons
    • Wooden Spoon

    Why These Tools Matter

    • Slow Cooker: It allows for even cooking and enhances the flavors as the apples simmer.
    • Apple Slicer: This tool simplifies the peeling and slicing process, saving you time.
    • Mixing Bowl: A spacious bowl helps in combining ingredients without any mess.

    Ingredients for Slow Cooker Cracker Barrel Fried Apples

    Fresh Ingredients

    • 2 teaspoons lemon juice
    • 3-4 lbs apples, peeled and sliced into wedges

    Sweeteners and Spices

    • ¼ cup granulated sugar
    • ¼ cup brown sugar
    • 1 teaspoon cinnamon

    Binding Ingredients

    • ¼ cup butter, melted
    • 2 tablespoons cornstarch
    • 1 teaspoon vanilla extract

    How to Make Slow Cooker Cracker Barrel Fried Apples Step-by-Step

    Step 1: Prep the Apples

    Begin by adding the apple wedges and cornstarch to the slow cooker. Stir well to ensure each piece is evenly coated with cornstarch. This step helps to thicken the mixture as it cooks.

    Step 2: Mix Sugars and Cinnamon

    Next, pour in the brown sugar, granulated sugar, and cinnamon. Stir the mixture thoroughly, ensuring that the sugars are evenly distributed among the apple wedges.

    Step 3: Add Liquids

    Now, incorporate the melted butter, lemon juice, and vanilla extract into the slow cooker. Stir again to combine all ingredients, ensuring the apples are well-coated with the mixture.

    Step 4: Cook

    Cover the slow cooker and set it to high heat. Allow the apples to cook for 2 hours. During this time, the flavors will meld beautifully, creating a rich and sweet dish.

    Step 5: Serve

    Once cooking is complete, stir the apples gently before serving. These Slow Cooker Cracker Barrel Fried Apples are best enjoyed warm, either on their own or as a topping over vanilla ice cream.

    Enjoy the warm, sweet comfort of these Slow Cooker Cracker Barrel Fried Apples, perfect for a cozy dessert or a special treat!

    How to Serve Slow Cooker Cracker Barrel Fried Apples

    These Slow Cooker Cracker Barrel Fried Apples can be enjoyed in various delightful ways.

    Over Vanilla Ice Cream

    Serve the warm fried apples over a scoop of creamy vanilla ice cream for a delicious contrast of temperatures and textures.

    As a Breakfast Topping

    Use the fried apples as a topping for pancakes or waffles, adding a sweet and fruity element to your morning routine.

    In a Tart or Pie

    Incorporate the fried apples into a homemade tart or pie for a comforting dessert that showcases their rich flavor.

    Pro Tips for the Best Slow Cooker Cracker Barrel Fried Apples

    To create the most flavorful and enjoyable fried apples, consider these helpful tips.

    • Apple Selection: Choose a mix of Granny Smith and Golden Delicious apples for the best balance of tartness and sweetness.
    • Even Cooking: Cut the apple wedges to uniform sizes to ensure even cooking throughout the dish.
    • Taste Before Serving: Adjust sweetness by adding more sugar or cinnamon based on your preference before serving.
    • Storage Tips: Store any leftovers in an airtight container in the refrigerator for up to three days.
    • Reheating: Reheat in the microwave or on the stovetop for a quick snack or dessert.

    Best Side Dishes and Pairings

    These fried apples pair perfectly with a variety of side dishes and drinks.

    1. Pork Chops: The savory flavor of grilled or roasted pork chops complements the sweet notes of the apples beautifully.
    2. Biscuits: Flaky, buttery biscuits can soak up the sweet syrup from the fried apples, making for a delightful combination.
    3. Oatmeal: Serve the fried apples over a bowl of warm oatmeal for a hearty breakfast option that adds sweetness and flavor.
    4. Cheddar Cheese: Sharp cheddar adds a nice contrast to the sweetness of the apples, making for a sophisticated snack.
    5. Hot Tea: A cup of spiced chai or herbal tea enhances the warmth and comfort of the fried apples, creating a cozy pairing.

    Common Mistakes to Avoid

    • Using the Wrong Apples: Not all apples hold up well in slow cooking. Stick to Granny Smith or Golden Delicious for the best results.
    • Skipping the Cornstarch: Failing to coat the apples with cornstarch can lead to a watery mixture instead of a thick, syrupy sauce.
    • Overcrowding the Slow Cooker: If your slow cooker is too full, the apples may not cook evenly, resulting in some being mushy while others remain firm.
    • Not Stirring Before Serving: Forgetting to stir the mixture before serving can mean uneven distribution of flavors and sweetness.

    Storage & Reheating Instructions

    Refrigerator Storage

    Store any leftover Slow Cooker Cracker Barrel Fried Apples in airtight containers in the refrigerator. They will stay fresh for up to 4 days.

    Freezing Instructions

    For freezing, allow the apples to cool completely, then transfer them to freezer-safe containers or bags. They can be frozen for up to 3 months. To thaw, place the container in the refrigerator overnight.

    Reheating Tips

    • Oven: Preheat the oven to 350°F (175°C). Transfer the apples to an oven-safe dish and cover with foil. Heat for about 15-20 minutes, or until warmed through.
    • Microwave: Place a serving in a microwave-safe bowl and cover. Heat on high for 1-2 minutes, checking and stirring halfway through.
    • Stovetop: In a saucepan over medium heat, add the apples and a splash of water. Stir occasionally and heat until warmed through, about 5-7 minutes.

    Frequently Asked Questions

    How do I make Slow Cooker Cracker Barrel Fried Apples healthier?

    You can reduce the sugar by using less granulated and brown sugar or substituting with a sugar alternative. Additionally, consider using less butter for a lighter version.

    Can I use other types of apples for Slow Cooker Cracker Barrel Fried Apples?

    While Granny Smith and Golden Delicious are recommended, you can experiment with other varieties like Fuji or Honeycrisp, but be aware that they may alter the texture and taste.

    How long do Slow Cooker Cracker Barrel Fried Apples take to cook?

    The apples need to cook on high for about 2 hours. Ensure they are tender and caramelized for the best flavor.

    Can I serve Slow Cooker Cracker Barrel Fried Apples with ice cream?

    Absolutely! These apples make a delightful topping for vanilla ice cream, adding a warm and sweet contrast.

    Final Thoughts

    Slow Cooker Cracker Barrel Fried Apples are a simple yet delicious treat that brings a touch of nostalgia to your table. We encourage you to try this recipe and share your thoughts in the comments below. Your feedback is invaluable!


    Desserts

    Slow Cooker Cracker Barrel Fried Apples


    5.0 from 24 reviews

    These Slow Cooker Cracker Barrel Fried Apples are a warm and sweet dessert that brings comfort to any occasion. Made with tender apples, brown sugar, and cinnamon, they are perfect for serving on their own or over vanilla ice cream.

    Author: Munch Twist
    Prep Time: 15 minutes
    Cook Time: 120 minutes
    Total Time: 135 minutes
    Yield: 6 servings
    Category: Desserts
    Method: No bake
    Cuisine: American

    Slow Cooker Cracker Barrel Fried Apples

    SCALE:
    1x
    2x
    3x
    Cook Mode: Prevent your screen from going dark

    Ingredients

    • 2 teaspoons lemon juice
    • ¼ cup butter, melted
    • ¼ cup granulated sugar
    • 3-4 lbs apples, peeled and sliced into wedges
    • 2 tablespoons cornstarch
    • 1 teaspoon vanilla extract
    • 1 teaspoon cinnamon
    • ¼ cup brown sugar

    Instructions

    1. Add apple wedges and cornstarch to the slow cooker. Stir to coat the apples evenly.
    2. Pour in the brown sugar, granulated sugar, and cinnamon. Stir to mix well.
    3. Add the melted butter, lemon juice, and vanilla extract. Stir to combine thoroughly.
    4. Cover and cook on high for 2 hours.
    5. When cooking time is complete, stir and serve warm.

    Nutrition Facts

    Serving Size: 1 serving
    Calories: 250 kcal
    Sugar: 40g
    Sodium: 55mg
    Fat: 6g
    Saturated Fat: 3.5g
    Carbohydrates: 50g
    Fiber: 4g
    Protein: 1g
    Cholesterol: 15mg

  • Easy Ranch-Parmesan Chicken Recipe for a Crispy Delight

    Easy Ranch-Parmesan Chicken Recipe for a Crispy Delight

    Ranch-Parmesan Chicken is a delightful dish that combines the tangy flavor of ranch dressing with the savory richness of Parmesan cheese. This crispy chicken recipe is not only delicious but also incredibly easy to prepare, making it a perfect choice for busy weeknight dinners.

    Why You’ll Love This Recipe

    • Crispy Texture: The combination of panko breadcrumbs and Parmesan creates a delightful crunch.
    • Flavorful Coating: The ranch dressing infuses the chicken with a zesty flavor that everyone will love.
    • Simple Ingredients: You likely have most of the ingredients in your pantry, making it easy to whip up on short notice.
    • Quick Preparation: With just 15 minutes of prep time, you can have a satisfying meal ready in no time.
    • Versatile Serving Options: Pair it with a salad, veggies, or your favorite side for a complete meal.

    Tools and Equipment

    Having the right tools makes cooking more efficient and enjoyable.

    Essential Tools

    • A 13 x 9-inch baking dish
    • Shallow bowls for mixing and coating
    • Baking sheet
    • Measuring cups and spoons
    • Whisk or fork for mixing

    Why These Tools Matter

    • Baking Dish: A larger dish prevents the chicken from becoming soggy, allowing for an even bake.
    • Shallow Bowls: They make it easier to coat the chicken thoroughly with dressing and breadcrumbs.
    • Baking Sheet: Provides ample space for even cooking, ensuring crispy chicken on all sides.

    Ingredients for Ranch-Parmesan Chicken

    Chicken and Coating

    • 6 boneless chicken breasts
    • 1 cup prepared ranch salad dressing
    • 1 cup dry bread crumbs (panko breadcrumbs preferred)
    • 1/4 cup butter, melted (no substitutes)
    • 1/4 cup (up to 1/3) Parmesan cheese
    • 1 teaspoon seasoned salt
    • 1/2 teaspoon (up to 1) black pepper, ground
    • 1/2 teaspoon (up to 1) garlic powder

    How to Make Ranch-Parmesan Chicken Step-by-Step

    Step 1: Preheat the Oven

    Preheat your oven to 400°F (200°C) and set the oven rack to the lowest position. Lightly grease a 13 x 9-inch baking dish to prevent sticking.

    Step 2: Prepare the Coating

    In a shallow bowl, combine the dry bread crumbs, Parmesan cheese, seasoned salt, black pepper, and garlic powder. This mixture will provide a flavorful crust for the chicken.

    Step 3: Coat the Chicken

    Take each chicken breast and dip it into the ranch dressing, ensuring both sides are coated. Allow any excess dressing to drip off before rolling the chicken in the breadcrumb mixture until fully covered.

    Step 4: Arrange on the Baking Sheet

    Place the coated chicken breasts in a single layer on a greased baking sheet or line it with non-stick foil. Spacing them properly helps to maintain their crispiness.

    Step 5: Drizzle Butter

    Lightly drizzle melted butter over each chicken breast. For a lighter dish, you can skip the butter or opt for a lower-fat alternative. Optionally, sprinkle additional black pepper for extra flavor.

    Step 6: Bake

    Bake the chicken uncovered for about 30-35 minutes. It should be cooked through and golden brown when done. Ensure the internal temperature reaches 165°F (75°C) for safety.

    Enjoy this crispy, flavorful Ranch-Parmesan Chicken that promises to be a hit at your dinner table! With its easy preparation and delicious taste, it’s bound to become a family favorite.

    How to Serve Ranch-Parmesan Chicken

    Ranch-Parmesan Chicken is versatile and can be served in various delightful ways.

    On a Bed of Greens

    Serve the chicken sliced over a fresh salad of mixed greens, cherry tomatoes, and cucumbers, drizzled with additional ranch dressing for a refreshing meal.

    With a Side of Pasta

    Pair the chicken with a simple garlic butter pasta. The creamy texture of the pasta complements the crispy chicken, creating a balanced dish.

    As a Sandwich

    Transform leftovers into a hearty sandwich by placing the chicken between slices of toasted bread with lettuce, tomato, and a spread of ranch dressing for added flavor.

    Pro Tips for the Best Ranch-Parmesan Chicken

    To elevate your Ranch-Parmesan Chicken, consider these expert tips.

    • Use Fresh Ingredients: Opt for fresh chicken breasts for the best texture and flavor. Frozen chicken can work, but it may result in a less desirable outcome.
    • Adjust Seasoning: Feel free to customize the seasoning in the breadcrumb mixture by adding herbs like oregano or thyme for an extra layer of flavor.
    • Monitor Cooking Time: Since oven temperatures can vary, check the chicken a few minutes before the suggested cooking time to avoid overcooking.
    • Let It Rest: Allow the chicken to rest for a few minutes after baking. This helps retain the juices for a moist and tender bite.
    • Experiment with Toppings: Try adding sliced jalapeños or a sprinkle of crushed red pepper for a spicy kick.

    Best Side Dishes and Pairings

    To complement the rich flavors of Ranch-Parmesan Chicken, here are some ideal side dishes and drinks.

    1. Garlic Mashed Potatoes: Creamy mashed potatoes enhanced with garlic make a comforting side that balances the crispy chicken.
    2. Steamed Broccoli: Bright green broccoli adds a nutritious element, and its slight bitterness contrasts nicely with the rich chicken.
    3. Coleslaw: A tangy coleslaw provides a refreshing crunch and acidity that cuts through the richness of the chicken.
    4. Roasted Vegetables: A medley of roasted seasonal vegetables adds color and flavor, making for a well-rounded plate.
    5. Caesar Salad: This classic salad, with its creamy dressing and crunchy croutons, pairs perfectly with the savory chicken.
    6. Iced Tea: A glass of unsweetened iced tea offers a refreshing beverage option that cleanses the palate between bites.

    Common Mistakes to Avoid

    • Overcrowding the Baking Sheet: Placing too many chicken breasts on the baking sheet can lead to uneven cooking and soggy bottoms.
    • Skipping the Butter: Omitting the butter can result in less crispy chicken, as it adds essential moisture and flavor.
    • Not Preheating the Oven: Failing to preheat the oven can affect cooking time and texture, leading to undercooked chicken.
    • Using Fresh Breadcrumbs: Fresh breadcrumbs can become too soggy; using dry panko breadcrumbs is key for that desired crunch.

    Storage & Reheating Instructions

    Refrigerator Storage

    Store any leftover Ranch-Parmesan Chicken in an airtight container in the refrigerator. It will stay fresh for up to 3 days.

    Freezing Instructions

    To freeze, wrap the cooled chicken breasts tightly in plastic wrap, then place them in a freezer-safe container or a resealable freezer bag. This will keep them fresh for up to 2 months. Thaw in the refrigerator overnight before reheating.

    Reheating Tips

    • Oven: Preheat to 350°F (175°C) and bake for about 15-20 minutes, or until heated through.
    • Microwave: Heat on medium power in 1-minute intervals until warmed, taking care not to overcook.
    • Stovetop: In a skillet over medium heat, add a bit of oil and heat for about 5 minutes, turning occasionally until warmed.

    Frequently Asked Questions

    How can I make Ranch-Parmesan Chicken healthier?

    You can reduce calories by using a low-fat ranch dressing and omitting the butter. Additionally, consider using skinless chicken breasts for a leaner option.

    Can I substitute the Parmesan cheese?

    Yes, you can use other hard cheeses like Pecorino Romano or Grana Padano if you prefer a different flavor profile.

    What sides pair well with Ranch-Parmesan Chicken?

    This dish pairs well with a fresh salad, roasted vegetables, or mashed potatoes to complement the flavors.

    How can I ensure my chicken stays moist?

    Using ranch dressing to coat the chicken helps lock in moisture, and baking it uncovered allows the exterior to crisp while keeping the inside tender.

    Can I use bone-in chicken instead of boneless?

    While boneless chicken breasts work best for this recipe, you can use bone-in pieces. Just be sure to adjust the cooking time, as they will take longer to cook through.

    Final Thoughts

    Ranch-Parmesan Chicken is a delightful and easy recipe that the whole family will love. Its crispy exterior and tender chicken make it a weeknight favorite. Don’t hesitate to try this recipe, and please leave a comment with your thoughts and any variations you tried.


    Dinner

    Ranch-Parmesan Chicken


    5.0 from 24 reviews

    This Ranch-Parmesan Chicken is a crispy and flavorful dish that's perfect for any night of the week. Coated in a savory ranch dressing and a crunchy breadcrumb mixture, it's baked to golden perfection for a satisfying meal.

    Author: Munch Twist
    Prep Time: 15 minutes
    Cook Time: 30-35 minutes
    Total Time: 45-50 minutes
    Yield: 6 servings
    Category: Desserts
    Method: Baking
    Cuisine: American

    Ranch-Parmesan Chicken

    SCALE:
    1x
    2x
    3x
    Cook Mode: Prevent your screen from going dark

    Ingredients

    • 1 cup prepared ranch salad dressing
    • 1 cup dry bread crumbs
    • 6 boneless chicken breasts
    • 1/4 cup butter, melted
    • 1/4 cup Parmesan cheese
    • 1 teaspoon seasoned salt
    • 1/2 teaspoon black pepper, ground
    • 1/2 teaspoon garlic powder

    Instructions

    1. Preheat your oven to 400°F (200°C) and set the oven rack to the lowest position. Lightly grease a 13 x 9-inch baking dish.
    2. In a shallow bowl, mix together the bread crumbs, Parmesan cheese, seasoned salt, black pepper, and garlic powder.
    3. Dip each chicken breast into the ranch dressing to coat both sides. Allow any excess to drip off, then coat thoroughly in the breadcrumb mixture.
    4. Place the coated chicken breasts in a single layer onto a greased baking sheet or line with non-stick foil.
    5. Lightly drizzle the melted butter over each chicken breast. Optionally, sprinkle additional black pepper over the chicken pieces.
    6. Bake uncovered for about 30-35 minutes, or until the chicken is cooked through and golden brown.

    Nutrition Facts

    Serving Size: 1 serving
    Calories: 450 kcal
    Sugar: 1g
    Sodium: 1000mg
    Fat: 28g
    Saturated Fat: 11g
    Carbohydrates: 14g
    Fiber: 1g
    Protein: 34g
    Cholesterol: 135mg