Category: Desserts

  • Indulge in Peanut Butter Balls with Chocolate Rice Krispies

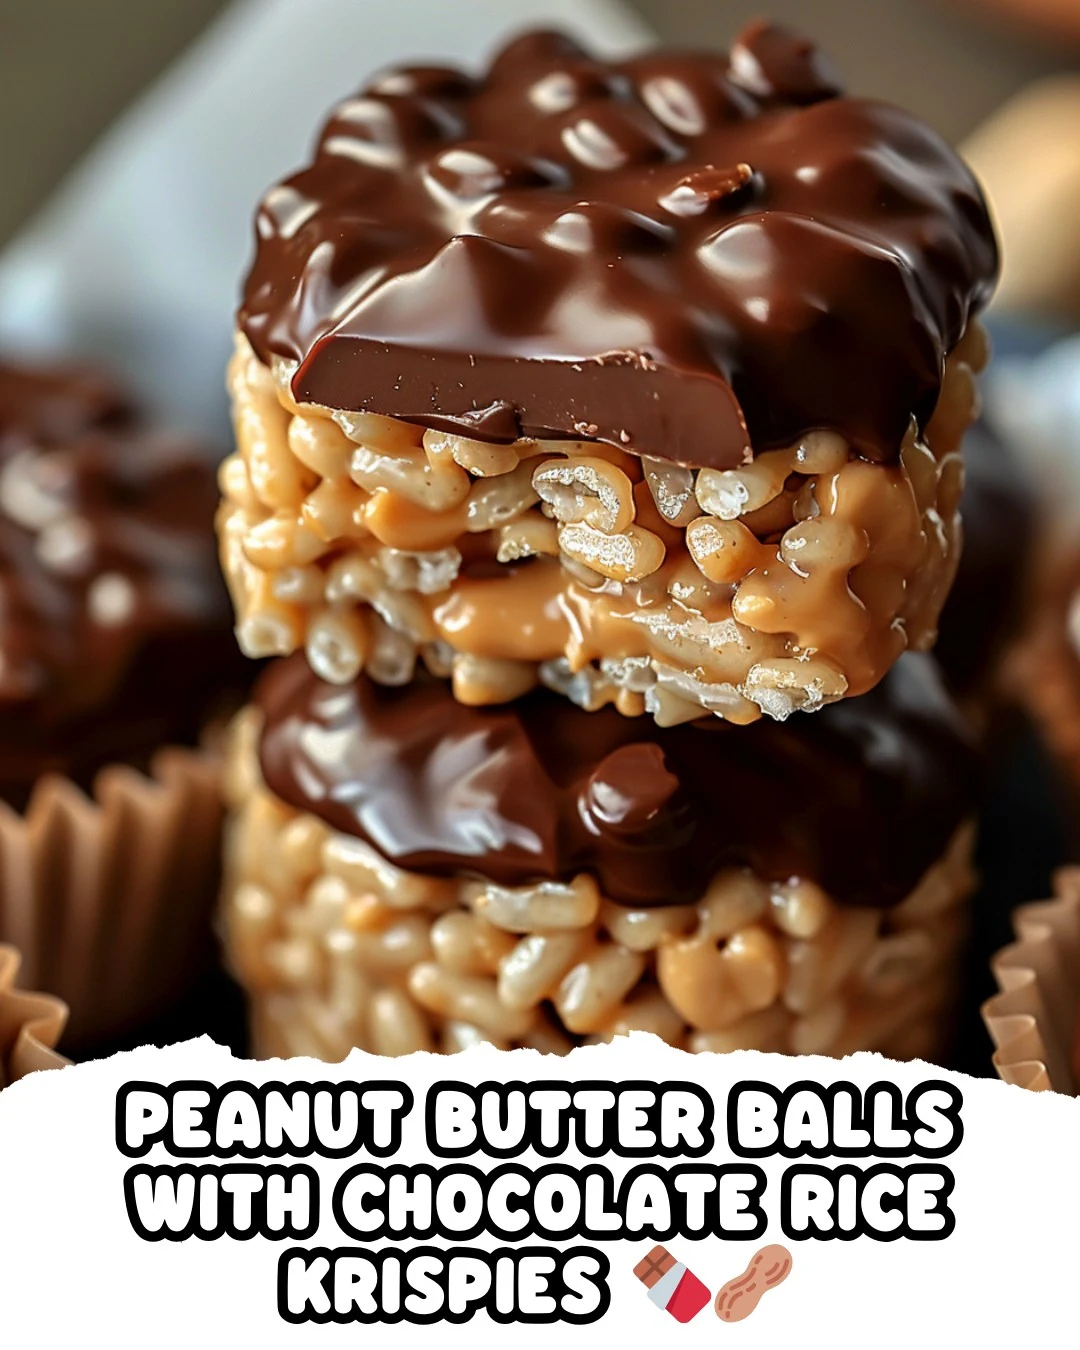
    Indulge in Peanut Butter Balls with Chocolate Rice Krispies

    Peanut Butter Balls with Chocolate Rice Krispies are a delightful treat that combines crunchy cereal with rich peanut butter and smooth chocolate. These no-bake snacks are perfect for satisfying your sweet tooth while being simple to make. With their irresistible taste and texture, they are sure to become a favorite.

    Why You’ll Love This Recipe

    • Quick & Easy: Ready in under 30 minutes, making them perfect for last-minute cravings.
    • No Baking Required: Enjoy the convenience of a no-bake recipe that simplifies preparation.
    • Customizable: You can easily adjust ingredients to suit dietary preferences or add extra flavors.
    • Family-Friendly: Kids will love helping to mix and assemble, making it a fun kitchen activity.
    • Satisfying Snack: Packed with protein and flavor, these treats are great for a post-workout boost.

    Tools and Equipment

    Having the right tools makes the process smoother and more enjoyable.

    Essential Tools

    • Muffin tin
    • Saucepan
    • Mixing spoon
    • Measuring cups
    • Paper or silicone liners

    Why These Tools Matter

    • Muffin tin: Perfect for shaping the peanut butter balls and ensuring even portions.
    • Saucepan: Allows for easy melting of the chocolate and mixing of the peanut butter.
    • Measuring cups: Ensure accurate ingredient portions for consistent results every time.

    Ingredients for Peanut Butter Balls with Chocolate Rice Krispies

    Peanut Butter Mixture

    • 3 cups Rice Krispies cereal
    • 1 cup chunky peanut butter
    • 6 tablespoons honey
    • 1/8 teaspoon salt

    Chocolate Topping

    • 1 1/2 cups chocolate chips (vegan for a plant-based option)

    How to Make Peanut Butter Balls with Chocolate Rice Krispies Step-by-Step

    Step 1: Prepare the Muffin Tin

    Line a muffin tin with paper or silicone liners. This step ensures easy removal of the peanut butter balls once they are set.

    Step 2: Make the Peanut Butter Mixture

    In a saucepan over low heat, combine 1 cup chunky peanut butter, 6 tablespoons honey, and 1/8 teaspoon salt. Stir continuously until the mixture is smooth and well-blended. Remove the saucepan from heat.

    Step 3: Mix in Rice Krispies

    Add 3 cups Rice Krispies cereal to the peanut butter mixture. Gently fold the cereal into the mixture until evenly coated.

    Step 4: Form the Cups

    Using a spoon, scoop the mixture into the prepared muffin tin. Press down gently to mold each cup. Ensure they are compact for better structure.

    Step 5: Melt the Chocolate

    In a separate saucepan, melt 1 1/2 cups chocolate chips over low heat. Stir until smooth and glossy, ensuring there are no lumps.

    Step 6: Assemble the Cups

    Spoon the melted chocolate over the peanut butter and cereal mixture in each cup. Spread it evenly to cover the entire top.

    Step 7: Chill

    Refrigerate the muffin tin for at least 1 hour. This allows the chocolate to set perfectly.

    Step 8: Serve

    Once chilled, remove the muffin tin from the refrigerator. Peel away the liners and enjoy your Peanut Butter Balls with Chocolate Rice Krispies!

    With a preparation time of just 15 minutes and a cooking time of 10 minutes, these treats are not only delicious but also a breeze to make. Enjoy the delightful combination of flavors and textures in every bite.

    How to Serve Peanut Butter Balls with Chocolate Rice Krispies

    These delightful treats can be enjoyed in various ways to enhance your snacking experience.

    Fun Dessert Platter

    Arrange the Peanut Butter Balls with Chocolate Rice Krispies on a colorful platter alongside fresh fruit and nuts. This creates a visually appealing and balanced dessert option.

    Individual Treat Bags

    Package each ball in clear treat bags tied with a ribbon. This makes for a great party favor or a fun addition to lunch boxes.

    Ice Cream Topping

    Crush the Peanut Butter Balls and use them as a topping for vanilla or chocolate ice cream. This adds a delicious crunch and a rich peanut butter flavor to your dessert.

    Pro Tips for the Best Peanut Butter Balls with Chocolate Rice Krispies

    For optimal results, consider these helpful tips while preparing your Peanut Butter Balls.

    • Use Natural Peanut Butter: Choosing a natural peanut butter without added sugars or oils enhances flavor and texture.
    • Adjust Sweetness: Feel free to adjust the amount of honey based on your sweetness preference or dietary needs.
    • Chill Longer for Firmness: If you prefer a firmer texture, chill the cups for longer than one hour before serving.
    • Experiment with Mix-Ins: Consider adding chopped nuts or dried fruit to the mixture for added texture and flavor.
    • Store Properly: Keep any leftovers in an airtight container in the refrigerator to maintain freshness.

    Best Side Dishes and Pairings

    Complement your Peanut Butter Balls with these delightful side dishes and drinks.

    1. Fresh Fruit Salad: A mix of seasonal fruits adds a refreshing contrast to the richness of the peanut butter balls.
    2. Greek Yogurt Dip: Serve with a side of Greek yogurt mixed with honey for a creamy, protein-rich accompaniment.
    3. Herbal Iced Tea: A chilled herbal tea balances the sweetness of the treats while providing a refreshing drink option.
    4. Dark Chocolate Covered Pretzels: The salty crunch of pretzels enhances the sweet and nutty flavors of the peanut butter balls.
    5. Nutty Granola: A small bowl of nutty granola offers an additional crunchy texture that pairs beautifully with the creamy peanut butter.

    Common Mistakes to Avoid

    • Not Measuring Ingredients Accurately: Precision is key in baking; too much or too little of any ingredient can affect the texture and flavor.
    • Using the Wrong Type of Peanut Butter: Opt for chunky peanut butter for the best texture; creamy varieties can lead to a different consistency.
    • Skipping the Chilling Step: Allowing the cups to chill is essential for the chocolate to set properly; don’t rush this process.
    • Overheating the Chocolate: Melt the chocolate slowly to prevent it from seizing; use low heat and stir continuously for optimal results.

    Storage & Reheating Instructions

    Refrigerator Storage

    Store your Peanut Butter Balls with Chocolate Rice Krispies in an airtight container in the refrigerator. They will stay fresh for up to one week.

    Freezing Instructions

    To freeze, place the cups in a single layer on a baking sheet until solid. Then transfer them to an airtight container or freezer bag, separating layers with parchment paper. They can be frozen for up to three months.

    Reheating Tips

    • Oven: Preheat to 350°F (175°C) and warm for 5-10 minutes until just heated through.
    • Microwave: Heat for 10-15 seconds; check frequently to avoid melting the chocolate too much.
    • Stovetop: Place in a covered pan on low heat for a few minutes, checking often until warmed.

    Frequently Asked Questions

    How can I make Peanut Butter Balls with Chocolate Rice Krispies vegan?

    You can easily make this recipe vegan by using vegan chocolate chips and substituting honey with maple syrup or agave nectar.

    Can I use different types of cereal instead of Rice Krispies?

    Yes, you can experiment with other crispy cereals or even granola, but the texture might vary.

    How do I know when the chocolate has melted properly?

    The chocolate should be smooth and glossy. Stir continuously to ensure even melting and to prevent it from burning.

    What can I serve with Peanut Butter Balls with Chocolate Rice Krispies?

    These treats pair wonderfully with a glass of almond milk or a cup of coffee for a delightful snack.

    Are Peanut Butter Balls with Chocolate Rice Krispies healthy?

    While they are a tasty treat, they do contain sugars and fats. Enjoy them in moderation as part of a balanced diet.

    Final Thoughts

    Peanut Butter Balls with Chocolate Rice Krispies are a delightful and easy treat that can satisfy your sweet tooth while providing a satisfying crunch. I encourage you to give this recipe a try and share your feedback in the comments below. Your experiences and variations can inspire others!


    Desserts

    Peanut Butter Balls with Chocolate Rice Krispies


    5.0 from 24 reviews

    These Peanut Butter Balls with Chocolate Rice Krispies are a delightful treat that combines the creamy richness of peanut butter with the crunch of Rice Krispies, all topped with smooth melted chocolate. Perfect for a quick snack or dessert, these no-bake treats are easy to make and sure to satisfy your sweet tooth.
    Author: Munch Twist
    Prep Time: 15 minutes
    Cook Time: 10 minutes
    Total Time: 1 hour 25 minutes
    Yield: 12 servings
    Category: Desserts
    Method: Baking
    Cuisine: American

    Peanut Butter Balls with Chocolate Rice Krispies

    SCALE:
    1x
    2x
    3x
    Cook Mode: Prevent your screen from going dark

    Ingredients

    • 3 cups Rice Krispies cereal
    • 1 cup chunky peanut butter
    • 1 1/2 cups chocolate chips
    • 6 tablespoons honey
    • 1/8 teaspoon salt

    Instructions

    1. Line a muffin tin with paper or silicone liners for easy removal.
    2. In a saucepan over low heat, combine chunky peanut butter, honey, and salt. Stir until smooth and well-blended. Remove from heat.
    3. Add Rice Krispies cereal to the peanut butter mixture, folding gently until the cereal is evenly coated.
    4. Spoon the mixture into the prepared muffin tin, pressing gently to shape each cup.
    5. In a separate saucepan, melt chocolate chips over low heat until smooth and glossy.
    6. Spoon melted chocolate over the peanut butter and cereal mixture in each cup, spreading it evenly.
    7. Refrigerate for at least 1 hour or until the chocolate is set.
    8. Remove from the refrigerator, peel away the liners, and enjoy!
    Nutrition Facts

    Serving Size: 1 serving
    Calories: 250 kcal
    Sugar: 12g
    Sodium: 50mg
    Fat: 14g
    Saturated Fat: 5g
    Carbohydrates: 28g
    Fiber: 1g
    Protein: 6g
    Cholesterol: 0mg

  • Irresistible Cinnamon Sugar Biscuit Bites Recipe

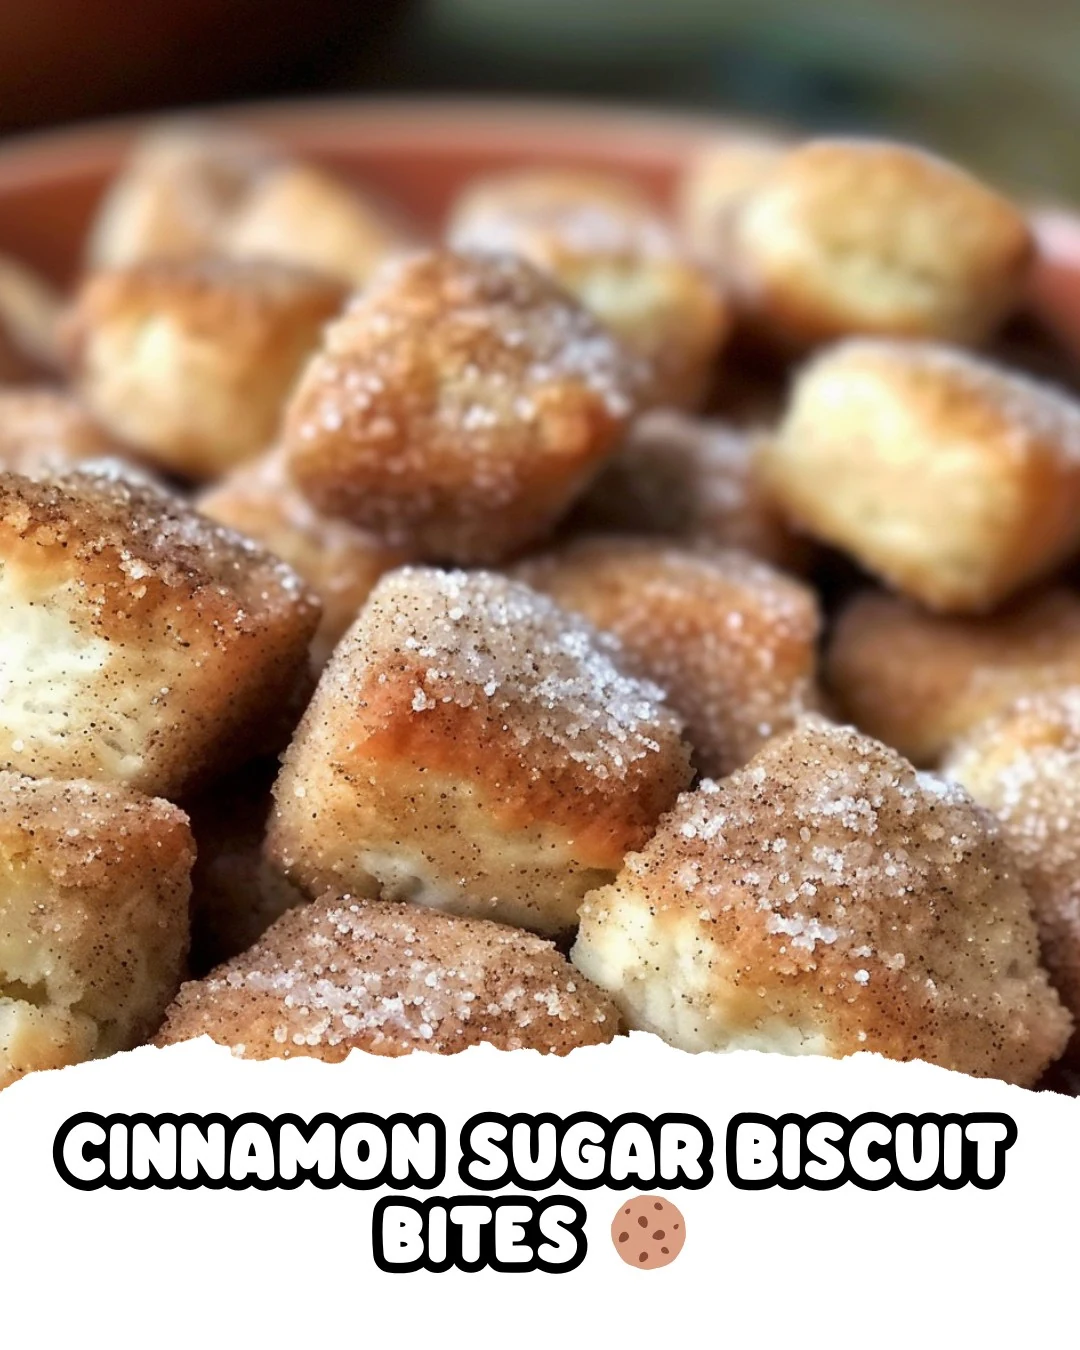
    Irresistible Cinnamon Sugar Biscuit Bites Recipe

    Cinnamon Sugar Biscuit Bites are a delightful treat that blend the warmth of cinnamon with the buttery goodness of biscuit dough. These bites are perfect for any occasion, offering a sweet, comforting experience that is hard to resist.

    Why You’ll Love This Recipe

    • Quick & Easy: Ready in under 30 minutes, making them perfect for a last-minute dessert.
    • Irresistibly Sweet: The combination of cinnamon and sugar creates a classic flavor that everyone loves.
    • Versatile Treat: Enjoy them warm with coffee or as a snack anytime during the day.
    • Kid Friendly: Simple enough for children to help make, turning cooking into a fun family activity.
    • Minimal Ingredients: Requires only a few pantry staples, making it budget-friendly and accessible.

    Tools and Equipment

    Having the right tools can make your baking experience smoother and more enjoyable.

    Essential Tools

    • Baking sheet
    • Parchment paper (optional)
    • Mixing bowls
    • Measuring cups and spoons
    • Knife or kitchen scissors

    Why These Tools Matter

    • Baking sheet: Provides a flat surface for even baking and easy handling of your biscuit bites.
    • Mixing bowls: Essential for combining ingredients efficiently without mess.
    • Measuring cups and spoons: Ensure accurate ingredient measurements for perfect results every time.

    Ingredients for Cinnamon Sugar Biscuit Bites

    Main Ingredients

    • 1/4 cup unsalted butter, melted
    • 1 tablespoon ground cinnamon
    • 1 can (16.3 ounces) refrigerated biscuit dough (like Pillsbury Grands!)
    • 1/2 cup granulated sugar

    How to Make Cinnamon Sugar Biscuit Bites Step-by-Step

    Step 1: Preheat the Oven

    Begin by setting your oven to 375°F (190°C). Prepare a baking sheet by greasing it or lining with parchment paper to prevent sticking.

    Step 2: Prepare the Biscuit Dough

    Open the can of biscuit dough carefully. Separate the biscuits and cut each one into quarters to create bite-sized pieces.

    Step 3: Mix Cinnamon Sugar

    In a small bowl, combine 1/2 cup granulated sugar with 1 tablespoon ground cinnamon. Mix well to ensure an even distribution of flavors.

    Step 4: Coat the Biscuit Pieces

    Dip each biscuit piece into the melted butter, allowing excess butter to drip off. Then, roll the biscuit piece in the cinnamon sugar mixture, ensuring it is coated thoroughly.

    Step 5: Arrange for Baking

    Place the coated biscuit pieces on the prepared baking sheet, ensuring they are spaced about 2 inches apart for even baking.

    Step 6: Bake

    Bake in the preheated oven for 12-15 minutes. Keep an eye on them until they turn golden brown and are fully cooked.

    Step 7: Cool and Serve

    Remove the biscuit bites from the oven and let them cool slightly on the baking sheet. Serve them warm or at room temperature for a delightful treat. Enjoy your Cinnamon Sugar Biscuit Bites!

    How to Serve Cinnamon Sugar Biscuit Bites

    Cinnamon Sugar Biscuit Bites are versatile and can be served in various delightful ways.

    As a Breakfast Treat

    Serve these biscuit bites warm alongside a cup of coffee or hot chocolate for a cozy breakfast experience.

    With a Creamy Dip

    Pair the biscuit bites with a cinnamon cream cheese dip or vanilla yogurt for a fun and interactive snack.

    As Dessert

    Serve drizzled with chocolate or caramel sauce for an indulgent dessert that will satisfy your sweet cravings.

    Pro Tips for the Best Cinnamon Sugar Biscuit Bites

    To elevate your Cinnamon Sugar Biscuit Bites, consider these practical tips.

    • Use Fresh Ingredients: Ensure your biscuit dough is fresh for the best rise and texture.
    • Adjust Cinnamon Sugar Ratio: Feel free to increase the cinnamon for a bolder flavor or decrease the sugar for a less sweet bite.
    • Experiment with Toppings: Add a sprinkle of chopped nuts or shredded coconut on top before baking for added texture.
    • Check Oven Temperature: Use an oven thermometer to ensure your oven is accurately heated, as variations can affect baking time.
    • Store Properly: Keep any leftovers in an airtight container at room temperature for up to two days to maintain freshness.

    Best Side Dishes and Pairings

    Cinnamon Sugar Biscuit Bites can be complemented by a variety of side dishes and drinks.

    1. Fresh Fruit Salad: A light and refreshing fruit salad balances the sweetness of the biscuit bites.
    2. Vanilla Ice Cream: The creamy texture of vanilla ice cream contrasts beautifully with the warm, cinnamon flavors.
    3. Coffee: A robust cup of coffee enhances the sweetness and spices, making for a perfect pairing.
    4. Hot Chocolate: The rich, chocolaty flavor of hot chocolate complements the cinnamon in the biscuit bites.
    5. Yogurt Parfait: Layered with yogurt and berries, this parfait adds a nutritious twist to your snack time.

    Common Mistakes to Avoid

    • Not Preheating the Oven: Ensure your oven is fully preheated to guarantee even baking.
    • Overcrowding the Baking Sheet: Leave enough space between biscuit bites for proper expansion and browning.
    • Skipping the Butter Dip: Coating in melted butter is essential for the cinnamon sugar to adhere properly.
    • Not Checking for Doneness: Keep an eye on the baking time; each oven can vary, and you want them golden brown, not burnt.

    Storage & Reheating Instructions

    Refrigerator Storage

    To store leftover Cinnamon Sugar Biscuit Bites, place them in an airtight container. They will remain fresh for up to 3 days in the refrigerator.

    Freezing Instructions

    For best results, freeze the biscuit bites in a single layer on a baking sheet before transferring them to a freezer-safe bag. They can be stored for up to 2 months. When ready to enjoy, thaw them overnight in the refrigerator.

    Reheating Tips

    • Oven: Preheat the oven to 350°F (175°C). Place the biscuit bites on a baking sheet and warm for about 5-7 minutes.
    • Microwave: Heat for 10-15 seconds at a time until warmed through. Be cautious not to overheat.
    • Stovetop: Heat a non-stick skillet over low heat. Add the biscuit bites and cover for a few minutes until warmed.

    Frequently Asked Questions

    How do I make Cinnamon Sugar Biscuit Bites from scratch?

    While this recipe uses refrigerated biscuit dough for convenience, you can make your own biscuit dough using flour, butter, milk, and baking powder for a homemade version.

    Can I use other types of dough for Cinnamon Sugar Biscuit Bites?

    Yes, you can experiment with different doughs, such as crescent roll dough or puff pastry, for varied textures and flavors.

    How can I customize my Cinnamon Sugar Biscuit Bites?

    Consider adding chocolate chips, nuts, or even drizzling a glaze on top for an extra twist on the classic recipe.

    Are Cinnamon Sugar Biscuit Bites suitable for freezing?

    Absolutely! Follow the freezing instructions to enjoy them later. They freeze well and can be reheated easily.

    Final Thoughts

    Cinnamon Sugar Biscuit Bites are a delightful treat that is simple to make and perfect for any occasion. We encourage you to whip up a batch and share your experience or modifications in the comments below.


    Desserts

    Cinnamon Sugar Biscuit Bites


    5.0 from 24 reviews

    Cinnamon Sugar Biscuit Bites are delightful treats made from flaky biscuit dough coated in a sweet cinnamon-sugar mixture. These bite-sized snacks are perfect for breakfast or as a dessert, offering a warm and comforting flavor that everyone will love.

    Author: Munch Twist
    Prep Time: 10 minutes
    Cook Time: 15 minutes
    Total Time: 25 minutes
    Yield: 8 servings
    Category: Desserts
    Method: No bake
    Cuisine: American

    Cinnamon Sugar Biscuit Bites

    SCALE:
    1x
    2x
    3x
    Cook Mode: Prevent your screen from going dark

    Ingredients

    • 1/4 cup unsalted butter, melted
    • 1 tablespoon ground cinnamon
    • 1 can (16.3 ounces) refrigerated biscuit dough
    • 1/2 cup granulated sugar

    Instructions

    1. Preheat the oven to 375°F (190°C) and grease a baking sheet or line it with parchment paper.
    2. Open the can of biscuit dough and separate the biscuits. Cut each biscuit into quarters.
    3. In a small bowl, combine 1/2 cup granulated sugar with 1 tablespoon ground cinnamon.
    4. Dip each biscuit piece in the melted butter, then roll in the cinnamon sugar mixture to coat evenly.
    5. Place the coated biscuit pieces on the prepared baking sheet, spacing them about 2 inches apart.
    6. Bake for 12-15 minutes, or until the biscuit bites are golden brown and fully cooked.
    7. Let the biscuit bites cool slightly before serving. Enjoy warm or at room temperature!

    Nutrition Facts

    Serving Size: 1 serving
    Calories: 150 kcal
    Sugar: 14g
    Sodium: 170mg
    Fat: 8g
    Saturated Fat: 4g
    Carbohydrates: 20g
    Fiber: 0g
    Protein: 2g
    Cholesterol: 20mg

  • Easy and Delicious Chicken and Dumplings Recipe

    Easy and Delicious Chicken and Dumplings Recipe

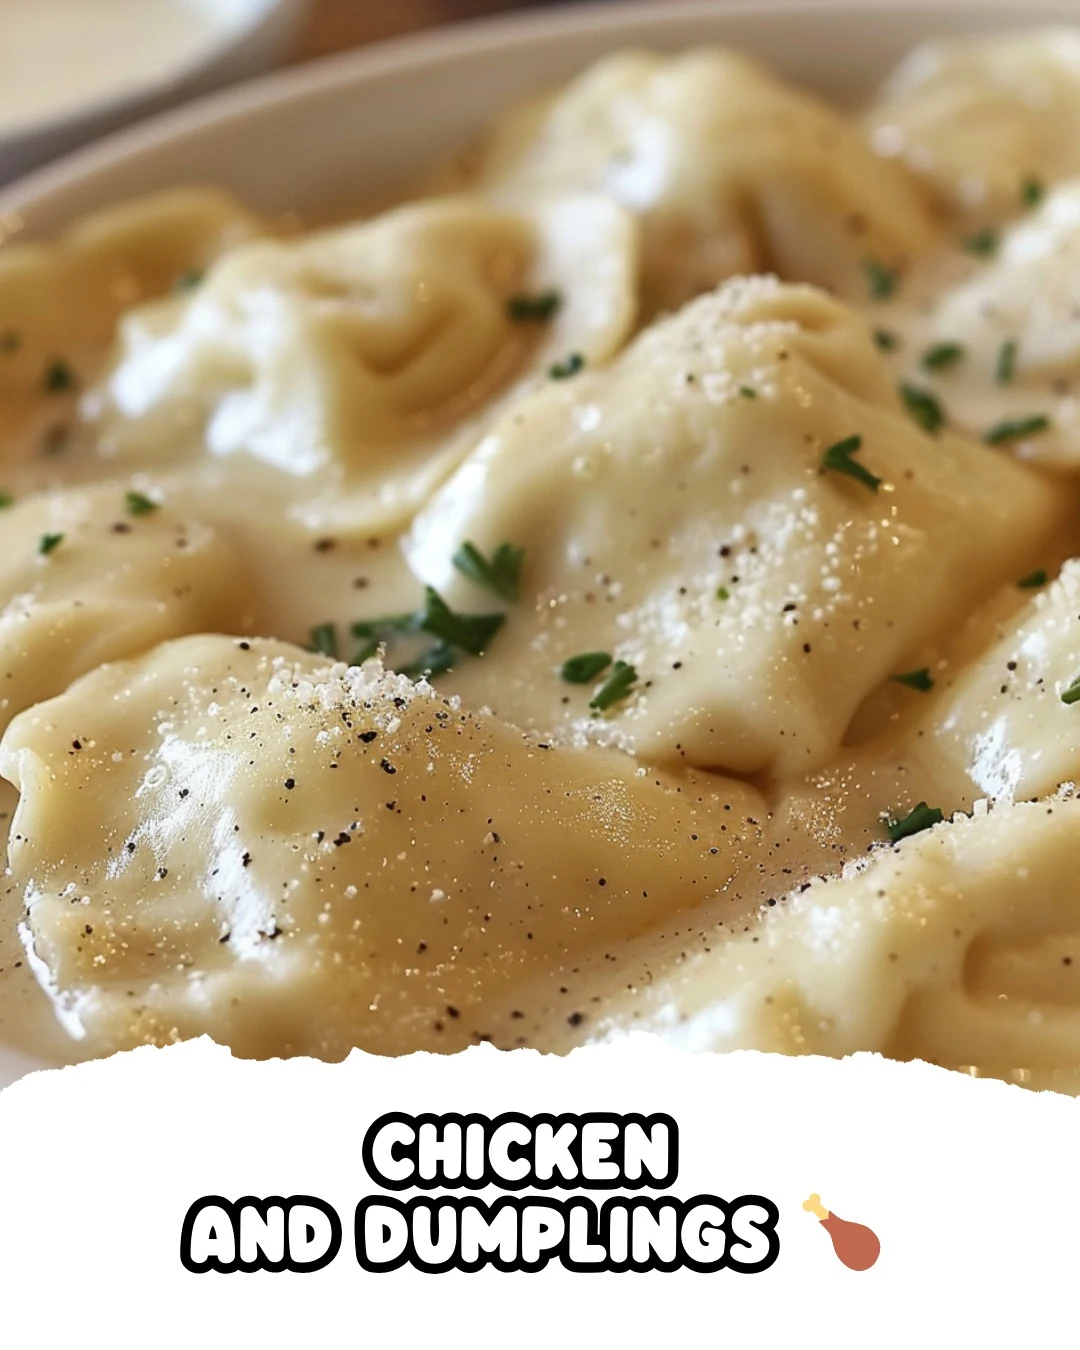
    Chicken and Dumplings is a comforting dish that brings warmth and joy to any table. The tender dumplings, simmered in savory chicken broth, create a delightful harmony of flavors and textures. This classic recipe is perfect for family gatherings or a cozy night in.

    Why You’ll Love This Recipe

    • Comforting & Hearty: This dish warms the soul with its rich flavors and satisfying texture.
    • Quick & Easy: Ready in just about 35 minutes, making it perfect for busy weeknights.
    • Versatile Ingredients: Use leftover chicken or customize with your favorite herbs and spices.
    • Family-Friendly: Kids and adults alike will love the soft, fluffy dumplings paired with tender chicken.
    • One-Pot Meal: Minimal cleanup thanks to everything being cooked in one pot.

    Tools and Equipment

    Having the right tools makes cooking much more enjoyable and efficient.

    Essential Tools

    • Large pot
    • Mixing bowl
    • Rolling pin
    • Pizza cutter or knife
    • Measuring cups and spoons

    Why These Tools Matter

    • Large pot: Allows for boiling the dumplings and broth simultaneously without crowding.
    • Mixing bowl: Provides ample space for mixing the dough, ensuring it comes together smoothly.
    • Rolling pin: Helps roll the dough evenly, which is crucial for uniform dumplings.

    Ingredients for Chicken and Dumplings

    Dumpling Ingredients

    • 2 cups flour
    • 1/2 teaspoon baking powder
    • 2 tablespoons butter
    • 1 pinch salt
    • 1 cup milk

    Broth and Chicken Ingredients

    • 2 quarts chicken broth
    • 3 cups cooked chicken

    How to Make Chicken and Dumplings Step-by-Step

    Step 1: Prepare the Dumpling Dough

    In a mixing bowl, combine the flour, baking powder, and salt. Cut the butter into the dry mixture using a fork or a pastry blender. The mixture should look like coarse crumbs. Gradually stir in the milk until a dough forms.

    Step 2: Roll Out the Dough

    On a lightly floured surface, roll out the dough to a thin layer. Use a well-floured rolling pin to avoid sticking. Cut the dough into 2×2-inch squares with a pizza cutter or knife.

    Step 3: Prepare the Dumplings for Cooking

    Transfer the cut dumplings to a heavily floured plate. Ensure to layer the dumplings with flour in between to prevent them from sticking together.

    Step 4: Cook the Dumplings

    Bring the chicken broth to a vigorous boil in a large pot. Gently drop the dumplings into the boiling broth, stirring carefully. The excess flour on the dumplings will help thicken the broth as they cook.

    Step 5: Add Chicken and Serve

    Allow the dumplings to cook for 15 to 20 minutes until they are no longer doughy. Stir in the cooked chicken and let it heat through. Serve hot and enjoy the comforting flavors of Chicken and Dumplings.

    Preparation time: 15 minutes | Cooking time: 20 minutes

    Nutritional Information (per serving)

    • Calories: 290 kcal
    • Carbohydrates: 28 g
    • Proteins: 20 g
    • Fats: 10 g

    This Chicken and Dumplings recipe is sure to become a family favorite, offering a delicious and satisfying meal in no time.

    How to Serve Chicken and Dumplings

    Serving Chicken and Dumplings can elevate your dining experience with a few creative twists.

    Garnish with Fresh Herbs

    Top your dish with freshly chopped parsley or thyme to enhance the flavor and add a pop of color.

    Accompany with a Side Salad

    A crisp green salad with a light vinaigrette provides a refreshing contrast to the rich, creamy goodness of Chicken and Dumplings.

    Serve in Individual Bowls

    For a more elegant presentation, serve the dish in individual bowls, allowing guests to enjoy their own serving.

    Pro Tips for the Best Chicken and Dumplings

    To achieve the most delicious Chicken and Dumplings, consider these practical tips.

    • Use Homemade Broth: For a richer flavor, opt for homemade chicken broth instead of store-bought varieties.
    • Don’t Overmix the Dough: Mix just until combined to ensure your dumplings remain tender and fluffy.
    • Adjust Cooking Time: Keep an eye on your dumplings; cooking times may vary based on thickness.
    • Add Vegetables: Incorporate carrots, peas, or celery for added flavor and nutrition.
    • Allow to Rest: Let the dish sit for a few minutes after cooking to enhance the flavors before serving.

    Best Side Dishes and Pairings

    Pairing Chicken and Dumplings with complementary sides can enhance your meal.

    1. Buttered Corn: The sweetness of buttered corn balances the savory flavors of the dish perfectly.
    2. Garlic Bread: A loaf of warm garlic bread is perfect for soaking up the broth.
    3. Coleslaw: A tangy coleslaw adds a crunchy texture that contrasts nicely with the softness of the dumplings.
    4. Roasted Vegetables: Seasonal roasted vegetables bring additional depth and flavor to the meal.
    5. Iced Tea: A refreshing glass of iced tea can cleanse the palate between bites.

    Common Mistakes to Avoid

    • Skipping the Flour Dusting: Not flouring the work surface and rolling pin can lead to sticky dough that is difficult to handle.
    • Overcooking the Dumplings: Cooking the dumplings too long can make them tough instead of light and fluffy.
    • Not Using Enough Liquid: Insufficient chicken broth can result in dry dumplings and lack of flavor.
    • Ignoring the Thickness of the Dough: Rolling the dumpling dough too thick can cause uneven cooking and a doughy texture.

    Storage & Reheating Instructions

    Refrigerator Storage

    Store leftover Chicken and Dumplings in airtight containers in the refrigerator. They will stay fresh for up to 3 days.

    Freezing Instructions

    To freeze, portion the Chicken and Dumplings into airtight containers or freezer bags. They can be frozen for up to 3 months. Thaw in the refrigerator overnight before reheating.

    Reheating Tips

    • Oven: Preheat the oven to 350°F (175°C). Place in a baking dish and cover with foil. Heat for 20-30 minutes or until warmed through.
    • Microwave: Place a portion in a microwave-safe dish and cover. Heat in 1-minute intervals, stirring in between, until hot.
    • Stovetop: In a saucepan, add a splash of broth or water to prevent sticking. Heat over medium, stirring gently until warmed through.

    Frequently Asked Questions

    How do I make Chicken and Dumplings from scratch?

    To make Chicken and Dumplings from scratch, follow the recipe provided, starting with preparing the dumpling dough and cooking it in chicken broth.

    Can I use leftover chicken for Chicken and Dumplings?

    Yes, leftover chicken is perfect for this recipe. It adds flavor and saves time during preparation.

    What can I serve with Chicken and Dumplings?

    Chicken and Dumplings can be served with a simple side salad or steamed vegetables for a complete meal.

    How do I ensure my dumplings are fluffy?

    To ensure fluffy dumplings, avoid overmixing the dough and make sure to cook them in boiling broth without overcrowding the pot.

    Can I freeze Chicken and Dumplings?

    Yes, you can freeze Chicken and Dumplings for up to 3 months. Be sure to thaw them in the refrigerator before reheating.

    Final Thoughts

    Chicken and Dumplings is a comforting dish that brings warmth and satisfaction to any meal. We encourage you to try this recipe and share your experience in the comments below. Your feedback is invaluable!


    Dinner

    Chicken and Dumplings


    5.0 from 24 reviews

    A comforting dish featuring tender dumplings cooked in rich chicken broth with succulent pieces of chicken. Perfect for family dinners or a cozy night in, this recipe brings warmth and satisfaction to the table.

    Author: Munch Twist
    Prep Time: 15 minutes
    Cook Time: 20 minutes
    Total Time: 35 minutes
    Yield: 4 servings
    Category: Desserts
    Method: No bake
    Cuisine: American

    Chicken and Dumplings

    SCALE:
    1x
    2x
    3x
    Cook Mode: Prevent your screen from going dark

    Ingredients

    • 2 cups flour
    • 2 quarts chicken broth
    • 1 cup milk
    • 3 cups cooked chicken
    • 1/2 teaspoon baking powder
    • 2 tablespoons butter
    • 1 pinch salt

    Instructions

    1. Prepare the Dumpling Dough: In a bowl, mix together the flour, baking powder, and salt. Cut the butter into the dry ingredients with a fork or pastry blender until the mixture resembles coarse crumbs. Stir in the milk until a dough forms.
    2. Roll Out the Dough: Lightly flour a work surface and rolling pin. Roll the dough thinly, ensuring both are well-floured to prevent sticking. Cut the dough into 2×2-inch squares using a pizza cutter or knife.
    3. Prepare the Dumplings for Cooking: Transfer the cut dumplings to a heavily floured plate, ensuring to flour between layers to prevent sticking.
    4. Cook the Dumplings: Bring the chicken broth to a boil in a large pot. Gently drop the dumplings into the boiling broth, stirring gently. The excess flour on the dumplings will help thicken the broth.
    5. Add Chicken and Serve: Cook the dumplings for 15 to 20 minutes until they are cooked through and no longer doughy. Stir in the cooked chicken. Serve hot and enjoy!

    Nutrition Facts

    Serving Size: 1 serving
    Calories: 290 kcal
    Sugar: 4g
    Sodium: 800mg
    Fat: 10g
    Saturated Fat: 5g
    Carbohydrates: 28g
    Fiber: 1g
    Protein: 20g
    Cholesterol: 60mg

  • Crispy and Sweet Deep Fried Marshmallows Recipe

    Crispy and Sweet Deep Fried Marshmallows Recipe

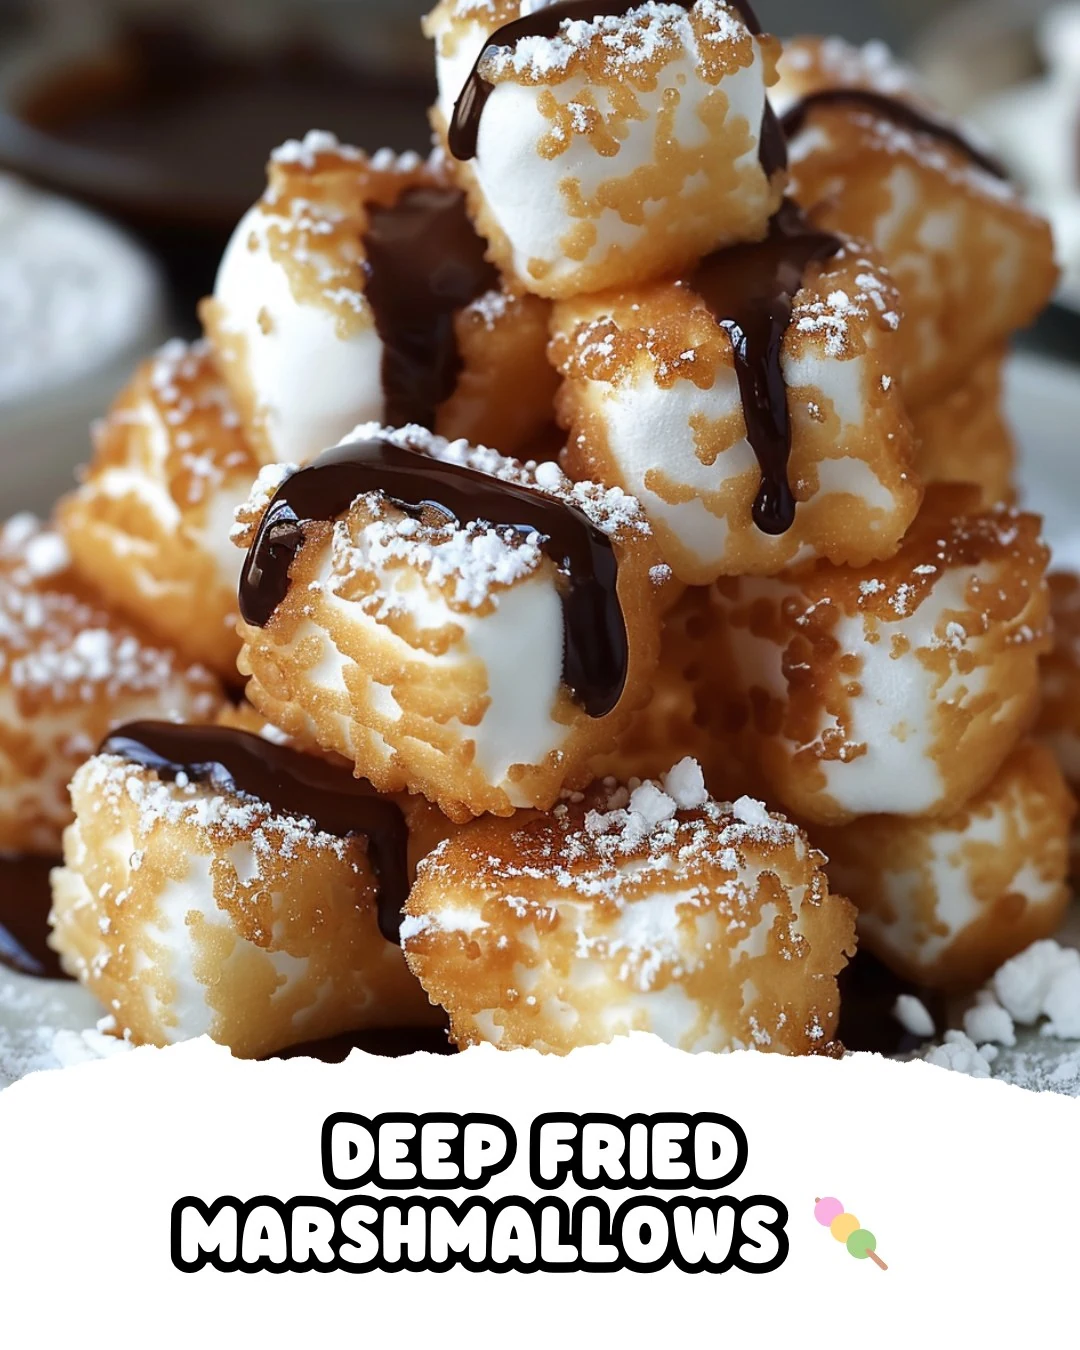
    Deep Fried Marshmallows are a delightful treat that combines the soft, gooey texture of marshmallows with a crispy, golden exterior. This indulgent dessert is perfect for parties or a fun family snack, offering a unique twist on classic flavors.

    Why You’ll Love This Recipe

    • Irresistibly Sweet: Each bite delivers a burst of sugary goodness that pairs perfectly with the crispy coating.
    • Unique Flavor Combination: The contrast of warm marshmallows and crunchy graham cracker crumbs creates an unforgettable treat.
    • Quick & Easy: Ready in just 15 minutes, this recipe is a simple way to satisfy your sweet tooth.
    • Customizable Toppings: Enhance your deep fried marshmallows with powdered sugar or rich chocolate sauce for an extra touch.
    • Fun for Everyone: Kids and adults alike will enjoy the fun of this playful dessert that brings joy to any occasion.

    Tools and Equipment

    Gathering the right tools will make your cooking experience smoother and more enjoyable.

    Essential Tools

    • Deep fryer or large pot
    • Slotted spoon
    • Medium mixing bowl
    • Shallow bowl for coating
    • Paper towels

    Why These Tools Matter

    • Deep fryer or large pot: Essential for achieving the perfect frying temperature to create a crispy exterior.
    • Slotted spoon: Helps you safely remove the marshmallows from hot oil without excess oil dripping.
    • Shallow bowl for coating: Allows for easy rolling of the marshmallows in graham cracker crumbs, ensuring an even coat.

    Ingredients for Deep Fried Marshmallows

    For the Batter

    • 1 cup pancake mix
    • 1 teaspoon vanilla extract
    • 1/2 cup water

    For the Coating

    • 1 cup graham cracker crumbs

    For Frying

    • 1 bag large marshmallows
    • Oil for frying (vegetable or canola oil)

    Optional Toppings

    • Powdered sugar for dusting (optional)
    • Chocolate sauce for dipping (optional)

    How to Make Deep Fried Marshmallows Step-by-Step

    Step 1: Heat the Oil

    In a deep fryer or large pot, heat oil to 375°F (190°C). This temperature is crucial for achieving that golden, crispy texture.

    Step 2: Prepare the Batter

    In a medium bowl, mix the pancake mix, water, and vanilla extract until smooth. This will be the batter that coats your marshmallows.

    Step 3: Prepare the Coating

    Place graham cracker crumbs in a shallow bowl. This will allow for easy rolling of the marshmallows after dipping.

    Step 4: Coat the Marshmallows

    Dip each marshmallow into the batter, ensuring it is fully coated. Then roll it in the graham cracker crumbs to cover evenly. This creates a delicious outer layer.

    Step 5: Fry the Marshmallows

    Carefully lower the coated marshmallows into the hot oil. Fry for about 30-60 seconds, or until they turn golden brown. Keep an eye on them to prevent burning.

    Step 6: Drain Excess Oil

    Use a slotted spoon to remove the marshmallows from the oil. Place them on a paper towel-lined plate to drain excess oil, ensuring the perfect texture.

    Step 7: Repeat

    Continue with the remaining marshmallows, frying them in batches if necessary. This ensures every marshmallow gets the same delicious treatment.

    Step 8: Optional Toppings

    Dust with powdered sugar or serve with chocolate sauce for extra indulgence. These toppings add an elegant finish to your deep fried marshmallows.

    Preparation time: 10 minutes | Cooking time: 5 minutes

    Nutritional Information

    Per serving (approximately 2 marshmallows):
    * Calories: 180 kcal
    * Carbohydrates: 25 g
    * Proteins: 2 g
    * Fats: 9 g

    Now you are ready to enjoy your homemade Deep Fried Marshmallows, a treat that will surely impress everyone!

    How to Serve Deep Fried Marshmallows

    Deep fried marshmallows are a delightful treat perfect for various occasions. Here are some creative serving ideas to elevate your dessert experience.

    S’mores Style

    Serve your deep fried marshmallows with graham crackers and chocolate squares for a fun twist on the classic s’mores. The crispy exterior complements the gooey marshmallow inside, creating a satisfying contrast.

    Marshmallow Sundae

    Create a decadent sundae by placing fried marshmallows atop a scoop of vanilla ice cream. Drizzle with chocolate sauce and sprinkle with crushed nuts for an indulgent dessert.

    Dipping Delight

    Offer a variety of dipping sauces, such as caramel, raspberry coulis, or melted chocolate, alongside your deep fried marshmallows. Guests can customize their treats, making it an interactive dessert option.

    Pro Tips for the Best Deep Fried Marshmallows

    To ensure your deep fried marshmallows turn out perfectly, consider these practical tips:

    • Use Fresh Ingredients: Fresh marshmallows will yield the best texture and flavor. Stale marshmallows may not puff up as desired.

    • Maintain Oil Temperature: Use a thermometer to monitor the oil temperature. If the oil is too hot, the marshmallows will burn; if too cool, they will absorb excess oil.

    • Coat Generously: Ensure each marshmallow is thoroughly coated in batter and graham cracker crumbs for an even and satisfying crunch.

    • Fry in Batches: Fry a small number of marshmallows at a time to avoid overcrowding, which can lower the oil temperature and result in soggy treats.

    • Serve Immediately: Deep fried marshmallows are best enjoyed fresh and warm. Serve them right after frying for optimal taste and texture.

    Best Side Dishes and Pairings

    Deep fried marshmallows pair well with various side dishes and drinks. Here are some delightful options:

    1. Hot Chocolate: A rich cup of hot chocolate complements the sweetness of the marshmallows, creating a cozy dessert experience.

    2. Fruit Salad: A light and refreshing fruit salad balances the richness of the fried marshmallows, adding a burst of freshness.

    3. Ice Cream: Pairing deep fried marshmallows with ice cream enhances the dessert’s indulgence and offers a cool contrast.

    4. Milkshake: A thick milkshake, particularly chocolate or vanilla, provides a creamy accompaniment that makes for a delightful treat.

    5. Coffee: A strong cup of coffee or espresso can cut through the sweetness, making for a well-rounded dessert pairing.

    Common Mistakes to Avoid

    • Skipping the Batter: Ensure each marshmallow is fully coated in the batter before rolling in the graham cracker crumbs.
    • Oil Temperature: Using oil that is not hot enough can result in soggy marshmallows instead of the desired crispiness.
    • Overcrowding the Fryer: Frying too many marshmallows at once can lower the oil temperature and lead to uneven cooking.
    • Not Draining Excess Oil: Failing to place the fried marshmallows on paper towels can make them greasy.

    Storage & Reheating Instructions

    Refrigerator Storage

    Store leftover deep fried marshmallows in an airtight container in the refrigerator. They will stay fresh for up to 3 days.

    Freezing Instructions

    To freeze, let the fried marshmallows cool completely, then place them in a single layer on a baking sheet. Freeze until solid, then transfer to an airtight container or freezer bag. They can be stored for up to 1 month.

    Reheating Tips

    • Oven: Preheat the oven to 350°F (175°C). Place marshmallows on a baking sheet and heat for about 5-7 minutes until warmed.
    • Microwave: Heat on a microwave-safe plate for 10-15 seconds. Be cautious not to overheat, as they can become sticky.
    • Stovetop: Reheat in a non-stick pan over low heat for a few minutes, turning gently to warm evenly.

    Frequently Asked Questions

    Can I use mini marshmallows for deep fried marshmallows?

    Yes, mini marshmallows can be used, but you may need to adjust the cooking time as they will fry faster than large marshmallows.

    How do I achieve a crispy coating on my deep fried marshmallows?

    To achieve a crispy coating, ensure your oil is at the correct temperature (375°F) and be sure to coat the marshmallows thoroughly in batter and graham cracker crumbs.

    Are deep fried marshmallows easy to make?

    Absolutely! With just a few simple ingredients and steps, deep fried marshmallows are a fun and easy treat to prepare at home.

    What can I dip deep fried marshmallows in?

    Deep fried marshmallows pair wonderfully with chocolate sauce, caramel sauce, or even a dusting of powdered sugar.

    Final Thoughts

    Deep fried marshmallows are a delightful treat that can elevate any occasion. Whether you’re indulging at home or impressing guests, this recipe is sure to please. Try it out and let us know how it turned out in the comments!


    Desserts

    Deep Fried Marshmallows


    5.0 from 24 reviews

    Deep Fried Marshmallows are a delightful treat that combines the sweetness of marshmallows with a crispy, golden-brown coating. Perfect for parties or as a fun dessert, these treats are easy to make and can be served with optional toppings like powdered sugar or chocolate sauce for an extra indulgence.

    Author: Munch Twist
    Prep Time: 10 minutes
    Cook Time: 5 minutes
    Total Time: 15 minutes
    Yield: 10 servings
    Category: Desserts
    Method: No bake
    Cuisine: American

    Deep Fried Marshmallows

    SCALE:
    1x
    2x
    3x
    Cook Mode: Prevent your screen from going dark

    Ingredients

    • 1 cup graham cracker crumbs
    • 1 cup pancake mix
    • 1 teaspoon vanilla extract
    • 1/2 cup water
    • 1 bag large marshmallows
    • Oil for frying
    • Powdered sugar for dusting (optional)
    • Chocolate sauce for dipping (optional)

    Instructions

    1. In a deep fryer or large pot, heat oil to 375°F (190°C).
    2. In a medium bowl, mix the pancake mix, water, and vanilla extract until smooth to create your batter.
    3. Place graham cracker crumbs in a shallow bowl.
    4. Dip each marshmallow into the batter, ensuring it is fully coated. Then roll it in the graham cracker crumbs to cover evenly.
    5. Carefully lower the coated marshmallows into the hot oil. Fry for about 30-60 seconds, or until golden brown.
    6. Use a slotted spoon to remove the marshmallows from the oil and place them on a paper towel-lined plate to drain.
    7. Continue with the remaining marshmallows.
    8. Dust with powdered sugar or serve with chocolate sauce for extra indulgence.

    Nutrition Facts

    Serving Size: 1 serving
    Calories: 180 kcal
    Sugar: 10g
    Sodium: 200mg
    Fat: 9g
    Saturated Fat: 1g
    Carbohydrates: 25g
    Fiber: 0g
    Protein: 2g
    Cholesterol: 0mg

  • Decadent Chocolate Cake Recipe for Any Occasion

    Decadent Chocolate Cake Recipe for Any Occasion

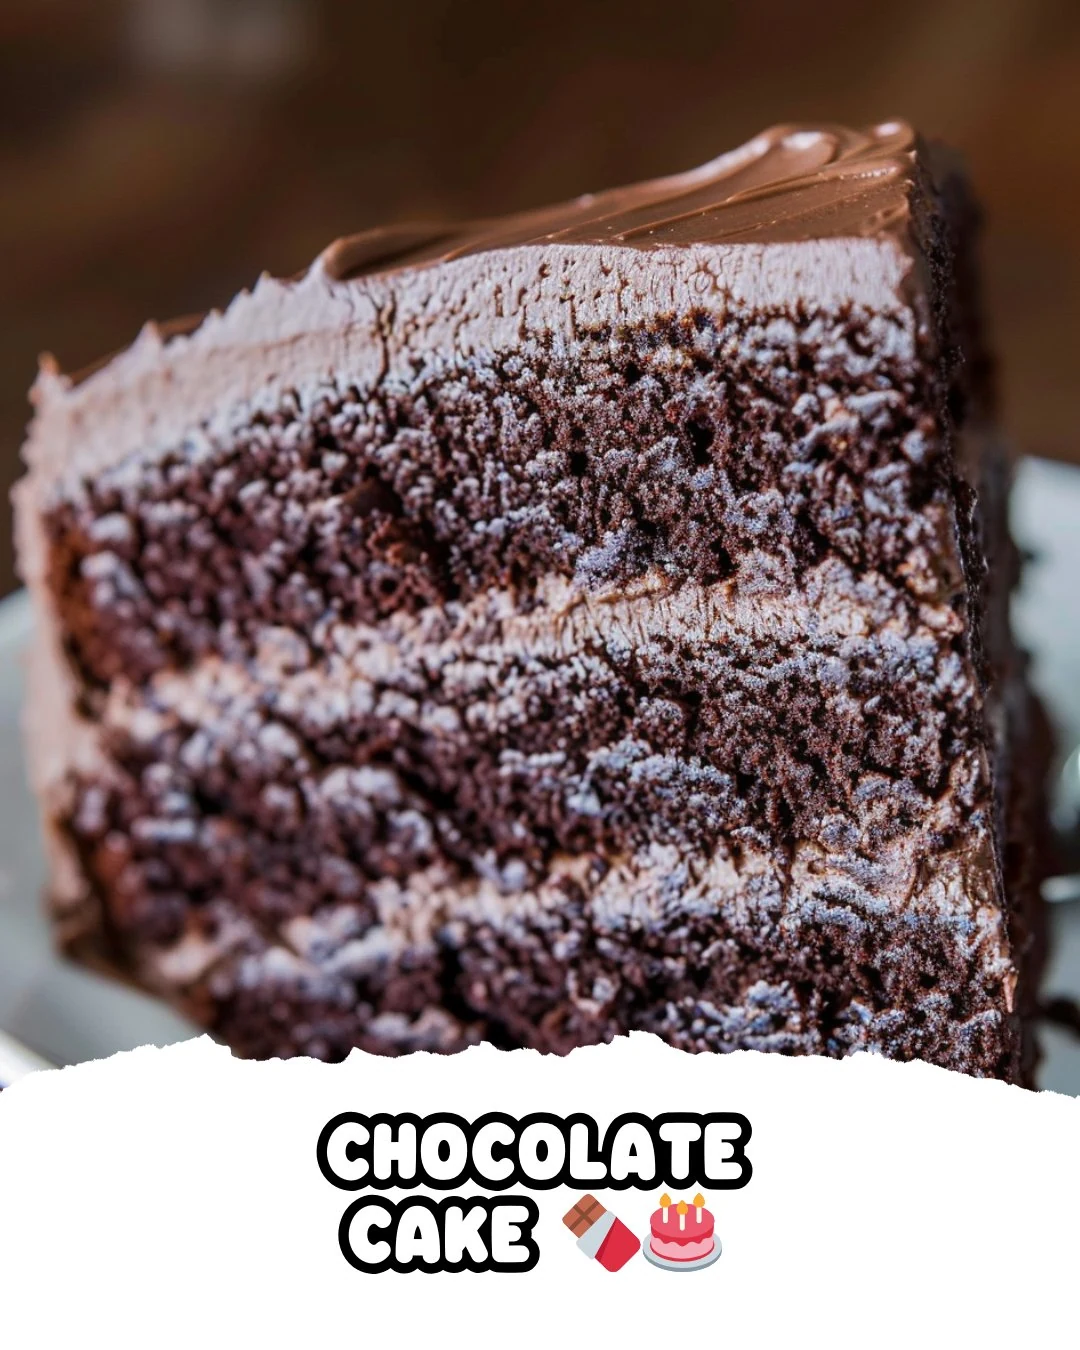
    Chocolate cake is a timeless dessert that delivers rich flavor and a moist texture. Its deep chocolate taste makes it a favorite for celebrations and quiet moments alike. This recipe will guide you to create a chocolate cake that is both delicious and visually appealing.

    Why You’ll Love This Recipe

    • Decadent Flavor: The combination of cocoa powder and sugar creates a rich chocolate experience.
    • Moist Texture: The addition of buttermilk ensures the cake remains moist and tender.
    • Simple Ingredients: You likely have most of the ingredients in your pantry already.
    • Versatile Frosting Options: This cake pairs perfectly with various frostings, from classic chocolate to cream cheese.
    • Perfect for Any Occasion: Whether a birthday or holiday gathering, this cake impresses every time.

    Tools and Equipment

    Having the right tools can simplify your baking process. Here are the essentials you’ll need.

    Essential Tools

    • Mixing bowls
    • Electric mixer
    • Measuring cups and spoons
    • Sifter
    • Rubber spatula
    • Two 9-inch round baking pans
    • Wire rack

    Why These Tools Matter

    • Electric mixer: Saves time and ensures the batter is mixed evenly and thoroughly.
    • Sifter: Helps incorporate air into the dry ingredients, resulting in a lighter cake.
    • Wire rack: Allows for even cooling, preventing sogginess on the bottom of the cake.

    Ingredients for Chocolate Cake

    Gather these ingredients to get started on your chocolate cake.

    Dry Ingredients

    • 2 cups sugar
    • 3/4 cup cocoa powder
    • 1 1/2 tsp baking powder
    • 1 1/2 tsp baking soda
    • 1 tsp salt
    • 1 3/4 cups all-purpose flour

    Wet Ingredients

    • 1 cup boiling water
    • 1/2 cup vegetable oil
    • 2 large eggs
    • 2 tsp vanilla extract
    • 1 cup buttermilk

    How to Make Chocolate Cake Step-by-Step

    Step 1: Prep the Base

    Preheat your oven to 350°F (175°C). Grease and flour two 9-inch round baking pans to ensure easy removal after baking.

    Step 2: Mix Dry Ingredients

    In a large bowl, sift together the flour, baking powder, baking soda, cocoa powder, sugar, and salt. This process helps to remove lumps and evenly distribute the leavening agents.

    Step 3: Combine Wet Ingredients

    Add the eggs, buttermilk, vegetable oil, and vanilla extract to the dry ingredients. Mix on medium speed until everything is well combined, creating a smooth batter.

    Step 4: Incorporate Boiling Water

    Reduce the mixer speed to low and carefully pour in the boiling water. This step is crucial as it helps create a lighter texture. Beat on high speed for about 1 minute until the batter is smooth and airy.

    Step 5: Bake the Cake

    Divide the batter evenly between the prepared pans. Bake for 30-35 minutes, or until a toothpick inserted into the center comes out clean. Keep an eye on the cakes as they bake to avoid overcooking.

    Step 6: Cool the Cake

    Remove the cakes from the oven and let them cool in the pans for 10 minutes. This resting period helps prevent breaking. Then, transfer the cakes to a wire rack to cool completely before frosting.

    Step 7: Frost and Decorate

    Once cooled, you can frost and decorate the cake as desired to add your personal touch.

    Preparation time: 20 minutes | Cooking time: 35 minutes

    Nutritional Information (per serving)

    • Calories: 360 kcal
    • Carbohydrates: 60 g
    • Proteins: 4 g
    • Fats: 13 g

    By following this chocolate cake recipe, you’ll create a delightful dessert that everyone will adore. Enjoy the process and the delicious results!

    How to Serve Chocolate Cake

    Chocolate cake is a versatile dessert that can be enjoyed in various delightful ways.

    A La Mode

    Serve warm slices of chocolate cake topped with a scoop of vanilla ice cream. The creaminess of the ice cream perfectly complements the rich chocolate flavor.

    With Fresh Berries

    Pair your chocolate cake with fresh strawberries or raspberries. The tartness of the berries cuts through the sweetness, adding a refreshing contrast.

    Drizzled with Chocolate Sauce

    Enhance the indulgence by drizzling warm chocolate sauce over each slice. This adds an extra layer of chocolatey goodness that chocolate lovers will appreciate.

    Pro Tips for the Best Chocolate Cake

    To achieve the perfect chocolate cake, consider the following expert tips:

    • Use Quality Cocoa Powder: Invest in high-quality cocoa powder for a richer flavor and darker color in your cake.

    • Sift Dry Ingredients: Sifting flour and cocoa powder helps to aerate them and removes lumps, ensuring a smoother batter.

    • Don’t Overmix the Batter: Mix just until ingredients are combined to maintain a light and fluffy texture.

    • Check Doneness Early: Ovens can vary in temperature; check your cake a few minutes before the suggested baking time to avoid overbaking.

    • Let it Cool Completely: Allow the cake to cool completely before frosting to prevent the frosting from melting and sliding off.

    Best Side Dishes and Pairings

    Enhance your chocolate cake experience with these delightful pairings.

    1. Coffee: The bitterness of coffee balances the sweetness of chocolate cake, making each bite more enjoyable.

    2. Milk: A classic pairing, a cold glass of milk contrasts beautifully with the richness of the cake.

    3. Whipped Cream: Light and airy, whipped cream adds a fluffy texture that complements the dense chocolate cake.

    4. Chocolate Milkshake: For a chocolate lover’s dream, a thick chocolate milkshake serves as a delicious and indulgent companion.

    5. Mint Tea: The refreshing taste of mint tea offers a palate-cleansing effect after enjoying rich chocolate cake.

    Common Mistakes to Avoid

    • Using Cold Ingredients: Make sure all ingredients are at room temperature for better mixing.
    • Overmixing the Batter: Mix just until combined to avoid a dense cake.
    • Not Measuring Ingredients Accurately: Use proper measuring cups to ensure accuracy in your recipe.
    • Skipping the Cooling Time: Allow the cake to cool completely before frosting to prevent melting.

    Storage & Reheating Instructions

    Refrigerator Storage

    Store the Chocolate Cake in airtight containers in the refrigerator. It will stay fresh for up to 5 days.

    Freezing Instructions

    To freeze, wrap the cooled cake tightly in plastic wrap and then in aluminum foil. This will keep it fresh for up to 3 months. Thaw in the refrigerator overnight before serving.

    Reheating Tips

    • Oven: Preheat to 350°F (175°C) and warm the cake for about 10-15 minutes.
    • Microwave: Heat individual slices for 15-20 seconds until warm.
    • Stovetop: Place a slice in a pan over low heat, covering with a lid for 5 minutes to warm through.

    Frequently Asked Questions

    How can I make my Chocolate Cake more chocolatey?

    Consider adding chocolate chips or using dark cocoa powder for a richer flavor.

    Can I substitute ingredients in the Chocolate Cake recipe?

    Yes, you can use almond milk or soy milk instead of buttermilk and substitute coconut oil for vegetable oil.

    How long does the Chocolate Cake last in the refrigerator?

    The Chocolate Cake will last up to 5 days when stored properly in the refrigerator.

    What is the best way to frost my Chocolate Cake?

    For best results, use a buttercream frosting or a ganache that complements the rich chocolate flavor.

    Can I make this Chocolate Cake as cupcakes?

    Absolutely! Pour the batter into cupcake liners and bake for about 20-25 minutes.

    Final Thoughts

    This Chocolate Cake recipe is a timeless classic that is sure to impress. With its rich flavor and moist texture, it’s perfect for any occasion. Give it a try, and don’t forget to leave a comment with your feedback!


    Desserts

    Chocolate Cake


    5.0 from 24 reviews

    This rich and moist chocolate cake is perfect for any occasion. With its deep chocolate flavor and fluffy texture, it's sure to satisfy any sweet tooth. Ideal for birthdays, celebrations, or just a delightful dessert, this cake can be frosted and decorated to your liking.

    Author: Munch Twist
    Prep Time: 20 minutes
    Cook Time: 35 minutes
    Total Time: 55 minutes
    Yield: 12 servings
    Category: Desserts
    Method: No bake
    Cuisine: American

    Chocolate Cake

    SCALE:
    1x
    2x
    3x
    Cook Mode: Prevent your screen from going dark

    Ingredients

    • 2 cups sugar
    • 1 cup boiling water
    • 3/4 cup cocoa powder
    • 1 1/2 tsp baking powder
    • 1 1/2 tsp baking soda
    • 1 tsp salt
    • 1 3/4 cups all-purpose flour
    • 1/2 cup vegetable oil
    • 2 large eggs
    • 2 tsp vanilla extract
    • 1 cup buttermilk

    Instructions

    1. Preheat your oven to 350°F (175°C). Grease and flour two 9-inch round baking pans.
    2. In a large bowl, sift together the flour, baking powder, baking soda, cocoa powder, sugar, and salt.
    3. Add the eggs, buttermilk, vegetable oil, and vanilla extract to the dry ingredients. Mix on medium speed until well combined.
    4. Reduce the mixer speed to low and carefully pour in the boiling water. Beat on high speed for about 1 minute to ensure the batter is smooth and airy.
    5. Divide the batter evenly between the prepared pans. Bake for 30-35 minutes, or until a toothpick inserted into the center comes out clean.
    6. Remove the cakes from the oven and let them cool in the pans for 10 minutes. Then transfer the cakes to a wire rack to cool completely before frosting.
    7. Once cooled, frost and decorate as desired.

    Nutrition Facts

    Serving Size: 1 serving
    Calories: 360 kcal
    Sugar: 40g
    Sodium: 300mg
    Fat: 13g
    Saturated Fat: 1.5g
    Carbohydrates: 60g
    Fiber: 2g
    Protein: 4g
    Cholesterol: 40mg

  • Easy Homemade Strawberry Freezer Jam Recipe

    Easy Homemade Strawberry Freezer Jam Recipe

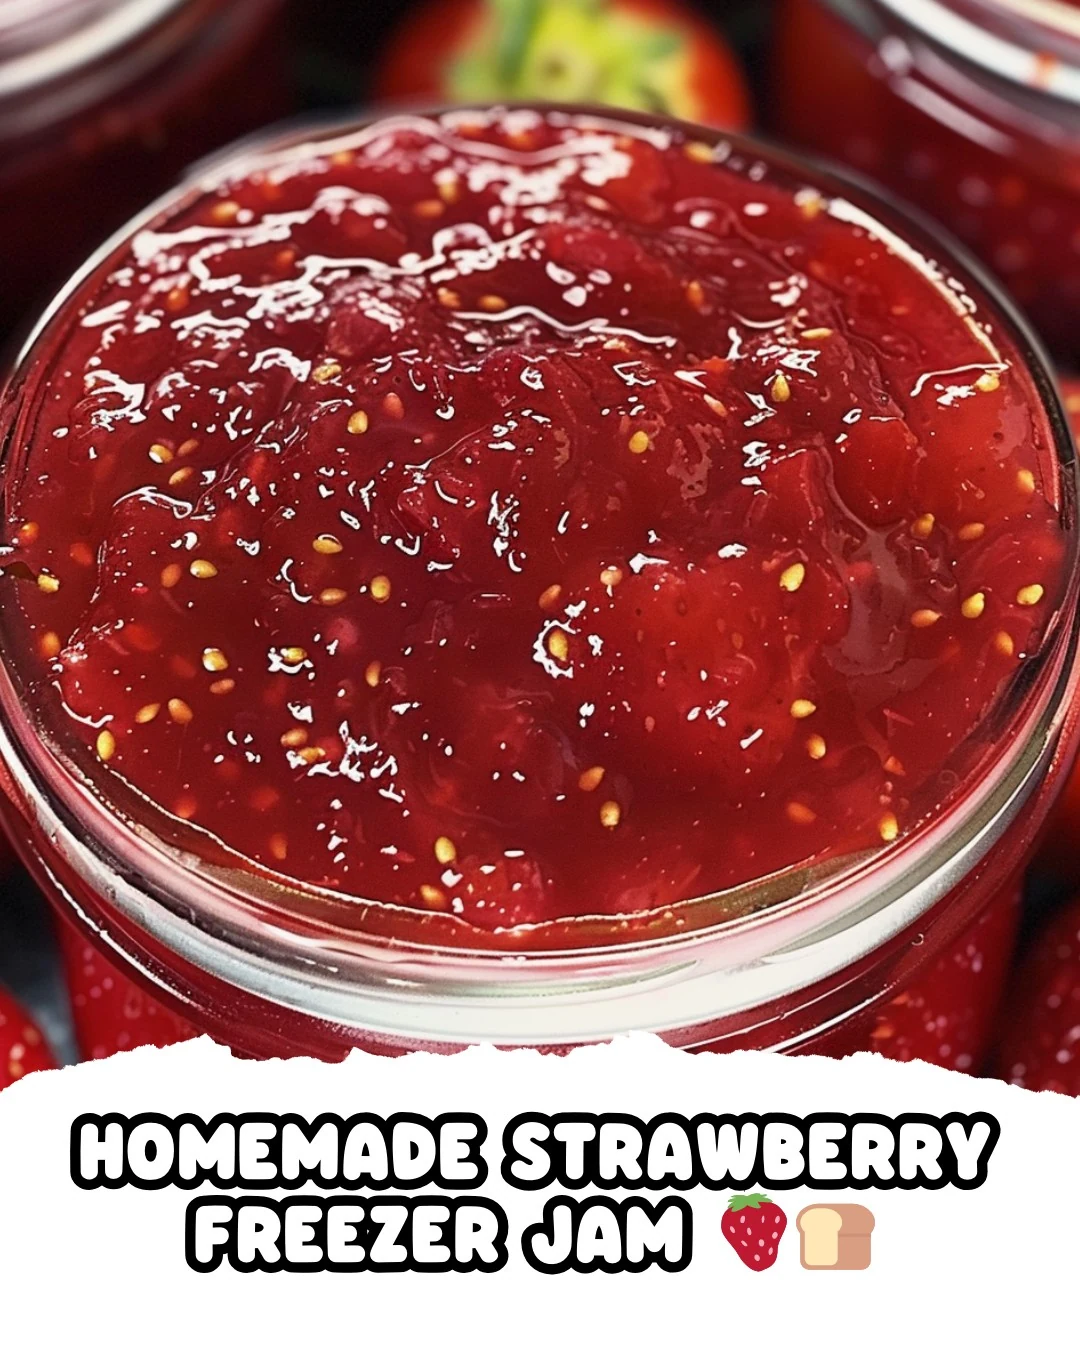
    Homemade Strawberry Freezer Jam is a delightful way to capture the essence of summer in a jar. This sweet, fruity spread is bursting with the vibrant flavor of fresh strawberries. It’s an easy and satisfying project that will elevate your breakfasts and snacks.

    Why You’ll Love This Recipe

    • Quick & Easy: Ready in under 30 minutes, with minimal hands-on time.
    • Fresh Flavor: Captures the peak taste of strawberries, making it a perfect addition to any meal.
    • Customizable: Adjust sweetness or add other fruits to suit your taste.
    • Long-Lasting: Store in the freezer for up to a year, ensuring you have delicious jam on hand.
    • No Cooking Required: Enjoy the fresh taste without the hassle of extensive cooking.

    Tools and Equipment

    To make Homemade Strawberry Freezer Jam, you’ll need a few essential kitchen tools.

    Essential Tools

    • Potato masher or food processor
    • Large mixing bowl
    • Small saucepan
    • Ladle
    • Freezer-safe containers with lids

    Why These Tools Matter

    • Potato masher or food processor: Helps achieve the desired consistency of mashed strawberries effortlessly.
    • Large mixing bowl: Provides ample space for mixing ingredients without spilling.
    • Freezer-safe containers: Ensure your jam stays fresh and is easy to store in the freezer.

    Ingredients for Homemade Strawberry Freezer Jam

    For the Jam Base

    • 1 packet (1.75 oz) powdered fruit pectin (such as Sure-Jell)
    • 2 cups mashed strawberries (about 1 quart of fresh strawberries)
    • 4 cups granulated sugar
    • 1/2 cup water

    For Storage

    • Half-pint or pint-sized freezer-safe containers with lids

    How to Make Homemade Strawberry Freezer Jam Step-by-Step

    Step 1: Prepare Strawberries

    Wash and hull the strawberries. Mash them until you have 2 cups of mashed berries. Use a potato masher or pulse them in a food processor if you prefer a chunkier texture.

    Step 2: Mix Strawberries and Sugar

    In a large bowl, combine the granulated sugar with the mashed strawberries. Stir until well combined and let the mixture sit for 10 minutes, stirring occasionally to help dissolve the sugar.

    Step 3: Prepare Pectin Mixture

    In a small saucepan, mix the powdered fruit pectin with the water. Bring to a boil over high heat, stirring constantly. Boil and stir for 1 minute to activate the pectin.

    Step 4: Combine and Stir

    Pour the hot pectin mixture into the strawberry mixture. Stir continuously for 3 minutes to ensure the sugar is fully dissolved and the pectin is evenly distributed.

    Step 5: Fill Containers

    Ladle the strawberry jam into clean half-pint or pint-sized freezer-safe containers. Leave about 1/2 inch of space at the top for expansion. Wipe any spills from the rims of the containers to ensure a good seal.

    Step 6: Seal and Store

    Cover the containers with lids. Let them stand at room temperature for 24 hours to set properly.

    Step 7: Freeze

    After 24 hours, transfer the containers to the freezer. The jam can be stored in the freezer for up to 1 year.

    Step 8: Thaw and Enjoy

    To use the jam, thaw it in the refrigerator. Once thawed, it will keep in the refrigerator for several weeks, allowing you to enjoy your Homemade Strawberry Freezer Jam anytime.

    How to Serve Homemade Strawberry Freezer Jam

    Homemade Strawberry Freezer Jam is incredibly versatile and can enhance a variety of dishes. Here are some creative serving ideas:

    On Toast or Biscuit

    Spread a generous layer of homemade strawberry freezer jam on warm toast or fluffy biscuits for a delightful breakfast or snack.

    In Yogurt Parfaits

    Layer the jam with yogurt and granola in a glass for a colorful and delicious parfait that adds sweetness and texture.

    As a Glaze for Meats

    Use homemade strawberry freezer jam as a glaze for grilled chicken or pork. The sweetness of the jam complements savory meats beautifully.

    Pro Tips for the Best Homemade Strawberry Freezer Jam

    To achieve the perfect consistency and flavor, consider these expert tips:

    • Choose Ripe Strawberries: Select berries that are fully ripe for maximum sweetness and flavor in your jam.

    • Measure Accurately: Ensure precise measurements of strawberries and sugar to maintain the right balance and texture.

    • Stir Thoroughly: When combining the pectin mixture with the strawberries, stir continuously to ensure all sugar is dissolved.

    • Use Clean Containers: Sterilize your freezer-safe containers before filling them to prevent any unwanted bacteria from spoiling your jam.

    • Label Your Containers: Clearly label each container with the date and contents to keep track of freshness and ensure you use them in time.

    Best Side Dishes and Pairings

    Homemade Strawberry Freezer Jam pairs well with a variety of dishes. Here are some excellent options:

    1. Pancakes: Fluffy pancakes topped with strawberry jam create a sweet morning treat that everyone will enjoy.

    2. Cheese Platter: A selection of cheeses, such as brie or goat cheese, complemented by strawberry jam offers a delightful contrast of flavors.

    3. Vanilla Ice Cream: Serve a spoonful of strawberry jam over vanilla ice cream for a refreshing dessert that highlights the fruit’s natural sweetness.

    4. Oatmeal: Stirring strawberry jam into a warm bowl of oatmeal adds flavor and sweetness, making for a comforting breakfast.

    5. Grilled Cheese Sandwich: Elevate a classic grilled cheese sandwich by spreading a thin layer of jam inside for a sweet and savory twist.

    Common Mistakes to Avoid

    • Using Overripe Strawberries: Ensure your strawberries are fresh for the best flavor and texture.
    • Skipping the Pectin Boil: Always bring the pectin mixture to a full boil to activate it properly.
    • Not Allowing Enough Setting Time: Allow the jam to set at room temperature for a full 24 hours before freezing.
    • Filling Containers Too Full: Leave at least 1/2 inch of space at the top of containers to allow for expansion during freezing.

    Storage & Reheating Instructions

    Refrigerator Storage

    Store your Homemade Strawberry Freezer Jam in airtight containers. It will stay fresh in the refrigerator for up to 3 weeks after thawing.

    Freezing Instructions

    For optimal results, freeze the jam in small batches. Ensure that the containers are tightly sealed and label them with the date. The jam can be stored in the freezer for up to 1 year.

    Reheating Tips

    • Oven: Place the jam in an oven-safe dish and warm at a low temperature until softened.
    • Microwave: Use a microwave-safe container and heat in short intervals, stirring in between until the desired consistency is reached.
    • Stovetop: Gently heat the jam in a saucepan over low heat, stirring continuously until warmed through.

    Frequently Asked Questions

    How do I make Homemade Strawberry Freezer Jam?

    To make Homemade Strawberry Freezer Jam, you need strawberries, sugar, and fruit pectin. Follow the provided recipe steps for best results.

    Can I use frozen strawberries for this recipe?

    Yes, you can use frozen strawberries, but ensure they are thawed and well-drained before mashing.

    How long does Homemade Strawberry Freezer Jam last?

    Homemade Strawberry Freezer Jam can be stored in the freezer for up to 1 year and in the refrigerator for about 3 weeks after thawing.

    What is the texture of Homemade Strawberry Freezer Jam?

    The texture is typically smooth with small pieces of fruit, providing a delightful spreadable consistency.

    Can I substitute other fruits in this recipe?

    Yes, you can substitute other fruits, but keep in mind that the pectin and sugar ratios may need adjustment depending on the fruit used.

    Final Thoughts

    Making Homemade Strawberry Freezer Jam is a rewarding and simple process that captures the essence of summer. I encourage you to try this recipe and experience the delightful taste of homemade jam. Please leave a comment with your feedback or any tips you discovered along the way.


    Desserts

    Homemade Strawberry Freezer Jam


    5.0 from 24 reviews

    This homemade strawberry freezer jam is a delightful and easy way to preserve the fresh taste of strawberries. With just a few simple ingredients, you can create a sweet and flavorful jam that pairs perfectly with toast, desserts, or as a topping for various dishes. Enjoy the taste of summer all year round with this quick and simple recipe.

    Author: Munch Twist
    Prep Time: 15 minutes
    Cook Time: 1 minute
    Total Time: 24 hours 15 minutes
    Yield: 32 servings
    Category: Desserts
    Method: No bake
    Cuisine: American

    Homemade Strawberry Freezer Jam

    SCALE:
    1x
    2x
    3x
    Cook Mode: Prevent your screen from going dark

    Ingredients

    • 1 packet (1.75 oz) powdered fruit pectin
    • 2 cups mashed strawberries
    • 4 cups granulated sugar
    • 1/2 cup water
    • Half-pint or pint-sized freezer-safe containers with lids

    Instructions

    1. Wash and hull the strawberries. Mash them until you have 2 cups of mashed berries.
    2. In a large bowl, combine the granulated sugar with the mashed strawberries. Stir until well combined and let sit for 10 minutes.
    3. In a small saucepan, mix the powdered fruit pectin with water. Bring to a boil over high heat, stirring constantly. Boil and stir for 1 minute.
    4. Pour the hot pectin mixture into the strawberry mixture. Stir continuously for 3 minutes.
    5. Ladle the strawberry jam into clean containers, leaving about 1/2 inch of space at the top.
    6. Cover the containers with lids and let them stand at room temperature for 24 hours.
    7. After 24 hours, transfer the containers to the freezer.

    Nutrition Facts

    Serving Size: 1 serving
    Calories: 50 kcal
    Sugar: 12g
    Sodium: 0mg
    Fat: 0g
    Saturated Fat: 0g
    Carbohydrates: 13g
    Fiber: 0g
    Protein: 0g
    Cholesterol: 0mg

  • Easy and Delicious Paula Deen’s 5 Minute Fudge Recipe

    Easy and Delicious Paula Deen’s 5 Minute Fudge Recipe

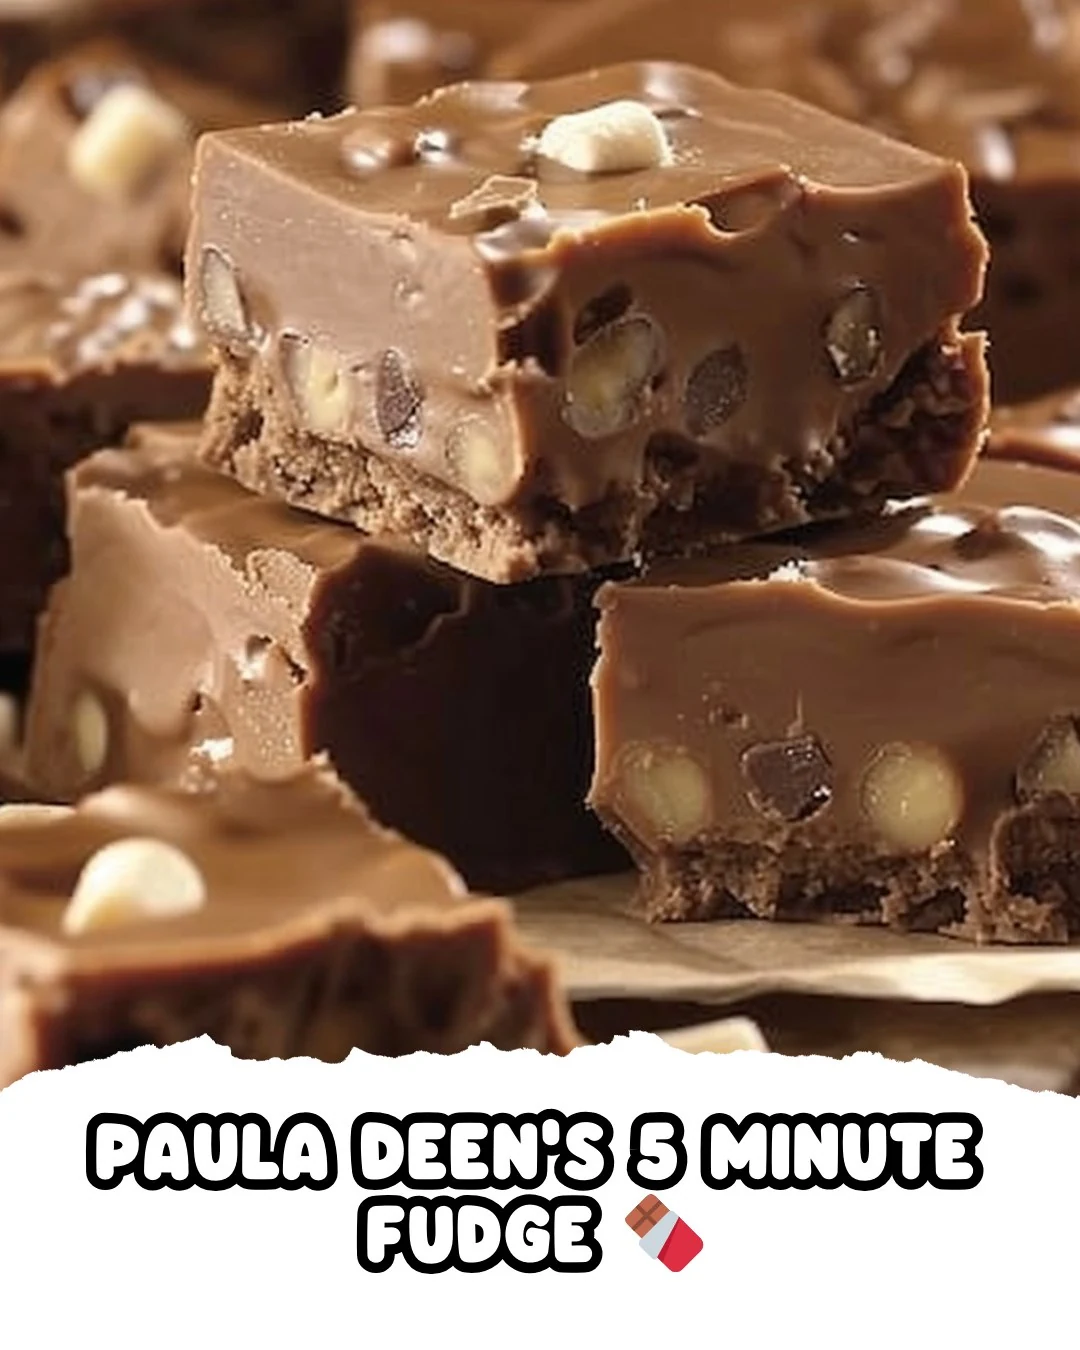
    PAULA DEEN’S 5 MINUTE FUDGE is a delightful treat that combines the rich flavors of chocolate with a creamy texture. This fudge is not only quick to prepare but also perfect for satisfying your sweet tooth in a flash.

    Why You’ll Love This Recipe

    • Quick & Easy: Ready in under 30 minutes, this fudge is perfect for last-minute cravings.
    • Decadent Flavor: The blend of milk chocolate and marshmallows creates a rich taste that everyone loves.
    • Customizable: Add your favorite nuts or mix-ins to make it uniquely yours.
    • Kid-Friendly: Perfect for baking with kids; they will enjoy stirring and tasting.
    • Great for Gifting: Slice it into squares, and it makes an excellent homemade gift for friends and family.

    Tools and Equipment

    Before you start making PAULA DEEN’S 5 MINUTE FUDGE, gather your tools for a smooth process.

    Essential Tools

    • Medium-sized saucepan
    • Wooden spoon or spatula
    • 8-inch square baking pan
    • Parchment paper
    • Measuring cups and spoons

    Why These Tools Matter

    • Medium-sized saucepan: Ideal for cooking the fudge base without spilling.
    • Parchment paper: Prevents sticking and makes cleanup a breeze.
    • Wooden spoon or spatula: Provides sturdy mixing and ensures even melting of ingredients.

    Ingredients for PAULA DEENS 5 MINUTE FUDGE

    Fudge Base Ingredients

    • 1 cup chopped nuts
    • 1 (6 ounce) package milk chocolate chips
    • 1 tablespoon unsalted butter
    • 1 2/3 cups white sugar
    • 16 large marshmallows
    • 2/3 cup evaporated milk
    • 1/2 teaspoon salt
    • 1 teaspoon pure vanilla extract

    How to Make PAULA DEENS 5 MINUTE FUDGE Step-by-Step

    Step 1: Cook the Base

    In a medium-sized saucepan, combine the white sugar, evaporated milk, unsalted butter, and salt. Bring the mixture to a boil over medium heat, stirring constantly. Allow it to boil for exactly 5 minutes, maintaining a steady stir to prevent burning.

    Step 2: Add the Chocolate

    Once the base has boiled, remove the saucepan from the heat. Stir in the milk chocolate chips. Continue stirring until the chocolate chips are completely melted and the mixture is smooth.

    Step 3: Mix in Marshmallows

    After the chocolate has melted, add the marshmallows, pure vanilla extract, and chopped nuts to the saucepan. Stir until everything is well combined and the marshmallows are mostly melted, creating a creamy texture.

    Step 4: Cool and Set

    Line an 8-inch square baking pan with parchment paper. Pour the fudge mixture into the pan, spreading it evenly. Allow the fudge to cool completely at room temperature. Once it has set, cut it into squares and enjoy!

    This PAULA DEEN’S 5 MINUTE FUDGE is sure to become a favorite in your home, combining simplicity with indulgent flavor.

    How to Serve PAULA DEENS 5 MINUTE FUDGE

    This delightful fudge can be served in various creative ways that enhance its flavor and presentation.

    Fudge Sundae

    Top a square of PAULA DEEN’S 5 MINUTE FUDGE with a scoop of vanilla ice cream and a drizzle of hot fudge for an indulgent dessert.

    Gift Box Treats

    Cut the fudge into small squares, package them in a decorative box, and give them as a homemade gift for holidays or special occasions.

    Coffee Pairing

    Serve a piece of fudge alongside a rich cup of coffee or espresso. The flavors complement each other beautifully, creating a satisfying treat.

    Pro Tips for the Best PAULA DEENS 5 MINUTE FUDGE

    Achieving the perfect fudge requires a few helpful insights.

    • Use Fresh Ingredients: Ensure your chocolate chips and marshmallows are fresh for the best flavor and texture.
    • Stir Constantly: Keep stirring the mixture while it cooks to prevent burning and ensure an even consistency.
    • Adjust Nut Variety: Feel free to experiment with different types of nuts, such as pecans or walnuts, to customize the flavor.
    • Cool Completely: Allow the fudge to cool completely at room temperature for the best cutting results.
    • Store Properly: Keep any leftovers in an airtight container at room temperature to maintain freshness.

    Best Side Dishes and Pairings

    Pairing PAULA DEEN’S 5 MINUTE FUDGE with the right side dishes can elevate your dessert experience.

    1. Vanilla Ice Cream – The creaminess of vanilla ice cream complements the rich chocolate flavor of the fudge.
    2. Espresso – A shot of espresso provides a robust counterbalance to the sweetness of the fudge.
    3. Fresh Berries – The tartness of fresh berries adds a refreshing contrast to the rich, sweet fudge.
    4. Chocolate Milk – Enhance the chocolate experience with a glass of cold chocolate milk for a nostalgic treat.
    5. Chai Tea – The warm spices in chai tea offer a delightful flavor contrast to the fudge, perfect for cozy evenings.

    Common Mistakes to Avoid

    • Overcooking the Base: Cooking the mixture for too long can lead to a hard fudge.
    • Not Stirring Constantly: Failing to stir continuously may cause the sugar to burn or clump.
    • Skipping the Nuts: Omitting nuts can alter the texture and flavor, making it less satisfying.
    • Insufficient Cooling Time: Cutting the fudge too early can result in a messy, unstructured treat.

    Storage & Reheating Instructions

    Refrigerator Storage

    Store Paula Deen’s 5 Minute Fudge in an airtight container in the refrigerator. It stays fresh for up to two weeks.

    Freezing Instructions

    For long-term storage, freeze the fudge by wrapping it tightly in plastic wrap and placing it in a freezer-safe container. It can be frozen for up to three months. Thaw in the refrigerator before serving.

    Reheating Tips

    • Oven: Preheat to 350°F (175°C) and warm the fudge in a covered dish for about 10 minutes.
    • Microwave: Heat in 10-second intervals until soft, stirring in between.
    • Stovetop: Place in a saucepan over low heat, stirring continuously until softened.

    Frequently Asked Questions

    How long does it take to make Paula Deen’s 5 Minute Fudge?

    The total preparation and cooking time is approximately 15 minutes.

    Can I use dark chocolate instead of milk chocolate chips in Paula Deen’s 5 Minute Fudge?

    Yes, you can substitute dark chocolate chips for a richer flavor, but the sweetness may vary.

    What can I add to Paula Deen’s 5 Minute Fudge for extra flavor?

    Consider adding ingredients like peanut butter, crushed candy canes, or dried fruits for added flavor and texture.

    Is Paula Deen’s 5 Minute Fudge suitable for freezing?

    Absolutely! Follow the freezing instructions to keep your fudge fresh for up to three months.

    Final Thoughts

    Paula Deen’s 5 Minute Fudge is a quick and delectable treat that is sure to impress friends and family. I encourage you to try this easy recipe and share your experience in the comments below.

    Desserts

    PAULA DEENS 5 MINUTE FUDGE


    5.0 from 24 reviews

    This quick and easy fudge recipe from Paula Deen combines rich milk chocolate, marshmallows, and nuts for a delightful treat. Perfect for satisfying your sweet tooth in just a few minutes, this fudge is sure to impress family and friends.

    Author: Munch Twist
    Prep Time: 10 minutes
    Cook Time: 5 minutes
    Total Time: 15 minutes
    Yield: 16 servings
    Category: Desserts
    Method: No bake
    Cuisine: American

    PAULA DEENS 5 MINUTE FUDGE

    SCALE:
    1x
    2x
    3x
    Cook Mode: Prevent your screen from going dark

    Ingredients

    • 1 cup chopped nuts
    • 1 (6 ounce) package milk chocolate chips
    • 1 tablespoon unsalted butter
    • 1 2/3 cups white sugar
    • 16 large marshmallows
    • 2/3 cup evaporated milk
    • 1/2 teaspoon salt
    • 1 teaspoon pure vanilla extract

    Instructions

    1. In a medium-sized saucepan, combine the white sugar, evaporated milk, butter, and salt. Bring to a boil, stirring constantly. Continue cooking for 5 minutes.
    2. Stir in the milk chocolate chips and cook until completely melted and smooth.
    3. Remove from heat. Add the marshmallows, vanilla extract, and chopped nuts. Stir until well combined and marshmallows are mostly melted.
    4. Pour the mixture into an 8-inch pan lined with parchment paper. Spread evenly and let cool completely. Once set, cut into squares.

    Nutrition Facts

    Serving Size: 1 serving
    Calories: 200 kcal
    Sugar: 20g
    Sodium: 50mg
    Fat: 11g
    Saturated Fat: 5g
    Carbohydrates: 24g
    Fiber: 0g
    Protein: 2g
    Cholesterol: 5mg

  • Delicious Smothered Pork Chops Recipe for Comfort Food

    Delicious Smothered Pork Chops Recipe for Comfort Food

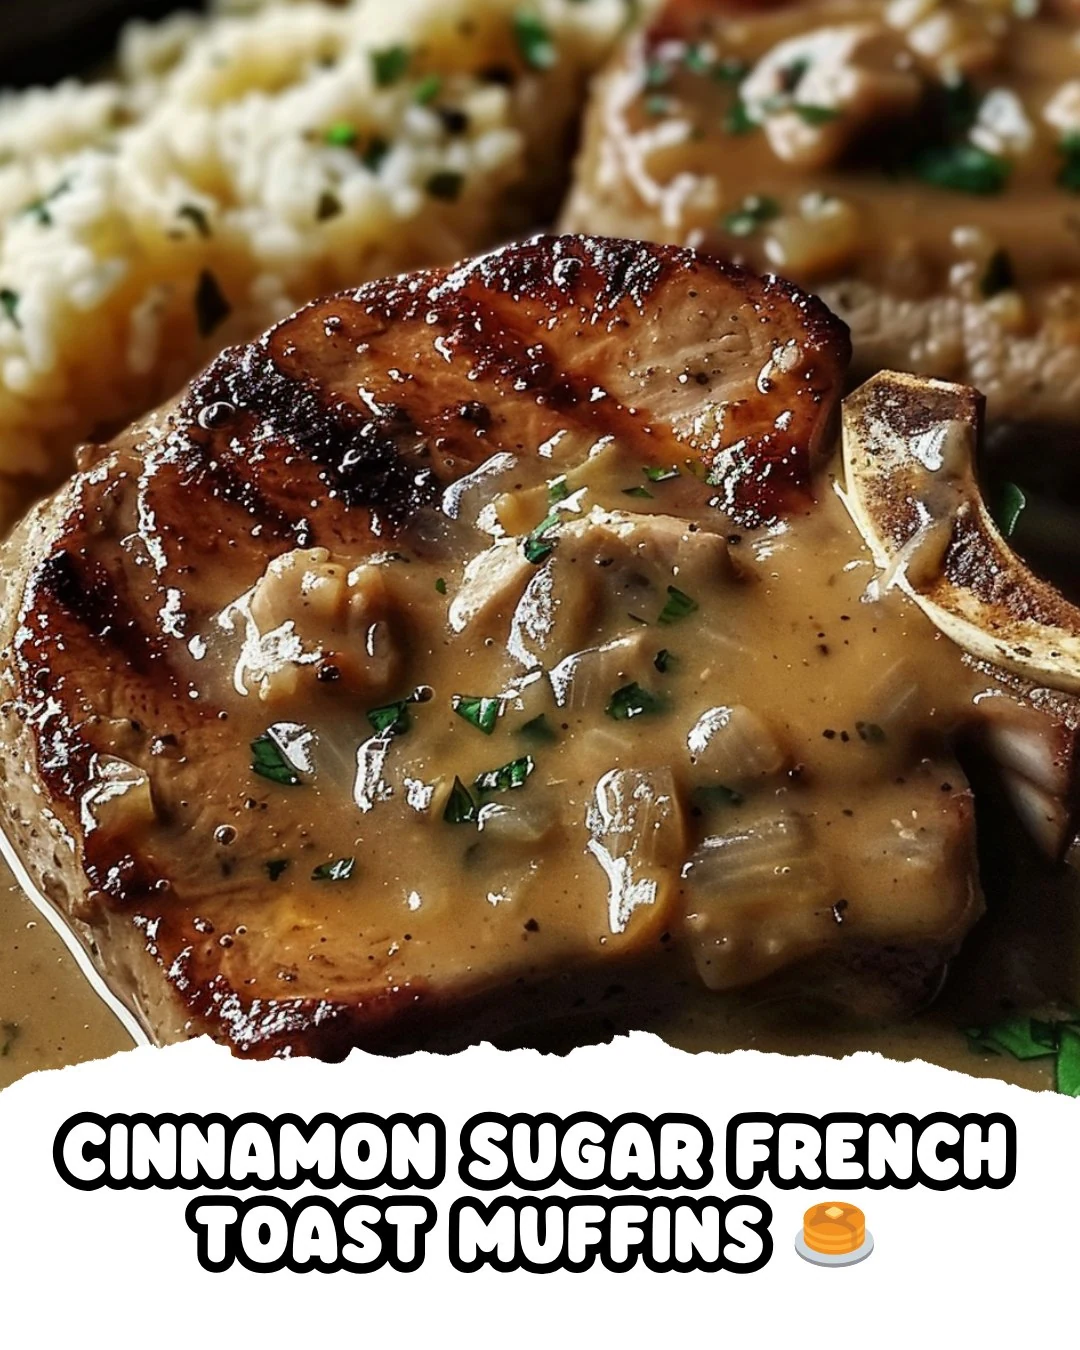
    Smothered Pork Chops are a comforting and flavorful dish that brings warmth to any table. The tender pork chops, drenched in a rich gravy, create a satisfying meal perfect for family dinners. This recipe is not only delicious but also simple to prepare in a slow cooker, making it an ideal choice for busy weeknights.

    Why You’ll Love This Recipe

    • Rich Flavor: The combination of cream of chicken soup and onion soup mix creates a deep, savory taste.
    • Tender Meat: Slow cooking ensures the pork chops are juicy and fork-tender every time.
    • Minimal Effort: With just a few ingredients, you can create a hearty meal without spending hours in the kitchen.
    • Versatile Side Options: Pair these pork chops with mashed potatoes, rice, or steamed vegetables for a complete meal.
    • Family-Friendly: This dish is sure to please both kids and adults alike, making it a perfect family dinner option.

    Tools and Equipment

    Having the right tools makes cooking easier and more enjoyable. Here are the essentials for making Smothered Pork Chops.

    Essential Tools

    • 5-6 quart oval slow cooker
    • Whisk
    • Small bowl for mixing cornstarch
    • Measuring spoons

    Why These Tools Matter

    • Slow Cooker: Allows for hands-off cooking, letting the flavors meld without constant supervision.
    • Whisk: Ensures smooth mixing of ingredients, preventing lumps in the gravy.
    • Small Bowl: Useful for mixing cornstarch and water without making a mess.

    Ingredients for Smothered Pork Chops

    • 4 bone-in pork chops
    • 1 teaspoon garlic powder
    • 1 (10.5 oz) can low-sodium cream of chicken soup
    • 1 (14 oz) can low-sodium chicken broth
    • 1 oz packet onion soup mix
    • 1 oz packet dry pork gravy mix
    • To thicken gravy:
    • 3 tablespoons cornstarch
    • 3 tablespoons cold water

    How to Make Smothered Pork Chops Step-by-Step

    Step 1: Prepare the Gravy Mixture

    In a 5-6 quart oval slow cooker, combine the onion soup mix, chicken broth, cream of chicken soup, and dry pork gravy mix. Whisk the ingredients together until well combined, ensuring no lumps remain.

    Step 2: Season the Pork Chops

    Sprinkle the garlic powder evenly over both sides of the pork chops. This simple seasoning adds depth to the dish without overpowering the other flavors.

    Step 3: Add Pork Chops to Slow Cooker

    Place the seasoned pork chops into the slow cooker, spreading them out as much as possible. Pour the gravy mixture over the chops, making sure they are well covered.

    Step 4: Cook the Pork Chops

    Cover the slow cooker and cook on low for 4-6 hours. The low and slow cooking method ensures that the pork chops become tender and absorb all the flavors from the gravy.

    Step 5: Thicken the Gravy

    About 30 minutes before the cooking time is complete, mix 3 tablespoons of cornstarch with 3 tablespoons of cold water in a small bowl until smooth. Stir this mixture into the slow cooker. Cover and switch the slow cooker to high for the last 30 minutes to thicken the gravy.

    Step 6: Serve

    Once the gravy has thickened, serve the Smothered Pork Chops hot. Enjoy this hearty dish with your favorite sides for a complete meal.

    Preparation Time: 10 minutes | Cooking Time: 4-6 hours

    Nutritional Information (per serving)

    • Calories: 350 kcal
    • Carbohydrates: 15g
    • Protein: 28g
    • Fat: 20g
    • Saturated Fat: 6g
    • Cholesterol: 95mg
    • Sodium: 1400mg
    • Fiber: 1g
    • Sugars: 2g

    How to Serve Smothered Pork Chops

    Smothered pork chops are a comforting dish that can be served in various ways to enhance your dining experience.

    Classic Mashed Potatoes

    Creamy mashed potatoes are an ideal pairing, absorbing the rich gravy from the smothered pork chops and adding a delightful texture to the meal.

    Steamed Green Beans

    A side of steamed green beans adds a pop of color and a fresh crunch, balancing the richness of the pork and gravy.

    Fluffy Rice

    Serve your smothered pork chops over fluffy white or brown rice. The rice will soak up the flavorful gravy, making each bite satisfying.

    Pro Tips for the Best Smothered Pork Chops

    For optimal results, consider these expert tips to enhance your smothered pork chops.

    • Choose Quality Meat: Select bone-in pork chops for better flavor and tenderness during cooking.
    • Sear the Chops First: For added depth of flavor, sear the pork chops in a skillet before placing them in the slow cooker.
    • Let It Rest: Allow the pork chops to rest after cooking for a few minutes to retain their juices when cutting.
    • Adjust Seasoning: Taste the gravy before serving and adjust seasoning if necessary, adding more salt or pepper to suit your preference.
    • Store Leftovers Properly: Store any leftovers in an airtight container in the refrigerator for up to three days to maintain freshness.

    Best Side Dishes and Pairings

    To complement your smothered pork chops, consider these delightful side dishes and beverages.

    1. Garlic Bread: The buttery, garlicky flavor of garlic bread makes it a perfect accompaniment to soak up the savory gravy.
    2. Coleslaw: A tangy coleslaw provides a refreshing contrast to the rich pork chops, adding a crunchy texture to your meal.
    3. Corn on the Cob: Sweet corn on the cob is a classic side that pairs beautifully, enhancing the comfort food experience.
    4. Biscuits: Fluffy biscuits are excellent for sopping up the gravy, making every bite more enjoyable.
    5. Sweet Tea: A glass of sweet tea offers a refreshing balance to the richness of the dish, enhancing the Southern comfort food vibe.

    Common Mistakes to Avoid

    • Skipping the Seasoning: Failing to evenly season the pork chops can lead to bland flavors.
    • Not Covering the Pork Chops: Make sure the gravy mixture fully covers the pork chops for even cooking and flavor.
    • Overcooking: Cooking the pork chops for too long can make them dry and tough; monitor carefully.
    • Neglecting to Thicken the Gravy: Forgetting to add the cornstarch mixture can result in a runny gravy that lacks richness.

    Storage & Reheating Instructions

    Refrigerator Storage

    Store any leftover smothered pork chops in airtight containers. They will stay fresh for up to 3-4 days in the refrigerator.

    Freezing Instructions

    To freeze, place the cooled smothered pork chops in freezer-safe containers or heavy-duty freezer bags. They can be frozen for up to 3 months. Thaw in the refrigerator overnight before reheating.

    Reheating Tips

    • Oven: Preheat to 350°F (175°C). Place pork chops in a baking dish, cover with foil, and heat for 20-25 minutes.
    • Microwave: Place pork chops on a microwave-safe plate, cover with a damp paper towel, and heat in 1-minute intervals until warmed through.
    • Stovetop: Heat in a skillet over medium heat, adding a splash of chicken broth to keep the gravy moist, stirring occasionally until heated.

    Frequently Asked Questions

    How can I make Smothered Pork Chops spicier?

    To add heat, consider incorporating crushed red pepper flakes or a dash of hot sauce into the gravy mixture.

    Can I use boneless pork chops for Smothered Pork Chops?

    Yes, boneless pork chops can be used, but adjust the cooking time as they may cook faster than bone-in chops.

    What side dishes pair well with Smothered Pork Chops?

    Mashed potatoes, steamed green beans, or rice are excellent side dishes that complement the rich flavors of smothered pork chops.

    How do I know when Smothered Pork Chops are done?

    The pork chops are done when they reach an internal temperature of 145°F (63°C) and are tender when pierced with a fork.

    Final Thoughts

    This Smothered Pork Chops recipe promises to deliver comfort and flavor in every bite. We invite you to try it out and share your experience in the comments. Your feedback helps us create more delicious recipes for everyone to enjoy.


    Dinner

    Smothered Pork Chops


    5.0 from 24 reviews

    Smothered Pork Chops are tender, flavorful pork chops cooked in a rich gravy made with cream of chicken soup and onion soup mix. This comforting dish is perfect for a family dinner and pairs well with mashed potatoes or rice.

    Author: Munch Twist
    Prep Time: 10 minutes
    Cook Time: 360 minutes
    Total Time: 370 minutes
    Yield: 4 servings
    Category: Desserts
    Method: No bake
    Cuisine: American

    Smothered Pork Chops

    SCALE:
    1x
    2x
    3x
    Cook Mode: Prevent your screen from going dark

    Ingredients

    • 4 bone-in pork chops
    • 1 teaspoon garlic powder
    • 1 (10.5 oz) can low-sodium cream of chicken soup
    • 1 (14 oz) can low-sodium chicken broth
    • 1 oz packet onion soup mix
    • 1 oz packet dry pork gravy mix
    • 3 tablespoons cornstarch
    • 3 tablespoons cold water

    Instructions

    1. In a 5-6 quart oval slow cooker, mix together the onion soup mix, chicken broth, cream of chicken soup, and dry pork gravy mix. Whisk until well combined.
    2. Sprinkle garlic powder evenly over both sides of the pork chops.
    3. Place the pork chops into the slow cooker, spreading them out as much as possible. Pour the gravy mixture over the chops, ensuring they are covered.
    4. Cover and cook on low for about 4-6 hours, until the pork chops are tender.
    5. About 30 minutes before the pork chops are done, mix cornstarch with cold water in a small bowl until smooth. Stir this mixture into the slow cooker. Cover and switch the slow cooker to high for the final 30 minutes to thicken the gravy.
    6. Once the gravy has thickened, serve the smothered pork chops hot.

    Nutrition Facts

    Serving Size: 1 serving
    Calories: 350 kcal
    Sugar: 2g
    Sodium: 1400mg
    Fat: 20g
    Saturated Fat: 6g
    Carbohydrates: 15g
    Fiber: 1g
    Protein: 28g
    Cholesterol: 95mg

  • Delicious Cinnamon Sugar French Toast Muffins Recipe

    Delicious Cinnamon Sugar French Toast Muffins Recipe

    Cinnamon Sugar French Toast Muffins offer a delightful twist on a classic breakfast favorite. These muffins combine the warm, comforting flavors of cinnamon and sugar with the soft texture of French toast. Perfect for a cozy morning, they are easy to make and sure to impress.

    Why You’ll Love This Recipe

    • Delicious Flavor: The combination of cinnamon and sugar creates a sweet, aromatic treat that’s irresistible.
    • Versatile Toppings: Enjoy with whipped cream, fresh berries, or maple syrup to suit your taste.
    • Family-Friendly: Kids and adults alike will love these muffins, making them a great choice for family gatherings.
    • Make Ahead Option: Bake a batch in advance and enjoy them throughout the week.
    • Perfect for Sharing: These muffins are ideal for brunch or as a sweet snack to share with friends.

    Tools and Equipment

    Having the right tools makes baking easier and more enjoyable.

    Essential Tools

    • Muffin tin
    • Paper liners
    • Mixing bowls
    • Whisk
    • Toothpick
    • Wire rack

    Why These Tools Matter

    • Muffin tin: Ensures uniform baking for all muffins, resulting in consistent texture.
    • Mixing bowls: Allows for easy mixing of wet and dry ingredients without mess.
    • Wire rack: Facilitates proper cooling, preventing soggy bottoms and maintaining texture.

    Ingredients for Cinnamon Sugar French Toast Muffins

    Dry Ingredients

    • 2 cups all-purpose flour
    • 1 cup granulated sugar
    • 2 teaspoons baking powder
    • 1/4 teaspoon salt
    • 1 teaspoon ground cinnamon
    • 1/4 teaspoon ground nutmeg

    Wet Ingredients

    • 1/2 cup unsalted butter (melted)
    • 1 cup milk
    • 2 large eggs
    • 1/4 teaspoon vanilla extract

    Optional Toppings

    • Whipped cream
    • Powdered sugar
    • Fresh berries
    • Maple syrup
    • Chopped nuts

    How to Make Cinnamon Sugar French Toast Muffins Step-by-Step

    Step 1: Prepare the Muffin Batter

    Preheat your oven to 375°F (190°C) and line a 12-cup muffin tin with paper liners. In a medium bowl, combine 2 cups all-purpose flour, 1 cup granulated sugar, 2 teaspoons baking powder, 1/4 teaspoon salt, and 1 teaspoon ground cinnamon. In a separate large bowl, whisk together 1/2 cup melted butter, 1 cup milk, 2 large eggs, 1/4 teaspoon ground nutmeg, and 1/4 teaspoon vanilla extract. Gradually mix the dry ingredients into the wet ingredients until just combined. Be careful not to overmix to ensure a light texture.

    Step 2: Bake the Muffins

    Spoon the batter evenly into the prepared muffin cups. Bake in the preheated oven for 20-25 minutes or until a toothpick inserted in the center comes out clean. Allow the muffins to cool in the tin for about 5 minutes before transferring them to a wire rack to cool completely.

    Step 3: Cinnamon Sugar Coating

    In a shallow dish, combine 1/2 cup granulated sugar with 1 tablespoon ground cinnamon. While the muffins are still warm, dip the tops into the cinnamon sugar mixture, pressing gently to ensure it adheres well.

    Step 4: Make it Crispy

    For an extra crispy top, return the muffins to the oven and bake them for an additional 2-3 minutes. Keep a close eye on them to prevent burning.

    Step 5: Store and Reheat

    Store cooled muffins in an airtight container at room temperature for up to 3 days. Reheat in the microwave or oven until warm and crispy.

    Enjoy your delightful Cinnamon Sugar French Toast Muffins with your favorite toppings!

    How to Serve Cinnamon Sugar French Toast Muffins

    Cinnamon Sugar French Toast Muffins are versatile and can be enjoyed in various ways. Here are some creative serving ideas:

    Classic with Maple Syrup

    Drizzle warm maple syrup over the muffins for a traditional breakfast experience that enhances their sweet and spiced flavor.

    Berry Delight

    Top muffins with fresh berries, such as strawberries or blueberries, to add a burst of freshness and balance the sweetness.

    Whipped Cream Indulgence

    Serve with a dollop of whipped cream for a decadent treat perfect for brunch or a special occasion.

    Pro Tips for the Best Cinnamon Sugar French Toast Muffins

    To ensure your muffins turn out perfectly, consider the following tips:

    • Use Room Temperature Ingredients: Always ensure that your eggs and milk are at room temperature for better emulsification and a lighter texture.

    • Don’t Overmix the Batter: Mix until just combined to avoid dense muffins. A few lumps are okay.

    • Adjust Baking Time: Keep an eye on the muffins towards the end of the baking time; ovens can vary, and you want them just baked through.

    • Experiment with Spices: Consider adding a pinch of cardamom or allspice to the batter for an extra layer of flavor.

    • Cool Before Coating: Allow muffins to cool slightly before dipping in cinnamon sugar to ensure the topping sticks well.

    Best Side Dishes and Pairings

    These muffins pair beautifully with a variety of side dishes and drinks. Here are some excellent options:

    1. Fresh Fruit Salad: A light and refreshing fruit salad complements the rich flavors of the muffins and adds a nutritious element.

    2. Greek Yogurt with Honey: The creaminess of Greek yogurt drizzled with honey offers a tangy contrast to the sweetness of the muffins.

    3. Crispy Bacon: The salty, savory flavor of crispy bacon creates a delightful contrast to the sweet muffins, making for a balanced breakfast.

    4. Coffee or Tea: A warm beverage like coffee or herbal tea enhances the comforting experience of enjoying these muffins.

    5. Smoothie Bowl: A smoothie bowl topped with granola and nuts provides a nutritious and filling side, perfect for a hearty breakfast.

    Common Mistakes to Avoid

    • Overmixing the Batter: Mixing too much can lead to dense muffins. Combine ingredients until just mixed.
    • Incorrect Oven Temperature: Ensure your oven is preheated to 375°F (190°C) for even baking.
    • Skipping the Cinnamon Sugar Coating: This step adds essential flavor and sweetness; don’t skip it!
    • Not Allowing Muffins to Cool: Letting muffins rest in the tin allows them to finish cooking and enhances their texture.

    Storage & Reheating Instructions

    Refrigerator Storage

    Store cooled Cinnamon Sugar French Toast Muffins in an airtight container in the refrigerator for up to 3 days to maintain freshness.

    Freezing Instructions

    For optimal freezing, wrap each muffin individually in plastic wrap and place them in a freezer-safe bag. They can be frozen for up to 3 months. To thaw, simply leave at room temperature for several hours or overnight in the refrigerator.

    Reheating Tips

    • Oven: Preheat to 350°F (175°C). Place muffins on a baking sheet and heat for about 10 minutes until warm.
    • Microwave: Heat one muffin at a time on high for 20-30 seconds or until warm.
    • Stovetop: Heat in a covered skillet on low for about 5 minutes, flipping occasionally to warm evenly.

    Frequently Asked Questions

    Can I use whole wheat flour for Cinnamon Sugar French Toast Muffins?

    Yes, you can substitute whole wheat flour for all-purpose flour, but the texture may be denser.

    How can I make these muffins dairy-free?

    To make dairy-free Cinnamon Sugar French Toast Muffins, use almond milk or oat milk and substitute the butter with coconut oil or a dairy-free butter alternative.

    Can I add fruits to the muffins?

    Absolutely! Fresh berries or chopped bananas can be added to the batter for extra flavor and moisture.

    What are the best toppings for Cinnamon Sugar French Toast Muffins?

    Popular toppings include whipped cream, powdered sugar, fresh berries, maple syrup, and chopped nuts, allowing for a customizable experience.

    How long do Cinnamon Sugar French Toast Muffins last?

    When stored properly, these muffins can last up to 3 days at room temperature or up to 3 months in the freezer.

    Final Thoughts

    Cinnamon Sugar French Toast Muffins are a delightful treat perfect for breakfast or brunch. Their warm, cinnamon-sugar coating makes them irresistible. Try making this recipe today and share your feedback in the comments; I would love to hear how they turned out!


    Desserts

    Cinnamon Sugar French Toast Muffins


    5.0 from 24 reviews

    These delightful muffins combine the classic flavors of French toast with a cinnamon sugar coating, making for a perfect breakfast or snack. Soft and fluffy on the inside, with a crispy exterior, they are easy to make and can be enjoyed with various toppings.

    Author: Munch Twist
    Prep Time: 15 minutes
    Cook Time: 25 minutes
    Total Time: 40 minutes
    Yield: 12 servings
    Category: Desserts
    Method: No bake
    Cuisine: American

    Cinnamon Sugar French Toast Muffins

    SCALE:
    1x
    2x
    3x
    Cook Mode: Prevent your screen from going dark

    Ingredients

    • 1 cup granulated sugar
    • 1/4 teaspoon vanilla extract
    • 1 teaspoon ground cinnamon
    • 1/2 cup unsalted butter (melted)
    • 2 cups all-purpose flour
    • 2 large eggs
    • 1 cup milk
    • 1/4 teaspoon ground nutmeg
    • 2 teaspoons baking powder
    • 1/4 teaspoon salt

    Instructions

    1. Preheat oven to 375°F (190°C). Line a 12-cup muffin tin with paper liners. In a medium bowl, combine flour, sugar, baking powder, salt, and cinnamon. In a large bowl, whisk together melted butter, milk, eggs, nutmeg, and vanilla extract. Gradually mix the dry ingredients into the wet ingredients until just combined.
    2. Spoon the batter evenly into the muffin cups. Bake for 20-25 minutes or until a toothpick inserted in the center comes out clean. Let the muffins cool in the tin for 5 minutes, then transfer them to a wire rack to cool completely.
    3. In a shallow dish, mix 1/2 cup granulated sugar with 1 tablespoon ground cinnamon. While muffins are still warm, dip the tops into the cinnamon sugar mixture, pressing gently to adhere.
    4. For an extra crispy top, bake muffins for an additional 2-3 minutes. Watch closely to prevent burning.
    5. Store cooled muffins in an airtight container at room temperature for up to 3 days. Reheat in the microwave or oven until warm and crispy.

    Nutrition Facts

    Serving Size: 1 serving
    Calories: 225 kcal
    Sugar: 15g
    Sodium: 200mg
    Fat: 11g
    Saturated Fat: 7g
    Carbohydrates: 30g
    Fiber: 1g
    Protein: 3g
    Cholesterol: 50mg

  • Easy Cool Whip and Pudding Frosting Recipe

    Easy Cool Whip and Pudding Frosting Recipe

    Cool Whip and Pudding Frosting is a delightful and creamy topping that takes your desserts to the next level. This frosting is not only easy to make but also offers a light, fluffy texture that pairs perfectly with cakes and cupcakes. Its sweet vanilla flavor makes it a versatile choice for any occasion.

    Why You’ll Love This Recipe

    • Quick & Easy: Ready in under 5 minutes, this frosting requires minimal effort.
    • Versatile Use: Perfect for cakes, cupcakes, and even as a fruit dip.
    • Flavorful & Creamy: The combination of Cool Whip and vanilla pudding creates a rich taste.
    • No Baking Required: You can whip up this frosting without turning on the oven.
    • Make Ahead Option: Store it in the fridge for up to a week for convenient use.

    Tools and Equipment

    To prepare Cool Whip and Pudding Frosting, you’ll need some basic kitchen tools.

    Essential Tools

    • Mixing bowl
    • Electric mixer
    • Measuring cups and spoons
    • Airtight container

    Why These Tools Matter

    • Mixing Bowl: Provides ample space for combining ingredients without spills.
    • Electric Mixer: Ensures a smooth and fluffy texture in just minutes.
    • Airtight Container: Keeps the frosting fresh when stored in the refrigerator.

    Ingredients for Cool Whip and Pudding Frosting

    Frosting Base

    • 1 teaspoon vanilla extract
    • 2 tbsp powdered sugar
    • 8 oz container Cool Whip (thawed)
    • 1/2 cup milk
    • 1 package instant vanilla pudding mix (3.4 oz)

    How to Make Cool Whip and Pudding Frosting Step-by-Step

    Step 1: Combine Ingredients

    In a large mixing bowl, combine the instant vanilla pudding mix, powdered sugar, milk, and vanilla extract. This mixture will form the base of your frosting.

    Step 2: Mix

    Using an electric mixer, beat the ingredients on medium-high speed for 2 minutes. Continue mixing until the mixture reaches a smooth and thick consistency.

    Step 3: Add Cool Whip

    Gently fold in the Cool Whip into the pudding mixture. Beat on medium speed until everything is well combined and fluffy. This step adds the creaminess that makes the frosting irresistible.

    Step 4: Use or Store

    You can use the frosting immediately to top your favorite cakes or cupcakes. If you have leftovers, transfer the frosting to an airtight container. Store it in the refrigerator until you are ready to use it. Remember to refrigerate any frosted desserts to maintain freshness.

    This Cool Whip and Pudding Frosting is a fantastic addition to your dessert recipes. With its delightful taste and creamy texture, it is sure to become a staple in your kitchen. Enjoy your baking!

    How to Serve Cool Whip and Pudding Frosting

    This versatile frosting can elevate a variety of desserts. Here are some creative serving ideas to inspire your culinary adventures.

    Cake Decorating

    Use Cool Whip and Pudding Frosting to beautifully frost layer cakes or sheet cakes. Its light and fluffy texture makes it easy to spread and pipe decorative designs.

    Cupcake Topping

    Top your favorite cupcakes with this delightful frosting for a sweet finishing touch. The creamy consistency complements various flavors, from chocolate to vanilla.

    Fruit Dip

    Serve the frosting as a dip for fresh fruits like strawberries, apples, or bananas. The sweetness of the frosting enhances the natural flavors of the fruit, creating a refreshing snack.

    Pro Tips for the Best Cool Whip and Pudding Frosting

    For optimal results when making Cool Whip and Pudding Frosting, keep these helpful tips in mind.

    • Use Thawed Cool Whip: Ensure the Cool Whip is completely thawed for the best texture and flavor in your frosting.
    • Chill Your Bowl: For an extra light and airy frosting, chill your mixing bowl before combining the ingredients.
    • Adjust Sweetness: If you prefer a sweeter frosting, feel free to add more powdered sugar according to your taste.
    • Experiment with Flavors: Try using different flavors of pudding mix, such as chocolate or butterscotch, to create unique frosting variations.
    • Store Properly: Store any leftover frosting in an airtight container in the refrigerator to maintain its freshness and texture.

    Best Side Dishes and Pairings

    To complement your Cool Whip and Pudding Frosting, consider these delightful pairings.

    1. Chocolate Cake: The rich, dense nature of chocolate cake contrasts beautifully with the lightness of the frosting.
    2. Vanilla Cupcakes: Pairing with vanilla cupcakes enhances the creamy flavors, making for a classic treat.
    3. Fresh Fruit Salad: A vibrant fruit salad offers a refreshing balance to the sweetness of the frosting.
    4. Ice Cream: Serve a scoop of ice cream alongside frosted desserts for a satisfying combination of temperatures and textures.
    5. Coffee or Tea: A warm cup of coffee or tea can help cut through the sweetness, balancing the overall dessert experience.

    Common Mistakes to Avoid

    • Not Thawing Cool Whip: Ensure that the Cool Whip is fully thawed before mixing to achieve the right consistency.
    • Skipping the Mixing Time: Mixing for the full 2 minutes is crucial for creating a smooth and fluffy texture.
    • Using Non-Instant Pudding: Make sure to use instant vanilla pudding mix; regular pudding will not set correctly in this recipe.
    • Overmixing After Adding Cool Whip: Mix just until combined to prevent the frosting from becoming runny.

    Storage & Reheating Instructions

    Refrigerator Storage

    Store your Cool Whip and Pudding Frosting in an airtight container in the refrigerator. It will stay fresh for up to 5 days. Be sure to keep it sealed to prevent it from absorbing any odors.

    Freezing Instructions

    While it’s not ideal to freeze this frosting due to the Cool Whip’s texture changes, you can freeze it in an airtight container for up to 2 months. To thaw, place it in the refrigerator overnight.

    Reheating Tips

    • Oven: Not recommended, as this frosting is best served cold.
    • Microwave: Use a microwave-safe bowl and heat in 10-second intervals, stirring in between until slightly softened.
    • Stovetop: Place in a bowl over simmering water, stirring gently until just warmed.

    Frequently Asked Questions

    Can I use a different flavor of pudding for the Cool Whip and Pudding Frosting?

    Yes, you can substitute instant chocolate, butterscotch, or any other flavor of pudding mix for a unique twist.

    How long does Cool Whip and Pudding Frosting last in the fridge?

    When stored in an airtight container, it lasts for up to 5 days in the refrigerator.

    Can I whip this frosting by hand?

    While it’s possible, using an electric mixer ensures a smoother and fluffier texture. Hand mixing may not achieve the same results.

    Is Cool Whip and Pudding Frosting suitable for vegan diets?

    No, since Cool Whip contains dairy. However, you can explore vegan alternatives for both the whipped topping and pudding mix.

    How can I use this Cool Whip and Pudding Frosting?

    This frosting is versatile; use it to top cakes, cupcakes, or even as a dip for fruits or cookies.

    Final Thoughts

    This Cool Whip and Pudding Frosting is a delightful addition to any dessert, offering both ease and taste. I encourage you to try making it and share your thoughts in the comments below!


    Desserts

    Cool Whip and Pudding Frosting


    5.0 from 24 reviews

    This creamy and delicious Cool Whip and Pudding Frosting is perfect for all your dessert needs. Whether you're decorating a birthday cake, topping cupcakes, or using it as a dip for fruit, this quick and easy frosting will become a favorite in your kitchen!

    Author: Munch Twist
    Prep Time: 5 minutes
    Cook Time: 0 minutes
    Total Time: 5 minutes
    Yield: 8 servings
    Category: Desserts
    Method: No bake
    Cuisine: American

    Cool Whip and Pudding Frosting

    SCALE:
    1x
    2x
    3x
    Cook Mode: Prevent your screen from going dark

    Ingredients

    • 1 teaspoon vanilla extract
    • 2 tbsp powdered sugar
    • 8 oz container Cool Whip (thawed)
    • 1/2 cup milk
    • 1 package instant vanilla pudding mix (3.4 oz)

    Instructions

    1. In a large mixing bowl, combine the instant vanilla pudding mix, powdered sugar, milk, and vanilla extract.
    2. Beat with an electric mixer on medium-high speed for 2 minutes until the mixture is smooth and thick.
    3. Add the Cool Whip to the mixture and beat on medium speed until well combined and fluffy.
    4. Use the frosting immediately to top cakes or cupcakes. If storing for later use, transfer to an airtight container and refrigerate until ready to use.

    Nutrition Facts

    Serving Size: 1 serving
    Calories: 140 kcal
    Sugar: 16g
    Sodium: 100mg
    Fat: 6g
    Saturated Fat: 4g
    Carbohydrates: 20g
    Fiber: 0g
    Protein: 1g
    Cholesterol: 0mg