Author: munch twist

  • Delicious Beef and Bean Burger Recipe You’ll Love

    Delicious Beef and Bean Burger Recipe You’ll Love

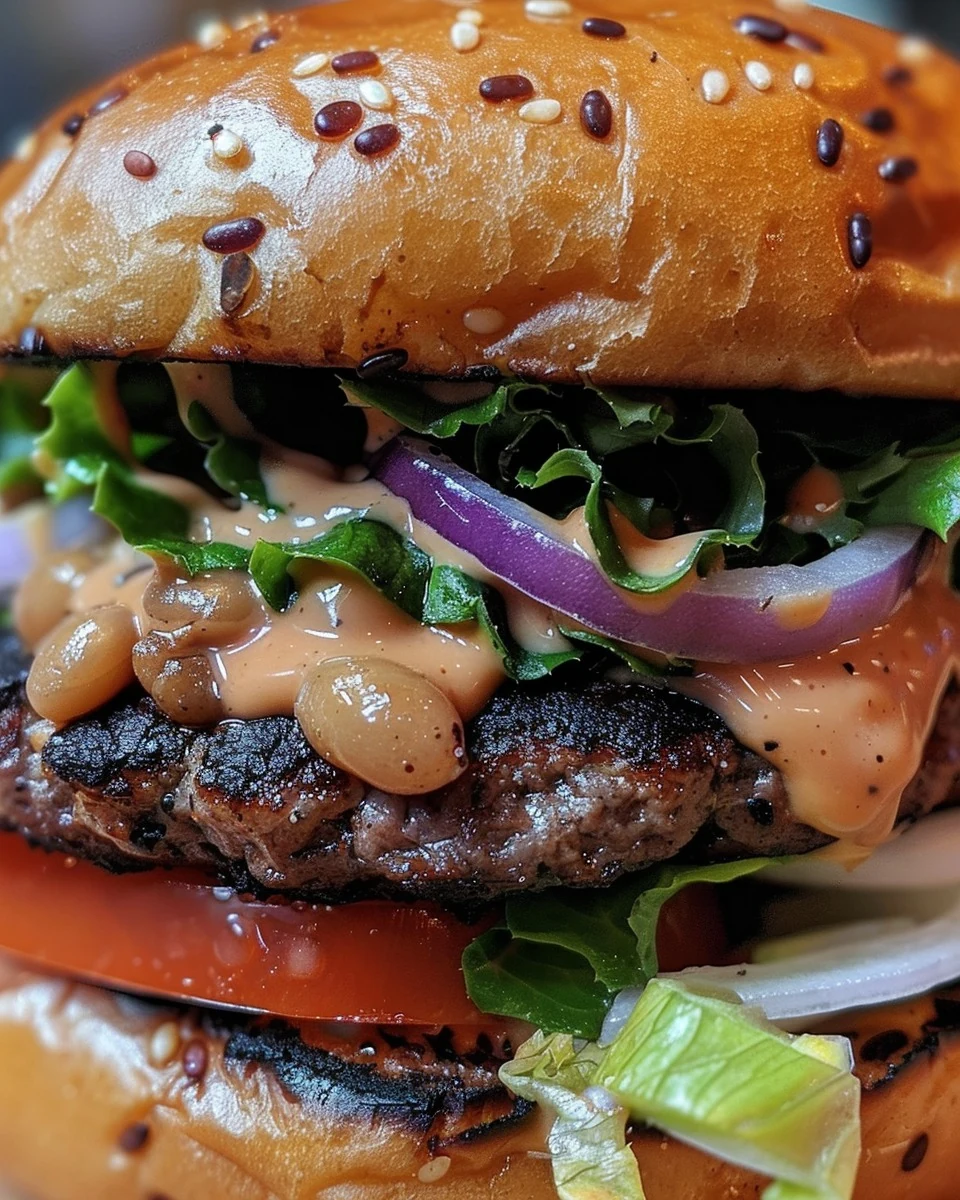
    Beef and Bean Burgers offer a delightful blend of flavors and textures that will satisfy your cravings. This hearty recipe combines the richness of beef with the wholesome goodness of beans, creating a burger that is both delicious and nutritious. Perfect for family dinners or casual gatherings, these burgers are sure to impress.

    Why You’ll Love This Recipe

    • Nutritious & Filling: Packed with protein and fiber, these burgers will keep you satisfied.
    • Quick & Easy: Ready in under 30 minutes, making them perfect for busy weeknights.
    • Versatile: Customize with your favorite toppings and sauces for a personal touch.
    • Budget-Friendly: Using beans stretches the beef, making this recipe economical.
    • Oven-Baked: Baking instead of frying reduces fat while still delivering great flavor.

    Tools and Equipment

    Having the right tools makes cooking easier and more enjoyable.

    Essential Tools

    • Mixing bowl
    • Baking sheet
    • Aluminum foil
    • Potato masher or fork
    • Measuring utensils

    Why These Tools Matter

    • Mixing bowl: Essential for combining ingredients without making a mess.
    • Baking sheet: Allows even cooking and easy cleanup, especially with foil.
    • Potato masher: Perfect for efficiently mashing beans to the desired consistency.

    Ingredients for Beef and Bean Burger

    Main Ingredients

    • 1/2 tbsp paprika
    • 3 cloves garlic, minced
    • 1 egg
    • 1 lb extra lean ground beef
    • 1 can (540 mL/19 oz) low sodium black beans, drained and rinsed
    • 1 tsp ground cumin
    • 1/4 tsp black pepper
    • 1/2 cup finely chopped onion
    • 1/2 tsp salt
    • 2 tbsp Dijon mustard

    How to Make Beef and Bean Burger Step-by-Step

    Step 1: Preheat and Prepare

    Preheat your oven to 400°F (200°C). Line a baking sheet with aluminum foil to simplify cleanup later.

    Step 2: Mash the Beans

    In a large mixing bowl, use a fork or potato masher to mash the black beans until they are mostly smooth. This creates a good base for the burgers.

    Step 3: Mix in the Flavors

    Add the finely chopped onion, minced garlic, Dijon mustard, ground cumin, paprika, salt, black pepper, and egg to the mashed beans. Stir well to ensure all the ingredients are combined.

    Step 4: Incorporate the Beef

    Add the ground beef to the mixture. Use your hands or a spatula to mix thoroughly until everything is well combined.

    Step 5: Form the Patties

    Shape the mixture into 8 equal-sized patties. Place them on the prepared baking sheet, ensuring they have space between them for even cooking.

    Step 6: Bake

    Bake in the preheated oven for 15-17 minutes. Use a meat thermometer to check that the internal temperature reaches 165°F (74°C).

    Step 7: Serve

    Enjoy your Beef and Bean Burgers hot. Serve them on buns with your favorite toppings, such as lettuce, tomato, or avocado.

    Preparation Time: 15 minutes | Cooking Time: 15-17 minutes

    Nutritional Information (per serving)

    • Calories: 250 kcal
    • Carbohydrates: 10g
    • Protein: 25g
    • Fat: 12g
    • Fiber: 5g
    • Sugar: 1g

    Enjoy these delicious and nutritious Beef and Bean Burgers, perfect for any meal!

    How to Serve Beef and Bean Burger

    Enhance your dining experience with creative serving suggestions for your Beef and Bean Burger.

    Classic Toppings

    Dress your Beef and Bean Burger with classic toppings like lettuce, tomato, and pickles. Add a slice of cheddar cheese for an extra layer of flavor.

    Spicy Avocado Spread

    Top your burger with a creamy avocado spread mixed with lime juice and jalapeños. This adds a zesty kick that complements the savory beef and beans.

    Gourmet Slaw

    Serve your burger with a side of tangy coleslaw made from cabbage, carrots, and a vinegar-based dressing. The crunch and acidity of the slaw balance the richness of the burger.

    Pro Tips for the Best Beef and Bean Burger

    Follow these expert tips to elevate your Beef and Bean Burger to perfection.

    • Choose Lean Beef: Use extra lean ground beef to keep the burgers juicy without excess fat.
    • Don’t Overmix: Mix the ingredients just until combined to maintain a tender texture in the burgers.
    • Chill the Patties: Refrigerate the formed patties for about 30 minutes before baking to help them hold their shape.
    • Use a Thermometer: Ensure your burgers reach an internal temperature of 165°F (74°C) for safe consumption.
    • Experiment with Spices: Feel free to customize the flavor profile by adding spices such as chili powder or smoked paprika for a unique twist.

    Best Side Dishes and Pairings

    Round out your meal with these delightful side dishes and drinks that complement the Beef and Bean Burger.

    1. Sweet Potato Fries: Their natural sweetness and crispiness offer a delicious contrast to the savory burger.
    2. Grilled Corn on the Cob: The smoky flavor of grilled corn enhances the overall taste experience.
    3. Caesar Salad: A refreshing Caesar salad provides a crisp and creamy side that pairs well with the hearty burger.
    4. Craft Beer: A cold craft beer, especially an amber or pale ale, complements the rich flavors of the beef and beans.
    5. Fruit Salad: A light fruit salad adds a refreshing sweetness that balances the savory elements of the burger.

    Common Mistakes to Avoid

    • Not Mashing the Beans Properly: Ensure the black beans are well mashed for better texture and binding.
    • Overmixing the Ingredients: Mixing too much can lead to tough patties; combine just until everything is incorporated.
    • Skipping the Seasoning: Don’t forget to season the mixture well; bland burgers can be disappointing.
    • Not Checking the Temperature: Always use a meat thermometer to confirm the patties have reached 165°F (74°C) for safety.

    Storage & Reheating Instructions

    Refrigerator Storage

    Store your Beef and Bean Burgers in airtight containers in the refrigerator. They will stay fresh for up to 3 days.

    Freezing Instructions

    To freeze, wrap each burger tightly in plastic wrap and place them in a freezer-safe bag. They can be stored for up to 3 months. For best results, thaw in the refrigerator overnight before reheating.

    Reheating Tips

    • Oven: Preheat to 350°F (175°C) and bake for about 10 minutes, or until heated through.
    • Microwave: Place on a microwave-safe plate and heat for 1-2 minutes, checking for even heating.
    • Stovetop: Heat a skillet over medium heat and cook for about 5 minutes on each side, or until warm.

    Frequently Asked Questions

    How do I make a Beef and Bean Burger vegetarian?

    You can substitute the ground beef with additional black beans or other plant-based proteins like lentils or quinoa while keeping the other ingredients the same.

    Can I grill the Beef and Bean Burgers instead of baking them?

    Yes, you can grill these burgers. Preheat the grill and cook for about 5-7 minutes on each side or until the internal temperature reaches 165°F (74°C).

    What toppings go well with Beef and Bean Burgers?

    Popular toppings include avocado, lettuce, tomato, cheese, and various sauces such as ketchup or barbecue sauce.

    Can I make Beef and Bean Burgers ahead of time?

    Absolutely! You can prepare the mixture a day in advance and refrigerate it. Form the patties just before cooking for the best texture.

    What is the nutritional information for a Beef and Bean Burger?

    Each Beef and Bean Burger contains approximately 250 calories, with 25g of protein, 10g of carbohydrates, and 5g of fiber.

    Final Thoughts

    Make these flavorful Beef and Bean Burgers for a nutritious and satisfying meal that everyone will love. Don’t forget to leave a comment with your experience and any variations you tried!


    Dinner

    Beef and Bean Burger


    5.0 from 24 reviews

    These Beef and Bean Burgers combine lean ground beef with nutritious black beans, creating a delicious and satisfying meal. Packed with flavor from garlic, onion, and spices, they are perfect for any occasion. Serve them hot on buns with your favorite toppings for a hearty dish.
    Author: Munch Twist
    Prep Time: 15 minutes
    Cook Time: 17 minutes
    Total Time: 32 minutes
    Yield: 8 servings
    Category: Dinner
    Method: No bake
    Cuisine: American

    Beef and Bean Burger

    SCALE:
    1x
    2x
    3x
    Cook Mode: Prevent your screen from going dark

    Ingredients

    • 1/2 tbsp paprika
    • 3 cloves garlic, minced
    • 1 egg
    • 1 lb extra lean ground beef
    • 1 can (540 mL/19 oz) low sodium black beans, drained and rinsed
    • 1 tsp ground cumin
    • 1/4 tsp black pepper
    • 1/2 cup finely chopped onion
    • 1/2 tsp salt
    • 2 tbsp Dijon mustard

    Instructions

    1. Preheat your oven to 400°F (200°C) and line a baking sheet with aluminum foil.
    2. In a large mixing bowl, mash the black beans until mostly smooth.
    3. Add the finely chopped onion, minced garlic, Dijon mustard, ground cumin, paprika, salt, black pepper, and egg to the mashed beans. Mix well to combine.
    4. Add the ground beef to the bowl. Mix thoroughly until all ingredients are well combined.
    5. Shape the mixture into 8 equal-sized patties and place them on the prepared baking sheet.
    6. Bake in the preheated oven for 15-17 minutes, or until the internal temperature reaches 165°F (74°C).
    7. Enjoy your Beef and Bean Burgers hot, served on buns with your favorite toppings!
    Nutrition Facts

    Serving Size: 1 serving
    Calories: 250 kcal
    Sugar: 1g
    Sodium: 300mg
    Fat: 12g
    Saturated Fat: 4g
    Carbohydrates: 10g
    Fiber: 5g
    Protein: 25g
    Cholesterol: 70mg

  • Delicious Grilled Cheeseburger Wraps Recipe to Try

    Delicious Grilled Cheeseburger Wraps Recipe to Try

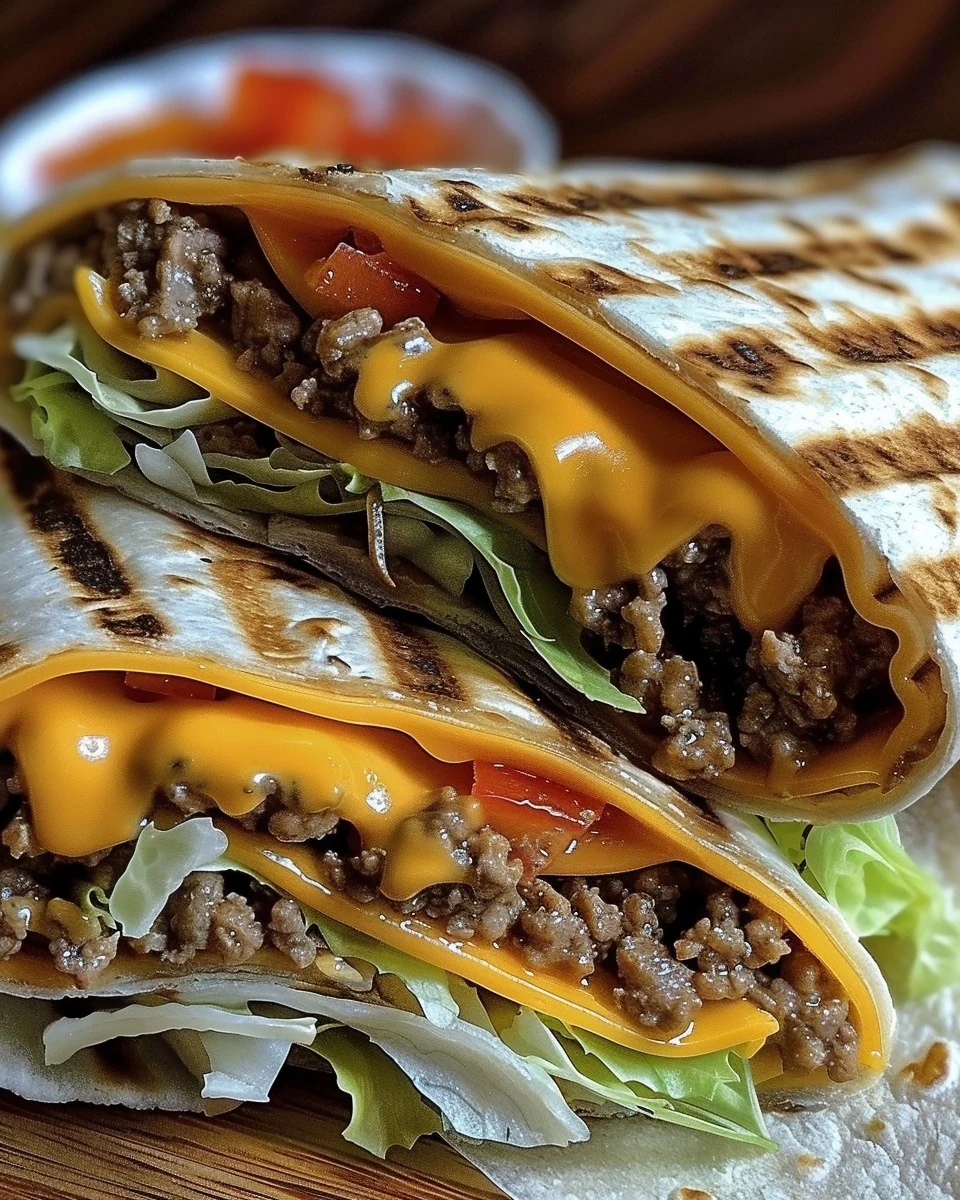
    Grilled Cheeseburger Wraps are a delicious twist on a classic favorite. These wraps combine the juicy flavors of a cheeseburger with the convenience of a tortilla, making them perfect for a quick meal or a fun dinner. With a crispy exterior and a melty filling, they are sure to be a hit with family and friends.

    Why You’ll Love This Recipe

    • Flavorful Fusion: Enjoy the classic cheeseburger taste wrapped in a convenient tortilla.
    • Quick & Easy: Ready in under 30 minutes, perfect for busy weeknights or last-minute gatherings.
    • Customizable: Tailor the ingredients to your liking by adding your favorite toppings or sauces.
    • Great for Meal Prep: Make a batch ahead of time and enjoy them throughout the week.
    • Kid-Friendly: A fun way to get kids involved in cooking while they enjoy their favorite flavors.

    Tools and Equipment

    Having the right tools makes preparation a breeze. Here are the essentials you will need.

    Essential Tools

    • Non-stick skillet or grill pan
    • Spatula
    • Cooking spoon
    • Sharp knife
    • Cutting board

    Why These Tools Matter

    • Non-stick skillet or grill pan: Prevents sticking and ensures even cooking for a perfect golden crust.
    • Spatula: Easily flips the wraps without tearing, ensuring a beautiful presentation.
    • Sharp knife and cutting board: Essential for safely chopping ingredients and assembling the wraps efficiently.

    Ingredients for Grilled Cheeseburger Wraps

    Main Ingredients

    • 1 cup shredded lettuce
    • 4 large flour tortillas
    • 1 cup shredded cheddar cheese
    • 1 pound ground beef
    • 1/2 cup diced onions
    • 1 cup diced tomatoes
    • Salt and pepper, to taste
    • Ketchup, mustard, and pickles, for serving (optional)

    How to Make Grilled Cheeseburger Wraps Step-by-Step

    Step 1: Cook the Beef

    In a skillet over medium heat, cook the ground beef until fully browned and cooked through. Season with salt and pepper to taste. After cooking, drain any excess grease and set the beef aside.

    Step 2: Assemble the Wraps

    Lay a flour tortilla on a clean surface. Spoon some cooked ground beef onto the center of the tortilla. Top with shredded cheddar cheese, shredded lettuce, diced tomatoes, and diced onions. If desired, drizzle with ketchup and mustard, and add a few pickle slices.

    Step 3: Wrap It Up

    Fold in the sides of the tortilla over the filling, then roll it up tightly to form a wrap. Repeat with the remaining tortillas and filling.

    Step 4: Grill the Wraps

    Heat a large skillet or grill pan over medium heat. Place the wraps seam-side down in the skillet or on the grill pan. Cook each wrap for 2-3 minutes on each side, or until golden brown and crispy.

    Step 5: Serve

    Remove the wraps from the skillet and let them cool slightly before slicing in half. Serve warm with additional ketchup, mustard, and pickles on the side if desired.

    With simple ingredients and easy steps, these Grilled Cheeseburger Wraps are a delightful meal option that everyone can enjoy.

    How to Serve Grilled Cheeseburger Wraps

    Grilled Cheeseburger Wraps can be enjoyed in various creative ways that enhance their flavor and presentation.

    Burger Style

    Serve the wraps with additional toppings on the side, such as crispy bacon or avocado slices, allowing everyone to customize their wraps just like a traditional cheeseburger.

    Dipping Sauces

    Offer a selection of dipping sauces alongside the wraps, such as BBQ sauce, ranch dressing, or a spicy sriracha mayo, for added flavor and variety.

    Salad Side

    Pair the wraps with a fresh side salad featuring mixed greens, cucumbers, and a light vinaigrette. This adds a refreshing contrast to the richness of the wraps.

    Pro Tips for the Best Grilled Cheeseburger Wraps

    To elevate your Grilled Cheeseburger Wraps, consider these helpful tips.

    • Use Quality Meat: Opt for fresh, high-quality ground beef for the best flavor and texture in your wraps.
    • Don’t Overstuff: Be mindful not to overfill the tortillas, as this can make them difficult to wrap and grill properly.
    • Experiment with Cheese: Try different types of cheese, such as pepper jack or gouda, to add unique flavors to your wraps.
    • Grill for Crispiness: Ensure your skillet or grill pan is properly preheated to achieve that perfect golden-brown, crispy exterior on the wraps.
    • Let Them Rest: Allow the wraps to rest for a minute after grilling before slicing. This helps to set the fillings and makes for a cleaner cut.

    Best Side Dishes and Pairings

    Pairing your Grilled Cheeseburger Wraps with complementary dishes can enhance your meal experience.

    1. Sweet Potato Fries – Their natural sweetness and crispy texture make a perfect contrast to the savory flavors of the wraps.
    2. Coleslaw – A tangy and crunchy coleslaw adds a refreshing element that balances the richness of the wraps.
    3. Corn on the Cob – Grilled or boiled corn is a classic summer side that adds a sweet, juicy bite to the meal.
    4. Potato Salad – A creamy potato salad provides a hearty and satisfying side that pairs well with the wraps.
    5. Iced Tea – A refreshing glass of iced tea, whether sweetened or unsweetened, complements the flavors of the wraps beautifully.

    Common Mistakes to Avoid

    • Overfilling the Wraps: Adding too much filling can make it difficult to wrap tightly and can lead to spills during grilling.
    • Not Cooking the Beef Thoroughly: Ensure the ground beef is fully cooked to avoid any food safety issues.
    • Skipping Seasoning: Failing to season the beef properly can result in bland flavors; salt and pepper are essential.
    • Using Cold Ingredients: Using cold fillings can make the wrap less enjoyable; warm ingredients help create a better texture and flavor.

    Storage & Reheating Instructions

    Refrigerator Storage

    Store the Grilled Cheeseburger Wraps in airtight containers in the refrigerator. They will stay fresh for up to 3 days.

    Freezing Instructions

    To freeze, wrap each grilled wrap tightly in plastic wrap or aluminum foil, then place them in a freezer-safe bag. They can be frozen for up to 2 months.

    Reheating Tips

    • Oven: Preheat the oven to 350°F (175°C) and place the wraps on a baking sheet. Heat for 10-15 minutes until warmed through.
    • Microwave: Place the wrap on a microwave-safe plate and cover with a damp paper towel. Heat for 1-2 minutes or until hot.
    • Stovetop: Heat a skillet over medium heat and add the wrap. Cook for about 2-3 minutes on each side until warmed and crispy.

    Frequently Asked Questions

    What can I serve with Grilled Cheeseburger Wraps?

    You can serve these wraps with a side of fries, a fresh salad, or even some homemade coleslaw for a complete meal.

    Can I customize the fillings in Grilled Cheeseburger Wraps?

    Absolutely! Feel free to add your favorite ingredients such as avocado, jalapeños, or different types of cheese to suit your taste.

    How do I make Grilled Cheeseburger Wraps healthier?

    Consider using lean ground beef, whole wheat tortillas, or adding more vegetables to increase the nutritional value of your wraps.

    Can I use a different type of meat for these wraps?

    Yes, you can substitute ground turkey, chicken, or even plant-based meat alternatives to create a different flavor profile.

    How long do Grilled Cheeseburger Wraps take to make?

    The preparation and cooking time totals about 25 minutes, making them a quick and delicious meal option.

    Final Thoughts

    Grilled Cheeseburger Wraps are a delightful and satisfying meal that can easily be customized to your liking. We encourage you to try this recipe and share your thoughts or any variations you make in the comments section below.


    Dinner

    Grilled Cheeseburger Wraps


    5.0 from 24 reviews

    These Grilled Cheeseburger Wraps are a delicious and satisfying meal that combines the classic flavors of a cheeseburger in a convenient wrap. Packed with ground beef, cheese, and fresh vegetables, they are perfect for a quick lunch or dinner.

    Author: Munch Twist
    Prep Time: 15 minutes
    Cook Time: 10 minutes
    Total Time: 25 minutes
    Yield: 4 servings
    Category: Lunch
    Method: No bake
    Cuisine: American

    Grilled Cheeseburger Wraps

    SCALE:
    1x
    2x
    3x
    Cook Mode: Prevent your screen from going dark

    Ingredients

    • 1 cup shredded lettuce
    • 4 large flour tortillas
    • 1 cup shredded cheddar cheese
    • 1 pound ground beef
    • 1/2 cup diced onions
    • 1 cup diced tomatoes
    • Salt and pepper, to taste
    • Ketchup, mustard, and pickles, for serving (optional)

    Instructions

    1. In a skillet over medium heat, cook the ground beef until fully browned and cooked through. Season with salt and pepper to taste. Drain any excess grease and set the beef aside.
    2. Lay a flour tortilla on a clean surface. Spoon some cooked ground beef onto the center of the tortilla. Top with shredded cheddar cheese, shredded lettuce, diced tomatoes, and diced onions. Optionally, add a drizzle of ketchup and mustard, and a few pickle slices if desired.
    3. Fold in the sides of the tortilla over the filling, then roll it up tightly to form a wrap. Repeat with the remaining tortillas and filling.
    4. Heat a large skillet or grill pan over medium heat. Place the wraps seam-side down in the skillet or on the grill pan. Cook each wrap for 2-3 minutes on each side, or until golden brown and crispy.
    5. Remove wraps from the skillet and let them cool slightly before slicing in half. Serve warm with additional ketchup, mustard, and pickles on the side if desired.

    Nutrition Facts

    Serving Size: 1 serving
    Calories: 480 kcal
    Sugar: 4g
    Sodium: 800mg
    Fat: 24g
    Saturated Fat: 10g
    Carbohydrates: 40g
    Fiber: 2g
    Protein: 24g
    Cholesterol: 80mg

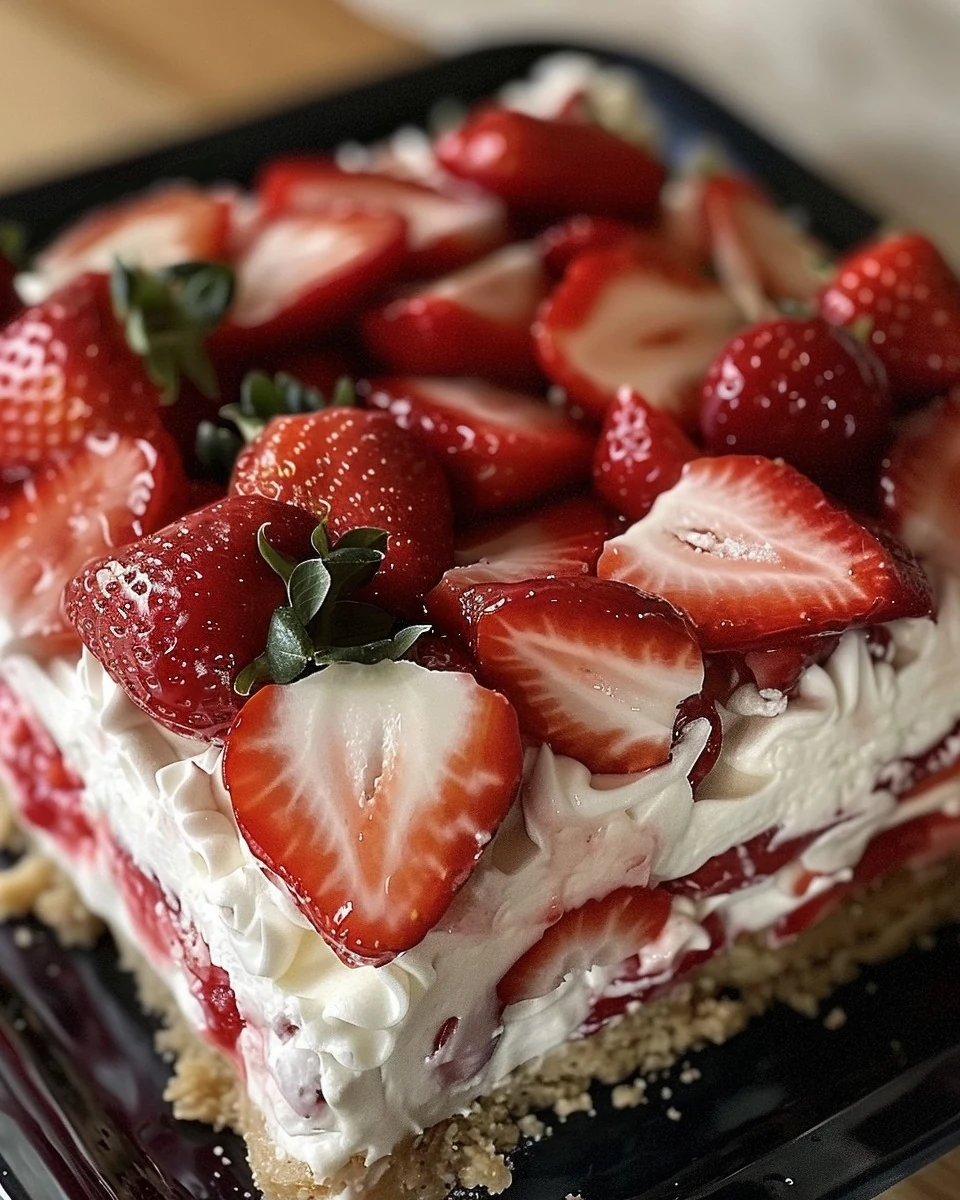
  • Delicious Strawberry Cream Cheese Icebox Cake Recipe

    Delicious Strawberry Cream Cheese Icebox Cake Recipe

    Strawberry Cream Cheese Icebox Cake is a delightful dessert that combines the freshness of strawberries with the rich creaminess of a cheesecake filling. This no-bake cake is perfect for warm weather, offering a refreshing treat that is both visually appealing and delicious.

    Why You’ll Love This Recipe

    • No-Bake Delight: This cake requires no baking, making it a hassle-free option for any occasion.
    • Layered Perfection: The combination of cream cheese and strawberries creates a beautiful, layered dessert that impresses.
    • Make-Ahead Convenience: Prepare it the night before, allowing flavors to meld for a fantastic taste experience.
    • Kid-Friendly: With its sweet and creamy flavor, this cake is a hit with both kids and adults.
    • Versatile Ingredients: Use seasonal strawberries or substitute with other fruits for a customized version.

    Tools and Equipment

    These essential kitchen tools will make crafting your Strawberry Cream Cheese Icebox Cake simple and enjoyable.

    Essential Tools

    • Electric mixer
    • Mixing bowls
    • 3-quart baking dish (13×9-inch)
    • Measuring cups
    • Cutting board and knife

    Why These Tools Matter

    • Electric mixer: Ensures a smooth, well-blended cream cheese mixture in less time.
    • Mixing bowls: Having multiple bowls makes it easier to prepare and layer ingredients.
    • Baking dish: A 3-quart dish is the perfect size for layering and serving this cake.

    Ingredients for Strawberry Cream Cheese Icebox Cake

    Fresh Ingredients

    • 2 pounds strawberries
    • 1 (8-ounce) package cream cheese, room temperature
    • 1 (12-ounce) carton Cool Whip, divided

    Pantry Ingredients

    • 2 sleeves graham crackers
    • 1 (14-ounce) can sweetened condensed milk
    • 2 (3.4-ounce) packages instant cheesecake-flavored pudding
    • 3 cups milk

    How to Make Strawberry Cream Cheese Icebox Cake Step-by-Step

    Step 1: Prepare the Strawberries

    Clean and slice the strawberries into 1/4-inch thick slices. Set them aside for layering later.

    Step 2: Prepare the Dish

    Line the bottom of a 3-quart (13×9-inch) baking dish with graham crackers. You will need about 6 whole crackers, breaking a seventh to fill any gaps.

    Step 3: Mix the Cream Cheese Mixture

    In a large bowl, beat together the cream cheese and sweetened condensed milk using an electric mixer until smooth. Add the pudding mixes and milk, mixing on low for 4 to 5 minutes until the mixture thickens. Gently fold in 2 cups of Cool Whip until well combined.

    Step 4: Assemble the Cake

    Pour half of the cream cheese mixture over the layer of graham crackers. Layer half of the strawberry slices on top. Add another layer of graham crackers, followed by the remaining cream cheese mixture. Finally, top with the remaining strawberry slices.

    Step 5: Chill the Cake

    Cover the dish and refrigerate for 6 to 8 hours, allowing the flavors to meld and the cake to set properly.

    Step 6: Finish and Serve

    Before serving, gently blot any moisture released by the strawberries with a paper towel. Spread the remaining Cool Whip over the top and sprinkle with crushed graham crackers for added texture.

    Enjoy this refreshing and creamy Strawberry Cream Cheese Icebox Cake as a perfect ending to any meal.

    How to Serve Strawberry Cream Cheese Icebox Cake

    This dessert is as versatile as it is delicious. Here are a few creative serving ideas:

    Individual Cups

    Serve the Strawberry Cream Cheese Icebox Cake in individual cups for a fun and personalized touch. Layer the ingredients in clear cups to showcase the beautiful colors of the strawberries and cream.

    Icebox Cake Parfait

    Transform leftovers into a parfait by layering the cake with additional fresh strawberries and a drizzle of chocolate sauce. This presentation adds elegance and makes for a delightful dessert.

    Picnic Treat

    Pack slices of the Strawberry Cream Cheese Icebox Cake for a picnic. Its chilled nature makes it a refreshing treat on a warm day, and the easy transportability makes it a perfect option for outdoor gatherings.

    Pro Tips for the Best Strawberry Cream Cheese Icebox Cake

    To ensure your icebox cake is a showstopper, consider these expert tips:

    • Use Fresh Strawberries: Opt for ripe, fresh strawberries for the best flavor and texture. Frozen strawberries can release excess moisture, which may affect the cake’s consistency.

    • Layer Carefully: When assembling, try to layer the ingredients evenly. This not only enhances the visual appeal but ensures every bite has a balanced flavor.

    • Chill Longer for Better Flavor: While 6 to 8 hours of chilling is recommended, allowing the cake to sit overnight can deepen the flavors and improve the texture.

    • Gently Fold Cool Whip: When incorporating Cool Whip into your cream cheese mixture, fold gently to maintain lightness and avoid deflating the mixture.

    • Crushed Graham Crackers for Garnish: For an added crunch, sprinkle crushed graham crackers on top before serving. This not only enhances texture but also adds visual interest.

    Best Side Dishes and Pairings

    Pair your Strawberry Cream Cheese Icebox Cake with these delightful side dishes and drinks:

    1. Mint Iced Tea: A refreshing beverage that complements the sweetness of the cake, enhancing its fruity flavors.

    2. Lemon Sorbet: The tartness of lemon sorbet provides a perfect contrast to the creamy cake, making for a balanced dessert experience.

    3. Fruit Salad: A light and refreshing fruit salad can round out the meal, providing additional fresh flavors that harmonize with the strawberries.

    4. Cheese Platter: A selection of mild cheeses can enhance the dessert’s richness, offering a savory contrast that elevates the overall dining experience.

    5. Vanilla Ice Cream: A scoop of vanilla ice cream adds a creamy element that pairs beautifully with the strawberry flavors, creating a classic combination.

    6. Sparkling Water: For a light and refreshing drink option, serve sparkling water with a slice of lemon or lime. This will cleanse the palate between bites of the rich cake.

    Common Mistakes to Avoid

    • Using Warm Ingredients: Ensure that the cream cheese is at room temperature; cold cream cheese will not blend smoothly.
    • Skipping the Chilling Time: Allow the cake to chill for at least 6 hours. Skipping this step can result in a runny dessert.
    • Overmixing the Cream Cheese Mixture: Mix just until combined to avoid a grainy texture in the final cake.
    • Not Preparing Strawberries Properly: Slice strawberries evenly and let them drain if they’re too juicy, to prevent excess moisture.

    Storage & Reheating Instructions

    Refrigerator Storage

    Store leftover Strawberry Cream Cheese Icebox Cake in an airtight container in the refrigerator. It will stay fresh for up to 3 days.

    Freezing Instructions

    For best results, freeze the cake before adding the Cool Whip topping. Wrap it tightly in plastic wrap and then in aluminum foil. It can be frozen for up to 2 months. Thaw in the refrigerator overnight before serving.

    Reheating Tips

    • Oven: Preheat to 350°F (175°C) and cover loosely with foil. Heat for about 15 minutes, checking to ensure it does not become too warm.
    • Microwave: Place a slice on a microwave-safe plate. Heat for 10-15 seconds, just until slightly warm.
    • Stovetop: Not recommended, as this dessert is best enjoyed chilled.

    Frequently Asked Questions

    How do I make a Strawberry Cream Cheese Icebox Cake without pudding?

    You can substitute the pudding with additional cream cheese mixed with sugar and vanilla extract. Adjust the milk for consistency.

    Can I use frozen strawberries in this recipe?

    Yes, you can use frozen strawberries. Thaw and drain them well to remove excess moisture before layering.

    How long can I store Strawberry Cream Cheese Icebox Cake?

    When stored properly in the refrigerator, this cake lasts for up to 3 days, making it great for meal prep or leftovers.

    Can I make this cake a day in advance?

    Absolutely! In fact, making it a day ahead allows the flavors to meld beautifully, enhancing the overall taste.

    Is this dessert gluten-free?

    The traditional recipe contains graham crackers, which are not gluten-free. However, you can use gluten-free graham crackers as a substitute.

    Final Thoughts

    This Strawberry Cream Cheese Icebox Cake is a delightful, no-bake dessert perfect for any occasion. Its creamy layers and fresh strawberries create a refreshing treat that everyone will love. We encourage you to try this recipe and share your feedback in the comments below!


    Desserts

    Strawberry Cream Cheese Icebox Cake


    5.0 from 24 reviews

    This Strawberry Cream Cheese Icebox Cake is a delightful and refreshing dessert that combines layers of creamy cheesecake filling, fresh strawberries, and crunchy graham crackers. Perfect for warm weather gatherings, this no-bake cake is easy to prepare and sure to impress your guests.

    Author: Munch Twist
    Prep Time: 20 minutes
    Cook Time: 25 mins
    Total Time: 6 hours 20 minutes
    Yield: 12 servings
    Category: Desserts
    Method: Baking
    Cuisine: American

    Strawberry Cream Cheese Icebox Cake

    SCALE:
    1x
    2x
    3x
    Cook Mode: Prevent your screen from going dark

    Ingredients

    • 2 pounds strawberries
    • 2 sleeves graham crackers
    • 1 (8-ounce) package cream cheese, room temperature
    • 1 (14-ounce) can sweetened condensed milk
    • 2 (3.4-ounce) packages instant cheesecake-flavored pudding
    • 3 cups milk
    • 1 (12-ounce) carton Cool Whip, divided

    Instructions

    1. Clean and slice strawberries into 1/4-inch thick slices. Set aside.
    2. Line the bottom of a 3-quart (13×9-inch) baking dish with graham crackers, using about 6 whole crackers and breaking up a seventh to fill gaps.
    3. In a large bowl, beat together the cream cheese and sweetened condensed milk with an electric mixer until smooth. Add the pudding mixes and milk, mixing on low for 4 to 5 minutes until the mixture begins to thicken. Gently fold in 2 cups of Cool Whip until well combined.
    4. Pour half of the cream cheese mixture over the graham crackers. Layer half of the strawberry slices on top. Add another layer of graham crackers, followed by the remaining cream cheese mixture. Top with the remaining strawberry slices.
    5. Cover and refrigerate for 6 to 8 hours to allow flavors to meld and the cake to set.
    6. Before serving, gently blot any moisture released by the strawberries with a paper towel. Spread the remaining Cool Whip over the top and sprinkle with crushed graham crackers.

    Nutrition Facts

    Serving Size: 1 serving
    Calories: 350 kcal
    Sugar: 30g
    Sodium: 200mg
    Fat: 16g
    Saturated Fat: 10g
    Carbohydrates: 49g
    Fiber: 2g
    Protein: 6g
    Cholesterol: 40mg

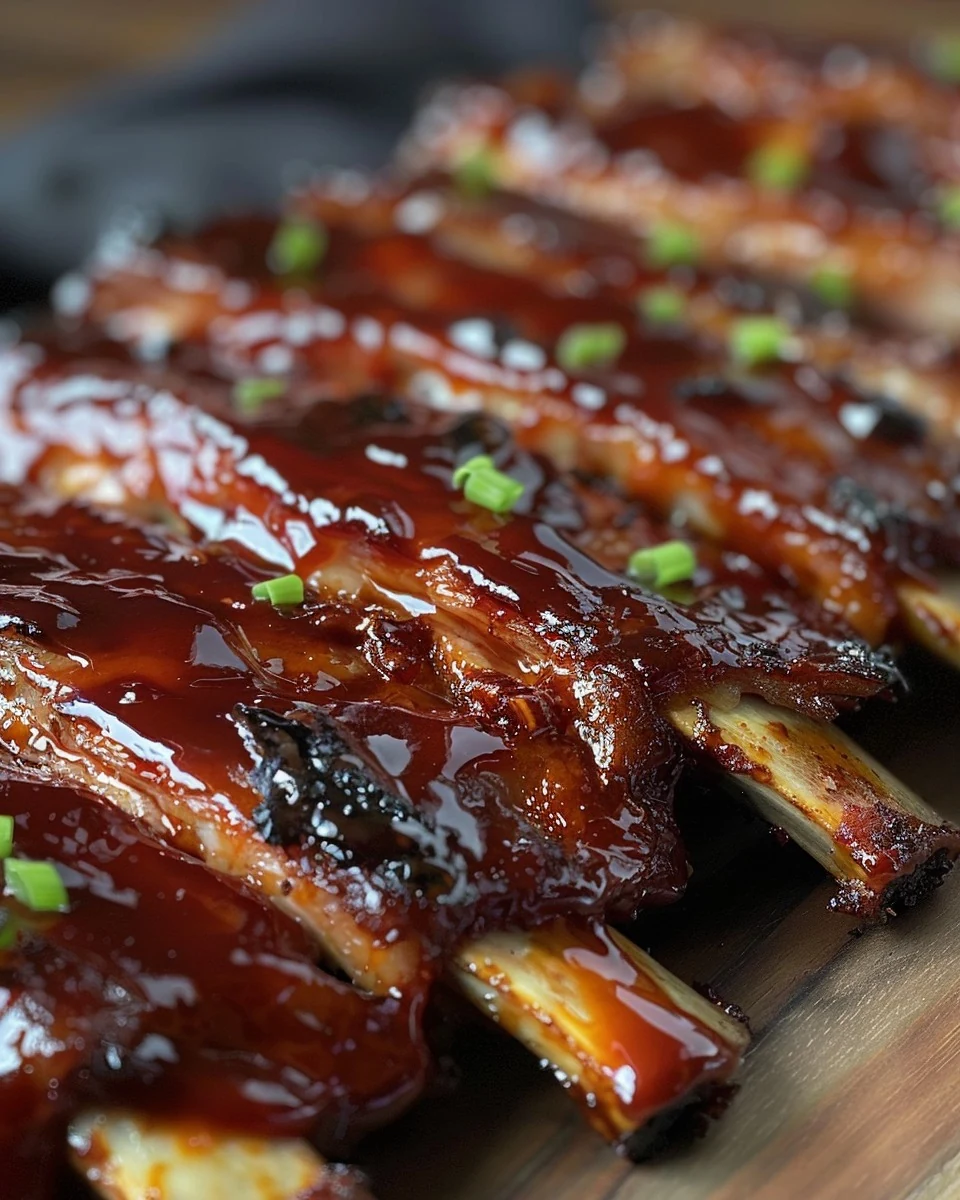
  • Delicious Dr Pepper Ribs Recipe You Must Try

    Delicious Dr Pepper Ribs Recipe You Must Try

    Dr Pepper Ribs are a delectable treat that combines the sweetness of soda with the smoky flavors of BBQ. These tender, juicy ribs are perfect for any gathering, offering a unique twist that will impress your guests.

    Why You’ll Love This Recipe

    • Tender & Flavorful: Slow cooking ensures the ribs are fork-tender and infused with rich flavors.
    • Unique Taste: The addition of Dr Pepper provides a sweet and tangy flavor profile that’s hard to resist.
    • Easy to Prepare: With minimal effort, you can create a dish that looks and tastes gourmet.
    • Perfect for Gatherings: These ribs are a crowd-pleaser, making them ideal for BBQs, parties, or family dinners.
    • Versatile Serving Options: Serve with your favorite sides, or enjoy them straight off the bone.

    Tools and Equipment

    Preparation is simplified with the right tools. Here are the essentials you will need.

    Essential Tools

    • Slow cooker
    • Baking sheet
    • Wire rack
    • Mixing bowl
    • Basting brush

    Why These Tools Matter

    • Slow cooker: Allows for hands-off cooking, making the ribs tender without constant monitoring.
    • Wire rack: Ensures even cooking and helps achieve that desired caramelized glaze on the ribs.
    • Basting brush: Helps evenly apply the BBQ glaze for a delicious finish.

    Ingredients for Dr Pepper Ribs

    For the Ribs

    • 4.5 lbs country-style pork ribs
    • 2 12 oz cans Dr. Pepper soda, divided

    For the BBQ Glaze

    • ¾ cup BBQ sauce
    • 1 tsp garlic powder
    • 2 tsp liquid smoke
    • 1 tsp ground black pepper
    • ½ cup Dr. Pepper soda (from the second can)

    How to Make Dr Pepper Ribs Step-by-Step

    Step 1: Prepare the Ribs in the Slow Cooker

    Place the pork ribs in a slow cooker. Pour one can of Dr. Pepper over the ribs. Cover and cook on low for 7 hours or on high for 4 hours, until the ribs are tender.

    Step 2: Preheat the Oven

    Preheat your oven to 400°F (200°C). Line a baking sheet with foil and place a wire rack on top.

    Step 3: Prepare the BBQ Glaze

    In a small bowl, mix together the BBQ sauce, liquid smoke, garlic powder, ground black pepper, and the remaining ½ cup of Dr. Pepper. Stir until well combined.

    Step 4: Transfer the Ribs to the Oven

    Carefully move the cooked ribs from the slow cooker to the wire rack on the prepared baking sheet.

    Step 5: Brush with BBQ Glaze

    Generously brush the ribs with the BBQ glaze, ensuring an even coating on all sides.

    Step 6: Bake the Ribs

    Bake the ribs in the preheated oven for 15 minutes. Flip the ribs, brush with additional BBQ glaze, and bake for another 15 minutes, or until the ribs are caramelized and glazed.

    Step 7: Serve and Enjoy

    Remove the ribs from the oven and serve hot, with any leftover BBQ sauce on the side for dipping.

    These Dr Pepper Ribs are sure to become a favorite. Enjoy the tender meat and the sweet, smoky flavors that make this dish a standout at any table.

    How to Serve Dr Pepper Ribs

    Dr Pepper ribs can be enjoyed in various ways to enhance their flavor and presentation.

    Serve with Coleslaw

    A refreshing coleslaw adds a crunchy texture and balances the sweetness of the ribs, making for a vibrant plate.

    Pair with Cornbread

    The buttery, slightly sweet flavor of cornbread complements the smoky BBQ glaze of the ribs, creating a comforting meal.

    Add Grilled Vegetables

    Grilled vegetables such as zucchini, bell peppers, and corn provide a colorful and healthy side that contrasts beautifully with the rich flavors of the ribs.

    Pro Tips for the Best Dr Pepper Ribs

    For the ultimate Dr Pepper ribs, consider these helpful tips.

    • Choose Quality Ribs: Opt for fresh, well-marbled pork ribs for maximum tenderness and flavor during cooking.
    • Marinate Overnight: Allow the ribs to marinate in the Dr Pepper and BBQ mixture overnight for enhanced flavor penetration.
    • Use a Meat Thermometer: Ensure the ribs reach an internal temperature of at least 190°F (88°C) for optimal tenderness.
    • Experiment with BBQ Sauce: Don’t hesitate to try different BBQ sauces to discover your preferred flavor profile.
    • Let Rest Before Serving: Allow the ribs to rest for a few minutes after baking to let the juices redistribute, ensuring each bite is juicy.

    Best Side Dishes and Pairings

    Pair your Dr Pepper ribs with these delightful sides and drinks for a complete meal.

    1. Classic Potato Salad: Creamy potato salad provides a rich contrast to the sweet and smoky flavors of the ribs.
    2. Baked Beans: The sweetness and heartiness of baked beans complement the ribs and create a satisfying barbecue experience.
    3. Sweet Potato Fries: Crispy sweet potato fries offer a delightful sweetness and crunch that pairs well with the ribs.
    4. Pickles: Tangy pickles add a refreshing bite, cutting through the richness of the ribs while enhancing the overall flavor.
    5. Iced Tea: A glass of refreshing iced tea balances the flavors and helps cleanse the palate between bites.

    Common Mistakes to Avoid

    • Skipping the Marinade: Don’t rush the process; let the ribs soak in the Dr. Pepper for maximum flavor.
    • Not Preheating the Oven: Ensure your oven is preheated to achieve that perfect caramelization on the glaze.
    • Overcrowding the Baking Sheet: Give the ribs space on the wire rack to allow for even cooking and glazing.
    • Ignoring the Cooking Times: Follow the suggested cooking times closely to ensure the ribs are tender and juicy.

    Storage & Reheating Instructions

    Refrigerator Storage

    Store leftover Dr Pepper Ribs in airtight containers in the refrigerator. They will stay fresh for up to 3 days.

    Freezing Instructions

    For long-term storage, wrap the ribs tightly in plastic wrap and then in aluminum foil before placing them in a freezer-safe container. They can be frozen for up to 3 months.

    Reheating Tips

    • Oven: Preheat to 350°F (175°C). Place ribs on a baking sheet and cover with foil. Heat for 20-25 minutes or until warmed through.
    • Microwave: Place ribs on a microwave-safe plate. Heat on medium power for 2-3 minutes, checking frequently to avoid overcooking.
    • Stovetop: Heat in a skillet over medium heat, turning occasionally until warmed through, about 10 minutes.

    Frequently Asked Questions

    How can I enhance the flavor of my Dr Pepper Ribs?

    You can enhance the flavor by marinating the ribs overnight in Dr. Pepper and your favorite spices for more intense taste.

    Can I use a different type of soda instead of Dr Pepper for the ribs?

    Yes, other sodas like cola or root beer can work well, but they will alter the flavor profile of the dish.

    How do I know when my Dr Pepper Ribs are done?

    The ribs are done when they are tender and easily pull away from the bone. The internal temperature should reach at least 145°F (63°C).

    Can I cook Dr Pepper Ribs in a pressure cooker?

    Yes, you can cook the ribs in a pressure cooker for about 30-40 minutes, followed by the same baking process for the glaze.

    What sides pair well with Dr Pepper Ribs?

    Great side dishes include coleslaw, cornbread, or baked beans, which complement the sweet and smoky flavors of the ribs.

    Final Thoughts

    These Dr Pepper Ribs are not only easy to make but also incredibly delicious. The combination of sweetness from the soda and the smokiness of the BBQ glaze creates a mouthwatering dish that is sure to impress. Give this recipe a try, and I encourage you to leave a comment with your feedback!


    Dinner

    Dr Pepper Ribs


    5.0 from 24 reviews

    These Dr Pepper Ribs are tender and flavorful, infused with the sweetness of Dr Pepper and a smoky BBQ glaze. Perfect for a family gathering or a weekend barbecue, these ribs are sure to impress with their rich taste and juicy texture.

    Author: Munch Twist
    Prep Time: 10 minutes
    Cook Time: 450 minutes
    Total Time: 460 minutes
    Yield: 6 servings
    Category: Desserts
    Method: No bake
    Cuisine: American

    Dr Pepper Ribs

    SCALE:
    1x
    2x
    3x
    Cook Mode: Prevent your screen from going dark

    Ingredients

    • 4.5 lbs country-style pork ribs
    • ¾ cup BBQ sauce
    • 1 tsp garlic powder
    • 2 tsp liquid smoke
    • 1 tsp ground black pepper
    • 2 12 oz cans Dr. Pepper soda

    Instructions

    1. Place the pork ribs in a slow cooker. Pour one can of Dr. Pepper over the ribs. Cover and cook on low for 7 hours or on high for 4 hours, until the ribs are tender.
    2. Preheat your oven to 400°F (200°C). Line a baking sheet with foil and place a wire rack on top.
    3. In a small bowl, mix together the BBQ sauce, liquid smoke, garlic powder, ground black pepper, and the remaining ½ cup of Dr. Pepper. Stir until well combined.
    4. Carefully move the cooked ribs from the slow cooker to the wire rack on the prepared baking sheet.
    5. Generously brush the ribs with the BBQ glaze, ensuring an even coating on all sides.
    6. Bake the ribs in the preheated oven for 15 minutes. Flip the ribs, brush with additional BBQ glaze, and bake for another 15 minutes, or until the ribs are caramelized and glazed.
    7. Remove the ribs from the oven and serve hot, with any leftover BBQ sauce on the side for dipping.

    Nutrition Facts

    Serving Size: 1 serving
    Calories: 420 kcal
    Sugar: 18g
    Sodium: 800mg
    Fat: 22g
    Saturated Fat: 8g
    Carbohydrates: 30g
    Fiber: 1g
    Protein: 32g
    Cholesterol: 100mg

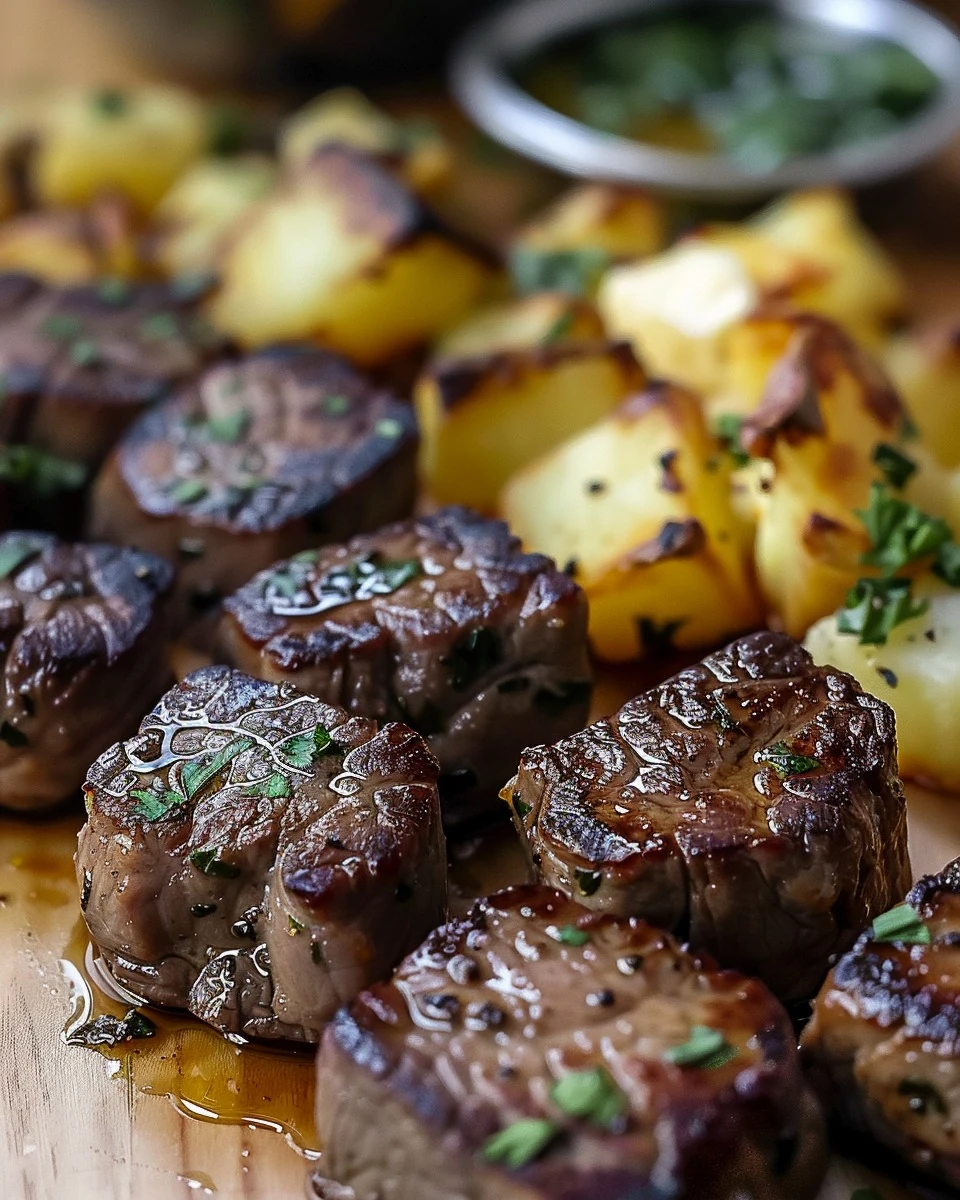
  • Savor Garlic Butter Steak Bites and Cheesy Smashed Potatoes

    Savor Garlic Butter Steak Bites and Cheesy Smashed Potatoes

    Garlic Butter Steak Bites and Cheesy Smashed Potatoes is a dish that combines rich flavors and comforting textures. The tender steak bites are sautéed in garlic butter, while the cheesy smashed potatoes provide a crispy, cheesy side. This meal is perfect for a cozy dinner or a special occasion.

    Why You’ll Love This Recipe

    • Delicious Flavor: The combination of garlic butter and juicy steak bites creates an irresistible taste.
    • Comforting Side Dish: Cheesy smashed potatoes are the ultimate comfort food, adding warmth to the meal.
    • Quick Preparation: Ready in under 50 minutes, making it a perfect option for busy weeknights.
    • Crowd-Pleaser: This dish is sure to impress family and friends at any gathering.
    • Easy to Customize: You can adjust the seasonings and cheese to suit your taste preferences.

    Tools and Equipment

    Having the right tools makes preparing this dish easier and more enjoyable.

    Essential Tools

    • Large pot
    • Griddle or skillet
    • Spatula
    • Cutting board
    • Knife

    Why These Tools Matter

    • Large pot: Essential for boiling the baby potatoes evenly.
    • Griddle or skillet: Provides a spacious surface for cooking both steak bites and smashed potatoes simultaneously.
    • Spatula: Helps in smashing the potatoes and flipping them without breaking.

    Ingredients for Garlic Butter Steak Bites and Cheesy Smashed Potatoes

    For the Steak Bites:

    • 1 pound sirloin steak, cut into cubes
    • 2 tablespoons minced garlic
    • 4 tablespoons butter
    • Salt and pepper to taste
    • Fresh parsley, chopped (for garnish)

    For the Smashed Potatoes:

    • 1 pound baby potatoes
    • 2 tablespoons olive oil
    • 1 cup shredded cheddar cheese
    • Salt and pepper to taste
    • Fresh chives, chopped (for garnish)

    How to Make Garlic Butter Steak Bites and Cheesy Smashed Potatoes Step-by-Step

    Step 1: Prep the Smashed Potatoes

    Begin by boiling the baby potatoes in a large pot of salted water until tender, about 15 minutes. Once cooked, drain the potatoes and let them cool slightly. Preheat a griddle over medium-high heat.

    Step 2: Smash and Cook the Potatoes

    Place the boiled potatoes on the griddle. Lightly smash each potato with a spatula. Drizzle with olive oil and season with salt and pepper. Cook until golden and crispy, approximately 10 minutes per side. Sprinkle the shredded cheddar cheese over the potatoes and continue cooking until the cheese melts.

    Step 3: Cook the Steak Bites

    In a separate pan, heat the griddle over high heat. Add butter and allow it to melt and become foamy. Stir in the minced garlic and sauté until fragrant, about 1 minute. Add the cubed sirloin steak to the griddle, season with salt and pepper, and cook until browned on all sides, about 8-10 minutes in total. Remove from heat and garnish with chopped parsley.

    Step 4: Serve the Dish

    Arrange the cheesy smashed potatoes on a serving platter, sprinkled with fresh chives. Serve the garlic butter steak bites alongside the potatoes for a delightful meal. Enjoy the perfect combination of tender steak and crispy, cheesy potatoes!

    This Garlic Butter Steak Bites and Cheesy Smashed Potatoes recipe is sure to become a favorite in your household. With its robust flavors and satisfying textures, it makes for a comforting dinner that is both simple and impressive.

    How to Serve Garlic Butter Steak Bites and Cheesy Smashed Potatoes

    This dish is versatile and can be presented in various enjoyable ways.

    Serve on a Platter

    Arrange the garlic butter steak bites and cheesy smashed potatoes on a large serving platter, garnished with fresh herbs. This family-style presentation invites guests to help themselves, making it perfect for gatherings.

    Steak Bite Sliders

    Transform the steak bites into sliders by placing them in small buns with a dollop of garlic butter sauce and a slice of cheese. Serve with the smashed potatoes on the side for a fun, handheld meal.

    Gourmet Bowl

    Create a gourmet bowl by layering cheesy smashed potatoes at the bottom, topped with steak bites, and finished with a sprinkle of fresh chives and parsley. This approach adds a rustic charm to the meal.

    Pro Tips for the Best Garlic Butter Steak Bites and Cheesy Smashed Potatoes

    For optimal flavor and texture, consider these expert tips.

    • Choose Quality Steak: Select a high-quality sirloin steak for tenderness and rich flavor. Grass-fed beef often offers superior taste and texture.

    • Let the Steak Rest: Allow the cubed steak to rest at room temperature for about 15 minutes before cooking. This helps ensure even cooking.

    • Don’t Overcrowd the Griddle: Cook the steak bites in batches if necessary. Overcrowding can lead to steaming instead of searing, preventing that delicious brown crust.

    • Use Fresh Garlic: Freshly minced garlic enhances the flavor profile of the steak. Avoid pre-minced garlic for the best results.

    • Adjust Seasoning to Taste: Taste your garlic butter and potatoes after cooking and adjust the seasoning as needed. Every palate is different, and a little extra salt or pepper can make a big difference.

    Best Side Dishes and Pairings

    To elevate your meal, consider these delightful pairings.

    1. Garlic Bread: The buttery, garlicky goodness of garlic bread complements the flavors of the steak and potatoes beautifully.

    2. Grilled Asparagus: Lightly grilled asparagus adds a fresh, crisp contrast to the rich flavors of the dish.

    3. Caesar Salad: A classic Caesar salad offers a refreshing crunch and a tangy dressing that balances the savory richness of the steak bites.

    4. Red Wine: A glass of full-bodied red wine, such as Cabernet Sauvignon, enhances the dish’s flavors and provides a sophisticated touch to the meal.

    5. Coleslaw: A tangy coleslaw can add a refreshing crunch and balance the richness of the steak and potatoes, making for a well-rounded meal.

    Common Mistakes to Avoid

    • Overcooking the Steak: Ensure that you do not exceed the cooking time to avoid tough and chewy steak bites.
    • Not Using Enough Seasoning: Season generously with salt and pepper to enhance the flavors of both the steak and the potatoes.
    • Skipping the Garlic: Garlic is essential for that rich flavor; don’t skip it or reduce the amount significantly.
    • Using Cold Potatoes: Allow the potatoes to cool slightly after boiling before smashing them to achieve a crispy texture.

    Storage & Reheating Instructions

    Refrigerator Storage

    Store any leftovers in airtight containers in the refrigerator. They will stay fresh for up to 3 days.

    Freezing Instructions

    To freeze, place the steak bites and smashed potatoes in a single layer on a baking sheet to freeze individually. Once frozen, transfer them to freezer-safe bags or containers. They can be stored for up to 2 months.

    Reheating Tips

    • Oven: Preheat the oven to 350°F (175°C). Place the steak bites and smashed potatoes on a baking sheet and reheat for about 15-20 minutes.
    • Microwave: Place a single serving on a microwave-safe plate and cover. Heat on medium power for 2-3 minutes, checking halfway through.
    • Stovetop: Heat a skillet over medium heat and add a splash of olive oil. Add the steak bites and smashed potatoes, stirring occasionally until heated through.

    Frequently Asked Questions

    How long do Garlic Butter Steak Bites and Cheesy Smashed Potatoes take to prepare?

    This recipe takes about 50 minutes in total, including both preparation and cooking time.

    Can I use a different cut of steak for the Garlic Butter Steak Bites?

    Yes, while sirloin is recommended, you can use other tender cuts like ribeye or tenderloin for a different flavor and texture.

    Can I make Garlic Butter Steak Bites and Cheesy Smashed Potatoes in advance?

    Yes, you can prepare both components in advance and store them in the refrigerator or freezer, as detailed in the storage section.

    What can I serve with Garlic Butter Steak Bites and Cheesy Smashed Potatoes?

    This dish pairs well with a simple salad or steamed vegetables for a well-rounded meal.

    Final Thoughts

    Garlic Butter Steak Bites and Cheesy Smashed Potatoes are a delightful combination that is sure to impress at any dinner table. We encourage you to try this recipe and share your thoughts in the comments below. Your feedback is invaluable and helps us create more delicious content!


    Dinner

    Garlic Butter Steak Bites and Cheesy Smashed Potatoes


    5.0 from 24 reviews

    This dish features tender sirloin steak bites cooked in garlic butter, served alongside crispy, cheesy smashed potatoes. It's a comforting meal that combines rich flavors and satisfying textures, perfect for a hearty dinner.

    Author: Munch Twist
    Prep Time: 20 minutes
    Cook Time: 30 minutes
    Total Time: 50 minutes
    Yield: 4 servings
    Category: Lunch
    Method: No bake
    Cuisine: American

    Garlic Butter Steak Bites and Cheesy Smashed Potatoes

    SCALE:
    1x
    2x
    3x
    Cook Mode: Prevent your screen from going dark

    Ingredients

    • 1 pound sirloin steak, cut into cubes
    • 2 tablespoons minced garlic
    • 4 tablespoons butter
    • Salt and pepper to taste
    • Fresh parsley, chopped (for garnish)
    • 1 pound baby potatoes
    • 2 tablespoons olive oil
    • 1 cup shredded cheddar cheese
    • Fresh chives, chopped (for garnish)

    Instructions

    1. Boil the baby potatoes in a large pot of salted water until tender, about 15 minutes. Drain and allow them to cool slightly. Preheat a griddle over medium-high heat. Place the boiled potatoes on the griddle, lightly smash them with a spatula, drizzle with olive oil, and season with salt and pepper. Cook until golden and crispy, approximately 10 minutes per side. Sprinkle shredded cheddar cheese over the potatoes and continue cooking until the cheese melts.
    2. Heat the griddle over high heat. Add butter and allow it to melt and become foamy. Stir in minced garlic and sauté until fragrant, about 1 minute. Add cubed sirloin steak to the griddle, season with salt and pepper, and cook until browned on all sides, about 8-10 minutes in total. Remove from heat and garnish with chopped parsley.
    3. Arrange the cheesy smashed potatoes on a serving platter, sprinkled with fresh chives. Serve the garlic butter steak bites alongside the potatoes.

    Nutrition Facts

    Serving Size: 1 serving
    Calories: 600 kcal
    Sugar: 2g
    Sodium: 500mg
    Fat: 40g
    Saturated Fat: 18g
    Carbohydrates: 25g
    Fiber: 3g
    Protein: 35g
    Cholesterol: 120mg

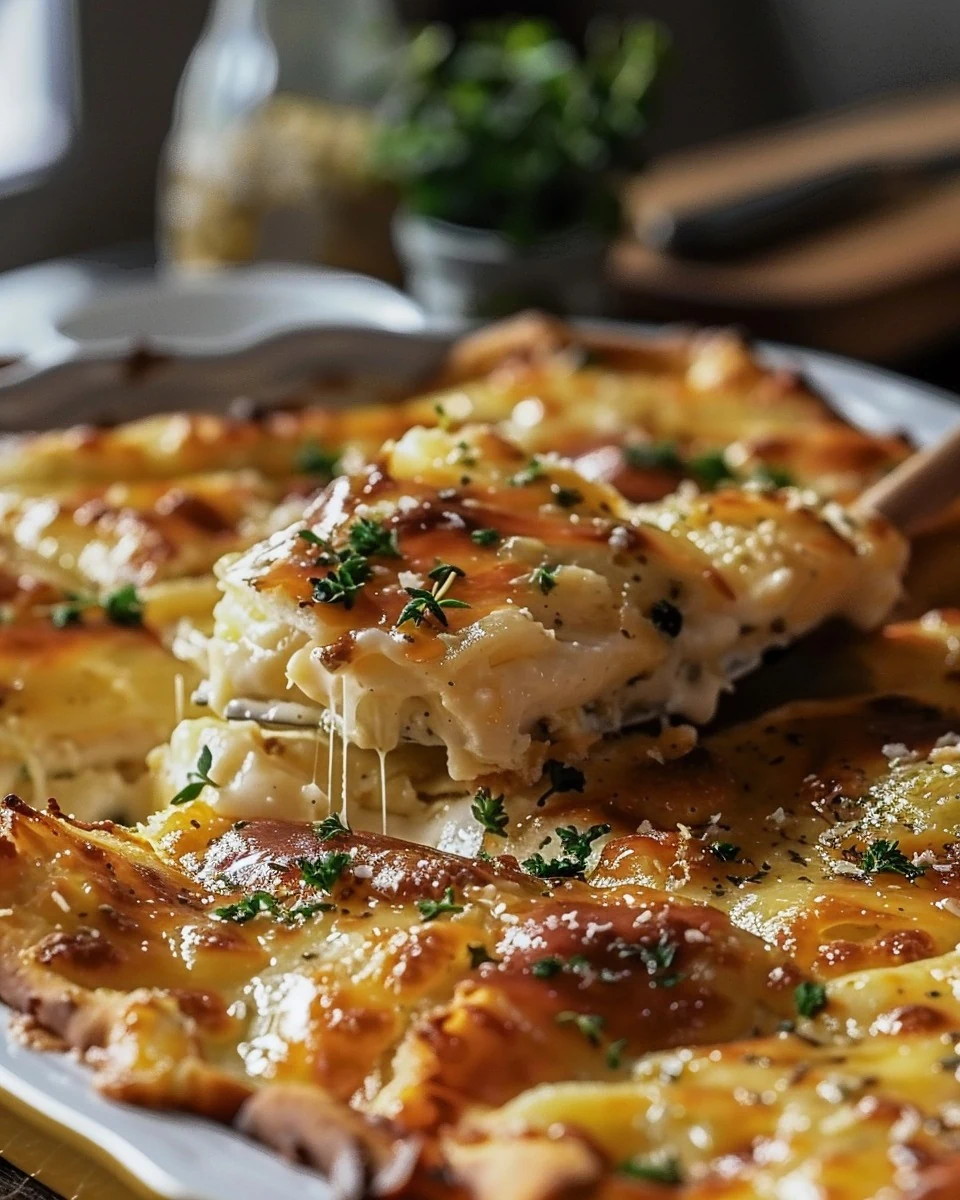
  • Easy Farmers Casserole Recipe for Breakfast or Brunch

    Easy Farmers Casserole Recipe for Breakfast or Brunch

    Farmers Casserole is a delightful and hearty dish that combines the rich flavors of ham, cheese, and hash browns into one satisfying meal. This recipe is perfect for breakfast or brunch, offering a comforting taste that will please everyone at the table.

    Why You’ll Love This Recipe

    • Hearty & Filling: This casserole is packed with protein and flavor, making it a great start to your day.
    • Versatile Dish: Enjoy it for breakfast, brunch, or even dinner. It works for any occasion.
    • Make-Ahead Friendly: Prepare it in advance and refrigerate, making mornings easier.
    • Customizable: Add your favorite vegetables or substitute ingredients to suit your taste.
    • Crowd-Pleaser: Ideal for serving a group, this recipe easily feeds six people.

    Tools and Equipment

    To make your cooking experience smoother, gather these essential tools.

    Essential Tools

    • 2-quart baking dish
    • Medium mixing bowl
    • Whisk
    • Knife
    • Cutting board

    Why These Tools Matter

    • Baking Dish: The right size ensures even cooking and easy serving.
    • Mixing Bowl: A medium bowl is perfect for combining ingredients without splashing.
    • Knife and Cutting Board: Essential for chopping ingredients efficiently and safely.

    Ingredients for Farmers Casserole

    Casserole Base

    • 3 cups frozen hash brown potatoes
    • 1 cup cooked ham, diced
    • ¼ cup chopped green onions

    Cheese Layer

    • ¾ cup shredded pepperjack cheese

    Egg Mixture

    • 4 eggs, beaten
    • 1 (12 fluid ounce) can evaporated milk
    • ⅛ teaspoon salt
    • ¼ teaspoon ground black pepper

    How to Make Farmers Casserole Step-by-Step

    Step 1: Preheat the Oven

    Preheat your oven to 350°F (175°C). Grease a 2-quart baking dish to prevent sticking.

    Step 2: Layer the Base

    Spread the frozen hash brown potatoes evenly across the bottom of the prepared baking dish. Next, layer the diced ham, shredded pepperjack cheese, and chopped green onions on top.

    Step 3: Prepare the Egg Mixture

    In a medium mixing bowl, whisk together the beaten eggs, evaporated milk, salt, and ground black pepper until well combined.

    Step 4: Assemble the Casserole

    Pour the egg mixture evenly over the layered ingredients in the baking dish. If you prefer, cover the dish and refrigerate it for several hours or overnight for a make-ahead option.

    Step 5: Bake the Casserole

    Place the dish in the preheated oven. Bake for 40-45 minutes if not chilled, or 55-60 minutes if refrigerated. Check for doneness by inserting a knife into the center; it should come out clean.

    Step 6: Cool and Serve

    Once baked, remove the casserole from the oven and let it stand for 5 minutes before serving. This allows it to set properly.

    Preparation time: 10 minutes | Cooking time: 40-45 minutes

    Nutritional Information (per serving, assuming 6 servings):
    – Calories: 300 kcal
    – Carbohydrates: 22g
    – Proteins: 16g
    – Fats: 18g

    Enjoy this hearty and satisfying Farmers Casserole, perfect for breakfast or brunch!

    How to Serve Farmers Casserole

    Farmers Casserole is versatile and can be enjoyed in various ways.

    Breakfast Delight

    Serve warm with a side of fresh fruit. The sweetness of strawberries or melons balances the savory flavors of the casserole.

    Brunch Buffet

    Cut into squares and arrange on a platter. This allows guests to help themselves and enjoy alongside other brunch favorites like pastries and salads.

    Family Dinner

    Pair with a simple green salad and a light vinaigrette to make a wholesome family meal that everyone will love.

    Pro Tips for the Best Farmers Casserole

    To elevate your Farmers Casserole, consider these helpful tips.

    • Use Fresh Ingredients: Whenever possible, opt for fresh vegetables and quality cheese for enhanced flavor and texture.
    • Customize Your Meats: Feel free to swap out the ham for cooked sausage or bacon for a different twist.
    • Add More Veggies: Incorporate bell peppers, tomatoes, or spinach for added nutrition and flavor.
    • Let It Rest: Allow the casserole to cool for a few minutes before serving to improve sliceability and flavor distribution.
    • Experiment with Cheeses: Try different cheese varieties like cheddar or mozzarella to create a unique flavor profile.

    Best Side Dishes and Pairings

    Complement your Farmers Casserole with these delightful side dishes and beverages.

    1. Fresh Fruit Salad: A refreshing mix of seasonal fruits adds a sweet contrast to the savory casserole.
    2. Crispy Bacon: The salty crunch of bacon enhances the dish’s flavors and adds a satisfying texture.
    3. Simple Green Salad: A light salad with a citrus vinaigrette cuts through the richness and provides a refreshing balance.
    4. Grilled Asparagus: The smoky flavor of grilled asparagus pairs nicely with the creamy casserole.
    5. Herb-Infused Tea: A warm cup of herbal tea, such as chamomile or mint, complements the meal without overpowering it.

    Common Mistakes to Avoid

    • Skipping the Preheating: Always preheat your oven to ensure even cooking.
    • Using Fresh Potatoes: Frozen hash browns are key for this recipe; fresh potatoes will alter the texture.
    • Not Letting It Rest: Allow the casserole to cool for at least 5 minutes before serving to help it set properly.
    • Overbaking: Keep an eye on the baking time; overbaking can lead to a dry casserole.

    Storage & Reheating Instructions

    Refrigerator Storage

    Store any leftovers in airtight containers in the refrigerator. It will remain fresh for up to 3 days.

    Freezing Instructions

    To freeze, cool the casserole completely, then wrap it tightly in plastic wrap and aluminum foil. It can be stored in the freezer for up to 3 months. Thaw in the refrigerator overnight before reheating.

    Reheating Tips

    • Oven: Preheat to 350°F (175°C) and reheat for 20-25 minutes until warmed through.
    • Microwave: Heat on medium power for 1-2 minutes per serving, checking for doneness.
    • Stovetop: Reheat in a skillet over medium heat, stirring occasionally until warmed through.

    Frequently Asked Questions

    Can I use fresh vegetables in Farmers Casserole?

    Yes, you can substitute fresh vegetables for frozen ones, but remember to cook them slightly before adding to the casserole to ensure they are tender.

    How can I customize Farmers Casserole?

    Feel free to add your choice of vegetables, different cheeses, or even swap out the ham for sausage or bacon to suit your taste.

    Is Farmers Casserole suitable for meal prep?

    Absolutely! This dish is perfect for meal prep, as it can be made ahead of time and stored in the refrigerator or freezer.

    Can I make Farmers Casserole ahead of time?

    Yes, you can prepare the casserole a day in advance and refrigerate it before baking. Just add a few extra minutes to the baking time if it’s chilled.

    What can I serve with Farmers Casserole?

    Farmers Casserole pairs well with fresh fruit, a side salad, or toast for a complete meal.

    Final Thoughts

    Farmers Casserole is a delightful and versatile dish, perfect for any meal of the day. We encourage you to give this recipe a try and leave a comment with your feedback or any variations you made. Your input helps us create more delicious recipes for everyone!


    Dinner

    Farmers Casserole


    5.0 from 24 reviews

    Farmers Casserole is a hearty and satisfying dish that combines frozen hash browns, diced ham, and pepperjack cheese, all baked together with a creamy egg mixture. Perfect for breakfast or brunch, this casserole is easy to prepare and can be made ahead of time.

    Author: Munch Twist
    Prep Time: 10 minutes
    Cook Time: 40-45 minutes
    Total Time: 50-55 minutes
    Yield: 6 servings
    Category: Lunch
    Method: Baking
    Cuisine: American

    Farmers Casserole

    SCALE:
    1x
    2x
    3x
    Cook Mode: Prevent your screen from going dark

    Ingredients

    • 3 cups frozen hash brown potatoes
    • ¼ cup chopped green onions
    • ¾ cup shredded pepperjack cheese
    • 1 cup cooked ham, diced
    • 4 eggs, beaten
    • 1 (12 fluid ounce) can evaporated milk
    • ⅛ teaspoon salt
    • ¼ teaspoon ground black pepper

    Instructions

    1. Preheat your oven to 350°F (175°C). Grease a 2-quart baking dish.
    2. Spread the hash brown potatoes evenly in the bottom of the prepared dish. Top with diced ham, shredded pepperjack cheese, and chopped green onions.
    3. In a medium bowl, whisk together the beaten eggs, evaporated milk, salt, and black pepper.
    4. Pour the egg mixture evenly over the layered ingredients in the dish. Cover and refrigerate for several hours or overnight if preparing in advance.
    5. Bake in the preheated oven for 40-45 minutes, or 55-60 minutes if chilled. It's done when a knife inserted into the center comes out clean.
    6. Let the casserole stand for 5 minutes before serving.

    Nutrition Facts

    Serving Size: 1 serving
    Calories: 300 kcal
    Sugar: 1g
    Sodium: 600mg
    Fat: 18g
    Saturated Fat: 8g
    Carbohydrates: 22g
    Fiber: 2g
    Protein: 16g
    Cholesterol: 240mg

  • Indulge in a Delicious Strawberry Velvet Cake Recipe

    Indulge in a Delicious Strawberry Velvet Cake Recipe

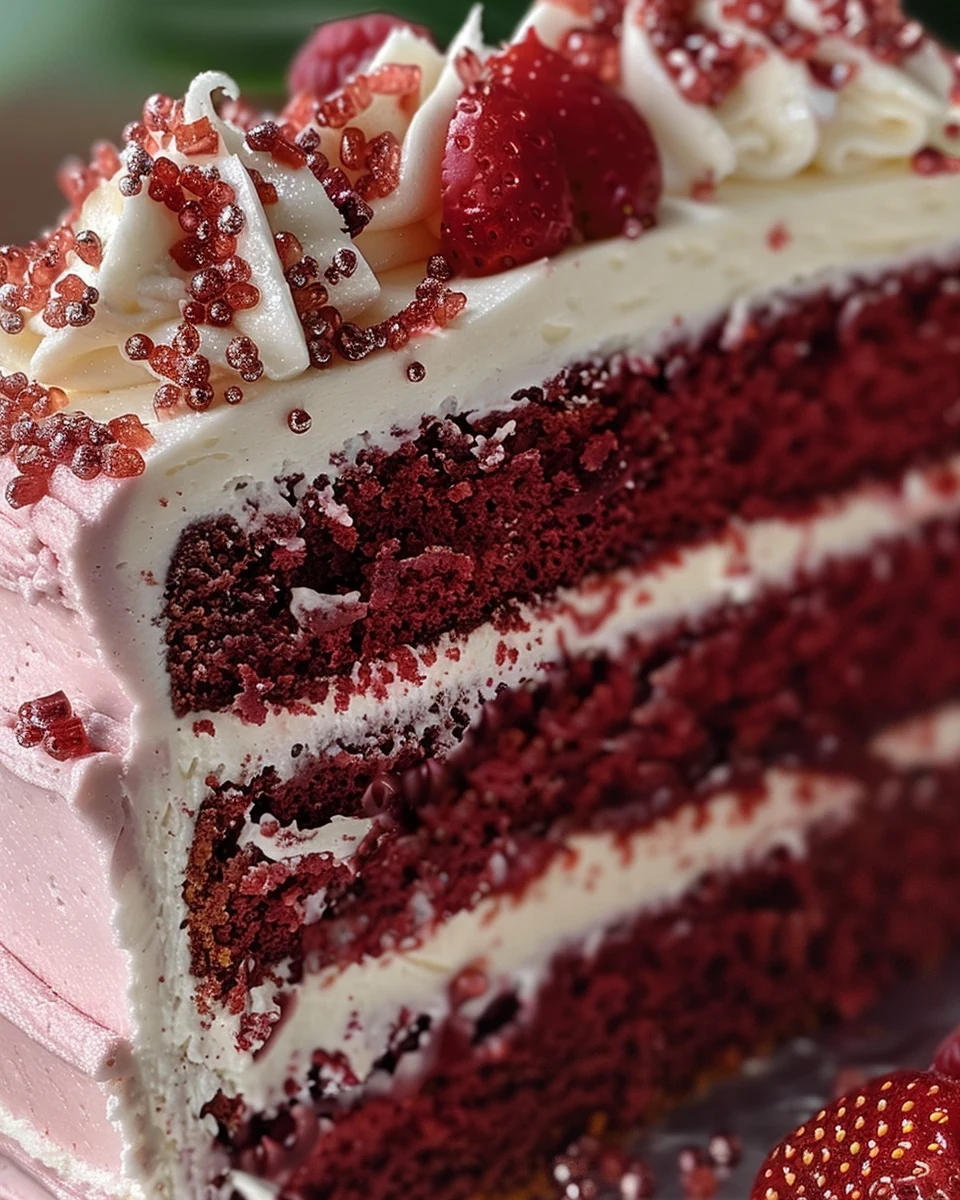
    Indulge in the delightful flavors of Strawberry Velvet Cake, a stunning dessert that combines the richness of chocolate with the fresh taste of strawberries. This cake is not only visually appealing but also offers a moist texture and a burst of fruity sweetness in every bite.

    Why You’ll Love This Recipe

    • Irresistible Flavor: The combination of strawberry and chocolate creates a uniquely delicious cake.
    • Perfect for Any Occasion: Whether it’s a birthday or a casual gathering, this cake is sure to impress.
    • Visual Appeal: The vibrant colors make it a showstopper on any dessert table.
    • Easy to Make: Follow simple steps for a delightful homemade treat.
    • Customizable: Add your favorite toppings or adjust the sweetness to your liking.

    Tools and Equipment

    To create this Strawberry Velvet Cake, you’ll need some essential kitchen tools.

    Essential Tools

    • Mixing bowls
    • Electric mixer
    • Measuring cups and spoons
    • Sifter
    • Rubber spatula
    • 9-inch round cake pans
    • Cooling rack

    Why These Tools Matter

    • Electric mixer: Ensures a smooth batter by thoroughly combining ingredients.
    • Sifter: Helps achieve a light and airy texture by breaking up clumps in dry ingredients.
    • Cooling rack: Allows cakes to cool evenly, preventing sogginess.

    Ingredients for Strawberry Velvet Cake

    For the Cake

    • 2 cups strawberries, pureed
    • 1 cup granulated sugar
    • 1/2 cup unsweetened cocoa powder
    • 2 1/2 cups all-purpose flour
    • 1 1/2 teaspoons baking soda
    • 1 teaspoon baking powder
    • 1 teaspoon salt
    • 1 cup boiling water
    • 1/2 cup strawberry jam
    • 2 large eggs
    • 1 cup buttermilk
    • 1 1/2 cups vegetable oil
    • 1 teaspoon vanilla extract

    For the Frosting

    • 1 cup unsalted butter, softened
    • 4 cups powdered sugar
    • 1/4 cup heavy cream
    • 1 teaspoon vanilla extract
    • Pink food coloring (optional)
    • Fresh strawberries, for garnish
    • Edible gold and pink sprinkles, for garnish

    How to Make Strawberry Velvet Cake Step-by-Step

    Step 1: Prepare the Oven and Pans

    Preheat your oven to 350°F (175°C). Grease and flour three 9-inch round cake pans to prevent sticking.

    Step 2: Mix Dry Ingredients

    In a large bowl, sift together the flour, granulated sugar, cocoa powder, baking soda, baking powder, and salt. This ensures even distribution of dry ingredients.

    Step 3: Combine Wet Ingredients

    Add the eggs, buttermilk, vegetable oil, and vanilla extract to the dry mix. Beat on medium speed until well combined and smooth.

    Step 4: Incorporate Wet Ingredients

    Gradually mix in the boiling water until the batter becomes smooth. The heat helps activate the cocoa for a richer flavor.

    Step 5: Add Flavors

    Gently fold in the strawberry puree and strawberry jam until fully incorporated. This adds moisture and fruity flavor to the cake.

    Step 6: Bake

    Divide the batter evenly among the prepared pans. Bake for 30-35 minutes, or until a toothpick inserted into the center comes out clean.

    Step 7: Cool

    Let the cakes cool in the pans for 10 minutes. Then transfer them to a wire rack to cool completely.

    Step 8: Prepare the Frosting

    Beat the softened butter until creamy. Gradually add powdered sugar, heavy cream, and vanilla extract, beating until smooth and fluffy. Add pink food coloring if desired for a lovely hue.

    Step 9: Assemble the Cake

    Place one cake layer on a serving plate. Spread a layer of frosting on top, then repeat with the remaining layers, stacking them carefully.

    Step 10: Decorate

    Frost the top and sides of the cake. Garnish with fresh strawberries and edible sprinkles for a festive touch.

    Preparation time: 20 minutes | Cooking time: 35 minutes

    Indulge in this vibrant Strawberry Velvet Cake for a sweet and fruity treat that’s perfect for any occasion!

    How to Serve Strawberry Velvet Cake

    Serving Strawberry Velvet Cake can be as delightful as making it. Here are some creative ways to present this delicious dessert.

    Elegant Layered Presentation

    Serve the cake on a beautiful cake stand, showcasing its vibrant layers. Add a drizzle of strawberry sauce on the plate for a touch of elegance.

    Individual Mini Cakes

    Bake the cake in cupcake or mini cake pans for individual servings. Top each with frosting and a fresh strawberry for a charming presentation at events or gatherings.

    With a Scoop of Ice Cream

    Pair slices of Strawberry Velvet Cake with a scoop of vanilla or strawberry ice cream. The creaminess of the ice cream complements the cake’s rich flavors, creating a delightful dessert experience.

    Pro Tips for the Best Strawberry Velvet Cake

    To achieve the perfect Strawberry Velvet Cake, consider the following expert tips.

    • Use Fresh Strawberries: For the best flavor, opt for fresh strawberries over frozen ones for the puree and garnish.

    • Check Oven Temperature: Ensure your oven is properly calibrated, as an incorrect temperature can affect baking time and cake texture.

    • Do Not Overmix: When combining wet and dry ingredients, mix until just combined to maintain a light and fluffy cake.

    • Cool Completely: Allow the cakes to cool completely before frosting to prevent melting and ensure a neat finish.

    • Experiment with Flavors: Consider adding a hint of lemon zest to the frosting for a refreshing twist that complements the strawberries.

    Best Side Dishes and Pairings

    To enhance your Strawberry Velvet Cake experience, consider these delightful pairings.

    1. Whipped Cream: A dollop of freshly whipped cream adds a light and airy texture, balancing the cake’s richness.

    2. Fresh Fruit Salad: A refreshing fruit salad provides a contrast in flavors and textures, making for a well-rounded dessert.

    3. Sparkling Water with Mint: The crispness of sparkling water infused with mint complements the fruity notes of the cake.

    4. Chocolate Ganache: A rich chocolate ganache can be drizzled over the cake for those who love the combination of chocolate and strawberry.

    5. Coffee or Espresso: A warm cup of coffee or espresso enhances the sweetness of the cake while providing a comforting contrast.

    Common Mistakes to Avoid

    • Skipping the Sifting: Not sifting the dry ingredients can lead to a lumpy batter and uneven texture.
    • Overmixing the Batter: Mixing too long can result in a dense cake. Blend just until combined.
    • Incorrect Oven Temperature: Ensure your oven is accurately preheated; an incorrect temperature can affect baking time and texture.
    • Not Cooling Cakes Properly: Allowing the cakes to cool in their pans for too long can lead to sogginess.

    Storage & Reheating Instructions

    Refrigerator Storage

    Store leftover Strawberry Velvet Cake in an airtight container in the refrigerator. It will remain fresh for up to 5 days.

    Freezing Instructions

    To freeze, wrap each cake layer tightly in plastic wrap and then in aluminum foil. The cake can be frozen for up to 3 months. Thaw in the refrigerator overnight before serving.

    Reheating Tips

    • Oven: Preheat to 350°F (175°C) and heat for about 10 minutes.
    • Microwave: Heat a slice for 15-20 seconds on medium power.
    • Stovetop: Place a slice in a covered skillet over low heat for 5 minutes.

    Frequently Asked Questions

    How can I make my Strawberry Velvet Cake more flavorful?

    Incorporate additional strawberry puree or jam into the frosting for an enhanced strawberry flavor.

    Can I use frozen strawberries for this Strawberry Velvet Cake?

    Yes, you can use frozen strawberries. Just thaw and drain excess liquid before pureeing.

    How do I ensure my Strawberry Velvet Cake is moist?

    Make sure to use fresh buttermilk and avoid overbaking. The use of strawberry puree also contributes to moisture.

    Can I make this recipe gluten-free?

    Yes, substitute all-purpose flour with a gluten-free flour blend, ensuring it has a 1:1 ratio for best results.

    Final Thoughts

    Creating a Strawberry Velvet Cake is a delightful way to celebrate any occasion. The vibrant flavors and stunning presentation will surely impress your guests. Don’t forget to leave a comment with your thoughts and any tips you may have for this recipe!


    Desserts

    Strawberry Velvet Cake


    5.0 from 24 reviews

    This Strawberry Velvet Cake is a delightful dessert that combines the rich flavors of chocolate and strawberries. With its moist texture and vibrant color, it's perfect for celebrations or a sweet treat any day.

    Author: Munch Twist
    Prep Time: 20 minutes
    Cook Time: 35 minutes
    Total Time: 55 minutes
    Yield: 12 servings
    Category: Desserts
    Method: No bake
    Cuisine: American

    Strawberry Velvet Cake

    SCALE:
    1x
    2x
    3x
    Cook Mode: Prevent your screen from going dark

    Ingredients

    • 2 cups strawberries, pureed
    • 1 cup granulated sugar
    • 1/2 cup unsweetened cocoa powder
    • 2 1/2 cups all-purpose flour
    • 1 1/2 teaspoons baking soda
    • 1 teaspoon baking powder
    • 1 teaspoon salt
    • 1 cup boiling water
    • 1/2 cup strawberry jam
    • 2 large eggs
    • 1 cup buttermilk
    • 1 1/2 cups vegetable oil
    • 1 teaspoon vanilla extract
    • 1 cup unsalted butter, softened
    • 4 cups powdered sugar
    • 1/4 cup heavy cream
    • 1 teaspoon vanilla extract
    • Pink food coloring (optional)
    • Fresh strawberries, for garnish
    • Edible gold and pink sprinkles, for garnish

    Instructions

    1. Preheat your oven to 350°F (175°C). Grease and flour three 9-inch round cake pans.
    2. In a large bowl, sift together the flour, granulated sugar, cocoa powder, baking soda, baking powder, and salt.
    3. Add the eggs, buttermilk, vegetable oil, and vanilla extract to the dry ingredients. Beat on medium speed until well combined.
    4. Gradually mix in the boiling water until the batter is smooth.
    5. Gently fold in the strawberry puree and strawberry jam until fully incorporated.
    6. Divide the batter evenly among the prepared pans. Bake for 30-35 minutes, or until a toothpick inserted into the center comes out clean.
    7. Let the cakes cool in the pans for 10 minutes, then transfer them to a wire rack to cool completely.
    8. Beat the softened butter until creamy. Gradually add powdered sugar, heavy cream, and vanilla extract, beating until smooth and fluffy. Add pink food coloring if desired.
    9. Place one cake layer on a serving plate and spread a layer of frosting on top. Repeat with the remaining layers.
    10. Frost the top and sides of the cake. Garnish with fresh strawberries and edible sprinkles.

    Nutrition Facts

    Serving Size: 1 serving
    Calories: 520 kcal
    Sugar: 47g
    Sodium: 400mg
    Fat: 27g
    Saturated Fat: 10g
    Carbohydrates: 68g
    Fiber: 2g
    Protein: 5g
    Cholesterol: 40mg

  • Simple Million Dollar Chicken Alfredo Stuffed Shells Recipe

    Simple Million Dollar Chicken Alfredo Stuffed Shells Recipe

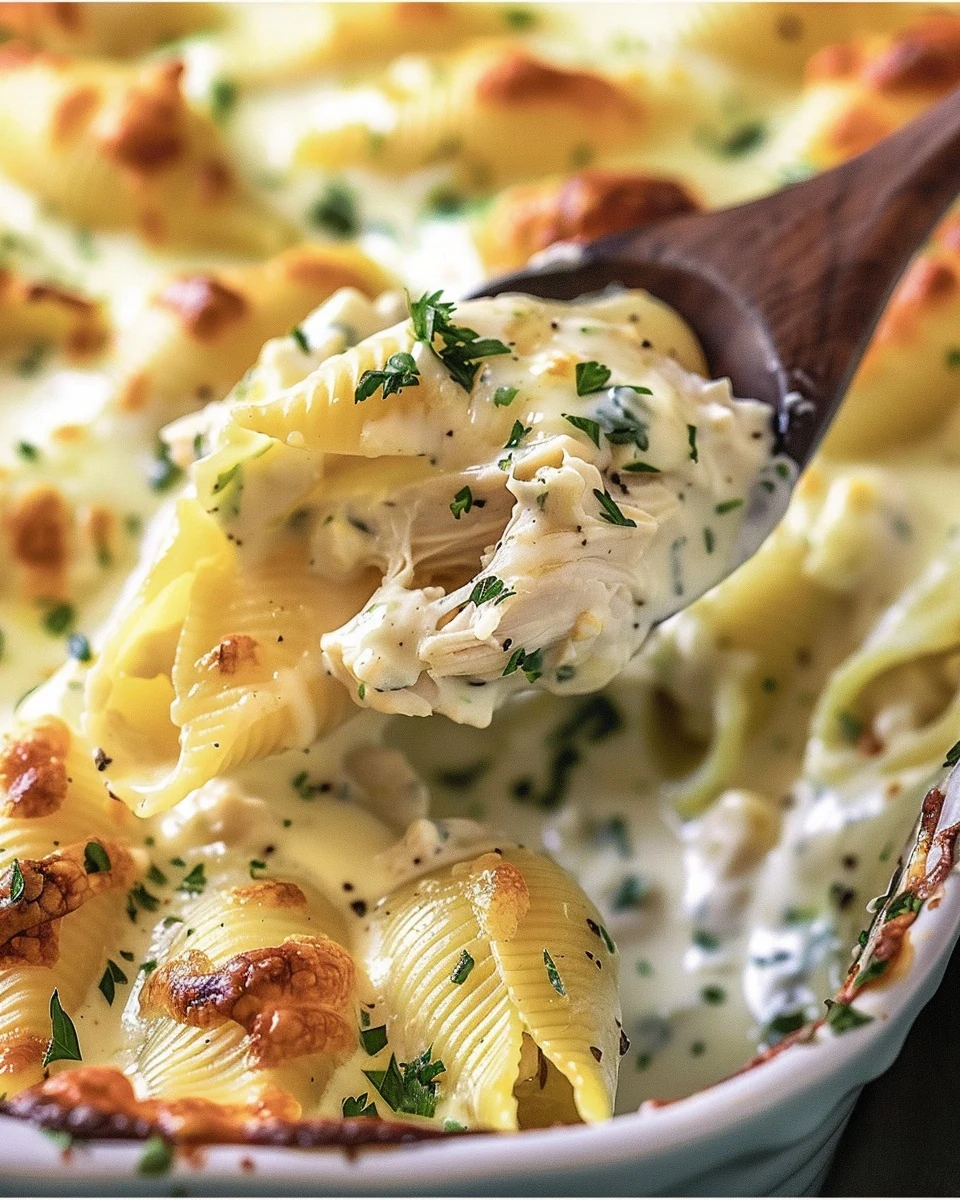
    Million Dollar Chicken Alfredo Stuffed Shells are a creamy, comforting dish that combines tender shells with a rich filling of chicken and cheeses. This recipe elevates classic comfort food, making it a perfect choice for family dinners or gatherings.

    Why You’ll Love This Recipe

    • Deliciously Indulgent: The combination of creamy Alfredo sauce and melted cheese creates a dish that is irresistibly rich.
    • Family-Friendly: Everyone will love the flavors, making it a hit with both kids and adults.
    • Versatile Meal Prep: These stuffed shells are great for meal prep and can be frozen for later enjoyment.
    • Nutrient-Rich Ingredients: Packed with protein from chicken and cottage cheese, this dish offers a satisfying meal.
    • Impressive Presentation: The stuffed shells look beautiful when served, making them perfect for entertaining.

    Tools and Equipment

    Having the right tools can make your cooking experience smoother and more enjoyable.

    Essential Tools

    • Large mixing bowl
    • 9×13-inch baking dish
    • Cooking spray
    • Saucepan for boiling pasta
    • Spoon or spatula for mixing

    Why These Tools Matter

    • Large mixing bowl: Provides ample space for combining ingredients without mess.
    • Baking dish: The right size ensures even cooking and easy serving.
    • Saucepan: A good saucepan helps you boil pasta perfectly for that ideal al dente texture.

    Ingredients for Million Dollar Chicken Alfredo Stuffed Shells

    Filling Ingredients

    • 1 ½ cups cottage cheese
    • 1 ½ cups shredded cooked chicken
    • ¼ cup grated Parmesan cheese
    • 4 oz cream cheese, softened
    • ¼ cup sour cream
    • 1 tablespoon dried parsley

    Pasta and Sauce Ingredients

    • 21 jumbo shells
    • 1 (15-oz) jar Alfredo sauce
    • 1 ½ cups shredded mozzarella cheese, divided

    How to Make Million Dollar Chicken Alfredo Stuffed Shells Step-by-Step

    Step 1: Prep the Base

    Preheat your oven to 375ºF (190ºC). Lightly spray a 9×13-inch baking dish with cooking spray and set it aside.

    Step 2: Cook the Pasta

    Boil the jumbo shells according to the package instructions until they are al dente. Drain the shells and let them cool slightly to handle.

    Step 3: Mix the Filling

    In a large mixing bowl, combine the shredded chicken, cottage cheese, softened cream cheese, sour cream, grated Parmesan cheese, 1 cup of shredded mozzarella cheese, and dried parsley. Stir the mixture until it is thoroughly combined and creamy.

    Step 4: Stuff the Shells

    Carefully stuff each cooked shell with the prepared cheese and chicken mixture. Place the stuffed shells in the prepared baking dish, arranging them in a single layer.

    Step 5: Add Alfredo Sauce

    Pour the Alfredo sauce evenly over the stuffed shells, ensuring they are well-covered for optimal flavor.

    Step 6: Top with Cheese

    Sprinkle the remaining ½ cup of shredded mozzarella cheese over the Alfredo sauce, covering the shells completely for a cheesy top layer.

    Step 7: Bake

    Place the baking dish in the preheated oven and bake uncovered for 30 to 35 minutes. Look for the cheese to be melted, bubbly, and slightly golden on top.

    Step 8: Serve

    Remove the dish from the oven and let the stuffed shells cool slightly before serving. Garnish with additional parsley if desired, and enjoy the rich, creamy flavors of this dish.

    How to Serve Million Dollar Chicken Alfredo Stuffed Shells

    These stuffed shells make for a delightful main course that can be enhanced with a few creative serving ideas.

    Garnish with Fresh Herbs

    Add a sprinkle of fresh basil or parsley on top of the baked shells just before serving. This not only enhances the presentation but also adds a burst of fresh flavor.

    Serve with a Side Salad

    Pair your stuffed shells with a refreshing side salad, such as a Caesar or mixed greens salad. The crisp vegetables will balance the creamy richness of the dish.

    Complement with Garlic Bread

    Serve the stuffed shells alongside warm garlic bread. The crunchy texture and garlicky flavor are perfect for scooping up any leftover Alfredo sauce.

    Pro Tips for the Best Million Dollar Chicken Alfredo Stuffed Shells

    To elevate your dish to the next level, consider these helpful tips.

    • Use Fresh Ingredients: Whenever possible, opt for fresh herbs and high-quality cheeses to enhance the overall flavor profile of your stuffed shells.

    • Customize the Filling: Feel free to add vegetables like spinach or mushrooms to the filling for extra nutrition and flavor.

    • Make Ahead: Assemble the shells ahead of time and refrigerate them. Just bake them when you’re ready to serve for a hassle-free meal.

    • Check for Doneness: Keep an eye on the cheese during baking; if it starts to brown too quickly, cover it with aluminum foil to prevent burning.

    • Let It Rest: Allow the stuffed shells to sit for a few minutes after baking. This helps the filling set and makes serving easier.

    Best Side Dishes and Pairings

    These side dishes and drinks will complement your Million Dollar Chicken Alfredo Stuffed Shells beautifully.

    1. Garlic Bread: The perfect accompaniment, garlic bread provides a crunchy contrast to the creamy stuffed shells.

    2. Caesar Salad: The crisp romaine lettuce and tangy dressing of a Caesar salad offer a refreshing balance to the rich flavors of the dish.

    3. Steamed Broccoli: Lightly steamed broccoli adds a nutritious touch and vibrant color to your meal, making it visually appealing.

    4. Red Wine: A glass of medium-bodied red wine, such as Merlot, pairs well with the creamy Alfredo sauce and adds depth to the dining experience.

    5. Roasted Vegetables: Seasonal roasted vegetables provide additional flavor and texture, enhancing the overall meal without overpowering the main dish.

    Common Mistakes to Avoid

    • Not Cooking the Shells Al Dente: Overcooking the shells can lead to them falling apart when stuffed.
    • Skipping the Cooling Step: Allowing the shells to cool slightly prevents burns and makes stuffing easier.
    • Using Low-Quality Ingredients: Opt for fresh and high-quality cheeses and sauces for the best flavor.
    • Not Covering the Dish: Baking uncovered can lead to a dry top; ensure the cheese stays gooey and delicious by covering it appropriately.

    Storage & Reheating Instructions

    Refrigerator Storage

    Store leftover Million Dollar Chicken Alfredo Stuffed Shells in airtight containers in the refrigerator. They will stay fresh for up to 3 days.

    Freezing Instructions

    To freeze, place individual servings in freezer-safe containers or wrap tightly in plastic wrap and aluminum foil. They can be frozen for up to 3 months. Thaw in the refrigerator overnight before reheating.

    Reheating Tips

    • Oven: Preheat to 350ºF (175ºC). Cover with foil and bake for about 20 minutes or until heated through.
    • Microwave: Place in a microwave-safe dish, cover, and heat for 2-3 minutes or until hot, stirring halfway.
    • Stovetop: Heat on medium-low in a skillet with a splash of water or sauce, stirring occasionally until warmed through.

    Frequently Asked Questions

    How can I customize Million Dollar Chicken Alfredo Stuffed Shells?

    You can add vegetables such as spinach, mushrooms, or bell peppers to the filling for added nutrition and flavor.

    Can I prepare Million Dollar Chicken Alfredo Stuffed Shells in advance?

    Yes, you can assemble the shells a day ahead and store them in the refrigerator before baking. Just add a few extra minutes to the baking time.

    What kind of chicken should I use for the filling?

    Shredded rotisserie chicken works great for convenience, but you can also use leftover grilled or baked chicken.

    Can I make this recipe gluten-free?

    Yes, simply use gluten-free jumbo shells and ensure all other ingredients are gluten-free.

    What should I serve with Million Dollar Chicken Alfredo Stuffed Shells?

    A light salad or steamed vegetables pairs nicely with this rich dish, balancing the meal perfectly.

    Final Thoughts

    Million Dollar Chicken Alfredo Stuffed Shells are a crowd-pleaser that promises creamy, cheesy goodness in every bite. I encourage you to try this delightful recipe, and please leave a comment with your feedback on the flavors and any personal touches you added.


    Dinner

    Million Dollar Chicken Alfredo Stuffed Shells


    5.0 from 24 reviews

    This delicious recipe features jumbo pasta shells stuffed with a creamy mixture of chicken, cheeses, and herbs, all topped with rich Alfredo sauce and melted mozzarella. It's a comforting dish perfect for family dinners or special occasions.

    Author: Munch Twist
    Prep Time: 15 minutes
    Cook Time: 30-35 minutes
    Total Time: 45-50 minutes
    Yield: 6 servings
    Category: Lunch
    Method: No bake
    Cuisine: American

    Million Dollar Chicken Alfredo Stuffed Shells

    SCALE:
    1x
    2x
    3x
    Cook Mode: Prevent your screen from going dark

    Ingredients

    • 1 ½ cups cottage cheese
    • 1 ½ cups shredded cooked chicken
    • ¼ cup grated Parmesan cheese
    • 4 oz cream cheese, softened
    • 21 jumbo shells
    • 1 tablespoon dried parsley
    • ¼ cup sour cream
    • 1 (15-oz) jar Alfredo sauce
    • 1 ½ cups shredded mozzarella cheese, divided

    Instructions

    1. Preheat your oven to 375ºF (190ºC). Lightly spray a 9×13-inch baking dish with cooking spray and set it aside.
    2. Boil the jumbo shells according to the package instructions until they are al dente. Drain the shells and let them cool slightly.
    3. In a large mixing bowl, combine the shredded chicken, cottage cheese, softened cream cheese, sour cream, grated Parmesan cheese, 1 cup of shredded mozzarella cheese, and dried parsley. Stir the mixture until it is thoroughly combined and creamy.
    4. Carefully stuff each cooked shell with the prepared cheese and chicken mixture. Place the stuffed shells in the prepared baking dish, arranging them in a single layer.
    5. Pour the Alfredo sauce evenly over the stuffed shells, ensuring they are well-covered.
    6. Sprinkle the remaining ½ cup of shredded mozzarella cheese over the Alfredo sauce, covering the shells completely.
    7. Place the baking dish in the preheated oven and bake uncovered for 30 to 35 minutes, or until the cheese is melted, bubbly, and slightly golden on top.
    8. Remove the dish from the oven and let the stuffed shells cool slightly before serving.

    Nutrition Facts

    Serving Size: 1 serving
    Calories: 420 kcal
    Sugar: 3g
    Sodium: 800mg
    Fat: 25g
    Saturated Fat: 14g
    Carbohydrates: 25g
    Fiber: 1g
    Protein: 24g
    Cholesterol: 90mg

  • Crazy Good Casserole: Quick and Delicious Recipe

    Crazy Good Casserole: Quick and Delicious Recipe

    Crazy Good Casserole is a delightful dish that combines savory flavors and comforting textures. This recipe is perfect for family gatherings or a cozy weeknight dinner, offering a melty cheese topping and crispy bacon that everyone will love.

    Why You’ll Love This Recipe

    • Delicious Flavor: The combination of chicken, bacon, and creamy soup creates an unforgettable taste.
    • Comforting Texture: The melted cheese and tender pasta make every bite satisfying.
    • Family-Friendly: It appeals to both kids and adults, making it a hit at the dinner table.
    • One-Dish Wonder: Easy cleanup with everything cooked in a single casserole dish.
    • Customizable: You can add vegetables or switch up the cheese for a personalized touch.

    Tools and Equipment

    Having the right tools makes cooking easier and more enjoyable. Here are the essentials you will need.

    Essential Tools

    • Large skillet
    • 9×13 inch baking dish
    • Pot for boiling pasta
    • Measuring cups
    • Mixing spoon

    Why These Tools Matter

    • Large Skillet: The spacious design allows for even cooking of chicken and bacon.
    • 9×13 Inch Baking Dish: Perfect size for holding all the casserole ingredients together.
    • Pot for Boiling Pasta: A sturdy pot ensures that the pasta cooks evenly and maintains its texture.

    Ingredients for Crazy Good Casserole

    Gather the following ingredients to prepare this fantastic casserole.

    Protein

    • 6 strips of quality bacon, cooked and crumbled
    • 4-5 boneless, skinless chicken breasts, cut into bite-sized chunks

    Dairy

    • 2 cups shredded Monterrey Jack cheese
    • 2 cans cream of chicken soup

    Pasta

    • 1 box (16 ounces) dried spiral pasta

    Seasonings

    • 1 tablespoon garlic powder
    • Salt and pepper to taste

    How to Make Crazy Good Casserole Step-by-Step

    Step 1: Cook the Bacon

    Start by cooking the bacon in a large pan over medium heat until crispy. Once done, place the bacon on a paper towel to drain and cool. Crumble it into pieces once it has cooled.

    Step 2: Cook the Chicken

    In the same pan with the bacon drippings, add the chicken chunks. Season with garlic powder, salt, and pepper. Cook the chicken until it is no longer pink inside, stirring occasionally for even cooking.

    Step 3: Prepare the Pasta

    While the chicken is cooking, bring a pot of salted water to a boil. Add the spiral pasta and cook according to the package directions. Drain the pasta and return it to the pot.

    Step 4: Mix Ingredients

    Once the chicken is cooked, add it to the pot with the drained pasta. Stir in both cans of cream of chicken soup and 1 cup of shredded Monterrey Jack cheese. Mix everything until well combined.

    Step 5: Assemble Casserole

    Preheat your oven to 400°F (200°C). Spray a 9×13 baking dish with non-stick cooking spray. Pour the pasta mixture into the dish, spreading it evenly. Top with the crumbled bacon and the remaining cup of Monterrey Jack cheese.

    Step 6: Bake the Casserole

    Place the assembled casserole in the preheated oven. Bake for about 20 minutes, or until the cheese is melted and golden brown.

    Step 7: Serve Hot

    Remove the casserole from the oven and let it cool slightly. Serve hot and enjoy the cheesy goodness of your Crazy Good Casserole.

    Nutritional Information (per serving):
    – Calories: 695 kcal
    – Carbohydrates: 50g
    – Protein: 41g
    – Fats: 36g
    – Fiber: 2g

    This Crazy Good Casserole is sure to become a favorite in your household. It’s quick to prepare and packed with flavors that will keep everyone coming back for seconds. Enjoy!

    How to Serve Crazy Good Casserole

    Serving Crazy Good Casserole can be as creative as it is delicious. Here are a few ideas to elevate your casserole experience.

    Garnished with Fresh Herbs

    Top your casserole with freshly chopped parsley or cilantro before serving. This adds a burst of color and a fresh flavor that balances the richness of the dish.

    With a Side Salad

    Serve your Crazy Good Casserole alongside a crisp green salad. A simple mix of arugula, cherry tomatoes, and a light vinaigrette provides a refreshing contrast to the hearty casserole.

    Accompanied by Garlic Bread

    Pairing your casserole with warm, buttery garlic bread not only complements the flavors but also makes for a satisfying meal, perfect for soaking up any leftover sauce.

    Pro Tips for the Best Crazy Good Casserole

    To ensure your Crazy Good Casserole turns out perfectly, keep these tips in mind.

    • Use Quality Ingredients: Opt for fresh chicken and high-quality bacon to enhance the overall flavor of the casserole.

    • Don’t Overcook the Pasta: Make sure to cook the pasta al dente, as it will continue to cook in the oven and absorb flavors.

    • Customize Your Cheese: Feel free to experiment with different types of cheese, such as cheddar or pepper jack, for a unique twist on the classic recipe.

    • Make Ahead: Prepare the casserole a day in advance and refrigerate. Simply bake it when you’re ready to serve.

    • Check for Doneness: Ensure the chicken is fully cooked and the cheese is melted and bubbly before removing the casserole from the oven.

    Best Side Dishes and Pairings

    A well-rounded meal is always more enjoyable. Here are some side dishes and drinks that pair wonderfully with Crazy Good Casserole.

    1. Steamed Broccoli: The mild flavor and crunchy texture of steamed broccoli complement the rich casserole, adding a nutritious touch.

    2. Caesar Salad: The crisp romaine and tangy dressing provide a refreshing contrast to the creamy casserole, making it a classic pairing.

    3. Roasted Vegetables: A medley of roasted seasonal vegetables adds color and depth to your meal, enhancing the overall dining experience.

    4. Rice Pilaf: The light, fluffy texture of rice pilaf serves as a great side, allowing you to enjoy the casserole’s richness without overwhelming your palate.

    5. Sparkling Water with Lemon: A refreshing beverage like sparkling water with a hint of lemon cleanses the palate and balances the richness of the dish.

    Common Mistakes to Avoid

    • Not Cooking the Bacon Properly: Ensure the bacon is crispy for the best flavor and texture in your casserole.
    • Overcooking the Chicken: Avoid overcooking the chicken to prevent it from becoming tough; it should be cooked just until no longer pink.
    • Skipping Seasoning: Don’t forget to season your chicken with garlic powder, salt, and pepper to enhance the dish’s overall flavor.
    • Using Uncooked Pasta: Make sure to cook the spiral pasta according to package instructions to achieve the right texture in the casserole.

    Storage & Reheating Instructions

    Refrigerator Storage

    Store any leftovers in airtight containers. The Crazy Good Casserole will remain fresh in the refrigerator for up to 3 days.

    Freezing Instructions

    For longer storage, the casserole can be frozen. Cover it tightly with plastic wrap and aluminum foil. It will keep well for up to 2 months.

    Reheating Tips

    • Oven: Preheat the oven to 350°F (175°C), cover the casserole with foil, and bake for about 15-20 minutes until heated through.
    • Microwave: Place a portion in a microwave-safe dish, cover, and heat for 2-3 minutes, stirring halfway for even warming.
    • Stovetop: Heat a portion in a skillet over medium heat, stirring occasionally, until warmed through.

    Frequently Asked Questions

    What is Crazy Good Casserole?

    Crazy Good Casserole is a cheesy, creamy dish made with chicken, pasta, bacon, and Monterrey Jack cheese, perfect for a comforting meal.

    Can I customize the ingredients in Crazy Good Casserole?

    Absolutely! You can add vegetables like broccoli or bell peppers or substitute the chicken for turkey or ground beef.

    How do I make Crazy Good Casserole ahead of time?

    You can prepare the casserole up to the baking step, cover it, and refrigerate it for up to 24 hours before baking.

    What sides pair well with Crazy Good Casserole?

    This dish pairs well with a simple green salad, garlic bread, or steamed vegetables to balance the richness.

    Can I make Crazy Good Casserole without bacon?

    Yes, you can omit the bacon or replace it with a vegetarian option, such as sautéed mushrooms or a plant-based bacon alternative.

    Final Thoughts

    Crazy Good Casserole is a delightful dish that brings comfort and satisfaction to any meal. We encourage you to try this recipe and share your experience in the comments below. Your feedback helps us create more delicious recipes for everyone to enjoy.


    Dinner

    Crazy Good Casserole


    5.0 from 24 reviews

    This Crazy Good Casserole combines tender chicken, crispy bacon, and creamy Monterrey Jack cheese for a comforting dish that is perfect for family dinners. The spiral pasta adds a fun twist, making it a delightful meal that is both easy to prepare and incredibly satisfying.

    Author: Munch Twist
    Prep Time: 20 minutes
    Cook Time: 20 minutes
    Total Time: 40 minutes
    Yield: 6 servings
    Category: Lunch
    Method: No bake
    Cuisine: American

    Crazy Good Casserole

    SCALE:
    1x
    2x
    3x
    Cook Mode: Prevent your screen from going dark

    Ingredients

    • 6 strips of quality bacon, cooked and crumbled
    • 1 tablespoon garlic powder
    • 2 cups shredded Monterrey Jack cheese
    • 2 cans cream of chicken soup
    • 4-5 boneless, skinless chicken breasts, cut into bite-sized chunks
    • 1 box (16 ounces) dried spiral pasta
    • Salt and pepper to taste

    Instructions

    1. Cook the bacon in a large pan until crispy. Set aside on a paper towel to drain and crumble when cool.
    2. In the same pan with the bacon drippings, cook the chicken chunks over medium heat, seasoned with garlic powder, salt, and pepper, until no longer pink inside.
    3. Prepare the spiral pasta according to the package directions. Drain and return to the pot.
    4. Add the cooked chicken, both cans of cream of chicken soup, and 1 cup of shredded Monterrey Jack cheese to the cooked pasta. Stir well to combine.
    5. Preheat the oven to 400°F (200°C) and spray a 9×13 baking dish with non-stick cooking spray. Pour the pasta mixture into the prepared dish. Sprinkle the crumbled bacon over the top, followed by the remaining cup of Monterrey Jack cheese.
    6. Bake in the preheated oven for about 20 minutes, until the cheese is melted and golden brown on top.
    7. Remove from the oven and let it cool slightly before serving.

    Nutrition Facts

    Serving Size: 1 serving
    Calories: 695 kcal
    Sugar: 2g
    Sodium: 1300mg
    Fat: 36g
    Saturated Fat: 17g
    Carbohydrates: 50g
    Fiber: 2g
    Protein: 41g
    Cholesterol: 150mg

  • Moist Sweet Potato Pound Cake Recipe to Savor

    Moist Sweet Potato Pound Cake Recipe to Savor

    Sweet Potato Pound Cake is a delightful dessert that combines the natural sweetness of sweet potatoes with a rich, moist texture. This cake is perfect for any occasion, offering a unique flavor that sets it apart from traditional pound cakes. With its creamy consistency and hint of spice, this recipe will surely impress your family and friends.

    Why You’ll Love This Recipe

    • Unique Flavor: The addition of sweet potatoes gives this cake a rich sweetness that is unlike any other.
    • Moist & Dense: The combination of cream cheese and sweet potatoes ensures a beautifully moist texture.
    • Versatile: Enjoy it as a dessert, snack, or breakfast treat; it fits all occasions.
    • Easy to Make: With straightforward steps, even novice bakers can create a stunning cake.
    • Nutritional Boost: Sweet potatoes provide vitamins and fiber, enhancing the overall healthiness of the dessert.

    Tools and Equipment

    Having the right tools makes baking easier and more enjoyable. Here’s what you’ll need:

    Essential Tools

    • Stand mixer
    • Mixing bowls
    • Measuring cups and spoons
    • Rubber spatula
    • Tube pan or loaf pans
    • Wire rack

    Why These Tools Matter

    • Stand Mixer: A stand mixer efficiently combines ingredients, saving time and ensuring a smooth batter.
    • Mixing Bowls: Using multiple bowls allows for organized preparation and easy incorporation of dry and wet ingredients.
    • Wire Rack: Cooling on a wire rack prevents the cake from becoming soggy, maintaining its perfect texture.

    Ingredients for Sweet Potato Pound Cake

    Wet Ingredients

    • 1 teaspoon vanilla extract
    • 2 ½ cups cooked, mashed sweet potatoes
    • 1 (8-oz.) package cream cheese, softened
    • ½ cup butter, softened
    • 4 large eggs

    Dry Ingredients

    • 3 cups all-purpose flour
    • 2 cups sugar
    • ¼ teaspoon salt
    • 1 teaspoon ground cinnamon or nutmeg (optional)
    • 1 teaspoon baking soda
    • 2 teaspoons baking powder

    How to Make Sweet Potato Pound Cake Step-by-Step

    Step 1: Prepare the Oven and Pans

    Preheat your oven to 350ºF (175ºC). Grease and flour a 10-inch tube pan or two 8 1/2- x 4 1/2-inch loaf pans if you prefer loaves.

    Step 2: Cream the Butter and Cream Cheese

    In a large mixing bowl, beat together the softened cream cheese and butter using a stand mixer on medium speed until creamy. Gradually add the sugar, mixing until the mixture is light and fluffy. Add the eggs one at a time, beating just until the yellow disappears. Mix in the mashed sweet potatoes until well combined.

    Step 3: Combine Dry Ingredients

    In a separate bowl, whisk together the flour, baking powder, baking soda, salt, and if desired, cinnamon or nutmeg.

    Step 4: Combine Wet and Dry Ingredients

    Gradually add the dry ingredients to the butter mixture, beating on low speed after each addition just until combined. Stir in the vanilla extract.

    Step 5: Bake the Cake

    Pour the batter into the prepared pan(s) and smooth the top with a spatula. Bake in the preheated oven for 1 hour and 5 minutes to 1 hour and 10 minutes, or until a wooden pick inserted into the center comes out clean.

    Step 6: Cool the Cake

    Allow the cake to cool in the pan on a wire rack for 10 minutes. Carefully remove it from the pan and let it cool completely on the wire rack for about 1 hour.

    For Sweet Potato Pound Cake Loaves: Prepare the batter as directed and pour it into 2 greased and floured 8 1/2- x 4 1/2-inch loaf pans. Bake and cool as instructed.

    Enjoy your delicious Sweet Potato Pound Cake! This recipe is sure to become a favorite in your baking repertoire.

    How to Serve Sweet Potato Pound Cake

    Sweet Potato Pound Cake is versatile and can be enjoyed in various delightful ways.

    Classic Slice with Butter

    Serve slices of Sweet Potato Pound Cake warm with a pat of butter. The buttery flavor enhances the cake’s moistness and adds richness.

    Cream Cheese Glaze

    Top the cooled cake with a cream cheese glaze made from cream cheese, powdered sugar, and a dash of vanilla extract. This adds a deliciously sweet and tangy contrast to the cake.

    Whipped Cream and Pecans

    Serve individual slices with a dollop of freshly whipped cream and a sprinkle of toasted pecans. The creaminess and crunch elevate the cake’s flavor profile.

    Pro Tips for the Best Sweet Potato Pound Cake

    To ensure your Sweet Potato Pound Cake turns out perfectly every time, follow these expert tips.

    • Use Fresh Sweet Potatoes: Opt for freshly cooked and mashed sweet potatoes for the best flavor and moisture.
    • Don’t Overmix the Batter: Mix just until combined to avoid a dense cake. Overmixing can lead to a tougher texture.
    • Check for Doneness Early: Ovens vary, so start checking for doneness a few minutes before the suggested baking time to prevent overbaking.
    • Cool Completely: Allow the cake to cool completely before slicing to maintain its structure and moisture.
    • Store Properly: Keep any leftovers in an airtight container at room temperature for up to three days or refrigerate for longer storage.

    Best Side Dishes and Pairings

    Pair your Sweet Potato Pound Cake with these delightful options to enhance your dessert experience.

    1. Coffee: The rich flavor of coffee balances the sweetness of the cake, making it a perfect afternoon treat.
    2. Hot Tea: A warm cup of herbal or chai tea complements the spices in the pound cake, creating a comforting pairing.
    3. Vanilla Ice Cream: The creaminess of vanilla ice cream contrasts wonderfully with the dense texture of the cake.
    4. Fruit Salad: A fresh fruit salad adds a refreshing element that brightens the dessert and offers a healthy contrast.
    5. Caramel Sauce: Drizzling warm caramel sauce over slices of cake adds an indulgent touch that enhances its sweetness.

    Common Mistakes to Avoid

    • Using Cold Ingredients: Ensure all ingredients, especially cream cheese and butter, are at room temperature for better mixing.
    • Overmixing the Batter: Mix just until combined to avoid a dense texture; overmixing can lead to a tough cake.
    • Incorrect Oven Temperature: Always preheat your oven and check the temperature with an oven thermometer for accuracy.
    • Skipping the Cooling Step: Allow the cake to cool in the pan before transferring; skipping this can cause it to break apart.

    Storage & Reheating Instructions

    Refrigerator Storage

    Store your Sweet Potato Pound Cake in an airtight container in the refrigerator. It will stay fresh for up to one week.

    Freezing Instructions

    For best results, wrap the cooled cake tightly in plastic wrap, then in aluminum foil before freezing. It can be frozen for up to three months. Thaw in the refrigerator overnight before serving.

    Reheating Tips

    • Oven: Preheat the oven to 350ºF (175ºC). Wrap the cake in foil and heat for about 10-15 minutes, or until warmed through.
    • Microwave: Place a slice on a microwave-safe plate and heat for 15-20 seconds, checking for warmth.
    • Stovetop: Heat slices in a non-stick skillet over low heat for about 3-5 minutes, flipping halfway through.

    Frequently Asked Questions

    Can I use canned sweet potatoes for Sweet Potato Pound Cake?

    Yes, canned sweet potatoes can be used. Ensure to drain and mash them well before adding to the batter.

    How do I know when my Sweet Potato Pound Cake is done?

    The cake is done when a wooden pick inserted into the center comes out clean. It should also spring back when gently pressed.

    Can I substitute other spices in this Sweet Potato Pound Cake?

    Absolutely! You can experiment with spices like ginger or allspice for a different flavor profile.

    What can I serve with Sweet Potato Pound Cake?

    This cake pairs well with whipped cream, vanilla ice cream, or a simple dusting of powdered sugar.

    How should I store leftover Sweet Potato Pound Cake?

    Store leftovers in an airtight container in the refrigerator for up to one week, or freeze for longer storage.

    Final Thoughts

    This Sweet Potato Pound Cake is a delightful treat that combines flavor and moisture in every bite. I encourage you to try this recipe and experience the unique sweetness of sweet potatoes in a cake form. Don’t forget to leave a comment sharing your thoughts and any variations you tried!


    Desserts

    Sweet Potato Pound Cake


    5.0 from 24 reviews

    This Sweet Potato Pound Cake is a moist and flavorful dessert that combines the natural sweetness of sweet potatoes with the richness of cream cheese and butter. Perfect for any occasion, this cake is sure to delight your taste buds with its warm spices and tender crumb.

    Author: Munch Twist
    Prep Time: 20 minutes
    Cook Time: 70 minutes
    Total Time: 90 minutes
    Yield: 12 servings
    Category: Desserts
    Method: No bake
    Cuisine: American

    Sweet Potato Pound Cake

    SCALE:
    1x
    2x
    3x
    Cook Mode: Prevent your screen from going dark

    Ingredients

    • 1 teaspoon vanilla extract
    • 2 cups sugar
    • 2 ½ cups cooked, mashed sweet potatoes
    • 1 (8-oz.) package cream cheese, softened
    • ¼ teaspoon salt
    • 3 cups all-purpose flour
    • ½ cup butter, softened
    • 1 teaspoon ground cinnamon or nutmeg (optional)
    • 1 teaspoon baking soda
    • 4 large eggs
    • 2 teaspoons baking powder

    Instructions

    1. Preheat your oven to 350ºF (175ºC). Grease and flour a 10-inch (12-cup) tube pan or two 8 1/2- x 4 1/2-inch loaf pans.
    2. In a large mixing bowl, beat together the softened cream cheese and butter until creamy. Gradually add the sugar, beating until light and fluffy. Add eggs one at a time, beating just until combined. Mix in the mashed sweet potatoes.
    3. In a separate bowl, whisk together the flour, baking powder, baking soda, salt, and optional cinnamon or nutmeg.
    4. Gradually add the dry ingredients to the butter mixture, beating at low speed just until combined. Stir in the vanilla extract.
    5. Pour the batter into the prepared pan(s) and smooth the top.
    6. Bake for 1 hour and 5 minutes to 1 hour and 10 minutes, or until a wooden pick inserted into the center comes out clean.
    7. Allow the cake to cool in the pan for 10 minutes, then remove and let it cool completely on a wire rack.

    Nutrition Facts

    Serving Size: 1 serving
    Calories: 360 kcal
    Sugar: 36g
    Sodium: 200mg
    Fat: 16g
    Saturated Fat: 8g
    Carbohydrates: 50g
    Fiber: 2g
    Protein: 4g
    Cholesterol: 80mg