Author: munch twist

  • Easy No Bake Chocolate Eclair Cake Recipe

    Easy No Bake Chocolate Eclair Cake Recipe

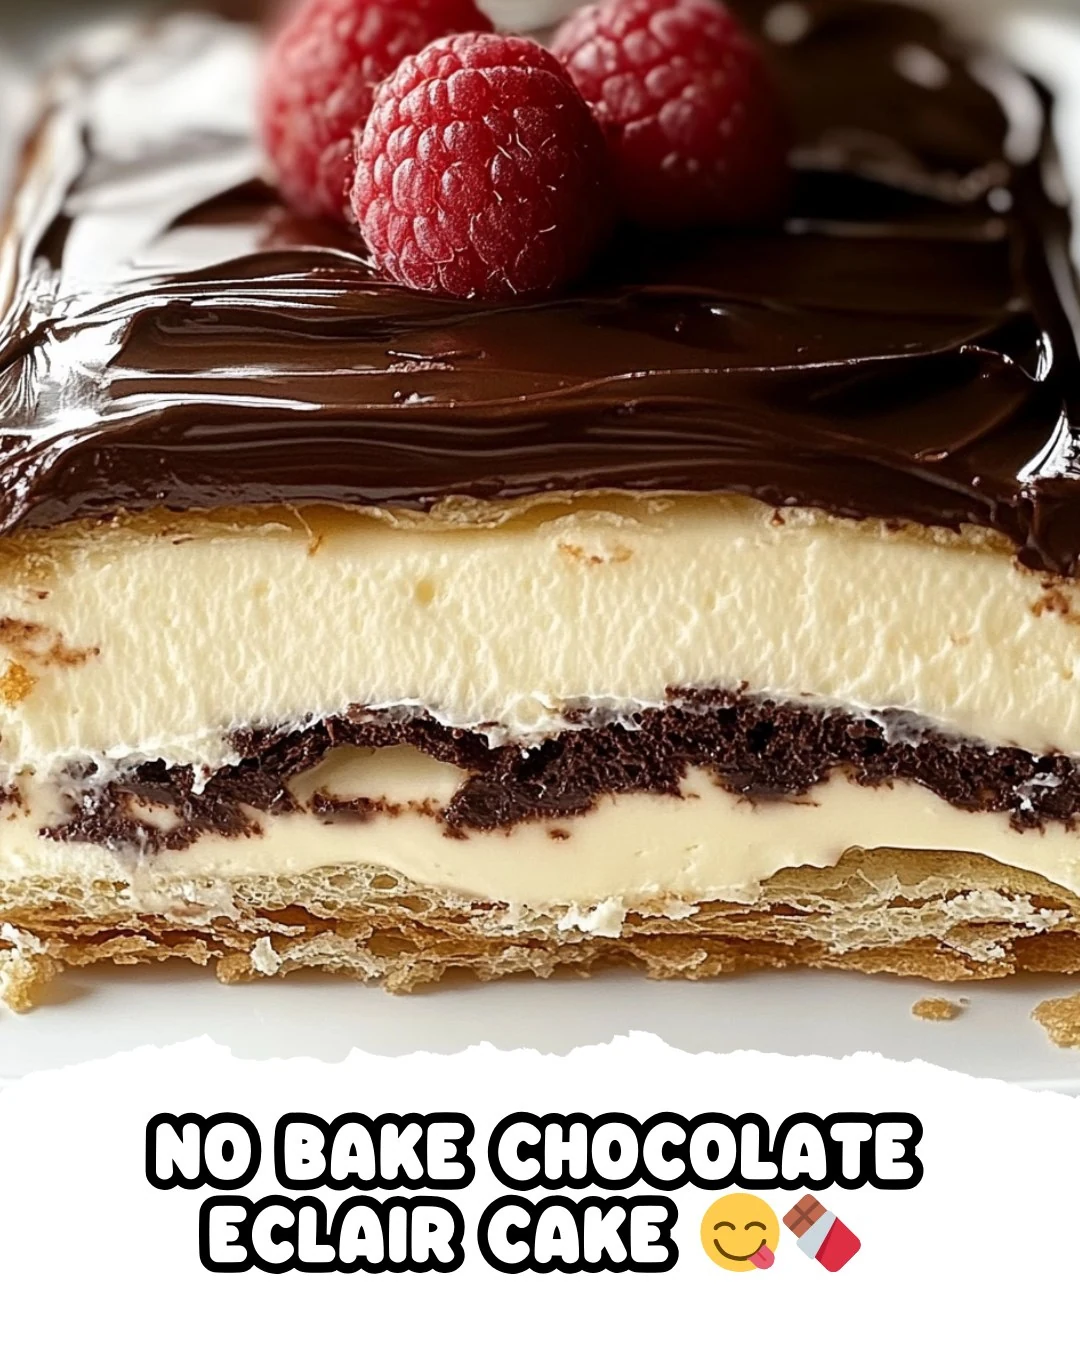
    No Bake Chocolate Eclair Cake is a delightful dessert that combines layers of creamy pudding and chocolate frosting with the crunch of graham crackers. This no-bake treat is perfect for gatherings or a sweet finish to any meal. Its rich flavor and easy preparation make it a standout choice for dessert lovers.

    Why You’ll Love This Recipe

    • Quick & Easy: Ready in under 30 minutes, making it perfect for last-minute gatherings.
    • No Baking Required: Enjoy a delicious dessert without turning on the oven.
    • Crowd-Pleaser: The combination of chocolate and vanilla flavors appeals to everyone.
    • Make Ahead: Perfect for preparing in advance, allowing flavors to develop overnight.
    • Versatile: Customize with your favorite toppings, like crushed nuts or fruit.

    Tools and Equipment

    To create this No Bake Chocolate Eclair Cake, a few essential tools will make the process straightforward.

    Essential Tools

    • 9 x 13-inch baking dish
    • Medium mixing bowl
    • Whisk or spatula
    • Plastic wrap
    • Microwave-safe bowl

    Why These Tools Matter

    • Baking dish: Ideal size for layering ingredients and serving.
    • Mixing bowl: Provides ample space to combine pudding and whipped topping without spills.
    • Plastic wrap: Ensures your cake sets properly while chilling in the refrigerator.

    Ingredients for No Bake Chocolate Eclair Cake

    Pudding Mixture

    • 3 cups milk
    • 2 (3.5 oz) packages instant vanilla pudding mix
    • 1 (8 oz) container whipped topping (COOL WHIP), thawed

    Cake Layers

    • 2 sleeves graham cracker squares

    Topping

    • 1 (16 oz) tub chocolate frosting

    How to Make No Bake Chocolate Eclair Cake Step-by-Step

    Step 1: Prepare the Pudding Mixture

    In a medium bowl, mix together the pudding mix, milk, and thawed COOL WHIP until well combined.

    Step 2: Assemble the Base

    Arrange a single layer of graham cracker squares on the bottom of a 9 x 13-inch baking dish. You may need to break some to fit the entire bottom.

    Step 3: Layer the Pudding

    Spread half of the pudding mixture over the layer of graham crackers. Add another layer of graham crackers on top of the pudding mixture.

    Step 4: Repeat the Layers

    Spread the remaining pudding mixture over the second layer of graham crackers. Top with a final layer of graham crackers.

    Step 5: Chill the Cake

    Cover the dish with plastic wrap and refrigerate for 30 minutes to 1 hour to allow the pudding to set.

    Step 6: Prepare the Frosting

    When the pudding is set, remove the plastic wrap. Microwave the tub of chocolate frosting for about 15 seconds to soften it, making sure to remove the lid and aluminum foil top first. Stir the frosting until it is smooth and easily spreadable.

    Step 7: Frost the Cake

    Spread the softened chocolate frosting evenly over the top layer of graham crackers. Cover the dish with plastic wrap and refrigerate overnight to allow the graham crackers to soften and the flavors to meld.

    Step 8: Serve

    When ready to serve, slice and enjoy your No Bake Chocolate Eclair Cake!

    This recipe captures the essence of a classic chocolate eclair, while being incredibly simple to prepare. Enjoy this delightful No Bake Chocolate Eclair Cake at your next gathering or as a special treat at home.

    How to Serve No Bake Chocolate Eclair Cake

    Serving this No Bake Chocolate Eclair Cake is both simple and versatile. Here are a few creative serving ideas to enhance your dessert experience.

    Individual Parfaits

    Layer portions of the cake in clear cups or jars for an attractive presentation. Top each parfait with additional whipped topping and chocolate shavings for a delightful touch.

    Fruit Garnish

    Serve slices with a side of fresh berries, such as strawberries or raspberries. The tartness of the fruit complements the sweetness of the cake beautifully.

    Chocolate Drizzle

    For an extra indulgence, drizzle some melted chocolate over each slice just before serving. This adds a rich flavor and an elegant appearance.

    Pro Tips for the Best No Bake Chocolate Eclair Cake

    To ensure your No Bake Chocolate Eclair Cake turns out perfectly, consider these practical tips.

    • Use Fresh Ingredients: Always check the expiration dates on your pudding mix and whipped topping for optimal flavor and texture.
    • Refrigeration Time: Allow the cake to chill overnight for the best results. This helps the graham crackers soften and the flavors meld together.
    • Microwave Technique: Make sure to heat the chocolate frosting just enough to soften it, but not too long, or it could become too runny.
    • Cutting Technique: Use a sharp knife and a gentle sawing motion to cut clean slices without disturbing the layers.
    • Storage Tips: Cover any leftovers tightly with plastic wrap, and store them in the refrigerator for up to 3 days for maximum freshness.

    Best Side Dishes and Pairings

    Pairing this No Bake Chocolate Eclair Cake with complementary dishes can elevate your dessert experience. Here are some great options.

    1. Coffee: A rich cup of coffee balances the sweetness of the cake and enhances its chocolate flavor.
    2. Vanilla Ice Cream: The creaminess of vanilla ice cream provides a delightful contrast to the texture of the cake.
    3. Fresh Fruit Salad: A light fruit salad adds a refreshing contrast and brightens the overall flavor profile of the meal.
    4. Chocolate-Covered Strawberries: These decadent bites echo the chocolate theme and make for an elegant pairing.
    5. Sparkling Water: A refreshing sparkling water with a hint of lemon or lime cleanses the palate between bites.

    Common Mistakes to Avoid

    • Not Allowing Enough Chill Time: Skipping the overnight refrigeration can lead to a less cohesive dessert.
    • Using Warm Frosting: If the chocolate frosting is too hot, it can melt the layers beneath, ruining the cake’s structure.
    • Forgetting to Thaw the Whipped Topping: Using frozen whipped topping will result in a clumpy texture in your pudding mixture.
    • Being Imprecise with Layering: Uneven layers of graham crackers and pudding can affect the presentation and taste of the final product.

    Storage & Reheating Instructions

    Refrigerator Storage

    Store leftover No Bake Chocolate Eclair Cake in an airtight container in the refrigerator. It will stay fresh for up to 4 days.

    Freezing Instructions

    Although this dessert is best enjoyed fresh, you can freeze it. Wrap it tightly in plastic wrap, then aluminum foil, and it will keep for up to 3 months. Thaw in the refrigerator overnight before serving.

    Reheating Tips

    • Oven: Preheat to 350°F (175°C) and cover with foil. Heat for 10-15 minutes.
    • Microwave: Heat individual slices on medium power for about 20-30 seconds.
    • Stovetop: Not recommended for this dessert due to its layered structure.

    Frequently Asked Questions

    Can I use other flavors of pudding for No Bake Chocolate Eclair Cake?

    Yes, you can experiment with different flavors like chocolate or butterscotch pudding for a unique twist.

    How can I make my No Bake Chocolate Eclair Cake healthier?

    Consider using low-fat milk and sugar-free pudding mix, and opt for a reduced-calorie whipped topping.

    How long does it take to set the No Bake Chocolate Eclair Cake?

    Allow at least 30 minutes to 1 hour for the pudding to set in the refrigerator before adding the frosting, and refrigerate overnight for the best results.

    Can I add toppings to the No Bake Chocolate Eclair Cake?

    Absolutely! You can top it with crushed nuts, chocolate shavings, or fresh berries for added flavor and texture.

    Is No Bake Chocolate Eclair Cake suitable for special diets?

    This recipe contains dairy and gluten. To make it gluten-free, substitute the graham crackers with gluten-free alternatives.

    Final Thoughts

    The No Bake Chocolate Eclair Cake is a delightful and simple dessert that is sure to impress friends and family alike. With its creamy layers and rich chocolate topping, it’s perfect for any occasion. We encourage you to try making this recipe and share your experience in the comments below!


    Desserts

    No Bake Chocolate Eclair Cake


    5.0 from 24 reviews

    This No Bake Chocolate Eclair Cake is a delightful and easy dessert that layers graham crackers with a creamy vanilla pudding mixture and a rich chocolate frosting. Perfect for any occasion, it requires no baking and is sure to impress your guests with its delicious flavors and textures.
    Author: Munch Twist
    Prep Time: 15 minutes
    Cook Time: 0 minutes
    Total Time: 12 hours 15 minutes
    Yield: 12 servings
    Category: Desserts
    Method: Baking
    Cuisine: American

    No Bake Chocolate Eclair Cake

    SCALE:
    1x
    2x
    3x
    Cook Mode: Prevent your screen from going dark

    Ingredients

    • 3 cups milk
    • 2 sleeves graham cracker squares
    • 2 (3.5 oz) packages instant vanilla pudding mix
    • 1 (16 oz) tub chocolate frosting
    • 1 (8 oz) container whipped topping (COOL WHIP), thawed

    Instructions

    1. In a medium bowl, mix together the pudding mix, milk, and thawed COOL WHIP until well combined.
    2. Arrange a single layer of graham cracker squares on the bottom of a 9 x 13-inch baking dish. You may need to break some to fit the entire bottom.
    3. Spread half of the pudding mixture over the layer of graham crackers.
    4. Add another layer of graham crackers on top of the pudding mixture.
    5. Spread the remaining pudding mixture over the second layer of graham crackers.
    6. Top with a final layer of graham crackers.
    7. Cover the dish with plastic wrap and refrigerate for 30 minutes to 1 hour to allow the pudding to set.
    8. When the pudding is set, remove the plastic wrap and microwave the tub of chocolate frosting for about 15 seconds to soften it (make sure to remove the lid and aluminum foil top before microwaving).
    9. Stir the frosting until it is smooth and easily spreadable.
    10. Spread the softened chocolate frosting evenly over the top layer of graham crackers.
    11. Cover the dish with plastic wrap and refrigerate overnight to allow the graham crackers to soften and the flavors to meld.
    12. When ready to serve, slice and enjoy!
    Nutrition Facts

    Serving Size: 1 serving
    Calories: 300 kcal
    Sugar: 20g
    Sodium: 350mg
    Fat: 15g
    Saturated Fat: 7g
    Carbohydrates: 40g
    Fiber: 1g
    Protein: 4g
    Cholesterol: 10mg

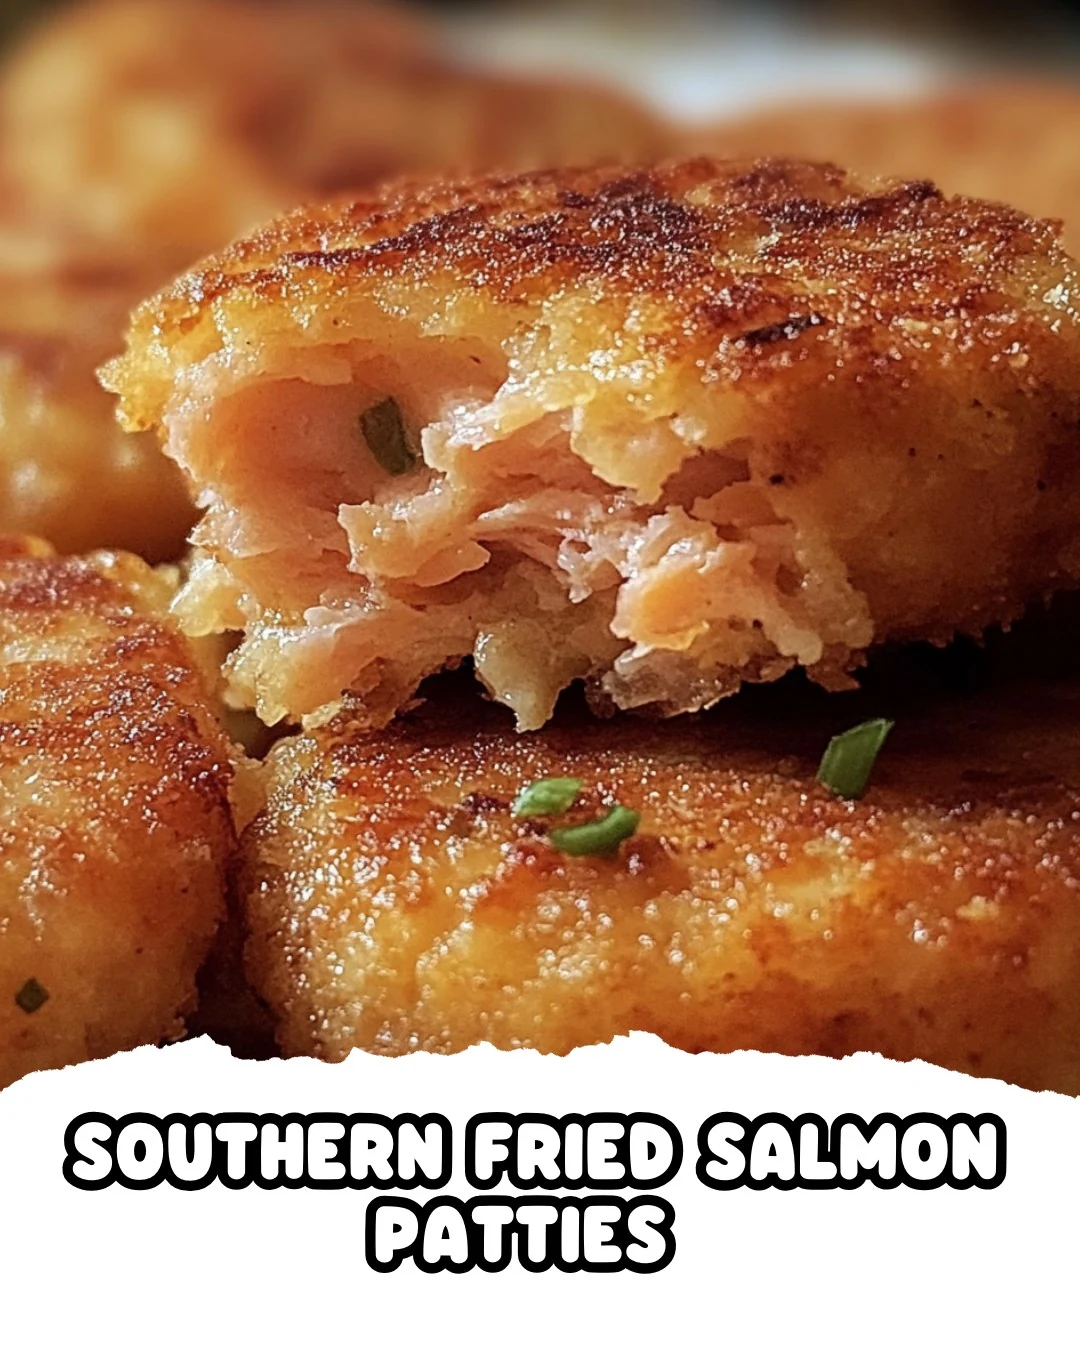
  • Delicious Southern Fried Salmon Patties – OMG DONT LOSE THIS

    Delicious Southern Fried Salmon Patties – OMG DONT LOSE THIS

    Southern Fried Salmon Patties – OMG DONT LOSE THIS are a delicious twist on a classic dish. These patties are perfectly crispy on the outside and tender on the inside, making them a delightful meal or snack. Whether you serve them for lunch or dinner, they are sure to impress family and friends.

    Why You’ll Love This Recipe

    • Quick & Easy: Ready in under 30 minutes, perfect for busy weeknights.
    • Budget-Friendly: Uses canned salmon, making it an economical choice without sacrificing taste.
    • Versatile: Enjoy them as a main dish, in a sandwich, or as an appetizer.
    • Healthy Option: Packed with protein and lower in carbs, these patties fit well into a balanced diet.
    • Kid-Approved: The mild flavor and appealing texture make them a hit with children.

    Tools and Equipment

    To make Southern Fried Salmon Patties, you will need a few essential kitchen tools.

    Essential Tools

    • Mixing bowl
    • Fork
    • Skillet
    • Spatula
    • Measuring cups and spoons

    Why These Tools Matter

    • Mixing bowl: Provides ample space for combining ingredients without mess.
    • Skillet: Ensures even cooking and browning of the patties.
    • Spatula: Helps flip the patties gently to maintain their shape.

    Ingredients for Southern Fried Salmon Patties – OMG DONT LOSE THIS

    Main Ingredients

    • 3 tablespoons mayonnaise
    • 1/4 cup flour
    • 1 egg
    • 1/4 cup onion, finely chopped
    • 1/4 cup cornmeal
    • 1 (14 3/4 ounce) canned salmon

    How to Make Southern Fried Salmon Patties – OMG DONT LOSE THIS Step-by-Step

    Step 1: Prepare the Salmon

    Open the can of salmon and drain thoroughly. Place the drained salmon in a mixing bowl and flake evenly with a fork. This ensures a consistent texture throughout the patties.

    Step 2: Mix the Ingredients

    Add the finely chopped onion, cornmeal, flour, mayonnaise, and egg to the salmon. Stir the mixture until well blended. The mayonnaise helps the patties hold their shape and adds moisture.

    Step 3: Shape the Patties

    Shape the mixture into patties about the size of an average burger. This size allows for even cooking and a satisfying bite.

    Step 4: Fry the Patties

    Heat oil in a skillet over medium heat. Cook the patties in the skillet until browned on each side, turning once while frying. This should take about 3-4 minutes per side.

    Enjoy these delightful Southern Fried Salmon Patties, a quick and tasty dish that’s sure to become a favorite!

    How to Serve Southern Fried Salmon Patties – OMG DONT LOSE THIS

    These Southern Fried Salmon Patties are versatile and can be enjoyed in various ways. Here are a few creative serving ideas:

    On a Bun

    Serve the patties on a toasted bun with lettuce, tomato, and a dollop of tartar sauce for a delicious salmon burger experience.

    With a Side Salad

    Pair the patties with a fresh green salad drizzled with a lemon vinaigrette for a light and refreshing meal.

    As an Appetizer

    Cut the patties into smaller pieces and serve them with a zesty dipping sauce for a perfect appetizer at your next gathering.

    Pro Tips for the Best Southern Fried Salmon Patties – OMG DONT LOSE THIS

    To elevate your salmon patties, consider these helpful tips:

    • Fresh Ingredients: Use fresh onion and high-quality canned salmon for the best flavor and texture.
    • Consistent Size: Shape the patties of uniform size to ensure even cooking and browning.
    • Hot Oil: Ensure the oil is hot enough before adding the patties to achieve a crispy exterior.
    • Don’t Overcrowd the Pan: Fry the patties in batches to prevent steaming and ensure they fry properly.
    • Resting Time: Let the cooked patties rest on paper towels briefly to absorb excess oil for a less greasy bite.

    Best Side Dishes and Pairings

    For a well-rounded meal, consider these excellent side dishes and drinks that complement Southern Fried Salmon Patties:

    1. Coleslaw – The crunch and creaminess of coleslaw balance the richness of the salmon patties.
    2. Corn on the Cob – Sweet, buttery corn enhances the Southern flavor profile of the meal.
    3. Potato Wedges – Crispy potato wedges provide a hearty side that pairs perfectly with the salmon.
    4. Cucumber Salad – A refreshing cucumber salad adds a cool contrast to the warm patties.
    5. Iced Tea – A classic Southern beverage, iced tea quenches thirst and complements the meal’s flavors.

    Common Mistakes to Avoid

    • Not Draining the Salmon Properly: Failing to drain the canned salmon can lead to overly moist patties that won’t hold together.
    • Overmixing the Ingredients: Mixing too vigorously can make the patties tough; stir gently until just combined.
    • Cooking at Too High a Temperature: Cooking on high heat may burn the outside before the inside is cooked through; medium heat is ideal.
    • Neglecting to Shape Evenly: Unevenly shaped patties can cook inconsistently; aim for uniform sizes for even cooking.

    Storage & Reheating Instructions

    Refrigerator Storage

    Store the Southern Fried Salmon Patties in airtight containers in the refrigerator. They will remain fresh for up to 3 days.

    Freezing Instructions

    To freeze, place the cooled patties in a single layer on a baking sheet until firm, then transfer them to airtight freezer bags. They can be stored for up to 3 months.

    Reheating Tips

    • Oven: Preheat the oven to 350°F (175°C). Place patties on a baking sheet and heat for about 10-15 minutes until warm.
    • Microwave: Place patties on a microwave-safe plate and cover with a damp paper towel. Heat in 30-second intervals until warm.
    • Stovetop: Heat a small amount of oil in a skillet over medium heat. Cook patties for about 3-4 minutes on each side until heated through.

    Frequently Asked Questions

    How do I know when Southern Fried Salmon Patties are done?

    The patties should be golden brown on the outside and heated thoroughly inside. A slight crust should form, ensuring a crispy texture.

    Can I use fresh salmon instead of canned for Southern Fried Salmon Patties?

    Yes, you can use fresh salmon. Just ensure it is cooked and flaked before mixing it with the other ingredients.

    What sides pair well with Southern Fried Salmon Patties?

    These patties are delicious with coleslaw, a fresh salad, or served with a side of tartar sauce and lemon wedges.

    Can Southern Fried Salmon Patties be made gluten-free?

    Yes, substitute the flour with a gluten-free flour blend or almond flour to make a gluten-free version.

    Final Thoughts

    Southern Fried Salmon Patties are a quick and satisfying dish that brings comfort to any meal. We encourage you to try this recipe and share your experiences in the comments below. Your feedback helps keep our community thriving!


    Dinner

    Southern Fried Salmon Patties – OMG DONT LOSE THIS


    5.0 from 24 reviews

    These Southern Fried Salmon Patties are a quick and delicious dish made with canned salmon, onion, and a blend of seasonings. Perfectly crispy on the outside and tender on the inside, they are ideal for a weeknight meal or a casual gathering. Enjoy them with your favorite dipping sauce or on a bun for a tasty twist.

    Author: Munch Twist
    Prep Time: 10 minutes
    Cook Time: 10 minutes
    Total Time: 20 minutes
    Yield: 4 servings
    Category: Desserts
    Method: No bake
    Cuisine: American

    Southern Fried Salmon Patties - OMG DONT LOSE THIS

    SCALE:
    1x
    2x
    3x
    Cook Mode: Prevent your screen from going dark

    Ingredients

    • 3 tablespoons mayonnaise
    • 1/4 cup flour
    • 1 egg
    • 1/4 cup onion, finely chopped
    • 1/4 cup cornmeal
    • 1 (14 3/4 ounce) canned salmon

    Instructions

    1. Open the can of salmon and drain thoroughly. Place the drained salmon in a mixing bowl and flake evenly with a fork.
    2. Add the finely chopped onion, cornmeal, flour, mayonnaise, and egg to the salmon. Stir the mixture until well blended.
    3. Shape the mixture into patties about the size of an average burger.
    4. Heat oil in a skillet over medium heat. Cook the patties in the skillet until browned on each side, turning once while frying.

    Nutrition Facts

    Serving Size: 1 serving
    Calories: 250 kcal
    Sugar: 1g
    Sodium: 400mg
    Fat: 15g
    Saturated Fat: 3g
    Carbohydrates: 10g
    Fiber: 1g
    Protein: 20g
    Cholesterol: 70mg

  • Irresistible Salted Caramel Frosting Recipe to Try

    Irresistible Salted Caramel Frosting Recipe to Try

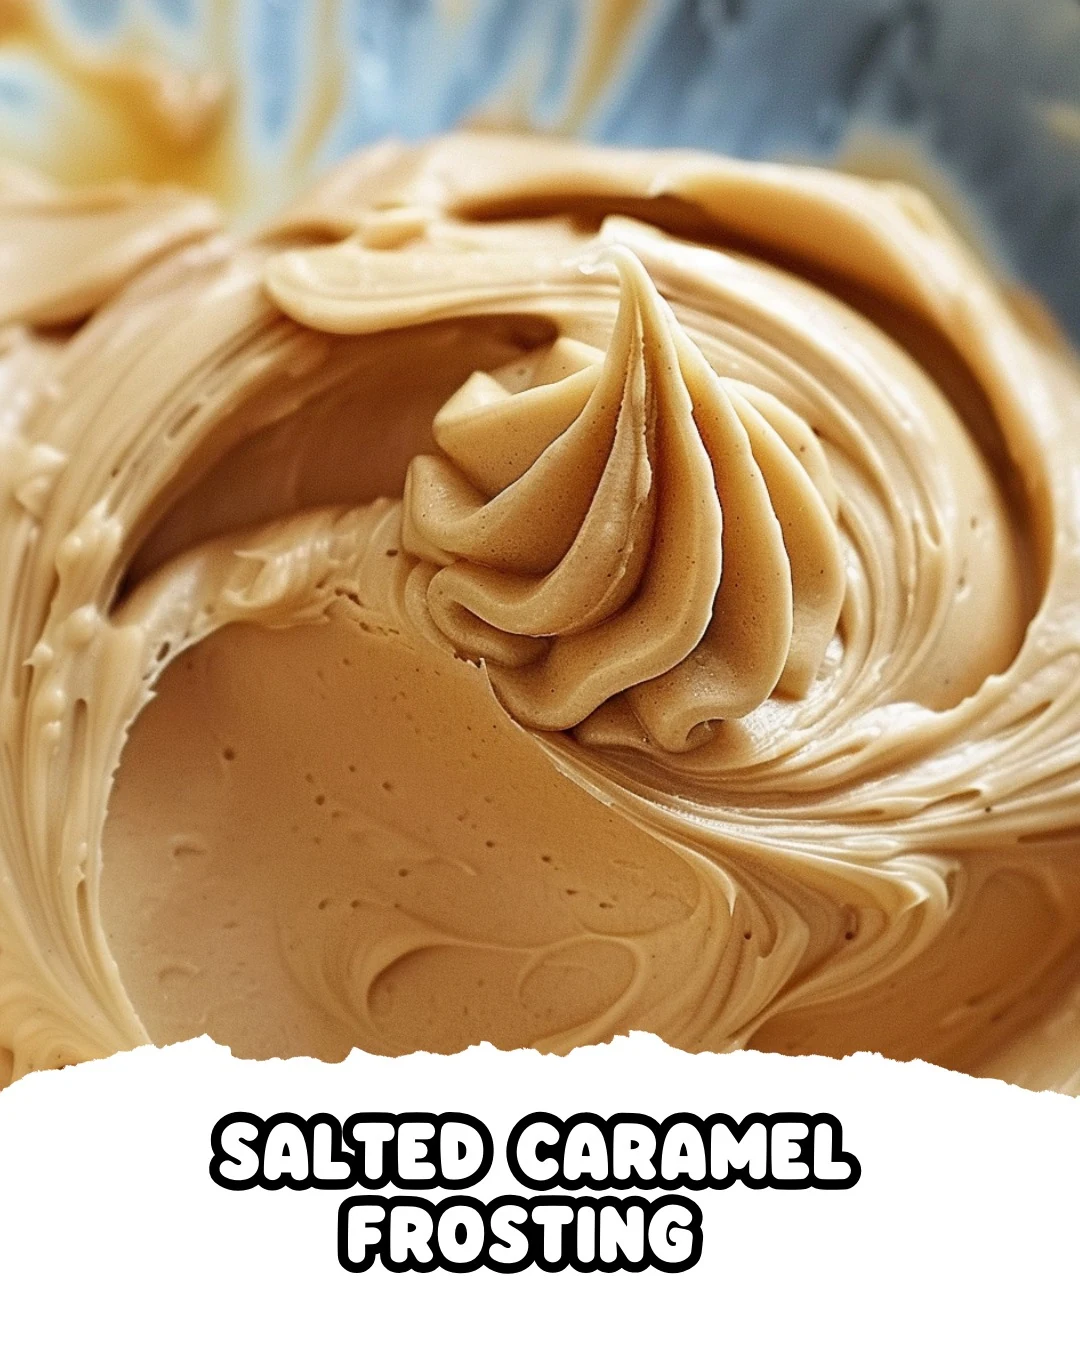
    Salted Caramel Frosting is a decadent twist on a classic frosting that brings a rich, buttery flavor with a hint of salt. This frosting is perfect for cakes, cupcakes, and cookies, adding an indulgent touch to any dessert. Its creamy texture and irresistible taste will make it your go-to frosting for special occasions.

    Why You’ll Love This Recipe

    • Irresistible Flavor: The combination of sweet caramel and a pinch of salt creates a delightful balance that elevates any dessert.
    • Versatile Use: Perfect for cakes, cupcakes, brownies, and more, this frosting complements a variety of baked goods.
    • Quick & Easy: Ready in just 20 minutes, you can whip up this frosting without spending hours in the kitchen.
    • Simple Ingredients: Made with everyday kitchen staples, this frosting is both accessible and easy to prepare.
    • Impressive Results: With its rich color and texture, this frosting will impress family and friends.

    Tools and Equipment

    To make Salted Caramel Frosting, you’ll need a few essential tools to streamline the process.

    Essential Tools

    • Heavy saucepan
    • Mixing bowl
    • Mixer
    • Measuring cups and spoons
    • Decorating bags
    • Wilton 2D decorating tip

    Why These Tools Matter

    • Heavy saucepan: Provides even heat distribution, which is crucial for dissolving sugar and creating caramel.
    • Mixer: Ensures a smooth and creamy consistency, making it easier to incorporate powdered sugar.
    • Decorating bags and tips: Allow for precise and beautiful application of frosting on your baked goods.

    Ingredients for Salted Caramel Frosting

    • 1/2 cup butter, cubed
    • 1 cup brown sugar
    • 1/4 cup milk
    • 1/4 teaspoon of sea salt (or 1/8 teaspoon of table salt)
    • 2 1/2 cups powdered sugar
    • Decorating bags
    • Wilton 2D decorating tip
    • Mixer

    How to Make Salted Caramel Frosting Step-by-Step

    Step 1: Prepare the Caramel Base

    1. In a heavy saucepan, combine the cubed butter, brown sugar, and milk.
    2. Cook and stir over low heat until the brown sugar dissolves completely.

    Step 2: Cook the Caramel

    1. Increase the heat to medium and stop stirring.
    2. Allow the mixture to cook for 3-6 minutes until bubbles form in the center or until the mixture turns amber.
    3. Remove from heat and transfer the caramel mixture to a small bowl. Let it cool to room temperature.

    Step 3: Mix the Frosting

    1. Once the caramel has cooled, add it to a mixer.
    2. Gradually mix in the powdered sugar until the frosting is combined, creamy, and reaches the desired consistency.
    3. Add sea salt to taste and mix until well incorporated.

    Step 4: Decorate Your Treats

    1. Transfer the frosting to decorating bags fitted with the Wilton 2D decorating tip.
    2. Use the frosting to beautifully decorate your cakes, cupcakes, or any other treats.

    Enjoy this luscious Salted Caramel Frosting that transforms ordinary desserts into extraordinary delights.

    How to Serve Salted Caramel Frosting

    Salted caramel frosting adds a delightful touch to various desserts. Here are a few creative serving ideas:

    Drizzle Over Brownies

    Enhance fudgy brownies by drizzling a generous amount of salted caramel frosting on top. The rich flavors complement each other perfectly.

    Fill Cupcakes

    Use salted caramel frosting as a filling for cupcakes. Simply core the center and fill it with this luscious frosting for an unexpected burst of flavor.

    Layer in a Cake

    Create a layered cake by alternating between your favorite cake layers and salted caramel frosting. This adds a sweet and salty dimension to every slice.

    Pro Tips for the Best Salted Caramel Frosting

    To achieve the perfect salted caramel frosting, consider these helpful tips:

    • Use Fresh Ingredients: Ensure your butter and milk are fresh for the best flavor and texture.
    • Monitor Cooking Time: Keep an eye on the caramel mixture to prevent burning; it should turn a rich amber color.
    • Sift Powdered Sugar: Sift the powdered sugar before adding it to the caramel mixture to avoid lumps and achieve a smooth consistency.
    • Taste and Adjust Salt: Start with a small amount of salt, then adjust according to your preference for that perfect sweet and salty balance.
    • Store Properly: If you have leftovers, store the frosting in an airtight container in the refrigerator for up to one week. Re-whip before using.

    Best Side Dishes and Pairings

    Salted caramel frosting pairs beautifully with a variety of desserts and drinks. Here are some options:

    1. Chocolate Cake: The deep flavor of chocolate balances the sweetness of the salted caramel, creating a decadent combination.
    2. Vanilla Ice Cream: A scoop of vanilla ice cream topped with salted caramel frosting makes for an indulgent dessert.
    3. Apple Pie: The sweet and salty notes enhance the spiced flavors of apple pie, adding an exciting twist.
    4. Coffee: A cup of rich coffee complements the sweetness of the frosting, making it a perfect afternoon treat.
    5. Cheesecake: Drizzling salted caramel frosting over cheesecake creates a delightful contrast of flavors and textures.

    Common Mistakes to Avoid

    • Not Cooling the Caramel: Failing to let the caramel mixture cool to room temperature can result in a runny frosting.
    • Incorrect Sugar Measurement: Using too much or too little powdered sugar can affect the consistency of your frosting. Measure accurately.
    • Stirring During Cooking: Stirring the caramel mixture when it reaches a boil can cause it to crystallize. Let it cook undisturbed.
    • Ignoring Taste Testing: Skipping the step to adjust the salt can lead to an unbalanced flavor. Always taste your frosting before using.

    Storage & Reheating Instructions

    Refrigerator Storage

    Store your salted caramel frosting in an airtight container in the refrigerator. It will remain fresh for up to one week. Before use, bring it to room temperature for easier spreading.

    Freezing Instructions

    To freeze salted caramel frosting, place it in an airtight container or a freezer-safe bag. It can be stored for up to three months. When ready to use, transfer it to the refrigerator to thaw overnight.

    Reheating Tips

    • Oven: Preheat to 300°F (150°C). Place frosting in an oven-safe dish and heat for 5-10 minutes, checking frequently.
    • Microwave: Use a microwave-safe bowl. Heat in 10-second intervals, stirring in between, until slightly warm and spreadable.
    • Stovetop: Place frosting in a saucepan over low heat, stirring constantly until it reaches the desired consistency.

    Frequently Asked Questions

    How can I make my Salted Caramel Frosting thicker?

    To thicken your salted caramel frosting, gradually add more powdered sugar until you achieve the desired consistency.

    Can I use regular salt instead of sea salt in Salted Caramel Frosting?

    Yes, you can use table salt instead of sea salt. However, you may want to use a slightly smaller amount as table salt is finer and can be saltier.

    How long will Salted Caramel Frosting last in the refrigerator?

    Salted caramel frosting will last for about one week when stored in an airtight container in the refrigerator.

    Can I use this frosting for layer cakes?

    Absolutely! Salted caramel frosting works beautifully for layering cakes and adds a delightful flavor contrast.

    Is it possible to make this frosting dairy-free?

    Yes, you can substitute the butter with a dairy-free alternative and use a plant-based milk to make a dairy-free version of salted caramel frosting.

    Final Thoughts

    This salted caramel frosting is an indulgent treat that can elevate your cakes and cupcakes to new heights. We encourage you to try this recipe and share your experience in the comments. Your feedback is invaluable!


    Desserts

    Salted Caramel Frosting


    5.0 from 24 reviews

    This luscious salted caramel frosting is perfect for topping your favorite cakes and cupcakes. Its rich, buttery flavor combined with a hint of sea salt creates a delightful balance that enhances any dessert.

    Author: Munch Twist
    Prep Time: 10 minutes
    Cook Time: 10 minutes
    Total Time: 20 minutes
    Yield: 12 servings
    Category: Desserts
    Method: No bake
    Cuisine: American

    Salted Caramel Frosting

    SCALE:
    1x
    2x
    3x
    Cook Mode: Prevent your screen from going dark

    Ingredients

    • 1/2 cup butter, cubed
    • 1 cup brown sugar
    • 1/4 cup milk
    • 1/4 teaspoon sea salt
    • 2 1/2 cups powdered sugar
    • Decorating bags
    • Wilton 2D decorating tip
    • Mixer

    Instructions

    1. In a heavy saucepan, combine the cubed butter, brown sugar, and milk.
    2. Cook and stir over low heat until the brown sugar is dissolved.
    3. Increase the heat to medium and stop stirring. Let it cook for 3-6 minutes until bubbles form in the center of the pan or the mixture turns amber.
    4. Remove from heat and transfer the caramel mixture to a small bowl. Allow it to cool to room temperature.
    5. Once cooled, add the caramel mixture to a mixer.
    6. Gradually mix in the powdered sugar until the frosting is combined, creamy, and reaches the correct consistency.
    7. Add sea salt to taste and mix until well incorporated.
    8. Transfer the frosting to decorating bags fitted with the Wilton 2D decorating tip for beautifully frosted treats.

    Nutrition Facts

    Serving Size: 1 serving
    Calories: 130 kcal
    Sugar: 20g
    Sodium: 40mg
    Fat: 5g
    Saturated Fat: 3g
    Carbohydrates: 22g
    Fiber: 0g
    Protein: 0g
    Cholesterol: 15mg

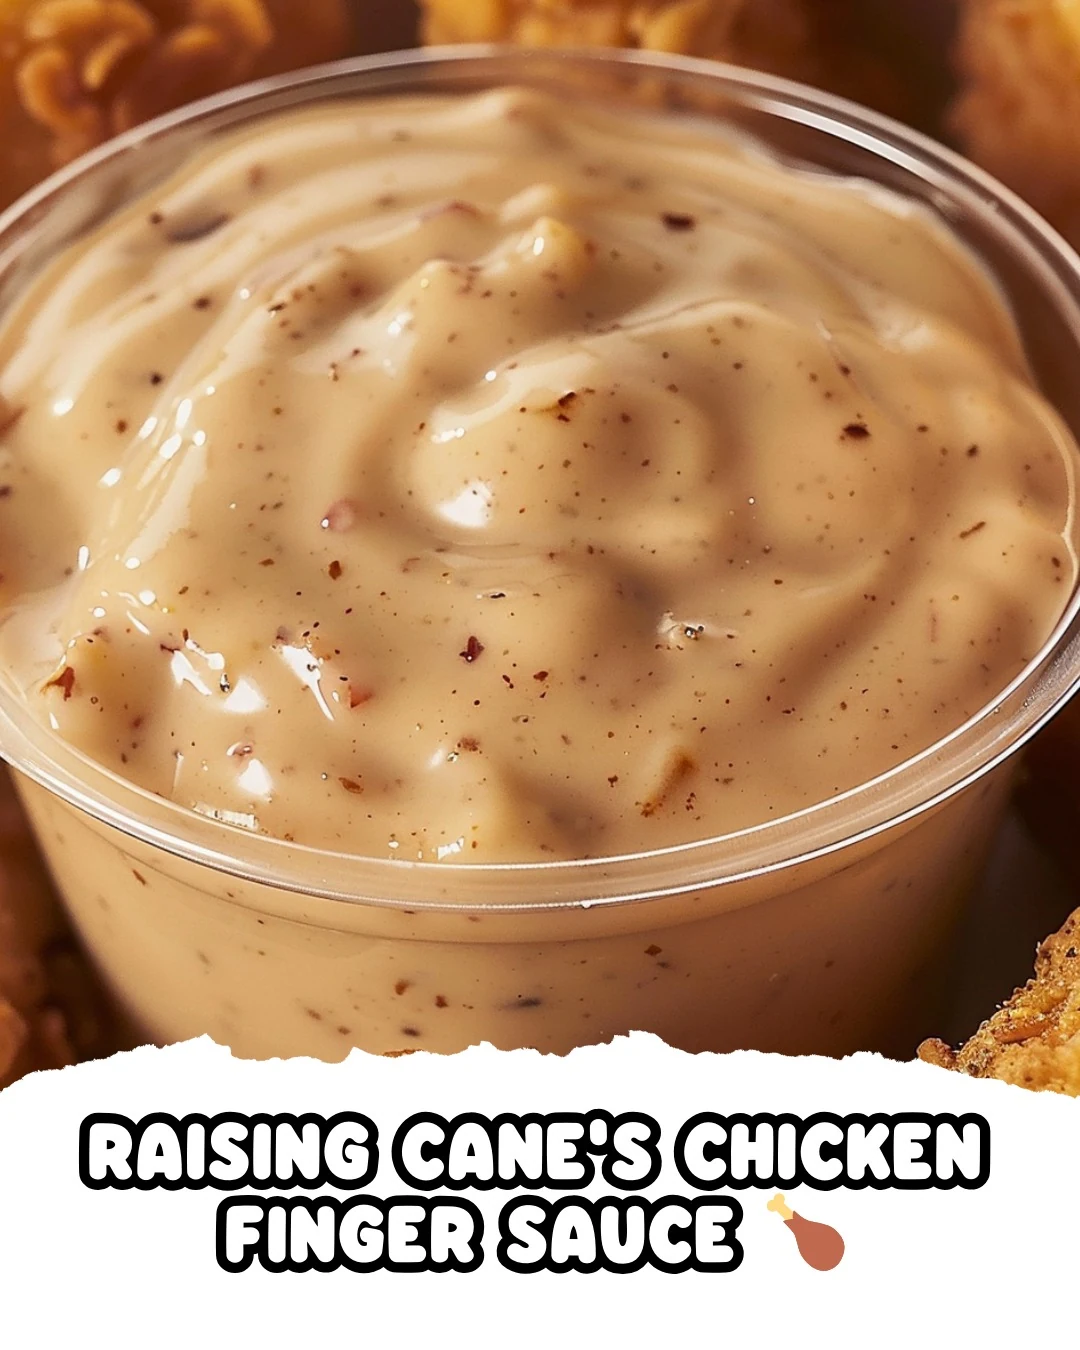
  • Delicious Raising Canes Chicken Finger Sauce Recipe

    Delicious Raising Canes Chicken Finger Sauce Recipe

    Raising Cane’s Chicken Finger Sauce is an irresistible blend of creamy and tangy flavors. This sauce perfectly complements crispy chicken fingers, creating a delightful dipping experience. Its unique taste makes it a standout addition to any meal.

    Why You’ll Love This Recipe

    • Quick & Easy: Ready in just 5 minutes, plus chilling time for enhanced flavor.
    • Versatile: Perfect for chicken fingers, fries, or as a sandwich spread.
    • Crowd-Pleaser: A favorite among family and friends, sure to impress at gatherings.
    • Customizable: Adjust ingredients to suit your taste preferences for a personal touch.
    • Cost-Effective: Made with simple ingredients, it’s budget-friendly and homemade.

    Tools and Equipment

    To make Raising Cane’s Chicken Finger Sauce, you’ll need a few essential kitchen tools.

    Essential Tools

    • Mixing bowl
    • Whisk or spoon
    • Measuring spoons
    • Tightly sealed container

    Why These Tools Matter

    • Mixing Bowl: Provides ample space for combining all ingredients evenly.
    • Whisk or Spoon: Ensures a smooth consistency, mixing all flavors thoroughly.
    • Tightly Sealed Container: Keeps the sauce fresh in the refrigerator, allowing flavors to meld.

    Ingredients for Raising Canes Chicken Finger Sauce

    Base Ingredients

    • 1 tablespoon Worcestershire sauce + extra teaspoon
    • 1 cup mayonnaise (Hellman’s or Dukes for an authentic touch)
    • ½ cup Heinz ketchup

    Flavor Enhancers

    • 1 teaspoon garlic powder
    • 1 teaspoon freshly ground black pepper
    • ¼ teaspoon salt

    How to Make Raising Canes Chicken Finger Sauce Step-by-Step

    Step 1: Prep the Base

    In a small bowl, combine the mayonnaise, Heinz ketchup, and Worcestershire sauce. These ingredients form the creamy and tangy base of your sauce.

    Step 2: Add Flavor

    Add the garlic powder, freshly ground black pepper, and salt to the base mixture. These flavors will elevate the sauce and give it that signature taste.

    Step 3: Mix Thoroughly

    Using a whisk or spoon, mix the ingredients until they are well combined. Aim for a smooth consistency that incorporates all flavors evenly.

    Step 4: Store and Chill

    Transfer the sauce into a tightly sealed container. Refrigerate for at least a couple of hours. This chilling time allows the flavors to meld together beautifully.

    Step 5: Serve and Enjoy

    Once chilled, serve the sauce with chicken fingers. Enjoy the savory and zesty goodness of Raising Cane’s Chicken Finger Sauce with every bite!

    Preparation time: 5 minutes | Cooking time: 0 minutes (2 hours chilling time)

    Nutritional Information (Approximate per serving)

    • Calories: 140
    • Carbohydrates: 4g
    • Protein: 0.5g
    • Fat: 14g
    • Fiber: 0g
    • Sodium: 300mg

    This classic sauce is sure to become a staple in your kitchen, perfect for dipping your favorite chicken fingers!

    How to Serve Raising Canes Chicken Finger Sauce

    Raising Cane’s Chicken Finger Sauce is versatile and enhances any meal. Here are some creative serving ideas.

    As a Dipping Sauce for Chicken Fingers

    Serve this sauce alongside crispy chicken fingers for the ultimate flavor experience. Its creamy texture and tangy taste perfectly complement the crunch of the chicken.

    Drizzled Over Fried Foods

    Elevate your fried foods by drizzling this sauce over items like onion rings or fried pickles. The zesty notes will enhance the flavor profile of your favorite snacks.

    As a Sandwich Spread

    Use Raising Cane’s Chicken Finger Sauce as a spread in sandwiches or wraps. Its creamy consistency adds moisture and flavor, making your meal more satisfying.

    Pro Tips for the Best Raising Canes Chicken Finger Sauce

    To make the most of your Raising Cane’s Chicken Finger Sauce, consider these helpful tips.

    • Use Quality Mayonnaise: Opt for Hellman’s or Dukes for an authentic taste that elevates the sauce.
    • Let It Chill: Refrigerate the sauce for at least two hours to allow the flavors to meld, enhancing the overall taste.
    • Adjust Consistency: If you prefer a thinner sauce, add a splash of milk or extra Worcestershire sauce to reach your desired consistency.
    • Experiment with Spices: Feel free to add a pinch of cayenne pepper or paprika for a spicy kick that pairs well with the existing flavors.
    • Store Properly: Keep the sauce in a tightly sealed container in the refrigerator to maintain freshness for up to a week.

    Best Side Dishes and Pairings

    Raising Cane’s Chicken Finger Sauce pairs well with various side dishes and drinks. Here are some excellent choices.

    1. French Fries: Crispy, golden fries are a classic pairing that complements the sauce’s creamy texture.
    2. Coleslaw: The crunch and acidity of coleslaw balance the richness of the sauce, creating a refreshing contrast.
    3. Sweet Potato Fries: The sweetness of these fries pairs wonderfully with the zesty sauce, offering a delightful flavor combination.
    4. Corn on the Cob: Grilled or steamed corn adds a sweet and savory element that enhances the overall meal experience.
    5. Iced Tea: A refreshing glass of iced tea serves as a perfect beverage to cleanse the palate between bites.

    Common Mistakes to Avoid

    • Using Low-Quality Mayonnaise: Opt for Hellman’s or Dukes for the best flavor.
    • Skipping the Chilling Time: Allowing the sauce to chill is essential for flavor development.
    • Not Measuring Ingredients Accurately: Precision can make a big difference in taste.
    • Ignoring Fresh Ingredients: Freshly ground black pepper and quality ketchup enhance the sauce.

    Storage & Reheating Instructions

    Refrigerator Storage

    Store the sauce in an airtight container in the refrigerator. It will remain fresh for up to one week.

    Freezing Instructions

    To freeze, pour the sauce into freezer-safe containers, leaving some space for expansion. It can be frozen for up to three months. Thaw in the refrigerator before use.

    Reheating Tips

    • Oven: Preheat the oven to 350°F (175°C) and place the sauce in an oven-safe dish. Heat for 10-15 minutes until warmed through.
    • Microwave: Transfer to a microwave-safe container, cover loosely, and heat in 30-second intervals until warm.
    • Stovetop: Warm over low heat in a saucepan, stirring frequently to avoid burning.

    Frequently Asked Questions

    What is Raising Canes Chicken Finger Sauce made of?

    Raising Canes Chicken Finger Sauce consists of mayonnaise, ketchup, Worcestershire sauce, garlic powder, black pepper, and salt.

    How long does homemade Raising Canes Chicken Finger Sauce last?

    When stored in an airtight container in the refrigerator, it lasts for about one week.

    Can I freeze Raising Canes Chicken Finger Sauce?

    Yes, you can freeze the sauce for up to three months. Make sure to use freezer-safe containers.

    What can I serve with Raising Canes Chicken Finger Sauce?

    This sauce pairs perfectly with chicken fingers, but you can also use it as a dip for fries, veggies, or even sandwiches.

    Is Raising Canes Chicken Finger Sauce spicy?

    No, this sauce is not spicy. It offers a savory and zesty flavor that complements chicken fingers well.

    Final Thoughts

    Raising Canes Chicken Finger Sauce is a delightful addition to your meal, perfect for enhancing the flavor of chicken fingers. Try making this recipe at home and experience the joy of its rich taste. We would love to hear your feedback, so please leave a comment sharing your thoughts!


    Dinner


    Title: Delicious Raising Canes Chicken Finger Sauce Recipe
    Meta: Discover how to make Raising Canes Chicken Finger Sauce at home. Perfect for dipping! Try it today and elevate your chicken finger experience.
    Synonyms: Raising Canes dipping sauce, chicken finger sauce, Cane’s sauce, homemade chicken sauce, fast food dipping sauce, creamy dipping sauce, zesty chicken sauce, savory dipping sauce, restaurant-style sauce, chicken nugget sauce, signature sauce, tangy chicken sauce, easy dipping sauce, flavorful sauce, quick chicken sauce, sauce for fries, thick dipping sauce, creamy condiment, chicken tender sauce, zesty condiment.

    Raising Canes Chicken Finger Sauce


    5.0 from 24 reviews

    Raising Cane's Chicken Finger Sauce is a creamy and tangy dip that perfectly complements chicken fingers. This easy-to-make sauce combines mayonnaise, ketchup, and a blend of seasonings to create a savory and zesty flavor that enhances your favorite fried foods.

    Author: Munch Twist
    Prep Time: 5 minutes
    Cook Time: 0 minutes
    Total Time: 125 minutes
    Yield: 8 servings
    Category: Lunch
    Method: No bake
    Cuisine: American

    Raising Canes Chicken Finger Sauce

    SCALE:
    1x
    2x
    3x
    Cook Mode: Prevent your screen from going dark

    Ingredients

    • 1 tablespoon Worcestershire sauce
    • 1 teaspoon Worcestershire sauce
    • 1 cup mayonnaise
    • 1 teaspoon garlic powder
    • 1 teaspoon freshly ground black pepper
    • ½ cup Heinz ketchup
    • ¼ teaspoon salt

    Instructions

    1. In a small bowl, combine the mayonnaise, Heinz ketchup, Worcestershire sauce, garlic powder, freshly ground black pepper, and salt.
    2. Mix the ingredients thoroughly until they are well combined and the sauce is smooth.
    3. Transfer the sauce into a tightly sealed container.
    4. Refrigerate the sauce for a couple of hours to allow the flavors to meld together.
    5. Serve with chicken fingers.

    Nutrition Facts

    Serving Size: 1 serving
    Calories: 140 kcal
    Sugar: 2g
    Sodium: 300mg
    Fat: 14g
    Saturated Fat: 2g
    Carbohydrates: 4g
    Fiber: 0g
    Protein: 0.5g
    Cholesterol: 5mg

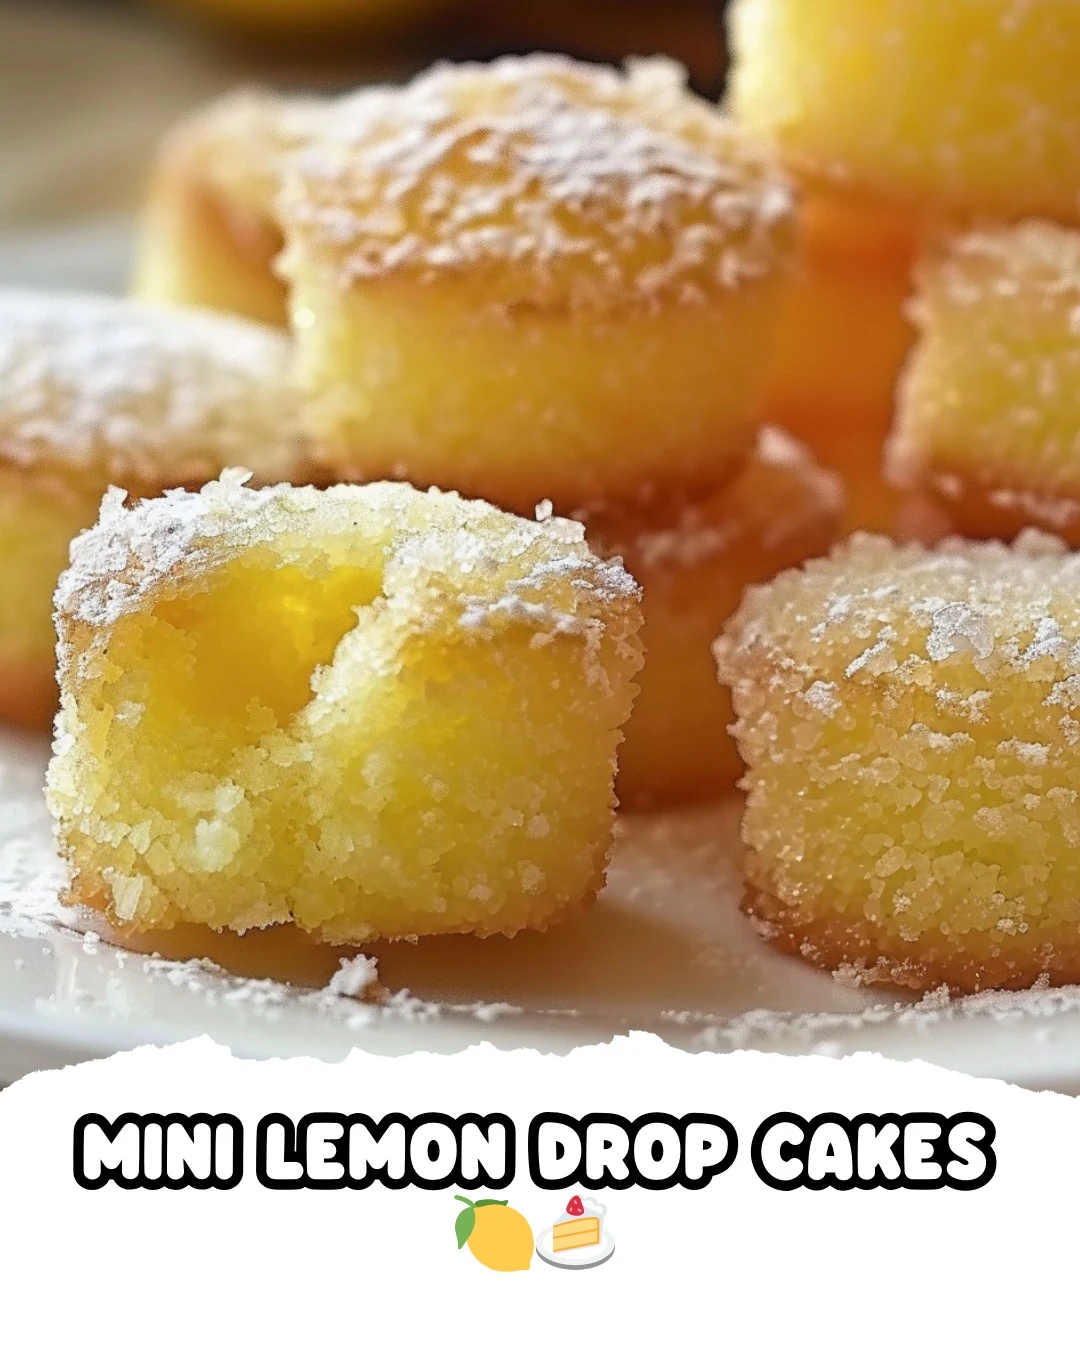
  • Delightful MINI LEMON DROP CAKES – DONT LOSE THIS Recipe

    Delightful MINI LEMON DROP CAKES – DONT LOSE THIS Recipe

    MINI LEMON DROP CAKES – DON’T LOSE THIS are a delightful treat that captures the essence of lemon in a bite-sized format. These cakes are moist, flavorful, and topped with a sweet glaze that makes them irresistible at any gathering.

    Why You’ll Love This Recipe

    • Bursting with Flavor: These cakes deliver a refreshing lemon taste that brightens any occasion.
    • Quick & Easy: Ready in under 30 minutes, perfect for last-minute cravings or gatherings.
    • Perfect for Sharing: Mini sizes make them ideal for parties, picnics, or simply enjoying with friends.
    • Customizable: Feel free to experiment with different citrus flavors or add poppy seeds for texture.
    • Simple Ingredients: Made with everyday items, ensuring you can whip them up anytime.

    Tools and Equipment

    To make these cakes successfully, you will need a few essential tools.

    Essential Tools

    • Mini muffin pans
    • Mixing bowls
    • Hand beater or whisk
    • Small saucepan
    • Cooling racks

    Why These Tools Matter

    • Mini muffin pans: Ensure uniform baking and perfect portion sizes for mini cakes.
    • Mixing bowls: Provide ample space for combining ingredients without mess.
    • Cooling racks: Allow cakes to cool evenly, preventing sogginess.

    Ingredients for MINI LEMON DROP CAKES – DONT LOSE THIS

    Cake Ingredients

    • 1 Tbsp fresh lemon juice
    • 1/4 cup sour cream
    • 1 cup flour
    • 1 Tbsp fresh lemon zest
    • 1 whole egg
    • 1/2 tsp baking soda
    • 1/2 cup butter
    • 1 cup sugar
    • 1/2 tsp salt
    • 1/2 cup water

    Lemon Glaze Ingredients

    • 1 Tbsp melted butter
    • 1 tsp fresh lemon zest
    • 1 1/2 cups powdered sugar
    • 2 Tbsp fresh lemon juice
    • 2 Tbsp milk

    How to Make MINI LEMON DROP CAKES – DONT LOSE THIS Step-by-Step

    Step 1: Prep the Base

    1. Preheat your oven to 325°F (165°C) and spray mini muffin pans with non-stick spray. Set aside.
    2. In a mixing bowl, whisk together 1 cup flour, 1 cup sugar, 1/2 tsp salt, and 1/2 tsp baking soda. Set aside.

    Step 2: Prepare the Batter

    1. In a small saucepan over medium heat, melt 1/2 cup butter. Add 1/2 cup water and bring the mixture to a boil.
    2. Pour the hot butter mixture over the dry ingredients. Beat with a hand beater until barely blended.
    3. Add 1/4 cup sour cream, 1 whole egg, 1 Tbsp fresh lemon zest, and 1 Tbsp fresh lemon juice to the batter. Beat until smooth.

    Step 3: Bake the Cakes

    1. Scoop the batter into the prepared mini muffin pans.
    2. Bake for about 12 minutes, or until a toothpick inserted into the center comes out clean.
    3. Let the mini cakes cool for 5 minutes in the pans, then turn them out onto cooling racks. Allow them to cool completely before glazing.

    Step 4: Make the Lemon Glaze

    1. In a small mixing bowl, whisk together 1 1/2 cups powdered sugar, 1 tsp fresh lemon zest, 1 Tbsp melted butter, 2 Tbsp fresh lemon juice, and 2 Tbsp milk.
    2. Heat the glaze for about 10 seconds in the microwave until it is very thin.

    Step 5: Glaze the Cakes

    1. Dip each mini cake bottom side down into the glaze, letting the excess drip off back into the bowl.
    2. Invert the glazed cakes top side down onto cooling racks. (Place waxed paper underneath for easier cleanup.)
    3. Let the cakes sit until the glaze hardens.

    These MINI LEMON DROP CAKES – DON’T LOSE THIS are sure to be a hit. Enjoy them fresh or store them for a delightful treat later.

    How to Serve MINI LEMON DROP CAKES – DONT LOSE THIS

    These Mini Lemon Drop Cakes are versatile and can be enjoyed in various delightful ways.

    With Fresh Berries

    Serve the mini cakes alongside a mix of fresh strawberries, blueberries, and raspberries. The tartness of the berries complements the sweetness of the lemon cakes perfectly.

    With a Scoop of Vanilla Ice Cream

    Top each mini cake with a scoop of creamy vanilla ice cream. The cold and rich ice cream balances the zesty flavor of the lemon cakes, creating a refreshing dessert experience.

    As a Breakfast Treat

    Serve these mini cakes as a light breakfast option, accompanied by a cup of herbal tea or coffee. Their bright lemon flavor can brighten up your morning routine.

    Pro Tips for the Best MINI LEMON DROP CAKES – DONT LOSE THIS

    For optimal results, consider these helpful tips.

    • Use Fresh Ingredients: Fresh lemon juice and zest will enhance the flavor of your batter significantly.
    • Don’t Overmix the Batter: Mix just until combined to ensure your cakes remain tender and fluffy.
    • Check Oven Temperature: Use an oven thermometer to ensure your oven is accurately calibrated, as this affects baking time.
    • Cool Completely Before Glazing: Allow the cakes to cool fully to prevent the glaze from melting into the cake.
    • Experiment with Flavors: Feel free to add a splash of vanilla or almond extract to the batter for a unique twist.

    Best Side Dishes and Pairings

    These Mini Lemon Drop Cakes pair beautifully with a variety of accompaniments.

    1. Herbal Tea: A calming herbal tea, such as chamomile or mint, enhances the lightness of the cakes.
    2. Coffee: A rich, brewed coffee provides a wonderful contrast to the sweet and tart flavors of the lemon cakes.
    3. Fruit Salad: A vibrant fruit salad adds a refreshing element and complements the citrus notes of the cakes.
    4. Lemonade: A chilled glass of homemade lemonade brings out the lemon flavor and is perfect for a warm day.
    5. Cheese Platter: A selection of soft cheeses, like goat cheese or cream cheese, adds a savory balance to the sweet cakes.

    Common Mistakes to Avoid

    • Skipping the Zest: Not including fresh lemon zest can lead to a flatter flavor profile.
    • Overmixing the Batter: Mixing too much can result in dense cakes; blend until just combined.
    • Incorrect Oven Temperature: Baking at the wrong temperature can affect the cakes’ rise and texture.
    • Not Cooling Before Glazing: Glazing warm cakes can cause the glaze to melt away rather than set properly.

    Storage & Reheating Instructions

    Refrigerator Storage

    Store your Mini Lemon Drop Cakes in an airtight container in the refrigerator for up to 3 days to maintain freshness and flavor.

    Freezing Instructions

    For best results, freeze the mini cakes individually wrapped in plastic wrap, then place them in a freezer-safe bag. They can be frozen for up to 2 months. Thaw at room temperature before serving.

    Reheating Tips

    • Oven: Preheat to 300°F (150°C) and warm the cakes for about 5-7 minutes.
    • Microwave: Heat each cake for 10-15 seconds until warm, being careful not to overheat.
    • Stovetop: Place the cakes in a covered pan over low heat for about 5 minutes, checking regularly.

    Frequently Asked Questions

    How can I make Mini Lemon Drop Cakes gluten-free?

    You can substitute all-purpose flour with a gluten-free flour blend. Ensure that the blend includes a binding agent, like xanthan gum, for better texture.

    Can I use bottled lemon juice instead of fresh?

    While you can use bottled lemon juice, fresh lemon juice and zest provide a brighter, more vibrant flavor that enhances the cakes significantly.

    How do I know when the cakes are done baking?

    Insert a toothpick into the center of a cake; if it comes out clean, the cakes are done. They should also spring back slightly when touched.

    What should I do if my glaze is too thick?

    If your glaze is too thick, add a teaspoon of milk or lemon juice at a time until you reach your desired consistency.

    Can I add different flavors to the Mini Lemon Drop Cakes?

    Yes, you can experiment by adding other citrus zests, such as lime or orange, or even a splash of vanilla extract for a unique twist.

    Final Thoughts

    These Mini Lemon Drop Cakes are a delightful treat that will brighten any occasion. We encourage you to try the recipe and share your thoughts in the comments. Your feedback is invaluable!


    Desserts

    MINI LEMON DROP CAKES – DONT LOSE THIS


    5.0 from 24 reviews

    These delightful Mini Lemon Drop Cakes are perfect for any occasion, offering a burst of lemony goodness in every bite.

    Author: Munch Twist
    Prep Time: 20 minutes
    Cook Time: 12 minutes
    Total Time: 32 minutes
    Yield: 12 servings
    Category: Desserts
    Method: No bake
    Cuisine: American

    MINI LEMON DROP CAKES - DONT LOSE THIS

    SCALE:
    1x
    2x
    3x
    Cook Mode: Prevent your screen from going dark

    Ingredients

    • 1 Tbsp fresh lemon juice
    • 1/4 cup sour cream
    • 1 cup flour
    • 1 Tbsp fresh lemon zest
    • 1 whole egg
    • 1/2 tsp baking soda
    • 1/2 cup butter
    • 1 cup sugar
    • 1/2 tsp salt
    • 1/2 cup water
    • 1 Tbsp melted butter (for glaze)
    • 1 tsp fresh lemon zest (for glaze)
    • 1 1/2 cups powdered sugar (for glaze)
    • 2 Tbsp fresh lemon juice (for glaze)
    • 2 Tbsp milk (for glaze)

    Instructions

    1. Preheat your oven to 325°F (165°C) and spray mini muffin pans with non-stick spray. Set aside.
    2. In a mixing bowl, whisk together 1 cup flour, 1 cup sugar, 1/2 tsp salt, and 1/2 tsp baking soda. Set aside.
    3. In a small saucepan over medium heat, melt 1/2 cup butter. Add 1/2 cup water and bring the mixture to a boil.
    4. Pour the hot butter mixture over the dry ingredients and beat with a hand beater until barely blended.
    5. Add 1/4 cup sour cream, 1 whole egg, 1 Tbsp fresh lemon zest, and 1 Tbsp fresh lemon juice to the batter. Beat until smooth.
    6. Scoop the batter into the prepared mini muffin pans.
    7. Bake for about 12 minutes, or until a toothpick inserted into the center comes out clean.
    8. Let the mini cakes cool for 5 minutes in the pans, then turn them out onto cooling racks. Allow them to cool completely before glazing.
    9. For the Lemon Glaze, whisk together 1 1/2 cups powdered sugar, 1 tsp fresh lemon zest, 1 Tbsp melted butter, 2 Tbsp fresh lemon juice, and 2 Tbsp milk in a small mixing bowl. Heat for about 10 seconds in the microwave until the glaze is very thin.
    10. Dip each mini cake bottom side down into the glaze, letting the excess drip off back into the bowl. Invert the glazed cakes top side down onto cooling racks. (Place waxed paper underneath the racks for easier cleanup.)
    11. Let the cakes sit until the glaze hardens.

    Nutrition Facts

    Serving Size: 1 serving
    Calories: 150 kcal
    Sugar: 18g
    Sodium: 150mg
    Fat: 5g
    Saturated Fat: 3g
    Carbohydrates: 25g
    Fiber: 0.5g
    Protein: 2g
    Cholesterol: 30mg

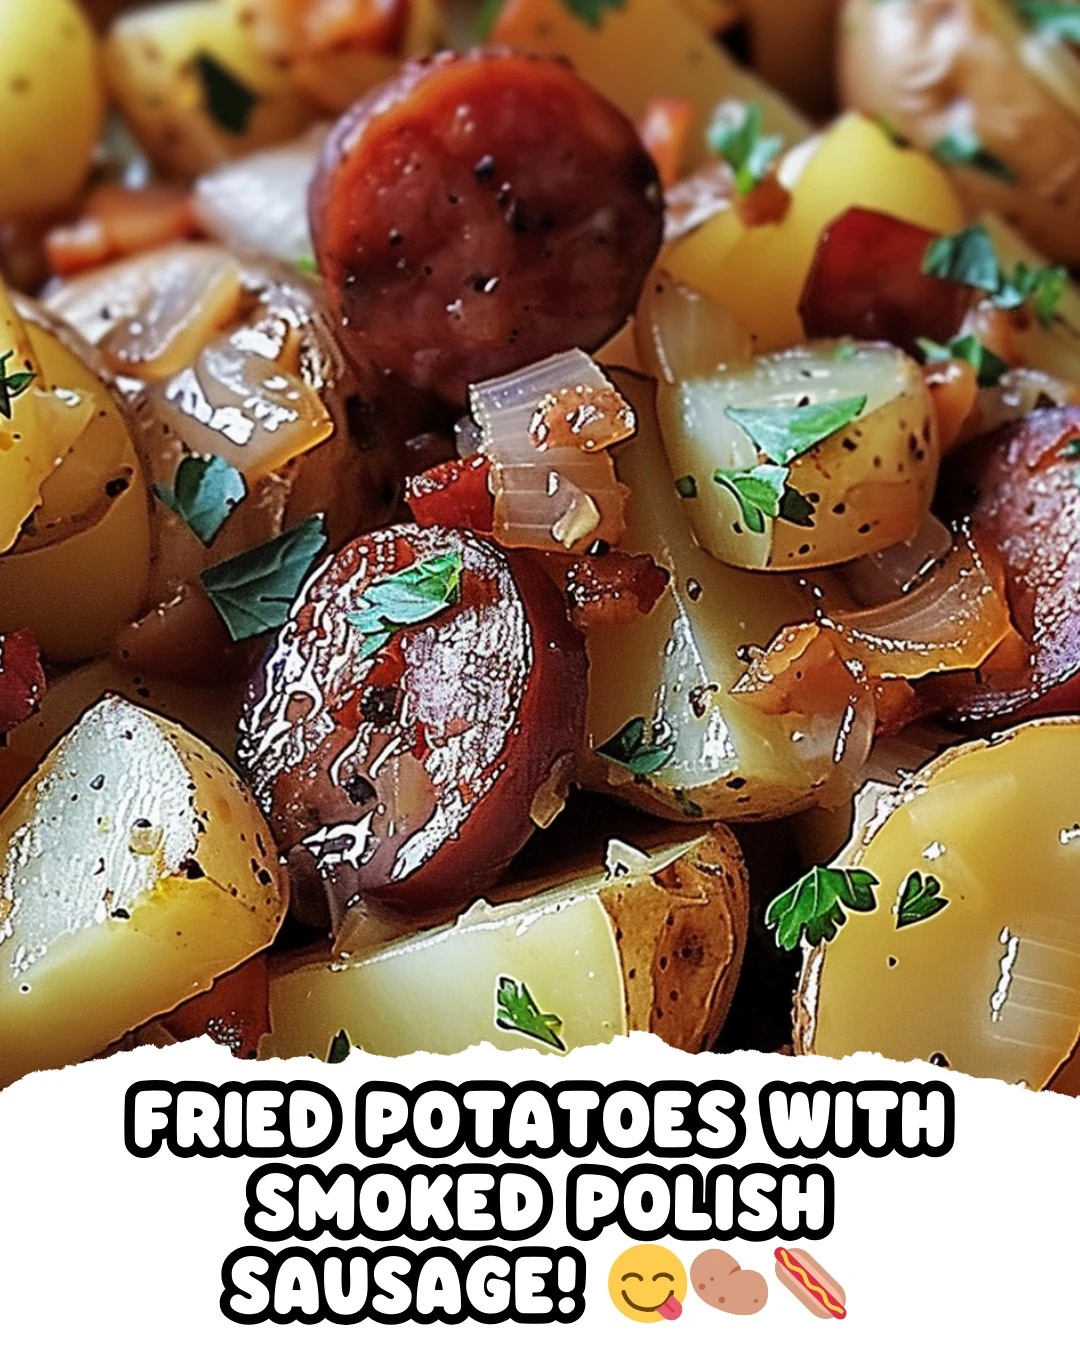
  • Delicious Fried Potatoes with Smoked Polish Sausage Recipe

    Delicious Fried Potatoes with Smoked Polish Sausage Recipe

    Fried Potatoes with Smoked Polish Sausage is a hearty dish that combines the rich flavors of crispy potatoes and savory sausage. This recipe is perfect for a comforting meal, delivering a satisfying balance of textures and tastes in every bite.

    Why You’ll Love This Recipe

    • Quick & Easy: Ready in under 30 minutes, making it perfect for busy weeknights.
    • Flavorful Combination: The smoky sausage pairs beautifully with the crispy potatoes and caramelized onions.
    • Versatile Dish: Enjoy it as a main course or a side, complementing various meals.
    • Simple Ingredients: Uses pantry staples and fresh produce, making it accessible for everyone.
    • Crowd-Pleaser: This dish is sure to impress family and friends with its hearty appeal.

    Tools and Equipment

    Having the right kitchen tools makes the cooking process smoother and more enjoyable.

    Essential Tools

    • Large skillet
    • Cutting board
    • Sharp knife
    • Measuring spoons
    • Serving spoon

    Why These Tools Matter

    • Large skillet: Provides ample space for even cooking and browning of the ingredients.
    • Sharp knife: Ensures clean cuts, making prep work quick and safe.
    • Measuring spoons: Help achieve the right amount of seasoning for a perfectly balanced flavor.

    Ingredients for Fried Potatoes with Smoked Polish Sausage

    Main Ingredients

    • 1 lb smoked Polish sausage, sliced into rounds
    • 4 medium-sized potatoes, peeled and diced
    • 1 large onion, thinly sliced
    • 3 tbsp vegetable oil or bacon fat
    • Salt and pepper to taste
    • Optional: chopped fresh parsley for garnish

    How to Make Fried Potatoes with Smoked Polish Sausage Step-by-Step

    Step 1: Prepare Ingredients

    Begin by peeling and dicing the potatoes into bite-sized pieces. Rinse the diced potatoes under cold water to remove excess starch. Next, slice the smoked Polish sausage into rounds and thinly slice the onion.

    Step 2: Cook Onions

    In a large skillet, heat vegetable oil or bacon fat over medium heat. Add the sliced onions and sauté until they become translucent and slightly caramelized, which should take about 5 minutes.

    Step 3: Add Potatoes

    Add the diced potatoes to the skillet, ensuring they are coated with oil. Season with salt and pepper. Cook the potatoes undisturbed for a few minutes to develop a golden-brown crust. Afterward, stir occasionally for even cooking and to prevent sticking.

    Step 4: Combine with Sausage

    Once the potatoes start to brown, add the sliced smoked Polish sausage to the skillet. Mix everything well, ensuring the sausage is evenly distributed among the potatoes and onions. Cook until the sausage is browned and the potatoes are fork-tender, which should take about 10-15 minutes.

    Step 5: Garnish and Serve

    Remove the skillet from heat. If desired, garnish the dish with chopped fresh parsley. Serve hot as a standalone dish or alongside your favorite main course. For additional flavor, consider pairing with sour cream or mustard.

    Preparation time: 10 minutes | Cooking time: 25 minutes

    Nutritional Information (per serving)

    • Calories: 350 kcal
    • Carbohydrates: 30 g
    • Proteins: 15 g
    • Fats: 20 g

    This Fried Potatoes with Smoked Polish Sausage recipe is not only simple but also packed with flavors that will keep you coming back for more. Enjoy this comforting dish that brings warmth and satisfaction to any meal.

    How to Serve Fried Potatoes with Smoked Polish Sausage

    Fried Potatoes with Smoked Polish Sausage is a versatile dish that can be enjoyed in various ways. Here are some creative serving ideas:

    Top with Fried Eggs

    Add a sunny-side-up or over-easy egg on top of your fried potatoes for a hearty breakfast or brunch option. The runny yolk adds richness and complements the smoky flavor of the sausage.

    Serve with Sauerkraut

    For a tangy contrast, serve your dish with a side of sauerkraut. The acidity cuts through the richness of the potatoes and sausage, creating a balanced meal.

    Create a Wrap

    Transform this dish into a delicious wrap by placing the fried potatoes and sausage in a tortilla. Add some fresh veggies and a drizzle of your favorite sauce for a satisfying lunch or snack.

    Pro Tips for the Best Fried Potatoes with Smoked Polish Sausage

    For optimal results, consider these helpful tips:

    • Choose the Right Potatoes: Opt for starchy potatoes like Russets for the best frying results, as they yield a fluffy interior and crispy exterior.

    • Pre-soak the Potatoes: Soaking diced potatoes in cold water for 30 minutes helps remove excess starch, leading to crispier fries.

    • Use High Heat: Cooking on medium-high heat ensures that the potatoes brown nicely without becoming mushy.

    • Don’t Overcrowd the Pan: Fry in batches if necessary. Overcrowding can lead to steaming instead of frying, resulting in less crispy potatoes.

    • Adjust Seasoning: Taste and adjust the salt and pepper towards the end of cooking to enhance flavors without over-salting initially.

    Best Side Dishes and Pairings

    Fried Potatoes with Smoked Polish Sausage pairs beautifully with a variety of sides and beverages. Here are some excellent options:

    1. Coleslaw: A refreshing coleslaw adds a crunchy texture and a tangy flavor that complements the richness of the dish.

    2. Garlic Bread: The buttery, garlicky notes of garlic bread make for a delightful side, perfect for soaking up any juices from the sausage.

    3. Pickled Vegetables: The acidity of pickled vegetables provides a nice contrast, balancing the savory flavors of the fried potatoes and sausage.

    4. Green Salad: A simple green salad with a light vinaigrette adds freshness and helps cleanse the palate.

    5. Beer: A cold lager or pilsner pairs well, enhancing the smoky notes of the sausage and making for a hearty meal experience.

    Common Mistakes to Avoid

    • Not Rinsing Potatoes: Failing to rinse the diced potatoes can lead to excess starch, making them sticky and preventing even frying.
    • Overcrowding the Skillet: Adding too many ingredients at once can lower the temperature of the skillet, resulting in soggy potatoes instead of a crispy texture.
    • Skipping Seasoning: Neglecting to season the potatoes and sausage adequately can lead to bland flavors. Always taste and adjust seasoning before serving.
    • Not Using Enough Fat: Insufficient oil or fat can prevent the potatoes from browning properly, which is key to achieving that perfect crispy texture.

    Storage & Reheating Instructions

    Refrigerator Storage

    Store leftover Fried Potatoes with Smoked Polish Sausage in an airtight container in the refrigerator. They will stay fresh for up to 3 days.

    Freezing Instructions

    For best results, freeze the dish in a freezer-safe container. It can be frozen for up to 2 months. Allow it to cool completely before freezing to maintain texture.

    Reheating Tips

    • Oven: Preheat the oven to 350°F (175°C). Place the dish in an oven-safe container and cover with foil. Heat for about 15-20 minutes until warmed through.
    • Microwave: Place a serving in a microwave-safe dish and cover. Heat on medium power for 2-3 minutes, stirring halfway through for even heating.
    • Stovetop: Reheat in a skillet over medium heat, stirring occasionally for about 5-7 minutes until heated through.

    Frequently Asked Questions

    What can I serve with Fried Potatoes with Smoked Polish Sausage?

    You can serve this dish alongside a fresh salad, crusty bread, or pickled vegetables for a well-rounded meal.

    How do I make Fried Potatoes with Smoked Polish Sausage healthier?

    To make this dish healthier, consider using less oil, opting for turkey or chicken sausage, and adding more vegetables like bell peppers or spinach.

    Can I customize the ingredients in Fried Potatoes with Smoked Polish Sausage?

    Absolutely! You can add your favorite vegetables, such as bell peppers or zucchini, or even swap out the sausage for a different type, like kielbasa.

    How do I store leftovers of Fried Potatoes with Smoked Polish Sausage?

    Store leftovers in an airtight container in the refrigerator for up to 3 days or freeze them for up to 2 months.

    Is this recipe suitable for meal prep?

    Yes, Fried Potatoes with Smoked Polish Sausage is a great option for meal prep. You can prepare a larger batch and portion it out for easy meals throughout the week.

    Final Thoughts

    Fried Potatoes with Smoked Polish Sausage is a delightful dish that combines hearty flavors and satisfying textures. It’s perfect for a comforting meal any day of the week. Try making this recipe, and feel free to leave a comment with your feedback or any variations you tried.


    Dinner

    Fried Potatoes with Smoked Polish Sausage


    5.0 from 24 reviews

    Fried Potatoes with Smoked Polish Sausage is a hearty and flavorful dish that combines crispy potatoes with savory smoked sausage and caramelized onions. Perfect as a standalone meal or a side dish, it is easy to prepare and sure to satisfy your cravings.

    Author: Munch Twist
    Prep Time: 10 minutes
    Cook Time: 25 minutes
    Total Time: 35 minutes
    Yield: 4 servings
    Category: Lunch
    Method: No bake
    Cuisine: American

    Fried Potatoes with Smoked Polish Sausage

    SCALE:
    1x
    2x
    3x
    Cook Mode: Prevent your screen from going dark

    Ingredients

    • 1 lb smoked Polish sausage, sliced into rounds
    • 4 medium-sized potatoes, peeled and diced
    • 1 large onion, thinly sliced
    • 3 tbsp vegetable oil or bacon fat
    • Salt and pepper to taste
    • Optional: chopped fresh parsley for garnish

    Instructions

    1. Peel and dice the potatoes into bite-sized pieces. Rinse under cold water to remove excess starch. Slice the smoked Polish sausage into rounds and thinly slice the onion.
    2. Heat vegetable oil or bacon fat in a large skillet over medium heat. Add the sliced onions and sauté until translucent and slightly caramelized, about 5 minutes.
    3. Add the diced potatoes to the skillet, ensuring they are coated with the oil. Season with salt and pepper. Cook undisturbed for a few minutes to develop a golden-brown crust, then stir occasionally for even cooking and to prevent sticking.
    4. Once the potatoes start to brown, add the sliced smoked Polish sausage to the skillet. Mix well with the potatoes and onions. Cook until the sausage is browned and the potatoes are fork-tender, about 10-15 minutes.
    5. Remove from heat. Garnish with chopped fresh parsley if desired. Serve hot as a standalone dish or alongside your favorite main course.

    Nutrition Facts

    Serving Size: 1 serving
    Calories: 350 kcal
    Sugar: 2g
    Sodium: 850mg
    Fat: 20g
    Saturated Fat: 7g
    Carbohydrates: 30g
    Fiber: 3g
    Protein: 15g
    Cholesterol: 50mg

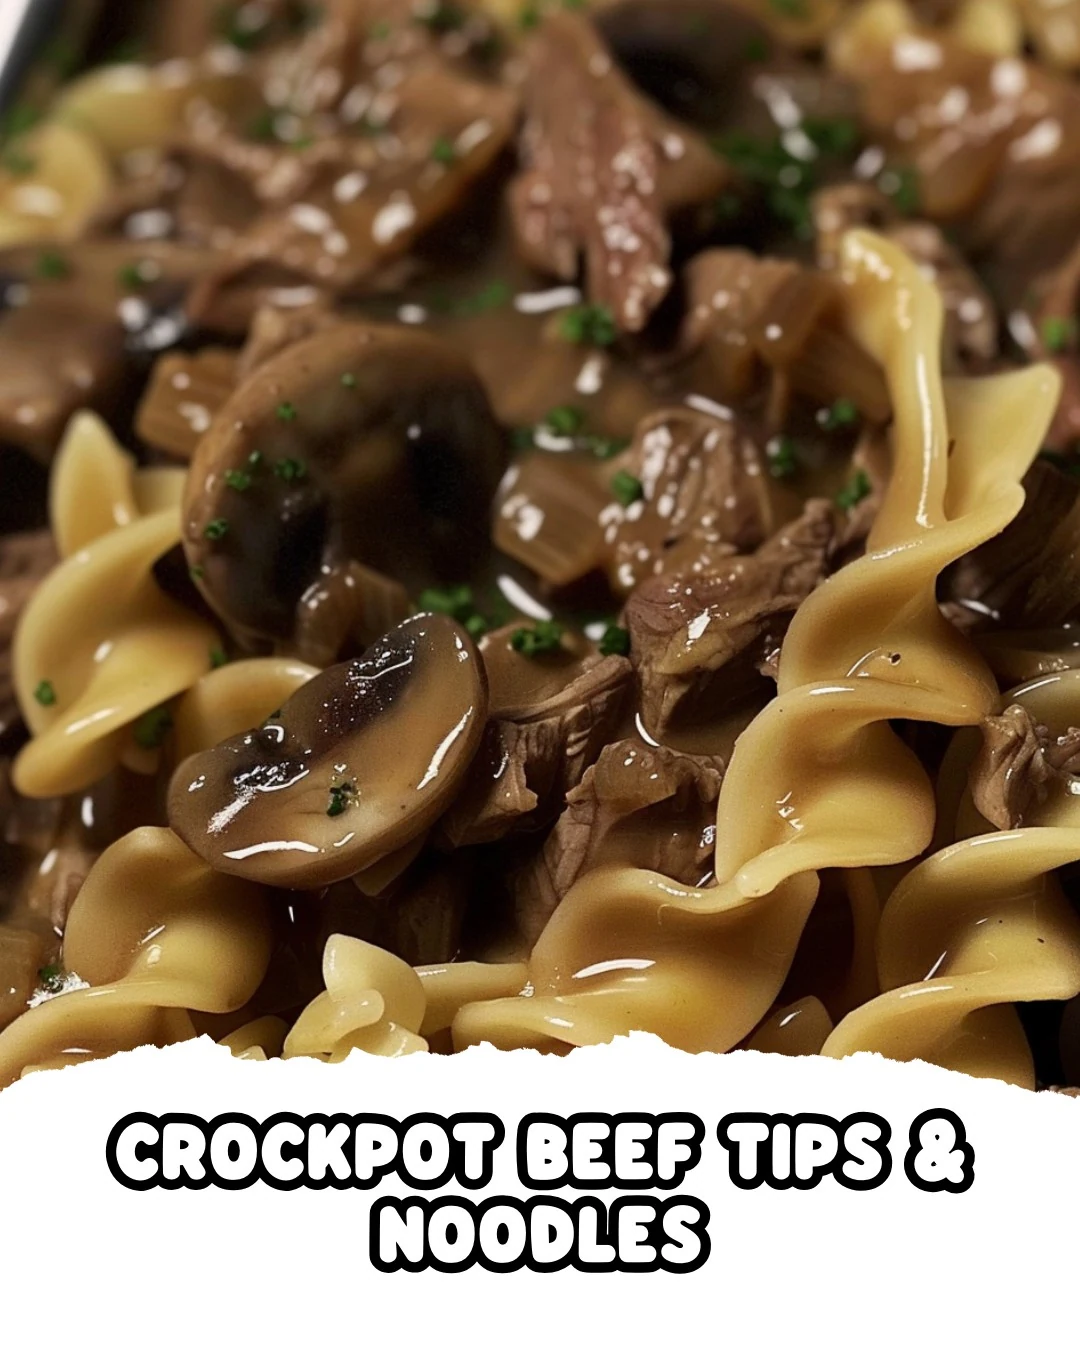
  • Easy Crockpot Beef Tips Noodles Recipe for Comfort

    Easy Crockpot Beef Tips Noodles Recipe for Comfort

    Crockpot Beef Tips Noodles deliver a comforting, hearty meal that is perfect for busy weeknights. The tender beef tips, rich gravy, and egg noodles combine beautifully to create a dish that is both satisfying and flavorful. This recipe is a simple way to enjoy a home-cooked meal with minimal effort.

    Why You’ll Love This Recipe

    • Effortless Cooking: Just combine the ingredients and let the crockpot do the work.
    • Rich Flavor: The combination of beef, mushrooms, and savory seasonings creates a deeply satisfying taste.
    • Versatile Serving: Enjoy it over egg noodles, rice, or even mashed potatoes for a twist.
    • Family-Friendly: This dish is sure to please both kids and adults alike.
    • Meal Prep Friendly: Make a large batch and enjoy leftovers throughout the week.

    Tools and Equipment

    Having the right tools makes cooking easier and more enjoyable.

    Essential Tools

    • Crockpot
    • Mixing bowl
    • Measuring cup (use the empty broth can)
    • Wooden spoon
    • Ladle

    Why These Tools Matter

    • Crockpot: Allows for hands-off cooking, perfect for busy days.
    • Mixing bowl: Ensures even mixing of sauces and seasonings, enhancing flavor.
    • Ladle: Makes serving the dish neat and easy, ensuring no mess on your dining table.

    Ingredients for Crockpot Beef Tips Noodles

    Main Ingredients

    • 1 small can mushrooms
    • 1 pack Lipton onion soup mix
    • 1 lb stew meat
    • 1 can (10.5 oz) cream of mushroom soup
    • 1 can beef broth (use the empty can to measure)
    • 1 pack brown gravy mix
    • Egg noodles (amount as desired)

    How to Make Crockpot Beef Tips Noodles Step-by-Step

    Step 1: Prepare the Ingredients

    Begin by placing the stew meat into the crockpot. Drain the small can of mushrooms and add them to the crockpot as well.

    Step 2: Mix Seasonings and Liquids

    In a separate bowl, combine the cream of mushroom soup, beef broth (using the empty can to measure), and brown gravy mix. Stir well to combine. Pour this mixture over the stew meat and mushrooms in the crockpot. Sprinkle the Lipton onion soup mix over the top and stir everything together to ensure even coverage.

    Step 3: Cook

    Cover the crockpot and cook on low for 8 hours. This slow cooking process will tenderize the meat and meld the flavors beautifully.

    Step 4: Prepare Noodles

    Just before serving, cook the egg noodles according to package instructions. Drain and set aside.

    Step 5: Combine and Serve

    Once the beef is tender and cooked through, serve the beef tips and gravy over the cooked egg noodles.

    Step 6: Optional

    For extra meat, you can double the amount of stew meat while keeping the same amount of other ingredients. This allows for a heartier serving.

    Enjoy this delightful Crockpot Beef Tips Noodles recipe, perfect for any occasion. With minimal preparation and maximum flavor, it’s sure to become a staple in your meal rotation.

    How to Serve Crockpot Beef Tips Noodles

    Crockpot Beef Tips Noodles can be enjoyed in various delightful ways.

    Serve with Fresh Herbs

    Garnish the dish with freshly chopped parsley or chives. This adds a burst of color and enhances the flavor profile.

    Accompany with Garlic Bread

    Serve alongside warm garlic bread to soak up the rich gravy. The buttery, garlicky goodness complements the hearty beef tips beautifully.

    Top with Grated Cheese

    Sprinkle some grated Parmesan or mozzarella cheese on top just before serving. The melted cheese adds a creamy texture that elevates the dish.

    Pro Tips for the Best Crockpot Beef Tips Noodles

    To achieve the best results from your Crockpot Beef Tips Noodles, consider the following tips.

    • Quality Meat: Use high-quality stew meat for tender and flavorful results.
    • Adjust Seasoning: Feel free to adjust the amount of Lipton onion soup mix based on your taste preference.
    • Thicker Gravy: For a thicker gravy, remove the lid during the last hour of cooking to allow some liquid to evaporate.
    • Add Vegetables: Consider adding diced carrots or peas during the last hour of cooking for added nutrition and flavor.
    • Leftover Storage: Store leftovers in an airtight container in the refrigerator for up to three days, reheating gently on the stove.

    Best Side Dishes and Pairings

    To enhance your meal, consider these side dishes and drinks that pair wonderfully with Crockpot Beef Tips Noodles.

    1. Steamed Broccoli: The slight bitterness of broccoli balances the richness of the beef.
    2. Caesar Salad: A crisp Caesar salad provides a refreshing contrast to the hearty noodles.
    3. Roasted Brussels Sprouts: Their caramelized flavor complements the savory notes of the beef tips.
    4. Mashed Potatoes: Creamy mashed potatoes are perfect for soaking up the gravy.
    5. Red Wine: A glass of robust red wine, such as Cabernet Sauvignon, pairs nicely with the rich flavors of the dish.

    Common Mistakes to Avoid

    • Not Browning the Meat: While this recipe does not require browning, some may choose to do so for added flavor. However, it can also lead to additional steps and time.
    • Overcooking the Noodles: Cooking the egg noodles too long can result in mushy pasta. Always follow package instructions for the best texture.
    • Ignoring Seasoning Adjustments: Depending on personal taste, you may need to adjust the amount of Lipton onion soup mix or gravy mix for desired flavor intensity.
    • Skipping the Stirring Step: Failing to mix all the ingredients thoroughly before cooking may lead to uneven flavor distribution in the dish.

    Storage & Reheating Instructions

    Refrigerator Storage

    Store leftover Crockpot Beef Tips & Noodles in airtight containers in the refrigerator. They will stay fresh for up to 3 days.

    Freezing Instructions

    For best results, freeze the beef and gravy mixture separately from the noodles. Place in freezer-safe containers or bags, and it can be stored for up to 3 months. Thaw in the refrigerator before reheating.

    Reheating Tips

    • Oven: Preheat to 350°F (175°C). Transfer to a baking dish, cover with foil, and heat for about 20-25 minutes, or until warmed through.
    • Microwave: Place in a microwave-safe dish, cover, and heat on high for 2-3 minutes, stirring halfway through, until heated thoroughly.
    • Stovetop: Reheat in a saucepan over medium heat, stirring occasionally, until warmed through.

    Frequently Asked Questions

    What can I serve with Crockpot Beef Tips & Noodles?

    You can serve a side salad or steamed vegetables for a balanced meal. Garlic bread also complements this dish well.

    Can I use different types of meat for Crockpot Beef Tips & Noodles?

    Yes, you can substitute stew meat with other cuts like chuck roast or even chicken. Adjust cooking times as needed.

    How can I make Crockpot Beef Tips & Noodles gluten-free?

    Use gluten-free gravy mix and ensure the cream of mushroom soup is gluten-free. Substitute regular egg noodles with gluten-free noodles.

    How long does it take to make Crockpot Beef Tips & Noodles?

    The preparation time is approximately 10 minutes, and the cooking time is 8 hours on low in the crockpot.

    Can I double the recipe for Crockpot Beef Tips & Noodles?

    Absolutely! You can double the stew meat while keeping the other ingredients the same for a larger serving size.

    Final Thoughts

    Crockpot Beef Tips & Noodles is a perfect dish for a busy day, offering a comforting and hearty meal with minimal effort. We encourage you to try this recipe and share your thoughts in the comments. Your feedback is invaluable.


    Dinner

    Crockpot Beef Tips Noodles


    5.0 from 24 reviews

    This Crockpot Beef Tips & Noodles recipe is perfect for a busy day, offering a hearty and delicious meal with minimal effort. Enjoy the rich flavors and comforting warmth of this easy-to-make dish.

    Author: Munch Twist
    Prep Time: 10 minutes
    Cook Time: 480 minutes
    Total Time: 490 minutes
    Yield: 4 servings
    Category: Lunch
    Method: No bake
    Cuisine: American

    Crockpot Beef Tips Noodles

    SCALE:
    1x
    2x
    3x
    Cook Mode: Prevent your screen from going dark

    Ingredients

    • 1 small can mushrooms
    • 1 pack Lipton onion soup mix
    • 1 lb stew meat
    • 1 can (10.5 oz) cream of mushroom soup
    • 1 can beef broth
    • 1 pack brown gravy mix
    • Egg noodles (amount as desired)

    Instructions

    1. Place the stew meat into the crockpot and add drained mushrooms.
    2. Combine cream of mushroom soup, beef broth, and brown gravy mix in a bowl, then pour over the meat and mushrooms. Sprinkle Lipton onion soup mix on top and stir.
    3. Cover the crockpot and cook on low for 8 hours.
    4. Cook egg noodles according to package instructions just before serving.
    5. Serve the beef tips and gravy over the cooked egg noodles.
    6. Optional: Double the amount of stew meat for extra meat while keeping other ingredients the same.

    Nutrition Facts

    Serving Size: 1 serving
    Calories: 450 kcal
    Sugar: 4g
    Sodium: 900mg
    Fat: 20g
    Saturated Fat: 8g
    Carbohydrates: 35g
    Fiber: 2g
    Protein: 30g
    Cholesterol: 75mg

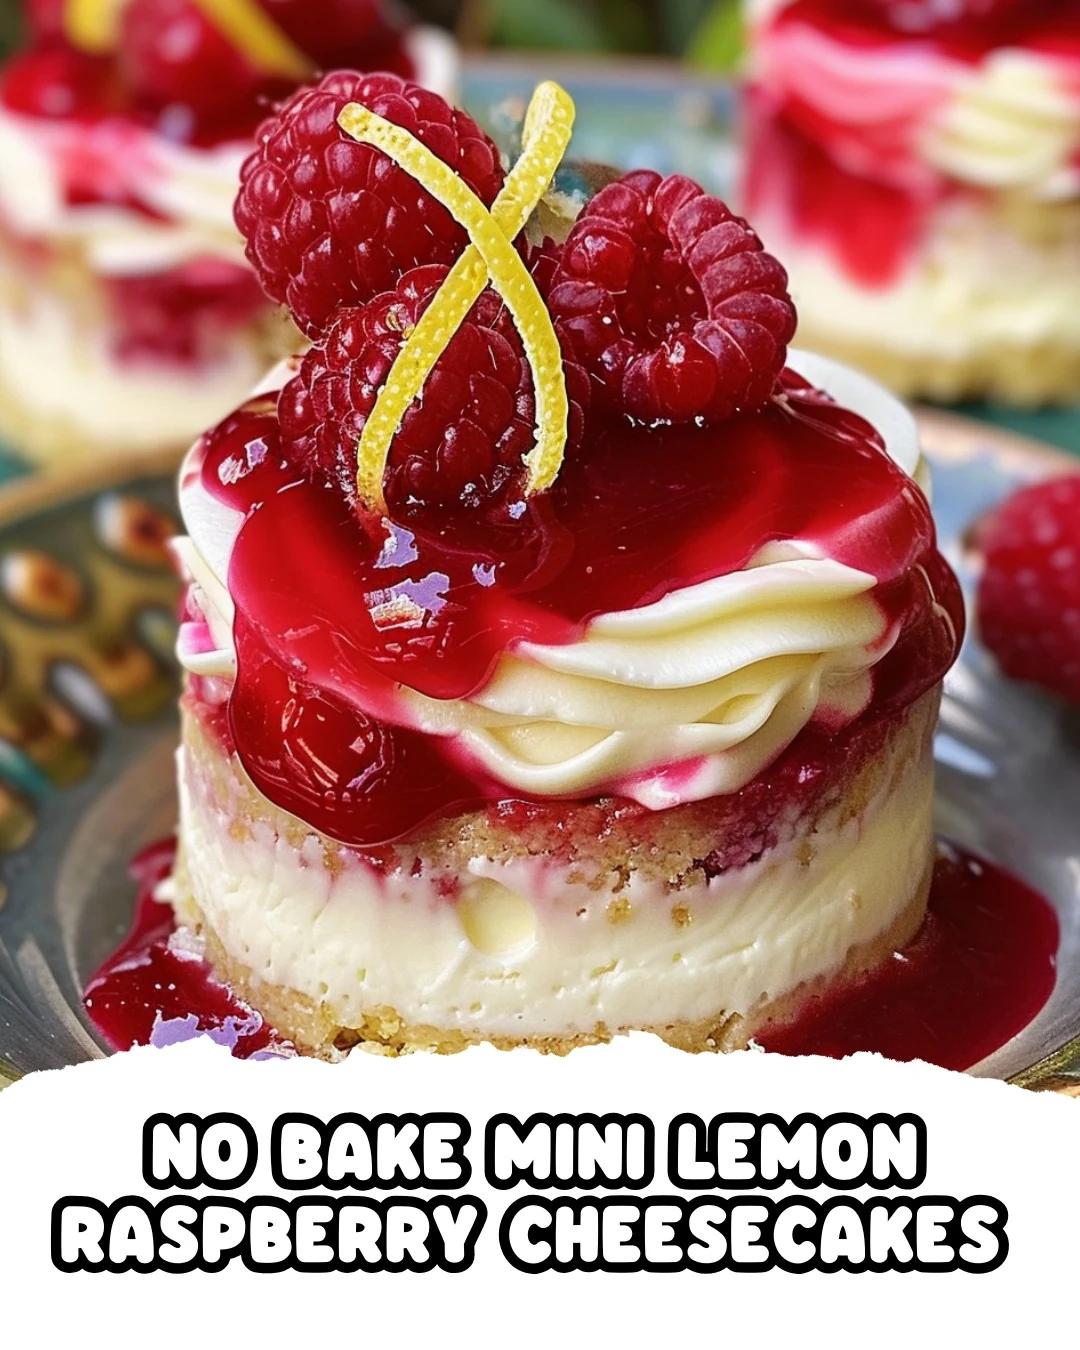
  • Delightful No Bake Mini Lemon Raspberry Cheesecakes

    Delightful No Bake Mini Lemon Raspberry Cheesecakes

    No Bake Mini Lemon Raspberry Cheesecakes are a delightful treat that beautifully combines the tartness of lemon with the sweetness of raspberry. These bite-sized desserts are perfect for any occasion, offering a refreshing taste that is sure to impress.

    Why You’ll Love This Recipe

    • No Baking Required: Enjoy the ease of making these delicious cheesecakes without the need for an oven.
    • Refreshing Flavor Combination: The blend of lemon and raspberry creates a perfect balance of tart and sweet.
    • Quick to Prepare: With just 25 minutes of prep time, you can whip up these mini desserts in no time.
    • Perfect for Any Occasion: Ideal for parties, picnics, or simply as a sweet treat at home.
    • Customizable Toppings: Feel free to experiment with different fruits or toppings to suit your taste.

    Tools and Equipment

    Having the right tools makes the preparation of No Bake Mini Lemon Raspberry Cheesecakes easier and more enjoyable.

    Essential Tools

    • Mixing bowls
    • Electric mixer
    • Spatula
    • Mini cheesecake molds or muffin tins
    • Measuring cups and spoons
    • Refrigerator

    Why These Tools Matter

    • Electric mixer: Ensures a smooth and creamy cheesecake filling without any lumps.
    • Spatula: Perfect for spreading the filling evenly and smoothing the tops.
    • Mini cheesecake molds: Help shape the cheesecakes neatly, making them easy to serve.

    Ingredients for No Bake Mini Lemon Raspberry Cheesecakes

    Crust Ingredients

    • 1 ½ cups graham cracker crumbs
    • ⅓ cup melted butter
    • 2 tablespoons sugar (for crust)

    Cheesecake Filling Ingredients

    • 16 oz cream cheese, softened
    • 1 cup heavy whipping cream
    • ½ cup sugar
    • 1 teaspoon vanilla extract
    • 2 tablespoons lemon juice
    • 1 teaspoon lemon zest

    Topping Ingredients

    • 1 cup raspberry preserves
    • Fresh raspberries for garnish
    • Lemon twists for garnish

    How to Make No Bake Mini Lemon Raspberry Cheesecakes Step-by-Step

    Step 1: Prepare the Crust

    In a medium bowl, mix graham cracker crumbs, ⅓ cup melted butter, and 2 tablespoons sugar. Press the mixture into the bottoms of mini cheesecake molds or muffin tins to form the crust. Refrigerate for 15 minutes to set.

    Step 2: Make the Cheesecake Filling

    In a large bowl, beat the softened cream cheese until smooth. Add ½ cup sugar, vanilla extract, lemon zest, and lemon juice. Continue beating until the mixture is well incorporated.

    Step 3: Whip the Cream

    In a separate bowl, whip the heavy cream until stiff peaks form. Gently fold the whipped cream into the cream cheese mixture until fully combined.

    Step 4: Assemble the Cheesecakes

    Spoon the cream cheese mixture onto the prepared crusts, smoothing the tops with a spatula. Refrigerate the cheesecakes for at least 4 hours, or until set.

    Step 5: Add Toppings

    Once set, spread a layer of raspberry preserves over the top of each cheesecake. Garnish with fresh raspberries and lemon twists before serving.

    These No Bake Mini Lemon Raspberry Cheesecakes are not only easy to make but also deliver a burst of flavor that will leave everyone wanting more. Enjoy your delightful creations!

    How to Serve No Bake Mini Lemon Raspberry Cheesecakes

    These delightful mini cheesecakes can be served in various ways to enhance their presentation and flavor.

    Individual Serving Cups

    Serve each cheesecake in a clear cup to showcase the beautiful layers of cream cheese and raspberry preserves. This adds a personal touch and makes them easy for guests to enjoy.

    Dessert Platter

    Create a stunning dessert platter by arranging the mini cheesecakes alongside other bite-sized treats, such as macarons and fruit tarts. This variety will please any crowd and elevate your dessert table.

    Picnic Treats

    Pack these mini cheesecakes in a cooler for a picnic. Their individual size makes them easy to transport and enjoy outdoors, perfect for a warm sunny day.

    Pro Tips for the Best No Bake Mini Lemon Raspberry Cheesecakes

    To ensure your mini cheesecakes turn out perfectly every time, consider the following tips:

    • Use Fresh Ingredients: Always opt for fresh lemons and quality cream cheese to enhance the flavor of your cheesecakes.
    • Chill Thoroughly: Allow the cheesecakes to set in the refrigerator for at least 4 hours to achieve the perfect texture.
    • Avoid Overmixing: When folding in the whipped cream, be gentle to maintain the light and fluffy consistency of the filling.
    • Customize Flavors: Experiment with different fruit preserves, like strawberry or blueberry, for a unique twist on the classic recipe.
    • Garnish Just Before Serving: To keep the garnishes fresh, add them right before serving to ensure they look vibrant and appealing.

    Best Side Dishes and Pairings

    These No Bake Mini Lemon Raspberry Cheesecakes pair wonderfully with a variety of side dishes and drinks.

    1. Iced Tea: A refreshing glass of iced tea complements the tartness of the lemon and balances the sweetness of the cheesecake.
    2. Fruit Salad: A light and colorful fruit salad can enhance the freshness of the dessert, providing a healthy contrast.
    3. Sparkling Water: Serve with sparkling water infused with mint or lemon for a refreshing palate cleanser.
    4. Chocolate-Covered Strawberries: The richness of chocolate pairs beautifully with the fruity flavors of the cheesecake.
    5. Cheese Platter: A selection of soft cheeses, like brie or goat cheese, offers a savory contrast that enhances the dessert experience.

    Common Mistakes to Avoid

    • Using Too Much Liquid: Be cautious not to add excessive lemon juice or preserves, as this can make the filling too runny.
    • Not Chilling Long Enough: Allow the cheesecakes to set for at least 4 hours; a shorter time may result in a soft texture.
    • Overmixing the Cream Cheese: Beat the cream cheese just until smooth; overmixing can introduce air and create a less dense filling.
    • Ignoring the Crust Setting Time: Skipping the refrigeration step for the crust can lead to a crumbly base that doesn’t hold together well.

    Storage & Reheating Instructions

    Refrigerator Storage

    Store the No Bake Mini Lemon Raspberry Cheesecakes in airtight containers in the refrigerator. They will remain fresh for up to 5 days.

    Freezing Instructions

    To freeze, wrap each cheesecake individually in plastic wrap and then place them in a freezer-safe container. They can be frozen for up to 2 months. Thaw in the refrigerator overnight before serving.

    Reheating Tips

    • Oven: Preheat to 350°F (175°C) and warm for about 10 minutes.
    • Microwave: Heat on low power for 15-20 seconds until just warm.
    • Stovetop: Place in a covered pan on low heat for a few minutes, monitoring closely to avoid melting.

    Frequently Asked Questions

    Can I make No Bake Mini Lemon Raspberry Cheesecakes ahead of time?

    Yes, you can prepare these cheesecakes up to 2 days in advance. Just store them in the refrigerator until ready to serve.

    What can I use instead of raspberry preserves?

    If you prefer, you can substitute raspberry preserves with other fruit preserves like strawberry or blueberry, or even fresh fruit.

    How can I make these cheesecakes gluten-free?

    To make No Bake Mini Lemon Raspberry Cheesecakes gluten-free, simply use gluten-free graham cracker crumbs for the crust.

    Can I use low-fat cream cheese?

    Yes, you can use low-fat cream cheese, but keep in mind that it may slightly alter the texture and flavor of the filling.

    What is the best way to serve No Bake Mini Lemon Raspberry Cheesecakes?

    Serve them chilled, garnished with fresh raspberries and lemon twists, for an elegant presentation.

    Final Thoughts

    These No Bake Mini Lemon Raspberry Cheesecakes are not only simple to make but also a delightful treat that combines bright flavors in every bite. Try making them for your next gathering, and feel free to leave a comment with your feedback on the recipe. Your thoughts are always appreciated!


    Desserts

    No Bake Mini Lemon Raspberry Cheesecakes


    5.0 from 24 reviews

    These mini cheesecakes are a delightful blend of tart lemon and sweet raspberry, perfect for a refreshing dessert.

    Author: Munch Twist
    Prep Time: 25 minutes
    Cook Time: 0 minutes
    Total Time: 4 hours 25 minutes
    Yield: 12 servings
    Category: Desserts
    Method: No bake
    Cuisine: American

    No Bake Mini Lemon Raspberry Cheesecakes

    SCALE:
    1x
    2x
    3x
    Cook Mode: Prevent your screen from going dark

    Ingredients

    • 1 cup heavy whipping cream
    • 1 ½ cups graham cracker crumbs
    • 16 oz cream cheese, softened
    • 1 cup raspberry preserves
    • ⅓ cup melted butter
    • 1 teaspoon vanilla extract
    • 2 tablespoons lemon juice
    • 1 teaspoon lemon zest
    • ½ cup sugar
    • 2 tablespoons sugar (for crust)
    • Fresh raspberries and lemon twists for garnish

    Instructions

    1. In a medium bowl, mix graham cracker crumbs, melted butter, and sugar. Press this mixture into the bottoms of mini cheesecake molds or muffin tins to form the crust. Refrigerate for 15 minutes to set.
    2. Beat the softened cream cheese in a large bowl until smooth. Add sugar, vanilla extract, lemon zest, and lemon juice. Continue beating until well incorporated.
    3. In a separate bowl, whip the heavy cream until stiff peaks form. Gently fold the whipped cream into the cream cheese mixture until fully combined.
    4. Spoon the cream cheese mixture onto the prepared crusts, smoothing the tops with a spatula. Refrigerate the cheesecakes for at least 4 hours, or until set.
    5. Once set, spread a layer of raspberry preserves over the top of each cheesecake. Garnish with fresh raspberries and lemon twists before serving.

    Nutrition Facts

    Serving Size: 1 serving
    Calories: 320 kcal
    Sugar: 21g
    Sodium: 200mg
    Fat: 22g
    Saturated Fat: 13g
    Carbohydrates: 28g
    Fiber: 1g
    Protein: 4g
    Cholesterol: 70mg

  • Indulge in Honey Baklava Cheesecake Bliss

    Indulge in Honey Baklava Cheesecake Bliss

    Honey Baklava Cheesecake is a delightful fusion dessert that combines the rich flavors of baklava with the creamy texture of cheesecake. This unique treat offers a perfect balance of nuttiness, sweetness, and a buttery crunch, making it a standout dish for any occasion.

    Why You’ll Love This Recipe

    • Decadent Flavor: The combination of honey, nuts, and cream creates a rich and indulgent taste experience.
    • Unique Twist: This recipe takes traditional baklava and transforms it into a creamy cheesecake, offering something different.
    • Impressive Presentation: The layered phyllo dough gives the dessert an elegant look, perfect for gatherings.
    • Versatile Dessert: Ideal for holidays, birthdays, or as a sweet ending to any meal.
    • Easy to Share: Cut into squares for easy serving, making it perfect for parties or potlucks.

    Tools and Equipment

    Having the right tools can make the preparation of Honey Baklava Cheesecake much smoother.

    Essential Tools

    • Food processor
    • 9×13 inch baking dish
    • Mixing bowls
    • Electric mixer
    • Pastry brush

    Why These Tools Matter

    • Food processor: Makes quick work of chopping nuts, ensuring even texture throughout.
    • Electric mixer: Helps achieve a smooth, creamy cheesecake filling with minimal effort.
    • Pastry brush: Ensures even distribution of melted butter on phyllo layers, contributing to a crispy texture.

    Ingredients for Honey Baklava Cheesecake

    For the Phyllo Base

    • 1 cup unsalted butter (melted)
    • 2 cups mixed nuts (pistachios, walnuts, almonds)
    • 1 teaspoon cinnamon
    • 3 tablespoons granulated sugar
    • 1 package of phyllo dough (thawed)

    For the Cheesecake Filling

    • 1 cup ricotta cheese
    • 2 packages cream cheese (softened)
    • 3/4 cup honey
    • 1/2 cup heavy cream
    • 4 large eggs
    • 1 teaspoon vanilla extract
    • 1/2 teaspoon almond extract

    How to Make Honey Baklava Cheesecake Step-by-Step

    Step 1: Prep the Base

    1. Preheat the oven to 325°F (165°C).
    2. Brush a 9×13 inch baking dish with melted butter to prevent sticking.

    Step 2: Prepare Nut Mixture

    1. In a food processor, pulse the mixed nuts, cinnamon, and sugar until finely chopped. This mixture will add texture and flavor to your cheesecake.

    Step 3: Assemble Phyllo Layers

    1. Layer half of the phyllo dough in the prepared dish, brushing each sheet with melted butter.
    2. Spread the nut mixture evenly over the phyllo layers.
    3. Top with the remaining phyllo dough, brushing each sheet with melted butter to ensure a golden crust.

    Step 4: Make Cheesecake Filling

    1. In a large bowl, beat the cream cheese and ricotta cheese until smooth. This creates a creamy base for your cheesecake.
    2. Mix in honey, heavy cream, eggs, vanilla extract, and almond extract until well combined.

    Step 5: Combine and Bake

    1. Pour the cheesecake mixture over the phyllo and nut layers in the baking dish.
    2. Bake for 45-50 minutes, or until the cheesecake is set and the phyllo is golden brown.

    Step 6: Cool and Serve

    1. Allow to cool completely before cutting into squares.
    2. Drizzle with additional honey and sprinkle with extra chopped nuts before serving for added flavor and presentation.

    Enjoy this Honey Baklava Cheesecake as a memorable dessert that combines tradition with innovation!

    How to Serve Honey Baklava Cheesecake

    This delightful dessert can be enjoyed in various ways to elevate your dining experience.

    Garnished with Honey and Nuts

    Drizzle extra honey over the cheesecake squares and sprinkle with additional chopped nuts for an added crunch and sweetness that complements the rich flavors.

    Accompanied by Fresh Berries

    Serve slices of the Honey Baklava Cheesecake with a side of fresh berries, such as raspberries or strawberries, to provide a refreshing contrast to the creamy richness of the cheesecake.

    With a Scoop of Vanilla Ice Cream

    Pairing a warm slice of cheesecake with a scoop of vanilla ice cream creates a decadent dessert experience, balancing the flavors perfectly while adding a creamy texture.

    Pro Tips for the Best Honey Baklava Cheesecake

    Achieving the perfect Honey Baklava Cheesecake requires attention to detail and a few insider tips.

    • Use Fresh Ingredients: Ensure all dairy products, including cream cheese and ricotta, are fresh for the best flavor and texture.

    • Keep Phyllo Dough Covered: To prevent drying out, keep the phyllo dough covered with a damp cloth while you work to maintain its moisture.

    • Bake at the Right Temperature: Maintaining the oven temperature at 325°F (165°C) helps the cheesecake set evenly without burning the phyllo layers.

    • Let it Cool Completely: Allow the cheesecake to cool completely in the pan before cutting to ensure clean and neat slices.

    • Experiment with Nuts: Feel free to mix different kinds of nuts or add spices to the nut mixture for a personalized flavor profile in your cheesecake.

    Best Side Dishes and Pairings

    Enhance your Honey Baklava Cheesecake experience with these delightful side dishes and drinks.

    1. Mint Tea
      The refreshing notes of mint tea provide a lovely contrast to the sweetness of the cheesecake, cleansing the palate between bites.

    2. Turkish Coffee
      This strong, rich coffee pairs beautifully with the dessert, balancing the sweetness while enhancing the overall flavor profile.

    3. Greek Yogurt
      A dollop of tangy Greek yogurt on the side adds creaminess and a slight tartness that complements the rich cheesecake.

    4. Chocolate Drizzle
      Adding a drizzle of chocolate sauce can enhance the dessert’s flavor and provide a decadent twist to the already luscious cheesecake.

    5. Fruit Salad
      A light fruit salad with citrus elements can offer a refreshing side that cuts through the richness of the cheesecake, making for a balanced dessert experience.

    6. Pistachio Crumble
      A simple pistachio crumble sprinkled on top adds texture and highlights the nutty flavors in both the cheesecake and the baklava.

    Common Mistakes to Avoid

    • Skipping the Phyllo Layering: Ensure each layer of phyllo is brushed with melted butter to achieve that crispy texture.
    • Overmixing the Cheesecake Filling: Mix just until combined to prevent a dense texture; overmixing can incorporate too much air.
    • Not Preheating the Oven: Always preheat your oven to ensure even baking and a perfectly set cheesecake.
    • Cutting Too Soon: Allow the cheesecake to cool completely before slicing to maintain its structure and presentation.

    Storage & Reheating Instructions

    Refrigerator Storage

    Store the Honey Baklava Cheesecake in airtight containers in the refrigerator. It will remain fresh for up to 5 days.

    Freezing Instructions

    For best results, freeze the cheesecake in individual portions wrapped tightly in plastic wrap, then placed in an airtight container. It can be frozen for up to 2 months. Thaw in the refrigerator overnight before serving.

    Reheating Tips

    • Oven: Preheat to 325°F (165°C), cover with foil, and heat for about 10-15 minutes until warmed through.
    • Microwave: Heat individual slices on medium power for 30-45 seconds or until warmed.
    • Stovetop: Place slices in a skillet over low heat, cover, and warm gently for about 5 minutes.

    Frequently Asked Questions

    Can I use different nuts in the Honey Baklava Cheesecake?

    Yes, feel free to substitute with your favorite nuts. Just ensure they are finely chopped for even distribution.

    How do I know when the Honey Baklava Cheesecake is done?

    The cheesecake is done when it is set in the center and the phyllo layers are golden brown. A slight jiggle is okay as it will firm up as it cools.

    Can I make the Honey Baklava Cheesecake ahead of time?

    Absolutely! This dessert can be made a day in advance and stored in the refrigerator until you’re ready to serve.

    What can I serve with Honey Baklava Cheesecake?

    This cheesecake pairs well with a dollop of whipped cream, a drizzle of honey, or a sprinkle of additional chopped nuts for added texture.

    Is it necessary to use ricotta cheese in the recipe?

    While ricotta adds creaminess, you can replace it with additional cream cheese if desired. The texture may differ slightly, but it will still be delicious.

    Final Thoughts

    This Honey Baklava Cheesecake is a delightful blend of flavors that will impress your guests. We encourage you to try making this recipe and share your experience in the comments below. Your feedback is invaluable and helps us create more delicious content!


    Desserts

    Honey Baklava Cheesecake


    5.0 from 24 reviews

    This decadent fusion of classic baklava and creamy cheesecake combines layers of flaky phyllo dough with a rich, honey-sweetened cheesecake filling, topped with a sprinkle of mixed nuts for added crunch. It's a dessert that beautifully marries textures and flavors, making it a delightful treat for any occasion.

    Author: Munch Twist
    Prep Time: 30 minutes
    Cook Time: 50 minutes
    Total Time: 1 hour 20 minutes
    Yield: 12 servings
    Category: Desserts
    Method: No bake
    Cuisine: American

    Honey Baklava Cheesecake

    SCALE:
    1x
    2x
    3x
    Cook Mode: Prevent your screen from going dark

    Ingredients

    • 1 cup unsalted butter (melted)
    • 2 cups mixed nuts (pistachios, walnuts, almonds)
    • 1 teaspoon cinnamon
    • 3 tablespoons granulated sugar
    • 1 package of phyllo dough (thawed)
    • 1 cup ricotta cheese
    • 2 packages cream cheese (softened)
    • 3/4 cup honey
    • 1/2 cup heavy cream
    • 4 large eggs
    • 1 teaspoon vanilla extract
    • 1/2 teaspoon almond extract

    Instructions

    1. Preheat the oven to 325°F (165°C) and brush a 9×13 inch baking dish with melted butter.
    2. In a food processor, pulse the mixed nuts, cinnamon, and sugar until finely chopped.
    3. Layer half of the phyllo dough in the prepared dish, brushing each sheet with melted butter, then spread the nut mixture evenly over the phyllo layers, and top with the remaining phyllo dough, brushing each sheet with melted butter.
    4. In a large bowl, beat the cream cheese and ricotta cheese until smooth, then mix in honey, heavy cream, eggs, vanilla extract, and almond extract until well combined.
    5. Pour the cheesecake mixture over the phyllo and nut layers in the baking dish and bake for 45-50 minutes, or until the cheesecake is set and the phyllo is golden brown.
    6. Allow to cool completely before cutting into squares and drizzle with additional honey and sprinkle with extra chopped nuts before serving.

    Nutrition Facts

    Serving Size: 1 serving
    Calories: 420 kcal
    Sugar: 27g
    Sodium: 210mg
    Fat: 27g
    Saturated Fat: 14g
    Carbohydrates: 38g
    Fiber: 2g
    Protein: 7g
    Cholesterol: 120mg

  • Decadent Blackberry Raspberry Heaven Cheesecake Recipe

    Decadent Blackberry Raspberry Heaven Cheesecake Recipe

    Indulge in the delightful flavors of Blackberry Raspberry Heaven Cheesecake, a decadent dessert that brings together the sweetness of blackberries and raspberries with a creamy cheesecake filling. This dessert is perfect for any occasion, offering a beautiful presentation and a taste that will leave your guests wanting more.

    Why You’ll Love This Recipe

    • Berry Bliss: The combination of fresh blackberries and raspberries creates a burst of flavor in every bite.
    • Creamy Texture: The rich cream cheese filling ensures a smooth and velvety cheesecake experience.
    • Elegant Presentation: This cheesecake is visually stunning, making it a showstopper at any gathering.
    • Make-Ahead Friendly: Prepare it in advance and refrigerate, allowing the flavors to meld beautifully.
    • Versatile Toppings: Garnish with fresh berries for added color and freshness.

    Tools and Equipment

    Creating this cheesecake is simple with the right tools.

    Essential Tools

    • Springform pan
    • Mixing bowls
    • Electric mixer
    • Rubber spatula
    • Wire rack

    Why These Tools Matter

    • Springform pan: Allows for easy removal of the cheesecake without damaging its structure.
    • Electric mixer: Ensures a smooth and creamy filling by thoroughly mixing the cream cheese and sugar.
    • Wire rack: Helps cool the cheesecake evenly, preventing cracks on the surface.

    Ingredients for Blackberry Raspberry Heaven Cheesecake

    For the Crust

    • 1 1/2 cups graham cracker crumbs
    • 1/4 cup granulated sugar
    • 1/2 cup unsalted butter, melted

    For the Cheesecake Filling

    • 4 packages (8 oz each) cream cheese, softened
    • 1 cup granulated sugar
    • 1 teaspoon vanilla extract
    • 4 large eggs

    For the Toppings

    • 1 cup fresh blackberries
    • 1 cup fresh raspberries
    • 1 cup blackberry jam

    How to Make Blackberry Raspberry Heaven Cheesecake Step-by-Step

    Step 1: Prepare the Crust

    Begin by preheating your oven to 325°F (163°C). Grease a 9-inch springform pan to prevent sticking. In a medium bowl, combine 1 1/2 cups graham cracker crumbs, 1/4 cup granulated sugar, and 1/2 cup melted butter. Press this mixture firmly into the bottom of the prepared pan to create a solid crust.

    Step 2: Make the Cheesecake Filling

    In a large bowl, beat 4 packages of softened cream cheese with 1 cup granulated sugar until the mixture is smooth and creamy. Mix in 1 teaspoon of vanilla extract to enhance the flavor. Add 4 large eggs, one at a time, beating just until blended after each addition.

    Step 3: Assemble the Cheesecake

    Pour half of the cream cheese mixture over the crust. Spoon 1/2 cup of blackberry jam evenly over the mixture. Then, pour the remaining cream cheese mixture on top of the jam layer, smoothing it out with a spatula.

    Step 4: Swirl in the Jam

    Spoon the remaining 1/2 cup of blackberry jam over the top of the cheesecake. Use a knife to gently swirl the jam into the cream cheese mixture, creating a marbled effect.

    Step 5: Bake and Cool

    Bake the cheesecake in the preheated oven for 50-60 minutes, or until the center is almost set. Once baked, cool the cheesecake on a wire rack for 10 minutes. Run a knife around the edge to loosen it, then cool completely in the pan. Refrigerate for at least 4 hours or overnight for best results.

    Step 6: Add Toppings

    Before serving, top the cheesecake with fresh blackberries and raspberries for a vibrant finish.

    Enjoy your Blackberry Raspberry Heaven Cheesecake, a dessert that is sure to impress with its rich flavors and elegant presentation!

    How to Serve Blackberry Raspberry Heaven Cheesecake

    Serving this cheesecake can elevate your dessert experience. Here are some creative serving ideas.

    Garnish with Fresh Berries

    Top each slice with a medley of fresh blackberries and raspberries for a burst of color and flavor. The freshness complements the creamy cheesecake beautifully.

    Drizzle with Berry Sauce

    Create a simple berry sauce by blending additional blackberries and raspberries with a touch of sugar. Drizzle this over each slice for added sweetness and a striking presentation.

    Accompany with Whipped Cream

    Serve slices of cheesecake with a dollop of freshly whipped cream. The lightness of the cream balances the richness of the cheesecake and adds a delightful texture.

    Pro Tips for the Best Blackberry Raspberry Heaven Cheesecake

    To ensure your cheesecake turns out perfectly, consider these expert tips.

    • Use Room Temperature Ingredients: Always ensure your cream cheese and eggs are at room temperature for a smoother batter and better incorporation.
    • Don’t Overmix: Mix the cheesecake batter just until combined to avoid incorporating too much air, which can cause cracks during baking.
    • Monitor Baking Time: Keep an eye on the cheesecake as it bakes. It should be set around the edges but slightly jiggly in the center for the perfect texture.
    • Cool Gradually: Allow the cheesecake to cool at room temperature before refrigerating. This helps prevent cracks and maintains its creamy consistency.
    • Chill Overnight: For the best flavor and texture, refrigerate the cheesecake overnight before serving. This allows the flavors to meld beautifully.

    Best Side Dishes and Pairings

    Pairing your Blackberry Raspberry Heaven Cheesecake with complementary dishes can enhance the overall dining experience.

    1. Coffee: A rich cup of coffee balances the sweetness of the cheesecake, making it a classic pairing.
    2. Vanilla Ice Cream: The creamy, smooth texture of vanilla ice cream contrasts nicely with the cheesecake while adding a touch of indulgence.
    3. Mint Tea: A refreshing mint tea can cleanse the palate and provide a light finish to the rich dessert.
    4. Chocolate Sauce: Drizzling chocolate sauce over the cheesecake adds a decadent layer of flavor that perfectly complements the berries.
    5. Fruit Salad: A light fruit salad can provide a refreshing contrast to the richness of the cheesecake, enhancing the berry flavors as well.

    Common Mistakes to Avoid

    • Not Using Room Temperature Ingredients: Make sure your cream cheese is softened to room temperature for a smooth filling.
    • Overmixing the Batter: Mix the ingredients just until combined to prevent a dense cheesecake.
    • Skipping the Cooling Step: Allow the cheesecake to cool completely before refrigerating to avoid cracks.
    • Not Using Fresh Berries for Topping: Using frozen berries can affect the texture and freshness of your cheesecake.

    Storage & Reheating Instructions

    Refrigerator Storage

    Store the Blackberry Raspberry Heaven Cheesecake in an airtight container in the refrigerator. It will stay fresh for up to 5 days.

    Freezing Instructions

    To freeze, wrap the cheesecake tightly in plastic wrap and then in aluminum foil. It can be frozen for up to 2 months. Thaw in the refrigerator overnight before serving.

    Reheating Tips

    • Oven: Preheat to 325°F (163°C) and bake for about 10-15 minutes until warmed through.
    • Microwave: Heat individual slices on medium power for 30-60 seconds.
    • Stovetop: Use a skillet over low heat, covering with a lid for a few minutes until warmed.

    Frequently Asked Questions

    How can I make the Blackberry Raspberry Heaven Cheesecake gluten-free?

    To make this cheesecake gluten-free, substitute regular graham cracker crumbs with gluten-free graham cracker crumbs.

    Can I use frozen berries in the Blackberry Raspberry Heaven Cheesecake?

    While fresh berries are recommended for the best flavor and texture, you can use frozen berries if fresh ones are unavailable. Just ensure they are thawed and drained.

    How do I prevent cracks in my cheesecake?

    To prevent cracks, avoid overmixing your batter, ensure your oven temperature is accurate, and allow the cheesecake to cool gradually before refrigerating.

    How long does the Blackberry Raspberry Heaven Cheesecake take to set?

    The cheesecake should be refrigerated for at least 4 hours, but overnight is best for optimal texture and flavor.

    Final Thoughts

    This Blackberry Raspberry Heaven Cheesecake is a delightful treat that is sure to impress your family and friends. We encourage you to give this recipe a try and share your experiences in the comments below!


    Desserts

    Blackberry Raspberry Heaven Cheesecake


    5.0 from 24 reviews

    Indulge in this creamy, berry-laden cheesecake that’s sure to impress with its rich flavors and elegant presentation.

    Author: Munch Twist
    Prep Time: 20 minutes
    Cook Time: 60 minutes
    Total Time: 80 minutes
    Yield: 12 servings
    Category: Desserts
    Method: No bake
    Cuisine: American

    Blackberry Raspberry Heaven Cheesecake

    SCALE:
    1x
    2x
    3x
    Cook Mode: Prevent your screen from going dark

    Ingredients

    • 1 cup fresh blackberries
    • 1 cup granulated sugar
    • 1 cup blackberry jam
    • 4 packages (8 oz each) cream cheese, softened
    • 1 teaspoon vanilla extract
    • 1 1/2 cups graham cracker crumbs
    • 1/2 cup unsalted butter, melted
    • 1 cup fresh raspberries
    • 4 large eggs
    • 1/4 cup granulated sugar (for crust)

    Instructions

    1. Preheat oven to 325°F (163°C). Grease a 9-inch springform pan. In a medium bowl, combine graham cracker crumbs, 1/4 cup granulated sugar, and melted butter. Press the mixture firmly into the bottom of the prepared pan.
    2. In a large bowl, beat softened cream cheese with 1 cup granulated sugar until smooth. Mix in vanilla extract. Add eggs, one at a time, beating just until blended after each addition.
    3. Pour half of the cream cheese mixture over the crust. Spoon 1/2 cup blackberry jam evenly over the mixture. Pour the remaining cream cheese mixture on top.
    4. Spoon the remaining 1/2 cup blackberry jam over the top of the cheesecake. Use a knife to gently swirl the jam into the cream cheese mixture.
    5. Bake in the preheated oven for 50-60 minutes, or until the center is almost set. Cool on a wire rack for 10 minutes. Run a knife around the edge to loosen. Cool completely in the pan, then refrigerate for at least 4 hours or overnight.
    6. Before serving, top the cheesecake with fresh blackberries and raspberries.

    Nutrition Facts

    Serving Size: 1 serving
    Calories: 450 kcal
    Sugar: 35g
    Sodium: 320mg
    Fat: 31g
    Saturated Fat: 18g
    Carbohydrates: 39g
    Fiber: 2g
    Protein: 6g
    Cholesterol: 120mg