
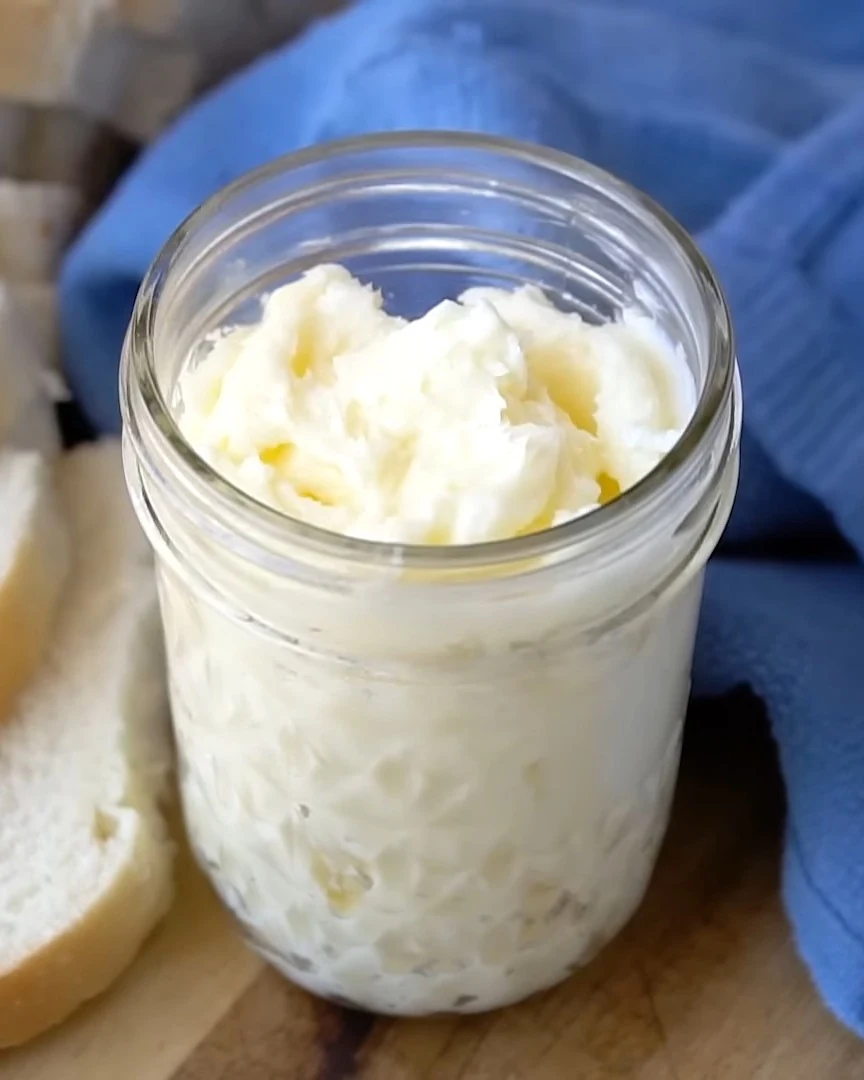
Homemade Butter in a Mason Jar is a delightful and satisfying recipe that allows you to create rich, creamy butter right in your kitchen. This simple process not only enhances the flavor of your dishes but also gives you the satisfaction of making something from scratch.
Why You’ll Love This Recipe
- Quick & Easy: Ready in under 30 minutes, this recipe is perfect for beginners and busy cooks alike.
- Fresh Flavor: Homemade butter tastes fresher and more flavorful than store-bought varieties.
- Customizable: Add herbs, spices, or sweeteners to create a butter that suits your taste.
- Minimal Ingredients: Requires only heavy cream and cold water, making it accessible and affordable.
- Sustainable: Using a mason jar reduces waste and allows you to control what goes into your butter.
Tools and Equipment
To make homemade butter, you’ll need a few essential tools. These items will simplify the process and ensure you achieve the best results.
Essential Tools
- Stand mixer or hand mixer
- Mason jar with a tight lid
- Fine mesh strainer or cheesecloth
Why These Tools Matter
- Stand Mixer or Hand Mixer: These tools speed up the process of whipping cream and ensure thorough mixing.
- Mason Jar: Provides a convenient and portable way to shake your cream into butter.
- Fine Mesh Strainer or Cheesecloth: Essential for separating the buttermilk from the butter fat, ensuring a smooth final product.
Ingredients for Homemade Butter in a Mason Jar
- 1 cup heavy cream (38% fat content)
- Cold water
How to Make Homemade Butter in a Mason Jar Step-by-Step
Step 1: Prepare the Cream
For the stand mixer method, pour the heavy cream into the bowl of your stand mixer. Attach the whisk attachment and start mixing on low speed. Gradually increase the speed as the cream thickens.
Step 2: Whip the Cream
Continue mixing until whipped cream forms. This should take several minutes. As you mix, the cream will begin to yellow, and eventually, the fat solids will separate from the liquid, leaving clumps of butter fat.
For the mason jar method, pour the heavy cream into the mason jar, filling it halfway. Screw the lid tightly and shake vigorously for about 5-7 minutes until you hear a lump forming inside.
Step 3: Separate the Butter from Buttermilk
Once the butter forms, strain the fat solids from the buttermilk using a fine mesh strainer or cheesecloth. You can reserve the buttermilk for other recipes, such as pancakes or biscuits.
Step 4: Rinse the Butter
Pour cold water over the butter to rinse off any remaining buttermilk. Discard the water and repeat this rinsing process two more times. This step is crucial for ensuring your butter stays fresh longer.
Step 5: Shape and Flavor the Butter
Once rinsed, shape the butter into a ball or any desired form. If desired, add salt, honey, or herbs to create flavored butters.
Now you have a delightful batch of homemade butter ready to enhance your favorite dishes!
How to Serve Homemade Butter in a Mason Jar
Homemade butter is versatile and adds a delightful touch to various dishes.
Spread on Fresh Bread
Slather your homemade butter on warm, crusty bread or rolls for a simple yet indulgent treat.
Flavorful Compound Butter
Mix in herbs, spices, or citrus zest to create a compound butter. This enhances grilled meats or vegetables and makes a sophisticated addition to any dish.
Topping for Popcorn
Melt your homemade butter and drizzle it over freshly popped popcorn for a gourmet movie night snack that elevates your usual buttered popcorn experience.
Pro Tips for the Best Homemade Butter in a Mason Jar
For optimal results, follow these expert tips.
- Use High-Quality Cream: Choose heavy cream with at least 38% fat content for the best flavor and texture in your homemade butter.
- Shake Vigorously: The faster and more vigorously you shake the jar, the quicker the butter will form. This can greatly reduce the time it takes.
- Rinse Thoroughly: Proper rinsing is crucial to remove buttermilk, which can cause your butter to spoil faster. Rinse until the water runs clear.
- Experiment with Flavors: Feel free to get creative by adding herbs, spices, or sweeteners after the butter is formed to customize your flavor profile.
- Store Properly: Keep your homemade butter in an airtight container in the refrigerator to maintain freshness for up to two weeks.
Best Side Dishes and Pairings
Pair your homemade butter with these delicious options.
- Garlic Bread: The rich, creamy flavor of homemade butter complements the garlic and herbs in garlic bread, making it a perfect pairing.
- Roasted Vegetables: Drizzling homemade butter over roasted vegetables adds a luscious finish to the dish, enhancing both flavor and texture.
- Pancakes: Serve homemade butter atop warm pancakes for a delightful breakfast that elevates simple flapjacks into a gourmet experience.
- Baked Potatoes: A generous dollop of homemade butter melting into a warm baked potato creates a comforting side dish that everyone will love.
- Grilled Steaks: The richness of homemade butter can add a luscious finish to grilled steaks, making them even more tender and flavorful.
Common Mistakes to Avoid
- Not Using Heavy Cream: Ensure you use heavy cream with at least 38% fat content for optimal butter texture.
- Overfilling the Jar: Do not fill the mason jar beyond halfway to allow enough space for the cream to expand as you shake.
- Skipping the Rinse: Rinsing the butter is essential to remove excess buttermilk, which can spoil the butter.
- Neglecting Flavoring: Don’t forget to experiment with adding salt, herbs, or other flavors to enhance your butter.
Storage & Reheating Instructions
Refrigerator Storage
Store your homemade butter in an airtight container in the refrigerator. It will remain fresh for up to two weeks.
Freezing Instructions
For longer storage, wrap the butter tightly in plastic wrap or place it in a freezer-safe container. It can be frozen for up to six months. To thaw, simply move it to the refrigerator overnight.
Reheating Tips
- Oven: Preheat to 350°F (175°C) and place butter in a small dish until softened, about 5-10 minutes.
- Microwave: Use a microwave-safe dish, heat on low power for 10-15 seconds at a time until softened.
- Stovetop: Place butter in a pan over low heat, stirring gently until melted.
Frequently Asked Questions
How long does homemade butter in a mason jar last?
Homemade butter will stay fresh in the refrigerator for up to two weeks, while frozen butter can last up to six months.
Can I make flavored homemade butter in a mason jar?
Yes, you can add ingredients like salt, herbs, or honey after rinsing the butter for delicious flavored variations.
What fat content should the cream have for homemade butter in a mason jar?
Use heavy cream with at least 38% fat content to achieve the best texture and flavor in your homemade butter.
Is it necessary to rinse homemade butter?
Yes, rinsing is crucial to remove buttermilk, which can cause the butter to spoil faster. Rinse until the water runs clear.
Can I use a hand mixer instead of a stand mixer?
Absolutely! A hand mixer works well for making homemade butter in a mason jar or mixing bowl.
Final Thoughts
Making homemade butter in a mason jar is a rewarding and straightforward process. With just a few ingredients and a little effort, you can enjoy fresh, creamy butter tailored to your taste. Try this recipe today, and feel free to leave a comment with your experience and any flavor variations you create.
Desserts
PrintHomemade Butter in a Mason Jar
This homemade butter recipe is simple and rewarding, allowing you to create fresh butter using just heavy cream. Whether you use a stand mixer or a mason jar, the process is straightforward and results in delicious, creamy butter perfect for spreading or cooking. Customize your butter with flavors like salt, honey, or herbs for a personal touch.
- Prep Time: 10 minutes
- Cook Time: 10 minutes
- Total Time: 20 minutes
- Yield: 8 servings 1x
- Category: Desserts
- Method: No bake
- Cuisine: American
Ingredients
- 1 cup heavy cream 38% fat content
- Cold water
Instructions
- Pour cream into the bowl of a stand mixer using the whisk attachment, or use a mixing bowl and hand mixer. Begin beating the cream on a low speed, and gradually increase the speed as the mixture thickens.
- After several minutes, whipped cream will form. Continue mixing until the fat solids separate from the liquids, forming clumps of butter fat.
- For mason jar method, pour heavy cream into the mason jar halfway, screw the lid tightly, and shake for 5-7 minutes until you hear a lump form inside.
- Strain the fat solids from the buttermilk using a fine mesh strainer or cheesecloth. Rinse the butter with cold water, discarding the water and repeating two more times.
- Shape the butter as desired and add flavorings if desired.
Nutrition
- Calories: 815
- Sugar: 0g
- Sodium: 0mg
- Fat: 88g
- Saturated Fat: 55g
- Carbohydrates: 0g
- Fiber: 0g
- Protein: 1g
- Cholesterol: 215mg