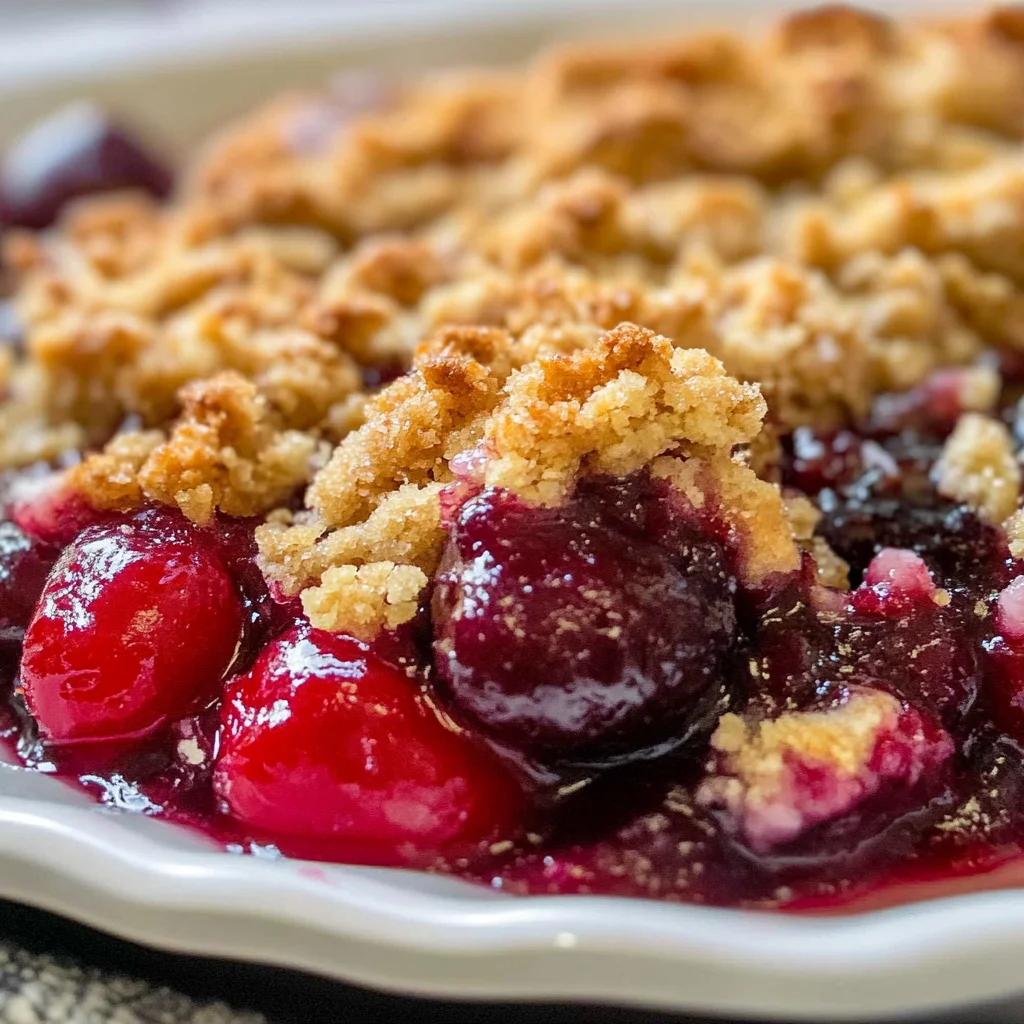
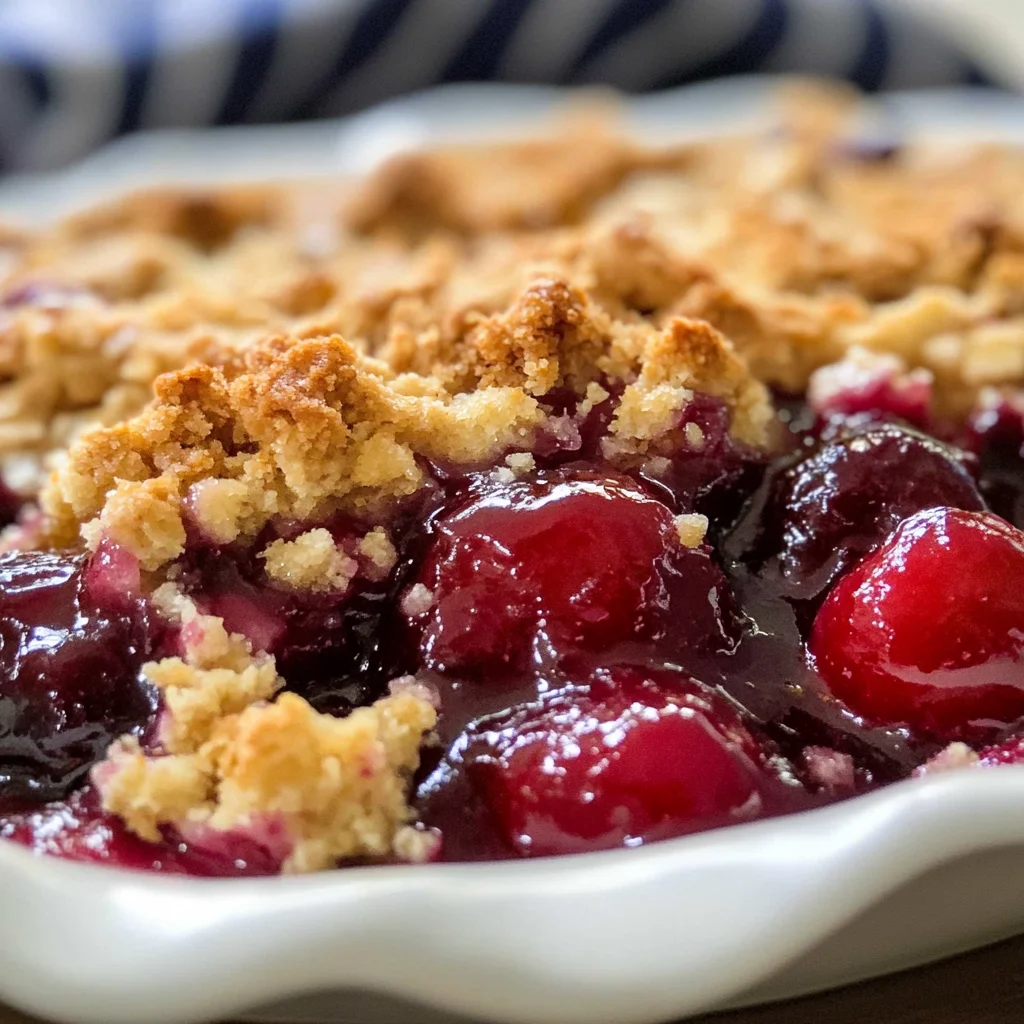
Old Fashioned Cherry Crisp is a delightful dessert that combines the tartness of cherries with a sweet, crunchy topping. This easy-to-make recipe is perfect for any occasion, whether you’re celebrating a special event or simply satisfying a craving. Enjoy it warm from the oven with a scoop of ice cream or serve it chilled for a refreshing treat. The best part? You can use fresh or frozen cherries, making this dish a year-round favorite!
Why You’ll Love This Recipe
- Simple Ingredients: This recipe uses common pantry staples that are easy to find and affordable.
- Quick Preparation: With only 5 minutes of prep time, you can have this delicious dessert ready in no time.
- Versatile Serving Options: Serve warm with ice cream or cold as a refreshing snack, perfect for any season.
- Crowd-Pleaser: Ideal for family gatherings, potlucks, or casual dinner parties; everyone loves cherry crisp!
- Healthier Dessert Option: Made with whole ingredients and less sugar than many store-bought desserts.
Tools and Preparation
Before diving into the recipe, gather your tools to ensure a smooth cooking experience. Having everything on hand will make the process easy and enjoyable.
Essential Tools and Equipment
- 13×9 baking pan
- Mixing bowl
- Measuring cups
- Measuring spoons
- Whisk or fork
Importance of Each Tool
- 13×9 baking pan: This size is perfect for ensuring even baking and allows for easy serving.
- Mixing bowl: Essential for combining ingredients without mess; larger bowls help prevent spills.
- Measuring cups: Accurate measurements ensure consistent results every time you make this cherry crisp.
Ingredients
This cherry crisp uses simple ingredients to create a delicious dessert. Make this recipe any time of year with fresh or frozen cherries.
For the Cherry Filling
- 32 oz cherries (fresh or frozen)
For the Crisp Topping
- 1 cup all purpose flour
- 1 cup sugar
- 1/2 cup rolled oats
- 1 tsp baking powder
- 1 tsp vanilla
- 1 large egg
- 1/3 cup butter
How to Make Old Fashioned Cherry Crisp
Step 1: Preheat the Oven
Preheat your oven to 400˚F (200˚C) so it’s hot and ready for baking your cherry crisp.
Step 2: Prepare the Cherries
- If using fresh cherries, remove their pits carefully.
- If using frozen cherries, allow them to thaw completely.
- Place the prepared cherries in a greased 13×9 baking pan.
Step 3: Make the Crisp Topping
- In a mixing bowl, combine flour, sugar, rolled oats, baking powder, egg, and vanilla.
- Use a whisk or fork to beat the mixture until it forms a crumbled texture.
Step 4: Assemble the Crisp
- Sprinkle the crumbled topping evenly over the cherries.
- Leave some areas uncovered for ventilation, allowing steam to escape during baking.
Step 5: Add Butter and Bake
- Melt the butter in a microwave-safe container.
- Drizzle melted butter over the topping evenly.
- Bake in preheated oven for about 40 minutes or until golden brown on top.
Step 6: Serve and Enjoy
Once baked, let cool slightly before serving. It pairs beautifully with ice cream or whipped cream if desired! Enjoy your homemade Old Fashioned Cherry Crisp!
How to Serve Old Fashioned Cherry Crisp
Serving Old Fashioned Cherry Crisp can elevate your dessert experience. Here are some delightful ways to enjoy this sweet treat.
Pair with Ice Cream
- Vanilla Ice Cream: The creamy texture of vanilla ice cream complements the tartness of cherries perfectly.
- Chocolate Ice Cream: For a richer flavor, chocolate ice cream adds a delicious twist to each bite.
Add Whipped Cream
- Homemade Whipped Cream: Whipping cream with a touch of sugar and vanilla creates a light topping that enhances the crisp.
- Flavored Whipped Cream: Try adding almond extract for a unique flavor that pairs well with cherries.
Serve Warm
- Fresh Out of the Oven: Enjoying your cherry crisp warm allows the flavors to shine and creates a comforting experience.
- With a Drizzle of Honey: A drizzle of honey on top can add an extra layer of sweetness and complexity.
Create a Parfait
- Layered Dessert: Alternate layers of cherry crisp, yogurt, and granola for a delightful parfait that’s perfect for brunch or dessert.
How to Perfect Old Fashioned Cherry Crisp
Perfecting your Old Fashioned Cherry Crisp is simple with these helpful tips. Follow these suggestions to enhance your baking skills.
- Choose Quality Cherries: Fresh or frozen cherries can greatly affect flavor. Opt for ripe, juicy cherries when available.
- Adjust Sweetness: Taste your cherries before baking. If they’re particularly tart, consider adding more sugar to balance the flavors.
- Use Cold Butter: Cut your butter into small pieces and chill it before mixing. This helps create a crumbly topping that crisps up nicely.
- Don’t Overmix: When combining ingredients for the topping, mix until just combined to maintain texture and avoid a dense result.
- Let it Rest: Allow the cherry crisp to cool slightly before serving. This helps the juices thicken and makes serving easier.
Best Side Dishes for Old Fashioned Cherry Crisp
Pairing side dishes with Old Fashioned Cherry Crisp can enhance your meal’s overall appeal. Here are some great options to consider.
- Fresh Fruit Salad: A mix of seasonal fruits adds freshness and balances the sweetness of the cherry crisp.
- Cheese Platter: Include soft cheeses like brie or goat cheese for a savory contrast to the sweet dessert.
- Yogurt Parfait: Layer yogurt with granola and fresh fruit for a creamy counterpoint that complements the crisp.
- Savory Nuts: Roasted almonds or walnuts provide crunchiness and flavor, enhancing your dessert experience.
- Green Salad: A light salad with vinaigrette can cleanse the palate between bites of rich cherry crisp.
- Chocolate Bark: Dark chocolate bark offers a bittersweet touch that pairs beautifully with the cherry flavor.
Common Mistakes to Avoid
Many people overlook key details when making Old Fashioned Cherry Crisp. Here are some common mistakes and how to avoid them.
- Ignoring the fruit preparation: Always remove the pits from fresh cherries or properly thaw frozen ones. This ensures a smooth texture and enjoyable eating experience.
- Overmixing the topping: Mixing the topping ingredients too much can lead to a dense texture. Aim for a crumbly consistency by mixing just until combined.
- Not using enough butter: Butter adds flavor and moisture. Ensure you drizzle enough melted butter over the topping for a delicious finish.
- Baking at the wrong temperature: Make sure your oven is preheated to 400˚F before baking. This helps achieve that perfect golden crisp on top.
- Skipping optional toppings: While the cherry crisp is delightful on its own, serving it with ice cream or whipped cream enhances the dessert experience.
Storage & Reheating Instructions
Refrigerator Storage
- Store in an airtight container for up to 3 days.
- Allow to cool completely before refrigerating to maintain texture.
Freezing Old Fashioned Cherry Crisp
- Wrap tightly in plastic wrap and then in aluminum foil for up to 2 months.
- Thaw overnight in the refrigerator before reheating.
Reheating Old Fashioned Cherry Crisp
- Oven: Preheat to 350˚F, cover with foil, and heat for about 15-20 minutes until warmed through.
- Microwave: Heat individual portions on medium power for 30-60 seconds, checking frequently.
- Stovetop: Place in a skillet over low heat, stirring occasionally until warmed.
Frequently Asked Questions
Here are some frequently asked questions about Old Fashioned Cherry Crisp that might help you enjoy this delightful dessert even more.
Can I use other fruits besides cherries?
Yes! You can substitute cherries with apples, peaches, or berries for different flavors in your crisp.
How do I make my Old Fashioned Cherry Crisp gluten-free?
You can easily make it gluten-free by using almond flour or a gluten-free all-purpose blend instead of regular flour.
What is the best way to serve Old Fashioned Cherry Crisp?
Serve warm, topped with vanilla ice cream or whipped cream for an extra treat!
Can I prepare Old Fashioned Cherry Crisp ahead of time?
Absolutely! You can prepare it a day in advance and bake it right before serving.
Final Thoughts
Old Fashioned Cherry Crisp is a classic dessert that appeals to many tastes with its sweet fruit filling and crispy oat topping. It’s perfect for any occasion and easy to customize based on your favorite fruits. Give this recipe a try, and enjoy a comforting dessert that everyone will love!

Old Fashioned Cherry Crisp
- Prep Time: 5 minutes
- Cook Time: 40 minutes
- Total Time: 45 minutes
- Yield: Serves 8
- Category: Dessert
- Method: Baking
- Cuisine: American
Description
Indulge in the delightful flavors of Old Fashioned Cherry Crisp, a comforting dessert that showcases the perfect balance of sweet and tart cherries topped with a crunchy oat layer. Whether enjoyed warm from the oven with a scoop of vanilla ice cream or served chilled for a refreshing treat, this easy-to-make recipe is ideal for any occasion. With the flexibility to use fresh or frozen cherries, you can savor this delicious dessert year-round.
Ingredients
- 32 oz cherries (fresh or frozen)
- 1 cup all-purpose flour
- 1 cup sugar
- 1/2 cup rolled oats
- 1 tsp baking powder
- 1 tsp vanilla extract
- 1 large egg
- 1/3 cup butter
Instructions
- Preheat your oven to 400˚F (200˚C).
- Prepare the cherries by pitting fresh ones or thawing frozen ones. Place in a greased 13"x9" baking pan.
- In a mixing bowl, combine flour, sugar, rolled oats, baking powder, egg, and vanilla. Mix until crumbly.
- Sprinkle the topping evenly over the cherries, leaving some areas uncovered for steam to escape.
- Melt the butter and drizzle it over the topping.
- Bake for about 40 minutes until golden brown on top.
Nutrition
- Serving Size: 1/8 of the dish (approximately 112g)
- Calories: 240
- Sugar: 20g
- Sodium: 80mg
- Fat: 10g
- Saturated Fat: 6g
- Unsaturated Fat: 4g
- Trans Fat: 0g
- Carbohydrates: 36g
- Fiber: 2g
- Protein: 3g
- Cholesterol: 30mg
Keywords: Experiment with other fruits like apples or peaches for different flavor profiles. For a gluten-free version, substitute regular flour with almond flour or gluten-free all-purpose blend. Let the cherry crisp cool slightly before serving to allow juices to thicken.