
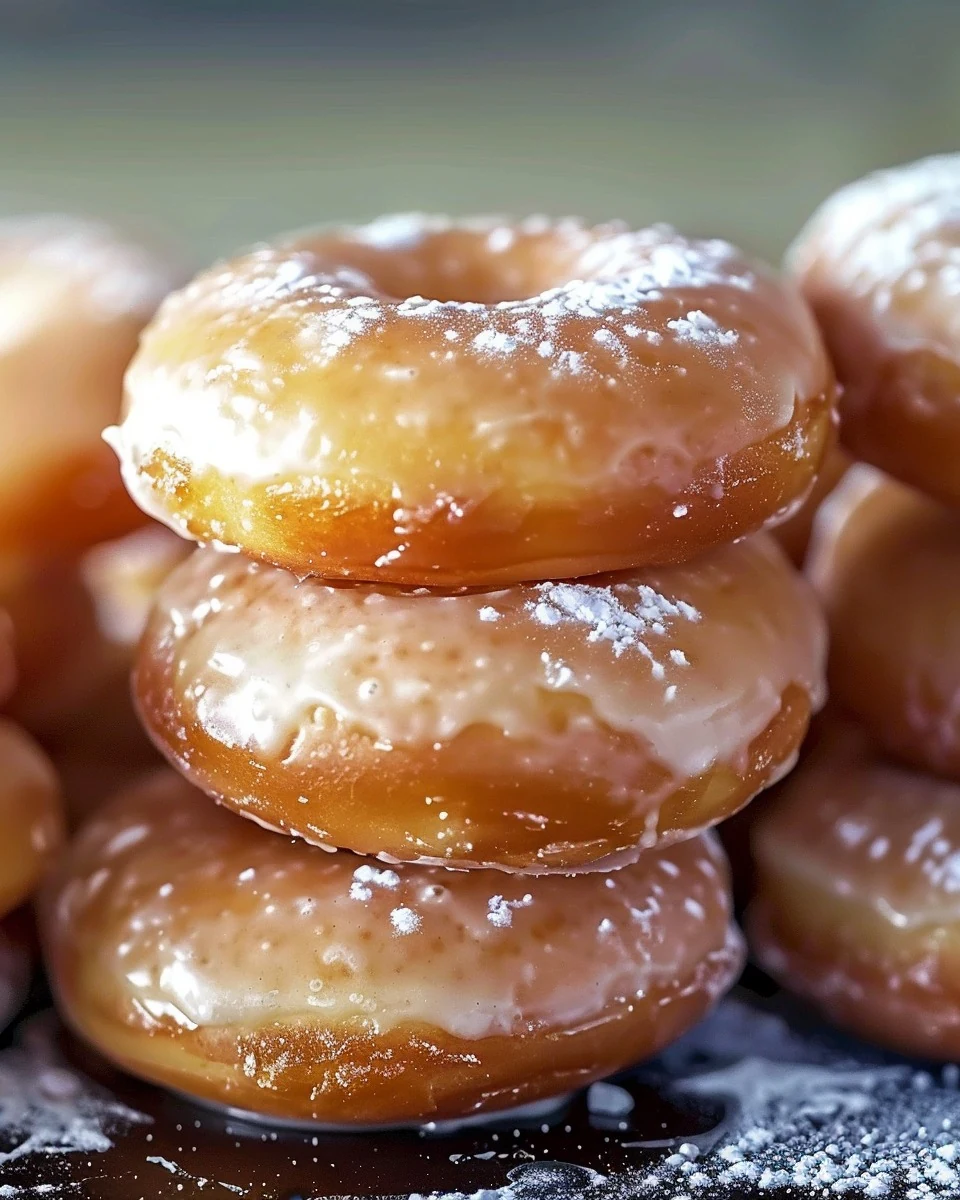
Homemade Krispy Kremes offer an irresistible combination of fluffy texture and sweet glaze. These delightful doughnuts are a treat that can elevate any breakfast or snack time. Making them at home is not only rewarding but also allows you to customize the sweetness to your liking.
Why You’ll Love This Recipe
- Fluffy Texture: Enjoy doughnuts that are light and airy, just like those from your favorite shop.
- Customizable Glaze: Create your perfect sweetness level with a homemade glaze that can be tailored to your taste.
- Fresh Ingredients: Using fresh ingredients means no preservatives, just wholesome goodness in every bite.
- Family Fun: Involve the whole family in making these delicious treats, creating lasting memories together.
- Cost-Effective: Save money by making your own doughnuts instead of buying them from the store.
Tools and Equipment
Having the right tools makes this process seamless and enjoyable.
Essential Tools
- Large mixing bowl
- Measuring jug
- Pastry blender (or your fingers)
- Rolling pin
- Fryer or wok
- Slotted spoon
- Wire rack
Why These Tools Matter
- Large mixing bowl: Provides ample space for mixing and kneading the dough.
- Fryer or wok: Ensures even cooking and the right temperature for frying.
- Wire rack: Allows excess oil to drain properly, keeping the doughnuts light and fluffy.
Ingredients for Homemade Krispy Kremes
Doughnut Ingredients
- 8 oz all purpose flour (a little under 2 cups – I recommend you measure and weigh)
- dash of salt
- 1 egg
- 3 tbsp boiling water
- 3 tbsp milk
- 1 oz butter (cold to room temperature)
- 1 tsp dry active yeast
- 1 1/2 oz sugar (about 3 tablespoons)
- Enough oil to cover the bottom few inches of a wok or a deep fryer
How to Make Homemade Krispy Kremes Step-by-Step
Step 1: Activate the Yeast
In a large measuring jug, combine milk and boiling water. Add a teaspoon of sugar and yeast. Stir gently and leave it in a warm place to activate. You should see it foam after a few minutes.
Step 2: Make the Dough
In a large mixing bowl, combine flour, remaining sugar, and salt. Cut in butter until the mixture resembles crumbs. Add the lightly beaten egg and the activated yeast mixture. Mix until you form a smooth dough, about 5 minutes.
Step 3: Knead the Dough
Turn the dough onto a lightly-floured counter and knead for 5 to 10 minutes. The dough should become springy with bubbles forming. Place it back in the bowl, cover it, and let it rise for about an hour until it doubles in size.
Step 4: Shape the Doughnuts
Once the dough has risen, place it on the counter and divide it into 4 pieces. Stretch each piece into a rope about 1 to 1.5 inches wide. Cut into 1-inch strips, roll them into balls, and place them on a baking tray or wire rack.
Step 5: Second Rise
Cover the doughnut holes with a cloth while you heat the oil to 375°F (190°C). This second rise helps create a lighter texture.
Step 6: Fry the Doughnuts
Fry the doughnuts in batches until they are golden brown on each side, about 2 minutes per side. Be careful not to overcrowd the fryer.
Step 7: Drain and Glaze
Once fried, drain the doughnuts on paper towels or a wire rack. Glaze them while still warm for the best coverage.
Enjoy your homemade Krispy Kremes, perfect for satisfying your doughnut cravings! These treats are sure to impress family and friends alike.
How to Serve Homemade Krispy Kremes
Serving homemade Krispy Kremes can be a delightful experience. Here are some creative ideas to elevate your doughnut enjoyment.
Classic Glaze with a Twist
Serve your homemade Krispy Kremes with a classic glaze, but add a hint of vanilla or almond extract for an extra layer of flavor that enhances the sweetness.
Doughnut Sandwich
Slice a Krispy Kreme in half and fill it with whipped cream or your favorite ice cream for a decadent dessert sandwich that combines textures and flavors beautifully.
Fruit Toppings
Top your doughnuts with fresh fruits such as strawberries or bananas, drizzling a bit of chocolate or caramel sauce over for a fresh and indulgent treat.
Pro Tips for the Best Homemade Krispy Kremes
To ensure your homemade Krispy Kremes turn out perfectly, consider these practical tips.
-
Use Fresh Yeast: Always check the expiration date on your yeast package to ensure it activates properly for a light and fluffy doughnut.
-
Monitor Oil Temperature: Use a thermometer to maintain the oil at 375°F (190°C). Too low, and the doughnuts will absorb oil; too high, and they may burn.
-
Don’t Rush the Rising: Allow the dough to rise until it has doubled in size. This step is crucial for achieving that signature light and airy texture.
-
Fry in Batches: Avoid overcrowding the fryer; this ensures that the temperature remains consistent, leading to evenly cooked doughnuts.
-
Glaze While Warm: Glaze the doughnuts while they are still warm to ensure the glaze adheres well and creates that delightful shiny finish.
Best Side Dishes and Pairings
Enhance your homemade Krispy Kremes experience with these delicious side dishes and drinks.
-
Coffee: A classic pairing, the rich flavor of coffee complements the sweetness of doughnuts, creating a perfect balance.
-
Milk: The creaminess of milk softens the sweetness of the doughnuts, making for a comforting combination.
-
Fruit Salad: A refreshing fruit salad adds a burst of freshness that contrasts well with the rich, sugary doughnuts.
-
Tea: Herbal or chai teas provide a warming, aromatic complement that enhances the overall tasting experience.
-
Ice Cream: For a decadent dessert, serve your Krispy Kremes alongside a scoop of vanilla or chocolate ice cream, creating an indulgent treat.
Common Mistakes to Avoid
- Not Activating the Yeast: Ensure the yeast is activated before mixing it into the dough. This step is crucial for fluffy doughnuts.
- Overcrowding the Fryer: Frying too many doughnuts at once can lower the oil temperature, resulting in greasy, soggy doughnuts. Fry in small batches.
- Insufficient Rising Time: Allow the dough to rise until it has doubled in size. Skipping this step can lead to dense doughnuts.
- Glazing While Cold: Glaze your doughnuts while they are still warm for the best coverage and flavor absorption.
Storage & Reheating Instructions
Refrigerator Storage
Store your homemade Krispy Kremes in an airtight container in the refrigerator. They will stay fresh for up to 3 days.
Freezing Instructions
To freeze, place the cooled doughnuts in a single layer on a baking sheet until firm, then transfer them to an airtight container or freezer bag. They can be frozen for up to 2 months.
Reheating Tips
- Oven: Preheat to 350°F (175°C) and heat doughnuts for 5-7 minutes until warm.
- Microwave: Heat individually on a microwave-safe plate for 10-15 seconds.
- Stovetop: Reheat in a non-stick skillet over low heat for a few minutes, turning frequently.
Frequently Asked Questions
Can I make these Homemade Krispy Kremes without yeast?
While yeast is essential for the dough’s texture, you can experiment with baking powder for a quicker version, though the result will differ.
How long do Homemade Krispy Kremes last?
They can be stored in the refrigerator for up to 3 days or frozen for up to 2 months, ensuring they remain delicious.
Can I add flavors to my Homemade Krispy Kremes?
Absolutely! You can incorporate vanilla extract or citrus zest into the dough for added flavor or try different glazes.
What type of oil is best for frying Homemade Krispy Kremes?
A neutral oil with a high smoke point, such as vegetable or canola oil, is ideal for frying these doughnuts.
What should I do if my dough doesn’t rise?
If your dough doesn’t rise, it could be due to inactive yeast. Ensure that your yeast is fresh and properly activated before using it.
Final Thoughts
Making homemade Krispy Kremes is a rewarding experience that can fill your kitchen with delightful aromas. I encourage you to give this recipe a try and share your thoughts in the comments below. Your feedback is always appreciated!
Desserts
PrintHomemade Krispy Kremes

These homemade Krispy Kremes are fluffy, sweet, and perfect for satisfying your doughnut cravings. With a simple dough made from basic ingredients, you can enjoy fresh, warm doughnuts right from your kitchen. Glazed while still warm, they offer a delightful treat for any occasion.
- Prep Time: 30 minutes
- Cook Time: 20 minutes
- Total Time: 1 hour 50 minutes
- Yield: 12 servings 1x
- Category: Desserts
- Method: No bake
- Cuisine: American
Ingredients
- 8 oz all purpose flour
- dash of salt
- 1 egg
- 3 tbsp boiling water
- 3 tbsp milk
- 1 oz butter, cold to room temperature
- 1 tsp dry active yeast
- enough oil to cover the bottom few inches of a wok or deep fryer
- 1 1/2 oz sugar
Instructions
- In a large measuring jug, combine milk and boiling water. Add a teaspoon of sugar and yeast. Stir gently, then leave it in a warm place for the yeast to activate.
- In a large mixing bowl, combine flour, remaining sugar, and salt. Cut in butter until it resembles crumbs.
- Add the lightly beaten egg and yeast mixture to the flour mixture. Mix into a smooth dough, about 5 minutes.
- Turn the dough onto a lightly-floured counter and knead for 5 to 10 minutes until springy. Place back in the bowl, cover, and let rise for about an hour until doubled in size.
- Once risen, divide the dough into 4 pieces, stretch each into a rope, cut into 1-inch strips, roll into balls, and place on a baking tray.
- Cover the doughnut holes with a cloth to rise while heating the oil to 375°F.
- Fry the doughnuts in batches until golden brown on each side, about 2 minutes per side.
- Drain on paper towels or a wire rack before glazing them while still warm.
Nutrition
- Calories: 280
- Sugar: 5g
- Sodium: 180mg
- Fat: 12g
- Saturated Fat: 7g
- Carbohydrates: 36g
- Fiber: 1g
- Protein: 5g
- Cholesterol: 40mg