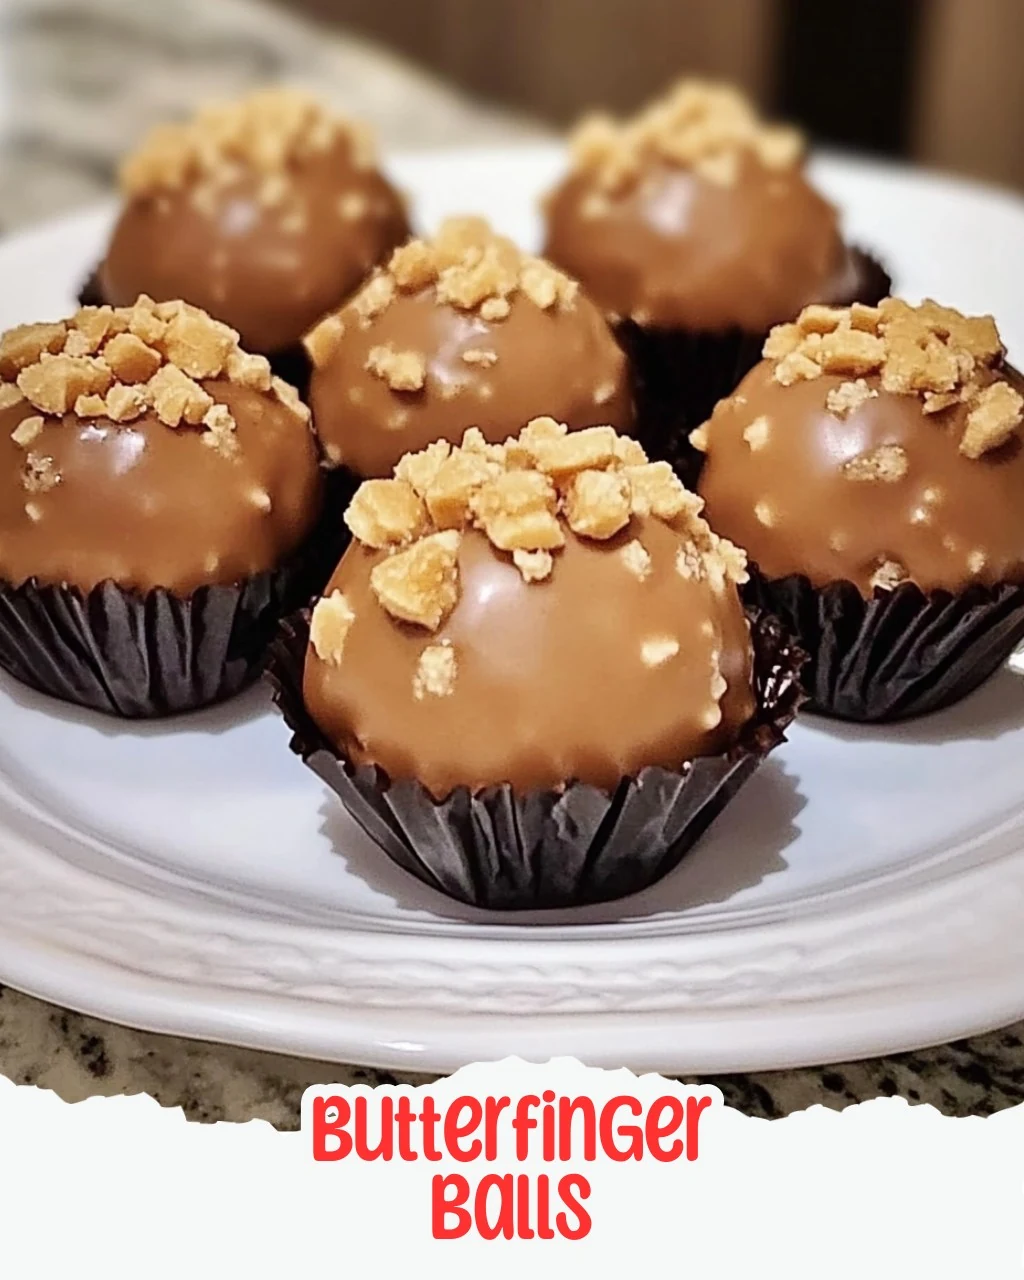
Get ready to satisfy your sweet tooth with these irresistible Butterfinger Balls! This delightful treat combines creamy, crunchy, and chocolaty goodness in every bite. They are incredibly easy to make and will have your friends and family coming back for more.
Why You’ll Love This Recipe
- Quick & Easy: Ready in under 45 minutes, these treats are perfect for last-minute cravings or gatherings.
- No Baking Required: Enjoy a hassle-free cooking experience with no need for an oven.
- Customizable Toppings: Elevate your Butterfinger Balls with sprinkles or additional crushed candy for a personal touch.
- Crowd-Pleaser: Their rich flavor and fun texture make them a hit at parties and family events.
- Kid-Friendly: A fun recipe that kids can help with, making it a great activity for family bonding.
Tools and Equipment
To make Butterfinger Balls, you will need some essential kitchen tools for a smooth process.
Essential Tools
- Mixing bowl
- Baking sheet
- Parchment paper
- Microwave-safe bowl
- Fork or dipping tool
Why These Tools Matter
- Mixing bowl: Essential for combining the cream cheese and crushed candy smoothly.
- Baking sheet: Provides a stable surface for chilling and setting the Butterfinger Balls.
- Microwave-safe bowl: Ensures safe melting of chocolate without the risk of burns or spills.
Ingredients for Butterfinger Balls
Gather these ingredients for the perfect Butterfinger Balls:
Base Ingredients
- 8 oz. cream cheese, softened
- 2 cups crushed Butterfinger candy bars (about 16 fun-sized bars)
Coating Ingredients
- 2 cups semi-sweet chocolate chips
- 1 tbsp optional vegetable shortening (for smoother dipping)
Optional Toppings
- Butterfinger or chocolate sprinkles for decoration
How to Make Butterfinger Balls Step-by-Step
Step 1: Mix Ingredients
In a large mixing bowl, combine the softened cream cheese with the crushed Butterfinger pieces. Use a sturdy spoon or mixer to blend the mixture until it is smooth and well combined.
Step 2: Form Balls
Once the mixture is well combined, scoop out portions and roll them into 1-inch balls. Arrange the balls on a baking sheet lined with parchment paper. Chill them in the refrigerator for 30 minutes to firm up.
Step 3: Melt Chocolate
While the balls are chilling, melt the semi-sweet chocolate chips in a microwave-safe bowl. Heat them in 30-second intervals, stirring in between until completely melted. For a smoother finish, stir in the optional vegetable shortening.
Step 4: Dip Balls
After the chilling time, remove the balls from the refrigerator. Dip each ball into the melted chocolate, ensuring they are fully coated. Use a fork or your fingers to help remove any excess chocolate.
Step 5: Set and Enjoy
Return the chocolate-coated balls to the parchment-lined baking sheet. For a decorative touch, sprinkle some additional crushed Butterfinger or chocolate sprinkles on top before the chocolate sets. Allow the chocolate to harden completely before serving.
Enjoy making and sharing these delightful Butterfinger Balls with your loved ones!
How to Serve Butterfinger Balls
These Butterfinger Balls are versatile treats that can be enjoyed in various ways.
Dessert Platter
Arrange Butterfinger Balls on a decorative platter alongside other bite-sized desserts for a visually appealing dessert table.
Movie Night Treat
Serve these delicious treats during a movie night as a sweet snack that everyone will love. They are easy to pop in your mouth without interrupting the film.
Festive Gift
Package Butterfinger Balls in a decorative box or jar to give as a thoughtful homemade gift for birthdays or holidays.
Pro Tips for the Best Butterfinger Balls
To ensure your Butterfinger Balls are irresistible, consider these expert tips.
-
Use Softened Cream Cheese: Make sure your cream cheese is softened to room temperature for easier mixing and a smoother texture.
-
Chill Thoroughly: Don’t skip the chilling step; it helps the balls maintain their shape while being dipped in chocolate.
-
Choose Quality Chocolate: Opt for high-quality semi-sweet chocolate chips for a richer flavor and better melting consistency.
-
Experiment with Toppings: Get creative with toppings by using crushed nuts or colorful sprinkles to add visual appeal and texture.
-
Store Properly: Keep leftover Butterfinger Balls in an airtight container in the refrigerator for up to a week to maintain freshness.
Best Side Dishes and Pairings
To enhance your experience with Butterfinger Balls, consider these delightful pairings.
-
Vanilla Ice Cream – The creamy texture of vanilla ice cream complements the crunchy and chocolaty flavors of the Butterfinger Balls.
-
Coffee – A cup of freshly brewed coffee balances the sweetness of the Butterfinger Balls, making for a perfect afternoon treat.
-
Milk – A classic pairing, cold milk enhances the rich taste of the Butterfinger Balls and provides a satisfying contrast.
-
Fruit Platter – Fresh fruits like strawberries or bananas offer a refreshing contrast to the rich, sweet flavor of the Butterfinger Balls.
-
Chocolate Milkshake – For a decadent treat, serve Butterfinger Balls with a chocolate milkshake that echoes their flavors.
Common Mistakes to Avoid
- Using Cold Cream Cheese: Make sure your cream cheese is softened to ensure a smooth mixture.
- Skipping the Chilling Step: Chilling the balls is crucial for proper coating and to maintain their shape.
- Not Coating Evenly: Ensure each ball is fully coated in chocolate to enhance the flavor and presentation.
- Overheating the Chocolate: Melt chocolate in short intervals to prevent burning, which can affect the texture.
Storage & Reheating Instructions
Refrigerator Storage
Store your Butterfinger Balls in an airtight container in the refrigerator. They will stay fresh for up to one week, making them a great make-ahead treat.
Freezing Instructions
For longer storage, you can freeze the Butterfinger Balls. Place them in a single layer on a baking sheet until solid, then transfer them to a freezer-safe container. They will maintain their quality for up to three months.
Reheating Tips
- Oven: Preheat to 350°F (175°C) and warm Butterfinger Balls on a baking sheet for about 5-10 minutes until slightly softened.
- Microwave: Heat in 10-15 second intervals until just warm; be careful not to melt the chocolate coating.
- Stovetop: Use a double boiler to gently warm the balls, stirring occasionally to prevent melting.
Frequently Asked Questions
How do I make Butterfinger Balls without cream cheese?
You can use a vegan cream cheese alternative or a blend of nut butter and powdered sugar for a different flavor profile.
Can I use milk chocolate instead of semi-sweet chocolate?
Yes, you can substitute milk chocolate for a sweeter taste, but it may alter the overall flavor balance of the Butterfinger Balls.
How long do Butterfinger Balls take to make?
The total time to prepare Butterfinger Balls is about 45 minutes, including preparation and chilling time.
Can I decorate my Butterfinger Balls?
Absolutely! Feel free to use crushed Butterfinger or chocolate sprinkles to add a decorative touch before the chocolate sets.
What is the best way to serve Butterfinger Balls?
Serve them chilled on a platter for parties or gatherings, or store them in individual wrappers for a fun gift option.
Final Thoughts
Butterfinger Balls are an easy and delicious treat that everyone will love. Give this recipe a try, and don’t forget to leave a comment sharing your experience!
Desserts
Butterfinger Balls
5.0 from 24 reviews
Get ready to satisfy your sweet tooth with these irresistible Butterfinger Balls! The perfect blend of creamy, crunchy, and chocolaty goodness, they’re a delightful treat that’s super easy to make. Your friends and family will be begging for seconds!
1x
2x
3x
Ingredients
- 8 oz. cream cheese, softened
- 2 cups crushed Butterfinger candy bars (about 16 fun-sized bars)
- 2 cups semi-sweet chocolate chips
- 1 tbsp optional vegetable shortening
Instructions
- In a large mixing bowl, combine the softened cream cheese with the crushed Butterfinger pieces. Blend the mixture until smooth and well combined.
- Scoop out the mixture and roll it into 1-inch balls. Place the formed balls on a baking sheet lined with parchment paper. Chill them in the refrigerator for 30 minutes to firm up.
- Melt the semi-sweet chocolate chips in a microwave-safe bowl. Heat in 30-second intervals, stirring in between until completely melted. Stir in the optional vegetable shortening for a smoother finish.
- Dip each ball into the melted chocolate, ensuring they are completely coated. Use a fork or your fingers to help remove excess chocolate.
- Place the chocolate-coated balls back on the parchment-lined baking sheet. Sprinkle some additional crushed Butterfinger or chocolate sprinkles on top before the chocolate sets. Allow the chocolate to harden completely before serving.
Leave a Reply