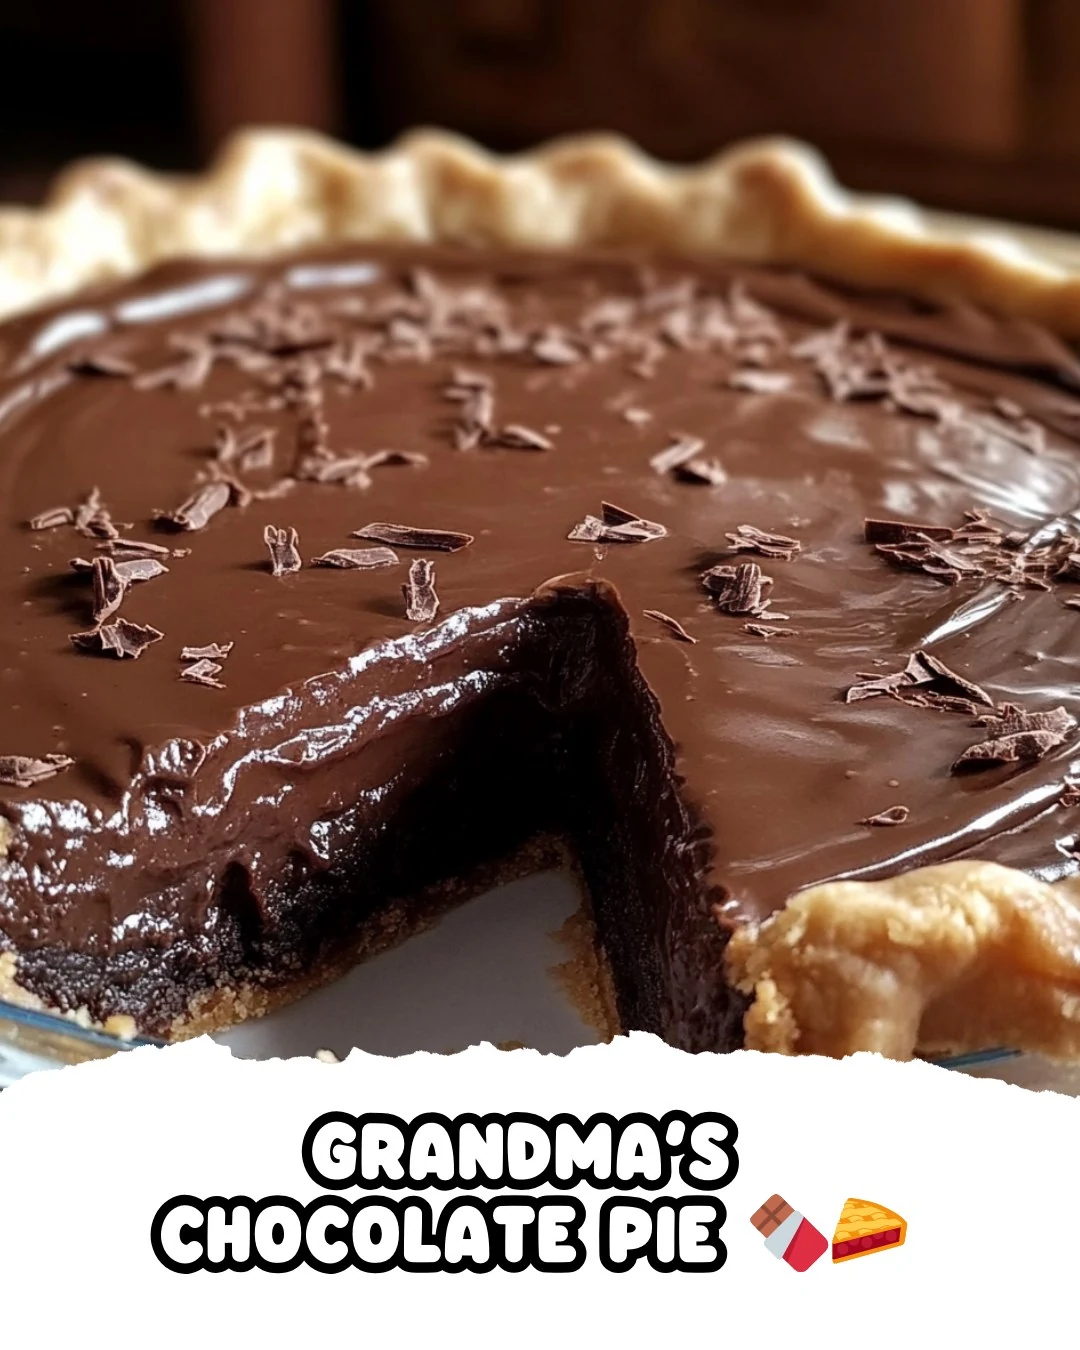
Grandma’s Chocolate Pie is a delightful dessert that brings back memories of family gatherings and special occasions. This creamy pie features a rich chocolate filling that is both indulgent and comforting. With its smooth texture and decadent flavor, it’s sure to please chocolate lovers of all ages.
Why You’ll Love This Recipe
- Classic Flavor: This pie captures the essence of traditional chocolate desserts, making it a timeless favorite.
- Rich and Creamy: The filling is smooth and velvety, offering a satisfying mouthfeel with every bite.
- Easy to Prepare: With simple ingredients and straightforward steps, you can whip this pie up in no time.
- Perfect for Any Occasion: Whether it’s a holiday or a casual dinner, this pie is a crowd-pleaser.
- Nostalgic Experience: Each slice brings back warm memories of Grandma’s kitchen and family traditions.
Tools and Equipment
Having the right tools makes the baking process smoother and more enjoyable.
Essential Tools
- Mixing bowls
- Whisk
- Medium pot
- Measuring cups and spoons
- Pre-baked pie shell
- Refrigeration container
Why These Tools Matter
- Mixing Bowls: They allow you to easily combine and prepare both dry and wet ingredients without mess.
- Medium Pot: A sturdy pot is essential for cooking the filling evenly and preventing burning.
- Whisk: A good whisk helps to incorporate ingredients smoothly and ensures a lump-free filling.
Ingredients for Grandmas Chocolate Pie
Dry Ingredients
- ½ cup cocoa powder
- 1 ½ cups sugar
- ¼ teaspoon salt
- ¼ cup cornstarch
Wet Ingredients
- 2 cups milk
- 3 egg yolks
- 1 teaspoon vanilla extract
How to Make Grandmas Chocolate Pie Step-by-Step
Step 1: Combine Dry Ingredients
In a medium bowl, mix together cocoa powder, sugar, and salt. This forms the base of your chocolate filling.
Step 2: Blend Wet Ingredients
In a separate bowl, whisk the egg yolks. Gradually add milk, ensuring to blend well for a uniform mixture.
Step 3: Cook the Mixture
In a pot over medium-high heat, combine the cocoa mixture with the egg yolk mixture. Stir constantly to prevent any lumps from forming.
Step 4: Thicken the Pie Filling
Continue cooking and stirring until the mixture thickens and becomes smooth. This step is crucial for achieving the perfect texture.
Step 5: Add Vanilla
Once thickened, remove the pot from heat and stir in the vanilla extract. This adds depth to the flavor of your pie.
Step 6: Assemble the Pie
Pour the thickened filling into a pre-baked pie shell. Spread it evenly to ensure each slice has the same delicious filling.
Step 7: Chill
Refrigerate the pie until fully chilled and set. This usually takes a few hours, but letting it chill overnight enhances the flavors.
Enjoy a slice of this classic, creamy chocolate pie for a taste of nostalgia and a whole lot of deliciousness!
How to Serve Grandmas Chocolate Pie
Serving Grandma’s Chocolate Pie can elevate any occasion. Here are some creative serving ideas:
Whipped Cream Topping
Add a generous dollop of freshly whipped cream on top of each slice for a light, airy contrast to the rich chocolate filling.
Chocolate Shavings
For an elegant touch, sprinkle chocolate shavings over the pie before serving. This enhances the chocolate flavor and adds a decorative element.
Fresh Berries
Serve slices of pie with a side of fresh strawberries or raspberries. The tartness of the berries perfectly complements the sweetness of the chocolate.
Pro Tips for the Best Grandmas Chocolate Pie
To achieve the perfect chocolate pie, consider these helpful tips:
- Use High-Quality Cocoa Powder: Select a premium cocoa powder for a richer chocolate flavor in your pie filling.
- Pre-Bake Your Pie Crust: Ensure your pie crust is fully baked before adding the filling to prevent a soggy bottom.
- Stir Constantly: When cooking the filling, continuous stirring is key to achieving a smooth and lump-free texture.
- Cool Gradually: After cooking, allow the filling to cool slightly before pouring it into the crust for easier handling.
- Chill Overnight: For the best texture and flavor, let the pie chill in the refrigerator overnight before serving.
Best Side Dishes and Pairings
Pairing dishes and drinks can enhance the experience of enjoying Grandma’s Chocolate Pie. Consider these options:
-
Vanilla Ice Cream
The creamy, cool texture of vanilla ice cream provides a delightful contrast to the rich chocolate filling. -
Coffee
A strong cup of coffee complements the sweetness of the pie, balancing flavors and enhancing the chocolate notes. -
Chocolate Milkshake
For the ultimate chocolate lover, a chocolate milkshake serves as a rich, indulgent pairing that amplifies the dessert experience. -
Fresh Fruit Salad
A refreshing fruit salad adds a light, fruity balance to the dessert, cutting through the richness of the pie. -
Mint Tea
A warm cup of mint tea offers a refreshing palate cleanser, making it a great accompaniment to the sweet chocolate flavors.
Common Mistakes to Avoid
- Not Sifting Cocoa Powder: Failing to sift the cocoa powder can lead to clumps in your pie filling.
- Overcooking the Mixture: Cooking the filling for too long can cause it to become grainy instead of smooth.
- Skipping the Chilling Step: Not allowing the pie to chill properly can result in a runny filling.
- Using a Warm Pie Shell: Pouring the filling into a warm pie shell may affect the consistency of the filling.
Storage & Reheating Instructions
Refrigerator Storage
Store Grandma’s Chocolate Pie in an airtight container in the refrigerator. It will stay fresh for up to 4 days.
Freezing Instructions
For best results, freeze the pie before adding any whipped cream or toppings. Wrap it tightly in plastic wrap and aluminum foil. It can be frozen for up to 2 months. To thaw, place it in the refrigerator overnight.
Reheating Tips
- Oven: Preheat the oven to 350°F (175°C) and warm the pie for about 10-15 minutes until heated through.
- Microwave: Heat individual slices on medium power for 30-45 seconds or until warm.
- Stovetop: Place slices in a skillet over low heat, covering to retain moisture, for about 5 minutes.
Frequently Asked Questions
How can I make Grandma’s Chocolate Pie gluten-free?
You can easily make this pie gluten-free by using a gluten-free pie crust instead of a traditional one.
Can I use dark chocolate instead of cocoa powder for Grandma’s Chocolate Pie?
Yes, substituting dark chocolate can enhance the chocolate flavor, but you’ll need to adjust the sugar since dark chocolate is less sweet than cocoa powder.
How long does Grandma’s Chocolate Pie last in the fridge?
When stored properly in an airtight container, the pie can last up to 4 days in the refrigerator.
What can I pair with Grandma’s Chocolate Pie?
This pie pairs wonderfully with whipped cream, vanilla ice cream, or fresh berries for a delightful contrast.
Can I make Grandma’s Chocolate Pie in advance?
Absolutely! This pie is great to make a day ahead of time, allowing the flavors to meld and the filling to set properly.
Final Thoughts
Grandma’s Chocolate Pie is a timeless dessert that brings back sweet memories and joy. We encourage you to try this recipe and share your experiences in the comments section below. Your feedback helps us spread the love for this classic treat.
Desserts
Grandmas Chocolate Pie
5.0 from 24 reviews
This classic chocolate pie is a nostalgic treat that combines rich cocoa and creamy filling for a delightful dessert. Perfect for family gatherings or a sweet indulgence, it's sure to please chocolate lovers of all ages.
1x
2x
3x
Ingredients
- ½ cup cocoa powder
- 2 cups milk
- 1 ½ cups sugar
- ¼ teaspoon salt
- ¼ cup cornstarch
- 3 egg yolks
- 1 teaspoon vanilla extract
Instructions
- In a medium bowl, mix together cocoa powder, sugar, and salt.
- In a separate bowl, whisk the egg yolks. Gradually add milk, blending well.
- In a pot over medium-high heat, combine the cocoa mixture with the egg yolk mixture, stirring constantly.
- Cook, continuing to stir, until the mixture thickens and becomes smooth.
- Remove from heat and stir in vanilla extract.
- Pour the thickened filling into a pre-baked pie shell.
- Refrigerate the pie until fully chilled and set.
Leave a Reply