
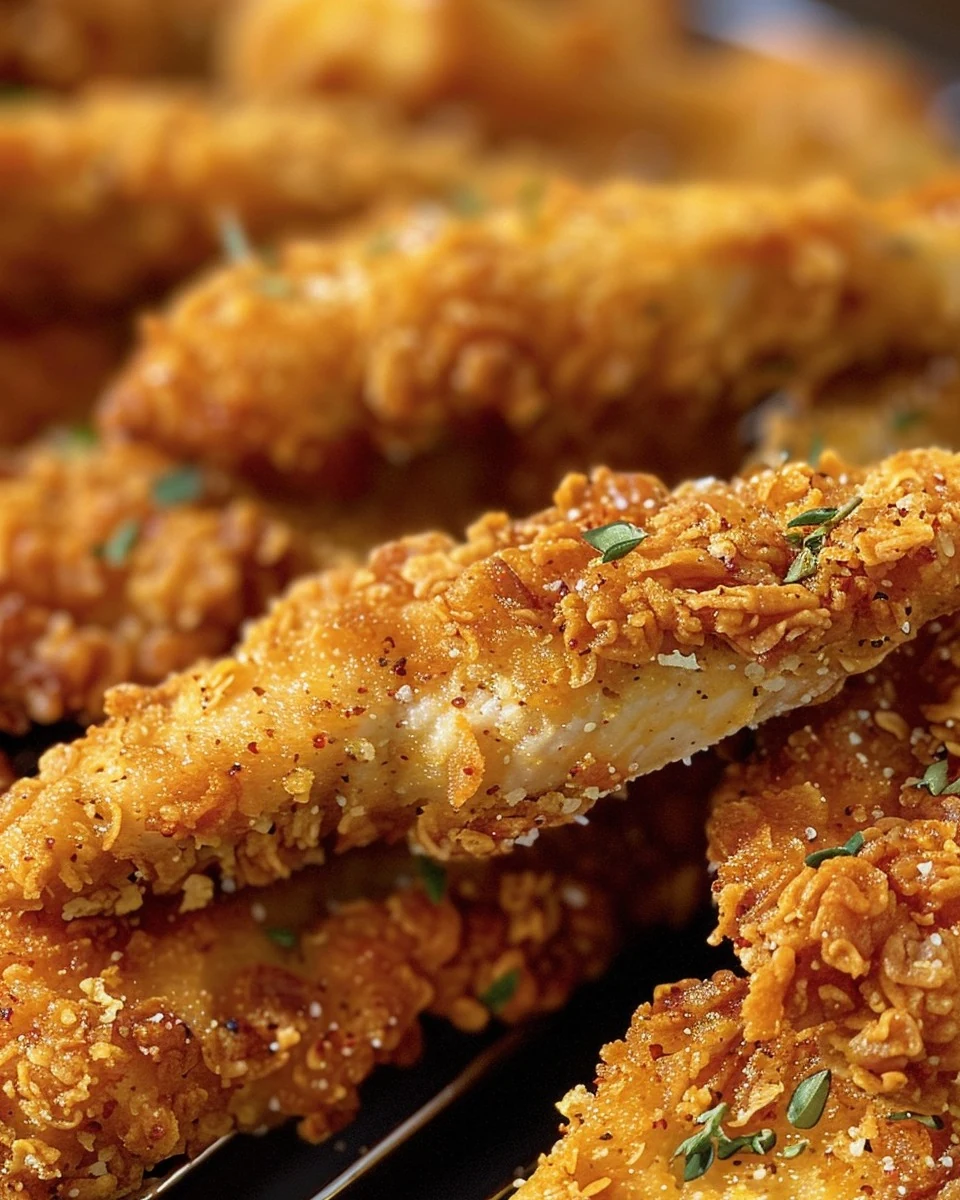
Homemade Frozen Chicken Fingers are a delightful and convenient option for busy weeknights. These crispy, flavorful chicken tenders are not only easy to prepare but also freeze beautifully, making them a perfect addition to your meal prep routine.
Why You’ll Love This Recipe
- Crispy Texture: The combination of cornflakes and Melba toast creates a crunchy coating that kids and adults will love.
- Customizable Flavors: Feel free to add your favorite spices or herbs to tailor the taste to your liking.
- Make-Ahead Convenience: Prepare a batch and freeze for quick meals on hectic days.
- Healthier Option: Baked instead of fried, these chicken fingers provide a guilt-free indulgence.
- Kid-Friendly: A great way to get children involved in the kitchen and excited about eating healthy.
Tools and Equipment
Having the right tools makes cooking easier and more enjoyable.
Essential Tools
- Baking sheet
- Wire rack
- Shallow dishes for coating
- Whisk
- Resealable freezer bags
Why These Tools Matter
- Baking sheet: Ensures even heat distribution for perfectly cooked chicken fingers.
- Wire rack: Allows air circulation, resulting in a crispier texture as they bake.
- Shallow dishes: Simplify the coating process, making it mess-free and efficient.
Ingredients for Homemade Frozen Chicken Fingers
Chicken and Coating
- 1 1/2 pounds chicken tenders
- 1/4 cup grated Parmesan
- 1 cup Melba toast, finely crushed
- 2 tablespoons water
- 1 teaspoon paprika
- 3 large egg whites
- 1 cup cornflakes, finely crushed
- 1 tablespoon chopped parsley
- 1/2 teaspoon salt
- Cooking spray
How to Make Homemade Frozen Chicken Fingers Step-by-Step
Step 1: Preheat the Oven
Start by preheating your oven to 425°F (220°C). Fit a baking sheet with a wire rack and coat it with cooking spray. This will help the chicken fingers cook evenly and become crispy.
Step 2: Prepare the Coating
In a shallow dish, combine cornflakes, Melba toast, Parmesan, parsley, paprika, and salt. Mix well to ensure that all ingredients are evenly distributed.
Step 3: Dip the Chicken
In another shallow dish, whisk together egg whites and water. Take each chicken tender and dip it into the egg white mixture. Then, coat it thoroughly with the crumb mixture, pressing gently to adhere.
Step 4: Bake the Chicken Fingers
Arrange the coated chicken tenders on the prepared baking sheet. Lightly spray the tops with cooking spray. Bake in the preheated oven for about 15-20 minutes, or until golden brown and cooked through. If you are baking from frozen, extend the cooking time to 20-25 minutes.
Step 5: Freeze for Later
To freeze your homemade chicken fingers, lay the breaded tenders on a baking sheet in a single layer. Freeze them until hard, then transfer to resealable freezer bags. They will keep well for up to 1 month.
Enjoy your crispy and delicious Homemade Frozen Chicken Fingers! This recipe is a fantastic way to have a wholesome meal ready whenever you need it.
How to Serve Homemade Frozen Chicken Fingers
These versatile chicken fingers can be enjoyed in various ways to suit your taste.
Serve with Dipping Sauces
Pair your chicken fingers with a variety of dips such as honey mustard, barbecue sauce, or ranch dressing to enhance their flavor.
Create a Chicken Finger Sandwich
Place a few chicken fingers in a toasted bun with lettuce, tomato, and your favorite sauce for a delicious sandwich option.
Add to a Salad
Toss sliced chicken fingers onto a fresh garden salad for a satisfying meal that combines crispy textures with healthy greens.
Pro Tips for the Best Homemade Frozen Chicken Fingers
For the perfect batch of chicken fingers, follow these expert tips.
-
Use Fresh Ingredients: Always select fresh chicken tenders for the best taste and texture.
-
Coat Generously: Make sure to fully coat each tender in the breadcrumb mixture for a crunchier exterior.
-
Experiment with Spices: Customize the flavor by adding your favorite spices like garlic powder or cayenne pepper to the coating mixture.
-
Double Batch for Convenience: Consider making a double batch to always have a quick meal option on hand.
-
Thaw Properly: When ready to cook from frozen, thaw the chicken fingers in the refrigerator overnight for even cooking.
Best Side Dishes and Pairings
Enjoy your Homemade Frozen Chicken Fingers with these complementary side dishes.
-
French Fries: The classic pairing of crispy fries brings a satisfying crunch and enhances the meal’s comfort factor.
-
Coleslaw: This refreshing side adds a creamy and tangy contrast to the crispy chicken fingers.
-
Sweet Potato Wedges: Baked sweet potato wedges provide a sweet and nutritious twist to balance the savory chicken.
-
Macaroni and Cheese: For a comforting and indulgent side, creamy macaroni and cheese pairs perfectly with the crispy chicken.
-
Cucumber and Tomato Salad: A light salad adds freshness and brightness to the meal, perfectly complementing the fried flavors.
-
Lemonade: A cold glass of lemonade can refreshingly cut through the richness of the chicken fingers, making it an ideal beverage choice.
Common Mistakes to Avoid
- Skipping the Wire Rack: Not using a wire rack can result in soggy chicken fingers instead of crispy ones.
- Overcrowding the Baking Sheet: Placing too many chicken tenders on the baking sheet can lead to uneven cooking.
- Inadequate Coating: Failing to thoroughly coat the chicken tenders may result in a bland flavor and texture.
- Not Preheating the Oven: Baking in a cold oven can affect cooking times and overall crispiness.
Storage & Reheating Instructions
Refrigerator Storage
Store your Homemade Frozen Chicken Fingers in an airtight container in the refrigerator. They will stay fresh for up to 3 days.
Freezing Instructions
To freeze, arrange the breaded chicken tenders in a single layer on a baking sheet and freeze until solid. Once frozen, transfer them to resealable freezer bags. They can be stored for up to 1 month.
Reheating Tips
- Oven: Preheat the oven to 400°F (200°C) and bake for 10-15 minutes until heated through and crispy.
- Microwave: Heat on high for 1-2 minutes, turning halfway, but note that they may lose some crispiness.
- Stovetop: Heat a skillet over medium heat and cook for about 5-7 minutes, flipping occasionally until warmed through.
Frequently Asked Questions
How do I make Homemade Frozen Chicken Fingers crispy?
To achieve a crispy texture, ensure you use a wire rack during baking and spray the tops with cooking spray before baking.
Can I make Homemade Frozen Chicken Fingers in advance?
Yes, these chicken fingers can be breaded and frozen ahead of time, making for a convenient meal option.
What is the best way to reheat Homemade Frozen Chicken Fingers?
The oven is the best option for reheating as it helps maintain the crispiness. However, you can also use a microwave or stovetop if needed.
How long do Homemade Frozen Chicken Fingers last in the freezer?
When stored properly in resealable freezer bags, they can last for up to 1 month in the freezer.
Can I substitute ingredients in this recipe?
Yes, you can experiment with different coatings or spices to suit your taste, but note that it may affect the final flavor and texture.
Final Thoughts
Making your own Homemade Frozen Chicken Fingers is a rewarding and delicious endeavor. Not only do they taste better than store-bought options, but they are also customizable to your liking. Give this recipe a try and let us know how it turns out by leaving a comment!
Dinner
PrintHomemade Frozen Chicken Fingers
These Homemade Frozen Chicken Fingers are a delicious and convenient option for a quick meal. Coated in a crispy mixture of cornflakes and Parmesan, they are baked to perfection and can be frozen for later use. Perfect for kids and adults alike, these chicken fingers are sure to satisfy your cravings.
- Prep Time: 20 minutes
- Cook Time: 20 minutes
- Total Time: 40 minutes
- Yield: 4 servings 1x
- Category: Dinner
- Method: Baking
- Cuisine: American
Ingredients
- 1 1/2 pounds chicken tenders
- 1/4 cup grated Parmesan
- 1 cup Melba toast, finely crushed
- 2 tablespoons water
- 1 teaspoon paprika
- 3 large egg whites
- 1 cup cornflakes, finely crushed
- 1 tablespoon chopped parsley
- 1/2 teaspoon salt
- Cooking spray
Instructions
- Preheat your oven to 425°F (220°C). Fit a baking sheet with a wire rack and coat with cooking spray.
- In a shallow dish, combine cornflakes, Melba toast, Parmesan, parsley, paprika, and salt.
- In another shallow dish, whisk together egg whites and water. Dip each chicken tender in the egg white mixture, then coat with the crumb mixture.
- Place the coated chicken tenders on the prepared baking sheet. Spray the tops with cooking spray and bake until golden and cooked through, about 15-20 minutes. If baking from frozen, cook for 20-25 minutes.
- To freeze, arrange the breaded chicken tenders on a baking sheet and freeze until hard. Transfer to resealable freezer bags for up to 1 month.
Nutrition
- Calories: 220
- Sugar: 1g
- Sodium: 300mg
- Fat: 6g
- Saturated Fat: 2g
- Carbohydrates: 15g
- Fiber: 1g
- Protein: 25g
- Cholesterol: 60mg