Category: Lunch

  • Indulge in Smothered Chicken and Rice Tonight

    Indulge in Smothered Chicken and Rice Tonight

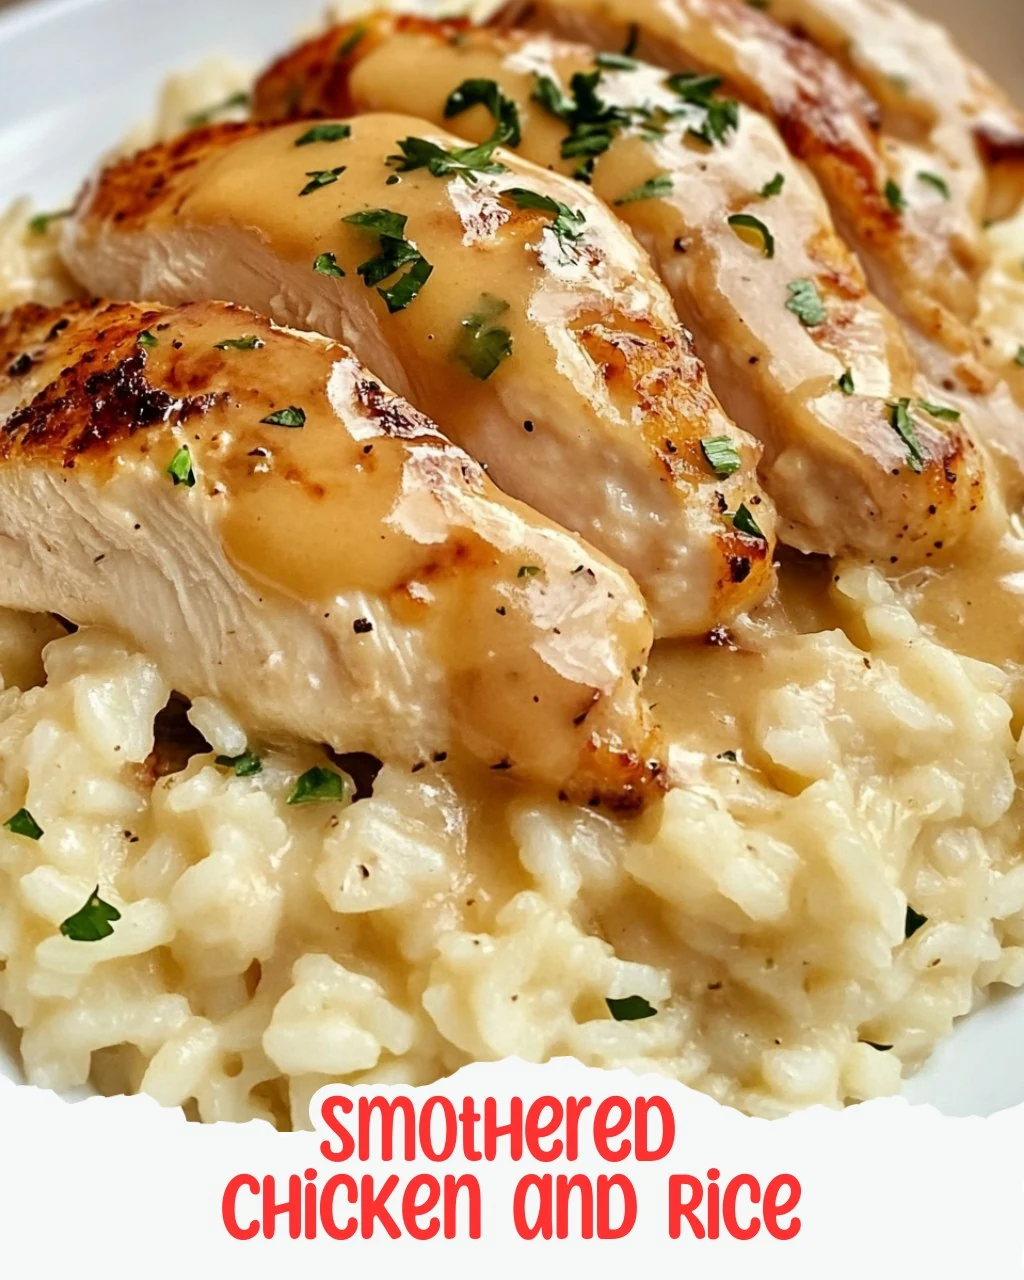
    Get ready to savor the heartwarming goodness of Southern comfort food! This Smothered Chicken and Rice dish boasts a deliciously creamy texture with perfectly cooked chicken and rice that will make your taste buds dance. Let’s delve into this delightful recipe that is sure to become a family favorite.

    Why You’ll Love This Recipe

    • Hearty and Satisfying: This dish combines protein and carbs in a creamy, comforting way, making it perfect for any meal.
    • One-Pan Wonder: With minimal cleanup required, you can enjoy your meal without the hassle of multiple dishes.
    • Customizable Flavor: You can easily add your favorite vegetables or spices to make this dish your own.
    • Family-Friendly: Kids love the creamy texture and mild flavors, making it an easy option for family dinners.
    • Make Ahead: This recipe can be prepared in advance, perfect for busy weekdays.

    Tools and Equipment

    Having the right tools can simplify your cooking process and ensure a successful outcome.

    Essential Tools

    • Skillet
    • Baking dish
    • Mixing bowl
    • Wooden spoon
    • Aluminum foil

    Why These Tools Matter

    • Skillet: Essential for browning the chicken and sautéing the vegetables, enhancing flavors.
    • Baking dish: A sturdy vessel for even cooking and easy serving.
    • Mixing bowl: Necessary for combining ingredients without creating a mess.

    Ingredients for Smothered Chicken and Rice

    Main Ingredients

    • 1 can 14 oz chicken broth
    • 1 cup long-grain white rice, uncooked
    • 4 boneless, skinless chicken breasts
    • 1 tablespoon olive oil
    • 1 can 10.75 oz cream of chicken soup
    • 1 onion, chopped
    • 1 can 10.75 oz cream of mushroom soup
    • 1 green bell pepper, chopped
    • 1 teaspoon garlic powder
    • 1 teaspoon paprika
    • Salt and pepper to taste

    How to Make Smothered Chicken and Rice Step-by-Step

    Step 1: Prepare the Oven

    Begin by preheating your oven to 350°F (175°C). This ensures a perfectly cooked dish by the time you’re done assembling.

    Step 2: Brown the Chicken

    In a large skillet, heat the olive oil over medium-high heat. Season both sides of the chicken breasts with salt, pepper, garlic powder, and paprika for a flavor-packed bite. Once the oil is hot, add the seasoned chicken to the skillet. Cook for about 2-3 minutes on each side until nicely browned. Don’t worry about cooking it through; it will finish baking in the oven.

    Step 3: Sauté the Vegetables

    Remove the chicken from the skillet and place it on a plate. In the same skillet, toss in the chopped onion and green bell pepper. Sauté for about 5 minutes or until they are softened and fragrant.

    Step 4: Mix the Creamy Base

    In a separate mixing bowl, combine the cream of chicken soup, cream of mushroom soup, and chicken broth. Stir well until the mixtures are fully blended. Next, add in the uncooked rice and stir until evenly mixed.

    Step 5: Assemble the Dish

    In a baking dish, layer the sautéed onions and bell peppers at the bottom. Place the browned chicken breasts on top of the veggies. Finally, pour the creamy soup and rice mixture over the chicken, ensuring everything is well coated.

    Step 6: Bake

    Cover the baking dish tightly with aluminum foil and bake in the preheated oven for 60 minutes. Check at the 50-minute mark for doneness; the rice should be tender, and the chicken should be fully cooked.

    With this Smothered Chicken and Rice recipe, you will enjoy a comforting meal that brings warmth and satisfaction to your table. Happy cooking!

    How to Serve Smothered Chicken and Rice

    Serving Smothered Chicken and Rice can elevate your dining experience. Here are a few creative ideas to enhance your meal.

    Garnish with Fresh Herbs

    Top each serving with freshly chopped parsley or cilantro to add a burst of color and flavor that complements the creamy sauce.

    Serve with Hot Sauce

    For those who enjoy a kick, offer a side of hot sauce. The heat balances the richness of the dish and adds an extra layer of flavor.

    Accompany with Cornbread

    Pair this dish with a slice of warm cornbread. Its slightly sweet flavor and crumbly texture make it a perfect match for the creamy chicken and rice.

    Pro Tips for the Best Smothered Chicken and Rice

    To ensure your Smothered Chicken and Rice turns out perfectly, consider these helpful tips.

    • Use Fresh Ingredients: Whenever possible, opt for fresh vegetables and high-quality chicken to enhance the overall flavor of the dish.

    • Brown the Chicken Thoroughly: Take your time when browning the chicken. A good sear adds depth of flavor that enhances the final dish.

    • Adjust Consistency: If you prefer a creamier texture, feel free to add an additional half cup of chicken broth to the soup mixture.

    • Let it Rest: After baking, allow the dish to sit for 10 minutes before serving. This resting period helps the flavors meld and makes serving easier.

    • Experiment with Spices: Don’t hesitate to add your favorite spices or herbs to the seasoning mix for a personalized touch.

    Best Side Dishes and Pairings

    Complementing your Smothered Chicken and Rice with the right sides can enhance the overall meal experience. Here are some excellent options.

    1. Steamed Broccoli: The slight bitterness of broccoli balances the creaminess of the dish and adds a nutritious element.

    2. Garlic Bread: This savory bread not only complements the meal but also provides a delightful crunch to each bite.

    3. Coleslaw: A tangy coleslaw adds a refreshing crunch that contrasts beautifully with the creamy chicken and rice.

    4. Green Salad: A light green salad with vinaigrette dressing can cleanse the palate and offer a fresh counterpoint to the rich dish.

    5. Sweet Tea: This classic Southern beverage pairs perfectly, balancing the richness of the meal with its refreshing sweetness.

    6. Mashed Potatoes: Creamy mashed potatoes are a hearty addition that can soak up the flavorful sauce, making for a comforting side.

    Common Mistakes to Avoid

    • Not Browning the Chicken: Skipping the browning step can lead to a lack of flavor in the final dish.
    • Using Instant Rice: Instant rice does not work well in this recipe; stick to long-grain white rice for the best texture.
    • Overcrowding the Pan: Cooking too many chicken breasts at once can prevent them from browning properly.
    • Skipping the Foil Cover: Not covering the baking dish can result in dry chicken and undercooked rice.

    Storage & Reheating Instructions

    Refrigerator Storage

    Store leftover Smothered Chicken and Rice in airtight containers. It will remain fresh for up to 3 days when properly stored.

    Freezing Instructions

    For best results, freeze the dish in an airtight container or heavy-duty freezer bag. It can be frozen for up to 3 months. Thaw in the refrigerator overnight before reheating.

    Reheating Tips

    • Oven: Preheat to 350°F (175°C). Cover with foil and heat for about 25-30 minutes until warmed through.
    • Microwave: Place in a microwave-safe dish, cover loosely, and heat in 1-minute intervals, stirring in between until hot.
    • Stovetop: Heat in a skillet over medium heat, adding a splash of chicken broth if needed to prevent sticking, stirring occasionally until warmed through.

    Frequently Asked Questions

    How can I make Smothered Chicken and Rice spicier?

    You can add diced jalapeños or a dash of cayenne pepper to the seasoning for an extra kick.

    Can I use brown rice instead of white rice in Smothered Chicken and Rice?

    Brown rice can be used, but it will require a longer cooking time and additional liquid to ensure it cooks properly.

    What sides pair well with Smothered Chicken and Rice?

    Consider serving this dish with a fresh green salad or steamed vegetables for a balanced meal.

    Can I make Smothered Chicken and Rice ahead of time?

    Yes, you can prepare the dish ahead of time and store it in the refrigerator. Just bake it before serving.

    Is there a vegetarian version of Smothered Chicken and Rice?

    You can substitute the chicken with firm tofu or a variety of vegetables and use vegetable broth instead of chicken broth for a vegetarian version.

    Final Thoughts

    Smothered Chicken and Rice is a delightful dish that encapsulates the essence of comfort food. We encourage you to try this recipe and savor its rich flavors. After making it, please leave a comment with your thoughts and any variations you tried. Your feedback is always appreciated!


    Dinner

    Smothered Chicken and Rice


    5.0 from 24 reviews

    Get ready to savor the heartwarming goodness of Southern comfort food! This Smothered Chicken and Rice dish boasts a deliciously creamy texture with perfectly cooked chicken and rice that'll make your taste buds dance.
    Author: Munch Twist
    Prep Time: 15 minutes
    Cook Time: 60 minutes
    Total Time: 75 minutes
    Yield: 4 servings
    Category: Lunch
    Method: No bake
    Cuisine: American

    Smothered Chicken and Rice

    SCALE:
    1x
    2x
    3x
    Cook Mode: Prevent your screen from going dark

    Ingredients

    • 1 can 14 oz chicken broth
    • 1 cup long-grain white rice, uncooked
    • 4 boneless, skinless chicken breasts
    • 1 tablespoon olive oil
    • 1 can 10.75 oz cream of chicken soup
    • 1 onion, chopped
    • 1 can 10.75 oz cream of mushroom soup
    • 1 green bell pepper, chopped
    • 1 teaspoon garlic powder
    • 1 teaspoon paprika
    • Salt and pepper to taste

    Instructions

    1. Preheat your oven to 350°F (175°C).
    2. In a large skillet, heat the olive oil over medium-high heat and season the chicken breasts with salt, pepper, garlic powder, and paprika.
    3. Cook the seasoned chicken for about 2-3 minutes on each side until browned.
    4. Remove the chicken and sauté the chopped onion and green bell pepper in the same skillet for about 5 minutes.
    5. In a mixing bowl, combine the cream of chicken soup, cream of mushroom soup, and chicken broth. Stir in the uncooked rice.
    6. Layer the sautéed veggies in a baking dish, place the chicken on top, and pour the soup and rice mixture over everything.
    7. Cover with aluminum foil and bake for 60 minutes, checking for doneness at the 50-minute mark.
    Nutrition Facts

    Serving Size: 1 serving
    Calories: 510 kcal
    Sugar: 2g
    Sodium: 1200mg
    Fat: 14g
    Saturated Fat: 3g
    Carbohydrates: 58g
    Fiber: 2g
    Protein: 36g
    Cholesterol: 90mg

  • Delicious Baked Cream Cheese Spaghetti Casserole Recipe

    Delicious Baked Cream Cheese Spaghetti Casserole Recipe

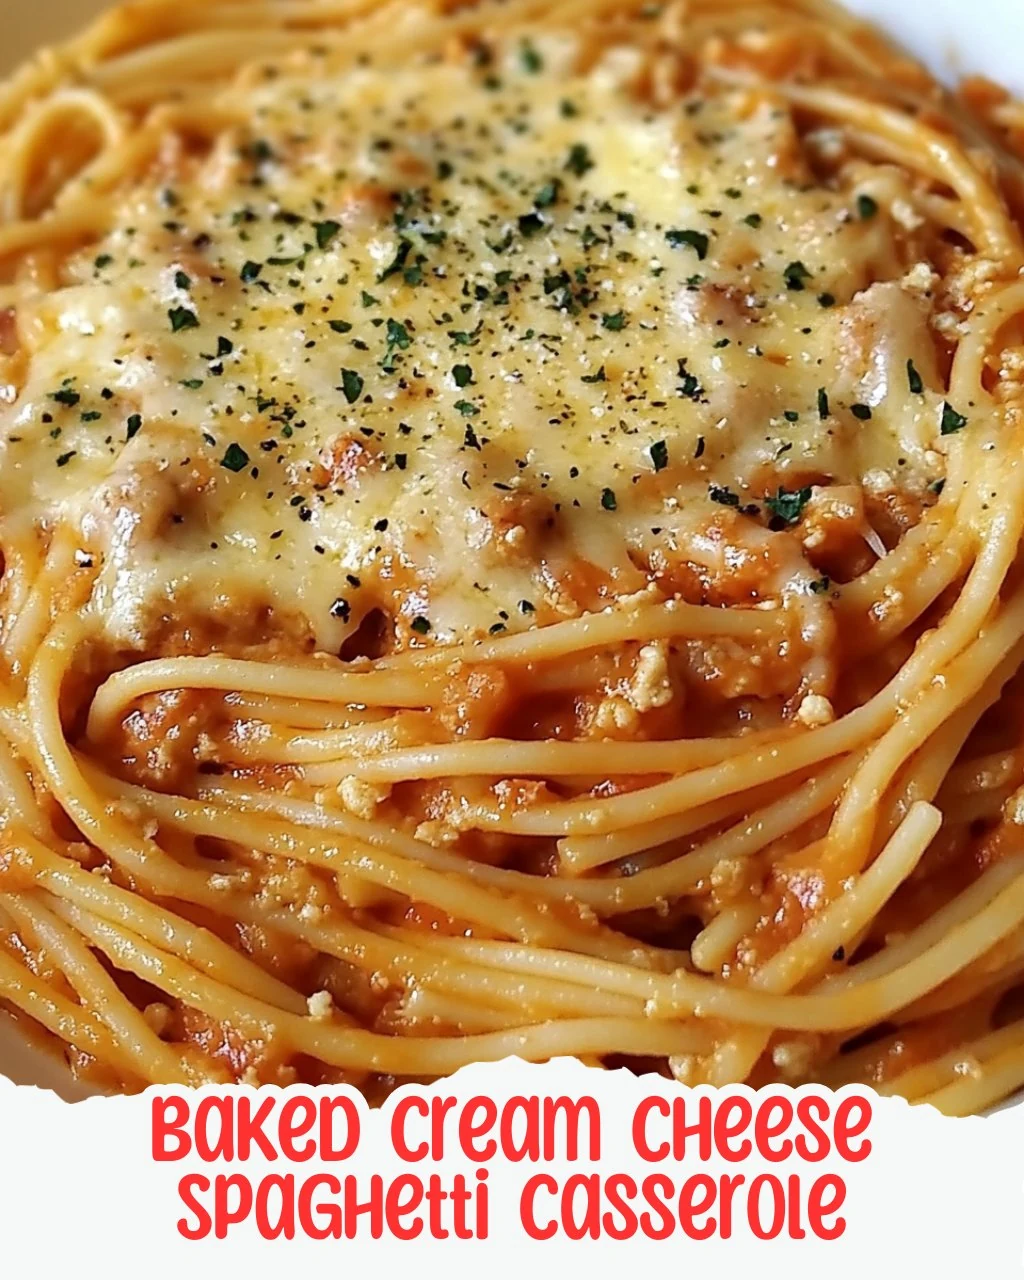
    Baked Cream Cheese Spaghetti Casserole is a delightful dish that combines creamy, cheesy goodness with the beloved flavors of spaghetti. This casserole is a crowd-pleaser that brings comfort to the dinner table, making it an ideal choice for family meals or gatherings.

    Why You’ll Love This Recipe

    • Creamy Texture: The combination of cream cheese and spaghetti creates a rich, velvety mouthfeel that is irresistible.
    • Hearty and Filling: Packed with lean ground beef and spaghetti, this casserole is sure to satisfy even the hungriest appetites.
    • Make-Ahead Friendly: You can prepare this dish in advance, making dinner time stress-free and easy.
    • Crowd-Pleaser: Perfect for potlucks and gatherings, this casserole will leave everyone asking for the recipe.
    • Simple Ingredients: Made with pantry staples, this dish is economical and easy to whip up anytime.

    Tools and Equipment

    Having the right tools can make the cooking process smoother and more enjoyable.

    Essential Tools

    • Large skillet
    • 9×13-inch baking dish
    • Mixing bowl
    • Colander
    • Wooden spoon

    Why These Tools Matter

    • Large skillet: Ideal for browning ground beef evenly and for mixing in the sauce.
    • 9×13-inch baking dish: Provides ample space for layering and baking the casserole to perfection.
    • Colander: Ensures spaghetti is drained properly for the best texture in your dish.

    Ingredients for Baked Cream Cheese Spaghetti Casserole

    Pasta and Meat

    • 12 oz spaghetti
    • 1 lb lean ground beef

    Sauce and Seasoning

    • 1 26 oz jar prepared spaghetti sauce
    • 1 clove garlic, minced
    • 1 tsp Italian seasoning

    Cheese

    • 1/2 cup grated parmesan cheese
    • 1 8 oz package cream cheese, at room temperature

    How to Make Baked Cream Cheese Spaghetti Casserole Step-by-Step

    Step 1: Prep the Base

    1. Preheat your oven to 350°F (175°C).
    2. In a large skillet over medium heat, brown the ground beef until fully cooked. Drain any excess fat.

    Step 2: Create the Meat Sauce

    1. Stir in the prepared spaghetti sauce into the skillet with the ground beef.
    2. Allow the mixture to simmer for a couple of minutes, enhancing the flavors. Set it aside.

    Step 3: Cook the Spaghetti

    1. Prepare the spaghetti according to the package directions until al dente.
    2. Once cooked, drain the pasta and transfer it to a mixing bowl.

    Step 4: Combine Ingredients

    1. Add the room temperature cream cheese, minced garlic, and Italian seasoning to the warm spaghetti.
    2. Stir until the cream cheese is fully melted and the mixture is creamy and well combined.

    Step 5: Assemble the Casserole

    1. Lightly grease a 9×13-inch baking dish.
    2. Spread a thin layer of the meat sauce on the bottom of the dish.
    3. Layer the spaghetti mixture on top of the sauce, followed by the remaining meat sauce. Ensure it covers the spaghetti evenly.
    4. Sprinkle the grated parmesan cheese on top for a delicious crust.

    Step 6: Bake

    1. Place the casserole in the preheated oven.
    2. Bake for about 30 minutes, or until the casserole is bubbly and golden.

    Enjoy the comforting and delicious Baked Cream Cheese Spaghetti Casserole with family and friends. This dish is sure to become a favorite in your home.

    How to Serve Baked Cream Cheese Spaghetti Casserole

    Serving this casserole is a delightful experience that can be customized to suit various occasions.

    Garnished with Fresh Herbs

    Top your baked casserole with freshly chopped basil or parsley for a pop of color and added freshness that complements the creamy flavors.

    Accompanied by Garlic Bread

    Serve slices of warm garlic bread on the side to soak up the delicious sauce and enhance the comforting Italian vibe of the meal.

    Paired with a Simple Salad

    A crisp green salad with a light vinaigrette provides a refreshing contrast to the richness of the casserole, balancing the meal beautifully.

    Pro Tips for the Best Baked Cream Cheese Spaghetti Casserole

    Maximize your casserole’s flavor and texture with these helpful tips.

    • Use Quality Ingredients: Opt for high-quality ground beef and spaghetti sauce to enhance the overall taste of your casserole.
    • Add Vegetables: Incorporate diced bell peppers, onions, or mushrooms into the meat sauce for added nutrition and flavor.
    • Mix Cheeses: Experiment with different cheeses, such as mozzarella or cheddar, for a unique twist on the classic parmesan topping.
    • Let it Rest: Allow the casserole to sit for about 10 minutes after baking. This helps the layers set, making it easier to serve.
    • Refrigerate Leftovers: Store any leftovers in an airtight container in the fridge for up to three days for a quick and easy reheatable meal.

    Best Side Dishes and Pairings

    Enhance your meal experience with these complementary side dishes and drinks.

    1. Caesar Salad: The creamy dressing and crunchy croutons offer a nice contrast to the baked cream cheese spaghetti casserole.
    2. Steamed Broccoli: This nutrient-rich side adds a pop of color and balances the richness of the casserole.
    3. Roasted Vegetables: Seasoned and roasted vegetables provide a flavorful, healthy accompaniment that pairs well with the dish.
    4. Italian Wine: A glass of Chianti or Pinot Grigio can elevate the dining experience, enhancing the Italian flavors in the casserole.
    5. Stuffed Mushrooms: These bite-sized appetizers are a great way to kick off the meal, adding an extra layer of savory flavor to your table.

    Common Mistakes to Avoid

    • Not Cooking the Spaghetti Al Dente: Overcooked spaghetti can become mushy when baked.
    • Skipping the Cream Cheese at Room Temperature: Cold cream cheese is harder to incorporate into the spaghetti mixture.
    • Neglecting to Drain the Ground Beef: Leaving excess fat can make the casserole greasy.
    • Rushing the Baking Time: Ensure the casserole is baked until bubbly and golden for the best flavor.

    Storage & Reheating Instructions

    Refrigerator Storage

    Store any leftovers in airtight containers in the refrigerator. The casserole will stay fresh for up to 3-4 days.

    Freezing Instructions

    For longer storage, freeze the casserole before baking. Wrap it tightly in plastic wrap and then aluminum foil. It can be frozen for up to 2-3 months. Thaw in the refrigerator overnight before baking.

    Reheating Tips

    • Oven: Preheat to 350°F (175°C) and cover with foil. Bake for 20-25 minutes until heated through.
    • Microwave: Place a portion in a microwave-safe dish, cover, and heat on high for 1-2 minutes, stirring halfway through.
    • Stovetop: Heat in a skillet over medium heat, stirring occasionally until warmed through.

    Frequently Asked Questions

    How can I make the Baked Cream Cheese Spaghetti Casserole vegetarian?

    You can substitute the ground beef with a plant-based meat alternative or skip the meat entirely and add more vegetables.

    Can I use a different type of cheese in this casserole?

    Absolutely! Feel free to experiment with mozzarella, cheddar, or any cheese you prefer for a different flavor profile.

    How long does the Baked Cream Cheese Spaghetti Casserole last in the fridge?

    It will stay fresh in the refrigerator for 3-4 days when stored in an airtight container.

    Can I prepare the Baked Cream Cheese Spaghetti Casserole in advance?

    Yes, you can assemble the casserole ahead of time and refrigerate it until you’re ready to bake.

    What sides pair well with Baked Cream Cheese Spaghetti Casserole?

    A simple green salad or garlic bread complements this casserole nicely and adds a refreshing contrast.

    Final Thoughts

    This Baked Cream Cheese Spaghetti Casserole is a delightful comfort food that your family will love. It’s easy to prepare, and the leftovers are just as delicious. Be sure to give this recipe a try, and I encourage you to leave a comment with your thoughts and any variations you’ve made!

    Dinner

    Baked Cream Cheese Spaghetti Casserole


    5.0 from 24 reviews

    Get ready for a cozy dinner that combines creamy, cheesy deliciousness with the comforting flavors of spaghetti! This baked casserole is perfect for a family meal or potluck, featuring layers of rich meat sauce and creamy spaghetti that’ll leave everyone asking for seconds.

    Author: Munch Twist
    Prep Time: 15 minutes
    Cook Time: 30 minutes
    Total Time: 45 minutes
    Yield: 8 servings
    Category: Lunch
    Method: Baking
    Cuisine: American

    Baked Cream Cheese Spaghetti Casserole

    SCALE:
    1x
    2x
    3x
    Cook Mode: Prevent your screen from going dark

    Ingredients

    • 12 oz spaghetti
    • 1 lb lean ground beef
    • 1 26 oz jar prepared spaghetti sauce
    • 1/2 cup grated parmesan cheese
    • 1 clove garlic, minced
    • 1 tsp Italian seasoning
    • 1 8 oz package cream cheese, at room temperature

    Instructions

    1. Preheat your oven to 350°F (175°C).
    2. In a large skillet over medium heat, brown the ground beef until fully cooked and drain excess fat.
    3. Stir in the prepared spaghetti sauce and let it simmer for a couple of minutes, then set aside.
    4. Cook the spaghetti according to package directions until al dente, then drain and transfer to a mixing bowl.
    5. Add the room temperature cream cheese, minced garlic, and Italian seasoning to the warm spaghetti and stir until combined.
    6. Lightly grease a 9×13-inch baking dish and spread a thin layer of meat sauce on the bottom.
    7. Layer the spaghetti mixture on top of the sauce, then pour the remaining meat sauce over it.
    8. Sprinkle the grated parmesan cheese on top.
    9. Bake in the preheated oven for about 30 minutes or until bubbly and golden.

    Nutrition Facts

    Serving Size: 1 serving
    Calories: 400 kcal
    Sugar: 4g
    Sodium: 800mg
    Fat: 20g
    Saturated Fat: 10g
    Carbohydrates: 36g
    Fiber: 2g
    Protein: 24g
    Cholesterol: 70mg

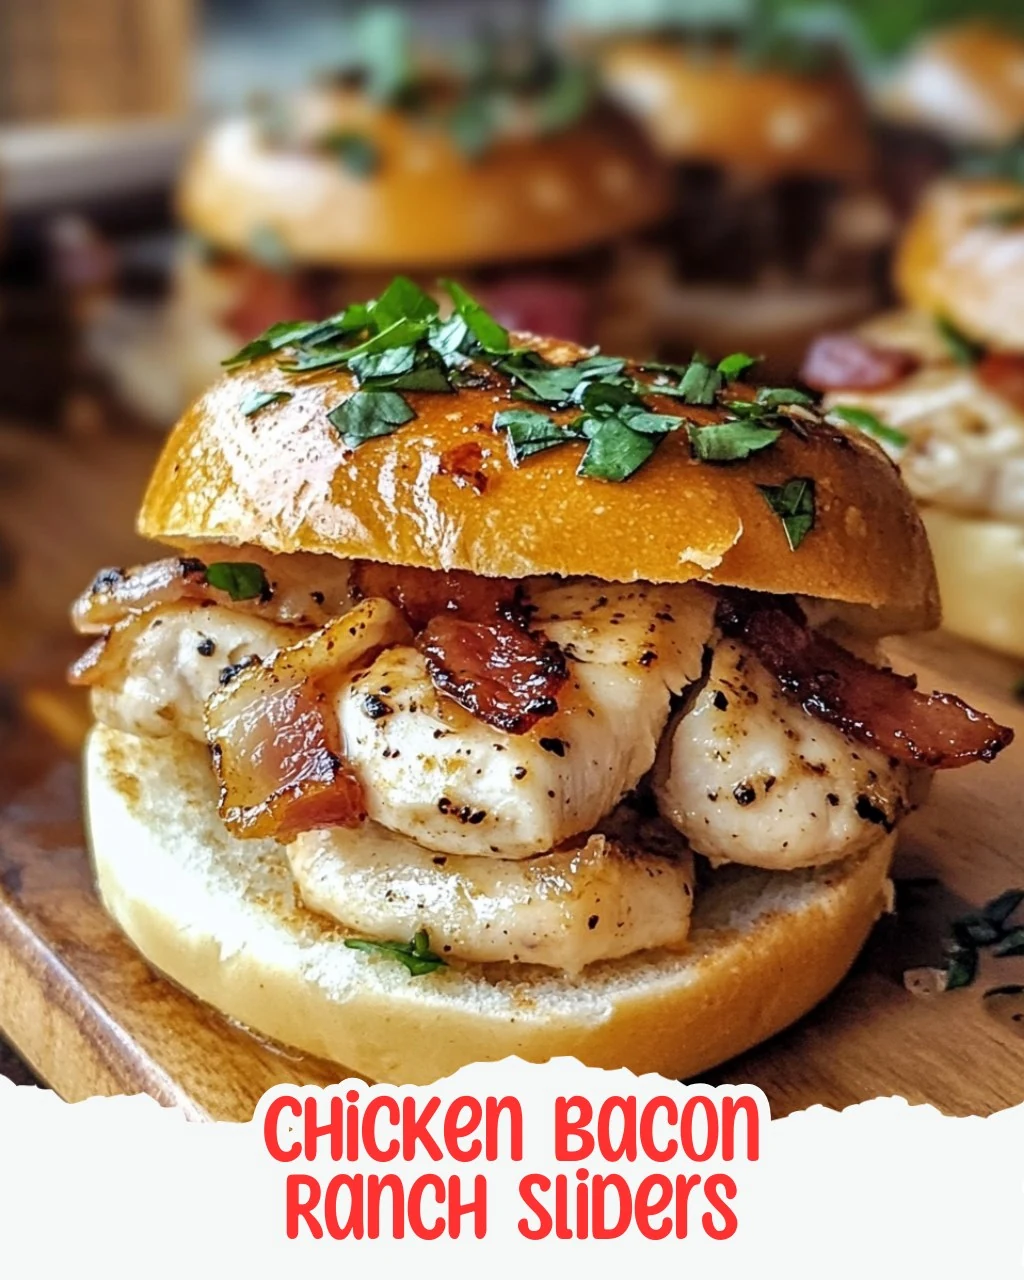
  • Delicious Chicken Bacon Ranch Sliders Recipe

    Delicious Chicken Bacon Ranch Sliders Recipe

    Chicken Bacon Ranch Sliders are a delicious blend of savory chicken, crispy bacon, and creamy ranch dressing, all nestled between sweet Hawaiian rolls. This dish is perfect for gatherings, game days, or a quick family dinner. The combination of flavors makes these sliders irresistible.

    Why You’ll Love This Recipe

    • Quick & Easy: Ready in under 30 minutes, making it perfect for busy weeknights.
    • Crowd-Pleaser: Great for parties or gatherings, everyone will want seconds.
    • Comfort Food: The warm, cheesy filling is a comforting treat that satisfies.
    • Versatile: Customize with your favorite toppings or sauces for a personal touch.

    Tools and Equipment

    Having the right tools makes cooking a breeze. Here’s what you need.

    Essential Tools

    • Baking pan (9×13 inches)
    • Mixing bowl
    • Spatula
    • Brush for butter
    • Aluminum foil

    Why These Tools Matter

    • Baking pan: The perfect size for holding all the sliders while they bake.
    • Mixing bowl: Essential for easily combining all the ingredients.
    • Brush for butter: Ensures even coating of the garlic butter on the rolls.

    Ingredients for Chicken Bacon Ranch Sliders

    Main Ingredients

    • 15 Hawaiian sweet rolls
    • 4 cups cooked, shredded chicken
    • 2 cups shredded cheddar cheese
    • 1 cup Ranch dressing
    • 1/2 cup crumbled bacon
    • 3 tablespoons grated Parmesan cheese
    • 1/4 cup melted butter
    • 1 teaspoon garlic powder

    How to Make Chicken Bacon Ranch Sliders Step-by-Step

    Step 1: Prep the Base

    1. Start by preheating your oven to 350°F (175°C).
    2. Grease a 9×13-inch baking pan to prevent sticking.
    3. Place the bottom half of the Hawaiian rolls snugly in the pan.

    Step 2: Make the Filling

    1. In a large mixing bowl, combine the shredded chicken, Ranch dressing, crumbled bacon, and Parmesan cheese.
    2. Use a spatula to mix these ingredients thoroughly until well coated.

    Step 3: Assemble the Sliders

    1. Spread the chicken mixture evenly over the roll bottoms in the baking pan.
    2. Generously sprinkle the shredded cheddar cheese over the chicken layer.
    3. Place the top half of the rolls on top to create little sandwiches.

    Step 4: Add the Garlic Butter

    1. In a small bowl, mix the melted butter with garlic powder.
    2. Use a brush to liberally coat the tops of the rolls with the garlic butter mixture.

    Step 5: Bake

    1. Cover the baking pan with aluminum foil.
    2. Bake in the preheated oven for about 15 minutes, until the cheese has melted and the sliders are heated throughout.

    Step 6: Serve

    1. Once ready, remove the foil and serve the sliders warm.
    2. They are best enjoyed fresh out of the oven.

    These Chicken Bacon Ranch Sliders are sure to become a favorite in your household. Enjoy the delicious combination of flavors and the ease of preparation.

    How to Serve Chicken Bacon Ranch Sliders

    These Chicken Bacon Ranch Sliders are versatile and can be served in various delightful ways.

    Serve with Fresh Veggies

    Pair the sliders with an assortment of fresh vegetables like carrot sticks, celery, and cherry tomatoes for a healthy crunch that balances the richness of the sliders.

    Create a Slider Platter

    Present the sliders on a stylish platter with a selection of dipping sauces such as extra Ranch dressing, barbecue sauce, or a spicy aioli to elevate the experience.

    Add a Side Salad

    A light side salad with mixed greens, cucumbers, and a citrus vinaigrette complements the sliders beautifully, adding freshness and a burst of flavor.

    Pro Tips for the Best Chicken Bacon Ranch Sliders

    To elevate your Chicken Bacon Ranch Sliders, consider these helpful tips.

    • Use Quality Ingredients: Opt for fresh, high-quality chicken and bacon for the best flavor and texture in your sliders.
    • Let the Chicken Cool: Allow the shredded chicken to cool before mixing it with the Ranch dressing to prevent the cheese from melting prematurely.
    • Customize the Cheese: Experiment with different types of cheese like pepper jack or mozzarella for a unique flavor profile.
    • Don’t Skip the Garlic Butter: The garlic butter topping adds a rich, savory flavor that enhances the overall taste of the sliders.
    • Adjust for Spice: If you enjoy a bit of heat, consider adding jalapeños or a dash of hot sauce to the chicken mixture for a spicy kick.

    Best Side Dishes and Pairings

    Complete your meal with these fantastic side dishes and drinks that enhance the enjoyment of Chicken Bacon Ranch Sliders.

    1. Sweet Potato Fries: Their natural sweetness and crispy texture provide a delicious contrast to the savory sliders.
    2. Coleslaw: A tangy coleslaw adds a refreshing crunch, balancing the richness of the chicken and cheese.
    3. Potato Chips: Choose a variety of flavored potato chips for a crunchy side that complements the flavors of the sliders.
    4. Pickles: The briny crunch of pickles makes for a perfect palate cleanser between bites.
    5. Iced Tea: A refreshing glass of iced tea, whether sweetened or unsweetened, pairs well with the hearty sliders, enhancing the overall dining experience.

    Common Mistakes to Avoid

    • Skipping the Greasing Step: Failing to grease the baking pan can lead to sticky sliders that are difficult to remove.
    • Overloading with Ingredients: Adding too much filling can make it hard to close the sliders and may lead to messy baking.
    • Not Covering with Foil: Skipping the foil while baking can cause the tops to burn before the cheese is fully melted.
    • Serving Too Soon: Cutting into the sliders immediately after baking can result in a messy serving experience; let them cool for a few minutes.

    Storage & Reheating Instructions

    Refrigerator Storage

    Store any leftover Chicken Bacon Ranch Sliders in an airtight container in the refrigerator. They will stay fresh for up to 3 days.

    Freezing Instructions

    For long-term storage, you can freeze the sliders. Wrap individual sliders tightly in plastic wrap, then place them in a freezer-safe bag. They can be frozen for up to 2 months.

    Reheating Tips

    • Oven: Preheat to 350°F (175°C) and bake wrapped in foil for about 10-15 minutes until heated through.
    • Microwave: Place a slider on a microwave-safe plate and heat for 30-60 seconds, checking for warmth.
    • Stovetop: Heat in a skillet over medium heat, covering with a lid for about 5 minutes until warmed.

    Frequently Asked Questions

    Can I use a different type of cheese for the Chicken Bacon Ranch Sliders?

    Yes, you can substitute cheddar with Monterey Jack, mozzarella, or pepper jack cheese for a different flavor profile.

    Can I make Chicken Bacon Ranch Sliders ahead of time?

    Absolutely! You can prepare the filling and assemble the sliders a day in advance; just bake them when you’re ready to serve.

    What can I serve with Chicken Bacon Ranch Sliders?

    These sliders pair well with a side salad, potato chips, or vegetable sticks for a complete meal.

    How can I customize my Chicken Bacon Ranch Sliders?

    Feel free to add toppings like sliced jalapeños, fresh herbs, or different dressings to suit your taste preferences.

    Are Chicken Bacon Ranch Sliders suitable for meal prep?

    Yes, they are perfect for meal prep! You can make a large batch and store them for quick lunches or dinners throughout the week.

    Final Thoughts

    Chicken Bacon Ranch Sliders are a delightful addition to any meal or gathering. They are easy to make and sure to be a crowd-pleaser. We encourage you to try this recipe and leave a comment with your feedback or any variations you’ve enjoyed!


    Dinner

    Chicken Bacon Ranch Sliders


    5.0 from 24 reviews

    These Chicken Bacon Ranch Sliders are a delicious and easy-to-make appetizer or meal. With tender shredded chicken, crispy bacon, and gooey cheddar cheese all nestled between sweet Hawaiian rolls, they are perfect for gatherings or a cozy family dinner. The addition of Ranch dressing adds a creamy, tangy flavor that elevates these sliders to a new level of deliciousness.

    Author: Munch Twist
    Prep Time: 10 minutes
    Cook Time: 15 minutes
    Total Time: 25 minutes
    Yield: 15 servings
    Category: Lunch
    Method: No bake
    Cuisine: American

    Chicken Bacon Ranch Sliders

    SCALE:
    1x
    2x
    3x
    Cook Mode: Prevent your screen from going dark

    Ingredients

    • 15 Hawaiian sweet rolls
    • 4 cups cooked, shredded chicken
    • 2 cups shredded cheddar cheese
    • 1 cup Ranch dressing
    • 1/2 cup crumbled bacon
    • 3 tablespoons grated Parmesan cheese
    • 1/4 cup melted butter
    • 1 teaspoon garlic powder

    Instructions

    1. Preheat your oven to 350°F (175°C).
    2. Grease a 9×13-inch baking pan and place the bottom half of the Hawaiian rolls in the pan.
    3. In a large mixing bowl, combine the shredded chicken, Ranch dressing, crumbled bacon, and Parmesan cheese. Mix thoroughly.
    4. Spread the chicken mixture evenly over the roll bottoms in the baking pan.
    5. Sprinkle the shredded cheddar cheese over the chicken layer.
    6. Place the top half of the rolls on top.
    7. Mix the melted butter with garlic powder and brush it over the tops of the rolls.
    8. Cover with aluminum foil and bake for about 15 minutes.
    9. Remove the foil and serve the sliders warm.

    Nutrition Facts

    Serving Size: 1 serving
    Calories: 361 kcal
    Sugar: 4g
    Sodium: 670mg
    Fat: 22g
    Saturated Fat: 10g
    Carbohydrates: 24g
    Fiber: 1g
    Protein: 18g
    Cholesterol: 60mg

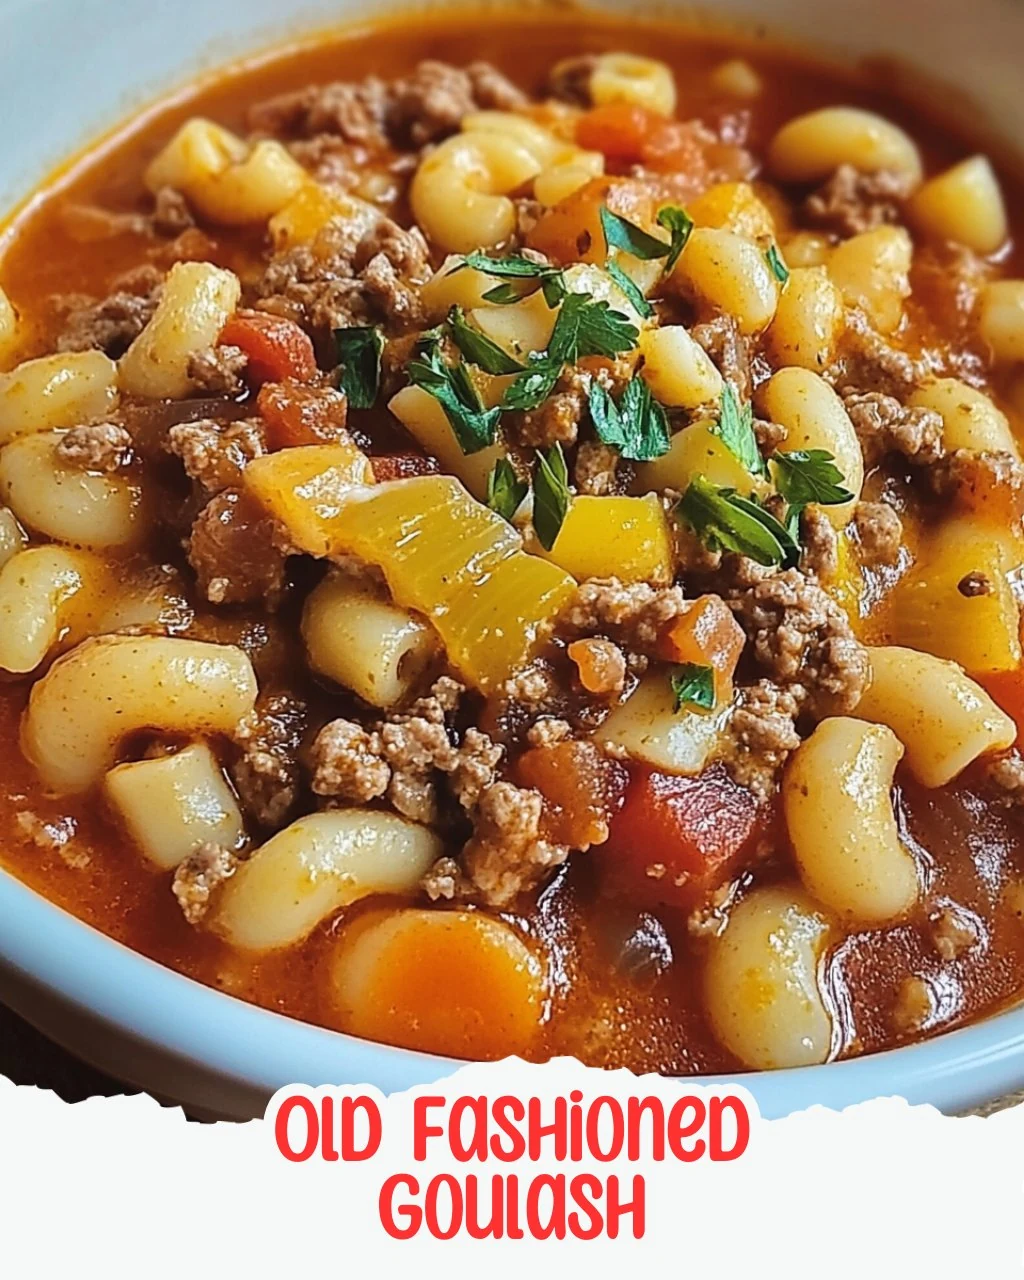
  • Hearty Old Fashioned Goulash Recipe Made Easy

    Hearty Old Fashioned Goulash Recipe Made Easy

    Old Fashioned Goulash is a comforting dish that brings warmth and nostalgia to the dinner table. This hearty meal combines tender meat, pasta, and a rich tomato sauce, making it a favorite for families and gatherings. Its simplicity and flavorful profile ensure that it will be a hit at any mealtime.

    Why You’ll Love This Recipe

    • Hearty & Satisfying: This dish is packed with protein and fiber, perfect for a filling meal.
    • Family-Friendly: Old Fashioned Goulash appeals to both kids and adults, making it great for family dinners.
    • One-Pot Wonder: Minimal cleanup is required since everything is cooked in one skillet.
    • Versatile: Customize with your favorite ingredients or spices for a personalized touch.
    • Budget-Friendly: With affordable ingredients, this recipe is easy on the wallet while being delicious.

    Tools and Equipment

    To make Old Fashioned Goulash, you will need a few essential kitchen tools.

    Essential Tools

    • Large skillet
    • Wooden spoon or spatula
    • Measuring cups and spoons
    • Knife and cutting board

    Why These Tools Matter

    • Large skillet: Provides ample space for browning the meat and simmering the sauce.
    • Measuring cups and spoons: Ensure accurate ingredient quantities for balanced flavors.
    • Wooden spoon or spatula: Ideal for stirring without scratching your cookware.

    Ingredients for Old Fashioned Goulash

    Meat and Vegetables

    • 2 lbs ground beef or turkey
    • 1 large yellow onion, diced
    • 3 tsp minced garlic

    Liquid Ingredients

    • 2 15-ounce cans diced tomatoes
    • 2 15-ounce cans tomato sauce
    • 1/2 cup beef broth
    • 2 1/2 cups water

    Seasonings

    • 1 T Italian seasoning
    • 1 T Adobo seasoning
    • 1/2 T black pepper
    • 1 T seasoned salt
    • 3 bay leaves

    Pasta and Cheese

    • 2 cups elbow macaroni, uncooked
    • 1 cup shredded mozzarella cheese
    • 1/2 cup shredded cheddar cheese

    Oil

    • 1/3 cup olive oil

    How to Make Old Fashioned Goulash Step-by-Step

    Step 1: Cook the Meat

    In a large skillet, heat the olive oil over medium-high heat. Add the ground beef or turkey, cooking until it’s halfway done. Remove from heat and set aside.

    Step 2: Sauté the Vegetables

    To the same skillet, add the minced garlic and diced onions. Sauté until the onions turn translucent and the meat finishes cooking.

    Step 3: Add the Liquids

    Pour in the water and beef broth. Then stir in the two cans of tomato sauce and the diced tomatoes.

    Step 4: Season the Mixture

    Sprinkle in the Italian seasoning, Adobo seasoning, seasoned salt, black pepper, and bay leaves. Mix everything well to ensure the flavors combine beautifully.

    Step 5: Simmer the Base

    Reduce the heat, cover the skillet, and let the mixture simmer for about 20 minutes. Stir occasionally to prevent sticking.

    Step 6: Incorporate the Pasta

    After 20 minutes, add in the uncooked elbow macaroni, stirring until the macaroni is well incorporated into the sauce. Cover again and allow to simmer for an additional 30 minutes, stirring occasionally.

    Step 7: Add Cheese

    Once cooked, remove the bay leaves. Stir in the shredded cheddar cheese until it’s melted and evenly distributed throughout the goulash.

    Step 8: Final Touches

    Before serving, sprinkle the shredded mozzarella cheese on top and let it slightly melt.

    Step 9: Serve and Enjoy

    Serve hot and enjoy this hearty goulash with your favorite bread or a simple side salad.

    Nutritional Information: This dish contains high protein from the meat, fiber from the tomatoes, and carbohydrates from elbow macaroni, making it a balanced, satisfying meal!

    Time: Preparation time: 15 minutes | Cooking time: 50 minutes

    How to Serve Old Fashioned Goulash

    Old Fashioned Goulash is a versatile dish that can be enjoyed in various ways. Here are some creative serving ideas.

    Garnish with Fresh Herbs

    Top your goulash with freshly chopped parsley or basil for a burst of color and flavor. The herbs add a fresh contrast to the hearty dish.

    Serve with Garlic Bread

    Pairing Old Fashioned Goulash with warm, buttery garlic bread creates a delightful combination. The bread is perfect for soaking up the rich sauce.

    Create a Goulash Bar

    Set up a goulash bar where guests can customize their servings. Offer toppings like sour cream, sliced jalapeños, or additional cheese for a fun twist on this classic dish.

    Pro Tips for the Best Old Fashioned Goulash

    To elevate your Old Fashioned Goulash, consider these practical tips.

    • Brown the Meat Properly: Ensure the ground beef or turkey is well-browned to enhance the flavor of the dish.
    • Use Quality Ingredients: Opt for high-quality canned tomatoes and broth for a richer taste in your goulash.
    • Adjust the Seasoning: Feel free to adjust the spices to suit your personal taste; a little extra Italian seasoning can add depth.
    • Simmer Longer if Possible: Allow the goulash to simmer longer for a more developed flavor; just keep an eye on the liquid level.
    • Add Veggies: Boost the nutritional value by adding vegetables like bell peppers or zucchini during the cooking process.

    Best Side Dishes and Pairings

    To complement your Old Fashioned Goulash, consider these side dishes and drinks.

    1. Simple Side Salad: A light salad with mixed greens and a vinaigrette balances the richness of the goulash.
    2. Steamed Broccoli: The slight bitterness of steamed broccoli pairs well with the savory flavors of goulash.
    3. Corn on the Cob: Sweet corn adds a delightful crunch and sweetness that contrasts nicely with the hearty dish.
    4. Coleslaw: A tangy coleslaw brings a refreshing crunch, making it a perfect side to counteract the richness of the goulash.
    5. Red Wine: A glass of red wine, such as Merlot or Cabernet Sauvignon, complements the flavors of the meat and tomatoes beautifully.
    6. Sparkling Water with Lemon: For a non-alcoholic option, sparkling water with a splash of lemon provides a refreshing palate cleanser.

    Common Mistakes to Avoid

    • Not Browning the Meat Properly: Ensure the ground beef or turkey is well-browned for maximum flavor.
    • Skipping the Simmering Step: Allow the mixture to simmer long enough for flavors to meld; rushing this can lead to bland goulash.
    • Using Too Much Water: Measure the water carefully; too much can result in a soupy consistency.
    • Neglecting to Remove Bay Leaves: Remember to take out the bay leaves before serving, as they are not edible.

    Storage & Reheating Instructions

    Refrigerator Storage

    Store leftovers in airtight containers in the refrigerator. The Old Fashioned Goulash will stay fresh for up to 3-4 days.

    Freezing Instructions

    For best results, freeze the goulash in portions in airtight freezer-safe containers. It can be frozen for up to 3 months. To thaw, place in the refrigerator overnight or use the defrost function on your microwave.

    Reheating Tips

    • Oven: Preheat the oven to 350°F (175°C). Place the goulash in an oven-safe dish, cover with foil, and heat for about 20-30 minutes.
    • Microwave: Transfer portions to a microwave-safe bowl, cover, and heat on high for 2-3 minutes, stirring halfway through.
    • Stovetop: Heat in a saucepan over medium heat, stirring occasionally until warmed through, about 10-15 minutes.

    Frequently Asked Questions

    How can I make Old Fashioned Goulash healthier?

    You can substitute ground beef with turkey or chicken and use whole wheat elbow macaroni for added fiber.

    Can I add vegetables to Old Fashioned Goulash?

    Absolutely! Bell peppers, carrots, or zucchini can be added for extra nutrition and flavor.

    How do I adjust the spice levels in Old Fashioned Goulash?

    For a milder dish, reduce the amount of Adobo seasoning and black pepper. For more heat, consider adding red pepper flakes.

    What can I serve with Old Fashioned Goulash?

    This hearty dish pairs well with crusty bread or a simple side salad for a complete meal.

    How long does Old Fashioned Goulash last in the freezer?

    When properly stored, Old Fashioned Goulash can last up to 3 months in the freezer.

    Final Thoughts

    Old Fashioned Goulash is a comforting and hearty meal perfect for any occasion. We encourage you to give this recipe a try and share your thoughts in the comments below. Your feedback helps us improve and inspire more delicious dishes!


    Dinner

    Old Fashioned Goulash


    5.0 from 24 reviews

    Old Fashioned Goulash is a hearty and comforting dish that combines ground beef or turkey with elbow macaroni, tomatoes, and a blend of seasonings. This one-pot meal is perfect for family dinners, offering a satisfying mix of protein, fiber, and carbohydrates, making it a balanced choice for any occasion.

    Author: Munch Twist
    Prep Time: 15 minutes
    Cook Time: 50 minutes
    Total Time: 65 minutes
    Yield: 6 servings
    Category: Lunch
    Method: No bake
    Cuisine: American

    Old Fashioned Goulash

    SCALE:
    1x
    2x
    3x
    Cook Mode: Prevent your screen from going dark

    Ingredients

    • 2 lbs ground beef or turkey
    • 2 15-ounce cans diced tomatoes
    • 2 cups elbow macaroni, uncooked
    • 3 tsp minced garlic
    • 1 large yellow onion, diced
    • 1 T Italian seasoning
    • 1/2 T black pepper
    • 1/3 cup olive oil
    • 1/2 cup beef broth
    • 3 bay leaves
    • 1 T Adobo seasoning
    • 1 T seasoned salt
    • 2 15-ounce cans tomato sauce
    • 1 cup shredded mozzarella cheese
    • 1/2 cup shredded cheddar cheese
    • 2 1/2 cups water

    Instructions

    1. In a large skillet, heat the olive oil over medium-high heat. Add the ground beef or turkey, cooking until it's halfway done. Remove from heat and set aside.
    2. To the same skillet, add the minced garlic and diced onions. Sauté until the onions turn translucent and the meat finishes cooking.
    3. Next, pour in the water and beef broth, then stir in the two cans of tomato sauce and the diced tomatoes.
    4. Sprinkle in the Italian seasoning, Adobo seasoning, seasoned salt, black pepper, and bay leaves. Mix everything well, ensuring the flavors combine beautifully.
    5. Reduce the heat, cover the skillet, and let the mixture simmer for about 20 minutes. Stir occasionally to prevent sticking.
    6. After 20 minutes, add in the uncooked elbow macaroni, stirring until the macaroni is well incorporated into the sauce. Cover again and allow to simmer for an additional 30 minutes, stirring occasionally.
    7. Once cooked, make sure to remove the bay leaves. Stir in the shredded cheddar cheese until it's melted and evenly distributed throughout the goulash.
    8. Before serving, sprinkle the shredded mozzarella cheese on top and let it slightly melt.
    9. Serve hot and enjoy this hearty goulash with your favorite bread or a simple side salad!

    Nutrition Facts

    Serving Size: 1 serving
    Calories: 600 kcal
    Sugar: 10g
    Sodium: 1200mg
    Fat: 30g
    Saturated Fat: 10g
    Carbohydrates: 50g
    Fiber: 5g
    Protein: 40g
    Cholesterol: 100mg

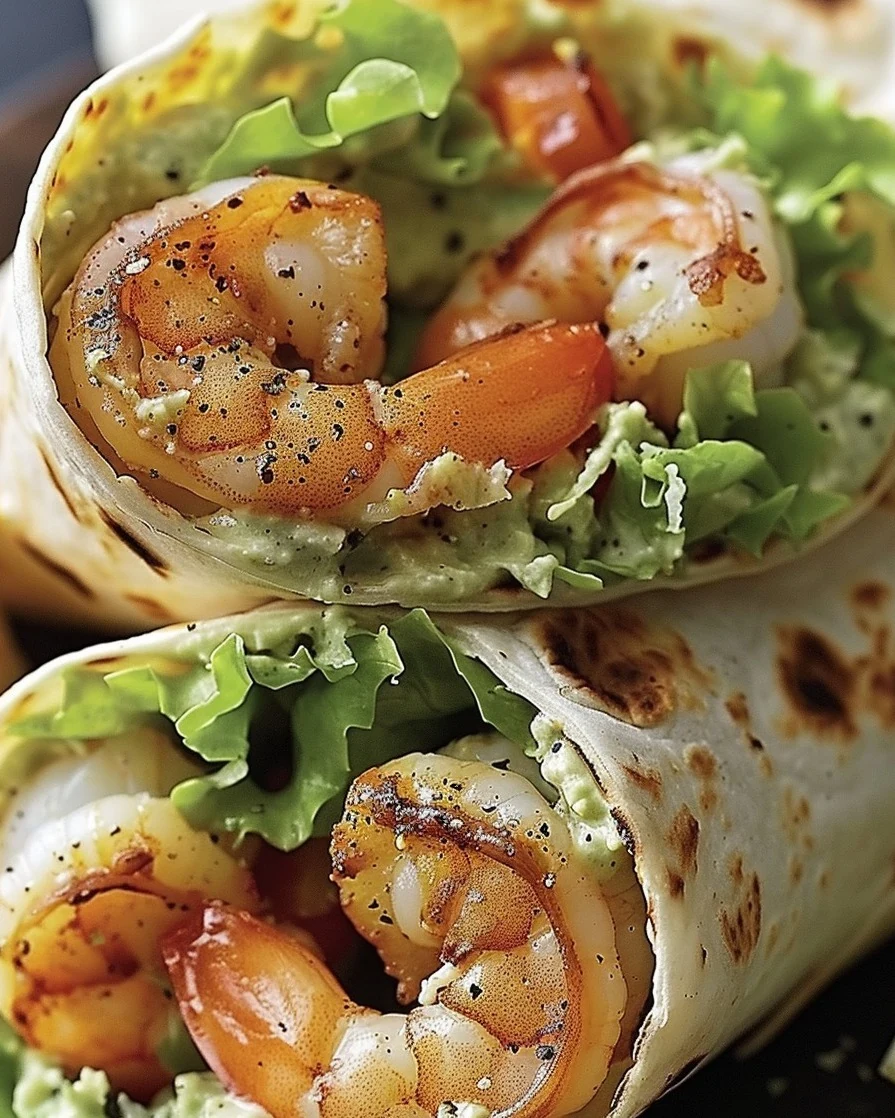
  • Delicious Grilled Shrimp Caesar Wraps Recipe

    Delicious Grilled Shrimp Caesar Wraps Recipe

    Grilled Shrimp Caesar Wraps are a delightful fusion of flavors that bring together the classic Caesar salad and succulent grilled shrimp. Perfect for a quick lunch or a light dinner, these wraps are not only satisfying but also incredibly easy to prepare. The combination of creamy dressing, fresh vegetables, and perfectly grilled shrimp makes for a dish that’s hard to resist.

    Why You’ll Love This Recipe

    • Flavorful & Zesty: The garlic and lemon juice in the marinade and dressing add a refreshing zing.
    • Healthy Option: Packed with protein and fresh vegetables, these wraps are a nutritious choice.
    • Customizable: Feel free to add your favorite veggies or swap out the shrimp for chicken or tofu.
    • Perfect for Meal Prep: Make the shrimp and dressing in advance for quick assembly during busy weeknights.
    • Family-Friendly: Kids and adults alike will enjoy the fun, handheld nature of these wraps.

    Tools and Equipment

    Having the right tools can streamline your cooking process. Here’s what you’ll need.

    Essential Tools

    • Grill or grill pan
    • Skewers (if using)
    • Mixing bowls
    • Whisk
    • Knife and cutting board
    • Measuring spoons and cups

    Why These Tools Matter

    • Grill or grill pan: Ensures even cooking and gives shrimp a delicious char.
    • Mixing bowls: Help keep your ingredients organized and make mixing easy.
    • Knife and cutting board: Essential for chopping vegetables efficiently.

    Ingredients for Grilled Shrimp Caesar Wraps

    For the Shrimp:

    • 2 cloves garlic, minced
    • 1 teaspoon paprika
    • 1 pound (450g) large shrimp, peeled and deveined
    • Salt and pepper to taste
    • 1 tablespoon lemon juice
    • 2 tablespoons olive oil

    For the Caesar Dressing:

    • 1/2 cup mayonnaise
    • 2 cloves garlic, minced
    • 2 tablespoons fresh lemon juice
    • 1 teaspoon Worcestershire sauce
    • 1/4 cup grated Parmesan cheese
    • Salt and pepper to taste
    • 1 tablespoon Dijon mustard

    For the Wraps:

    • 1/4 cup grated Parmesan cheese
    • 4 large flour tortillas
    • 1/2 cup cherry tomatoes, halved
    • 2 cups romaine lettuce, chopped
    • Lemon wedges (for serving)

    How to Make Grilled Shrimp Caesar Wraps Step-by-Step

    Step 1: Marinate the Shrimp

    In a medium bowl, combine olive oil, minced garlic, lemon juice, paprika, salt, and pepper. Add the shrimp and toss until coated. Allow the shrimp to marinate for 15-20 minutes to absorb the flavors.

    Step 2: Prepare the Caesar Dressing

    In a small bowl, whisk together mayonnaise, grated Parmesan cheese, lemon juice, Dijon mustard, minced garlic, Worcestershire sauce, salt, and pepper. Adjust the seasoning to taste and set aside.

    Step 3: Grill the Shrimp

    Preheat your grill to medium-high heat. If using skewers, thread the marinated shrimp onto them. Alternatively, place the shrimp in a grill basket. Grill for 2-3 minutes on each side until the shrimp are pink and opaque. Remove from the grill.

    Step 4: Assemble the Wraps

    Warm the flour tortillas on the grill or in a skillet for about 30 seconds per side. Lay each tortilla flat and spread a generous layer of Caesar dressing in the center. Add a handful of chopped romaine lettuce, halved cherry tomatoes, and grilled shrimp. Top with additional grated Parmesan cheese.

    Step 5: Wrap and Serve

    To wrap, fold in the sides of the tortilla and roll it up tightly. Serve immediately with lemon wedges on the side for a zesty touch.

    These Grilled Shrimp Caesar Wraps are sure to become a favorite in your household. Enjoy the burst of flavors and the ease of preparation they offer!

    How to Serve Grilled Shrimp Caesar Wraps

    These Grilled Shrimp Caesar Wraps are versatile and can be served in various creative ways.

    Picnic Perfection

    Pack these wraps for a picnic and pair them with fresh fruit and a light beverage. They are easy to transport and maintain their flavor, making them an ideal choice for outdoor dining.

    Lunchbox Delight

    Cut the wraps into smaller pieces for a lunchbox treat. Add some crunchy veggie sticks and a small container of extra Caesar dressing for dipping to enhance the experience.

    Game Day Snack

    Serve the wraps as a hearty snack during game day. Cut them into bite-sized pieces for easy sharing, and offer a variety of dipping sauces to elevate the flavor profile.

    Pro Tips for the Best Grilled Shrimp Caesar Wraps

    To ensure your Grilled Shrimp Caesar Wraps turn out perfectly every time, consider these expert tips.

    • Fresh Ingredients: Use the freshest shrimp and vegetables possible for the best flavor and texture. Fresh ingredients make a significant difference in taste.

    • Preheat the Grill: Make sure your grill is hot before placing the shrimp on it. A properly preheated grill will give you those beautiful grill marks and prevent sticking.

    • Don’t Overcook the Shrimp: Shrimp cooks quickly; overcooking can lead to a rubbery texture. Aim for a cooking time of 2-3 minutes per side until they are just opaque.

    • Customize Your Wraps: Feel free to add other ingredients to the wraps, such as avocado, bacon bits, or even grilled vegetables for added flavor and texture.

    • Resting Time: Allow the grilled shrimp to rest for a few minutes before assembling the wraps. This helps retain the juices and enhances the overall flavor.

    Best Side Dishes and Pairings

    Complement your Grilled Shrimp Caesar Wraps with these delicious side dishes and drinks.

    1. Garlic Bread: The rich flavors of garlic bread pair well with the Caesar dressing and enhance the overall meal experience.

    2. Cucumber Salad: A refreshing cucumber salad adds crunch and lightness, balancing the creamy elements of the wraps.

    3. Roasted Vegetables: Seasoned roasted vegetables provide a savory contrast and add a healthy touch to your meal.

    4. Chips and Salsa: The crunch of tortilla chips and the freshness of salsa make for a fun side that enhances the wrap’s flavors.

    5. Iced Tea: A refreshing glass of iced tea is perfect for cutting through the richness of the dressing, providing a thirst-quenching element to your meal.

    6. Lemonade: A bright and zesty lemonade complements the lemony notes in the wraps, making it a perfect pairing for a sunny day.

    Common Mistakes to Avoid

    • Overcooking the Shrimp: Grilled shrimp should be cooked just until they turn pink and opaque. Overcooking can lead to a rubbery texture.
    • Skipping the Marinade: Marinating the shrimp enhances flavor significantly. Don’t rush this step.
    • Using Cold Tortillas: Warm tortillas are easier to roll and hold the fillings without tearing. Always warm them before assembling.
    • Not Tasting the Dressing: Always taste and adjust the seasoning of your Caesar dressing before serving. This ensures the best flavor balance.

    Storage & Reheating Instructions

    Refrigerator Storage

    Store the Grilled Shrimp Caesar Wraps in airtight containers. They will stay fresh for up to 3 days in the refrigerator.

    Freezing Instructions

    To freeze, wrap the assembled wraps tightly in plastic wrap and then place them in a freezer-safe bag. They can be frozen for up to 2 months. Thaw in the refrigerator before reheating.

    Reheating Tips

    • Oven: Preheat your oven to 350°F (175°C). Wrap the Caesar wraps in aluminum foil and heat for about 10-15 minutes, or until warmed through.
    • Microwave: Place the wrap on a microwave-safe plate and cover with a damp paper towel. Heat in 30-second intervals until warmed to your liking.
    • Stovetop: Heat a skillet over medium heat. Place the wrap in the skillet and cook for about 2-3 minutes on each side until heated through.

    Frequently Asked Questions

    What can I substitute for shrimp in Grilled Shrimp Caesar Wraps?

    You can substitute chicken or tofu for a different protein option. Just adjust the cooking time accordingly.

    Can I make the dressing in advance?

    Yes, the Caesar dressing can be made a day ahead and stored in the refrigerator. Just give it a good whisk before using.

    Are Grilled Shrimp Caesar Wraps healthy?

    Yes, they can be a healthy option, especially when packed with fresh vegetables and lean protein. Adjust the dressing and cheese to manage calorie intake.

    How do I make Grilled Shrimp Caesar Wraps gluten-free?

    Use gluten-free tortillas instead of flour tortillas to make this recipe suitable for a gluten-free diet.

    Can I add other vegetables to the wraps?

    Absolutely! Feel free to add other vegetables like bell peppers, cucumbers, or avocados for extra flavor and nutrition.

    Final Thoughts

    Grilled Shrimp Caesar Wraps are a delightful combination of flavors and textures that are sure to impress. We encourage you to try this recipe and share your thoughts in the comments below. Your feedback is invaluable and helps us continue to create delicious content.


    Dinner

    Grilled Shrimp Caesar Wraps


    5.0 from 24 reviews

    Grilled Shrimp Caesar Wraps are a delicious and satisfying meal that combines the flavors of grilled shrimp with a creamy Caesar dressing, fresh romaine lettuce, and cherry tomatoes, all wrapped in a warm flour tortilla. Perfect for a quick lunch or dinner.

    Author: Munch Twist
    Prep Time: 20 mins
    Cook Time: 10 mins
    Total Time: 30 mins
    Yield: 4 servings
    Category: Lunch
    Method: No bake
    Cuisine: American

    Grilled Shrimp Caesar Wraps

    SCALE:
    1x
    2x
    3x
    Cook Mode: Prevent your screen from going dark

    Ingredients

    • 2 cloves garlic, minced
    • 1 teaspoon paprika
    • 1 pound large shrimp, peeled and deveined
    • Salt and pepper to taste
    • 1 tablespoon lemon juice
    • 2 tablespoons olive oil
    • 1/2 cup mayonnaise
    • 2 tablespoons fresh lemon juice
    • 1 teaspoon Worcestershire sauce
    • 1/4 cup grated Parmesan cheese
    • 1 tablespoon Dijon mustard
    • 1/4 cup grated Parmesan cheese
    • 4 large flour tortillas
    • 1/2 cup cherry tomatoes, halved
    • 2 cups romaine lettuce, chopped
    • Lemon wedges for serving

    Instructions

    1. In a medium bowl, mix together olive oil, minced garlic, lemon juice, paprika, salt, and pepper. Add the shrimp and toss to coat evenly. Let the shrimp marinate for 15-20 minutes.
    2. In a small bowl, whisk together mayonnaise, grated Parmesan cheese, lemon juice, Dijon mustard, minced garlic, Worcestershire sauce, salt, and pepper. Taste and adjust seasoning if needed. Set aside.
    3. Preheat your grill to medium-high heat. Thread the marinated shrimp onto skewers or place them in a grill basket. Grill the shrimp for 2-3 minutes on each side, until they turn pink and opaque. Remove from the grill and set aside.
    4. Warm the flour tortillas on the grill or in a skillet for about 30 seconds on each side. Lay each tortilla flat and spread a generous amount of Caesar dressing in the center. Top with a handful of chopped romaine lettuce, halved cherry tomatoes, and grilled shrimp. Sprinkle with additional grated Parmesan cheese.
    5. Fold in the sides of the tortilla and roll it up tightly to form a wrap. Serve immediately with lemon wedges on the side for a zesty finish.

    Nutrition Facts

    Serving Size: 1 serving
    Calories: 450 kcal
    Sugar: 4g
    Sodium: 800mg
    Fat: 22g
    Saturated Fat: 6g
    Carbohydrates: 30g
    Fiber: 2g
    Protein: 28g
    Cholesterol: 200mg

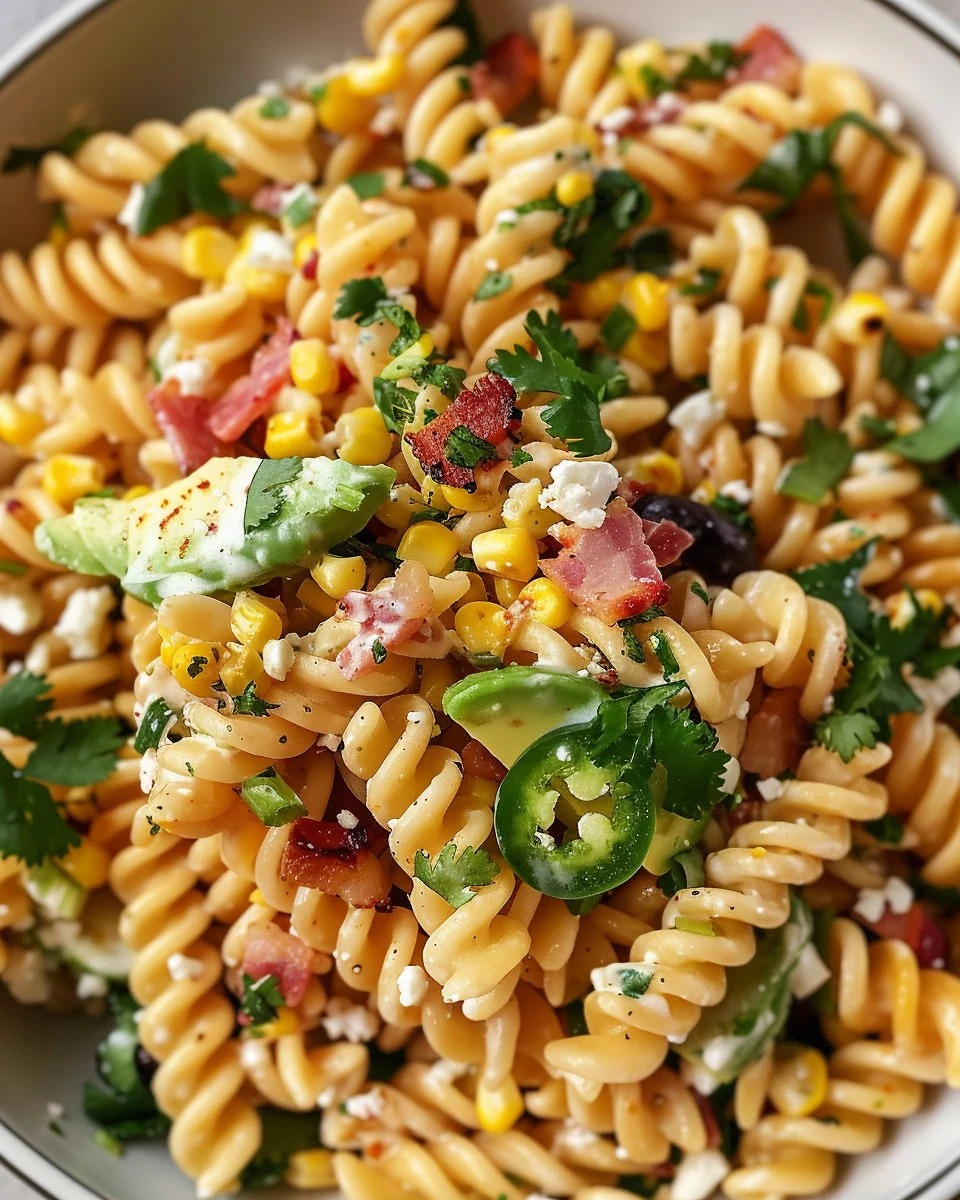
  • Delicious Mexican Street Corn Pasta Salad Recipe

    Delicious Mexican Street Corn Pasta Salad Recipe

    Mexican Street Corn Pasta Salad is a delightful fusion of flavors that brings the vibrant taste of street corn into a refreshing pasta dish. This salad combines creamy avocado, smoky bacon, and charred corn, making it a perfect side or light meal for any occasion.

    Why You’ll Love This Recipe

    • Flavor Explosion: The combination of ingredients offers a delightful mix of creamy, smoky, and spicy flavors.
    • Versatile Dish: Enjoy it as a side at barbecues or make it a light lunch.
    • Fresh Ingredients: Packed with fresh vegetables and herbs, this salad is as nutritious as it is delicious.
    • Quick Preparation: This recipe can be ready in just 30 minutes, perfect for busy days.
    • Crowd-Pleaser: Its vibrant colors and bold flavors make it a hit at gatherings.

    Tools and Equipment

    Having the right tools can make the preparation process smoother and more enjoyable.

    Essential Tools

    • Large mixing bowl
    • Cast-iron skillet
    • Whisk
    • Pot for boiling pasta
    • Cutting board
    • Sharp knife

    Why These Tools Matter

    • Large mixing bowl: Provides ample space to combine all ingredients without spilling.
    • Cast-iron skillet: Ensures even charring of the corn for enhanced flavor.
    • Whisk: Helps achieve a smooth dressing, ensuring all ingredients are well combined.

    Ingredients for Mexican Street Corn Pasta Salad

    Salad Ingredients

    • ½ cup feta cheese, crumbled
    • 1 can (15 ounces) corn kernels, drained
    • 1 large avocado, diced
    • 6 strips thick-cut bacon, cooked and roughly chopped
    • 3 green onions, thinly sliced
    • ½ bunch cilantro, finely chopped
    • 1 can (15 ounces) black beans, drained and rinsed
    • 2 tablespoons olive oil
    • 2 cups (6 ounces) radiatori noodles (or your noodle of choice)
    • 1 medium jalapeno pepper, seeded and diced

    Dressing Ingredients

    • ¼ teaspoon paprika
    • 1 teaspoon hot sauce
    • ½ cup full-fat mayonnaise
    • ½ teaspoon chili powder
    • ⅛ teaspoon ground cumin
    • 3 tablespoons freshly squeezed lime juice, approximately 2-3 limes
    • Salt and pepper, to taste

    How to Make Mexican Street Corn Pasta Salad Step-by-Step

    Step 1: Cook the Pasta

    Prepare the radiatori noodles according to the package directions. Once cooked, drain the pasta, toss it with olive oil to prevent sticking, and set aside to cool.

    Step 2: Roast the Corn

    Heat a large cast-iron skillet over high heat. Add the drained corn kernels in a single layer and char them for 2-3 minutes, flipping to char the other side. Remove from heat and let them cool.

    Step 3: Assemble the Salad

    In a large mixing bowl, combine the cooled pasta, charred corn, diced avocado, chopped bacon, sliced green onions, chopped cilantro, diced jalapeno, crumbled feta cheese, and rinsed black beans. Toss gently to mix the ingredients.

    Step 4: Make the Dressing

    In a separate bowl, whisk together the mayonnaise, freshly squeezed lime juice, ground cumin, paprika, chili powder, and hot sauce. Season the dressing with salt and pepper to taste.

    Step 5: Dress the Salad

    Pour the prepared dressing over the salad ingredients and toss everything together until the salad is evenly coated with the dressing.

    Step 6: Serve

    Serve the salad immediately, or chill it in the refrigerator for 10-15 minutes to let the flavors meld together before serving.

    Preparation time: 20 minutes | Cooking time: 10 minutes

    Nutritional Information

    Approximate per serving:
    * Calories: 350 kcal
    * Carbohydrates: 36g
    * Protein: 10g
    * Fat: 20g
    * Fiber: 6g
    * Sugar: 3g

    Enjoy this vibrant and flavorful Mexican Street Corn Pasta Salad as a side dish or a light meal.

    How to Serve Mexican Street Corn Pasta Salad

    This dish is versatile and can be enjoyed in several delightful ways.

    As a Main Dish

    Serve the Mexican Street Corn Pasta Salad as a refreshing main course, especially during warm months. It provides a satisfying blend of flavors and textures that can stand alone.

    In a Lettuce Wrap

    For a low-carb option, scoop the salad into crisp lettuce leaves. This adds a refreshing crunch and is perfect for a light lunch or appetizer at gatherings.

    As a Party Platter

    Present the salad in a large bowl at your next get-together. It makes for an eye-catching centerpiece that guests can help themselves to, perfect for barbecues or potlucks.

    Pro Tips for the Best Mexican Street Corn Pasta Salad

    To elevate your dish, consider these practical tips for preparation and serving.

    • Use Fresh Ingredients: Fresh corn, ripe avocados, and crisp vegetables enhance the overall flavor and texture of the salad.
    • Customize Your Noodles: While radiatori noodles are recommended, feel free to use other pasta shapes like fusilli or penne to suit your preference.
    • Adjust the Spice Level: If you prefer a milder flavor, reduce the amount of jalapeno or omit the hot sauce entirely.
    • Make It Ahead of Time: Prepare the salad a few hours in advance and refrigerate it. This allows the flavors to meld beautifully.
    • Garnish with Lime Wedges: Serve with extra lime wedges on the side for guests to squeeze over their portion, adding a zesty kick.

    Best Side Dishes and Pairings

    Pair your Mexican Street Corn Pasta Salad with these delicious options for a complete meal.

    1. Grilled Chicken: The smoky flavor of grilled chicken complements the salad’s sweetness and adds protein.
    2. Chips and Guacamole: A classic pairing that brings a crunchy and creamy element to your meal.
    3. Black Bean Soup: This hearty soup adds warmth and richness, making for a balanced dining experience.
    4. Margaritas: A refreshing margarita provides a perfect citrus contrast to the salad’s flavors.
    5. Mexican Street Corn on the Cob: For a thematic touch, serve alongside traditional elote, enhancing the street corn experience.

    Common Mistakes to Avoid

    • Overcooking the Pasta: Make sure to cook the pasta al dente. Overcooked pasta can become mushy and affect the salad’s texture.
    • Skipping the Charring: Charring the corn adds a smoky flavor that elevates the dish. Don’t skip this step for the best taste.
    • Using Unripe Avocado: Ensure your avocado is ripe for the best flavor and creaminess. An unripe avocado can be too firm and lack flavor.
    • Not Tasting the Dressing: Always taste and adjust the seasoning of the dressing before mixing it with the salad. This ensures balanced flavors.

    Storage & Reheating Instructions

    Refrigerator Storage

    Store leftover Mexican Street Corn Pasta Salad in an airtight container in the refrigerator. It stays fresh for up to 3 days.

    Freezing Instructions

    While it’s best enjoyed fresh, you can freeze the salad for up to 1 month. To freeze, omit avocado and dressings, then store in an airtight container. Thaw in the refrigerator overnight before serving.

    Reheating Tips

    • Oven: Preheat to 350°F (175°C), spread the salad out on a baking sheet, and heat for about 10-15 minutes.
    • Microwave: Place the salad in a microwave-safe dish and heat in 30-second intervals, stirring in between, until warm.
    • Stovetop: Warm in a skillet over medium heat, stirring gently until heated through.

    Frequently Asked Questions

    How can I make my Mexican Street Corn Pasta Salad vegetarian?

    To make this dish vegetarian, simply omit the bacon and consider adding more beans or roasted vegetables for added texture and flavor.

    Can I prepare Mexican Street Corn Pasta Salad in advance?

    Yes, you can prepare it a few hours ahead of time. However, it’s best to wait until just before serving to add the avocado and dressing to maintain freshness.

    What can I serve with Mexican Street Corn Pasta Salad?

    This pasta salad pairs well with grilled meats, tacos, or as a stand-alone dish for a light lunch or dinner.

    How do I adjust the spice level in the salad?

    You can adjust the spice level by reducing the amount of jalapeno or hot sauce in the dressing. Alternatively, add more for an extra kick.

    Is Mexican Street Corn Pasta Salad gluten-free?

    To make this dish gluten-free, substitute the pasta with a gluten-free variety, ensuring all other ingredients are also gluten-free.

    Final Thoughts

    This Mexican Street Corn Pasta Salad is a vibrant and flavorful dish that is sure to impress your family and friends. Perfect for a light meal or as a side, we encourage you to give this recipe a try. Don’t forget to leave a comment with your thoughts and any variations you made!


    Lunch


    Title: Discover the Delight of Mexican Street Corn Pasta Salad
    Meta: Try this Mexican Street Corn Pasta Salad for a refreshing twist on a classic. Perfect for any occasion—make it today!
    Synonyms: Mexican corn pasta salad, street corn pasta salad, elote pasta salad, corn salad with pasta, summer corn pasta salad, creamy corn pasta salad, spicy corn pasta salad, pasta salad with avocado, corn and pasta dish, Mexican-inspired pasta salad, charred corn salad, cold pasta salad, pasta salad with feta, bacon corn salad, zesty pasta salad, fresh corn salad, pasta salad for BBQ, vibrant pasta salad, Mexican-style salad, corn and bean pasta salad

    Mexican Street Corn Pasta Salad


    5.0 from 24 reviews

    This vibrant and flavorful Mexican Street Corn Pasta Salad combines charred corn, creamy avocado, and crispy bacon with a zesty dressing. It's perfect as a side dish or a light meal, offering a delightful mix of textures and tastes.

    Author: Munch Twist
    Prep Time: 20 minutes
    Cook Time: 10 minutes
    Total Time: 30 minutes
    Yield: 6 servings
    Category: Lunch
    Method: No bake
    Cuisine: American

    Mexican Street Corn Pasta Salad

    SCALE:
    1x
    2x
    3x
    Cook Mode: Prevent your screen from going dark

    Ingredients

    • ½ cup feta cheese, crumbled
    • 1 can (15 ounces) corn kernels, drained
    • 1 large avocado, diced
    • 6 strips thick-cut bacon, cooked and roughly chopped
    • 3 green onions, thinly sliced
    • ½ bunch cilantro, finely chopped
    • 1 can (15 ounces) black beans, drained and rinsed
    • 2 tablespoons olive oil
    • 2 cups (6 ounces) radiatori noodles (or your noodle of choice)
    • 1 medium jalapeno pepper, seeded and diced
    • ¼ teaspoon paprika
    • 1 teaspoon hot sauce
    • ½ cup full-fat mayonnaise
    • ½ teaspoon chili powder
    • ⅛ teaspoon ground cumin
    • 3 tablespoons freshly squeezed lime juice
    • Salt and pepper, to taste

    Instructions

    1. Prepare the radiatori noodles according to the package directions. Once cooked, drain the pasta, toss with olive oil to prevent sticking, and set it aside to cool.
    2. Heat a large cast-iron skillet over high heat. Add the drained corn kernels in a single layer and char them for 2-3 minutes, flipping to char the other side. Remove from the heat and let them cool.
    3. In a large mixing bowl, combine the cooled pasta, charred corn, diced avocado, chopped bacon, sliced green onions, chopped cilantro, diced jalapeno, crumbled feta cheese, and rinsed black beans. Toss gently to mix the ingredients.
    4. In a separate bowl, whisk together the mayonnaise, freshly squeezed lime juice, ground cumin, paprika, chili powder, and hot sauce. Season the dressing with salt and pepper to taste.
    5. Pour the prepared dressing over the salad ingredients and toss everything together until the salad is evenly coated with the dressing.
    6. Serve the salad immediately, or chill it in the refrigerator for 10-15 minutes to let the flavors meld together before serving.

    Nutrition Facts

    Serving Size: 1 serving
    Calories: 350 kcal
    Sugar: 3g
    Sodium: 600mg
    Fat: 20g
    Saturated Fat: 5g
    Carbohydrates: 36g
    Fiber: 6g
    Protein: 10g
    Cholesterol: 25mg

  • Easy Beef and Cheese Chimichanga Recipe for Dinner

    Easy Beef and Cheese Chimichanga Recipe for Dinner

    Beef and Cheese Chimichanga offers a delightful combination of crispy golden tortillas filled with savory ground beef and melted cheese. This dish is not just a meal; it’s an experience that brings the vibrant flavors of Mexican cuisine to your table.

    Why You’ll Love This Recipe

    • Crispy Perfection: These chimichangas are fried to a golden brown, providing the perfect crunch with each bite.
    • Flavor-Packed Filling: The combination of spices, beef, and beans creates a filling that is both hearty and satisfying.
    • Customizable: Adjust the heat by changing the types of chilis or cheeses used in the filling.
    • Serve with Style: Top with zesty sauce and cheese for an impressive presentation that tastes as good as it looks.
    • Family-Friendly: This recipe is sure to please both kids and adults with its delicious flavors and fun to eat format.

    Tools and Equipment

    Having the right tools can make your cooking experience smoother and more enjoyable.

    Essential Tools

    • Skillet
    • Microwave
    • Deep-sided skillet
    • Paper towels
    • Toothpicks
    • Saucepan

    Why These Tools Matter

    • Skillet: Essential for browning the beef evenly, allowing the spices to infuse well.
    • Deep-sided skillet: Ideal for frying chimichangas to ensure they cook evenly without splattering oil.
    • Microwave: Quickly warms tortillas, making them easier to handle for wrapping.

    Ingredients for Beef and Cheese Chimichanga

    Filling Ingredients

    • 1 ½ lbs. ground beef
    • 1 can refried beans
    • ½ medium onion, chopped
    • 2 tsp minced garlic
    • 2 tsp chili powder
    • 1 tsp cumin
    • ½ tsp oregano
    • 4 oz diced green chilis (canned)
    • 4 oz chopped jalapenos (canned)

    Sauce Ingredients

    • 24 oz tomato sauce
    • 1 ½ cups shredded taco blend cheese

    Tortilla Ingredients

    • 10 (10-inch) flour tortillas
    • Salt and pepper to taste
    • Oil for frying

    How to Make Beef and Cheese Chimichanga Step-by-Step

    Step 1: Cook the Beef

    In a skillet over medium-high heat, cook the ground beef until browned. Drain off any excess liquid to prevent sogginess.

    Step 2: Prepare the Filling

    Add the refried beans, chopped onion, minced garlic, chili powder, cumin, oregano, and salt and pepper to the skillet with the beef. Stir to combine and cook for 5 minutes over medium heat.

    Step 3: Warm the Tortillas

    Heat the flour tortillas in the microwave until warm and pliable. This will help in folding and rolling them without tearing.

    Step 4: Prepare the Oil

    Pour about an inch of oil into a deep-sided skillet. Heat over medium-high heat until the oil is hot but not smoking.

    Step 5: Assemble the Chimichangas

    Place a portion of the beef mixture in the center of each tortilla. Fold one end over the filling, tuck in the sides, and roll tightly. Secure with a toothpick to prevent unrolling during frying.

    Step 6: Fry the Chimichangas

    Fry the chimichangas in the hot oil until golden brown and crispy on both sides. This should take just a few minutes, so watch closely to avoid burning. Drain on a paper towel-lined tray.

    Step 7: Prepare the Sauce

    In a saucepan over medium heat, combine the remaining tomato sauce, diced green chilis, and chopped jalapenos. Heat until warm, adding salt and pepper to taste.

    Step 8: Serve

    Pour the warm sauce over the fried chimichangas. Top with shredded taco blend cheese and serve hot for a delightful meal.

    Enjoy these crispy, cheesy delights with a zesty sauce that enhances the flavors of the Beef and Cheese Chimichanga.

    How to Serve Beef and Cheese Chimichanga

    These Beef and Cheese Chimichangas are versatile and can be served in various ways to enhance your meal experience.

    Toppings Bar

    Set up a toppings bar with options like sour cream, guacamole, diced tomatoes, and sliced green onions. This allows guests to customize their chimichangas to their liking.

    Side of Rice and Beans

    Serve the chimichangas alongside a side of Mexican rice and black beans. The combination adds a hearty element and complements the flavors of the chimichangas.

    Fresh Salad

    Pair with a fresh garden salad dressed lightly with lime vinaigrette. The crispness of the salad balances the richness of the chimichangas.

    Pro Tips for the Best Beef and Cheese Chimichanga

    To ensure your Beef and Cheese Chimichangas turn out perfectly every time, consider these expert tips.

    • Quality Ingredients: Use fresh, high-quality ingredients for the best flavor. Fresh spices and good cheese make a noticeable difference.

    • Don’t Overfill: Avoid overfilling the tortillas to prevent them from bursting while frying. A heaping spoonful of filling is sufficient.

    • Maintain Oil Temperature: Keep the oil at the right temperature to achieve crispy chimichangas. If the oil is too cool, they will absorb too much oil and become greasy.

    • Use Toothpicks for Stability: Secure each rolled chimichanga with a toothpick before frying to help maintain its shape.

    • Experiment with Spice: Adjust the amount of jalapenos and chili powder according to your spice preference. This lets you tailor the heat level to your taste.

    Best Side Dishes and Pairings

    Enhance your meal with these delightful side dishes and beverages that pair wonderfully with Beef and Cheese Chimichangas.

    1. Mexican Rice: Fluffy, seasoned rice adds a flavorful base that complements the richness of the chimichangas.

    2. Refried Beans: Creamy refried beans provide a classic accompaniment, adding texture and flavor that pairs well.

    3. Guacamole: The creamy avocado dip adds a refreshing contrast to the crispy chimichangas, enhancing each bite.

    4. Corn Salad: A zesty corn salad with lime and cilantro introduces a fresh element that brightens the meal.

    5. Margaritas: A classic margarita, whether frozen or on the rocks, offers a refreshing and tangy drink that pairs perfectly with the savory flavors.

    Common Mistakes to Avoid

    • Overfilling the Tortillas: Adding too much filling can make it difficult to roll the chimichangas tightly, leading to a messy fry.
    • Not Draining the Beef: Failing to drain excess fat from the ground beef can result in greasy chimichangas.
    • Skipping the Sauce: Serving without the warm sauce can leave the dish lacking in flavor and moisture.
    • Inadequate Oil Temperature: Frying in oil that isn’t hot enough can result in soggy chimichangas instead of crispy ones.

    Storage & Reheating Instructions

    Refrigerator Storage

    Store any leftovers in airtight containers in the refrigerator. They will stay fresh for up to 3 days.

    Freezing Instructions

    To freeze, wrap each chimichanga tightly in plastic wrap and then place them in a freezer-safe bag. They can be frozen for up to 2 months. Thaw in the refrigerator overnight before reheating.

    Reheating Tips

    • Oven: Preheat to 350°F (175°C). Place chimichangas on a baking sheet and heat for 15-20 minutes, until warmed through.
    • Microwave: Place chimichangas on a microwave-safe plate and cover with a damp paper towel. Heat on high for 1-2 minutes or until hot.
    • Stovetop: Heat a skillet over medium heat. Add a small amount of oil and warm the chimichangas for about 3-5 minutes on each side.

    Frequently Asked Questions

    How do I make Beef and Cheese Chimichanga vegetarian?

    You can substitute the ground beef with a plant-based meat alternative or use additional beans and vegetables for a hearty filling.

    Can I use corn tortillas instead of flour for Beef and Cheese Chimichanga?

    Yes, you can use corn tortillas, but they may be more fragile. Ensure they are warmed well to prevent tearing.

    What can I serve with Beef and Cheese Chimichanga?

    Consider serving with sides like Mexican rice, guacamole, or a fresh salad for a complete meal.

    How can I make the chimichangas spicier?

    Add more jalapenos or a dash of hot sauce to the filling for an extra kick.

    Can Beef and Cheese Chimichanga be made ahead of time?

    Yes, you can prepare the filling in advance and assemble the chimichangas when you’re ready to fry them.

    Final Thoughts

    Beef and Cheese Chimichangas are a delicious and satisfying dish that will surely impress family and friends. We encourage you to try this recipe and share your thoughts in the comments below. Your feedback is valuable and helps others in their cooking journey.


    Dinner

    Beef and Cheese Chimichanga


    5.0 from 24 reviews

    These Beef and Cheese Chimichangas are a delicious combination of seasoned ground beef, refried beans, and cheese, all wrapped in a crispy tortilla. Topped with a zesty sauce and extra cheese, they make for a satisfying meal perfect for any occasion.

    Author: Munch Twist
    Prep Time: 20 minutes
    Cook Time: 20 minutes
    Total Time: 40 minutes
    Yield: 10 servings
    Category: Lunch
    Method: No bake
    Cuisine: American

    Beef and Cheese Chimichanga

    SCALE:
    1x
    2x
    3x
    Cook Mode: Prevent your screen from going dark

    Ingredients

    • 1 ½ lbs. ground beef
    • 1 can refried beans
    • ½ medium onion, chopped
    • 2 tsp minced garlic
    • 2 tsp chili powder
    • 1 tsp cumin
    • ½ tsp oregano
    • 4 oz diced green chilis (canned)
    • 4 oz chopped jalapenos (canned)
    • 24 oz tomato sauce
    • 1 ½ cups shredded taco blend cheese
    • 10 (10-inch) flour tortillas
    • Salt and pepper to taste
    • Oil for frying

    Instructions

    1. In a skillet over medium-high heat, cook the ground beef until browned. Drain off any excess liquid.
    2. Add the refried beans, chopped onion, minced garlic, chili powder, cumin, oregano, and salt and pepper to the skillet with the beef. Stir to combine and cook for 5 minutes over medium heat.
    3. Heat the flour tortillas in the microwave until warm and pliable.
    4. Pour about an inch of oil into a deep-sided skillet. Heat over medium-high heat.
    5. Place a portion of the beef mixture in the center of each tortilla. Fold one end over the filling, tuck in the sides, and roll tightly. Secure with a toothpick.
    6. Fry the chimichangas in the hot oil until golden brown and crispy on both sides. This will take just a few minutes, so watch closely. Drain on a paper towel-lined tray.
    7. In a saucepan over medium heat, combine the remaining tomato sauce, diced green chilis, and chopped jalapenos. Heat until warm, adding salt and pepper to taste.
    8. Pour the warm sauce over the fried chimichangas. Top with shredded taco blend cheese and serve hot.

    Nutrition Facts

    Serving Size: 1 serving
    Calories: 380 kcal
    Sugar: 2g
    Sodium: 850mg
    Fat: 20g
    Saturated Fat: 6g
    Carbohydrates: 30g
    Fiber: 3g
    Protein: 20g
    Cholesterol: 60mg

  • Delicious Cheese Tortellini Pepperoni Pizza Casserole Recipe

    Delicious Cheese Tortellini Pepperoni Pizza Casserole Recipe

    Cheese Tortellini Pepperoni Pizza Casserole brings together the comforting flavors of pizza and pasta in one delicious dish. This casserole is a crowd-pleaser, perfect for busy weeknights or casual gatherings. The combination of cheese, pepperoni, and tortellini creates an irresistible meal that everyone will love.

    Why You’ll Love This Recipe

    • Quick & Easy: Ready in under 30 minutes, making it perfect for a weeknight dinner.
    • Cheesy Goodness: Velveeta and mozzarella blend together for a creamy, rich sauce.
    • Versatile Ingredients: Customize with your favorite toppings or additional vegetables.
    • Kid-Friendly: A fun way to get kids to enjoy pasta and pizza flavors in one dish.
    • One-Pan Wonder: Minimal cleanup with everything cooked in one pot and one baking dish.

    Tools and Equipment

    To successfully prepare this casserole, having the right tools makes all the difference.

    Essential Tools

    • Large 3-quart pot
    • Casserole dish
    • Wooden spoon
    • Measuring cups and spoons
    • Knife and cutting board

    Why These Tools Matter

    • Large 3-quart pot: Ideal for cooking garlic and melting cheese without splatter.
    • Casserole dish: Perfect size for baking and serving the dish, ensuring even cooking.
    • Wooden spoon: Gentle on cookware and great for mixing without scratching surfaces.

    Ingredients for Cheese Tortellini Pepperoni Pizza Casserole

    Sauce and Seasoning

    • ½ cup Pizza Sauce
    • 2 Garlic Cloves, chopped
    • 1 tablespoon Olive Oil
    • 2 cups Whole Milk
    • ½ teaspoon Dry Italian Seasoning

    Cheese and Pasta

    • 8 ounces Original Velveeta Cheese, cubed
    • 16 ounces Cheese Stuffed Tortellini, cooked according to package instructions
    • 1 cup Shredded Mozzarella Cheese
    • 2 cups Shredded Cheese Blend (mozzarella-based)

    Toppings

    • 2 ounces Pepperoni, quartered
    • Sliced Pepperoni, for topping

    How to Make Cheese Tortellini Pepperoni Pizza Casserole Step-by-Step

    Step 1: Prep the Base

    1. Preheat your oven to 375°F (190°C).
    2. In a large 3-quart pot over medium heat, add the chopped garlic and olive oil. Cook while stirring for about 1 minute or until the garlic is golden.

    Step 2: Create the Cheese Sauce

    1. Add the whole milk and dry Italian seasoning to the pot. Stir and heat until the milk begins to steam.
    2. Reduce the heat to low. Add the cubed Velveeta cheese and shredded cheese blend. Stir continuously until the cheese melts and the sauce is smooth.

    Step 3: Combine Ingredients

    1. Turn off the heat but keep the pot on the burner. Add the cooked tortellini and quartered pepperoni to the cheese sauce.
    2. Gently stir to ensure everything is evenly combined.

    Step 4: Assemble the Casserole

    1. Transfer the cheesy tortellini mixture to a casserole dish, spreading it evenly.
    2. Dollop the pizza sauce on top of the tortellini mixture. Gently swirl it in without fully mixing.

    Step 5: Add Toppings and Bake

    1. Arrange sliced pepperoni on top of the sauce. Then sprinkle the shredded mozzarella cheese over the pepperoni.
    2. Place the casserole dish uncovered on the center rack of the preheated oven. Bake for 25 minutes.

    Step 6: Broil for Finish

    1. After baking, switch the oven to broil on high for 3-4 minutes. Keep a close eye to prevent burning.

    Enjoy this Cheese Tortellini Pepperoni Pizza Casserole as a delightful meal that combines the best of both worlds, sure to satisfy your cravings for pizza and pasta!

    How to Serve Cheese Tortellini Pepperoni Pizza Casserole

    This delightful casserole is versatile and can be presented in various ways to enhance your dining experience.

    Individual Portions

    Serve the casserole in small ramekins for a fun, individual presentation. This makes it perfect for a casual dinner party or a family gathering, allowing guests to have their own servings.

    Garnished with Fresh Herbs

    Add a sprinkle of fresh basil or parsley on top just before serving. This not only adds a pop of color but also enhances the flavor profile, bringing a fresh touch to the rich cheese and pepperoni.

    Accompanied by Garlic Bread

    Pair the casserole with warm garlic bread for a satisfying meal. The buttery, garlicky flavors of the bread complement the cheesy dish beautifully, making each bite even more indulgent.

    Pro Tips for the Best Cheese Tortellini Pepperoni Pizza Casserole

    To ensure your casserole turns out perfectly every time, consider these helpful tips.

    • Use Fresh Ingredients: Opt for fresh garlic and high-quality cheese for a richer flavor in your casserole.
    • Adjust Seasoning: Feel free to tweak the dry Italian seasoning according to your taste preference. Fresh herbs can also be a great addition.
    • Keep an Eye on the Broil: When broiling, monitor the casserole closely to prevent burning. It can go from perfectly browned to charred in a matter of seconds.
    • Let It Rest: Allow the casserole to sit for about 5 minutes after removing it from the oven. This helps the cheese set and makes serving easier.
    • Experiment with Toppings: Try adding other toppings like sliced olives or bell peppers for a different twist on the classic flavor.

    Best Side Dishes and Pairings

    Enhance your meal with these complementary side dishes and drinks that pair wonderfully with Cheese Tortellini Pepperoni Pizza Casserole.

    1. Caesar Salad: The crisp romaine and tangy dressing provide a fresh contrast to the rich casserole.
    2. Steamed Broccoli: Lightly steamed broccoli adds a nutritious element and a pop of color to your plate.
    3. Garlic Knots: These soft, buttery knots are perfect for soaking up any leftover cheese sauce.
    4. Red Wine: A medium-bodied red wine, such as Chianti, complements the savory flavors of the casserole and adds depth to the meal.
    5. Antipasto Platter: A selection of cured meats, cheeses, and marinated vegetables creates a delightful appetizer that pairs well with the main dish.

    Common Mistakes to Avoid

    • Not Cooking the Tortellini Properly: Ensure the tortellini is cooked according to package instructions before adding it to the casserole.
    • Overcooking the Cheese Sauce: Keep the heat low when melting the cheese to prevent it from becoming grainy.
    • Skipping the Broiling Step: Broiling is essential for achieving a golden, bubbly cheese topping; don’t skip this step.
    • Using Low-Quality Ingredients: Opt for high-quality cheese and pepperoni to enhance the overall flavor of the casserole.

    Storage & Reheating Instructions

    Refrigerator Storage

    Store any leftovers in airtight containers in the refrigerator. It will remain fresh for up to 3 days.

    Freezing Instructions

    For freezing, let the casserole cool completely, then wrap it tightly in plastic wrap and foil. It can be frozen for up to 2 months. Thaw in the refrigerator overnight before reheating.

    Reheating Tips

    • Oven: Preheat to 350°F (175°C) and bake for 20-25 minutes until heated through.
    • Microwave: Place a serving in a microwave-safe dish and heat on high for 1-2 minutes, stirring halfway through.
    • Stovetop: Heat in a skillet over medium heat, stirring occasionally until warmed through.

    Frequently Asked Questions

    Can I use a different type of cheese for the Cheese Tortellini Pepperoni Pizza Casserole?

    Yes, you can substitute with your favorite cheeses, but keep in mind that the texture and flavor may vary.

    How do I make the Cheese Tortellini Pepperoni Pizza Casserole healthier?

    Consider using whole wheat tortellini and reducing the amount of cheese or using lower-fat cheese options.

    Can I add vegetables to the Cheese Tortellini Pepperoni Pizza Casserole?

    Absolutely! Feel free to add sautéed bell peppers, mushrooms, or spinach for added nutrition and flavor.

    How long does the Cheese Tortellini Pepperoni Pizza Casserole take to make?

    The total preparation and cooking time is about 40-45 minutes, making it a quick and easy weeknight dinner option.

    What pairs well with the Cheese Tortellini Pepperoni Pizza Casserole?

    A fresh garden salad or garlic bread complements this casserole nicely, adding a refreshing balance to the meal.

    Final Thoughts

    This Cheese Tortellini Pepperoni Pizza Casserole is a perfect blend of flavors that the whole family will love. We encourage you to give this recipe a try and share your thoughts in the comments section below!


    Dinner


    Title: Delicious Cheese Tortellini Pepperoni Pizza Casserole Recipe
    Meta: Discover the ultimate Cheese Tortellini Pepperoni Pizza Casserole recipe! Easy to make and packed with flavor—try it today!
    Synonyms: Cheese tortellini pizza casserole, pepperoni tortellini bake, cheesy tortellini pizza dish, easy tortellini casserole, comforting pizza pasta bake, tortellini pepperoni casserole, cheesy pasta bake, pepperoni cheese dish, tortellini pizza bake, Italian tortellini casserole, pizza-inspired tortellini, creamy tortellini casserole, quick tortellini recipe, baked tortellini with pepperoni, pasta pizza casserole, cheesy pepperoni bake, savory tortellini pizza, one-pot tortellini dish, cheesy pepperoni casserole, Italian-inspired pasta bake.

    Cheese Tortellini Pepperoni Pizza Casserole


    5.0 from 24 reviews

    This Cheese Tortellini Pepperoni Pizza Casserole combines the rich flavors of pizza and pasta into a comforting dish. With creamy cheese, savory pepperoni, and tender tortellini, it's a delightful meal perfect for family dinners or gatherings.

    Author: Munch Twist
    Prep Time: 15 minutes
    Cook Time: 28 minutes
    Total Time: 43 minutes
    Yield: 6 servings
    Category: Lunch
    Method: No bake
    Cuisine: American

    Cheese Tortellini Pepperoni Pizza Casserole

    SCALE:
    1x
    2x
    3x
    Cook Mode: Prevent your screen from going dark

    Ingredients

    • ½ cup Pizza Sauce
    • 2 Garlic Cloves, chopped
    • 1 tablespoon Olive Oil
    • 8 ounces Original Velveeta Cheese, cubed
    • 16 ounces Cheese Stuffed Tortellini, cooked according to package instructions
    • 2 cups Whole Milk
    • ½ teaspoon Dry Italian Seasoning
    • 2 ounces Pepperoni, quartered
    • 1 cup Shredded Mozzarella Cheese
    • 2 cups Shredded Cheese Blend (mozzarella-based)
    • Sliced Pepperoni, for topping

    Instructions

    1. Preheat your oven to 375°F (190°C).
    2. In a 3-quart pot over medium heat, cook the chopped garlic in olive oil, stirring constantly for 1 minute or until golden.
    3. Add the whole milk and dry Italian seasoning to the pot. Stir and heat until the milk begins to steam.
    4. Reduce the heat to low and add the cubed Velveeta cheese along with the shredded cheese blend. Stir continuously until the cheese is melted and the sauce is smooth.
    5. Turn off the heat but keep the pot on the burner. Add the cooked tortellini and quartered pepperoni to the cheese sauce. Stir gently to combine everything evenly.
    6. Transfer the cheesy tortellini mixture to a casserole dish.
    7. Dollop the pizza sauce on top of the tortellini mixture, then gently swirl it into the cheesy tortellini without fully mixing.
    8. Arrange sliced pepperoni on top of the sauce, then sprinkle shredded mozzarella cheese over the pepperoni.
    9. Place the casserole uncovered on the center rack of the preheated oven. Bake for 25 minutes.
    10. After baking, switch to broil on high for 3-4 minutes to brown the cheese topping. Keep a close eye on it to avoid burning.

    Nutrition Facts

    Serving Size: 1 serving
    Calories: 450 kcal
    Sugar: 5g
    Sodium: 950mg
    Fat: 28g
    Saturated Fat: 14g
    Carbohydrates: 32g
    Fiber: 2g
    Protein: 20g
    Cholesterol: 75mg

  • Delicious Hot Chicken Ham and Cheese Wraps Recipe

    Delicious Hot Chicken Ham and Cheese Wraps Recipe

    Hot Chicken Ham and Cheese Wraps are a delightful combination of savory chicken, smoky turkey ham, and gooey cheddar cheese. This recipe is perfect for a quick lunch or a satisfying dinner that the whole family will enjoy. With a zesty ranch and hot sauce drizzle, these wraps pack a flavorful punch that is sure to please.

    Why You’ll Love This Recipe

    • Quick & Easy: Ready in under 30 minutes, this recipe is perfect for busy weeknights.
    • Customizable: Adjust the heat level by modifying the amount of hot sauce to suit your taste.
    • Family-Friendly: Kids and adults alike will love these tasty wraps, making them great for family meals.
    • Great for Meal Prep: Prepare a batch ahead of time for easy lunches throughout the week.
    • Air Fryer Convenience: Cooking in an air fryer ensures a crispy texture without the extra oil.

    Tools and Equipment

    Having the right tools makes the cooking process smoother and more enjoyable.

    Essential Tools

    • Air fryer
    • Mixing bowl
    • Cooking spray or brush
    • Cutting board
    • Knife

    Why These Tools Matter

    • Air fryer: Provides a healthier way to achieve a crispy texture without deep frying.
    • Mixing bowl: Makes it easy to combine ingredients thoroughly for a balanced flavor.
    • Cooking spray or brush: Prevents sticking, ensuring your wraps come out perfectly every time.

    Ingredients for Hot Chicken Ham and Cheese Wraps

    Main Ingredients

    • 4 slices turkey ham
    • 1 cup shredded cheddar cheese
    • 2 tablespoons ranch dressing
    • 2 cooked chicken breasts, shredded or diced
    • 1/4 cup hot sauce (adjust to taste)
    • 4 large flour tortillas
    • Cooking spray or olive oil, for greasing

    How to Make Hot Chicken Ham and Cheese Wraps Step-by-Step

    Step 1: Mix the Sauce

    In a small bowl, combine the hot sauce with ranch dressing until smooth. This flavorful mixture will elevate the taste of your wraps.

    Step 2: Prepare the Tortillas

    Lay the flour tortillas flat on a clean surface. This provides a sturdy base for your fillings.

    Step 3: Assemble the Wraps

    Evenly distribute the shredded or diced chicken onto the center of each tortilla. Ensure each wrap has a generous portion of protein.

    Step 4: Add the Ham and Cheese

    Place a slice of turkey ham on top of the chicken, followed by a sprinkle of shredded cheddar cheese. This combination adds richness and flavor.

    Step 5: Drizzle the Sauce

    Spoon the hot sauce-ranch mixture over the fillings on each tortilla. This step is crucial for adding moistness and flavor.

    Step 6: Wrap It Up

    Fold the sides of the tortillas over the fillings and roll them up tightly to form wraps. A tight roll will keep the ingredients secure during cooking.

    Step 7: Preheat the Air Fryer

    Set your air fryer to 375°F (190°C). Preheating ensures even cooking throughout the wraps.

    Step 8: Grease the Basket

    Lightly spray the air fryer basket with cooking spray or brush it with olive oil to prevent sticking. This will help the wraps achieve a golden color.

    Step 9: Cook the Wraps

    Place the wraps seam side down in the air fryer basket, ensuring they do not touch each other. Cook for 5-7 minutes, or until golden brown and crispy on the outside, and the cheese is melted on the inside.

    Step 10: Serve

    Carefully remove the wraps from the air fryer. Allow them to cool slightly before serving. Serve hot with additional hot sauce or ranch dressing for dipping, if desired.

    Enjoy these Hot Chicken Ham and Cheese Wraps as a quick and satisfying meal that’s packed with flavor!

    How to Serve Hot Chicken Ham and Cheese Wraps

    These wraps are versatile and can be enjoyed in various ways.

    With a Fresh Salad

    Serve your Hot Chicken Ham and Cheese Wraps alongside a crisp garden salad. The freshness of the greens complements the rich flavors of the wraps.

    As a Party Platter

    Slice the wraps into bite-sized pieces and arrange them on a platter for a fun appetizer at gatherings. Pair them with dipping sauces like extra ranch or hot sauce for added flavor.

    With Sweet Potato Fries

    Accompany the wraps with a side of sweet potato fries. The sweetness and crunch of the fries provide a delightful contrast to the savory wraps.

    Pro Tips for the Best Hot Chicken Ham and Cheese Wraps

    For optimal flavor and texture, consider the following tips:

    • Use Fresh Ingredients: Fresh tortillas and high-quality cheese will enhance the overall taste and texture of your wraps.

    • Customize the Heat: Adjust the amount of hot sauce based on your spice preference. Start with less if you’re unsure.

    • Don’t Overfill: Be cautious not to overstuff the wraps, as this can make them difficult to roll and may lead to a mess during cooking.

    • Keep Them Even: Ensure that the ingredients are evenly distributed for consistent cooking and flavor in each bite.

    • Experiment with Fillings: Feel free to add other ingredients like bell peppers, spinach, or jalapeños for added flavor and nutrition.

    Best Side Dishes and Pairings

    These wraps pair nicely with a variety of side dishes and beverages.

    1. Coleslaw – The crunch and tanginess of coleslaw provide a refreshing contrast to the richness of the wraps.

    2. Potato Wedges – Crispy potato wedges offer a hearty side that complements the flavors of the wraps.

    3. Pickles – A side of pickles adds a zesty crunch that cuts through the richness of the cheese and ham.

    4. Iced Tea – A cold glass of iced tea serves as a refreshing drink to balance the heat of the wraps.

    5. Fruit Salad – A light fruit salad adds a sweet and refreshing element to your meal, enhancing the overall dining experience.

    Common Mistakes to Avoid

    • Not Measuring Ingredients: Skipping this step can lead to imbalanced flavors and textures.
    • Overstuffing the Wraps: Adding too much filling can make it difficult to roll them up properly.
    • Skipping the Greasing Step: Not greasing the air fryer basket may result in the wraps sticking.
    • Cooking at Incorrect Temperature: Ensure your air fryer is preheated to avoid undercooked or soggy wraps.

    Storage & Reheating Instructions

    Refrigerator Storage

    Store the Hot Chicken Ham and Cheese Wraps in airtight containers in the refrigerator. They will stay fresh for up to 3 days.

    Freezing Instructions

    To freeze, wrap each cooled wrap tightly in plastic wrap and then place them in a freezer-safe bag. They can be frozen for up to 2 months.

    Reheating Tips

    • Oven: Preheat to 350°F (175°C). Place wraps on a baking sheet and heat for about 10-15 minutes until warmed through.
    • Microwave: Heat on a microwave-safe plate for 1-2 minutes, checking intermittently for desired warmth.
    • Stovetop: Heat in a skillet over medium heat for 3-4 minutes on each side until crispy and heated through.

    Frequently Asked Questions

    What are Hot Chicken Ham and Cheese Wraps?

    Hot Chicken Ham and Cheese Wraps are a flavorful combination of shredded chicken, turkey ham, and melted cheddar cheese wrapped in a flour tortilla.

    Can I use different types of cheese in the wraps?

    Yes, feel free to substitute with your favorite cheese, such as mozzarella or pepper jack, for a different flavor profile in your Hot Chicken Ham and Cheese Wraps.

    How do I make these wraps spicier?

    To increase the heat level, add more hot sauce to the sauce mixture or incorporate spicy peppers into the filling of your Hot Chicken Ham and Cheese Wraps.

    Can I prepare the Hot Chicken Ham and Cheese Wraps ahead of time?

    Absolutely! You can assemble the wraps in advance and refrigerate them until you’re ready to cook, making them a convenient meal option.

    What can I serve with Hot Chicken Ham and Cheese Wraps?

    These wraps pair well with a side salad, vegetable sticks, or chips for a complete meal.

    Final Thoughts

    These Hot Chicken Ham and Cheese Wraps are a quick and satisfying meal perfect for lunch or dinner. With their delightful combination of flavors, they’re sure to please everyone. Don’t forget to leave a comment with your feedback after trying the recipe!


    Dinner

    Hot Chicken Ham and Cheese Wraps


    5.0 from 24 reviews

    These Hot Chicken Ham and Cheese Wraps are a delicious and satisfying meal, perfect for a quick lunch or dinner. Packed with shredded chicken, turkey ham, and melted cheddar cheese, all wrapped in a soft tortilla and cooked to crispy perfection in an air fryer, they are sure to please anyone looking for a flavorful bite.

    Author: Munch Twist
    Prep Time: 10 minutes
    Cook Time: 7 minutes
    Total Time: 17 minutes
    Yield: 4 servings
    Category: Lunch
    Method: No bake
    Cuisine: American

    Hot Chicken Ham and Cheese Wraps

    SCALE:
    1x
    2x
    3x
    Cook Mode: Prevent your screen from going dark

    Ingredients

    • 4 slices turkey ham
    • 1 cup shredded cheddar cheese
    • 2 tablespoons ranch dressing
    • 2 cooked chicken breasts, shredded or diced
    • 1/4 cup hot sauce
    • 4 large flour tortillas
    • Cooking spray or olive oil, for greasing

    Instructions

    1. In a small bowl, combine the hot sauce with ranch dressing until smooth.
    2. Lay the flour tortillas flat on a clean surface.
    3. Evenly distribute the shredded or diced chicken onto the center of each tortilla.
    4. Place a slice of turkey ham on top of the chicken, followed by a sprinkle of shredded cheddar cheese.
    5. Spoon the hot sauce-ranch mixture over the fillings on each tortilla.
    6. Fold the sides of the tortillas over the fillings and roll them up tightly to form wraps.
    7. Set your air fryer to 375°F (190°C).
    8. Lightly spray the air fryer basket with cooking spray or brush it with olive oil to prevent sticking.
    9. Place the wraps seam side down in the air fryer basket, ensuring they do not touch each other. Cook for 5-7 minutes, or until golden brown and crispy on the outside, and the cheese is melted on the inside.
    10. Carefully remove the wraps from the air fryer. Allow them to cool slightly before serving.

    Nutrition Facts

    Serving Size: 1 serving
    Calories: 400 kcal
    Sugar: 2g
    Sodium: 1000mg
    Fat: 20g
    Saturated Fat: 10g
    Carbohydrates: 32g
    Fiber: 2g
    Protein: 25g
    Cholesterol: 85mg

  • Delicious Creamed Potatoes and Peas Recipe

    Delicious Creamed Potatoes and Peas Recipe

    Creamed Potatoes and Peas is a comforting dish that combines tender potatoes, sweet peas, and crispy bacon in a rich, creamy sauce. This recipe offers a delightful balance of flavors and textures, making it a perfect side dish or a satisfying main course that will please everyone at the table.

    Why You’ll Love This Recipe

    • Comfort Food at Its Best: This dish is a hearty blend of ingredients that warms the soul.
    • Quick & Easy: Ready in under 30 minutes, making it a perfect last-minute meal option.
    • Versatile Side Dish: Pairs well with a variety of main courses, from grilled meats to vegetarian options.
    • Kid-Friendly: The creamy sauce and familiar flavors are sure to please even the pickiest eaters.
    • Make Ahead Option: Prepare it in advance and reheat for an effortless dinner.

    Tools and Equipment

    Having the right tools makes cooking easier and more enjoyable. Here are some essential items for this recipe.

    Essential Tools

    • A large baking pan
    • Medium saucepan
    • Whisk
    • Cooking spoon
    • Measuring cups and spoons

    Why These Tools Matter

    • Large baking pan: Provides ample space for the potatoes and peas, allowing for even cooking.
    • Medium saucepan: Ideal for making the creamy sauce, ensuring it thickens properly.
    • Whisk: Helps to blend the ingredients smoothly, preventing lumps in the sauce.

    Ingredients for Creamed Potatoes and Peas

    For the Creamy Sauce

    • 1 cup evaporated milk
    • ¼ cup butter
    • 3 Tbsp flour
    • 1 ½ cups milk
    • 1 ½ tsp salt
    • ¼ tsp pepper

    For the Dish

    • 2 lbs red potatoes, boiled and halved
    • 10 oz frozen peas
    • ½ cup onion, diced
    • 4 slices bacon, cooked and crumbled

    How to Make Creamed Potatoes and Peas Step-by-Step

    Step 1: Preheat the Oven

    Set your oven to 325°F (165°C) to prepare for baking.

    Step 2: Prepare the Potatoes

    Place the halved, boiled potatoes on a greased baking pan. Evenly sprinkle the frozen peas over the potatoes for added sweetness and color.

    Step 3: Cook the Sauce

    In a medium saucepan over medium heat, melt the butter. Stir in the flour, salt, and pepper. Cook for 1-2 minutes until the mixture is smooth and bubbly. Gradually add the milk and evaporated milk, stirring constantly until the sauce thickens.

    Step 4: Assemble the Dish

    Pour the creamy sauce over the potatoes and peas in the baking pan. Sprinkle the diced onions evenly over the top for extra flavor and texture.

    Step 5: Add Bacon and Bake

    Top the dish with the crumbled bacon. Place it in the preheated oven and bake for 20-25 minutes, or until the dish is bubbly and slightly golden on top.

    This recipe for Creamed Potatoes and Peas is not only easy to make but also delivers a heartwarming experience with every bite. Enjoy this delightful dish as a comforting side or a satisfying main course.

    How to Serve Creamed Potatoes and Peas

    Creamed Potatoes and Peas is a versatile dish that can be enjoyed in various ways. Here are some creative serving ideas:

    As a Standalone Meal

    Serve the creamed potatoes and peas on their own for a comforting and hearty meal. The combination of creamy sauce, tender potatoes, and crispy bacon makes it satisfying enough to be the main attraction.

    With Grilled Meats

    Pair this dish with grilled chicken or pork chops. The creaminess of the potatoes and peas complements the smoky flavors of the grilled meats perfectly, creating a balanced plate.

    In a Casserole

    Transform your creamed potatoes and peas into a casserole. After baking, top with breadcrumbs and additional cheese, then return to the oven for a crispy finish. This adds texture and enhances the dish’s flavor profile.

    Pro Tips for the Best Creamed Potatoes and Peas

    To elevate your Creamed Potatoes and Peas, consider these practical tips:

    • Use Fresh Ingredients: Fresh potatoes and peas will enhance the flavor and texture of the dish compared to frozen or canned alternatives.

    • Adjust the Consistency: If the sauce is too thick, gradually add more milk until you reach your desired consistency. This ensures a creamy texture without being overly runny.

    • Experiment with Cheese: Adding shredded cheese, such as cheddar or Parmesan, to the sauce can elevate the flavor and add a delightful cheesiness to the dish.

    • Add Herbs for Freshness: Consider incorporating fresh herbs like parsley or chives into the mix for an added layer of flavor and a pop of color.

    • Make it Ahead of Time: This dish can be prepared ahead and refrigerated before baking. Reheat it in the oven, allowing the flavors to meld beautifully.

    Best Side Dishes and Pairings

    Creamed Potatoes and Peas pairs well with various side dishes and drinks. Here are some suggestions:

    1. Grilled Asparagus: The slight bitterness of grilled asparagus balances the creaminess of the dish, providing a fresh contrast.

    2. Roasted Carrots: Sweet roasted carrots add a vibrant color and flavor that complements the savory elements of the creamed potatoes and peas.

    3. Cornbread: The slightly sweet and crumbly texture of cornbread is a perfect accompaniment, soaking up the creamy sauce beautifully.

    4. Caesar Salad: A crisp Caesar salad adds a refreshing crunch and tangy flavor, creating a delightful contrast to the richness of the dish.

    5. White Wine: A chilled glass of Sauvignon Blanc or Chardonnay pairs well with the creamy elements, enhancing the overall dining experience.

    6. Garlic Bread: Serve with garlic bread for a satisfying addition that allows you to scoop up the creamy potatoes and peas.

    Common Mistakes to Avoid

    • Not Boiling the Potatoes Properly: Ensure the potatoes are boiled until fork-tender for the best texture.
    • Skipping the Bacon: Crumbled bacon adds essential flavor; do not omit it for the full taste experience.
    • Overcooking the Sauce: Cook the sauce until just thickened to avoid a gummy texture.
    • Neglecting to Season: Taste your sauce before pouring it over the potatoes; proper seasoning enhances the dish.

    Storage & Reheating Instructions

    Refrigerator Storage

    Store any leftovers in an airtight container in the refrigerator. The dish will stay fresh for up to 3 days.

    Freezing Instructions

    To freeze, place cooled creamed potatoes and peas in a freezer-safe container. This dish can be frozen for up to 2 months. Thaw in the refrigerator before reheating.

    Reheating Tips

    • Oven: Preheat to 325°F (165°C) and cover the dish with foil. Heat for 20-30 minutes or until warmed through.
    • Microwave: Place a serving in a microwave-safe dish and cover. Heat for 2-3 minutes, stirring halfway.
    • Stovetop: Use a non-stick skillet over medium heat, adding a splash of milk if necessary, and stir until heated through.

    Frequently Asked Questions

    How can I make my Creamed Potatoes and Peas healthier?

    You can use low-fat milk or replace some of the butter with olive oil to reduce fat content while still enjoying the creamy texture.

    Can I use fresh peas instead of frozen in Creamed Potatoes and Peas?

    Yes, fresh peas can be used. Just blanch them briefly before adding to the dish to ensure they cook evenly.

    What can I serve with Creamed Potatoes and Peas?

    This dish pairs well with grilled chicken, roasted meats, or a fresh salad for a complete meal.

    How do I adjust the recipe for a larger crowd?

    To serve more people, simply multiply the ingredients by the number of servings needed, ensuring an appropriately sized baking dish.

    Can I make Creamed Potatoes and Peas ahead of time?

    Yes, you can prepare the dish ahead, assemble it in the baking pan, and refrigerate it. Bake it just before serving.

    Final Thoughts

    Creamed Potatoes and Peas is a delightful dish that combines comfort and flavor. We encourage you to try this recipe and share your experience with us in the comments section.

    Dinner

    Creamed Potatoes and Peas


    5.0 from 24 reviews

    This hearty and comforting dish brings together tender potatoes, sweet peas, and crispy bacon in a creamy sauce. Perfect as a side or a satisfying main course!

    Author: Munch Twist
    Prep Time: 15 mins
    Cook Time: 25 mins
    Total Time: 40 mins
    Yield: 6 servings
    Category: Lunch
    Method: No bake
    Cuisine: American

    Creamed Potatoes and Peas

    SCALE:
    1x
    2x
    3x
    Cook Mode: Prevent your screen from going dark

    Ingredients

    • 1 cup evaporated milk
    • ¼ cup butter
    • 4 slices bacon, cooked and crumbled
    • 2 lbs red potatoes, boiled and halved
    • 10 oz frozen peas
    • ½ cup onion, diced
    • 1 ½ tsp salt
    • 3 Tbsp flour
    • 1 ½ cups milk
    • ¼ tsp pepper

    Instructions

    1. Preheat the oven to 325°F (165°C).
    2. Place halved, boiled potatoes on a greased baking pan. Sprinkle frozen peas evenly over the potatoes.
    3. In a saucepan over medium heat, melt the butter. Stir in the flour, salt, and pepper, cooking for 1-2 minutes until smooth. Gradually add milk and evaporated milk, stirring constantly until the mixture thickens.
    4. Pour the creamy sauce over the potatoes and peas in the baking pan. Sprinkle the diced onions over the top.
    5. Top with crumbled bacon. Bake in the preheated oven for 20-25 minutes, until bubbly and slightly golden on top.

    Nutrition Facts

    Serving Size: 1 serving
    Calories: 295 kcal
    Sugar: 7g
    Sodium: 800mg
    Fat: 14g
    Saturated Fat: 8g
    Carbohydrates: 35g
    Fiber: 4g
    Protein: 9g
    Cholesterol: 30mg