Category: Lunch

  • Irresistible Cream Cheese and Bacon Stuffed Doritos Chicken

    Irresistible Cream Cheese and Bacon Stuffed Doritos Chicken

    Cream Cheese and Bacon Stuffed Doritos Chicken is a delightful dish that combines creamy, cheesy goodness with a satisfying crunch. This recipe delivers a flavor explosion that will impress family and friends alike. Perfect for dinner or a special occasion, this dish is sure to become a favorite.

    Why You’ll Love This Recipe

    • Flavorful Combination: The blend of cream cheese, bacon, and cheese creates a rich and savory filling.
    • Crunchy Texture: The Doritos coating adds an irresistible crunch that contrasts beautifully with the tender chicken.
    • Easy to Prepare: With straightforward steps, this dish is perfect for both novice and experienced cooks.
    • Versatile Serving Options: Great as a main dish or served alongside your favorite sides for a complete meal.
    • Crowd-Pleaser: Ideal for gatherings, this recipe is sure to impress your guests and satisfy their cravings.

    Tools and Equipment

    To successfully prepare Cream Cheese and Bacon Stuffed Doritos Chicken, you’ll need a few essential tools.

    Essential Tools

    • Sharp knife
    • Medium mixing bowl
    • Baking sheet
    • Parchment paper or cooking spray
    • Three shallow dishes for coating
    • Measuring cups and spoons

    Why These Tools Matter

    • A sharp knife ensures clean cuts when preparing the chicken, making it easier to create pockets for stuffing.
    • Mixing bowls are vital for combining the filling ingredients thoroughly, ensuring every bite is packed with flavor.
    • Shallow dishes for coating make the breading process simple and allow for even coverage on the chicken.

    Ingredients for Cream Cheese and Bacon Stuffed Doritos Chicken

    Filling Ingredients

    • 8 oz cream cheese, softened
    • 1 cup shredded cheddar cheese
    • 6 slices bacon, cooked and crumbled
    • 1 teaspoon garlic powder
    • 1 teaspoon onion powder
    • Salt and black pepper to taste

    Chicken Ingredients

    • 4 boneless, skinless chicken breasts

    Coating Ingredients

    • 1/2 cup all-purpose flour
    • 2 large eggs, beaten
    • 2 cups crushed Doritos (any flavor)

    Garnish

    • Fresh parsley, chopped (optional, for garnish)

    How to Make Cream Cheese and Bacon Stuffed Doritos Chicken Step-by-Step

    Step 1: Preheat the Oven

    Preheat your oven to 375°F (190°C). Prepare a baking sheet by lining it with parchment paper or lightly greasing it.

    Step 2: Prepare the Chicken

    Using a sharp knife, carefully cut a pocket into each chicken breast. Be cautious not to cut all the way through, as you want to keep the filling contained.

    Step 3: Make the Filling

    In a medium mixing bowl, combine the softened cream cheese, shredded cheddar cheese, crumbled bacon, garlic powder, onion powder, salt, and black pepper. Mix until well combined.

    Step 4: Stuff the Chicken

    Spoon the cream cheese mixture into each chicken breast pocket. Ensure the filling is well packed and press the edges of the chicken to seal it.

    Step 5: Coat the Chicken

    Set up three shallow dishes. Place flour in one, beaten eggs in another, and crushed Doritos in the third. Dredge each stuffed chicken breast in the flour, shaking off the excess. Dip it into the beaten eggs, then press it firmly into the crushed Doritos for full coverage.

    Step 6: Bake

    Arrange the coated chicken breasts on the prepared baking sheet. Bake in the preheated oven for 25-30 minutes until the chicken is cooked through and the coating is crispy and golden brown.

    Step 7: Serve

    If desired, garnish with fresh parsley before serving. Enjoy this creamy, cheesy, and crunchy delight with your favorite side dishes.

    This Cream Cheese and Bacon Stuffed Doritos Chicken will surely become a staple in your home cooking repertoire.

    How to Serve Cream Cheese and Bacon Stuffed Doritos Chicken

    This dish can be enjoyed in various ways to enhance your dining experience.

    With a Fresh Salad

    Serve the chicken alongside a crisp garden salad. The freshness of the greens balances the richness of the stuffed chicken.

    On a Bed of Rice

    Place the chicken on a bed of fluffy rice, such as cilantro lime rice. This adds a delightful texture and complements the flavors beautifully.

    As a Sandwich

    Transform the stuffed chicken into a hearty sandwich. Use a toasted bun, add lettuce and tomato, and drizzle with ranch dressing for a satisfying meal.

    Pro Tips for the Best Cream Cheese and Bacon Stuffed Doritos Chicken

    Maximize the flavor and texture of your dish with these helpful tips.

    • Use Room Temperature Ingredients: Allow the cream cheese to soften at room temperature for easier mixing and a smoother filling.
    • Choose Quality Bacon: Opt for thick-cut bacon for a heartier crunch and richer flavor in the stuffing.
    • Don’t Overstuff the Chicken: Be cautious not to overfill the chicken breasts, as this can lead to spillage during baking.
    • Experiment with Dorito Flavors: Try using different flavors of Doritos, such as Cool Ranch or Spicy Nacho, to add unique twists to the dish.
    • Let the Chicken Rest: Allow the stuffed chicken to rest for a few minutes after baking. This helps the juices redistribute for a moister bite.

    Best Side Dishes and Pairings

    Complement your Cream Cheese and Bacon Stuffed Doritos Chicken with these delightful options.

    1. Garlic Mashed Potatoes: Creamy mashed potatoes provide a comforting side that pairs well with the crunchy chicken.
    2. Steamed Broccoli: The slight bitterness of broccoli contrasts nicely with the richness of the stuffed chicken, adding a healthy touch.
    3. Coleslaw: A tangy coleslaw adds a refreshing crunch that balances the savory flavors of the chicken.
    4. Corn on the Cob: Sweet corn enhances the overall meal experience with its natural sweetness and vibrant color.
    5. Iced Tea: A chilled glass of iced tea provides a refreshing beverage option that complements the meal without overpowering it.

    Common Mistakes to Avoid

    • Not Sealing the Chicken Properly: Ensure the chicken pocket is tightly sealed to prevent the filling from leaking during cooking.
    • Using Cold Cream Cheese: Make sure the cream cheese is softened to blend easily with other ingredients for a smooth filling.
    • Skipping the Coating: Don’t skip the Doritos coating, as it adds essential crunch and flavor to the dish.
    • Overcrowding the Baking Sheet: Give each chicken breast enough space on the baking sheet to ensure even cooking and crispiness.

    Storage & Reheating Instructions

    Refrigerator Storage

    Store leftover Cream Cheese and Bacon Stuffed Doritos Chicken in airtight containers. It will stay fresh for up to 3 days in the refrigerator.

    Freezing Instructions

    To freeze, wrap each stuffed chicken breast tightly in plastic wrap, then place them in a freezer-safe bag. They can be frozen for up to 3 months. When ready to use, thaw in the refrigerator overnight before reheating.

    Reheating Tips

    • Oven: Preheat the oven to 350°F (175°C) and bake the chicken for about 15-20 minutes until heated through.
    • Microwave: Place the chicken on a microwave-safe plate and heat in 30-second intervals until warmed, but be cautious as it may become soggy.
    • Stovetop: Heat in a skillet over medium heat, turning occasionally, until warmed through.

    Frequently Asked Questions

    Can I use different types of cheese in the Cream Cheese and Bacon Stuffed Doritos Chicken?

    You can certainly experiment with different cheeses. Monterey Jack, pepper jack, or even mozzarella would work well alongside or instead of cheddar.

    How can I make the Cream Cheese and Bacon Stuffed Doritos Chicken healthier?

    To lighten the dish, consider using lower-fat cream cheese and turkey bacon. You can also bake the chicken without the Doritos coating for a lighter version.

    What should I serve with Cream Cheese and Bacon Stuffed Doritos Chicken?

    This dish pairs well with a fresh salad, roasted vegetables, or a side of rice to complement the flavors.

    Can I prepare the Cream Cheese and Bacon Stuffed Doritos Chicken ahead of time?

    Yes, you can prepare the chicken breasts and stuff them the day before. Store them in the refrigerator and bake when ready to serve.

    Is this recipe suitable for meal prep?

    Absolutely! Cream Cheese and Bacon Stuffed Doritos Chicken makes for a delicious meal prep option. Just store in individual containers for quick lunches or dinners.

    Final Thoughts

    Cream Cheese and Bacon Stuffed Doritos Chicken is a delightful dish that combines creamy, cheesy goodness with a satisfying crunch. It’s perfect for family dinners or meal prep. Give this recipe a try and let us know how it turns out in the comments!


    Dinner

    Cream Cheese and Bacon Stuffed Doritos Chicken


    5.0 from 24 reviews

    This Cream Cheese and Bacon Stuffed Doritos Chicken is a delightful dish that combines tender chicken breasts with a rich and creamy filling of cream cheese, cheddar cheese, and crumbled bacon. The chicken is then coated in crushed Doritos for a crunchy texture, making it a perfect comfort food that is both savory and satisfying.

    Author: Munch Twist
    Prep Time: 15 mins
    Cook Time: 30 mins
    Total Time: 45 mins
    Yield: 4 servings
    Category: Lunch
    Method: No bake
    Cuisine: American

    Cream Cheese and Bacon Stuffed Doritos Chicken

    SCALE:
    1x
    2x
    3x
    Cook Mode: Prevent your screen from going dark

    Ingredients

    • 1 cup shredded cheddar cheese
    • 4 boneless, skinless chicken breasts
    • 2 large eggs, beaten
    • 6 slices bacon, cooked and crumbled
    • 2 cups crushed Doritos (any flavor)
    • 1 teaspoon onion powder
    • 1/2 cup all-purpose flour
    • 8 oz cream cheese, softened
    • Salt and black pepper to taste
    • 1 teaspoon garlic powder
    • Fresh parsley, chopped (optional, for garnish)

    Instructions

    1. Preheat your oven to 375°F (190°C). Line a baking sheet with parchment paper or lightly grease it.
    2. Carefully cut a pocket into each chicken breast using a sharp knife, being cautious not to cut all the way through.
    3. In a medium bowl, mix the softened cream cheese, shredded cheddar cheese, crumbled bacon, garlic powder, onion powder, salt, and black pepper until well combined.
    4. Spoon the cream cheese mixture into each chicken breast pocket. Press the edges of the chicken to seal the filling inside.
    5. Prepare three shallow dishes: place flour in one, beaten eggs in another, and crushed Doritos in the third. Dredge each stuffed chicken breast in the flour, shaking off any excess. Dip into the beaten eggs, and then press into the crushed Doritos, ensuring the chicken is well coated.
    6. Place the coated chicken breasts on the prepared baking sheet. Bake in the preheated oven for 25-30 minutes, or until the chicken is cooked through and the coating is crispy and golden brown.
    7. Garnish with fresh parsley if desired. Serve immediately and enjoy the creamy, cheesy, and crunchy delight!

    Nutrition Facts

    Serving Size: 1 serving
    Calories: 600 kcal
    Sugar: 2g
    Sodium: 800mg
    Fat: 38g
    Saturated Fat: 18g
    Carbohydrates: 25g
    Fiber: 2g
    Protein: 40g
    Cholesterol: 150mg

  • Delicious Cheesy Spinach-Artichoke Bagels Recipe

    Delicious Cheesy Spinach-Artichoke Bagels Recipe

    Cheesy Spinach-Artichoke Bagels are a delightful combination of creamy cheese, savory spinach, and tangy artichokes, all nestled atop a perfectly toasted bagel. This recipe is ideal for a quick breakfast or a satisfying snack, delivering rich flavors that will please any palate.

    Why You’ll Love This Recipe

    • Delicious Flavor: The combination of cream cheese, mozzarella, and artichokes creates a rich and satisfying taste.
    • Versatile Serving: Perfect for breakfast, brunch, or as a party appetizer, these bagels fit any occasion.
    • Quick & Easy: With straightforward steps, you can have these cheesy bagels ready in under 30 minutes.
    • Customizable: Feel free to add your favorite ingredients, such as sun-dried tomatoes or different cheeses.
    • Nutrient-Rich: Packed with spinach and artichokes, this dish offers a tasty way to enjoy your veggies.

    Tools and Equipment

    Having the right tools makes cooking easier and more enjoyable.

    Essential Tools

    • Mixing bowl
    • Baking sheet
    • Parchment paper
    • Spatula
    • Knife and cutting board

    Why These Tools Matter

    • Mixing bowl: Essential for combining the creamy topping ingredients efficiently.
    • Baking sheet: Provides ample space for all bagel halves, ensuring even baking.
    • Spatula: Helps in spreading the topping smoothly over the bagels.

    Ingredients for Cheesy Spinach-Artichoke Bagels

    Cheese and Greens

    • 8 oz. cream cheese, softened
    • 1/2 c. freshly grated Parmesan
    • 1 c. shredded mozzarella, divided
    • 1/2 c. finely chopped spinach
    • 1/2 c. finely chopped artichoke hearts

    Seasoning and Garnish

    • 1 Tbsp. chopped parsley, plus more for garnish
    • 1 garlic clove, minced
    • 1/2 tsp. crushed red pepper flakes, plus more for garnish
    • Kosher salt
    • Freshly ground black pepper

    Bagels

    • 2 bagels, halved

    How to Make Cheesy Spinach-Artichoke Bagels Step-by-Step

    Step 1: Preheat the Oven

    Preheat your oven to 350°F (175°C) and line a medium baking sheet with parchment paper to prevent sticking.

    Step 2: Prepare the Topping

    In a large mixing bowl, combine the softened cream cheese, finely chopped artichoke hearts, finely chopped spinach, 2/3 cup of shredded mozzarella, freshly grated Parmesan, minced garlic, chopped parsley, and crushed red pepper flakes. Season the mixture with kosher salt and freshly ground black pepper, then mix until well combined.

    Step 3: Assemble the Bagels

    Arrange the halved bagels, cut side up, on the prepared baking sheet. Generously spread the spinach-artichoke mixture on each bagel half. Top each with the remaining shredded mozzarella.

    Step 4: Bake and Broil

    Bake the assembled bagels in the preheated oven for 10 to 12 minutes, or until they are heated through and the cheese is melted and bubbly. For a golden top, broil for an additional minute or two, watching closely to avoid burning.

    Step 5: Garnish and Serve

    Once baked, remove the bagels from the oven. Garnish with more chopped parsley and a sprinkle of crushed red pepper flakes. Serve immediately and enjoy your Cheesy Spinach-Artichoke Bagels!

    How to Serve Cheesy Spinach-Artichoke Bagels

    These Cheesy Spinach-Artichoke Bagels are versatile and can be enjoyed in various ways.

    As a Brunch Delight

    Serve these bagels as part of a brunch spread, alongside fresh fruit and a selection of pastries for a delightful morning treat.

    With a Side Salad

    Pair the bagels with a light, crisp salad, such as a Caesar or mixed greens, to balance the richness of the cheesy topping.

    For a Cozy Movie Night

    Enjoy these bagels as a shareable snack during a movie night, accompanied by a dipping sauce like marinara for added flavor.

    Pro Tips for the Best Cheesy Spinach-Artichoke Bagels

    To elevate your Cheesy Spinach-Artichoke Bagels, consider these helpful tips.

    • Use Fresh Ingredients: Fresh spinach and artichokes yield better flavor and texture compared to canned or frozen options.
    • Adjust Spice Levels: Customize the heat by varying the amount of crushed red pepper flakes based on your preference.
    • Experiment with Cheese: Try adding other cheeses, such as gouda or cheddar, for a unique twist on the classic flavor.
    • Make Ahead: Prepare the spinach-artichoke mixture in advance and store it in the refrigerator for easy assembly later.
    • Toast the Bagels: For added crunch, lightly toast the bagels before spreading the topping.

    Best Side Dishes and Pairings

    These bagels pair beautifully with a variety of dishes and beverages.

    1. Mimosas: The refreshing citrus notes of mimosas complement the rich flavors of the bagels, making for a perfect brunch pairing.
    2. Roasted Vegetable Medley: A side of roasted vegetables adds color and nutrition, enhancing the overall meal experience.
    3. Creamy Tomato Soup: The acidity and creaminess of tomato soup provide a delightful contrast to the cheesy bagels.
    4. Herbed Quinoa Salad: A light quinoa salad with fresh herbs offers a nutritious option that balances the richness of the bagels.
    5. Iced Coffee: The bold flavors of iced coffee make it a great beverage choice to accompany your cheesy treat.

    Common Mistakes to Avoid

    • Using Cold Cream Cheese: Ensure your cream cheese is softened to blend smoothly with other ingredients.
    • Overloading the Bagels: Avoid piling on too much topping, which can lead to uneven baking and soggy bagels.
    • Not Preheating the Oven: Preheating is essential for achieving that perfect melt and bubbly cheese topping.
    • Skipping the Broil: For a golden color and extra texture, don’t skip the broiling step at the end.

    Storage & Reheating Instructions

    Refrigerator Storage

    Store any leftover Cheesy Spinach-Artichoke Bagels in an airtight container in the refrigerator. They will stay fresh for up to 3 days.

    Freezing Instructions

    For best results, freeze the assembled bagels before baking. Wrap each bagel half individually in plastic wrap, then place them in a freezer-safe bag. They can be stored for up to 2 months.

    Reheating Tips

    • Oven: Preheat to 350°F (175°C) and bake for 10-12 minutes until heated through.
    • Microwave: Heat individually for 30-45 seconds, but be aware that the bagel may become soft.
    • Stovetop: Heat in a skillet over low heat for about 5 minutes, covering to retain moisture.

    Frequently Asked Questions

    Can I use different types of bagels for Cheesy Spinach-Artichoke Bagels?

    Yes, you can use any type of bagel you prefer, such as whole wheat, everything, or sesame bagels, depending on your taste.

    How can I make my Cheesy Spinach-Artichoke Bagels healthier?

    You can substitute low-fat cream cheese and mozzarella to reduce calories and fat content. Adding more spinach can also boost the nutritional value.

    Can I prepare the topping in advance?

    Absolutely! You can prepare the spinach-artichoke mixture a day ahead and store it in the refrigerator. Just spread it on the bagels when you are ready to bake.

    What should I serve with Cheesy Spinach-Artichoke Bagels?

    These bagels pair well with a light salad or can be enjoyed as a snack on their own. They also make a great appetizer for gatherings.

    Can I customize the recipe?

    Yes, feel free to add other ingredients like diced bell peppers or cooked bacon for added flavor and texture.

    Final Thoughts

    This Cheesy Spinach-Artichoke Bagels recipe is sure to impress family and friends alike. It’s easy to prepare and packed with flavor. We encourage you to try it out and share your thoughts in the comments below!


    Lunch

    Cheesy Spinach-Artichoke Bagels


    5.0 from 24 reviews

    These Cheesy Spinach-Artichoke Bagels are a delightful combination of creamy, cheesy goodness and nutritious greens. Perfect for a snack or light meal, they feature a rich topping of cream cheese, artichoke hearts, and spinach, all baked to perfection on a toasted bagel. Garnished with parsley and a hint of red pepper flakes, they offer a satisfying blend of flavors and textures.

    Author: Munch Twist
    Prep Time: 10 mins
    Cook Time: 12 mins
    Total Time: 22 mins
    Yield: 2 servings
    Category: Lunch
    Method: Baking
    Cuisine: American

    Cheesy Spinach-Artichoke Bagels

    SCALE:
    1x
    2x
    3x
    Cook Mode: Prevent your screen from going dark

    Ingredients

    • 1/2 cup freshly grated Parmesan
    • 1 tablespoon chopped parsley, plus more for garnish
    • 1/2 cup finely chopped spinach
    • 1/2 teaspoon crushed red pepper flakes, plus more for garnish
    • 8 oz cream cheese, softened
    • 1 cup shredded mozzarella, divided
    • 2 bagels, halved
    • 1 garlic clove, minced
    • Kosher salt to taste
    • Freshly ground black pepper to taste
    • 1/2 cup finely chopped artichoke hearts

    Instructions

    1. Preheat your oven to 350°F (175°C) and line a medium cooking sheet with parchment paper.
    2. In a large bowl, mix together the softened cream cheese, finely chopped artichoke hearts, finely chopped spinach, 2/3 cup of shredded mozzarella, freshly grated Parmesan, minced garlic, chopped parsley, and crushed red pepper flakes. Season with kosher salt and freshly ground black pepper, and stir until well combined.
    3. Place the halved bagels, cut side up, on the prepared baking sheet. Spread a generous amount of the spinach-and-artichoke mixture onto each bagel half. Top each with the remaining shredded mozzarella.
    4. Bake in the preheated oven for 10 to 12 minutes, or until the bagels are warmed through and the cheese is melted and bubbly. If you prefer a golden top, broil for an additional minute or two, keeping a close eye to prevent burning.
    5. Once out of the oven, garnish the bagels with more chopped parsley and a sprinkle of crushed red pepper flakes. Serve immediately.

    Nutrition Facts

    Serving Size: 1 serving
    Calories: 300 kcal
    Sugar: 2g
    Sodium: 550mg
    Fat: 18g
    Saturated Fat: 10g
    Carbohydrates: 28g
    Fiber: 2g
    Protein: 12g
    Cholesterol: 50mg

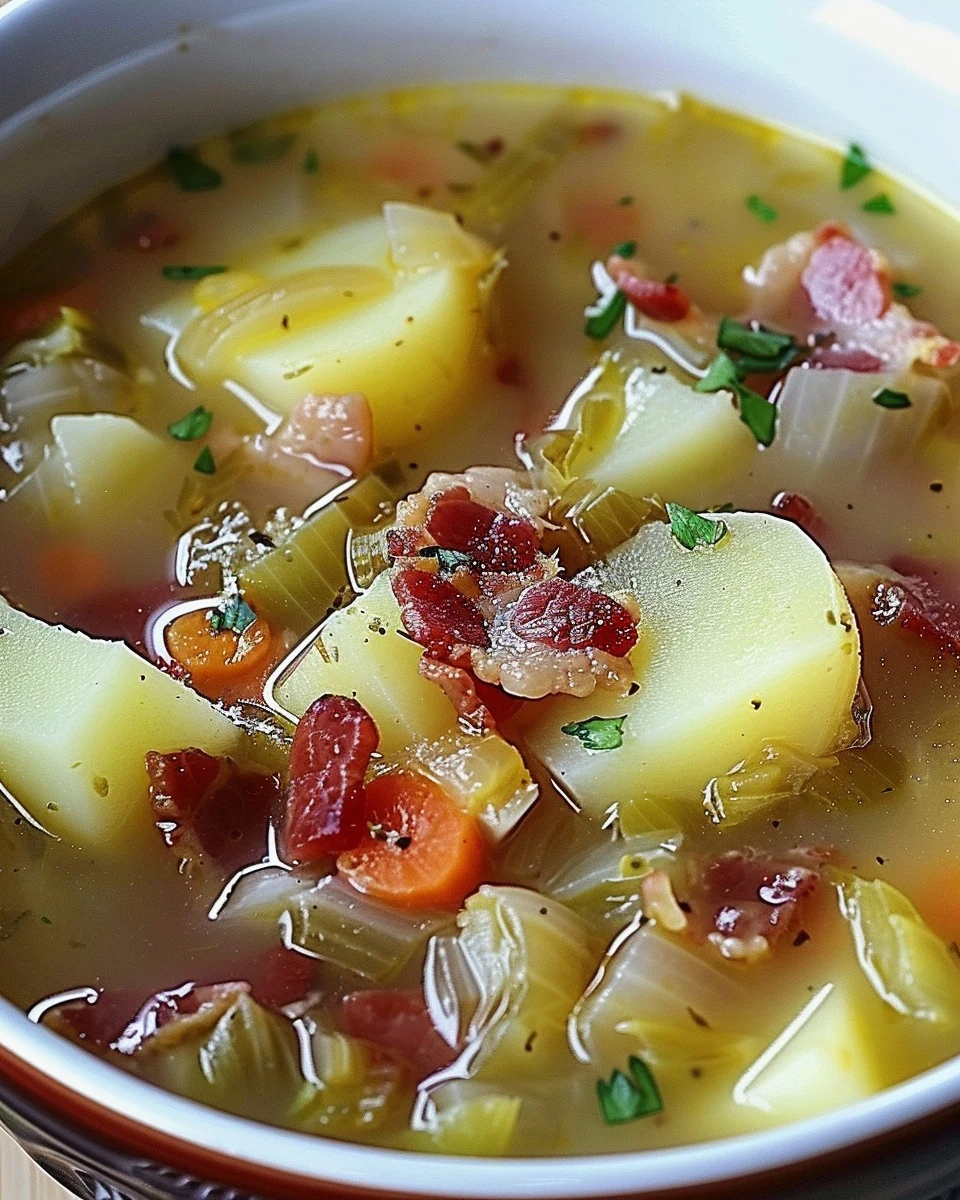
  • Authentic Irish Bacon Cabbage and Potato Soup Recipe

    Authentic Irish Bacon Cabbage and Potato Soup Recipe

    Irish Bacon Cabbage and Potato Soup is a comforting dish that embodies the heartwarming flavors of traditional Irish cuisine. This soup combines the smoky richness of bacon with the earthiness of potatoes and the freshness of cabbage, creating a delightful meal perfect for any occasion.

    Why You’ll Love This Recipe

    • Hearty & Satisfying: This soup is packed with ingredients that provide a fulfilling meal, perfect for chilly days.
    • Flavorful & Rich: The combination of Irish bacon and aromatic herbs creates a deep, savory flavor profile.
    • Customizable: You can easily adjust the ingredients to suit your taste, including adding more vegetables or spices.
    • Family-Friendly: This recipe is simple enough for kids to enjoy, making it a hit for the whole family.
    • One-Pot Wonder: Minimal cleanup is required since everything cooks in one pot, saving you time in the kitchen.

    Tools and Equipment

    Gathering the right tools will streamline your cooking process.

    Essential Tools

    • Large pot or Dutch oven
    • Slotted spoon
    • Chopping board
    • Sharp knife
    • Measuring cups and spoons

    Why These Tools Matter

    • Large pot or Dutch oven: Ideal for cooking all ingredients evenly and allows for easy stirring.
    • Slotted spoon: Perfect for removing crispy bacon without excess grease.
    • Sharp knife: Ensures quick and safe chopping of vegetables, making prep time more efficient.

    Ingredients for Irish Bacon Cabbage and Potato Soup

    Base Ingredients

    • 1 teaspoon dried thyme
    • 1 bay leaf
    • 1 large onion, chopped
    • 3 large potatoes, peeled and diced
    • 1/2 teaspoon black pepper
    • 4 cups chicken broth
    • Salt to taste

    Vegetables

    • 1 cup carrots, sliced
    • 3 cups green cabbage, shredded

    Bacon and Cream

    • 6 slices of Irish bacon or thick-cut bacon, diced
    • 1 cup heavy cream (optional)

    Garnish

    • Fresh parsley, chopped (for garnish)
    • 2 cloves garlic, minced

    How to Make Irish Bacon Cabbage and Potato Soup Step-by-Step

    Step 1: Cook the Bacon

    In a large pot or Dutch oven, cook the diced bacon over medium heat until it turns crisp. Remove the bacon with a slotted spoon and set it aside, leaving the drippings in the pot.

    Step 2: Sauté the Aromatics

    Add the chopped onion to the pot with the bacon drippings. Sauté for about 5 minutes until the onion becomes translucent. Then, add the minced garlic and sauté for another minute until fragrant.

    Step 3: Add Broth and Potatoes

    Pour in the chicken broth and add the diced potatoes. Bring the mixture to a boil, then reduce the heat and simmer for about 10 minutes, allowing the potatoes to start cooking.

    Step 4: Incorporate Vegetables and Seasoning

    Stir in the shredded cabbage, sliced carrots, bay leaf, dried thyme, and black pepper. Continue simmering for an additional 15-20 minutes, or until the vegetables are tender.

    Step 5: Optional Cream Addition

    If you prefer a creamier soup, stir in the heavy cream and heat it through gently, being careful not to let it boil.

    Step 6: Season and Serve

    Taste the soup and adjust the seasoning with salt and additional pepper if needed. Remove the bay leaf.

    Step 7: Garnish and Enjoy

    Ladle the soup into bowls, top with the crispy bacon, and garnish with chopped fresh parsley.

    This Irish Bacon Cabbage and Potato Soup is sure to warm your soul and delight your taste buds, making it a perfect addition to your recipe collection. Enjoy!

    How to Serve Irish Bacon Cabbage and Potato Soup

    Serving Irish Bacon Cabbage and Potato Soup can elevate your dining experience with a touch of creativity.

    Top with Crusty Bread

    Serve the soup with a slice of warm, crusty bread for dipping. The bread absorbs the flavors and adds a delightful texture to each spoonful.

    Serve with a Side Salad

    A fresh green salad with a tangy vinaigrette complements the rich flavors of the soup. The crispness of the salad provides a refreshing contrast.

    Pair with Irish Soda Bread

    Traditional Irish soda bread is an excellent accompaniment. Its dense, slightly sweet flavor harmonizes beautifully with the hearty soup.

    Pro Tips for the Best Irish Bacon Cabbage and Potato Soup

    Enhancing your soup-making skills can lead to a more flavorful dish.

    • Quality Ingredients: Use fresh, high-quality bacon and vegetables to maximize flavor.
    • Adjust Thickness: If the soup is too thick, add more chicken broth until the desired consistency is reached.
    • Flavor Development: Allow the soup to simmer longer for deeper flavor; just be careful not to overcook the vegetables.
    • Storage Tips: Store leftovers in an airtight container in the refrigerator for up to three days. Reheat gently on the stove.
    • Garnish Wisely: Always garnish with fresh parsley just before serving for a burst of color and freshness.

    Best Side Dishes and Pairings

    Pairing side dishes with Irish Bacon Cabbage and Potato Soup can enhance your meal’s overall experience.

    1. Irish Brown Bread: This hearty bread adds a nutty flavor and is perfect for soaking up the soup.
    2. Colcannon: A traditional Irish dish of mashed potatoes and cabbage that complements the soup’s ingredients.
    3. Cheese Platter: A selection of Irish cheeses provides a delightful contrast to the soup’s warmth and flavor.
    4. Steamed Green Beans: These add a splash of color and a nutritional boost, enhancing the meal’s healthiness.
    5. Apple Tart: A slice of warm apple tart offers a sweet finish that balances the savory soup.

    Common Mistakes to Avoid

    • Using Low-Quality Bacon: The flavor of your soup heavily relies on the quality of the bacon, so opt for thick-cut Irish bacon for the best results.
    • Overcooking the Vegetables: To maintain a pleasant texture, avoid overcooking the cabbage and potatoes; they should be tender but not mushy.
    • Skipping the Seasoning: Always taste your soup before serving; under-seasoning can lead to a bland dish, so adjust salt and pepper as needed.
    • Not Using Fresh Ingredients: Fresh vegetables will enhance the flavor and nutritional value of your soup, so choose fresh over canned or frozen when possible.

    Storage & Reheating Instructions

    Refrigerator Storage

    Store Irish Bacon Cabbage and Potato Soup in airtight containers. It will stay fresh for up to 3-4 days in the refrigerator.

    Freezing Instructions

    For best results, freeze the soup in individual portions. Allow it to cool completely before transferring to freezer-safe containers. It can be stored for up to 3 months. Thaw in the refrigerator overnight before reheating.

    Reheating Tips

    • Oven: Preheat the oven to 350°F (175°C). Pour the soup into an oven-safe dish, cover with foil, and heat for about 20-30 minutes or until warmed through.
    • Microwave: Transfer the soup to a microwave-safe bowl. Heat in 1-minute intervals, stirring in between, until heated thoroughly.
    • Stovetop: Pour the soup into a saucepan over medium heat. Stir occasionally and heat for about 5-10 minutes, until warmed to your liking.

    Frequently Asked Questions

    What can I serve with Irish Bacon Cabbage and Potato Soup?

    Irish Bacon Cabbage and Potato Soup pairs well with crusty bread or a side salad for a complete meal.

    Can I make this soup vegetarian?

    Yes, you can substitute the bacon with smoked tempeh or mushrooms for a vegetarian option. Use vegetable broth instead of chicken broth for a fully vegetarian soup.

    How long does Irish Bacon Cabbage and Potato Soup last in the fridge?

    When stored in airtight containers, the soup will stay fresh for 3-4 days in the refrigerator.

    Is it possible to make this soup dairy-free?

    Absolutely! Simply omit the heavy cream or replace it with a dairy-free alternative, such as coconut milk or almond milk.

    Can I add other vegetables to the soup?

    Yes, feel free to add other vegetables such as peas, corn, or bell peppers to enhance the flavor and nutrition of your Irish Bacon Cabbage and Potato Soup.

    Final Thoughts

    This Irish Bacon Cabbage and Potato Soup is a comforting and hearty dish perfect for any occasion. Its rich flavors and creamy texture make it a favorite among family and friends. We encourage you to try this recipe and share your feedback in the comments. Your thoughts and experiences help other readers enjoy this dish even more.


    Dinner

    Irish Bacon Cabbage and Potato Soup


    5.0 from 24 reviews

    This hearty Irish Bacon Cabbage and Potato Soup combines the rich flavors of crispy bacon, tender potatoes, and fresh cabbage in a creamy broth. Perfect for a cozy meal, this soup is both comforting and satisfying, making it an ideal dish for chilly days.

    Author: Munch Twist
    Prep Time: 15 mins
    Cook Time: 35 mins
    Total Time: 50 mins
    Yield: 6 servings
    Category: Lunch
    Method: No bake
    Cuisine: American

    Irish Bacon Cabbage and Potato Soup

    SCALE:
    1x
    2x
    3x
    Cook Mode: Prevent your screen from going dark

    Ingredients

    • 1 teaspoon dried thyme
    • 1 bay leaf
    • 1 large onion, chopped
    • 3 large potatoes, peeled and diced
    • 1/2 teaspoon black pepper
    • 1 cup heavy cream (optional)
    • 1 cup carrots, sliced
    • 4 cups chicken broth
    • Salt to taste
    • 3 cups green cabbage, shredded
    • 6 slices of Irish bacon or thick-cut bacon, diced
    • Fresh parsley, chopped (for garnish)
    • 2 cloves garlic, minced

    Instructions

    1. In a large pot or Dutch oven, cook the diced bacon over medium heat until it turns crisp. Remove the bacon with a slotted spoon and set it aside, leaving the drippings in the pot.
    2. Add the chopped onion to the pot with the bacon drippings. Sauté for about 5 minutes until the onion becomes translucent. Then, add the minced garlic and sauté for another minute until fragrant.
    3. Pour in the chicken broth and add the diced potatoes. Bring the mixture to a boil, then reduce the heat and simmer for about 10 minutes, allowing the potatoes to start cooking.
    4. Stir in the shredded cabbage, sliced carrots, bay leaf, dried thyme, and black pepper. Continue simmering for an additional 15-20 minutes, or until the vegetables are tender.
    5. If you prefer a creamier soup, stir in the heavy cream and heat it through gently, being careful not to let it boil.
    6. Taste the soup and adjust the seasoning with salt and additional pepper if needed. Remove the bay leaf.
    7. Ladle the soup into bowls, top with the crispy bacon, and garnish with chopped fresh parsley.

    Nutrition Facts

    Serving Size: 1 serving
    Calories: 320 kcal
    Sugar: 3g
    Sodium: 800mg
    Fat: 18g
    Saturated Fat: 9g
    Carbohydrates: 30g
    Fiber: 4g
    Protein: 10g
    Cholesterol: 60mg

  • Delicious Bacon Jalapeño Popper Cheese Balls Recipe

    Delicious Bacon Jalapeño Popper Cheese Balls Recipe

    Bacon Jalapeño Popper Cheese Balls are the ultimate appetizer, combining creamy cheese with a spicy kick and crispy bacon. These bite-sized treats are sure to be a hit at any gathering, delivering an irresistible flavor that will leave everyone wanting more.

    Why You’ll Love This Recipe

    • Flavor Explosion: The combination of cream cheese, jalapeños, and bacon creates a mouthwatering taste experience.
    • Crowd-Pleaser: Perfect for parties, game days, or family gatherings, these cheese balls are always a favorite.
    • Customizable: Adjust the spice level by adding more or fewer jalapeños to suit your taste.
    • Make Ahead: Prepare them in advance and refrigerate, making entertaining effortless.
    • Simple Ingredients: With just a few common ingredients, you can whip up these cheese balls in no time.

    Tools and Equipment

    To make the preparation process smooth, having the right tools is essential.

    Essential Tools

    • Mixing bowl
    • Cookie scoop or spoon
    • Shallow plate
    • Refrigerator

    Why These Tools Matter

    • Mixing bowl: Allows for easy combining of ingredients without spills.
    • Cookie scoop or spoon: Ensures uniform size for each cheese ball, promoting even cooking.
    • Refrigerator: Helps the cheese balls firm up, enhancing their texture and flavor.

    Ingredients for Bacon Jalapeño Popper Cheese Balls

    • 1 teaspoon black pepper
    • 16 oz cream cheese, softened
    • 1 tablespoon mayonnaise
    • 1 cup jalapeño, deseeded and diced
    • ½ cup minced fresh chives
    • 1 teaspoon cayenne pepper
    • ½ cup sharp cheddar, shredded
    • 2 cups finely crumbled bacon (or more)

    How to Make Bacon Jalapeño Popper Cheese Balls Step-by-Step

    Step 1: Prepare the Cheese Mixture

    In a large bowl, combine the cream cheese, mayonnaise, shredded cheddar, diced jalapeño, minced chives, black pepper, and cayenne pepper. Mix everything thoroughly until the mixture is fluffy and well-blended.

    Step 2: Form the Cheese Balls

    Place the remaining 1½ cups of crumbled bacon on a shallow plate. Using a cookie scoop or your hands, form the cheese mixture into balls, each about 1 inch in diameter.

    Step 3: Coat with Bacon

    Roll each cheese ball in the crumbled bacon, ensuring they are fully coated. Place them on a plate or tray.

    Step 4: Chill and Serve

    Refrigerate the cheese balls for at least 30 minutes, or until ready to serve. This helps them firm up and enhances the flavors, making them even more delicious.

    Enjoy your Bacon Jalapeño Popper Cheese Balls as a delightful appetizer that combines creamy, spicy, and crispy elements in every bite.

    How to Serve Bacon Jalapeño Popper Cheese Balls

    Bacon Jalapeño Popper Cheese Balls can be served in a variety of delightful ways that enhance their flavor and presentation.

    Garnished with Fresh Herbs

    Sprinkle chopped fresh herbs such as parsley or cilantro over the cheese balls before serving. This adds a pop of color and freshness that complements the rich and spicy flavors.

    Accompanied by Dipping Sauces

    Serve these cheese balls with an array of dipping sauces like ranch, blue cheese, or a spicy sriracha mayo. This allows guests to customize their experience and adds an extra layer of flavor.

    On a Charcuterie Board

    Incorporate Bacon Jalapeño Popper Cheese Balls into a charcuterie board with cured meats, cheeses, and crackers. This makes for an impressive presentation and a wonderful mix of flavors for guests to enjoy.

    Pro Tips for the Best Bacon Jalapeño Popper Cheese Balls

    To achieve the best results with your Bacon Jalapeño Popper Cheese Balls, consider the following tips:

    • Use Fresh Ingredients: Opt for fresh jalapeños and high-quality bacon for the best flavor and texture.

    • Customize Spice Levels: Adjust the amount of jalapeño and cayenne pepper to suit your spice tolerance. You can even add diced poblano peppers for a milder option.

    • Chill Thoroughly: Make sure to refrigerate the cheese balls for the full 30 minutes. This helps them hold their shape and enhances the flavors.

    • Experiment with Cheeses: For different flavor profiles, try mixing in other cheeses like pepper jack or gouda.

    • Serve at Room Temperature: Allow the cheese balls to sit out for a few minutes before serving. This makes them more flavorful and easier to enjoy.

    Best Side Dishes and Pairings

    Bacon Jalapeño Popper Cheese Balls pair wonderfully with a variety of dishes and beverages. Here are some great options:

    1. Classic Buffalo Wings – The spicy and tangy flavor of buffalo wings complements the creamy and cheesy goodness of the cheese balls.

    2. Crispy Potato Wedges – Seasoned and baked potato wedges provide a crunchy contrast that enhances the overall snacking experience.

    3. Fresh Veggie Platter – A selection of crunchy vegetables like carrots, celery, and bell peppers adds a refreshing balance to the richness of the cheese balls.

    4. Guacamole and Tortilla Chips – The creamy texture of guacamole pairs perfectly with the crunchy cheese balls, making for a delightful combination.

    5. Light Beer or Hard Seltzer – These beverages offer a refreshing contrast to the richness of the cheese balls, making them ideal for casual gatherings.

    Common Mistakes to Avoid

    • Not Softening the Cream Cheese: Always ensure the cream cheese is softened for easier mixing.
    • Skipping the Chilling Time: Refrigerating the cheese balls helps them firm up and enhances the flavors, so don’t skip this step.
    • Overloading on Jalapeños: While jalapeños add great flavor, too many can overwhelm the dish. Stick to the recommended amount for balance.
    • Inconsistent Sizing: If the cheese balls are not uniform in size, they may not cook evenly or may vary in flavor. Use a scoop for consistency.

    Storage & Reheating Instructions

    Refrigerator Storage

    Store any leftover Bacon Jalapeño Popper Cheese Balls in an airtight container in the refrigerator. They will stay fresh for up to 5 days.

    Freezing Instructions

    To freeze, arrange the cheese balls on a baking sheet and freeze until solid. Once frozen, transfer them to an airtight container or freezer bag. They can be stored for up to 3 months.

    Reheating Tips

    • Oven: Preheat the oven to 350°F (175°C) and bake the cheese balls for about 10-15 minutes until heated through.
    • Microwave: Place the cheese balls on a microwave-safe plate and heat in 20-second intervals until warm, being careful not to overheat.
    • Stovetop: Heat a skillet over medium heat and warm the cheese balls for a few minutes, turning occasionally until heated through.

    Frequently Asked Questions

    How can I make Bacon Jalapeño Popper Cheese Balls spicier?

    To increase the heat, consider using spicy jalapeños or adding a dash of hot sauce to the cheese mixture.

    Can I use turkey bacon instead of regular bacon?

    Yes, turkey bacon can be used as a lighter alternative, though it may not provide the same level of crispiness or flavor.

    What can I serve with Bacon Jalapeño Popper Cheese Balls?

    These cheese balls pair well with dipping sauces such as ranch, blue cheese, or spicy aioli, and they are perfect for parties or game day.

    How long do Bacon Jalapeño Popper Cheese Balls last in the freezer?

    When properly stored, they can last up to 3 months in the freezer without losing flavor or texture.

    Can I make these cheese balls ahead of time?

    Absolutely! You can prepare and chill them a day in advance, making them a convenient option for entertaining.

    Final Thoughts

    Bacon Jalapeño Popper Cheese Balls are an irresistible treat that combines creamy, spicy, and crispy flavors, making them ideal for any occasion. We encourage you to try this recipe and share your experience in the comments below!


    Lunch

    Bacon Jalapeño Popper Cheese Balls


    5.0 from 24 reviews

    These Bacon Jalapeño Popper Cheese Balls are a delightful combination of creamy cheese, spicy jalapeños, and crispy bacon. Perfect for parties or gatherings, they offer a flavorful bite that is sure to impress your guests.

    Author: Munch Twist
    Prep Time: 15 minutes
    Cook Time: 25 mins
    Total Time: 45 minutes
    Yield: 24 servings
    Category: Lunch
    Method: No bake
    Cuisine: American

    Bacon Jalapeño Popper Cheese Balls

    SCALE:
    1x
    2x
    3x
    Cook Mode: Prevent your screen from going dark

    Ingredients

    • 1 teaspoon black pepper
    • 16 oz cream cheese, softened
    • 1 tablespoon mayonnaise
    • 1 cup jalapeño, deseeded and diced
    • ½ cup minced fresh chives
    • 1 teaspoon cayenne pepper
    • ½ cup sharp cheddar, shredded
    • 2 cups finely crumbled bacon

    Instructions

    1. In a large bowl, combine the cream cheese, mayonnaise, shredded cheddar, diced jalapeño, minced chives, black pepper, cayenne pepper, and ½ cup of the crumbled bacon. Mix everything thoroughly until the mixture is fluffy and well-blended.
    2. Place the remaining 1½ cups of crumbled bacon on a shallow plate. Using a cookie scoop or your hands, form the cheese mixture into balls, each about 1 inch in diameter.
    3. Roll each cheese ball in the crumbled bacon, ensuring they’re fully coated. Place them on a plate or tray.
    4. Refrigerate the cheese balls for at least 30 minutes, or until ready to serve, to help them firm up and enhance the flavors.

    Nutrition Facts

    Serving Size: 1 serving
    Calories: 110 kcal
    Sugar: 0g
    Sodium: 250mg
    Fat: 10g
    Saturated Fat: 4g
    Carbohydrates: 1g
    Fiber: 0g
    Protein: 3g
    Cholesterol: 30mg

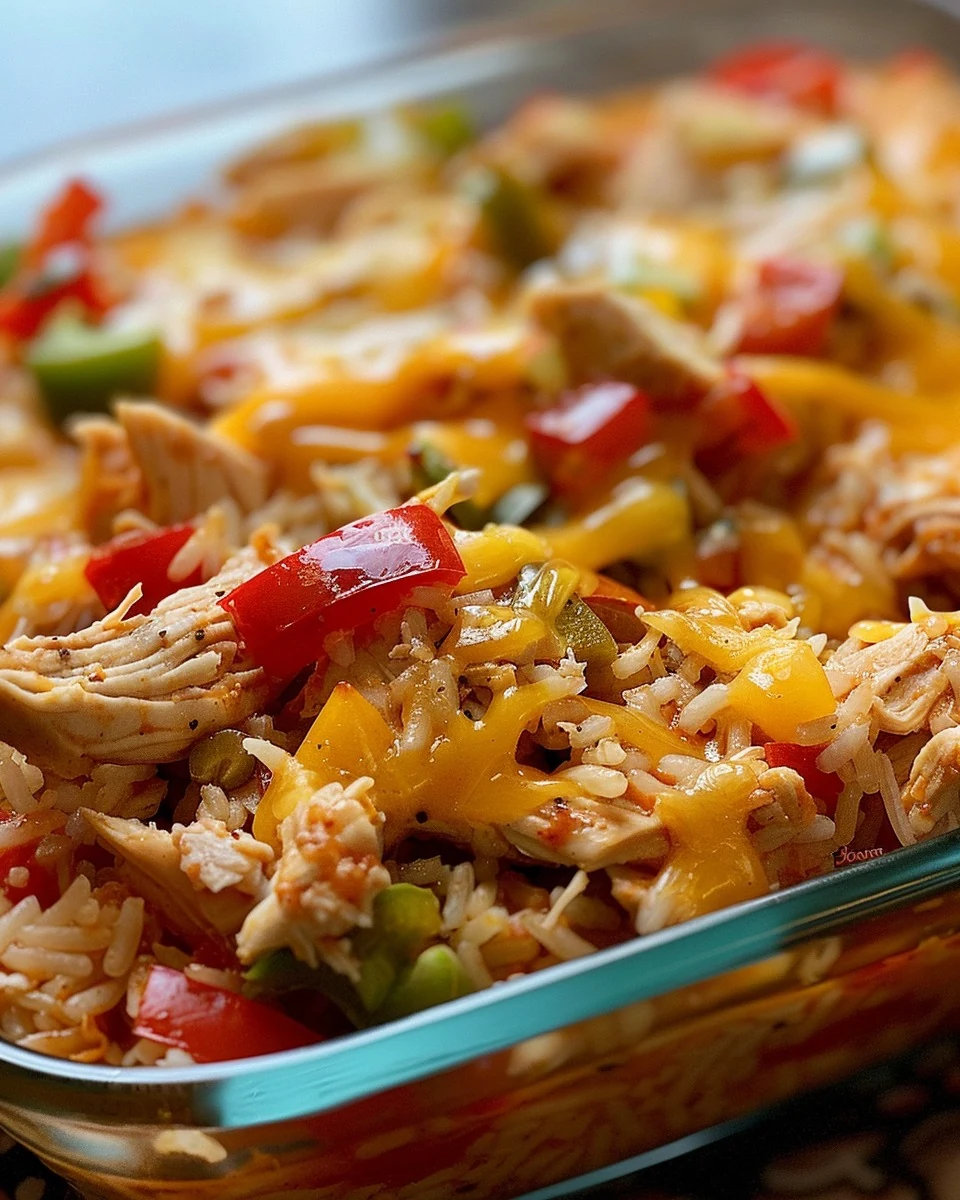
  • Delicious Fajita Chicken Casserole – Standard Oven Directions Recipe

    Delicious Fajita Chicken Casserole – Standard Oven Directions Recipe

    Fajita Chicken Casserole – Standard Oven Directions

    This Fajita Chicken Casserole is a delightful dish that combines creamy textures with bold flavors, making it a favorite for family dinners. With its perfect balance of spices and cheesy goodness, this casserole is sure to become a staple in your recipe collection.

    Why You’ll Love This Recipe

    • Quick & Easy: Ready in under 30 minutes, this dish is perfect for busy weeknights.
    • Flavor Packed: The fajita seasoning adds a burst of flavor that elevates the dish.
    • Versatile: Customize with your favorite vegetables or spices for a personal touch.
    • Satisfying: Packed with protein from chicken and cheese, it’s a hearty meal.
    • One-Dish Wonder: Minimal cleanup with everything cooked in a single baking dish.

    Tools and Equipment

    To make this casserole, you’ll need a few essential kitchen tools.

    Essential Tools

    • A 9×13-inch baking dish
    • Large mixing bowl
    • Measuring cups and spoons
    • Spoon or spatula for mixing
    • Nonstick cooking spray

    Why These Tools Matter

    • 9×13-inch baking dish: Perfect size for even cooking and easy serving.
    • Large mixing bowl: Provides ample space for combining all ingredients without spilling.
    • Nonstick cooking spray: Ensures easy release of the casserole for perfect presentation.

    Ingredients for Fajita Chicken Casserole – Standard Oven Directions

    Casserole Base

    • 1 (10.5-ounce) can cream of chicken soup
    • 1 1/2 cups chicken broth
    • 4 cups shredded cooked chicken (about 3 large breasts)
    • 2 cups instant rice
    • 1 (1.12-ounce) packet fajita seasoning (I prefer McCormick)
    • 1 cup frozen diced onion and bell pepper blend
    • 1 (10-ounce) can diced tomatoes with chilies (like Ro Tel), undrained

    Toppings

    • 1 (8-ounce) shredded Mexican blend cheese (about 2 cups)
    • 1 cup sour cream

    How to Make Fajita Chicken Casserole – Standard Oven Directions Step-by-Step

    Step 1: Preheat the Oven

    Preheat your oven to 350°F. Lightly spray a 9×13-inch baking dish with nonstick cooking spray to prevent sticking.

    Step 2: Combine Ingredients

    In a large mixing bowl, combine the shredded chicken, instant rice, cream of chicken soup, sour cream, frozen onion and bell pepper blend, diced tomatoes with chilies (undrained), chicken broth, fajita seasoning, and half of the shredded cheese. Mix everything together until well combined.

    Step 3: Transfer to Dish

    Pour the mixture into the prepared baking dish, spreading it out evenly to cover the entire dish.

    Step 4: Bake

    Place the dish in the preheated oven and bake for about 25 minutes until heated through.

    Step 5: Add Cheese

    Remove the casserole from the oven and top it with the remaining shredded cheese. Return the dish to the oven and bake until the cheese is melted and bubbly, about 5 minutes.

    Step 6: Serve

    Allow the casserole to cool slightly before serving. Enjoy this hearty Fajita Chicken Casserole with your favorite sides.

    This tasty dish is perfect for gatherings or a comforting family meal.

    How to Serve Fajita Chicken Casserole – Standard Oven Directions

    Serving this Fajita Chicken Casserole can be as creative as it is delicious. Here are some ideas to elevate your meal.

    Garnish with Fresh Herbs

    Sprinkle chopped cilantro or parsley over the casserole just before serving for a fresh pop of color and flavor.

    Serve with Avocado Slices

    Creamy avocado slices on the side provide a rich contrast to the spicy flavors of the casserole, enhancing the overall taste experience.

    Pair with a Side Salad

    A crisp, refreshing side salad with a light vinaigrette balances the richness of the casserole and adds a nutritious element to your meal.

    Pro Tips for the Best Fajita Chicken Casserole – Standard Oven Directions

    To ensure your Fajita Chicken Casserole turns out perfectly every time, consider the following tips.

    • Use Rotisserie Chicken: For a quicker option, using rotisserie chicken can save time and enhance the flavor of your dish.

    • Customize Your Veggies: Feel free to add your favorite vegetables, such as zucchini or corn, to the casserole for added nutrition and texture.

    • Adjust Spice Level: If you prefer a milder dish, use less fajita seasoning or choose a mild version to suit your taste.

    • Cover While Baking: Cover the casserole with foil for the first half of the baking time to prevent the cheese from over-browning.

    • Make Ahead: Assemble the casserole in advance and refrigerate it overnight. Just add a few extra minutes to the baking time if baking from cold.

    Best Side Dishes and Pairings

    Enhance your meal with these delightful side dishes and beverages that pair wonderfully with Fajita Chicken Casserole.

    1. Mexican Street Corn: This creamy, cheesy corn dish complements the flavors of the casserole and adds a delightful crunch.

    2. Refried Beans: Smooth and savory, refried beans add a hearty element that pairs well with the casserole’s flavors.

    3. Guacamole: The creamy texture of guacamole provides a refreshing contrast to the spicy casserole, making it a perfect accompaniment.

    4. Cilantro Lime Rice: This zesty rice dish adds a fresh, citrusy flavor that brightens the meal and pairs beautifully with the casserole.

    5. Chips and Salsa: The crunch of tortilla chips and the tangy salsa create a fun, interactive side that enhances the overall dining experience.

    6. Chilled Margaritas: A refreshing margarita can be the perfect drink to accompany the rich flavors of the casserole, providing a festive touch to your meal.

    Common Mistakes to Avoid

    • Using Regular Rice: Instant rice is key for this recipe; regular rice may not cook properly in the casserole.
    • Skipping the Drainage: Do not drain the diced tomatoes with chilies; the liquid is essential for the casserole’s texture.
    • Overbaking the Casserole: Keep an eye on the baking time; overbaking can dry out the dish.
    • Not Mixing Thoroughly: Ensure all ingredients are well combined to avoid uneven flavors and textures.

    Storage & Reheating Instructions

    Refrigerator Storage

    Store leftover Fajita Chicken Casserole in airtight containers. It will stay fresh for up to 3-4 days in the refrigerator.

    Freezing Instructions

    To freeze, cool the casserole completely, then transfer it to an airtight freezer-safe container. It can be frozen for up to 2-3 months. Thaw in the refrigerator overnight before reheating.

    Reheating Tips

    • Oven: Preheat to 350°F and cover the casserole with foil. Heat for about 20-25 minutes until warmed through.
    • Microwave: Place a portion in a microwave-safe dish and cover. Heat on high for 2-3 minutes, stirring halfway through.
    • Stovetop: Heat in a skillet over medium heat, stirring occasionally until heated through.

    Frequently Asked Questions

    What is Fajita Chicken Casserole – Standard Oven Directions?

    This is a one-dish meal that combines chicken, rice, cheese, and fajita seasoning, baked to perfection in a standard oven.

    Can I use rotisserie chicken for this recipe?

    Yes, rotisserie chicken is a great option as it saves time and adds flavor.

    How can I spice up the Fajita Chicken Casserole?

    Consider adding jalapeños, extra chili powder, or hot sauce to enhance the dish’s heat.

    Can I make this casserole ahead of time?

    Absolutely! You can prepare the casserole a day in advance and bake it just before serving.

    What sides pair well with Fajita Chicken Casserole?

    This dish pairs well with a simple green salad, corn on the cob, or tortilla chips with salsa.

    Final Thoughts

    This Fajita Chicken Casserole is an easy and delicious meal that brings comfort and flavor to your table. I encourage you to try this recipe and share your experience in the comments below. Your feedback is always appreciated!

    Dinner

    Fajita Chicken Casserole – Standard Oven Directions


    5.0 from 24 reviews

    This Fajita Chicken Casserole is a perfect blend of creamy, cheesy, and spicy goodness that will satisfy your cravings for a hearty meal.

    Author: Munch Twist
    Prep Time: 10 minutes
    Cook Time: 30 minutes
    Total Time: 40 minutes
    Yield: 6 servings
    Category: Lunch
    Method: No bake
    Cuisine: American

    Fajita Chicken Casserole - Standard Oven Directions

    SCALE:
    1x
    2x
    3x
    Cook Mode: Prevent your screen from going dark

    Ingredients

    • 1 (10.5-ounce) can cream of chicken soup
    • 1 (8-ounce) shredded Mexican blend cheese (about 2 cups)
    • 1 1/2 cups chicken broth
    • 4 cups shredded cooked chicken (about 3 large breasts)
    • 2 cups instant rice
    • 1 (1.12-ounce) packet fajita seasoning
    • 1 cup sour cream
    • 1 cup frozen diced onion and bell pepper blend
    • 1 (10-ounce) can diced tomatoes with chilies (undrained)

    Instructions

    1. Preheat your oven to 350°F. Lightly spray a 9×13-inch baking dish with nonstick cooking spray.
    2. In a large mixing bowl, combine the shredded chicken, instant rice, cream of chicken soup, sour cream, frozen onion and bell pepper blend, diced tomatoes with chilies (undrained), chicken broth, fajita seasoning, and half of the shredded cheese. Mix everything together until well combined.
    3. Pour the mixture into the prepared baking dish, spreading it out evenly to cover the entire dish.
    4. Place the dish in the preheated oven and bake for about 25 minutes.
    5. Remove the casserole from the oven and top it with the remaining shredded cheese. Return the dish to the oven and bake until the cheese is melted and bubbly, about 5 minutes.
    6. Allow the casserole to cool slightly before serving.

    Nutrition Facts

    Serving Size: 1 serving
    Calories: 380 kcal
    Sugar: 3g
    Sodium: 800mg
    Fat: 18g
    Saturated Fat: 10g
    Carbohydrates: 25g
    Fiber: 2g
    Protein: 28g
    Cholesterol: 90mg