Category: Desserts

  • Crispy Fried Cinnamon Apple Rings Recipe to Try

    Crispy Fried Cinnamon Apple Rings Recipe to Try

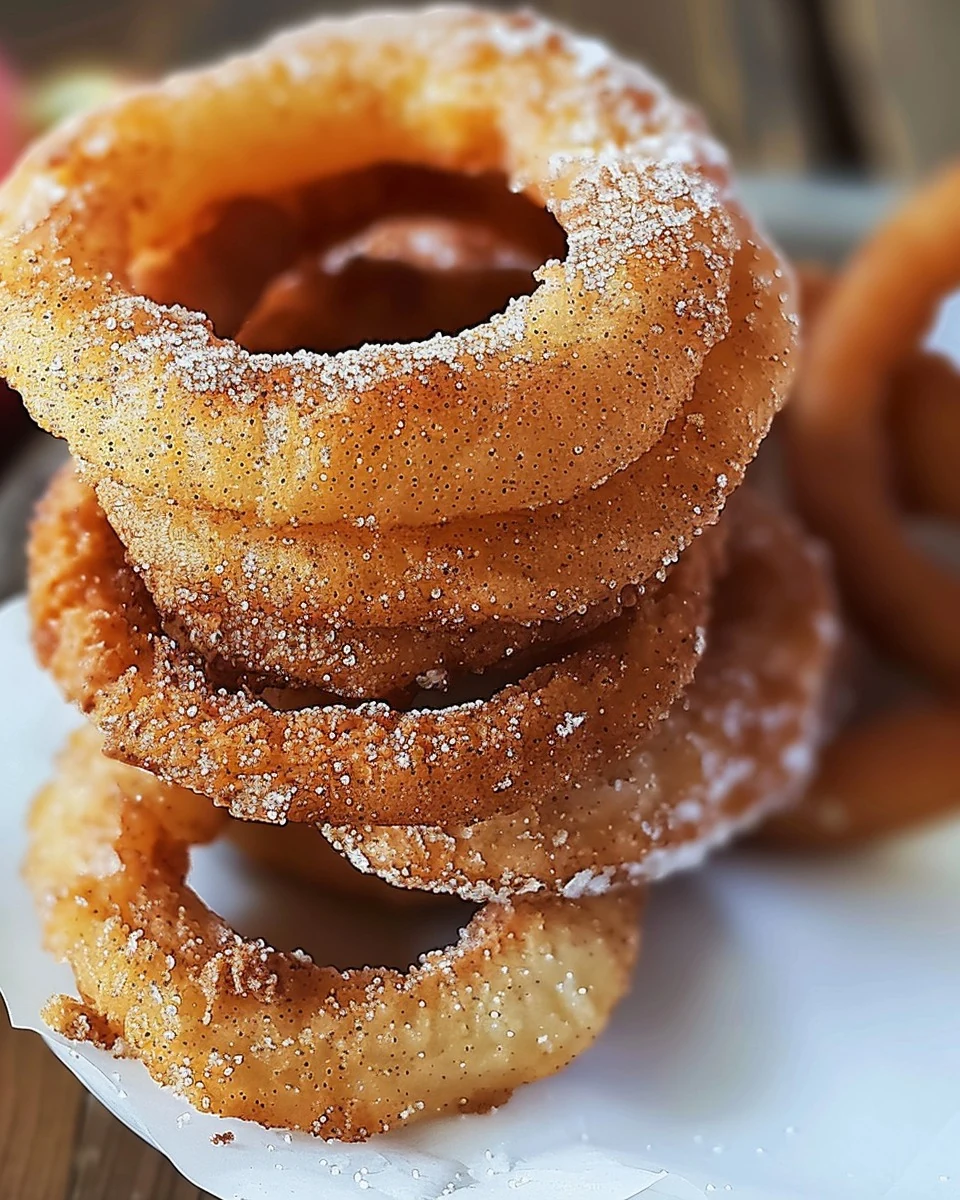
    Fried Cinnamon Apple Rings are a delightful treat that perfectly combines the sweetness of apples with a crispy, cinnamon-infused batter. These rings are not only visually appealing but also offer a warm, comforting flavor that makes them irresistible.

    Why You’ll Love This Recipe

    • Quick & Easy: Ready in under 30 minutes, making them perfect for any occasion.
    • Family-Friendly: A fun and interactive way to get kids involved in the kitchen.
    • Versatile: Enjoy them as a dessert, snack, or even a breakfast treat.
    • Crispy & Flavorful: The combination of cinnamon and sugar adds a delicious crunch.
    • Fresh Ingredients: Made with simple ingredients that highlight the natural sweetness of apples.

    Tools and Equipment

    Having the right tools can enhance your cooking experience.

    Essential Tools

    • Large mixing bowl
    • Whisk
    • Frying pan
    • Biscuit cutter
    • Paper towels
    • Wire rack

    Why These Tools Matter

    • Large mixing bowl: Provides ample space for combining ingredients without spills.
    • Frying pan: Allows for even heat distribution, ensuring perfect frying results.
    • Wire rack: Helps air circulate around the fried apple rings, keeping them crispy.

    Ingredients for Fried Cinnamon Apple Rings

    For the Apple Rings:

    • 1 large egg, beaten
    • ¼ teaspoon baking powder
    • 1 cup flour
    • 1 cup buttermilk
    • 2 tablespoons sugar
    • ⅛ teaspoon cinnamon
    • ¼ teaspoon salt
    • 4 large apples (e.g., Gala)
    • Vegetable oil for frying

    For the Cinnamon Sugar Topping:

    • 2 teaspoons cinnamon
    • ⅓ cup sugar

    How to Make Fried Cinnamon Apple Rings Step-by-Step

    Step 1: Prepare the Dry Ingredients

    In a large bowl, combine the flour, baking powder, sugar, salt, and ⅛ teaspoon of cinnamon. This mixture forms the base of your batter and should be set aside for later use.

    Step 2: Make the Wet Batter

    In a separate small bowl, whisk together the beaten egg and buttermilk. This will be your wet batter mixture that adds moisture and richness to the fried apple rings.

    Step 3: Prepare the Cinnamon Sugar

    In a third dish, mix ⅓ cup of sugar with 2 teaspoons of cinnamon to create the cinnamon-sugar topping. Set this aside for later, as it will enhance the flavor of the fried apple rings.

    Step 4: Slice the Apples

    Slice the apples into ¼-inch thick rounds. Use circular biscuit cutters to create rings, discarding the core centers. This step is crucial for achieving the perfect shape and texture.

    Step 5: Heat the Oil

    Heat vegetable oil in a frying pan over medium heat until it reaches 350°F (175°C). The right temperature ensures that the apple rings fry evenly and become perfectly crispy.

    Step 6: Combine the Ingredients

    As the oil warms, combine the dry ingredients with the wet mixture to form a smooth batter. Ensure there are no lumps, as a smooth batter will coat the apple rings better.

    Step 7: Dip the Apple Rings

    Dip each apple ring into the batter, making sure to tap off any excess on the side of the bowl. This prevents sogginess and allows for a crispier finish.

    Step 8: Fry the Apple Rings

    Fry the apple rings in small batches, turning them occasionally to ensure even browning on both sides. Cook until they are golden and crispy, usually around 2-3 minutes per side.

    Step 9: Drain Excess Oil

    Transfer the fried rings to a paper towel-lined plate for a few seconds to drain any excess oil. This step helps keep the rings light and not overly greasy.

    Step 10: Coat in Cinnamon Sugar

    Quickly coat each apple ring in the cinnamon-sugar mixture, ensuring even coverage. Then, place them on a wire rack to cool slightly, allowing excess sugar to fall away.

    Step 11: Serve and Enjoy

    Serve the Fried Cinnamon Apple Rings warm and enjoy them as a delightful treat. Their combination of flavors and textures will surely satisfy your cravings.

    How to Serve Fried Cinnamon Apple Rings

    Fried Cinnamon Apple Rings can be enjoyed in various delightful ways. Here are some creative serving ideas.

    A La Mode

    Serve the warm apple rings with a scoop of vanilla ice cream on top. The contrast of temperatures and the creamy texture of the ice cream complement the crispy, warm apple rings perfectly.

    Drizzled with Caramel Sauce

    Add a decadent touch by drizzling caramel sauce over the fried apple rings. This adds a rich sweetness that enhances the cinnamon flavor, making for an indulgent dessert.

    Topped with Whipped Cream

    For a light and airy finish, top the apple rings with freshly whipped cream. This simple addition balances the sweetness and adds a lovely texture to each bite.

    Pro Tips for the Best Fried Cinnamon Apple Rings

    To ensure your Fried Cinnamon Apple Rings are as delicious as possible, consider these practical tips:

    • Use Fresh Apples: Select firm, fresh apples for the best texture and flavor. Gala apples are a great choice for their sweetness and crispness.

    • Maintain Oil Temperature: Use a kitchen thermometer to monitor the oil temperature. Cooking at 350°F (175°C) ensures a crispy exterior without burning the batter.

    • Don’t Overcrowd the Pan: Fry the apple rings in small batches. Overcrowding can lower the oil temperature and lead to soggy rings.

    • Tap Off Excess Batter: After dipping in the batter, gently tap the apple rings against the bowl to remove excess. This helps prevent a thick coating that can take longer to cook.

    • Serve Immediately: For the best taste and texture, serve the Fried Cinnamon Apple Rings immediately after frying. They are at their crispiest when fresh.

    Best Side Dishes and Pairings

    Pair these Fried Cinnamon Apple Rings with complementary dishes and drinks for a complete experience. Here are some great options:

    1. Vanilla Ice Cream: The classic pairing enhances the warm, spiced flavors of the apple rings and adds creaminess.

    2. Coffee or Espresso: The rich, bold flavors of coffee provide a perfect contrast to the sweetness of the apple rings.

    3. Fresh Fruit Salad: A refreshing fruit salad can balance the richness of the fried apple rings and add a burst of freshness.

    4. Cider or Apple Juice: Pairing with a glass of apple cider or juice enhances the apple flavors and creates a seasonal vibe.

    5. Cheese Platter: A selection of cheeses, particularly sharp or tangy varieties, can create an interesting flavor contrast with the sweetness of the apple rings.

    Common Mistakes to Avoid

    • Skipping the Dry Ingredients: Always mix your dry ingredients thoroughly before adding them to the wet mixture to ensure an even batter.
    • Not Heating the Oil Properly: Make sure the oil is at the right temperature (350°F) before frying to achieve a crispy texture.
    • Overcrowding the Pan: Fry the apple rings in small batches to prevent steaming and ensure uniform cooking.
    • Ignoring the Topping: Coat the fried rings in the cinnamon-sugar mixture immediately after frying for the best flavor adherence.

    Storage & Reheating Instructions

    Refrigerator Storage

    Store any leftover Fried Cinnamon Apple Rings in an airtight container in the refrigerator. They will stay fresh for up to 3 days.

    Freezing Instructions

    To freeze, place the cooled apple rings in a single layer on a baking sheet and freeze until solid. Transfer them to a freezer-safe bag or container for up to 2 months.

    Reheating Tips

    • Oven: Preheat the oven to 350°F (175°C) and bake the apple rings for 10-15 minutes until warmed through and crispy.
    • Microwave: Heat on a microwave-safe plate for 20-30 seconds. Note that this may result in a softer texture.
    • Stovetop: Reheat in a skillet over medium heat for a few minutes, turning occasionally until heated through.

    Frequently Asked Questions

    Can I use different types of apples for Fried Cinnamon Apple Rings?

    Yes, while Gala apples are recommended for their sweetness and texture, you can use any variety you prefer. Just ensure they are firm and not overly soft.

    How do I achieve a thicker batter for Fried Cinnamon Apple Rings?

    For a thicker batter, simply add a little more flour until you reach your desired consistency. Be cautious not to overmix.

    Can Fried Cinnamon Apple Rings be made gluten-free?

    Absolutely! Substitute the regular flour with a gluten-free blend, and adjust the liquid as necessary to achieve the right batter consistency.

    What is the best way to serve Fried Cinnamon Apple Rings?

    These rings are best served warm on their own or with a scoop of vanilla ice cream or a drizzle of caramel sauce for an extra treat.

    Final Thoughts

    Fried Cinnamon Apple Rings are a delightful treat that can be enjoyed as a dessert or snack. We encourage you to try this recipe and share your thoughts in the comments. Your feedback helps others discover the joy of this delicious dish.


    Desserts

    Fried Cinnamon Apple Rings


    5.0 from 24 reviews

    These Fried Cinnamon Apple Rings are a delightful treat, combining the sweetness of apples with a crispy batter and a dusting of cinnamon sugar. Perfect for a snack or dessert, they are best served warm and are sure to please everyone.
    Author: Munch Twist
    Prep Time: 15 minutes
    Cook Time: 15 minutes
    Total Time: 30 minutes
    Yield: 4 servings
    Category: Desserts
    Method: No bake
    Cuisine: American

    Fried Cinnamon Apple Rings

    SCALE:
    1x
    2x
    3x
    Cook Mode: Prevent your screen from going dark

    Ingredients

    • 1 large egg, beaten
    • ¼ teaspoon baking powder
    • 1 cup flour
    • 1 cup buttermilk
    • 2 tablespoons sugar
    • ⅛ teaspoon cinnamon
    • ¼ teaspoon salt
    • 4 large apples (e.g., Gala)
    • Vegetable oil for frying
    • 2 teaspoons cinnamon for topping
    • ⅓ cup sugar for topping

    Instructions

    1. In a large bowl, combine the flour, baking powder, sugar, salt, and ⅛ teaspoon of cinnamon. Set aside.
    2. In a separate small bowl, whisk together the beaten egg and buttermilk.
    3. In a third dish, prepare the cinnamon-sugar topping by mixing ⅓ cup of sugar with 2 teaspoons of cinnamon.
    4. Slice the apples into ¼-inch thick rounds and use biscuit cutters to create rings, discarding the core centers.
    5. Heat vegetable oil in a frying pan over medium heat until it reaches 350°F (175°C).
    6. Combine the dry ingredients with the wet mixture to form the batter.
    7. Dip each apple ring into the batter, tapping off any excess.
    8. Fry the apple rings in small batches, turning them to ensure even browning until golden and crispy.
    9. Transfer the fried rings to a paper towel-lined plate to drain excess oil.
    10. Coat each apple ring in the cinnamon-sugar mixture and place them on a wire rack to cool slightly.
    11. Serve warm.

    Nutrition Facts

    Serving Size: 1 serving
    Calories: 220 kcal
    Sugar: 12g
    Sodium: 180mg
    Fat: 8g
    Saturated Fat: 2g
    Carbohydrates: 35g
    Fiber: 3g
    Protein: 4g
    Cholesterol: 30mg

  • Easy and Delicious Breakfast Casserole Recipe

    Easy and Delicious Breakfast Casserole Recipe

    Breakfast Casserole is the ultimate dish to kickstart your day. This hearty meal combines the richness of eggs, cheese, and sausage, all baked to perfection. It’s not just delicious; it’s also a crowd-pleaser, making it ideal for family gatherings or lazy weekend brunches.

    Why You’ll Love This Recipe

    • Satisfying Flavor: The combination of savory sausage and melted cheddar cheese creates a rich taste that everyone will enjoy.
    • Make-Ahead Convenience: Prepare the casserole the night before and pop it in the oven the next morning for a hassle-free breakfast.
    • Customizable Options: Feel free to add vegetables or swap the sausage for bacon to suit your taste.
    • Crowd-Pleasing: Perfect for feeding a group, this dish is sure to impress at any brunch or family gathering.
    • Balanced Nutrition: Packed with protein and essential nutrients, it provides a wholesome start to your day.

    Tools and Equipment

    Having the right tools makes cooking easier and more enjoyable. Here’s what you’ll need to make your Breakfast Casserole.

    Essential Tools

    • 9×13-inch baking dish
    • Mixing bowls
    • Whisk
    • Aluminum foil
    • Cutting board
    • Knife

    Why These Tools Matter

    • Baking Dish: The right size ensures even cooking and easy serving.
    • Mixing Bowl: A sturdy bowl makes it easier to whisk the egg mixture without spills.
    • Aluminum Foil: Covering the casserole helps it cook evenly without drying out.

    Ingredients for Breakfast Casserole

    Base Ingredients

    • 8 slices of bread, cubed
    • 1 pound (16 ounces) breakfast sausage, cooked and crumbled
    • 2 cups shredded cheddar cheese

    Egg Mixture

    • 6 large eggs
    • 2 cups milk
    • 1/4 teaspoon dry mustard
    • 1/2 teaspoon salt
    • 1/2 teaspoon ground black pepper

    How to Make Breakfast Casserole Step-by-Step

    Step 1: Prep the Base

    Begin by preheating your oven to 350°F (175°C). Grease your 9×13-inch baking dish to prevent sticking. Evenly distribute the cubed bread across the bottom of the dish. This will create a solid base for your casserole.

    Step 2: Layer the Ingredients

    Sprinkle the cooked and crumbled breakfast sausage over the bread cubes. Follow this with a generous layer of shredded cheddar cheese. These layers will provide richness and flavor.

    Step 3: Mix the Egg Mixture

    In a separate mixing bowl, whisk together the eggs, milk, salt, pepper, and dry mustard. Make sure all ingredients are thoroughly combined to ensure even seasoning throughout the casserole.

    Step 4: Assemble the Casserole

    Pour the egg mixture evenly over the layers of bread, sausage, and cheese. Use a spatula to ensure the mixture seeps into the bread for a uniform texture.

    Step 5: Refrigerate

    Cover the assembled casserole with aluminum foil. Refrigerate for at least 1 hour, or overnight if you prefer. This allows the flavors to meld and the bread to soak up the egg mixture.

    Step 6: Bake

    Remove the foil and bake the casserole in the preheated oven for 45 minutes. After that, check for doneness and bake uncovered for an additional 15 minutes, or until the top is golden brown and the eggs are fully set.

    Step 7: Cool & Serve

    Once baked, let the casserole cool slightly before cutting it into squares. Serve warm for a delightful breakfast experience.

    Enjoy this hearty Breakfast Casserole for a satisfying and delicious start to your day!

    How to Serve Breakfast Casserole

    There are many creative ways to present and enjoy your Breakfast Casserole.

    Garnished with Fresh Herbs

    Top the casserole with freshly chopped chives or parsley just before serving for a burst of color and flavor.

    Accompanied by Salsa

    Serve with a side of salsa for a zesty kick that complements the richness of the casserole.

    With a Side of Fresh Fruit

    Pair the casserole with a refreshing fruit salad for a balance of flavors and a touch of sweetness.

    Pro Tips for the Best Breakfast Casserole

    To elevate your Breakfast Casserole to the next level, consider these helpful tips.

    • Use Day-Old Bread: Stale bread absorbs the egg mixture better, resulting in a creamier texture.
    • Customize Your Ingredients: Feel free to incorporate vegetables like spinach or bell peppers for added nutrition and flavor.
    • Let It Rest: Allow the casserole to sit overnight in the refrigerator for deeper flavor development.
    • Check for Doneness: Ensure the eggs are fully set by inserting a knife into the center; it should come out clean.
    • Experiment with Cheeses: Try different cheeses like pepper jack or feta for a unique taste profile.

    Best Side Dishes and Pairings

    Enhance your Breakfast Casserole experience with these perfect accompaniments.

    1. Freshly Squeezed Orange Juice – A classic breakfast staple that adds a refreshing citrus flavor.
    2. Crispy Bacon – The salty and crunchy texture of bacon contrasts beautifully with the softness of the casserole.
    3. Hash Browns – Crispy hash browns provide a satisfying crunch and complement the flavors of the casserole.
    4. Yogurt Parfait – Layered with granola and berries, this option adds a healthy and sweet element to your meal.
    5. Coffee or Tea – A warm beverage serves as the perfect companion to enhance your breakfast experience.

    Common Mistakes to Avoid

    • Underestimating the Refrigeration Time: Allowing the casserole to sit in the refrigerator for at least an hour, or overnight, enhances the flavors and texture.
    • Skipping the Greasing Step: Not greasing the baking dish can lead to the casserole sticking, making it difficult to serve.
    • Overbaking the Casserole: Keeping it in the oven too long can dry out the dish. Monitor the baking time closely.
    • Neglecting to Let it Cool: Cutting into the casserole too soon can result in runny eggs and uneven servings.

    Storage & Reheating Instructions

    Refrigerator Storage

    Store any leftovers in an airtight container in the refrigerator. The Breakfast Casserole will stay fresh for up to 3 days.

    Freezing Instructions

    For longer storage, you can freeze the casserole. Wrap it tightly in plastic wrap and then in aluminum foil. It will keep in the freezer for up to 2 months. Thaw it in the refrigerator overnight before reheating.

    Reheating Tips

    • Oven: Preheat the oven to 350°F (175°C). Place the casserole in a baking dish covered with foil and heat for about 20-30 minutes or until warmed through.
    • Microwave: Microwave individual portions on high for 1-2 minutes, checking for doneness.
    • Stovetop: Heat slices in a non-stick skillet over medium heat for about 5-7 minutes, turning occasionally until heated through.

    Frequently Asked Questions

    Can I make this Breakfast Casserole ahead of time?

    Yes, this Breakfast Casserole is perfect for preparing ahead of time. You can assemble it the night before, refrigerate, and bake in the morning.

    What can I substitute for the breakfast sausage?

    You can use turkey sausage, ham, or even sautéed vegetables for a vegetarian option in your Breakfast Casserole.

    How can I make a healthier version of this Breakfast Casserole?

    Consider using whole grain bread, low-fat cheese, and egg whites or a combination of whole eggs and egg whites to reduce calories and fat.

    Can I add other ingredients to the Breakfast Casserole?

    Absolutely! Feel free to add ingredients like bell peppers, onions, or spinach for added flavor and nutrition.

    How do I know when the Breakfast Casserole is done?

    The casserole is done when the top is golden brown and a knife inserted into the center comes out clean, indicating that the eggs are fully set.

    Final Thoughts

    This Breakfast Casserole is a versatile and satisfying dish that can elevate your morning routine. We encourage you to try this recipe and share your thoughts in the comments below. Your feedback is invaluable!


    Lunch

    Breakfast Casserole


    5.0 from 24 reviews

    This Breakfast Casserole is a hearty and satisfying dish perfect for starting your day. With layers of cubed bread, crumbled sausage, and melted cheddar cheese, all bound together by a creamy egg mixture, it's a delicious option for breakfast or brunch gatherings.

    Author: Munch Twist
    Prep Time: 15 minutes
    Cook Time: 60 minutes
    Total Time: 75 minutes
    Yield: 8 servings
    Category: Desserts
    Method: No bake
    Cuisine: American

    Breakfast Casserole

    SCALE:
    1x
    2x
    3x
    Cook Mode: Prevent your screen from going dark

    Ingredients

    • 8 slices of bread, cubed
    • 2 cups shredded cheddar cheese
    • 1/4 teaspoon dry mustard
    • 1 pound breakfast sausage, cooked and crumbled
    • 6 large eggs
    • 2 cups milk
    • 1/2 teaspoon salt
    • 1/2 teaspoon ground black pepper

    Instructions

    1. Preheat your oven to 350°F (175°C) and grease a 9×13-inch baking dish.
    2. Evenly distribute the cubed bread across the bottom of the baking dish. Sprinkle the cooked sausage over the bread, followed by the shredded cheddar cheese.
    3. In a separate bowl, whisk together the eggs, milk, salt, pepper, and dry mustard until well combined.
    4. Pour the egg mixture evenly over the bread, sausage, and cheese layers.
    5. Cover the dish with aluminum foil and refrigerate for at least 1 hour, or overnight for best results.
    6. Bake the casserole, covered, for 45 minutes. Remove the foil and bake for an additional 15 minutes, or until the top is golden brown and the eggs are fully set.
    7. Let the casserole cool slightly before cutting into squares and serving.

    Nutrition Facts

    Serving Size: 1 serving
    Calories: 350 kcal
    Sugar: 4g
    Sodium: 850mg
    Fat: 18g
    Saturated Fat: 7g
    Carbohydrates: 30g
    Fiber: 2g
    Protein: 20g
    Cholesterol: 320mg

  • Deliciously Easy FRENCH TOAST BAKE Recipe

    Deliciously Easy FRENCH TOAST BAKE Recipe

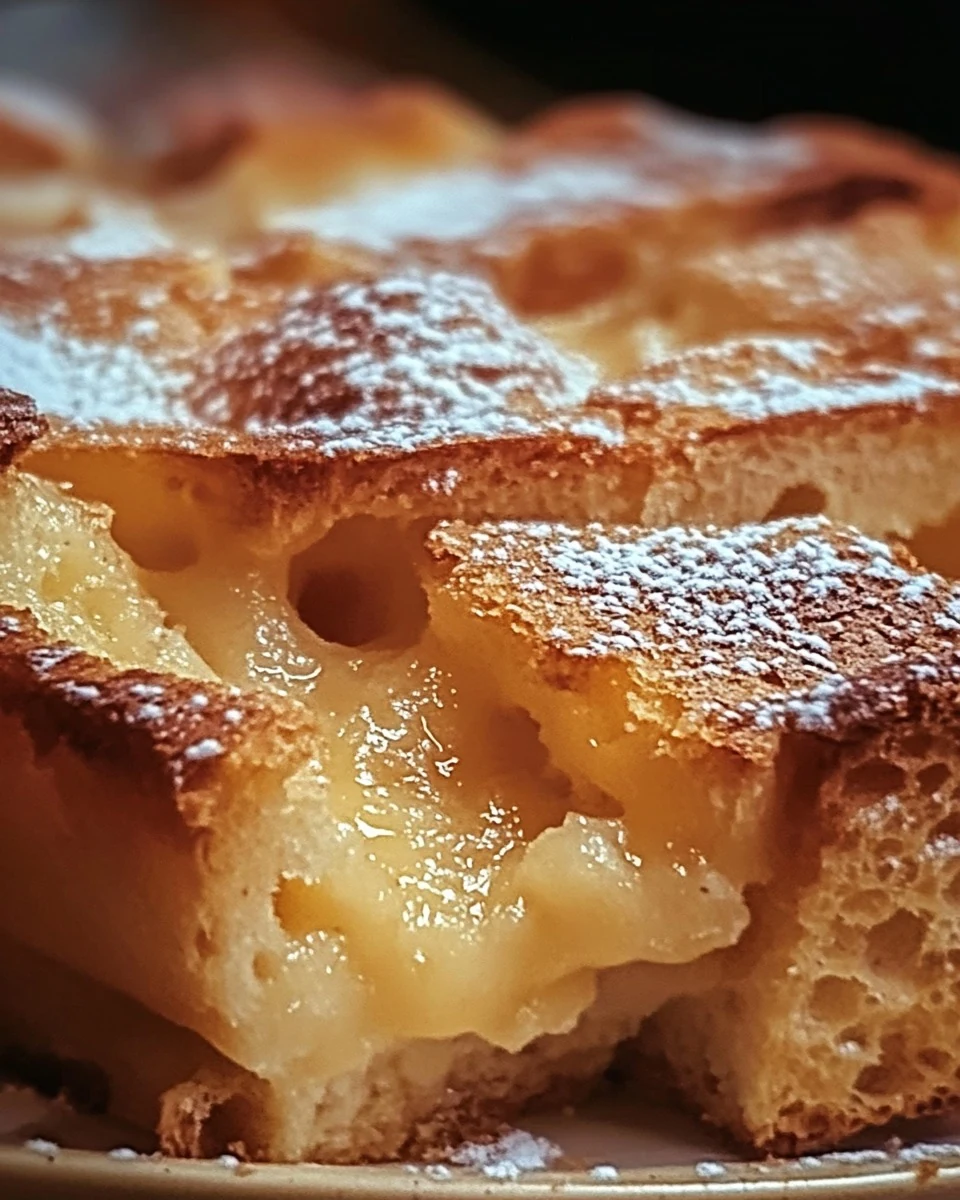
    FRENCH TOAST BAKE is a delightful twist on a classic breakfast favorite. This dish combines the comforting flavors of cinnamon and vanilla with the convenience of baking, making it perfect for brunch or holiday gatherings. With its soft, custardy interior and golden-brown top, this recipe is sure to impress family and friends.

    Why You’ll Love This Recipe

    • Deliciously Comforting: The warm, cinnamon-spiced flavor makes every bite a cozy experience.
    • Perfect for Sharing: This recipe serves eight, making it ideal for family breakfasts or brunch with friends.
    • Make-Ahead Convenience: Prepare it the night before to save time on busy mornings.
    • Customizable Options: Add your favorite toppings like fresh fruit, nuts, or chocolate chips for a personalized touch.
    • Simple Ingredients: Using common pantry items makes it easy to whip up anytime.

    Tools and Equipment

    Having the right tools can make preparing the FRENCH TOAST BAKE a breeze.

    Essential Tools

    • 9×13-inch baking pan
    • Microwave-safe bowl
    • Mixing bowls
    • Whisk
    • Plastic wrap
    • Foil

    Why These Tools Matter

    • Baking pan: The 9×13-inch size allows for even baking and is perfect for serving multiple portions.
    • Whisk: Essential for blending the egg mixture smoothly, ensuring a uniform custard for the bread.
    • Plastic wrap: Helps retain moisture while chilling overnight, enhancing flavor and texture.

    Ingredients for FRENCH TOAST BAKE

    Base Ingredients

    • 1 teaspoon vanilla extract
    • 1 loaf thickly sliced bread
    • 1 1/2 cups milk
    • 1/2 cup melted butter (1 stick)
    • 1 cup brown sugar

    Egg Mixture

    • 4 large eggs
    • Cinnamon for sprinkling
    • Powdered sugar for sprinkling

    How to Make FRENCH TOAST BAKE Step-by-Step

    Step 1: Prep the Base

    In a microwave-safe bowl, melt the butter. Stir in the brown sugar until fully combined. Pour this mixture into the bottom of a 9×13-inch baking pan, spreading it evenly to form a sweet base.

    Step 2: Assemble the First Layer

    Take the thickly sliced bread and arrange a single layer over the butter-sugar mixture. Ensure the slices fit snugly together for even soaking later.

    Step 3: Create the Egg Mixture

    In a separate bowl, whisk together the eggs, milk, and vanilla extract until the mixture is smooth and well combined. This will create the custard that soaks into the bread.

    Step 4: Add Egg Mixture to Layers

    Spoon half of the egg mixture evenly over the first layer of bread. Sprinkle a generous amount of cinnamon on top to enhance the flavor.

    Step 5: Assemble the Second Layer

    Add a second layer of bread slices over the first layer. Pour the remaining egg mixture over the bread, ensuring every slice is soaked and covered.

    Step 6: Chill Overnight

    Cover the pan with plastic wrap and refrigerate overnight. This allows the flavors to meld and the bread to absorb the custard fully.

    Step 7: Bake the French Toast

    Preheat your oven to 350°F (175°C). Bake the FRENCH TOAST BAKE, covered with foil, for 30 minutes. Remove the foil and bake for an additional 15 minutes until the top is golden brown and the center is set.

    Step 8: Finish and Serve

    Once baked, remove from the oven and sprinkle generously with powdered sugar and more cinnamon. Serve warm with maple syrup on the side for an extra touch of sweetness.

    Enjoy this deliciously sweet and cinnamon-spiced FRENCH TOAST BAKE with your favorite syrup!

    How to Serve FRENCH TOAST BAKE

    Elevate your dining experience with creative serving suggestions for your French Toast Bake.

    With Fresh Berries

    Top your French Toast Bake with a medley of fresh berries such as strawberries, blueberries, and raspberries. The tartness of the berries complements the sweetness of the dish beautifully.

    Drizzled with Nut Butter

    Enhance the flavor by drizzling almond or peanut butter over the warm French Toast Bake. This adds a rich, nutty element that balances the sweetness.

    Accompanied by Whipped Cream

    Serve your French Toast Bake with a dollop of homemade whipped cream. The light and airy texture of the cream adds a luxurious touch to this hearty breakfast dish.

    Pro Tips for the Best FRENCH TOAST BAKE

    Achieve the perfect French Toast Bake with these expert tips.

    • Use Stale Bread: For the best texture, use day-old or stale bread, as it soaks up the egg mixture without becoming too soggy.

    • Customize the Spices: Feel free to experiment with spices like nutmeg or cardamom for a unique flavor twist that complements the cinnamon.

    • Increase Soaking Time: If you have time, let the assembled dish soak in the refrigerator for up to 24 hours to deepen the flavors.

    • Monitor Baking Time: Ovens can vary, so keep an eye on your French Toast Bake as it bakes. It should be golden brown on top and set in the center.

    • Serve Immediately: For the best texture and flavor, serve the French Toast Bake warm right out of the oven.

    Best Side Dishes and Pairings

    Enhance your French Toast Bake with these delightful side dishes and beverages.

    1. Maple Syrup – A classic pairing that adds sweetness and richness, making every bite even more indulgent.

    2. Crispy Bacon – The salty crunch of bacon contrasts perfectly with the sweet, soft French Toast Bake.

    3. Sautéed Apples – Warm, spiced apples bring a complementary flavor and texture to the dish, adding an autumnal twist.

    4. Greek Yogurt – A dollop of Greek yogurt offers a tangy, creamy contrast that balances the sweetness of the bake.

    5. Coffee or Tea – A warm beverage like coffee or tea not only enhances the breakfast experience but also complements the dish’s flavors beautifully.

    Common Mistakes to Avoid

    • Not Using Thick Bread: Regular sandwich bread may become too soggy; opt for thick slices such as brioche or challah.
    • Skipping the Overnight Chill: Allowing the French Toast Bake to rest overnight helps the flavors meld and the bread to absorb the egg mixture.
    • Overbaking: Keep an eye on the baking time; overbaking can lead to a dry texture rather than a soft, custardy center.
    • Inadequate Cinnamon: Don’t skimp on the cinnamon; it adds essential flavor that complements the sweetness of the dish.

    Storage & Reheating Instructions

    Refrigerator Storage

    Store any leftovers in an airtight container in the refrigerator for up to 3 days to maintain freshness.

    Freezing Instructions

    To freeze, wrap individual portions tightly in plastic wrap and then place them in a freezer-safe container. This will keep them fresh for up to 2 months.

    Reheating Tips

    • Oven: Preheat to 350°F (175°C) and bake for about 15-20 minutes, covered with foil to prevent drying out.
    • Microwave: Heat individual servings on medium power for 1-2 minutes, checking to ensure even heating.
    • Stovetop: Place a portion in a skillet over medium heat, cover, and warm for about 5-7 minutes, flipping halfway through.

    Frequently Asked Questions

    Can I make this FRENCH TOAST BAKE ahead of time?

    Yes, this recipe is perfect for making ahead. Prepare it the night before and let it chill in the refrigerator overnight.

    What type of bread is best for FRENCH TOAST BAKE?

    Thick, sturdy bread varieties like brioche, challah, or Texas toast are ideal as they hold up well to soaking in the egg mixture.

    Can I customize the toppings for my FRENCH TOAST BAKE?

    Absolutely! Feel free to add fruits like berries or bananas, nuts, or even chocolate chips for added flavor and texture.

    How do I know when the FRENCH TOAST BAKE is done?

    The dish is done when the top is golden brown and the center is set. A toothpick inserted in the center should come out clean.

    Is FRENCH TOAST BAKE suitable for a large gathering?

    Yes, this recipe is great for serving a crowd. It can easily be doubled and prepared in a larger baking dish.

    Final Thoughts

    This FRENCH TOAST BAKE is a delightful way to start your day or to serve at brunch. Its sweet, cinnamon-spiced flavor is sure to impress. Give this recipe a try and let us know how it turned out by leaving a comment below.


    Desserts

    FRENCH TOAST BAKE


    5.0 from 24 reviews

    This French Toast Bake is a delightful and easy dish perfect for breakfast or brunch. With layers of thickly sliced bread soaked in a rich egg mixture and topped with a buttery brown sugar base, it is baked to golden perfection. Serve warm with a dusting of powdered sugar and a drizzle of maple syrup for a sweet start to your day.

    Author: Munch Twist
    Prep Time: 15 minutes
    Cook Time: 45 minutes
    Total Time: 1 hour
    Yield: 8 servings
    Category: Desserts
    Method: Baking
    Cuisine: American

    FRENCH TOAST BAKE

    SCALE:
    1x
    2x
    3x
    Cook Mode: Prevent your screen from going dark

    Ingredients

    • 1 teaspoon vanilla extract
    • 1 loaf thickly sliced bread
    • 1 1/2 cups milk
    • 1/2 cup melted butter (1 stick)
    • 1 cup brown sugar
    • 4 large eggs
    • Cinnamon for sprinkling
    • Powdered sugar for sprinkling

    Instructions

    1. In a microwave-safe bowl, melt the butter. Stir in the brown sugar until fully combined. Pour this mixture into the bottom of a 9×13-inch baking pan and spread it evenly.
    2. Arrange a single layer of thickly sliced bread in the pan over the butter-sugar mixture.
    3. In a separate bowl, whisk together the eggs, milk, and vanilla extract until smooth.
    4. Spoon half of the egg mixture evenly over the first bread layer. Sprinkle a generous amount of cinnamon on top.
    5. Add a second layer of bread slices over the first. Pour the remaining egg mixture over the bread, ensuring every slice is soaked.
    6. Cover the pan with plastic wrap and refrigerate overnight to allow the flavors to meld.
    7. Preheat the oven to 350°F (175°C). Bake the French toast, covered with foil, for 30 minutes. Then, remove the foil and bake for an additional 15 minutes or until the top is golden brown and the center is set.
    8. Once baked, remove from the oven and sprinkle generously with powdered sugar and more cinnamon. Serve warm with maple syrup on the side.

    Nutrition Facts

    Serving Size: 1 serving
    Calories: 380 kcal
    Sugar: 24g
    Sodium: 340mg
    Fat: 16g
    Saturated Fat: 9g
    Carbohydrates: 51g
    Fiber: 2g
    Protein: 9g
    Cholesterol: 130mg

  • Decadent Midnight Chocolate Meringue Pies Recipe

    Decadent Midnight Chocolate Meringue Pies Recipe

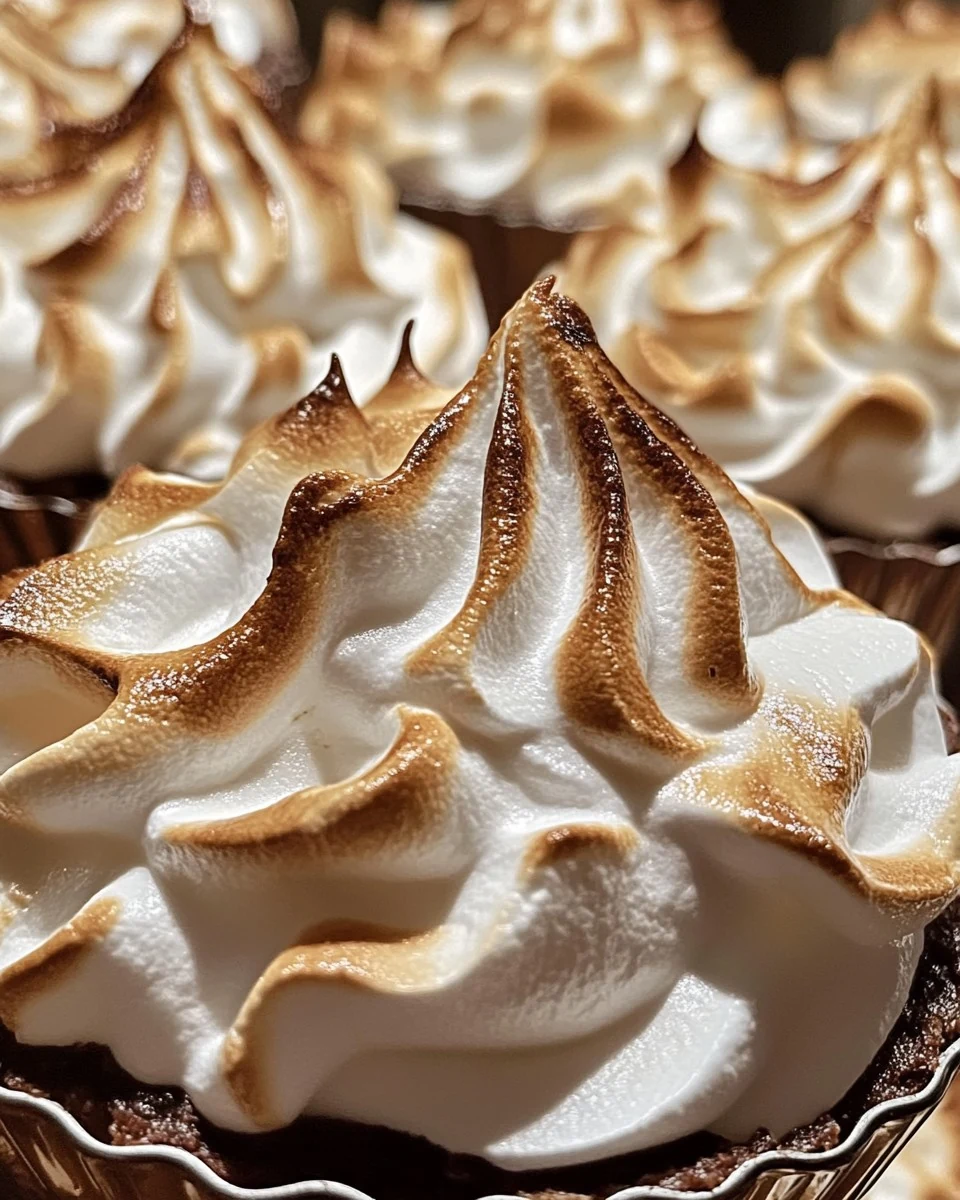
    Midnight Chocolate Meringue Pies are an irresistible dessert that combines rich chocolate filling with a light, airy meringue topping. The contrast of textures and flavors makes them a perfect treat for any occasion, especially for those who crave something sweet late at night.

    Why You’ll Love This Recipe

    • Decadent Flavor: The intense chocolate filling pairs beautifully with the light meringue, creating a delightful taste experience.
    • Impressive Presentation: These pies look stunning with their golden meringue peaks, making them a showstopper for gatherings.
    • Perfect for Sharing: This recipe yields two pies, ideal for parties or family gatherings.
    • Easy to Customize: Feel free to add toppings like chocolate shavings or fresh berries for an extra touch.
    • Comforting Treat: Whether it’s a special occasion or a midnight snack, these pies are sure to satisfy your sweet tooth.

    Tools and Equipment

    Having the right tools makes the preparation easier and more enjoyable.

    Essential Tools

    • Mixing bowls
    • Whisk
    • Saucepan
    • Electric mixer
    • Pie crusts
    • Wire rack

    Why These Tools Matter

    • Mixing bowls: A variety of sizes helps in organizing ingredients and mixing smoothly.
    • Electric mixer: Ensures that the egg whites reach stiff peaks quickly, making meringue preparation effortless.
    • Wire rack: Allows the pies to cool evenly, preventing sogginess and ensuring a perfect texture.

    Ingredients for Midnight Chocolate Meringue Pies

    For the Filling (for two pies):

    • 4 cups whole milk
    • 8 egg yolks
    • 8 heaping tablespoons Hershey’s cocoa
    • 3 cups sugar
    • 4 teaspoons pure vanilla extract
    • 1 cup heavy cream
    • 1/2 cup flour

    For the Meringue:

    • 8 egg whites
    • 1/2 cup corn syrup
    • 1/4 cup sugar

    How to Make Midnight Chocolate Meringue Pies Step-by-Step

    Step 1: Prepare the Filling Mixture

    In a large bowl, whisk together the sugar, flour, and cocoa. Gradually add the heavy cream, milk, vanilla, and egg yolks. Whisk until the mixture is smooth and fully combined. Ensure thorough mixing before heating.

    Step 2: Cook the Filling

    Pour the mixture into a saucepan and cook over medium-high heat. Whisk continuously until the filling thickens, which takes about 10-15 minutes. Once thickened, remove from heat and immediately pour the filling into two pre-baked deep-dish pie crusts.

    Step 3: Make the Meringue

    In a clean mixing bowl, beat the egg whites, corn syrup, and sugar on high speed until stiff peaks form. This process usually takes a few minutes.

    Step 4: Top and Bake

    Spoon the meringue over the chocolate filling in both pies. Spread it evenly and create peaks using the back of a spoon. Place the pies in a preheated oven at 425°F (220°C) and bake until the meringue turns golden brown, approximately 5-7 minutes.

    Step 5: Cool and Serve

    Remove the pies from the oven and let them cool on a wire rack for one hour before serving. This cooling time allows the filling to set properly and enhances the flavors.

    These Midnight Chocolate Meringue Pies are a rich and indulgent treat, perfect for any late-night craving!

    How to Serve Midnight Chocolate Meringue Pies

    These pies are not just a dessert; they are an experience. Here are some creative ways to serve them.

    Whipped Cream and Berries

    Top each slice of pie with a dollop of freshly whipped cream and a handful of mixed berries. The tartness of the berries complements the rich chocolate filling beautifully.

    Chocolate Sauce Drizzle

    For an extra touch of decadence, drizzle warm chocolate sauce over the meringue. This adds an additional layer of chocolate flavor that chocolate lovers will adore.

    Ice Cream Scoop

    Serve slices of the pie with a scoop of vanilla or coffee ice cream. The creamy texture of the ice cream balances the airy meringue and rich filling.

    Pro Tips for the Best Midnight Chocolate Meringue Pies

    To elevate your Midnight Chocolate Meringue Pies, consider these expert tips.

    • Use Fresh Ingredients: Ensure your eggs and cream are fresh for the best flavor and texture.
    • Avoid Overbeating Egg Whites: When making the meringue, stop beating as soon as stiff peaks form to avoid a grainy texture.
    • Cool Gradually: Allow the pies to cool at room temperature before refrigerating to prevent the meringue from weeping.
    • Store Properly: If you need to store leftovers, cover the pies loosely with plastic wrap to keep the meringue intact without sogginess.
    • Experiment with Flavors: Consider adding a hint of espresso powder to the filling for an intriguing mocha flavor.

    Best Side Dishes and Pairings

    Pair your Midnight Chocolate Meringue Pies with these delightful accompaniments for a complete experience.

    1. Espresso Coffee
      The boldness of espresso enhances the chocolate richness and balances the sweetness of the pie.

    2. Red Wine
      A light red wine, such as Pinot Noir, pairs well with chocolate desserts, adding depth to the overall flavor.

    3. Chocolate Stout Cake
      For the ultimate chocolate lover’s pairing, serve a slice of rich chocolate stout cake alongside the pie for a double chocolate experience.

    4. Fresh Mint Tea
      The refreshing qualities of mint tea cleanse the palate and offer a pleasant contrast to the dessert’s sweetness.

    5. Caramel Sauce
      A drizzle of homemade caramel sauce adds a buttery contrast to the chocolate, enhancing the overall decadence of the dish.

    Common Mistakes to Avoid

    • Not Whisking Enough: Ensure the filling mixture is thoroughly whisked to avoid lumps.
    • Overbaking the Meringue: Keep an eye on the meringue to prevent it from burning; it should be golden brown, not dark.
    • Using Cold Ingredients: Make sure all ingredients, especially egg whites, are at room temperature for optimal meringue texture.
    • Skipping the Cooling Step: Allow the pies to cool completely on a wire rack; this helps set the filling and meringue.

    Storage & Reheating Instructions

    Refrigerator Storage

    Store the midnight chocolate meringue pies in airtight containers in the refrigerator. They will stay fresh for up to 3 days.

    Freezing Instructions

    For the best results, freeze the pies without the meringue. Wrap them tightly in plastic wrap and aluminum foil. They can be frozen for up to 2 months. Thaw in the refrigerator overnight before adding fresh meringue.

    Reheating Tips

    • Oven: Preheat to 350°F (175°C), cover with foil, and reheat for about 10-15 minutes.
    • Microwave: Use a microwave-safe plate, cover loosely, and heat in 30-second intervals until warmed through.
    • Stovetop: Place slices in a skillet over low heat, cover, and warm gently for about 5-7 minutes.

    Frequently Asked Questions

    How do I know when the filling for Midnight Chocolate Meringue Pies is thick enough?

    The filling is ready when it coats the back of a spoon and holds a line when you run your finger through it.

    Can I use a different type of chocolate in the Midnight Chocolate Meringue Pies?

    Yes, you can experiment with different cocoa powders or even melted chocolate for a richer flavor.

    What can I do if my meringue doesn’t form stiff peaks?

    Ensure your mixing bowl is clean and free of grease. Also, make sure to whip the egg whites at room temperature for better volume.

    How long do Midnight Chocolate Meringue Pies last in the fridge?

    These pies can be stored in an airtight container in the refrigerator for up to 3 days.

    Can I make Midnight Chocolate Meringue Pies ahead of time?

    Yes, you can prepare the filling and crust in advance, but it’s best to add the meringue just before baking for optimal texture.

    Final Thoughts

    Midnight chocolate meringue pies are a delightful indulgence that combines rich chocolate filling with a light and fluffy meringue topping. We encourage you to try this recipe and share your thoughts in the comments section below. Your feedback is invaluable, and we would love to hear how your pies turned out!


    Desserts

    Midnight Chocolate Meringue Pies


    5.0 from 24 reviews

    These midnight chocolate meringue pies are a rich and indulgent treat, perfect for any late-night craving. With a creamy chocolate filling topped with fluffy meringue, they are sure to satisfy your sweet tooth.

    Author: Munch Twist
    Prep Time: 20 minutes
    Cook Time: 45 minutes
    Total Time: 65 minutes
    Yield: 16 servings
    Category: Desserts
    Method: No bake
    Cuisine: American

    Midnight Chocolate Meringue Pies

    SCALE:
    1x
    2x
    3x
    Cook Mode: Prevent your screen from going dark

    Ingredients

    • 4 cups whole milk
    • 8 egg yolks
    • 8 heaping tablespoons Hershey’s cocoa
    • 3 cups sugar
    • 4 teaspoons pure vanilla extract
    • 1 cup heavy cream
    • 1/2 cup flour
    • 8 egg whites
    • 1/2 cup corn syrup
    • 1/4 cup sugar

    Instructions

    1. In a large bowl, whisk together the sugar, flour, and cocoa. Gradually whisk in the heavy cream, milk, vanilla, and egg yolks until the mixture is smooth and fully combined.
    2. Pour the mixture into a saucepan and cook over medium-high heat, whisking continuously until thickened, about 10-15 minutes. Pour into two pre-baked deep-dish pie crusts.
    3. In a clean mixing bowl, beat the egg whites, corn syrup, and sugar on high speed until stiff peaks form.
    4. Spoon the meringue over the chocolate filling in both pies, spreading it evenly and forming peaks. Bake in a preheated oven at 425°F (220°C) until golden brown, about 5-7 minutes.
    5. Remove from the oven and let cool on a wire rack for 1 hour before serving.

    Nutrition Facts

    Serving Size: 1 serving
    Calories: 340 kcal
    Sugar: 38g
    Sodium: 80mg
    Fat: 12g
    Saturated Fat: 7g
    Carbohydrates: 50g
    Fiber: 1g
    Protein: 7g
    Cholesterol: 140mg

  • Delicious Roasted Sweet Potatoes Recipe Made Easy

    Delicious Roasted Sweet Potatoes Recipe Made Easy

    Roasted sweet potatoes are a delicious and versatile side dish that combines natural sweetness with warm spices. Their caramelized edges and tender interior make them a standout choice for any meal. Whether served alongside roasted meats or enjoyed on their own, these roasted sweet potatoes are sure to please.

    Why You’ll Love This Recipe

    • Flavorful Combination: The blend of cinnamon, nutmeg, and brown sugar elevates the natural sweetness of sweet potatoes.
    • Nutrient-Rich: Sweet potatoes are packed with vitamins and minerals, making this dish both tasty and healthy.
    • Versatile Side Dish: Perfect for holidays, weeknight dinners, or meal prep, they pair well with various main dishes.
    • Simple Preparation: With just a few ingredients, you can whip up a flavorful dish without fuss.
    • Customizable Sweetness: Adjust the sweetness to your liking by adding more brown sugar or cinnamon.

    Tools and Equipment

    Having the right tools makes cooking easier and more enjoyable. Here are the essentials for this recipe.

    Essential Tools

    • Baking dish
    • Microwave-safe bowl
    • Mixing spoon
    • Peeler
    • Knife and cutting board

    Why These Tools Matter

    • Baking dish: Ensures even cooking and easy serving of the sweet potatoes.
    • Microwave-safe bowl: Allows for quick melting of butter, saving time during preparation.
    • Peeler: Helps quickly and efficiently remove the skin from sweet potatoes, making prep a breeze.

    Ingredients for Roasted Sweet Potatoes

    Sweet Potato Base

    • 3 sweet potatoes, peeled and cut into bite-sized cubes

    Flavor Enhancers

    • 2 teaspoons olive oil
    • 1 tablespoon brown sugar (adjust for sweetness)
    • 1/4 teaspoon ground nutmeg
    • 1 teaspoon ground cinnamon
    • Pinch of ground ginger
    • 1 tablespoon butter
    • Sea salt, to taste

    How to Make Roasted Sweet Potatoes Step-by-Step

    Step 1: Prep the Oven

    1. Preheat your oven to 350°F (175°C).

    Step 2: Prepare the Baking Dish

    1. Coat a small baking dish with cooking spray to prevent sticking.

    Step 3: Cut the Sweet Potatoes

    1. Peel the sweet potatoes and cut them into bite-sized cubes.
    2. Place the cubes in the prepared baking dish.

    Step 4: Mix the Flavors

    1. In a microwave-safe bowl, melt the butter.
    2. Stir in the olive oil, brown sugar, cinnamon, nutmeg, ginger, and sea salt until well combined.

    Step 5: Combine Ingredients

    1. Pour the butter mixture over the sweet potatoes in the baking dish.
    2. Toss to coat the cubes evenly with the mixture.

    Step 6: Roast the Sweet Potatoes

    1. Bake in the preheated oven for 60 minutes.
    2. Stir the sweet potatoes once or twice during roasting for even cooking.

    Step 7: Adjust Sweetness

    1. Taste the roasted sweet potatoes and add more brown sugar or cinnamon if desired.

    Step 8: Serve and Enjoy

    1. Serve your perfectly roasted sweet potatoes as a delicious side dish.

    These roasted sweet potatoes provide a satisfying balance of sweetness and spice, making them a delightful addition to any meal.

    How to Serve Roasted Sweet Potatoes

    Roasted sweet potatoes are versatile and can complement a variety of dishes. Here are some creative serving ideas:

    As a Salad Topping

    Add roasted sweet potatoes to your favorite salad for a sweet and hearty touch. They pair well with leafy greens, nuts, and a tangy vinaigrette.

    In Tacos

    Incorporate roasted sweet potatoes into tacos for a flavorful vegetarian option. Combine them with black beans, avocado, and a zesty lime dressing for extra flavor.

    As a Breakfast Bowl

    Serve roasted sweet potatoes in a breakfast bowl topped with poached eggs, sautéed greens, and a sprinkle of feta cheese. This combination is nutritious and satisfying.

    Pro Tips for the Best Roasted Sweet Potatoes

    For the most flavorful and perfectly roasted sweet potatoes, consider these helpful tips:

    • Uniform Cutting: Ensure that all sweet potato cubes are cut to the same size to promote even cooking.

    • High-Quality Olive Oil: Use a good-quality olive oil for better flavor and a crispier texture.

    • Don’t Overcrowd the Pan: Spread the sweet potatoes in a single layer to allow for proper roasting and caramelization.

    • Experiment with Spices: Feel free to adjust the spices or add new ones, such as paprika or cayenne, for a unique twist on the flavor profile.

    • Rest Before Serving: Allow the roasted sweet potatoes to sit for a few minutes after baking; this helps enhance their flavor.

    Best Side Dishes and Pairings

    Roasted sweet potatoes can be paired with various side dishes and drinks to create a well-rounded meal. Here are some excellent options:

    1. Grilled Chicken: The savory flavor of grilled chicken balances the sweetness of the roasted sweet potatoes, making for a satisfying combination.

    2. Quinoa Salad: A refreshing quinoa salad with herbs and citrus complements the rich taste of sweet potatoes while adding a nutritious boost.

    3. Sautéed Greens: Sautéed kale or spinach adds a nutritious element and a slight bitterness that contrasts nicely with the sweetness of the potatoes.

    4. Cranberry Sauce: A simple cranberry sauce offers a tart contrast that enhances the overall flavor profile and brings brightness to the dish.

    5. Roasted Brussels Sprouts: The nuttiness of roasted Brussels sprouts pairs beautifully with the sweet and spiced notes of the sweet potatoes.

    6. Red Wine: A glass of red wine, such as Pinot Noir, can elevate the meal, providing a fruity and earthy complement to the roasted sweet potatoes.

    Common Mistakes to Avoid

    • Using Cold Sweet Potatoes: Make sure your sweet potatoes are at room temperature before roasting for even cooking.
    • Overcrowding the Baking Dish: Spread the sweet potato cubes in a single layer to ensure they roast rather than steam.
    • Skipping the Toss: Failing to toss the sweet potatoes in the seasoning mixture can lead to uneven flavor distribution.
    • Not Checking for Doneness: Always test for doneness with a fork; they should be tender in the center and caramelized on the outside.

    Storage & Reheating Instructions

    Refrigerator Storage

    Store the roasted sweet potatoes in an airtight container in the refrigerator. They will stay fresh for up to 4 days.

    Freezing Instructions

    For best results, freeze roasted sweet potatoes in a single layer on a baking sheet before transferring them to a freezer-safe bag. They can be frozen for up to 3 months.

    Reheating Tips

    • Oven: Preheat to 350°F (175°C) and reheat for about 15-20 minutes until warmed through.
    • Microwave: Place in a microwave-safe dish and heat for 1-2 minutes, stirring halfway through.
    • Stovetop: Heat in a skillet over medium heat, stirring occasionally, until warmed through.

    Frequently Asked Questions

    How can I enhance the flavor of Roasted Sweet Potatoes?

    To enhance the flavor, consider adding herbs such as thyme or rosemary, or a splash of balsamic vinegar before roasting.

    Can I make Roasted Sweet Potatoes ahead of time?

    Yes, you can roast sweet potatoes a day in advance. Store them in the refrigerator and reheat before serving.

    What should I serve with Roasted Sweet Potatoes?

    Roasted sweet potatoes pair well with grilled meats, salads, or can be served as a part of a vegetarian meal.

    Are Roasted Sweet Potatoes healthy?

    Yes, roasted sweet potatoes are nutritious. They are rich in vitamins, fiber, and antioxidants, making them a healthy addition to any meal.

    Can I use other types of potatoes for roasting?

    While sweet potatoes are recommended for this recipe, you can use other varieties, though cooking times may vary.

    Final Thoughts

    Roasted sweet potatoes are a versatile and delicious addition to any meal. Their natural sweetness and warm spices make them a favorite among many. We encourage you to try this recipe and share your thoughts in the comments below. Your feedback helps us improve and inspire others to enjoy this delightful dish!


    Dinner

    Roasted Sweet Potatoes


    5.0 from 24 reviews

    These roasted sweet potatoes are a delightful side dish with a perfect balance of sweetness and spice, making them an ideal complement to any meal.

    Author: Munch Twist
    Prep Time: 15 minutes
    Cook Time: 60 minutes
    Total Time: 75 minutes
    Yield: 4 servings
    Category: Desserts
    Method: No bake
    Cuisine: American

    Roasted Sweet Potatoes

    SCALE:
    1x
    2x
    3x
    Cook Mode: Prevent your screen from going dark

    Ingredients

    • 2 teaspoons olive oil
    • 3 sweet potatoes, peeled and cut into bite-sized cubes
    • 1 tablespoon brown sugar
    • 1/4 teaspoon ground nutmeg
    • 1 teaspoon ground cinnamon
    • Pinch of ground ginger
    • 1 tablespoon butter
    • Sea salt, to taste

    Instructions

    1. Preheat your oven to 350°F (175°C).
    2. Coat a small baking dish with cooking spray.
    3. Peel and cut the sweet potatoes into bite-sized cubes. Place them in the prepared baking dish.
    4. In a microwave-safe bowl, melt the butter. Stir in the olive oil, brown sugar, cinnamon, nutmeg, ginger, and sea salt.
    5. Pour the butter mixture over the sweet potatoes. Toss to coat the cubes evenly with the mixture.
    6. Bake in the preheated oven for 60 minutes, stirring once or twice during roasting for even cooking.
    7. Taste and add more brown sugar or cinnamon if desired.
    8. Enjoy your perfectly roasted sweet potatoes!

    Nutrition Facts

    Serving Size: 1 serving
    Calories: 190 kcal
    Sugar: 8g
    Sodium: 200mg
    Fat: 6g
    Saturated Fat: 3g
    Carbohydrates: 34g
    Fiber: 5g
    Protein: 2g
    Cholesterol: 15mg

  • Irresistible Cinnamon Bread Recipe You Must Try

    Irresistible Cinnamon Bread Recipe You Must Try

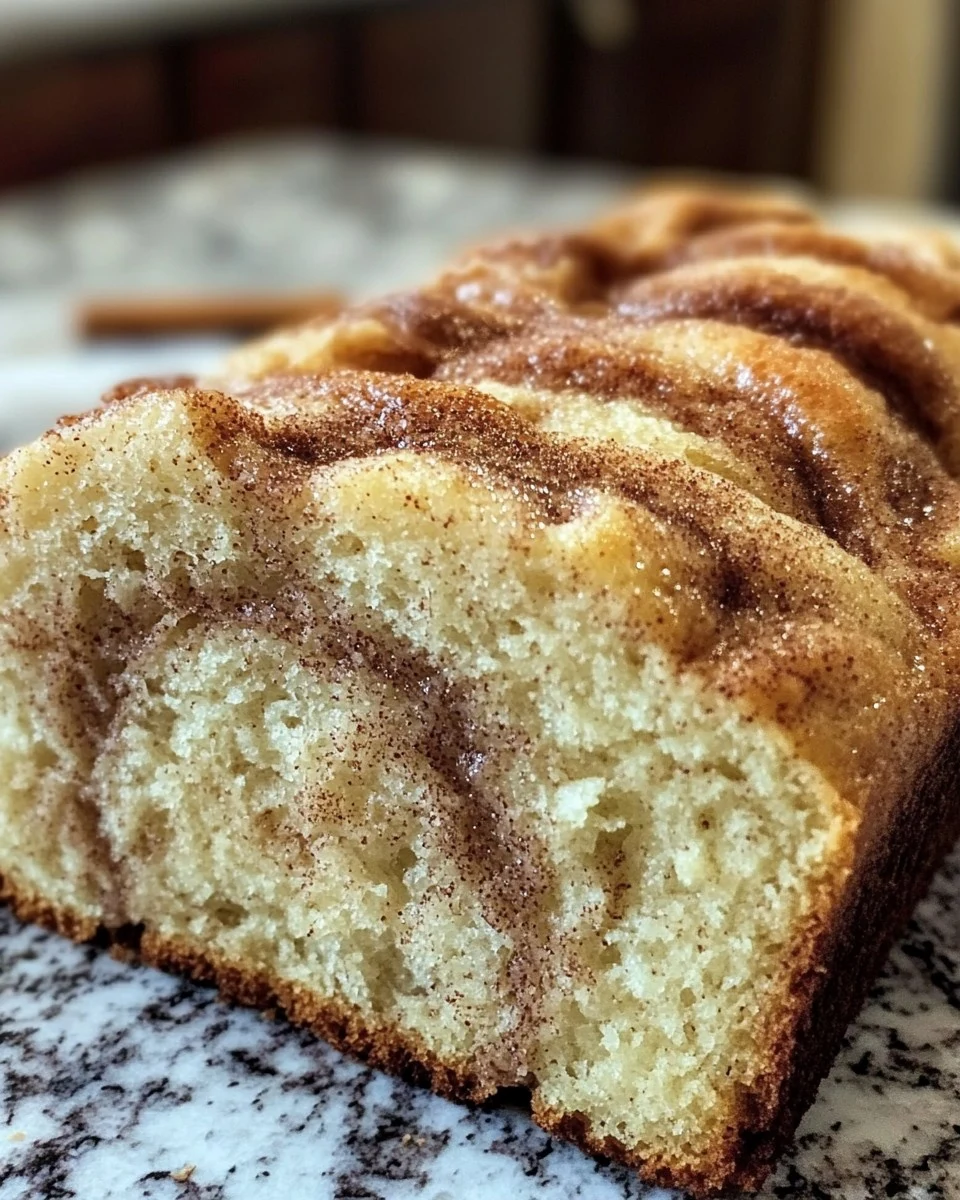
    Cinnamon bread is a delightful treat that combines the warm, comforting flavors of cinnamon and sugar with a soft, fluffy texture. This cinnamon bread recipe is perfect for breakfast, dessert, or a cozy snack. With its sweet aroma and beautiful swirl, it’s sure to become a household favorite.

    Why You’ll Love This Recipe

    • Irresistibly Flavorful: The rich combination of cinnamon and sugar creates a mouthwatering taste that will please any palate.
    • Easy to Follow: This straightforward recipe is beginner-friendly, ensuring that anyone can bake this delicious bread.
    • Versatile Serving Options: Enjoy it plain, toasted, or drizzled with vanilla icing for an extra touch of sweetness.
    • Perfect for Any Occasion: Whether it’s a family breakfast or a gathering with friends, this bread is a crowd-pleaser.
    • Make Ahead: This bread stores well, allowing you to prepare it in advance for busy mornings or entertaining.

    Tools and Equipment

    Having the right tools makes baking this cinnamon bread recipe effortless.

    Essential Tools

    • 9×5 inch loaf pan
    • Mixing bowls
    • Whisk
    • Measuring cups and spoons
    • Rubber spatula
    • Wire rack

    Why These Tools Matter

    • Loaf Pan: A quality loaf pan ensures even baking for a perfectly shaped bread.
    • Mixing Bowls: Using different sizes helps keep your ingredients organized and makes mixing easier.
    • Wire Rack: Cooling the bread on a wire rack prevents it from becoming soggy, maintaining its delightful texture.

    Ingredients for Cinnamon Bread Recipe

    Cinnamon Swirl

    • 1 tablespoon ground cinnamon
    • ½ cup (100g) granulated sugar

    Bread

    • 2 cups (250g) all-purpose flour (spooned & leveled)
    • 1 teaspoon baking soda
    • ½ teaspoon salt
    • 1 large egg, at room temperature
    • ¾ cup (150g) granulated sugar
    • ⅓ cup (80ml) vegetable oil
    • ⅓ cup (80g) sour cream (or plain/Greek yogurt), at room temperature
    • ⅔ cup (160ml) whole milk, at room temperature
    • 1½ teaspoons pure vanilla extract

    Optional

    • Vanilla icing for drizzling

    How to Make Cinnamon Bread Recipe Step-by-Step

    Step 1: Preheat and Prepare

    Preheat your oven to 350°F (177°C). Spray a 9×5 inch loaf pan with nonstick spray to ensure easy removal after baking.

    Step 2: Make Cinnamon Swirl

    In a small bowl, combine ½ cup granulated sugar with 1 tablespoon ground cinnamon. This mixture will create the delightful swirl in the bread.

    Step 3: Prepare the Bread Batter

    In a large bowl, whisk together 2 cups all-purpose flour, 1 teaspoon baking soda, and ½ teaspoon salt. In another bowl, whisk 1 large egg with ¾ cup granulated sugar until well combined. Then, add ⅓ cup vegetable oil, ⅓ cup sour cream, ⅔ cup whole milk, and 1½ teaspoons vanilla extract. Mix the wet ingredients thoroughly. Pour them into the dry ingredients and stir gently until just combined. Do not over-mix to keep the bread light and airy.

    Step 4: Layer and Swirl

    Pour half of the batter into the prepared loaf pan. Sprinkle almost all of the cinnamon sugar mixture on top, saving about 2 tablespoons for later. Carefully spread the remaining batter on top and smooth it out. Sprinkle the reserved cinnamon sugar over this layer. Using a knife, swirl through the batter gently to create distinct layers without overdoing it.

    Step 5: Bake

    Bake the bread for 50-60 minutes. Cover it loosely with foil halfway through to prevent over-browning. Check for doneness by inserting a toothpick into the center; it should come out clean. Keep in mind that baking times may vary based on your oven.

    Step 6: Cool and Serve

    Let the bread cool completely in the pan on a wire rack. If you wish, drizzle with vanilla icing before serving to add a sweet finishing touch.

    Step 7: Storage

    Cover and store any leftover bread at room temperature for up to 1 day or in the refrigerator for up to 1 week. Enjoy this delightful, swirled cinnamon bread that’s perfect for any time of day!

    How to Serve Cinnamon Bread Recipe

    Cinnamon bread is versatile and can be enjoyed in various ways.

    Toasted with Butter

    Toasting slices of cinnamon bread and spreading a pat of butter on top enhances its flavor and adds a delightful crunch.

    Served with Fresh Fruit

    Pairing cinnamon bread with fresh fruit like sliced strawberries or bananas adds a refreshing contrast and complements the warm spices.

    Cinnamon Bread French Toast

    Transform leftover cinnamon bread into a delicious French toast by dipping slices in an egg mixture and frying until golden brown. Serve with syrup or a dusting of powdered sugar.

    Pro Tips for the Best Cinnamon Bread Recipe

    To achieve the perfect cinnamon bread, consider these expert tips.

    • Use Fresh Ingredients: Ensure that your baking powder, baking soda, and spices are fresh for optimal flavor and rise.
    • Don’t Overmix: Stir the batter until just combined to keep the bread light and airy; overmixing can lead to a dense texture.
    • Check Oven Temperature: Use an oven thermometer to confirm your oven is at the correct temperature, as inaccurate settings can affect baking time.
    • Cool Completely: Allow the bread to cool in the pan before transferring it to a wire rack to prevent sogginess and maintain its structure.
    • Experiment with Add-ins: Consider adding nuts, raisins, or chocolate chips to the batter for an extra twist on flavor and texture.

    Best Side Dishes and Pairings

    Cinnamon bread pairs well with various complementary side dishes and drinks.

    1. Coffee: A warm cup of coffee enhances the cinnamon flavor and makes for a perfect breakfast or snack pairing.
    2. Herbal Tea: The soothing properties of herbal tea can balance the sweetness of the cinnamon bread, making it an excellent afternoon treat.
    3. Yogurt Parfait: Layering yogurt with granola and fresh fruit alongside cinnamon bread offers a nutritious and satisfying meal option.
    4. Maple Syrup: Drizzling warm maple syrup over cinnamon bread adds an extra layer of sweetness that enhances its flavor.
    5. Cream Cheese Spread: A rich cream cheese spread can provide a creamy contrast to the cinnamon-spiced bread, elevating your serving experience.

    Common Mistakes to Avoid

    • Using Cold Ingredients: Always ensure your eggs, sour cream, and milk are at room temperature for better mixing and texture.
    • Overmixing the Batter: Stir the batter until just combined to avoid tough bread; a few lumps are perfectly fine.
    • Incorrect Oven Temperature: Use an oven thermometer to confirm that your oven is at the correct temperature; this ensures even baking.
    • Skipping the Swirling Step: Make sure to create the cinnamon swirl properly to achieve that delightful marbled effect in your bread.

    Storage & Reheating Instructions

    Refrigerator Storage

    Store leftover cinnamon bread in an airtight container at room temperature for up to 1 day. If you need to keep it longer, refrigerate it for up to 1 week.

    Freezing Instructions

    To freeze, wrap the cooled bread tightly in plastic wrap followed by aluminum foil. This prevents freezer burn and preserves flavor. It can be frozen for up to 3 months. To thaw, place it in the refrigerator overnight.

    Reheating Tips

    • Oven: Preheat to 350°F (177°C) and warm the bread for about 10-15 minutes until heated through.
    • Microwave: Microwave individual slices on a microwave-safe plate for 15-20 seconds, checking to avoid overheating.
    • Stovetop: Heat in a skillet over low heat for a few minutes, flipping occasionally until warmed.

    Frequently Asked Questions

    Can I substitute yogurt for sour cream in this Cinnamon Bread Recipe?

    Yes, plain or Greek yogurt can be used as a substitute for sour cream, providing a similar texture and flavor.

    How do I know when my Cinnamon Bread is done baking?

    Insert a toothpick into the center of the bread; it should come out clean or with a few moist crumbs, indicating that it’s fully baked.

    Can I add nuts or raisins to the Cinnamon Bread Recipe?

    Absolutely! Adding chopped nuts or raisins can enhance the flavor and texture. Just fold them into the batter before pouring it into the loaf pan.

    What can I serve with this Cinnamon Bread?

    This cinnamon bread pairs well with butter, cream cheese, or even a drizzle of honey or maple syrup for added sweetness.

    How should I store the Cinnamon Bread if I have leftovers?

    Store the cinnamon bread in an airtight container at room temperature for up to 1 day or refrigerate for up to 1 week to maintain freshness.

    Final Thoughts

    This cinnamon bread recipe is a delightful treat that brings warmth and comfort to any occasion. Whether enjoyed fresh from the oven or toasted for breakfast, it never fails to impress. I encourage you to try making this recipe and share your thoughts in the comments below!


    Desserts

    Cinnamon Bread Recipe


    5.0 from 24 reviews

    This delightful cinnamon bread features a sweet cinnamon swirl that adds a burst of flavor to each slice. Perfect for breakfast or as a snack, it's easy to make and sure to please everyone. Enjoy it plain or drizzled with vanilla icing for an extra treat.

    Author: Munch Twist
    Prep Time: 15 minutes
    Cook Time: 60 minutes
    Total Time: 75 minutes
    Yield: 12 servings
    Category: Desserts
    Method: No bake
    Cuisine: American

    Cinnamon Bread Recipe

    SCALE:
    1x
    2x
    3x
    Cook Mode: Prevent your screen from going dark

    Ingredients

    • 1 tablespoon ground cinnamon
    • ½ cup granulated sugar
    • 2 cups all-purpose flour
    • 1 teaspoon baking soda
    • ½ teaspoon salt
    • 1 large egg
    • ¾ cup granulated sugar
    • ⅓ cup vegetable oil
    • ⅓ cup sour cream
    • ⅔ cup whole milk
    • 1½ teaspoons pure vanilla extract
    • Vanilla icing (optional)

    Instructions

    1. Preheat your oven to 350°F (177°C) and spray a 9×5 inch loaf pan with nonstick spray.
    2. In a small bowl, mix ½ cup granulated sugar with 1 tablespoon ground cinnamon.
    3. In a large bowl, whisk together 2 cups all-purpose flour, 1 teaspoon baking soda, and ½ teaspoon salt. In another bowl, whisk 1 large egg with ¾ cup granulated sugar until well combined. Add ⅓ cup vegetable oil, ⅓ cup sour cream, ⅔ cup whole milk, and 1½ teaspoons vanilla extract. Mix well. Pour the wet ingredients into the dry ingredients and stir until just combined.
    4. Pour half of the batter into the prepared loaf pan. Sprinkle almost all of the cinnamon sugar evenly on top. Carefully spread the remaining batter on top and sprinkle the reserved cinnamon sugar on top. Use a knife to make a large swirl through the batter.
    5. Bake for 50-60 minutes, covering loosely with foil halfway through. Test doneness by inserting a toothpick into the center; it should come out clean.
    6. Allow the bread to cool completely in the pan on a wire rack. Drizzle with vanilla icing before serving if desired.
    7. Cover and store leftover bread at room temperature for up to 1 day or in the refrigerator for up to 1 week.

    Nutrition Facts

    Serving Size: 1 serving
    Calories: 290 kcal
    Sugar: 19g
    Sodium: 270mg
    Fat: 14g
    Saturated Fat: 6g
    Carbohydrates: 39g
    Fiber: 1g
    Protein: 4g
    Cholesterol: 40mg

  • Delicious Cinna-Bun Cake in the Oven Recipe

    Delicious Cinna-Bun Cake in the Oven Recipe

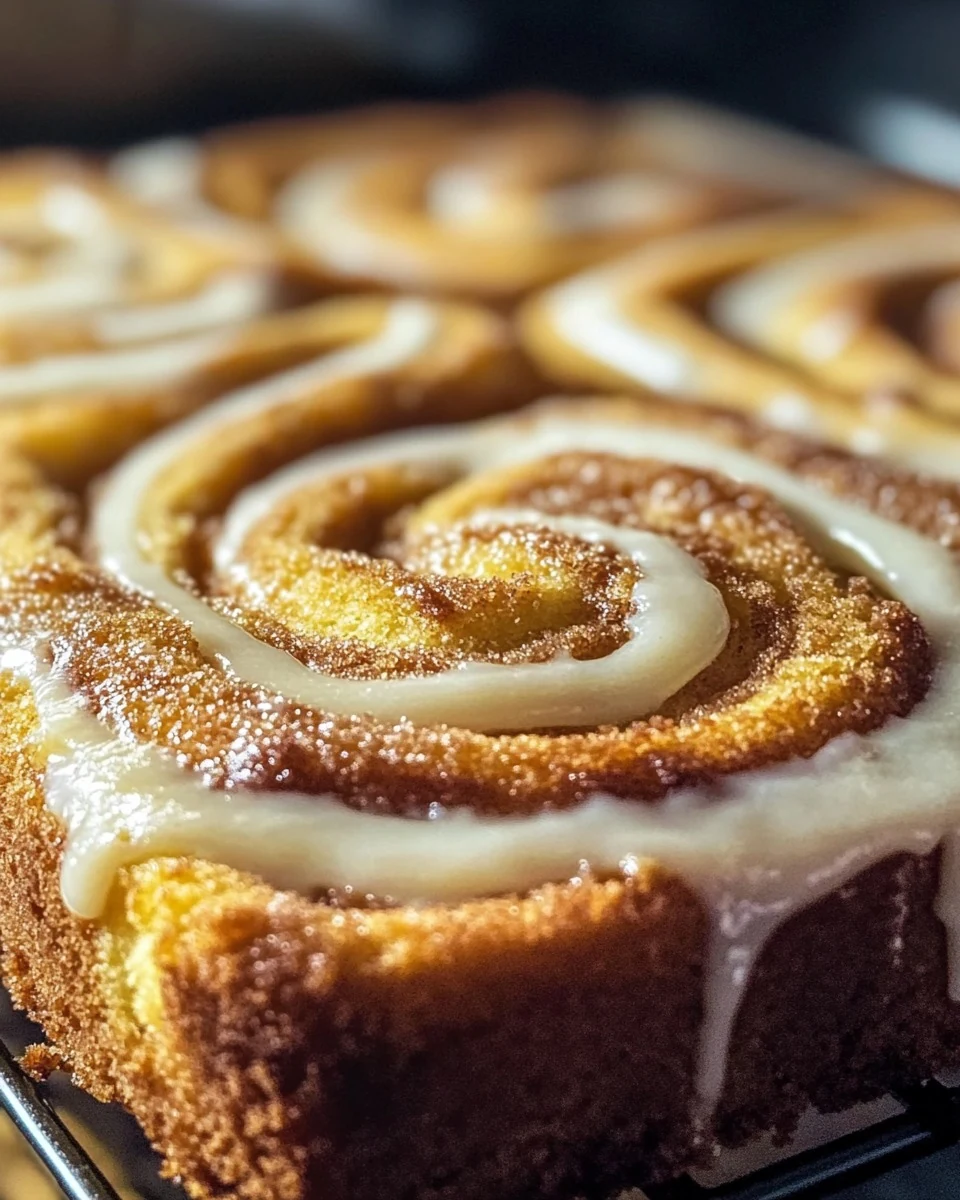
    CINNA-BUN CAKE IN THE OVEN is a delightful treat that combines the warm, comforting flavors of cinnamon rolls with the ease of a cake. This recipe offers a gooey topping and a sweet glaze, making it an irresistible dessert for any occasion.

    Why You’ll Love This Recipe

    • Delicious Flavor: The combination of cinnamon and brown sugar creates a rich, comforting taste.
    • Quick & Easy: Ready in under 30 minutes, this cake is perfect for busy days or spontaneous gatherings.
    • One-Pan Wonder: Minimal cleanup is required, as everything is mixed and baked in one pan.
    • Versatile Treat: Enjoy it as a breakfast delight or a satisfying dessert after dinner.
    • Crowd-Pleaser: Perfect for parties, family gatherings, or simply indulging yourself.

    Tools and Equipment

    Having the right tools makes baking easier and more enjoyable.

    Essential Tools

    • Mixing bowls
    • Whisk
    • Baking pan (9×13-inch)
    • Measuring cups and spoons
    • Rubber spatula
    • Toothpick or cake tester

    Why These Tools Matter

    • Mixing bowls: Essential for combining ingredients without mess.
    • Baking pan: The specific size ensures even cooking and proper rise.
    • Toothpick: A simple tool that helps check for doneness effortlessly.

    Ingredients for CINNA-BUN CAKE IN THE OVEN

    For the Cake Base

    • 3 cups flour
    • 1 cup sugar
    • 1 ½ cups milk
    • 2 eggs
    • 2 teaspoons vanilla extract
    • 4 teaspoons baking powder
    • ¼ teaspoon salt
    • ½ cup melted butter

    For the Topping

    • 1 cup softened butter
    • 1 tablespoon cinnamon
    • 1 cup brown sugar
    • 2 tablespoons flour

    For the Glaze

    • 2 cups powdered sugar
    • 5 tablespoons milk
    • 1 teaspoon vanilla extract

    How to Make CINNA-BUN CAKE IN THE OVEN Step-by-Step

    Step 1: Preheat and Prepare

    Preheat your oven to 350°F (175°C). Grease a 9×13-inch baking pan with butter to prevent sticking.

    Step 2: Mix the Base

    In a large bowl, combine 3 cups flour, 1 cup sugar, 4 teaspoons baking powder, and ¼ teaspoon salt. Whisk these dry ingredients together. Add 1 ½ cups milk, 2 eggs, and 2 teaspoons vanilla extract. Stir until well combined. Gently fold in ½ cup melted butter, then pour the batter into the prepared pan.

    Step 3: Prepare the Topping

    In a separate bowl, mix 1 cup softened butter, 1 cup brown sugar, 1 tablespoon cinnamon, and 2 tablespoons flour until well blended. Drop spoonfuls of this mixture over the batter in the pan. Use a butter knife to swirl the topping into the batter, creating a marbled effect.

    Step 4: Bake

    Place the pan in the preheated oven and bake for 28-30 minutes. Check for doneness by inserting a toothpick into the center; it should come out clean.

    Step 5: Make the Glaze

    While the cake is baking, prepare the glaze. In a bowl, mix 2 cups powdered sugar, 5 tablespoons milk, and 1 teaspoon vanilla extract until smooth. Set aside.

    Step 6: Glaze the Cake

    Once the cake is baked, remove it from the oven. While still warm, drizzle the glaze over the top, allowing it to soak in for extra sweetness.

    Enjoy this delightful CINNA-BUN CAKE IN THE OVEN with its gooey cinnamon topping and sweet glaze!

    How to Serve CINNA-BUN CAKE IN THE OVEN

    This cake is versatile and can be enjoyed in a variety of ways.

    With Fresh Fruit

    Serve slices of CINNA-BUN CAKE IN THE OVEN alongside fresh berries or banana slices for a delightful contrast of flavors and textures.

    As a Breakfast Treat

    Enjoy this cake warm with a cup of coffee or tea for a comforting breakfast option. The cinnamon flavor pairs perfectly with morning beverages.

    Drizzled with Extra Glaze

    For an indulgent treat, drizzle additional glaze over individual slices just before serving. This adds an extra layer of sweetness that’s hard to resist.

    Pro Tips for the Best CINNA-BUN CAKE IN THE OVEN

    Enhance your baking experience with these practical tips.

    • Use Fresh Ingredients: Ensure your baking powder and spices are fresh for optimal flavor and rise.
    • Don’t Overmix the Batter: Mix just until combined to maintain a light and fluffy texture in your cake.
    • Swirl Gently: When adding the topping, swirl gently to create a marbled effect without fully combining it with the batter.
    • Check for Doneness: Use a toothpick to test the center; it should come out clean for perfect baking.
    • Store Properly: Keep any leftovers in an airtight container to maintain freshness and prevent drying out.

    Best Side Dishes and Pairings

    These pairings will enhance your experience of CINNA-BUN CAKE IN THE OVEN.

    1. Coffee: The rich flavors of coffee complement the sweetness of the cake, making it a perfect pairing for breakfast or an afternoon treat.
    2. Chai Tea: The warm spices in chai enhance the cinnamon in the cake, creating a harmonious flavor profile.
    3. Vanilla Ice Cream: A scoop of vanilla ice cream adds creaminess to the warm cake, creating a delightful dessert experience.
    4. Yogurt Parfait: Layered yogurt with granola and fruit balances the sweetness of the cake and adds a refreshing element.
    5. Milk: A classic pairing, milk helps to cut through the richness of the cake, making each bite enjoyable.

    Common Mistakes to Avoid

    • Not Preheating the Oven: Always preheat your oven to ensure even baking.
    • Overmixing the Batter: Mixing too much can lead to a dense cake; stir until just combined.
    • Ignoring the Toothpick Test: Use a toothpick to check for doneness; it should come out clean when the cake is done.
    • Skipping the Glaze: The glaze adds the finishing touch; don’t forget to drizzle it over the warm cake.

    Storage & Reheating Instructions

    Refrigerator Storage

    Store the Cinna-Bun Cake in an airtight container in the refrigerator. It will stay fresh for up to 5 days.

    Freezing Instructions

    For freezing, wrap individual pieces of the cake in plastic wrap and then place them in a freezer-safe bag. The cake can be frozen for up to 3 months. To thaw, simply transfer it to the refrigerator overnight.

    Reheating Tips

    • Oven: Preheat the oven to 350°F (175°C), place the cake in for about 10-15 minutes, or until warmed through.
    • Microwave: Heat individual slices in the microwave for 15-20 seconds at a time, checking to avoid overheating.
    • Stovetop: Place a slice in a skillet over low heat, cover, and warm for about 5 minutes, or until heated through.

    Frequently Asked Questions

    How do I make the Cinna-Bun Cake in the oven more flavorful?

    To enhance the flavor, consider adding a pinch of nutmeg or using vanilla bean paste instead of vanilla extract.

    Can I use whole wheat flour in the Cinna-Bun Cake in the oven?

    Yes, you can substitute half of the all-purpose flour with whole wheat flour for a healthier option, but it may affect the texture slightly.

    How do I store leftover Cinna-Bun Cake in the oven?

    Store any leftover cake in an airtight container in the refrigerator for up to 5 days or freeze it for longer storage.

    What can I substitute for butter in this Cinna-Bun Cake in the oven?

    You can use coconut oil or a vegan butter substitute if you want a dairy-free version.

    Is it necessary to glaze the Cinna-Bun Cake in the oven?

    While the glaze adds sweetness and moisture, you can skip it if you prefer a less sweet option.

    Final Thoughts

    The Cinna-Bun Cake in the oven is a delightful treat that brings the flavors of cinnamon rolls to a cake form. This recipe is simple enough for anyone to try, and I encourage you to make it for your next gathering. Don’t forget to leave a comment with your feedback or any variations you tried!

    Desserts

    CINNA-BUN CAKE IN THE OVEN


    5.0 from 24 reviews

    This Cinna-Bun Cake is a delightful treat that combines the flavors of cinnamon and sugar in a moist cake topped with a sweet glaze. Perfect for any occasion, it's easy to make and sure to please everyone.

    Author: Munch Twist
    Prep Time: 15 minutes
    Cook Time: 30 minutes
    Total Time: 45 minutes
    Yield: 12 servings
    Category: Desserts
    Method: No bake
    Cuisine: American

    CINNA-BUN CAKE IN THE OVEN

    SCALE:
    1x
    2x
    3x
    Cook Mode: Prevent your screen from going dark

    Ingredients

    • 3 cups flour
    • 1 cup sugar
    • 1 ½ cups milk
    • 2 eggs
    • 2 teaspoons vanilla extract
    • 4 teaspoons baking powder
    • ½ cup melted butter
    • ¼ teaspoon salt
    • 1 cup softened butter
    • 1 tablespoon cinnamon
    • 1 cup brown sugar
    • 2 tablespoons flour
    • 2 cups powdered sugar
    • 5 tablespoons milk
    • 1 teaspoon vanilla extract

    Instructions

    1. Preheat your oven to 350°F (175°C). Butter a 9×13-inch baking pan.
    2. In a large bowl, combine flour, sugar, baking powder, salt, milk, eggs, and vanilla extract. Stir until well combined. Gently fold in melted butter. Pour the batter into the prepared pan.
    3. In a separate bowl, mix softened butter, brown sugar, cinnamon, and flour until well blended. Drop spoonfuls of this mixture over the batter in the pan. Use a butter knife to swirl the topping into the batter.
    4. Bake in the preheated oven for 28-30 minutes, or until a toothpick inserted into the center comes out clean.
    5. While the cake is baking, mix powdered sugar, milk, and vanilla extract in a bowl until smooth. Set aside.
    6. Remove the cake from the oven and while still warm, drizzle the glaze over the top.

    Nutrition Facts

    Serving Size: 1 serving
    Calories: 290 kcal
    Sugar: 20g
    Sodium: 200mg
    Fat: 14g
    Saturated Fat: 9g
    Carbohydrates: 38g
    Fiber: 0g
    Protein: 3g
    Cholesterol: 50mg

  • Mini Meatloaf Muffins with Mashed Potato Frosting Recipe

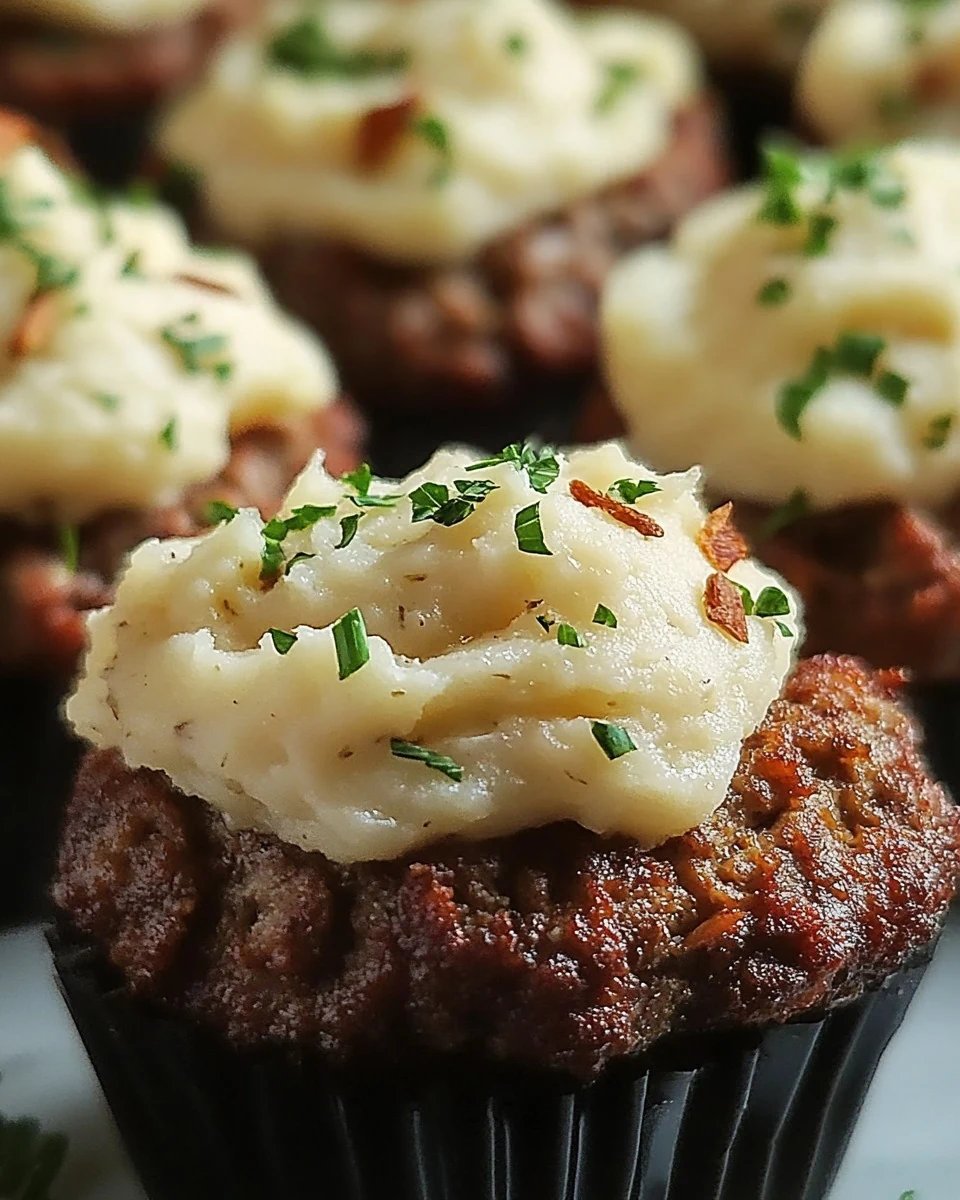
    Mini Meatloaf Muffins with Mashed Potato Frosting Recipe

    Mini Meatloaf Muffins with Mashed Potato Frosting are a delightful twist on a classic dish. These mini-sized meatloaves are not only adorable but also packed with flavor. Topped with creamy mashed potatoes, they offer a comforting, satisfying meal that appeals to all ages.

    Why You’ll Love This Recipe

    • Fun Presentation: The mini size and frosting make these muffins visually appealing and perfect for any gathering.
    • Kid-Friendly: Children love the bite-sized portions and the creamy mashed potato topping.
    • Versatile: Customize the meatloaf with your favorite seasonings or add vegetables for extra nutrition.
    • Make Ahead: These muffins can be prepared in advance and reheated, making them ideal for busy weeknights.
    • Comforting Flavor: The combination of savory meat and creamy potatoes is the ultimate comfort food.

    Tools and Equipment

    To make Mini Meatloaf Muffins with Mashed Potato Frosting, you’ll need a few key kitchen tools.

    Essential Tools

    • Muffin tin
    • Mixing bowl
    • Potato masher or ricer
    • Piping bag (optional)
    • Saucepan

    Why These Tools Matter

    • Muffin tin: Perfectly shapes and bakes the meatloaf muffins, ensuring even cooking.
    • Mixing bowl: Allows for easy mixing of the meatloaf ingredients without mess.
    • Potato masher or ricer: Creates smooth, creamy mashed potatoes, which are essential for the frosting.

    Ingredients for Mini Meatloaf Muffins with Mashed Potato Frosting

    For the Meatloaf:

    • 1 lb ground beef
    • 1 small onion, finely chopped
    • 1/4 cup milk
    • 1/2 teaspoon garlic powder
    • 1/4 cup ketchup
    • 1 teaspoon Worcestershire sauce
    • 1/2 cup breadcrumbs
    • 1 egg
    • Salt and pepper to taste

    For the Mashed Potato “Frosting”:

    • 4 large potatoes, peeled and cubed
    • 1/4 cup milk
    • 2 tablespoons butter
    • Fresh chives or parsley for garnish
    • Salt and pepper to taste

    How to Make Mini Meatloaf Muffins with Mashed Potato Frosting Step-by-Step

    Step 1: Prepare the Oven

    Begin by preheating your oven to 375°F (190°C). Grease a muffin tin to prevent the meatloaf muffins from sticking.

    Step 2: Mix the Meatloaf

    In a large mixing bowl, combine the ground beef, finely chopped onion, milk, garlic powder, ketchup, Worcestershire sauce, breadcrumbs, egg, and a pinch of salt and pepper. Mix until well combined, being careful not to overmix to maintain tenderness.

    Step 3: Form the Muffins

    Press the meatloaf mixture evenly into the muffin tin cups, filling each to the top. This ensures they hold their shape while baking.

    Step 4: Bake

    Place the muffin tin in the preheated oven and bake for 20-25 minutes. The muffins are done when they are fully cooked and the tops are nicely browned.

    Step 5: Prepare the Mashed Potatoes

    While the meatloaf bakes, boil the cubed potatoes in a pot of salted water until tender, which takes about 15-20 minutes. Drain the potatoes well and return them to the pot. Mash the potatoes with milk, butter, and a pinch of salt and pepper until smooth and creamy.

    Step 6: Frost the Meatloaf Muffins

    Once the meatloaf muffins are done, let them cool slightly before removing them from the tin. Use a piping bag or spoon to dollop the mashed potato “frosting” on top of each muffin.

    Step 7: Garnish and Serve

    Sprinkle with fresh chives or parsley for added color and flavor. Serve warm and enjoy your savory, adorable Mini Meatloaf Muffins with Mashed Potato Frosting!

    How to Serve Mini Meatloaf Muffins with Mashed Potato Frosting

    Mini Meatloaf Muffins with Mashed Potato Frosting can be served in various creative ways to enhance your dining experience.

    Casual Family Dinner

    Serve these muffins alongside a simple green salad and your favorite dressing for a wholesome family meal that is both nutritious and comforting.

    Fun Party Appetizer

    Transform these mini muffins into bite-sized appetizers by serving them on skewers with cherry tomatoes and pickles, creating a delightful finger food option for gatherings.

    Kids’ Lunchbox Treat

    Pack these muffins in your children’s lunchboxes, pairing them with fresh fruit or veggie sticks for a balanced meal that keeps lunchtime exciting.

    Pro Tips for the Best Mini Meatloaf Muffins with Mashed Potato Frosting

    To achieve the perfect Mini Meatloaf Muffins, consider these practical tips.

    • Avoid Overmixing: Mixing the meatloaf ingredients too much can lead to a dense texture. Combine gently until just mixed.
    • Use Lean Meat: Opting for lean ground beef helps reduce excess fat, resulting in a healthier muffin without sacrificing flavor.
    • Customize the Seasoning: Feel free to add herbs or spices, like Italian seasoning or smoked paprika, to elevate the taste according to your preference.
    • Check for Doneness: Use a meat thermometer to ensure the internal temperature reaches 160°F (70°C) for safe consumption.
    • Make Ahead: Prepare the meatloaf mixture in advance and refrigerate for up to 24 hours. This not only saves time but allows flavors to meld beautifully.

    Best Side Dishes and Pairings

    To complement your Mini Meatloaf Muffins with Mashed Potato Frosting, consider these delightful side dishes.

    1. Steamed Broccoli: The slight bitterness of broccoli balances the richness of the meatloaf, providing a nutritious contrast.
    2. Garlic Bread: A slice of warm garlic bread adds a crunchy element and enhances the overall comfort food experience.
    3. Coleslaw: The crunchiness and tanginess of coleslaw provide a refreshing contrast to the savory muffins, making for a well-rounded meal.
    4. Roasted Carrots: Sweet roasted carrots offer a delightful sweetness that pairs perfectly with the savory flavors of the meatloaf.
    5. Apple Sauce: The sweetness of apple sauce can cut through the hearty flavors, creating a delightful flavor combination that appeals to all ages.

    Common Mistakes to Avoid

    • Overmixing the Meatloaf: Mixing the ingredients too much can lead to a tough texture. Aim for a gentle mix to keep it tender.
    • Not Preheating the Oven: Skipping this step can result in uneven cooking. Always preheat your oven to ensure proper baking.
    • Skipping the Cooling Time: Removing the muffins from the tin too soon can cause them to break apart. Allow them to cool slightly for easier removal.
    • Using Too Much Salt: While seasoning is important, overdoing it can overpower the dish. Start with a pinch and adjust to taste.

    Storage & Reheating Instructions

    Refrigerator Storage

    Store Mini Meatloaf Muffins with Mashed Potato Frosting in airtight containers in the refrigerator. They will stay fresh for up to 3 days.

    Freezing Instructions

    For best results, freeze the meatloaf muffins without the mashed potato frosting. Wrap each muffin in plastic wrap, then place them in a freezer-safe bag. They can be stored in the freezer for up to 3 months. To thaw, transfer them to the refrigerator overnight.

    Reheating Tips

    • Oven: Preheat to 350°F (175°C), place muffins on a baking sheet, and heat for about 15-20 minutes.
    • Microwave: Place one muffin on a microwave-safe plate and heat for 30-60 seconds, checking for warmth.
    • Stovetop: Heat in a non-stick skillet over medium heat for about 5-7 minutes, flipping occasionally until warmed through.

    Frequently Asked Questions

    Can I use turkey instead of beef for the Mini Meatloaf Muffins with Mashed Potato Frosting?

    Yes, ground turkey can be a healthier alternative. Just ensure it is well-seasoned to maintain flavor.

    How can I make the mashed potato frosting healthier?

    You can substitute regular milk with almond milk or use Greek yogurt instead of butter for a lower-fat option.

    Can I customize the flavor of the meatloaf muffins?

    Absolutely! Feel free to add your favorite herbs, spices, or even cheese to the meat mixture for a personalized touch.

    How do I prevent the mashed potatoes from being lumpy?

    Make sure to mash the potatoes thoroughly and add sufficient milk and butter to achieve a creamy consistency.

    What are some side dishes that pair well with Mini Meatloaf Muffins with Mashed Potato Frosting?

    These muffins pair wonderfully with a side salad, steamed vegetables, or a light soup for a complete meal.

    Final Thoughts

    Mini Meatloaf Muffins with Mashed Potato Frosting are not only a delightful twist on a classic dish but also a fun and engaging meal for the entire family. We encourage you to try this recipe and share your experience in the comments. Your feedback helps us improve and inspires others to cook!


    Dinner

    Mini Meatloaf Muffins with Mashed Potato Frosting


    5.0 from 24 reviews

    These Mini Meatloaf Muffins with Mashed Potato Frosting are a delightful twist on a classic comfort food. Perfectly portioned and topped with creamy mashed potatoes, they are both fun and satisfying for kids and adults alike.

    Author: Munch Twist
    Prep Time: 20 minutes
    Cook Time: 25 minutes
    Total Time: 45 minutes
    Yield: 4 servings
    Category: Desserts
    Method: No bake
    Cuisine: American

    Mini Meatloaf Muffins with Mashed Potato Frosting

    SCALE:
    1x
    2x
    3x
    Cook Mode: Prevent your screen from going dark

    Ingredients

    • 1 lb ground beef
    • 1 small onion, finely chopped
    • 1/4 cup milk
    • 1/2 teaspoon garlic powder
    • 1/4 cup ketchup
    • 1 teaspoon Worcestershire sauce
    • 1/2 cup breadcrumbs
    • 1 egg
    • Salt and pepper to taste
    • 4 large potatoes, peeled and cubed
    • 1/4 cup milk
    • 2 tablespoons butter
    • Salt and pepper to taste
    • Fresh chives or parsley for garnish

    Instructions

    1. Preheat your oven to 375°F (190°C) and grease a muffin tin.
    2. In a large mixing bowl, combine ground beef, onion, milk, garlic powder, ketchup, Worcestershire sauce, breadcrumbs, egg, and a pinch of salt and pepper. Mix until well combined.
    3. Press the meatloaf mixture evenly into the muffin tin cups, filling each to the top.
    4. Bake in the preheated oven for 20-25 minutes until fully cooked and browned.
    5. While baking, boil cubed potatoes in salted water until tender, about 15-20 minutes. Drain and mash with milk, butter, and a pinch of salt and pepper until smooth.
    6. Once the muffins are done, allow them to cool slightly before removing from the tin. Use a piping bag or spoon to dollop the mashed potato frosting on top.
    7. Garnish with fresh chives or parsley and serve warm.

    Nutrition Facts

    Serving Size: 1 serving
    Calories: 320 kcal
    Sugar: 2g
    Sodium: 400mg
    Fat: 14g
    Saturated Fat: 6g
    Carbohydrates: 28g
    Fiber: 3g
    Protein: 18g
    Cholesterol: 95mg

  • Tropical Hawaiian Pineapple Cake Recipe

    Tropical Hawaiian Pineapple Cake Recipe

    Hawaiian Pineapple Cake is a delightful dessert that brings a taste of the tropics to your table. This cake features a moist yellow base topped with sweet pineapple, creamy pudding, and toasted coconut. Its unique flavors and textures make it a standout treat for any occasion.

    Why You’ll Love This Recipe

    • Tropical Flavor: Experience the refreshing taste of pineapple and coconut that transports you to a sunny beach.
    • Easy to Make: With simple ingredients and straightforward steps, anyone can master this recipe.
    • Perfect for Gatherings: This cake serves a crowd, making it ideal for parties and family gatherings.
    • No Baking Skills Required: Even beginners can create a show-stopping dessert without complex techniques.
    • Chilled Delight: The cake is best served chilled, providing a refreshing finish to any meal.

    Tools and Equipment

    Gathering the right tools will make your baking process smooth and enjoyable.

    Essential Tools

    • Mixing bowls
    • Electric mixer
    • 9×13-inch baking pan
    • Wooden skewer
    • Rubber spatula
    • Measuring cups and spoons

    Why These Tools Matter

    • Electric mixer: Ensures smooth and fluffy mixtures, especially for whipped cream and pudding.
    • 9×13-inch baking pan: Perfectly sized for even baking and easy serving.
    • Rubber spatula: Helps incorporate ingredients thoroughly without leaving any behind.

    Ingredients for Hawaiian Pineapple Cake

    Cake Base

    • 1 cup flaked coconut, toasted
    • 40 ounces crushed pineapple, drained with juice reserved (2 cans, 20 ounces each)
    • 18.25-ounce package yellow cake mix

    Cream Cheese Layer

    • 8-ounce package cream cheese
    • 2 cups cold milk (2% fat or higher)

    Topping

    • 3 tablespoons sugar
    • 2 cups whipping cream
    • 3.4-ounce package instant vanilla pudding mix

    How to Make Hawaiian Pineapple Cake Step-by-Step

    Step 1: Prepare the Cake

    Start by draining the crushed pineapple and reserving the juice. Preheat your oven according to the cake mix package instructions. Prepare the yellow cake mix, using the reserved pineapple juice instead of water. Pour the batter into a 9×13-inch pan and bake according to the package instructions. Allow the cake to cool completely.

    Step 2: Add Pineapple Layer

    Once the cake has cooled, use a wooden skewer to poke holes all over the top. Spread the drained crushed pineapple evenly over the cake and set it aside.

    Step 3: Prepare Whipped Cream

    In a separate bowl, whip the cream and sugar together using an electric mixer until medium-stiff peaks form. Set this aside for later use.

    Step 4: Make the Pudding Mixture

    In another bowl, beat the softened cream cheese with an electric mixer until smooth. Gradually add the cold milk, mixing until smooth between each addition. Scrape down the sides of the bowl frequently. Once all the milk is incorporated, add the instant vanilla pudding mix and beat for about two minutes until the mixture thickens.

    Step 5: Combine and Assemble

    Gently fold the pudding mixture into the whipped cream until fully combined. Spread this mixture evenly over the pineapple layer on the cake.

    Step 6: Finish and Serve

    Sprinkle the toasted coconut evenly over the top of the cake. Chill the cake in the refrigerator for at least one hour before serving. Slice and enjoy this tropical delight!

    Enjoy a taste of the tropics with every bite of this delicious Hawaiian Pineapple Cake!

    How to Serve Hawaiian Pineapple Cake

    Hawaiian Pineapple Cake can be enjoyed in various delightful ways. Here are some creative serving suggestions:

    Garnished with Fresh Fruit

    Top each slice with a mix of fresh tropical fruits like mango, kiwi, or strawberries. This adds a refreshing contrast to the cake’s sweetness and enhances its tropical theme.

    Served with Vanilla Ice Cream

    Pairing a slice of Hawaiian Pineapple Cake with a scoop of vanilla ice cream creates a deliciously creamy texture that complements the cake’s flavors perfectly.

    Drizzled with Coconut Cream

    Finish off each serving with a drizzle of coconut cream. This extra layer of coconut flavor elevates the cake while adding a luscious finish.

    Pro Tips for the Best Hawaiian Pineapple Cake

    To achieve the perfect Hawaiian Pineapple Cake, consider the following tips:

    • Use Fresh Ingredients: Opt for fresh cream and quality canned pineapple for the best flavor and texture in your cake.

    • Toast the Coconut: Toasting the coconut before adding it to the cake enhances its flavor and adds a delightful crunch.

    • Cool the Cake Completely: Allow the cake to cool completely before adding the pineapple and whipped cream layer to prevent melting.

    • Chill Before Serving: Chilling the cake for at least an hour before serving allows the flavors to meld together and makes it easier to slice.

    • Experiment with Toppings: Feel free to get creative with toppings; consider adding chopped nuts or a sprinkle of cinnamon for added flavor.

    Best Side Dishes and Pairings

    Pair this Hawaiian Pineapple Cake with these delightful options for a complete meal experience:

    1. Tropical Fruit Salad: A light and refreshing blend of fruits that complements the sweet and tangy flavors of the cake.

    2. Grilled Shrimp Skewers: The smoky flavor of grilled shrimp offers a savory contrast to the sweetness of the cake.

    3. Coconut Rice: The subtle coconut flavor in the rice harmonizes beautifully with the cake’s tropical essence.

    4. Mango Smoothie: A creamy mango smoothie serves as a refreshing drink that pairs well with the cake’s flavors.

    5. Herbed Green Salad: A crisp green salad with a citrus vinaigrette provides a refreshing balance to the rich dessert.

    Common Mistakes to Avoid

    • Not Draining the Pineapple: Ensure the crushed pineapple is thoroughly drained to prevent a soggy cake.
    • Skipping the Cooling Step: Allow the cake to cool completely before adding toppings to maintain the integrity of the layers.
    • Overmixing the Batter: Mix the cake batter just until combined to avoid a dense texture.
    • Not Using Reserved Juice: Substitute water with reserved pineapple juice for enhanced flavor; don’t skip this step.

    Storage & Reheating Instructions

    Refrigerator Storage

    Store leftover Hawaiian Pineapple Cake in an airtight container in the refrigerator. It stays fresh for up to 3 days.

    Freezing Instructions

    For best results, freeze the cake before adding the whipped cream and coconut. Wrap it tightly in plastic wrap and aluminum foil, and it can be stored in the freezer for up to 2 months. Thaw in the refrigerator overnight before serving.

    Reheating Tips

    • Oven: Preheat to 350°F (175°C), cover with foil, and heat for about 10-15 minutes until warmed through.
    • Microwave: Heat individual slices for 20-30 seconds on medium power until warm.
    • Stovetop: Place slices in a skillet over low heat, covering the pan, until warmed through.

    Frequently Asked Questions

    How can I make the Hawaiian Pineapple Cake gluten-free?

    You can substitute the yellow cake mix with a gluten-free cake mix, following the package instructions for the best results.

    Can I use fresh pineapple instead of canned?

    Yes, fresh pineapple can be used, but ensure it is finely chopped and well-drained to avoid excess moisture.

    How should I serve Hawaiian Pineapple Cake?

    Hawaiian Pineapple Cake is best served chilled, making it a refreshing dessert for warm weather gatherings.

    How long does it take to make Hawaiian Pineapple Cake?

    The total time to prepare and bake the Hawaiian Pineapple Cake is approximately 50 minutes, plus cooling and chilling time.

    Can I add other fruits to the Hawaiian Pineapple Cake?

    Absolutely! You can add other tropical fruits like mango or banana for a more diverse flavor profile.

    Final Thoughts

    This Hawaiian Pineapple Cake is a delightful treat that brings a taste of the tropics to your table. We encourage you to try this recipe and share your thoughts in the comments below!


    Desserts

    Hawaiian Pineapple Cake


    5.0 from 24 reviews

    This Hawaiian Pineapple Cake is a delightful tropical dessert featuring a moist yellow cake layered with crushed pineapple, creamy pudding, and whipped cream, all topped with toasted coconut. Perfect for any occasion, it offers a refreshing taste of the tropics in every bite.

    Author: Munch Twist
    Prep Time: 20 minutes
    Cook Time: 30 minutes
    Total Time: 50 minutes
    Yield: 12 servings
    Category: Desserts
    Method: No bake
    Cuisine: American

    Hawaiian Pineapple Cake

    SCALE:
    1x
    2x
    3x
    Cook Mode: Prevent your screen from going dark

    Ingredients

    • 1 cup flaked coconut, toasted
    • 40 ounces crushed pineapple, drained with juice reserved
    • 18.25-ounce package yellow cake mix
    • 8-ounce package cream cheese
    • 2 cups cold milk (2% fat or higher)
    • 3 tablespoons sugar
    • 2 cups whipping cream
    • 3.4-ounce package instant vanilla pudding mix

    Instructions

    1. Prepare the Cake: Drain the crushed pineapple, reserving the juice. Preheat the oven according to the cake mix package instructions. Prepare the yellow cake mix, substituting water with reserved pineapple juice. Pour batter into a 9×13-inch pan and bake according to package instructions. Allow the cake to cool completely.
    2. Add Pineapple Layer: Once the cake is cool, poke holes all over the top with a wooden skewer. Spread the drained crushed pineapple evenly over the top of the cake.
    3. Prepare Whipped Cream: In a separate bowl, whip the cream and sugar together using an electric mixer until medium-stiff peaks form. Set aside.
    4. Make the Pudding Mixture: Beat softened cream cheese with an electric mixer until smooth. Gradually add cold milk, beating until smooth. Add instant vanilla pudding mix and beat for about 2 minutes until thickened.
    5. Combine and Assemble: Gently fold the pudding mixture into the whipped cream until fully combined. Spread this mixture evenly over the pineapple layer on the cake.
    6. Finish and Serve: Sprinkle toasted coconut evenly over the top of the cake. Chill in the refrigerator for at least 1 hour before serving. Slice and enjoy.

    Nutrition Facts

    Serving Size: 1 serving
    Calories: 360 kcal
    Sugar: 25g
    Sodium: 320mg
    Fat: 15g
    Saturated Fat: 9g
    Carbohydrates: 50g
    Fiber: 1g
    Protein: 5g
    Cholesterol: 60mg

  • Delicious Peach Cobbler Muffins Recipe

    Delicious Peach Cobbler Muffins Recipe

    Peach cobbler muffins are a delicious fusion of sweet peaches and a tender, fluffy muffin base. These treats are perfect for breakfast or as a snack, featuring a delightful streusel topping that gives them a satisfying crunch. They combine the comforting flavors of traditional peach cobbler with the convenience of portable muffins.

    Why You’ll Love This Recipe

    • Delicious Flavor: The combination of fresh peaches and vanilla creates a sweet, mouthwatering experience.
    • Versatile Enjoyment: Perfect for breakfast, snacks, or dessert, making them a versatile addition to any meal.
    • Quick & Easy: Ready in just 35 minutes, these muffins are simple enough for any skill level.
    • Perfect Texture: The fluffy muffins paired with a crunchy streusel topping make for an irresistible bite.
    • Customizable: Feel free to swap out peaches for other fruits, adding your personal touch.

    Tools and Equipment

    To make the preparation seamless, having the right tools is essential.

    Essential Tools

    • Mixing bowls
    • Muffin tin
    • Rubber spatula
    • Whisk
    • Measuring cups and spoons

    Why These Tools Matter

    • Mixing bowls: Provide enough space to combine ingredients without spilling.
    • Muffin tin: Ensures even baking and perfect muffin shapes.
    • Rubber spatula: Helps gently fold ingredients without overmixing, keeping the muffins light and airy.

    Ingredients for Peach Cobbler Muffins

    For the Muffins

    • 1/4 cup vegetable oil
    • 1 egg
    • 1 1/2 teaspoons baking powder
    • 1/2 teaspoon salt
    • 1 cup chopped fresh (or canned) peaches
    • 1 1/4 cups all-purpose flour
    • 2/3 cup white sugar
    • 1 teaspoon vanilla extract
    • 1/2 cup whole milk

    For the Streusel Topping

    • 3 tablespoons white sugar
    • 4 tablespoons cold unsalted butter
    • 1/4 cup all-purpose flour
    • 1/2 teaspoon baking powder
    • 1/2 teaspoon cinnamon

    How to Make Peach Cobbler Muffins Step-by-Step

    Step 1: Prep the Oven

    Preheat your oven to 350°F (175°C). Line a large muffin tin with 12 muffin cups to prepare for baking.

    Step 2: Mix Dry Ingredients

    In a large bowl, whisk together the all-purpose flour, baking powder, salt, and white sugar. This mixture provides the base for your muffins.

    Step 3: Coat the Peaches

    Add the chopped peaches to the dry mixture. Stir gently to ensure the peaches are well-coated, which helps distribute their flavor throughout the muffins.

    Step 4: Combine Wet Ingredients

    In a separate bowl, whisk together the whole milk, egg, vegetable oil, and vanilla extract. This mixture adds moisture and flavor to the muffins.

    Step 5: Form the Batter

    Gently fold the wet ingredients into the dry mixture using a rubber spatula. Mix just until the flour disappears, being careful not to overmix.

    Step 6: Fill the Muffin Cups

    Divide the batter evenly among the muffin cups, filling each about 3/4 full. This allows space for the muffins to rise.

    Step 7: Make the Streusel Topping

    In a small bowl, combine the flour, sugar, cinnamon, and baking powder. Add the cold unsalted butter in chunks. Use your fingers to break it into the dry mixture until it resembles coarse crumbs.

    Step 8: Top the Muffins

    Spoon the streusel topping generously onto each muffin. This adds a delicious crunch to the finished product.

    Step 9: Bake

    Bake the muffins at 350°F (175°C) for about 20 minutes. They are done when they are golden brown and a toothpick inserted into the center comes out clean.

    Step 10: Cool and Enjoy

    Let the muffins cool slightly before serving. They can be enjoyed warm or at room temperature, making them a delightful treat any time of day.

    With this easy-to-follow recipe, your Peach Cobbler Muffins will surely impress family and friends alike.

    How to Serve Peach Cobbler Muffins

    These Peach Cobbler Muffins are versatile and can be enjoyed in various delightful ways.

    With a Dollop of Whipped Cream

    Add a generous spoonful of whipped cream on top of your muffin for an indulgent treat that enhances the sweet peach flavor.

    A Side of Vanilla Ice Cream

    Serve your warm muffins with a scoop of vanilla ice cream. The creamy texture complements the warm, fruity muffins perfectly.

    Drizzled with Honey

    A light drizzle of honey over the muffins adds a touch of natural sweetness and enhances the peach flavor, making for a simple yet elegant serving option.

    Pro Tips for the Best Peach Cobbler Muffins

    To ensure your muffins turn out perfect every time, consider these helpful tips.

    • Choose Ripe Peaches: Use ripe, sweet peaches for the best flavor. If using canned peaches, opt for those in juice rather than syrup for a healthier option.

    • Don’t Overmix the Batter: Mix the wet ingredients into the dry just until combined. Overmixing can lead to dense muffins.

    • Use Cold Butter for Streusel: Keep your butter cold when making the streusel topping. This helps achieve a crumbly texture that adds crunch.

    • Adjust Baking Time for Your Oven: Every oven is different. Keep an eye on your muffins and check for doneness a few minutes early to avoid overbaking.

    • Store Properly: Once cooled, store muffins in an airtight container at room temperature for up to three days or freeze for longer storage.

    Best Side Dishes and Pairings

    Pair these Peach Cobbler Muffins with complementary dishes and drinks for a delightful experience.

    1. Coffee: A warm cup of coffee balances the sweetness of the muffins and makes for a perfect breakfast or afternoon snack.

    2. Fruit Salad: A light and refreshing fruit salad provides a healthy contrast to the rich muffins, enhancing your meal’s overall flavor.

    3. Greek Yogurt: Creamy Greek yogurt adds a protein boost and tangy flavor that pairs wonderfully with the sweet muffins.

    4. Herbal Tea: A soothing cup of herbal tea complements the muffins and provides a calming beverage option for any time of day.

    5. Sparkling Water: For a refreshing and bubbly accompaniment, sparkling water is a great choice that cleanses the palate.

    Common Mistakes to Avoid

    • Using Overripe Peaches: Ensure the peaches are ripe but firm for the best texture in your muffins.
    • Not Measuring Flour Correctly: Use the spoon and level method to avoid dense muffins.
    • Overmixing the Batter: Gently fold the ingredients to keep the muffins light and fluffy.
    • Skipping the Streusel Topping: This adds essential texture and flavor; don’t omit it!

    Storage & Reheating Instructions

    Refrigerator Storage

    Store the peach cobbler muffins in an airtight container in the refrigerator. They will stay fresh for up to 3 days.

    Freezing Instructions

    To freeze, wrap each muffin tightly in plastic wrap and place them in a freezer-safe bag. They can be frozen for up to 3 months. Thaw overnight in the refrigerator before serving.

    Reheating Tips

    • Oven: Preheat to 350°F (175°C) and warm the muffins for about 10 minutes.
    • Microwave: Heat each muffin for 15-20 seconds until warm.
    • Stovetop: Place muffins in a skillet over low heat, cover, and warm for about 5 minutes.

    Frequently Asked Questions

    How can I make Peach Cobbler Muffins gluten-free?

    You can substitute all-purpose flour with a gluten-free flour blend. This adjustment will maintain the texture of the muffins.

    Can I use canned peaches for Peach Cobbler Muffins?

    Yes, using canned peaches is acceptable. Just make sure to drain them well to avoid excess moisture in the batter.

    How do I prevent my Peach Cobbler Muffins from sticking to the pan?

    Using paper liners or greasing the muffin tin with butter or cooking spray can help prevent sticking.

    Can I add other fruits to the Peach Cobbler Muffins?

    Absolutely! Berries or apples can complement the peach flavor beautifully. Just adjust the quantity accordingly.

    Final Thoughts

    These Peach Cobbler Muffins are a delightful way to enjoy the flavors of summer. They’re perfect for breakfast or a sweet treat any time of day. Try making this recipe today, and feel free to leave a comment with your thoughts and any variations you tried!

    Desserts

    Peach Cobbler Muffins


    5.0 from 24 reviews

    These peach cobbler muffins are a delightful treat with a sweet streusel topping that adds the perfect crunch. They are moist, flavorful, and perfect for breakfast or a snack.

    Author: Munch Twist
    Prep Time: 15 minutes
    Cook Time: 20 minutes
    Total Time: 35 minutes
    Yield: 12 servings
    Category: Desserts
    Method: No bake
    Cuisine: American

    Peach Cobbler Muffins

    SCALE:
    1x
    2x
    3x
    Cook Mode: Prevent your screen from going dark

    Ingredients

    • 1/4 cup vegetable oil
    • 1 egg
    • 1 1/2 teaspoons baking powder
    • 1/2 teaspoon salt
    • 1 cup chopped fresh or canned peaches
    • 1 1/4 cups all-purpose flour
    • 2/3 cup white sugar
    • 1 teaspoon vanilla extract
    • 1/2 cup whole milk
    • 3 tablespoons white sugar (for streusel)
    • 4 tablespoons cold unsalted butter
    • 1/4 cup all-purpose flour (for streusel)
    • 1/2 teaspoon baking powder (for streusel)
    • 1/2 teaspoon cinnamon

    Instructions

    1. Preheat your oven to 350°F (175°C). Line a large muffin tin with 12 muffin cups.
    2. In a large bowl, whisk together the flour, baking powder, salt, and sugar.
    3. Stir in the chopped peaches, ensuring they are well-coated with the dry mixture.
    4. In a separate bowl, whisk together the milk, egg, vegetable oil, and vanilla extract.
    5. Gently fold the wet ingredients into the dry mixture using a rubber spatula, mixing just until the flour disappears.
    6. Evenly divide the batter among the muffin cups, filling each about 3/4 full.
    7. In a small bowl, combine the flour, sugar, cinnamon, and baking powder for the streusel. Add the cold butter in chunks and use your fingers to break it into the dry mixture until it resembles coarse crumbs.
    8. Spoon the streusel topping onto each muffin.
    9. Bake at 350°F (175°C) for about 20 minutes, or until the muffins are golden brown and a toothpick inserted into the center comes out clean.
    10. Let the muffins cool slightly before serving. Enjoy warm or at room temperature!

    Nutrition Facts

    Serving Size: 1 serving
    Calories: 180 kcal
    Sugar: 12g
    Sodium: 140mg
    Fat: 8g
    Saturated Fat: 3g
    Carbohydrates: 24g
    Fiber: 1g
    Protein: 2g
    Cholesterol: 20mg