Category: Desserts

  • Irresistible Pecan Pie Muffins Recipe to Try Today

    Irresistible Pecan Pie Muffins Recipe to Try Today

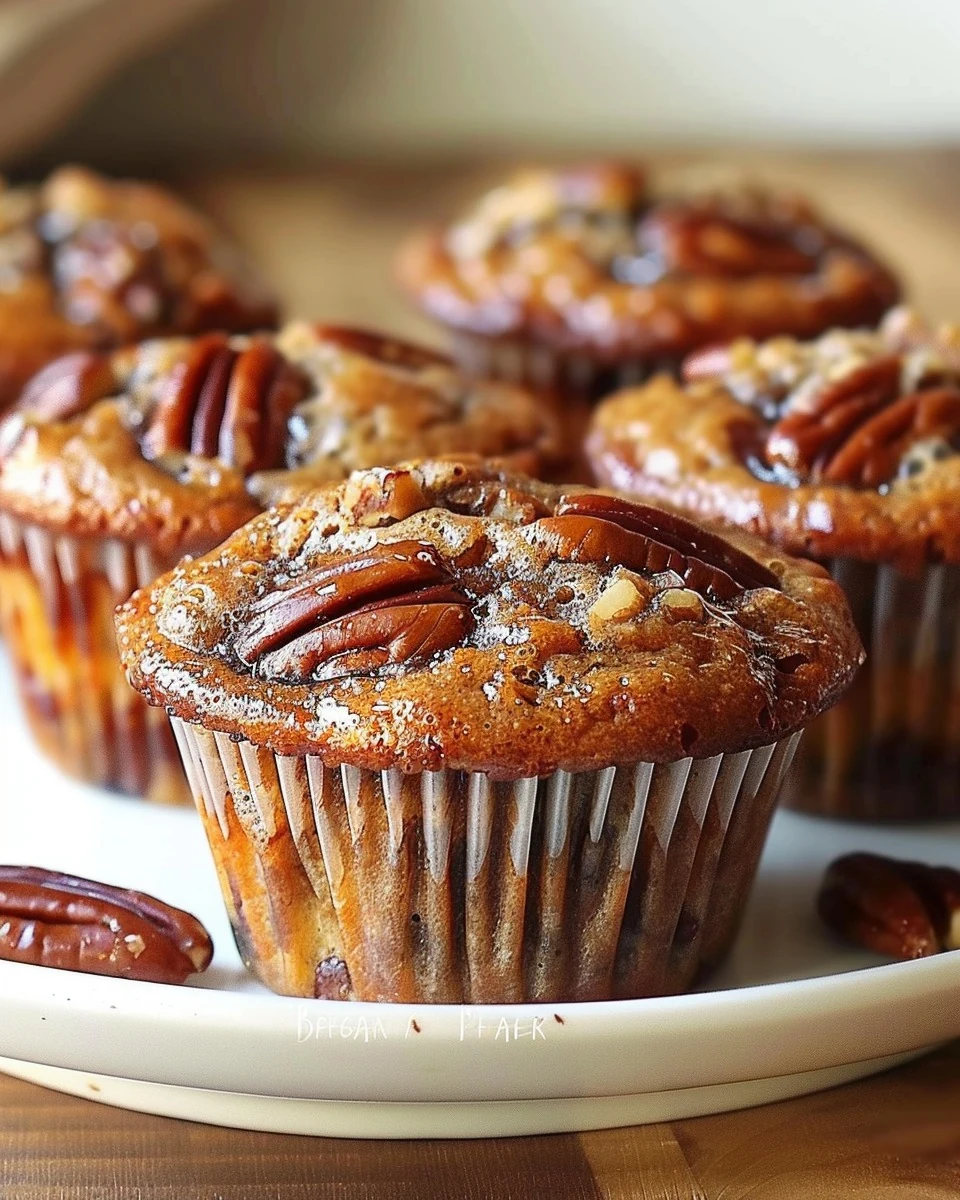
    Pecan Pie Muffins are a delightful twist on a classic dessert. These muffins capture the rich, nutty flavor of pecan pie in a portable form. With a gooey center and a crunchy top, they are perfect for any occasion.

    Why You’ll Love This Recipe

    • Irresistible Flavor: The combination of pecans and brown sugar delivers a sweet, nutty taste that is hard to resist.
    • Perfectly Portable: Enjoy the flavors of pecan pie in a convenient muffin form, ideal for breakfast or snacks.
    • Quick & Easy: Ready in under 30 minutes, these muffins are simple to prepare, making them suitable for any skill level.
    • Customizable: Feel free to add chocolate chips or a splash of vanilla for a personal touch.
    • Great for Sharing: These muffins are perfect for gatherings, ensuring everyone gets a taste of this delicious treat.

    Tools and Equipment

    Having the right tools makes baking easier and more efficient.

    Essential Tools

    • Mixing bowls
    • Muffin tin (mini or regular)
    • Measuring cups and spoons
    • Whisk
    • Rubber spatula

    Why These Tools Matter

    • Mixing Bowls: Sturdy bowls help combine ingredients without spilling.
    • Muffin Tin: A good-quality muffin tin ensures even baking and easy removal.
    • Rubber Spatula: This tool is perfect for folding ingredients gently without overmixing.

    Ingredients for Pecan Pie Muffins

    Dry Ingredients

    • 2 cups chopped pecans
    • 1 cup packed light brown sugar
    • ½ cup all-purpose flour

    Wet Ingredients

    • 2/3 cup butter, softened
    • 2 eggs, beaten

    How to Make Pecan Pie Muffins Step-by-Step

    Step 1: Preheat the Oven

    Preheat your oven to 350°F (175°C). Grease mini or regular muffin cups generously to ensure easy removal.

    Step 2: Mix Dry Ingredients

    In a medium bowl, combine the chopped pecans, brown sugar, and flour. Stir until well mixed and set aside.

    Step 3: Prepare Wet Ingredients

    In a separate bowl, beat together the softened butter and eggs until creamy and well combined.

    Step 4: Combine Mixtures

    Gently fold the dry ingredients into the butter and egg mixture. Mix until just combined, ensuring not to overmix.

    Step 5: Fill Muffin Cups

    Spoon the batter into the prepared muffin cups, filling each about 2/3 full. This allows room for the muffins to rise.

    Step 6: Bake

    Bake mini muffins for 12-13 minutes or regular-sized muffins for 15-17 minutes. Look for a golden brown color on top.

    Step 7: Cool and Remove

    Run a knife around the edge of each muffin to loosen it. Carefully pop them out of the cups. For the best flavor, serve warm.

    Final Thoughts

    These Pecan Pie Muffins capture the essence of a traditional pecan pie but in a delightful muffin form. They are perfect for breakfast, dessert, or as a sweet snack. Enjoy them fresh out of the oven, or store them for later to savor the deliciousness.

    How to Serve Pecan Pie Muffins

    Pecan Pie Muffins can be enjoyed in various delightful ways. Here are some creative serving ideas:

    With Whipped Cream

    Top your muffins with a dollop of whipped cream for a light and airy finish that complements the rich flavors.

    Drizzled with Maple Syrup

    A drizzle of pure maple syrup adds an extra layer of sweetness and enhances the nutty taste of the muffins.

    As a Dessert Parfait

    Layer crumbled muffins with yogurt and fresh fruit in a glass for an indulgent yet balanced dessert option.

    Pro Tips for the Best Pecan Pie Muffins

    To ensure your Pecan Pie Muffins turn out perfectly every time, keep these tips in mind:

    • Use Fresh Pecans: Freshly chopped pecans have a more robust flavor and crunch than older nuts, enhancing the overall taste of your muffins.

    • Do Not Overmix: Gently combine the ingredients to avoid dense muffins; a few lumps are okay.

    • Check for Doneness: Use a toothpick to check if the muffins are done; it should come out clean or with a few moist crumbs.

    • Store Properly: Keep leftover muffins in an airtight container at room temperature for up to three days to maintain freshness.

    • Experiment with Add-Ins: Try adding chocolate chips or dried fruit to the batter for an extra twist on the classic recipe.

    Best Side Dishes and Pairings

    Pecan Pie Muffins pair beautifully with various side dishes and drinks. Consider these options:

    1. Coffee
      A warm cup of coffee balances the sweetness of the muffins and enhances the overall flavor experience.

    2. Cinnamon Tea
      The warmth and spiciness of cinnamon tea complement the nutty notes of the muffins perfectly.

    3. Fresh Fruit Salad
      Light and refreshing, a fruit salad provides a contrast to the rich muffin, making for a balanced meal.

    4. Cheese Platter
      A selection of soft cheeses can add a creamy element that pairs wonderfully with the nutty flavor of the muffins.

    5. Yogurt Parfait
      Layered with yogurt and granola, this dish adds texture and a refreshing element to your muffin experience.

    Common Mistakes to Avoid

    • Using Stale Ingredients: Fresh ingredients will ensure your muffins taste their best. Check the expiration dates on your baking supplies.
    • Overmixing the Batter: Gently fold the ingredients together. Overmixing can lead to dense muffins.
    • Not Greasing the Muffin Cups: Ensure your muffin cups are well-greased to prevent sticking and make removal easier.
    • Baking at the Wrong Temperature: Always preheat your oven to the specified temperature for even baking.

    Storage & Reheating Instructions

    Refrigerator Storage

    Store Pecan Pie Muffins in an airtight container in the refrigerator. They will stay fresh for up to 5 days.

    Freezing Instructions

    For best results, freeze muffins individually in plastic wrap and place them in a freezer-safe bag or container. They can be stored for up to 3 months.

    Reheating Tips

    • Oven: Preheat to 350°F (175°C) and bake for about 5-7 minutes until warmed through.
    • Microwave: Heat on medium power for 15-20 seconds or until warm.
    • Stovetop: Place muffins in a skillet over low heat, cover, and warm for 2-3 minutes.

    Frequently Asked Questions

    How do I make Pecan Pie Muffins gluten-free?

    You can substitute all-purpose flour with a gluten-free flour blend. Ensure all other ingredients are gluten-free.

    Can I make Pecan Pie Muffins ahead of time?

    Yes, you can prepare the batter and store it in the refrigerator for up to 24 hours before baking.

    What is the best way to serve Pecan Pie Muffins?

    Serve them warm with a dollop of whipped cream or a drizzle of caramel sauce for an extra indulgent treat.

    How can I add more flavor to my Pecan Pie Muffins?

    Consider adding a teaspoon of vanilla extract or a pinch of cinnamon to enhance the flavor profile.

    What should I do if my muffins are too dry?

    Overbaking can lead to dry muffins. If this happens, you can add a bit of butter or serve them with a spread to add moisture.

    Final Thoughts

    Pecan Pie Muffins are a delightful twist on a classic dessert, perfect for any occasion. We encourage you to try this simple recipe and share your thoughts in the comments. Your feedback helps us create even better recipes for you.


    Desserts

    Pecan Pie Muffins


    5.0 from 24 reviews

    These Pecan Pie Muffins are a delightful twist on the classic pecan pie, combining the rich flavors of pecans, brown sugar, and butter into a moist and delicious muffin. Perfect for breakfast or as a sweet treat, they are easy to make and sure to please any crowd.
    Author: Munch Twist
    Prep Time: 10 minutes
    Cook Time: 15 minutes
    Total Time: 25 minutes
    Yield: 12 servings
    Category: Desserts
    Method: No bake
    Cuisine: American

    Pecan Pie Muffins

    SCALE:
    1x
    2x
    3x
    Cook Mode: Prevent your screen from going dark

    Ingredients

    • 2 cups chopped pecans
    • 1 cup packed light brown sugar
    • ½ cup all-purpose flour
    • 2/3 cup butter, softened
    • 2 eggs, beaten

    Instructions

    1. Preheat your oven to 350°F (175°C). Grease mini or regular muffin cups generously to prevent sticking.
    2. In a medium bowl, combine the chopped pecans, brown sugar, and flour. Stir until well mixed.
    3. In a separate bowl, beat together the softened butter and beaten eggs until creamy.
    4. Gently fold the dry ingredients into the butter and egg mixture until just combined.
    5. Spoon the batter into the prepared muffin cups, filling each about 2/3 full.
    6. Bake mini muffins for 12-13 minutes, or regular-sized muffins for 15-17 minutes, until golden brown.
    7. Run a knife around the edge of each muffin to loosen and pop them out of the cups. Serve warm for the best flavor.
    Nutrition Facts

    Serving Size: 1 serving
    Calories: 180 kcal
    Sugar: 12g
    Sodium: 100mg
    Fat: 10g
    Saturated Fat: 5g
    Carbohydrates: 20g
    Fiber: 1g
    Protein: 2g
    Cholesterol: 40mg

  • Delicious Hawaiian Style Teriyaki Chicken Recipe

    Delicious Hawaiian Style Teriyaki Chicken Recipe

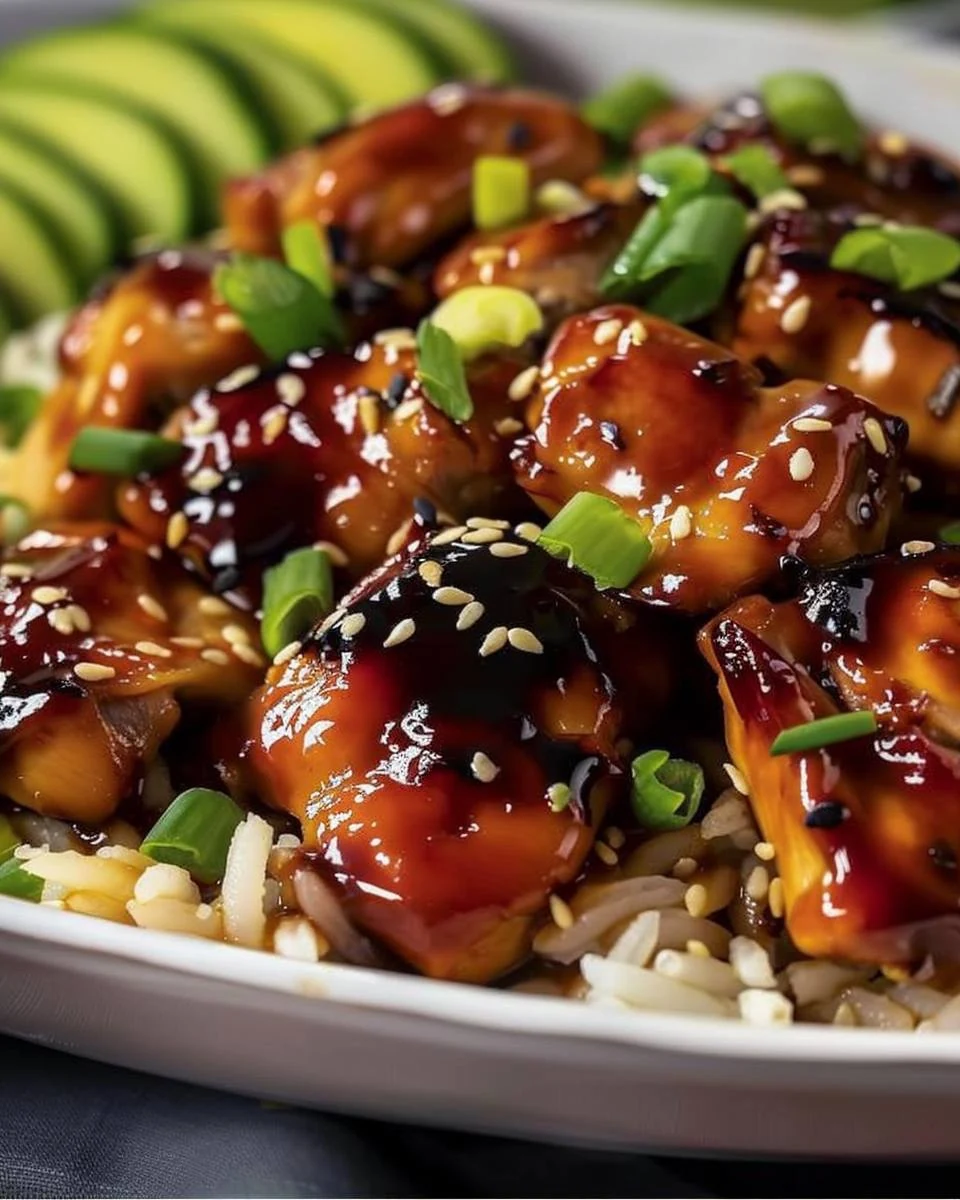
    Transport your taste buds to the tropics with this mouth-watering Hawaiian Style Teriyaki Chicken. Juicy, flavorful, and oh-so-delicious, this dish is perfect for any occasion, whether you’re hosting a summer barbecue or enjoying a quiet family dinner.

    Why You’ll Love This Recipe

    • Tropical Flavor: The combination of pineapple juice and soy sauce creates a sweet and savory profile that is hard to resist.
    • Versatile Cooking Methods: Whether you prefer grilling, baking, or using a slow cooker, this recipe adapts to your cooking style.
    • Quick Preparation: With just 10 minutes of prep time, you can marinate the chicken and let it soak in the flavors.
    • Perfect for Meal Prep: Cook a large batch and enjoy leftovers throughout the week, making weeknight dinners a breeze.
    • Family-Friendly: This dish is a hit with both kids and adults, making it a great choice for family gatherings.

    Tools and Equipment

    To make Hawaiian Style Teriyaki Chicken, you’ll need a few essential tools to streamline your cooking process.

    Essential Tools

    • Large mixing bowl
    • Whisk or spoon
    • Grill or stovetop skillet
    • Digital meat thermometer
    • Baking dish (if using the oven)

    Why These Tools Matter

    • Large mixing bowl: Essential for mixing the marinade and ensuring all ingredients are combined thoroughly.
    • Digital meat thermometer: Guarantees the chicken reaches the perfect internal temperature, ensuring safety and flavor.
    • Grill or stovetop skillet: Provides versatility in cooking methods, allowing for a delicious char and flavor infusion.

    Ingredients for HAWAIIAN STYLE TERIYAKI CHICKEN

    Marinade

    • 1 cup pineapple juice (or pineapple chunks with juice)
    • 1 cup soy sauce
    • 1 cup packed brown sugar
    • 5 cloves garlic, mashed
    • 1 tablespoon fresh ginger, minced

    Chicken

    • 3 pounds boneless, skinless chicken thighs

    How to Make HAWAIIAN STYLE TERIYAKI CHICKEN Step-by-Step

    Step 1: Prepare the Marinade

    In a large bowl, mix together pineapple juice, soy sauce, and brown sugar until the sugar dissolves. Add the mashed garlic and minced ginger to the mixture, stirring well.

    Step 2: Marinate the Chicken

    Add the chicken thighs to the bowl, ensuring they are fully submerged in the marinade. Cover and refrigerate for at least 24 hours for best results. If you’re short on time, you can boil the chicken in the marinade immediately after preparation.

    Step 3: Grill Method

    Preheat the grill to high heat. Grill the marinated chicken thighs until they are nicely charred on the outside. Transfer the grilled chicken to a pot on the grill and add a bit of fresh teriyaki sauce. Steam the chicken until tender and juicy.

    Alternative Cooking Methods

    Stir Fry

    Cut the chicken into bite-sized pieces. Heat a large wok or skillet over medium-high heat with a bit of sesame oil. Sauté the chicken until it is white on the outside, then add the marinade. Simmer until the sauce thickens and the chicken is fully cooked.

    Stove Top

    Keep the chicken thighs whole. Sear each thigh in a large skillet over medium heat until golden brown. Add the marinade and simmer until the sauce reduces and the chicken is cooked through.

    Crock Pot / Instant Pot

    Place the chicken and marinade in the slow cooker or pressure cooker. Cook until the chicken is tender. To thicken the sauce, simmer it separately on the stove for 20-30 minutes. Serve the chicken whole or shredded.

    Baked

    Preheat the oven to 350°F (175°C). Place the chicken in a baking dish and pour 1-2 cups of the marinade over the top. Bake for 35-40 minutes, or until the chicken reaches an internal temperature of 165°F (75°C).

    Step 4: Serve

    Ensure the chicken reaches an internal temperature of 165°F (75°C) using a digital thermometer. Enjoy your Hawaiian Style Teriyaki Chicken hot, served with your favorite sides.

    Preparation Time: 10 minutes | Cooking Time: 35-40 minutes | Total Time: 45-50 minutes

    Nutritional Information (per serving)

    • Calories: 280
    • Carbohydrates: 30g
    • Protein: 22g
    • Fat: 10g
    • Saturated Fat: 2g
    • Cholesterol: 105mg
    • Sodium: 900mg
    • Fiber: 1g
    • Sugar: 25g

    Enjoy this tropical delight that’s bursting with flavor and sure to impress!

    How to Serve HAWAIIAN STYLE TERIYAKI CHICKEN

    Serving Hawaiian Style Teriyaki Chicken is an opportunity to showcase its vibrant flavors and tropical vibes. Here are some creative serving ideas:

    Serve with Coconut Rice

    Coconut rice complements the sweetness of the teriyaki chicken, adding a creamy texture that enhances the dish’s tropical theme.

    Pair with Grilled Pineapple

    Grilled pineapple slices bring a smoky sweetness that perfectly balances the rich flavors of the teriyaki sauce, creating a delightful contrast.

    Create a Teriyaki Chicken Bowl

    Layer the chicken over a bed of steamed vegetables and rice, drizzling extra teriyaki sauce on top for a satisfying and colorful meal.

    Pro Tips for the Best HAWAIIAN STYLE TERIYAKI CHICKEN

    For a truly exceptional Hawaiian Style Teriyaki Chicken, consider these expert tips:

    • Use Fresh Ingredients: Fresh garlic and ginger enhance the overall flavor profile, making the marinade more vibrant and aromatic.

    • Opt for Chicken Thighs: Boneless, skinless chicken thighs provide juiciness and tenderness, ensuring the chicken remains flavorful throughout cooking.

    • Marinate Longer for Best Results: While 24 hours is ideal, extending the marination to 3 days will deepen the flavors, making the chicken even more delicious.

    • Monitor Cooking Temperature: Use a meat thermometer to confirm the chicken reaches an internal temperature of 165°F (75°C) for safe consumption.

    • Reserve Marinade for Sauce: If you desire a thicker sauce, simmer the reserved marinade separately after cooking the chicken to intensify the flavors and achieve the desired consistency.

    Best Side Dishes and Pairings

    To elevate your meal, consider these excellent side dishes and drink pairings:

    1. Coleslaw: A crunchy, tangy coleslaw adds freshness and a nice contrast to the rich teriyaki chicken.

    2. Grilled Vegetables: Seasonal grilled vegetables, such as zucchini and bell peppers, provide a colorful and nutritious accompaniment.

    3. Hawaiian Macaroni Salad: This creamy, comforting salad is a classic pairing that balances the bold flavors of the chicken.

    4. Teriyaki Noodles: Stir-fried noodles tossed in teriyaki sauce echo the dish’s flavors, creating a harmonious meal.

    5. Pineapple Mango Salsa: A bright and zesty salsa enhances the tropical essence of the chicken while adding a refreshing flair.

    Common Mistakes to Avoid

    • Not Marinating Long Enough: Failing to marinate the chicken for the recommended time can result in less flavorful meat.
    • Skipping the Internal Temperature Check: Not using a thermometer can lead to undercooked chicken, which is unsafe to eat.
    • Using Low-Quality Soy Sauce: Cheap soy sauce can negatively affect the flavor profile of your Hawaiian Style Teriyaki Chicken.
    • Overcrowding the Grill or Pan: Cooking too much chicken at once can cause uneven cooking and prevent proper browning.

    Storage & Reheating Instructions

    Refrigerator Storage

    Store any leftover Hawaiian Style Teriyaki Chicken in airtight containers in the refrigerator. It will stay fresh for up to 3-4 days.

    Freezing Instructions

    For freezing, place the chicken in airtight freezer bags or containers, removing as much air as possible. It can be stored for up to 3 months. Thaw in the refrigerator overnight before reheating.

    Reheating Tips

    • Oven: Preheat to 350°F (175°C), cover with foil, and heat for about 20 minutes or until warmed through.
    • Microwave: Place on a microwave-safe plate, cover, and heat in 1-minute intervals until hot.
    • Stovetop: Heat in a skillet over medium heat, adding a splash of water or teriyaki sauce to prevent drying out.

    Frequently Asked Questions

    How do I know when my Hawaiian Style Teriyaki Chicken is cooked?

    Use a digital thermometer to ensure the chicken reaches an internal temperature of 165°F (75°C).

    Can I use chicken breasts instead of thighs for Hawaiian Style Teriyaki Chicken?

    Yes, you can use chicken breasts, but keep in mind they may become dry if overcooked, so monitor the cooking time closely.

    What sides pair well with Hawaiian Style Teriyaki Chicken?

    Consider serving it with rice, steamed vegetables, or a fresh salad to complement the flavors.

    How can I make this recipe gluten-free?

    To make Hawaiian Style Teriyaki Chicken gluten-free, use tamari instead of regular soy sauce.

    Can I adjust the sweetness in the marinade?

    Absolutely. You can reduce the amount of brown sugar or substitute with a sugar alternative to adjust the sweetness to your preference.

    Final Thoughts

    This Hawaiian Style Teriyaki Chicken is a delicious way to bring tropical flavors to your dining table. Don’t hesitate to try this recipe, and be sure to leave a comment with your feedback on how it turned out!


    Dinner

    HAWAIIAN STYLE TERIYAKI CHICKEN


    5.0 from 24 reviews

    Transport your taste buds to the tropics with this mouth-watering Hawaiian Style Teriyaki Chicken! Juicy, flavorful, and oh-so-delicious, it's perfect for any occasion.

    Author: Munch Twist
    Prep Time: 10 minutes
    Cook Time: 35-40 minutes
    Total Time: 45-50 minutes
    Yield: 6 servings
    Category: Desserts
    Method: No bake
    Cuisine: American

    HAWAIIAN STYLE TERIYAKI CHICKEN

    SCALE:
    1x
    2x
    3x
    Cook Mode: Prevent your screen from going dark

    Ingredients

    • 3 pounds boneless, skinless chicken thighs
    • 1 cup pineapple juice
    • 1 cup soy sauce
    • 1 cup packed brown sugar
    • 5 cloves garlic, mashed
    • 1 tablespoon fresh ginger, minced

    Instructions

    1. In a large bowl, mix together pineapple juice, soy sauce, and brown sugar until the sugar dissolves. Add the mashed garlic and minced ginger to the mixture.
    2. Add the chicken thighs to the bowl, ensuring they are fully submerged in the marinade. Cover and refrigerate for 24 hours, or up to 3 days for enhanced flavor.
    3. Preheat the grill to high heat. Grill the chicken thighs until charred on the outside. Transfer to a pot on the grill, add fresh teriyaki sauce, and steam until tender.
    4. For stir fry, cut chicken into bite-sized pieces, sauté in sesame oil, add marinade, and simmer until thickened.
    5. For stove top, sear chicken thighs, add marinade, and simmer until sauce reduces.
    6. For crock pot, place chicken and marinade in the slow cooker and cook until tender. Thicken sauce separately if needed.
    7. For baking, preheat oven to 350°F, place chicken in a dish, pour marinade over, and bake for 35-40 minutes.

    Nutrition Facts

    Serving Size: 1 serving
    Calories: 280 kcal
    Sugar: 25g
    Sodium: 900mg
    Fat: 10g
    Saturated Fat: 2g
    Carbohydrates: 30g
    Fiber: 1g
    Protein: 22g
    Cholesterol: 105mg

  • Irresistible Hazelnut Babka Recipe You’ll Love

    Irresistible Hazelnut Babka Recipe You’ll Love

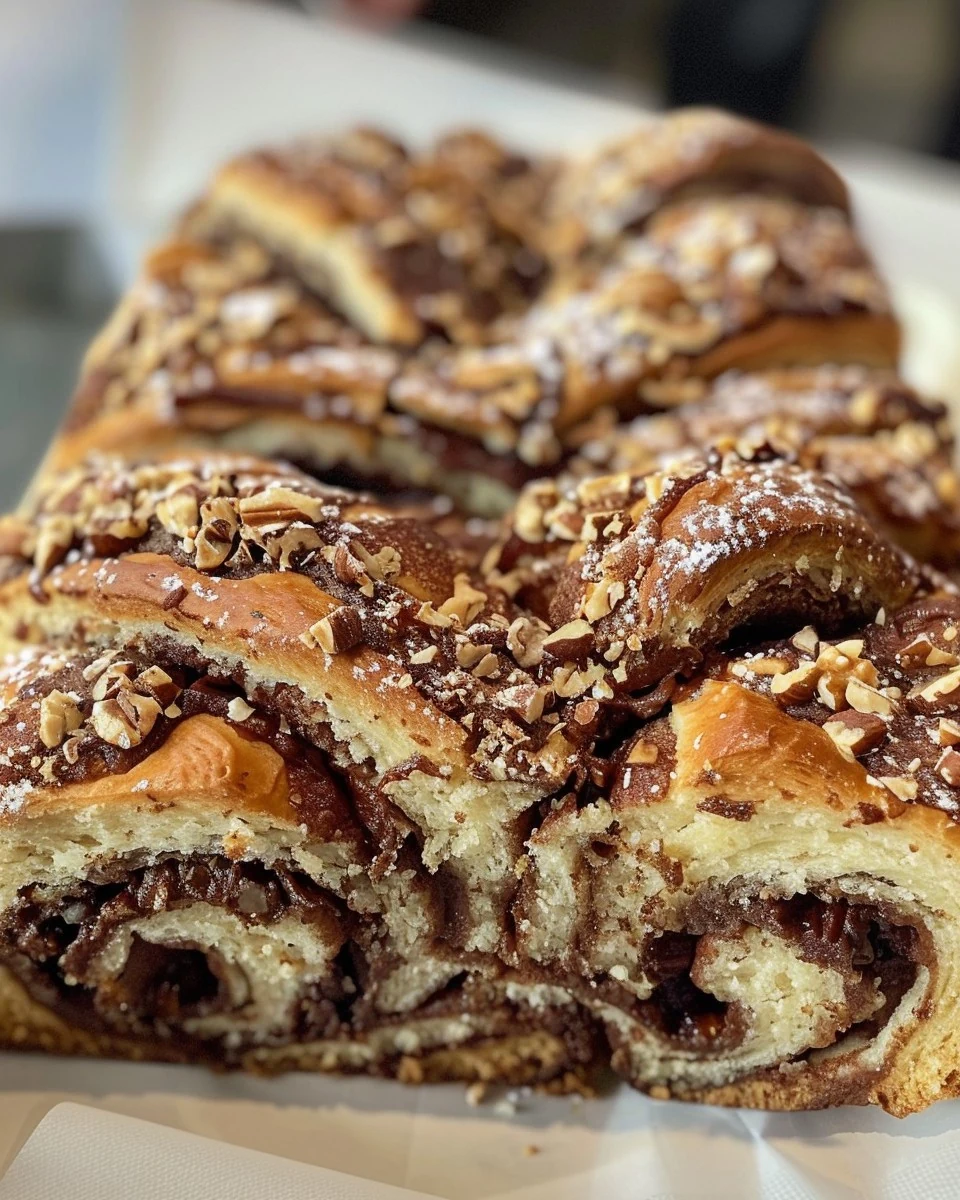
    Hazelnut Babka is a delightful twist on the traditional sweet bread, combining rich flavors of hazelnut and cinnamon. This braided loaf is not only visually stunning but also offers a heavenly taste that pairs perfectly with your morning coffee or afternoon tea.

    Why You’ll Love This Recipe

    • Irresistibly Delicious: The combination of hazelnut spread and cinnamon creates a flavor explosion that will satisfy your sweet tooth.
    • Impressive Presentation: The braided design of the babka makes it a showstopper for any gathering or special occasion.
    • Versatile Enjoyment: Perfect for breakfast, dessert, or a snack, this babka can be enjoyed at any time of the day.
    • Homemade Goodness: Baking from scratch allows you to control the quality of ingredients, ensuring a superior taste.
    • Fun to Make: The process of rolling and twisting the dough is an enjoyable activity, perfect for baking enthusiasts.

    Tools and Equipment

    To create your Hazelnut Babka, you’ll need a few essential kitchen tools.

    Essential Tools

    • Stand mixer or mixing bowl
    • Rolling pin
    • Loaf pan
    • Sharp knife or bench scraper
    • Small saucepan

    Why These Tools Matter

    • Stand mixer or mixing bowl: Helps in thoroughly mixing and kneading the dough, saving time and effort.
    • Rolling pin: Ensures an even thickness when rolling out the dough for the filling.
    • Loaf pan: Provides the perfect shape for baking the babka, promoting even cooking and a beautiful presentation.

    Ingredients for Hazelnut Babka

    For the Dough

    • 3 1/4 cups all-purpose flour
    • 1/2 cup unsalted butter, softened
    • 2 1/4 teaspoons active dry yeast
    • 1/4 cup granulated sugar
    • 3/4 cup whole milk, warmed
    • 1/2 teaspoon salt
    • 2 large eggs

    For the Filling

    • 1/2 cup unsalted butter, softened
    • 1 cup hazelnut spread (such as Nutella)
    • 1/4 cup granulated sugar
    • 1/4 cup finely chopped hazelnuts
    • 1 teaspoon ground cinnamon

    For the Syrup

    • 1/2 cup water
    • 1/2 cup granulated sugar

    How to Make Hazelnut Babka Step-by-Step

    Step 1: Prepare the Dough

    In a large bowl, mix the flour, sugar, yeast, and salt. Stir in the warm milk and eggs until a dough forms. Add the softened butter and knead until smooth and elastic. Cover the bowl and let the dough rise in a warm place until doubled in size, about 1-2 hours.

    Step 2: Prepare the Filling

    In a medium bowl, blend the softened butter with the hazelnut spread, sugar, chopped hazelnuts, and cinnamon until fully combined. This filling will provide a rich, nutty flavor to your babka.

    Step 3: Assemble the Babka

    Preheat your oven to 350°F (175°C) and grease a loaf pan. Roll out the dough on a floured surface into a large rectangle. Evenly spread the hazelnut mixture over the dough. Roll the dough tightly from the long side to form a log. Cut the log in half lengthwise to expose the filling. Twist the two halves together and place them in the prepared loaf pan. Cover and let rise for an additional 30 minutes.

    Step 4: Bake

    Bake the babka for 40-45 minutes, or until golden brown and a skewer inserted into the center comes out clean. The aroma of baking hazelnut babka will fill your kitchen.

    Step 5: Make the Syrup

    While the babka is baking, combine the water and sugar in a small saucepan. Bring to a boil, then simmer until the sugar dissolves. Allow it to cool slightly.

    Step 6: Finish the Babka

    Once the babka is baked, brush it with the warm syrup while still hot. Let it cool in the pan for 10 minutes before transferring to a wire rack to cool completely. This final touch ensures a glossy finish and enhances the flavor.

    Preparation time: 20 minutes | Cooking time: 50 minutes

    Nutritional Information (per serving, assuming 12 servings):
    – Calories: 350 kcal
    – Carbohydrates: 47g
    – Protein: 5g
    – Fats: 17g

    Enjoy your sweet, nutty Hazelnut Babka with a cup of coffee or tea!

    How to Serve Hazelnut Babka

    Hazelnut Babka is delicious on its own, but there are several creative ways to enhance your experience.

    Toasted with Butter

    Lightly toast slices of Hazelnut Babka and spread a thin layer of butter on top. The warmth of the toast combined with the butter brings out the rich flavors of the hazelnuts.

    With Whipped Cream

    Serve slices of Hazelnut Babka with a dollop of freshly whipped cream. The creaminess adds a delightful contrast to the sweet, nutty bread.

    As French Toast

    Transform leftover Hazelnut Babka into indulgent French toast. Dip slices in an egg mixture and cook until golden brown, then serve with maple syrup for a decadent breakfast.

    Pro Tips for the Best Hazelnut Babka

    For a perfect Hazelnut Babka, follow these expert tips.

    • Use Fresh Yeast: Ensure your yeast is fresh for optimal rising. Check the expiration date before use.
    • Knead Thoroughly: Knead the dough until it is smooth and elastic, which helps develop the gluten for a better texture.
    • Avoid Over-Filling: Spread the filling evenly but avoid using too much to prevent it from spilling out during baking.
    • Cool Completely: Allow the babka to cool completely before slicing to ensure clean cuts and avoid a doughy texture.
    • Store Properly: Keep any leftovers in an airtight container at room temperature for up to 3 days to maintain freshness.

    Best Side Dishes and Pairings

    Pairing Hazelnut Babka with complementary dishes enhances its flavor profile.

    1. Espresso: The strong, rich flavor of espresso contrasts beautifully with the sweetness of the babka.
    2. Fresh Fruit Salad: A light fruit salad adds a refreshing balance to the dense, sweet babka.
    3. Vanilla Ice Cream: The creaminess of vanilla ice cream provides a delightful contrast to the nutty texture of the babka.
    4. Chai Tea: The warm spices in chai tea complement the cinnamon in the babka, creating a cozy pairing.
    5. Dark Chocolate: A few squares of dark chocolate can elevate the dessert experience, enhancing the hazelnut flavor.

    Common Mistakes to Avoid

    • Using Cold Ingredients: Ensure all ingredients, especially the milk and butter, are at room temperature for the best dough texture.
    • Not Kneading Enough: Kneading the dough is crucial for developing gluten; under-kneaded dough may not rise properly.
    • Overfilling the Dough: Be careful not to add too much filling, or it may ooze out during baking, making a mess in the oven.
    • Skipping the Second Rise: Allowing the babka to rise a second time is key for achieving a light, airy texture.

    Storage & Reheating Instructions

    Refrigerator Storage

    Store your Hazelnut Babka in an airtight container at room temperature for up to 3 days. If you prefer, you can refrigerate it for up to 1 week, but this may affect its texture.

    Freezing Instructions

    Wrap the cooled babka tightly in plastic wrap and then in aluminum foil. It can be frozen for up to 3 months. When ready to enjoy, thaw it in the refrigerator overnight.

    Reheating Tips

    • Oven: Preheat to 350°F (175°C) and heat for 10-15 minutes, wrapped in foil to prevent drying out.
    • Microwave: Heat slices on a microwave-safe plate for about 15-20 seconds until warm.
    • Stovetop: Place slices in a skillet over low heat, cover, and warm for about 5 minutes until heated through.

    Frequently Asked Questions

    How do I make the dough for Hazelnut Babka?

    To make the dough, mix flour, sugar, yeast, and salt, then add warm milk and eggs. Knead until smooth, allowing it to rise until doubled.

    Can I substitute the hazelnut spread in Hazelnut Babka?

    Yes, you can use other spreads like almond or peanut butter, but the flavor will vary. Hazelnut spread offers a rich, nutty taste that complements the babka perfectly.

    How long does Hazelnut Babka last?

    When stored properly, Hazelnut Babka stays fresh for up to 3 days at room temperature or up to a week in the refrigerator.

    Can I freeze Hazelnut Babka?

    Absolutely! Wrap it tightly and freeze for up to 3 months. Thaw it in the refrigerator before serving.

    What should I serve with Hazelnut Babka?

    Hazelnut Babka pairs wonderfully with coffee or tea, making it a delightful treat for breakfast or dessert.

    Final Thoughts

    Making Hazelnut Babka is a rewarding experience that fills your kitchen with delightful aromas. I encourage you to try this recipe and share your thoughts in the comments below. Your feedback is invaluable and inspires others to bake!


    Desserts

    Hazelnut Babka


    5.0 from 24 reviews

    This Hazelnut Babka is a rich and indulgent bread filled with a luscious hazelnut spread and topped with a sweet syrup. Perfect for breakfast or as a delightful dessert, this recipe combines the nutty flavor of hazelnuts with a soft, buttery dough, making it a favorite for any occasion.

    Author: Munch Twist
    Prep Time: 20 minutes
    Cook Time: 45 minutes
    Total Time: 1 hour 5 minutes
    Yield: 12 servings
    Category: Desserts
    Method: No bake
    Cuisine: American

    Hazelnut Babka

    SCALE:
    1x
    2x
    3x
    Cook Mode: Prevent your screen from going dark

    Ingredients

    • 3 1/4 cups all-purpose flour
    • 1/2 cup unsalted butter, softened
    • 2 1/4 teaspoons active dry yeast
    • 1/4 cup granulated sugar
    • 3/4 cup whole milk, warmed
    • 1/2 teaspoon salt
    • 2 large eggs
    • 1/2 cup unsalted butter, softened (for filling)
    • 1 cup hazelnut spread
    • 1/4 cup granulated sugar (for filling)
    • 1/4 cup finely chopped hazelnuts
    • 1 teaspoon ground cinnamon
    • 1/2 cup water (for syrup)
    • 1/2 cup granulated sugar (for syrup)

    Instructions

    1. In a large bowl, mix the flour, sugar, yeast, and salt. Stir in the warm milk and eggs until a dough forms. Add the softened butter and knead until smooth and elastic. Cover the bowl and let the dough rise in a warm place until doubled in size, about 1-2 hours.
    2. In a medium bowl, blend the softened butter with the hazelnut spread, sugar, chopped hazelnuts, and cinnamon until fully combined.
    3. Preheat your oven to 350°F (175°C). Grease a loaf pan. Roll out the dough on a floured surface into a large rectangle. Evenly spread the hazelnut mixture over the dough. Roll the dough tightly from the long side to form a log. Cut the log in half lengthwise to expose the filling. Twist the two halves together and place them in the prepared loaf pan. Cover and let rise for an additional 30 minutes.
    4. Bake the babka for 40-45 minutes, or until golden brown and a skewer inserted into the center comes out clean.
    5. While the babka is baking, combine the water and sugar in a small saucepan. Bring to a boil, then simmer until the sugar dissolves. Allow it to cool slightly.
    6. Once the babka is baked, brush it with the warm syrup while still hot. Let it cool in the pan for 10 minutes before transferring to a wire rack to cool completely.

    Nutrition Facts

    Serving Size: 1 serving
    Calories: 350 kcal
    Sugar: 20g
    Sodium: 200mg
    Fat: 17g
    Saturated Fat: 8g
    Carbohydrates: 47g
    Fiber: 2g
    Protein: 5g
    Cholesterol: 60mg

  • Souvlaki Meat on a Stick: A Flavorful Grill Recipe

    Souvlaki Meat on a Stick: A Flavorful Grill Recipe

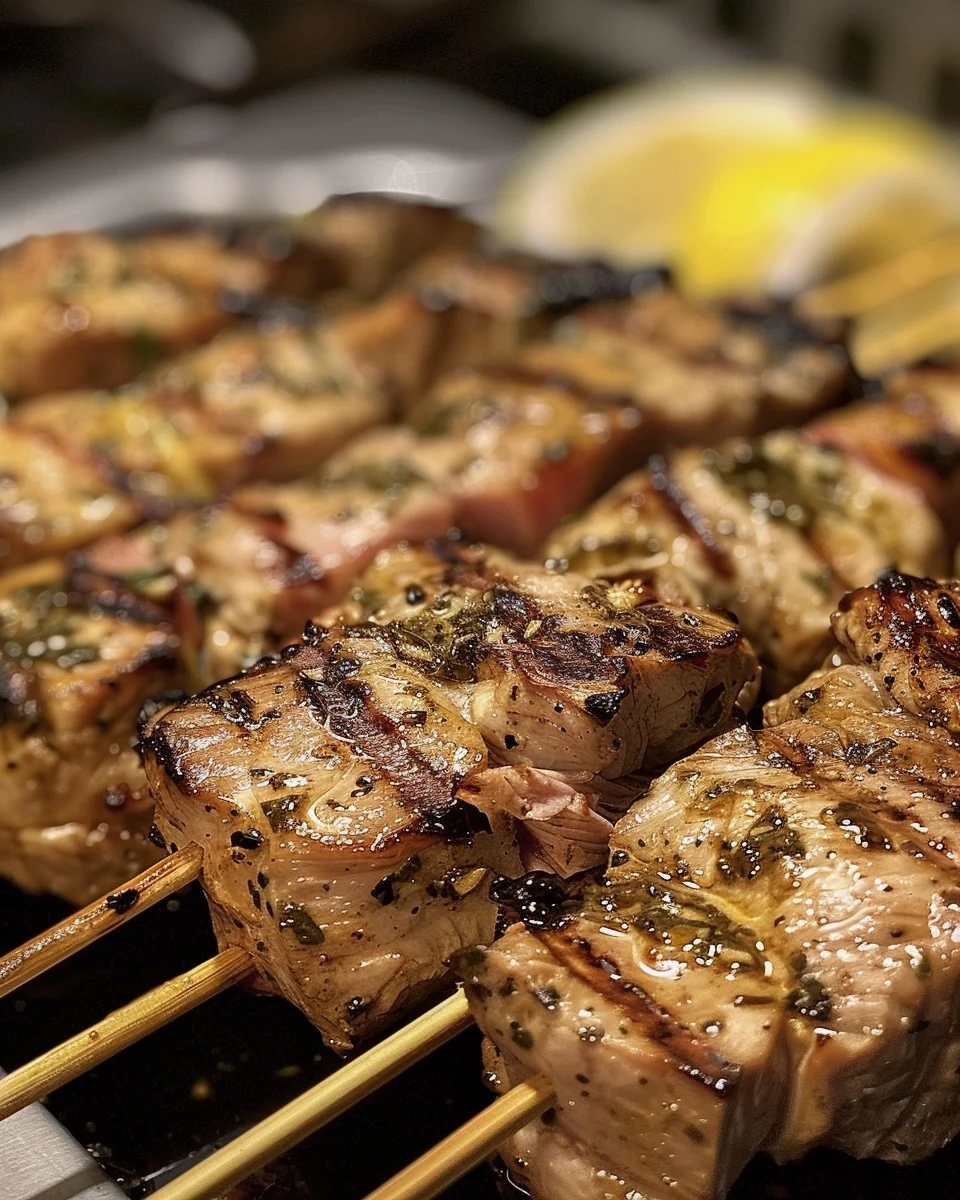
    Souvlaki Meat on a Stick is a delightful dish that captures the essence of Mediterranean cuisine. The tender, marinated chicken is grilled to perfection, delivering a burst of flavors in every bite. This recipe is not only delicious but also simple to prepare, making it a perfect addition to your weeknight meals or gatherings.

    Why You’ll Love This Recipe

    • Flavor-Packed: The combination of garlic, lemon, and oregano creates a vibrant taste profile.
    • Quick & Easy: Ready in under 30 minutes, this dish is perfect for busy weeknights.
    • Versatile Serving Options: Pair it with pita, tzatziki, or a fresh Greek salad for a complete meal.
    • Healthy Choice: With lean chicken and fresh ingredients, it fits well into a balanced diet.
    • Grill Perfection: The grilling process adds a lovely char and smokiness, enhancing the overall flavor.

    Tools and Equipment

    Having the right tools makes cooking easier and more enjoyable.

    Essential Tools

    • Wooden skewers
    • Grill or grill pan
    • Mixing bowl
    • Measuring cups and spoons
    • Knife and cutting board

    Why These Tools Matter

    • Wooden skewers: Ensure even cooking and easy handling of the meat on the grill.
    • Grill or grill pan: Provides the high heat necessary for achieving that perfect char.
    • Mixing bowl: Allows for easy marinating and mixing of ingredients without mess.

    Ingredients for Souvlaki Meat on a Stick

    Marinade

    • 1 tablespoon dried oregano
    • 4 garlic cloves, minced
    • Salt and pepper, to taste
    • Juice of 2 lemons
    • 1/4 cup olive oil

    Chicken

    • 2 pounds chicken breast, cut into 1-inch cubes

    Skewers

    • Wooden skewers, soaked in water for 30 minutes

    How to Make Souvlaki Meat on a Stick Step-by-Step

    Step 1: Marinate the Chicken

    In a mixing bowl, combine the lemon juice, olive oil, minced garlic, dried oregano, salt, and pepper. Mix well to create the marinade. Add the chicken cubes to the marinade, ensuring they are well coated. Cover and refrigerate for at least 1 hour, or preferably overnight for maximum flavor.

    Step 2: Prepare the Grill

    Preheat your grill or grill pan to medium-high heat. This step is essential for achieving a good sear on the chicken.

    Step 3: Skewer the Chicken

    Thread the marinated meat onto the soaked wooden skewers, leaving a little space between each piece. This allows for even cooking.

    Step 4: Grill the Souvlaki

    Place the skewers on the grill and cook for 10-12 minutes, turning occasionally. Grill until the meat is cooked through and nicely charred.

    Step 5: Rest and Serve

    Once cooked, remove the skewers from the grill and let them rest for a few minutes. Serve hot with pita bread, tzatziki sauce, and your favorite Greek salad for a complete meal.

    Preparation time: 10 minutes (plus marinating time) | Cooking time: 12 minutes

    Nutritional Information (per serving):
    – Calories: 210 kcal
    – Carbohydrates: 2g
    – Protein: 28g
    – Fats: 10g

    Enjoy your delicious and authentic Souvlaki Meat on a Stick with a burst of Mediterranean flavors!

    How to Serve Souvlaki Meat on a Stick

    Souvlaki Meat on a Stick can be enjoyed in various creative ways that enhance its delicious flavors.

    Serve with Pita and Tzatziki

    Wrap the grilled souvlaki in warm pita bread and add a generous dollop of tzatziki sauce for a refreshing and satisfying meal.

    Create a Souvlaki Platter

    Arrange the skewers on a platter alongside fresh vegetables, olives, and feta cheese for a beautiful Mediterranean spread perfect for sharing.

    Add to a Salad

    Slice the grilled souvlaki and serve it on top of a Greek salad, combining fresh greens, tomatoes, cucumbers, olives, and a light vinaigrette for a healthy and flavorful option.

    Pro Tips for the Best Souvlaki Meat on a Stick

    To elevate your souvlaki experience, consider these expert tips.

    • Marinate Longer: For deeper flavor, marinate the chicken overnight to allow the spices and herbs to penetrate the meat thoroughly.
    • Use Fresh Herbs: Fresh oregano can enhance the dish’s flavor profile compared to dried oregano, adding brightness to each bite.
    • Preheat the Grill: Ensure your grill is hot before adding the skewers to achieve a nice char and prevent sticking.
    • Avoid Overcrowding: Give each piece of meat space on the skewer to cook evenly and get that desired grilled texture.
    • Check Doneness: Use a meat thermometer to ensure the chicken reaches an internal temperature of 165°F for safe consumption.

    Best Side Dishes and Pairings

    Pairing your Souvlaki Meat on a Stick with complementary side dishes enhances the overall dining experience.

    1. Greek Salad: A fresh mix of tomatoes, cucumbers, red onion, and feta, this salad adds a crisp and refreshing counterpoint to the warm, spiced meat.
    2. Tzatziki Sauce: This creamy yogurt-based sauce with cucumbers and garlic provides a cooling effect that balances the savory flavors of the souvlaki.
    3. Roasted Potatoes: Crispy, herbed roasted potatoes are a hearty side that pairs well with the lightness of the grilled chicken.
    4. Hummus and Pita Chips: The creamy texture of hummus with crunchy pita chips makes for a delightful appetizer or side to complement the main dish.
    5. Grilled Vegetables: Seasonal vegetables like bell peppers, zucchini, and eggplant bring vibrant colors and smoky flavors that enhance your meal.
    6. Ouzo or Retsina Wine: These traditional Greek beverages add an authentic touch and enhance the flavors of your souvlaki experience.

    Common Mistakes to Avoid

    • Not Marinating Long Enough: Failing to marinate the chicken for a sufficient time can result in bland flavor.
    • Using Dry Skewers: Skewers that haven’t been soaked may burn on the grill, impacting the cooking process.
    • Overcrowding the Skewers: Packing too many pieces of chicken on a skewer can prevent even cooking and charring.
    • Skipping the Resting Time: Cutting into the meat immediately after grilling can cause juices to run out, leading to dry souvlaki.

    Storage & Reheating Instructions

    Refrigerator Storage

    Store any leftover Souvlaki Meat on a Stick in airtight containers in the refrigerator. The dish will remain fresh for up to 3 days.

    Freezing Instructions

    To freeze, place the cooled skewers in a single layer on a baking sheet, then transfer them to a freezer-safe bag once frozen. They can be stored for up to 3 months. Thaw in the refrigerator before reheating.

    Reheating Tips

    • Oven: Preheat the oven to 350°F (175°C). Place the skewers on a baking sheet and heat for about 10-15 minutes, or until warmed through.
    • Microwave: Place the skewers on a microwave-safe plate. Heat in 30-second intervals until warmed, typically around 1-2 minutes.
    • Stovetop: Heat a little olive oil in a skillet over medium heat. Add the skewers and cook for about 5-7 minutes, turning occasionally until heated through.

    Frequently Asked Questions

    How do I know when the Souvlaki Meat on a Stick is done?

    The chicken should reach an internal temperature of 165°F (75°C), and the meat should be no longer pink inside.

    Can I use other types of meat for Souvlaki Meat on a Stick?

    Yes, you can substitute chicken with pork, lamb, or beef, adjusting the marinating time as needed based on the type of meat.

    What sides pair well with Souvlaki Meat on a Stick?

    Souvlaki pairs beautifully with pita bread, tzatziki sauce, and a fresh Greek salad for a complete meal.

    Can I make the marinade ahead of time?

    Absolutely! You can prepare the marinade and store it in the refrigerator for up to 2 days before marinating your meat.

    Is Souvlaki Meat on a Stick healthy?

    Yes, this recipe is a healthy option, providing high protein and low carbohydrates, making it a great choice for a balanced meal.

    Final Thoughts

    Try making this delicious Souvlaki Meat on a Stick recipe for a taste of the Mediterranean in your own home. I encourage you to share your experiences and leave a comment with your feedback!


    Dinner

    Souvlaki Meat on a Stick


    5.0 from 24 reviews

    Souvlaki is a popular Greek dish consisting of marinated chicken skewers grilled to perfection. The combination of lemon, garlic, and oregano creates a flavorful experience that is both satisfying and delicious. Serve with pita bread and tzatziki for a complete meal.

    Author: Munch Twist
    Prep Time: 10 mins (plus marinating time)
    Cook Time: 12 mins
    Total Time: 1 hour 22 mins
    Yield: 4 servings
    Category: Desserts
    Method: No bake
    Cuisine: American

    Souvlaki Meat on a Stick

    SCALE:
    1x
    2x
    3x
    Cook Mode: Prevent your screen from going dark

    Ingredients

    • 1 tablespoon dried oregano
    • 4 garlic cloves, minced
    • Salt and pepper, to taste
    • 2 pounds chicken breast, cut into 1-inch cubes
    • Juice of 2 lemons
    • 1/4 cup olive oil
    • Wooden skewers, soaked in water for 30 minutes

    Instructions

    1. In a bowl, combine lemon juice, olive oil, minced garlic, dried oregano, salt, and pepper. Mix well to create the marinade. Add the chicken cubes to the marinade, ensuring they are well coated. Cover and refrigerate for at least 1 hour, or preferably overnight.
    2. Preheat your grill or grill pan to medium-high heat.
    3. Thread the marinated meat onto the soaked wooden skewers, leaving a little space between each piece.
    4. Grill the skewers for 10-12 minutes, turning occasionally, until the meat is cooked through and nicely charred.
    5. Remove the skewers from the grill and let them rest for a few minutes before serving. Serve hot with pita bread, tzatziki sauce, and your favorite Greek salad.

    Nutrition Facts

    Serving Size: 1 serving
    Calories: 210 kcal
    Sugar: 0g
    Sodium: 150mg
    Fat: 10g
    Saturated Fat: 1.5g
    Carbohydrates: 2g
    Fiber: 0g
    Protein: 28g
    Cholesterol: 90mg

  • Delicious Cornbread Muffins Recipe You’ll Love

    Delicious Cornbread Muffins Recipe You’ll Love

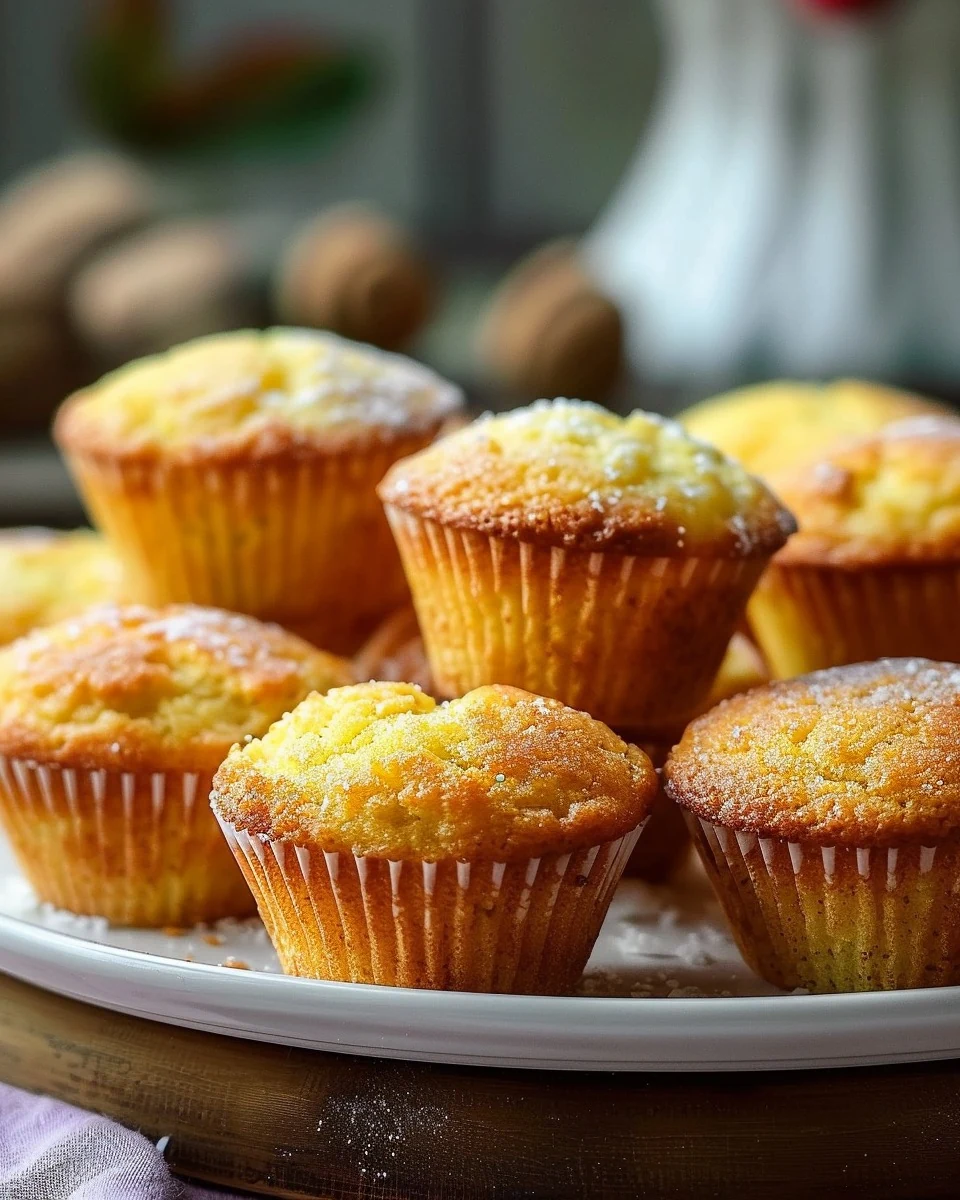
    Cornbread muffins are a delightful treat that perfectly blend sweet and savory flavors. Their golden crust and fluffy texture make them a favorite at any gathering. Whether enjoyed alone or paired with a hearty meal, these cornbread muffins are sure to impress.

    Why You’ll Love This Recipe

    • Quick & Easy: Ready in under 30 minutes, these muffins are perfect for busy days.
    • Versatile: Enjoy them as a side dish or a snack; they pair well with soups and stews.
    • Customizable: Add ingredients like cheese, jalapeños, or herbs for a personal twist.
    • Kid-Friendly: Their mild flavor and fun size make them a hit with children.
    • Make Ahead: You can prepare the batter in advance and bake when ready.

    Tools and Equipment

    Having the right tools makes baking cornbread muffins a breeze.

    Essential Tools

    • Muffin tin
    • Mixing bowls
    • Whisk
    • Measuring cups and spoons
    • Spatula

    Why These Tools Matter

    • Muffin tin: Ensures even baking and perfect portion sizes.
    • Mixing bowls: Allows for easy mixing of dry and wet ingredients without spills.
    • Spatula: Helps fold the batter gently, preventing overmixing.

    Ingredients for Cornbread Muffins

    Dry Ingredients

    • 1 cup (170g) yellow cornmeal
    • 1 cup (150g) all-purpose flour
    • 1/4 cup (50g) sugar
    • 1 tbsp baking powder
    • 1/2 tsp salt

    Wet Ingredients

    • 1 cup (240ml) milk
    • 1/4 cup (60g) butter, melted
    • 1 large egg

    How to Make Cornbread Muffins Step-by-Step

    Step 1: Preheat the Oven

    Start by heating your oven to 400°F (200°C). Grease a muffin tin or line it with paper cups to prevent sticking.

    Step 2: Mix Dry Ingredients

    In a large bowl, whisk together the yellow cornmeal, all-purpose flour, sugar, baking powder, and salt. This step ensures that the leavening agent is evenly distributed.

    Step 3: Combine Wet Ingredients

    In a separate bowl, blend the milk, melted butter, and egg until well mixed. This mixture adds moisture and richness to the muffins.

    Step 4: Combine Mixtures

    Pour the wet mixture into the dry ingredients. Stir gently until just combined, being careful not to overmix. A few lumps are perfectly fine.

    Step 5: Fill Muffin Tins

    Spoon the batter into the muffin cups, filling them about two-thirds full. This allows room for the muffins to rise while baking.

    Step 6: Bake

    Place the muffin tin in the preheated oven and bake for 15-18 minutes. To check for doneness, insert a toothpick into the center; it should come out clean.

    Step 7: Cool

    After baking, let the muffins cool in the pan for a few minutes. Then, transfer them to a wire rack to cool completely.

    Prepare to enjoy these golden, buttery cornbread muffins as a delightful addition to any meal!

    How to Serve Cornbread Muffins

    Cornbread muffins are versatile and can enhance any meal with their delightful texture and flavor.

    With Honey Butter

    Spread a generous layer of honey butter on warm cornbread muffins for a sweet and creamy treat that complements the corn flavor beautifully.

    As a Side for Chili

    Serve cornbread muffins alongside a hearty bowl of chili. The muffins absorb the chili’s rich flavors, making each bite even more satisfying.

    With a Fresh Salad

    Pair cornbread muffins with a light, fresh salad. The muffins add a comforting element that balances the crispness of the greens.

    Pro Tips for the Best Cornbread Muffins

    For the perfect cornbread muffins, keep these expert tips in mind.

    • Use Fresh Ingredients: Always check the freshness of your baking powder and flour to ensure optimal rise and texture.
    • Don’t Overmix the Batter: Mix until just combined to achieve a light and fluffy muffin instead of a dense one.
    • Experiment with Add-ins: Consider adding corn kernels, jalapeños, or cheese to elevate the flavor profile of your cornbread muffins.
    • Adjust Sweetness: Feel free to modify the sugar amount based on your preference for sweetness or if you’re serving them with sweet toppings.
    • Store Properly: Keep leftover muffins in an airtight container at room temperature for up to three days for the best flavor and texture.

    Best Side Dishes and Pairings

    Cornbread muffins are a delightful addition to many meals. Here are some side dishes and drinks that pair wonderfully with them:

    1. Hearty Beef Chili: The robust flavors of chili complement the sweet, buttery taste of cornbread muffins, creating a satisfying meal.
    2. Grilled Chicken Salad: A light salad with grilled chicken enhances the savory notes of the muffins while keeping the meal balanced.
    3. Vegetable Soup: The warmth of vegetable soup paired with cornbread muffins makes for a comforting and nourishing combination.
    4. BBQ Ribs: The sweetness of cornbread muffins contrasts beautifully with the smoky, tangy flavors of BBQ ribs.
    5. Honey Lemonade: A refreshing drink that echoes the sweetness of the muffins, making it a perfect pairing for any meal.

    Common Mistakes to Avoid

    • Overmixing the Batter: Stir until just combined to keep the muffins light and fluffy.
    • Not Preheating the Oven: Ensure your oven is at the correct temperature for even baking.
    • Incorrect Measuring: Use the spoon-and-level method for accurate flour and cornmeal measurements.
    • Skipping the Cooling Step: Allow the muffins to cool before serving for the best texture.

    Storage & Reheating Instructions

    Refrigerator Storage

    Store cornbread muffins in an airtight container in the refrigerator for up to 5 days. Make sure they are completely cooled before sealing to maintain their texture.

    Freezing Instructions

    To freeze cornbread muffins, wrap them individually in plastic wrap and place them in a freezer-safe bag. They can be frozen for up to 3 months. Thaw at room temperature or in the refrigerator overnight before serving.

    Reheating Tips

    • Oven: Preheat to 350°F (175°C) and heat muffins for about 10 minutes.
    • Microwave: Heat on medium power for 15-20 seconds until warm.
    • Stovetop: Place on a skillet over low heat, cover, and warm for a few minutes.

    Frequently Asked Questions

    How can I make cornbread muffins healthier?

    You can substitute whole wheat flour for all-purpose flour and reduce the sugar for a healthier version of cornbread muffins.

    Can I add ingredients to my cornbread muffins?

    Absolutely! Consider adding cheese, jalapeños, or corn kernels for added flavor and texture.

    What pairs well with cornbread muffins?

    Cornbread muffins are delicious alongside chili, soups, or as a side with barbecue dishes.

    How do I know when my cornbread muffins are done?

    Muffins are done when a toothpick inserted into the center comes out clean, typically around 15-18 minutes of baking.

    Can I make cornbread muffins ahead of time?

    Yes, you can prepare the batter ahead of time and store it in the refrigerator for up to 2 days before baking.

    Final Thoughts

    These cornbread muffins are sure to become a favorite in your household. Their delightful texture and buttery flavor make them a perfect side dish for any meal. We encourage you to try this recipe and share your thoughts or any variations you made in the comments below.


    Dinner

    Cornbread Muffins


    5.0 from 24 reviews

    These cornbread muffins are golden, buttery, and perfect for any meal. They are easy to make and provide a delightful texture and flavor that complements a variety of dishes.

    Author: Munch Twist
    Prep Time: 10 minutes
    Cook Time: 15-18 minutes
    Total Time: 25-28 minutes
    Yield: 12 servings
    Category: Desserts
    Method: No bake
    Cuisine: American

    Cornbread Muffins

    SCALE:
    1x
    2x
    3x
    Cook Mode: Prevent your screen from going dark

    Ingredients

    • 1 cup yellow cornmeal
    • 1 cup all-purpose flour
    • 1/4 cup sugar
    • 1 tbsp baking powder
    • 1/2 tsp salt
    • 1 cup milk
    • 1/4 cup butter, melted
    • 1 large egg

    Instructions

    1. Preheat your oven to 400°F (200°C). Grease a muffin tin or line it with paper cups.
    2. In a large bowl, whisk together the cornmeal, flour, sugar, baking powder, and salt.
    3. In a separate bowl, blend the milk, melted butter, and egg until well mixed.
    4. Pour the wet ingredients into the dry ingredients. Stir until just combined—don’t overmix!
    5. Spoon the batter into the muffin cups, filling them about 2/3 full.
    6. Bake for 15-18 minutes, or until a toothpick inserted into the center comes out clean.
    7. Let the muffins cool in the pan for a few minutes, then transfer them to a wire rack to cool completely.

    Nutrition Facts

    Serving Size: 1 serving
    Calories: 170 kcal
    Sugar: 5g
    Sodium: 150mg
    Fat: 7g
    Saturated Fat: 4g
    Carbohydrates: 24g
    Fiber: 1g
    Protein: 3g
    Cholesterol: 30mg

  • Indulge in Elegant Black Forest Roll Cake Today

    Indulge in Elegant Black Forest Roll Cake Today

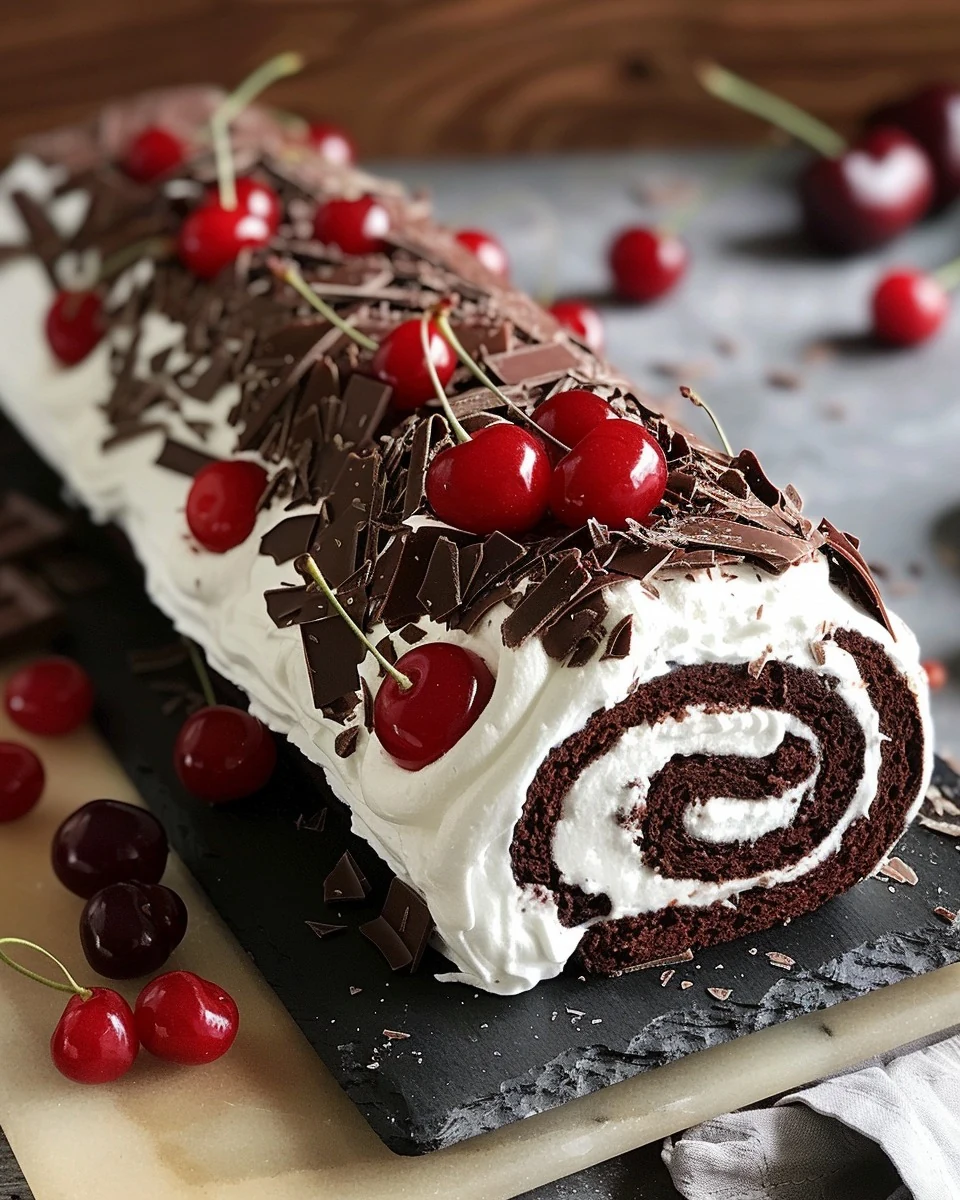
    Elegant Black Forest Roll Cake is a delightful twist on the classic dessert. This cake combines rich chocolate flavors with fresh fruits, creating a visually stunning and delicious treat. Perfect for any celebration, the Elegant Black Forest Roll Cake is sure to impress your guests.

    Why You’ll Love This Recipe

    • Decadent Flavor: The combination of dark chocolate, cherries, and raspberries creates a rich and satisfying taste.
    • Visual Appeal: Its rolled design and vibrant fruits make it a stunning centerpiece for any dessert table.
    • Versatile Serving Options: Enjoy it as a dessert for special occasions or a sweet treat for everyday indulgence.
    • Light and Airy Texture: The whipped cream filling adds a lightness that balances the dense chocolate cake.
    • Easy to Customize: Feel free to experiment with different fruits or toppings to suit your taste.

    Tools and Equipment

    To create your Elegant Black Forest Roll Cake, you will need a few essential tools.

    Essential Tools

    • Mixing bowls
    • Baking sheet
    • Parchment paper
    • Electric mixer or whisk
    • Kitchen towel
    • Serving platter

    Why These Tools Matter

    • Mixing bowls: Provide ample space for combining ingredients without mess.
    • Electric mixer or whisk: Ensures eggs and cream are beaten to the perfect consistency, saving time and effort.
    • Baking sheet: Offers a flat surface for even baking, ensuring the cake rolls smoothly.

    Ingredients for Elegant Black Forest Roll Cake

    Cake Base

    • 1/3 cup all-purpose flour
    • 1/4 cup granulated sugar
    • 4 large eggs
    • 1/4 cup cocoa powder
    • 1 teaspoon baking powder

    Chocolate Filling

    • 1/2 cup dark chocolate, chopped

    Fruit Filling

    • 1/2 cup fresh cherries, pitted
    • 1/4 cup raspberries

    Whipped Cream

    • 3/4 cup heavy cream
    • 1/4 cup powdered sugar
    • 1 teaspoon vanilla extract

    Garnish

    • Chocolate shavings for garnish
    • Fresh cherries and raspberries for garnish

    How to Make Elegant Black Forest Roll Cake Step-by-Step

    Step 1: Prepare the Cake

    1. Preheat your oven to 180°C (350°F). Line a baking sheet with parchment paper.
    2. In a large mixing bowl, beat the eggs and granulated sugar until light and fluffy.
    3. Sift flour, cocoa powder, and baking powder into the egg mixture. Gently fold until combined.
    4. Pour the batter onto the prepared baking sheet, spreading it evenly. Bake for 10-12 minutes until a toothpick inserted into the center comes out clean.

    Step 2: Whip the Cream

    1. While the cake is baking, whip the heavy cream with powdered sugar and vanilla extract until stiff peaks form.

    Step 3: Roll and Fill the Cake

    1. Once the cake is done, turn it out onto a clean kitchen towel dusted with powdered sugar. Peel off the parchment paper.
    2. While still warm, roll the cake with the towel inside and let it cool completely.
    3. Unroll the cooled cake and spread an even layer of whipped cream over the surface. Sprinkle with chopped dark chocolate, cherries, and raspberries.
    4. Roll the cake up tightly and place it seam-side down on a serving platter. Refrigerate for at least 1 hour.

    Step 4: Garnish and Serve

    1. Garnish the cake with chocolate shavings, fresh cherries, and raspberries before slicing and serving.

    Enjoy your Elegant Black Forest Roll Cake, a perfect dessert that combines rich flavors and beautiful presentation. The light texture and fruity accents make it a delightful treat for every occasion.

    How to Serve Elegant Black Forest Roll Cake

    There are many delightful ways to present your Elegant Black Forest Roll Cake that will impress guests and elevate any occasion.

    Classic Presentation

    Serve the roll cake sliced into generous portions on individual dessert plates. Garnish each slice with additional whipped cream and a few fresh cherries for a classic yet elegant touch.

    Chocolate Drizzle

    For a more indulgent serving, drizzle warm chocolate sauce over each slice. This enhances the chocolate flavor and adds a rich, inviting appearance that chocolate lovers will adore.

    Berry Compote

    Accompany the roll cake with a side of berry compote made from fresh cherries and raspberries. This adds a tart contrast to the sweetness of the cake, creating a balanced dessert experience.

    Pro Tips for the Best Elegant Black Forest Roll Cake

    To achieve the perfect roll cake, consider these essential tips that will enhance your baking process.

    • Use Fresh Ingredients: Ensure your eggs and dairy are fresh for the best flavor and texture.
    • Sift Dry Ingredients: Sifting flour, cocoa powder, and baking powder helps to aerate the mixture, resulting in a lighter cake.
    • Don’t Overmix: When folding in the dry ingredients, be gentle to maintain the airiness of the batter.
    • Chill Before Serving: Let the rolled cake chill in the refrigerator for at least an hour to allow the flavors to meld and the cake to set properly.
    • Experiment with Fillings: Feel free to mix in different fruits or flavored extracts to personalize your roll cake.

    Best Side Dishes and Pairings

    Pairing your Elegant Black Forest Roll Cake with complementary side dishes or drinks can enhance the overall dining experience.

    1. Vanilla Ice Cream – The creamy, smooth texture of vanilla ice cream balances the rich chocolate and tart fruits of the roll cake.
    2. Espresso – A shot of rich espresso provides a perfect contrast to the sweetness of the cake, making it an ideal after-dinner treat.
    3. Fruit Salad – A light and refreshing fruit salad can cleanse the palate and add a vibrant touch to the dessert spread.
    4. Chocolate Fondue – Set up a chocolate fondue station for guests to dip fresh fruits, enhancing the chocolate experience.
    5. Mint Tea – The herbal notes of mint tea offer a refreshing contrast and aid in digestion after a rich dessert.

    Common Mistakes to Avoid

    • Overmixing the Batter: Gently fold the ingredients to maintain the cake’s light texture.
    • Not Using Parchment Paper: This can cause the cake to stick, making it difficult to roll.
    • Skipping the Cooling Step: Allowing the cake to cool completely ensures it holds its shape when rolled.
    • Using Too Much Filling: Overfilling can make it hard to roll the cake without tearing.

    Storage & Reheating Instructions

    Refrigerator Storage

    Store the Elegant Black Forest Roll Cake in an airtight container in the refrigerator. It will remain fresh for up to 3 days.

    Freezing Instructions

    For freezing, wrap the roll cake tightly in plastic wrap and then in aluminum foil. It can be frozen for up to 2 months. To thaw, move it to the refrigerator overnight.

    Reheating Tips

    • Oven: Preheat to 150°C (300°F) and warm the cake for about 10 minutes.
    • Microwave: Heat individual slices on a microwave-safe plate for 15-20 seconds.
    • Stovetop: Place slices in a skillet over low heat, cover, and warm for 5 minutes.

    Frequently Asked Questions

    What makes the Elegant Black Forest Roll Cake unique?

    The combination of rich dark chocolate, fresh cherries, and a light whipped cream filling creates a delightful contrast in flavors and textures.

    Can I use frozen cherries for the Elegant Black Forest Roll Cake?

    Yes, frozen cherries can be used, but ensure they are thawed and patted dry to avoid excess moisture in the cake.

    How can I customize the filling for the Elegant Black Forest Roll Cake?

    Feel free to experiment with different fruits such as strawberries or blueberries, or add a splash of liqueur to the cream for an adult twist.

    Is this recipe suitable for special occasions?

    Absolutely! The Elegant Black Forest Roll Cake is perfect for celebrations, gatherings, or simply as a special treat.

    Can I make this cake ahead of time?

    Yes, you can prepare the cake a day in advance. Just store it properly and garnish before serving for the best presentation.

    Final Thoughts

    The Elegant Black Forest Roll Cake is a stunning dessert that is sure to impress your guests. We encourage you to try this recipe and share your experience in the comments below. Your feedback not only helps us but also inspires others to create this delightful treat.


    Desserts

    Elegant Black Forest Roll Cake


    5.0 from 24 reviews

    This Elegant Black Forest Roll Cake is a delightful dessert that combines rich chocolate and fresh berries. The light and fluffy chocolate sponge is rolled with a luscious whipped cream filling and garnished with chocolate shavings and fresh fruit, making it a perfect treat for any occasion.

    Author: Munch Twist
    Prep Time: 20 minutes
    Cook Time: 12 minutes
    Total Time: 1 hour 32 minutes
    Yield: 8 servings
    Category: Desserts
    Method: No bake
    Cuisine: American

    Elegant Black Forest Roll Cake

    SCALE:
    1x
    2x
    3x
    Cook Mode: Prevent your screen from going dark

    Ingredients

    • 1/3 cup all-purpose flour
    • 1/4 cup granulated sugar
    • 1/2 cup dark chocolate, chopped
    • 4 large eggs
    • 1/4 cup cocoa powder
    • 1/2 cup fresh cherries, pitted
    • 1/4 cup raspberries
    • 1 teaspoon baking powder
    • 3/4 cup heavy cream
    • 1/4 cup powdered sugar
    • 1 teaspoon vanilla extract
    • Chocolate shavings for garnish
    • Fresh cherries and raspberries for garnish

    Instructions

    1. Preheat your oven to 180°C (350°F). Line a baking sheet with parchment paper. In a large mixing bowl, beat the eggs and granulated sugar until light and fluffy. Sift flour, cocoa powder, and baking powder into the egg mixture. Gently fold until combined. Pour the batter onto the prepared baking sheet, spreading it evenly. Bake for 10-12 minutes until a toothpick inserted into the center comes out clean.
    2. While the cake is baking, whip the heavy cream with powdered sugar and vanilla extract until stiff peaks form.
    3. Once the cake is done, turn it out onto a clean kitchen towel dusted with powdered sugar. Peel off the parchment paper. While still warm, roll the cake with the towel inside and let it cool completely. Unroll the cooled cake and spread an even layer of whipped cream over the surface. Sprinkle with chopped dark chocolate, cherries, and raspberries. Roll the cake up tightly and place it seam-side down on a serving platter. Refrigerate for at least 1 hour.
    4. Garnish the cake with chocolate shavings, fresh cherries, and raspberries before slicing and serving.

    Nutrition Facts

    Serving Size: 1 serving
    Calories: 350 kcal
    Sugar: 20g
    Sodium: 180mg
    Fat: 23g
    Saturated Fat: 13g
    Carbohydrates: 30g
    Fiber: 3g
    Protein: 6g
    Cholesterol: 145mg

  • Decadent Chocolate Ganache Truffles Recipe

    Decadent Chocolate Ganache Truffles Recipe

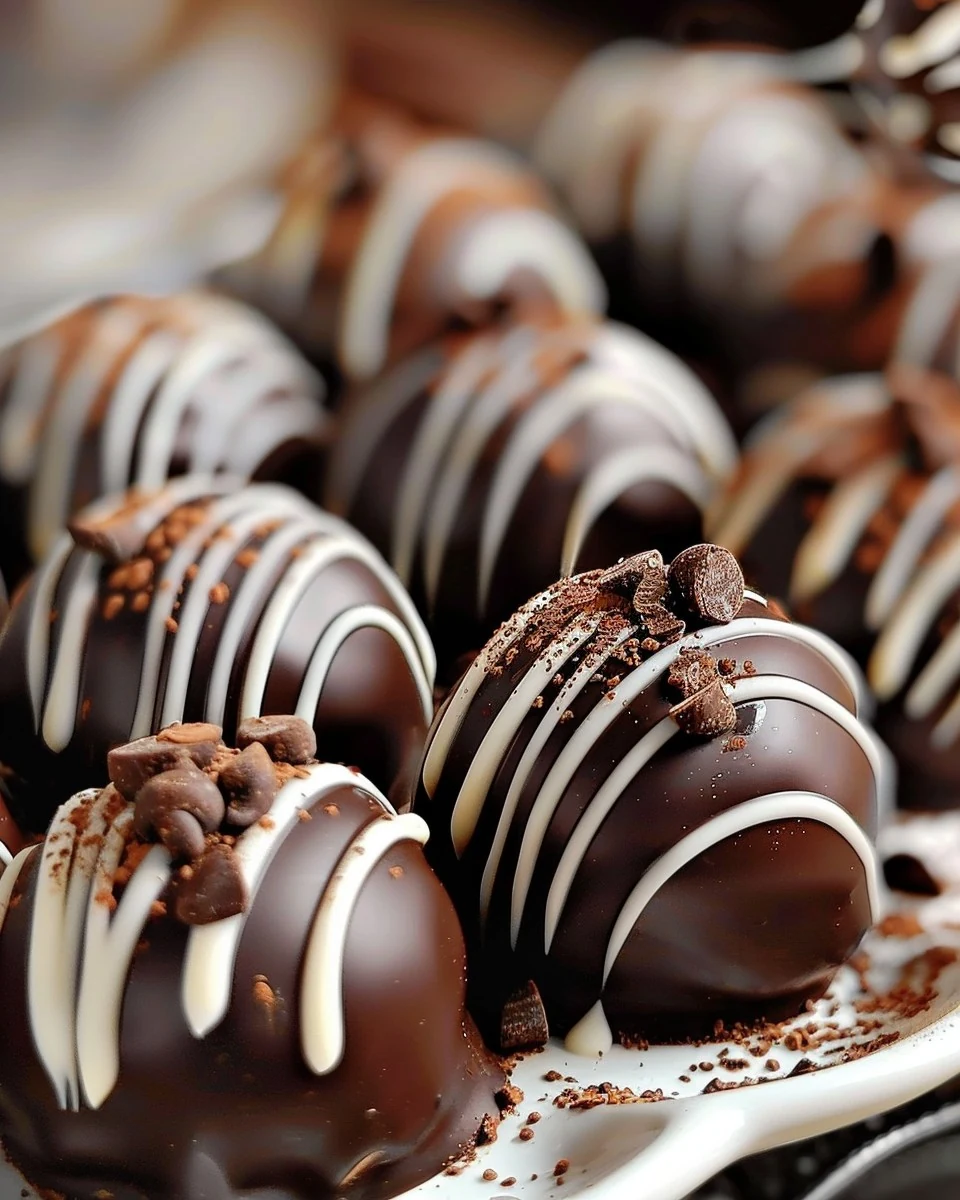
    Chocolate Ganache Truffles are a luxurious treat that melt in your mouth. Their rich, intense flavor and silky texture make them irresistible. With just a few ingredients, you can create a gourmet dessert at home.

    Why You’ll Love This Recipe

    • Decadent Flavor: The combination of dark chocolate and cream creates an indulgent taste experience.
    • Versatile Coating Options: While cocoa powder is classic, you can experiment with nuts, sprinkles, or coconut.
    • Perfect for Any Occasion: These truffles are ideal for celebrations, gifts, or a sweet treat any day.
    • Simple to Make: With minimal ingredients and steps, anyone can master this recipe.
    • Customizable: Add your favorite flavors, such as espresso or orange zest, to make them uniquely yours.

    Tools and Equipment

    To make Chocolate Ganache Truffles, you’ll need a few essential tools.

    Essential Tools

    • Saucepan
    • Mixing bowl
    • Whisk or spatula
    • Baking sheet
    • Parchment paper

    Why These Tools Matter

    • Saucepan: Ideal for heating cream evenly without scorching.
    • Mixing bowl: Provides enough space to mix the ganache smoothly.
    • Baking sheet: Useful for chilling truffles without them sticking together.

    Ingredients for Chocolate Ganache Truffles

    Ganache Base

    • 1 cup heavy cream
    • 300g dark chocolate, chopped
    • 1 tsp vanilla extract

    Coating

    • Cocoa powder, for coating

    How to Make Chocolate Ganache Truffles Step-by-Step

    Step 1: Heat the Cream

    In a saucepan, heat the heavy cream over medium heat. Allow it to simmer gently, being careful not to boil.

    Step 2: Make the Ganache

    Pour the hot cream over the chopped dark chocolate. Let it sit for 2 minutes to soften. Stir the mixture until smooth, then mix in the vanilla extract.

    Step 3: Chill the Ganache

    Transfer the ganache to the refrigerator. Chill for 1-2 hours or until it becomes firm and easy to handle.

    Step 4: Form Truffles

    Use a small scoop or spoon to take out portions of the chilled ganache. Roll each piece into a ball with your hands.

    Step 5: Coat the Truffles

    Roll each truffle in cocoa powder until fully coated. This adds a rich flavor and a beautiful finish.

    Step 6: Serve

    Place the truffles on a serving platter. Enjoy your rich and indulgent Chocolate Ganache Truffles!

    With just a few simple steps, you can create these delightful treats. Perfect for sharing or savoring alone, these truffles offer a truly satisfying dessert experience.

    How to Serve Chocolate Ganache Truffles

    Chocolate Ganache Truffles are not only delicious but can also be served in various creative ways to enhance their appeal.

    As a Dessert Platter

    Create an elegant dessert platter by arranging Chocolate Ganache Truffles alongside fresh berries and nuts. This combination offers a delightful contrast in flavors and textures.

    For a Coffee Pairing

    Serve your truffles with a rich espresso or a creamy latte. The bitterness of coffee complements the sweetness of the truffles, making for a satisfying treat.

    Gift-Wrapped Treats

    Package the truffles in decorative boxes or glass jars as homemade gifts. Add a personal touch with a handwritten note, making them a thoughtful gesture for any occasion.

    Pro Tips for the Best Chocolate Ganache Truffles

    To elevate your Chocolate Ganache Truffles, consider these expert tips.

    • Use Quality Chocolate: The flavor of your truffles depends heavily on the chocolate you choose. Opt for high-quality dark chocolate for the best taste.

    • Chill Thoroughly: Make sure to chill the ganache until it’s firm enough to handle. This ensures your truffles hold their shape when rolled.

    • Experiment with Flavors: Feel free to infuse your ganache with different flavors, such as orange zest or sea salt, to create unique variations.

    • Keep Hands Warm: When rolling the truffles, keep your hands warm to prevent the ganache from melting too quickly. A quick rinse under warm water can help.

    • Store Properly: Store your truffles in an airtight container in the refrigerator to keep them fresh and maintain their texture.

    Best Side Dishes and Pairings

    Pairing side dishes and drinks with Chocolate Ganache Truffles can enhance the overall experience.

    1. Red Wine: A glass of full-bodied red wine, such as Cabernet Sauvignon, complements the richness of the chocolate.

    2. Fresh Berries: Raspberries or strawberries bring a fresh acidity that balances the sweetness of the truffles.

    3. Cheese Platter: A selection of creamy cheeses, like Brie or mascarpone, adds a savory contrast that pairs beautifully with chocolate.

    4. Nutty Biscotti: The crunch of biscotti provides a delightful texture contrast, making for an enjoyable dessert experience.

    5. Herbal Tea: A warm cup of herbal tea, such as chamomile or mint, can cleanse the palate and enhance the flavors of the truffles.

    6. Chocolate Stout Beer: The deep flavors of a chocolate stout beer can amplify the chocolate notes in the truffles, creating a harmonious pairing.

    Common Mistakes to Avoid

    • Incorrect Chocolate Type: Using milk chocolate instead of dark chocolate can alter the flavor and consistency of your truffles.
    • Overheating Cream: Heating the cream too much can cause it to boil, which may lead to a grainy ganache.
    • Not Chilling Long Enough: If the ganache is not chilled thoroughly, it will be too soft to handle when forming the truffles.
    • Uneven Coating: Rolling the truffles in cocoa powder before they are fully set may result in an uneven coating.

    Storage & Reheating Instructions

    Refrigerator Storage

    Store the Chocolate Ganache Truffles in an airtight container in the refrigerator. They will stay fresh for up to one week.

    Freezing Instructions

    For longer storage, you can freeze the truffles. Place them in a single layer on a baking sheet to freeze, then transfer to an airtight container. They can be frozen for up to three months. Thaw in the refrigerator before serving.

    Reheating Tips

    • Oven: Preheat the oven to 200°F (93°C) and place truffles on a baking sheet for about 10 minutes to soften slightly.
    • Microwave: Heat truffles in 5-second intervals at medium power until just softened, being careful not to melt them.
    • Stovetop: Place truffles in a heat-safe bowl over a pot of simmering water and stir gently until softened.

    Frequently Asked Questions

    Can I use milk chocolate instead of dark chocolate for Chocolate Ganache Truffles?

    While you can use milk chocolate, it will result in a sweeter and creamier truffle. Dark chocolate is recommended for a more balanced flavor.

    How do I prevent my Chocolate Ganache Truffles from being too soft?

    Ensure that you chill the ganache thoroughly for 1-2 hours. If it’s still too soft, you can chill it for an additional 30 minutes.

    Can I flavor my Chocolate Ganache Truffles?

    Absolutely! You can add different extracts like hazelnut or peppermint, or even incorporate a splash of liqueur for a unique twist.

    How should I coat my Chocolate Ganache Truffles?

    Cocoa powder is a classic choice, but you can also roll them in chopped nuts, shredded coconut, or melted chocolate for different textures and flavors.

    How long do Chocolate Ganache Truffles last?

    When stored properly in the refrigerator, they can last up to one week. If frozen, they can be kept for up to three months.

    Final Thoughts

    These Chocolate Ganache Truffles are a simple yet indulgent treat that anyone can make at home. Don’t hesitate to try this recipe, and please leave a comment with your feedback or any variations you tried!


    Desserts

    Chocolate Ganache Truffles


    5.0 from 24 reviews

    These Chocolate Ganache Truffles are a decadent treat made with rich dark chocolate and creamy heavy cream. Coated in cocoa powder, they are perfect for special occasions or a sweet indulgence any time.

    Author: Munch Twist
    Prep Time: 15 minutes
    Cook Time: 120 minutes
    Total Time: 135 minutes
    Yield: 12 servings
    Category: Desserts
    Method: No bake
    Cuisine: American

    Chocolate Ganache Truffles

    SCALE:
    1x
    2x
    3x
    Cook Mode: Prevent your screen from going dark

    Ingredients

    • 1 cup heavy cream
    • 300g dark chocolate, chopped
    • Cocoa powder, for coating
    • 1 tsp vanilla extract

    Instructions

    1. In a saucepan, heat the heavy cream over medium heat until it just begins to simmer.
    2. Pour the hot cream over the chopped dark chocolate. Let it sit for 2 minutes to soften, then stir until smooth. Mix in the vanilla extract.
    3. Refrigerate the ganache for 1-2 hours or until it becomes firm and easy to handle.
    4. Scoop out small portions of the chilled ganache and roll them into balls. Roll each ball in cocoa powder to coat.
    5. Enjoy your rich and indulgent truffles!

    Nutrition Facts

    Serving Size: 1 serving
    Calories: 90 kcal
    Sugar: 5g
    Sodium: 5mg
    Fat: 7g
    Saturated Fat: 4g
    Carbohydrates: 7g
    Fiber: 2g
    Protein: 1g
    Cholesterol: 20mg

  • Irresistible Grandmas Apple Dumplings Recipe

    Irresistible Grandmas Apple Dumplings Recipe

    Grandma’s Apple Dumplings are a delightful dessert that combines tender, spiced apples wrapped in warm, flaky biscuit dough. This comforting dish evokes nostalgia and warmth with every bite, making it a perfect addition to your family gatherings or cozy evenings at home.

    Why You’ll Love This Recipe

    • Comforting Flavor: The combination of cinnamon and sweet apples creates a warm, inviting taste.
    • Family Favorite: This recipe is sure to impress both kids and adults, becoming a staple in your home.
    • Easy to Prepare: With simple ingredients and straightforward steps, anyone can make these delicious dumplings.
    • Versatile Serving Options: Serve them warm with vanilla ice cream or enjoy them on their own for a sweet treat.
    • Perfect for Occasions: Ideal for holidays, potlucks, or just because you deserve a sweet indulgence.

    Tools and Equipment

    You’ll need a few essential tools to make Grandma’s Apple Dumplings effortlessly.

    Essential Tools

    • 9×13-inch baking pan
    • Medium saucepan
    • Mixing bowl
    • Peeler and corer
    • Measuring cups and spoons

    Why These Tools Matter

    • Baking Pan: A 9×13-inch pan is perfect for holding all the dumplings and syrup without spilling.
    • Saucepan: A medium saucepan ensures even heating of the syrup, making it easier to dissolve the sugar.
    • Peeler and Corer: These tools simplify the apple preparation process, saving time and effort.

    Ingredients for Grandmas Apple Dumplings

    For the Dumplings

    • 2 Granny Smith apples
    • 8 canned biscuits (I use Pillsbury buttermilk)

    For the Syrup

    • 1 stick butter
    • 1 cup water
    • 1 cup sugar, divided
    • 1/4 tsp vanilla extract
    • 4 teaspoons ground cinnamon

    How to Make Grandmas Apple Dumplings Step-by-Step

    Step 1: Prep the Apples

    Begin by preheating your oven to 375°F (190°C). Peel, core, and slice the Granny Smith apples vertically into 8 slices each. To prevent browning, cover the apple slices with cold water while preparing the rest of the recipe.

    Step 2: Prepare the Syrup

    In a medium saucepan, combine 1 cup of water, 3/4 cup of the sugar, 1 stick of butter, and 1/4 tsp of vanilla extract. Heat over medium heat until boiling, stirring occasionally to ensure the sugar dissolves completely.

    Step 3: Wrap the Apples

    Separate each biscuit in half. Wrap one layer of biscuit dough around each apple slice, stretching the dough slightly to overlap and seal the bottom. Place the wrapped apple slices, sealed side down, in a 9×13-inch baking pan.

    Step 4: Add the Syrup and Topping

    Pour the hot sugar mixture over the wrapped apple slices in the baking pan. In a small bowl, mix the remaining 1/4 cup of sugar with 4 teaspoons of ground cinnamon. Sprinkle this cinnamon-sugar mixture evenly over the tops of the wrapped apples.

    Step 5: Bake

    Bake in the preheated oven for 35 minutes or until the dumplings are golden brown and the apples are tender. Serve the apple dumplings warm, ideally with a scoop of vanilla ice cream for an extra touch of indulgence.

    Enjoy making this classic dessert that captures the essence of home and family gatherings with every bite of Grandma’s Apple Dumplings.

    How to Serve Grandmas Apple Dumplings

    Grandma’s Apple Dumplings are versatile and can be enjoyed in various delightful ways.

    A La Mode

    Serve warm apple dumplings topped with a generous scoop of vanilla ice cream. The cold ice cream melts slightly into the warm dumplings, creating a delightful contrast of temperatures.

    Drizzled with Caramel Sauce

    For an extra indulgent treat, drizzle warm caramel sauce over the dumplings before serving. The sweetness of the caramel enhances the flavor of the apples and adds a rich, sticky texture.

    With Whipped Cream

    Top the apple dumplings with freshly whipped cream for a light, airy finish. This addition cuts through the richness of the dumplings and adds a creamy texture that complements the dish perfectly.

    Pro Tips for the Best Grandmas Apple Dumplings

    To ensure your apple dumplings turn out perfectly every time, consider these helpful tips.

    • Use Fresh Apples: Opt for Granny Smith apples for their tartness, which balances the sweetness of the dish beautifully.

    • Seal the Edges Well: Make sure to seal the edges of the biscuit dough tightly around the apple slices to prevent the syrup from leaking out during baking.

    • Experiment with Spices: Feel free to experiment with additional spices like nutmeg or allspice in the cinnamon-sugar mixture for added depth of flavor.

    • Let Them Cool Slightly: Allow the dumplings to cool for a few minutes after baking. This helps the syrup thicken slightly, making it easier to serve without making a mess.

    • Store Properly: If you have leftovers, store them in an airtight container in the refrigerator. Reheat in the oven to restore their crispness before serving.

    Best Side Dishes and Pairings

    These side dishes and drinks complement the flavors of Grandma’s Apple Dumplings beautifully.

    1. Vanilla Ice Cream
      Classic and creamy, vanilla ice cream pairs perfectly with the warm dumplings, enhancing their sweetness.

    2. Caramel Sauce
      A rich, gooey caramel sauce drizzled over each serving adds an extra layer of sweetness and flavor.

    3. Whipped Cream
      Light and fluffy whipped cream balances the richness of the dumplings and adds a delightful texture.

    4. Chai Tea
      The warm spices in chai tea harmonize with the cinnamon in the dumplings, creating a comforting drink pairing.

    5. Coffee
      A robust cup of coffee offers a perfect counterbalance to the sweetness of the dessert, making for a delightful after-dinner treat.

    6. Apple Cider
      Serve warm apple cider alongside the dumplings for an apple-themed dessert experience that enhances the flavors of the dish.

    Common Mistakes to Avoid

    • Using the Wrong Apples: Always choose tart apples like Granny Smith for the best flavor contrast.
    • Not Sealing the Dumplings Properly: Ensure each biscuit is well sealed to prevent leakage during baking.
    • Skipping the Sugar Mixture: This syrup is crucial for flavor and moisture; don’t skip it.
    • Overbaking the Dumplings: Keep an eye on them to avoid drying out; they should be golden brown and tender.

    Storage & Reheating Instructions

    Refrigerator Storage

    Store leftover dumplings in an airtight container in the refrigerator for up to 3 days. Make sure they are fully cooled before sealing to maintain their texture.

    Freezing Instructions

    To freeze, wrap individual dumplings tightly in plastic wrap, then place them in a freezer-safe container. They can be frozen for up to 3 months. Thaw in the refrigerator overnight before reheating.

    Reheating Tips

    • Oven: Preheat to 350°F (175°C) and reheat for about 15-20 minutes until warmed through.
    • Microwave: Place a dumpling on a microwave-safe plate and heat for 30-45 seconds, checking for warmth.
    • Stovetop: Heat in a skillet over low heat, covered, for about 5-7 minutes until hot.

    Frequently Asked Questions

    Can I use other types of apples for Grandmas Apple Dumplings?

    While Granny Smith apples are recommended for their tartness, you can experiment with other varieties. Just be cautious of sweetness and texture.

    How do I make Grandmas Apple Dumplings ahead of time?

    You can prepare the dumplings and store them unbaked in the refrigerator for up to 24 hours. Bake them just before serving for the best results.

    What can I serve with Grandmas Apple Dumplings?

    These dumplings pair wonderfully with vanilla ice cream, whipped cream, or a drizzle of caramel sauce for added indulgence.

    Can I adjust the sweetness in Grandmas Apple Dumplings?

    Yes, you can reduce the sugar in the syrup or the cinnamon-sugar topping to suit your taste preferences.

    Are Grandmas Apple Dumplings suitable for a dinner party?

    Absolutely! They make a delightful dessert that can impress guests, especially when served warm with ice cream.

    Final Thoughts

    Grandma’s Apple Dumplings are a delightful and comforting treat that brings nostalgia to every bite. I encourage you to try this recipe and share your experience in the comments below. Your feedback helps others discover the joy of this classic dessert.


    Desserts

    Grandmas Apple Dumplings


    5.0 from 24 reviews

    Grandma's Apple Dumplings are a delightful dessert featuring tender apple slices wrapped in buttery biscuit dough, baked to golden perfection and topped with a sweet cinnamon-sugar mixture. This comforting treat is perfect for family gatherings or a cozy evening at home.

    Author: Munch Twist
    Prep Time: 20 minutes
    Cook Time: 35 minutes
    Total Time: 55 minutes
    Yield: 8 servings
    Category: Desserts
    Method: Baking
    Cuisine: American

    Grandmas Apple Dumplings

    SCALE:
    1x
    2x
    3x
    Cook Mode: Prevent your screen from going dark

    Ingredients

    • 1 stick butter
    • 1 cup water
    • 2 Granny Smith apples
    • 4 teaspoons ground cinnamon
    • 8 canned biscuits
    • 1 cup sugar, divided
    • 1/4 tsp vanilla extract

    Instructions

    1. Preheat your oven to 375°F (190°C). Peel, core, and slice the Granny Smith apples vertically into 8 slices each. Cover the apple slices with cold water to prevent browning while you prepare the rest of the recipe.
    2. In a medium saucepan, combine 1 cup water, 3/4 cup of the sugar, 1 stick of butter, and 1/4 tsp of vanilla extract. Heat the mixture over medium heat until it comes to a boil, stirring occasionally to ensure the sugar dissolves completely.
    3. Separate each biscuit in half. Wrap a biscuit dough layer around each apple slice, stretching the dough slightly to overlap and seal the bottom. Place the wrapped apple slices, sealed side down, in a 9×13-inch baking pan.
    4. Pour the hot sugar mixture over the wrapped apple slices in the baking pan. In a small bowl, mix the remaining 1/4 cup of sugar with 4 teaspoons of ground cinnamon. Sprinkle this cinnamon-sugar mixture evenly over the tops of the wrapped apples.
    5. Bake in the preheated oven for 35 minutes or until the dumplings are golden brown and the apples are tender. Serve the apple dumplings warm.

    Nutrition Facts

    Serving Size: 1 serving
    Calories: 300 kcal
    Sugar: 26g
    Sodium: 400mg
    Fat: 12g
    Saturated Fat: 7g
    Carbohydrates: 50g
    Fiber: 2g
    Protein: 2g
    Cholesterol: 30mg

  • Indulge in Delicious Root Beer Float Pie Today

    Indulge in Delicious Root Beer Float Pie Today

    Root Beer Float Pie is a delightful dessert that brings together the nostalgic flavors of a classic root beer float in a creamy, pie form. This no-bake treat is perfect for warm days, offering a refreshing and indulgent experience with every bite.

    Why You’ll Love This Recipe

    • No-Bake Convenience: This dessert requires no baking, making it a hassle-free option for any occasion.
    • Quick & Easy: Ready in under 30 minutes, you’ll spend less time in the kitchen and more time enjoying the pie.
    • Kid-Friendly Fun: The sweet, fizzy flavors appeal to both kids and adults, making it a hit at gatherings.
    • Customizable Toppings: Enjoy endless variations with toppings like cherries, whipped cream, or your favorite candy.
    • Make-Ahead Delight: Prepare it a day in advance and simply freeze, ensuring a stress-free dessert option.

    Tools and Equipment

    Gathering the right tools can streamline your preparation process. Here’s what you’ll need:

    Essential Tools

    • Mixing bowl
    • Whisk
    • Rubber spatula
    • Measuring cups
    • Prepared graham cracker crust
    • Freezer-safe pie dish

    Why These Tools Matter

    • Mixing Bowl: A large bowl allows ample space for whisking the ingredients together without spills.
    • Rubber Spatula: Perfect for gently folding in the Cool Whip, ensuring a smooth and airy texture.
    • Freezer-Safe Pie Dish: A sturdy pie dish will keep your dessert intact while it freezes.

    Ingredients for Root Beer Float Pie

    Filling

    • 8 oz Cool Whip, thawed
    • 1 box instant vanilla pudding mix (4-serving size)
    • ¾ cup root beer
    • ½ cup milk
    • 1-2 tbsp root beer extract

    Crust

    • 1 prepared graham cracker crust

    Garnish

    • Cherries and whipped cream
    • Crushed root beer barrel candy

    How to Make Root Beer Float Pie Step-by-Step

    Step 1: Mix the Pudding

    In a large bowl, combine ¾ cup root beer, ½ cup milk, 1-2 tbsp root beer extract, and 1 box instant vanilla pudding mix. Whisk for about 2 minutes until the mixture thickens.

    Step 2: Incorporate the Cool Whip

    Gently fold in the 8 oz Cool Whip into the pudding mixture using a rubber spatula. Aim for a smooth consistency without deflating the whipped topping.

    Step 3: Assemble the Pie

    Spoon the pudding mixture into the prepared graham cracker crust. Spread it evenly to ensure each slice has a balanced filling.

    Step 4: Freeze

    Place the assembled pie in the freezer. Allow it to set for at least 8 hours, preferably overnight, to achieve the best texture.

    Step 5: Serve

    Once set, remove the pie from the freezer. Cut it into 8 slices for serving.

    Step 6: Garnish

    Top each slice with whipped cream and a cherry. For an extra touch, sprinkle crushed root beer barrel candy around the edges of the pie.

    Step 7: Store

    Any leftovers can be stored in the freezer for later enjoyment. Wrap the pie tightly to prevent freezer burn.

    Enjoy this cool, creamy dessert that captures the essence of a classic root beer float in every bite!

    How to Serve Root Beer Float Pie

    Serving Root Beer Float Pie can be a delightful experience, and there are several creative ways to enhance this dessert.

    Individual Servings

    Consider serving individual slices in small dessert cups. This presentation makes it easy for guests to enjoy their own portion and adds a touch of elegance to your dessert table.

    Float-Inspired Sundae

    Transform each slice into a sundae by adding a scoop of vanilla ice cream on top. Drizzle with additional root beer for an extra burst of flavor, mimicking the classic float experience.

    Festive Dessert Bar

    Create a dessert bar where guests can customize their slices. Provide toppings such as sprinkles, crushed candy, and additional whipped cream to let everyone personalize their Root Beer Float Pie.

    Pro Tips for the Best Root Beer Float Pie

    To ensure your Root Beer Float Pie turns out perfectly, follow these expert tips.

    • Chill Your Bowl: Before mixing the ingredients, chill your mixing bowl to help keep the Cool Whip fluffy and light.
    • Use Cold Ingredients: Always use cold root beer and milk to ensure a smooth and creamy texture in your pudding mixture.
    • Don’t Overmix: When folding in the Cool Whip, be gentle to maintain the lightness of the mixture—overmixing can lead to a dense pie.
    • Customize Flavor: Adjust the amount of root beer extract to suit your taste preferences; more extract can intensify the root beer flavor.
    • Plan Ahead: For the best results, prepare your pie a day in advance. This allows for a firmer set and enhances the flavors.

    Best Side Dishes and Pairings

    Pairing your Root Beer Float Pie with complementary sides can elevate your dessert experience.

    1. Classic Vanilla Ice Cream: The rich creaminess of vanilla ice cream balances the flavors of the pie and enhances the float concept.
    2. Chocolate Chip Cookies: The sweet, chewy texture of chocolate chip cookies provides a delightful contrast to the creamy pie.
    3. Fruit Salad: A fresh fruit salad adds a refreshing element, cutting through the sweetness of the pie and providing a light option alongside.
    4. Root Beer Cocktails: A root beer cocktail or a simple root beer float drink can enhance the theme and provide a fun beverage option.
    5. Salted Pretzels: The salty crunch of pretzels offers a nice textural contrast and pairs well with the sweet and creamy elements of the pie.

    Common Mistakes to Avoid

    • Ignoring the Thawing Process: Ensure your Cool Whip is completely thawed before mixing to achieve a smooth texture.
    • Skipping the Freezing Time: Allow the pie to set for at least 8 hours; rushing this step can result in a soupy dessert.
    • Overmixing the Pudding: Whisk the pudding mixture gently to avoid incorporating too much air, which can affect the final texture.
    • Neglecting the Garnish: Don’t skip the whipped cream and candy topping; it adds both flavor and visual appeal to your Root Beer Float Pie.

    Storage & Reheating Instructions

    Refrigerator Storage

    Store any leftover Root Beer Float Pie in an airtight container in the refrigerator. It will remain fresh for up to 3 days, but it’s best enjoyed within the first day or two.

    Freezing Instructions

    To freeze the pie, wrap it tightly with plastic wrap or aluminum foil before placing it in the freezer. For the best quality, consume within 1 month. To thaw, transfer the pie to the refrigerator overnight before serving.

    Reheating Tips

    • Oven: Not recommended, as this pie is best served cold.
    • Microwave: Use with caution; heat a slice for 10-15 seconds to soften slightly without melting.
    • Stovetop: Not suitable; this dessert should be enjoyed chilled.

    Frequently Asked Questions

    Can I use a different type of crust for the Root Beer Float Pie?

    Absolutely! While a graham cracker crust is traditional, you can experiment with an Oreo crust or even a cookie crust for a unique twist.

    How can I enhance the flavor of my Root Beer Float Pie?

    Adding extra root beer extract can intensify the root beer flavor. Consider also mixing in some finely crushed root beer barrel candies into the pudding for added texture.

    Can I make this pie ahead of time?

    Yes, this pie is perfect for making ahead. It can be prepared up to a week in advance and kept in the freezer until you’re ready to serve.

    Is Root Beer Float Pie suitable for parties?

    Definitely! This dessert is a crowd-pleaser and is ideal for parties, barbecues, or family gatherings, offering a nostalgic flavor.

    What are some alternatives to Cool Whip?

    If you’re looking for a homemade option, you can substitute Cool Whip with fresh whipped cream. Just be sure to stabilize it if you plan to keep the pie for several days.

    Final Thoughts

    Root Beer Float Pie is a delightful way to bring a classic favorite into dessert form. Its creamy texture and nostalgic flavor make it a must-try for any occasion. We encourage you to make this recipe and share your thoughts in the comments below!


    Desserts

    Root Beer Float Pie


    5.0 from 24 reviews

    This Root Beer Float Pie is a delightful dessert that combines the classic flavors of root beer and vanilla in a creamy, chilled pie. It's easy to make and perfect for any occasion, offering a nostalgic taste of a root beer float in every slice.

    Author: Munch Twist
    Prep Time: 20 mins
    Cook Time: 0 mins
    Total Time: 480 mins
    Yield: 8 servings
    Category: Desserts
    Method: No bake
    Cuisine: American

    Root Beer Float Pie

    SCALE:
    1x
    2x
    3x
    Cook Mode: Prevent your screen from going dark

    Ingredients

    • 8 oz Cool Whip, thawed
    • 1 box instant vanilla pudding mix (4-serving size)
    • ¾ cup root beer
    • ½ cup milk
    • 1-2 tbsp root beer extract
    • 1 prepared graham cracker crust

    Instructions

    1. In a large bowl, whisk together the root beer, milk, root beer extract, and instant vanilla pudding mix for about 2 minutes or until the mixture thickens.
    2. Gently fold the thawed Cool Whip into the pudding mixture until fully combined.
    3. Spoon the pudding mixture into the prepared graham cracker crust, spreading it evenly.
    4. Place the pie in the freezer and let it set for at least 8 hours, preferably overnight.
    5. Once set, remove the pie from the freezer and cut into 8 slices.
    6. Top each slice with whipped cream and a cherry. Sprinkle crushed root beer barrel candy around the edges of the pie for an extra touch of sweetness.
    7. Any leftovers can be stored in the freezer for later enjoyment.

    Nutrition Facts

    Serving Size: 1 serving
    Calories: 290 kcal
    Sugar: 22g
    Sodium: 210mg
    Fat: 14g
    Saturated Fat: 7g
    Carbohydrates: 37g
    Fiber: 0g
    Protein: 2g
    Cholesterol: 25mg

  • Delicious Pumpkin Pie Crisp Recipe You Must Try

    Delicious Pumpkin Pie Crisp Recipe You Must Try

    Pumpkin Pie Crisp is a delightful twist on the classic pumpkin pie, combining the creamy richness of pumpkin with a crunchy topping. This dessert is perfect for fall gatherings, bringing warmth and comfort with each bite. The blend of spices and textures makes it an irresistible treat that will leave your guests asking for seconds.

    Why You’ll Love This Recipe

    • Deliciously Spiced: The warm spices of cinnamon, nutmeg, and ginger create a cozy flavor profile that celebrates autumn.
    • Textural Contrast: The combination of creamy pumpkin filling and a crunchy oat topping provides a satisfying bite.
    • Easy to Make: With simple ingredients and straightforward steps, this recipe is perfect for bakers of all levels.
    • Crowd-Pleaser: Ideal for gatherings, this dessert is sure to impress family and friends alike.
    • Versatile Serving Options: Enjoy it warm with whipped cream or at room temperature as a delightful snack.

    Tools and Equipment

    Having the right tools makes the cooking process smoother and more enjoyable.

    Essential Tools

    • 9×13-inch baking dish
    • Mixing bowls (medium and large)
    • Whisk
    • Measuring cups and spoons
    • Spatula

    Why These Tools Matter

    • Baking Dish: A 9×13-inch baking dish provides ample space for the filling and topping to cook evenly.
    • Mixing Bowls: Using separate bowls helps keep ingredients organized and ensures thorough mixing.
    • Whisk: A whisk is essential for creating a smooth pumpkin filling without lumps.

    Ingredients for Pumpkin Pie Crisp

    For the Topping

    • 1/4 teaspoon ground ginger
    • 1 cup brown sugar, packed
    • 1 cup all-purpose flour
    • 1 cup old-fashioned oats
    • 1/4 teaspoon salt
    • 1/2 cup unsalted butter, melted
    • 1/4 teaspoon ground nutmeg
    • 1/2 teaspoon ground cinnamon

    For the Filling

    • 1/2 teaspoon ground cinnamon
    • 1 cup evaporated milk
    • 1 can (15 ounces) pumpkin puree
    • 1 cup granulated sugar
    • 1/4 teaspoon ground ginger
    • 1/4 teaspoon ground nutmeg
    • 2 large eggs

    How to Make Pumpkin Pie Crisp Step-by-Step

    Step 1: Prep the Base

    1. Preheat your oven to 350°F (175°C) and grease a 9×13-inch baking dish.
    2. In a medium bowl, combine the melted butter, brown sugar, flour, oats, cinnamon, nutmeg, ginger, and salt until the mixture is crumbly. Set aside.

    Step 2: Prepare the Filling

    1. In a large bowl, whisk together the pumpkin puree, granulated sugar, cinnamon, nutmeg, ginger, eggs, and evaporated milk until smooth.

    Step 3: Assemble and Bake

    1. Pour the pumpkin mixture into the greased baking dish, spreading it evenly.
    2. Sprinkle the crumbly topping over the pumpkin filling, ensuring even coverage.
    3. Bake for 45-50 minutes, or until the topping is golden brown and the filling is set.
    4. Allow the crisp to cool slightly before serving. Enjoy it warm or at room temperature.

    This Pumpkin Pie Crisp recipe combines tradition with a modern twist, making it a must-try for your next dessert. With its rich flavors and textures, it’s sure to become a favorite in your household.

    How to Serve Pumpkin Pie Crisp

    Serving Pumpkin Pie Crisp can elevate your dessert experience. Here are some creative ideas to enhance this delicious treat.

    A La Mode

    Serve warm Pumpkin Pie Crisp with a generous scoop of vanilla ice cream. The creaminess of the ice cream complements the warm spices and texture of the crisp perfectly.

    Whipped Cream Delight

    Top each serving of Pumpkin Pie Crisp with freshly whipped cream. This adds a light, airy quality that balances the richness of the pumpkin filling.

    Nutty Topping

    Sprinkle chopped pecans or walnuts over the crisp before serving. This adds an extra crunch and enhances the autumn flavors with a nutty twist.

    Pro Tips for the Best Pumpkin Pie Crisp

    To achieve the perfect Pumpkin Pie Crisp, consider these expert tips.

    • Use Fresh Spices: Freshly ground spices will provide a more vibrant flavor compared to pre-ground options.
    • Don’t Overmix the Topping: Mix just until crumbly to ensure a nice texture; overmixing can make it dense.
    • Cool Before Serving: Allowing the crisp to cool slightly helps the filling set and makes serving easier.
    • Experiment with Sweetness: Adjust the sugar in the filling or topping based on your taste preference or the sweetness of your pumpkin puree.
    • Store Properly: Cover any leftovers with plastic wrap or aluminum foil and store in the refrigerator for up to three days.

    Best Side Dishes and Pairings

    Pairing your Pumpkin Pie Crisp with complementary dishes can enhance the overall dining experience. Here are some excellent suggestions.

    1. Spiced Coffee: A warm spiced coffee, like a cinnamon latte, pairs beautifully with the flavors of the crisp.
    2. Apple Cider: Hot or cold apple cider brings a refreshing contrast to the rich pumpkin filling.
    3. Cheese Platter: A selection of soft cheeses, such as brie or goat cheese, can balance the sweetness of the dessert.
    4. Fresh Fruit Salad: A light fruit salad with seasonal fruits can provide a refreshing palate cleanser.
    5. Vanilla Yogurt: A dollop of vanilla yogurt adds a tangy creaminess that complements the pumpkin flavors well.

    Common Mistakes to Avoid

    • Using Fresh Pumpkin: Always use canned pumpkin puree for a smoother texture.
    • Skipping the Spices: Don’t omit spices like cinnamon and nutmeg, as they enhance the flavor significantly.
    • Overmixing the Topping: Mix the topping just until crumbly; overmixing can make it dense.
    • Not Allowing to Cool: Let the crisp cool slightly before serving; this helps the filling set properly.

    Storage & Reheating Instructions

    Refrigerator Storage

    Store leftover Pumpkin Pie Crisp in an airtight container in the refrigerator. It will stay fresh for up to 4 days.

    Freezing Instructions

    For best results, freeze the Pumpkin Pie Crisp before baking. Wrap it tightly in plastic wrap and then in aluminum foil. It can be frozen for up to 3 months. To thaw, transfer it to the refrigerator overnight before baking.

    Reheating Tips

    • Oven: Preheat to 350°F (175°C). Cover with foil and heat for 15-20 minutes or until warmed through.
    • Microwave: Heat in 30-second intervals until warm, checking regularly to avoid overheating.
    • Stovetop: Place slices in a skillet over low heat, covering to warm evenly for about 5 minutes.

    Frequently Asked Questions

    Can I make Pumpkin Pie Crisp ahead of time?

    Yes, you can prepare the filling and topping separately and combine them just before baking for a fresh dessert.

    What can I serve with Pumpkin Pie Crisp?

    This dessert pairs wonderfully with whipped cream or vanilla ice cream for added creaminess.

    How can I adjust the sweetness of Pumpkin Pie Crisp?

    Feel free to reduce the sugar in the filling if you prefer a less sweet dessert.

    Can I use gluten-free flour in this recipe?

    Yes, you can substitute all-purpose flour with a gluten-free flour blend for a gluten-free version.

    What is the difference between Pumpkin Pie and Pumpkin Pie Crisp?

    Pumpkin Pie is a smooth custard filling baked in a crust, while Pumpkin Pie Crisp features a crumbly topping instead of a crust.

    Final Thoughts

    This Pumpkin Pie Crisp is a delicious twist on a classic dessert, perfect for any occasion. We encourage you to try making it and share your thoughts in the comments below. Your feedback is always appreciated!


    Desserts

    Pumpkin Pie Crisp


    5.0 from 24 reviews

    This Pumpkin Pie Crisp is a delightful dessert that combines the classic flavors of pumpkin pie with a crunchy oat topping. It's easy to make and perfect for fall gatherings or holiday celebrations. Serve it warm with whipped cream or enjoy it at room temperature for a comforting treat.

    Author: Munch Twist
    Prep Time: 15 mins
    Cook Time: 50 mins
    Total Time: 65 mins
    Yield: 12 servings
    Category: Desserts
    Method: No bake
    Cuisine: American

    Pumpkin Pie Crisp

    SCALE:
    1x
    2x
    3x
    Cook Mode: Prevent your screen from going dark

    Ingredients

    • 1/4 teaspoon ground ginger
    • 1 cup brown sugar, packed
    • 1 cup all-purpose flour
    • 1 cup old-fashioned oats
    • 1/4 teaspoon salt
    • 1/2 cup unsalted butter, melted
    • 1/4 teaspoon ground nutmeg
    • 1/2 teaspoon ground cinnamon
    • 1/2 teaspoon ground cinnamon (for filling)
    • 1 cup evaporated milk
    • 1 can (15 ounces) pumpkin puree
    • 1 cup granulated sugar
    • 1/4 teaspoon ground ginger (for filling)
    • 1/4 teaspoon ground nutmeg (for filling)
    • 2 large eggs

    Instructions

    1. Preheat your oven to 350°F (175°C) and grease a 9×13-inch baking dish.
    2. In a medium bowl, combine the melted butter, brown sugar, flour, oats, cinnamon, nutmeg, ginger, and salt until the mixture is crumbly. Set aside.
    3. In a large bowl, whisk together the pumpkin puree, granulated sugar, cinnamon, nutmeg, ginger, eggs, and evaporated milk until smooth.
    4. Pour the pumpkin mixture into the greased baking dish, spreading it evenly.
    5. Sprinkle the crumbly topping over the pumpkin filling, ensuring even coverage.
    6. Bake for 45-50 minutes, or until the topping is golden brown and the filling is set.
    7. Allow the crisp to cool slightly before serving.

    Nutrition Facts

    Serving Size: 1 serving
    Calories: 300 kcal
    Sugar: 20g
    Sodium: 170mg
    Fat: 12g
    Saturated Fat: 7g
    Carbohydrates: 43g
    Fiber: 2g
    Protein: 5g
    Cholesterol: 55mg