Author: munch twist

  • Indulge in Amish Peanut Butter Cream Pie Today

    Indulge in Amish Peanut Butter Cream Pie Today

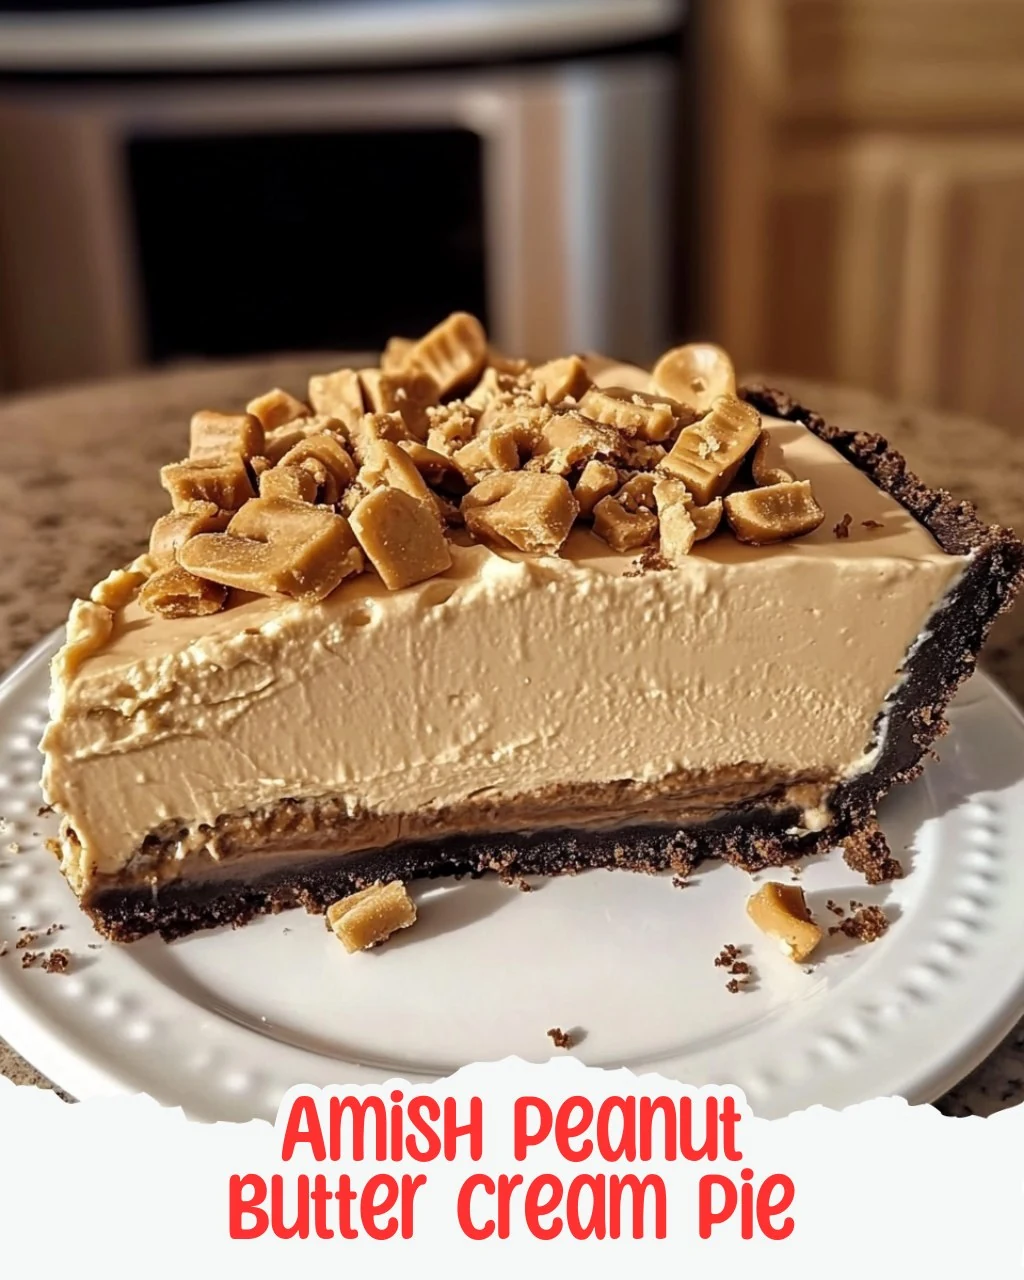
    Amish Peanut Butter Cream Pie is a dessert lover’s dream. This pie perfectly combines smooth, creamy peanut butter and rich cream cheese, making it an irresistible treat. Each slice offers a delightful balance of flavors that will have everyone asking for more.

    Why You’ll Love This Recipe

    • Decadent Flavor: The combination of peanut butter and cream cheese creates a rich, indulgent taste.
    • No Baking Required: This pie is easy to make with no oven needed, saving you time and effort.
    • Perfect for Any Occasion: Whether it’s a family gathering or a casual dinner, this pie suits every event.
    • Quick Preparation: With only 20 minutes of prep time, you can whip up this dessert in no time.
    • Chill and Serve: Simply let it set in the fridge and serve cold, making it a hassle-free dessert option.

    Tools and Equipment

    To make this pie, you’ll need a few essential kitchen tools to simplify the process.

    Essential Tools

    • Mixing bowls
    • Electric mixer
    • Whisk
    • Measuring cups and spoons
    • Pie dish

    Why These Tools Matter

    • Mixing bowls: Necessary for combining ingredients efficiently and keeping everything organized.
    • Electric mixer: Helps achieve a smooth and fluffy filling without much effort.
    • Whisk: Ideal for blending the pudding mix and milk to ensure a creamy texture.

    Ingredients for Amish Peanut Butter Cream Pie

    For the Crust

    • 1 pre-made graham cracker pie crust

    For the Filling

    • 8 oz cream cheese, softened
    • 1 cup creamy peanut butter
    • 1 cup granulated sugar
    • 1 cup powdered sugar
    • 1 teaspoon vanilla extract
    • 2 cups heavy cream
    • 1 package 3.4 oz instant vanilla pudding mix
    • 1 cup milk

    How to Make Amish Peanut Butter Cream Pie Step-by-Step

    Step 1: Prep the Base

    Start by prepping your ingredients. In a medium bowl, mix together the creamy peanut butter and powdered sugar until it forms a crumbly texture. Reserve half of this mixture to sprinkle on top later.

    Step 2: Make the Cream Cheese Mixture

    In a large mixing bowl, beat the softened cream cheese and granulated sugar together until the mixture is perfectly smooth. This is the base for your creamy filling.

    Step 3: Add Cream and Vanilla

    Pour in the heavy cream and vanilla extract into the cream cheese mixture. Keep beating until it’s light and fluffy—approximately 2 to 3 minutes.

    Step 4: Prepare the Crust

    Take that scrumptious half of the peanut butter crumble and sprinkle it evenly in the bottom of your graham cracker crust.

    Step 5: Combine Pudding and Cream Cheese

    In a separate bowl, whisk the milk and the instant vanilla pudding mix together until it thickens. Then, gently fold this pudding mixture into your cream cheese blend until everything is well combined.

    Step 6: Assemble the Pie

    Carefully pour the creamy filling over the peanut butter crumbles in the crust, spreading it evenly. Don’t forget to top it off with the remaining peanut butter crumbles for that extra flavor punch.

    Step 7: Chill the Pie

    Place your pie in the refrigerator to chill for at least 4 hours, allowing all the flavors to meld and the pie to set perfectly.

    Step 8: Serve and Enjoy

    Serve cold and watch as everyone dives into this sweet, creamy bliss!

    Nutritional Information: Approximately 380 kcal per slice, with each pie serving 8 slices.

    Time: Preparation time: 20 minutes | Chill time: 4 hours

    How to Serve Amish Peanut Butter Cream Pie

    Serving this pie can elevate your dessert experience. Here are a few creative ideas to enhance your presentation.

    Garnished with Whipped Cream

    Top each slice of pie with a dollop of freshly whipped cream. This adds an airy texture that complements the creamy filling beautifully.

    Chocolate Drizzle

    A drizzle of melted chocolate over the pie can provide a rich contrast to the peanut butter flavor, making it even more indulgent.

    Chopped Peanuts

    Sprinkle some chopped peanuts on top for added crunch and visual appeal. This adds a delightful texture that balances the smoothness of the pie.

    Pro Tips for the Best Amish Peanut Butter Cream Pie

    To ensure your pie turns out perfectly, keep these expert tips in mind.

    • Use High-Quality Peanut Butter: Opt for a natural, creamy peanut butter for the best flavor and texture in your pie.

    • Chill the Bowl: Before whipping the heavy cream, chill your mixing bowl and beaters. This helps achieve a fluffier consistency.

    • Don’t Overmix: When combining the pudding and cream cheese mixtures, gently fold them together to maintain the lightness of the filling.

    • Allow for Proper Chilling: Make sure to chill the pie for the full 4 hours to ensure it sets correctly and enhances the flavor.

    • Experiment with Flavors: Feel free to add a pinch of sea salt or a splash of chocolate extract to the filling for a unique twist on the classic recipe.

    Best Side Dishes and Pairings

    Pairing your Amish Peanut Butter Cream Pie with complementary flavors can enhance the overall dessert experience. Here are some great options:

    1. Fresh Berries
      The tartness of fresh berries, such as strawberries or raspberries, provides a refreshing contrast to the rich pie.

    2. Vanilla Ice Cream
      A scoop of vanilla ice cream adds a creamy layer that pairs perfectly with the pie’s peanut butter flavor.

    3. Coffee
      A cup of strong coffee balances the sweetness and brings out the flavors of the pie beautifully.

    4. Chocolate Milkshake
      A thick chocolate milkshake can create a decadent combination that peanut butter lovers will appreciate.

    5. Caramel Sauce
      Drizzling caramel sauce over the pie or serving it on the side adds a sweet and buttery flavor that enhances the dessert even further.

    6. Mint Tea
      A warm cup of mint tea offers a refreshing palate cleanser after indulging in the rich pie, making it an excellent pairing choice.

    Common Mistakes to Avoid

    • Not Softening Cream Cheese: Make sure your cream cheese is at room temperature for a smooth filling.
    • Skipping the Chill Time: Allow the pie to chill for at least 4 hours to ensure it sets properly.
    • Overmixing the Cream: Beat the heavy cream until fluffy, but avoid overmixing to prevent it from turning into butter.
    • Not Reserving Enough Peanut Butter Crumble: Remember to set aside half of the peanut butter mixture for topping the pie, as it adds texture and flavor.

    Storage & Reheating Instructions

    Refrigerator Storage

    Store your Amish Peanut Butter Cream Pie in an airtight container in the refrigerator. It will stay fresh for up to 5 days.

    Freezing Instructions

    To freeze, wrap the pie tightly in plastic wrap or aluminum foil, then place it in an airtight container. It can be frozen for up to 2 months. Thaw in the refrigerator overnight before serving.

    Reheating Tips

    • Oven: Preheat to 350°F. Cover the pie with aluminum foil and warm for about 10-15 minutes.
    • Microwave: Microwave individual slices on a microwave-safe plate for 15-20 seconds, checking for warmth.
    • Stovetop: Place a slice in a non-stick skillet over low heat, cover, and warm for about 5 minutes.

    Frequently Asked Questions

    How can I make my Amish Peanut Butter Cream Pie more chocolatey?

    You can add chocolate syrup drizzled on top or mix cocoa powder into the cream cheese layer for a delicious chocolate twist.

    Can I use natural peanut butter for this recipe?

    Yes, natural peanut butter can be used, but make sure to stir it well as it tends to separate more than regular creamy peanut butter.

    How long does Amish Peanut Butter Cream Pie last in the refrigerator?

    When stored in an airtight container, Amish Peanut Butter Cream Pie can last for about 5 days in the refrigerator.

    Can I make this pie ahead of time?

    Absolutely! This pie is perfect for making ahead. Just remember to chill it for at least 4 hours before serving.

    What is the best way to serve Amish Peanut Butter Cream Pie?

    Serve it cold, and consider garnishing with whipped cream or chocolate shavings for an extra special touch.

    Final Thoughts

    This Amish Peanut Butter Cream Pie is a delightful treat that’s sure to impress friends and family. With its rich flavors and creamy texture, it’s a dessert worth making. Don’t forget to leave a comment below sharing your experience with this recipe!


    Desserts

    Amish Peanut Butter Cream Pie


    5.0 from 24 reviews

    Get ready to experience a smooth, creamy delight! This Amish Peanut Butter Cream Pie is a dessert lover's dream, combining luscious layers of peanut butter and cream cheese that will have everyone coming back for just one more slice.
    Author: Munch Twist
    Prep Time: 20 minutes
    Cook Time: 25 mins
    Total Time: 260 minutes
    Yield: 8 servings
    Category: Desserts
    Method: No bake
    Cuisine: American

    Amish Peanut Butter Cream Pie

    SCALE:
    1x
    2x
    3x
    Cook Mode: Prevent your screen from going dark

    Ingredients

    • 1 pre-made graham cracker pie crust
    • 8 oz cream cheese, softened
    • 1 cup creamy peanut butter
    • 2 cups heavy cream
    • 1 package 3.4 oz instant vanilla pudding mix
    • 1 teaspoon vanilla extract
    • 1 cup granulated sugar
    • 1 cup milk
    • 1 cup powdered sugar

    Instructions

    1. In a medium bowl, mix together the creamy peanut butter and powdered sugar until it forms a crumbly texture. Reserve half of this mixture to sprinkle on top later.
    2. In a large mixing bowl, beat the softened cream cheese and granulated sugar together until the mixture is perfectly smooth.
    3. Pour in the heavy cream and the vanilla extract into the cream cheese mixture. Keep beating until it’s light and fluffy—approximately 2 to 3 minutes.
    4. Sprinkle half of the peanut butter crumble evenly in the bottom of your graham cracker crust.
    5. In a separate bowl, whisk the milk and the instant vanilla pudding mix together until it thickens. Gently fold this pudding mixture into your cream cheese blend until well combined.
    6. Carefully pour the creamy filling over the peanut butter crumbles in the crust, spreading it evenly. Top with the remaining peanut butter crumbles.
    7. Place your pie in the refrigerator to chill for at least 4 hours.
    8. Serve cold.

    Nutrition Facts

    Serving Size: 1 serving
    Calories: 380 kcal
    Sugar: 22g
    Sodium: 300mg
    Fat: 28g
    Saturated Fat: 14g
    Carbohydrates: 34g
    Fiber: 1g
    Protein: 7g
    Cholesterol: 60mg

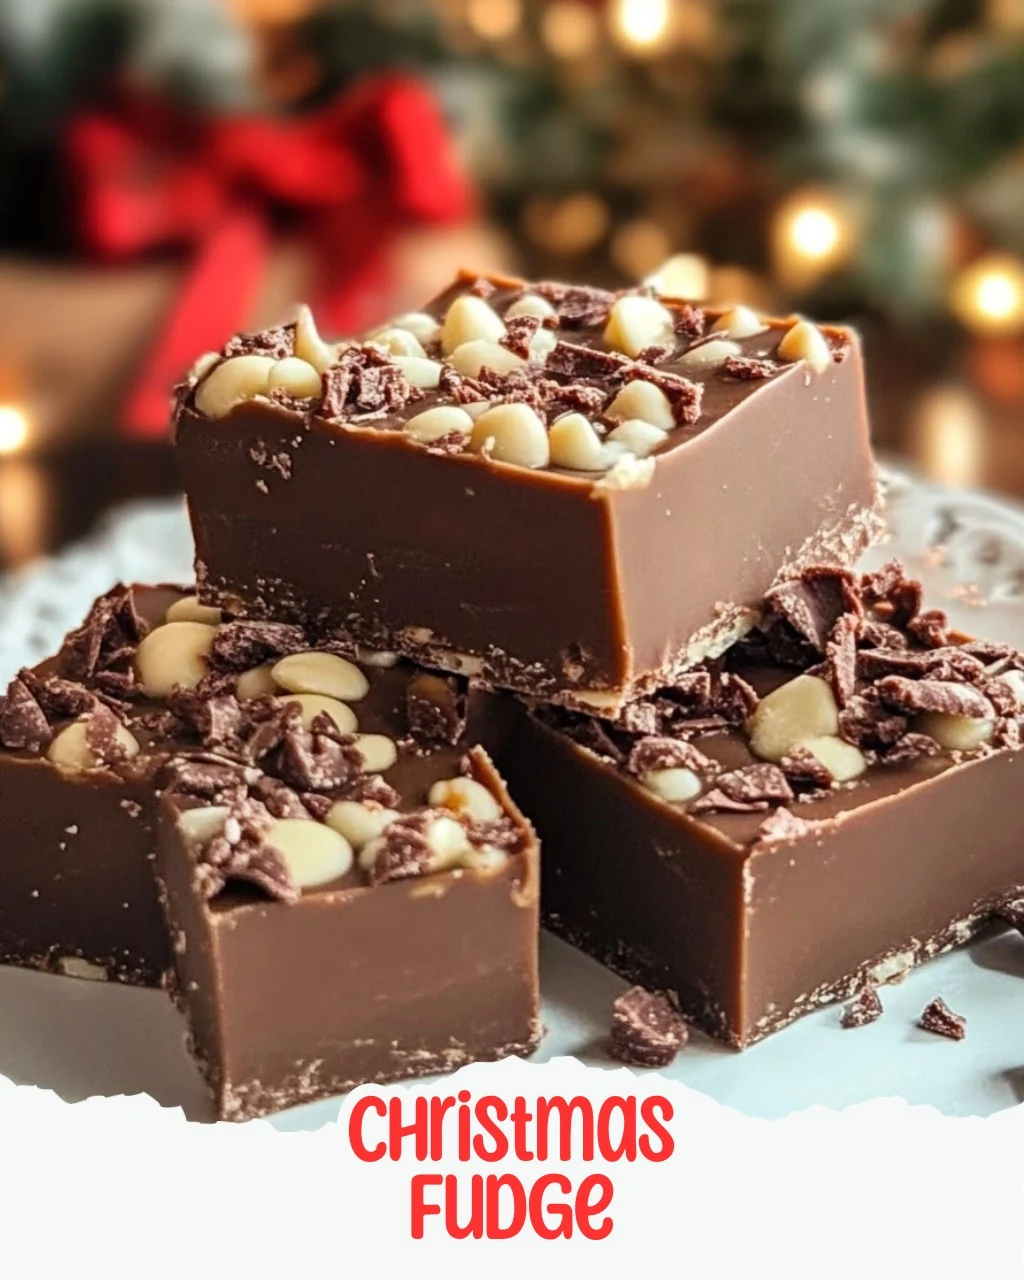
  • Easy and Festive Christmas Fudge Recipe

    Easy and Festive Christmas Fudge Recipe

    Get ready for a festive treat that will make your holiday season extra sweet! This colorful Christmas fudge is delightful, easy to make, and perfect for sharing with friends and family. Let’s dive into this delicious holiday confection!

    Why You’ll Love This Recipe

    • Festive Appearance: The vibrant red and green colors make this fudge a beautiful addition to any holiday spread.
    • Customizable Flavors: You can easily modify the flavors or colors to suit your taste or theme.
    • Perfect for Gifting: This fudge makes an excellent gift when packaged in festive boxes or jars.
    • Family-Friendly Activity: Making this fudge is a fun activity for the whole family to enjoy together.
    • Simple Ingredients: You probably already have most of the ingredients in your kitchen.

    Tools and Equipment

    To create this delightful Christmas fudge, you will need some essential kitchen tools.

    Essential Tools

    • 8×8-inch baking dish
    • Parchment paper
    • Medium saucepan
    • Mixing bowls (3)
    • Rubber spatula
    • Knife

    Why These Tools Matter

    • Baking Dish: The 8×8-inch dish is perfect for setting the fudge to achieve the right thickness.
    • Parchment Paper: Lining the dish with parchment makes it easy to lift the fudge out for cutting.
    • Rubber Spatula: This tool helps in mixing the fudge smoothly and scraping down the sides of the bowl.

    Ingredients for Christmas Fudge

    Main Ingredients

    • 1/2 teaspoon vanilla extract
    • 3 cups white chocolate chips
    • 1 14-ounce can sweetened condensed milk

    Coloring and Decoration

    • Red and green food coloring
    • 1/4 cup holiday sprinkles (optional, for decoration)

    How to Make Christmas Fudge Step-by-Step

    Step 1: Prepare the Pan

    Start by lining an 8×8-inch baking dish with parchment paper. Leave some excess hanging over the sides to make it easier to lift out the fudge later.

    Step 2: Melt the Chocolate

    In a medium saucepan, combine the white chocolate chips and sweetened condensed milk. Heat over low while stirring continuously until everything has melted into a smooth, creamy mixture. Remove it from the heat and stir in the vanilla extract for that extra flavor.

    Step 3: Color the Fudge

    Next, divide this luscious mixture evenly into three separate bowls. Add red food coloring to one bowl and green food coloring to another, mixing until you reach your desired shades. Leave the third bowl untouched for a classic white layer.

    Step 4: Layer the Fudge

    Pour the red fudge into your prepared pan, spreading it out evenly. Carefully layer the plain fudge on top of the red, followed by the green mixture. Use a knife to gently swirl through the layers, creating a marbled appearance for a festive touch.

    Step 5: Add Sprinkles

    While the mixture is still warm, sprinkle the holiday sprinkles generously over the top for some added holiday cheer.

    Step 6: Chill

    Place the pan in the refrigerator and let it chill for at least two hours, or until the fudge is firm enough to cut. Once hardened, lift the fudge out using the parchment paper and cut it into small squares for perfect little bites!

    Nutritional Information

    This recipe yields approximately 24 pieces. Each piece has about 100 calories, 5g of fat, 15g of carbs, and 1g of protein, making it a delightful treat to indulge in during the holiday festivities.

    Time

    Preparation time: 10 minutes | Chilling time: 2 hours

    Indulge in this festive Christmas fudge and share it with loved ones. It’s sure to become a holiday favorite in your home!

    How to Serve Christmas Fudge

    Christmas fudge is not only delicious but also versatile. Here are some creative ways to serve it.

    Festive Gift Boxes

    Package the cut fudge pieces in decorative boxes or tins. Add a festive ribbon for a thoughtful homemade gift that friends and family will appreciate during the holiday season.

    Dessert Platter

    Arrange the fudge squares on a beautiful platter alongside other holiday treats, such as cookies and candies. This colorful presentation makes for an inviting centerpiece at any holiday gathering.

    Hot Chocolate Topping

    Crush the fudge into smaller pieces and use it as a topping for hot chocolate. The creamy sweetness of the fudge elevates your drink, making it a perfect accompaniment for cozy winter evenings.

    Pro Tips for the Best Christmas Fudge

    To achieve the ultimate Christmas fudge, consider these expert tips.

    • Use High-Quality Chocolate: Opt for premium white chocolate chips for a richer flavor and smoother texture in your fudge.

    • Avoid Overheating: When melting the chocolate, keep the heat low and stir constantly to prevent burning, ensuring a silky mixture.

    • Customize Colors: Feel free to experiment with different shades of red and green or even add other colors to match your holiday theme.

    • Add Flavor Variations: Enhance the fudge with other extracts, such as almond or peppermint, for a unique twist on the classic recipe.

    • Store Properly: Keep your Christmas fudge in an airtight container at room temperature for up to two weeks to maintain its freshness.

    Best Side Dishes and Pairings

    Pair your Christmas fudge with these delightful options for a complete holiday experience.

    1. Peppermint Hot Chocolate – The rich flavors of peppermint-infused hot chocolate complement the sweetness of the fudge perfectly.

    2. Spiced Mulled Wine – This warm, spiced drink offers a comforting contrast to the creamy texture of the fudge, creating a delightful balance.

    3. Cheese Platter – A selection of cheeses, particularly creamy brie or sharp cheddar, can provide a savory counterpoint to the sweet fudge.

    4. Gingerbread Cookies – The spiced flavors of gingerbread cookies harmonize beautifully with the sweetness of the fudge, making them a festive duo.

    5. Tea or Coffee – A warm cup of spiced tea or coffee serves as a lovely beverage pairing, enhancing the overall holiday indulgence.

    Common Mistakes to Avoid

    • Not Measuring Ingredients Accurately: Precision is key in making fudge. Use measuring cups and spoons to ensure the right amounts.
    • Using High Heat: Melting chocolate over too high a heat can cause it to seize. Always melt on low and stir continuously.
    • Skipping the Chilling Step: Allowing the fudge to chill is crucial for it to set properly. Don’t rush this step for the best texture.
    • Neglecting to Line the Pan: Failing to line the baking dish can make it difficult to remove the fudge once it’s set. Always use parchment paper for easy removal.

    Storage & Reheating Instructions

    Refrigerator Storage

    Store your Christmas Fudge in an airtight container in the refrigerator. It will stay fresh for up to two weeks, making it a perfect treat for holiday gatherings.

    Freezing Instructions

    To freeze, cut the fudge into squares and place them in a single layer in an airtight container. Separate layers with parchment paper. It can be frozen for up to three months. To thaw, simply transfer the container to the refrigerator for a few hours before serving.

    Reheating Tips

    • Oven: Preheat the oven to 200°F (93°C). Place the fudge in an oven-safe dish and warm for 5-10 minutes until just soft.
    • Microwave: Heat on low power in 10-second intervals, checking frequently to avoid overheating.
    • Stovetop: Place fudge in a heatproof bowl over a pot of simmering water, stirring until soft.

    Frequently Asked Questions

    How can I make my Christmas Fudge more festive?

    You can add more colorful holiday sprinkles or even chopped nuts for added texture and flavor.

    Can I use dark chocolate instead of white chocolate in Christmas Fudge?

    Yes, you can substitute dark chocolate chips for white chocolate to create a different flavor profile.

    How long does Christmas Fudge last?

    When stored properly in the refrigerator, Christmas Fudge can last up to two weeks, and if frozen, it can stay fresh for about three months.

    Is Christmas Fudge suitable for gift-giving?

    Absolutely! Christmas Fudge makes a wonderful homemade gift. Just package it in a decorative box or tin for a thoughtful treat.

    Can I customize the colors of my Christmas Fudge?

    Definitely! Feel free to use any food coloring to match your holiday theme or personal preference.

    Final Thoughts

    This Christmas Fudge recipe is a delightful addition to your holiday festivities. Easy to make and perfect for sharing, it is sure to impress your family and friends. Try it out and let us know how it turns out by leaving a comment!


    Desserts

    Christmas Fudge


    5.0 from 24 reviews

    Get ready for a festive treat that will make your holiday season extra sweet! This colorful Christmas fudge is delightful, easy to make, and perfect for sharing with friends and family.

    Author: Munch Twist
    Prep Time: 10 minutes
    Cook Time: 25 mins
    Total Time: 130 minutes
    Yield: 24 servings
    Category: Desserts
    Method: No bake
    Cuisine: American

    Christmas Fudge

    SCALE:
    1x
    2x
    3x
    Cook Mode: Prevent your screen from going dark

    Ingredients

    • 1/2 teaspoon vanilla extract
    • 3 cups white chocolate chips
    • 1 14-ounce can sweetened condensed milk
    • Red and green food coloring
    • 1/4 cup holiday sprinkles (optional, for decoration)

    Instructions

    1. Prepare the Pan: Line an 8×8-inch baking dish with parchment paper.
    2. Melt the Chocolate: Combine white chocolate chips and sweetened condensed milk in a saucepan over low heat, stirring until melted. Stir in vanilla extract.
    3. Color the Fudge: Divide the mixture into three bowls. Add red food coloring to one bowl, green to another, and leave the third bowl plain.
    4. Layer the Fudge: Pour red fudge into the pan, followed by the plain fudge, and then the green mixture. Swirl with a knife.
    5. Add Sprinkles: Sprinkle holiday sprinkles over the top while the mixture is warm.
    6. Chill: Refrigerate for at least 2 hours until firm. Lift out and cut into squares.

    Nutrition Facts

    Serving Size: 1 serving
    Calories: 100 kcal
    Sugar: 14g
    Sodium: 30mg
    Fat: 5g
    Saturated Fat: 3g
    Carbohydrates: 15g
    Fiber: 0g
    Protein: 1g
    Cholesterol: 5mg

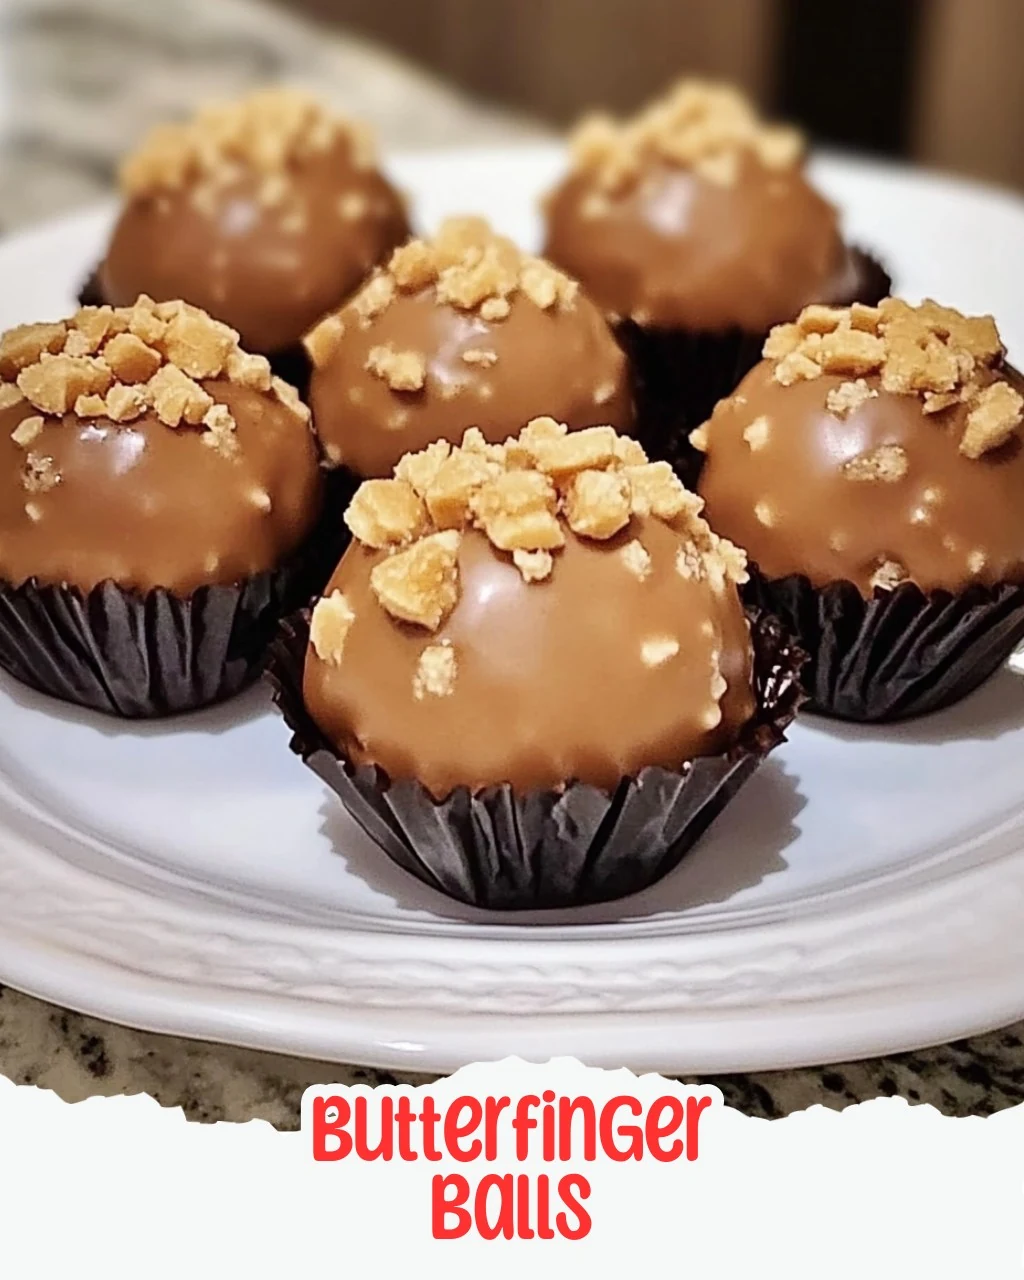
  • Irresistible Butterfinger Balls Recipe in 45 Minutes

    Irresistible Butterfinger Balls Recipe in 45 Minutes

    Get ready to satisfy your sweet tooth with these irresistible Butterfinger Balls! This delightful treat combines creamy, crunchy, and chocolaty goodness in every bite. They are incredibly easy to make and will have your friends and family coming back for more.

    Why You’ll Love This Recipe

    • Quick & Easy: Ready in under 45 minutes, these treats are perfect for last-minute cravings or gatherings.
    • No Baking Required: Enjoy a hassle-free cooking experience with no need for an oven.
    • Customizable Toppings: Elevate your Butterfinger Balls with sprinkles or additional crushed candy for a personal touch.
    • Crowd-Pleaser: Their rich flavor and fun texture make them a hit at parties and family events.
    • Kid-Friendly: A fun recipe that kids can help with, making it a great activity for family bonding.

    Tools and Equipment

    To make Butterfinger Balls, you will need some essential kitchen tools for a smooth process.

    Essential Tools

    • Mixing bowl
    • Baking sheet
    • Parchment paper
    • Microwave-safe bowl
    • Fork or dipping tool

    Why These Tools Matter

    • Mixing bowl: Essential for combining the cream cheese and crushed candy smoothly.
    • Baking sheet: Provides a stable surface for chilling and setting the Butterfinger Balls.
    • Microwave-safe bowl: Ensures safe melting of chocolate without the risk of burns or spills.

    Ingredients for Butterfinger Balls

    Gather these ingredients for the perfect Butterfinger Balls:

    Base Ingredients

    • 8 oz. cream cheese, softened
    • 2 cups crushed Butterfinger candy bars (about 16 fun-sized bars)

    Coating Ingredients

    • 2 cups semi-sweet chocolate chips
    • 1 tbsp optional vegetable shortening (for smoother dipping)

    Optional Toppings

    • Butterfinger or chocolate sprinkles for decoration

    How to Make Butterfinger Balls Step-by-Step

    Step 1: Mix Ingredients

    In a large mixing bowl, combine the softened cream cheese with the crushed Butterfinger pieces. Use a sturdy spoon or mixer to blend the mixture until it is smooth and well combined.

    Step 2: Form Balls

    Once the mixture is well combined, scoop out portions and roll them into 1-inch balls. Arrange the balls on a baking sheet lined with parchment paper. Chill them in the refrigerator for 30 minutes to firm up.

    Step 3: Melt Chocolate

    While the balls are chilling, melt the semi-sweet chocolate chips in a microwave-safe bowl. Heat them in 30-second intervals, stirring in between until completely melted. For a smoother finish, stir in the optional vegetable shortening.

    Step 4: Dip Balls

    After the chilling time, remove the balls from the refrigerator. Dip each ball into the melted chocolate, ensuring they are fully coated. Use a fork or your fingers to help remove any excess chocolate.

    Step 5: Set and Enjoy

    Return the chocolate-coated balls to the parchment-lined baking sheet. For a decorative touch, sprinkle some additional crushed Butterfinger or chocolate sprinkles on top before the chocolate sets. Allow the chocolate to harden completely before serving.

    Enjoy making and sharing these delightful Butterfinger Balls with your loved ones!

    How to Serve Butterfinger Balls

    These Butterfinger Balls are versatile treats that can be enjoyed in various ways.

    Dessert Platter

    Arrange Butterfinger Balls on a decorative platter alongside other bite-sized desserts for a visually appealing dessert table.

    Movie Night Treat

    Serve these delicious treats during a movie night as a sweet snack that everyone will love. They are easy to pop in your mouth without interrupting the film.

    Festive Gift

    Package Butterfinger Balls in a decorative box or jar to give as a thoughtful homemade gift for birthdays or holidays.

    Pro Tips for the Best Butterfinger Balls

    To ensure your Butterfinger Balls are irresistible, consider these expert tips.

    • Use Softened Cream Cheese: Make sure your cream cheese is softened to room temperature for easier mixing and a smoother texture.

    • Chill Thoroughly: Don’t skip the chilling step; it helps the balls maintain their shape while being dipped in chocolate.

    • Choose Quality Chocolate: Opt for high-quality semi-sweet chocolate chips for a richer flavor and better melting consistency.

    • Experiment with Toppings: Get creative with toppings by using crushed nuts or colorful sprinkles to add visual appeal and texture.

    • Store Properly: Keep leftover Butterfinger Balls in an airtight container in the refrigerator for up to a week to maintain freshness.

    Best Side Dishes and Pairings

    To enhance your experience with Butterfinger Balls, consider these delightful pairings.

    1. Vanilla Ice Cream – The creamy texture of vanilla ice cream complements the crunchy and chocolaty flavors of the Butterfinger Balls.

    2. Coffee – A cup of freshly brewed coffee balances the sweetness of the Butterfinger Balls, making for a perfect afternoon treat.

    3. Milk – A classic pairing, cold milk enhances the rich taste of the Butterfinger Balls and provides a satisfying contrast.

    4. Fruit Platter – Fresh fruits like strawberries or bananas offer a refreshing contrast to the rich, sweet flavor of the Butterfinger Balls.

    5. Chocolate Milkshake – For a decadent treat, serve Butterfinger Balls with a chocolate milkshake that echoes their flavors.

    Common Mistakes to Avoid

    • Using Cold Cream Cheese: Make sure your cream cheese is softened to ensure a smooth mixture.
    • Skipping the Chilling Step: Chilling the balls is crucial for proper coating and to maintain their shape.
    • Not Coating Evenly: Ensure each ball is fully coated in chocolate to enhance the flavor and presentation.
    • Overheating the Chocolate: Melt chocolate in short intervals to prevent burning, which can affect the texture.

    Storage & Reheating Instructions

    Refrigerator Storage

    Store your Butterfinger Balls in an airtight container in the refrigerator. They will stay fresh for up to one week, making them a great make-ahead treat.

    Freezing Instructions

    For longer storage, you can freeze the Butterfinger Balls. Place them in a single layer on a baking sheet until solid, then transfer them to a freezer-safe container. They will maintain their quality for up to three months.

    Reheating Tips

    • Oven: Preheat to 350°F (175°C) and warm Butterfinger Balls on a baking sheet for about 5-10 minutes until slightly softened.
    • Microwave: Heat in 10-15 second intervals until just warm; be careful not to melt the chocolate coating.
    • Stovetop: Use a double boiler to gently warm the balls, stirring occasionally to prevent melting.

    Frequently Asked Questions

    How do I make Butterfinger Balls without cream cheese?

    You can use a vegan cream cheese alternative or a blend of nut butter and powdered sugar for a different flavor profile.

    Can I use milk chocolate instead of semi-sweet chocolate?

    Yes, you can substitute milk chocolate for a sweeter taste, but it may alter the overall flavor balance of the Butterfinger Balls.

    How long do Butterfinger Balls take to make?

    The total time to prepare Butterfinger Balls is about 45 minutes, including preparation and chilling time.

    Can I decorate my Butterfinger Balls?

    Absolutely! Feel free to use crushed Butterfinger or chocolate sprinkles to add a decorative touch before the chocolate sets.

    What is the best way to serve Butterfinger Balls?

    Serve them chilled on a platter for parties or gatherings, or store them in individual wrappers for a fun gift option.

    Final Thoughts

    Butterfinger Balls are an easy and delicious treat that everyone will love. Give this recipe a try, and don’t forget to leave a comment sharing your experience!


    Desserts

    Butterfinger Balls


    5.0 from 24 reviews

    Get ready to satisfy your sweet tooth with these irresistible Butterfinger Balls! The perfect blend of creamy, crunchy, and chocolaty goodness, they’re a delightful treat that’s super easy to make. Your friends and family will be begging for seconds!

    Author: Munch Twist
    Prep Time: 15 minutes
    Cook Time: 25 mins
    Total Time: 45 minutes
    Yield: 16 servings
    Category: Desserts
    Method: No bake
    Cuisine: American

    Butterfinger Balls

    SCALE:
    1x
    2x
    3x
    Cook Mode: Prevent your screen from going dark

    Ingredients

    • 8 oz. cream cheese, softened
    • 2 cups crushed Butterfinger candy bars (about 16 fun-sized bars)
    • 2 cups semi-sweet chocolate chips
    • 1 tbsp optional vegetable shortening

    Instructions

    1. In a large mixing bowl, combine the softened cream cheese with the crushed Butterfinger pieces. Blend the mixture until smooth and well combined.
    2. Scoop out the mixture and roll it into 1-inch balls. Place the formed balls on a baking sheet lined with parchment paper. Chill them in the refrigerator for 30 minutes to firm up.
    3. Melt the semi-sweet chocolate chips in a microwave-safe bowl. Heat in 30-second intervals, stirring in between until completely melted. Stir in the optional vegetable shortening for a smoother finish.
    4. Dip each ball into the melted chocolate, ensuring they are completely coated. Use a fork or your fingers to help remove excess chocolate.
    5. Place the chocolate-coated balls back on the parchment-lined baking sheet. Sprinkle some additional crushed Butterfinger or chocolate sprinkles on top before the chocolate sets. Allow the chocolate to harden completely before serving.

    Nutrition Facts

    Serving Size: 1 serving
    Calories: 150 kcal
    Sugar: 12g
    Sodium: 100mg
    Fat: 8g
    Saturated Fat: 4g
    Carbohydrates: 15g
    Fiber: 0g
    Protein: 2g
    Cholesterol: 25mg

  • Festive Grinch Oreo Balls for Holiday Celebrations

    Festive Grinch Oreo Balls for Holiday Celebrations

    Get ready to put a festive twist on your sweet treats! These Grinch Oreo Balls are a fun and delicious way to celebrate the holiday season. With a vibrant green coating and a touch of red, they will surely bring a grin to your face.

    Why You’ll Love This Recipe

    • Delicious Flavor: The combination of creamy cream cheese and rich Red Velvet Oreos creates a delightful taste experience.
    • Festive Presentation: The bright green coating and red candy hearts make these treats visually appealing for holiday gatherings.
    • Simple to Make: This recipe is beginner-friendly, requiring just a few steps to create impressive results.
    • Perfect for Gifting: These Grinch Oreo Balls make a charming gift for friends and family during the holiday season.
    • Customizable: Feel free to experiment with different types of Oreos or toppings to make them uniquely yours.

    Tools and Equipment

    Having the right tools makes preparation smoother and more enjoyable.

    Essential Tools

    • Food processor
    • Large mixing bowl
    • Electric hand mixer
    • Cookie scoop (1.5-inch)
    • Baking sheet
    • Parchment paper
    • Double boiler
    • Fork or toothpick
    • Microwave-safe piping bag

    Why These Tools Matter

    • Food processor: Quickly transforms cookies into fine crumbs, saving time and effort.
    • Double boiler: Allows for gentle melting of candy melts, preventing burning.
    • Electric hand mixer: Ensures a smooth cream cheese mixture, making it easier to combine with cookie crumbs.

    Ingredients for Grinch Oreo Balls

    Base Ingredients

    • 15 ounces light green candy melts
    • 8 ounces cream cheese, softened to room temperature
    • 24.4 ounces Red Velvet Oreos (2 packages, 44 cookies total)

    Topping Ingredients

    • Red candy hearts

    How to Make Grinch Oreo Balls Step-by-Step

    Step 1: Prep the Base

    1. Start by lining a large baking sheet with parchment paper. This will prevent the Oreo balls from sticking and make for easy clean-up.

    2. In a food processor, add the 24.4 ounces of Red Velvet Oreos and pulse until they transform into fine crumbs. If you don’t have a food processor, crush the cookies by placing them in a zip closure plastic bag and rolling over them with a rolling pin.

    3. In a large mixing bowl, combine the 8 ounces of softened cream cheese. Using an electric hand mixer on high speed, blend until the mixture is smooth and creamy.

    4. Pour in the Oreo crumbs and mix well. You should have a thick and doughy consistency.

    Step 2: Form the Balls

    1. Using a 1.5 cookie scoop, scoop out portions of the mixture and roll them into smooth balls with your hands. Place each ball onto the lined baking sheet.

    2. Refrigerate the cookie balls for at least 2 hours to help them firm up and hold their shape during the dipping process.

    Step 3: Melt the Candy Coating

    1. While they chill, set aside a small cup of the 15 ounces of light green candy melts for drizzling later if desired.

    2. In a double boiler, melt the remaining candy melts over low heat, stirring frequently to ensure a smooth consistency. Be careful to avoid overheating or letting any water come into contact with the candy.

    Step 4: Coat the Oreo Balls

    1. Once melted, use a fork or toothpick to dip each chilled ball into the green candy melts. Let excess candy drip off by tapping the fork on the edge of the pot before placing it back onto the baking sheet.

    2. If you want to add some extra flair, drizzle any leftover melted candy over the coated balls using a spoon or knife. Alternatively, you can place the reserved melts in a microwave-safe piping bag, twist it tight, and heat in the microwave on a low setting (defrost setting) for 30 seconds. Massage the bag until fully melted, repeating for another 30 seconds if needed. Just be cautious not to overheat.

    3. Snip a small tip off the piping bag and drizzle it over the coated balls. Immediately top each one with a red candy heart before the drizzle sets.

    Step 5: Chill and Serve

    1. Return the finished Grinch Oreo Balls to the refrigerator to let them set completely. Once firm, serve and enjoy these festive treats!

    Nutritional Information: Approx. 130 calories per ball, with a balance of carbs, fats, and proteins depending on exact ingredient brands.

    Time: Preparation time: 30 minutes | Chilling time: 2 hours

    How to Serve Grinch Oreo Balls

    These festive treats can be enjoyed in several delightful ways.

    Festive Dessert Platter

    Arrange the Grinch Oreo Balls on a decorative platter alongside other holiday sweets. This colorful display will brighten up your dessert table and impress your guests.

    Holiday Gift Treats

    Package the Grinch Oreo Balls in clear cellophane bags tied with a red ribbon. They make perfect homemade gifts for friends, family, or coworkers during the holiday season.

    Themed Party Favors

    If you’re hosting a holiday gathering, serve each guest a Grinch Oreo Ball on a themed plate. This fun touch adds a whimsical element to your party and ensures everyone leaves with a smile.

    Pro Tips for the Best Grinch Oreo Balls

    For the most delicious and visually appealing Grinch Oreo Balls, follow these expert tips.

    • Use High-Quality Candy Melts: Opt for good-quality candy melts for smoother coating and better flavor.

    • Ensure Proper Chilling: Always refrigerate the Oreo balls for the full two hours to ensure they hold their shape when dipped.

    • Experiment with Coatings: Feel free to try different colors of candy melts for various occasions, or use white chocolate for a different flavor profile.

    • Keep Your Tools Dry: Ensure that all utensils and bowls are completely dry before melting candy to prevent clumping.

    • Mix Well: When combining the cream cheese and Oreo crumbs, make sure to mix thoroughly for an even texture throughout.

    Best Side Dishes and Pairings

    Complement your Grinch Oreo Balls with these delightful options.

    1. Hot Cocoa: A warm cup of hot cocoa pairs perfectly with the sweetness of the Oreo balls, creating a cozy dessert experience.

    2. Peppermint Bark: This classic holiday treat offers a refreshing minty contrast to the rich flavors of the Grinch Oreo Balls.

    3. Christmas Sugar Cookies: The buttery sweetness of sugar cookies enhances the festive spirit, making it a great addition to your dessert spread.

    4. Fruit Platter: A colorful assortment of fresh fruits provides a refreshing balance to the richness of the Oreo balls.

    5. Spiced Apple Cider: This warm beverage adds a seasonal touch and pairs wonderfully with the creamy texture of the treats.

    Common Mistakes to Avoid

    • Overheating Candy Melts: Be cautious while melting the candy melts, as overheating can cause them to seize up and become unusable.
    • Skipping Chilling Time: Allowing the Oreo balls to chill for at least two hours is crucial for maintaining their shape during dipping.
    • Not Using Parchment Paper: Failing to line your baking sheet with parchment paper can result in the balls sticking, making them difficult to remove.
    • Ignoring Consistency: If the mixture is too dry, add more cream cheese. If too wet, incorporate more Oreo crumbs for a better rolling consistency.

    Storage & Reheating Instructions

    Refrigerator Storage

    Store the Grinch Oreo Balls in an airtight container in the refrigerator. They will remain fresh for up to one week.

    Freezing Instructions

    To freeze, place the Oreo balls on a baking sheet and freeze until solid. Then transfer them to a freezer-safe container or bag. They can be frozen for up to three months. To thaw, simply place them in the refrigerator overnight.

    Reheating Tips

    • Oven: Preheat to 350°F (175°C), place the balls on a baking sheet, and warm for 5-10 minutes.
    • Microwave: Heat on low power in 15-second intervals until warmed through.
    • Stovetop: Use a non-stick skillet on low heat, turning the balls gently until warmed.

    Frequently Asked Questions

    How do I make Grinch Oreo Balls without a food processor?

    You can crush the cookies by placing them in a zip closure plastic bag and rolling over them with a rolling pin until they are fine crumbs.

    Can I use different flavors of Oreos for Grinch Oreo Balls?

    Yes, you can experiment with different Oreo flavors, but keep in mind that it may alter the overall taste and color.

    How should I store Grinch Oreo Balls?

    Store them in an airtight container in the refrigerator for up to one week, or freeze them for longer storage.

    Can I decorate Grinch Oreo Balls differently?

    Absolutely! Feel free to use different toppings or drizzles to customize your Grinch Oreo Balls for various occasions.

    What is the best way to serve Grinch Oreo Balls?

    Serve them chilled as a festive treat at holiday gatherings, or package them as gifts for friends and family.

    Final Thoughts

    These Grinch Oreo Balls are a delightful addition to your holiday dessert lineup. Their festive appearance and rich flavor are sure to impress your guests. We encourage you to try this recipe and share your thoughts in the comments below!


    Desserts

    Grinch Oreo Balls


    5.0 from 24 reviews

    Get ready to put a festive twist on your sweet treats! These Grinch Oreo Balls are a fun and delicious way to celebrate the holiday season. With a vibrant green coating and a touch of red, they’ll surely bring a grin to your face.

    Author: Munch Twist
    Prep Time: 30 minutes
    Cook Time: 25 mins
    Total Time: 150 minutes
    Yield: 24 servings
    Category: Desserts
    Method: No bake
    Cuisine: American

    Grinch Oreo Balls

    SCALE:
    1x
    2x
    3x
    Cook Mode: Prevent your screen from going dark

    Ingredients

    • 15 ounces light green candy melts
    • 8 ounces cream cheese, softened to room temperature
    • 24.4 ounces Red Velvet Oreos (2 packages, 44 cookies total)
    • Red candy hearts

    Instructions

    1. Line a large baking sheet with parchment paper.
    2. In a food processor, pulse the Red Velvet Oreos until they become fine crumbs.
    3. In a large mixing bowl, combine the softened cream cheese and blend until smooth.
    4. Add the Oreo crumbs and mix until you achieve a thick and doughy consistency.
    5. Scoop out portions of the mixture and roll them into smooth balls, placing them on the lined baking sheet.
    6. Refrigerate the cookie balls for at least 2 hours.
    7. Melt the light green candy melts in a double boiler over low heat.
    8. Dip each chilled ball into the melted green candy melts and let excess drip off.
    9. Drizzle any leftover melted candy over the coated balls and top with a red candy heart.
    10. Return the finished Grinch Oreo Balls to the refrigerator to set completely.

    Nutrition Facts

    Serving Size: 1 serving
    Calories: 130 kcal
    Sugar: 10g
    Sodium: 70mg
    Fat: 7g
    Saturated Fat: 4g
    Carbohydrates: 16g
    Fiber: 0g
    Protein: 1g
    Cholesterol: 20mg

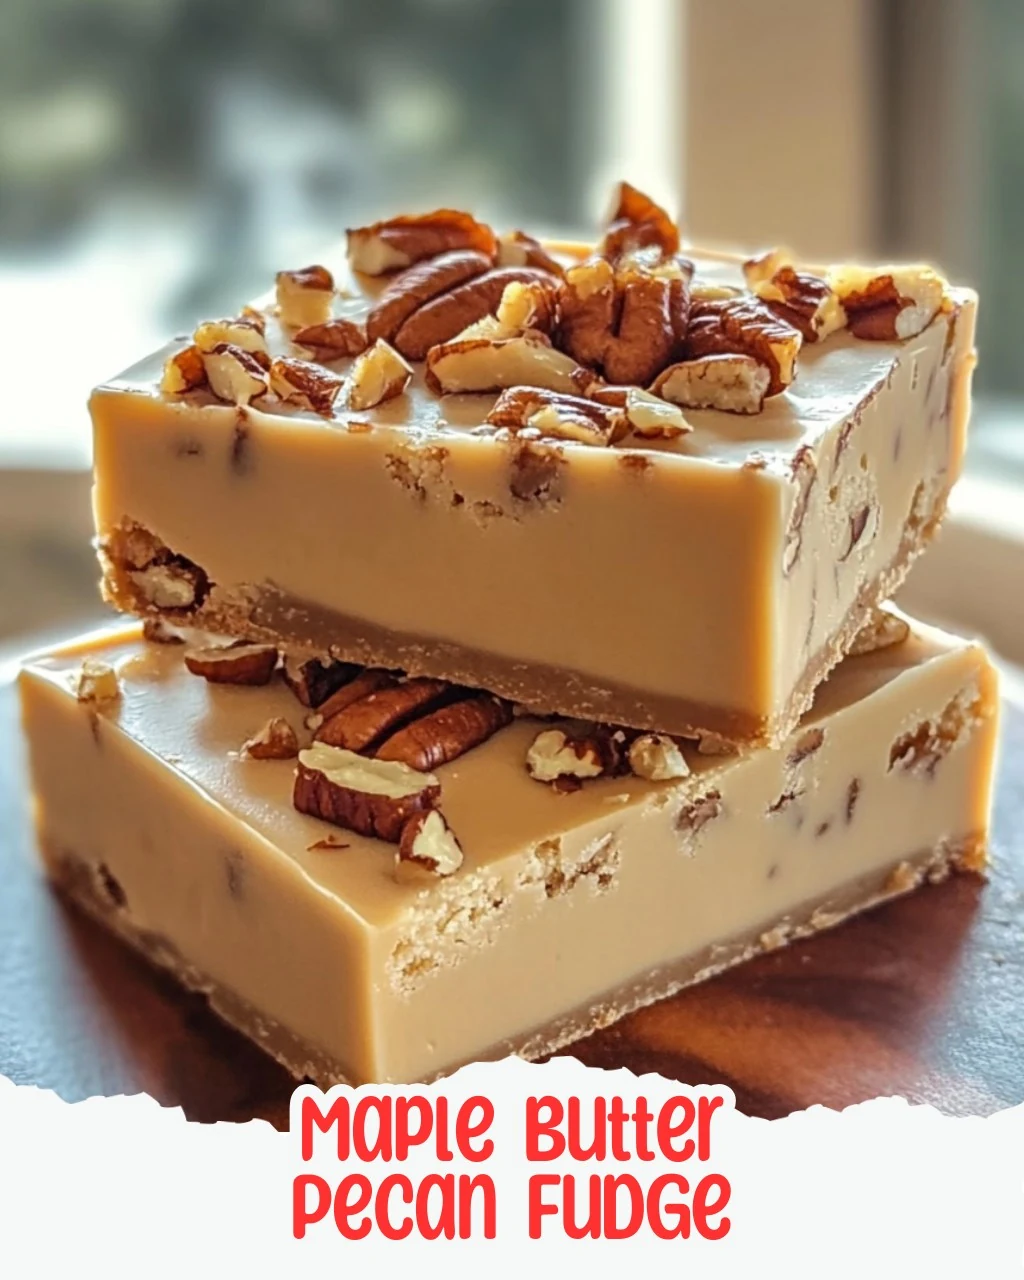
  • Irresistible Maple Butter Pecan Fudge Recipe

    Irresistible Maple Butter Pecan Fudge Recipe

    Treat yourself to a luscious blend of sweet maple and crunchy pecans in this decadent Maple Butter Pecan Fudge. This delightful treat is perfect for sharing, gifting, or simply indulging yourself. With its rich flavors, it brings a taste of autumn straight to your palate.

    Why You’ll Love This Recipe

    • Irresistible Flavor: The combination of maple and pecans creates a unique and satisfying taste experience.
    • Perfect for Gifting: Packaged nicely, this fudge makes a thoughtful gift for friends and family.
    • Easy to Make: With straightforward steps, even novice cooks can master this recipe.
    • Versatile Treat: Enjoy it as a dessert, snack, or during festive occasions.
    • Customizable: Feel free to add other nuts or spices for a personal touch.

    Tools and Equipment

    Gathering the right tools will simplify your fudge-making process.

    Essential Tools

    • Medium saucepan
    • Candy thermometer
    • Spatula
    • Parchment paper
    • Mixing bowl

    Why These Tools Matter

    • Candy Thermometer: This ensures that you cook the fudge to the perfect temperature for optimal texture.
    • Spatula: A sturdy spatula helps you mix ingredients thoroughly and scrape every bit from the saucepan.
    • Parchment Paper: This makes for easy clean-up and helps shape the fudge without sticking.

    Ingredients for Maple Butter Pecan Fudge

    Base Ingredients

    • 1 cup heavy whipping cream
    • 1 cup granulated sugar
    • 1 cup butter
    • 1 teaspoon maple extract
    • 1 cup brown sugar
    • 1 teaspoon salt
    • 1 teaspoon cinnamon

    Additions

    • 1 cup toasted pecans, chopped
    • 2 cups powdered sugar

    How to Make Maple Butter Pecan Fudge Step-by-Step

    Step 1: Prepare the Base

    1. In a medium saucepan, melt the butter over medium heat until fully liquid.
    2. Pour in the heavy whipping cream and add the brown sugar, granulated sugar, salt, and cinnamon. Stir gently to combine.

    Step 2: Cook the Mixture

    1. Bring the mixture to a boil, stirring occasionally.
    2. Use a candy thermometer to monitor the temperature. Boil until it reaches 235°F.

    Step 3: Cool the Mixture

    1. Carefully remove the saucepan from heat when the desired temperature is reached.
    2. Add the maple extract but avoid stirring. Let the mixture cool until it reaches 105°F, about 30 minutes.

    Step 4: Mix and Thicken

    1. Once cooled, use a spatula to stir the mixture vigorously. This step thickens the fudge.
    2. Gradually add the powdered sugar and chopped pecans, stirring until everything is smooth and well combined.

    Step 5: Shape the Fudge

    1. Spoon the mixture onto a sheet of parchment paper.
    2. Shape it into a log and wrap it carefully in the paper.

    Step 6: Chill and Serve

    1. Refrigerate the fudge for 12 hours to set completely.
    2. After chilling, slice the fudge into your desired thickness. Enjoy this delightful Maple Butter Pecan Fudge with friends and family!

    This Maple Butter Pecan Fudge recipe is not only delicious but also a wonderful way to embrace the flavors of the season. Indulge in this treat and share the joy with others!

    How to Serve Maple Butter Pecan Fudge

    Serving Maple Butter Pecan Fudge can elevate any occasion with its rich flavors and delightful textures.

    Gift-Worthy Treats

    Wrap individual pieces of fudge in decorative boxes or cellophane bags for a charming homemade gift. Perfect for holidays or special occasions, this fudge makes a thoughtful present.

    Decadent Dessert Platter

    Arrange sliced fudge on a platter alongside fresh fruit, chocolate-covered strawberries, or whipped cream. This combination creates a visually appealing and indulgent dessert spread.

    Coffee Companion

    Serve Maple Butter Pecan Fudge with a hot cup of coffee or espresso. The rich flavors of the fudge complement the boldness of coffee, enhancing the overall tasting experience.

    Pro Tips for the Best Maple Butter Pecan Fudge

    For the perfect Maple Butter Pecan Fudge, consider these expert tips.

    • Use Fresh Ingredients: Always opt for fresh heavy cream and butter to enhance the flavor and texture of the fudge.
    • Monitor Temperature Carefully: Use a reliable candy thermometer to ensure accuracy when reaching the boiling point, as this is crucial for achieving the right consistency.
    • Cool Before Stirring: Allow the fudge mixture to cool to 105°F before stirring to achieve the ideal texture and prevent graininess.
    • Toast Pecans for Extra Flavor: Toasting the pecans before adding them to the fudge enhances their flavor, adding a delightful crunch.
    • Store Properly: Keep the fudge in an airtight container in the refrigerator to maintain its freshness and texture for longer.

    Best Side Dishes and Pairings

    Pairing Maple Butter Pecan Fudge with complementary dishes can enhance its indulgent flavors.

    1. Vanilla Ice Cream: The creamy texture of vanilla ice cream balances the richness of the fudge, creating a heavenly dessert combination.
    2. Chai Latte: The spiced flavors of a chai latte pair beautifully with the maple and pecan notes, making for a cozy treat.
    3. Apple Slices: Fresh apple slices provide a crisp contrast to the sweetness of the fudge, offering a refreshing bite.
    4. Dark Chocolate: The bitterness of dark chocolate enhances the sweetness of the fudge, creating a delightful contrast.
    5. Hot Cocoa: A warm cup of hot cocoa complements the fudge’s texture and sweetness, perfect for a chilly day.

    Common Mistakes to Avoid

    • Not Measuring Ingredients Accurately: Precision is key in fudge-making. Use a kitchen scale for best results.
    • Skipping the Candy Thermometer: Avoid the guesswork; a thermometer ensures you reach the perfect temperature for a smooth texture.
    • Not Allowing the Mixture to Cool Properly: Cooling down to 105°F is essential for achieving the right consistency. Patience pays off.
    • Overmixing After Adding Powdered Sugar: Stir just until combined to prevent the fudge from becoming too dense or grainy.

    Storage & Reheating Instructions

    Refrigerator Storage

    Store the Maple Butter Pecan Fudge in an airtight container in the refrigerator. It will stay fresh for up to two weeks, allowing you to enjoy its rich flavors.

    Freezing Instructions

    For longer storage, you can freeze the fudge. Wrap it tightly in plastic wrap and place it in an airtight container. It can be frozen for up to three months. To thaw, simply place it in the refrigerator overnight.

    Reheating Tips

    • Oven: Preheat to 200°F and place the fudge in a baking dish, covering it with foil to prevent drying out. Heat for about 10-15 minutes.
    • Microwave: Heat in short intervals of 10-15 seconds, checking frequently to avoid melting too much. Stir between intervals for even heating.
    • Stovetop: Place the fudge in a saucepan over low heat, stirring constantly until softened.

    Frequently Asked Questions

    How can I make Maple Butter Pecan Fudge without maple extract?

    You can substitute vanilla extract for maple extract if desired. However, the flavor will differ slightly from traditional Maple Butter Pecan Fudge.

    Can I use different nuts in this fudge?

    Absolutely! While pecans add a delightful crunch, you can use walnuts, almonds, or even a mix of your favorite nuts for a unique twist.

    How long does Maple Butter Pecan Fudge last?

    When stored properly in an airtight container, it will remain fresh in the refrigerator for up to two weeks.

    Can I use light brown sugar instead of dark brown sugar?

    Yes, using light brown sugar will result in a slightly less rich flavor, but the fudge will still be delicious.

    What is the best way to cut Maple Butter Pecan Fudge?

    Using a sharp knife coated with a little cooking spray will help you cut clean, even pieces without sticking.

    Final Thoughts

    This Maple Butter Pecan Fudge recipe is a delightful treat that embodies the flavors of fall. We encourage you to make this indulgent confection and share it with friends and family. If you try the recipe, please leave a comment below to let us know how it turned out!


    Desserts

    Maple Butter Pecan Fudge


    5.0 from 24 reviews

    Treat yourself to a luscious blend of sweet maple and crunchy pecans in this decadent fudge! Perfect for sharing, gifting, or just indulging yourself, it brings a taste of autumn straight to your palate.

    Author: Munch Twist
    Prep Time: 15 minutes
    Cook Time: 30 minutes
    Total Time: 12 hours 45 minutes
    Yield: 24 servings
    Category: Desserts
    Method: No bake
    Cuisine: American

    Maple Butter Pecan Fudge

    SCALE:
    1x
    2x
    3x
    Cook Mode: Prevent your screen from going dark

    Ingredients

    • 1 cup heavy whipping cream
    • 1 cup granulated sugar
    • 1 cup butter
    • 1 teaspoon maple extract
    • 1 cup brown sugar
    • 1 teaspoon salt
    • 1 cup toasted pecans, chopped
    • 2 cups powdered sugar
    • 1 teaspoon cinnamon

    Instructions

    1. In a medium saucepan, melt the butter over medium heat until fully liquid.
    2. Pour in the heavy whipping cream and add the brown sugar, granulated sugar, salt, and cinnamon. Stir the mixture gently to combine all the ingredients.
    3. Bring the mixture to a boil while continuing to stir occasionally. Use a candy thermometer to monitor the temperature, and let it boil until it reaches 235°F.
    4. Once it reaches the desired temperature, carefully remove the saucepan from the heat. Add the maple extract, but avoid stirring at this point. Allow the mixture to cool down untouched until it reaches 105°F, which should take about 30 minutes.
    5. When cooled, take a spatula and stir the mixture vigorously. This will help it thicken beautifully.
    6. Gradually add the powdered sugar and chopped pecans into the mixture, stirring until everything is well combined and smooth.
    7. Spoon the mixture onto a sheet of parchment paper. Shape it into a log, carefully wrapping it in the paper.
    8. Refrigerate the fudge for 12 hours to set fully.
    9. After chilling, slice the fudge into your desired thickness.

    Nutrition Facts

    Serving Size: 1 serving
    Calories: 120 kcal
    Sugar: 8g
    Sodium: 50mg
    Fat: 7g
    Saturated Fat: 4g
    Carbohydrates: 15g
    Fiber: 0g
    Protein: 1g
    Cholesterol: 30mg

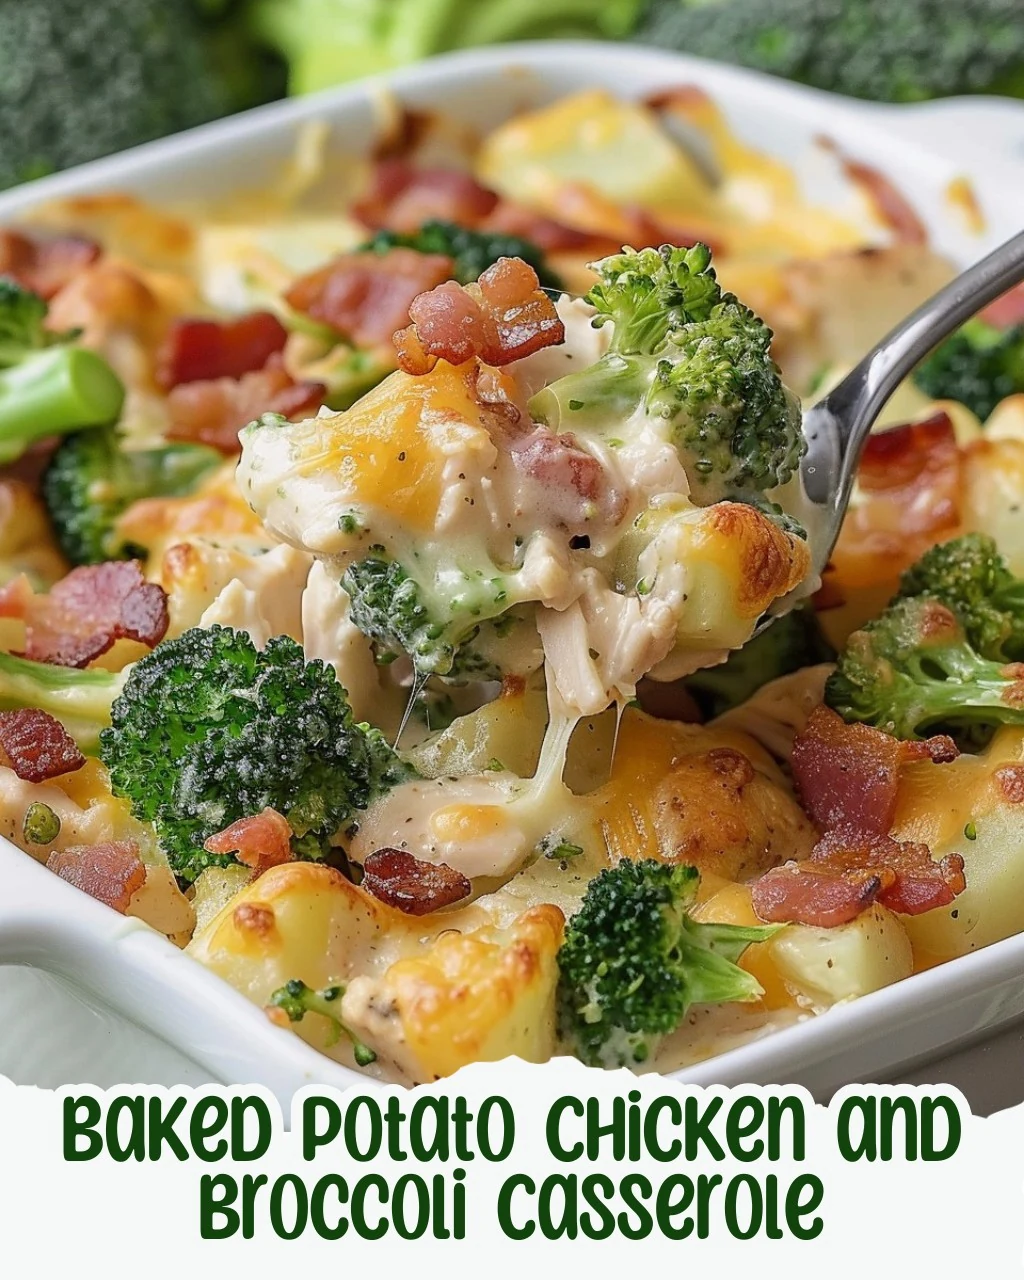
  • Easy Baked Potato Chicken and Broccoli Casserole Recipe

    Easy Baked Potato Chicken and Broccoli Casserole Recipe

    Baked Potato Chicken and Broccoli Casserole is a comforting dish that combines creamy mashed potatoes, tender chicken, and crisp broccoli. This casserole is not only delicious but also offers a satisfying blend of flavors that will please the whole family.

    Why You’ll Love This Recipe

    • Comfort Food Classic: This casserole brings together familiar tastes that everyone loves.
    • Nutritious Ingredients: Packed with protein from chicken and vitamins from broccoli.
    • Versatile Meal: Perfect for weeknight dinners or special occasions.
    • Make Ahead Friendly: Prepare it in advance and bake when ready to serve.
    • Cheesy Goodness: Each bite is topped with melted cheese for extra flavor.

    Tools and Equipment

    Having the right tools can simplify your cooking experience.

    Essential Tools

    • Large pot
    • Potato masher
    • Baking dish (10-inch square)
    • Mixing bowl
    • Cooking spoon

    Why These Tools Matter

    • Large pot: Essential for boiling the potatoes evenly and quickly.
    • Potato masher: Helps achieve the perfect creamy texture for the potatoes.
    • Baking dish: Ensures even cooking and easy serving of the casserole.

    Ingredients for Baked Potato Chicken and Broccoli Casserole

    Potatoes and Dairy

    • 4 tablespoons butter (room temperature)
    • 3 pounds red potatoes (cut into 1-inch pieces)
    • ½ teaspoon paprika
    • 1 cup sour cream
    • 2 cups shredded cheese (divided)

    Vegetables and Meats

    • 1 medium-sized broccoli crown (about 2-3 cups bite-size broccoli florets)
    • 3 cups cooked chicken (chopped)
    • 4 slices bacon (cooked and crumbled)

    Seasoning

    • ½ teaspoon granulated garlic or garlic powder
    • ½ – 1 teaspoon kosher salt
    • ½ teaspoon freshly ground black pepper

    How to Make Baked Potato Chicken and Broccoli Casserole Step-by-Step

    Step 1: Preheat and Prep

    Preheat the oven to 350°F (175°C). Grease a 10-inch square baking dish with butter or cooking spray.

    Step 2: Cook the Potatoes

    Place the potatoes in a large pot and cover with water. Bring to a boil and cook until fork-tender, about 10-15 minutes. Drain the potatoes and transfer them back to the hot pot.

    Step 3: Prepare the Broccoli

    While the potatoes are boiling, steam or roast the broccoli until hot and barely softened. It should still be a little crisp. Drain any liquid from the broccoli.

    Step 4: Cook the Bacon

    Cook the bacon until crispy, then chop or crumble it and set aside.

    Step 5: Mash the Potatoes

    Place the pot with the potatoes back over the warm (but turned off) burner. If you have a gas stove, turn the heat to the lowest possible setting. Smash the potatoes with a potato masher. Add the butter, sour cream, salt, pepper, garlic, and paprika. Stir to combine.

    Step 6: Combine Ingredients

    Add the cooked broccoli, chicken, bacon, and 1 cup of cheese to the pot. Stir to mix thoroughly and then transfer to the prepared baking dish. Sprinkle with the remaining cheese.

    Step 7: Bake

    Bake for 20-25 minutes until the cheese has melted and the casserole is heated through. Enjoy!

    This Baked Potato Chicken and Broccoli Casserole is a delightful dish that combines simplicity with heartiness, making it an ideal meal for any occasion.

    How to Serve Baked Potato Chicken and Broccoli Casserole

    This casserole is versatile and can be served in various creative ways. Here are a few ideas to elevate your meal experience.

    Individual Portions

    Serve the casserole in individual ramekins for an elegant touch. This allows guests to enjoy their own serving while making for an appealing presentation.

    Topped with Fresh Herbs

    Garnish the baked casserole with freshly chopped herbs such as parsley or chives. This adds a pop of color and freshness to the dish, enhancing its flavor profile.

    Accompanied by a Salad

    Pair the casserole with a light mixed greens salad dressed with a vinaigrette. The crispness of the salad balances the creamy richness of the casserole, creating a harmonious meal.

    Pro Tips for the Best Baked Potato Chicken and Broccoli Casserole

    To ensure your casserole turns out perfectly every time, consider these expert tips.

    • Use Fresh Ingredients: Fresh broccoli and quality chicken will enhance the overall flavor and texture of your casserole.

    • Avoid Overcooking the Broccoli: Steaming or roasting the broccoli until just tender keeps it bright and adds a pleasant crunch to the dish.

    • Customize the Cheese: Experiment with different cheese blends, such as sharp cheddar or pepper jack, to add a unique flavor twist to your casserole.

    • Let It Rest: Allow the casserole to sit for a few minutes after baking. This helps it set and makes serving easier.

    • Make It Ahead: Prepare the casserole a day in advance and refrigerate it until you’re ready to bake. This can enhance the flavors and save time on busy nights.

    Best Side Dishes and Pairings

    Enhance your meal with these complementary side dishes and drinks that pair wonderfully with Baked Potato Chicken and Broccoli Casserole.

    1. Garlic Bread – The buttery, garlicky flavors of garlic bread complement the rich casserole perfectly, making it a hearty addition.

    2. Caesar Salad – A classic Caesar salad provides a crisp and tangy contrast to the creamy casserole, balancing the meal beautifully.

    3. Steamed Green Beans – Bright and vibrant, steamed green beans add a fresh element to your plate, making for a colorful presentation.

    4. Apple Sauce – The sweetness of apple sauce offers a delightful contrast to the savory casserole, adding a touch of nostalgia to your meal.

    5. Chardonnay – A chilled glass of Chardonnay pairs well, as its acidity cuts through the richness and enhances the overall dining experience.

    Common Mistakes to Avoid

    • Skipping the Potato Boiling Step: Ensure the potatoes are cooked until fork-tender for the best texture.
    • Overcooking the Broccoli: Broccoli should be steamed or roasted until just tender to retain crunchiness in the casserole.
    • Using Cold Ingredients: Room temperature ingredients mix better, so let your butter and sour cream sit out before use.
    • Not Greasing the Baking Dish: Always grease the dish to prevent sticking and ensure an easy serving.

    Storage & Reheating Instructions

    Refrigerator Storage

    Store any leftovers in airtight containers in the refrigerator. The casserole will stay fresh for up to 3 days.

    Freezing Instructions

    To freeze, let the casserole cool completely, then wrap it tightly in plastic wrap followed by aluminum foil. It can be frozen for up to 3 months. Thaw in the refrigerator overnight before reheating.

    Reheating Tips

    • Oven: Preheat to 350°F (175°C) and bake covered for about 20-25 minutes until heated through.
    • Microwave: Place in a microwave-safe dish, cover, and heat in 1-minute intervals until hot.
    • Stovetop: Heat in a skillet over low heat, stirring occasionally, until warmed through.

    Frequently Asked Questions

    How can I customize my Baked Potato Chicken and Broccoli Casserole?

    You can add different vegetables such as bell peppers or carrots, or swap the chicken for turkey or a plant-based protein for variety.

    Can I make Baked Potato Chicken and Broccoli Casserole ahead of time?

    Yes, you can prepare the casserole a day in advance. Just assemble it, cover it, and refrigerate until you are ready to bake.

    What type of cheese works best for this recipe?

    Cheddar cheese is traditional, but you can mix it with Monterey Jack or mozzarella for a different flavor profile.

    How do I know when the casserole is done?

    The casserole is ready when the cheese is melted and bubbly, and the edges are slightly golden.

    Can I use leftover chicken in this casserole?

    Absolutely! It’s a great way to utilize leftover chicken, making this casserole a time-saver.

    Final Thoughts

    This Baked Potato Chicken and Broccoli Casserole is a comforting and satisfying dish perfect for any meal. We encourage you to try making this recipe and share your thoughts in the comments below. Your feedback means a lot!


    Dinner

    Baked Potato Chicken and Broccoli Casserole

    SCALE:
    1x
    2x
    3x
    Cook Mode: Prevent your screen from going dark

    Ingredients

    • 4 tablespoons butter (room temperature)
    • 3 pounds red potatoes (cut into 1-inch pieces)
    • ½ teaspoon paprika
    • 2 cups shredded cheese (divided)
    • 1 cup sour cream
    • 1 medium-sized broccoli crown (about 2-3 cups bite-size broccoli florets)
    • ½ teaspoon granulated garlic or garlic powder
    • 4 slices bacon (cooked and crumbled)
    • ½ – 1 teaspoon kosher salt
    • 3 cups cooked chicken (chopped)
    • ½ teaspoon freshly ground black pepper

    Instructions

    1. Preheat the oven to 350°F (175°C). Grease a 10-inch square baking dish with butter or cooking spray.
    2. Place the potatoes in a large pot and cover with water. Bring to a boil and cook until fork-tender, about 10-15 minutes. Drain the potatoes and transfer them back to the hot pot.
    3. While the potatoes are boiling, steam or roast the broccoli until hot and barely softened. It should still be a little crisp. Drain any liquid from the broccoli.
    4. Cook the bacon, chop or crumble, and set aside.
    5. Place the pot with the potatoes back over the warm (but turned off) burner. Smash the potatoes with a potato masher. Add the butter, sour cream, salt, pepper, garlic, and paprika. Stir to combine.
    6. Add the cooked broccoli, chicken, bacon, and 1 cup of cheese to the pot. Stir to mix thoroughly and then transfer to the prepared baking dish. Sprinkle with the remaining cheese.
    7. Bake for 20-25 minutes, until the cheese has melted and the casserole is heated through.

    Nutrition Facts

    Serving Size: 1 serving
    Calories: 320 kcal
    Sugar: 2g
    Sodium: 600mg
    Fat: 15g
    Saturated Fat: 9g
    Carbohydrates: 28g
    Fiber: 3g
    Protein: 22g
    Cholesterol: 70mg

Print

Easy Baked Potato Chicken and Broccoli Casserole

5 Stars 4 Stars 3 Stars 2 Stars 1 Star

No reviews

A comforting, cheesy baked potato chicken and broccoli casserole.

  • Author: Munch Twist
  • Prep Time: 15 mins
  • Cook Time: 25 mins
  • Total Time: 40 mins
  • Yield: 6 servings 1x
  • Category: Dinner
  • Method: Baking
  • Cuisine: American

Ingredients

Scale
  • 2 cups cooked chicken, shredded
  • 2 cups broccoli florets
  • 3 russet potatoes, baked and cubed
  • 1 cup cheddar cheese
  • 1/2 cup sour cream

Instructions

  1. Preheat oven to 375F.
  2. In a large bowl, mix chicken, broccoli, potatoes, and sour cream.
  3. Transfer to baking dish and top with cheese.
  4. Bake for 25 minutes until bubbly.

Nutrition

  • Calories: 420
  • Sugar: 3g
  • Sodium: 480mg
  • Fat: 18g
  • Saturated Fat: 8g
  • Carbohydrates: 32g
  • Fiber: 3g
  • Protein: 28g
  • Cholesterol: 75mg

Did you make this recipe?

Share a photo and tag us — we can’t wait to see what you’ve made!

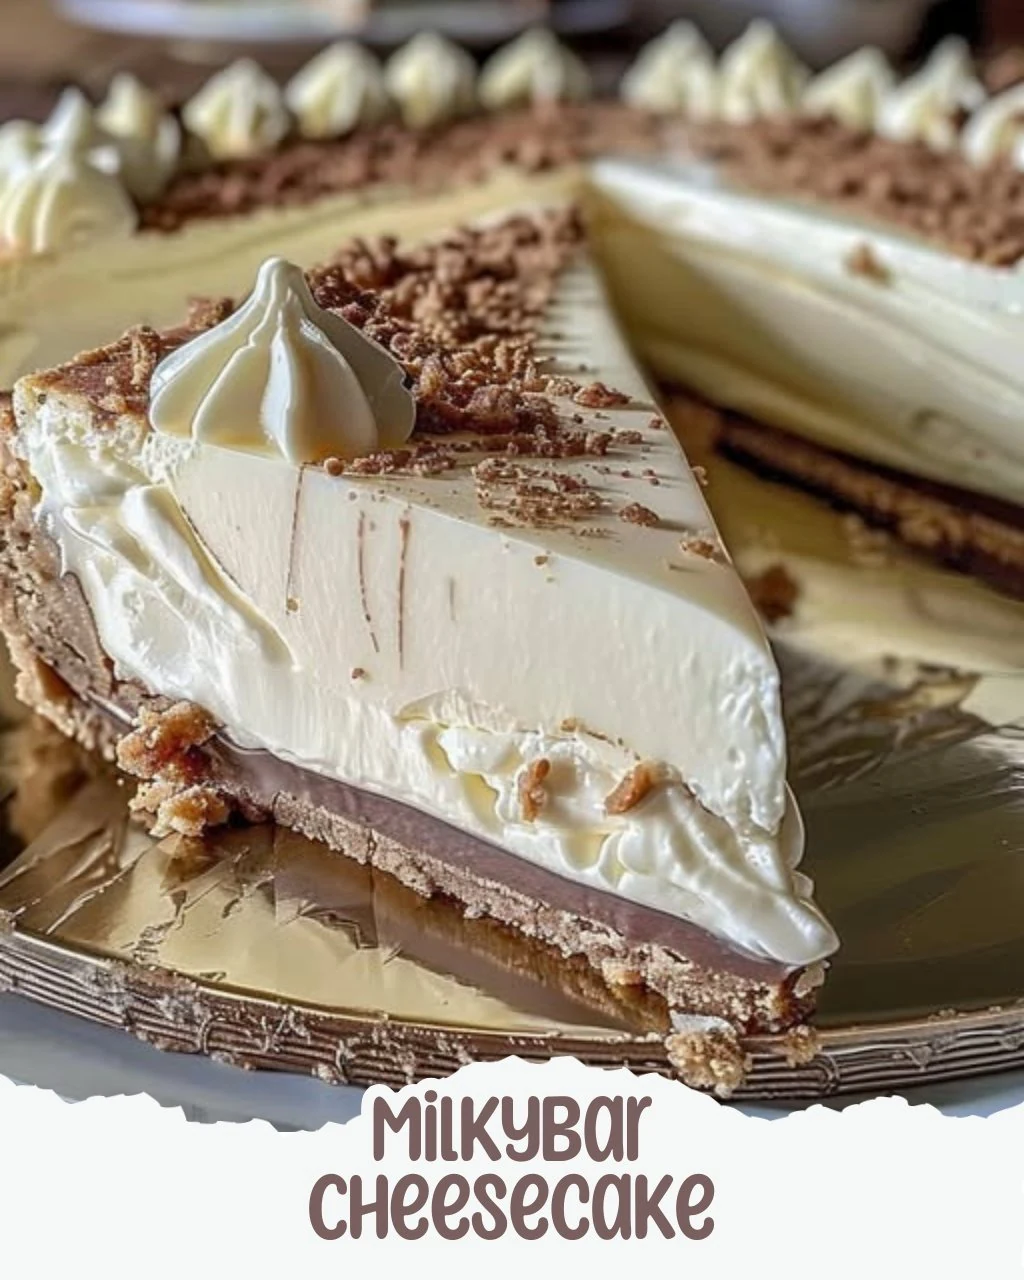
  • Indulge in Delightful Milkybar Cheesecake Today

    Indulge in Delightful Milkybar Cheesecake Today

    Milkybar Cheesecake is a delightful dessert that combines the rich creaminess of cheesecake with the sweet, smooth flavor of Milkybar chocolate. This no-bake treat is perfect for those who crave a chocolatey indulgence without the fuss of traditional baking. With its luscious layers and simple preparation, this cheesecake is sure to impress at any gathering.

    Why You’ll Love This Recipe

    • Decadent Flavor: The combination of creamy cheesecake and Milkybar chocolate creates an irresistible taste experience.
    • No-Bake Convenience: This recipe requires no oven time, making it perfect for warm days or busy schedules.
    • Impressive Presentation: The beautiful layers and chocolate topping make this cheesecake a showstopper for any occasion.
    • Versatile Dessert: Ideal for birthdays, parties, or just a sweet treat at home, this cheesecake fits any celebration.
    • Easily Customizable: You can adapt this recipe with different toppings or fillings to suit your taste preferences.

    Tools and Equipment

    Having the right tools can streamline your cheesecake-making process.

    Essential Tools

    • 23 cm cake tin
    • Mixing bowls
    • Electric mixer
    • Spatula
    • Microwave or double boiler
    • Measuring cups and spoons

    Why These Tools Matter

    • Electric mixer: Saves time and effort when beating cream cheese and whipping cream to the right consistency.
    • Spatula: Essential for folding ingredients gently without deflating the whipped cream.
    • 23 cm cake tin: Provides the perfect size for assembling and setting the cheesecake evenly.

    Ingredients for Milkybar Cheesecake

    For the Base

    • 350g shortbread
    • 175g melted butter

    For the Cheesecake Filling

    • 500g cream cheese
    • 120g icing sugar
    • 250g Milkybar chocolate (for filling)
    • 350ml whipped cream (for filling)

    For the Topping

    • 250g Milkybar chocolate (for topping)
    • 200ml whipped cream (for topping)

    How to Make Milkybar Cheesecake Step-by-Step

    Step 1: Prepare the Base

    1. Crush 350g of shortbread into fine crumbs.
    2. Mix the crumbs with 175g of melted butter until well combined.
    3. Press the mixture firmly into the base of a 23 cm cake tin.
    4. Refrigerate the base to set while preparing the filling.

    Step 2: Make the Cheesecake Filling

    1. Melt 250g of Milkybar chocolate using a microwave or double boiler. Allow it to cool slightly.
    2. In a mixing bowl, beat 500g of cream cheese with 120g of icing sugar until smooth.
    3. Fold the cooled Milkybar chocolate into the cream cheese mixture.
    4. Whip 350ml of cream until soft peaks form. Gently fold this whipped cream into the cream cheese-chocolate mixture.

    Step 3: Assemble and Chill

    1. Spoon the cheesecake filling over the chilled shortbread base.
    2. Smooth the top with a spatula to create an even surface.
    3. Refrigerate for about 5 hours or until the cheesecake is fully set.

    Step 4: Prepare the Topping

    1. Melt 250g of Milkybar chocolate with 200ml of whipped cream in the microwave for 90 seconds, stirring until smooth.
    2. Pour this chocolate mixture over the set cheesecake.
    3. Smooth the surface with a palette knife.

    Step 5: Decorate

    1. Sprinkle shortbread crumbs around the edge of the cheesecake for added texture.
    2. Press a square of Milkybar chocolate in the center for decoration.

    Preparation time: 30 minutes | Chilling time: 5 hours

    Enjoy this creamy, chocolatey Milkybar Cheesecake as a delicious dessert for any occasion!

    How to Serve Milkybar Cheesecake

    Milkybar Cheesecake is a versatile dessert that can be enjoyed in various ways. Here are some creative serving ideas to elevate your cheesecake experience.

    Garnished with Fresh Berries

    Top your cheesecake with a mix of fresh berries such as strawberries, raspberries, and blueberries. The tartness of the berries complements the sweetness of the Milkybar chocolate, creating a balanced flavor profile.

    Drizzled with Caramel Sauce

    Adding a drizzle of warm caramel sauce over the cheesecake enhances its richness and provides an additional layer of sweetness. This combination is sure to impress your guests.

    Served with Whipped Cream

    For an extra touch of indulgence, serve slices of Milkybar Cheesecake with a dollop of freshly whipped cream. This classic pairing adds a lightness that contrasts beautifully with the creamy filling.

    Pro Tips for the Best Milkybar Cheesecake

    To ensure your Milkybar Cheesecake turns out perfectly every time, keep these tips in mind.

    • Use Room Temperature Ingredients: Always ensure your cream cheese and eggs are at room temperature for a smoother mixture.
    • Don’t Overmix: When folding in the whipped cream, be gentle to maintain the light and airy texture of the cheesecake.
    • Chill Longer If Needed: If the cheesecake hasn’t fully set after 5 hours, don’t hesitate to leave it in the refrigerator for a few additional hours.
    • Experiment with Flavors: Consider adding a hint of vanilla extract or a splash of almond extract to the cheesecake filling for a unique flavor twist.
    • Store Properly: Keep any leftovers in an airtight container in the refrigerator for up to 5 days for the best taste and texture.

    Best Side Dishes and Pairings

    Pairing your Milkybar Cheesecake with the right side dishes or drinks can enhance the overall dining experience. Here are some excellent options:

    1. Coffee: A rich cup of coffee balances the sweetness of the cheesecake and enhances the chocolate flavor.
    2. Mint Tea: The refreshing taste of mint tea cleanses the palate, making it an excellent companion to the creamy dessert.
    3. Chocolate Ice Cream: For chocolate lovers, serving a scoop of chocolate ice cream alongside the cheesecake adds another layer of decadence.
    4. Fruit Salad: A light fruit salad provides a refreshing contrast to the richness of the cheesecake and adds a burst of flavor.
    5. Sparkling Water with Lemon: The effervescence and citrus notes of sparkling water with lemon can refresh the palate and complement the dessert beautifully.

    Common Mistakes to Avoid

    • Not Chilling Long Enough: Rushing the chilling time can result in a cheesecake that is not set properly.
    • Overmixing the Cheesecake Filling: Be careful not to overmix after adding the whipped cream, as this can lead to a dense texture.
    • Using Warm Chocolate: Adding warm melted chocolate to the cream cheese can cause the mixture to become runny.
    • Skipping the Base Preparation: Neglecting to press the shortbread base firmly can lead to a crumbly cheesecake.

    Storage & Reheating Instructions

    Refrigerator Storage

    Store the Milkybar Cheesecake in an airtight container in the refrigerator. It will stay fresh for up to 5 days.

    Freezing Instructions

    To freeze, wrap the cheesecake tightly in plastic wrap and then in aluminum foil. It can be frozen for up to 2 months. Thaw in the refrigerator before serving.

    Reheating Tips

    • Oven: Preheat to 180°C (350°F), cover with foil, and heat for about 10 minutes to maintain moisture.
    • Microwave: Heat a slice on medium power for 20-30 seconds until just warmed.
    • Stovetop: Use a pan over low heat and cover with a lid for 5-7 minutes.

    Frequently Asked Questions

    How do I know when the Milkybar Cheesecake is set?

    The cheesecake should be firm to the touch and not jiggle when gently shaken. It typically takes about 5 hours to set in the refrigerator.

    Can I make Milkybar Cheesecake in advance?

    Yes, you can prepare the cheesecake up to two days in advance. Just ensure it is properly stored in the refrigerator.

    What can I substitute for Milkybar chocolate in the cheesecake?

    You can use any white chocolate or a similar sweet chocolate that you enjoy, but it will change the flavor profile slightly.

    How can I make this recipe gluten-free?

    To make a gluten-free Milkybar Cheesecake, use gluten-free shortbread cookies for the base.

    Final Thoughts

    This Milkybar Cheesecake is sure to impress your friends and family with its creamy texture and delightful flavor. I encourage you to try making this dessert and share your thoughts in the comments below!


    Desserts

    Milkybar Cheesecake


    5.0 from 24 reviews

    This creamy Milkybar Cheesecake features a delightful shortbread base and a rich filling made with Milkybar chocolate and cream cheese. Topped with a smooth chocolate ganache and decorated with shortbread crumbs, it is a perfect dessert for any occasion.

    Author: Munch Twist
    Prep Time: 30 minutes
    Cook Time: 0 minutes
    Total Time: 5 hours 30 minutes
    Yield: 12 servings
    Category: Desserts
    Method: No bake
    Cuisine: American

    Milkybar Cheesecake

    SCALE:
    1x
    2x
    3x
    Cook Mode: Prevent your screen from going dark

    Ingredients

    • 500g cream cheese
    • 350g shortbread
    • 250g Milkybar chocolate (for filling)
    • 200ml whipped cream (for topping)
    • 175g melted butter
    • 120g icing sugar
    • 350ml whipped cream (for filling)
    • 250g Milkybar chocolate (for topping)

    Instructions

    1. Crush 350g of shortbread into fine crumbs. Mix with 175g melted butter until well combined. Press the mixture firmly into the base of a 23 cm cake tin. Refrigerate to set.
    2. Melt 250g of Milkybar chocolate in the microwave or over a double boiler. Let it cool slightly. In a bowl, beat 500g cream cheese with 120g icing sugar until smooth. Fold the melted Milkybar chocolate into the cream cheese mixture. Whip 350ml cream until soft peaks form. Gently fold the whipped cream into the cream cheese-chocolate mixture.
    3. Spoon the cheesecake filling over the chilled shortbread base. Smooth the top with a spatula. Refrigerate for about 5 hours or until fully set.
    4. Melt 250g of Milkybar chocolate with 200ml whipped cream in the microwave for 90 seconds, stirring until smooth. Pour the chocolate mixture over the set cheesecake. Smooth the surface with a palette knife.
    5. Sprinkle shortbread crumbs around the edge of the cheesecake. Press a square of Milkybar chocolate in the center for decoration.

    Nutrition Facts

    Serving Size: 1 serving
    Calories: 400 kcal
    Sugar: 23g
    Sodium: 150mg
    Fat: 27g
    Saturated Fat: 16g
    Carbohydrates: 35g
    Fiber: 1g
    Protein: 5g
    Cholesterol: 80mg

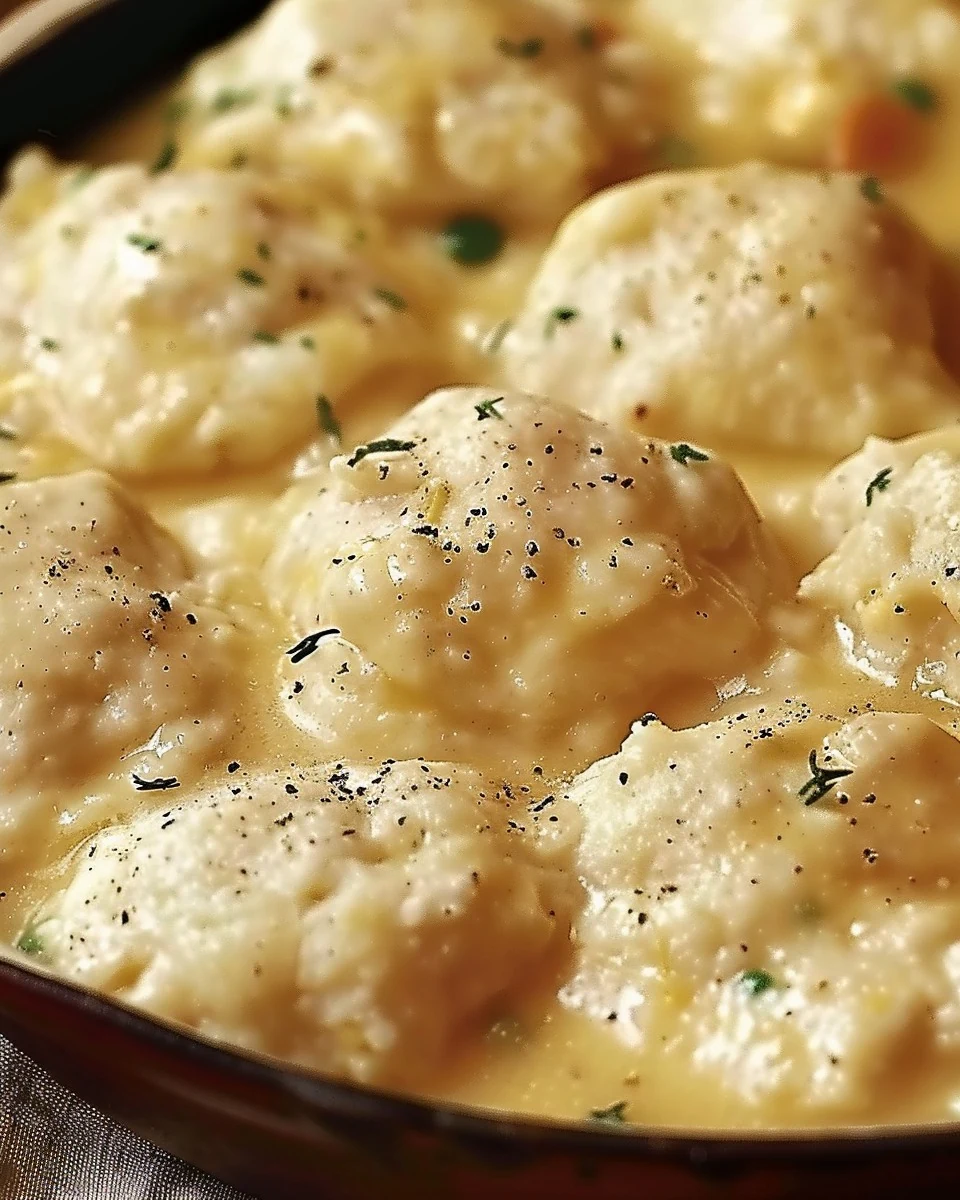
  • Classic Old-Fashioned Chicken and Dumplings Recipe

    Classic Old-Fashioned Chicken and Dumplings Recipe

    Old-Fashioned Chicken and Dumplings is a comforting dish that evokes nostalgia with every bite. The tender chicken, flavorful broth, and fluffy dumplings create a satisfying meal perfect for family gatherings or cozy evenings at home.

    Why You’ll Love This Recipe

    • Comforting Flavors: This dish is a warm hug in a bowl, perfect for chilly nights.
    • Made from Scratch: Every component, from the chicken to the dumplings, is homemade for authentic taste.
    • Family-Friendly: A dish that pleases both kids and adults alike, making it a great choice for family dinners.
    • Versatile Ingredients: You can easily customize the vegetables and seasonings to fit your taste preferences.
    • Easy to Prepare: With step-by-step instructions, even novice cooks can master this classic recipe.

    Tools and Equipment

    Having the right tools makes cooking much more enjoyable and efficient.

    Essential Tools

    • Large pot or Dutch oven
    • Mixing bowls
    • Whisk or fork
    • Measuring cups and spoons
    • Wooden spoon or spatula

    Why These Tools Matter

    • Large pot or Dutch oven: Provides ample space for simmering the chicken and sauce, ensuring even cooking.
    • Mixing bowls: Essential for combining the dumpling ingredients without mess.
    • Wooden spoon or spatula: Ideal for stirring without scratching your cookware.

    Ingredients for Old-Fashioned Chicken and Dumplings

    For the Chicken:

    • 2 tablespoons olive oil, divided
    • 1/2 cup all-purpose flour
    • 2 lbs boneless, skinless chicken breasts and/or thighs, trimmed and cut into 1 1/2-inch pieces

    For the Sauce:

    • 1/2 cup heavy cream
    • 1 1/2 cups frozen peas, thawed
    • 2 bay leaves
    • 2 cloves garlic, minced
    • 2 tablespoons butter
    • 5-6 cups chicken broth
    • 1/2 teaspoon dried thyme
    • 2 large carrots, peeled and diced
    • 2 stalks celery, diced
    • 1 large onion, diced

    For the Dumplings:

    • 1 1/2 cups all-purpose flour
    • 2 teaspoons baking powder
    • 1/2 teaspoon salt
    • 3/4 cup buttermilk
    • 2 eggs

    Seasoning:

    • Kosher salt and freshly ground black pepper, to taste

    How to Make Old-Fashioned Chicken and Dumplings Step-by-Step

    Step 1: Prepare the Chicken

    Start by seasoning the chicken with kosher salt and freshly ground black pepper. Toss the seasoned chicken in 1/2 cup of flour for an even coating.

    Step 2: Brown the Chicken

    In a large pot or Dutch oven, heat 1 tablespoon of olive oil over medium-high heat. Add the floured chicken pieces and cook, stirring occasionally, until browned on the outside, about 3-5 minutes. Remove the chicken and set it aside on a plate.

    Step 3: Cook the Vegetables

    Reduce the heat to medium. Add the remaining 1 tablespoon of olive oil and 2 tablespoons of butter to the pot. Add the diced carrots, celery, and onion. Sauté the vegetables until softened, approximately 5 minutes.

    Step 4: Create the Sauce

    Stir in the minced garlic, bay leaves, dried thyme, and chicken broth. Return the browned chicken to the pot. Bring to a simmer, then add the heavy cream and thawed peas. Stir well and season to taste with salt and pepper.

    Step 5: Prepare the Dumplings

    While the sauce simmers, prepare the dumplings. In a medium bowl, combine 1 1/2 cups of all-purpose flour, baking powder, and 1/2 teaspoon of salt. Stir in the buttermilk and eggs until the mixture is smooth and no raw flour remains.

    Step 6: Cook the Dumplings

    Drop spoonfuls of the dumpling dough into the simmering broth. Leave space between each dumpling to allow them to puff up. Cover the pot, reduce the heat to low, and let simmer gently for about 15 minutes, or until the dumplings are puffy and the chicken is cooked through.

    Step 7: Serve

    Ladle the chicken, dumplings, and sauce into bowls. Enjoy the comforting flavors of this classic dish!

    How to Serve Old-Fashioned Chicken and Dumplings

    Old-Fashioned Chicken and Dumplings is a versatile dish that can be served in various ways to enhance your dining experience.

    Classic Bowl Presentation

    Serve the chicken, dumplings, and sauce in deep bowls, garnished with fresh parsley. This presentation emphasizes the comforting nature of the dish, perfect for family dinners.

    Family-Style Serving

    Transfer the chicken and dumplings to a large serving platter, allowing guests to help themselves. This method creates a warm, inviting atmosphere, encouraging everyone to dig in together.

    Accompanied by Fresh Bread

    Pair the dish with a side of warm, crusty bread or biscuits. This not only complements the creamy sauce but also provides an ideal vehicle for soaking up every last drop.

    Pro Tips for the Best Old-Fashioned Chicken and Dumplings

    Achieving the perfect Old-Fashioned Chicken and Dumplings requires attention to detail and a few expert tricks.

    • Use Quality Chicken Broth: A rich, homemade chicken broth will elevate the flavor of the dish significantly compared to store-bought varieties.

    • Don’t Overmix the Dumplings: Stir just until combined to ensure your dumplings remain tender and fluffy rather than dense.

    • Add Fresh Herbs: Incorporating fresh herbs like parsley or thyme at the end of cooking can brighten the flavors and add a fresh touch.

    • Simmer Gently: Maintain a gentle simmer when cooking the dumplings to prevent them from disintegrating in the broth.

    • Adjust Seasoning to Taste: Always taste and adjust the seasoning before serving, as flavors can vary based on the broth and other ingredients.

    Best Side Dishes and Pairings

    Complementing your Old-Fashioned Chicken and Dumplings with the right sides can enhance the meal.

    1. Crispy Green Salad: A light, refreshing salad with a vinaigrette dressing balances the richness of the dish, providing a crisp contrast.

    2. Roasted Brussels Sprouts: The slight bitterness of Brussels sprouts, when roasted, pairs wonderfully with the creamy sauce of the chicken and dumplings.

    3. Garlic Mashed Potatoes: Creamy mashed potatoes can be a delightful addition, offering a hearty side that complements the flavors in the main dish.

    4. Steamed Green Beans: Simple and fresh, steamed green beans provide a vibrant color and a crunchy texture that enhances the overall meal.

    5. Homemade Cornbread: A slice of sweet cornbread is perfect for soaking up the creamy sauce, making it a delicious addition to your dinner table.

    Common Mistakes to Avoid

    • Overcrowding the Pot: When browning the chicken, ensure there’s enough space. Overcrowding can lead to steaming instead of browning.
    • Skipping the Seasoning: Don’t forget to season the chicken and the sauce well. Insufficient seasoning can result in bland flavors.
    • Not Allowing Dumplings Enough Space: When adding dumplings to the pot, leave enough space for them to expand. This helps achieve a light and fluffy texture.
    • Cooking on Too High Heat: Keep the heat low while simmering the dumplings. High heat can cause them to cook unevenly or become dense.

    Storage & Reheating Instructions

    Refrigerator Storage

    Store leftovers in airtight containers in the refrigerator. They will remain fresh for up to 3 days.

    Freezing Instructions

    For freezing, let the chicken and dumplings cool completely. Transfer to freezer-safe containers, leaving space for expansion, and freeze for up to 3 months. To thaw, place in the refrigerator overnight before reheating.

    Reheating Tips

    • Oven: Preheat to 350°F (175°C). Place chicken and dumplings in an oven-safe dish, cover with foil, and heat for 20-25 minutes until warmed through.
    • Microwave: Transfer a portion to a microwave-safe bowl, cover loosely, and heat on medium power for 2-3 minutes, stirring halfway through.
    • Stovetop: Reheat in a saucepan over low heat, stirring occasionally, until warmed through. Add a splash of chicken broth if it appears dry.

    Frequently Asked Questions

    How can I make Old-Fashioned Chicken and Dumplings gluten-free?

    You can substitute all-purpose flour with a gluten-free flour blend in both the chicken and dumplings. Ensure the baking powder is also gluten-free.

    Can I use frozen chicken for Old-Fashioned Chicken and Dumplings?

    Yes, you can use frozen chicken. Just ensure to thaw it completely before cooking to achieve even cooking and proper browning.

    How do I know when the dumplings are done?

    Dumplings are done when they are puffy and cooked through. You can test one by cutting it in half; it should be light and fluffy inside.

    Can I add vegetables to Old-Fashioned Chicken and Dumplings?

    Absolutely! Feel free to add your favorite vegetables such as green beans or corn for added flavor and nutrition.

    What can I serve with Old-Fashioned Chicken and Dumplings?

    This dish pairs well with a simple green salad or steamed vegetables for a complete meal.

    Final Thoughts

    Old-Fashioned Chicken and Dumplings is a comforting dish that brings warmth to any table. We encourage you to try this recipe and share your thoughts in the comments below. Your feedback helps us create better recipes for everyone to enjoy.


    Dinner

    Old-Fashioned Chicken and Dumplings


    5.0 from 24 reviews

    This classic dish features tender chicken simmered in a rich broth with vegetables, topped with fluffy dumplings. It's a comforting meal perfect for family gatherings or cozy nights in.

    Author: Munch Twist
    Prep Time: 20 minutes
    Cook Time: 35 minutes
    Total Time: 55 minutes
    Yield: 6 servings
    Category: Desserts
    Method: No bake
    Cuisine: American

    Old-Fashioned Chicken and Dumplings

    SCALE:
    1x
    2x
    3x
    Cook Mode: Prevent your screen from going dark

    Ingredients

    • 2 tablespoons olive oil, divided
    • 1/2 cup all-purpose flour
    • 2 lbs boneless, skinless chicken breasts and/or thighs, trimmed and cut into 1 1/2-inch pieces
    • 1/2 cup heavy cream
    • 1 1/2 cups frozen peas, thawed
    • 2 bay leaves
    • 2 cloves garlic, minced
    • 2 tablespoons butter
    • 5-6 cups chicken broth
    • 1/2 teaspoon dried thyme
    • 2 large carrots, peeled and diced
    • 2 stalks celery, diced
    • 1 large onion, diced
    • 1 1/2 cups all-purpose flour
    • 2 teaspoons baking powder
    • 1/2 teaspoon salt
    • 3/4 cup buttermilk
    • 2 eggs
    • Kosher salt and freshly ground black pepper, to taste

    Instructions

    1. Season the chicken with kosher salt and freshly ground black pepper. Toss the seasoned chicken in 1/2 cup of flour, ensuring an even coating.
    2. In a large pot or Dutch oven, heat 1 tablespoon of olive oil over medium-high heat. Add the floured chicken pieces and cook, stirring occasionally, until browned on the outside, about 3-5 minutes. Remove the chicken from the pot and set it aside on a plate.
    3. Reduce the heat to medium and add the remaining 1 tablespoon of olive oil along with 2 tablespoons of butter to the pot. Add the diced carrots, celery, and onion. Sauté the vegetables until they soften, approximately 5 minutes.
    4. Stir in the minced garlic, bay leaves, dried thyme, and chicken broth. Return the browned chicken to the pot. Bring the mixture to a simmer. Once simmering, add the heavy cream and thawed peas. Stir well and season to taste with salt and pepper.
    5. In a medium bowl, combine 1 1/2 cups of all-purpose flour, baking powder, and 1/2 teaspoon of salt. Stir in the buttermilk and eggs until the mixture is smooth, and no raw flour remains.
    6. Drop spoonfuls of the dumpling dough into the simmering broth. Make sure to leave some space between each dumpling to allow them to puff up. Cover the pot, reduce the heat to low, and let the mixture simmer gently for about 15 minutes, or until the dumplings are puffy and the chicken is cooked through.
    7. Ladle the chicken, dumplings, and sauce into bowls.

    Nutrition Facts

    Serving Size: 1 serving
    Calories: 450 kcal
    Sugar: 5g
    Sodium: 800mg
    Fat: 22g
    Saturated Fat: 10g
    Carbohydrates: 35g
    Fiber: 3g
    Protein: 30g
    Cholesterol: 150mg

  • Quick Crispy Zucchini Recipe – Ready in 10 Minutes

    Quick Crispy Zucchini Recipe – Ready in 10 Minutes

    Crispy Zucchini Recipe – Ready in 10 Minutes is a delightful way to enjoy vegetables without sacrificing flavor. This quick and easy dish features perfectly golden zucchini slices that are both crispy and satisfying. Whether as a snack or a side dish, this recipe is sure to impress.

    Why You’ll Love This Recipe

    • Quick & Easy: Ready in under 10 minutes, making it perfect for busy weeknights.
    • Flavorful: The combination of marjoram, paprika, and Parmesan adds a rich taste.
    • Healthy Alternative: Zucchini is low in calories yet high in nutrients, making this a guilt-free treat.
    • Versatile: Enjoy as a side dish, appetizer, or even a topping for salads.
    • Kid-Friendly: Even picky eaters will love these crispy bites.

    Tools and Equipment

    To make this Crispy Zucchini Recipe effective and enjoyable, you’ll need some essential kitchen tools.

    Essential Tools

    • Frying pan
    • Mixing bowls
    • Clean kitchen towel or cheesecloth
    • Cooking spatula
    • Knife and cutting board

    Why These Tools Matter

    • Frying pan: A good quality pan ensures even cooking and helps achieve that perfect crisp.
    • Mixing bowls: Using separate bowls for dry and wet ingredients prevents clumping and ensures even coating.
    • Clean kitchen towel or cheesecloth: These tools are crucial for removing excess moisture, which is key to achieving crispy zucchini.

    Ingredients for Crispy Zucchini Recipe – Ready in 10 Minutes

    • 1 teaspoon marjoram
    • 50 grams of flour
    • 3 eggs, beaten
    • 100 grams of breadcrumbs
    • 2 zucchini
    • Salt to taste
    • Black pepper to taste
    • Olive oil for frying
    • 1 teaspoon paprika
    • 100 grams of Parmesan cheese, grated

    How to Make Crispy Zucchini Recipe – Ready in 10 Minutes Step-by-Step

    Step 1: Prep the Zucchini

    Slice the zucchini into even rounds and place them in a bowl. Sprinkle with salt to draw out moisture. Let them sit for about 5 minutes.

    Step 2: Remove Excess Moisture

    Using a clean kitchen towel or cheesecloth, squeeze the salted zucchini slices to remove excess liquid. This step is crucial for achieving crispy results.

    Step 3: Prepare the Coating

    In one mixing bowl, combine the breadcrumbs and flour. In another bowl, beat the eggs and mix in the grated Parmesan cheese, marjoram, and paprika.

    Step 4: Coat the Zucchini

    Roll each zucchini slice in the flour and breadcrumb mixture. Then dip the coated slices into the egg mixture, ensuring they are fully covered.

    Step 5: Fry the Zucchini

    Heat olive oil in a frying pan over medium heat. Fry the coated zucchini slices for about 4-5 minutes on one side until golden brown. Flip them over and lower the heat, cooking for an additional 5 minutes until crispy.

    Step 6: Serve

    Remove the zucchini slices from the pan and place them on paper towels to absorb excess oil. Serve hot and enjoy the crispy, flavorful zucchini.

    With this Crispy Zucchini Recipe – Ready in 10 Minutes, you have a deliciously quick dish that’s perfect for any occasion. Enjoy every bite of this simple yet satisfying treat!

    How to Serve Crispy Zucchini Recipe – Ready in 10 Minutes

    Crispy zucchini is a versatile dish that can be served in various delightful ways.

    As an Appetizer

    Serve the crispy zucchini slices on a platter with a side of marinara or garlic aioli for dipping. This makes for a great starter at any gathering.

    In a Salad

    Chop the crispy zucchini and toss it into a fresh salad for added crunch and flavor. It complements greens, cherry tomatoes, and a light vinaigrette beautifully.

    As a Side Dish

    Pair the crispy zucchini with grilled meats or fish. Its crunchy texture and savory taste enhance the overall meal, making it a perfect side dish.

    Pro Tips for the Best Crispy Zucchini Recipe – Ready in 10 Minutes

    To elevate your crispy zucchini, consider these helpful tips.

    • Use Fresh Zucchini: Choose firm, vibrant zucchini for the best flavor and texture in your dish.
    • Adjust the Seasoning: Feel free to experiment with spices like garlic powder or Italian seasoning for a personalized touch.
    • Maintain Oil Temperature: Ensure the oil is hot enough before frying to achieve that perfect crispy exterior.
    • Don’t Overcrowd the Pan: Fry the zucchini in batches to prevent steaming and ensure even cooking.
    • Serve Immediately: Enjoy the zucchini right after frying for optimal crispiness.

    Best Side Dishes and Pairings

    Crispy zucchini pairs beautifully with a variety of dishes and beverages.

    1. Grilled Chicken: The smoky flavor complements the crunchy zucchini, creating a satisfying meal.
    2. Quinoa Salad: This healthy option adds a nutritious balance, making for a well-rounded plate.
    3. Ranch Dressing: A classic pairing that enhances the flavors and adds creaminess.
    4. Pasta Primavera: The lightness of the pasta dish allows the zucchini to shine alongside fresh vegetables.
    5. Lemonade: A refreshing drink that provides a zesty contrast to the savory zucchini.

    Common Mistakes to Avoid

    • Not Salting the Zucchini: Skipping the salting step can result in soggy zucchini.
    • Using Too Much Oil: Overcrowding the pan with oil can lead to greasy slices instead of crispy ones.
    • Inadequate Coating: Failing to properly coat the zucchini slices can lead to uneven cooking and loss of flavor.
    • Cooking on High Heat: Frying on high heat may burn the exterior while leaving the inside undercooked.

    Storage & Reheating Instructions

    Refrigerator Storage

    Store leftover crispy zucchini in an airtight container in the refrigerator. They will stay fresh for up to 3 days.

    Freezing Instructions

    To freeze, place the cooked zucchini slices in a single layer on a baking sheet. Once frozen solid, transfer them to a freezer bag. They can be stored for up to 2 months.

    Reheating Tips

    • Oven: Preheat to 375°F (190°C) and bake for 10-15 minutes until heated through and crispy.
    • Microwave: Heat on high for 30 seconds to 1 minute, but expect a softer texture.
    • Stovetop: Heat a little olive oil in a pan and fry on medium heat for 3-5 minutes until crispy.

    Frequently Asked Questions

    How can I make my crispy zucchini recipe even healthier?

    You can use whole grain breadcrumbs or almond flour instead of regular flour to enhance the nutritional value while maintaining the crispy texture.

    Can I use other vegetables for this crispy zucchini recipe?

    Yes, you can substitute zucchini with vegetables like eggplant or bell peppers, but adjust the cooking time accordingly.

    What is the best way to serve crispy zucchini?

    Serve crispy zucchini as an appetizer, side dish, or snack. They pair well with dips like marinara sauce or tzatziki.

    How can I ensure my crispy zucchini recipe is ready in 10 minutes?

    Preparation is key. Slice zucchini ahead of time and have all ingredients ready to go to streamline the cooking process.

    Can I make this crispy zucchini recipe gluten-free?

    Absolutely! Use gluten-free breadcrumbs and a gluten-free flour blend to make the recipe suitable for those with gluten sensitivities.

    Final Thoughts

    This Crispy Zucchini Recipe – Ready in 10 Minutes is not only quick to prepare but also a delightful addition to your meals. It’s perfect for a snack or a side dish. We invite you to try it out and share your thoughts in the comments below.


    Dinner

    Crispy Zucchini Recipe – Ready in 10 Minutes


    5.0 from 24 reviews

    This crispy zucchini recipe is a quick and delicious way to enjoy fresh vegetables. With a light coating of flour, breadcrumbs, and Parmesan cheese, these zucchini slices are fried to perfection, making them a perfect appetizer or side dish. Ready in just 10 minutes, they are a tasty addition to any meal.

    Author: Munch Twist
    Prep Time: 5 minutes
    Cook Time: 10 minutes
    Total Time: 15 minutes
    Yield: 4 servings
    Category: Dinner
    Method: No bake
    Cuisine: American

    Crispy Zucchini Recipe - Ready in 10 Minutes

    SCALE:
    1x
    2x
    3x
    Cook Mode: Prevent your screen from going dark

    Ingredients

    • 1 teaspoon marjoram
    • 50 grams of flour
    • 3 eggs, beaten
    • 100 grams of breadcrumbs
    • 2 zucchini
    • Salt to taste
    • Black pepper to taste
    • Olive oil for frying
    • 1 teaspoon paprika
    • 100 grams of Parmesan cheese, grated

    Instructions

    1. Slice the zucchini and place the slices in a bowl. Sprinkle them with salt and let them sit for a few minutes to release excess moisture.
    2. Use a clean kitchen towel or cheesecloth to squeeze out any liquid from the salted zucchini slices.
    3. In one bowl, combine the breadcrumbs and flour. In a separate bowl, beat the eggs and mix in the grated Parmesan cheese, marjoram, and paprika.
    4. Roll each zucchini slice in the flour and breadcrumb mixture. Then, dip the coated slices into the egg mixture, ensuring they are well-coated.
    5. Heat olive oil in a frying pan over medium heat. Fry the coated zucchini slices for 4-5 minutes on one side until golden brown. Flip them over and cook on low heat for an additional 5 minutes until crispy.
    6. Remove the zucchini slices from the pan and place them on paper towels to drain any excess oil. Serve hot.

    Nutrition Facts

    Serving Size: 1 serving
    Calories: 180 kcal
    Sugar: 2g
    Sodium: 300mg
    Fat: 10g
    Saturated Fat: 3g
    Carbohydrates: 15g
    Fiber: 2g
    Protein: 8g
    Cholesterol: 210mg

  • Indulge in Pumpkin Pie French Toast with Homemade Syrup

    Indulge in Pumpkin Pie French Toast with Homemade Syrup

    Pumpkin Pie French Toast with Homemade Pumpkin Syrup offers a delightful blend of flavors that captures the essence of fall. This recipe combines the warm spices of pumpkin pie with the comforting texture of French toast, creating a breakfast dish that is both indulgent and satisfying.

    Why You’ll Love This Recipe

    • Seasonal Flavor: Enjoy the rich taste of pumpkin and warm spices, perfect for autumn mornings.
    • Quick & Easy: Ready in under 30 minutes, making it a fantastic choice for busy weekdays or leisurely weekends.
    • Homemade Syrup: The homemade pumpkin syrup elevates the dish, adding an extra layer of flavor that store-bought options can’t match.
    • Versatile: Customize the recipe by adding nuts, whipped cream, or fresh fruit for added texture and taste.
    • Family-Friendly: This dish appeals to both kids and adults, ensuring everyone at the table is satisfied.

    Tools and Equipment

    To prepare this delicious dish, having the right tools is crucial.

    Essential Tools

    • Non-stick griddle or skillet
    • Mixing bowls
    • Whisk
    • Measuring cups and spoons
    • Spatula

    Why These Tools Matter

    • Non-stick griddle or skillet: Ensures even cooking and prevents the French toast from sticking.
    • Mixing bowls: Essential for combining ingredients effectively and making the mixing process simpler.
    • Spatula: Helps in flipping the French toast easily, ensuring even browning on both sides.

    Ingredients for Pumpkin Pie French Toast with Homemade Pumpkin Syrup

    For the French Toast

    • 1/2 teaspoon vanilla extract
    • 1/2 teaspoon ground nutmeg
    • 1 tablespoon butter
    • 1 teaspoon ground cinnamon
    • 1/4 teaspoon ground ginger
    • 1 cup milk
    • 1/2 cup canned pumpkin puree
    • 1/4 cup granulated sugar
    • 4 large eggs
    • 8 slices of bread

    For the Pumpkin Syrup

    • 1/4 teaspoon ground nutmeg
    • 1/2 teaspoon ground cinnamon
    • 1 cup maple syrup
    • 1/2 cup canned pumpkin puree

    How to Make Pumpkin Pie French Toast with Homemade Pumpkin Syrup Step-by-Step

    Step 1: Prepare the Pumpkin Mixture

    In a large bowl, whisk together the eggs, milk, pumpkin puree, sugar, cinnamon, nutmeg, ginger, and vanilla extract until the mixture is smooth and well combined.

    Step 2: Heat the Griddle

    Preheat your non-stick griddle or skillet over medium heat. Add 1 tablespoon of butter and allow it to melt, coating the cooking surface evenly.

    Step 3: Coat the Bread

    Dip each slice of bread into the pumpkin mixture, ensuring that both sides are evenly coated. Allow any excess mixture to drip off before placing the bread on the griddle.

    Step 4: Cook the French Toast

    Place the coated bread slices onto the griddle. Cook for 2-3 minutes on each side, until they turn golden brown and are cooked through.

    Step 5: Prepare the Pumpkin Syrup

    While the French toast is cooking, heat a saucepan over medium heat. Combine the maple syrup, pumpkin puree, cinnamon, and nutmeg. Stir frequently until the mixture is warmed through and well blended.

    Step 6: Serve and Enjoy

    Serve the French toast hot, drizzled generously with your homemade pumpkin syrup. Enjoy the comforting flavors of this seasonal breakfast dish with family and friends.

    How to Serve Pumpkin Pie French Toast with Homemade Pumpkin Syrup

    Elevate your dining experience with these creative serving ideas.

    Garnished with Whipped Cream

    Top your pumpkin pie French toast with a dollop of freshly whipped cream for a light, airy contrast that complements the richness of the dish.

    Sprinkled with Toasted Pecans

    Add a crunchy texture by sprinkling toasted pecans on top. Their nutty flavor enhances the overall taste and adds an extra layer of autumn warmth.

    Served with Seasonal Fruit

    Pair your French toast with slices of fresh apples or pears. The natural sweetness and tartness of the fruit provide a refreshing balance to the dish.

    Pro Tips for the Best Pumpkin Pie French Toast with Homemade Pumpkin Syrup

    Maximize flavor and texture with these expert tips.

    • Use Stale Bread: Stale bread absorbs the pumpkin mixture better, resulting in a richer flavor and creamier texture.
    • Adjust Spice Levels: Feel free to tweak the amounts of cinnamon, nutmeg, and ginger to suit your personal taste preferences.
    • Cook on Low Heat: Cooking at a lower temperature ensures even cooking without burning the bread, allowing it to become perfectly golden.
    • Make Ahead: Prepare the pumpkin mixture the night before and store it in the fridge to save time in the morning.
    • Experiment with Bread Types: Try different types of bread, such as brioche, challah, or whole grain, to find your favorite combination.

    Best Side Dishes and Pairings

    Enhance your meal with these delicious accompaniments.

    1. Crispy Bacon: The salty, savory flavor of crispy bacon provides a delightful contrast to the sweetness of the French toast.
    2. Sausage Links: Breakfast sausage adds a hearty element that complements the pumpkin flavors beautifully.
    3. Fresh Orange Juice: A glass of freshly squeezed orange juice offers a bright and refreshing citrus note that balances the richness of the dish.
    4. Yogurt Parfait: Layered yogurt with granola and fruit adds a light, creamy side that can balance the meal.
    5. Herbal Tea: A warm cup of herbal tea, such as chai or cinnamon, enhances the warm spices in the French toast and creates a cozy dining experience.

    Common Mistakes to Avoid

    • Skipping the Whisking: Not whisking the egg mixture enough can lead to uneven flavor and texture in your French toast.
    • Overcrowding the Griddle: Cooking too many slices at once can lower the temperature, resulting in soggy toast.
    • Ignoring Bread Type: Using thin or low-quality bread can affect the absorption of the pumpkin mixture, leading to a less satisfying texture.
    • Not Monitoring Heat: Cooking at too high a temperature can burn the French toast while leaving the inside uncooked.

    Storage & Reheating Instructions

    Refrigerator Storage

    Store leftover Pumpkin Pie French Toast in airtight containers in the refrigerator for up to 3 days. Ensure the French toast is completely cooled before sealing to maintain freshness.

    Freezing Instructions

    To freeze, place slices of Pumpkin Pie French Toast in a single layer on a baking sheet and freeze until solid. Once frozen, transfer them to a freezer-safe bag or container. They will stay fresh for up to 2 months.

    Reheating Tips

    • Oven: Preheat the oven to 350°F (175°C). Place the French toast on a baking sheet and heat for about 10 minutes or until warmed through.
    • Microwave: Place a slice on a microwave-safe plate and heat for 30-45 seconds, checking for warmth.
    • Stovetop: Heat a skillet over medium heat and warm the French toast for 2-3 minutes on each side until heated through.

    Frequently Asked Questions

    How can I make Pumpkin Pie French Toast with Homemade Pumpkin Syrup vegan?

    You can substitute eggs with a flaxseed meal or chia seed mixture and use plant-based milk and butter alternatives to create a vegan version.

    Can I use fresh pumpkin puree instead of canned?

    Yes, fresh pumpkin puree can be used. Just ensure it is well-cooked and pureed to achieve the right consistency for the recipe.

    What bread works best for Pumpkin Pie French Toast with Homemade Pumpkin Syrup?

    Thick slices of brioche, challah, or Texas toast work best as they absorb the pumpkin mixture well without becoming too soggy.

    How do I know when the French toast is done cooking?

    The French toast is done when both sides are golden brown and the center feels firm to the touch.

    Can I make the pumpkin syrup ahead of time?

    Yes, you can prepare the pumpkin syrup in advance and store it in the refrigerator for up to a week. Reheat before serving.

    Final Thoughts

    This Pumpkin Pie French Toast with Homemade Pumpkin Syrup is a delightful way to celebrate the flavors of fall. We encourage you to give this recipe a try and share your thoughts in the comments below. Your feedback helps us create more delicious content!


    Desserts

    Pumpkin Pie French Toast with Homemade Pumpkin Syrup


    5.0 from 24 reviews

    This delightful Pumpkin Pie French Toast combines the flavors of pumpkin pie with the comforting texture of French toast. Topped with a homemade pumpkin syrup, it's a perfect breakfast for fall or any time you crave something sweet and satisfying.

    Author: Munch Twist
    Prep Time: 15 minutes
    Cook Time: 10 minutes
    Total Time: 25 minutes
    Yield: 4 servings
    Category: Desserts
    Method: No bake
    Cuisine: American

    Pumpkin Pie French Toast with Homemade Pumpkin Syrup

    SCALE:
    1x
    2x
    3x
    Cook Mode: Prevent your screen from going dark

    Ingredients

    • 1/2 teaspoon vanilla extract
    • 1/2 teaspoon ground nutmeg
    • 1 tablespoon butter
    • 1 teaspoon ground cinnamon
    • 1/4 teaspoon ground ginger
    • 1 cup milk
    • 1/2 cup canned pumpkin puree
    • 1/4 cup granulated sugar
    • 4 large eggs
    • 8 slices of bread
    • 1/4 teaspoon ground nutmeg (for syrup)
    • 1/2 teaspoon ground cinnamon (for syrup)
    • 1 cup maple syrup
    • 1/2 cup canned pumpkin puree (for syrup)

    Instructions

    1. In a large bowl, whisk together the eggs, milk, pumpkin puree, sugar, cinnamon, nutmeg, ginger, and vanilla extract until well combined.
    2. Heat a griddle or skillet over medium heat and melt 1 tablespoon of butter.
    3. Dip each slice of bread into the pumpkin mixture, ensuring both sides are evenly coated.
    4. Place the coated bread slices on the griddle and cook for 2-3 minutes on each side, until golden brown.
    5. While the French toast is cooking, prepare the pumpkin syrup. In a saucepan, combine the maple syrup, pumpkin puree, cinnamon, and nutmeg.
    6. Heat the syrup mixture over medium heat, stirring frequently, until it's warmed through.
    7. Serve the French toast hot, drizzled with the homemade pumpkin syrup.

    Nutrition Facts

    Serving Size: 1 serving
    Calories: 350 kcal
    Sugar: 24g
    Sodium: 300mg
    Fat: 11g
    Saturated Fat: 5g
    Carbohydrates: 55g
    Fiber: 3g
    Protein: 8g
    Cholesterol: 135mg