Author: munch twist

  • Big Mac Smash Tacos: A Tasty Twist on Tradition

    Big Mac Smash Tacos: A Tasty Twist on Tradition

    Get ready to flip the taco game with these Big Mac Smash Tacos! Bursting with all the classic flavors of a Big Mac but wrapped in a soft tortilla, this dish is a fusion feast perfect for a quick dinner or a fun twist for taco night.

    Why You’ll Love This Recipe

    • Unique Flavor Combination: Enjoy the classic Big Mac flavors in a fun taco format.
    • Quick & Easy: Ready in under 30 minutes, making it perfect for busy weeknights.
    • Customizable: Add your favorite toppings or adjust the ingredients to suit your taste.
    • Kid-Friendly: A great way to get children excited about dinner with a familiar taste.
    • Entertaining Appeal: Perfect for taco night or casual gatherings with friends and family.

    Tools and Equipment

    To prepare these delicious Big Mac Smash Tacos, you’ll need a few essential tools.

    Essential Tools

    • Skillet
    • Spatula
    • Mixing bowl
    • Measuring cups
    • Knife and cutting board

    Why These Tools Matter

    • Skillet: Provides even heat for perfect browning and crispy tortillas.
    • Spatula: Essential for flipping the tacos without breaking them.
    • Mixing bowl: Helps in portioning and preparing the ground beef easily.

    Ingredients for Big Mac Smash Tacos

    Main Ingredients

    • 1 pound 90/10 ground beef
    • 8 slices American cheese
    • 2 cups shredded iceberg lettuce
    • 1/2 cup diced onion
    • 8 soft taco size flour tortillas
    • Pickle slices
    • 1/2 cup thousand island dressing
    • Salt and pepper to taste

    How to Make Big Mac Smash Tacos Step-by-Step

    Step 1: Prepare the Beef

    1. Start by dividing the ground beef into 8 equal portions and rolling them into balls. This will make smushing them onto the tortillas a breeze!

    Step 2: Assemble the Tacos

    1. Grab a flour tortilla and lay it flat. Place one beef ball in the center.
    2. Use your hands or a spatula to spread the meat into a thin, even layer that covers the tortilla.
    3. Season the beef generously with salt and pepper for that extra flavor punch.

    Step 3: Cook the Tacos

    1. Preheat your skillet over medium heat until it’s nice and hot. This step is crucial for achieving that delicious browning!
    2. Place the tortilla, meat side down, in the skillet. Cook for 2-3 minutes or until the beef is fully cooked and browned.
    3. Carefully flip the tortilla over to crisp up the other side. Let it cook for another minute until golden brown.

    Step 4: Add Cheese and Toppings

    1. As soon as the tortilla is beautifully crispy, lay a slice of American cheese on top of the beef and let it melt.
    2. Once the cheese is gooey and melted, layer on the toppings: a handful of shredded lettuce, a sprinkle of diced onion, and a couple of pickle slices.
    3. Drizzle with thousand island dressing for that signature Big Mac taste.

    Step 5: Serve and Enjoy

    1. Serve your Big Mac Smash Tacos hot, and enjoy the explosion of flavors in every bite!

    Nutritional Information: Each taco is a delicious blend of protein, carbs, and healthy fats. Approx. 350 calories, 20g protein, 25g carbs, and 20g fat (nutritional values may vary).

    Preparation Time: 15 minutes | Cooking Time: 10 minutes.

    These Big Mac Smash Tacos will undoubtedly become a favorite in your household. Enjoy the delightful fusion of flavors and the ease of preparation!

    How to Serve Big Mac Smash Tacos

    These Big Mac Smash Tacos are versatile and can be enjoyed in various ways to elevate your dining experience.

    Taco Bar Extravaganza

    Set up a taco bar with extra toppings like jalapeños, diced tomatoes, and different sauces. Let everyone customize their own tacos for a fun, interactive meal.

    Crunchy Nacho Style

    Chop the tacos into bite-sized pieces and serve them on a platter with tortilla chips and additional thousand island dressing for dipping. This makes for a great party appetizer.

    Meal Prep Magic

    Prepare a batch of Big Mac Smash Tacos and store them in the refrigerator for quick lunches throughout the week. Just reheat and enjoy the delightful flavors in no time.

    Pro Tips for the Best Big Mac Smash Tacos

    For an unforgettable taco experience, follow these handy tips.

    • Quality Beef: Choose a higher fat content ground beef (80/20) for juicier and more flavorful tacos.
    • Hot Skillet: Always preheat your skillet thoroughly before cooking to ensure the beef gets a nice sear and crisp.
    • Fresh Ingredients: Use fresh lettuce and crisp pickles to enhance the overall texture and taste of your tacos.
    • Experiment with Cheese: While American cheese is a classic choice, feel free to mix in other cheeses like cheddar or pepper jack for added flavor.
    • Don’t Overcrowd: If making multiple tacos, cook them in batches to avoid overcrowding the skillet, which can lead to steaming instead of browning.

    Best Side Dishes and Pairings

    Enhance your meal with these delightful side dishes and drinks that complement Big Mac Smash Tacos perfectly.

    1. Classic French Fries: Crispy fries are always a favorite, providing a satisfying crunch alongside the soft tacos.
    2. Coleslaw: A tangy coleslaw adds a refreshing crunch and balances the richness of the tacos.
    3. Corn on the Cob: Grilled or boiled corn drizzled with butter and lime brings a sweet, vibrant contrast to the savory flavors.
    4. Beer: A light lager or pilsner pairs well, complementing the beefiness of the tacos while cleansing the palate.
    5. Iced Tea: A refreshing glass of iced tea, sweetened or unsweetened, provides a great counterbalance to the richness of the dish.
    6. Guacamole: Creamy guacamole adds a rich texture and a fresh flavor that elevates the overall taco experience.

    Common Mistakes to Avoid

    • Overcooking the Beef: Ensure you cook the beef just until browned to prevent dryness.
    • Skipping the Seasoning: Don’t forget to season the beef with salt and pepper for maximum flavor.
    • Using Cold Tortillas: Warm your tortillas before assembling to enhance texture and flavor.
    • Not Preheating the Skillet: A hot skillet is essential for achieving that perfect crispy texture.

    Storage & Reheating Instructions

    Refrigerator Storage

    Store any leftover Big Mac Smash Tacos in airtight containers in the refrigerator. They will remain fresh for up to 3 days.

    Freezing Instructions

    To freeze, wrap individual tacos tightly in plastic wrap and then place them in a freezer-safe bag. They can be stored for up to 2 months. Thaw in the refrigerator overnight before reheating.

    Reheating Tips

    • Oven: Preheat the oven to 350°F (175°C). Place tacos on a baking sheet and heat for about 10-15 minutes until warmed through.
    • Microwave: Place tacos on a microwave-safe plate. Heat on high for 30-60 seconds, checking for doneness.
    • Stovetop: Heat a skillet over medium heat. Add tacos and cook for 2-3 minutes on each side until heated through.

    Frequently Asked Questions

    How do I customize my Big Mac Smash Tacos?

    You can add additional toppings like tomatoes or jalapeños to personalize your Big Mac Smash Tacos.

    Can I make Big Mac Smash Tacos ahead of time?

    Yes, you can prepare the beef and toppings in advance, then assemble and cook the tacos when ready to serve.

    What are the best sides to serve with Big Mac Smash Tacos?

    Consider pairing your Big Mac Smash Tacos with a side of fries or a simple salad for a complete meal.

    Can I use a different type of cheese?

    Absolutely! While American cheese is traditional, feel free to experiment with cheddar, Monterey Jack, or pepper jack for a twist.

    Final Thoughts

    Big Mac Smash Tacos offer a delightful twist on classic flavors, making them perfect for any taco night or quick dinner. Try making this recipe and share your experience in the comments below; I would love to hear how it turned out for you.


    Dinner

    Big Mac Smash Tacos


    5.0 from 24 reviews

    Get ready to flip the taco game with these Big Mac Smash Tacos! Bursting with all the classic flavors of a Big Mac but wrapped in a soft tortilla, it’s the fusion feast you never knew you needed. Perfect for a quick dinner or a fun twist for taco night.
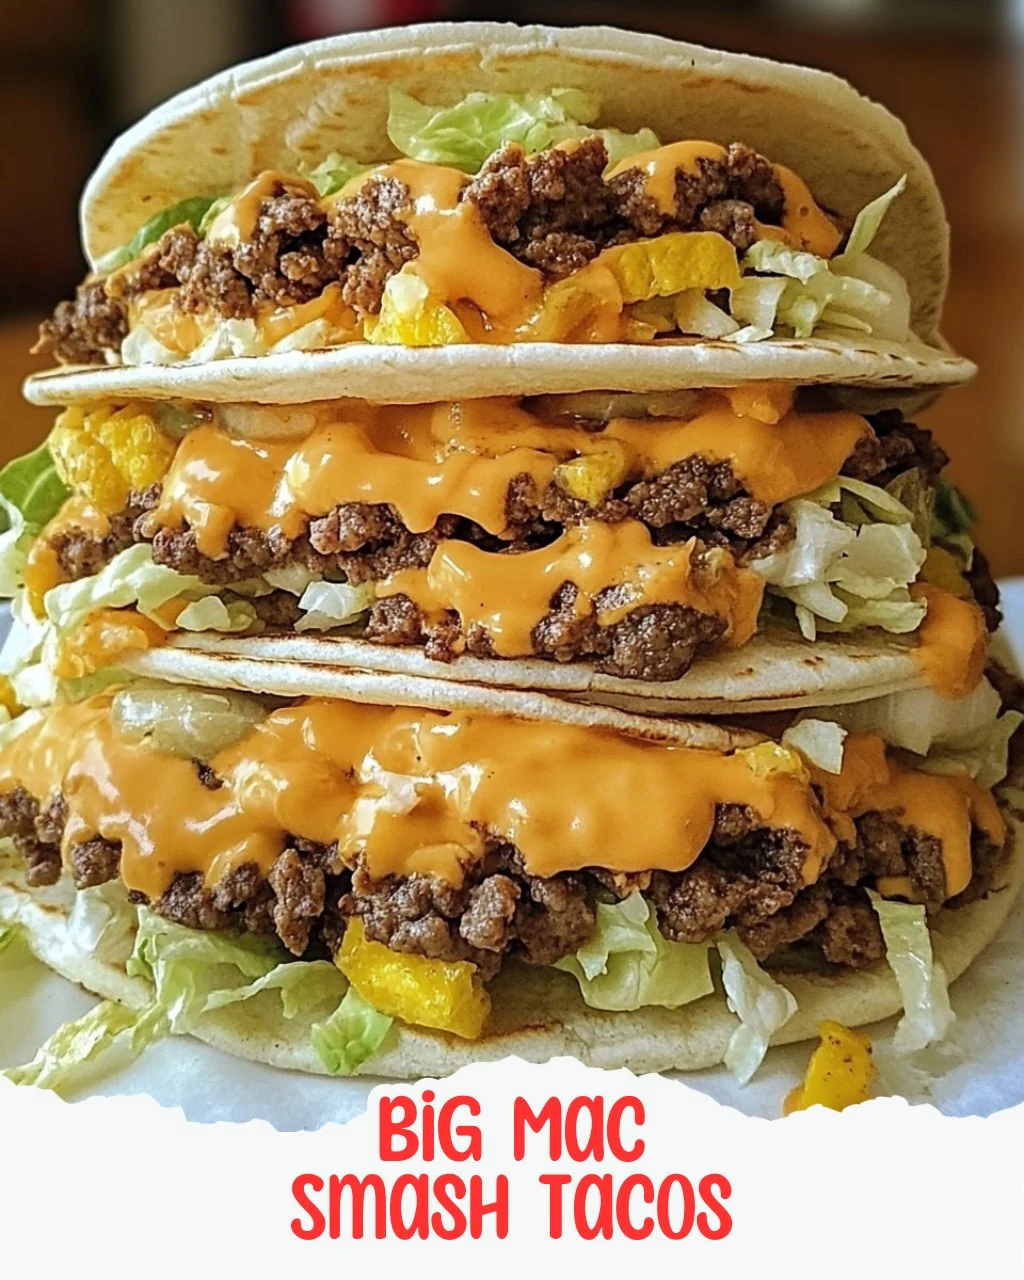
    Author: Munch Twist
    Prep Time: 15 minutes
    Cook Time: 10 minutes
    Total Time: 25 minutes
    Yield: 8 servings
    Category: Lunch
    Method: No bake
    Cuisine: American

    Big Mac Smash Tacos

    SCALE:
    1x
    2x
    3x
    Cook Mode: Prevent your screen from going dark

    Ingredients

    • 1 pound 90/10 ground beef
    • 8 slices American cheese
    • 2 cups shredded iceberg lettuce
    • 1/2 cup diced onion
    • 8 soft taco size flour tortillas
    • Pickle slices
    • 1/2 cup thousand island dressing
    • Salt and pepper to taste

    Instructions

    1. Start by dividing the ground beef into 8 equal portions and rolling them into balls.
    2. Grab a flour tortilla, and lay it flat. Place one beef ball in the center, then spread the meat into a thin, even layer that covers the tortilla.
    3. Season the beef generously with salt and pepper.
    4. Preheat your skillet over medium heat.
    5. Place the tortilla, meat side down, in the skillet. Cook for 2-3 minutes or until the beef is fully cooked and browned.
    6. Carefully flip the tortilla over to crisp up the other side, and let it cook for another minute until golden brown.
    7. Lay a slice of American cheese on top of the beef and let it melt.
    8. Layer on the toppings: shredded lettuce, diced onion, and pickle slices. Drizzle with thousand island dressing.
    9. Serve your Big Mac Smash Tacos hot.
    Nutrition Facts

    Serving Size: 1 serving
    Calories: 350 kcal
    Sugar: 2g
    Sodium: 800mg
    Fat: 20g
    Saturated Fat: 10g
    Carbohydrates: 25g
    Fiber: 1g
    Protein: 20g
    Cholesterol: 60mg

  • Easy Ham and Cheese Pinwheels Recipe

    Easy Ham and Cheese Pinwheels Recipe

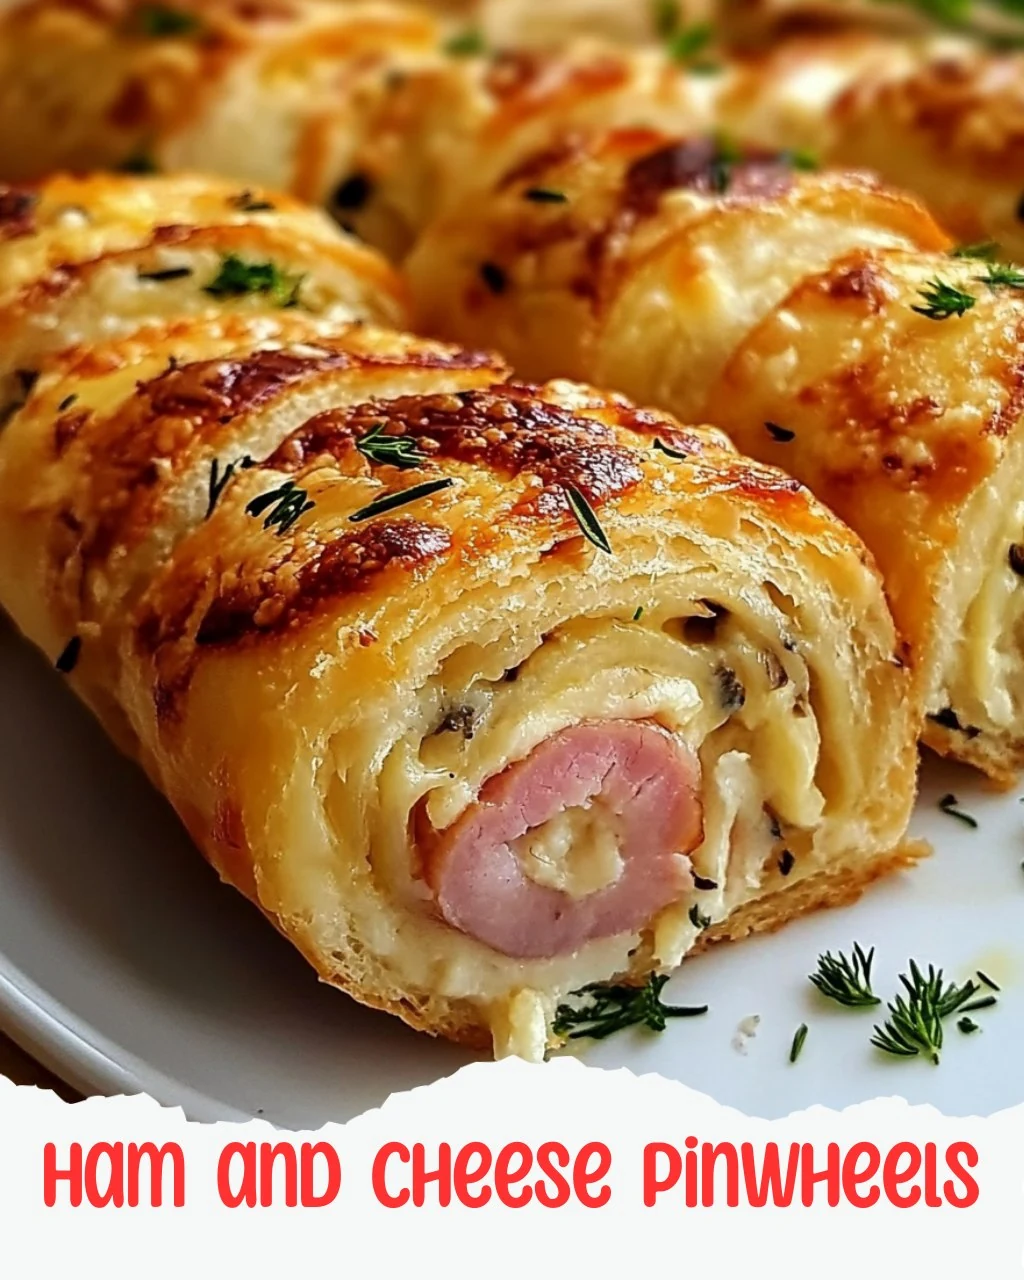
    Ham and cheese pinwheels are a delightful treat that everyone loves. These savory bites combine rich Swiss cheese and flavorful Black Forest ham, all wrapped in buttery crescent dough. Perfect for any occasion, they are sure to impress your guests and satisfy your cravings.

    Why You’ll Love This Recipe

    • Quick & Easy: Ready in under 30 minutes, these pinwheels are perfect for unexpected guests or a last-minute snack.
    • Crowd-Pleaser: With their delicious flavors and appealing presentation, they are sure to be a hit at any gathering.
    • Versatile Snack: Great for parties, game days, or a fun dinner option, these pinwheels fit any occasion.
    • Customizable: Feel free to swap out the cheese or add veggies for a personal touch to your pinwheels.
    • Freezer-Friendly: Make a batch ahead of time and freeze for a quick snack whenever you need it.

    Tools and Equipment

    Having the right tools makes preparing ham and cheese pinwheels easier and more efficient.

    Essential Tools

    • Baking dish (9×13 inch)
    • Sharp knife
    • Mixing bowl
    • Whisk
    • Cooking spray or butter for greasing

    Why These Tools Matter

    • Baking dish: The right size ensures even cooking and easy serving.
    • Sharp knife: A good knife makes slicing the pinwheels cleanly simple, resulting in better presentation.
    • Mixing bowl: A sturdy bowl helps in combining ingredients without spills or mess.

    Ingredients for Ham and Cheese Pinwheels

    Dough and Filling

    • 1 tube crescent dough sheet
    • 12 slices Swiss cheese, thinly sliced
    • 20-22 slices Black Forest ham, thinly sliced

    Sauce

    • 1/2 cup butter, melted
    • 2 tsp Dijon mustard
    • 1 tbsp poppy seeds
    • 1/2 tsp Worcestershire sauce

    How to Make Ham and Cheese Pinwheels Step-by-Step

    Step 1: Preheat and Prepare

    Begin by preheating your oven to 350ºF (175ºC). Prepare a 9×13 inch baking dish by spraying it with cooking spray or greasing it with butter.

    Step 2: Prepare the Dough

    Open the tube of crescent dough and unroll it so the longest side is at the bottom. Pinch the seams together to seal, then gently stretch the dough to approximately 10 x 13 inches.

    Step 3: Add the Cheese and Ham

    Lay down 6 slices of Swiss cheese on the dough, leaving a 1/4 inch margin at the edges. Evenly distribute the ham on top of the cheese, folding slices if necessary. Top the ham with the remaining Swiss cheese slices.

    Step 4: Roll and Slice

    Starting from the longest side, carefully roll the dough up tightly around the filling. Pinch the ends to seal the roll. Using a sharp knife, slice the roll into 18 evenly spaced pieces.

    Step 5: Arrange in the Baking Dish

    Place the pinwheels in your prepared baking dish, ensuring they are spaced apart. If any seams have opened, gently press them back together.

    Step 6: Prepare the Sauce

    In a mixing bowl, whisk together the melted butter, poppy seeds, Dijon mustard, and Worcestershire sauce. Drizzle this sauce evenly over the pinwheels to enhance their flavor.

    Step 7: Bake

    Bake the pinwheels in the preheated oven for 20-25 minutes, or until they are golden brown and fragrant.

    Step 8: Serve

    Once baked, let them cool for a few minutes before carefully removing from the dish. Serve warm and enjoy your delightful ham and cheese pinwheels!

    Nutritional Information: Approximately 250 calories per serving (based on 1/6 of the recipe), with high protein content from ham and cheese, and a delightful blend of fats from butter and dough.

    Preparation time: 15 minutes | Cooking time: 25 minutes.

    How to Serve Ham and Cheese Pinwheels

    Ham and cheese pinwheels are versatile and can be served in various ways to suit different occasions.

    As an Appetizer

    Serve the pinwheels on a platter with toothpicks for easy handling. They make a perfect finger food option for parties and gatherings.

    With Dipping Sauces

    Pair the pinwheels with a selection of dipping sauces, such as honey mustard or marinara. These add an extra layer of flavor and enhance the overall experience.

    In a Sandwich Platter

    For a creative twist, cut the pinwheels into halves or quarters and arrange them on a sandwich platter alongside other finger foods. This presentation is visually appealing and allows guests to sample a variety of flavors.

    Pro Tips for the Best Ham and Cheese Pinwheels

    To achieve the perfect ham and cheese pinwheels, consider the following tips.

    • Use Fresh Ingredients: Fresh ham and cheese will enhance the flavor and texture of your pinwheels.

    • Don’t Overfill: Be careful not to add too much filling, as this can make rolling difficult and cause the pinwheels to burst during baking.

    • Chill the Dough: If the crescent dough is too warm, it can become sticky. Chill it in the refrigerator for a few minutes before rolling for easier handling.

    • Cut Evenly: Use a sharp knife to cut the pinwheels evenly. This ensures they cook uniformly and look appealing when served.

    • Experiment with Fillings: Feel free to customize your pinwheels by adding ingredients like spinach, bell peppers, or different types of cheese for a unique twist.

    Best Side Dishes and Pairings

    Serving ham and cheese pinwheels is even better with complementary side dishes and beverages.

    1. Mixed Green Salad: A light salad with vinaigrette balances the richness of the pinwheels, adding freshness to the meal.

    2. Vegetable Platter: A colorful assortment of raw vegetables with dip provides a healthy crunch that pairs well with the savory flavors of the pinwheels.

    3. Potato Wedges: Crispy potato wedges offer a hearty side that complements the pinwheels, making for a satisfying meal.

    4. Fruit Skewers: Fresh fruit adds a sweet contrast to the salty ham and cheese, creating a delightful balance of flavors.

    5. Sparkling Water: A refreshing beverage like sparkling water cleanses the palate and enhances the overall dining experience.

    Common Mistakes to Avoid

    • Not Sealing the Dough Properly: Ensure that all seams are tightly pinched to prevent the filling from leaking during baking.
    • Using Too Much Filling: Overstuffing the pinwheels can make them difficult to roll and may lead to uneven cooking.
    • Skipping the Cooling Step: Allowing the pinwheels to cool slightly before serving helps maintain their shape and makes them easier to handle.
    • Underbaking: Keep an eye on the baking time; pinwheels should be golden brown for the best texture and flavor.

    Storage & Reheating Instructions

    Refrigerator Storage

    Store ham and cheese pinwheels in an airtight container in the refrigerator. They will stay fresh for up to 3 days.

    Freezing Instructions

    To freeze, place the pinwheels in a single layer on a baking sheet until solid, then transfer them to an airtight container or freezer bag. They can be frozen for up to 2 months. Thaw in the refrigerator before reheating.

    Reheating Tips

    • Oven: Preheat to 350ºF (175ºC) and bake for 10-15 minutes until warmed through.
    • Microwave: Place on a microwave-safe plate and heat for 30-60 seconds, checking at intervals to avoid overcooking.
    • Stovetop: Heat in a skillet over medium-low heat for about 5 minutes, turning occasionally until heated through.

    Frequently Asked Questions

    Can I use different types of cheese for Ham and Cheese Pinwheels?

    Absolutely! Feel free to experiment with other cheeses like cheddar or provolone to customize the flavors to your liking.

    How can I make Ham and Cheese Pinwheels healthier?

    Consider using whole wheat crescent dough and reducing the amount of butter or using a healthier alternative to lower the calorie count.

    Are Ham and Cheese Pinwheels kid-friendly?

    Yes, these pinwheels are a hit with kids and can be a fun way to introduce them to new flavors.

    Can I prepare Ham and Cheese Pinwheels ahead of time?

    Yes, you can assemble the pinwheels and store them in the refrigerator for up to 24 hours before baking.

    What is the best way to serve Ham and Cheese Pinwheels?

    Serve them warm as an appetizer or snack, or pair them with a fresh salad for a light meal.

    Final Thoughts

    These ham and cheese pinwheels are an easy and delicious addition to any gathering. We encourage you to try this recipe and share your thoughts in the comments below. Your feedback helps us create even more delightful dishes!


    Dinner

    Ham and Cheese Pinwheels


    5.0 from 24 reviews

    These scrumptious ham and cheese pinwheels are your go-to treat for any gathering! Quick to assemble and baked to golden perfection, they'll have everyone coming back for seconds. Perfect as a snack, appetizer, or even a fun dinner option!

    Author: Munch Twist
    Prep Time: 15 minutes
    Cook Time: 25 minutes
    Total Time: 40 minutes
    Yield: 6 servings
    Category: Lunch
    Method: Baking
    Cuisine: American

    Ham and Cheese Pinwheels

    SCALE:
    1x
    2x
    3x
    Cook Mode: Prevent your screen from going dark

    Ingredients

    • 1 tube crescent dough sheet
    • 1/2 cup butter, melted
    • 12 slices Swiss cheese, thinly sliced
    • 20-22 slices Black Forest ham, thinly sliced
    • 2 tsp Dijon mustard
    • 1 tbsp poppy seeds
    • 1/2 tsp Worcestershire sauce

    Instructions

    1. Preheat your oven to 350ºF (175ºC). Prepare a 9×13 inch baking dish by spraying it with cooking spray or greasing it with butter.
    2. Open the tube of crescent dough and unroll it so the longest side is at the bottom. Pinch the seams together to seal, then gently press the dough to stretch it to approximately 10 x 13 inches.
    3. Lay down 6 slices of Swiss cheese on the dough, leaving a 1/4 inch margin at the edges.
    4. Evenly distribute the ham on top of the cheese. You can fold the ham slices if necessary to fit nicely.
    5. Top the ham with the remaining Swiss cheese slices.
    6. Starting from the longest side, carefully roll the dough up tightly around the filling, ensuring everything is well enclosed. Pinch the ends to seal the roll.
    7. Using a sharp knife, slice the roll into 18 evenly spaced pieces.
    8. Place the pinwheels in your prepared baking dish, making sure they're spaced apart. If any seams have opened, press them back together.
    9. In a mixing bowl, whisk together the melted butter, poppy seeds, Dijon mustard, and Worcestershire sauce.
    10. Drizzle the prepared sauce evenly over the pinwheels, ensuring each one gets a little flavor boost.
    11. Bake the pinwheels in the preheated oven for 20-25 minutes, or until they're golden brown and deliciously fragrant.
    12. Once baked, let them cool for a few minutes before carefully removing from the dish. Serve warm and enjoy your delightful creations!

    Nutrition Facts

    Serving Size: 1 serving
    Calories: 250 kcal
    Sugar: 1g
    Sodium: 800mg
    Fat: 20g
    Saturated Fat: 12g
    Carbohydrates: 16g
    Fiber: 0g
    Protein: 10g
    Cholesterol: 60mg

  • Delicious Chocolate Pecan Turtle Clusters Recipe

    Delicious Chocolate Pecan Turtle Clusters Recipe

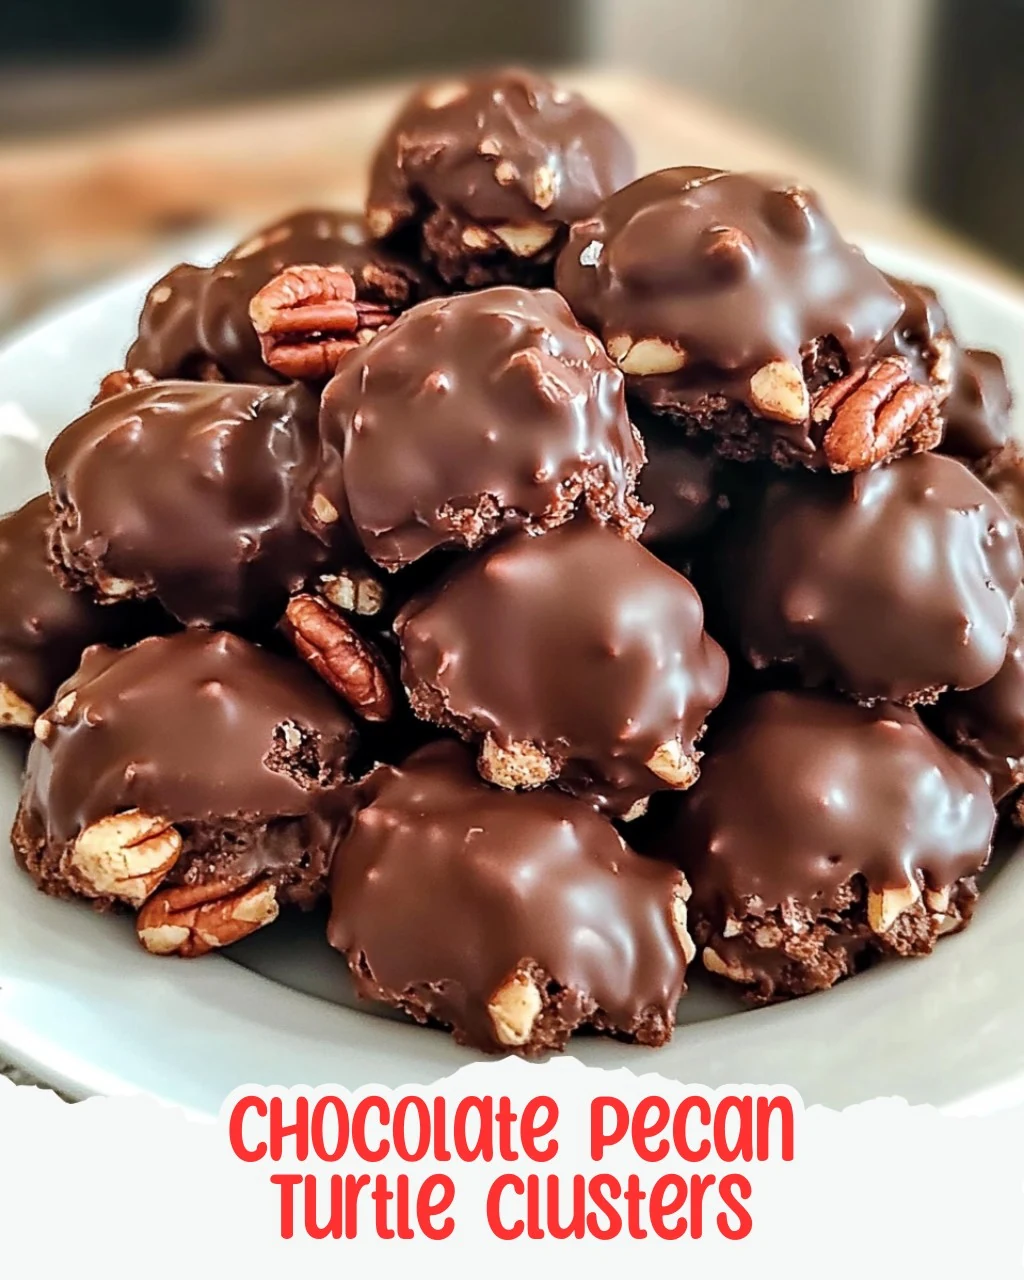
    Prepare to dive into gourmet goodness with these Chocolate Pecan Turtle Clusters! Rich, sweet, and salty, they’re the perfect treat for any occasion. Who can resist the combination of crunchy pecans, gooey caramel, and silky chocolate? Let’s create some magic!

    Why You’ll Love This Recipe

    • Irresistible Flavor Combination: The blend of sweet caramel, crunchy pecans, and smooth chocolate creates a delightful taste experience.
    • Quick & Easy: Ready in under 30 minutes, these clusters are perfect for last-minute cravings or gatherings.
    • Perfect for Any Occasion: Whether it’s a holiday or a casual get-together, these treats impress every time.
    • Customizable Treats: You can easily adjust the chocolate type or add other nuts, making them your own.
    • Great for Gifting: Package them beautifully, and they make a thoughtful homemade gift.

    Tools and Equipment

    Having the right tools makes the process smoother and more enjoyable.

    Essential Tools

    • Baking sheet
    • Parchment paper or silicone baking mat
    • Microwave-safe bowls
    • Spoon or spatula
    • Measuring cups and spoons

    Why These Tools Matter

    • Baking sheet: Provides a sturdy base for the clusters and ensures even spacing.
    • Parchment paper or silicone baking mat: Creates a non-stick surface, making it easy to lift the clusters off after they set.
    • Microwave-safe bowls: Allow for quick melting of caramel and chocolate without the risk of overheating.

    Ingredients for Chocolate Pecan Turtle Clusters

    For the Clusters

    • 1 cup caramel bits or soft caramels, unwrapped
    • 1 1/2 cups pecan halves, toasted
    • 1 tablespoon coconut oil or vegetable shortening (optional, for smooth melting)
    • 1 1/2 cups semi-sweet or milk chocolate chips
    • 2 tablespoons heavy cream
    • Sea salt (optional, for garnish)

    How to Make Chocolate Pecan Turtle Clusters Step-by-Step

    Step 1: Prepare the Baking Sheet

    Line a baking sheet with parchment paper or a silicone baking mat. This non-stick surface is essential for easy removal of the clusters.

    Step 2: Form the Pecan Clusters

    Arrange 3-4 toasted pecan halves together on the baking sheet to form small clusters. Leave about an inch of space between each cluster for easy handling.

    Step 3: Melt the Caramel

    In a microwave-safe bowl, combine the caramel bits and heavy cream. Microwave in 20-second intervals, stirring in between until the mixture is smooth and fully melted.

    Step 4: Add Caramel to Clusters

    Take about 1 teaspoon of the melted caramel and generously spoon it over each pecan cluster. Allow the caramel to cascade over the nuts. Let it set for approximately 10 minutes.

    Step 5: Melt the Chocolate

    In another microwave-safe bowl, melt the chocolate chips using 20-30 second bursts. Stir well after each interval until the chocolate is fully smooth. If desired, add coconut oil or shortening for a silkier texture.

    Step 6: Drizzle Chocolate Over Clusters

    Using a spoon, carefully pour the melted chocolate over each cluster, ensuring the caramel is covered while allowing some pecans to remain visible for texture.

    Step 7: Garnish with Sea Salt

    For a finishing touch, sprinkle a pinch of sea salt on each cluster. This enhances the flavor and balances the sweetness.

    Step 8: Set the Clusters

    Allow the clusters to cool at room temperature. Alternatively, place them in the refrigerator for 15-20 minutes until the chocolate sets completely.

    Step 9: Enjoy Your Creation

    Once set, gently lift the clusters off the parchment paper. Your homemade Chocolate Pecan Turtle Clusters are ready to enjoy!

    Nutritional Information: Approximately 160 kcal per cluster, serves 20 clusters.

    Time: Preparation time: 15 minutes | Cooling time: 20 minutes.

    How to Serve Chocolate Pecan Turtle Clusters

    These delicious treats are versatile and can be served in various ways.

    Gift-Worthy Treats

    Wrap the clusters in clear cellophane bags tied with a ribbon for a thoughtful homemade gift that is perfect for holidays or special occasions.

    Dessert Platter

    Arrange the Chocolate Pecan Turtle Clusters on a decorative serving platter alongside other desserts like brownies or cookies for an impressive dessert spread.

    Ice Cream Topping

    Crush the clusters and sprinkle them over vanilla or chocolate ice cream for a delightful crunch and added flavor.

    Pro Tips for the Best Chocolate Pecan Turtle Clusters

    Enhance your chocolate pecan turtle clusters with these helpful tips.

    • Use Fresh Ingredients: Ensure that your pecans are fresh and toasted to bring out their nutty flavor.

    • Control Chocolate Thickness: Adjust the amount of coconut oil or shortening to achieve your desired chocolate consistency.

    • Temperature Matters: Let the caramel cool slightly before adding it to the clusters to prevent it from running off.

    • Experiment with Flavors: Try adding a splash of vanilla extract to the caramel for an added depth of flavor.

    • Storage Tips: Keep the clusters in an airtight container at room temperature for up to a week to maintain their freshness.

    Best Side Dishes and Pairings

    Pair your Chocolate Pecan Turtle Clusters with these delightful options.

    1. Coffee: A rich cup of coffee complements the sweetness of the clusters, enhancing their flavor profile.

    2. Milk: Classic and comforting, a glass of milk balances the richness of the chocolate and caramel.

    3. Hot Chocolate: For chocolate lovers, pairing these clusters with hot chocolate creates a decadent experience.

    4. Cheesecake: The creamy texture of cheesecake provides a contrasting flavor and texture that works well with the clusters.

    5. Fruit Platter: Fresh fruits like strawberries or apples add a refreshing contrast to the sweet and salty flavors of the clusters.

    6. Sparkling Water: A light and bubbly drink can cleanse the palate and enhance the overall dessert experience.

    Common Mistakes to Avoid

    • Not Toasting the Pecans: Skipping this step can result in a less flavorful cluster. Toasting enhances the nutty flavor.
    • Overheating the Caramel: Microwaving the caramel for too long can result in a hard texture. Heat in short intervals to maintain smoothness.
    • Using Cold Ingredients: Ensure that your chocolate and caramel are at room temperature before mixing, or they may not melt properly.
    • Skipping the Parchment Paper: Not lining your baking sheet can lead to sticking, making it difficult to remove the clusters.

    Storage & Reheating Instructions

    Refrigerator Storage

    Store the Chocolate Pecan Turtle Clusters in an airtight container in the refrigerator. They will stay fresh for up to two weeks.

    Freezing Instructions

    To freeze, place the clusters in a single layer on a baking sheet until solid, then transfer them to an airtight container or freezer bag. They can be frozen for up to three months. Thaw in the refrigerator before enjoying.

    Reheating Tips

    • Oven: Preheat to 300°F (150°C), place clusters on a baking sheet, and heat for 5-10 minutes until slightly warm.
    • Microwave: Heat in 10-second intervals on a microwave-safe plate until just warm, being careful not to melt the chocolate.
    • Stovetop: Use a double boiler to gently warm the clusters until desired warmth is reached, ensuring they don’t melt.

    Frequently Asked Questions

    How do I make Chocolate Pecan Turtle Clusters gluten-free?

    This recipe is naturally gluten-free, as it contains no flour or gluten-containing ingredients. Always check your chocolate and caramel brands for gluten-free certification.

    Can I use different nuts for the clusters?

    Yes, you can substitute pecans with other nuts such as walnuts or almonds. However, the flavor and texture may vary slightly.

    What can I do if my chocolate gets too thick while melting?

    If the chocolate becomes too thick, stir in a small amount of coconut oil or vegetable shortening to restore its smooth consistency.

    How can I make these Chocolate Pecan Turtle Clusters vegan?

    To make this recipe vegan, use dairy-free chocolate chips and coconut cream instead of heavy cream.

    What is the best way to serve Chocolate Pecan Turtle Clusters?

    These clusters are perfect for serving at parties, gifting, or enjoying as a sweet treat after dinner. Pair with coffee or tea for a delightful experience.

    Final Thoughts

    These Chocolate Pecan Turtle Clusters are a delightful combination of flavors and textures that are sure to impress. I encourage you to try making them and share your experience in the comments below. Your feedback is invaluable!


    Desserts

    Chocolate Pecan Turtle Clusters


    5.0 from 24 reviews

    Dive into gourmet goodness with these Chocolate Pecan Turtle Clusters! Rich, sweet, and salty, they combine crunchy pecans, gooey caramel, and silky chocolate for the perfect treat.

    Author: Munch Twist
    Prep Time: 15 minutes
    Cook Time: 5 minutes
    Total Time: 20 minutes
    Yield: 20 clusters
    Category: Desserts
    Method: No bake
    Cuisine: American

    Chocolate Pecan Turtle Clusters

    SCALE:
    1x
    2x
    3x
    Cook Mode: Prevent your screen from going dark

    Ingredients

    • 1 cup caramel bits or soft caramels, unwrapped
    • 1 1/2 cups pecan halves, toasted
    • 1 tablespoon coconut oil or vegetable shortening (optional)
    • 1 1/2 cups semi-sweet or milk chocolate chips
    • 2 tablespoons heavy cream
    • Sea salt (optional, for garnish)

    Instructions

    1. Line a baking sheet with parchment paper or a silicone baking mat.
    2. Form small clusters on the baking sheet by arranging 3-4 toasted pecan halves together.
    3. In a microwave-safe bowl, combine the caramel bits with the heavy cream and microwave until smooth.
    4. Spoon melted caramel over each pecan cluster and let it set for approximately 10 minutes.
    5. Melt the chocolate chips in another bowl, adding coconut oil if desired.
    6. Pour melted chocolate over each caramel and pecan cluster, leaving some pecans peeking through.
    7. Sprinkle a pinch of sea salt on each cluster.
    8. Allow the clusters to cool at room temperature or refrigerate until chocolate sets.

    Nutrition Facts

    Serving Size: 1 serving
    Calories: 160 kcal
    Sugar: 12g
    Sodium: 50mg
    Fat: 10g
    Saturated Fat: 4g
    Carbohydrates: 17g
    Fiber: 1g
    Protein: 2g
    Cholesterol: 5mg

  • Irresistible Christmas MM Peanut Butter Clusters Recipe

    Irresistible Christmas MM Peanut Butter Clusters Recipe

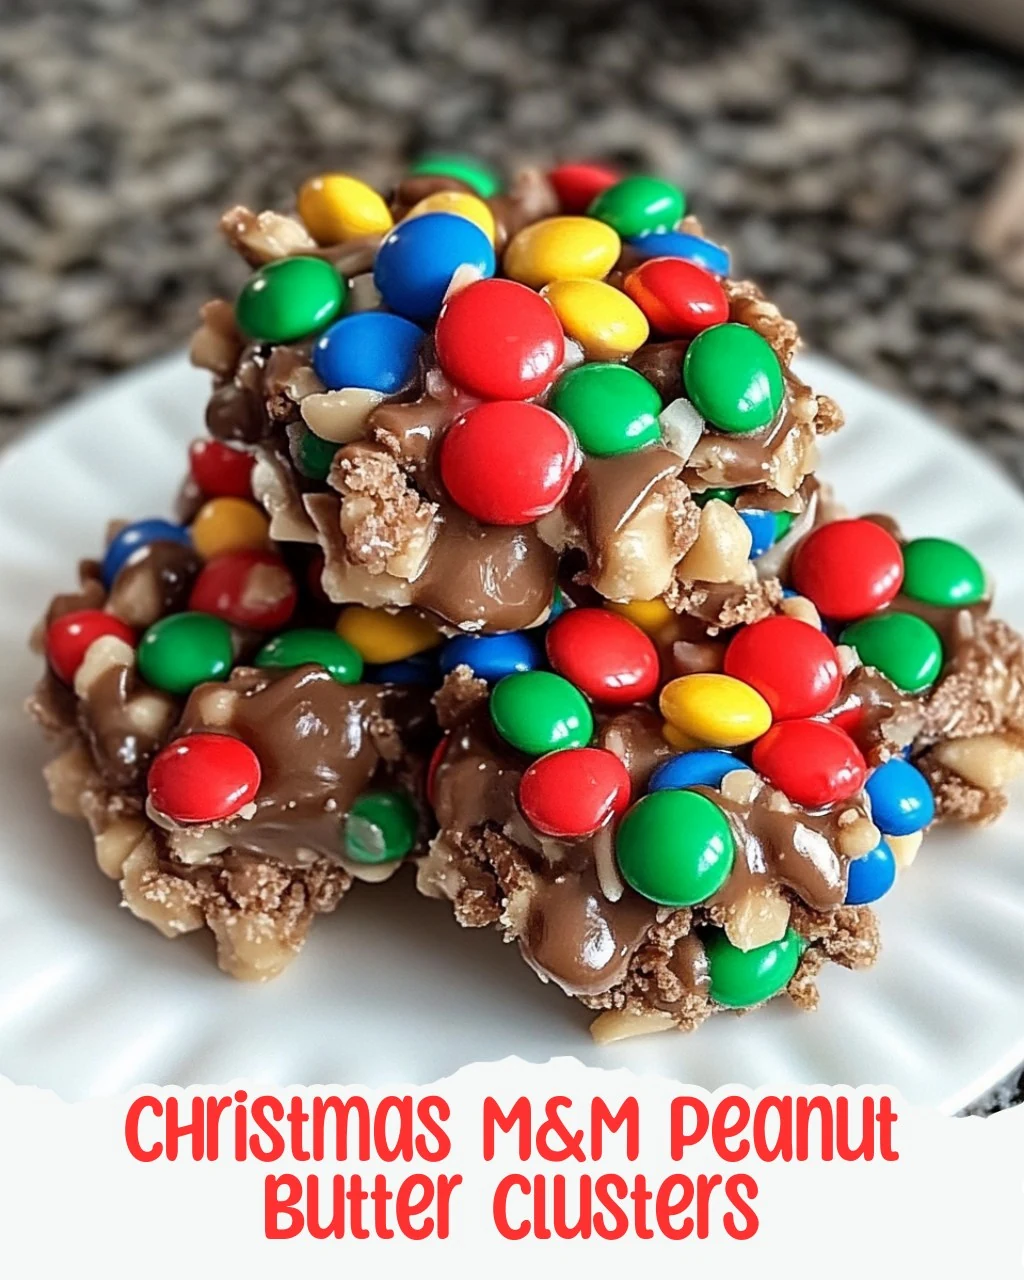
    Christmas M&M Peanut Butter Clusters are a delightful treat that perfectly encapsulates the festive spirit. These clusters are easy to make, deliciously creamy, and loaded with textures and flavors that everyone will love. Share them with family and friends for a sweet holiday celebration.

    Why You’ll Love This Recipe

    • Quick & Easy: Ready in under 30 minutes, making them perfect for last-minute holiday treats.
    • Irresistibly Delicious: The combination of peanut butter, chocolate, and M&Ms creates a flavor explosion.
    • Customizable: Add your favorite nuts or swap out M&Ms for different seasonal candies.
    • Great for Gifting: Package them in festive boxes for a thoughtful homemade gift.
    • Family Fun: Involve kids in the process for a fun holiday activity.

    Tools and Equipment

    Gathering the right tools makes the process smoother and more enjoyable.

    Essential Tools

    • Microwave-safe bowl
    • Baking sheet
    • Parchment paper
    • Spoon or cookie scoop
    • Refrigerator

    Why These Tools Matter

    • Microwave-safe bowl: Ensures safe melting of chocolate and peanut butter without any spills.
    • Baking sheet: Provides a sturdy surface for your clusters to set and cool evenly.
    • Parchment paper: Prevents sticking, making it easy to remove clusters once they are set.

    Ingredients for Christmas M&M Peanut Butter Clusters

    Main Ingredients

    • 1 cup creamy peanut butter
    • 2 cups semi-sweet chocolate chips
    • 1 1/2 cups salted peanuts
    • 1 cup holiday M&Ms (red and green)

    Optional Drizzle

    • 1/2 cup white chocolate chips (optional, for drizzling)

    How to Make Christmas M&M Peanut Butter Clusters Step-by-Step

    Step 1: Prep the Base

    Begin by melting the semi-sweet chocolate chips and creamy peanut butter together. Place them in a microwave-safe bowl. Microwave in 30-second bursts, stirring well after each interval. Continue until the mixture is completely smooth and velvety.

    Step 2: Mix in the Goodies

    Once melted, remove the bowl from the microwave. Fold in the salted peanuts and 3/4 cup of holiday M&Ms. Ensure everything is thoroughly coated with the chocolate-peanut butter blend for maximum flavor.

    Step 3: Form the Clusters

    On a baking sheet lined with parchment paper, spoon out dollops of the mixture. Allow some space between each cluster, as they will expand during the setting process.

    Step 4: Add Festive Touches

    For an extra pop of color, place a few of the remaining holiday M&Ms onto each cluster. This will enhance their festive appeal and make them even more inviting.

    Step 5: Chill to Set

    Place the baking sheet in the refrigerator. Chill for about 30-45 minutes, or until the clusters are firm and ready to enjoy.

    Step 6: Drizzle (Optional)

    For an additional festive touch, melt the white chocolate chips in the microwave. Drizzle it over the chilled clusters to create a beautiful finish.

    Step 7: Serve and Store

    Enjoy your Christmas M&M Peanut Butter Clusters immediately, or store them in an airtight container in the refrigerator for up to a week. They make a delightful treat for any holiday gathering.

    How to Serve Christmas MM Peanut Butter Clusters

    These clusters are not only delicious but also versatile in how you can present them.

    Festive Gift Bags

    Package individual clusters in small cellophane bags tied with festive ribbons. They make excellent homemade gifts for friends and family during the holiday season.

    Dessert Platter

    Arrange the clusters on a decorative platter alongside other holiday treats. Their vibrant colors will add a cheerful touch to your dessert table.

    Ice Cream Topping

    Crush the clusters and use them as a topping for ice cream sundaes. The combination of chocolate, peanut butter, and candy will elevate any ice cream experience.

    Pro Tips for the Best Christmas MM Peanut Butter Clusters

    For the ultimate holiday treat, keep these tips in mind.

    • Use Quality Ingredients: Opt for high-quality chocolate chips and peanut butter for a richer flavor.

    • Be Patient with Melting: Melt the chocolate and peanut butter slowly to avoid burning. Stir frequently for a smooth consistency.

    • Chill Thoroughly: Ensure the clusters are completely chilled before serving for the best texture and flavor.

    • Customize Your Clusters: Experiment with different types of nuts or add dried fruits for a unique twist on the classic recipe.

    • Store Properly: Keep the clusters in an airtight container in the fridge to maintain freshness for longer.

    Best Side Dishes and Pairings

    Enhance your enjoyment of Christmas M&M Peanut Butter Clusters with these delightful pairings.

    1. Hot Cocoa: The rich, chocolatey flavor of hot cocoa complements the clusters perfectly, making for a cozy treat.

    2. Coffee: A warm cup of coffee balances the sweetness of the clusters, providing a delightful contrast.

    3. Milk: Classic and simple, a glass of milk pairs beautifully with the clusters, enhancing their creamy texture.

    4. Fruit Salad: The freshness of a fruit salad adds a refreshing contrast to the richness of the clusters.

    5. Cheese Board: A selection of cheeses can provide a savory balance to the sweet and salty flavors of the clusters.

    Common Mistakes to Avoid

    • Skipping the Melting Step: Ensure the chocolate chips and peanut butter are fully melted for a smooth mixture.
    • Not Folding Ingredients Gently: Stir too vigorously can break the M&Ms and peanuts, affecting the final look and texture.
    • Crowding the Baking Sheet: Leave enough space between clusters to allow for spreading as they set.
    • Ignoring the Chill Time: Skipping the refrigeration step can result in clusters that are too soft and difficult to handle.

    Storage & Reheating Instructions

    Refrigerator Storage

    Store the Christmas M&M Peanut Butter Clusters in an airtight container in the refrigerator. They will remain fresh for up to a week.

    Freezing Instructions

    To freeze, place the clusters in a single layer on a baking sheet until firm. Then transfer them to a freezer-safe container or bag, separating layers with parchment paper. They can be frozen for up to three months. To thaw, simply leave them in the refrigerator overnight.

    Reheating Tips

    • Oven: Preheat to 350°F (175°C) and warm clusters for 5-10 minutes until slightly softened.
    • Microwave: Heat on low power in 10-second intervals until warm, being cautious not to melt them completely.
    • Stovetop: Use a double boiler method on low heat, stirring gently until just warmed.

    Frequently Asked Questions

    How can I make Christmas M&M Peanut Butter Clusters dairy-free?

    You can substitute semi-sweet chocolate chips with dairy-free chocolate chips and ensure that the peanut butter used is also dairy-free.

    Can I use different types of nuts in this recipe?

    Absolutely! Feel free to replace salted peanuts with your favorite nuts such as almonds, cashews, or even sunflower seeds for a different flavor profile.

    How do I store Christmas M&M Peanut Butter Clusters?

    Store them in an airtight container in the refrigerator to maintain freshness for up to a week, or freeze them for longer storage.

    What can I do if my chocolate mixture is too thick?

    If the mixture becomes too thick, you can add a small amount of coconut oil or additional peanut butter to help thin it out while stirring gently.

    Can I add other festive toppings to these clusters?

    Yes, consider adding sprinkles, crushed candy canes, or even a drizzle of caramel for a unique twist on the classic recipe.

    Final Thoughts

    These Christmas M&M Peanut Butter Clusters are the perfect festive treat to share with loved ones during the holiday season. They are simple to prepare and sure to be a crowd-pleaser. Give this recipe a try, and don’t forget to leave a comment with your thoughts!

    Desserts

    Christmas MM Peanut Butter Clusters


    5.0 from 24 reviews

    Get ready to celebrate the holiday season with these delightful clusters! They’re quick to whip up, utterly irresistible, and a festive treat you can share with family and friends.

    Author: Munch Twist
    Prep Time: 10 minutes
    Cook Time: 25 mins
    Total Time: 55 minutes
    Yield: 20 servings
    Category: Desserts
    Method: No bake
    Cuisine: American

    Christmas MM Peanut Butter Clusters

    SCALE:
    1x
    2x
    3x
    Cook Mode: Prevent your screen from going dark

    Ingredients

    • 1 cup creamy peanut butter
    • 2 cups semi-sweet chocolate chips
    • 1 1/2 cups salted peanuts
    • 1 cup holiday M&Ms (red and green)
    • 1/2 cup white chocolate chips (optional, for drizzling)

    Instructions

    1. Begin by melting your semi-sweet chocolate chips and peanut butter together. Place them in a microwave-safe bowl, then microwave in 30-second bursts, stirring well after each interval until the mixture is completely smooth and velvety.
    2. Once melted, take the bowl out of the microwave and fold in the salted peanuts and 3/4 cup of the holiday M&Ms until they are thoroughly coated with the chocolate-peanut butter blend.
    3. On a baking sheet lined with parchment paper, spoon out dollops of the mixture. Give them some space between each cluster for expansion during setting.
    4. To top it off, place a few of the remaining holiday M&Ms onto each cluster for that pop of color and extra cheer!
    5. Place the baking sheet in the refrigerator to chill for about 30-45 minutes, or until the clusters are firm and ready to devour.
    6. For an extra festive touch, melt the white chocolate chips in the microwave and drizzle it over the chilled clusters.
    7. Enjoy your clusters right away, or store them in an airtight container in the refrigerator for up to a week.

    Nutrition Facts

    Serving Size: 1 serving
    Calories: 180 kcal
    Sugar: 10g
    Sodium: 150mg
    Fat: 10g
    Saturated Fat: 3g
    Carbohydrates: 20g
    Fiber: 2g
    Protein: 4g
    Cholesterol: 0mg

  • Easy One-Pot Chicken Parmesan Pasta Recipe

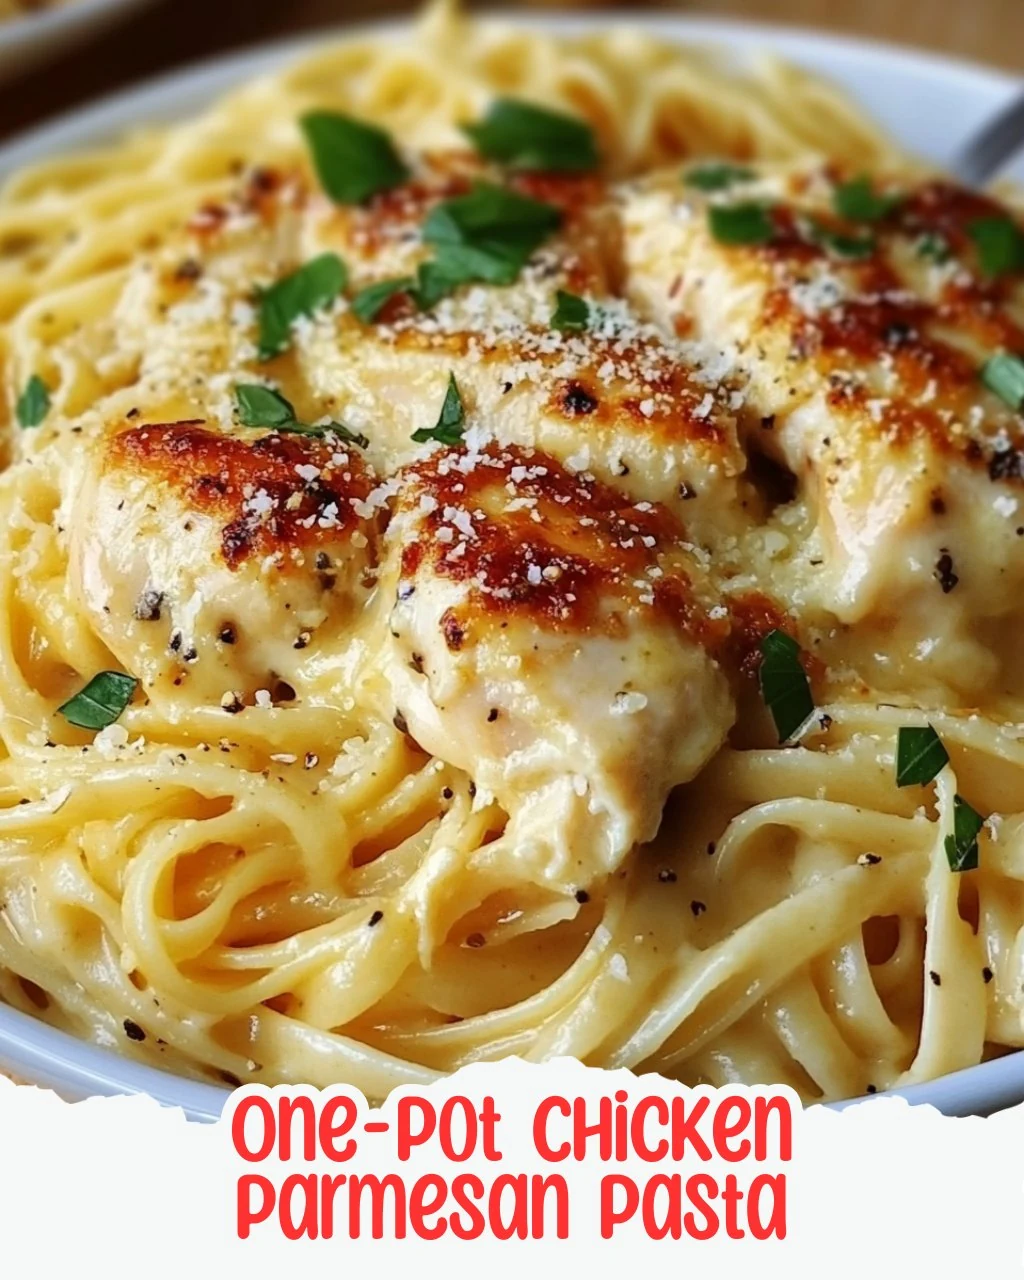
    Easy One-Pot Chicken Parmesan Pasta Recipe

    One-Pot Chicken Parmesan Pasta is a delightful dish that combines rich flavors and comforting textures in a single pot. This recipe is perfect for busy weeknights, offering a quick and satisfying meal that everyone will love. The combination of tender chicken, gooey cheese, and hearty pasta makes it a family favorite.

    Why You’ll Love This Recipe

    • Quick & Easy: Ready in under 30 minutes, making weeknight dinners a breeze.
    • Minimal Cleanup: Cook everything in one pot, reducing the number of dishes to wash.
    • Flavor Packed: The blend of marinara sauce, cheeses, and seasonings creates a rich taste.
    • Customizable: You can easily add vegetables or adjust spices for personal preference.
    • Family-Friendly: This dish appeals to both kids and adults, ensuring a happy table.

    Tools and Equipment

    Before you start, gather the necessary kitchen tools to streamline your cooking process.

    Essential Tools

    • Large pot or Dutch oven
    • Cutting board
    • Chef’s knife
    • Measuring cups and spoons
    • Wooden spoon or spatula

    Why These Tools Matter

    • Large pot or Dutch oven: Provides ample space for cooking chicken and pasta together.
    • Chef’s knife: Ensures precise cutting of ingredients, making prep easier and faster.
    • Wooden spoon or spatula: Perfect for stirring without scratching the pot’s surface.

    Ingredients for One-Pot Chicken Parmesan Pasta

    Proteins

    • 2-3 boneless, skinless chicken breasts, diced into bite-sized pieces

    Cheeses

    • 1 cup mozzarella cheese, shredded (divide for later use)
    • 1/2 cup Parmesan cheese, grated

    Vegetables

    • 1 medium yellow onion, minced
    • 3 cloves garlic, minced

    Pasta

    • 16 oz dried short-cut pasta (e.g., rigatoni)

    Sauces

    • 24 oz jar of marinara sauce (e.g., Newman’s Own)

    Seasonings

    • 1 tsp Italian seasoning
    • 1/2 tsp garlic powder
    • Salt and pepper, to taste
    • Water to fill the empty marinara sauce jar
    • Additional dried Italian seasoning, optional

    Garnish

    • Fresh parsley and/or basil, minced for garnish
    • Drizzle of olive oil

    How to Make One-Pot Chicken Parmesan Pasta Step-by-Step

    Step 1: Cook the Chicken

    In a large pot or Dutch oven, drizzle some olive oil and heat over medium-high heat. Add the diced chicken, seasoning it with salt, pepper, Italian seasoning, and garlic powder. Sauté for about 5 minutes until the chicken is nearly cooked through. Remove the chicken from the pot and set it aside.

    Step 2: Sauté the Onions and Garlic

    Using the same pot, add the minced onion and garlic. Cook for 2-3 minutes until the onion becomes soft and translucent, filling your kitchen with an irresistible aroma.

    Step 3: Add Marinara Sauce and Water

    Pour in the marinara sauce along with enough water to fill the emptied marinara jar. Stir everything together and bring it to a vigorous boil. Once boiling, lower the heat to a strong simmer.

    Step 4: Combine Chicken and Pasta

    Return the chicken to the pot, then add the dried pasta. Stir well to combine, cover the pot, and let it cook for about 10-15 minutes. Stir occasionally until the pasta reaches your desired doneness.

    Step 5: Melt the Cheeses

    Stir in the grated Parmesan cheese and 1/4 cup of shredded mozzarella until melted and evenly blended throughout the dish.

    Step 6: Add More Cheese

    Sprinkle the remaining mozzarella on top. Cover again and let it cook for an additional 2-3 minutes until the cheese is beautifully melted and gooey.

    Step 7: Garnish and Serve

    Optionally, sprinkle extra Italian seasoning for added flavor. Garnish with freshly chopped parsley or basil before serving. Enjoy your hearty, cheesy, one-pot wonder!

    Nutritional Information: Approximately 620 kcal per serving. Serves 4-6.

    Preparation time: 10 minutes | Cooking time: 25 minutes.

    How to Serve One-Pot Chicken Parmesan Pasta

    Serving this dish is as simple as it is delicious. Here are a few creative ideas to elevate your dining experience.

    Family Style

    Serve the One-Pot Chicken Parmesan Pasta directly from the pot at the table. This encourages sharing and creates a cozy atmosphere for family dinners.

    Individual Bowls

    Scoop the pasta into individual bowls and top each serving with a sprinkle of fresh herbs and an extra drizzle of olive oil for a more refined presentation.

    Garlic Bread Side

    Pair the pasta with slices of warm garlic bread. This not only complements the cheesy flavors but also provides a satisfying crunch to each bite.

    Pro Tips for the Best One-Pot Chicken Parmesan Pasta

    Maximize the flavor and ease of preparation with these expert tips.

    • Use Quality Ingredients: Opt for high-quality marinara sauce and fresh cheeses for the best flavor.
    • Don’t Overcook the Chicken: Sauté the chicken just until it’s nearly cooked through to prevent it from becoming dry during the pasta cooking process.
    • Adjust Seasoning: Taste the sauce before serving and adjust the seasoning to your preference, enhancing the overall flavor profile.
    • Experiment with Pasta Shapes: While short-cut pasta works best, feel free to substitute with your favorite shape to change the texture and presentation.
    • Make it Ahead: Prepare the dish in advance and reheat it for a quick weeknight meal, as the flavors will deepen over time.

    Best Side Dishes and Pairings

    Enhance your meal with these delightful side dishes and drinks that complement One-Pot Chicken Parmesan Pasta beautifully.

    1. Caesar Salad: A classic salad with crisp romaine, crunchy croutons, and tangy dressing that adds a refreshing contrast.
    2. Steamed Broccoli: Lightly steamed broccoli provides a nutritious and vibrant side that balances the richness of the pasta.
    3. Garlic Knots: These buttery, garlic-infused knots are perfect for mopping up any leftover sauce on your plate.
    4. Red Wine: A glass of Chianti or Sangiovese pairs well with the dish, enhancing the flavors of the marinara sauce.
    5. Roasted Vegetables: A medley of seasonal vegetables roasted to perfection adds color and flavor, making for a well-rounded meal.

    Common Mistakes to Avoid

    • Overcooking the Pasta: Cooking the pasta too long can lead to mushy results. Keep an eye on the cooking time.
    • Not Seasoning the Chicken: Failing to properly season the chicken can result in bland flavors. Use salt, pepper, and Italian seasoning generously.
    • Skipping the Cheese Mix: Not incorporating the Parmesan and mozzarella cheeses before serving can lead to a less creamy and rich dish.
    • Using Too Much Water: Adding too much water when mixing with marinara sauce can dilute the flavors. Stick to filling the jar to avoid this.

    Storage & Reheating Instructions

    Refrigerator Storage

    Store leftover One-Pot Chicken Parmesan Pasta in airtight containers. It will stay fresh for up to 3-4 days in the refrigerator.

    Freezing Instructions

    For best results, freeze the pasta in an airtight container or heavy-duty freezer bag. It can be frozen for up to 2-3 months. Thaw in the refrigerator overnight before reheating.

    Reheating Tips

    • Oven: Preheat the oven to 350°F (175°C). Place the pasta in an oven-safe dish, cover with foil, and bake for about 15-20 minutes, or until heated through.
    • Microwave: Transfer a portion to a microwave-safe bowl, cover with a microwave-safe lid, and heat on high for 1-2 minutes, stirring halfway through.
    • Stovetop: Heat a non-stick skillet over medium heat. Add the pasta and a splash of water or broth, stirring occasionally until warmed through.

    Frequently Asked Questions

    Can I use a different type of pasta for One-Pot Chicken Parmesan Pasta?

    Yes, you can substitute different short pasta shapes, such as penne or fusilli. Just adjust the cooking time as needed.

    How can I make One-Pot Chicken Parmesan Pasta vegetarian?

    To make this dish vegetarian, replace the chicken with chickpeas or sautéed vegetables and use vegetable broth instead of water.

    Is One-Pot Chicken Parmesan Pasta suitable for meal prep?

    Absolutely! This dish keeps well in the refrigerator and can be portioned out for easy meal prep throughout the week.

    Can I add more vegetables to One-Pot Chicken Parmesan Pasta?

    Yes, feel free to add vegetables like spinach, bell peppers, or zucchini. Just add them during the cooking process for optimal flavor and texture.

    What can I serve with One-Pot Chicken Parmesan Pasta?

    This dish pairs well with a simple side salad or garlic bread to complement the rich flavors.

    Final Thoughts

    One-Pot Chicken Parmesan Pasta is a deliciously simple dish that can transform any weeknight dinner into a comforting experience. We encourage you to try this recipe and share your feedback in the comments below. Your thoughts are invaluable and help us create even more delightful dishes in the future.


    Dinner

    One-Pot Chicken Parmesan Pasta


    5.0 from 24 reviews

    Get ready for a rich and comforting dish that combines tender chicken, cheesy goodness, and hearty pasta all in one pot. This One-Pot Chicken Parmesan Pasta is perfect for busy weeknights and is sure to please everyone at the table.

    Author: Munch Twist
    Prep Time: 10 minutes
    Cook Time: 25 minutes
    Total Time: 35 minutes
    Yield: 4-6 servings
    Category: Lunch
    Method: No bake
    Cuisine: American

    One-Pot Chicken Parmesan Pasta

    SCALE:
    1x
    2x
    3x
    Cook Mode: Prevent your screen from going dark

    Ingredients

    • 2-3 boneless, skinless chicken breasts, diced into bite-sized pieces
    • 1 cup mozzarella cheese, shredded (divide for later use)
    • 1/2 cup Parmesan cheese, grated
    • 1 medium yellow onion, minced
    • 3 cloves garlic, minced
    • 16 oz dried short-cut pasta (e.g., rigatoni)
    • 24 oz jar of marinara sauce (e.g., Newman's Own)
    • 1 tsp Italian seasoning
    • 1/2 tsp garlic powder
    • Salt and pepper, to taste
    • Water to fill the empty marinara sauce jar
    • Additional dried Italian seasoning, optional
    • Fresh parsley and/or basil, minced for garnish
    • Drizzle of olive oil

    Instructions

    1. In a large pot or Dutch oven, drizzle in some olive oil and heat over medium-high heat. Add the diced chicken to the pot, seasoning it with salt, pepper, Italian seasoning, and garlic powder. Sauté for about 5 minutes until the chicken is nearly cooked through. Remove the chicken from the pot and set it aside.
    2. Using the same pot, toss in the minced onion and garlic. Cook for 2-3 minutes until the onion turns soft and translucent.
    3. Pour in the marinara sauce along with enough water to fill the emptied marinara jar. Stir and bring to a vigorous boil. Lower the heat to a strong simmer.
    4. Return the chicken back to the pot, then add the dried pasta. Stir well to combine, cover the pot, and let it cook for about 10-15 minutes, stirring occasionally until the pasta reaches your desired doneness.
    5. Stir in the grated Parmesan cheese and 1/4 cup of shredded mozzarella until melted and blended evenly throughout.
    6. Sprinkle the remaining mozzarella on top of the dish. Cover again and let it cook for an additional 2-3 minutes until the cheese is melted.
    7. Optional: Add a sprinkle of extra Italian seasoning for more flavor. Garnish with freshly chopped parsley or basil before serving.

    Nutrition Facts

    Serving Size: 1 serving
    Calories: 620 kcal
    Sugar: 8g
    Sodium: 900mg
    Fat: 24g
    Saturated Fat: 10g
    Carbohydrates: 70g
    Fiber: 3g
    Protein: 40g
    Cholesterol: 90mg

  • Savory Stuffing Balls Recipe for Any Occasion

    Savory Stuffing Balls Recipe for Any Occasion

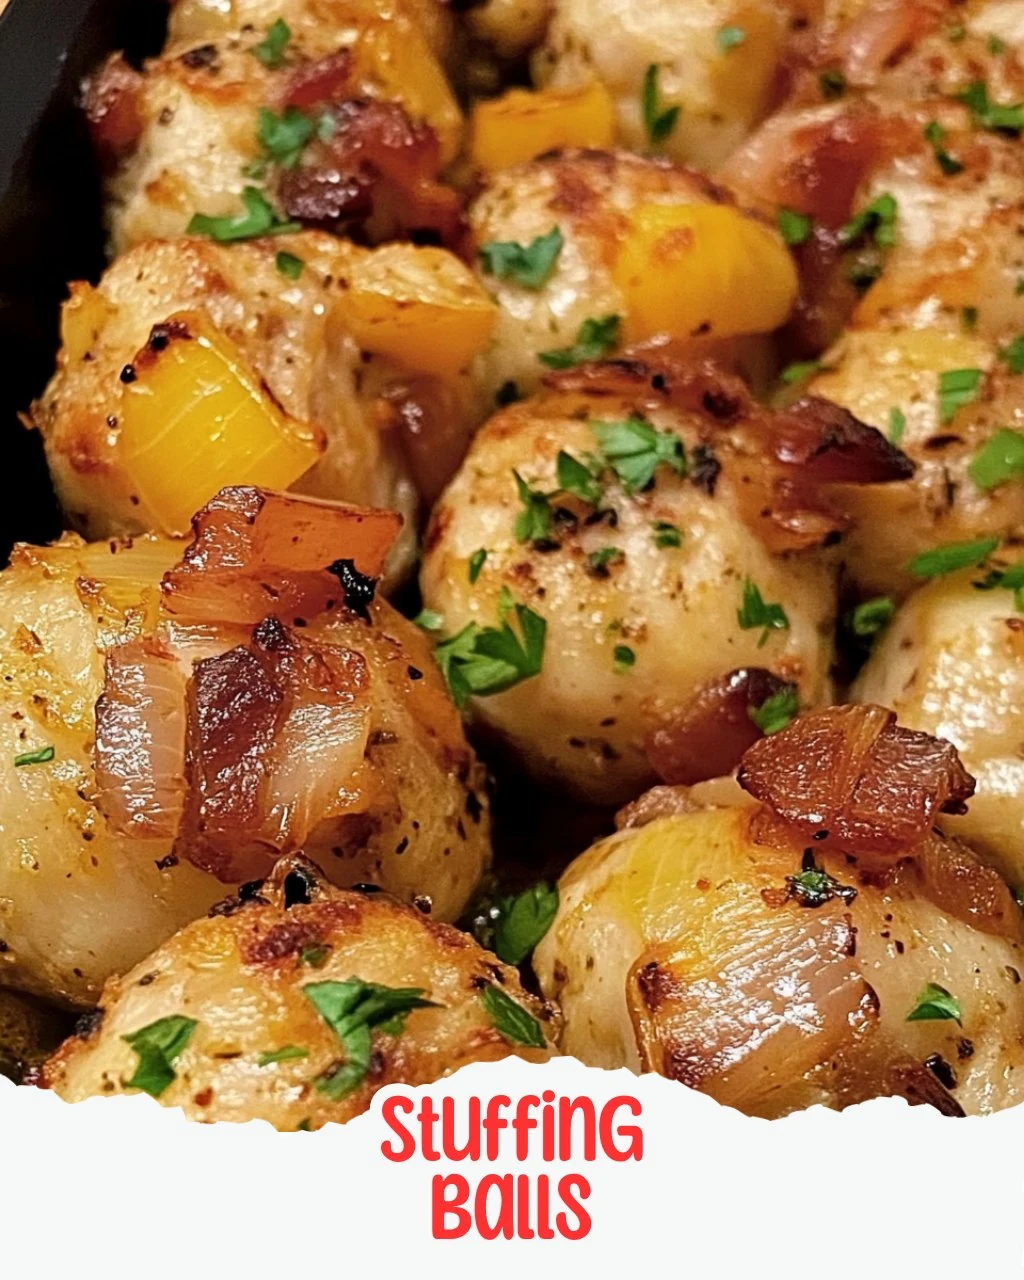
    Stuffing balls are not just for turkey anymore. These savory treats combine the warm, comforting flavors of Thanksgiving in a delightful bite-sized form. Perfect for any occasion, they are sure to impress your family and friends.

    Why You’ll Love This Recipe

    • Versatile Delight: Stuffing balls work as appetizers, side dishes, or even a main course.
    • Flavor-Packed: Each bite is filled with savory goodness, making them irresistible.
    • Make-Ahead Option: Prepare them in advance and simply bake when ready to serve.
    • Customizable: Feel free to add your favorite ingredients like sausage or cranberries for a twist.
    • Crowd-Pleaser: These tasty bites are sure to be a hit at any gathering.

    Tools and Equipment

    Having the right tools makes cooking more enjoyable and efficient.

    Essential Tools

    • Mixing bowl
    • Baking sheet
    • Parchment paper
    • Measuring cups and spoons
    • Chef’s knife and cutting board

    Why These Tools Matter

    • Mixing bowl: Provides ample space for combining ingredients without spilling.
    • Baking sheet: Ensures even cooking and browning of your stuffing balls.
    • Parchment paper: Prevents sticking, making cleanup a breeze.

    Ingredients for Stuffing Balls

    Base Ingredients

    • 1 small onion, finely chopped
    • 1 cup chicken broth
    • 4 cups dry stuffing mix

    Flavor Enhancers

    • 1/2 cup celery, finely chopped
    • 1/2 cup unsalted butter, melted
    • 2 eggs, beaten
    • 1 tsp poultry seasoning
    • Salt and pepper to taste

    Garnish

    • Fresh parsley, chopped for garnish

    How to Make Stuffing Balls Step-by-Step

    Step 1: Prep the Base

    1. Start by preheating your oven to 350F (175C). This ensures your stuffing balls cook evenly.
    2. Line a baking sheet with parchment paper to prevent sticking.

    Step 2: Combine Ingredients

    1. In a large mixing bowl, combine the dry stuffing mix and chicken broth. Stir until the mixture is well moistened.
    2. Add the melted butter and mix thoroughly to incorporate.

    Step 3: Add Flavor

    1. Introduce the beaten eggs, chopped onion, celery, and poultry seasoning. Season with salt and pepper to taste.
    2. Mix everything together until the ingredients are evenly distributed.

    Step 4: Form the Balls

    1. With your hands, scoop out portions of the mixture and form them into small balls, about the size of a golf ball. Ensure they are compact to hold their shape.

    Step 5: Bake

    1. Place the formed stuffing balls on the prepared baking sheet, spacing them evenly.
    2. Bake in the preheated oven for 20-25 minutes. They should be golden brown and firm to the touch.

    Step 6: Serve

    1. Allow the stuffing balls to cool slightly before removing them from the baking sheet.
    2. Garnish with freshly chopped parsley just before serving for an appealing presentation.

    Enjoy your delicious stuffing balls, perfect for any gathering or simply as a comforting snack.

    How to Serve Stuffing Balls

    Stuffing balls are versatile and can be enjoyed in various ways, making them an excellent addition to any meal.

    As an Appetizer

    Serve the stuffing balls with a side of cranberry sauce or a zesty dipping sauce for a delightful starter that will impress your guests.

    In a Salad

    Toss warm stuffing balls into a fresh garden salad for added texture and flavor. They provide a savory contrast to the crisp greens.

    As a Snack

    Enjoy them on their own as a savory snack or quick bite during the day. Their satisfying nature makes them perfect for any occasion.

    Pro Tips for the Best Stuffing Balls

    To elevate your stuffing balls, consider these expert tips.

    • Use Fresh Ingredients: Fresh herbs and vegetables will enhance the flavor of your stuffing balls significantly.
    • Don’t Overmix: Mix the ingredients just enough to combine, ensuring your stuffing balls remain tender and not dense.
    • Experiment with Flavors: Feel free to add in cooked sausage, cheese, or nuts for a unique twist on the classic recipe.
    • Adjust Seasoning: Taste your mixture before forming the balls to ensure the seasoning is just right for your palate.
    • Cool Before Serving: Allow the stuffing balls to cool slightly to help them firm up and make them easier to handle.

    Best Side Dishes and Pairings

    These stuffing balls complement a variety of dishes, enhancing your dining experience.

    1. Roasted Vegetables: The caramelized sweetness of roasted vegetables balances the savory flavors of the stuffing balls.
    2. Mashed Potatoes: Creamy mashed potatoes provide a comforting contrast to the crispy exterior of the stuffing balls.
    3. Green Bean Almondine: The freshness and crunch of green beans topped with toasted almonds offer a delightful texture contrast.
    4. Gravy: A rich turkey or chicken gravy drizzled over the stuffing balls adds moisture and depth of flavor.
    5. Apple Sauce: The sweetness of apple sauce pairs beautifully with the savory herbs, creating a perfect harmony of flavors.

    Common Mistakes to Avoid

    • Not Using Fresh Ingredients: Always opt for fresh herbs and vegetables to enhance the flavor of your stuffing balls.
    • Overmixing the Ingredients: Mixing too much can lead to a dense texture. Stir until just combined for the best results.
    • Skipping the Cooling Step: Allowing the stuffing balls to cool slightly before serving helps them firm up and makes them easier to handle.
    • Ignoring Oven Temperature: Make sure your oven is properly preheated to ensure even cooking and achieve that golden-brown exterior.

    Storage & Reheating Instructions

    Refrigerator Storage

    Store leftover stuffing balls in airtight containers in the refrigerator. They will remain fresh for up to 4 days.

    Freezing Instructions

    To freeze, place the stuffing balls in a single layer on a baking sheet and freeze until solid. Once frozen, transfer them to a freezer-safe bag or container. They can be stored for up to 3 months.

    Reheating Tips

    • Oven: Preheat to 350F (175C) and bake for 10-15 minutes until heated through.
    • Microwave: Place on a microwave-safe plate and heat in 30-second intervals until warm.
    • Stovetop: Heat in a skillet over medium heat, turning occasionally until warmed through.

    Frequently Asked Questions

    Can I make stuffing balls ahead of time?

    Yes, you can prepare the mixture a day in advance and store it in the refrigerator until you’re ready to form and bake the stuffing balls.

    How can I customize my stuffing balls?

    Feel free to add your favorite ingredients such as cooked sausage, dried cranberries, or nuts to give your stuffing balls a personal twist.

    Are stuffing balls gluten-free?

    To make gluten-free stuffing balls, use a gluten-free stuffing mix and ensure all other ingredients are gluten-free.

    What can I serve with stuffing balls?

    Stuffing balls pair well with roasted meats, salads, or can even be served as an appetizer with dipping sauces.

    Can I bake stuffing balls on a grill?

    Absolutely! You can place the formed stuffing balls on a grill-safe pan and cook them over indirect heat until golden and heated through.

    Final Thoughts

    These stuffing balls are a versatile and delicious addition to any meal. Don’t hesitate to try this recipe, and be sure to leave a comment below with your thoughts and any variations you made!


    Dinner

    Stuffing Balls


    5.0 from 24 reviews

    These savory stuffing balls are perfect bite-sized treats that bring all the cozy flavors of Thanksgiving to your table any day of the year. Made with a blend of dry stuffing mix, chicken broth, and fresh vegetables, they are easy to prepare and bake to a golden brown perfection.

    Author: Munch Twist
    Prep Time: 15 minutes
    Cook Time: 25 minutes
    Total Time: 40 minutes
    Yield: 12 servings
    Category: Lunch
    Method: Baking
    Cuisine: American

    Stuffing Balls

    SCALE:
    1x
    2x
    3x
    Cook Mode: Prevent your screen from going dark

    Ingredients

    • 1 small onion, finely chopped
    • 1 cup chicken broth
    • 4 cups dry stuffing mix
    • 1/2 cup celery, finely chopped
    • 1/2 cup unsalted butter, melted
    • 2 eggs, beaten
    • 1 tsp poultry seasoning
    • Salt and pepper to taste
    • Fresh parsley, chopped for garnish

    Instructions

    1. Preheat your oven to 350F (175C) and line a baking sheet with parchment paper.
    2. In a large mixing bowl, combine the dry stuffing mix and chicken broth. Stir in the melted butter until everything is moistened.
    3. Add the beaten eggs, chopped onion, celery, poultry seasoning, salt, and pepper. Mix until well blended.
    4. Form the mixture into small balls, about the size of a golf ball, ensuring they are packed firmly.
    5. Place the stuffing balls on the prepared baking sheet, spaced evenly.
    6. Bake for 20-25 minutes until golden brown and firm to the touch.
    7. Let cool slightly before removing from the baking sheet and garnish with freshly chopped parsley.

    Nutrition Facts

    Serving Size: 1 serving
    Calories: 100 kcal
    Sugar: 1g
    Sodium: 250mg
    Fat: 6g
    Saturated Fat: 3g
    Carbohydrates: 10g
    Fiber: 1g
    Protein: 2g
    Cholesterol: 40mg

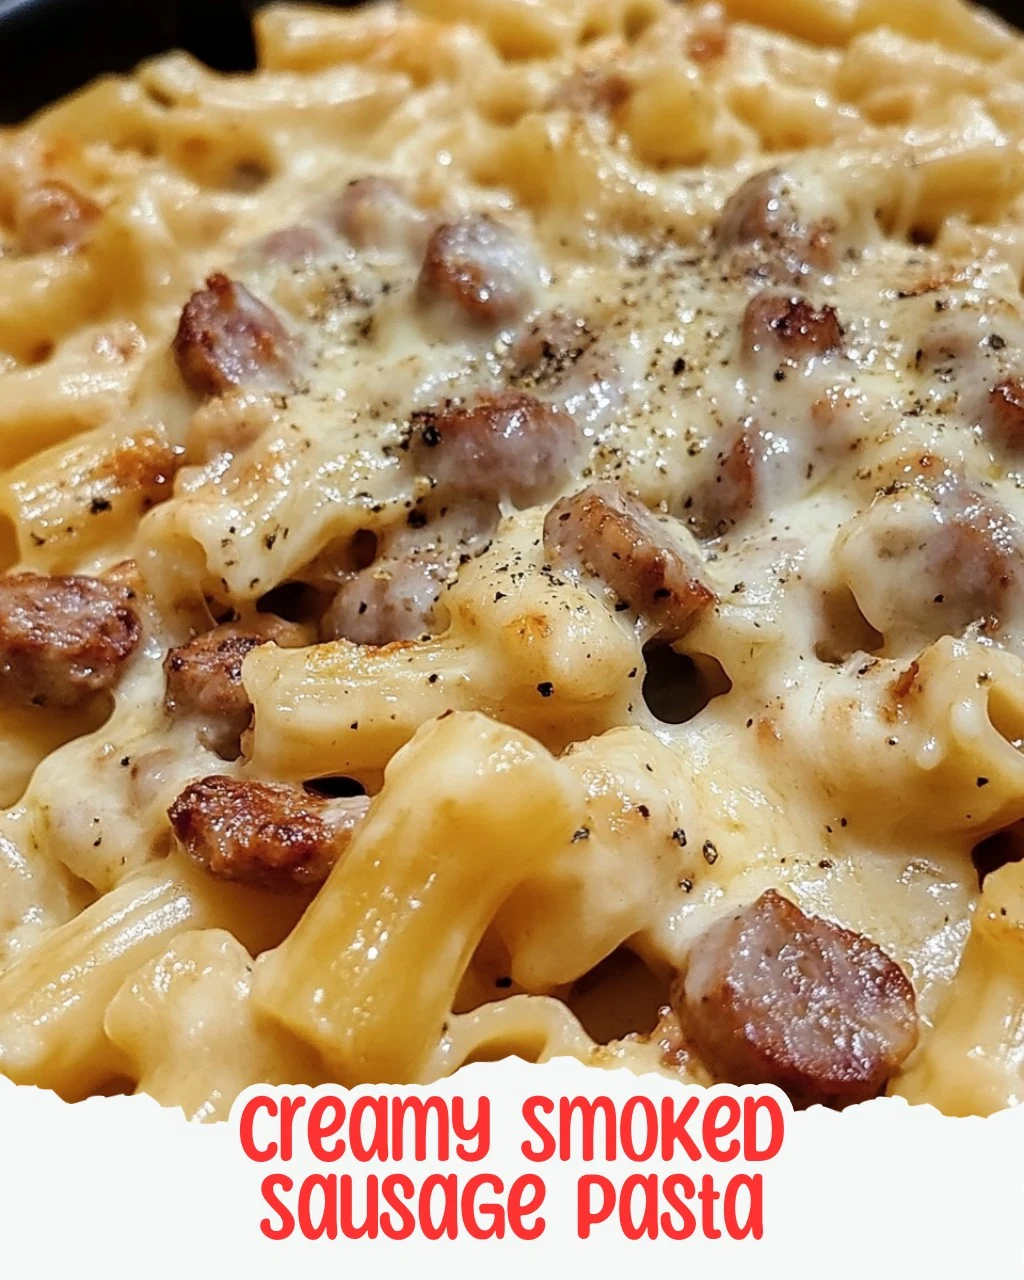
  • Creamy Smoked Sausage Pasta: A Family Favorite

    Creamy Smoked Sausage Pasta: A Family Favorite

    Creamy Smoked Sausage Pasta is a delightful dish that combines savory kielbasa with a luscious tomato-Parmesan sauce. This recipe is perfect for a busy weeknight dinner, offering a satisfying meal that your family will love. The combination of rich flavors and creamy texture makes this pasta dish a true standout.

    Why You’ll Love This Recipe

    • Quick & Easy: Ready in under 30 minutes, making it ideal for busy evenings.
    • Flavor Explosion: The blend of kielbasa and creamy sauce creates a deliciously rich taste.
    • Family-Friendly: Even picky eaters will enjoy this hearty and comforting dish.
    • Customizable: You can easily add vegetables or substitute different sausages to suit your taste.
    • One-Pan Wonder: Less cleanup with everything cooked in one skillet.

    Tools and Equipment

    Having the right tools can streamline your cooking process.

    Essential Tools

    • Large skillet
    • Cooking pot for pasta
    • Wooden spoon or spatula
    • Measuring cups and spoons
    • Knife and cutting board

    Why These Tools Matter

    • Large skillet: Allows for even cooking of the sausage and easy mixing of the sauce.
    • Cooking pot for pasta: Essential for boiling pasta to the perfect al dente texture.
    • Wooden spoon or spatula: Ideal for stirring without damaging your skillet.

    Ingredients for Creamy Smoked Sausage Pasta

    Main Ingredients

    • 2 tbsp minced garlic
    • 1 tsp Italian seasoning
    • 12 oz package of kielbasa
    • 16 oz box of pasta
    • 3 tbsp tomato paste
    • 1 cup heavy whipping cream
    • 2 oz cans of tomato sauce
    • 1 tsp garlic powder
    • 2 tbsp butter
    • 1/2 cup shredded Parmesan cheese
    • Salt and pepper to taste
    • Dried parsley for garnish

    How to Make Creamy Smoked Sausage Pasta Step-by-Step

    Step 1: Prep the Kielbasa and Pasta

    Begin by gathering all your ingredients. Slice the kielbasa into small rounds and set aside. If you have a block of Parmesan cheese, shred it now to have it ready when making the sauce.

    Step 2: Cook the Sausage

    Heat a large skillet over medium-high heat. Once hot, add the sliced kielbasa to the skillet. Cook until golden brown, about 5-7 minutes. Once cooked, remove the sausage from the skillet and set it aside.

    Step 3: Prepare the Sauce

    In the same skillet, lower the heat to medium and add the butter. Once melted, stir in the minced garlic, cooking for about 1 minute until fragrant. Pour in the heavy cream, tomato sauce, and tomato paste, mixing everything together. Add the Parmesan cheese, Italian seasoning, garlic powder, salt, and pepper. Let the sauce simmer for 3-5 minutes until it thickens slightly.

    Step 4: Cook the Pasta

    While your sauce simmers, boil a pot of water and cook the pasta according to the package instructions. Once cooked, drain the pasta and gently add it to the sauce in the skillet, ensuring each piece is well coated.

    Step 5: Combine and Serve

    Stir the browned sausage back into the pasta and sauce mixture. Serve warm, garnished with additional Parmesan cheese and a sprinkle of dried parsley if desired.

    This Creamy Smoked Sausage Pasta recipe is sure to impress and satisfy. With its quick preparation and rich flavors, it will become a staple in your dinner rotation.

    How to Serve Creamy Smoked Sausage Pasta

    This dish can be enjoyed in various ways to elevate your dining experience.

    With a Fresh Salad

    Pair your creamy smoked sausage pasta with a simple mixed green salad dressed in a light vinaigrette. The freshness of the greens balances the richness of the pasta.

    As a Bake

    Transform leftovers into a baked dish. Transfer the pasta to a baking dish, top with extra Parmesan cheese, and bake at 350°F until bubbly and golden on top.

    With Garlic Bread

    Serve alongside warm, crusty garlic bread to soak up the delicious sauce. The crispy texture complements the creamy pasta beautifully.

    Pro Tips for the Best Creamy Smoked Sausage Pasta

    To achieve the perfect creamy smoked sausage pasta, consider these expert tips.

    • Use High-Quality Sausage: Opt for a flavorful kielbasa to enhance the overall taste of the dish.

    • Adjust the Creaminess: For a lighter version, substitute half of the heavy cream with low-fat milk or broth.

    • Add Vegetables: Incorporate spinach or bell peppers into the sauce for added nutrition and flavor.

    • Get Creative with Herbs: Experiment with fresh herbs like basil or oregano to brighten the dish.

    • Cook Pasta Al Dente: Ensure the pasta is cooked al dente so it holds its shape and texture when mixed with the sauce.

    Best Side Dishes and Pairings

    Enhance your meal with these complementary side dishes and drinks.

    1. Garlic Bread – A classic choice, its crunchy texture complements the creamy pasta beautifully.

    2. Caesar Salad – The crisp romaine and tangy dressing provide a refreshing contrast to the dish’s richness.

    3. Roasted Vegetables – Seasonal vegetables add a nutritious and flavorful side, balancing the meal.

    4. Wine – A glass of Chardonnay or Pinot Grigio pairs well with the creamy sauce, enhancing the flavors.

    5. Steamed Broccoli – This nutrient-rich side adds color and a mild flavor that complements the pasta.

    6. Creamy Coleslaw – A creamy coleslaw gives a crunchy texture and tang, perfectly balancing the dish’s richness.

    Common Mistakes to Avoid

    • Not Browning the Sausage: Ensure the kielbasa is browned properly to enhance flavor.
    • Skipping the Simmer: Allow the sauce to simmer; this helps the flavors meld beautifully.
    • Overcooking the Pasta: Follow the package instructions closely to avoid mushy pasta.
    • Forgetting to Season: Always taste and adjust seasoning before serving for optimal flavor.

    Storage & Reheating Instructions

    Refrigerator Storage

    Store any leftovers in airtight containers. This creamy smoked sausage pasta will stay fresh for up to 3 days in the refrigerator.

    Freezing Instructions

    For best results, freeze the pasta in individual portions. Allow it to cool completely before transferring to freezer-safe containers. It can be stored for up to 2 months.

    Reheating Tips

    • Oven: Preheat to 350°F (175°C). Cover the pasta with foil in a baking dish and heat for about 20 minutes or until warmed through.
    • Microwave: Place in a microwave-safe bowl, cover, and heat on medium power for 2-3 minutes, stirring halfway through.
    • Stovetop: Heat in a skillet over medium heat, adding a splash of cream if it appears dry. Stir occasionally until heated through.

    Frequently Asked Questions

    What can I substitute for kielbasa in the Creamy Smoked Sausage Pasta?

    You can use any smoked sausage, such as andouille or a turkey sausage, for a lighter version.

    Can I make Creamy Smoked Sausage Pasta gluten-free?

    Yes, simply swap regular pasta for a gluten-free pasta option.

    How can I make this dish spicier?

    Add red pepper flakes or a dash of hot sauce to the sauce for an extra kick.

    Is this Creamy Smoked Sausage Pasta suitable for meal prep?

    Absolutely! This dish holds up well for meal prep and can be stored in the refrigerator or freezer for easy meals throughout the week.

    Can I add vegetables to the Creamy Smoked Sausage Pasta?

    Yes, feel free to add your favorite vegetables, such as spinach or bell peppers, for added nutrition and flavor.

    Final Thoughts

    This creamy smoked sausage pasta is not only delicious but also easy to prepare, making it a perfect choice for busy weeknights. I encourage you to try this recipe and share your thoughts in the comments. Your feedback is always appreciated!


    Dinner

    Creamy Smoked Sausage Pasta


    5.0 from 24 reviews

    This creamy smoked sausage pasta is a showstopper that's sure to become a family favorite! With savory kielbasa and a rich tomato-Parmesan sauce, every bite is a burst of flavor that will leave you wanting more. Get ready for a delicious dinner that’s quick and easy to whip up!

    Author: Munch Twist
    Prep Time: 10 minutes
    Cook Time: 20 minutes
    Total Time: 30 minutes
    Yield: 4 servings
    Category: Dinner
    Method: No bake
    Cuisine: American

    Creamy Smoked Sausage Pasta

    SCALE:
    1x
    2x
    3x
    Cook Mode: Prevent your screen from going dark

    Ingredients

    • 2 tbsp minced garlic
    • 1 tsp Italian seasoning
    • 12 oz package of kielbasa
    • 16 oz box of pasta
    • 3 tbsp tomato paste
    • 1 cup heavy whipping cream
    • 2 oz cans of tomato sauce
    • 1 tsp garlic powder
    • 2 tbsp butter
    • 1/2 cup shredded Parmesan cheese
    • Salt and pepper to taste
    • Dried parsley for garnish

    Instructions

    1. Begin by gathering all your ingredients. Slice the kielbasa into small rounds and set aside. If using a block of Parmesan cheese, shred it now to have it ready when making the sauce.
    2. Heat a large skillet over medium-high heat. Once hot, add the sliced kielbasa to the skillet and cook until golden brown, about 5-7 minutes. Once cooked, remove the sausage from the skillet and set it aside.
    3. In the same skillet, lower the heat to medium and add the butter. Once melted, stir in the minced garlic, cooking for about 1 minute until fragrant. Pour in the heavy cream, tomato sauce, and tomato paste, mixing everything together. Add the Parmesan cheese, Italian seasoning, garlic powder, salt, and pepper. Let the sauce simmer for 3-5 minutes until it thickens slightly.
    4. While your sauce simmers, boil a pot of water and cook the pasta according to the package instructions. Once cooked, drain the pasta and gently add it to the sauce in the skillet, ensuring each piece is well coated.
    5. Stir the browned sausage back into the pasta and sauce mixture. Serve warm, garnished with additional Parmesan cheese and a sprinkle of dried parsley if desired.

    Nutrition Facts

    Serving Size: 1 serving
    Calories: 550 kcal
    Sugar: 4g
    Sodium: 1200mg
    Fat: 30g
    Saturated Fat: 17g
    Carbohydrates: 55g
    Fiber: 2g
    Protein: 20g
    Cholesterol: 90mg

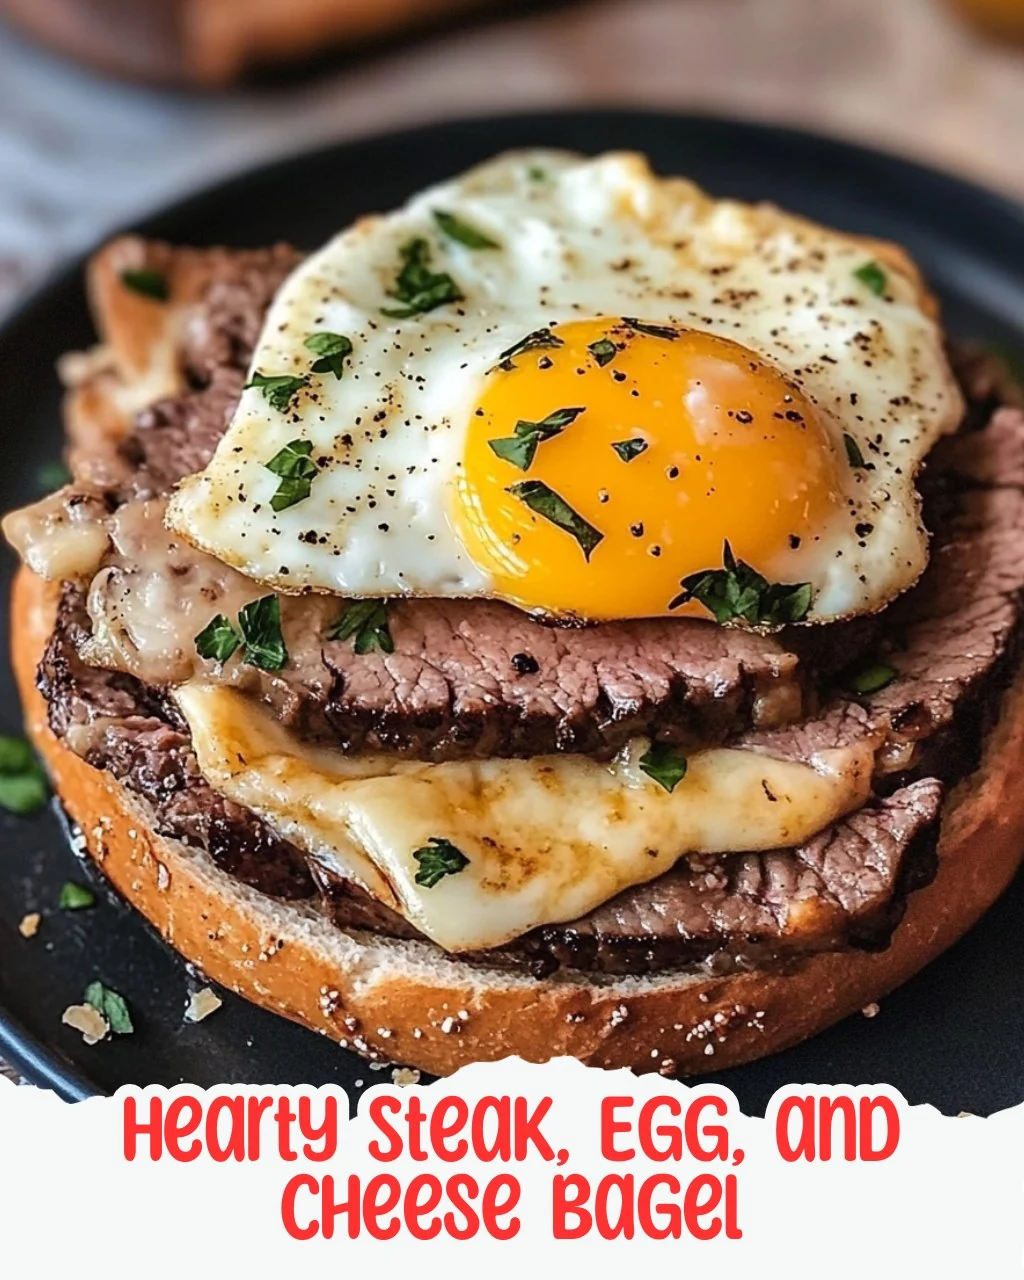
  • Ultimate Breakfast Delight: Hearty Steak Egg and Cheese Bagel

    Ultimate Breakfast Delight: Hearty Steak Egg and Cheese Bagel

    Ultimate Breakfast Delight: Hearty Steak, Egg, and Cheese Bagel

    Wake up your mornings with this savory steak, egg, and cheese bagel that brings the taste of your favorite diner right to your kitchen. The Ultimate Breakfast Delight Hearty Steak Egg and Cheese Bagel features perfectly seasoned steak, creamy cheese, and fluffy scrambled eggs all nestled in a warm bagel, making your breakfast a delicious experience.

    Why You’ll Love This Recipe

    • Savory Flavor: The combination of steak, eggs, and cheese creates a mouthwatering breakfast option.
    • Customizable: Choose your favorite bagel type—plain, onion, everything, or cheese.
    • Filling Meal: Packed with protein, this bagel will keep you satisfied throughout the morning.
    • Quick & Easy: Ready in under 30 minutes, making it perfect for busy mornings.
    • Diner-Style Experience: Enjoy a taste of your favorite diner at home without the wait.

    Tools and Equipment

    Having the right tools makes cooking easier and more enjoyable.

    Essential Tools

    • Skillet
    • Mixing bowl
    • Spatula
    • Knife
    • Cutting board
    • Measuring spoons

    Why These Tools Matter

    • Skillet: Provides even heat for cooking steak and scrambling eggs efficiently.
    • Mixing bowl: Essential for preparing the breakfast sauce and mixing ingredients.
    • Spatula: Helps in flipping the steak and scrambling the eggs without mess.

    Ingredients for Ultimate Breakfast Delight Hearty Steak Egg and Cheese Bagel

    Main Ingredients

    • 2 plain bagels (or onion, everything, or cheese bagels)
    • 1/2 pound of shaved steak
    • 4 eggs, beaten
    • 2 slices of American cheese (or cheddar/provolone)
    • 1 small onion, sliced
    • 1 tablespoon Worcestershire sauce
    • 1/2 teaspoon salt
    • 1 teaspoon Montreal steak seasoning
    • 3 tablespoons unsalted butter

    Sauce Ingredients

    • 1/2 cup mayonnaise
    • 2 tablespoons mustard
    • 1/4 teaspoon dried dill

    How to Make Ultimate Breakfast Delight Hearty Steak Egg and Cheese Bagel Step-by-Step

    Step 1: Prepare the Sauce

    Start by preparing your breakfast sauce. In a small bowl, combine the mayonnaise, mustard, and dried dill. Stir well until mixed, then refrigerate while you work on the other components.

    Step 2: Sauté the Onions

    Heat a skillet over medium heat. Melt 1 tablespoon of butter and add the sliced onion along with a pinch of salt. Sauté until golden brown and fragrant, then set aside.

    Step 3: Season the Steak

    In a bowl, toss the shaved steak with Worcestershire sauce and Montreal steak seasoning until evenly coated.

    Step 4: Cook the Steak

    Return the skillet to medium heat with another tablespoon of butter. Add the seasoned steak and cook until just browned. Mix the sautéed onions back into the skillet with the steak. Form the mixture into two equal piles and place a slice of cheese on top of each pile until melted.

    Step 5: Scramble the Eggs

    Without washing the skillet, add the last tablespoon of butter and pour in the beaten eggs. Scramble until fluffy, then divide into two portions for the sandwiches.

    Step 6: Toast the Bagels

    While the eggs cook, toast the bagels in the skillet or a toaster until warm and slightly crispy.

    Step 7: Assemble the Bagels

    To assemble, spread some of the chilled sauce on each bagel half. Place half of the scrambled eggs on the bottom of each bagel, followed by a generous serving of the steak and onion mix. Top it off with the other bagel half.

    Enjoy this delicious breakfast bagel that will fuel your day!

    Nutritional Information: Approx. 998 kcal per serving

    Time: Preparation time: 10 minutes | Cooking time: 15 minutes

    How to Serve Ultimate Breakfast Delight Hearty Steak Egg and Cheese Bagel

    Elevate your breakfast experience with these creative serving ideas.

    Bagel Sandwich Stack

    Layer additional toppings such as avocado slices, fresh spinach, or even a fried egg on top for a hearty bagel sandwich that bursts with flavor and nutrition.

    Breakfast Platter

    Serve the bagels alongside a selection of fresh fruit, yogurt, and granola for a balanced breakfast platter that offers a variety of textures and tastes.

    Diner-Style Meal

    Pair your bagel with classic diner sides like crispy hash browns or a side of baked beans to recreate a nostalgic breakfast experience.

    Pro Tips for the Best Ultimate Breakfast Delight Hearty Steak Egg and Cheese Bagel

    Enhance your cooking process with these valuable tips.

    • Use Fresh Ingredients: Always opt for fresh bagels and high-quality steak for the best flavor and texture in your breakfast bagel.

    • Customize Your Cheese: Experiment with different cheeses like pepper jack or gouda for a unique twist on the classic flavor profile.

    • Perfectly Scrambled Eggs: Whisk the eggs until fully combined and avoid overcooking them to achieve a light, fluffy texture in your sandwiches.

    • Sautéed Vegetables: Feel free to add bell peppers or mushrooms to the sautéed onions for additional flavor and nutrition.

    • Make it Ahead: Prepare the sauce and cook the steak mixture the night before to streamline your morning routine.

    Best Side Dishes and Pairings

    Complement your Ultimate Breakfast Delight Hearty Steak Egg and Cheese Bagel with these delicious options.

    1. Fresh Fruit Salad: A mix of seasonal fruits adds a refreshing contrast to the hearty flavors of the bagel.

    2. Crispy Hash Browns: Their crunchy texture provides a delightful contrast to the soft bagel and creamy egg.

    3. Smoothie: A berry or green smoothie can offer a nutritious balance, enhancing your breakfast with vitamins and minerals.

    4. Coffee: A rich cup of coffee pairs excellently with this savory breakfast, bringing out the flavors of the steak and cheese.

    5. Herbal Tea: For a lighter option, a soothing herbal tea can complement the meal while aiding digestion.

    Common Mistakes to Avoid

    • Skipping the Sauce: The breakfast sauce adds a creamy tang that enhances the sandwich. Don’t skip this step!
    • Overcooking the Eggs: Fluffy scrambled eggs are key. Remove them from heat as soon as they are cooked to avoid dryness.
    • Underseasoning the Steak: Ensure the steak is well-seasoned with Worcestershire sauce and Montreal steak seasoning for maximum flavor.
    • Not Toasting the Bagels: Toasting adds texture and warmth. Don’t skip toasting your bagels for the best experience.

    Storage & Reheating Instructions

    Refrigerator Storage

    Store any leftover bagels in airtight containers in the refrigerator. They will stay fresh for up to 3 days.

    Freezing Instructions

    For freezing, wrap each assembled bagel tightly in plastic wrap and place them in a freezer-safe bag. They can be frozen for up to 2 months. To thaw, place them in the refrigerator overnight.

    Reheating Tips

    • Oven: Preheat to 350°F (175°C) and wrap the bagel in aluminum foil. Heat for about 10-15 minutes until warmed through.
    • Microwave: Place the bagel on a microwave-safe plate and cover with a damp paper towel. Heat for 30-45 seconds or until warm.
    • Stovetop: Heat a skillet over medium heat and place the bagel halves cut-side down. Cook for 2-3 minutes until crispy and warmed.

    Frequently Asked Questions

    Can I make the Ultimate Breakfast Delight Hearty Steak Egg and Cheese Bagel ahead of time?

    Yes, you can prepare the components in advance and assemble the bagels when you are ready to eat.

    What type of bagel works best for the Ultimate Breakfast Delight Hearty Steak Egg and Cheese Bagel?

    Plain, onion, everything, or cheese bagels all complement the flavors of this recipe wonderfully.

    Can I use different cheese for the Ultimate Breakfast Delight Hearty Steak Egg and Cheese Bagel?

    Absolutely! Cheddar or provolone can be used as tasty alternatives to American cheese.

    How can I customize my Ultimate Breakfast Delight Hearty Steak Egg and Cheese Bagel?

    Feel free to add additional toppings such as avocado, hot sauce, or fresh herbs to enhance your bagel experience.

    Final Thoughts

    This Ultimate Breakfast Delight Hearty Steak Egg and Cheese Bagel is a game-changer for your morning routine. With its rich flavors and satisfying textures, it’s sure to become a breakfast favorite. We encourage you to give this recipe a try and share your thoughts in the comments!


    Lunch

    Ultimate Breakfast Delight Hearty Steak Egg and Cheese Bagel


    5.0 from 24 reviews

    Wake up your mornings with this savory steak, egg, and cheese bagel that brings the taste of your favorite diner right to your kitchen! Perfectly seasoned steak, creamy American cheese, and fluffy scrambled eggs all nestled in a warm bagel.

    Author: Munch Twist
    Prep Time: 10 minutes
    Cook Time: 15 minutes
    Total Time: 25 minutes
    Yield: 2 servings
    Category: Lunch
    Method: No bake
    Cuisine: American

    Ultimate Breakfast Delight Hearty Steak Egg and Cheese Bagel

    SCALE:
    1x
    2x
    3x
    Cook Mode: Prevent your screen from going dark

    Ingredients

    • 2 plain bagels
    • 1/2 pound of shaved steak
    • 4 eggs, beaten
    • 2 slices of American cheese
    • 1 small onion, sliced
    • 1 tablespoon Worcestershire sauce
    • 1/2 teaspoon salt
    • 1 teaspoon Montreal steak seasoning
    • 3 tablespoons unsalted butter
    • 1/2 cup mayonnaise
    • 2 tablespoons mustard
    • 1/4 teaspoon dried dill

    Instructions

    1. In a small bowl, combine the mayonnaise, mustard, and dried dill. Stir until well mixed and refrigerate.
    2. Heat a skillet over medium heat and melt 1 tablespoon of butter. Add the sliced onion and a pinch of salt. Sauté until golden brown and fragrant, then set aside.
    3. Toss the shaved steak with Worcestershire sauce and Montreal steak seasoning.
    4. In the skillet, add another tablespoon of butter and cook the seasoned steak until browned. Return the sautéed onions to the skillet and mix. Form into two piles and place a slice of cheese on top of each, allowing it to melt.
    5. Add the last tablespoon of butter to the skillet and pour in the beaten eggs. Scramble until fluffy and divide into two portions.
    6. Toast the bagels until warm and slightly crispy.
    7. Spread the chilled sauce on each bagel half. Place half of the scrambled eggs on the bottom of each bagel, followed by the steak and onion mix. Top with the other half of the bagel.

    Nutrition Facts

    Serving Size: 1 serving
    Calories: 998 kcal
    Sugar: 2g
    Sodium: 1640mg
    Fat: 66g
    Saturated Fat: 27g
    Carbohydrates: 60g
    Fiber: 3g
    Protein: 49g
    Cholesterol: 520mg

  • Sweet and Spicy Honey Pepper Chicken with Creamy Macaroni Cheese

    Sweet and Spicy Honey Pepper Chicken with Creamy Macaroni Cheese

    Get ready to tantalize your taste buds! This Sweet and Spicy Honey Pepper Chicken with Creamy Macaroni Cheese is the perfect combination of flavors that will leave you craving more. It’s a delightful dish that brings comfort food to a whole new level.

    Why You’ll Love This Recipe

    • Flavor Explosion: The sweet and spicy sauce perfectly complements the creamy macaroni cheese.
    • Crowd-Pleaser: This dish is sure to impress family and friends at any gathering.
    • Comfort Food Upgrade: Enjoy a classic meal with a delicious twist that elevates your dining experience.
    • Satisfying & Filling: With hearty chicken and rich cheese, this recipe is both satisfying and indulgent.
    • Customizable: Easily adjust the spice levels and cheese types to suit your preferences.

    Tools and Equipment

    Gathering the right tools will make your cooking experience smoother.

    Essential Tools

    • Skillet
    • Pot
    • Whisk
    • Measuring cups and spoons
    • Cooking spoon
    • Colander

    Why These Tools Matter

    • Skillet: Ideal for cooking chicken and simmering the sauce, ensuring even heat distribution.
    • Pot: Perfect for boiling pasta and making the creamy cheese sauce without burning.
    • Whisk: Helps create a lump-free cheese sauce, ensuring a smooth and creamy texture.

    Ingredients for Sweet and Spicy Honey Pepper Chicken with Creamy Macaroni Cheese

    For the Chicken

    • 2 boneless, skinless chicken breasts
    • 1/2 cup honey
    • Salt and pepper to taste
    • 1 tablespoon olive oil
    • 1/4 cup soy sauce
    • 1 tablespoon apple cider vinegar
    • 1 teaspoon ground black pepper
    • 1/2 teaspoon garlic powder
    • 1/2 teaspoon onion powder
    • 1/4 teaspoon ground cayenne pepper

    For the Macaroni Cheese

    • 8 ounces macaroni pasta
    • 2 cups shredded sharp cheddar cheese
    • 1 cup shredded mozzarella cheese
    • 2 tablespoons butter
    • 2 tablespoons all-purpose flour
    • 2 cups milk

    Garnish

    • Chopped parsley for garnish

    How to Make Sweet and Spicy Honey Pepper Chicken with Creamy Macaroni Cheese Step-by-Step

    Step 1: Prepare the Chicken

    1. Begin by seasoning both chicken breasts generously with salt and pepper.
    2. Heat the olive oil in a skillet over medium heat. Add the chicken and cook until golden brown and cooked through, about 6-7 minutes per side. Transfer the chicken to a plate and set aside.

    Step 2: Make the Honey Pepper Sauce

    1. In the same skillet, add the honey, soy sauce, apple cider vinegar, and spices (black pepper, garlic powder, onion powder, cayenne pepper). Stir and let it simmer for about 2-3 minutes to thicken the sauce.
    2. Slice the cooked chicken into strips and return it to the skillet. Toss well to coat the chicken evenly with the sauce, keeping it warm.

    Step 3: Prepare the Macaroni Cheese

    1. Boil the macaroni pasta according to package instructions, then drain and set aside.
    2. In a separate pot, melt the butter over medium heat. Stir in the flour and cook for 1 minute to form a roux.
    3. Gradually whisk in the milk, ensuring no lumps remain. Continue stirring until thickened, about 2-3 minutes.
    4. Remove from heat and stir in the shredded cheddar and mozzarella cheese until melted and smooth. Season with salt and pepper.

    Step 4: Combine and Serve

    1. Fold the cooked macaroni into the cheese sauce, coating each piece of pasta well.
    2. To serve, place a generous scoop of creamy macaroni cheese on a plate, top with the honey pepper chicken, and garnish with chopped parsley for a fresh touch.

    Enjoy your delicious Sweet and Spicy Honey Pepper Chicken with Creamy Macaroni Cheese! This recipe serves 4 people and is approximately 780 kcal per serving. Prepare time is 15 minutes, with a cooking time of 45 minutes.

    How to Serve Sweet and Spicy Honey Pepper Chicken with Creamy Macaroni Cheese

    This dish is not only delicious but also versatile in presentation. Here are some creative serving ideas:

    On a Platter

    Serve the Sweet and Spicy Honey Pepper Chicken and Creamy Macaroni Cheese on a large platter for a family-style meal. This allows everyone to help themselves and creates a warm, inviting atmosphere at the dining table.

    With a Side Salad

    Complement this hearty dish with a fresh garden salad. The crispness and acidity of greens like arugula or mixed lettuce balance the richness of the macaroni cheese and the sweetness of the chicken.

    In Individual Bowls

    For a more refined presentation, serve each portion in individual bowls. Layer the creamy macaroni cheese at the bottom and top it with the honey pepper chicken, garnished with chopped parsley for a pop of color.

    Pro Tips for the Best Sweet and Spicy Honey Pepper Chicken with Creamy Macaroni Cheese

    To elevate your cooking experience, consider these practical tips:

    • Use Fresh Ingredients: Fresh herbs and spices will enhance the flavor of your dish significantly, making it more aromatic and appealing.

    • Adjust Spice Levels: If you prefer a milder dish, reduce the amount of cayenne pepper. For those who enjoy heat, feel free to add extra spices to elevate the flavor.

    • Cook Chicken Evenly: Ensure the chicken breasts are of similar thickness for even cooking. You can pound them to an even thickness if needed.

    • Let Cheese Sauce Cool Slightly: Allowing the cheese sauce to cool for just a minute before adding the macaroni can help prevent the sauce from becoming too thick.

    • Garnish for Presentation: Always finish with a sprinkle of fresh parsley or chives to add color and a touch of freshness to the dish.

    Best Side Dishes and Pairings

    To create a complete meal, consider these excellent side dishes and drink pairings:

    1. Garlic Bread: This classic side is perfect for soaking up any leftover sauce and adds a delightful crunch.

    2. Coleslaw: The tangy crunch of coleslaw provides a refreshing contrast to the rich, creamy macaroni.

    3. Grilled Vegetables: Seasonal grilled vegetables like zucchini, bell peppers, and asparagus add color and a healthy element to your plate.

    4. Roasted Brussels Sprouts: The slight bitterness of Brussels sprouts complements the sweetness of the honey pepper chicken beautifully.

    5. Iced Tea: A glass of unsweetened iced tea offers a refreshing counterbalance to the rich flavors of the meal.

    6. Sparkling Water with Lime: This bubbly drink is a light and refreshing option that cleanses the palate between bites.

    Common Mistakes to Avoid

    • Overcooking the Chicken: Ensure the chicken breasts are cooked just until golden brown to prevent dryness.
    • Under-seasoning the Sauce: Taste the honey pepper sauce and adjust the seasoning as needed for a balanced flavor.
    • Not Stirring the Cheese Sauce: Stir continuously when adding milk to avoid lumps in your cheese sauce.
    • Skipping the Pasta Drain: Make sure to drain the macaroni well before mixing it with the cheese sauce for the best texture.

    Storage & Reheating Instructions

    Refrigerator Storage

    Store any leftovers in airtight containers in the refrigerator. This dish will stay fresh for up to 3 days.

    Freezing Instructions

    To freeze, place the cooled chicken and macaroni cheese in separate airtight containers. This dish can be frozen for up to 2 months. Thaw in the refrigerator overnight before reheating.

    Reheating Tips

    • Oven: Preheat to 350°F (175°C), place in a baking dish, and cover with foil. Heat for 20-25 minutes or until warmed through.
    • Microwave: Place in a microwave-safe dish, cover, and heat on medium power for 2-3 minutes, stirring occasionally.
    • Stovetop: Reheat in a skillet over medium heat, stirring frequently until warmed through. Add a splash of milk to revive the cheese sauce if needed.

    Frequently Asked Questions

    How can I adjust the spiciness of the Sweet and Spicy Honey Pepper Chicken with Creamy Macaroni Cheese?

    You can reduce the amount of cayenne pepper or omit it entirely for a milder flavor. Alternatively, add more for extra heat.

    Can I use different types of cheese in the macaroni cheese?

    Absolutely! Feel free to experiment with cheeses like gouda, fontina, or pepper jack for varied flavors in your creamy macaroni cheese.

    How long does it take to prepare Sweet and Spicy Honey Pepper Chicken with Creamy Macaroni Cheese?

    The total time for this recipe is approximately 60 minutes, including preparation and cooking.

    What should I serve with Sweet and Spicy Honey Pepper Chicken?

    This dish pairs well with a fresh salad or steamed vegetables for a complete meal.

    Is Sweet and Spicy Honey Pepper Chicken suitable for meal prep?

    Yes, this recipe is perfect for meal prep! Store portions in airtight containers for easy lunches or dinners throughout the week.

    Final Thoughts

    Sweet and Spicy Honey Pepper Chicken with Creamy Macaroni Cheese is an unforgettable dish that combines comfort and flavor. We encourage you to try this recipe and share your experience in the comments below. Your feedback helps us create even more delicious recipes!


    Dinner

    Sweet and Spicy Honey Pepper Chicken with Creamy Macaroni Cheese


    5.0 from 24 reviews

    Get ready to tantalize your taste buds! This Sweet and Spicy Honey Pepper Chicken paired with creamy macaroni cheese is the perfect combination of flavors that will leave you craving more. It's a delightful dish that brings comfort food to a whole new level!

    Author: Munch Twist
    Prep Time: 15 minutes
    Cook Time: 45 minutes
    Total Time: 60 minutes
    Yield: 4 servings
    Category: Desserts
    Method: No bake
    Cuisine: American

    Sweet and Spicy Honey Pepper Chicken with Creamy Macaroni Cheese

    SCALE:
    1x
    2x
    3x
    Cook Mode: Prevent your screen from going dark

    Ingredients

    • 2 boneless, skinless chicken breasts
    • 1/2 cup honey
    • Salt and pepper to taste
    • 1 tablespoon olive oil
    • 1/4 cup soy sauce
    • 8 ounces macaroni pasta
    • 2 cups shredded sharp cheddar cheese
    • 1 cup shredded mozzarella cheese
    • 2 tablespoons butter
    • 2 tablespoons all-purpose flour
    • 2 cups milk
    • 1 tablespoon apple cider vinegar
    • 1 teaspoon ground black pepper
    • 1/2 teaspoon garlic powder
    • 1/2 teaspoon onion powder
    • 1/4 teaspoon ground cayenne pepper
    • Chopped parsley for garnish

    Instructions

    1. Begin by seasoning both chicken breasts generously with salt and pepper.
    2. Heat the olive oil in a skillet over medium heat. Once hot, add the seasoned chicken and cook until golden brown and cooked through, about 6-7 minutes on each side. Once done, transfer the chicken to a plate and set it aside.
    3. In the same skillet, pour in the honey, soy sauce, apple cider vinegar, and the spices (black pepper, garlic powder, onion powder, and cayenne pepper). Stir and let it simmer for about 2-3 minutes, allowing the flavors to meld and the sauce to thicken slightly.
    4. Slice the cooked chicken into strips and return it to the skillet with the honey pepper sauce. Toss well to coat the chicken evenly with the sauce and keep it warm while you prepare the macaroni cheese.
    5. Boil the macaroni pasta according to package instructions, then drain and set aside.
    6. In a separate pot, melt the butter over medium heat. Stir in the flour and cook for 1 minute while stirring continuously to form a roux.
    7. Gradually whisk in the milk, ensuring there are no lumps. Continue stirring until the mixture thickens up nicely, about 2-3 minutes.
    8. Remove the pot from heat and stir in the shredded cheddar and mozzarella cheese. Mix until the cheese is melted and the sauce is smooth. Season with salt and pepper to taste.
    9. Fold the cooked macaroni into the cheese sauce, ensuring each piece of pasta is well coated.
    10. To serve, place a generous scoop of creamy macaroni cheese on a plate, top it with the honey pepper chicken, and finish with a sprinkle of chopped parsley for a fresh touch.

    Nutrition Facts

    Serving Size: 1 serving
    Calories: 780 kcal
    Sugar: 24g
    Sodium: 1300mg
    Fat: 34g
    Saturated Fat: 18g
    Carbohydrates: 77g
    Fiber: 3g
    Protein: 45g
    Cholesterol: 150mg

  • Creamy Chicken and Broccoli Delight Pasta Recipe

    Creamy Chicken and Broccoli Delight Pasta Recipe

    Get ready to elevate your weeknight dinner with Creamy Chicken and Broccoli Delight Pasta. This creamy, cheesy dish combines tender chicken, vibrant broccoli, and a medley of flavors. It is perfectly comforting and oh-so-satisfying, making it a sure family favorite.

    Why You’ll Love This Recipe

    • Deliciously Creamy: The rich cheddar cheese sauce envelops every bite, providing a comforting and satisfying experience.
    • Nutritious Ingredients: Packed with broccoli and chicken, this dish offers a healthy balance of protein and vegetables.
    • Quick & Easy: Ready in under 45 minutes, it’s perfect for busy weeknights without sacrificing flavor.
    • Customizable: Feel free to add your favorite vegetables or substitute the pasta type to suit your tastes.
    • Family-Friendly: Kids and adults alike will love this dish, making it a great choice for family dinners.

    Tools and Equipment

    Prepare to create this delightful dish with the right tools in your kitchen.

    Essential Tools

    • Large pot
    • Skillet
    • Stirring spoon
    • Measuring cups and spoons
    • Knife and cutting board
    • Colander

    Why These Tools Matter

    • Large pot: Ideal for cooking pasta and vegetables simultaneously, saving time and dishes.
    • Skillet: Perfect for sautéing chicken and creating the delicious cheese sauce.
    • Colander: Ensures easy draining of pasta and broccoli without making a mess.

    Ingredients for Creamy Chicken and Broccoli Delight Pasta

    For the Pasta and Sauce

    • 16 ounces pipe rigate pasta or your preferred pasta
    • 2 cups vegetable broth
    • 2 cups milk
    • 2 tablespoons butter
    • 1/2 cup all-purpose flour
    • 2 cups sharp cheddar cheese, shredded

    For the Chicken and Vegetables

    • 2 boneless, skinless chicken breasts
    • 2 cups broccoli florets
    • 3-ounce bag sun-dried tomatoes, coarsely chopped
    • 1 medium onion, diced
    • 2 cloves garlic, minced

    Seasonings

    • 1 teaspoon black pepper
    • 1 teaspoon garlic powder
    • 1 teaspoon Slap Ya Mama seasoning
    • 1 teaspoon smoked paprika
    • 1/2 teaspoon red pepper flakes

    How to Make Creamy Chicken and Broccoli Delight Pasta Step-by-Step

    Step 1: Cook the Pasta and Broccoli

    Start by bringing a large pot of salted water to a boil. Cook the pasta according to the package instructions until al dente. Just three minutes before the pasta is done, toss in the broccoli florets. Once cooked, drain the pasta and broccoli, and return them to the pot. Stir in the chopped sun-dried tomatoes for a burst of flavor.

    Step 2: Sauté the Aromatics

    While the pasta is cooking, heat the butter in a large skillet over medium heat. Once melted, add the diced onion and minced garlic. Sauté until the onions are translucent and fragrant, which should take about 3-4 minutes.

    Step 3: Cook the Chicken

    Add the chicken breasts to the skillet. Season them with Slap Ya Mama seasoning, black pepper, garlic powder, smoked paprika, and red pepper flakes. Cook the chicken until it’s fully cooked, about 6-7 minutes per side. Once done, remove the chicken from the skillet and let it rest for a moment.

    Step 4: Create the Sauce

    Sprinkle the flour over the onion and garlic mixture in the skillet, stirring well to combine. Cook for an additional 1-2 minutes to eliminate the raw flour taste. Gradually pour in the milk and vegetable broth, stirring continuously. Increase the heat to bring the sauce to a gentle boil, cooking until it thickens slightly.

    Step 5: Add Cheese and Chicken

    Lower the heat and stir in the shredded cheddar cheese, mixing until the cheese is fully melted and incorporated into the sauce. Slice the resting chicken into bite-sized pieces and fold it into the cheese sauce.

    Step 6: Combine and Serve

    Pour the creamy mixture over the pasta and broccoli in the pot. Stir everything together gently to combine, ensuring that every piece is coated in the luscious sauce. Serve warm, and consider adding a side salad or some crusty bread for a complete meal.

    Enjoy your Creamy Chicken and Broccoli Delight Pasta, a comforting dish that is sure to impress!

    How to Serve Creamy Chicken and Broccoli Delight Pasta

    This dish is versatile and can be served in various ways to enhance your dining experience.

    Garnished with Fresh Herbs

    Top your pasta with freshly chopped parsley or basil for a pop of color and added flavor.

    With a Side of Garlic Bread

    Serve alongside warm, buttery garlic bread to complement the creamy sauce and soak up every last drop.

    As a Casserole

    Transform leftovers into a comforting casserole by baking them in a dish topped with breadcrumbs and additional cheese until golden and bubbly.

    Pro Tips for the Best Creamy Chicken and Broccoli Delight Pasta

    Elevate your dish with these helpful tips.

    • Use Fresh Ingredients: Fresh broccoli and high-quality cheese will significantly enhance the flavor of your pasta.

    • Cook Pasta Al Dente: Ensure the pasta is cooked al dente to maintain a perfect texture that holds up in the creamy sauce.

    • Adjust Cheese to Taste: Feel free to experiment with different types of cheese, such as mozzarella or gouda, for varied flavors.

    • Add More Vegetables: Incorporate additional vegetables like bell peppers or spinach for extra nutrition and color.

    • Store Properly: Store leftovers in an airtight container in the refrigerator for up to three days, reheating gently to avoid drying out.

    Best Side Dishes and Pairings

    Complement your Creamy Chicken and Broccoli Delight Pasta with these delightful options.

    1. Caesar Salad: A classic Caesar salad provides a crisp and refreshing contrast to the rich pasta.

    2. Steamed Asparagus: Lightly steamed asparagus adds a touch of elegance and pairs beautifully with the creamy sauce.

    3. Roasted Brussels Sprouts: These savory sprouts roasted to perfection offer a delicious balance to the dish.

    4. Red Wine: A glass of medium-bodied red wine, such as Merlot, enhances the flavors and adds a touch of sophistication.

    5. Lemonade: A refreshing glass of lemonade can provide a zesty contrast to the creamy pasta, perfect for warm evenings.

    Common Mistakes to Avoid

    • Overcooking the Pasta: Ensure you cook the pasta until it is al dente, as it will continue to cook when mixed with the sauce.
    • Not Seasoning the Chicken Properly: Seasoning is crucial; don’t skip the spices to enhance the dish’s flavor.
    • Using Cold Dairy Ingredients: Make sure your milk and cheese are at room temperature to help them melt smoothly into the sauce.
    • Neglecting to Stir the Sauce: Continuously stirring prevents the sauce from sticking to the bottom of the skillet and ensures even thickness.

    Storage & Reheating Instructions

    Refrigerator Storage

    Store leftovers in airtight containers in the refrigerator. The dish will stay fresh for up to 3 days.

    Freezing Instructions

    To freeze, place the cooled pasta in airtight, freezer-safe containers. It can be frozen for up to 2 months. Thaw in the refrigerator overnight before reheating.

    Reheating Tips

    • Oven: Preheat to 350°F (175°C), place pasta in a baking dish, cover with foil, and heat for 20-25 minutes.
    • Microwave: Use a microwave-safe dish, cover loosely, and heat on medium power for 2-3 minutes, stirring halfway through.
    • Stovetop: In a skillet over low heat, add a splash of milk to the pasta and stir until heated through, about 5-7 minutes.

    Frequently Asked Questions

    How can I make Creamy Chicken and Broccoli Delight Pasta gluten-free?

    You can substitute the all-purpose flour with a gluten-free flour blend and choose gluten-free pasta for a safe option.

    Can I use frozen broccoli for this recipe?

    Yes, frozen broccoli can be used. Just add it directly to the pasta for the last three minutes of cooking.

    What type of pasta works best for Creamy Chicken and Broccoli Delight Pasta?

    Pipe rigate is ideal for this dish, but you can use any pasta shape you prefer, such as penne or rotini.

    Can I prepare this dish in advance?

    Yes, you can prepare the components in advance. Cook the pasta and chicken, then combine everything right before serving.

    What can I serve with Creamy Chicken and Broccoli Delight Pasta?

    This dish pairs well with a fresh side salad or some crusty bread to soak up the creamy sauce.

    Final Thoughts

    This Creamy Chicken and Broccoli Delight Pasta is not only delicious but also simple to prepare, making it an ideal choice for a cozy weeknight dinner. We encourage you to try this recipe and share your thoughts in the comments below. Your feedback helps us create more delightful dishes for you!


    Dinner

    Creamy Chicken and Broccoli Delight Pasta


    5.0 from 24 reviews

    Get ready to elevate your weeknight dinner with this creamy, cheesy delight that combines tender chicken, vibrant broccoli, and a medley of flavors! Perfectly comforting and oh-so-satisfying, this pasta dish is sure to become a family favorite!

    Author: Munch Twist
    Prep Time: 15 minutes
    Cook Time: 25 minutes
    Total Time: 40 minutes
    Yield: 4 servings
    Category: Lunch
    Method: No bake
    Cuisine: American

    Creamy Chicken and Broccoli Delight Pasta

    SCALE:
    1x
    2x
    3x
    Cook Mode: Prevent your screen from going dark

    Ingredients

    • 2 cups vegetable broth
    • 2 cups sharp cheddar cheese, shredded
    • 16 ounces pipe rigate pasta or your preferred pasta
    • 2 tablespoons butter
    • 2 cups milk
    • 3-ounce bag sun-dried tomatoes, coarsely chopped
    • 2 cups broccoli florets
    • 2 cloves garlic, minced
    • 1 medium onion, diced
    • 1 teaspoon black pepper
    • 1 teaspoon garlic powder
    • 1 teaspoon Slap Ya Mama seasoning
    • 1 teaspoon smoked paprika
    • 1/2 teaspoon red pepper flakes
    • 1/2 cup all-purpose flour
    • 2 boneless, skinless chicken breasts

    Instructions

    1. Start by bringing a large pot of salted water to a boil. Cook the pasta according to the package instructions until al dente. Just three minutes before the pasta is done, toss in the broccoli florets. Once cooked, drain the pasta and broccoli and return them to the pot. Stir in the chopped sun-dried tomatoes for a burst of flavor.
    2. While the pasta is cooking, heat the butter in a large skillet over medium heat. Once melted, add the diced onion and minced garlic. Sauté until the onions are translucent and fragrant.
    3. Next, add the chicken breasts to the skillet. Season them with Slap Ya Mama seasoning, black pepper, garlic powder, smoked paprika, and red pepper flakes. Cook the chicken until it’s fully cooked, about 6-7 minutes per side. Once done, remove the chicken from the skillet and let it rest for a moment.
    4. Sprinkle the flour over the onion and garlic mixture in the skillet, stirring well to combine. Cook for an additional 1-2 minutes to cook off the raw flour taste.
    5. Gradually pour in the milk and vegetable broth, stirring continuously. Increase the heat to bring the sauce to a gentle boil, cooking until it thickens slightly.
    6. Lower the heat and stir in the shredded cheddar cheese, mixing until the cheese is fully melted and incorporated into the sauce.
    7. Slice the resting chicken into bite-sized pieces and fold it into the cheese sauce. Finally, pour the creamy mixture over the pasta and broccoli in the pot. Stir everything together gently to combine, ensuring that every piece is coated in the luscious sauce.
    8. Serve warm, and feel free to add a side salad or some crusty bread for a complete meal!

    Nutrition Facts

    Serving Size: 1 serving
    Calories: 640 kcal
    Sugar: 8g
    Sodium: 820mg
    Fat: 32g
    Saturated Fat: 18g
    Carbohydrates: 56g
    Fiber: 3g
    Protein: 41g
    Cholesterol: 120mg