Author: munch twist

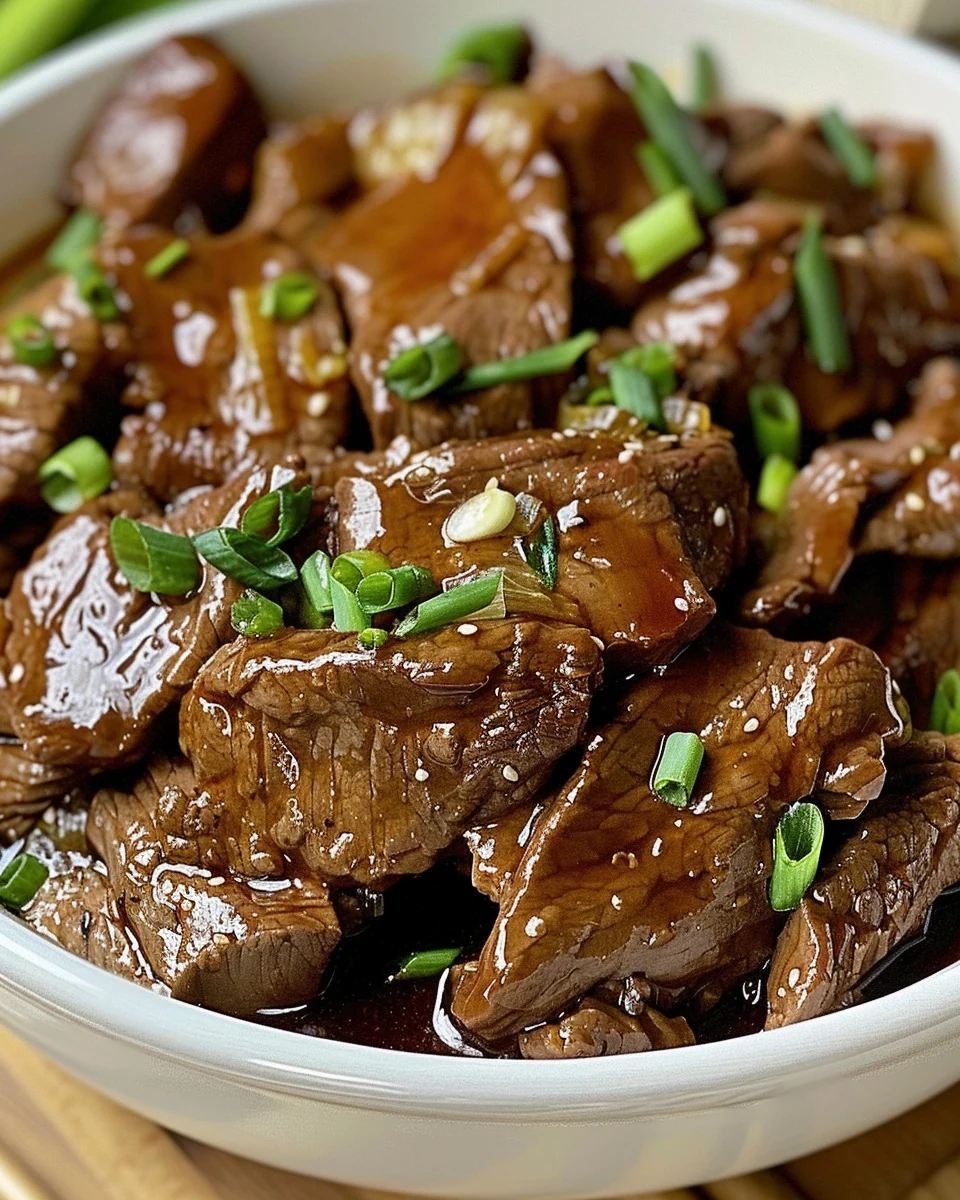
  • Delicious Slow Cooker Mongolian Beef Recipe

    Delicious Slow Cooker Mongolian Beef Recipe

    Slow Cooker Mongolian Beef is a delightful dish that combines tender beef with a rich and savory sauce. This recipe is perfect for busy weeknights, allowing you to enjoy a restaurant-quality meal at home with minimal effort.

    Why You’ll Love This Recipe

    • Flavorful and Savory: The combination of soy sauce, garlic, and ginger creates a mouthwatering sauce that elevates the dish.
    • Tender Beef: Slow cooking ensures the flank steak becomes incredibly tender and infused with flavor.
    • Minimal Prep Time: With just 10 minutes of prep, you can set it and forget it while it cooks.
    • Family-Friendly: This dish appeals to both kids and adults, making it perfect for family dinners.
    • Versatile Serving Options: Serve it over rice or noodles for a complete meal that suits your preference.

    Tools and Equipment

    Having the right tools makes the cooking process smoother and more enjoyable.

    Essential Tools

    • Slow cooker
    • Bowl for mixing
    • Measuring cups and spoons
    • Cutting board
    • Sharp knife

    Why These Tools Matter

    • Slow cooker: This is essential for achieving tender meat with minimal supervision.
    • Bowl for mixing: A sturdy bowl allows for easy mixing of sauces and coatings.
    • Sharp knife: A sharp knife ensures precise slicing of the beef, enhancing presentation and cooking.

    Ingredients for Slow Cooker Mongolian Beef

    Main Ingredients

    • 1 ½ pounds flank steak, thinly sliced against the grain
    • ¼ cup cornstarch
    • 1 tablespoon toasted sesame oil
    • 1 teaspoon minced garlic
    • 1 teaspoon minced ginger
    • ½ cup low sodium soy sauce
    • ⅓ cup brown sugar
    • ½ cup water
    • ½ cup green onions, cut into 1/2 inch pieces

    How to Make Slow Cooker Mongolian Beef Step-by-Step

    Step 1: Prepare the Beef

    In a bowl, coat the thinly sliced flank steak evenly with cornstarch. This will help tenderize the beef and thicken the sauce.

    Step 2: Transfer to Slow Cooker

    Place the coated flank steak in the slow cooker. Spread it out evenly for consistent cooking.

    Step 3: Prepare the Sauce

    In a small bowl, mix together toasted sesame oil, minced garlic, minced ginger, soy sauce, brown sugar, and water until well combined. This flavorful sauce is the heart of the dish.

    Step 4: Pour Over Beef

    Pour the sauce mixture over the flank steak in the slow cooker, ensuring an even coating. This will allow the beef to absorb all the delicious flavors.

    Step 5: Cook

    Cover and cook on HIGH for 2-3 hours or LOW for 4-5 hours until the beef is tender and the sauce thickens. Check occasionally to ensure even cooking.

    Step 6: Add Green Onions

    Once cooked, stir in the green onions. This adds a fresh crunch and enhances the overall flavor profile.

    Step 7: Serve

    Serve the Mongolian beef over cooked rice or noodles. Enjoy a hearty and satisfying meal that the whole family will love.

    Nutritional Information

    • Calories: 320 kcal
    • Carbohydrates: 20g
    • Protein: 30g
    • Fat: 12g
    • Saturated Fat: 4g
    • Cholesterol: 70mg
    • Sodium: 900mg
    • Fiber: 1g
    • Sugar: 12g

    Preparation time: 10 minutes | Cooking time: 2-3 hours on HIGH or 4-5 hours on LOW.

    This Slow Cooker Mongolian Beef recipe is sure to become a favorite in your household. Enjoy the rich flavors and tender meat with every bite.

    How to Serve Slow Cooker Mongolian Beef

    Slow Cooker Mongolian Beef is a versatile dish that can be enjoyed in various ways.

    Over Rice

    Serve the Mongolian beef over a bed of fluffy white or jasmine rice to soak up the savory sauce. This classic pairing enhances the meal’s flavor and provides a satisfying base.

    In Lettuce Wraps

    For a lighter option, spoon the Mongolian beef into crisp lettuce leaves. This creates a fresh, crunchy wrap that adds a delightful texture and is perfect for a low-carb meal.

    With Noodles

    Toss the Mongolian beef with cooked noodles for a heartier dish. The noodles will absorb the flavors of the sauce, resulting in a comforting and fulfilling meal.

    Pro Tips for the Best Slow Cooker Mongolian Beef

    To elevate your Slow Cooker Mongolian Beef, consider these practical tips.

    • Use Flank Steak: Flank steak is ideal due to its tenderness and flavor when cooked slowly.

    • Marinate Overnight: For deeper flavor, marinate the beef in the sauce mixture overnight before cooking.

    • Adjust Sweetness: Feel free to modify the amount of brown sugar according to your taste preference for a sweeter or less sweet dish.

    • Thicken the Sauce: If you prefer a thicker sauce, remove the beef once cooked and mix a cornstarch slurry into the sauce, cooking it on the stove until thickened.

    • Garnish with Sesame Seeds: Sprinkle toasted sesame seeds on top before serving for added flavor and presentation.

    Best Side Dishes and Pairings

    To complement your Slow Cooker Mongolian Beef, consider these delicious pairings.

    1. Steamed Broccoli: The slight bitterness of steamed broccoli balances the dish’s sweetness and adds a nutritious element.

    2. Fried Rice: A flavorful fried rice can offer a perfect contrast to the tender beef and sauce, enriching the meal.

    3. Cucumber Salad: A refreshing cucumber salad adds a crunchy texture and a cool contrast to the warm, savory beef.

    4. Egg Rolls: Crispy egg rolls serve as a great appetizer, enhancing the Asian flavors of the main dish.

    5. Green Tea: A warm cup of green tea provides a soothing beverage choice that complements the dish without overpowering it.

    Common Mistakes to Avoid

    • Not Slicing Against the Grain: Failing to slice the flank steak against the grain can result in tough pieces of meat.
    • Overcrowding the Slow Cooker: Adding too much beef can hinder even cooking and sauce absorption.
    • Skipping the Cornstarch Step: Not coating the beef in cornstarch can lead to a thinner sauce and less tender meat.
    • Not Adjusting Cooking Time: Cooking on HIGH for too long can dry out the beef; monitor closely for optimal tenderness.

    Storage & Reheating Instructions

    Refrigerator Storage

    Store Slow Cooker Mongolian Beef in airtight containers in the refrigerator. It will remain fresh for up to 3 days.

    Freezing Instructions

    For best quality, freeze Slow Cooker Mongolian Beef in airtight containers or freezer bags. It can be frozen for up to 3 months. Thaw in the refrigerator overnight before reheating.

    Reheating Tips

    • Oven: Preheat to 350°F (175°C), place in a covered dish, and heat for about 20-25 minutes or until warmed through.
    • Microwave: Use a microwave-safe dish, cover, and heat in 1-minute intervals until hot, stirring in between.
    • Stovetop: Heat in a skillet over medium heat, stirring occasionally, until warmed through.

    Frequently Asked Questions

    What is Slow Cooker Mongolian Beef?

    Slow Cooker Mongolian Beef is a tender, flavorful dish made with flank steak cooked in a savory sauce of soy sauce, brown sugar, and aromatics.

    How can I make Slow Cooker Mongolian Beef spicier?

    To add heat, include red pepper flakes or sriracha to the sauce before cooking. Adjust to your desired spice level.

    Can I use a different cut of beef for this recipe?

    Yes, you can use other cuts like sirloin or chuck. However, cooking times may vary based on the cut’s tenderness.

    What should I serve with Slow Cooker Mongolian Beef?

    This dish pairs well with steamed rice or noodles, along with a side of vegetables for a complete meal.

    How do I ensure my Slow Cooker Mongolian Beef is tender?

    Proper slicing against the grain and monitoring the cooking time are key to ensuring the beef remains tender and juicy.

    Final Thoughts

    Slow Cooker Mongolian Beef is a delicious, hassle-free meal perfect for busy days. Try this recipe and enjoy the rich flavors that develop during cooking. We invite you to leave a comment with your feedback or any variations you tried!


    Dinner

    Slow Cooker Mongolian Beef


    5.0 from 24 reviews

    Slow Cooker Mongolian Beef is a savory and tender dish featuring thinly sliced flank steak coated in a rich sauce made from soy sauce, brown sugar, and sesame oil. Perfectly cooked in a slow cooker, this meal is ideal for busy weeknights and pairs wonderfully with rice or noodles.
    Author: Munch Twist
    Prep Time: 10 minutes
    Cook Time: 180 minutes
    Total Time: 190 minutes
    Yield: 4 servings
    Category: Desserts
    Method: No bake
    Cuisine: American

    Slow Cooker Mongolian Beef

    SCALE:
    1x
    2x
    3x
    Cook Mode: Prevent your screen from going dark

    Ingredients

    • 1 ½ pounds flank steak, thinly sliced against the grain
    • ¼ cup cornstarch
    • 1 tablespoon toasted sesame oil
    • 1 teaspoon minced garlic
    • 1 teaspoon minced ginger
    • ½ cup low sodium soy sauce
    • ⅓ cup brown sugar
    • ½ cup water
    • ½ cup green onions, cut into 1/2 inch pieces

    Instructions

    1. In a bowl, coat the thinly sliced flank steak evenly with cornstarch.
    2. Place the coated flank steak in the slow cooker.
    3. In a small bowl, mix together toasted sesame oil, minced garlic, minced ginger, soy sauce, brown sugar, and water until well combined.
    4. Pour the sauce mixture over the flank steak in the slow cooker, ensuring even coating.
    5. Cover and cook on HIGH for 2-3 hours or LOW for 4-5 hours until the beef is tender and the sauce thickens.
    6. Once cooked, stir in the green onions.
    7. Serve the Mongolian beef over cooked rice or noodles.
    Nutrition Facts

    Serving Size: 1 serving
    Calories: 320 kcal
    Sugar: 12g
    Sodium: 900mg
    Fat: 12g
    Saturated Fat: 4g
    Carbohydrates: 20g
    Fiber: 1g
    Protein: 30g
    Cholesterol: 70mg

  • Delicious Avocado Mozzarella and Tomato Grilled Cheese Recipe

    Delicious Avocado Mozzarella and Tomato Grilled Cheese Recipe

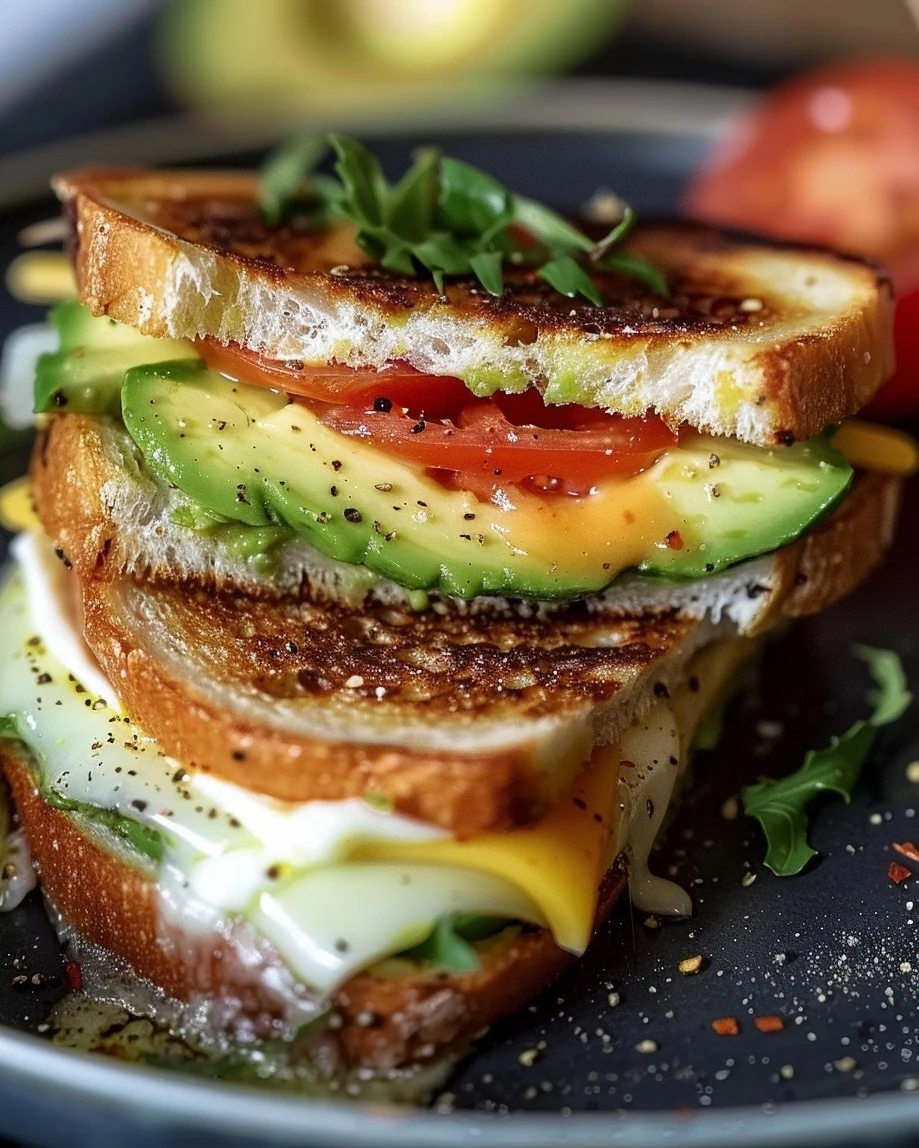
    Avocado Mozzarella and Tomato Grilled Cheese is a delightful twist on the classic sandwich. This recipe combines creamy avocado, gooey mozzarella, and juicy tomatoes, creating a comforting yet fresh flavor profile that will appeal to both grilled cheese lovers and health-conscious eaters alike.

    Why You’ll Love This Recipe

    • Quick & Easy: Ready in under 30 minutes, perfect for busy weeknights or a quick lunch.
    • Nutritious: Packed with healthy fats from avocado and protein from mozzarella, this sandwich is also rich in vitamins.
    • Flavorful: The combination of creamy, tangy, and savory ingredients creates a deliciously satisfying meal.
    • Versatile: Customize it by adding herbs, spices, or other vegetables to suit your taste.
    • Satisfying: With a perfect balance of textures, this grilled cheese is both crispy and gooey.

    Tools and Equipment

    To prepare this delicious grilled cheese, you will need a few essential kitchen tools.

    Essential Tools

    • Non-stick frying pan
    • Spatula
    • Butter knife
    • Cutting board
    • Sharp knife

    Why These Tools Matter

    • Non-stick frying pan: Prevents the sandwich from sticking, allowing for easy flipping and cooking.
    • Spatula: Essential for flipping the sandwich without losing any fillings.
    • Sharp knife: Ensures clean cuts for even slicing of the tomatoes and avocado.

    Ingredients for Avocado Mozzarella and Tomato Grilled Cheese

    Bread

    • 2 slices multigrain bread (I prefer Ezekiel sprouted grain bread)

    Cheese

    • 4 slices mozzarella cheese

    Vegetables

    • 4 cherry tomatoes (halved)
    • ½ avocado (sliced)

    Other

    • A dab of butter

    How to Make Avocado Mozzarella and Tomato Grilled Cheese Step-by-Step

    Step 1: Prep the Base

    Butter the outside of each slice of bread generously. This will create a golden, crispy exterior when cooked.

    Step 2: Assemble the Sandwich

    Heat a frying pan over medium heat. Place one slice of bread in the pan, buttered side down. Layer the mozzarella cheese, cherry tomatoes, and avocado slices on top of the bread in the pan. Place the second slice of bread on top, buttered side up.

    Step 3: Cook the First Side

    Cook the sandwich for a few minutes until the bottom slice is golden brown and crispy. Keep an eye on it to avoid burning.

    Step 4: Flip and Finish Cooking

    Carefully flip the sandwich using a spatula. Cook the other side until it is golden brown, and the cheese has fully melted.

    Step 5: Serve

    Remove the sandwich from the pan and let it cool slightly before serving. This helps prevent burns and allows the flavors to meld.

    Enjoy this Avocado Mozzarella and Tomato Grilled Cheese, a delightful fusion of flavors that is sure to please everyone at the table.

    How to Serve Avocado Mozzarella and Tomato Grilled Cheese

    Elevate your grilled cheese experience with these creative serving ideas.

    With a Side of Tomato Soup

    Pairing this sandwich with a warm bowl of tomato soup creates a classic combination that enhances the flavors of both dishes.

    Add a Fresh Salad

    Serve your grilled cheese alongside a light green salad dressed with a lemon vinaigrette. The acidity of the dressing complements the richness of the sandwich.

    Garnish with Fresh Herbs

    Top your sandwich with freshly chopped basil or cilantro for an aromatic finish that adds a burst of flavor.

    Pro Tips for the Best Avocado Mozzarella and Tomato Grilled Cheese

    Maximize the deliciousness of your grilled cheese with these helpful tips.

    • Use Fresh Ingredients: Always opt for ripe avocados and fresh mozzarella to ensure the best flavor and texture.
    • Choose the Right Bread: Multigrain or sourdough bread can add a delightful crunch and flavor to your sandwich.
    • Control the Heat: Cooking on medium heat allows the cheese to melt completely without burning the bread.
    • Experiment with Spices: A sprinkle of garlic powder or red pepper flakes can add an extra layer of flavor to your sandwich.
    • Let it Rest: Allow the sandwich to cool for a minute before cutting to avoid messy toppings spilling out.

    Best Side Dishes and Pairings

    Complement your Avocado Mozzarella and Tomato Grilled Cheese with these delightful sides and beverages.

    1. Kale Caesar Salad: This salad’s creamy dressing and crunchy croutons provide a refreshing contrast to the sandwich’s richness.
    2. Sweet Potato Fries: Crispy sweet potato fries offer a slightly sweet flavor that pairs perfectly with the savory elements of the grilled cheese.
    3. Crisp Pickles: The acidity and crunch of pickles cut through the creaminess, creating a balanced bite.
    4. Herbal Iced Tea: A refreshing iced tea infused with herbs can cleanse the palate and enhance the overall meal experience.
    5. Roasted Vegetable Platter: A mix of seasonal roasted vegetables adds a nutritious and colorful element to your dining experience.

    Common Mistakes to Avoid

    • Not Buttering Evenly: Ensure that the butter is spread evenly on the bread to achieve a perfect golden crust.
    • Overcrowding the Ingredients: Avoid adding too many toppings, as it can make it difficult to flip the sandwich without spilling.
    • Cooking on High Heat: Cooking at too high a temperature can burn the bread before the cheese has a chance to melt.
    • Skipping the Cooling Period: Allowing the sandwich to cool slightly helps the cheese set, making it easier to cut and eat.

    Storage & Reheating Instructions

    Refrigerator Storage

    Store your Avocado Mozzarella and Tomato Grilled Cheese in an airtight container in the refrigerator. It will stay fresh for up to 2 days.

    Freezing Instructions

    For best results, freeze the sandwich before cooking. Wrap it tightly in plastic wrap and then in aluminum foil. It can be frozen for up to 1 month. Thaw in the refrigerator overnight before cooking.

    Reheating Tips

    • Oven: Preheat the oven to 350°F (175°C). Place the sandwich on a baking sheet and heat for about 10-15 minutes until warmed through.
    • Microwave: Place the sandwich on a microwave-safe plate and cover it with a damp paper towel. Heat for 30 seconds, checking to see if it’s warmed through.
    • Stovetop: Reheat in a pan over low heat for about 5 minutes on each side, covering with a lid to ensure even heating.

    Frequently Asked Questions

    How do I make the Avocado Mozzarella and Tomato Grilled Cheese gluten-free?

    You can easily make this sandwich gluten-free by using gluten-free bread. Just make sure the bread is sturdy enough to hold the fillings.

    Can I add additional ingredients to the Avocado Mozzarella and Tomato Grilled Cheese?

    Yes, feel free to add ingredients like spinach, pesto, or even a slice of turkey for extra flavor and nutrition.

    What is the best type of cheese for this grilled cheese recipe?

    While mozzarella is the classic choice, you can mix in other cheeses like sharp cheddar or fontina for a different flavor profile.

    How can I enhance the flavor of my Avocado Mozzarella and Tomato Grilled Cheese?

    Consider adding herbs such as basil or a sprinkle of red pepper flakes for added flavor. A drizzle of balsamic glaze can also elevate the taste.

    Can I make this recipe vegan?

    To make a vegan version, substitute the mozzarella with a plant-based cheese and use vegan butter or olive oil for grilling.

    Final Thoughts

    This Avocado Mozzarella and Tomato Grilled Cheese is a delightful twist on a beloved classic. By combining fresh ingredients and a gooey texture, it offers a satisfying meal perfect for any time of day. I encourage you to try this recipe and share your experience in the comments below.


    Lunch

    Avocado Mozzarella and Tomato Grilled Cheese


    5.0 from 24 reviews

    This Avocado Mozzarella and Tomato Grilled Cheese is a delicious twist on the classic sandwich. It features creamy avocado, gooey mozzarella, and juicy cherry tomatoes, all grilled to perfection between slices of multigrain bread. Perfect for a quick lunch or snack.

    Author: Munch Twist
    Prep Time: 5 minutes
    Cook Time: 10 minutes
    Total Time: 15 minutes
    Yield: 1 serving
    Category: Lunch
    Method: No bake
    Cuisine: American

    Avocado Mozzarella and Tomato Grilled Cheese

    SCALE:
    1x
    2x
    3x
    Cook Mode: Prevent your screen from going dark

    Ingredients

    • 4 slices mozzarella cheese
    • 2 slices multigrain bread
    • 4 cherry tomatoes (halved)
    • ½ avocado (sliced)
    • A dab of butter

    Instructions

    1. Butter the outside of each slice of bread.
    2. Heat a frying pan over medium heat. Place one slice of bread in the pan, buttered side down.
    3. Layer the mozzarella cheese, cherry tomatoes, and avocado slices on top of the bread in the pan.
    4. Place the second slice of bread on top, buttered side up.
    5. Cook for a few minutes until the bottom slice is golden brown and crispy.
    6. Flip the sandwich carefully and cook the other side until golden brown and the cheese is melted.
    7. Remove from the pan and let cool slightly before serving.

    Nutrition Facts

    Serving Size: 1 serving
    Calories: 380 kcal
    Sugar: 3g
    Sodium: 600mg
    Fat: 25g
    Saturated Fat: 10g
    Carbohydrates: 24g
    Fiber: 6g
    Protein: 18g
    Cholesterol: 60mg

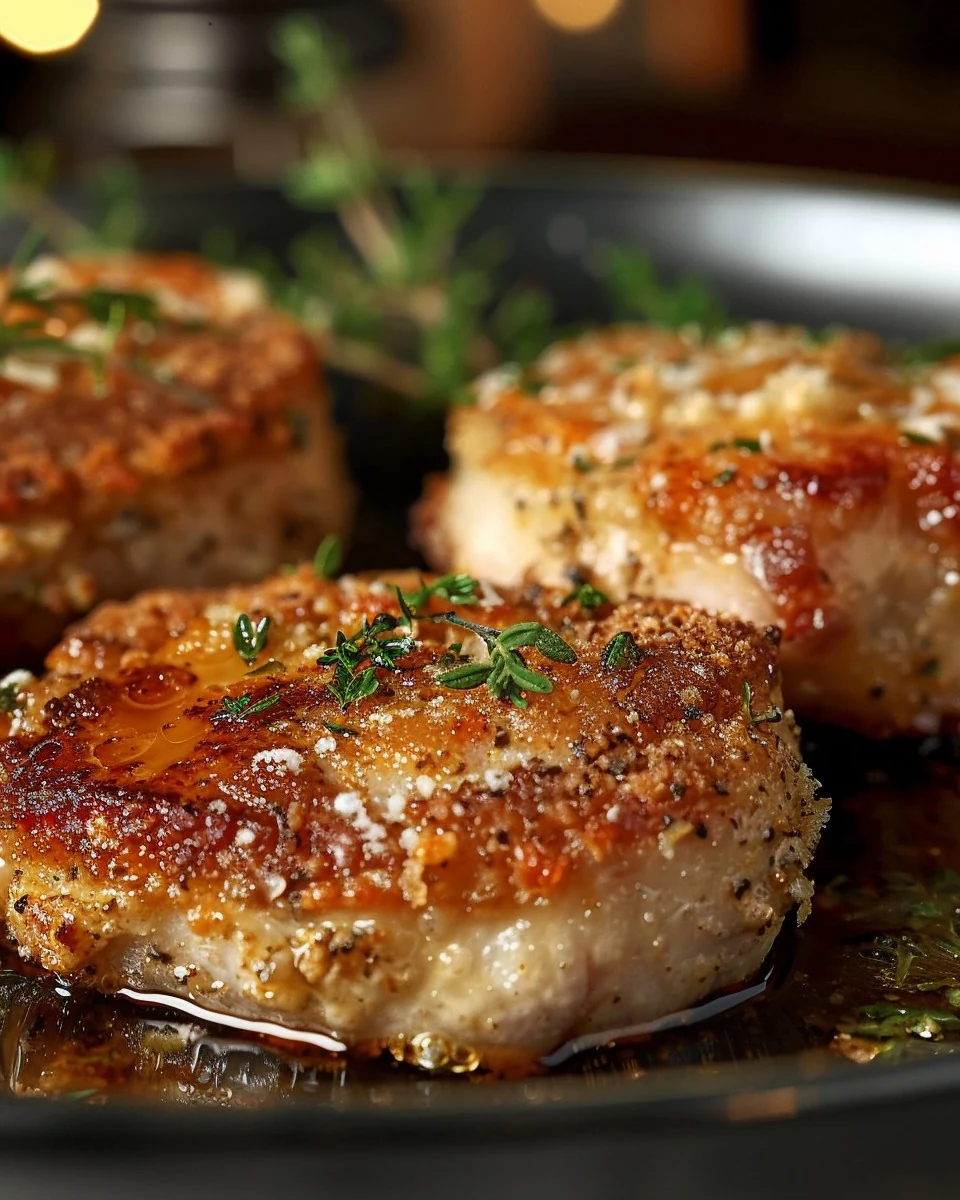
  • Delicious Parmesan Baked Pork Chops Recipe

    Delicious Parmesan Baked Pork Chops Recipe

    Parmesan Baked Pork Chops are a delightful dish that combines juicy pork with a crispy, cheesy coating. This recipe stands out with its simple preparation and rich flavor, making it a perfect choice for weeknight dinners or special occasions.

    Why You’ll Love This Recipe

    • Delicious Flavor: The combination of parmesan cheese and garlic powder provides a savory taste that elevates the pork.
    • Crispy Coating: The Italian bread crumbs create a crunchy texture that contrasts beautifully with the tender meat.
    • Quick & Easy: This dish can be prepared in under an hour, making it suitable for busy weeknights.
    • Healthy Option: With lean pork chops and minimal oil, this recipe offers a nutritious meal without sacrificing flavor.
    • Versatile Pairing: Serve with vegetables or a salad for a complete meal that appeals to everyone.

    Tools and Equipment

    Having the right tools can streamline your cooking process. Here’s what you need to make Parmesan Baked Pork Chops.

    Essential Tools

    • Baking pan
    • Tin foil
    • Cooking spray
    • Mixing plate
    • Measuring cups and spoons

    Why These Tools Matter

    • Baking pan: Provides even heat distribution for consistent cooking.
    • Tin foil: Makes cleanup easier and prevents sticking.
    • Cooking spray: Helps achieve a golden, crisp coating without added calories from excess oil.

    Ingredients for Parmesan Baked Pork Chops

    Main Ingredients

    • 1 tsp. pepper
    • 1 tsp. garlic powder
    • 1 C. Italian bread crumbs
    • 4 boneless pork chops
    • 1 T. olive oil
    • 1 C. parmesan cheese (I used Kraft)

    How to Make Parmesan Baked Pork Chops Step-by-Step

    Step 1: Prep the Oven and Baking Pan

    1. Preheat your oven to 350°F (175°C).
    2. Line a baking pan with tin foil and spray it with cooking spray to prevent sticking.

    Step 2: Prepare the Coating

    1. On a plate, combine the parmesan cheese, Italian bread crumbs, pepper, and garlic powder. Mix until evenly distributed.

    Step 3: Prepare the Pork Chops

    1. Rub each pork chop with olive oil to ensure the coating adheres well.

    Step 4: Coat the Pork Chops

    1. Dip each pork chop into the cheese mixture. Press the mixture onto the pork to ensure a thorough coating.

    Step 5: Bake the Pork Chops

    1. Place the coated pork chops on the prepared baking pan.
    2. Bake in the preheated oven for 40-45 minutes, or until the pork chops are cooked through and the coating is golden brown.

    Enjoy these Parmesan Baked Pork Chops as a flavorful and satisfying meal. Perfectly paired with a side of your choice, they are sure to become a family favorite.

    How to Serve Parmesan Baked Pork Chops

    Serving Parmesan Baked Pork Chops can elevate your meal experience. Here are some creative ideas to enhance your dining presentation.

    Fresh Salad

    A light mixed greens salad with a tangy vinaigrette complements the richness of the pork chops, balancing flavors beautifully.

    Garlic Mashed Potatoes

    Creamy garlic mashed potatoes provide a comforting side that pairs well with the savory notes of the parmesan coating.

    Grilled Vegetables

    Grilled seasonal vegetables add a smoky flavor and vibrant colors to your plate, making for a visually appealing and nutritious meal.

    Pro Tips for the Best Parmesan Baked Pork Chops

    To ensure your Parmesan Baked Pork Chops turn out perfectly every time, consider these expert tips.

    • Use Fresh Ingredients: Fresh parmesan cheese enhances the flavor compared to pre-grated options.

    • Do Not Overcook: Use a meat thermometer to check for an internal temperature of 145°F (63°C) to avoid dry pork.

    • Let Rest Before Serving: Allow the pork chops to rest for 5-10 minutes after baking; this helps retain their juices.

    • Customize Seasoning: Feel free to add herbs like oregano or thyme to the breading for additional flavor.

    • Experiment with Coatings: Try mixing in crushed nuts or different cheese varieties for a unique twist on the classic recipe.

    Best Side Dishes and Pairings

    Pairing your Parmesan Baked Pork Chops with the right sides can enhance the overall meal experience. Here are some excellent options.

    1. Steamed Broccoli: The slight bitterness of broccoli contrasts well with the savory pork, adding a nutritious element.

    2. Roasted Sweet Potatoes: The natural sweetness of roasted sweet potatoes balances the richness of the pork and adds a colorful touch.

    3. Caesar Salad: A classic Caesar salad with its creamy dressing and crunchy croutons complements the flavors of the pork chops.

    4. Red Wine: A glass of medium-bodied red wine, such as Merlot, adds depth to the meal and enhances the savory profile.

    5. Garlic Bread: Warm, crispy garlic bread is perfect for soaking up any juices from the pork, making every bite enjoyable.

    Common Mistakes to Avoid

    • Not Preheating the Oven: Always preheat your oven to ensure even cooking.
    • Skipping the Olive Oil: Olive oil helps the coating adhere and enhances flavor.
    • Overcrowding the Baking Pan: Give each pork chop enough space for optimal browning.
    • Not Checking Internal Temperature: Use a meat thermometer to ensure the pork chops reach 145°F (63°C).

    Storage & Reheating Instructions

    Refrigerator Storage

    Store leftover Parmesan Baked Pork Chops in airtight containers. They will remain fresh for up to 3 days in the refrigerator.

    Freezing Instructions

    To freeze, wrap the pork chops tightly in plastic wrap and then place them in a freezer-safe bag. They can be frozen for up to 2 months. For best results, thaw in the refrigerator overnight before reheating.

    Reheating Tips

    • Oven: Preheat to 350°F (175°C) and heat for about 15-20 minutes or until warmed through.
    • Microwave: Place on a microwave-safe plate, cover with a damp paper towel, and heat on medium power for 1-2 minutes.
    • Stovetop: Heat a skillet over medium heat and warm the pork chops for about 5 minutes on each side.

    Frequently Asked Questions

    How long do I bake Parmesan Baked Pork Chops?

    Parmesan Baked Pork Chops should be baked in a preheated oven for 40-45 minutes or until the internal temperature reaches 145°F (63°C).

    Can I use bone-in pork chops for this recipe?

    While boneless pork chops are recommended for even cooking, you can use bone-in chops. Just adjust the cooking time as they may take a bit longer.

    What can I serve with Parmesan Baked Pork Chops?

    These pork chops pair well with a variety of sides such as roasted vegetables, mashed potatoes, or a fresh salad.

    Can I make Parmesan Baked Pork Chops ahead of time?

    Yes, you can prepare the pork chops and coat them with the cheese mixture ahead of time. Store them in the refrigerator until you are ready to bake.

    Final Thoughts

    Parmesan Baked Pork Chops are a simple yet delicious meal that is sure to impress. We encourage you to try this recipe and share your experience in the comments below. Your feedback helps others discover the joy of cooking!


    Dinner

    Parmesan Baked Pork Chops


    5.0 from 24 reviews

    Parmesan Baked Pork Chops are a delicious and easy-to-make dish that combines tender pork chops with a crispy, cheesy coating. Perfect for a weeknight dinner, these chops are seasoned to perfection and baked until golden brown, making them a family favorite.

    Author: Munch Twist
    Prep Time: 10 mins
    Cook Time: 45 mins
    Total Time: 55 mins
    Yield: 4 servings
    Category: Lunch
    Method: Baking
    Cuisine: American

    Parmesan Baked Pork Chops

    SCALE:
    1x
    2x
    3x
    Cook Mode: Prevent your screen from going dark

    Ingredients

    • 1 tsp pepper
    • 1 tsp garlic powder
    • 1 cup Italian bread crumbs
    • 4 boneless pork chops
    • 1 tbsp olive oil
    • 1 cup parmesan cheese

    Instructions

    1. Preheat your oven to 350°F (175°C). Line a baking pan with tin foil and spray with cooking spray.
    2. On a plate, combine the parmesan cheese, Italian bread crumbs, pepper, and garlic powder.
    3. Rub each pork chop with olive oil.
    4. Dip each pork chop into the cheese mixture, pressing the mixture onto the pork chops to ensure they are well coated.
    5. Place the coated pork chops on the prepared baking pan.
    6. Bake in the preheated oven for 40-45 minutes, or until the pork chops are cooked through and the coating is golden brown.

    Nutrition Facts

    Serving Size: 1 serving
    Calories: 350 kcal
    Sugar: 1g
    Sodium: 600mg
    Fat: 20g
    Saturated Fat: 7g
    Carbohydrates: 8g
    Fiber: 1g
    Protein: 35g
    Cholesterol: 90mg

  • Freakin Fantastic Fried Rice – Quick, Easy, And Pleasy

    Freakin Fantastic Fried Rice – Quick, Easy, And Pleasy

    Freakin’ Fantastic Fried Rice – Quick, Easy, And Pleasy! This dish is a flavor-packed delight that brings together vibrant vegetables and fluffy rice in a savory blend. Perfect for busy weeknights, this recipe is all about convenience without sacrificing taste.

    Why You’ll Love This Recipe

    • Quick & Easy: Ready in under 30 minutes, making it perfect for last-minute meals.
    • Versatile: Customize with your favorite proteins or vegetables for a unique twist.
    • Family-Friendly: Kids and adults alike will enjoy this colorful and tasty dish.
    • Budget-Friendly: Uses simple ingredients that are often already in your pantry.
    • One-Pan Wonder: Minimal cleanup with everything cooked in a single skillet.

    Tools and Equipment

    To make this recipe effortlessly, you’ll need some essential kitchen tools.

    Essential Tools

    • Nonstick skillet
    • Spatula
    • Measuring cups and spoons
    • Mixing bowl

    Why These Tools Matter

    • Nonstick skillet: Ensures the rice doesn’t stick and makes for easy flipping and stirring.
    • Spatula: Perfect for scrambling eggs and mixing ingredients without damaging the skillet.
    • Measuring cups and spoons: Guarantees accurate ingredient portions for optimal flavor.

    Ingredients for Freakin Fantastic Fried Rice Quick Easy And Pleasy

    Vegetables

    • 12 oz of frozen peas and carrots
    • 1 diced onion

    Eggs

    • 3 beaten eggs

    Seasoning

    • ½ cup of soy sauce

    Base

    • 4 cups of cooked rice

    Fat

    • 3 tbsps of butter

    How to Make Freakin Fantastic Fried Rice Quick Easy And Pleasy Step-by-Step

    Step 1: Sauté the Onion

    In a large nonstick skillet, melt the butter over medium heat. Once melted, add the diced onion and sauté until tender and translucent.

    Step 2: Cook the Vegetables

    Add the frozen peas and carrots to the skillet. Cook until they are thawed and tender, stirring occasionally to ensure even cooking.

    Step 3: Scramble the Eggs

    Push the vegetables to one side of the skillet. Pour the beaten eggs into the empty space and scramble them until fully cooked. Mix the scrambled eggs with the vegetables.

    Step 4: Add the Soy Sauce

    Pour the soy sauce over the vegetable and egg mixture. Stir well to combine all the flavors.

    Step 5: Incorporate the Rice

    Gradually add the cooked rice to the skillet. Stir continuously until all ingredients are well combined and heated through.

    This fried rice is a delightful addition to any meal, especially when paired with chicken. Enjoy this quick, easy, and delicious dish!

    How to Serve Freakin Fantastic Fried Rice Quick Easy And Pleasy

    Freakin Fantastic Fried Rice is not just a meal; it’s a versatile dish that can be enjoyed in various ways.

    Serve with Grilled Chicken

    Grilled chicken adds a smoky flavor that complements the savory notes of the fried rice, making for a satisfying meal.

    Top with Green Onions

    Sprinkling fresh green onions on top not only enhances the presentation but also adds a burst of freshness and crunch to every bite.

    Accompany with Egg Rolls

    Crispy egg rolls are a perfect pairing, providing a delightful contrast to the soft texture of the fried rice, creating a well-rounded dining experience.

    Pro Tips for the Best Freakin Fantastic Fried Rice Quick Easy And Pleasy

    For optimal results, consider these valuable tips.

    • Use Day-Old Rice: Freshly cooked rice contains moisture, which can make your fried rice mushy. Using day-old rice helps achieve that perfect texture.

    • High Heat Cooking: Cooking on high heat allows for quick evaporation of moisture, resulting in a more distinct flavor and better texture.

    • Customize with Proteins: Feel free to add your choice of protein, such as shrimp, chicken, or tofu, to enhance the dish’s heartiness.

    • Don’t Overcrowd the Pan: If making a large batch, consider cooking in batches to ensure even cooking and prevent steaming.

    • Experiment with Sauces: While soy sauce is classic, adding a splash of sesame oil or chili sauce can elevate the flavor profile even further.

    Best Side Dishes and Pairings

    Freakin Fantastic Fried Rice pairs well with a variety of side dishes and drinks to complete your meal.

    1. Steamed Broccoli: The mild flavor and crunch of steamed broccoli provide a nutritious balance to the richness of the fried rice.

    2. Sweet and Sour Chicken: This dish’s tangy sweetness contrasts beautifully with the savory fried rice, creating a delightful flavor combination.

    3. Miso Soup: A warm bowl of miso soup offers a comforting, umami-rich side that complements the fried rice perfectly.

    4. Teriyaki Salmon: The sweet and savory notes of teriyaki salmon enhance the overall Asian-inspired meal experience.

    5. Cucumber Salad: A refreshing cucumber salad brings a crisp texture and lightness that offsets the heartiness of the fried rice.

    Common Mistakes to Avoid

    • Using Stale Rice: Always use freshly cooked or properly stored rice to ensure the best texture.
    • Overcooking the Vegetables: Sauté just until tender to maintain their vibrant color and crunch.
    • Not Scrambling the Eggs Properly: Ensure the eggs are fully cooked before mixing them with the rice to avoid a rubbery texture.
    • Skipping the Soy Sauce: This ingredient is essential for flavor; don’t omit it or reduce the amount significantly.

    Storage & Reheating Instructions

    Refrigerator Storage

    Store any leftover Freakin Fantastic Fried Rice in airtight containers in the refrigerator. It will stay fresh for up to 3 days.

    Freezing Instructions

    For longer storage, freeze the fried rice in portion-sized airtight containers or freezer bags. It can be frozen for up to 2 months. Thaw in the refrigerator overnight before reheating.

    Reheating Tips

    • Oven: Preheat to 350°F (175°C). Spread the rice on a baking sheet and cover with foil. Heat for 15-20 minutes, stirring halfway through.
    • Microwave: Place the rice in a microwave-safe dish, cover with a microwave-safe lid, and heat on high for 1-2 minutes, stirring halfway through.
    • Stovetop: Heat a skillet over medium heat, add a splash of water or oil, and stir-fry the rice for about 5 minutes until heated through.

    Frequently Asked Questions

    Can I use brown rice for this Freakin Fantastic Fried Rice?

    Yes, brown rice can be used, but it may require a longer cooking time and a bit more liquid.

    What can I add to make my Freakin Fantastic Fried Rice even better?

    Consider adding cooked chicken, shrimp, or tofu for added protein. You can also include different vegetables like bell peppers or broccoli.

    How do I prevent my fried rice from becoming mushy?

    To prevent mushiness, ensure your rice is day-old or cooled completely before using. This helps maintain the right texture.

    Is this recipe suitable for meal prep?

    Absolutely! This quick, easy, and pleasy recipe is perfect for meal prep and can be stored in the fridge or freezer for convenient meals.

    What is the best way to serve Freakin Fantastic Fried Rice?

    Serve it as a standalone dish or paired with your favorite protein, like grilled chicken or beef stir-fry, for a complete meal.

    Final Thoughts

    Freakin Fantastic Fried Rice is a versatile and simple dish that can elevate any meal. Its quick preparation makes it a go-to option for busy weeknights. Try this recipe and let your culinary creativity shine. We’d love to hear your thoughts, so please leave a comment below with your feedback!


    Dinner

    Freakin Fantastic Fried Rice Quick Easy And Pleasy


    5.0 from 24 reviews

    This fried rice recipe is quick, easy, and delicious, making it a perfect addition to any meal. With a blend of peas, carrots, eggs, and soy sauce, it's a satisfying dish that can be enjoyed on its own or paired with chicken.

    Author: Munch Twist
    Prep Time: 10 minutes
    Cook Time: 15 minutes
    Total Time: 25 minutes
    Yield: 4 servings
    Category: Dinner
    Method: No bake
    Cuisine: American

    Freakin Fantastic Fried Rice Quick Easy And Pleasy

    SCALE:
    1x
    2x
    3x
    Cook Mode: Prevent your screen from going dark

    Ingredients

    • 12 oz of frozen peas and carrots
    • 3 beaten eggs
    • ½ cup of soy sauce
    • 3 tbsps of butter
    • 4 cups of cooked rice
    • 1 diced onion

    Instructions

    1. In a large nonstick skillet, melt the butter over medium heat. Sauté the diced onion until tender.
    2. Add the frozen peas and carrots to the skillet. Cook until thawed and tender, stirring occasionally.
    3. Push the vegetables to one side of the skillet. On the other side, pour in the beaten eggs and scramble until fully cooked.
    4. Mix the scrambled eggs with the vegetables. Pour in the soy sauce and stir well to combine.
    5. Gradually add the cooked rice to the skillet, stirring continuously until all ingredients are well combined and heated through.

    Nutrition Facts

    Serving Size: 1 serving
    Calories: 320 kcal
    Sugar: 3g
    Sodium: 1200mg
    Fat: 10g
    Saturated Fat: 5g
    Carbohydrates: 48g
    Fiber: 4g
    Protein: 10g
    Cholesterol: 210mg

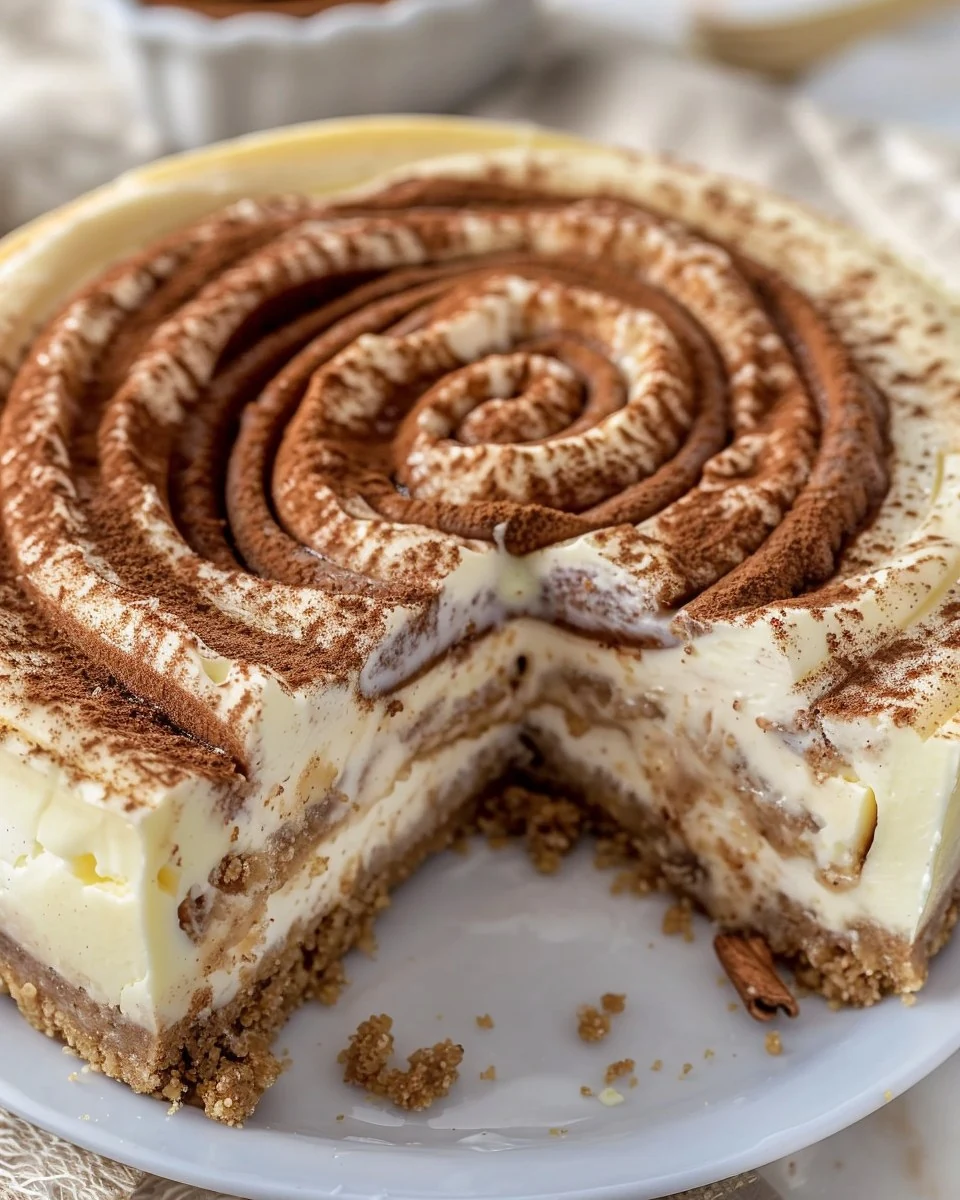
  • Indulgent Cinnamon Roll Cheesecake Recipe You’ll Love

    Indulgent Cinnamon Roll Cheesecake Recipe You’ll Love

    Cinnamon Roll Cheesecake combines the rich flavors of creamy cheesecake with the warm, comforting taste of cinnamon rolls. This indulgent dessert is perfect for special occasions or just a sweet treat at home. With layers of cinnamon swirl and a luscious cream cheese frosting, it’s sure to impress anyone who takes a bite.

    Why You’ll Love This Recipe

    • Decadent Flavors: Enjoy the delightful blend of creamy cheesecake and spiced cinnamon roll.
    • Impressive Presentation: Layers of cinnamon swirl create a beautiful dessert that looks as good as it tastes.
    • Perfect for Any Occasion: Ideal for parties, holidays, or a cozy night in with family.
    • Make Ahead: This cheesecake is perfect for prepping in advance, allowing flavors to deepen as it chills.
    • Customize Your Toppings: Feel free to add nuts or caramel for an extra layer of flavor.

    Tools and Equipment

    Before starting, make sure you have the necessary tools ready to streamline your baking process.

    Essential Tools

    • 9-inch springform pan
    • Mixing bowls
    • Electric mixer
    • Measuring cups and spoons
    • Rubber spatula
    • Roasting pan

    Why These Tools Matter

    • Springform Pan: Allows for easy removal of the cheesecake without damaging its delicate structure.
    • Electric Mixer: Ensures a smooth and creamy batter, essential for achieving the perfect cheesecake texture.
    • Roasting Pan: Aids in creating a water bath, preventing cracks and ensuring even baking.

    Ingredients for Cinnamon Roll Cheesecake

    Graham Cracker Crust

    • 1/4 cup brown sugar
    • 1 1/2 cups graham cracker crumbs (or digestive biscuits/Biscoff cookies)
    • 1/2 tsp cinnamon
    • 6 tbsp unsalted butter, melted

    Cinnamon Roll Swirl

    • 1/3 cup unsalted butter, melted
    • 1 cup brown sugar
    • 1/3 cup all-purpose flour
    • 1 tbsp ground cinnamon

    Cheesecake Batter

    • 4 packages (8 oz each) cream cheese, softened
    • 1 cup brown sugar
    • 1/4 cup granulated sugar
    • 1/2 cup sour cream
    • 4 large eggs, room temperature
    • 1 tbsp vanilla extract
    • 1/2 tsp salt

    Cream Cheese Frosting

    • 1 cup heavy whipping cream
    • 6 tbsp cream cheese
    • 1 cup powdered sugar
    • 1 tsp vanilla extract
    • 1-2 tsp cinnamon powder for dusting

    How to Make Cinnamon Roll Cheesecake Step-by-Step

    Step 1: Prep the Base

    • Preheat your oven to 325°F (163°C).
    • In a bowl, combine graham cracker crumbs, brown sugar, and cinnamon. Stir in the melted butter until the mixture resembles wet sand.
    • Press the mixture firmly into the bottom of a cheesecake pan. Bake for 10 minutes and set aside to cool.

    Step 2: Prepare the Cinnamon Swirl

    • In a bowl, mix together brown sugar, flour, and ground cinnamon. Stir in the melted butter until well combined. Set aside.

    Step 3: Make the Cheesecake Filling

    • In a large bowl, beat the softened cream cheese until creamy and smooth.
    • Add brown sugar and granulated sugar, beating until well incorporated. Mix in the sour cream.
    • Add the eggs one at a time, beating well after each addition. Stir in the vanilla extract and salt.
    • Pour a layer of the cheesecake batter into the crust. Spoon dollops of the cinnamon swirl mixture over the batter, then cover with another layer of batter. Repeat, ending with a layer of cheesecake batter.

    Step 4: Bake the Cheesecake

    • Place the cheesecake pan in a larger roasting pan. Fill the roasting pan with hot water until it reaches halfway up the sides of the cheesecake pan.
    • Bake in the preheated oven for 60-75 minutes, or until the edges are set but the center still jiggles slightly.

    Step 5: Cooling the Cheesecake

    • Turn off the oven and let the cheesecake cool in the oven with the door slightly open for 1 hour.
    • Remove the cheesecake from the oven and chill in the refrigerator for at least 6 hours or overnight.

    Step 6: Prepare the Frosting

    • Beat the cream cheese and powdered sugar together until smooth.
    • In a separate bowl, whip the heavy cream to stiff peaks. Gently fold the whipped cream into the cream cheese mixture until fully combined.
    • Pipe or spread the frosting onto the chilled cheesecake and sprinkle with cinnamon powder.

    Enjoy your delicious Cinnamon Roll Cheesecake, a delightful treat that will become a favorite among family and friends!

    How to Serve Cinnamon Roll Cheesecake

    Cinnamon Roll Cheesecake can be enjoyed in a variety of delightful ways that enhance its rich flavors.

    Warm with a Drizzle of Caramel

    Serve slices of warm Cinnamon Roll Cheesecake topped with a generous drizzle of caramel sauce. The sweetness of the caramel complements the cinnamon flavor, creating a decadent treat.

    Fresh Berries on the Side

    Accompany your cheesecake with a medley of fresh berries such as strawberries, blueberries, and raspberries. Their tartness balances the sweetness of the cheesecake, adding a refreshing contrast.

    Coffee or Tea Pairing

    Pair your cheesecake with a hot cup of coffee or a soothing herbal tea. The warmth of the beverage enhances the comforting flavors of the cinnamon roll, making for a perfect afternoon treat.

    Pro Tips for the Best Cinnamon Roll Cheesecake

    To ensure your Cinnamon Roll Cheesecake turns out perfectly, keep these tips in mind.

    • Room Temperature Ingredients: Always ensure that your cream cheese, eggs, and sour cream are at room temperature for a smooth and creamy batter.
    • Use a Water Bath: Baking your cheesecake in a water bath helps prevent cracks and ensures an even baking temperature, resulting in a creamy texture.
    • Cool Gradually: After baking, allow the cheesecake to cool slowly in the oven with the door slightly open to prevent sudden temperature changes that can cause cracks.
    • Chill Overnight: For the best flavor and texture, chill your cheesecake overnight. This allows the flavors to meld and the cheesecake to fully set.
    • Store Properly: Keep any leftover cheesecake covered in the refrigerator for up to a week to maintain its freshness.

    Best Side Dishes and Pairings

    Enhance your dining experience with these delightful side dishes and drinks that pair wonderfully with Cinnamon Roll Cheesecake.

    1. Vanilla Ice Cream: A scoop of vanilla ice cream adds a creamy, cold contrast to the warm cheesecake, enhancing its rich flavors.
    2. Coffee Cake: A slice of coffee cake alongside your cheesecake creates a comforting brunch experience, echoing the cinnamon flavors.
    3. Spiced Chai Latte: The warm spices in a chai latte complement the cinnamon in the cheesecake, making for a cozy pairing.
    4. Chocolate-Dipped Fruit: Fresh fruit dipped in chocolate provides a sweet and slightly tart contrast that balances the richness of the cheesecake.
    5. Nutty Granola: A sprinkle of nutty granola on top adds a crunchy texture that complements the creamy cheesecake, creating a delightful contrast.

    Common Mistakes to Avoid

    • Skipping the Room Temperature Step: Using cold ingredients can lead to a lumpy cheesecake batter.
    • Not Using a Water Bath: Omitting the water bath increases the risk of cracks in the cheesecake.
    • Overmixing the Batter: Mixing too vigorously can incorporate excess air, leading to a dense texture.
    • Cutting Too Soon: Slicing the cheesecake before it has fully set can result in a messy presentation.

    Storage & Reheating Instructions

    Refrigerator Storage

    Store leftover Cinnamon Roll Cheesecake in an airtight container in the refrigerator. It will stay fresh for up to 5 days.

    Freezing Instructions

    To freeze, wrap the cheesecake tightly in plastic wrap and then in aluminum foil. It can be frozen for up to 2 months. For best results, slice before freezing.

    Reheating Tips

    • Oven: Preheat the oven to 350°F (175°C). Place the cheesecake on a baking sheet and warm for 10-15 minutes.
    • Microwave: Heat individual slices for 20-30 seconds on medium power.
    • Stovetop: Place a slice in a non-stick skillet over low heat. Cover and warm gently for about 5 minutes.

    Frequently Asked Questions

    Can I make Cinnamon Roll Cheesecake ahead of time?

    Yes, this cheesecake can be made a day in advance. It actually tastes better after chilling overnight.

    How do I prevent cracks in my Cinnamon Roll Cheesecake?

    Using a water bath while baking and letting the cheesecake cool gradually in the oven helps prevent cracks.

    Can I use a different crust for the Cinnamon Roll Cheesecake?

    Absolutely! You can substitute the graham cracker crust with a cookie crust or even a traditional pie crust.

    What can I use instead of sour cream in the Cheesecake Batter?

    Plain Greek yogurt can be used as a substitute for sour cream without compromising the taste or texture.

    Final Thoughts

    This Cinnamon Roll Cheesecake is a delightful twist on two beloved desserts, perfect for any occasion. I encourage you to try this recipe and share your experiences in the comments. Your feedback is always appreciated!


    Desserts

    Cinnamon Roll Cheesecake


    5.0 from 24 reviews

    This Cinnamon Roll Cheesecake combines the rich flavors of a classic cheesecake with the warm, comforting taste of cinnamon rolls. A buttery graham cracker crust is layered with a creamy cheesecake filling swirled with a cinnamon mixture, topped with a luscious cream cheese frosting. Perfect for any occasion, this dessert is sure to impress your guests.

    Author: Munch Twist
    Prep Time: 30 minutes
    Cook Time: 75 minutes
    Total Time: 7 hours 30 minutes
    Yield: 12 servings
    Category: Desserts
    Method: No bake
    Cuisine: American

    Cinnamon Roll Cheesecake

    SCALE:
    1x
    2x
    3x
    Cook Mode: Prevent your screen from going dark

    Ingredients

    • 1/4 cup brown sugar
    • 1 1/2 cups graham cracker crumbs
    • 1/2 tsp cinnamon
    • 6 tbsp unsalted butter, melted
    • 1/3 cup unsalted butter, melted
    • 1 cup brown sugar
    • 1/3 cup all-purpose flour
    • 1 tbsp ground cinnamon
    • 4 packages (8 oz each) cream cheese, softened
    • 1 cup brown sugar
    • 1/4 cup granulated sugar
    • 1/2 cup sour cream
    • 4 large eggs, room temperature
    • 1 tbsp vanilla extract
    • 1/2 tsp salt
    • 1 cup heavy whipping cream
    • 6 tbsp cream cheese
    • 1 cup powdered sugar
    • 1 tsp vanilla extract
    • 1-2 tsp cinnamon powder for dusting

    Instructions

    1. Preheat your oven to 325°F (163°C). Combine the graham cracker crumbs, brown sugar, and cinnamon in a bowl. Stir in the melted butter until the mixture resembles wet sand. Press the mixture firmly into the bottom of a cheesecake pan. Bake for 10 minutes and set aside to cool.
    2. In a bowl, mix together the brown sugar, flour, and ground cinnamon. Stir in the melted butter until well combined. Set aside.
    3. Beat the softened cream cheese in a large bowl until creamy and smooth. Add the brown sugar and granulated sugar, beating until well incorporated. Mix in the sour cream. Add the eggs one at a time, beating well after each addition. Stir in the vanilla extract and salt. Pour a layer of the cheesecake batter into the crust. Spoon dollops of the cinnamon swirl mixture over the batter, then cover with another layer of batter. Repeat, ending with a layer of cheesecake batter.
    4. Place the cheesecake pan in a larger roasting pan. Fill the roasting pan with hot water until it reaches halfway up the sides of the cheesecake pan. Bake in the preheated oven for 60-75 minutes, or until the edges are set but the center still jiggles slightly.
    5. Turn off the oven and let the cheesecake cool in the oven with the door slightly open for 1 hour. Remove the cheesecake from the oven and chill in the refrigerator for at least 6 hours or overnight.
    6. Beat the cream cheese and powdered sugar together until smooth. In a separate bowl, whip the heavy cream to stiff peaks. Gently fold the whipped cream into the cream cheese mixture until fully combined. Pipe or spread the frosting onto the chilled cheesecake and sprinkle with cinnamon powder.

    Nutrition Facts

    Serving Size: 1 serving
    Calories: 450 kcal
    Sugar: 33g
    Sodium: 300mg
    Fat: 29g
    Saturated Fat: 17g
    Carbohydrates: 42g
    Fiber: 1g
    Protein: 7g
    Cholesterol: 120mg

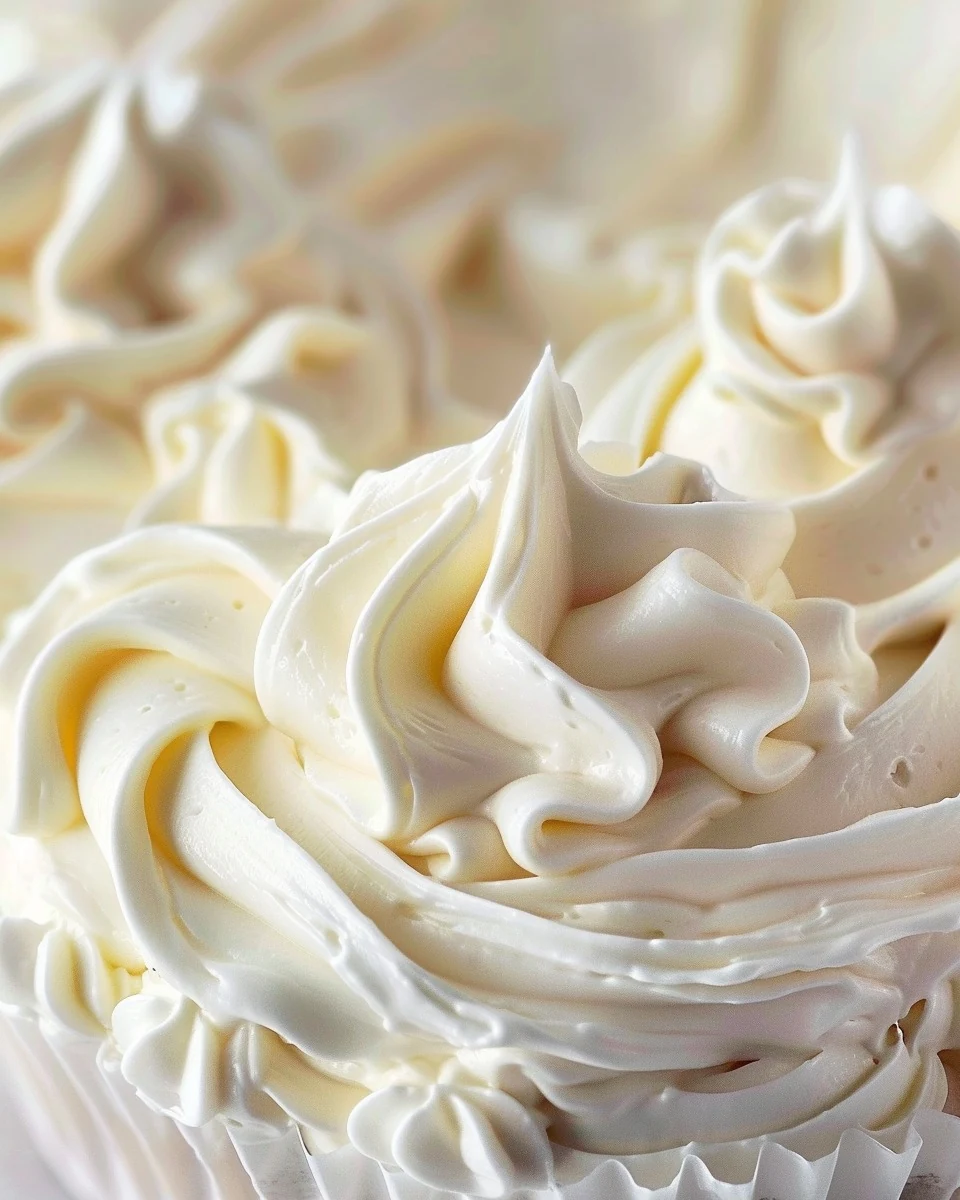
  • Easy Homemade Buttercream Frosting Recipe

    Easy Homemade Buttercream Frosting Recipe

    Homemade Buttercream Frosting is a delightful way to elevate your baked goods. This rich, creamy frosting is perfect for cakes and cupcakes, offering a smooth texture and sweet flavor that complements any dessert. With just a few simple ingredients, you can create a homemade treat that will impress your family and friends.

    Why You’ll Love This Recipe

    • Quick & Easy: Ready in under 10 minutes, this frosting is a simple solution for last-minute baking needs.
    • Versatile Flavor: The classic vanilla flavor pairs well with a variety of cakes and desserts.
    • Customizable: Easily add colors or flavors to match any occasion or personal preference.
    • Smooth Texture: The heavy whipping cream gives it a creamy consistency that spreads beautifully.
    • Homemade Goodness: Made from scratch, this frosting is free from preservatives and artificial ingredients.

    Tools and Equipment

    To create your Homemade Buttercream Frosting, you’ll need a few essential kitchen tools.

    Essential Tools

    • Hand mixer
    • Mixing bowl
    • Measuring cups
    • Spatula
    • Piping bag (optional)

    Why These Tools Matter

    • Hand Mixer: Ensures the butter is whipped to the perfect light and fluffy texture.
    • Mixing Bowl: Provides enough space for mixing ingredients without making a mess.
    • Piping Bag: Allows for decorative frosting applications, elevating your baked goods.

    Ingredients for Homemade Buttercream Frosting

    Basic Ingredients

    • 1 cup butter, unsalted and softened
    • 3 cups Confectioners Sugar
    • 1 tsp vanilla extract
    • 2 tbsp heavy whipping cream

    How to Make Homemade Buttercream Frosting Step-by-Step

    Step 1: Beat the Butter

    Begin by using a hand mixer to beat the softened butter until it becomes light and fluffy. This step is crucial for achieving the right texture.

    Step 2: Add Vanilla

    Once the butter is fluffy, add the vanilla extract. Beat again until the ingredients are well combined and the mixture is smooth.

    Step 3: Incorporate Sugar

    Gradually add the Confectioners Sugar, about ½ cup at a time. Mix thoroughly after each addition to prevent lumps from forming in the frosting.

    Step 4: Mix in Cream

    Pour in the heavy whipping cream. Beat the mixture until it is smooth and fully combined, creating a creamy consistency.

    Step 5: Frost Your Treats

    Fill a piping bag with your Homemade Buttercream Frosting. Use it generously to frost your favorite cakes or cupcakes.

    Step 6: Enjoy

    Savor the delicious flavors of your homemade buttercream frosting. It’s the perfect finishing touch to any dessert.

    With this easy recipe, you can create Homemade Buttercream Frosting that will delight everyone. Enjoy the process and the sweet results!

    How to Serve Homemade Buttercream Frosting

    Homemade buttercream frosting is versatile and can elevate a variety of baked goods. Here are some creative serving ideas:

    Frosted Cupcakes

    Frost individual cupcakes with a swirl of homemade buttercream frosting for a delightful treat. Decorate with sprinkles or edible flowers for an eye-catching presentation.

    Layered Cakes

    Use the buttercream to fill and frost multi-layered cakes. This rich frosting complements the flavors of chocolate, vanilla, or even red velvet cakes beautifully.

    Cookies

    Spread a generous layer of homemade buttercream on sugar cookies or sandwich cookies for an indulgent dessert experience. The creamy texture pairs perfectly with the crunch of the cookie.

    Pro Tips for the Best Homemade Buttercream Frosting

    Achieving the perfect homemade buttercream frosting can be simple with these expert tips:

    • Use Room Temperature Butter: Ensure your butter is softened to room temperature for easy mixing and a smoother texture.
    • Sift the Sugar: Sifting the confectioners sugar helps eliminate lumps, resulting in a creamier frosting.
    • Adjust Consistency: If the frosting is too thick, add more heavy cream, a tablespoon at a time, until you reach the desired consistency.
    • Flavor Variations: Experiment with different extracts like almond or lemon to create unique flavor profiles for your frosting.
    • Store Properly: Keep leftover frosting in an airtight container in the refrigerator for up to a week, or freeze for longer storage.

    Best Side Dishes and Pairings

    Homemade buttercream frosting pairs well with a range of delicious accompaniments. Consider these options:

    1. Chocolate Cake – The richness of chocolate cake complements the sweet, creamy frosting perfectly.
    2. Sugar Cookies – A classic pairing, the sweetness of both enhances the overall dessert experience.
    3. Fruit Salad – The freshness of fruit adds a light contrast to the richness of the frosting.
    4. Coffee – A warm cup of coffee balances the sweetness and enhances the flavors of the buttercream.
    5. Milkshakes – Creamy milkshakes create a delightful combination with the frosting, perfect for indulgent treats.

    Common Mistakes to Avoid

    • Using Cold Butter: Ensure the butter is softened to room temperature for the best texture.
    • Adding Sugar Too Quickly: Gradually incorporate the confectioners sugar to prevent lumps.
    • Not Mixing Long Enough: Beat the frosting until it is smooth and fluffy to achieve the perfect consistency.
    • Skipping the Cream: The heavy whipping cream adds necessary moisture; don’t omit it.

    Storage & Reheating Instructions

    Refrigerator Storage

    Store homemade buttercream frosting in airtight containers in the refrigerator. It will stay fresh for up to two weeks. Before using, allow it to come to room temperature and re-whip for the best texture.

    Freezing Instructions

    To freeze, place the frosting in a sealed, airtight container or freezer-safe bag. It can be stored for up to three months. To thaw, move it to the refrigerator overnight and re-whip before use.

    Reheating Tips

    • Oven: Place in an oven-safe dish at a low temperature (around 200°F) for a few minutes, checking frequently.
    • Microwave: Heat in 10-second intervals on low power, stirring in between until soft.
    • Stovetop: Use a double boiler to gently warm the frosting, stirring until it reaches the desired consistency.

    Frequently Asked Questions

    What is Homemade Buttercream Frosting made of?

    Homemade buttercream frosting is made from unsalted butter, confectioners sugar, vanilla extract, and heavy whipping cream.

    How do I make Homemade Buttercream Frosting less sweet?

    To reduce sweetness, you can add a pinch of salt or more butter to balance the flavors.

    Can I use this Homemade Buttercream Frosting for cookie decorating?

    Yes, this frosting works well for cookie decorating. Just adjust the consistency with more cream if needed.

    How long can I store Homemade Buttercream Frosting?

    You can store homemade buttercream frosting in the refrigerator for up to two weeks or freeze it for up to three months.

    Can I flavor my Homemade Buttercream Frosting?

    Absolutely! You can add cocoa powder, fruit purees, or extracts like almond or lemon for varied flavors.

    Final Thoughts

    Making your own homemade buttercream frosting is not only simple but incredibly rewarding. The rich, creamy texture and delightful flavor elevate any dessert. Try this recipe and leave a comment sharing your experience. We love hearing from you!


    Desserts

    Homemade Buttercream Frosting


    5.0 from 24 reviews

    This homemade buttercream frosting is a rich and creamy delight, perfect for topping cakes and cupcakes. With just a few simple ingredients, you can create a smooth and fluffy frosting that adds a sweet finish to your baked goods.

    Author: Munch Twist
    Prep Time: 10 minutes
    Cook Time: 0 minutes
    Total Time: 10 minutes
    Yield: 12 servings
    Category: Desserts
    Method: Baking
    Cuisine: American

    Homemade Buttercream Frosting

    SCALE:
    1x
    2x
    3x
    Cook Mode: Prevent your screen from going dark

    Ingredients

    • 1 cup butter, unsalted and softened
    • 3 cups Confectioners Sugar
    • 1 tsp vanilla extract
    • 2 tbsp heavy whipping cream

    Instructions

    1. Using a hand mixer, beat the softened butter until it is light and fluffy.
    2. Add the vanilla extract and beat again until well combined.
    3. Gradually add the Confectioners Sugar, ½ cup at a time, mixing thoroughly after each addition to ensure there are no lumps.
    4. Pour in the heavy whipping cream and beat until the mixture is smooth and completely combined.
    5. Fill a piping bag with the frosting and use it to frost your cake or cupcakes.
    6. Enjoy your delicious homemade buttercream frosting!

    Nutrition Facts

    Serving Size: 1 serving
    Calories: 140 kcal
    Sugar: 15g
    Sodium: 0mg
    Fat: 8g
    Saturated Fat: 5g
    Carbohydrates: 16g
    Fiber: 0g
    Protein: 0g
    Cholesterol: 30mg

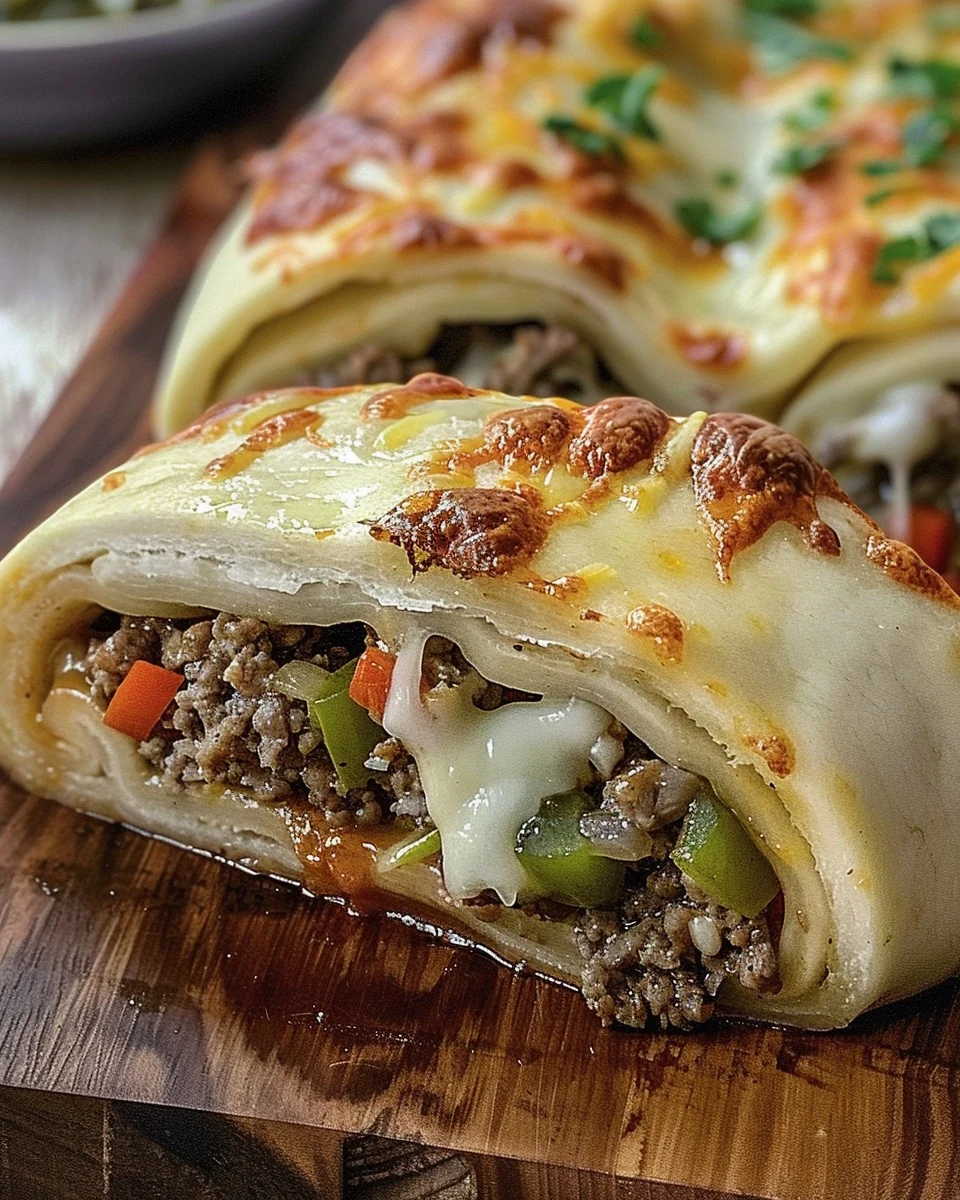
  • Easy and Delicious Philly Cheesesteak Stromboli Recipe

    Easy and Delicious Philly Cheesesteak Stromboli Recipe

    PHILLY CHEESESTEAK STROMBOLI combines the savory flavors of a classic cheesesteak with the convenience of a rolled pastry. This dish is not only delicious but also perfect for gatherings or a cozy night in. Its cheesy, meaty filling wrapped in golden crust makes it an irresistible choice.

    Why You’ll Love This Recipe

    • Flavorful Filling: A delightful mix of ground beef, onions, and bell peppers creates a robust flavor.
    • Cheesy Goodness: With two cups of mozzarella cheese, every bite is creamy and satisfying.
    • Easy to Make: The use of refrigerated pizza dough simplifies the process without sacrificing taste.
    • Great for Sharing: Perfect for parties, game days, or family dinners, it’s sure to please a crowd.
    • Customizable: Feel free to add your favorite ingredients, such as mushrooms or different cheeses.

    Tools and Equipment

    Having the right tools on hand makes cooking much easier.

    Essential Tools

    • Large skillet
    • Baking sheet
    • Rolling pin
    • Sharp knife
    • Mixing spoon

    Why These Tools Matter

    • Large skillet: Ensures even cooking of the beef and vegetables while providing enough space for stirring.
    • Baking sheet: A sturdy surface for baking the stromboli, allowing for even heat distribution.
    • Sharp knife: Essential for slicing the rolled dough without tearing it, ensuring a clean presentation.

    Ingredients for PHILLY CHEESESTEAK STROMBOLI

    Main Ingredients

    • 1 tsp pepper
    • 1 green bell pepper, chopped
    • ½ onion, chopped
    • 1 (13.8-oz) can refrigerated pizza dough
    • 1 tsp Italian seasoning
    • 2 cloves garlic, minced
    • 1 lb ground beef
    • ½ tsp salt
    • 1 (8-oz) bottle Parmesan-peppercorn dressing, divided
    • 1 (8-oz) pkg shredded mozzarella cheese

    How to Make PHILLY CHEESESTEAK STROMBOLI Step-by-Step

    Step 1: Prep the Base

    1. Preheat your oven to 425°F (220°C). Grease a large rimmed baking sheet.
    2. In a large skillet over medium heat, cook the ground beef, onion, bell pepper, and minced garlic. Stir until the beef is browned and crumbly. Drain excess fat and return the mixture to the skillet.

    Step 2: Season the Filling

    1. Stir in the Italian seasoning, salt, and pepper into the beef mixture. Ensure all ingredients are well combined for the best flavor.

    Step 3: Assemble the Stromboli

    1. Unroll the pizza dough on the greased baking sheet, pressing it into a large rectangle.
    2. Sprinkle 1 cup of shredded mozzarella cheese evenly over the dough.
    3. Top with the beef mixture, leaving a 1-inch border on all sides.
    4. Sprinkle another cup of shredded mozzarella cheese over the beef mixture and drizzle with ¼ cup of Parmesan-peppercorn dressing.

    Step 4: Roll and Cut

    1. Starting from one long side, roll up the dough tightly, pinching the ends to seal.
    2. Arrange the rolled dough seam side down on the baking sheet. Cut slits into the dough at 1-inch intervals to allow steam to escape.

    Step 5: Bake and Serve

    1. Bake in the preheated oven for 20 to 25 minutes, or until the stromboli is deep golden brown.
    2. Let the stromboli stand for 10 minutes before slicing.
    3. Serve with the remaining Parmesan-peppercorn dressing for dipping.

    Enjoy your delicious PHILLY CHEESESTEAK STROMBOLI, a comforting dish that’s sure to impress!

    How to Serve PHILLY CHEESESTEAK STROMBOLI

    PHILLY CHEESESTEAK STROMBOLI is versatile and can be served in various creative ways.

    Dipping Sauces

    Pair your stromboli with an assortment of sauces like marinara, ranch, or extra Parmesan-peppercorn dressing to enhance the flavors and add a fun interactive element to your meal.

    Salad Accompaniment

    Serve with a fresh garden salad topped with Italian dressing. The crisp greens and light dressing balance the hearty flavors of the stromboli, creating a satisfying meal.

    Game Day Snack

    Cut the stromboli into bite-sized pieces for an easy appetizer during game days or gatherings. It’s a crowd-pleaser that is sure to impress your guests.

    Pro Tips for the Best PHILLY CHEESESTEAK STROMBOLI

    Enhance your stromboli experience with these practical tips.

    • Use Fresh Ingredients: Fresh vegetables and high-quality beef make a significant difference in flavor and texture.
    • Don’t Overfill: Be cautious not to overload the filling; this can cause the stromboli to burst during baking.
    • Seal Properly: Make sure to pinch the seams tightly to prevent any filling from leaking out while baking.
    • Experiment with Cheese: While mozzarella is classic, consider mixing in provolone or cheddar for a unique twist.
    • Let it Rest: Allow the stromboli to rest for a few minutes after baking; this helps the cheese set and makes for cleaner slices.

    Best Side Dishes and Pairings

    Serving PHILLY CHEESESTEAK STROMBOLI with complementary sides can elevate your dining experience.

    1. Garlic Bread – The buttery, garlicky flavor complements the rich filling of the stromboli.
    2. Coleslaw – A crunchy and tangy coleslaw adds a refreshing contrast to the savory meat and cheese.
    3. Potato Wedges – Crispy potato wedges seasoned with herbs provide a hearty side that pairs well with the stromboli.
    4. Pickles – The acidity of pickles cuts through the richness of the cheese and beef, adding a delightful crunch.
    5. Beer – A cold lager or pale ale balances the flavors of the stromboli and enhances the overall dining experience.

    Common Mistakes to Avoid

    • Not Draining Excess Fat: Ensure that you drain the excess fat from the beef mixture to prevent a soggy stromboli.
    • Overstuffing the Dough: Avoid adding too much filling; leave a 1-inch border for proper sealing and rolling.
    • Skipping the Resting Time: Let the stromboli rest for 10 minutes after baking to allow the filling to set, making it easier to slice.
    • Incorrect Oven Temperature: Always preheat the oven to the correct temperature to achieve a golden-brown crust.

    Storage & Reheating Instructions

    Refrigerator Storage

    Store any leftover Philly Cheesesteak Stromboli in airtight containers. It will stay fresh for up to 3 days in the refrigerator.

    Freezing Instructions

    For best results, freeze the stromboli before baking. Wrap it tightly in plastic wrap and aluminum foil. It can be frozen for up to 2 months. Thaw in the refrigerator overnight before baking.

    Reheating Tips

    • Oven: Preheat to 350°F (175°C), wrap in foil, and heat for about 15 minutes.
    • Microwave: Place on a microwave-safe plate and heat for 1-2 minutes, checking frequently.
    • Stovetop: Heat in a skillet over low heat, covered, for about 5-7 minutes, flipping occasionally.

    Frequently Asked Questions

    How can I customize my Philly Cheesesteak Stromboli?

    You can add other ingredients like mushrooms, jalapeños, or different cheeses to personalize your stromboli.

    Can I use other types of meat for Philly Cheesesteak Stromboli?

    Yes, you can substitute ground beef with shredded chicken, turkey, or even a plant-based meat alternative for a different flavor.

    How do I know when my Philly Cheesesteak Stromboli is done?

    The stromboli is ready when it’s deep golden brown and the cheese is melted. Ensure to let it rest for 10 minutes before slicing.

    Can I make Philly Cheesesteak Stromboli ahead of time?

    Absolutely. You can prepare the filling and assemble the stromboli, then refrigerate it before baking. Just increase the baking time if it’s cold from the fridge.

    What dipping sauce pairs well with Philly Cheesesteak Stromboli?

    In addition to the Parmesan-peppercorn dressing, marinara sauce or a spicy ranch dressing also complement the flavors well.

    Final Thoughts

    This Philly Cheesesteak Stromboli is a delicious twist on a classic favorite, perfect for any meal. Give it a try and share your thoughts in the comments below. Your feedback is always welcome!


    Dinner

    PHILLY CHEESESTEAK STROMBOLI


    5.0 from 24 reviews

    This Philly Cheesesteak Stromboli combines the classic flavors of a cheesesteak with the convenience of a rolled pizza. Filled with seasoned ground beef, sautéed vegetables, and gooey mozzarella cheese, this dish is perfect for a hearty meal or a fun party appetizer. Serve it warm with a side of Parmesan-peppercorn dressing for dipping.

    Author: Munch Twist
    Prep Time: 20 minutes
    Cook Time: 25 minutes
    Total Time: 45 minutes
    Yield: 6 servings
    Category: Lunch
    Method: No bake
    Cuisine: American

    PHILLY CHEESESTEAK STROMBOLI

    SCALE:
    1x
    2x
    3x
    Cook Mode: Prevent your screen from going dark

    Ingredients

    • 1 tsp pepper
    • 1 green bell pepper, chopped
    • ½ onion, chopped
    • 1 (13.8-oz) can refrigerated pizza dough
    • 1 tsp Italian seasoning
    • 2 cloves garlic, minced
    • 1 lb ground beef
    • ½ tsp salt
    • 1 (8-oz) bottle Parmesan-peppercorn dressing, divided
    • 1 (8-oz) pkg shredded mozzarella cheese

    Instructions

    1. Preheat your oven to 425°F (220°C). Grease a large rimmed baking sheet.
    2. In a large skillet over medium heat, cook the ground beef, onion, bell pepper, and minced garlic until the beef is browned and crumbly. Drain the excess fat and return the mixture to the skillet.
    3. Stir in the Italian seasoning, salt, and pepper into the beef mixture.
    4. Unroll the pizza dough on the greased baking sheet, pressing it into a large rectangle.
    5. Sprinkle 1 cup of shredded mozzarella cheese evenly over the dough.
    6. Top with the beef mixture, leaving a 1-inch border on all sides.
    7. Sprinkle another cup of shredded mozzarella cheese over the beef mixture and drizzle with ¼ cup of Parmesan-peppercorn dressing.
    8. Starting from one long side, roll up the dough tightly, pinching the ends to seal.
    9. Arrange the rolled dough seam side down on the baking sheet. Cut slits into the dough at 1-inch intervals.
    10. Bake in the preheated oven for 20 to 25 minutes, or until the stromboli is deep golden brown.
    11. Let the stromboli stand for 10 minutes before slicing.
    12. Serve with the remaining Parmesan-peppercorn dressing for dipping.

    Nutrition Facts

    Serving Size: 1 serving
    Calories: 400 kcal
    Sugar: 3g
    Sodium: 800mg
    Fat: 23g
    Saturated Fat: 10g
    Carbohydrates: 28g
    Fiber: 2g
    Protein: 22g
    Cholesterol: 70mg

  • Perfect Longhorn Steakhouse Parmesan Crusted Chicken Recipe

    Perfect Longhorn Steakhouse Parmesan Crusted Chicken Recipe

    Longhorn Steakhouse Parmesan Crusted Chicken is a flavorful dish that combines crispy textures with cheesy goodness. This recipe delivers a restaurant-quality meal right at home, making it a perfect choice for family dinners or special occasions.

    Why You’ll Love This Recipe

    • Delicious Flavor: The combination of provolone and Parmesan cheese creates a rich, savory topping.
    • Crispy Texture: The panko breadcrumbs add a satisfying crunch that complements the tender chicken.
    • Quick & Easy: This dish can be prepared in under 30 minutes, allowing for a stress-free cooking experience.
    • Versatile Meal: It pairs well with various sides, making it ideal for any occasion.
    • Kid-Friendly: The cheesy crust appeals to both kids and adults, ensuring everyone enjoys their meal.

    Tools and Equipment

    Having the right tools makes cooking easier and more enjoyable. Here are the essentials you’ll need.

    Essential Tools

    • Skillet
    • Baking sheet
    • Parchment paper or olive oil spray
    • Mixing bowl
    • Measuring cups and spoons
    • Tongs or spatula

    Why These Tools Matter

    • Skillet: Perfect for searing chicken, ensuring a golden-brown exterior.
    • Baking sheet: Provides a stable surface for baking and easy cleanup with parchment paper.
    • Mixing bowl: Allows for thorough mixing of ingredients, ensuring even distribution of flavors.

    Ingredients for Longhorn Steakhouse Parmesan Crusted Chicken

    Cheese Mixture

    • 1/2 cup shredded provolone cheese
    • 1 cup shredded Parmesan cheese
    • 1/2 cup panko breadcrumbs
    • 2 tablespoons unsalted butter, melted
    • 1/4 cup mayonnaise

    Chicken Preparation

    • 4 boneless, skinless chicken breasts
    • 1 tablespoon all-purpose flour
    • 1 teaspoon garlic powder
    • 1 teaspoon onion powder
    • 1/2 teaspoon paprika
    • 1/2 teaspoon dried oregano
    • Salt and pepper, to taste
    • Olive oil, for cooking

    How to Make Longhorn Steakhouse Parmesan Crusted Chicken Step-by-Step

    Step 1: Preheat the Oven

    Preheat your oven to 375°F (190°C). Line a baking sheet with parchment paper or lightly grease it with olive oil to prevent sticking.

    Step 2: Prepare Parmesan Mixture

    In a small bowl, combine the shredded Parmesan cheese, shredded provolone cheese, panko breadcrumbs, melted butter, and mayonnaise. Mix until well combined to create a rich topping.

    Step 3: Season Chicken

    Season the chicken breasts with garlic powder, onion powder, paprika, dried oregano, salt, and pepper. This step ensures the chicken is flavorful throughout.

    Step 4: Sear Chicken

    Heat a skillet over medium-high heat. Add a drizzle of olive oil and sear the chicken breasts for 3-4 minutes on each side until they are golden brown. This adds depth to the flavor and texture. Transfer the seared chicken to the prepared baking sheet.

    Step 5: Top and Bake

    Spread the Parmesan mixture evenly over the chicken breasts. Bake in the preheated oven for 15-20 minutes, or until the chicken is cooked through and the topping is golden and crispy. This step is crucial for achieving that perfect crust.

    Step 6: Serve

    Allow the chicken to cool slightly before serving. This will help the topping set and enhances the overall presentation of the dish.

    Nutritional Information (per serving)

    • Calories: Approximately 450 kcal
    • Carbohydrates: 12g
    • Proteins: 45g
    • Fats: 24g
    • Fiber: 1g

    Preparation time: 15 minutes | Cooking time: 20-25 minutes

    Enjoy your homemade Longhorn Steakhouse Parmesan Crusted Chicken, a dish that brings restaurant flavors right to your kitchen.

    How to Serve Longhorn Steakhouse Parmesan Crusted Chicken

    This dish can be enjoyed in various ways to enhance your dining experience.

    With a Fresh Salad

    Pair the Parmesan Crusted Chicken with a light mixed greens salad dressed in a simple vinaigrette. The freshness of the salad complements the richness of the chicken.

    On a Bed of Risotto

    Serve the chicken atop a creamy risotto for a more indulgent meal. The creamy texture of the risotto will balance the crispy topping beautifully.

    With Garlic Mashed Potatoes

    Accompany the chicken with garlic mashed potatoes for a comforting side. The buttery potatoes will absorb the flavors of the chicken and the Parmesan topping.

    Pro Tips for the Best Longhorn Steakhouse Parmesan Crusted Chicken

    To ensure your chicken turns out perfectly every time, consider these expert tips.

    • Use Fresh Ingredients: Fresh cheese and spices will enhance the flavor of your dish significantly.
    • Don’t Skip the Searing: Searing the chicken before baking adds a depth of flavor and keeps the chicken juicy.
    • Monitor Cooking Time: Keep an eye on the chicken as ovens can vary; you want the chicken to be cooked through but not dry.
    • Let it Rest: Allow the chicken to rest for a few minutes after baking before serving to retain its juices.
    • Experiment with Cheese: Try adding different cheeses to the topping, such as mozzarella or cheddar, for a unique twist.

    Best Side Dishes and Pairings

    Pairing the right side dishes can elevate your Longhorn Steakhouse Parmesan Crusted Chicken experience.

    1. Steamed Asparagus: This vegetable adds a fresh crunch and a hint of bitterness that balances the richness of the chicken.
    2. Roasted Brussels Sprouts: The caramelized flavor of roasted Brussels sprouts complements the savory elements of the dish.
    3. Caesar Salad: A classic Caesar salad offers a creamy and tangy contrast that pairs well with the savory chicken.
    4. Baked Sweet Potatoes: The sweetness of baked sweet potatoes provides a delightful contrast to the savory Parmesan crust.
    5. Chardonnay: A glass of chilled Chardonnay pairs beautifully with the chicken, enhancing its flavors with its crisp acidity.

    Common Mistakes to Avoid

    • Skipping the Searing Step: Searing the chicken is crucial for flavor and texture; don’t skip it.
    • Not Letting Chicken Rest: Allow the chicken to rest after baking for juicy results; cutting into it too soon can lead to dryness.
    • Overbaking: Keep an eye on the chicken to avoid overbaking, which can make it tough.
    • Using Low-Quality Cheese: The quality of cheese impacts the dish significantly; opt for freshly shredded cheese for the best flavor.

    Storage & Reheating Instructions

    Refrigerator Storage

    Store leftovers in airtight containers in the refrigerator. They will remain fresh for up to 3 days.

    Freezing Instructions

    For best results, freeze the chicken in an airtight container. It can be frozen for up to 3 months. Thaw in the refrigerator overnight before reheating.

    Reheating Tips

    • Oven: Preheat the oven to 350°F (175°C) and bake for 10-15 minutes until heated through.
    • Microwave: Place on a microwave-safe plate, cover, and heat in 30-second intervals until warm.
    • Stovetop: Heat a skillet over medium heat, add a splash of olive oil, and warm the chicken for about 5-7 minutes.

    Frequently Asked Questions

    How can I make Longhorn Steakhouse Parmesan Crusted Chicken healthier?

    You can use skinless chicken breasts and reduce the amount of cheese or substitute with a lower-fat option.

    Can I use chicken thighs instead of breasts for Longhorn Steakhouse Parmesan Crusted Chicken?

    Yes, chicken thighs will provide a juicier flavor, but adjust the cooking time as they may take longer to cook through.

    What sides pair well with Longhorn Steakhouse Parmesan Crusted Chicken?

    Consider serving it with a fresh salad, roasted vegetables, or garlic mashed potatoes for a complete meal.

    Can I prepare Longhorn Steakhouse Parmesan Crusted Chicken ahead of time?

    Yes, you can prepare the chicken and the topping ahead of time. Store them separately in the refrigerator and assemble just before baking.

    How do I know when the chicken is cooked through?

    Use a meat thermometer; the internal temperature should reach 165°F (75°C) for safe consumption.

    Final Thoughts

    Longhorn Steakhouse Parmesan Crusted Chicken is a delicious and satisfying dish that is sure to impress family and friends. We encourage you to try this recipe and share your thoughts in the comments below. Your feedback helps us create more delicious content.


    Dinner

    Longhorn Steakhouse Parmesan Crusted Chicken


    5.0 from 24 reviews

    This delicious Parmesan Crusted Chicken features tender, juicy chicken breasts topped with a crispy, cheesy mixture of Parmesan and provolone cheeses, panko breadcrumbs, and a hint of garlic and herbs. Perfectly baked to golden perfection, this dish is sure to impress at any dinner table.

    Author: Munch Twist
    Prep Time: 15 minutes
    Cook Time: 20 minutes
    Total Time: 35 minutes
    Yield: 4 servings
    Category: Lunch
    Method: Baking
    Cuisine: American

    Longhorn Steakhouse Parmesan Crusted Chicken

    SCALE:
    1x
    2x
    3x
    Cook Mode: Prevent your screen from going dark

    Ingredients

    • 1/2 cup shredded provolone cheese
    • 1 teaspoon garlic powder
    • 1 teaspoon onion powder
    • 2 tablespoons unsalted butter, melted
    • 4 boneless, skinless chicken breasts
    • 1/2 teaspoon paprika
    • 1/2 cup panko breadcrumbs
    • 1/2 teaspoon dried oregano
    • 1 tablespoon all-purpose flour
    • Salt and pepper, to taste
    • Olive oil, for cooking
    • 1 cup shredded Parmesan cheese
    • 1/4 cup mayonnaise

    Instructions

    1. Preheat your oven to 375°F (190°C). Line a baking sheet with parchment paper or lightly grease it with olive oil.
    2. In a small bowl, combine the shredded Parmesan cheese, shredded provolone cheese, panko breadcrumbs, melted butter, and mayonnaise. Mix until well combined.
    3. Season the chicken breasts with garlic powder, onion powder, paprika, dried oregano, salt, and pepper.
    4. Heat a skillet over medium-high heat, add a drizzle of olive oil, and sear the chicken breasts for 3-4 minutes on each side until they are golden brown. Transfer the seared chicken to the prepared baking sheet.
    5. Spread the Parmesan mixture evenly over the chicken breasts. Bake in the preheated oven for 15-20 minutes, or until the chicken is cooked through and the topping is golden and crispy.
    6. Allow the chicken to cool slightly before serving.

    Nutrition Facts

    Serving Size: 1 serving
    Calories: 450 kcal
    Sugar: 1g
    Sodium: 800mg
    Fat: 24g
    Saturated Fat: 11g
    Carbohydrates: 12g
    Fiber: 1g
    Protein: 45g
    Cholesterol: 135mg

  • Easy Chocolate Fudge Cake – Simple and Delicious Recipe

    Easy Chocolate Fudge Cake – Simple and Delicious Recipe

    Easy Chocolate Fudge Cake is a delightful dessert that embodies rich chocolate flavor and a moist, fudgy texture. This cake is perfect for any occasion, whether celebrating a birthday or enjoying a cozy night in.

    Why You’ll Love This Recipe

    • Quick & Easy: Ready in under an hour, this cake is perfect for last-minute cravings.
    • Rich Chocolate Flavor: The combination of cocoa powder and sugar creates a deep, satisfying taste.
    • No Special Equipment Needed: You only need basic kitchen tools to whip up this treat.
    • Versatile Serving Options: Serve it plain, with frosting, or alongside ice cream for added indulgence.
    • Great for All Skill Levels: Even beginners can create this impressive dessert with ease.

    Tools and Equipment

    This recipe requires basic kitchen tools that are essential for any home baker.

    Essential Tools

    • Mixing bowl
    • Whisk
    • Measuring cups and spoons
    • 8-inch round cake pan
    • Toothpick
    • Wire rack

    Why These Tools Matter

    • Mixing bowl: A large bowl allows for easy mixing of ingredients without spills.
    • Whisk: Ensures the batter is well combined and smooth for the best texture.
    • Wire rack: Helps cool the cake evenly, preventing sogginess.

    Ingredients for Easy Chocolate Fudge Cake

    Dry Ingredients

    • 1 cup (200g) sugar
    • 1 1/2 cups (225g) all-purpose flour
    • 1/4 cup (30g) cocoa powder
    • 1 tsp baking soda
    • 1/2 tsp salt

    Wet Ingredients

    • 1/3 cup (80ml) vegetable oil
    • 1 cup (240ml) water
    • 1 tsp vanilla extract
    • 1 tbsp white vinegar

    How to Make Easy Chocolate Fudge Cake Step-by-Step

    Step 1: Preheat the Oven

    Preheat your oven to 350°F (175°C). Grease and flour an 8-inch (20cm) round cake pan to prevent sticking.

    Step 2: Mix Dry Ingredients

    In a large bowl, whisk together the all-purpose flour, cocoa powder, baking soda, salt, and sugar until well combined.

    Step 3: Add Wet Ingredients

    Pour in the water, vegetable oil, white vinegar, and vanilla extract. Mix until the batter is smooth and homogenous.

    Step 4: Pour Batter

    Carefully pour the batter into the prepared cake pan. Spread it evenly to ensure even baking.

    Step 5: Bake

    Place the cake in the preheated oven. Bake for 30-35 minutes, or until a toothpick inserted in the center comes out clean.

    Step 6: Cool

    After baking, let the cake cool in the pan for about 10 minutes. Then, transfer it to a wire rack to cool completely.

    Enjoy your delicious Easy Chocolate Fudge Cake as a delightful end to any meal or a special treat on its own.

    How to Serve Easy Chocolate Fudge Cake

    Serving your Easy Chocolate Fudge Cake creatively can elevate the dessert experience.

    Whipped Cream and Berries

    Top slices of the cake with a generous dollop of whipped cream and a mix of fresh berries. The tartness of the berries complements the rich chocolate flavor perfectly.

    Ice Cream Sandwich

    For a fun twist, sandwich a slice of Easy Chocolate Fudge Cake between two scoops of your favorite ice cream. This combination offers a delightful contrast in textures and flavors.

    Chocolate Ganache Drizzle

    Enhance the indulgence by drizzling warm chocolate ganache over the cake just before serving. This adds an extra layer of chocolate richness that chocolate lovers will adore.

    Pro Tips for the Best Easy Chocolate Fudge Cake

    To ensure your cake turns out perfectly every time, consider these helpful tips.

    • Use Quality Ingredients: Opt for high-quality cocoa powder and vanilla extract for a richer flavor profile.
    • Measure Accurately: Use a kitchen scale for precise measurement of ingredients, particularly flour and sugar, to achieve the best texture.
    • Don’t Overmix: Mix the batter just until combined to avoid a dense cake; some lumps are okay.
    • Test for Doneness: Check the cake a few minutes before the suggested baking time, as ovens can vary in temperature.
    • Store Properly: Keep leftover cake in an airtight container at room temperature for up to three days to maintain its moistness.

    Best Side Dishes and Pairings

    Pairing your Easy Chocolate Fudge Cake with complementary dishes can enhance the overall dessert experience.

    1. Vanilla Ice Cream – The classic pairing of vanilla ice cream adds a creamy contrast to the rich chocolate flavor.
    2. Espresso or Coffee – A strong cup of coffee or espresso brings out the chocolate’s depth and balances its sweetness.
    3. Chocolate Mousse – For the ultimate chocolate experience, serve with a light and airy chocolate mousse for varied textures.
    4. Fruit Salad – A refreshing fruit salad can cleanse the palate and add a burst of freshness alongside the rich cake.
    5. Milk – A glass of cold milk is a nostalgic and satisfying complement that enhances the cake’s flavors.

    Common Mistakes to Avoid

    • Incorrect Measurements: Always measure your ingredients accurately to ensure the best texture and flavor.
    • Overmixing the Batter: Mix just until combined; overmixing can lead to a tough cake.
    • Not Preheating the Oven: Make sure your oven is fully preheated before placing the cake inside for even baking.
    • Skipping the Cooling Time: Allow the cake to cool completely before serving to achieve the best taste and texture.

    Storage & Reheating Instructions

    Refrigerator Storage

    Store your Easy Chocolate Fudge Cake in an airtight container in the refrigerator. It will stay fresh for up to 5 days.

    Freezing Instructions

    For best results, wrap slices of the cake in plastic wrap and then foil before placing them in the freezer. The cake can be frozen for up to 3 months.

    Reheating Tips

    • Oven: Preheat your oven to 350°F (175°C) and heat the cake for about 10-15 minutes.
    • Microwave: Place a slice on a microwave-safe plate and heat for 10-15 seconds.
    • Stovetop: Use a skillet over low heat, covering it with a lid to warm the cake gently for about 5 minutes.

    Frequently Asked Questions

    Can I use a different type of flour for the Easy Chocolate Fudge Cake?

    Yes, you can substitute all-purpose flour with gluten-free flour or a blend, but the texture may vary slightly.

    How can I make the Easy Chocolate Fudge Cake more chocolatey?

    You can increase the cocoa powder to 1/3 cup for a richer chocolate flavor or add chocolate chips to the batter.

    Is the Easy Chocolate Fudge Cake suitable for special diets?

    This cake is vegan-friendly as it contains no eggs or dairy, but ensure all ingredients align with your dietary needs.

    How do I know when the Easy Chocolate Fudge Cake is done baking?

    The cake is done when a toothpick inserted into the center comes out clean or with a few moist crumbs.

    Can I frost the Easy Chocolate Fudge Cake?

    Absolutely! A simple chocolate ganache or buttercream frosting pairs wonderfully with this cake.

    Final Thoughts

    Making this Easy Chocolate Fudge Cake is a delightful experience that yields a rich and satisfying dessert. We encourage you to try the recipe and share your thoughts in the comments section below. Your feedback helps others and inspires us to create even more delicious recipes.


    Desserts

    Easy Chocolate Fudge Cake


    5.0 from 24 reviews

    This Easy Chocolate Fudge Cake is a simple yet delicious dessert that combines rich chocolate flavor with a moist texture. Perfect for any occasion, this cake is easy to make and requires minimal ingredients. Enjoy it as is or dress it up with your favorite frosting.

    Author: Munch Twist
    Prep Time: 15 minutes
    Cook Time: 30-35 minutes
    Total Time: 45-50 minutes
    Yield: 8 servings
    Category: Desserts
    Method: No bake
    Cuisine: American

    Easy Chocolate Fudge Cake

    SCALE:
    1x
    2x
    3x
    Cook Mode: Prevent your screen from going dark

    Ingredients

    • 1 cup (200g) sugar
    • 1 1/2 cups (225g) all-purpose flour
    • 1/3 cup (80ml) vegetable oil
    • 1 cup (240ml) water
    • 1 tsp vanilla extract
    • 1/4 cup (30g) cocoa powder
    • 1 tbsp white vinegar
    • 1 tsp baking soda
    • 1/2 tsp salt

    Instructions

    1. Preheat your oven to 350°F (175°C). Grease and flour an 8-inch (20cm) round cake pan.
    2. In a large bowl, whisk together the all-purpose flour, cocoa powder, baking soda, salt, and sugar.
    3. Add the water, vegetable oil, white vinegar, and vanilla extract to the dry ingredients. Mix until the batter is smooth and well combined.
    4. Pour the batter into the prepared cake pan, spreading it evenly.
    5. Bake in the preheated oven for 30-35 minutes, or until a toothpick inserted in the center comes out clean.
    6. Let the cake cool in the pan for 10 minutes. Then transfer it to a wire rack to cool completely.

    Nutrition Facts

    Serving Size: 1 serving
    Calories: 250 kcal
    Sugar: 25g
    Sodium: 260mg
    Fat: 9g
    Saturated Fat: 1g
    Carbohydrates: 42g
    Fiber: 1g
    Protein: 3g
    Cholesterol: 0mg

  • Irresistible Hawaiian Roll Garlic Bread Recipe

    Irresistible Hawaiian Roll Garlic Bread Recipe

    Hawaiian Roll Garlic Bread is a delightful twist on traditional garlic bread, combining the soft sweetness of Hawaiian rolls with rich, savory flavors. This dish is perfect for gatherings or a cozy evening at home, offering a mouthwatering aroma and irresistible taste that will leave everyone wanting more.

    Why You’ll Love This Recipe

    • Quick & Easy: Ready in under 30 minutes, perfect for last-minute gatherings.
    • Flavor Explosion: The combination of garlic, butter, and cheese creates a rich taste experience.
    • Versatile Side Dish: Pairs beautifully with pasta, soups, or as a standalone snack.
    • Crowd-Pleaser: Ideal for parties or family dinners, satisfying even the pickiest eaters.
    • Fun to Make: Involve the kids in the preparation for a fun family activity.

    Tools and Equipment

    To prepare Hawaiian Roll Garlic Bread efficiently, a few essential tools will make the process smoother.

    Essential Tools

    • Sharp knife
    • 9 x 13-inch baking dish
    • Small mixing bowl
    • Pastry brush

    Why These Tools Matter

    • Sharp knife: Ensures clean cuts in the rolls, making stuffing easier.
    • Baking dish: The right size allows for even baking and easy serving.
    • Pastry brush: Helps spread the garlic butter evenly, enhancing flavor coverage.

    Ingredients for Hawaiian Roll Garlic Bread

    Bread and Cheese

    • 12 Hawaiian slider rolls
    • 1 cup mozzarella cheese, shredded

    Seasonings and Butter

    • 2 teaspoons minced garlic
    • 1/2 cup butter, softened
    • 1 teaspoon garlic powder
    • 1 tablespoon grated Parmesan cheese
    • 1 teaspoon dried parsley
    • 1/2 teaspoon sea salt

    How to Make Hawaiian Roll Garlic Bread Step-by-Step

    Step 1: Prepare the Rolls

    Begin by placing the Hawaiian slider rolls into a 9 x 13-inch baking dish. Use a sharp knife to cut two slits into each roll, about one-third of the way through. Be careful not to cut all the way through to keep the rolls intact.

    Step 2: Add the Cheese

    Stuff each slit in the rolls generously with shredded mozzarella cheese. Ensure each roll has a good amount of cheese for that delicious melted effect.

    Step 3: Make the Garlic Butter

    In a small mixing bowl, combine the softened butter, garlic powder, dried parsley, sea salt, minced garlic, and grated Parmesan cheese. Mix until all ingredients are well incorporated.

    Step 4: Spread the Garlic Butter

    Using a pastry brush, spread the garlic butter mixture evenly over the tops of the rolls. Make sure every area is covered to enhance the flavor as the rolls bake.

    Step 5: Bake

    Preheat your oven to 400°F (200°C). Place the baking dish in the oven and bake the rolls for 9 to 11 minutes. Watch closely until the cheese is melted and the tops of the rolls begin to brown.

    Step 6: Serve

    Once baked, remove from the oven, serve warm, and enjoy this irresistible Hawaiian Roll Garlic Bread with friends and family.

    Preparation time: 10 minutes | Cooking time: 11 minutes

    Nutritional Information (per roll)

    • Calories: Approximately 150 kcal
    • Carbohydrates: 12g
    • Proteins: 5g
    • Fats: 10g
    • Fiber: 1g

    This Hawaiian Roll Garlic Bread is sure to become a favorite in your home. With its easy preparation and delightful flavors, it is a recipe worth keeping close at hand.

    How to Serve Hawaiian Roll Garlic Bread

    Hawaiian Roll Garlic Bread is versatile and can complement various meals. Here are some creative serving ideas.

    As a Side for Pasta Dishes

    Pair this garlic bread with your favorite pasta, such as spaghetti or fettuccine, to soak up rich sauces and enhance the meal’s flavors.

    Perfect for Dipping

    Serve Hawaiian Roll Garlic Bread with marinara or pesto sauce for a delightful dipping experience. The fluffy rolls and gooey cheese make every bite enjoyable.

    Accompaniment to Grilled Meats

    This garlic bread works wonderfully alongside grilled chicken, steak, or fish, adding a comforting touch to a hearty meal.

    Pro Tips for the Best Hawaiian Roll Garlic Bread

    To ensure your Hawaiian Roll Garlic Bread turns out perfectly every time, consider these tips.

    • Use Fresh Ingredients: Always opt for fresh garlic and high-quality butter to enhance the flavor of your garlic bread.

    • Customize the Cheese: Feel free to mix different cheeses, such as cheddar or gouda, for a unique flavor profile that suits your taste.

    • Adjust the Garlic Level: If you love garlic, increase the minced garlic or garlic powder to intensify that savory flavor.

    • Broil for Extra Crispiness: For a crispy top, switch to broil for the last minute of baking, watching closely to prevent burning.

    • Store Properly: If you have leftovers, wrap them in foil and refrigerate. Reheat in the oven for the best texture.

    Best Side Dishes and Pairings

    Hawaiian Roll Garlic Bread pairs excellently with various dishes. Here are some options to consider.

    1. Caesar Salad: The crispness of romaine and the tangy dressing complement the rich flavors of the garlic bread.

    2. Tomato Soup: A classic pairing that combines the warm, cheesy bread with the comforting nature of tomato soup.

    3. Grilled Vegetables: The smoky flavors of grilled veggies provide a nice contrast to the buttery garlic rolls.

    4. Baked Ziti: This hearty pasta dish creates a satisfying meal when served alongside succulent garlic bread.

    5. Chicken Alfredo: The creamy sauce of chicken Alfredo pairs perfectly with the savory garlic bread, enhancing every bite.

    Common Mistakes to Avoid

    • Not Cutting Deep Enough: Ensure you cut the rolls sufficiently to allow for cheese and garlic butter to fill the slits.
    • Overbaking: Keep a close eye on the rolls as they bake to prevent them from becoming too brown or dry.
    • Skipping the Garlic Butter: The garlic butter is essential for flavor; don’t skip this step for the best results.
    • Using Cold Butter: Make sure your butter is softened, as cold butter won’t spread easily and may leave dry spots.

    Storage & Reheating Instructions

    Refrigerator Storage

    Store any leftovers in an airtight container in the refrigerator. Properly stored, they will stay fresh for up to 3 days.

    Freezing Instructions

    To freeze Hawaiian Roll Garlic Bread, wrap it tightly in plastic wrap and then in aluminum foil. It can be stored in the freezer for up to 2 months. To thaw, place it in the refrigerator overnight before reheating.

    Reheating Tips

    • Oven: Preheat the oven to 350°F (175°C). Wrap the rolls in aluminum foil and heat for about 10-15 minutes.
    • Microwave: Place a roll on a microwave-safe plate and heat for 15-20 seconds. Be cautious not to overheat.
    • Stovetop: Heat a skillet over medium-low heat. Add a little butter and warm the rolls for about 2-3 minutes on each side.

    Frequently Asked Questions

    What is Hawaiian Roll Garlic Bread?

    Hawaiian Roll Garlic Bread is a delicious twist on traditional garlic bread, using sweet Hawaiian slider rolls filled with cheese and garlic butter.

    Can I make Hawaiian Roll Garlic Bread ahead of time?

    Yes, you can prepare the rolls and garlic butter in advance. Assemble the rolls, cover them, and store them in the refrigerator for up to 24 hours before baking.

    How do I customize Hawaiian Roll Garlic Bread?

    Feel free to add additional herbs, spices, or even different types of cheese to suit your taste preferences.

    How should I serve Hawaiian Roll Garlic Bread?

    Serve warm as a side dish or appetizer. It pairs well with pasta, soups, or salads.

    Final Thoughts

    This Hawaiian Roll Garlic Bread is a delightful addition to any meal, combining the sweetness of the rolls with savory garlic and cheese. I encourage you to try this recipe and share your thoughts in the comments below.


    Dinner

    Hawaiian Roll Garlic Bread


    5.0 from 24 reviews

    Hawaiian Roll Garlic Bread is a delicious and easy-to-make appetizer that combines soft Hawaiian rolls with a rich garlic butter and gooey mozzarella cheese. Perfect for gatherings or as a side dish, this recipe is sure to please everyone at the table.

    Author: Munch Twist
    Prep Time: 10 minutes
    Cook Time: 11 minutes
    Total Time: 21 minutes
    Yield: 12 servings
    Category: Desserts
    Method: No bake
    Cuisine: American

    Hawaiian Roll Garlic Bread

    SCALE:
    1x
    2x
    3x
    Cook Mode: Prevent your screen from going dark

    Ingredients

    • 1 tablespoon grated Parmesan cheese
    • 12 Hawaiian slider rolls
    • 1 teaspoon dried parsley
    • 1 cup mozzarella cheese, shredded
    • 2 teaspoons minced garlic
    • 1/2 teaspoon sea salt
    • 1 teaspoon garlic powder
    • 1/2 cup butter, softened

    Instructions

    1. Place the Hawaiian slider rolls into a 9 x 13-inch baking dish. Cut 2 slits into each roll, about 1/3 of the way through.
    2. Stuff each slit with shredded mozzarella cheese.
    3. In a small bowl, mix the softened butter, garlic powder, dried parsley, sea salt, minced garlic, and grated Parmesan cheese until well combined.
    4. Use a pastry brush to spread the garlic butter mixture evenly over the top of the rolls.
    5. Preheat your oven to 400°F (200°C). Bake the rolls for 9 to 11 minutes, or until the cheese is melted and the rolls begin to brown on top.
    6. Remove from the oven, serve warm, and enjoy!

    Nutrition Facts

    Serving Size: 1 serving
    Calories: 150 kcal
    Sugar: 1g
    Sodium: 260mg
    Fat: 10g
    Saturated Fat: 6g
    Carbohydrates: 12g
    Fiber: 1g
    Protein: 5g
    Cholesterol: 30mg