Author: munch twist

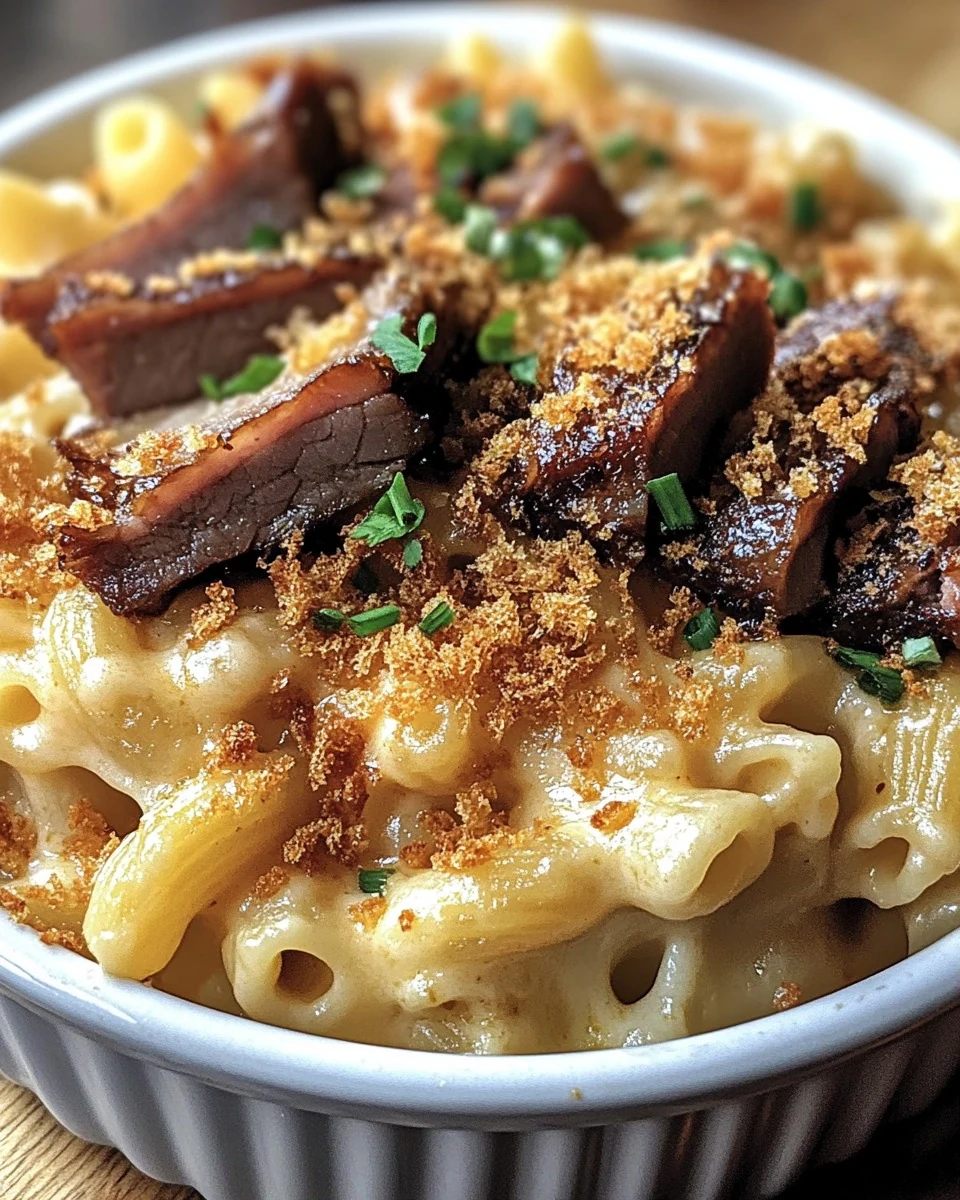
  • Creamy Brisket Mac and Cheese Recipe for Comfort

    Creamy Brisket Mac and Cheese Recipe for Comfort

    Brisket Mac and Cheese combines creamy cheese sauce with tender, smoky brisket for a comforting dish that delights the senses. This recipe elevates traditional mac and cheese into a rich, hearty meal that is perfect for gatherings or a cozy night in.

    Why You’ll Love This Recipe

    • Decadent Flavor: The combination of cheeses and smoked brisket creates a rich, savory experience.
    • Comfort Food Classic: This dish offers a delightful twist on the beloved mac and cheese.
    • Crowd-Pleaser: Perfect for family dinners or gatherings, everyone will love this hearty meal.
    • Easy to Make: With straightforward steps and minimal prep, you can whip this up with ease.
    • Versatile Ingredients: Customize with different cheeses or spices to suit your taste.

    Tools and Equipment

    Having the right tools makes preparing Brisket Mac and Cheese a breeze.

    Essential Tools

    • Large pot
    • Skillet
    • Whisk
    • Measuring cups and spoons
    • Colander

    Why These Tools Matter

    • Large pot: Essential for cooking the macaroni noodles evenly.
    • Skillet: Ideal for making the roux and cheese sauce without mess.
    • Whisk: Helps achieve a smooth, lump-free cheese sauce.

    Ingredients for Brisket Mac and Cheese

    Pasta

    • 1 lb macaroni noodles

    Cheeses

    • 1 cup white cheddar cheese, shredded
    • 2 cups Gruyere cheese, shredded
    • 1 cup pepper jack cheese, shredded

    Base

    • ½ cup butter, cubed
    • ½ cup flour
    • 4 cups milk

    Flavorings

    • 1 teaspoon minced dry onion
    • ½ teaspoon smoked paprika
    • Salt and pepper, to taste

    Add-ins

    • 2 cups smoked brisket, chopped
    • ½ cup green chilis, diced or canned

    How to Make Brisket Mac and Cheese Step-by-Step

    Step 1: Cook the Pasta

    Begin by preparing the macaroni noodles according to the package instructions. Once cooked, drain the noodles and return them to the pot. This ensures they stay warm while you prepare the cheese sauce.

    Step 2: Make the Roux

    In a large skillet, melt the cubed butter over medium-high heat. Once melted, whisk in the flour, minced dry onion, smoked paprika, salt, and pepper. Cook this mixture for about 1 minute, until it becomes thick and bubbly.

    Step 3: Prepare the Cheese Sauce

    Gradually whisk in the milk, ensuring there are no lumps. Bring the mixture to a boil while stirring constantly. Continue to stir until the sauce thickens, which should take a few minutes.

    Step 4: Add the Cheeses

    Remove the skillet from heat. Whisk in the shredded white cheddar, Gruyere, and pepper jack cheeses until they melt completely and the sauce is smooth and creamy.

    Step 5: Combine Ingredients

    Stir in the chopped smoked brisket and diced green chilis into the cheese sauce. This step adds a smoky flavor and texture to the dish.

    Step 6: Mix Pasta and Sauce

    Pour the rich cheese sauce with brisket over the cooked macaroni noodles. Mix thoroughly until the pasta is evenly coated and the dish is creamy.

    Step 7: Serve

    Your Brisket Mac and Cheese is ready to be enjoyed. Serve it hot and relish every cheesy bite.

    Preparation time: 15 minutes | Cooking time: 20 minutes | Total Time: 35 minutes

    This Brisket Mac and Cheese recipe guarantees a delicious meal that combines the comfort of mac and cheese with the savory depth of smoked brisket. Enjoy this rich and satisfying dish today!

    How to Serve Brisket Mac and Cheese

    Brisket Mac and Cheese is a versatile dish that can be enjoyed in various creative ways.

    Garnished with Fresh Herbs

    Top your Brisket Mac and Cheese with chopped chives or parsley for a burst of freshness that complements the rich flavors.

    With a Crunchy Topping

    Add a crispy breadcrumb or panko topping for an extra layer of texture. Simply mix breadcrumbs with melted butter and sprinkle on top before baking for a golden finish.

    As a Loaded Bowl

    Serve in a bowl topped with additional smoked brisket, jalapeños, and a drizzle of barbecue sauce for a hearty meal that satisfies all cravings.

    Pro Tips for the Best Brisket Mac and Cheese

    Achieving the perfect Brisket Mac and Cheese requires attention to detail and a few expert tips.

    • Use Quality Cheese: Opt for high-quality cheeses for a richer flavor and creamier texture.
    • Cook Pasta Al Dente: Ensure the macaroni is cooked al dente to prevent it from becoming mushy when combined with the cheese sauce.
    • Incorporate Leftover Brisket: Utilize leftover brisket for a more economical and flavorful dish.
    • Adjust Seasoning to Taste: Always taste and adjust seasoning before serving to enhance the overall flavor profile.
    • Bake for Extra Creaminess: For a baked version, transfer to a casserole dish, top with extra cheese and breadcrumbs, and bake until bubbly and golden.

    Best Side Dishes and Pairings

    Pairing your Brisket Mac and Cheese with complementary sides can elevate your meal experience.

    1. Coleslaw: The crunch and acidity of coleslaw balance the richness of the mac and cheese.
    2. Garlic Bread: A side of warm garlic bread is perfect for scooping up that cheesy goodness.
    3. Grilled Vegetables: Lightly charred vegetables add a fresh contrast to the heaviness of the dish.
    4. Pickles: The tartness of pickles offers a delightful contrast to the creamy flavors of the mac and cheese.
    5. Craft Beer: A hoppy IPA or a smooth lager pairs beautifully with the smoky flavors of the brisket.

    Common Mistakes to Avoid

    • Not Cooking the Pasta Properly: Overcooking or undercooking the macaroni can affect the texture of the dish.
    • Skipping the Roux: Failing to create a roux can result in a grainy cheese sauce.
    • Using Low-Quality Cheese: Cheap cheeses may not melt well, affecting the creaminess of the sauce.
    • Neglecting Seasoning: Under-seasoning can lead to bland flavors; always taste and adjust salt and pepper.

    Storage & Reheating Instructions

    Refrigerator Storage

    Store Brisket Mac and Cheese in airtight containers in the refrigerator. It remains fresh for up to 3–4 days.

    Freezing Instructions

    For best results, freeze Brisket Mac and Cheese in a freezer-safe container. It can be frozen for up to 2–3 months. Thaw overnight in the refrigerator before reheating.

    Reheating Tips

    • Oven: Preheat to 350°F (175°C), cover with foil, and bake for 20–25 minutes until heated through.
    • Microwave: Heat in 1-minute intervals, stirring in between, until warm.
    • Stovetop: Reheat in a skillet over low heat, adding a splash of milk to keep it creamy.

    Frequently Asked Questions

    What can I substitute for smoked brisket in Brisket Mac and Cheese?

    You can use shredded chicken, pulled pork, or even vegetarian options like mushrooms for a different flavor profile.

    How can I make Brisket Mac and Cheese spicier?

    Add more diced green chilis or incorporate jalapeños to the cheese sauce for an extra kick.

    Can I prepare Brisket Mac and Cheese in advance?

    Yes, you can prepare the dish ahead of time and either refrigerate or freeze it. Just follow the storage instructions provided.

    What type of cheese works best for Brisket Mac and Cheese?

    A combination of white cheddar, Gruyere, and pepper jack cheeses offers a rich and creamy flavor profile that complements the brisket well.

    How do I make Brisket Mac and Cheese gluten-free?

    Substitute regular macaroni with gluten-free pasta and use a gluten-free flour blend to make the roux.

    Final Thoughts

    Brisket Mac and Cheese is a delightful twist on a classic comfort food that combines rich flavors and creamy textures. We encourage you to try this recipe and share your experience in the comments below!


    Dinner

    Brisket Mac and Cheese


    5.0 from 24 reviews

    This creamy, cheesy mac and cheese with tender brisket is perfect for a comforting meal. Enjoy every cheesy bite!
    Author: Munch Twist
    Prep Time: 15 minutes
    Cook Time: 20 minutes
    Total Time: 35 minutes
    Yield: 4 servings
    Category: Dinner
    Method: No bake
    Cuisine: American

    Brisket Mac and Cheese

    SCALE:
    1x
    2x
    3x
    Cook Mode: Prevent your screen from going dark

    Ingredients

    • 1 lb macaroni noodles
    • 1 cup white cheddar cheese, shredded
    • 2 cups Gruyere cheese, shredded
    • ½ cup butter, cubed
    • 2 cups smoked brisket, chopped
    • 1 teaspoon minced dry onion
    • 4 cups milk
    • ½ cup green chilis, diced or canned
    • ½ cup flour
    • ½ teaspoon smoked paprika
    • 1 cup pepper jack cheese, shredded
    • Salt and pepper, to taste

    Instructions

    1. Prepare the macaroni noodles according to the package instructions. Drain and return to the pot.
    2. In a large skillet, melt the butter over medium-high heat. Whisk in the flour, minced dry onion, smoked paprika, salt, and pepper. Cook for 1 minute until the mixture is thick and bubbly.
    3. Gradually whisk in the milk. Bring the mixture to a boil, stirring constantly until it thickens.
    4. Remove from heat and whisk in the white cheddar, Gruyere, and pepper jack cheeses until fully melted and smooth.
    5. Stir in the chopped smoked brisket and diced green chilis into the cheese sauce.
    6. Pour the cheese sauce with brisket over the cooked macaroni. Mix thoroughly until the pasta is evenly coated and creamy.
    7. Enjoy your rich and hearty Brisket Mac and Cheese!
    Nutrition Facts

    Serving Size: 1 serving
    Calories: 750 kcal
    Sugar: 6g
    Sodium: 800mg
    Fat: 40g
    Saturated Fat: 24g
    Carbohydrates: 60g
    Fiber: 2g
    Protein: 40g
    Cholesterol: 120mg

  • Irresistible Roasted Flat Mushrooms with Green Onion Thyme Butter

    Irresistible Roasted Flat Mushrooms with Green Onion Thyme Butter

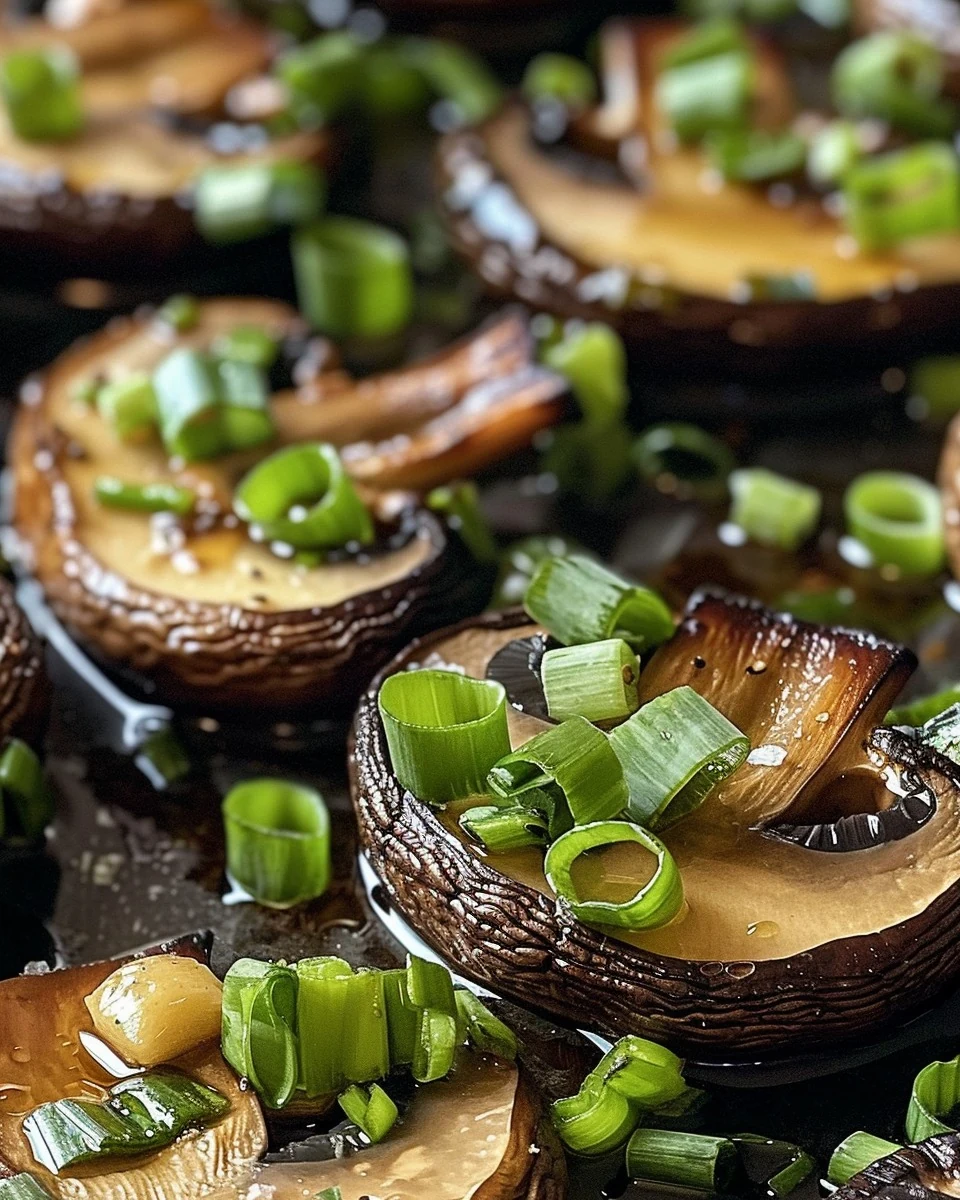
    Roasted Flat Mushrooms with Green Onion Thyme Butter deliver a delightful blend of earthy flavors and aromatic herbs. This dish is a perfect side or appetizer, showcasing the rich taste of mushrooms enhanced by the savory butter mixture. The simplicity of preparation makes it an appealing choice for any meal.

    Why You’ll Love This Recipe

    • Flavorful Combination: The blend of garlic, green onions, and thyme elevates the mushrooms, creating a rich taste experience.
    • Quick & Easy: Ready in just 30 minutes, this recipe is perfect for busy weeknights or impromptu gatherings.
    • Versatile Side Dish: These roasted mushrooms pair well with various main courses, from grilled meats to vegetarian dishes.
    • Healthy Choice: Low in carbohydrates and packed with flavor, this dish is a guilt-free indulgence.
    • Impressive Presentation: The golden brown mushrooms look stunning on any table, making them a great choice for entertaining.

    Tools and Equipment

    Having the right tools can significantly enhance your cooking experience.

    Essential Tools

    • Baking sheet
    • Mixing bowl
    • Brush for olive oil
    • Knife and cutting board

    Why These Tools Matter

    • Baking sheet: Provides ample space for the mushrooms, allowing them to roast evenly.
    • Mixing bowl: Essential for combining the butter mixture, ensuring all flavors meld well.
    • Brush for olive oil: Helps evenly coat the mushrooms for optimal roasting.

    Ingredients for Roasted Flat Mushrooms with Green Onion Thyme Butter

    For the Butter Mixture

    • 100g unsalted butter, softened
    • 2 cloves garlic, minced
    • 2 green onions, finely chopped
    • 1 tablespoon fresh thyme leaves
    • Salt and pepper, to taste

    For the Mushrooms

    • 8 large flat mushrooms
    • Olive oil, for brushing

    How to Make Roasted Flat Mushrooms with Green Onion Thyme Butter Step-by-Step

    Step 1: Preheat the Oven

    Set your oven to 220°C (430°F). This high temperature ensures the mushrooms roast perfectly.

    Step 2: Prepare the Butter Mixture

    In a mixing bowl, combine the softened butter, minced garlic, chopped green onions, fresh thyme leaves, salt, and pepper. Mix until all ingredients are well combined and fragrant.

    Step 3: Prepare the Mushrooms

    Brush the flat mushrooms lightly with olive oil. Place them gill side up on a baking sheet, ensuring they are spaced out for even cooking.

    Step 4: Apply the Butter Mixture

    Spread the prepared butter mixture evenly over each mushroom cap. Ensure each mushroom is generously coated for maximum flavor.

    Step 5: Roast the Mushrooms

    Roast in the preheated oven for about 20 minutes. The mushrooms should become tender and golden brown, indicating they are ready to serve.

    Enjoy your Roasted Flat Mushrooms with Green Onion Thyme Butter as a flavorful side that will impress your guests and satisfy your palate.

    How to Serve Roasted Flat Mushrooms with Green Onion Thyme Butter

    These roasted flat mushrooms make a versatile dish that can elevate any meal.

    As an Appetizer

    Serve the mushrooms warm on a platter as a delightful starter. Garnish with additional thyme or green onions for a fresh touch.

    On Toast

    Spread the roasted mushroom mixture over crusty bread or toasted baguettes. This creates a delicious crostini that is perfect for gatherings or casual snacking.

    As a Side Dish

    Pair the mushrooms alongside grilled meats or fish. Their rich flavor complements proteins beautifully and adds a gourmet touch to any dinner plate.

    Pro Tips for the Best Roasted Flat Mushrooms with Green Onion Thyme Butter

    Maximize the flavor and texture of your dish with these expert tips.

    • Use Fresh Ingredients: Always opt for fresh thyme and green onions for a more vibrant flavor in your butter mixture.

    • Uniform Size: Choose mushrooms that are similar in size to ensure even cooking and consistent texture across all pieces.

    • Don’t Overcrowd the Baking Sheet: Allow space between the mushrooms on the baking sheet to promote even roasting and prevent steaming.

    • Adjust Seasoning: Taste the butter mixture before applying it to the mushrooms; feel free to adjust the salt and pepper for your preference.

    • Experiment with Herbs: Try adding other herbs such as parsley or rosemary to the butter mixture for a unique flavor twist.

    Best Side Dishes and Pairings

    Complement your roasted flat mushrooms with these delightful side dishes and drinks.

    1. Grilled Steak: The rich, hearty flavor of grilled steak pairs well with the earthy taste of the mushrooms.

    2. Quinoa Salad: A light, refreshing quinoa salad adds a nutritious balance to the richness of the mushrooms.

    3. Roasted Asparagus: The crisp texture and subtle bitterness of roasted asparagus provide a nice contrast to the buttery mushrooms.

    4. Garlic Mashed Potatoes: Creamy garlic mashed potatoes enhance the umami flavors of the mushrooms, creating a comforting combination.

    5. Sauvignon Blanc: This crisp wine offers acidity that cuts through the richness of the butter, making it an ideal pairing.

    6. Herbed Couscous: Light and fluffy, herbed couscous complements the mushrooms while adding a delightful texture to the meal.

    Common Mistakes to Avoid

    • Overcooking the Mushrooms: Keep an eye on the baking time to prevent the mushrooms from becoming too mushy.
    • Not Seasoning Enough: Ensure you season the butter mixture adequately; under-seasoning can lead to bland flavors.
    • Using Old Mushrooms: Fresh mushrooms yield the best results. Check for firmness and avoid any that appear slimy or discolored.
    • Skipping the Olive Oil: Brushing the mushrooms with olive oil adds flavor and helps with even roasting.

    Storage & Reheating Instructions

    Refrigerator Storage

    Store leftover Roasted Flat Mushrooms with Green Onion Thyme Butter in an airtight container in the refrigerator. They will stay fresh for up to 3 days.

    Freezing Instructions

    For freezing, place the cooled mushrooms in a single layer on a baking sheet until frozen. Then transfer them to an airtight container or freezer bag. They can be frozen for up to 2 months.

    Reheating Tips

    • Oven: Preheat the oven to 180°C (350°F). Place the mushrooms on a baking sheet and heat for about 10 minutes.
    • Microwave: Place the mushrooms on a microwave-safe plate and cover with a damp paper towel. Heat in 30-second intervals until warmed through.
    • Stovetop: Reheat in a skillet over medium heat for a few minutes, allowing the mushrooms to warm without losing their texture.

    Frequently Asked Questions

    How can I customize Roasted Flat Mushrooms with Green Onion Thyme Butter?

    You can add other herbs like rosemary or parsley, or incorporate different types of cheese for added richness.

    Can I use other types of mushrooms for this recipe?

    While flat mushrooms are recommended, you can substitute with portobello or shiitake mushrooms, adjusting the cooking time as needed.

    What can I serve with Roasted Flat Mushrooms with Green Onion Thyme Butter?

    These mushrooms pair well with grilled meats, salads, or as a hearty topping for crostini.

    How do I know when the mushrooms are done?

    Mushrooms should be tender and golden brown when roasted, typically taking about 20 minutes at the recommended temperature.

    Can I make the butter mixture in advance?

    Yes, you can prepare the butter mixture a day ahead and store it in the refrigerator. Just allow it to soften before using.

    Final Thoughts

    This Roasted Flat Mushrooms with Green Onion Thyme Butter recipe is a delightful addition to any meal. Its rich flavor and easy preparation make it a must-try. Don’t forget to leave a comment below with your feedback and any variations you tried!


    Dinner

    Roasted Flat Mushrooms with Green Onion Thyme Butter


    5.0 from 24 reviews

    This dish features large flat mushrooms roasted to perfection, topped with a flavorful mixture of green onions, garlic, fresh thyme, and butter. It's a simple yet elegant appetizer or side dish that highlights the earthy taste of mushrooms.

    Author: Munch Twist
    Prep Time: 10 minutes
    Cook Time: 20 minutes
    Total Time: 30 minutes
    Yield: 4 servings
    Category: Lunch
    Method: No bake
    Cuisine: American

    Roasted Flat Mushrooms with Green Onion Thyme Butter

    SCALE:
    1x
    2x
    3x
    Cook Mode: Prevent your screen from going dark

    Ingredients

    • 100g unsalted butter, softened
    • 2 cloves garlic, minced
    • 2 green onions, finely chopped
    • 8 large flat mushrooms
    • 1 tablespoon fresh thyme leaves
    • Salt and pepper to taste
    • Olive oil for brushing

    Instructions

    1. Preheat your oven to 220°C (430°F).
    2. In a bowl, combine the softened butter, minced garlic, chopped green onions, fresh thyme leaves, salt, and pepper. Mix until well combined.
    3. Brush the flat mushrooms lightly with olive oil and place them, gill side up, on a baking sheet.
    4. Spread the prepared butter mixture evenly over each mushroom cap.
    5. Roast in the preheated oven for about 20 minutes, or until the mushrooms are tender and golden brown.

    Nutrition Facts

    Serving Size: 1 serving
    Calories: 180 kcal
    Sugar: 1g
    Sodium: 200mg
    Fat: 16g
    Saturated Fat: 10g
    Carbohydrates: 6g
    Fiber: 1g
    Protein: 2g
    Cholesterol: 30mg

  • Irresistible Grandmas Apple Dumplings Recipe

    Irresistible Grandmas Apple Dumplings Recipe

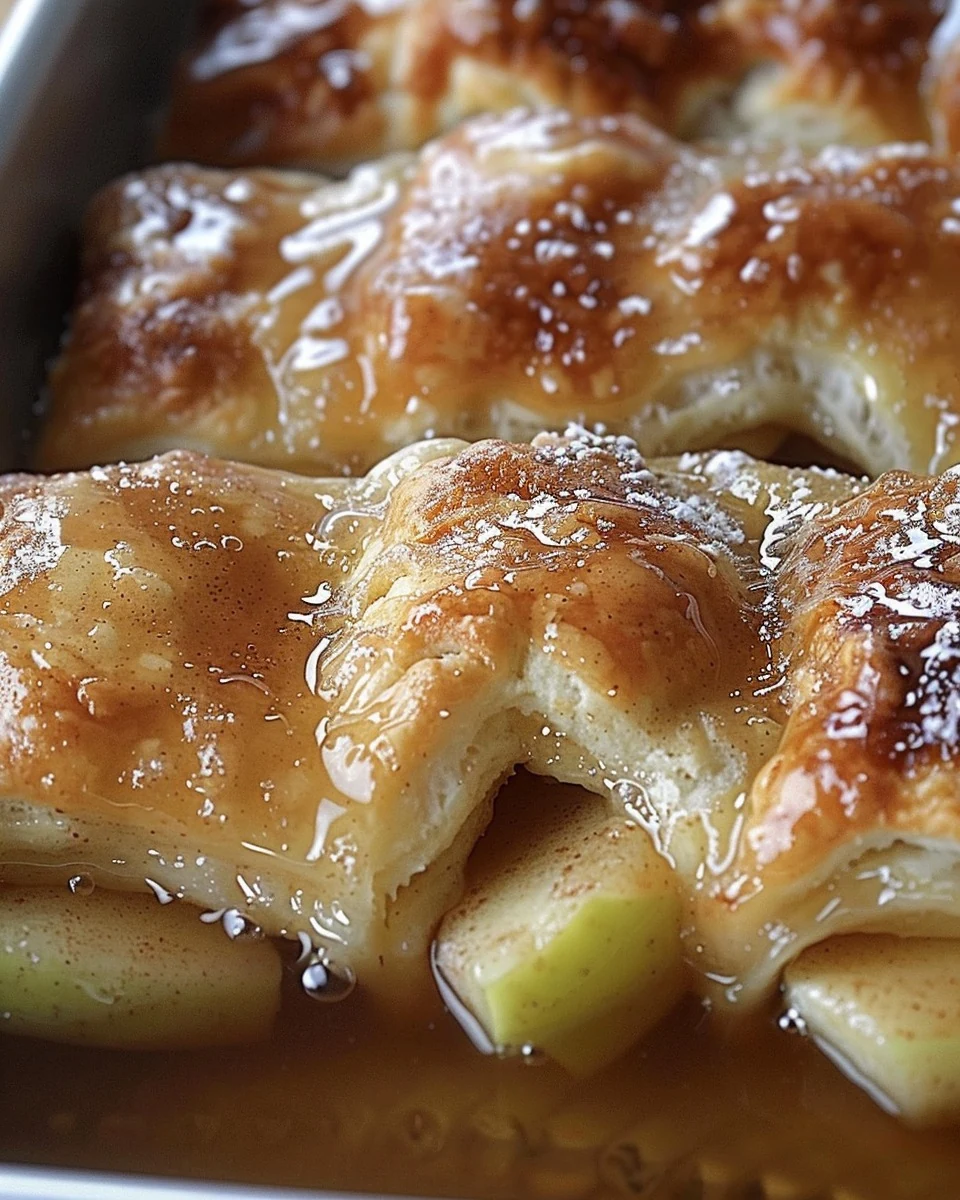
    Grandma’s Apple Dumplings are a delightful dessert that combines tender, spiced apples wrapped in warm, flaky biscuit dough. This comforting dish evokes nostalgia and warmth with every bite, making it a perfect addition to your family gatherings or cozy evenings at home.

    Why You’ll Love This Recipe

    • Comforting Flavor: The combination of cinnamon and sweet apples creates a warm, inviting taste.
    • Family Favorite: This recipe is sure to impress both kids and adults, becoming a staple in your home.
    • Easy to Prepare: With simple ingredients and straightforward steps, anyone can make these delicious dumplings.
    • Versatile Serving Options: Serve them warm with vanilla ice cream or enjoy them on their own for a sweet treat.
    • Perfect for Occasions: Ideal for holidays, potlucks, or just because you deserve a sweet indulgence.

    Tools and Equipment

    You’ll need a few essential tools to make Grandma’s Apple Dumplings effortlessly.

    Essential Tools

    • 9×13-inch baking pan
    • Medium saucepan
    • Mixing bowl
    • Peeler and corer
    • Measuring cups and spoons

    Why These Tools Matter

    • Baking Pan: A 9×13-inch pan is perfect for holding all the dumplings and syrup without spilling.
    • Saucepan: A medium saucepan ensures even heating of the syrup, making it easier to dissolve the sugar.
    • Peeler and Corer: These tools simplify the apple preparation process, saving time and effort.

    Ingredients for Grandmas Apple Dumplings

    For the Dumplings

    • 2 Granny Smith apples
    • 8 canned biscuits (I use Pillsbury buttermilk)

    For the Syrup

    • 1 stick butter
    • 1 cup water
    • 1 cup sugar, divided
    • 1/4 tsp vanilla extract
    • 4 teaspoons ground cinnamon

    How to Make Grandmas Apple Dumplings Step-by-Step

    Step 1: Prep the Apples

    Begin by preheating your oven to 375°F (190°C). Peel, core, and slice the Granny Smith apples vertically into 8 slices each. To prevent browning, cover the apple slices with cold water while preparing the rest of the recipe.

    Step 2: Prepare the Syrup

    In a medium saucepan, combine 1 cup of water, 3/4 cup of the sugar, 1 stick of butter, and 1/4 tsp of vanilla extract. Heat over medium heat until boiling, stirring occasionally to ensure the sugar dissolves completely.

    Step 3: Wrap the Apples

    Separate each biscuit in half. Wrap one layer of biscuit dough around each apple slice, stretching the dough slightly to overlap and seal the bottom. Place the wrapped apple slices, sealed side down, in a 9×13-inch baking pan.

    Step 4: Add the Syrup and Topping

    Pour the hot sugar mixture over the wrapped apple slices in the baking pan. In a small bowl, mix the remaining 1/4 cup of sugar with 4 teaspoons of ground cinnamon. Sprinkle this cinnamon-sugar mixture evenly over the tops of the wrapped apples.

    Step 5: Bake

    Bake in the preheated oven for 35 minutes or until the dumplings are golden brown and the apples are tender. Serve the apple dumplings warm, ideally with a scoop of vanilla ice cream for an extra touch of indulgence.

    Enjoy making this classic dessert that captures the essence of home and family gatherings with every bite of Grandma’s Apple Dumplings.

    How to Serve Grandmas Apple Dumplings

    Grandma’s Apple Dumplings are versatile and can be enjoyed in various delightful ways.

    A La Mode

    Serve warm apple dumplings topped with a generous scoop of vanilla ice cream. The cold ice cream melts slightly into the warm dumplings, creating a delightful contrast of temperatures.

    Drizzled with Caramel Sauce

    For an extra indulgent treat, drizzle warm caramel sauce over the dumplings before serving. The sweetness of the caramel enhances the flavor of the apples and adds a rich, sticky texture.

    With Whipped Cream

    Top the apple dumplings with freshly whipped cream for a light, airy finish. This addition cuts through the richness of the dumplings and adds a creamy texture that complements the dish perfectly.

    Pro Tips for the Best Grandmas Apple Dumplings

    To ensure your apple dumplings turn out perfectly every time, consider these helpful tips.

    • Use Fresh Apples: Opt for Granny Smith apples for their tartness, which balances the sweetness of the dish beautifully.

    • Seal the Edges Well: Make sure to seal the edges of the biscuit dough tightly around the apple slices to prevent the syrup from leaking out during baking.

    • Experiment with Spices: Feel free to experiment with additional spices like nutmeg or allspice in the cinnamon-sugar mixture for added depth of flavor.

    • Let Them Cool Slightly: Allow the dumplings to cool for a few minutes after baking. This helps the syrup thicken slightly, making it easier to serve without making a mess.

    • Store Properly: If you have leftovers, store them in an airtight container in the refrigerator. Reheat in the oven to restore their crispness before serving.

    Best Side Dishes and Pairings

    These side dishes and drinks complement the flavors of Grandma’s Apple Dumplings beautifully.

    1. Vanilla Ice Cream
      Classic and creamy, vanilla ice cream pairs perfectly with the warm dumplings, enhancing their sweetness.

    2. Caramel Sauce
      A rich, gooey caramel sauce drizzled over each serving adds an extra layer of sweetness and flavor.

    3. Whipped Cream
      Light and fluffy whipped cream balances the richness of the dumplings and adds a delightful texture.

    4. Chai Tea
      The warm spices in chai tea harmonize with the cinnamon in the dumplings, creating a comforting drink pairing.

    5. Coffee
      A robust cup of coffee offers a perfect counterbalance to the sweetness of the dessert, making for a delightful after-dinner treat.

    6. Apple Cider
      Serve warm apple cider alongside the dumplings for an apple-themed dessert experience that enhances the flavors of the dish.

    Common Mistakes to Avoid

    • Using the Wrong Apples: Always choose tart apples like Granny Smith for the best flavor contrast.
    • Not Sealing the Dumplings Properly: Ensure each biscuit is well sealed to prevent leakage during baking.
    • Skipping the Sugar Mixture: This syrup is crucial for flavor and moisture; don’t skip it.
    • Overbaking the Dumplings: Keep an eye on them to avoid drying out; they should be golden brown and tender.

    Storage & Reheating Instructions

    Refrigerator Storage

    Store leftover dumplings in an airtight container in the refrigerator for up to 3 days. Make sure they are fully cooled before sealing to maintain their texture.

    Freezing Instructions

    To freeze, wrap individual dumplings tightly in plastic wrap, then place them in a freezer-safe container. They can be frozen for up to 3 months. Thaw in the refrigerator overnight before reheating.

    Reheating Tips

    • Oven: Preheat to 350°F (175°C) and reheat for about 15-20 minutes until warmed through.
    • Microwave: Place a dumpling on a microwave-safe plate and heat for 30-45 seconds, checking for warmth.
    • Stovetop: Heat in a skillet over low heat, covered, for about 5-7 minutes until hot.

    Frequently Asked Questions

    Can I use other types of apples for Grandmas Apple Dumplings?

    While Granny Smith apples are recommended for their tartness, you can experiment with other varieties. Just be cautious of sweetness and texture.

    How do I make Grandmas Apple Dumplings ahead of time?

    You can prepare the dumplings and store them unbaked in the refrigerator for up to 24 hours. Bake them just before serving for the best results.

    What can I serve with Grandmas Apple Dumplings?

    These dumplings pair wonderfully with vanilla ice cream, whipped cream, or a drizzle of caramel sauce for added indulgence.

    Can I adjust the sweetness in Grandmas Apple Dumplings?

    Yes, you can reduce the sugar in the syrup or the cinnamon-sugar topping to suit your taste preferences.

    Are Grandmas Apple Dumplings suitable for a dinner party?

    Absolutely! They make a delightful dessert that can impress guests, especially when served warm with ice cream.

    Final Thoughts

    Grandma’s Apple Dumplings are a delightful and comforting treat that brings nostalgia to every bite. I encourage you to try this recipe and share your experience in the comments below. Your feedback helps others discover the joy of this classic dessert.


    Desserts

    Grandmas Apple Dumplings


    5.0 from 24 reviews

    Grandma's Apple Dumplings are a delightful dessert featuring tender apple slices wrapped in buttery biscuit dough, baked to golden perfection and topped with a sweet cinnamon-sugar mixture. This comforting treat is perfect for family gatherings or a cozy evening at home.

    Author: Munch Twist
    Prep Time: 20 minutes
    Cook Time: 35 minutes
    Total Time: 55 minutes
    Yield: 8 servings
    Category: Desserts
    Method: Baking
    Cuisine: American

    Grandmas Apple Dumplings

    SCALE:
    1x
    2x
    3x
    Cook Mode: Prevent your screen from going dark

    Ingredients

    • 1 stick butter
    • 1 cup water
    • 2 Granny Smith apples
    • 4 teaspoons ground cinnamon
    • 8 canned biscuits
    • 1 cup sugar, divided
    • 1/4 tsp vanilla extract

    Instructions

    1. Preheat your oven to 375°F (190°C). Peel, core, and slice the Granny Smith apples vertically into 8 slices each. Cover the apple slices with cold water to prevent browning while you prepare the rest of the recipe.
    2. In a medium saucepan, combine 1 cup water, 3/4 cup of the sugar, 1 stick of butter, and 1/4 tsp of vanilla extract. Heat the mixture over medium heat until it comes to a boil, stirring occasionally to ensure the sugar dissolves completely.
    3. Separate each biscuit in half. Wrap a biscuit dough layer around each apple slice, stretching the dough slightly to overlap and seal the bottom. Place the wrapped apple slices, sealed side down, in a 9×13-inch baking pan.
    4. Pour the hot sugar mixture over the wrapped apple slices in the baking pan. In a small bowl, mix the remaining 1/4 cup of sugar with 4 teaspoons of ground cinnamon. Sprinkle this cinnamon-sugar mixture evenly over the tops of the wrapped apples.
    5. Bake in the preheated oven for 35 minutes or until the dumplings are golden brown and the apples are tender. Serve the apple dumplings warm.

    Nutrition Facts

    Serving Size: 1 serving
    Calories: 300 kcal
    Sugar: 26g
    Sodium: 400mg
    Fat: 12g
    Saturated Fat: 7g
    Carbohydrates: 50g
    Fiber: 2g
    Protein: 2g
    Cholesterol: 30mg

  • Indulge in Elegant Black Forest Roll Cake Today

    Indulge in Elegant Black Forest Roll Cake Today

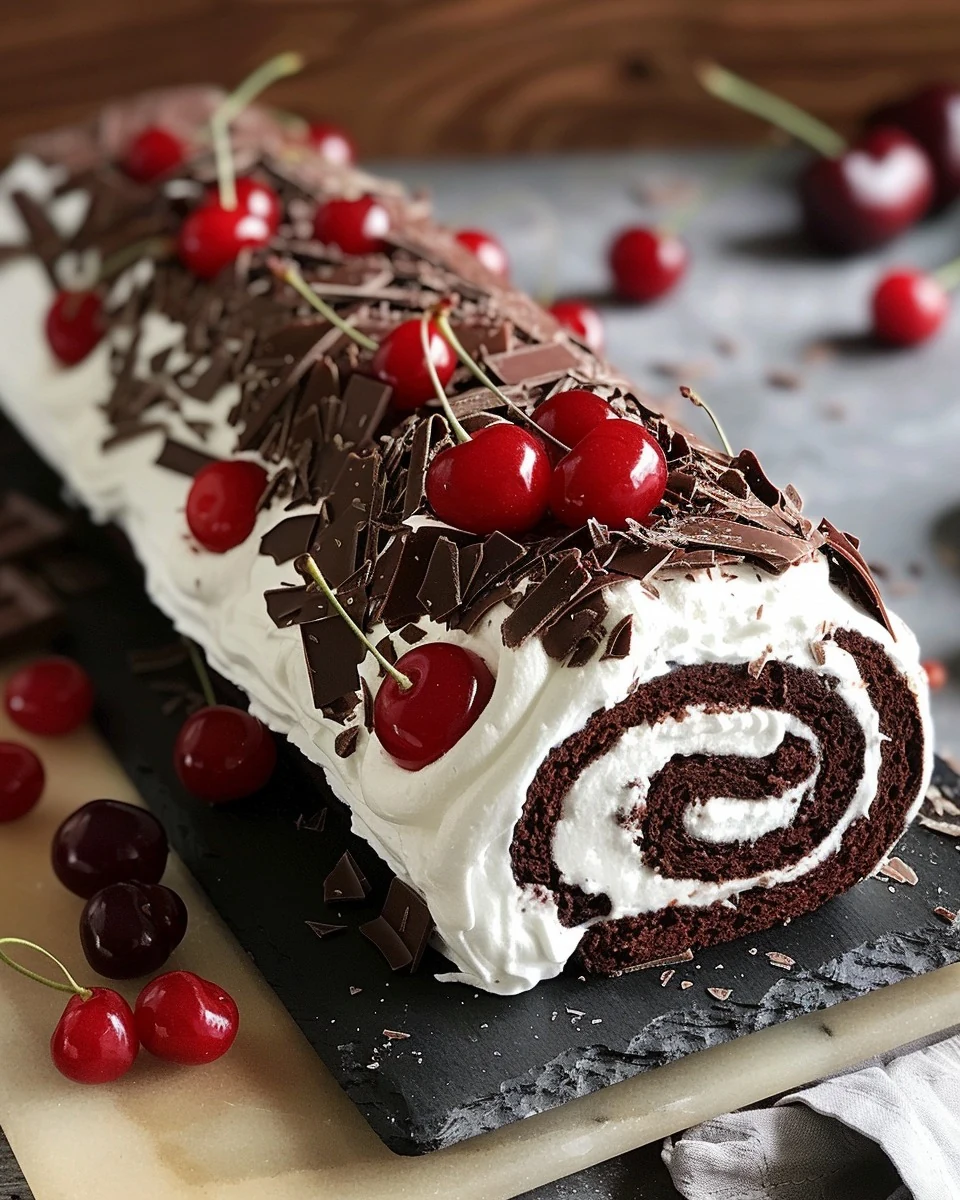
    Elegant Black Forest Roll Cake is a delightful twist on the classic dessert. This cake combines rich chocolate flavors with fresh fruits, creating a visually stunning and delicious treat. Perfect for any celebration, the Elegant Black Forest Roll Cake is sure to impress your guests.

    Why You’ll Love This Recipe

    • Decadent Flavor: The combination of dark chocolate, cherries, and raspberries creates a rich and satisfying taste.
    • Visual Appeal: Its rolled design and vibrant fruits make it a stunning centerpiece for any dessert table.
    • Versatile Serving Options: Enjoy it as a dessert for special occasions or a sweet treat for everyday indulgence.
    • Light and Airy Texture: The whipped cream filling adds a lightness that balances the dense chocolate cake.
    • Easy to Customize: Feel free to experiment with different fruits or toppings to suit your taste.

    Tools and Equipment

    To create your Elegant Black Forest Roll Cake, you will need a few essential tools.

    Essential Tools

    • Mixing bowls
    • Baking sheet
    • Parchment paper
    • Electric mixer or whisk
    • Kitchen towel
    • Serving platter

    Why These Tools Matter

    • Mixing bowls: Provide ample space for combining ingredients without mess.
    • Electric mixer or whisk: Ensures eggs and cream are beaten to the perfect consistency, saving time and effort.
    • Baking sheet: Offers a flat surface for even baking, ensuring the cake rolls smoothly.

    Ingredients for Elegant Black Forest Roll Cake

    Cake Base

    • 1/3 cup all-purpose flour
    • 1/4 cup granulated sugar
    • 4 large eggs
    • 1/4 cup cocoa powder
    • 1 teaspoon baking powder

    Chocolate Filling

    • 1/2 cup dark chocolate, chopped

    Fruit Filling

    • 1/2 cup fresh cherries, pitted
    • 1/4 cup raspberries

    Whipped Cream

    • 3/4 cup heavy cream
    • 1/4 cup powdered sugar
    • 1 teaspoon vanilla extract

    Garnish

    • Chocolate shavings for garnish
    • Fresh cherries and raspberries for garnish

    How to Make Elegant Black Forest Roll Cake Step-by-Step

    Step 1: Prepare the Cake

    1. Preheat your oven to 180°C (350°F). Line a baking sheet with parchment paper.
    2. In a large mixing bowl, beat the eggs and granulated sugar until light and fluffy.
    3. Sift flour, cocoa powder, and baking powder into the egg mixture. Gently fold until combined.
    4. Pour the batter onto the prepared baking sheet, spreading it evenly. Bake for 10-12 minutes until a toothpick inserted into the center comes out clean.

    Step 2: Whip the Cream

    1. While the cake is baking, whip the heavy cream with powdered sugar and vanilla extract until stiff peaks form.

    Step 3: Roll and Fill the Cake

    1. Once the cake is done, turn it out onto a clean kitchen towel dusted with powdered sugar. Peel off the parchment paper.
    2. While still warm, roll the cake with the towel inside and let it cool completely.
    3. Unroll the cooled cake and spread an even layer of whipped cream over the surface. Sprinkle with chopped dark chocolate, cherries, and raspberries.
    4. Roll the cake up tightly and place it seam-side down on a serving platter. Refrigerate for at least 1 hour.

    Step 4: Garnish and Serve

    1. Garnish the cake with chocolate shavings, fresh cherries, and raspberries before slicing and serving.

    Enjoy your Elegant Black Forest Roll Cake, a perfect dessert that combines rich flavors and beautiful presentation. The light texture and fruity accents make it a delightful treat for every occasion.

    How to Serve Elegant Black Forest Roll Cake

    There are many delightful ways to present your Elegant Black Forest Roll Cake that will impress guests and elevate any occasion.

    Classic Presentation

    Serve the roll cake sliced into generous portions on individual dessert plates. Garnish each slice with additional whipped cream and a few fresh cherries for a classic yet elegant touch.

    Chocolate Drizzle

    For a more indulgent serving, drizzle warm chocolate sauce over each slice. This enhances the chocolate flavor and adds a rich, inviting appearance that chocolate lovers will adore.

    Berry Compote

    Accompany the roll cake with a side of berry compote made from fresh cherries and raspberries. This adds a tart contrast to the sweetness of the cake, creating a balanced dessert experience.

    Pro Tips for the Best Elegant Black Forest Roll Cake

    To achieve the perfect roll cake, consider these essential tips that will enhance your baking process.

    • Use Fresh Ingredients: Ensure your eggs and dairy are fresh for the best flavor and texture.
    • Sift Dry Ingredients: Sifting flour, cocoa powder, and baking powder helps to aerate the mixture, resulting in a lighter cake.
    • Don’t Overmix: When folding in the dry ingredients, be gentle to maintain the airiness of the batter.
    • Chill Before Serving: Let the rolled cake chill in the refrigerator for at least an hour to allow the flavors to meld and the cake to set properly.
    • Experiment with Fillings: Feel free to mix in different fruits or flavored extracts to personalize your roll cake.

    Best Side Dishes and Pairings

    Pairing your Elegant Black Forest Roll Cake with complementary side dishes or drinks can enhance the overall dining experience.

    1. Vanilla Ice Cream – The creamy, smooth texture of vanilla ice cream balances the rich chocolate and tart fruits of the roll cake.
    2. Espresso – A shot of rich espresso provides a perfect contrast to the sweetness of the cake, making it an ideal after-dinner treat.
    3. Fruit Salad – A light and refreshing fruit salad can cleanse the palate and add a vibrant touch to the dessert spread.
    4. Chocolate Fondue – Set up a chocolate fondue station for guests to dip fresh fruits, enhancing the chocolate experience.
    5. Mint Tea – The herbal notes of mint tea offer a refreshing contrast and aid in digestion after a rich dessert.

    Common Mistakes to Avoid

    • Overmixing the Batter: Gently fold the ingredients to maintain the cake’s light texture.
    • Not Using Parchment Paper: This can cause the cake to stick, making it difficult to roll.
    • Skipping the Cooling Step: Allowing the cake to cool completely ensures it holds its shape when rolled.
    • Using Too Much Filling: Overfilling can make it hard to roll the cake without tearing.

    Storage & Reheating Instructions

    Refrigerator Storage

    Store the Elegant Black Forest Roll Cake in an airtight container in the refrigerator. It will remain fresh for up to 3 days.

    Freezing Instructions

    For freezing, wrap the roll cake tightly in plastic wrap and then in aluminum foil. It can be frozen for up to 2 months. To thaw, move it to the refrigerator overnight.

    Reheating Tips

    • Oven: Preheat to 150°C (300°F) and warm the cake for about 10 minutes.
    • Microwave: Heat individual slices on a microwave-safe plate for 15-20 seconds.
    • Stovetop: Place slices in a skillet over low heat, cover, and warm for 5 minutes.

    Frequently Asked Questions

    What makes the Elegant Black Forest Roll Cake unique?

    The combination of rich dark chocolate, fresh cherries, and a light whipped cream filling creates a delightful contrast in flavors and textures.

    Can I use frozen cherries for the Elegant Black Forest Roll Cake?

    Yes, frozen cherries can be used, but ensure they are thawed and patted dry to avoid excess moisture in the cake.

    How can I customize the filling for the Elegant Black Forest Roll Cake?

    Feel free to experiment with different fruits such as strawberries or blueberries, or add a splash of liqueur to the cream for an adult twist.

    Is this recipe suitable for special occasions?

    Absolutely! The Elegant Black Forest Roll Cake is perfect for celebrations, gatherings, or simply as a special treat.

    Can I make this cake ahead of time?

    Yes, you can prepare the cake a day in advance. Just store it properly and garnish before serving for the best presentation.

    Final Thoughts

    The Elegant Black Forest Roll Cake is a stunning dessert that is sure to impress your guests. We encourage you to try this recipe and share your experience in the comments below. Your feedback not only helps us but also inspires others to create this delightful treat.


    Desserts

    Elegant Black Forest Roll Cake


    5.0 from 24 reviews

    This Elegant Black Forest Roll Cake is a delightful dessert that combines rich chocolate and fresh berries. The light and fluffy chocolate sponge is rolled with a luscious whipped cream filling and garnished with chocolate shavings and fresh fruit, making it a perfect treat for any occasion.

    Author: Munch Twist
    Prep Time: 20 minutes
    Cook Time: 12 minutes
    Total Time: 1 hour 32 minutes
    Yield: 8 servings
    Category: Desserts
    Method: No bake
    Cuisine: American

    Elegant Black Forest Roll Cake

    SCALE:
    1x
    2x
    3x
    Cook Mode: Prevent your screen from going dark

    Ingredients

    • 1/3 cup all-purpose flour
    • 1/4 cup granulated sugar
    • 1/2 cup dark chocolate, chopped
    • 4 large eggs
    • 1/4 cup cocoa powder
    • 1/2 cup fresh cherries, pitted
    • 1/4 cup raspberries
    • 1 teaspoon baking powder
    • 3/4 cup heavy cream
    • 1/4 cup powdered sugar
    • 1 teaspoon vanilla extract
    • Chocolate shavings for garnish
    • Fresh cherries and raspberries for garnish

    Instructions

    1. Preheat your oven to 180°C (350°F). Line a baking sheet with parchment paper. In a large mixing bowl, beat the eggs and granulated sugar until light and fluffy. Sift flour, cocoa powder, and baking powder into the egg mixture. Gently fold until combined. Pour the batter onto the prepared baking sheet, spreading it evenly. Bake for 10-12 minutes until a toothpick inserted into the center comes out clean.
    2. While the cake is baking, whip the heavy cream with powdered sugar and vanilla extract until stiff peaks form.
    3. Once the cake is done, turn it out onto a clean kitchen towel dusted with powdered sugar. Peel off the parchment paper. While still warm, roll the cake with the towel inside and let it cool completely. Unroll the cooled cake and spread an even layer of whipped cream over the surface. Sprinkle with chopped dark chocolate, cherries, and raspberries. Roll the cake up tightly and place it seam-side down on a serving platter. Refrigerate for at least 1 hour.
    4. Garnish the cake with chocolate shavings, fresh cherries, and raspberries before slicing and serving.

    Nutrition Facts

    Serving Size: 1 serving
    Calories: 350 kcal
    Sugar: 20g
    Sodium: 180mg
    Fat: 23g
    Saturated Fat: 13g
    Carbohydrates: 30g
    Fiber: 3g
    Protein: 6g
    Cholesterol: 145mg

  • Crispy Mozzarella Stick Onion Rings Recipe

    Crispy Mozzarella Stick Onion Rings Recipe

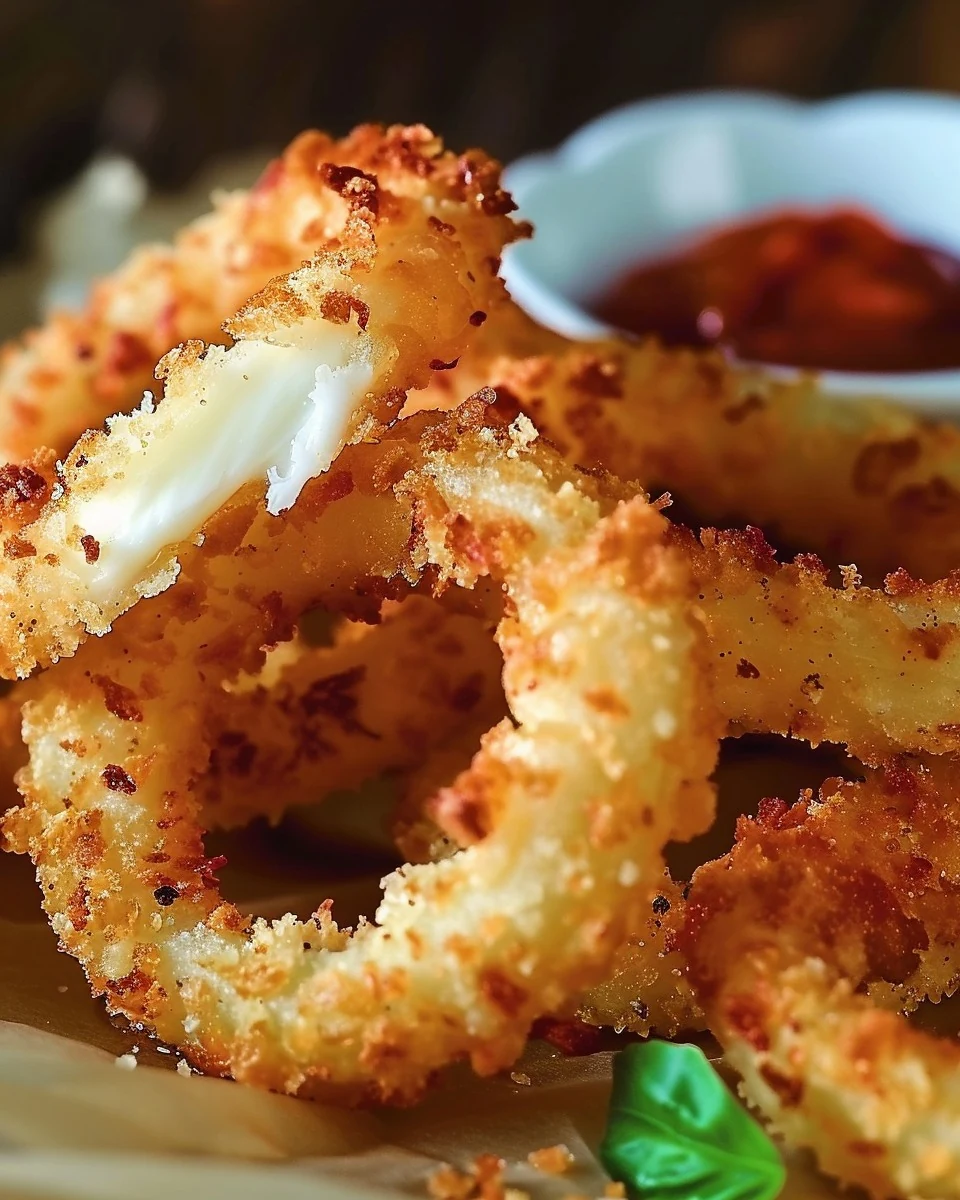
    Mozzarella Stick Onion Rings combine the delightful crunch of onion rings with the gooey goodness of mozzarella cheese. This indulgent recipe is perfect for parties or a cozy snack at home, offering a unique twist on classic flavors that everyone will love.

    Why You’ll Love This Recipe

    • Crispy Texture: The double batter coating ensures a satisfying crunch with every bite.
    • Cheesy Goodness: Each ring is filled with melted mozzarella that oozes out when bitten into.
    • Fun to Make: Assemble these rings with friends or family for a fun activity in the kitchen.
    • Versatile Appetizer: Great for game days or movie nights, these rings are sure to impress guests.
    • Easy to Customize: Feel free to add spices or herbs to the breadcrumbs for a unique flavor.

    Tools and Equipment

    Having the right tools can make your cooking experience smoother and more enjoyable.

    Essential Tools

    • Large pot for frying
    • Mixing bowls (3)
    • Knife and cutting board
    • Freezer-safe tray
    • Slotted spoon or spider for frying

    Why These Tools Matter

    • Large pot for frying: Allows for even cooking and prevents overcrowding.
    • Mixing bowls: Separate bowls keep the coating process organized and efficient.
    • Slotted spoon or spider: Perfect for safely removing the rings from hot oil without splashing.

    Ingredients for Mozzarella Stick Onion Rings

    For the Onion Rings

    • 5 eggs
    • 2 cups flour (250 g)
    • 2 large white onions
    • 2 cups breadcrumbs (230 g)

    For the Filling

    • 3 slices mozzarella cheese

    For Frying

    • Oil for frying
    • Marinara sauce for dipping

    How to Make Mozzarella Stick Onion Rings Step-by-Step

    Step 1: Prepare the Onions

    Start by peeling and slicing the onions into 1-centimeter (½ inch) rings. Carefully separate the rings to create two sizes: larger rings for the outside and smaller ones for the inside.

    Step 2: Assemble the Rings

    Slice the mozzarella cheese into four even strips per slice. Take a smaller onion ring and place it inside a larger one. Fill the space between the rings with the mozzarella strips. For even more cheese, add a second layer of mozzarella. Repeat this process with all rings. Once assembled, freeze the rings for about 1 hour to help them hold their shape during frying.

    Step 3: Coat the Rings

    Prepare three bowls: one with flour, one with beaten eggs, and one with breadcrumbs. Coat each frozen onion ring in flour, then dip it into the beaten eggs, and finally coat it with breadcrumbs. For an extra crispy texture, repeat the egg and breadcrumb coating process. Return the coated rings to the freezer while you heat the oil.

    Step 4: Fry the Rings

    Heat oil in a large pot to 350°F (175°C). Carefully fry the coated onion rings in batches, turning them until they are golden brown. Monitor the heat to prevent the cheese from melting out.

    Step 5: Serve

    After frying, remove the rings from the oil and drain them on paper towels to absorb excess oil. Serve them hot with marinara sauce for dipping.

    Preparation time: 30 minutes (plus 1 hour freezing) | Cooking time: 15 minutes

    Enjoy these crispy, cheesy Mozzarella Stick Onion Rings as a fun appetizer or a tasty snack!

    How to Serve Mozzarella Stick Onion Rings

    These Mozzarella Stick Onion Rings make for a delightful appetizer or snack, and there are several creative ways to serve them.

    Garnished with Fresh Herbs

    Top your Mozzarella Stick Onion Rings with freshly chopped parsley or basil before serving. This adds a pop of color and a burst of freshness that complements the rich flavors.

    Create a Cheese Dip Bar

    Set up a cheese dip bar featuring a variety of sauces such as ranch, blue cheese, or spicy nacho cheese. This allows guests to customize their dipping experience and enhances the overall flavor profile.

    Serve with a Side Salad

    Pair the crispy onion rings with a light, refreshing salad. A simple arugula salad drizzled with lemon vinaigrette can balance the richness of the Mozzarella Stick Onion Rings perfectly.

    Pro Tips for the Best Mozzarella Stick Onion Rings

    To achieve the ultimate crispy and cheesy onion rings, keep these expert tips in mind.

    • Use Fresh Ingredients: Fresh mozzarella and onions will provide the best flavor and texture. Avoid pre-packaged cheese that may not melt as well.

    • Freeze the Rings: Freezing the assembled onion rings not only helps them hold their shape but also ensures the cheese melts perfectly without leaking out during frying.

    • Double Dipping for Crispiness: For an extra crunchy exterior, double dip your onion rings in the egg and breadcrumbs. This creates a thicker coating that fries up beautifully.

    • Monitor Oil Temperature: Use a thermometer to maintain the oil temperature at 350°F (175°C). If the oil is too hot, the rings will burn; too cool, and they will absorb excess oil.

    • Drain Properly: After frying, let the onion rings drain on paper towels to remove excess oil, keeping them crispy and light.

    Best Side Dishes and Pairings

    Enhance your Mozzarella Stick Onion Rings experience with these complementary side dishes and drinks.

    1. Classic Marinara Sauce: A rich and tangy marinara sauce serves as the perfect dip to elevate the flavors of the onion rings.

    2. Crispy French Fries: The combination of fried foods is always a hit. Crispy French fries offer a satisfying crunch and can be seasoned to taste.

    3. Coleslaw: A tangy coleslaw adds a refreshing crunch and acidity that balances the richness of the onion rings.

    4. Garlic Bread: Warm, buttery garlic bread is a comforting side that pairs well with the cheesy goodness of the onion rings.

    5. Craft Beer: A cold craft beer, particularly a pale ale or lager, complements the flavors and adds a refreshing contrast to the fried snacks.

    Common Mistakes to Avoid

    • Overcrowding the Fryer: Frying too many rings at once can lower the oil temperature, resulting in soggy onion rings instead of crispy ones.
    • Improper Freezing Time: Not freezing the assembled rings long enough can cause the cheese to melt out during frying.
    • Inconsistent Coating: Skipping the double coating of egg and breadcrumbs can lead to an uneven texture and less crispiness.
    • Incorrect Oil Temperature: Frying at a temperature that is too low will make the rings absorb more oil, while too high can burn the coating.

    Storage & Reheating Instructions

    Refrigerator Storage

    Store leftover Mozzarella Stick Onion Rings in an airtight container in the refrigerator. They will stay fresh for up to 3 days.

    Freezing Instructions

    For longer storage, freeze the assembled but uncooked rings on a baking sheet until solid, then transfer them to a freezer-safe bag or container. This will keep them fresh for up to 2 months.

    Reheating Tips

    • Oven: Preheat the oven to 375°F (190°C). Place the rings on a baking sheet and heat for about 10-15 minutes, or until heated through and crispy.
    • Microwave: For a quick option, heat the rings on a microwave-safe plate for 1-2 minutes, but be aware this may result in a softer texture.
    • Stovetop: Reheat in a skillet over medium heat for about 5-7 minutes, turning occasionally until warm and crispy.

    Frequently Asked Questions

    Can I make Mozzarella Stick Onion Rings ahead of time?

    Yes, you can prepare the rings and freeze them before frying. This not only saves time but also enhances the flavor.

    What can I serve with Mozzarella Stick Onion Rings?

    These rings pair wonderfully with marinara sauce, ranch dressing, or even spicy aioli for dipping.

    How do I ensure the cheese doesn’t leak out during frying?

    Make sure to freeze the assembled rings thoroughly before frying to help keep the cheese contained.

    What type of oil is best for frying?

    Using oils with a high smoke point, such as vegetable oil or canola oil, is ideal for frying Mozzarella Stick Onion Rings.

    Final Thoughts

    Mozzarella Stick Onion Rings make for a delightful appetizer or snack that’s sure to impress. The combination of crispy onion and gooey cheese is a crowd-pleaser. Try out this recipe and let us know your thoughts in the comments!


    Dinner

    Mozzarella Stick Onion Rings


    5.0 from 24 reviews

    These Mozzarella Stick Onion Rings combine the crunch of onion rings with the gooeyness of mozzarella cheese. Perfect as an appetizer or snack, they are coated in a crispy breadcrumb layer and served with marinara sauce for dipping.

    Author: Munch Twist
    Prep Time: 30 minutes
    Cook Time: 15 minutes
    Total Time: 1 hour 45 minutes
    Yield: 4 servings
    Category: Dinner
    Method: No bake
    Cuisine: American

    Mozzarella Stick Onion Rings

    SCALE:
    1x
    2x
    3x
    Cook Mode: Prevent your screen from going dark

    Ingredients

    • 5 eggs
    • 2 cups flour (250 g)
    • 2 large white onions
    • 2 cups breadcrumbs (230 g)
    • 3 slices mozzarella cheese
    • Oil for frying
    • Marinara sauce for dipping

    Instructions

    1. Peel and slice the onions into 1-centimeter rings and gently separate the rings.
    2. Slice the mozzarella cheese into 4 even strips per slice. Create double rings with the onion and fill with mozzarella strips. Freeze for about 1 hour.
    3. Set up three bowls with flour, beaten eggs, and breadcrumbs. Coat each frozen onion ring in flour, dip in eggs, and coat with breadcrumbs. Repeat for extra crispiness and return to freezer.
    4. Heat oil in a large pot to 350°F (175°C) and fry the coated onion rings in batches until golden brown.
    5. Remove from oil, drain on paper towels, and serve hot with marinara sauce.

    Nutrition Facts

    Serving Size: 1 serving
    Calories: 400 kcal
    Sugar: 2g
    Sodium: 600mg
    Fat: 25g
    Saturated Fat: 10g
    Carbohydrates: 30g
    Fiber: 2g
    Protein: 15g
    Cholesterol: 400mg

  • Souvlaki Meat on a Stick: A Flavorful Grill Recipe

    Souvlaki Meat on a Stick: A Flavorful Grill Recipe

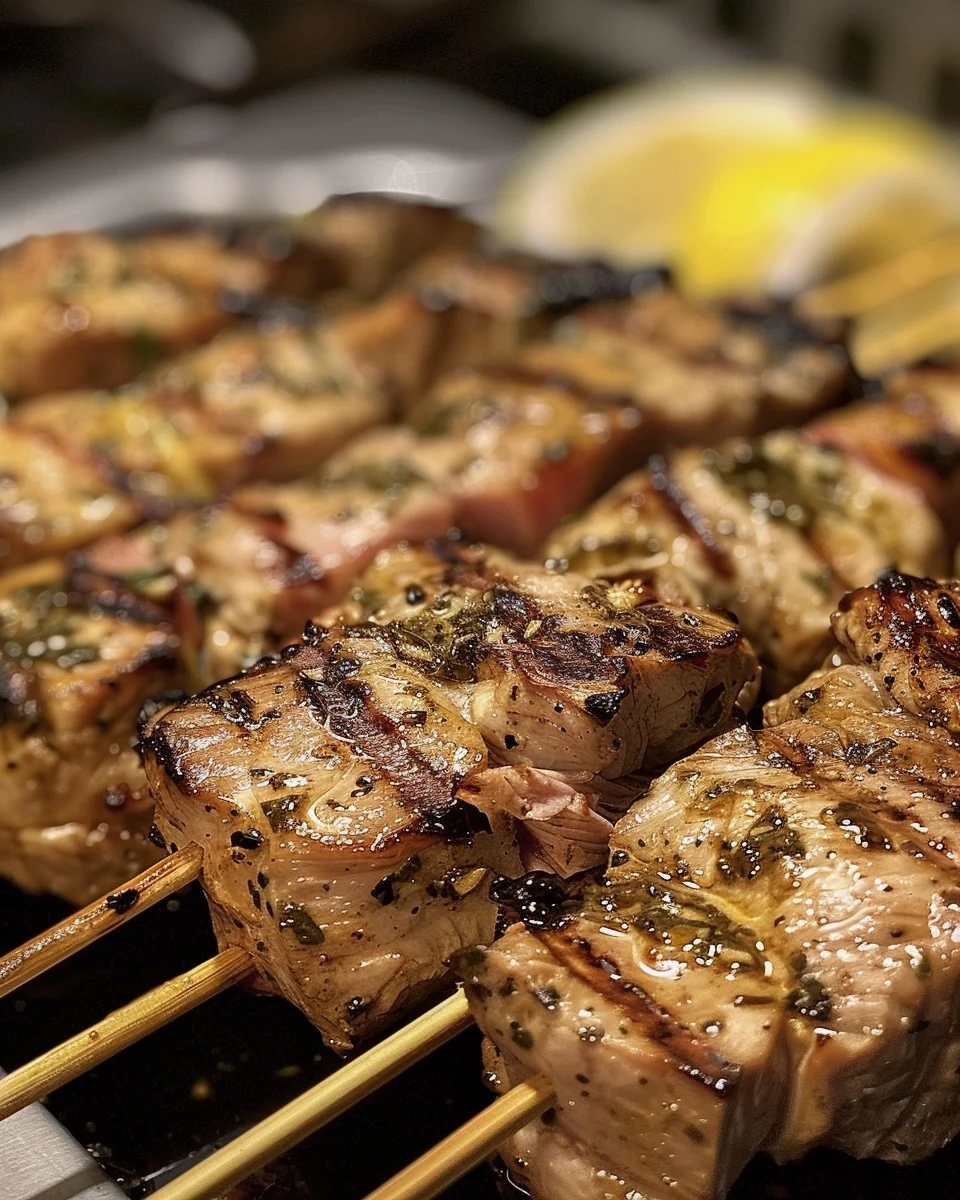
    Souvlaki Meat on a Stick is a delightful dish that captures the essence of Mediterranean cuisine. The tender, marinated chicken is grilled to perfection, delivering a burst of flavors in every bite. This recipe is not only delicious but also simple to prepare, making it a perfect addition to your weeknight meals or gatherings.

    Why You’ll Love This Recipe

    • Flavor-Packed: The combination of garlic, lemon, and oregano creates a vibrant taste profile.
    • Quick & Easy: Ready in under 30 minutes, this dish is perfect for busy weeknights.
    • Versatile Serving Options: Pair it with pita, tzatziki, or a fresh Greek salad for a complete meal.
    • Healthy Choice: With lean chicken and fresh ingredients, it fits well into a balanced diet.
    • Grill Perfection: The grilling process adds a lovely char and smokiness, enhancing the overall flavor.

    Tools and Equipment

    Having the right tools makes cooking easier and more enjoyable.

    Essential Tools

    • Wooden skewers
    • Grill or grill pan
    • Mixing bowl
    • Measuring cups and spoons
    • Knife and cutting board

    Why These Tools Matter

    • Wooden skewers: Ensure even cooking and easy handling of the meat on the grill.
    • Grill or grill pan: Provides the high heat necessary for achieving that perfect char.
    • Mixing bowl: Allows for easy marinating and mixing of ingredients without mess.

    Ingredients for Souvlaki Meat on a Stick

    Marinade

    • 1 tablespoon dried oregano
    • 4 garlic cloves, minced
    • Salt and pepper, to taste
    • Juice of 2 lemons
    • 1/4 cup olive oil

    Chicken

    • 2 pounds chicken breast, cut into 1-inch cubes

    Skewers

    • Wooden skewers, soaked in water for 30 minutes

    How to Make Souvlaki Meat on a Stick Step-by-Step

    Step 1: Marinate the Chicken

    In a mixing bowl, combine the lemon juice, olive oil, minced garlic, dried oregano, salt, and pepper. Mix well to create the marinade. Add the chicken cubes to the marinade, ensuring they are well coated. Cover and refrigerate for at least 1 hour, or preferably overnight for maximum flavor.

    Step 2: Prepare the Grill

    Preheat your grill or grill pan to medium-high heat. This step is essential for achieving a good sear on the chicken.

    Step 3: Skewer the Chicken

    Thread the marinated meat onto the soaked wooden skewers, leaving a little space between each piece. This allows for even cooking.

    Step 4: Grill the Souvlaki

    Place the skewers on the grill and cook for 10-12 minutes, turning occasionally. Grill until the meat is cooked through and nicely charred.

    Step 5: Rest and Serve

    Once cooked, remove the skewers from the grill and let them rest for a few minutes. Serve hot with pita bread, tzatziki sauce, and your favorite Greek salad for a complete meal.

    Preparation time: 10 minutes (plus marinating time) | Cooking time: 12 minutes

    Nutritional Information (per serving):
    – Calories: 210 kcal
    – Carbohydrates: 2g
    – Protein: 28g
    – Fats: 10g

    Enjoy your delicious and authentic Souvlaki Meat on a Stick with a burst of Mediterranean flavors!

    How to Serve Souvlaki Meat on a Stick

    Souvlaki Meat on a Stick can be enjoyed in various creative ways that enhance its delicious flavors.

    Serve with Pita and Tzatziki

    Wrap the grilled souvlaki in warm pita bread and add a generous dollop of tzatziki sauce for a refreshing and satisfying meal.

    Create a Souvlaki Platter

    Arrange the skewers on a platter alongside fresh vegetables, olives, and feta cheese for a beautiful Mediterranean spread perfect for sharing.

    Add to a Salad

    Slice the grilled souvlaki and serve it on top of a Greek salad, combining fresh greens, tomatoes, cucumbers, olives, and a light vinaigrette for a healthy and flavorful option.

    Pro Tips for the Best Souvlaki Meat on a Stick

    To elevate your souvlaki experience, consider these expert tips.

    • Marinate Longer: For deeper flavor, marinate the chicken overnight to allow the spices and herbs to penetrate the meat thoroughly.
    • Use Fresh Herbs: Fresh oregano can enhance the dish’s flavor profile compared to dried oregano, adding brightness to each bite.
    • Preheat the Grill: Ensure your grill is hot before adding the skewers to achieve a nice char and prevent sticking.
    • Avoid Overcrowding: Give each piece of meat space on the skewer to cook evenly and get that desired grilled texture.
    • Check Doneness: Use a meat thermometer to ensure the chicken reaches an internal temperature of 165°F for safe consumption.

    Best Side Dishes and Pairings

    Pairing your Souvlaki Meat on a Stick with complementary side dishes enhances the overall dining experience.

    1. Greek Salad: A fresh mix of tomatoes, cucumbers, red onion, and feta, this salad adds a crisp and refreshing counterpoint to the warm, spiced meat.
    2. Tzatziki Sauce: This creamy yogurt-based sauce with cucumbers and garlic provides a cooling effect that balances the savory flavors of the souvlaki.
    3. Roasted Potatoes: Crispy, herbed roasted potatoes are a hearty side that pairs well with the lightness of the grilled chicken.
    4. Hummus and Pita Chips: The creamy texture of hummus with crunchy pita chips makes for a delightful appetizer or side to complement the main dish.
    5. Grilled Vegetables: Seasonal vegetables like bell peppers, zucchini, and eggplant bring vibrant colors and smoky flavors that enhance your meal.
    6. Ouzo or Retsina Wine: These traditional Greek beverages add an authentic touch and enhance the flavors of your souvlaki experience.

    Common Mistakes to Avoid

    • Not Marinating Long Enough: Failing to marinate the chicken for a sufficient time can result in bland flavor.
    • Using Dry Skewers: Skewers that haven’t been soaked may burn on the grill, impacting the cooking process.
    • Overcrowding the Skewers: Packing too many pieces of chicken on a skewer can prevent even cooking and charring.
    • Skipping the Resting Time: Cutting into the meat immediately after grilling can cause juices to run out, leading to dry souvlaki.

    Storage & Reheating Instructions

    Refrigerator Storage

    Store any leftover Souvlaki Meat on a Stick in airtight containers in the refrigerator. The dish will remain fresh for up to 3 days.

    Freezing Instructions

    To freeze, place the cooled skewers in a single layer on a baking sheet, then transfer them to a freezer-safe bag once frozen. They can be stored for up to 3 months. Thaw in the refrigerator before reheating.

    Reheating Tips

    • Oven: Preheat the oven to 350°F (175°C). Place the skewers on a baking sheet and heat for about 10-15 minutes, or until warmed through.
    • Microwave: Place the skewers on a microwave-safe plate. Heat in 30-second intervals until warmed, typically around 1-2 minutes.
    • Stovetop: Heat a little olive oil in a skillet over medium heat. Add the skewers and cook for about 5-7 minutes, turning occasionally until heated through.

    Frequently Asked Questions

    How do I know when the Souvlaki Meat on a Stick is done?

    The chicken should reach an internal temperature of 165°F (75°C), and the meat should be no longer pink inside.

    Can I use other types of meat for Souvlaki Meat on a Stick?

    Yes, you can substitute chicken with pork, lamb, or beef, adjusting the marinating time as needed based on the type of meat.

    What sides pair well with Souvlaki Meat on a Stick?

    Souvlaki pairs beautifully with pita bread, tzatziki sauce, and a fresh Greek salad for a complete meal.

    Can I make the marinade ahead of time?

    Absolutely! You can prepare the marinade and store it in the refrigerator for up to 2 days before marinating your meat.

    Is Souvlaki Meat on a Stick healthy?

    Yes, this recipe is a healthy option, providing high protein and low carbohydrates, making it a great choice for a balanced meal.

    Final Thoughts

    Try making this delicious Souvlaki Meat on a Stick recipe for a taste of the Mediterranean in your own home. I encourage you to share your experiences and leave a comment with your feedback!


    Dinner

    Souvlaki Meat on a Stick


    5.0 from 24 reviews

    Souvlaki is a popular Greek dish consisting of marinated chicken skewers grilled to perfection. The combination of lemon, garlic, and oregano creates a flavorful experience that is both satisfying and delicious. Serve with pita bread and tzatziki for a complete meal.

    Author: Munch Twist
    Prep Time: 10 mins (plus marinating time)
    Cook Time: 12 mins
    Total Time: 1 hour 22 mins
    Yield: 4 servings
    Category: Desserts
    Method: No bake
    Cuisine: American

    Souvlaki Meat on a Stick

    SCALE:
    1x
    2x
    3x
    Cook Mode: Prevent your screen from going dark

    Ingredients

    • 1 tablespoon dried oregano
    • 4 garlic cloves, minced
    • Salt and pepper, to taste
    • 2 pounds chicken breast, cut into 1-inch cubes
    • Juice of 2 lemons
    • 1/4 cup olive oil
    • Wooden skewers, soaked in water for 30 minutes

    Instructions

    1. In a bowl, combine lemon juice, olive oil, minced garlic, dried oregano, salt, and pepper. Mix well to create the marinade. Add the chicken cubes to the marinade, ensuring they are well coated. Cover and refrigerate for at least 1 hour, or preferably overnight.
    2. Preheat your grill or grill pan to medium-high heat.
    3. Thread the marinated meat onto the soaked wooden skewers, leaving a little space between each piece.
    4. Grill the skewers for 10-12 minutes, turning occasionally, until the meat is cooked through and nicely charred.
    5. Remove the skewers from the grill and let them rest for a few minutes before serving. Serve hot with pita bread, tzatziki sauce, and your favorite Greek salad.

    Nutrition Facts

    Serving Size: 1 serving
    Calories: 210 kcal
    Sugar: 0g
    Sodium: 150mg
    Fat: 10g
    Saturated Fat: 1.5g
    Carbohydrates: 2g
    Fiber: 0g
    Protein: 28g
    Cholesterol: 90mg

  • Delicious Cajun Chicken Sloppy Joes Recipe

    Delicious Cajun Chicken Sloppy Joes Recipe

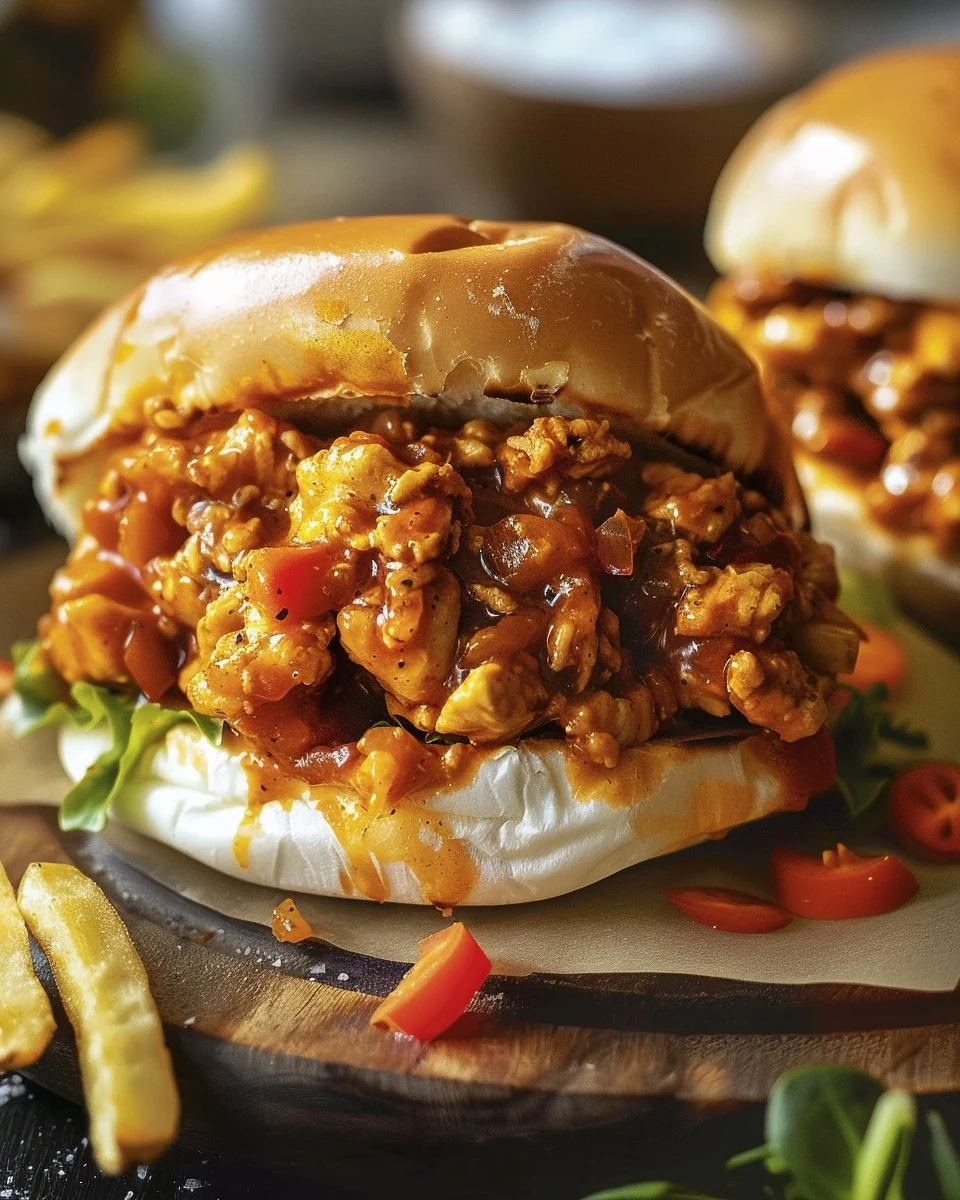
    Cajun Chicken Sloppy Joes bring a delightful twist to a classic comfort food. With a spicy kick from Cajun seasoning and a savory blend of vegetables, this dish is packed with flavor and sure to please any crowd.

    Why You’ll Love This Recipe

    • Bold Flavors: The Cajun seasoning adds a unique spice that elevates the traditional Sloppy Joe.
    • Quick & Easy: Ready in under 30 minutes, perfect for busy weeknights.
    • Healthy Option: Ground chicken provides lean protein, making this a lighter choice.
    • Customizable Toppings: Easily personalize with your favorite toppings like cheese or coleslaw.
    • Family-Friendly: A fun and messy meal that kids love, making dinner time entertaining.

    Tools and Equipment

    Having the right tools makes cooking more efficient and enjoyable.

    Essential Tools

    • Large skillet
    • Wooden spoon
    • Measuring cups and spoons
    • Knife and cutting board
    • Toaster or separate skillet for buns

    Why These Tools Matter

    • Large skillet: Provides ample space for sautéing vegetables and cooking the chicken evenly.
    • Wooden spoon: Ideal for breaking apart ground chicken and mixing ingredients without scratching cookware.
    • Measuring cups and spoons: Ensure accuracy in adding sauces and seasonings for balanced flavors.

    Ingredients for Cajun Chicken Sloppy Joes

    Main Ingredients

    • 1 lb ground chicken
    • 1 bell pepper, diced
    • 1 small onion, diced
    • 2 cloves garlic, minced
    • 1 can (8 oz) tomato sauce
    • 1/4 cup ketchup
    • 1 tablespoon Worcestershire sauce
    • 1 tablespoon Cajun seasoning
    • 1 teaspoon smoked paprika
    • Salt and pepper to taste
    • 4 hamburger buns
    • 1 tablespoon olive oil

    Optional Toppings

    • Sliced pickles
    • Shredded cheese
    • Coleslaw

    How to Make Cajun Chicken Sloppy Joes Step-by-Step

    Step 1: Sauté Vegetables

    1. Heat 1 tablespoon of olive oil in a large skillet over medium heat.
    2. Add the diced bell pepper and onion. Sauté until softened, about 3-4 minutes.
    3. Add the minced garlic and cook for another minute until fragrant.

    Step 2: Cook Ground Chicken

    1. Add 1 lb of ground chicken to the skillet.
    2. Break it up with a spoon as it cooks.
    3. Cook until no longer pink, about 5-7 minutes.

    Step 3: Simmer Sauce

    1. Stir in the tomato sauce, ketchup, Worcestershire sauce, Cajun seasoning, smoked paprika, and salt and pepper.
    2. Simmer for 10 minutes, allowing the flavors to meld.

    Step 4: Toast Buns

    1. Toast the hamburger buns in a separate skillet or toaster until golden brown.

    Step 5: Assemble and Serve

    1. Spoon the Cajun chicken mixture onto the bottom halves of the buns.
    2. Add optional toppings if desired.
    3. Place the top halves of the buns on top and serve hot.

    Enjoy the bold flavors of these Cajun Chicken Sloppy Joes!

    How to Serve Cajun Chicken Sloppy Joes

    Cajun Chicken Sloppy Joes are versatile and can be served in various creative ways.

    Sloppy Joe Sliders

    Transform these sandwiches into sliders by using mini buns. Perfect for parties or game day, these sliders are easy to grab and enjoy.

    Cajun Chicken Nachos

    Spread tortilla chips on a baking sheet, top with the Cajun chicken mixture, and sprinkle with cheese. Bake until the cheese is melted for a spicy twist on traditional nachos.

    Stuffed Bell Peppers

    For a healthier option, hollow out bell peppers and fill them with the Cajun chicken mixture. Bake until the peppers are tender for a colorful and nutritious meal.

    Pro Tips for the Best Cajun Chicken Sloppy Joes

    To elevate your Cajun Chicken Sloppy Joes, consider these practical tips.

    • Fresh Ingredients: Use fresh bell peppers and onions for a brighter flavor and better texture in your dish.
    • Adjust the Spice: Modify the amount of Cajun seasoning to suit your heat preference; start with less if you are sensitive to spice.
    • Let It Rest: Allow the mixture to sit for a few minutes after cooking to let the flavors meld together before serving.
    • Homemade Buns: For an extra touch, try making your own hamburger buns. Freshly baked buns enhance the overall experience.
    • Customize Toppings: Experiment with different toppings like avocado, jalapeños, or even a drizzle of hot sauce for added flavor.

    Best Side Dishes and Pairings

    Pair your Cajun Chicken Sloppy Joes with these delightful side dishes and drinks.

    1. Coleslaw: The crunch and creaminess of coleslaw complement the spiciness of the Sloppy Joes perfectly.
    2. Sweet Potato Fries: Their natural sweetness balances the heat of the Cajun seasoning, making for a satisfying side.
    3. Corn on the Cob: Grilled or boiled corn adds a fresh, sweet element that pairs well with the bold flavors of the dish.
    4. Potato Salad: This classic side offers a creamy texture that contrasts nicely with the spicy chicken.
    5. Iced Tea: A refreshing glass of sweetened iced tea helps to cool down the palate while enjoying the Sloppy Joes.

    Common Mistakes to Avoid

    • Overcooking the Chicken: Cook the chicken until just no longer pink to avoid dryness.
    • Skipping the Simmer: Letting the sauce simmer allows flavors to meld and enhances taste.
    • Using Low-Quality Buns: Opt for fresh, sturdy buns to hold up against the filling.
    • Neglecting Seasoning: Adjust salt and pepper to taste; don’t skip on seasoning for a flavorful dish.

    Storage & Reheating Instructions

    Refrigerator Storage

    Store Cajun Chicken Sloppy Joes in airtight containers in the refrigerator. They will stay fresh for up to 3 days.

    Freezing Instructions

    To freeze, allow the chicken mixture to cool completely. Transfer to freezer-safe containers or bags, removing as much air as possible. They can be frozen for up to 3 months. Thaw overnight in the refrigerator before reheating.

    Reheating Tips

    • Oven: Preheat to 350°F (175°C). Place the chicken mixture in an oven-safe dish and cover with foil. Heat for about 15-20 minutes until warmed through.
    • Microwave: Place the chicken mixture in a microwave-safe bowl. Cover and heat on high for 1-2 minutes, stirring halfway through.
    • Stovetop: Heat in a skillet over medium heat, stirring occasionally, until warmed through, about 5-7 minutes.

    Frequently Asked Questions

    How can I make Cajun Chicken Sloppy Joes less spicy?

    You can reduce the Cajun seasoning or use a mild version to control the heat level.

    Can I use other types of meat for Cajun Chicken Sloppy Joes?

    Yes, ground turkey or beef can be substituted for ground chicken in this recipe.

    How do I make Cajun Chicken Sloppy Joes healthier?

    Consider using whole grain buns, adding more vegetables, or reducing the amount of ketchup for a healthier twist.

    What toppings pair well with Cajun Chicken Sloppy Joes?

    Popular toppings include sliced pickles, shredded cheese, and coleslaw. Customize to your taste!

    Can I prepare Cajun Chicken Sloppy Joes in advance?

    Absolutely! You can prepare the chicken mixture ahead of time and store it in the refrigerator or freezer until ready to serve.

    Final Thoughts

    Cajun Chicken Sloppy Joes are a delightful twist on a classic favorite, bursting with flavor and warmth. We encourage you to try this recipe and share your thoughts in the comments. Your feedback is always appreciated!


    Dinner


    Title: Tasty Cajun Chicken Sloppy Joes for a Quick Dinner
    Meta: Try these Cajun Chicken Sloppy Joes for a flavorful dinner! Easy to make and packed with taste. Leave a comment with your thoughts!
    Synonyms: spicy chicken sandwiches, Cajun chicken sliders, Southern sloppy joes, Cajun chicken buns, chicken sloppy joe recipe, Creole chicken sandwiches, ground chicken recipes, Cajun comfort food, chicken and sauce on buns, zesty chicken sandwiches, easy chicken dinners, Cajun-style sandwiches, flavorful chicken burgers, spicy ground chicken, Cajun chicken meals, quick chicken recipes, hearty chicken sandwiches, comfort food recipes, chicken sub sandwiches, Cajun-inspired meals

    Cajun Chicken Sloppy Joes


    5.0 from 24 reviews

    Bring the bold flavors of Louisiana to your kitchen with these easy-to-make Cajun Chicken Sloppy Joes. This dish features ground chicken cooked with bell peppers, onions, and a zesty sauce, all served on toasted hamburger buns. Perfect for a quick weeknight dinner or a fun gathering.

    Author: Munch Twist
    Prep Time: 10 minutes
    Cook Time: 20 minutes
    Total Time: 30 minutes
    Yield: 4 servings
    Category: Lunch
    Method: No bake
    Cuisine: American

    Cajun Chicken Sloppy Joes

    SCALE:
    1x
    2x
    3x
    Cook Mode: Prevent your screen from going dark

    Ingredients

    • 1 lb ground chicken
    • 1 bell pepper, diced
    • 1 small onion, diced
    • 2 cloves garlic, minced
    • 1 can (8 oz) tomato sauce
    • 1/4 cup ketchup
    • 1 tablespoon Worcestershire sauce
    • 1 tablespoon Cajun seasoning
    • 1 teaspoon smoked paprika
    • Salt and pepper to taste
    • 4 hamburger buns
    • 1 tablespoon olive oil
    • Optional toppings: sliced pickles, shredded cheese, coleslaw

    Instructions

    1. Heat olive oil in a large skillet over medium heat. Add diced bell pepper and onion. Sauté until softened, about 3-4 minutes. Add minced garlic and cook for another minute until fragrant.
    2. Add ground chicken to the skillet, breaking it up with a spoon as it cooks. Cook until no longer pink, about 5-7 minutes.
    3. Stir in tomato sauce, ketchup, Worcestershire sauce, Cajun seasoning, smoked paprika, salt, and pepper. Simmer for 10 minutes, allowing the flavors to meld.
    4. Toast hamburger buns in a separate skillet or toaster until golden brown.
    5. Spoon the Cajun chicken mixture onto the bottom halves of the buns. Add optional toppings if desired, then place the top halves of the buns on top. Serve hot.

    Nutrition Facts

    Serving Size: 1 serving
    Calories: 350 kcal
    Sugar: 11g
    Sodium: 820mg
    Fat: 13g
    Saturated Fat: 3g
    Carbohydrates: 34g
    Fiber: 3g
    Protein: 24g
    Cholesterol: 75mg

  • Delicious Shakshuka Recipe for a Flavorful Meal

    Delicious Shakshuka Recipe for a Flavorful Meal

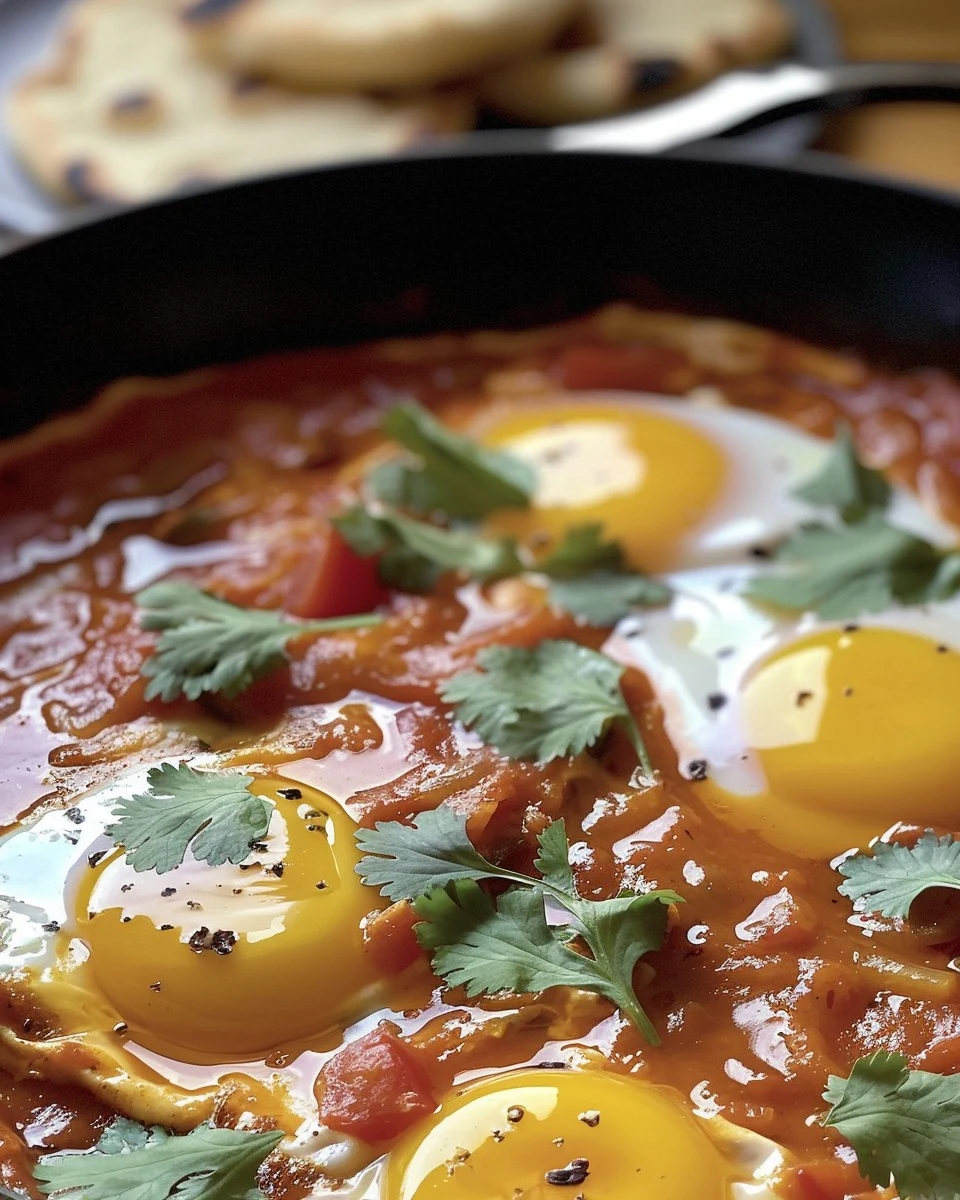
    Shakshuka is a vibrant, flavorful dish that is perfect for breakfast, brunch, or even dinner. This North African and Middle Eastern classic features poached eggs nestled in a rich tomato sauce, seasoned with aromatic spices. Its unique blend of flavors makes Shakshuka not only delicious but also a comforting meal that everyone will love.

    Why You’ll Love This Recipe

    • Flavorful and Satisfying: The combination of spices and tomatoes creates a rich, savory sauce that perfectly complements the eggs.
    • Quick & Easy: Ready in under 30 minutes, Shakshuka is perfect for busy mornings or last-minute dinners.
    • Versatile Dish: You can customize this recipe by adding vegetables or your favorite herbs.
    • Healthy Ingredients: Packed with protein and vitamins, this dish is a nutritious choice for any meal.
    • Impressive Presentation: The vibrant colors and rustic style make Shakshuka visually appealing for serving guests.

    Tools and Equipment

    To prepare Shakshuka, you will need a few essential kitchen tools.

    Essential Tools

    • A large skillet or frying pan
    • A spatula or wooden spoon
    • Measuring spoons
    • A sharp knife
    • A cutting board

    Why These Tools Matter

    • Large skillet or frying pan: This allows ample space for cooking the vegetables and eggs evenly.
    • Spatula or wooden spoon: These tools help in sautéing ingredients and stirring the sauce without damaging your cookware.
    • Sharp knife and cutting board: Efficient chopping and dicing of vegetables make the preparation quicker and more manageable.

    Ingredients for Shakshuka

    Vegetable Base

    • 4 garlic cloves, minced
    • 1 large onion, finely chopped
    • 1 red bell pepper, chopped

    Tomato Sauce

    • 1 can (400g) diced tomatoes
    • 1 can (400g) crushed tomatoes

    Eggs and Spices

    • 4-6 large eggs
    • 2 teaspoons ground cumin
    • 1 teaspoon paprika
    • 1/4 teaspoon cayenne pepper (optional)
    • Salt and pepper to taste

    Finishing Touch

    • 2 tablespoons olive oil
    • Fresh parsley or cilantro, chopped, for garnish

    How to Make Shakshuka Step-by-Step

    Step 1: Sauté Vegetables

    Heat the olive oil in a large skillet over medium heat. Add the chopped onion and red bell pepper, cooking until softened, about 5-7 minutes. Stir occasionally to prevent sticking.

    Step 2: Add Spices

    Once the vegetables are softened, stir in the minced garlic, ground cumin, paprika, and cayenne pepper (if using). Cook for 1-2 minutes until fragrant, allowing the spices to release their flavors.

    Step 3: Simmer Sauce

    Pour in the diced and crushed tomatoes. Season the mixture with salt and pepper. Let it simmer for 10-15 minutes, stirring occasionally. This helps the sauce thicken and develop its rich flavor.

    Step 4: Cook Eggs

    Make small wells in the sauce and crack the eggs into each well. Cover the skillet and cook until the eggs are set to your preference, about 5-8 minutes. For runny yolks, check earlier.

    Step 5: Garnish and Serve

    Once the eggs are cooked, remove the skillet from the heat. Garnish with freshly chopped parsley or cilantro. Serve hot with crusty bread or pita for dipping.

    Enjoy your homemade Shakshuka! This dish is sure to impress and satisfy.

    How to Serve Shakshuka

    Shakshuka is a versatile dish that can be enjoyed in various ways.

    With Crusty Bread

    Serve Shakshuka with a side of fresh, crusty bread. This allows you to scoop up the flavorful sauce and runny eggs, creating a perfect bite.

    Over Rice or Quinoa

    For a heartier meal, serve Shakshuka over a bed of rice or quinoa. The grains absorb the delicious sauce, making for a filling and satisfying dish.

    As a Breakfast Burrito

    For a unique twist, wrap Shakshuka in a warm tortilla to create a flavorful breakfast burrito. Add avocado or cheese for extra richness.

    Pro Tips for the Best Shakshuka

    To elevate your Shakshuka, consider these practical tips.

    • Fresh Ingredients: Use fresh vegetables and herbs for a vibrant flavor and texture.
    • Adjust Spice Levels: Customize the heat by varying the amount of cayenne pepper or adding a dash of hot sauce.
    • Egg Cooking Preference: For runny yolks, cook the eggs for less time; for firmer yolks, allow a few extra minutes.
    • Experiment with Toppings: Try adding feta cheese or olives for a Mediterranean twist.
    • Make Ahead: Prepare the sauce in advance and store it in the fridge. Simply reheat and add the eggs when ready to serve.

    Best Side Dishes and Pairings

    Shakshuka pairs beautifully with a variety of side dishes and drinks.

    1. Hummus: The creamy texture and rich flavor of hummus complement the spices in Shakshuka.
    2. Greek Yogurt: A dollop of Greek yogurt adds a refreshing tang that balances the dish’s heat.
    3. Feta Cheese: Crumbled feta on top enhances the dish with a salty, creamy contrast.
    4. Mixed Green Salad: A light salad provides a crisp, fresh counterpoint to the warm, hearty Shakshuka.
    5. Pita Bread: Soft pita is perfect for dipping and soaking up the delicious sauce.
    6. Mint Tea: A refreshing mint tea can cleanse the palate and enhance the meal’s flavor profile.

    Common Mistakes to Avoid

    • Overcooking the Eggs: Ensure you monitor the eggs closely; overcooked eggs can become rubbery.
    • Skipping the Spices: Don’t underestimate the importance of spices; they are essential for flavor.
    • Using Low-Quality Tomatoes: Opt for high-quality canned tomatoes to achieve a rich and tasty sauce.
    • Not Simmering Long Enough: Allow the sauce to properly thicken by simmering for the suggested time.

    Storage & Reheating Instructions

    Refrigerator Storage

    Store leftover Shakshuka in airtight containers in the refrigerator. It will stay fresh for up to 3 days.

    Freezing Instructions

    For best results, freeze Shakshuka in an airtight container or freezer bag. It can be frozen for up to 2 months. Thaw in the refrigerator overnight before reheating.

    Reheating Tips

    • Oven: Preheat the oven to 350°F (175°C) and bake for about 15-20 minutes until heated through.
    • Microwave: Heat in a microwave-safe dish for 1-2 minutes, stirring halfway for even heating.
    • Stovetop: Reheat on medium-low heat in a pan, stirring occasionally until warmed through.

    Frequently Asked Questions

    What is Shakshuka?

    Shakshuka is a North African and Middle Eastern dish consisting of poached eggs in a spicy tomato sauce, often served with bread.

    Can I customize the ingredients in Shakshuka?

    Absolutely! You can add vegetables like spinach or zucchini, or even include feta cheese for added flavor.

    How do I serve Shakshuka?

    Shakshuka is best served hot, garnished with fresh herbs. It pairs well with crusty bread for dipping.

    Is Shakshuka suitable for meal prep?

    Yes, Shakshuka is perfect for meal prep. Just store it properly and reheat when ready to enjoy.

    Can I make Shakshuka in advance?

    While you can prepare the sauce in advance, it is best to add the eggs and cook just before serving for optimal texture.

    Final Thoughts

    Shakshuka is a delightful and versatile dish that is perfect for any meal. We encourage you to try this recipe and share your experience in the comments. Your feedback is invaluable!


    Dinner

    Shakshuka


    5.0 from 24 reviews

    Shakshuka is a vibrant and flavorful dish originating from North Africa, featuring poached eggs in a spicy tomato and pepper sauce. It's perfect for breakfast, brunch, or any meal of the day, offering a delightful combination of spices and fresh herbs.

    Author: Munch Twist
    Prep Time: 10 minutes
    Cook Time: 25 minutes
    Total Time: 35 minutes
    Yield: 4 servings
    Category: Dinner
    Method: No bake
    Cuisine: American

    Shakshuka

    SCALE:
    1x
    2x
    3x
    Cook Mode: Prevent your screen from going dark

    Ingredients

    • 4 garlic cloves, minced
    • 1 large onion, finely chopped
    • 2 teaspoons ground cumin
    • 1 can (400g) diced tomatoes
    • 1 red bell pepper, chopped
    • 4-6 large eggs
    • 1 can (400g) crushed tomatoes
    • 2 tablespoons olive oil
    • Salt and pepper to taste
    • 1 teaspoon paprika
    • 1/4 teaspoon cayenne pepper (optional)
    • Fresh parsley or cilantro, chopped, for garnish

    Instructions

    1. Heat olive oil in a large skillet over medium heat. Add the chopped onion and red bell pepper, cooking until softened, about 5-7 minutes.
    2. Stir in minced garlic, ground cumin, paprika, and cayenne pepper (if using). Cook for 1-2 minutes until fragrant.
    3. Pour in the diced and crushed tomatoes. Season with salt and pepper. Let the mixture simmer for 10-15 minutes, allowing the sauce to thicken.
    4. Make small wells in the sauce and crack the eggs into each well. Cover the skillet and cook until the eggs are set to your preference, about 5-8 minutes.
    5. Garnish with freshly chopped parsley or cilantro. Serve hot.

    Nutrition Facts

    Serving Size: 1 serving
    Calories: 220 kcal
    Sugar: 6g
    Sodium: 400mg
    Fat: 12g
    Saturated Fat: 2g
    Carbohydrates: 20g
    Fiber: 4g
    Protein: 12g
    Cholesterol: 370mg

  • Easy Italian Stuffed Chicken Recipe to Impress

    Easy Italian Stuffed Chicken Recipe to Impress

    Italian Stuffed Chicken is a delightful dish that combines tender chicken with rich cheese and vibrant tomatoes. This recipe offers a savory explosion of flavors that will impress your family and friends. Perfect for a weeknight dinner or a special occasion, this dish is sure to become a favorite.

    Why You’ll Love This Recipe

    • Flavorful and Savory: The combination of pesto, cheese, and tomatoes creates a mouthwatering filling.
    • Quick & Easy: With only 10 minutes of prep time, you can have a delicious meal on the table in no time.
    • Healthy Option: Packed with protein and fresh ingredients, this dish is both nutritious and satisfying.
    • Versatile: You can easily customize the stuffing with your favorite herbs or cheeses.
    • Impressive Presentation: The rolled chicken looks elegant, making it perfect for entertaining guests.

    Tools and Equipment

    Having the right tools can make cooking Italian Stuffed Chicken a breeze.

    Essential Tools

    • Non-stick baking dish
    • Meat mallet or rolling pin
    • Toothpicks or kitchen twine
    • Cutting board
    • Mixing bowl

    Why These Tools Matter

    • Non-stick baking dish: Ensures easy removal of the chicken without sticking.
    • Meat mallet or rolling pin: Helps achieve the perfect thickness for even cooking.
    • Toothpicks or kitchen twine: Keeps the chicken tightly rolled for an appealing presentation.

    Ingredients for Italian Stuffed Chicken

    Main Ingredients

    • 4 boneless, skinless chicken breasts (6 oz each), pounded 1/4 inch thick
    • 1 cup Italian-style bread crumbs
    • 1 cup Provolone or Mozzarella cheese, shredded
    • 1/4 cup pesto
    • 1 14 oz can Italian-style diced tomatoes
    • Non-stick spray or olive oil

    How to Make Italian Stuffed Chicken Step-by-Step

    Step 1: Prep the Base

    1. Preheat your oven to 400ºF (200ºC).
    2. If your chicken breasts are large, butterfly them by slicing lengthwise. This will create two thinner pieces.
    3. Pound each piece to about 1/4 inch thickness for even cooking.

    Step 2: Assemble the Filling

    1. On a cutting board, spread about 1 tablespoon of pesto over each chicken piece.
    2. Top with shredded cheese and spoon about 1 tablespoon of Italian-style diced tomatoes in the center of each piece.

    Step 3: Roll and Coat

    1. Roll each chicken piece tightly, ensuring the filling stays inside. Secure with toothpicks.
    2. Coat each rolled chicken piece evenly with Italian-style bread crumbs, ensuring complete coverage.

    Step 4: Prepare for Baking

    1. Pour the remaining diced tomatoes into the bottom of a non-stick baking dish.
    2. Arrange the chicken rolls on top of the tomatoes, ensuring they are spaced evenly.

    Step 5: Bake the Chicken

    1. Lightly spray the chicken with non-stick spray or drizzle with olive oil.
    2. Bake in the preheated oven for 25-35 minutes, until the chicken is cooked through.
    3. For a golden finish, use the broiler for the last 2-3 minutes.

    Step 6: Serve

    1. Remove the chicken from the oven and discard the toothpicks.
    2. Serve immediately, allowing the delicious flavors to shine.

    This Italian Stuffed Chicken recipe is not only simple to prepare but also delivers an impressive dish that is sure to please any palate. Enjoy the cheesy, savory goodness that awaits you!

    How to Serve Italian Stuffed Chicken

    Italian Stuffed Chicken is a versatile dish that can be enjoyed in various ways. Here are some creative serving ideas:

    Serve with a Simple Salad

    A fresh arugula or mixed greens salad drizzled with balsamic vinaigrette complements the rich flavors of the stuffed chicken, adding a refreshing contrast.

    Pair with Garlic Bread

    Serve the Italian Stuffed Chicken alongside warm, crusty garlic bread. This classic pairing enhances the meal and allows guests to soak up the delicious tomato sauce.

    Create a Chicken Parmesan Style Dish

    For a twist, top the baked chicken with marinara sauce and extra cheese, then broil for a few minutes. This elevates the dish to a Chicken Parmesan experience.

    Pro Tips for the Best Italian Stuffed Chicken

    To achieve optimal flavor and texture in your Italian Stuffed Chicken, consider the following tips:

    • Use Fresh Ingredients: Fresh basil and homemade pesto can significantly enhance the flavor profile of the dish.
    • Pound Evenly: Ensure that the chicken breasts are pounded to an even thickness for uniform cooking.
    • Let It Rest: Allow the stuffed chicken to rest for a few minutes after baking. This helps retain moisture and improves texture.
    • Experiment with Cheese: Try different cheeses like feta or goat cheese for a unique flavor twist.
    • Monitor Cooking Time: Use a meat thermometer to ensure chicken reaches an internal temperature of 165ºF (74ºC) for perfect doneness.

    Best Side Dishes and Pairings

    Pair your Italian Stuffed Chicken with these delightful side dishes and drinks:

    1. Roasted Vegetables: Seasonal roasted veggies add color and nutrients, making the meal more balanced.
    2. Risotto: A creamy risotto can absorb the flavors from the chicken and tomatoes, creating a harmonious dining experience.
    3. Steamed Asparagus: The bright, crisp texture of asparagus provides a refreshing contrast to the rich stuffed chicken.
    4. Red Wine: A glass of Chianti or a light Pinot Noir enhances the Italian flavors while complementing the dish’s richness.
    5. Caprese Salad: Fresh mozzarella, basil, and tomatoes create a light, flavorful side that echoes the ingredients in the chicken.

    Common Mistakes to Avoid

    • Not Pounding the Chicken Evenly: Ensure the chicken is pounded to an even thickness for consistent cooking.
    • Overfilling the Chicken: Avoid adding too much stuffing, as it can make rolling difficult and lead to uneven cooking.
    • Skipping the Broiler Step: For a perfect golden crust, do not skip the broiler at the end of baking.
    • Not Allowing the Chicken to Rest: Let the chicken rest for a few minutes after baking to retain its juices.

    Storage & Reheating Instructions

    Refrigerator Storage

    Store leftover Italian Stuffed Chicken in an airtight container in the refrigerator. It will stay fresh for up to 3 days.

    Freezing Instructions

    To freeze, wrap the stuffed chicken tightly in plastic wrap and then in aluminum foil. It can be frozen for up to 3 months. Thaw in the refrigerator overnight before reheating.

    Reheating Tips

    • Oven: Preheat to 350ºF (175ºC), place chicken in a baking dish, cover with foil, and heat for 15-20 minutes.
    • Microwave: Place on a microwave-safe plate, cover, and heat for 2-3 minutes, checking for even warming.
    • Stovetop: Heat in a skillet over medium heat with a splash of water, cover, and cook for about 5-7 minutes, flipping halfway.

    Frequently Asked Questions

    What sides pair well with Italian Stuffed Chicken?

    Italian Stuffed Chicken goes well with a simple green salad, garlic bread, or roasted vegetables for a complete meal.

    Can I use different types of cheese in the recipe?

    Yes, you can substitute Provolone or Mozzarella with other cheeses like Fontina or Parmesan for different flavor profiles.

    How can I make this recipe healthier?

    To make Italian Stuffed Chicken healthier, consider using whole-grain bread crumbs and reducing the amount of cheese.

    Is Italian Stuffed Chicken suitable for meal prep?

    Absolutely! Italian Stuffed Chicken is perfect for meal prep as it stores well and can be reheated for quick meals throughout the week.

    Can I make this dish ahead of time?

    Yes, you can assemble the chicken rolls ahead of time and store them in the refrigerator until you are ready to bake them.

    Final Thoughts

    This Italian Stuffed Chicken recipe is not only delicious but also easy to prepare, making it a fantastic addition to your dinner rotation. We encourage you to try it out and share your thoughts in the comments below. Your feedback is always appreciated!


    Dinner

    Italian Stuffed Chicken


    5.0 from 24 reviews

    This Italian-inspired stuffed chicken features tender chicken breasts filled with a savory mixture of Provolone cheese, pesto, and diced tomatoes, all coated in crispy bread crumbs. It's a delightful dish that combines cheesy flavors with a fresh tomato base, perfect for a family dinner.

    Author: Munch Twist
    Prep Time: 10 minutes
    Cook Time: 35 minutes
    Total Time: 45 minutes
    Yield: 4 servings
    Category: Lunch
    Method: No bake
    Cuisine: American

    Italian Stuffed Chicken

    SCALE:
    1x
    2x
    3x
    Cook Mode: Prevent your screen from going dark

    Ingredients

    • 1 cup Italian-style bread crumbs
    • 1 cup Provolone or Mozzarella cheese, shredded
    • 4 boneless, skinless chicken breasts (6 oz each), pounded 1/4 inch thick
    • 1 14 oz can Italian-style diced tomatoes
    • 1/4 cup pesto
    • Non-stick spray or olive oil

    Instructions

    1. Preheat your oven to 400ºF (200ºC).
    2. Butterfly the chicken breasts and pound them to about 1/4 inch thickness.
    3. Spread about 1 tablespoon of pesto on each chicken piece, top with shredded cheese and 1 tablespoon of diced tomatoes.
    4. Roll each chicken piece tightly and secure with toothpicks, then coat with bread crumbs.
    5. Pour remaining diced tomatoes into a baking dish and arrange chicken rolls on top.
    6. Lightly spray with non-stick spray or drizzle with olive oil, then bake for 25-35 minutes.
    7. Remove from oven, discard toothpicks, and serve immediately.

    Nutrition Facts

    Serving Size: 1 serving
    Calories: 350 kcal
    Sugar: 6g
    Sodium: 800mg
    Fat: 16g
    Saturated Fat: 8g
    Carbohydrates: 22g
    Fiber: 2g
    Protein: 36g
    Cholesterol: 100mg

  • Delicious Hawaiian Style Teriyaki Chicken Recipe

    Delicious Hawaiian Style Teriyaki Chicken Recipe

    Transport your taste buds to the tropics with this mouth-watering Hawaiian Style Teriyaki Chicken. Juicy, flavorful, and oh-so-delicious, this dish is perfect for any occasion, whether you’re hosting a summer barbecue or enjoying a quiet family dinner.

    Why You’ll Love This Recipe

    • Tropical Flavor: The combination of pineapple juice and soy sauce creates a sweet and savory profile that is hard to resist.
    • Versatile Cooking Methods: Whether you prefer grilling, baking, or using a slow cooker, this recipe adapts to your cooking style.
    • Quick Preparation: With just 10 minutes of prep time, you can marinate the chicken and let it soak in the flavors.
    • Perfect for Meal Prep: Cook a large batch and enjoy leftovers throughout the week, making weeknight dinners a breeze.
    • Family-Friendly: This dish is a hit with both kids and adults, making it a great choice for family gatherings.

    Tools and Equipment

    To make Hawaiian Style Teriyaki Chicken, you’ll need a few essential tools to streamline your cooking process.

    Essential Tools

    • Large mixing bowl
    • Whisk or spoon
    • Grill or stovetop skillet
    • Digital meat thermometer
    • Baking dish (if using the oven)

    Why These Tools Matter

    • Large mixing bowl: Essential for mixing the marinade and ensuring all ingredients are combined thoroughly.
    • Digital meat thermometer: Guarantees the chicken reaches the perfect internal temperature, ensuring safety and flavor.
    • Grill or stovetop skillet: Provides versatility in cooking methods, allowing for a delicious char and flavor infusion.

    Ingredients for HAWAIIAN STYLE TERIYAKI CHICKEN

    Marinade

    • 1 cup pineapple juice (or pineapple chunks with juice)
    • 1 cup soy sauce
    • 1 cup packed brown sugar
    • 5 cloves garlic, mashed
    • 1 tablespoon fresh ginger, minced

    Chicken

    • 3 pounds boneless, skinless chicken thighs

    How to Make HAWAIIAN STYLE TERIYAKI CHICKEN Step-by-Step

    Step 1: Prepare the Marinade

    In a large bowl, mix together pineapple juice, soy sauce, and brown sugar until the sugar dissolves. Add the mashed garlic and minced ginger to the mixture, stirring well.

    Step 2: Marinate the Chicken

    Add the chicken thighs to the bowl, ensuring they are fully submerged in the marinade. Cover and refrigerate for at least 24 hours for best results. If you’re short on time, you can boil the chicken in the marinade immediately after preparation.

    Step 3: Grill Method

    Preheat the grill to high heat. Grill the marinated chicken thighs until they are nicely charred on the outside. Transfer the grilled chicken to a pot on the grill and add a bit of fresh teriyaki sauce. Steam the chicken until tender and juicy.

    Alternative Cooking Methods

    Stir Fry

    Cut the chicken into bite-sized pieces. Heat a large wok or skillet over medium-high heat with a bit of sesame oil. Sauté the chicken until it is white on the outside, then add the marinade. Simmer until the sauce thickens and the chicken is fully cooked.

    Stove Top

    Keep the chicken thighs whole. Sear each thigh in a large skillet over medium heat until golden brown. Add the marinade and simmer until the sauce reduces and the chicken is cooked through.

    Crock Pot / Instant Pot

    Place the chicken and marinade in the slow cooker or pressure cooker. Cook until the chicken is tender. To thicken the sauce, simmer it separately on the stove for 20-30 minutes. Serve the chicken whole or shredded.

    Baked

    Preheat the oven to 350°F (175°C). Place the chicken in a baking dish and pour 1-2 cups of the marinade over the top. Bake for 35-40 minutes, or until the chicken reaches an internal temperature of 165°F (75°C).

    Step 4: Serve

    Ensure the chicken reaches an internal temperature of 165°F (75°C) using a digital thermometer. Enjoy your Hawaiian Style Teriyaki Chicken hot, served with your favorite sides.

    Preparation Time: 10 minutes | Cooking Time: 35-40 minutes | Total Time: 45-50 minutes

    Nutritional Information (per serving)

    • Calories: 280
    • Carbohydrates: 30g
    • Protein: 22g
    • Fat: 10g
    • Saturated Fat: 2g
    • Cholesterol: 105mg
    • Sodium: 900mg
    • Fiber: 1g
    • Sugar: 25g

    Enjoy this tropical delight that’s bursting with flavor and sure to impress!

    How to Serve HAWAIIAN STYLE TERIYAKI CHICKEN

    Serving Hawaiian Style Teriyaki Chicken is an opportunity to showcase its vibrant flavors and tropical vibes. Here are some creative serving ideas:

    Serve with Coconut Rice

    Coconut rice complements the sweetness of the teriyaki chicken, adding a creamy texture that enhances the dish’s tropical theme.

    Pair with Grilled Pineapple

    Grilled pineapple slices bring a smoky sweetness that perfectly balances the rich flavors of the teriyaki sauce, creating a delightful contrast.

    Create a Teriyaki Chicken Bowl

    Layer the chicken over a bed of steamed vegetables and rice, drizzling extra teriyaki sauce on top for a satisfying and colorful meal.

    Pro Tips for the Best HAWAIIAN STYLE TERIYAKI CHICKEN

    For a truly exceptional Hawaiian Style Teriyaki Chicken, consider these expert tips:

    • Use Fresh Ingredients: Fresh garlic and ginger enhance the overall flavor profile, making the marinade more vibrant and aromatic.

    • Opt for Chicken Thighs: Boneless, skinless chicken thighs provide juiciness and tenderness, ensuring the chicken remains flavorful throughout cooking.

    • Marinate Longer for Best Results: While 24 hours is ideal, extending the marination to 3 days will deepen the flavors, making the chicken even more delicious.

    • Monitor Cooking Temperature: Use a meat thermometer to confirm the chicken reaches an internal temperature of 165°F (75°C) for safe consumption.

    • Reserve Marinade for Sauce: If you desire a thicker sauce, simmer the reserved marinade separately after cooking the chicken to intensify the flavors and achieve the desired consistency.

    Best Side Dishes and Pairings

    To elevate your meal, consider these excellent side dishes and drink pairings:

    1. Coleslaw: A crunchy, tangy coleslaw adds freshness and a nice contrast to the rich teriyaki chicken.

    2. Grilled Vegetables: Seasonal grilled vegetables, such as zucchini and bell peppers, provide a colorful and nutritious accompaniment.

    3. Hawaiian Macaroni Salad: This creamy, comforting salad is a classic pairing that balances the bold flavors of the chicken.

    4. Teriyaki Noodles: Stir-fried noodles tossed in teriyaki sauce echo the dish’s flavors, creating a harmonious meal.

    5. Pineapple Mango Salsa: A bright and zesty salsa enhances the tropical essence of the chicken while adding a refreshing flair.

    Common Mistakes to Avoid

    • Not Marinating Long Enough: Failing to marinate the chicken for the recommended time can result in less flavorful meat.
    • Skipping the Internal Temperature Check: Not using a thermometer can lead to undercooked chicken, which is unsafe to eat.
    • Using Low-Quality Soy Sauce: Cheap soy sauce can negatively affect the flavor profile of your Hawaiian Style Teriyaki Chicken.
    • Overcrowding the Grill or Pan: Cooking too much chicken at once can cause uneven cooking and prevent proper browning.

    Storage & Reheating Instructions

    Refrigerator Storage

    Store any leftover Hawaiian Style Teriyaki Chicken in airtight containers in the refrigerator. It will stay fresh for up to 3-4 days.

    Freezing Instructions

    For freezing, place the chicken in airtight freezer bags or containers, removing as much air as possible. It can be stored for up to 3 months. Thaw in the refrigerator overnight before reheating.

    Reheating Tips

    • Oven: Preheat to 350°F (175°C), cover with foil, and heat for about 20 minutes or until warmed through.
    • Microwave: Place on a microwave-safe plate, cover, and heat in 1-minute intervals until hot.
    • Stovetop: Heat in a skillet over medium heat, adding a splash of water or teriyaki sauce to prevent drying out.

    Frequently Asked Questions

    How do I know when my Hawaiian Style Teriyaki Chicken is cooked?

    Use a digital thermometer to ensure the chicken reaches an internal temperature of 165°F (75°C).

    Can I use chicken breasts instead of thighs for Hawaiian Style Teriyaki Chicken?

    Yes, you can use chicken breasts, but keep in mind they may become dry if overcooked, so monitor the cooking time closely.

    What sides pair well with Hawaiian Style Teriyaki Chicken?

    Consider serving it with rice, steamed vegetables, or a fresh salad to complement the flavors.

    How can I make this recipe gluten-free?

    To make Hawaiian Style Teriyaki Chicken gluten-free, use tamari instead of regular soy sauce.

    Can I adjust the sweetness in the marinade?

    Absolutely. You can reduce the amount of brown sugar or substitute with a sugar alternative to adjust the sweetness to your preference.

    Final Thoughts

    This Hawaiian Style Teriyaki Chicken is a delicious way to bring tropical flavors to your dining table. Don’t hesitate to try this recipe, and be sure to leave a comment with your feedback on how it turned out!


    Dinner

    HAWAIIAN STYLE TERIYAKI CHICKEN


    5.0 from 24 reviews

    Transport your taste buds to the tropics with this mouth-watering Hawaiian Style Teriyaki Chicken! Juicy, flavorful, and oh-so-delicious, it's perfect for any occasion.

    Author: Munch Twist
    Prep Time: 10 minutes
    Cook Time: 35-40 minutes
    Total Time: 45-50 minutes
    Yield: 6 servings
    Category: Desserts
    Method: No bake
    Cuisine: American

    HAWAIIAN STYLE TERIYAKI CHICKEN

    SCALE:
    1x
    2x
    3x
    Cook Mode: Prevent your screen from going dark

    Ingredients

    • 3 pounds boneless, skinless chicken thighs
    • 1 cup pineapple juice
    • 1 cup soy sauce
    • 1 cup packed brown sugar
    • 5 cloves garlic, mashed
    • 1 tablespoon fresh ginger, minced

    Instructions

    1. In a large bowl, mix together pineapple juice, soy sauce, and brown sugar until the sugar dissolves. Add the mashed garlic and minced ginger to the mixture.
    2. Add the chicken thighs to the bowl, ensuring they are fully submerged in the marinade. Cover and refrigerate for 24 hours, or up to 3 days for enhanced flavor.
    3. Preheat the grill to high heat. Grill the chicken thighs until charred on the outside. Transfer to a pot on the grill, add fresh teriyaki sauce, and steam until tender.
    4. For stir fry, cut chicken into bite-sized pieces, sauté in sesame oil, add marinade, and simmer until thickened.
    5. For stove top, sear chicken thighs, add marinade, and simmer until sauce reduces.
    6. For crock pot, place chicken and marinade in the slow cooker and cook until tender. Thicken sauce separately if needed.
    7. For baking, preheat oven to 350°F, place chicken in a dish, pour marinade over, and bake for 35-40 minutes.

    Nutrition Facts

    Serving Size: 1 serving
    Calories: 280 kcal
    Sugar: 25g
    Sodium: 900mg
    Fat: 10g
    Saturated Fat: 2g
    Carbohydrates: 30g
    Fiber: 1g
    Protein: 22g
    Cholesterol: 105mg