
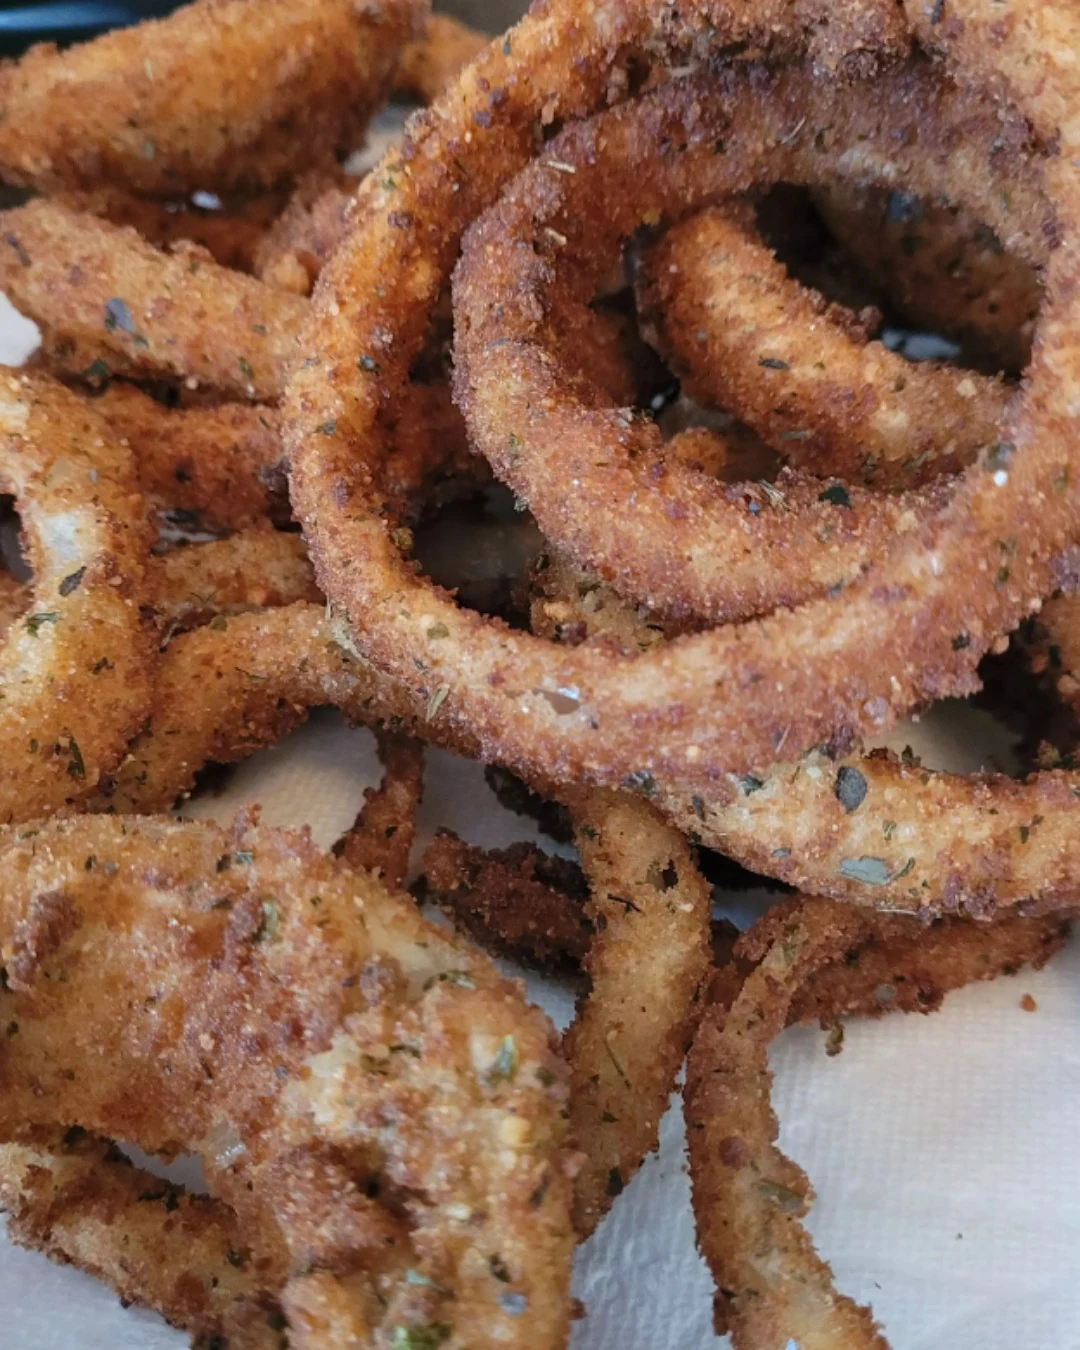
Crispy Homemade Onion Rings are the ultimate snack, delivering a satisfying crunch and rich flavor. Perfectly seasoned and fried to a beautiful golden hue, these onion rings will impress friends and family alike. They are easy to prepare and make for a delightful addition to any meal.
Why You’ll Love This Recipe
- Irresistibly Crunchy: Each bite offers a satisfying crunch that enhances your snacking experience.
- Versatile Snacking: Enjoy them as a side dish, appetizer, or even a party snack that everyone will love.
- Customizable Flavors: Adjust the seasoning to suit your taste, from spicy to savory.
- Homemade Goodness: Made from scratch, ensuring quality ingredients and flavors you can trust.
- Quick Prep Time: With just 15 minutes of prep, you can have these delicious onion rings ready in no time.
Tools and Equipment
Having the right tools can make your cooking experience smoother and more enjoyable.
Essential Tools
- Heavy-bottomed pot or deep fryer
- Shallow bowls for coating
- Baking sheet
- Parchment paper
- Slotted spoon
- Tongs
Why These Tools Matter
- Heavy-bottomed pot or deep fryer: Ensures even heat distribution for perfectly fried onion rings.
- Baking sheet with parchment paper: Prevents sticking and makes cleanup easier after freezing the coated rings.
- Slotted spoon: Allows for easy removal of onion rings from hot oil, minimizing splatter and ensuring safety.
Ingredients for Crispy Homemade Onion Rings
Coating Mixture
- 1 cup all-purpose flour
- 1 teaspoon salt
- 1 teaspoon garlic powder
- 1 teaspoon paprika
- 1/2 teaspoon black pepper
Wet Ingredients
- 1 cup buttermilk
- 1 egg
Onion Rings
- 2 large onions, sliced into rings
Frying
- Oil for frying
- 1 cup breadcrumbs
How to Make Crispy Homemade Onion Rings Step-by-Step
Step 1: Prepare the Coating
In a shallow bowl, combine the flour, paprika, garlic powder, salt, and black pepper. In another bowl, whisk together the buttermilk and egg until well blended.
Step 2: Coat the Onion Rings
Dip each onion ring into the flour mixture, ensuring it is fully coated. Follow this by dipping it into the buttermilk mixture, and then into the breadcrumbs, pressing lightly to adhere the crumbs.
Step 3: Freeze for Better Adherence
Place the coated onion rings on a baking sheet lined with parchment paper. Freeze for about 30 minutes to help the coating stick better during frying.
Step 4: Heat the Oil
In a deep fryer or heavy-bottomed pot, heat the oil to 375°F (190°C). This high temperature is crucial for achieving a crispy texture.
Step 5: Fry the Onion Rings
Fry the onion rings in batches for 2-3 minutes or until they turn golden brown and crispy. Avoid overcrowding the pot to ensure even frying.
Step 6: Drain and Serve
Remove the onion rings from the oil using a slotted spoon and drain on paper towels to remove excess oil. Serve hot with your favorite dipping sauce.
Enjoy these crispy delights hot out of the fryer, perfect for snacking or as a side dish to your favorite meal!
How to Serve Crispy Homemade Onion Rings
Crispy Homemade Onion Rings are versatile and can elevate any meal or gathering. Here are some creative serving ideas:
As a Standalone Snack
Serve your crispy onion rings with a variety of dipping sauces like ranch, barbecue, or spicy aioli for a delightful snack experience that your guests will love.
Loaded Onion Rings
Top your onion rings with melted cheese, crispy bacon bits, and a drizzle of sour cream for a loaded version that makes for an indulgent appetizer or side dish.
Burger Topping
Add crispy onion rings on top of your favorite burger for an extra crunch and flavor layer. They complement the juiciness of the meat and the freshness of the toppings beautifully.
Pro Tips for the Best Crispy Homemade Onion Rings
To achieve the ultimate crunch and flavor in your onion rings, consider these expert tips:
-
Choose the Right Onions: Sweet onions can add a milder flavor, while yellow onions provide a stronger taste that pairs well with the crispy coating.
-
Use Cold Buttermilk: Chilling the buttermilk before dipping helps create a crispier texture when frying.
-
Maintain Oil Temperature: Keep the oil temperature consistent at 375°F (190°C) to ensure the onion rings fry evenly without absorbing too much oil.
-
Double Dip for Extra Crunch: For an even crunchier coating, consider double dipping the onion rings in the flour and breadcrumbs after the buttermilk mix.
-
Work in Batches: Fry the onion rings in small batches to prevent overcrowding, which can lead to soggy results.
Best Side Dishes and Pairings
Crispy Homemade Onion Rings pair well with a variety of sides and drinks. Here are some great options:
-
Classic Cheeseburgers – The juiciness of a cheeseburger complements the crunch of onion rings perfectly, creating a satisfying meal.
-
Coleslaw – A refreshing coleslaw provides a crunchy contrast and a tangy flavor that balances the richness of fried onion rings.
-
French Fries – Pairing onion rings with crispy French fries creates a delightful duo that is always a hit at gatherings.
-
Grilled Chicken Sandwiches – The savory flavors of grilled chicken sandwiches work wonderfully with the crispy texture of onion rings.
-
Craft Beer – A cold craft beer can enhance the experience, as the carbonation cuts through the richness of the onion rings while complementing their flavors.
Common Mistakes to Avoid
- Skipping the Freezing Step: Not freezing the coated onion rings can lead to the breading falling off during frying.
- Overcrowding the Fryer: Frying too many rings at once can lower the oil temperature, resulting in soggy onion rings instead of crispy ones.
- Improper Oil Temperature: Using oil that is not hot enough will prevent the onion rings from achieving that crispy texture and may cause them to absorb more oil.
- Inconsistent Coating: Failing to fully coat the onion rings in the flour, buttermilk, and breadcrumbs can lead to uneven breading and texture.
Storage & Reheating Instructions
Refrigerator Storage
Store leftover crispy homemade onion rings in an airtight container in the refrigerator. They will stay fresh for up to 3 days.
Freezing Instructions
To freeze, place the uncooked coated onion rings in a single layer on a baking sheet and freeze until solid. Transfer them to a freezer-safe bag or container for up to 2 months. When ready to use, cook directly from frozen.
Reheating Tips
- Oven: Preheat the oven to 375°F (190°C). Place the onion rings on a baking sheet and bake for 10-15 minutes, or until heated through and crispy.
- Microwave: Heat in a microwave-safe dish in 30-second intervals, but be aware that this may result in a softer texture.
- Stovetop: Reheat in a skillet over medium heat, flipping occasionally until heated through and crispy.
Frequently Asked Questions
How do I achieve the perfect crispy texture for Crispy Homemade Onion Rings?
To achieve a crispy texture, ensure your oil is at the right temperature (375°F or 190°C) and consider double dipping the onion rings in the flour and breadcrumbs.
Can I use regular milk instead of buttermilk for Crispy Homemade Onion Rings?
Yes, you can substitute buttermilk with a mixture of regular milk and a tablespoon of lemon juice or vinegar. Let it sit for 5 minutes before using.
What type of onions are best for Crispy Homemade Onion Rings?
Sweet onions like Vidalia or yellow onions work well. Sweet onions provide a milder flavor, whereas yellow onions offer a stronger taste.
How long can I store Crispy Homemade Onion Rings in the refrigerator?
Crispy Homemade Onion Rings can be stored in an airtight container in the refrigerator for up to 3 days.
Can I freeze Crispy Homemade Onion Rings?
Yes, you can freeze uncooked onion rings. Place them in a single layer on a baking sheet to freeze, then transfer to a freezer-safe bag for up to 2 months. Cook them directly from frozen when ready.
Final Thoughts
Crispy Homemade Onion Rings are a delightful treat that can elevate any meal or serve as a satisfying snack. We encourage you to try this recipe and share your thoughts in the comments. Your feedback is invaluable, and we love hearing how your onion rings turned out!
Lunch
PrintCrispy Homemade Onion Rings

Get ready to crunch into the ultimate Crispy Homemade Onion Rings! Perfectly seasoned and fried to golden perfection, these onion rings are a crowd-pleaser you can easily whip up at home.
- Prep Time: 15 minutes
- Cook Time: 10 minutes
- Total Time: 25 minutes
- Yield: 4 servings 1x
- Category: Desserts
- Method: No bake
- Cuisine: American
Ingredients
- 1 teaspoon salt
- 1 cup buttermilk
- 1 teaspoon garlic powder
- 1 cup breadcrumbs
- 1 cup all-purpose flour
- 1/2 teaspoon black pepper
- Oil for frying
- 2 large onions, sliced into rings
- 1 teaspoon paprika
- 1 egg
Instructions
- In a shallow bowl, combine the flour, paprika, garlic powder, salt, and black pepper. In another bowl, whisk together the buttermilk and egg until well blended.
- Dip each onion ring into the flour mixture, ensuring it is fully coated. Then, dip it into the buttermilk mixture, followed by the breadcrumbs, pressing lightly to adhere the crumbs.
- Place the coated onion rings on a baking sheet lined with parchment paper. Freeze for about 30 minutes to help the coating stick better during frying.
- In a deep fryer or heavy-bottomed pot, heat the oil to 375°F (190°C).
- Fry the onion rings in batches for 2-3 minutes or until they turn golden brown and crispy. Avoid overcrowding the pot to ensure even frying.
- Remove the onion rings from the oil using a slotted spoon and drain on paper towels to remove excess oil. Serve hot with your favorite dipping sauce.
Nutrition
- Calories: 350
- Sugar: 6g
- Sodium: 260mg
- Fat: 16g
- Saturated Fat: 3g
- Carbohydrates: 45g
- Fiber: 3g
- Protein: 7g
- Cholesterol: 40mg