
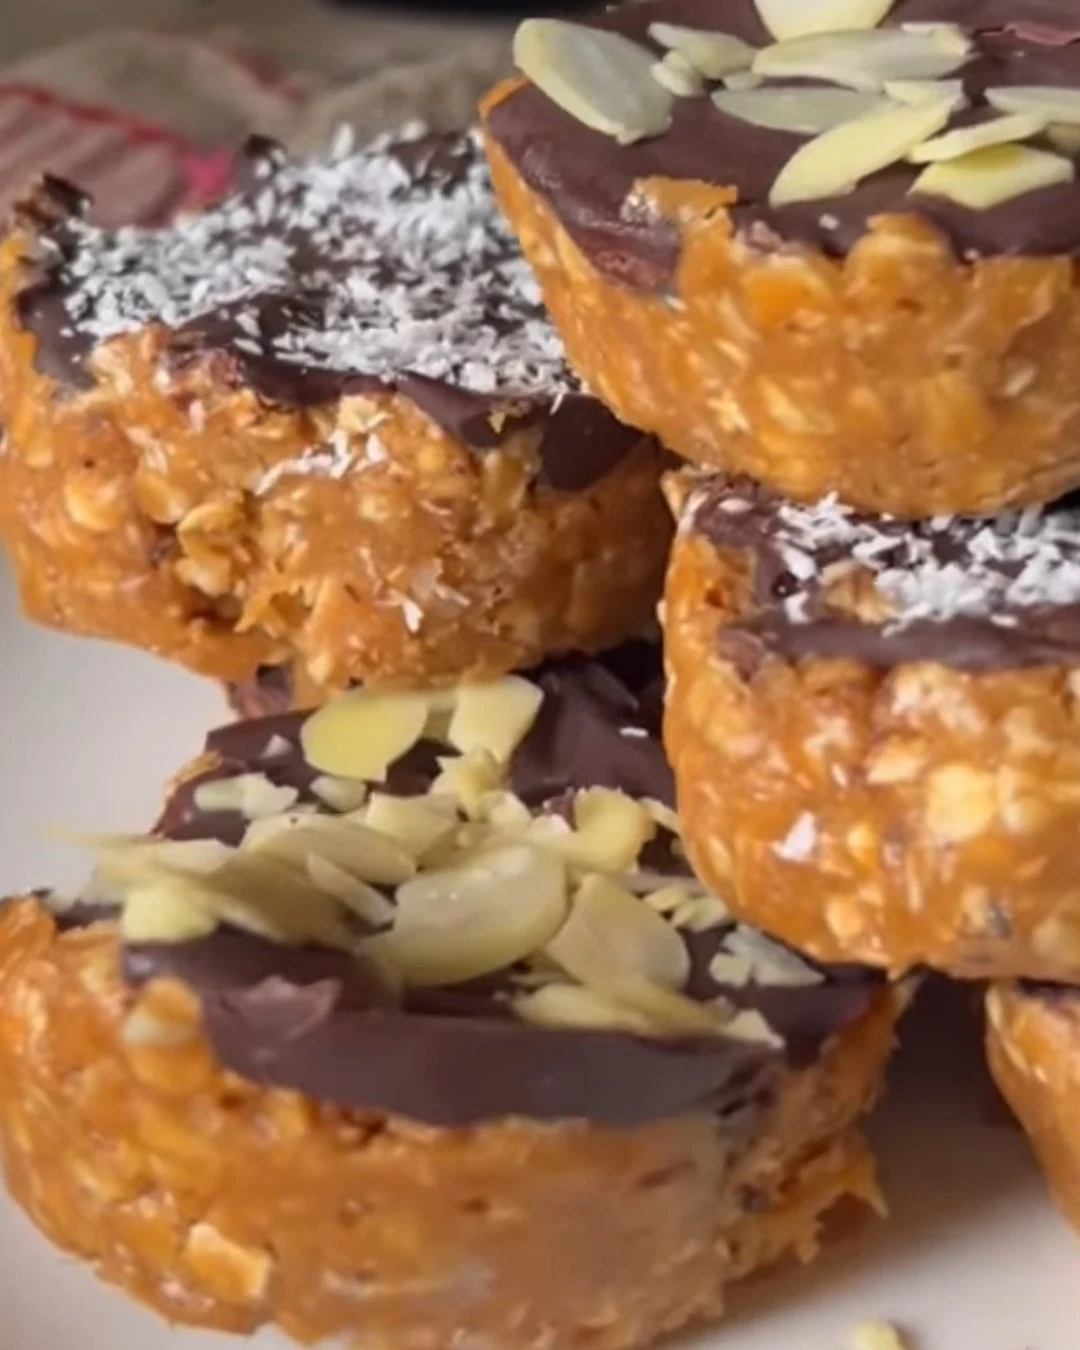
No-Bake Peanut Butter Oat Cups are a delightful treat that combines the rich flavor of peanut butter with the satisfying texture of oats. These cups are not only delicious but also incredibly easy to prepare, making them a perfect choice for anyone looking for a quick snack or dessert option.
Why You’ll Love This Recipe
- Quick & Easy: Ready in under 30 minutes, these treats require minimal effort.
- No Baking Required: Perfect for warm days or when you want to avoid turning on the oven.
- Nutritious Ingredients: Packed with oats and peanut butter, they provide a good source of energy.
- Customizable: You can add various mix-ins like dried fruits or nuts to suit your taste.
- Kid-Friendly: A fun and healthy treat that kids will love to help make.
Tools and Equipment
Having the right tools makes preparing No-Bake Peanut Butter Oat Cups a breeze.
Essential Tools
- Medium microwave-safe bowl
- Large mixing bowl
- Muffin tin
- Paper liners
- Spoon or spatula
Why These Tools Matter
- Microwave-safe bowl: Ideal for melting peanut butter and honey quickly.
- Muffin tin: The perfect shape for forming the oat cups.
- Spatula: Ensures thorough mixing of ingredients without leaving any behind.
Ingredients for No-Bake Peanut Butter Oat Cups
Wet Ingredients
- 1 teaspoon vanilla extract
- 1 cup creamy peanut butter
- 1/2 cup honey
Dry Ingredients
- 3 cups rolled oats
- 1/2 cup mini chocolate chips
How to Make No-Bake Peanut Butter Oat Cups Step-by-Step
Step 1: Prepare the Peanut Butter Mixture
In a medium microwave-safe bowl, combine the creamy peanut butter and honey. Microwave on high for 1 minute. Stir until smooth and well combined.
Step 2: Add Vanilla
Mix in the vanilla extract until it is fully incorporated into the peanut butter mixture.
Step 3: Combine Dry Ingredients
In a large mixing bowl, combine the rolled oats and mini chocolate chips. Stir to evenly distribute the chocolate chips.
Step 4: Mix Wet and Dry Ingredients
Pour the peanut butter mixture over the oats and chocolate chips. Stir thoroughly until all ingredients are well combined and coated.
Step 5: Form the Cups
Line a muffin tin with paper liners. Spoon the mixture into the liners, pressing down firmly to compact each cup.
Step 6: Chill
Refrigerate for at least 1 hour, or until the cups are firm and set.
Step 7: Enjoy
Once set, remove the cups from the muffin tin. Enjoy your delightful No-Bake Peanut Butter Oat Cups as a satisfying snack or dessert!
These No-Bake Peanut Butter Oat Cups are a quick, easy, and delicious way to satisfy your sweet tooth without the fuss of baking. Perfect for snacks, desserts, or anytime you need a quick treat!
How to Serve No-Bake Peanut Butter Oat Cups
These versatile no-bake peanut butter oat cups can be enjoyed in various ways. Here are some creative serving ideas:
Drizzle with Chocolate
Enhance the flavor by drizzling melted dark chocolate over the top of each cup. This adds a rich, decadent touch.
Serve with Fresh Fruit
Pair the oat cups with sliced bananas or strawberries for a refreshing contrast that complements the peanut butter flavor.
Add a Dollop of Yogurt
Top each cup with a spoonful of Greek yogurt. This not only adds creaminess but also a tangy balance to the sweetness.
Pro Tips for the Best No-Bake Peanut Butter Oat Cups
To ensure your no-bake peanut butter oat cups turn out perfectly every time, consider these helpful tips:
-
Use Natural Peanut Butter: Opt for a natural peanut butter without added sugars or oils for a healthier option and better texture.
-
Press Firmly: When forming the cups, make sure to press the mixture down firmly to ensure they hold their shape when set.
-
Chill Longer for Firmer Cups: If you prefer a firmer texture, allow the cups to chill for longer than an hour. This helps them set more thoroughly.
-
Mix-In Variations: Feel free to customize your oat cups by adding nuts, seeds, or dried fruits for additional flavor and texture.
-
Store Properly: Keep the cups in an airtight container in the refrigerator to maintain freshness for up to a week.
Best Side Dishes and Pairings
These no-bake peanut butter oat cups can be complemented by various side dishes and drinks. Here are some excellent pairings:
-
Milk: A classic pairing, milk provides a creamy contrast that enhances the flavor of these oat cups.
-
Smoothie: A fruit-based smoothie can serve as a refreshing and nutritious accompaniment to these treats.
-
Chia Seed Pudding: The creamy texture of chia seed pudding offers a delightful contrast, making for a well-rounded snack.
-
Trail Mix: A handful of trail mix adds crunch and variety, balancing the soft texture of the oat cups.
-
Herbal Tea: A warm cup of herbal tea complements the sweetness of the oat cups while providing a calming effect.
Common Mistakes to Avoid
- Not Measuring Ingredients Accurately: Ensure you measure your peanut butter and oats precisely for the best texture.
- Overmixing the Ingredients: Stir just until combined; overmixing can make the cups too dense.
- Skipping the Chilling Step: Allow the cups to chill properly; skipping this will result in a crumbly texture.
- Using Natural Peanut Butter: Stick to creamy peanut butter for a smoother consistency; natural varieties may not bind as well.
Storage & Reheating Instructions
Refrigerator Storage
Store the no-bake peanut butter oat cups in an airtight container in the refrigerator. They will stay fresh for up to one week.
Freezing Instructions
To freeze, place the cups in a single layer on a baking sheet until solid, then transfer them to an airtight container or freezer bag. They can be stored in the freezer for up to three months.
Reheating Tips
- Oven: Preheat to 350°F (175°C) and warm the cups for about 5-10 minutes.
- Microwave: Heat for 10-15 seconds at a time until warmed through.
- Stovetop: Place on a non-stick skillet over low heat, flipping occasionally until warmed.
Frequently Asked Questions
How do I make No-Bake Peanut Butter Oat Cups gluten-free?
To make these cups gluten-free, ensure you use certified gluten-free rolled oats.
Can I substitute honey in the No-Bake Peanut Butter Oat Cups?
Yes, you can substitute honey with maple syrup or agave nectar for a vegan option.
How long do No-Bake Peanut Butter Oat Cups last?
These cups can be stored in the refrigerator for up to one week and in the freezer for up to three months.
Can I add other ingredients to the No-Bake Peanut Butter Oat Cups?
Absolutely! Feel free to add nuts, seeds, or dried fruits to customize your cups.
What can I use instead of chocolate chips in the No-Bake Peanut Butter Oat Cups?
You can use chopped dark chocolate, butterscotch chips, or even dried fruits for a healthier alternative.
Final Thoughts
These no-bake peanut butter oat cups are not only simple to make but also provide a satisfying treat that everyone will love. Give this recipe a try, and don’t forget to leave a comment with your feedback!
Desserts
PrintNo-Bake Peanut Butter Oat Cups
These no-bake peanut butter oat cups are a quick, easy, and delicious way to satisfy your sweet tooth without the fuss of baking. Perfect for snacks, desserts, or anytime you need a quick treat!
- Prep Time: 10 minutes
- Cook Time: 0 minutes
- Total Time: 70 minutes
- Yield: 12 servings 1x
- Category: Desserts
- Method: Baking
- Cuisine: American
Ingredients
- 1 teaspoon vanilla extract
- 1 cup creamy peanut butter
- 1/2 cup mini chocolate chips
- 3 cups rolled oats
- 1/2 cup honey
Instructions
- In a medium microwave-safe bowl, combine the creamy peanut butter and honey. Microwave on high for 1 minute, then stir until smooth.
- Mix in the vanilla extract until well incorporated.
- In a large bowl, combine the rolled oats and mini chocolate chips.
- Pour the peanut butter mixture over the oats and chocolate chips. Stir until all the ingredients are thoroughly combined.
- Line a muffin tin with paper liners. Spoon the mixture into the liners, pressing down firmly to compact each cup.
- Refrigerate for at least 1 hour, or until the cups are firm.
- Once set, remove the cups from the muffin tin and enjoy your delightful no-bake treats!
Nutrition
- Calories: 150
- Sugar: 10g
- Sodium: 50mg
- Fat: 8g
- Saturated Fat: 2g
- Carbohydrates: 18g
- Fiber: 2g
- Protein: 4g
- Cholesterol: 0mg