
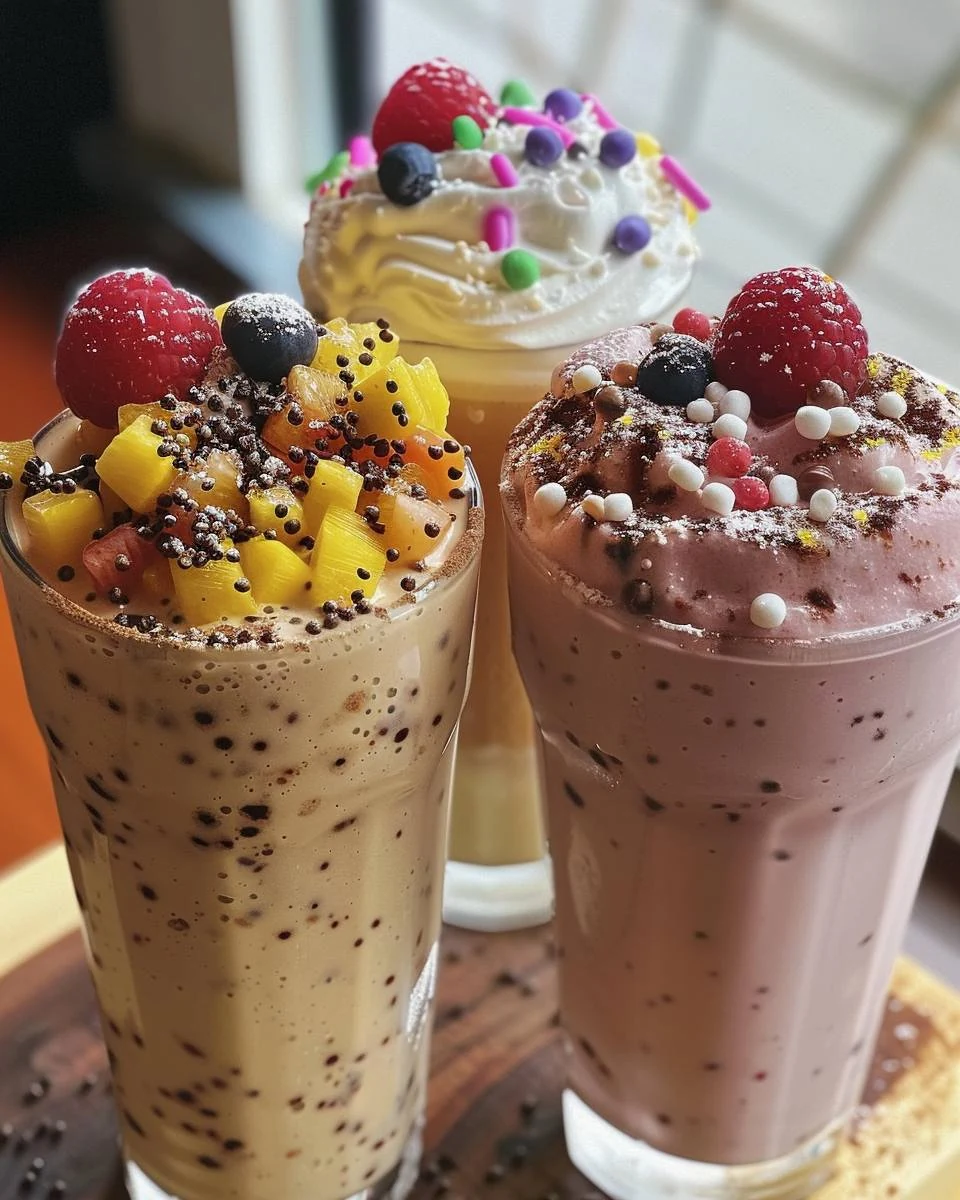
Indulge in the refreshing goodness of vibrant milkshakes bursting with fruity flavors. This recipe features delightful combinations like banana-blueberry, strawberry-raspberry, and mango-coconut-lime. Each sip promises a delightful treat that is not only delicious but also easy to make.
Why You’ll Love This Recipe
- Fruity Flavor Explosion: Each milkshake blends fresh fruit, delivering a burst of flavor in every sip.
- Nutrient-Rich: Packed with vitamins and minerals from fruits and yogurt, these milkshakes are a healthy indulgence.
- Quick & Easy: Ready in just 15 minutes, these milkshakes require no cooking, making them perfect for any occasion.
- Customizable: Feel free to mix and match fruits based on your preferences or seasonal availability.
- Fun Presentation: Skewered fruit adds a playful touch, making these milkshakes a hit with kids and adults alike.
Tools and Equipment
To create these delightful milkshakes, you’ll need a few essential tools.
Essential Tools
- Blender
- Small milk bottles
- Skewers
- Measuring cups
- Knife and cutting board
Why These Tools Matter
- Blender: Essential for achieving a smooth, creamy texture for your milkshakes.
- Small milk bottles: Great for portioning and serving, making them easy to enjoy on the go.
- Skewers: Adds a fun element to the presentation, allowing for easy stirring.
Ingredients for Milkshakes
Banana Blueberry Milkshake
- 1 small ripe banana, chopped
- 200ml whole milk
- 50g natural yogurt
- 1 small punnet blueberries
Strawberry Raspberry Milkshake
- 6 strawberries, hulled
- 1 small punnet raspberries
- 200ml whole milk
- 50g natural yogurt
Mango Coconut Lime Milkshake
- 120g mango chunks (fresh or frozen)
- 200ml coconut milk for drinking (or coconut kefir)
- 1/2 lime, cut into wedges
How to Make Milkshakes Step-by-Step
Step 1: Prepare the Banana Blueberry Milkshake
- In a blender, combine chopped banana, 200ml whole milk, and 50g natural yogurt.
- Blend until smooth.
- Pour the mixture into two or three small milk bottles.
- Skewer blueberries onto two sticks and place one into each milk bottle. Stir before serving.
Step 2: Prepare the Strawberry Raspberry Milkshake
- Using the same blender (unwashed), blend hulled strawberries, 6 raspberries, remaining 200ml whole milk, and remaining 50g natural yogurt until smooth.
- Divide the mixture between two small milk bottles.
- Skewer remaining raspberries onto two sticks and place one in each bottle for stirring.
Step 3: Prepare the Mango Coconut Lime Milkshake
- Rinse the blender or use a clean one. Blend mango chunks with coconut milk until smooth.
- Add a squeeze of lime juice and briefly blend to combine.
- Divide the mango coconut mixture between two milk bottles. Serve with lime wedges.
Enjoy these refreshing milkshakes as a delightful treat any time of day!
How to Serve Milkshakes
Milkshakes are versatile and can be enjoyed in various ways. Here are some creative serving ideas to elevate your milkshake experience.
Fun Milkshake Bar
Set up a milkshake bar with an array of toppings such as whipped cream, chocolate syrup, and sprinkles. Guests can customize their milkshakes, adding their favorite flavors and textures for a fun and interactive experience.
Layered Milkshake
Create a visually stunning layered milkshake by pouring different flavors in layers. Alternate between banana blueberry, strawberry raspberry, and mango coconut for a colorful treat that looks as good as it tastes.
Milkshake Floats
Transform your milkshake into a delightful float by adding a scoop of ice cream on top. The creamy texture of the ice cream combined with the milkshake will create a rich and indulgent dessert.
Pro Tips for the Best Milkshakes
To achieve the perfect milkshake consistency and flavor, consider these essential tips.
-
Use High-Quality Ingredients: Opt for fresh fruits and high-quality milk for a richer taste and better texture in your milkshakes.
-
Adjust Consistency: If you prefer a thicker milkshake, add more yogurt or use less milk. For a thinner version, increase the milk quantity.
-
Chill Your Glasses: Pre-chill your serving glasses in the freezer for a few minutes before pouring the milkshakes. This helps keep the shakes cold for longer.
-
Experiment with Flavors: Don’t hesitate to mix and match fruits or add extras like nut butters or protein powder for a unique twist.
-
Blend in Stages: To achieve a smoother texture, blend hard ingredients like frozen fruits first, then add liquids and softer items for an even mix.
Best Side Dishes and Pairings
Milkshakes pair beautifully with a variety of side dishes and drinks. Here are some great options to consider.
-
Grilled Cheese Sandwich: The savory, crispy texture of a grilled cheese pairs perfectly with the sweetness of milkshakes, creating a comforting combination.
-
Fruit Salad: A light and refreshing fruit salad complements the rich flavors of the milkshakes, adding a healthy touch to your meal.
-
Chocolate Chip Cookies: The classic combination of cookies and milk is elevated with these milkshakes, making for a nostalgic and satisfying treat.
-
Savory Nachos: The crunch and saltiness of nachos provide a delightful contrast to the creaminess of the milkshakes, creating a fun snack experience.
-
Brownies: Rich, fudgy brownies are a great dessert option that pairs well with the fruity flavors of the milkshakes, making for a decadent treat.
Common Mistakes to Avoid
- Using Overripe Fruit: Overripe fruit can lead to a less vibrant flavor and undesirable texture.
- Not Chilling Ingredients: For a refreshing milkshake, ensure that your ingredients, especially fruits and milk, are chilled before blending.
- Skipping the Blend Time: Failing to blend long enough can result in a lumpy consistency rather than a smooth milkshake.
- Neglecting to Taste: Always taste your milkshake before serving to adjust sweetness or flavor as needed.
Storage & Reheating Instructions
Refrigerator Storage
Store your milkshakes in airtight containers in the refrigerator. They will stay fresh for up to 24 hours.
Freezing Instructions
To freeze, pour the milkshakes into freezer-safe containers, leaving space at the top for expansion. They can be frozen for up to one month. Thaw in the refrigerator overnight before consuming.
Reheating Tips
- Oven: Not recommended for milkshakes, as they are best enjoyed cold.
- Microwave: Avoid microwaving; it alters the texture and flavor.
- Stovetop: Not applicable; milkshakes are served cold and should not be reheated.
Frequently Asked Questions
Can I make milkshakes in advance?
Yes, you can prepare the milkshakes in advance and store them in the refrigerator for up to 24 hours. However, for the best texture, they are best enjoyed fresh.
What can I substitute for whole milk in milkshakes?
You can use almond milk, oat milk, or any preferred milk alternative. However, keep in mind that this may alter the flavor slightly.
How can I make my milkshake thicker?
To achieve a thicker consistency, use less milk or add more yogurt or ice cream. You could also incorporate frozen fruits.
Are milkshakes healthy?
These milkshakes can be a nutritious treat, especially when made with fresh fruits and whole ingredients. They provide vitamins, fiber, and protein.
Can I add protein powder to my milkshakes?
Absolutely! Adding protein powder is a great way to boost the nutritional content of your milkshake. Just blend it in with the other ingredients.
Final Thoughts
These milkshakes are a delightful way to indulge in fruity flavors while enjoying a nutritious treat. We encourage you to try this recipe and share your feedback in the comments!
Desserts
PrintMilkshakes
Indulge in the refreshing goodness of these vibrant milkshakes bursting with fruity flavors. Whether you crave banana-blueberry, strawberry-raspberry, or mango-coconut-lime, each sip promises a delightful treat.
- Prep Time: 15 minutes
- Cook Time: 0 minutes
- Total Time: 15 minutes
- Yield: 6 servings 1x
- Category: Desserts
- Method: No bake
- Cuisine: American
Ingredients
- 1 small ripe banana, chopped
- 400ml whole milk
- 100g natural yogurt
- 1 small punnet blueberries
- 6 strawberries, hulled
- 1 small punnet raspberries
- 120g mango chunks (fresh or frozen)
- 200ml coconut milk for drinking (or coconut kefir)
- 1/2 lime, cut into wedges
Instructions
- In a blender, combine chopped banana, 200ml whole milk, and 50g natural yogurt. Blend until smooth. Pour the mixture into two or three small milk bottles. Skewer blueberries onto two sticks and place one into each milk bottle. Stir before serving.
- Using the same blender (unwashed), blend hulled strawberries, 6 raspberries, remaining 200ml whole milk, and remaining 50g natural yogurt until smooth. Divide the mixture between two small milk bottles. Skewer remaining raspberries onto two sticks and place one in each bottle for stirring.
- Rinse the blender or use a clean one. Blend mango chunks with coconut milk until smooth. Add a squeeze of lime juice and briefly blend to combine. Divide the mango coconut mixture between two milk bottles. Serve with lime wedges.
Nutrition
- Calories: 220
- Sugar: 22g
- Sodium: 80mg
- Fat: 7g
- Saturated Fat: 4g
- Carbohydrates: 32g
- Fiber: 6g
- Protein: 7g
- Cholesterol: 15mg