Category: Lunch

  • Delicious Garlic Parmesan Chicken Meatloaves Recipe

    Delicious Garlic Parmesan Chicken Meatloaves Recipe

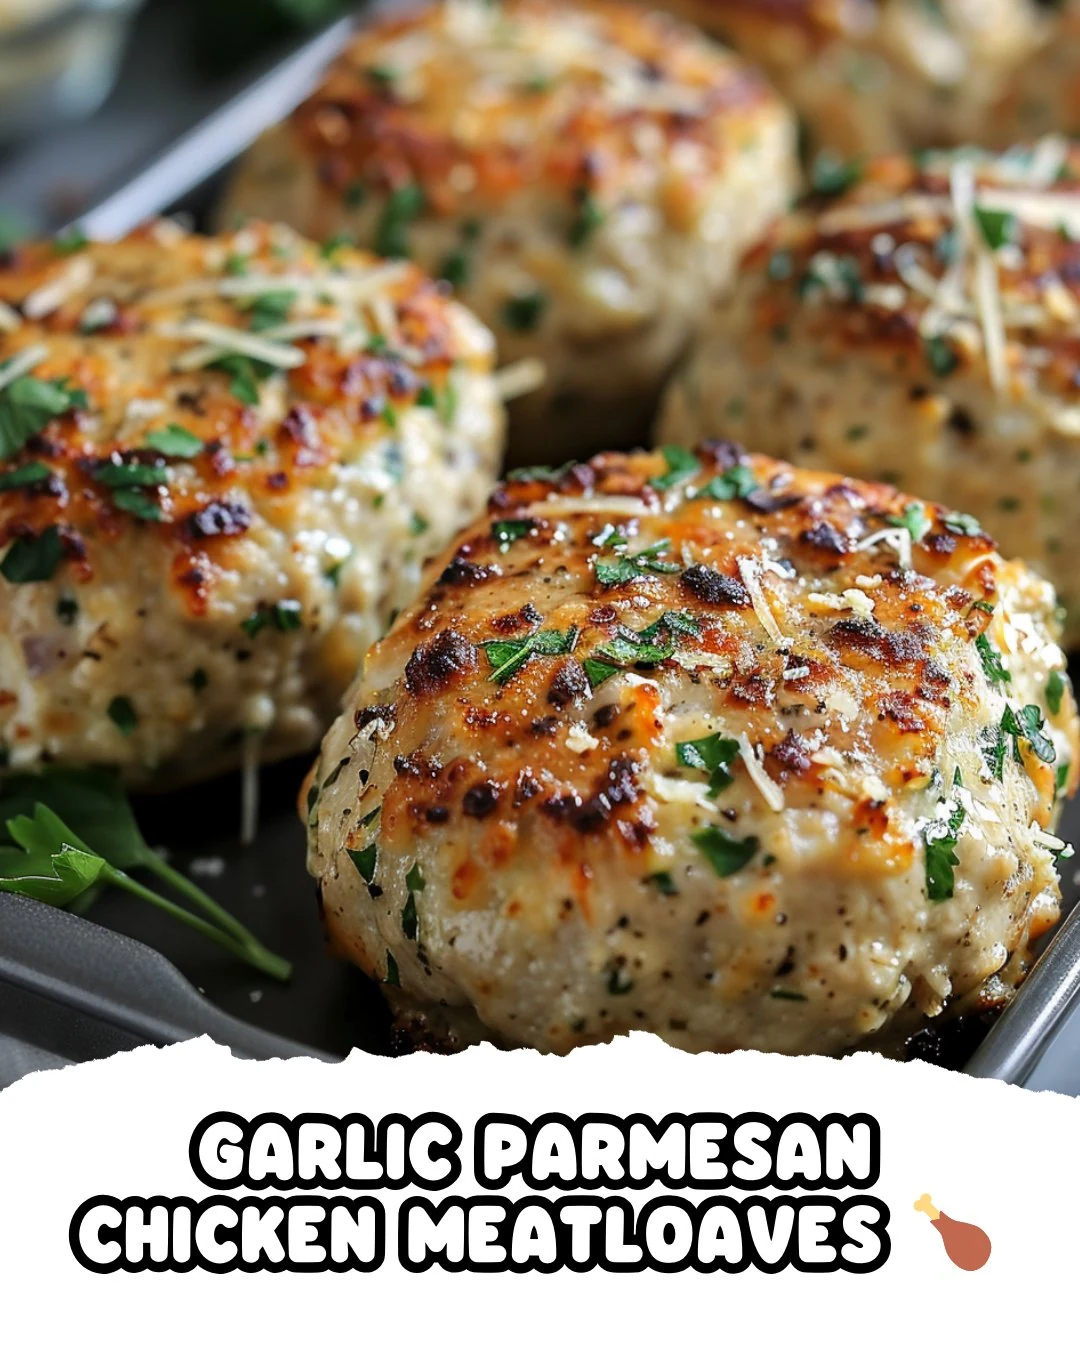
    Garlic Parmesan Chicken Meatloaves are a delightful twist on classic comfort food. These savory meatloaves burst with flavor from the garlic and Parmesan, making them a family favorite. Perfectly moist and easy to prepare, they are sure to impress at any dinner table.

    Why You’ll Love This Recipe

    • Flavorful & Savory: The combination of garlic and Parmesan creates a rich flavor profile that elevates ground chicken.
    • Healthier Option: Using ground chicken provides a leaner alternative to traditional meatloaf without sacrificing taste.
    • Quick & Easy: Ready in under an hour, these meatloaves are perfect for busy weeknights.
    • Versatile Serving Options: Enjoy them on their own, in a sandwich, or with a side of vegetables for a complete meal.
    • Kid-Friendly: The appealing flavors and fun shape make these meatloaves a hit with children.

    Tools and Equipment

    Having the right tools makes cooking smoother and more enjoyable. Here’s what you’ll need.

    Essential Tools

    • Mixing bowl
    • Baking sheet
    • Parchment paper or cooking spray
    • Measuring cups and spoons
    • Meat thermometer

    Why These Tools Matter

    • Mixing bowl: A large bowl allows for easy mixing of ingredients without mess.
    • Baking sheet: Provides a sturdy surface for even cooking and easy cleanup.
    • Meat thermometer: Ensures perfectly cooked meatloaves, avoiding any guesswork.

    Ingredients for Garlic Parmesan Chicken Meatloaves

    Main Ingredients

    • 2 lbs ground chicken
    • 8-10 garlic cloves, pressed
    • ½ cup diced yellow onion (about ½ yellow onion)
    • ¾ cup bread crumbs (or 2 slices of dense bread, crumbled)
    • 3 oz fresh grated Parmesan cheese
    • 1 egg
    • 3 Tbsp fresh minced parsley
    • Salt, to taste
    • Fresh cracked black pepper, to taste
    • Optional: extra fresh grated Parmesan cheese for topping

    How to Make Garlic Parmesan Chicken Meatloaves Step-by-Step

    Step 1: Preheat the Oven

    Preheat the oven to 375°F (190°C). Line a baking sheet with parchment paper or lightly grease it to prevent sticking.

    Step 2: Prepare the Meatloaf Mixture

    In a large mixing bowl, combine the following ingredients: ground chicken, pressed garlic, diced onion, bread crumbs, grated Parmesan cheese, egg, and minced parsley. Season with salt and freshly cracked black pepper. Mix until all ingredients are well incorporated.

    Step 3: Form the Meatloaves

    Divide the mixture into equal portions. Shape each portion into small individual meatloaves and place them on the prepared baking sheet.

    Step 4: Bake

    Bake the meatloaves in the preheated oven for 25-30 minutes. Check that they are cooked through and that the internal temperature reaches 165°F (74°C).

    Step 5: Optional Topping

    If desired, sprinkle additional fresh grated Parmesan cheese on top of each meatloaf during the last 5 minutes of baking for an extra cheesy finish.

    Step 6: Serve

    Allow the meatloaves to rest for a few minutes before serving. Garnish with additional fresh parsley if desired.

    Preparation time: 15 minutes | Cooking time: 30 minutes

    Nutritional Information

    Per serving (based on 6 servings):
    – Calories: 280 kcal
    – Carbohydrates: 10 g
    – Proteins: 30 g
    – Fats: 14 g

    Enjoy these Garlic Parmesan Chicken Meatloaves for a satisfying and flavorful meal that your family will love.

    How to Serve Garlic Parmesan Chicken Meatloaves

    These meatloaves are versatile and can be served in various delightful ways.

    Meatloaf Sandwich

    Transform leftovers into a hearty sandwich. Layer slices of meatloaf on crusty bread with lettuce, tomato, and a smear of garlic aioli for a satisfying lunch.

    Garlic Parmesan Meatloaf Muffins

    For a fun twist, use a muffin tin to bake individual meatloaves. Serve them as bite-sized appetizers, perfect for parties or family gatherings.

    Pasta and Meatloaf Combo

    Serve the meatloaves over a bed of spaghetti with marinara sauce. The combination of flavors creates a comforting and filling meal that everyone will enjoy.

    Pro Tips for the Best Garlic Parmesan Chicken Meatloaves

    Elevate your cooking game with these essential tips.

    • Use Fresh Ingredients: Fresh garlic, parsley, and Parmesan cheese will enhance the flavor significantly compared to dried alternatives.

    • Don’t Overmix: When combining the ingredients, mix just until incorporated. Overmixing can lead to tough meatloaves.

    • Check the Temperature: Use a meat thermometer to ensure the internal temperature reaches 165°F (74°C) for perfect doneness.

    • Let Rest Before Serving: Allow the meatloaves to rest for a few minutes after baking. This helps retain moisture and improves texture.

    • Experiment with Herbs: Feel free to add other herbs like thyme or basil to the mixture for additional flavor dimensions.

    Best Side Dishes and Pairings

    Pair these Garlic Parmesan Chicken Meatloaves with complementary sides for a complete meal.

    1. Garlic Mashed Potatoes: Creamy and buttery, these potatoes enhance the garlic flavor in the meatloaves, creating a harmonious dish.

    2. Steamed Green Beans: Lightly seasoned green beans add a fresh crunch and color, balancing the richness of the meatloaves.

    3. Caesar Salad: The crisp romaine and tangy dressing of a Caesar salad provide a refreshing contrast to the savory meatloaves.

    4. Roasted Vegetables: A medley of seasonal roasted vegetables brings natural sweetness and a variety of textures that pair well with the meatloaves.

    5. Quinoa Salad: A light quinoa salad with lemon dressing offers a healthy, nutty complement that enhances the dish without overpowering it.

    Common Mistakes to Avoid

    • Not Mixing Thoroughly: Ensure all ingredients are well combined for even flavor and texture.
    • Overbaking: Watch the cooking time closely; overbaking can dry out the meatloaves.
    • Inadequate Seasoning: Don’t skip on salt and pepper; these enhance the overall taste.
    • Skipping the Resting Time: Allow the meatloaves to rest before serving for better flavor and juiciness.

    Storage & Reheating Instructions

    Refrigerator Storage

    Store Garlic Parmesan Chicken Meatloaves in airtight containers in the refrigerator for up to 3 days.

    Freezing Instructions

    To freeze, wrap each meatloaf individually in plastic wrap and place them in a freezer-safe bag. They will maintain quality for up to 3 months. Thaw in the refrigerator overnight before reheating.

    Reheating Tips

    • Oven: Preheat to 350°F (175°C). Place meatloaves in a baking dish and cover with foil. Heat for about 15-20 minutes, or until warmed through.
    • Microwave: Place meatloaves on a microwave-safe plate. Heat on medium power for 2-3 minutes, checking halfway through.
    • Stovetop: In a skillet, add a little oil over medium heat. Cook meatloaves for 5-7 minutes, turning occasionally until heated through.

    Frequently Asked Questions

    How can I make Garlic Parmesan Chicken Meatloaves gluten-free?

    You can use gluten-free bread crumbs or substitute with ground oats to keep the recipe gluten-free.

    Can I use turkey instead of chicken for this recipe?

    Yes, ground turkey is a great alternative and will work well in this Garlic Parmesan Chicken Meatloaves recipe.

    How do I know when the meatloaves are done cooking?

    Use a meat thermometer; they should reach an internal temperature of 165°F (74°C).

    What is the best way to serve Garlic Parmesan Chicken Meatloaves?

    These meatloaves pair well with a side of mashed potatoes or a fresh garden salad for a balanced meal.

    Can I add vegetables to the meatloaf mixture?

    Absolutely! Finely chopped bell peppers or carrots can be added for extra flavor and nutrition.

    Final Thoughts

    Garlic Parmesan Chicken Meatloaves are a delightful and easy dish to prepare, perfect for family dinners or meal prep. I encourage you to try this recipe and share your thoughts in the comments below. Your feedback is always appreciated!


    Dinner

    Garlic Parmesan Chicken Meatloaves


    5.0 from 24 reviews

    These Garlic Parmesan Chicken Meatloaves are a delicious and healthy twist on a classic dish. Made with ground chicken, fresh garlic, and Parmesan cheese, they are packed with flavor and easy to prepare. Perfect for a family dinner or meal prep, these meatloaves are sure to please everyone at the table.
    Author: Munch Twist
    Prep Time: 15 minutes
    Cook Time: 30 minutes
    Total Time: 45 minutes
    Yield: 6 servings
    Category: Lunch
    Method: No bake
    Cuisine: American

    Garlic Parmesan Chicken Meatloaves

    SCALE:
    1x
    2x
    3x
    Cook Mode: Prevent your screen from going dark

    Ingredients

    • 2 lbs ground chicken
    • 8-10 garlic cloves, pressed
    • ½ cup diced yellow onion
    • ¾ cup bread crumbs
    • 3 oz fresh grated Parmesan cheese
    • 1 egg
    • 3 Tbsp fresh minced parsley
    • Salt, to taste
    • Fresh cracked black pepper, to taste
    • Optional: extra fresh grated Parmesan cheese for topping

    Instructions

    1. Preheat the oven to 375°F (190°C) and line a baking sheet with parchment paper or lightly grease it.
    2. In a large mixing bowl, combine ground chicken, pressed garlic, diced onion, bread crumbs, grated Parmesan cheese, egg, and minced parsley. Season with salt and black pepper and mix until well incorporated.
    3. Divide the mixture into equal portions and shape each portion into small individual meatloaves. Place them on the prepared baking sheet.
    4. Bake in the preheated oven for 25-30 minutes, or until the meatloaves are cooked through and the internal temperature reaches 165°F (74°C).
    5. For an extra cheesy touch, sprinkle additional fresh grated Parmesan cheese on top of each meatloaf during the last 5 minutes of baking.
    6. Let the meatloaves rest for a few minutes before serving. Garnish with extra fresh parsley if desired.

    Nutrition Facts

    Serving Size: 1 serving
    Calories: 280 kcal
    Sugar: 1g
    Sodium: 400mg
    Fat: 14g
    Saturated Fat: 5g
    Carbohydrates: 10g
    Fiber: 1g
    Protein: 30g
    Cholesterol: 120mg

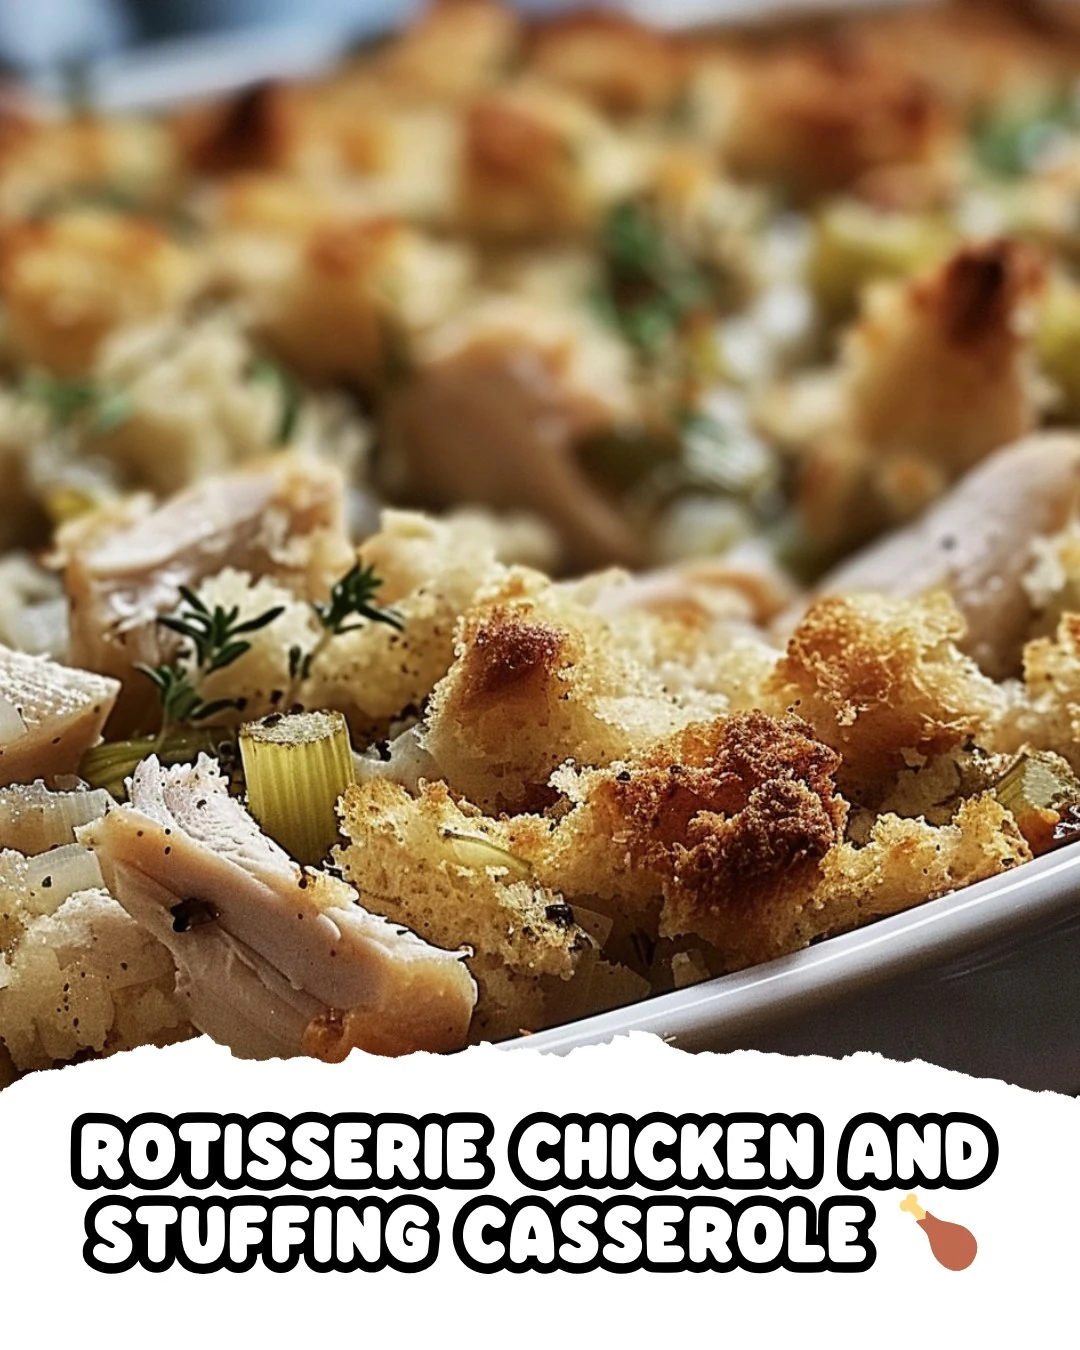
  • Delicious Rotisserie Chicken and Stuffing Casserole Recipe

    Delicious Rotisserie Chicken and Stuffing Casserole Recipe

    Rotisserie Chicken and Stuffing Casserole is a comforting dish that combines the savory flavors of shredded chicken with the rich textures of stuffing. This casserole is perfect for a family dinner or a cozy gathering, and it highlights the convenience of using a rotisserie chicken for quick meal preparation.

    Why You’ll Love This Recipe

    • Comforting Dish: This casserole brings warmth and nostalgia with every bite.
    • Quick & Easy: With just 15 minutes of prep time, you can have a delicious meal ready for the oven.
    • Flavorful Layers: The combination of cream soups and sour cream creates a rich, creamy base that enhances the dish.
    • Family Favorite: The blend of chicken and stuffing is a classic that pleases both kids and adults.
    • Versatile Ingredients: Use leftover chicken or customize with your favorite vegetables.

    Tools and Equipment

    To make the cooking process smooth, you’ll need a few essential kitchen tools.

    Essential Tools

    • A 9 x 13-inch baking dish
    • Medium saucepan
    • Skillet
    • Mixing bowl
    • Fork for fluffing stuffing

    Why These Tools Matter

    • Baking Dish: The size is perfect for even baking and generous servings.
    • Skillet: Allows for sautéing vegetables quickly, enhancing their flavor.
    • Mixing Bowl: Essential for combining sauces smoothly, ensuring even distribution in the casserole.

    Ingredients for Rotisserie Chicken and Stuffing Casserole

    Main Ingredients

    • 1 package Stove Top stuffing mix (or more if preferred)
    • 1 whole cooked rotisserie chicken, shredded
    • 1 ½ cups water or chicken broth
    • ¼ cup butter
    • 1 onion, diced
    • 3 stalks celery, diced
    • 1 can (10.5 oz) cream of chicken soup
    • ½ can (10.5 oz) cream of mushroom soup
    • 8 ounces sour cream
    • Salt and pepper to taste

    How to Make Rotisserie Chicken and Stuffing Casserole Step-by-Step

    Step 1: Prepare the Stuffing

    Preheat the oven to 350°F (175°C). Lightly spray a 9 x 13-inch baking dish with cooking spray. In a medium saucepan, bring the water or chicken broth to a boil. Add the Stove Top stuffing mix and stir. Remove from heat, cover, and let sit for 5 minutes. Fluff with a fork once done.

    Step 2: Cook the Vegetables

    In a skillet, melt the butter over medium heat. Add the diced onion and celery. Cook until softened, about 5-7 minutes.

    Step 3: Mix the Sauces

    In a mixing bowl, combine the cream of chicken soup, cream of mushroom soup, and sour cream. Mix until smooth and fully combined.

    Step 4: Assemble the Casserole

    Place the shredded chicken at the bottom of the prepared baking dish. Layer the cooked onions and celery over the chicken. Season with salt and pepper. Spread the soup mixture evenly on top of the onions and celery.

    Step 5: Add the Stuffing

    Spread the prepared stuffing evenly over the soup mixture, ensuring it covers the entire surface.

    Step 6: Bake

    Bake in the preheated oven for 1 hour, or until the casserole is bubbly and the top is golden brown.

    This Rotisserie Chicken and Stuffing Casserole is a straightforward recipe that delivers delicious results. Enjoy the layers of flavor and the ease of preparation, making it a go-to for your next meal.

    How to Serve Rotisserie Chicken and Stuffing Casserole

    Rotisserie Chicken and Stuffing Casserole is a versatile dish that can be served in various ways.

    Family-Style Serving

    Serve the casserole directly from the baking dish at the dining table, allowing everyone to help themselves. This approach encourages a casual, family-friendly atmosphere.

    Individual Portions

    For a more elegant presentation, scoop out individual portions into ramekins. This method not only looks appealing but also makes serving easier at gatherings or dinner parties.

    Garnish for Flair

    Sprinkle fresh herbs, such as parsley or thyme, on top just before serving. This adds a pop of color and freshness that elevates the presentation.

    Pro Tips for the Best Rotisserie Chicken and Stuffing Casserole

    Enhancing your casserole can make a big difference in flavor and texture.

    • Use Quality Chicken: Opt for a flavorful rotisserie chicken; the quality of the chicken greatly influences the overall taste of the casserole.
    • Customize the Stuffing: Feel free to add dried fruits or nuts to the stuffing for added texture and flavor.
    • Add Vegetables: Incorporate other vegetables like carrots or bell peppers into the mix for extra nutrition and taste.
    • Make Ahead: Prepare the casserole a day in advance and refrigerate it overnight. This allows the flavors to meld beautifully.
    • Check for Doneness: Ensure the casserole is heated through and bubbly before serving, and the top is golden brown for the best texture.

    Best Side Dishes and Pairings

    Pairing the right sides can elevate your meal experience.

    1. Garlic Bread
      This crispy and buttery bread complements the creamy casserole and provides a lovely crunch.

    2. Green Salad
      A fresh green salad with a light vinaigrette adds a refreshing contrast to the richness of the casserole.

    3. Roasted Vegetables
      Seasoned roasted vegetables bring a savory depth and additional nutrients to your meal.

    4. Mashed Potatoes
      Creamy mashed potatoes are a comforting side that pairs well with the flavors of the casserole.

    5. Cranberry Sauce
      The tartness of cranberry sauce provides a delightful balance to the savory elements of the dish.

    Common Mistakes to Avoid

    • Using Too Much Liquid: Adding excess water or broth can make the casserole too soggy.
    • Neglecting to Season: Failing to add salt and pepper can result in a bland dish.
    • Overcooking the Vegetables: Cooking onions and celery for too long can cause them to lose their texture.
    • Not Fluffing the Stuffing: Forgetting to fluff the stuffing before layering can lead to uneven texture.

    Storage & Reheating Instructions

    Refrigerator Storage

    Store the casserole in airtight containers in the refrigerator. It will stay fresh for up to 3 to 4 days.

    Freezing Instructions

    For freezing, wrap the casserole tightly in plastic wrap or aluminum foil, or transfer it to a freezer-safe container. It can be frozen for up to 3 months. To thaw, place it in the refrigerator overnight before reheating.

    Reheating Tips

    • Oven: Preheat the oven to 350°F (175°C). Cover with foil and bake for 25-30 minutes, or until heated through.
    • Microwave: Place a portion in a microwave-safe dish, cover loosely, and microwave on high for 2-3 minutes, stirring halfway through.
    • Stovetop: Heat in a skillet over medium heat, stirring occasionally, until warmed through.

    Frequently Asked Questions

    How can I customize my Rotisserie Chicken and Stuffing Casserole?

    You can add vegetables like peas or carrots, or substitute the cream soups with homemade versions for a healthier twist.

    Can I use leftover chicken instead of rotisserie chicken?

    Yes, using leftover chicken is a great way to save time and reduce waste. Just ensure it’s shredded for even distribution.

    How do I make this Rotisserie Chicken and Stuffing Casserole gluten-free?

    Use gluten-free stuffing mix and ensure the cream soups are gluten-free. You can also make your own cream soup substitutes using cornstarch and milk.

    Can I prepare the casserole ahead of time?

    Absolutely! You can prepare the casserole up to the baking stage and store it in the refrigerator for up to 24 hours before baking.

    What should I serve with this casserole?

    Pair the casserole with a fresh green salad or steamed vegetables for a balanced meal.

    Final Thoughts

    This Rotisserie Chicken and Stuffing Casserole is a comforting dish that’s perfect for weeknight dinners or gatherings. We encourage you to try this recipe and share your feedback in the comments below!


    Dinner

    Rotisserie Chicken and Stuffing Casserole


    5.0 from 24 reviews

    This hearty casserole combines tender shredded rotisserie chicken with savory stuffing, creamy soups, and fresh vegetables, all baked to perfection. It's a comforting dish that's perfect for family dinners or potlucks.

    Author: Munch Twist
    Prep Time: 15 minutes
    Cook Time: 60 minutes
    Total Time: 75 minutes
    Yield: 6 servings
    Category: Lunch
    Method: Baking
    Cuisine: American

    Rotisserie Chicken and Stuffing Casserole

    SCALE:
    1x
    2x
    3x
    Cook Mode: Prevent your screen from going dark

    Ingredients

    • 1 package Stove Top stuffing mix
    • 1 whole cooked rotisserie chicken, shredded
    • 1 ½ cups water or chicken broth
    • ¼ cup butter
    • 1 onion, diced
    • 3 stalks celery, diced
    • 1 can (10.5 oz) cream of chicken soup
    • ½ can (10.5 oz) cream of mushroom soup
    • 8 ounces sour cream
    • Salt and pepper to taste

    Instructions

    1. Preheat the oven to 350°F (175°C). Lightly spray a 9 x 13-inch baking dish with cooking spray. In a medium saucepan, bring the water or chicken broth to a boil. Add the Stove Top stuffing mix and stir. Remove from heat, cover, and let sit for 5 minutes. Fluff with a fork once done.
    2. In a skillet, melt the butter over medium heat. Add the diced onion and celery, cooking until softened, about 5-7 minutes.
    3. In a bowl, combine the cream of chicken soup, cream of mushroom soup, and sour cream. Mix until smooth.
    4. Place the shredded chicken in the bottom of the prepared baking dish. Layer the cooked onions and celery over the chicken. Season with salt and pepper. Spread the soup mixture evenly on top of the onions and celery.
    5. Spread the prepared stuffing evenly over the soup mixture.
    6. Bake in the preheated oven for 1 hour, or until the casserole is bubbly and the top is golden brown.

    Nutrition Facts

    Serving Size: 1 serving
    Calories: 450 kcal
    Sugar: 3g
    Sodium: 1200mg
    Fat: 24g
    Saturated Fat: 11g
    Carbohydrates: 36g
    Fiber: 2g
    Protein: 25g
    Cholesterol: 85mg

  • Easy English Muffin Breakfast Pizza Recipe to Try

    Easy English Muffin Breakfast Pizza Recipe to Try

    English Muffin Breakfast Pizza is a delicious twist on traditional breakfast fare. Combining toasted English muffins with savory toppings like scrambled eggs and sausage, this dish is both satisfying and flavorful. It’s perfect for busy mornings or leisurely brunches.

    Why You’ll Love This Recipe

    • Quick & Easy: Ready in under 30 minutes, making it perfect for busy mornings.
    • Flavor Packed: The combination of sausage, eggs, and cheese creates a mouthwatering experience.
    • Customizable: Easily swap ingredients based on your preferences or what you have on hand.
    • Kid-Friendly: A fun way to get kids involved in breakfast preparation.
    • Hearty & Filling: This recipe offers a balanced meal that keeps you full for hours.

    Tools and Equipment

    Having the right tools can make cooking easier and more enjoyable.

    Essential Tools

    • Cast iron skillet
    • Non-stick skillet
    • Baking sheet
    • Spatula
    • Whisk

    Why These Tools Matter

    • Cast iron skillet: Retains heat well, ensuring even cooking of the sausage.
    • Non-stick skillet: Makes scrambling eggs easier and helps prevent sticking.
    • Baking sheet: Provides a stable surface for assembling and broiling the pizzas.

    Ingredients for English Muffin Breakfast Pizza

    For the Pizza

    • 8 eggs
    • 1 lb breakfast sausage
    • 1 package of English muffins
    • 8 oz mild cheddar cheese, thinly sliced

    For the Sawmill Gravy

    • 2 cups milk
    • ¼ cup sausage drippings (add butter if insufficient drippings)
    • ¼ cup flour
    • ½ teaspoon salt (or to taste)
    • ¼ teaspoon pepper (or to taste)

    How to Make English Muffin Breakfast Pizza Step-by-Step

    Step 1: Cook the Sausage

    In a cast iron pan, cook the breakfast sausage until well done. Once cooked, remove the sausage from the pan and pour off all but ¼ cup of fat.

    Step 2: Make the Gravy

    Add the flour to the reserved meat drippings in the skillet. Cook and stir over medium heat for 5 to 10 minutes, or until the mixture begins to turn golden. Gradually add milk to the roux, stirring constantly. Cook until the gravy boils and thickens. Season with salt and pepper to taste.

    Step 3: Toast the Muffins

    While making the gravy, lightly toast the English muffins until golden brown. This adds a nice crunch to the base.

    Step 4: Scramble the Eggs

    In a non-stick skillet, scramble the eggs. If desired, add a small dash of milk to make the eggs fluffier. Cook until just set.

    Step 5: Assemble the Pizzas

    Preheat your oven broiler to high. On a baking sheet, assemble the pizzas by spreading sawmill gravy on each open-faced toasted English muffin. Top with scrambled eggs, a slice of cheddar cheese, and the cooked sausage.

    Step 6: Broil

    Place the baking sheet under the broiler. Broil until the cheese is bubbly and melted, about 2-3 minutes. Keep a close eye to prevent burning.

    These English Muffin Breakfast Pizzas are not only easy to make but also packed with flavor. Enjoy them for breakfast or as a delightful brunch option.

    How to Serve English Muffin Breakfast Pizza

    These English Muffin Breakfast Pizzas are versatile and can be served in various delightful ways.

    Individual Servings

    Serve each English Muffin Breakfast Pizza on a separate plate, garnished with fresh herbs like chives or parsley for added color and flavor.

    Family Style

    Arrange the pizzas on a large platter and let everyone build their own breakfast pizza by adding extra toppings such as diced tomatoes, jalapeños, or avocado for a fun, interactive dining experience.

    On-the-Go Option

    Slice the English muffin pizzas into quarters or halves and serve them in a to-go container for a quick, portable breakfast option perfect for busy mornings.

    Pro Tips for the Best English Muffin Breakfast Pizza

    To ensure your breakfast pizzas are a hit, consider these expert tips.

    • Use Fresh Ingredients: Fresh eggs and high-quality sausage make a significant difference in flavor and texture.
    • Customize Your Toppings: Feel free to experiment with different cheeses, vegetables, or even hot sauces to suit your taste preferences.
    • Monitor Broiling Time: Keep a close eye on the pizzas while broiling to prevent burning; the cheese should be bubbly but not overly browned.
    • Prep Ahead: Prepare the sawmill gravy and scramble the eggs the night before to save time in the morning.
    • Choose Whole Wheat Muffins: For a healthier option, consider using whole wheat English muffins for added fiber and nutrients.

    Best Side Dishes and Pairings

    Pair your English Muffin Breakfast Pizza with these delicious side dishes and drinks for a complete breakfast experience.

    1. Fresh Fruit Salad: A light and refreshing mix of seasonal fruits balances the richness of the pizza.
    2. Crispy Hash Browns: The crunchy texture of hash browns complements the soft toppings of the breakfast pizza.
    3. Greek Yogurt Parfait: Layered with granola and berries, this parfait adds a healthy and satisfying element to your meal.
    4. Coffee or Tea: A warm cup of coffee or herbal tea enhances the breakfast experience and wakes up your palate.
    5. Smoothie Bowl: A thick smoothie topped with nuts and seeds provides a nutritious and vibrant side that pairs well with the savory flavors of the pizza.

    Common Mistakes to Avoid

    • Overcooking the Sausage: Ensure the sausage is cooked through but not burnt, as it can impact the flavor and texture of the dish.
    • Skipping the Gravy: The sawmill gravy adds crucial moisture and flavor; don’t skip this step for the best results.
    • Not Toasting the Muffins: Toasting the English muffins prevents them from becoming soggy and helps them hold up to the toppings.
    • Ignoring the Broiling Step: Broiling is key for achieving that perfect melted cheese on top; don’t skip it or you’ll miss out on the best part.

    Storage & Reheating Instructions

    Refrigerator Storage

    Store any leftovers in airtight containers in the refrigerator. They will stay fresh for up to 3 days.

    Freezing Instructions

    For best results, freeze the assembled but unbaked English Muffin Breakfast Pizzas. Wrap them tightly in plastic wrap or aluminum foil, and they can be stored in the freezer for up to 2 months. When ready to eat, thaw in the refrigerator overnight before baking.

    Reheating Tips

    • Oven: Preheat to 350°F (175°C) and bake for about 10-15 minutes until heated through.
    • Microwave: Place on a microwave-safe plate and heat for 1-2 minutes, checking for doneness.
    • Stovetop: Heat in a skillet over medium heat, covering to melt the cheese, for about 5 minutes.

    Frequently Asked Questions

    Can I use whole grain English muffins for the English Muffin Breakfast Pizza?

    Yes, whole grain English muffins can be used as a healthier alternative, adding more fiber to your meal.

    How can I customize the toppings for my English Muffin Breakfast Pizza?

    Feel free to add vegetables like bell peppers or spinach, or use different types of cheese to suit your taste.

    What is the best way to serve English Muffin Breakfast Pizza?

    These pizzas are best served warm and can be accompanied by fresh fruit or a side salad for a complete meal.

    Can I make the sawmill gravy ahead of time for the English Muffin Breakfast Pizza?

    Yes, the sawmill gravy can be made ahead and stored in the refrigerator for up to 3 days. Just reheat it before assembling the pizzas.

    What can I do with leftover English Muffin Breakfast Pizza?

    Leftovers can be stored in the refrigerator or frozen and reheated as needed. They make for a quick breakfast option on busy mornings.

    Final Thoughts

    This English Muffin Breakfast Pizza recipe is a fantastic way to elevate your breakfast game. It’s simple, delicious, and perfect for any morning. Try making it yourself and don’t forget to leave a comment with your thoughts and variations!


    Lunch

    English Muffin Breakfast Pizza


    5.0 from 24 reviews

    These English Muffin Breakfast Pizzas are a delightful way to start your day. They’re easy to make and packed with flavor, making them perfect for a quick breakfast or a lazy weekend brunch.

    Author: Munch Twist
    Prep Time: 20 minutes
    Cook Time: 10 minutes
    Total Time: 30 minutes
    Yield: 4 servings
    Category: Lunch
    Method: No bake
    Cuisine: American

    English Muffin Breakfast Pizza

    SCALE:
    1x
    2x
    3x
    Cook Mode: Prevent your screen from going dark

    Ingredients

    • 8 eggs
    • 1 lb breakfast sausage
    • 1 package of English muffins
    • 2 cups milk
    • 8 oz mild cheddar cheese, thinly sliced
    • ¼ cup sausage drippings
    • ¼ cup flour
    • ½ teaspoon salt
    • ¼ teaspoon pepper

    Instructions

    1. In a cast iron pan, cook the breakfast sausage until well done. Remove from pan and pour off all but ¼ cup of fat.
    2. Add the flour to the reserved meat drippings in the skillet. Cook and stir over medium heat for 5 to 10 minutes or until the mixture starts to turn golden. Slowly add milk to the roux, stirring constantly. Cook the gravy until it boils and thickens. Season with salt and pepper to taste.
    3. Lightly toast the English muffins while making the gravy.
    4. In a non-stick skillet, scramble the eggs. Add a small dash of milk to make them fluffier, if desired.
    5. Turn the oven broiler on high and assemble the pizzas on a baking sheet. Spread the sawmill gravy on the open-faced toasted English muffins. Top with scrambled eggs, a slice of cheddar cheese, and cooked sausage.
    6. Broil until the cheese is bubbly and melted.

    Nutrition Facts

    Serving Size: 1 serving
    Calories: 458 kcal
    Sugar: 4g
    Sodium: 1000mg
    Fat: 25g
    Saturated Fat: 11g
    Carbohydrates: 30g
    Fiber: 2g
    Protein: 25g
    Cholesterol: 310mg

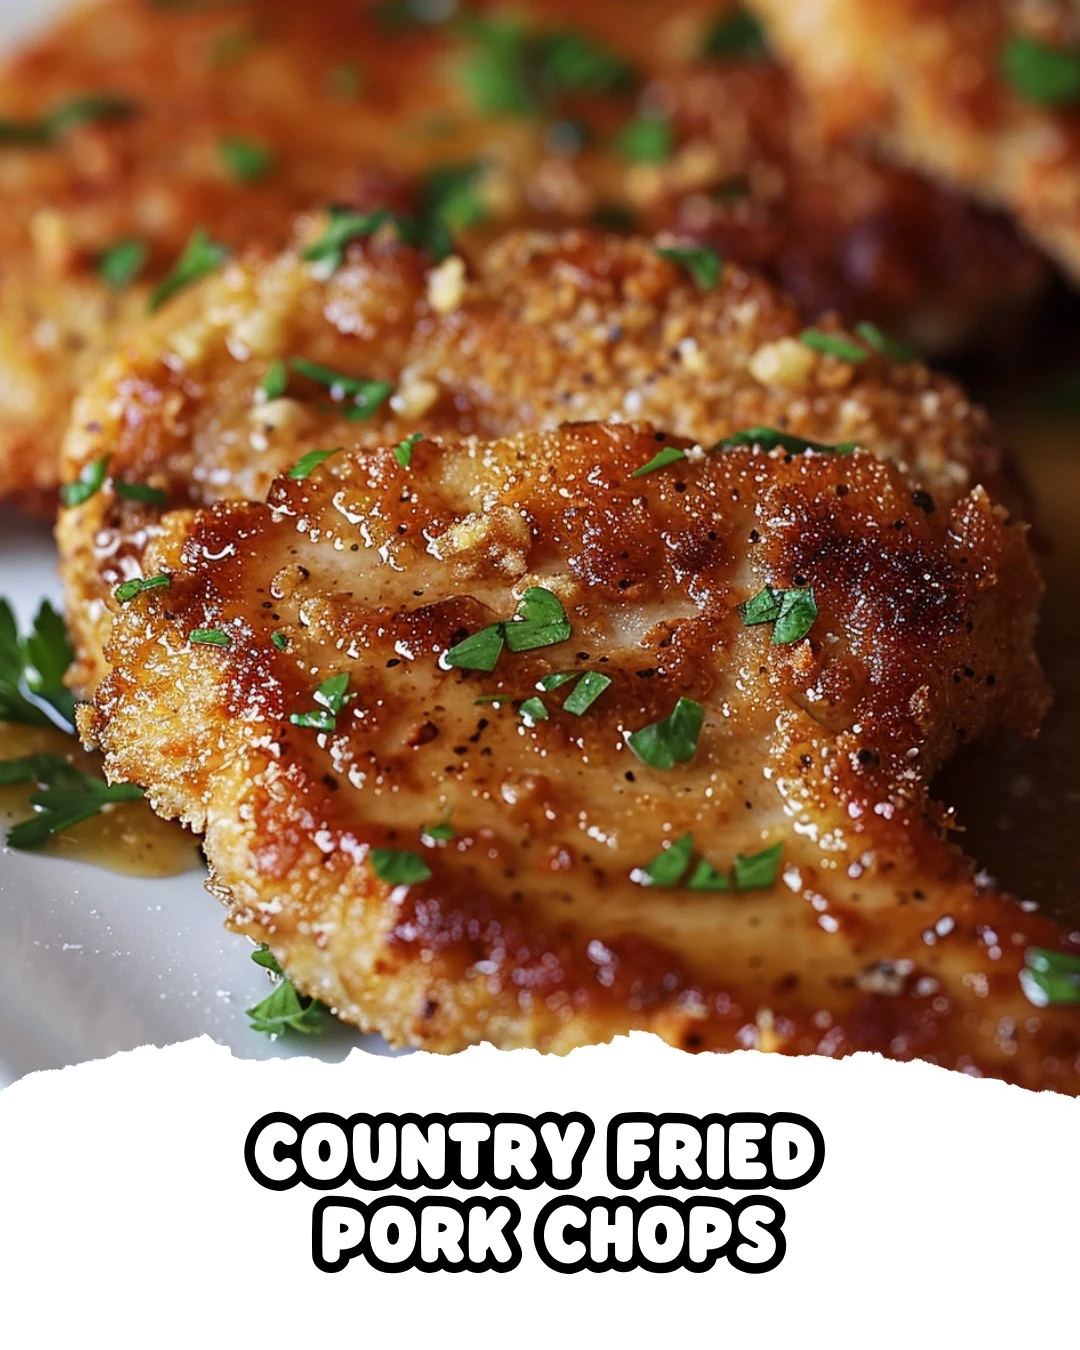
  • Crispy Country Fried Pork Chops Recipe to Savor

    Crispy Country Fried Pork Chops Recipe to Savor

    Country Fried Pork Chops deliver a hearty, comforting meal that is both satisfying and delicious. This dish combines juicy, tender pork with a crispy coating, making it a standout choice for any dinner table. The rich gravy elevates the experience, ensuring each bite is packed with flavor.

    Why You’ll Love This Recipe

    • Crispy Texture: The combination of flour and crushed saltine crackers creates a delightful crunch that perfectly contrasts the pork’s tenderness.
    • Flavor-Packed: Seasoned with garlic, onion powder, and hot sauce, these pork chops are anything but bland.
    • Versatile Dish: Serve them with mashed potatoes, green beans, or over rice for a complete meal.
    • Family Favorite: This comfort food is sure to please both kids and adults alike.
    • Easy to Follow: With simple steps, even beginner cooks can master this recipe.

    Tools and Equipment

    Having the right tools makes cooking more enjoyable and efficient.

    Essential Tools

    • Large skillet
    • Shallow bowls (3)
    • Whisk
    • Meat thermometer
    • Paper towels

    Why These Tools Matter

    • Large skillet: Provides ample space for frying multiple pork chops without overcrowding.
    • Shallow bowls: Ideal for dredging, allowing for even coating of the pork chops.
    • Meat thermometer: Ensures pork reaches a safe internal temperature for perfect doneness.

    Ingredients for Country Fried Pork Chops

    For the Pork Chops

    • 6 boneless pork chops (½ inch thick)
    • ¼ cup reserved oil
    • 1 cup all-purpose flour
    • 25 saltine crackers, finely crushed
    • 1 teaspoon garlic powder
    • 1 teaspoon seasoned salt
    • ½ teaspoon onion powder
    • ½ teaspoon black pepper
    • 2 large eggs
    • ⅓ cup milk
    • 1 tablespoon hot sauce
    • Shortening, for frying

    For the Dredge

    • ¾ teaspoon seasoned salt
    • ½ teaspoon black pepper

    For the Gravy

    • ¼ cup all-purpose flour
    • 2 cups milk
    • ½ teaspoon kosher salt
    • ½ teaspoon black pepper

    How to Make Country Fried Pork Chops Step-by-Step

    Step 1: Season the Pork Chops

    Rub the pork chops on both sides with ¾ teaspoon seasoned salt and ½ teaspoon black pepper. Set them aside to absorb the flavors.

    Step 2: Prepare the Dredge Stations

    In one shallow bowl, place ½ cup flour. In another bowl, combine the remaining ½ cup flour, crushed saltine crackers, 1 teaspoon seasoned salt, garlic powder, onion powder, and black pepper. In a third bowl, whisk together eggs, milk, and hot sauce until well combined.

    Step 3: Coat the Pork Chops

    Dredge each pork chop in the plain flour, shaking off the excess. Dip it into the egg mixture, letting any excess drip off. Finally, coat it in the saltine mixture, pressing gently to adhere.

    Step 4: Fry the Pork Chops

    In a large skillet, heat shortening over medium heat until melted, about ¼ inch up the sides of the pan. When the oil reaches around 350°F (175°C), add the pork chops, cooking in batches if necessary to avoid overcrowding. Fry for 4-5 minutes per side, or until golden brown and the internal temperature reaches 160°F (71°C). Transfer cooked pork chops to a paper towel-lined plate to drain excess grease.

    Step 5: Make the Gravy

    Wipe out the skillet and return ¼ cup of reserved oil to the pan over medium-low heat. Stir in ¼ cup flour and cook, whisking for about 1 minute. Gradually add 2 cups milk while whisking constantly to prevent lumps. Season with ½ teaspoon kosher salt and ½ teaspoon black pepper. Taste and adjust seasoning if needed.

    Step 6: Serve

    Pour the gravy over the fried pork chops and serve immediately for a delicious, comforting meal.

    Nutritional information per serving assumes 6 servings and includes calories, fat content, cholesterol, sodium, carbohydrates, and protein, making this a hearty yet balanced option for your family dinner. Enjoy your Country Fried Pork Chops!

    How to Serve Country Fried Pork Chops

    Country Fried Pork Chops are a versatile dish that can be enjoyed in various ways. Here are some creative serving ideas.

    With Creamy Mashed Potatoes

    Serve your pork chops atop a bed of creamy mashed potatoes, allowing the rich gravy to soak into the potatoes for a comforting and hearty meal.

    On a Southern-Style Biscuit Sandwich

    Slice the pork chops and layer them between warm, flaky biscuits, adding a drizzle of honey or hot sauce for an extra kick. This makes for a delicious breakfast or brunch option.

    Accompanied by Collard Greens

    Pair your pork chops with braised collard greens for a classic Southern side that complements the savory flavors of the dish while adding a nutritious element to your meal.

    Pro Tips for the Best Country Fried Pork Chops

    For optimal results when preparing Country Fried Pork Chops, consider these helpful tips.

    • Choose the Right Cut: Opt for boneless pork chops that are at least ½ inch thick for even cooking and better texture.
    • Pound the Pork Chops: Lightly pound the pork chops to ensure they cook evenly and to enhance tenderness.
    • Maintain Oil Temperature: Use a thermometer to keep the oil temperature consistent, ideally around 350°F (175°C), to achieve a crispy exterior without overcooking the inside.
    • Double-Dip for Extra Crunch: For an even crunchier coating, consider double-dipping the pork chops in the egg mixture and saltine coating before frying.
    • Let Them Rest: Allow the fried pork chops to rest for a few minutes after cooking. This helps retain juices and improve overall flavor.

    Best Side Dishes and Pairings

    To enhance your meal, consider these delightful side dishes and drinks that pair wonderfully with Country Fried Pork Chops.

    1. Coleslaw: The crisp, tangy flavors of coleslaw balance the richness of the fried pork chops, adding a refreshing crunch.
    2. Baked Beans: Sweet and savory baked beans provide a hearty contrast that complements the flavors of the pork.
    3. Corn on the Cob: Grilled or boiled corn on the cob adds a sweet touch and brightens up the plate with its vibrant color.
    4. Fried Green Tomatoes: The tartness of fried green tomatoes pairs excellently, providing a perfect acidic contrast to the savory pork chops.
    5. Sweet Tea: A classic Southern drink, sweet tea’s sweetness balances the savory notes of the dish, making it an ideal pairing.

    Common Mistakes to Avoid

    • Skipping the Seasoning: Failing to properly season the pork chops can lead to bland flavor.
    • Overcrowding the Pan: Cooking too many pork chops at once can result in uneven cooking and soggy texture.
    • Not Monitoring Oil Temperature: If the oil is too hot or not hot enough, the pork chops may burn or absorb too much grease.
    • Underestimating Cooking Time: Not allowing enough time for the pork chops to reach the safe internal temperature can result in undercooked meat.

    Storage & Reheating Instructions

    Refrigerator Storage

    Store leftover Country Fried Pork Chops in airtight containers in the refrigerator. They will stay fresh for up to 3 days.

    Freezing Instructions

    For best results, freeze the pork chops individually on a baking sheet before transferring them to a freezer-safe container. They can be frozen for up to 3 months. Thaw in the refrigerator overnight before reheating.

    Reheating Tips

    • Oven: Preheat the oven to 350°F (175°C). Place the pork chops on a baking sheet and cover with foil. Heat for about 15-20 minutes until warmed through.
    • Microwave: Place pork chops on a microwave-safe plate, cover with a damp paper towel, and heat in 30-second intervals until heated through.
    • Stovetop: Heat a skillet over medium heat. Add a small amount of oil and reheat the pork chops for about 3-5 minutes per side.

    Frequently Asked Questions

    How do I ensure my Country Fried Pork Chops are crispy?

    To achieve a crispy coating, make sure to press the saltine mixture firmly onto the pork chops and fry them in hot oil.

    Can I use bone-in pork chops for this recipe?

    Yes, you can use bone-in pork chops, but adjust the cooking time to ensure they cook through completely.

    What should I serve with Country Fried Pork Chops?

    These pork chops pair well with mashed potatoes, collard greens, or a fresh garden salad.

    How do I know when the pork chops are done?

    Use a meat thermometer to check that the internal temperature reaches 160°F (71°C) for safe consumption.

    Can I make the gravy ahead of time?

    Yes, you can prepare the gravy in advance. Simply reheat it gently before serving.

    Final Thoughts

    Country Fried Pork Chops are a comforting and satisfying dish that is sure to please any palate. With a flavorful coating and creamy gravy, it’s a meal worth trying. We encourage you to make this recipe and share your thoughts in the comments below!


    Dinner

    Country Fried Pork Chops


    5.0 from 24 reviews

    Country Fried Pork Chops are a delicious and hearty dish featuring tender pork chops coated in a crispy, flavorful crust. Perfectly seasoned and fried to golden perfection, these chops are served with a rich homemade gravy, making them a comforting meal for any occasion.

    Author: Munch Twist
    Prep Time: 20 minutes
    Cook Time: 30 minutes
    Total Time: 50 minutes
    Yield: 6 servings
    Category: Lunch
    Method: No bake
    Cuisine: American

    Country Fried Pork Chops

    SCALE:
    1x
    2x
    3x
    Cook Mode: Prevent your screen from going dark

    Ingredients

    • 6 boneless pork chops (½ inch thick)
    • ¼ cup reserved oil
    • 1 cup all-purpose flour
    • 25 saltine crackers, finely crushed
    • 1 teaspoon garlic powder
    • 1 teaspoon seasoned salt
    • ½ teaspoon onion powder
    • ½ teaspoon black pepper
    • 2 large eggs
    • ⅓ cup milk
    • 1 tablespoon hot sauce
    • Shortening, for frying
    • ¾ teaspoon seasoned salt (for dredge)
    • ½ teaspoon black pepper (for dredge)
    • ¼ cup all-purpose flour (for gravy)
    • 2 cups milk (for gravy)
    • ½ teaspoon kosher salt (for gravy)
    • ½ teaspoon black pepper (for gravy)

    Instructions

    1. Rub the pork chops on both sides with ¾ teaspoon seasoned salt and ½ teaspoon black pepper. Set aside.
    2. In one shallow bowl, place ½ cup flour. In another shallow bowl, combine the remaining ½ cup flour, crushed saltine crackers, 1 teaspoon seasoned salt, garlic powder, onion powder, and black pepper. In a third bowl, whisk together eggs, milk, and hot sauce until well combined.
    3. Dredge each pork chop in the plain flour, shaking off the excess. Dip it into the egg mixture, letting any excess drip off. Finally, coat it in the saltine mixture, pressing gently to adhere.
    4. In a large skillet, heat shortening over medium heat until melted (about ¼ inch up the sides of the pan). When the oil reaches around 350°F (175°C), add the pork chops, cooking in batches if necessary to avoid overcrowding. Fry for 4-5 minutes per side, or until golden brown and the internal temperature reaches 160°F (71°C). Transfer cooked pork chops to a paper towel-lined plate to drain excess grease.
    5. Wipe out the skillet and return ¼ cup of reserved oil to the pan over medium-low heat. Stir in ¼ cup flour and cook, whisking, for about 1 minute. Gradually add 2 cups milk while whisking constantly to prevent lumps. Season with ½ teaspoon kosher salt and ½ teaspoon black pepper. Taste and adjust seasoning if needed.
    6. Pour the gravy over the fried pork chops and serve immediately.

    Nutrition Facts

    Serving Size: 1 serving
    Calories: 410 kcal
    Sugar: 4g
    Sodium: 930mg
    Fat: 22g
    Saturated Fat: 8g
    Carbohydrates: 26g
    Fiber: 1g
    Protein: 28g
    Cholesterol: 90mg

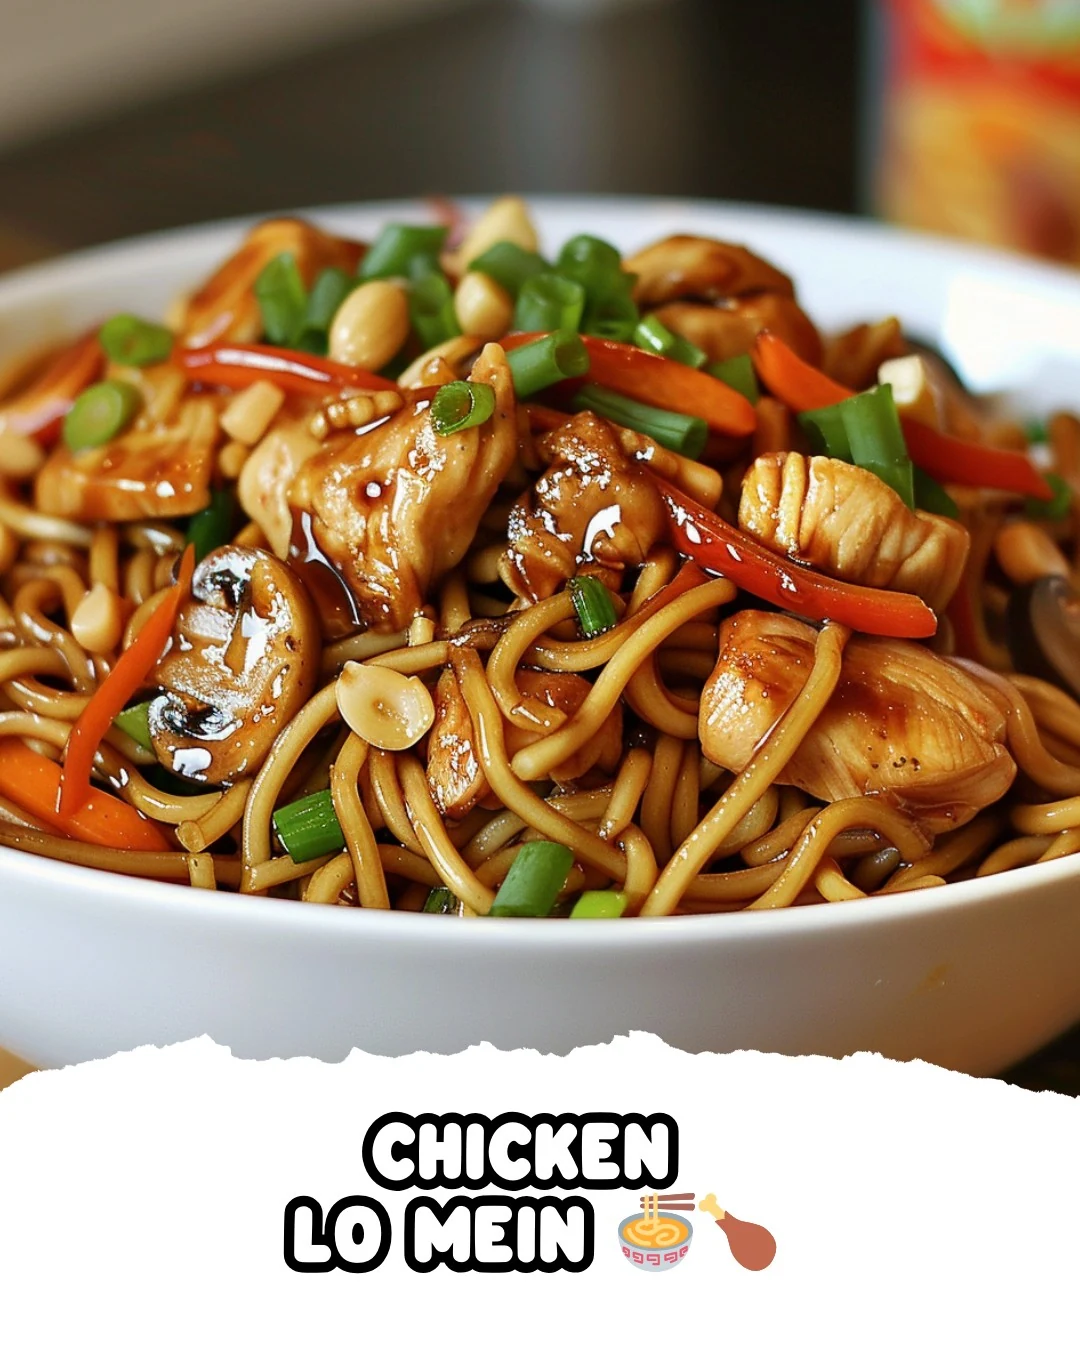
  • Delicious Chicken Lo Mein Recipe in 30 Minutes

    Delicious Chicken Lo Mein Recipe in 30 Minutes

    Chicken Lo Mein is a delicious, savory dish that combines tender chicken and colorful vegetables with perfectly cooked egg noodles. This quick and easy recipe is a weeknight favorite, offering a delightful balance of flavors and textures that will satisfy your cravings.

    Why You’ll Love This Recipe

    • Quick & Easy: Ready in under 30 minutes, making it perfect for busy weeknights.
    • Flavorful Dish: A harmonious blend of soy sauce, ginger, and sesame oil creates an irresistible sauce.
    • Healthy Ingredients: Packed with vegetables like sugar snap peas and shiitake mushrooms, it’s nutritious too.
    • Customizable: Feel free to substitute or add your favorite vegetables to suit your taste.
    • One-Pan Wonder: Minimal cleanup is required, as everything is cooked in a single pan.

    Tools and Equipment

    Having the right tools can make cooking Chicken Lo Mein a breeze.

    Essential Tools

    • Wok or large pan
    • Mixing bowls
    • Whisk
    • Cutting board
    • Sharp knife

    Why These Tools Matter

    • Wok or large pan: Provides ample space for stir-frying and allows even cooking.
    • Mixing bowls: Essential for preparing sauces and marinating chicken efficiently.
    • Sharp knife: Ensures clean cuts for vegetables and chicken, enhancing presentation and cooking time.

    Ingredients for Chicken Lo Mein

    Chicken and Sauce

    • 1 lb chicken breast (455 g), sliced
    • 1 tablespoon soy sauce
    • 1 teaspoon salt
    • 2 teaspoons sesame oil, divided
    • 1 tablespoon hoisin sauce
    • 1 tablespoon vegetable oil
    • ¼ cup chicken broth (60 mL)
    • 2 cloves garlic, minced
    • 1 teaspoon cornstarch
    • 1 tablespoon minced fresh ginger

    Vegetables and Noodles

    • ½ cup sugar snap peas (49 g), halved
    • ½ cup onion, sliced
    • ½ cup shiitake mushrooms, sliced
    • ½ cup carrot (61 g), sliced
    • 4 servings cooked egg noodles
    • 1 tablespoon scallions, chopped, for garnish
    • 1 teaspoon pepper

    How to Make Chicken Lo Mein Step-by-Step

    Step 1: Prepare the Chicken

    In a medium bowl, season the chicken breast with salt, pepper, and 1 tablespoon of sesame oil. Mix well and set aside.

    Step 2: Make the Sauce

    In another bowl, whisk together the chicken broth, the remaining sesame oil, soy sauce, hoisin sauce, and cornstarch. Set this sauce mixture aside.

    Step 3: Cook the Chicken

    Heat vegetable oil in a wok or large pan over medium-high heat. Add the seasoned chicken and cook until no longer pink, about 3-4 minutes. Remove the chicken from the pan and set aside.

    Step 4: Stir-Fry the Vegetables

    In the same pan, add garlic and ginger. Cook until fragrant. Add the shiitake mushrooms, onions, carrots, and sugar snap peas. Stir-fry until the vegetables are tender.

    Step 5: Combine Ingredients

    Return the cooked chicken to the pan. Add the cooked egg noodles and the prepared sauce. Stir well and cook for an additional 3 minutes, until everything is coated in the sauce and heated through.

    Step 6: Serve

    Garnish with chopped scallions and serve hot. Enjoy your homemade Chicken Lo Mein!

    How to Serve Chicken Lo Mein

    Chicken Lo Mein is a versatile dish that can be served in various ways to enhance your dining experience. Here are some creative serving ideas:

    Noodle Bowl

    Serve Chicken Lo Mein in a deep bowl, topped with additional scallions and sesame seeds. This presentation allows for easy mixing and enjoying.

    Lettuce Wraps

    For a fun twist, offer Chicken Lo Mein in crisp lettuce leaves. Guests can create their own wraps, adding a fresh crunch to each bite.

    Bento Box

    Pack Chicken Lo Mein in a bento box alongside pickled vegetables and a small portion of edamame. This makes for a delightful lunch option that’s both nutritious and visually appealing.

    Pro Tips for the Best Chicken Lo Mein

    To elevate your Chicken Lo Mein, consider these expert tips:

    • Prep Ingredients Ahead: Chop all vegetables and slice chicken beforehand to streamline the cooking process.
    • Use Fresh Noodles: Fresh egg noodles provide a superior texture compared to dried ones, enhancing the overall dish.
    • High Heat Cooking: Ensure your pan is hot enough when stir-frying to achieve a nice sear on the chicken and vegetables, intensifying their flavors.
    • Customize Vegetables: Feel free to substitute or add your favorite vegetables, such as bell peppers or broccoli, for a personal touch.
    • Adjust Seasoning: Taste and adjust the sauce seasoning as needed to achieve the perfect balance of flavors for your palate.

    Best Side Dishes and Pairings

    To complement your Chicken Lo Mein, consider these delicious sides and beverages:

    1. Spring Rolls – These crispy appetizers are filled with vegetables and sometimes meat, making them a great crunchy contrast to the noodles.
    2. Hot and Sour Soup – This flavorful soup adds a comforting and spicy element that enhances the overall meal experience.
    3. Chinese Cucumber Salad – A refreshing salad made with cucumbers and a tangy dressing that balances the richness of the lo mein.
    4. Steamed Dumplings – Soft and savory dumplings filled with pork or vegetables create a delightful pairing with the noodles.
    5. Jasmine Rice – Light and fragrant, jasmine rice serves as a perfect base for soaking up any extra sauce.

    Common Mistakes to Avoid

    • Skipping the Marinade: Not marinating the chicken can lead to a lack of flavor in your Chicken Lo Mein.
    • Overcooking the Vegetables: Cooking the vegetables for too long can result in a mushy texture; aim for crisp-tender.
    • Using Cold Noodles: Adding cold noodles to the stir-fry can cool down the dish; ensure they are warmed through.
    • Ignoring Sauce Consistency: Not giving enough time for the sauce to thicken can leave your dish watery instead of flavorful.

    Storage & Reheating Instructions

    Refrigerator Storage

    Store Chicken Lo Mein in airtight containers in the refrigerator for up to 3 days. This will help maintain its freshness and flavor.

    Freezing Instructions

    To freeze, place Chicken Lo Mein in freezer-safe containers. It can be stored for up to 3 months. For best results, freeze the dish without the scallions and add them fresh upon reheating.

    Reheating Tips

    • Oven: Preheat to 350°F (175°C), cover with foil, and heat for about 20 minutes or until warmed through.
    • Microwave: Place in a microwave-safe dish, cover loosely, and heat on high for 2-3 minutes, stirring halfway through.
    • Stovetop: Heat in a pan over medium heat, stirring frequently until warmed, about 5-7 minutes.

    Frequently Asked Questions

    Can I use other proteins in Chicken Lo Mein?

    Absolutely! You can substitute chicken with beef, shrimp, or tofu to suit your preferences.

    How can I make Chicken Lo Mein healthier?

    To make a healthier version, use whole grain noodles and add more vegetables like bell peppers or broccoli.

    What can I serve with Chicken Lo Mein?

    Chicken Lo Mein pairs well with spring rolls, dumplings, or a simple side salad for a complete meal.

    Is Chicken Lo Mein a good meal prep option?

    Yes, Chicken Lo Mein is excellent for meal prep! It stores well in the refrigerator and can be easily reheated.

    How can I enhance the flavor of Chicken Lo Mein?

    You can enhance the flavor by adding chili sauce for some heat or fresh herbs like cilantro for added freshness.

    Final Thoughts

    Chicken Lo Mein is a delightful dish that is both satisfying and easy to prepare. We encourage you to try this recipe and share your thoughts in the comments. Your feedback can inspire others to enjoy this delicious meal.


    Dinner

    Chicken Lo Mein


    5.0 from 24 reviews

    Chicken Lo Mein is a delicious and satisfying dish featuring tender chicken breast stir-fried with fresh vegetables and tossed in a savory sauce. Served over cooked egg noodles, this dish is perfect for a quick weeknight dinner or a special occasion.

    Author: Munch Twist
    Prep Time: 15 minutes
    Cook Time: 15 minutes
    Total Time: 30 minutes
    Yield: 4 servings
    Category: Lunch
    Method: No bake
    Cuisine: American

    Chicken Lo Mein

    SCALE:
    1x
    2x
    3x
    Cook Mode: Prevent your screen from going dark

    Ingredients

    • 1 lb chicken breast, sliced
    • 1 tablespoon soy sauce
    • 1 teaspoon salt
    • 2 teaspoons sesame oil, divided
    • 1 tablespoon hoisin sauce
    • 1 tablespoon vegetable oil
    • ¼ cup chicken broth
    • 2 cloves garlic, minced
    • 1 teaspoon cornstarch
    • 1 tablespoon minced fresh ginger
    • ½ cup sugar snap peas, halved
    • ½ cup onion, sliced
    • ½ cup shiitake mushrooms, sliced
    • ½ cup carrot, sliced
    • 4 servings cooked egg noodles
    • 1 tablespoon scallions, chopped, for garnish
    • 1 teaspoon pepper

    Instructions

    1. In a medium bowl, season the chicken with salt, pepper, and 1 tablespoon of sesame oil. Mix well and set aside.
    2. In another bowl, whisk together the chicken broth, remaining tablespoon of sesame oil, soy sauce, hoisin sauce, and cornstarch. Set this sauce mixture aside.
    3. Heat vegetable oil in a wok or large pan over medium-high heat. Add the seasoned chicken and cook until no longer pink, about 3-4 minutes. Remove the chicken from the pan and set aside.
    4. In the same pan, add garlic and ginger. Cook until fragrant. Add the mushrooms, onions, carrots, and sugar snap peas. Stir-fry until the vegetables are tender.
    5. Return the cooked chicken to the pan. Add the cooked egg noodles and the prepared sauce. Stir well and cook for an additional 3 minutes, until everything is coated in the sauce and heated through.
    6. Garnish with chopped scallions and serve hot.

    Nutrition Facts

    Serving Size: 1 serving
    Calories: 380 kcal
    Sugar: 9g
    Sodium: 850mg
    Fat: 14g
    Saturated Fat: 2g
    Carbohydrates: 38g
    Fiber: 3g
    Protein: 26g
    Cholesterol: 80mg

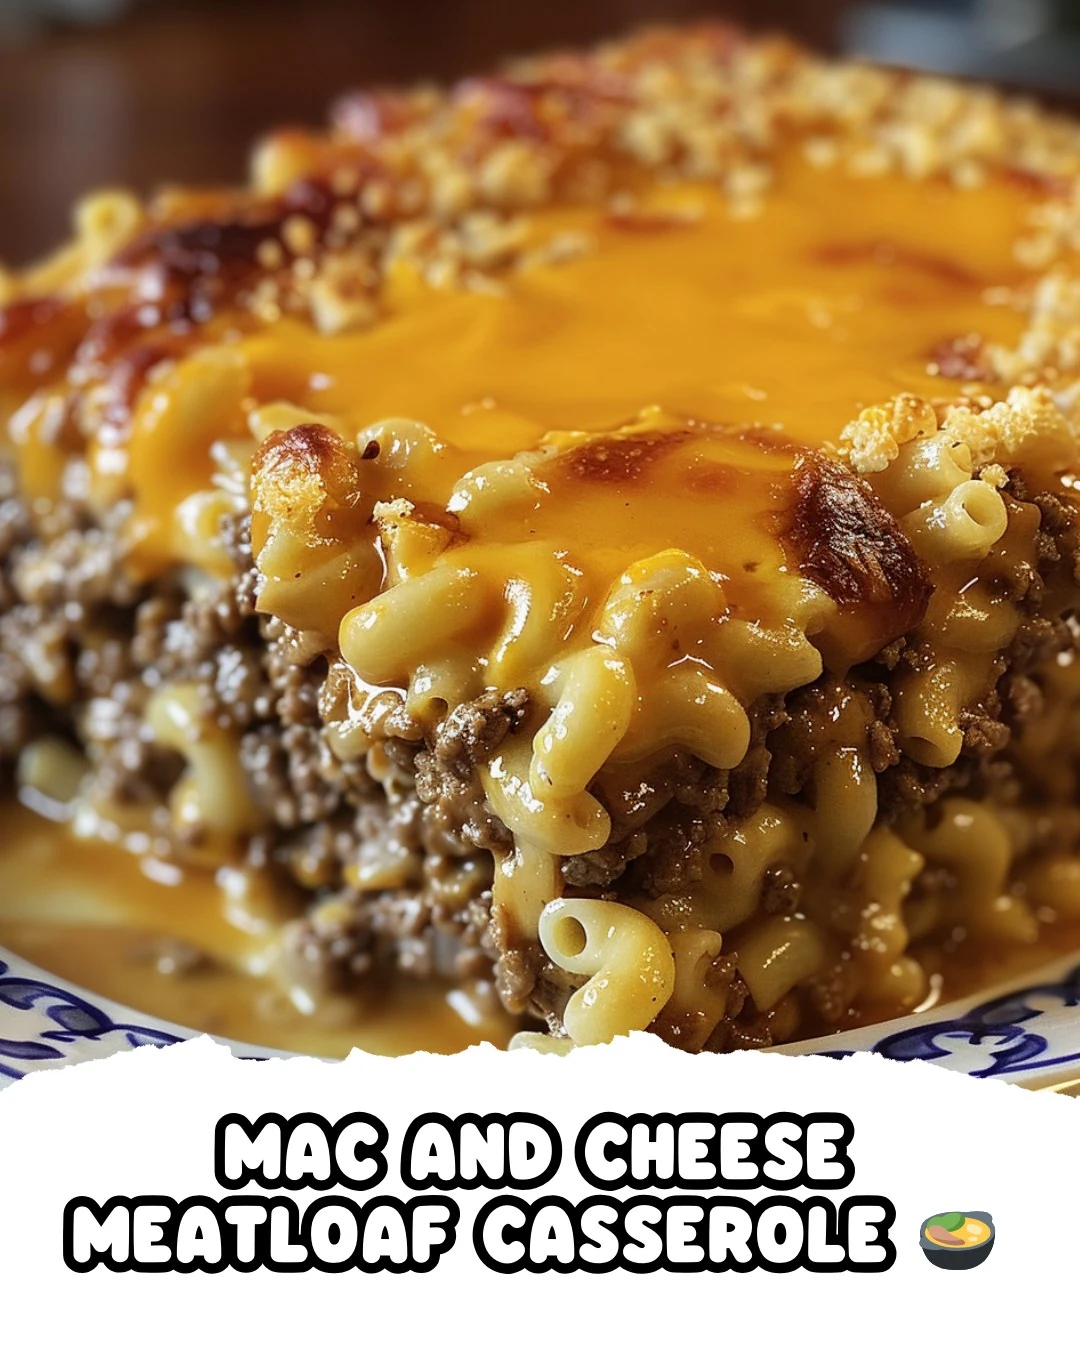
  • Delicious Mac and Cheese Meatloaf Casserole Recipe

    Delicious Mac and Cheese Meatloaf Casserole Recipe

    Mac and Cheese Meatloaf Casserole combines two comfort food classics into one satisfying dish. This recipe offers a delicious blend of flavors with tender meatloaf sitting under creamy macaroni and cheese. It’s perfect for family dinners or potlucks, ensuring everyone leaves the table happy.

    Why You’ll Love This Recipe

    • Family Favorite: This dish combines beloved flavors that appeal to both kids and adults.
    • Comforting & Hearty: The combination of meatloaf and macaroni cheese provides a filling and satisfying meal.
    • One-Pan Wonder: Everything cooks in one baking dish, making cleanup a breeze.
    • Customizable: You can easily adjust the ingredients to suit your family’s tastes.
    • Leftover Friendly: This casserole reheats well, making it perfect for meal prep.

    Tools and Equipment

    Having the right tools makes the cooking process smoother and more enjoyable.

    Essential Tools

    • A 9×13 inch baking dish
    • Large mixing bowls
    • Whisk
    • Pot for boiling macaroni
    • Measuring cups and spoons

    Why These Tools Matter

    • 9×13 inch baking dish: This size is perfect for layering the meatloaf and macaroni, ensuring even cooking.
    • Large mixing bowls: Ample space is necessary for combining ingredients without mess.
    • Whisk: A whisk helps achieve a smooth cheese sauce, integrating all ingredients seamlessly.

    Ingredients for Mac and Cheese Meatloaf Casserole

    Meatloaf Ingredients

    • 2 lbs lean ground beef
    • 30 Ritz Crackers
    • 2 oz Lipton onion soup mix
    • 2 eggs
    • 1 cup ketchup
    • 1 cup Sweet Baby Ray’s Hickory & Brown Sugar barbecue sauce

    Mac and Cheese Ingredients

    • 3 cups macaroni noodles
    • 2 cups milk
    • 10.5 oz condensed cheddar cheese soup
    • 1 tsp salt
    • 1 tsp pepper
    • 1 tbsp garlic powder
    • 1 tbsp onion powder
    • 4 cups shredded mozzarella and cheddar cheese blend

    How to Make Mac and Cheese Meatloaf Casserole Step-by-Step

    Step 1: Prep the Oven and Dish

    Preheat your oven to 350°F (175°C). Grease a 9×13 inch baking dish to prevent sticking.

    Step 2: Prepare the Meatloaf Mixture

    In a medium bowl, mix together the ketchup and barbecue sauce. In a large bowl, combine the ground beef, crushed Ritz Crackers, Lipton onion soup mix, and eggs. Add 1/2 cup of the ketchup-barbecue sauce mixture and mix well. Press the meat mixture evenly into the prepared baking dish. Spread the remaining ketchup-barbecue sauce mixture over the top.

    Step 3: Bake the Meatloaf

    Bake the meatloaf in the preheated oven for 30 minutes to allow it to cook thoroughly.

    Step 4: Cook the Macaroni

    While the meatloaf bakes, cook the macaroni noodles according to package directions. Drain and set aside for later.

    Step 5: Prepare the Cheese Sauce

    In a large bowl, whisk together the milk and condensed cheddar cheese soup until smooth. Stir in salt, pepper, garlic powder, and onion powder. Add the cooked macaroni and 2 cups of shredded cheese to the mixture, stirring to combine.

    Step 6: Assemble the Casserole

    Remove the meatloaf from the oven. Spread the macaroni and cheese mixture evenly over the top of the meatloaf. Sprinkle the remaining cheese over the macaroni.

    Step 7: Bake the Casserole

    Return the dish to the oven and bake for an additional 17-20 minutes, until the cheese is melted and beginning to brown. Let sit for a few minutes before serving.

    This Mac and Cheese Meatloaf Casserole is sure to become a staple in your recipe collection, providing comfort and flavor in every bite. Enjoy!

    How to Serve Mac and Cheese Meatloaf Casserole

    Serving this dish creatively can elevate the dining experience. Here are a few serving ideas:

    Individual Portions

    Serve the casserole in small ramekins for individual portions. This not only makes for an appealing presentation but also allows guests to enjoy their own serving with ease.

    Topped with Fresh Herbs

    Garnish the casserole with freshly chopped parsley or chives right before serving. This adds a splash of color and a fresh flavor that complements the richness of the dish.

    Accompanied by a Salad

    Pair the casserole with a light, crisp salad. A simple mixed greens salad with a lemon vinaigrette provides a refreshing contrast to the hearty casserole.

    Pro Tips for the Best Mac and Cheese Meatloaf Casserole

    To ensure your casserole turns out perfectly every time, consider these helpful tips:

    • Use Lean Meat: Opt for lean ground beef to reduce excess fat while maintaining flavor and texture.
    • Crush Crackers Finely: Ensure the Ritz Crackers are finely crushed for a cohesive meatloaf mixture that holds together well.
    • Experiment with Cheese: Feel free to mix different types of cheese, such as pepper jack or gouda, to add unique flavors to the dish.
    • Let it Rest: Allow the casserole to sit for a few minutes after baking. This helps it set and makes serving easier.
    • Store Leftovers Properly: Store any leftovers in an airtight container in the refrigerator for up to three days to maintain freshness and flavor.

    Best Side Dishes and Pairings

    Pairing side dishes and drinks with Mac and Cheese Meatloaf Casserole can enhance your meal. Here are some excellent options:

    1. Garlic Bread: A classic side that adds crunch and flavor, perfect for soaking up any extra sauce.
    2. Steamed Broccoli: The slight bitterness of broccoli balances the richness of the casserole, adding a nutritious touch.
    3. Coleslaw: This crunchy side brings a refreshing contrast to the hearty casserole, making for a well-rounded meal.
    4. Roasted Vegetables: Seasonal roasted vegetables provide a colorful and healthy complement to the dish.
    5. Iced Tea: A cold glass of iced tea is a refreshing beverage choice that pairs well with the savory flavors of the casserole.

    Common Mistakes to Avoid

    • Using Lean Meat Only: While lean ground beef is healthier, a mix of lean and fatty meat adds moisture and flavor.
    • Overcooking the Macaroni: Cook the macaroni al dente, as it will continue to cook in the oven and can turn mushy.
    • Skipping the Letting Time: Allow the casserole to sit for a few minutes after baking to help it set and make serving easier.
    • Not Measuring Ingredients: Be precise with ingredients, especially the cheese and spices, to ensure balanced flavors.

    Storage & Reheating Instructions

    Refrigerator Storage

    Store any leftovers in airtight containers in the refrigerator. The Mac and Cheese Meatloaf Casserole will remain fresh for up to 3 days.

    Freezing Instructions

    To freeze, wrap portions tightly in plastic wrap or aluminum foil, then place them in freezer-safe bags or containers. The casserole can be frozen for up to 3 months. Thaw overnight in the refrigerator before reheating.

    Reheating Tips

    • Oven: Preheat to 350°F (175°C). Cover the casserole with aluminum foil and bake for 20-25 minutes or until heated through.
    • Microwave: Place a portion on a microwave-safe plate, cover loosely, and heat on high for 2-3 minutes, stirring halfway through.
    • Stovetop: In a skillet over medium heat, add a splash of milk to rehydrate. Stir until heated through, about 5-7 minutes.

    Frequently Asked Questions

    Can I make Mac and Cheese Meatloaf Casserole in advance?

    Yes, you can prepare the casserole ahead of time. Assemble it and store it covered in the refrigerator for up to a day before baking.

    What can I substitute for Ritz Crackers in this recipe?

    You can use breadcrumbs, crushed cornflakes, or any other type of cracker that you prefer for a similar texture.

    How do I ensure my Mac and Cheese Meatloaf Casserole is not dry?

    Using a mix of ground meats and incorporating enough cheese and sauce will help keep the dish moist. Be careful not to overcook either component.

    Can I add vegetables to the casserole?

    Absolutely! Chopped vegetables like bell peppers, onions, or spinach can be mixed into the meatloaf or the cheese sauce for added nutrition and flavor.

    What is the best way to serve Mac and Cheese Meatloaf Casserole?

    Serve it hot out of the oven with a side salad or steamed vegetables for a complete meal.

    Final Thoughts

    Mac and Cheese Meatloaf Casserole is a delightful twist on two classic comfort foods, sure to please everyone at the table. We encourage you to give this recipe a try and share your thoughts in the comments below!


    Dinner

    Mac and Cheese Meatloaf Casserole


    5.0 from 24 reviews

    This Mac and Cheese Meatloaf Casserole combines the comforting flavors of classic meatloaf with creamy macaroni and cheese, creating a hearty dish that is perfect for family dinners. It's a delicious twist on two favorites, baked together for a satisfying meal.

    Author: Munch Twist
    Prep Time: 20 minutes
    Cook Time: 45 minutes
    Total Time: 65 minutes
    Yield: 8 servings
    Category: Lunch
    Method: Baking
    Cuisine: American

    Mac and Cheese Meatloaf Casserole

    SCALE:
    1x
    2x
    3x
    Cook Mode: Prevent your screen from going dark

    Ingredients

    • 2 lbs lean ground beef
    • 30 Ritz Crackers
    • 2 oz Lipton onion soup mix
    • 2 eggs
    • 1 cup ketchup
    • 1 cup Sweet Baby Ray’s Hickory & Brown Sugar barbecue sauce
    • 3 cups macaroni noodles
    • 2 cups milk
    • 10.5 oz condensed cheddar cheese soup
    • 1 tsp salt
    • 1 tsp pepper
    • 1 tbsp garlic powder
    • 1 tbsp onion powder
    • 4 cups shredded mozzarella and cheddar cheese blend

    Instructions

    1. Preheat your oven to 350°F (175°C). Grease a 9×13 inch baking dish.
    2. In a medium bowl, mix together the ketchup and barbecue sauce. Set aside. In a large bowl, combine the ground beef, crushed Ritz Crackers, Lipton onion soup mix, and eggs. Add 1/2 cup of the ketchup-barbecue sauce mixture and mix well. Press the meat mixture evenly into the prepared baking dish. Spread the remaining ketchup-barbecue sauce mixture over the top.
    3. Bake in the preheated oven for 30 minutes.
    4. While the meatloaf bakes, cook macaroni noodles according to package directions. Drain and set aside.
    5. In a large bowl, whisk together milk and condensed cheddar cheese soup until smooth. Stir in salt, pepper, garlic powder, and onion powder. Add cooked macaroni and 2 cups of shredded cheese to the mixture, stirring to combine.
    6. Remove the meatloaf from the oven. Spread the macaroni and cheese mixture evenly over the top of the meatloaf. Sprinkle the remaining cheese over the macaroni.
    7. Return to the oven and bake for an additional 17-20 minutes, until the cheese is melted and beginning to brown. Let sit for a few minutes before serving.

    Nutrition Facts

    Serving Size: 1 serving
    Calories: 500 kcal
    Sugar: 10g
    Sodium: 1000mg
    Fat: 30g
    Saturated Fat: 15g
    Carbohydrates: 35g
    Fiber: 2g
    Protein: 25g
    Cholesterol: 100mg

  • Delicious CHEDDAR CHEESE MUFFINS Recipe

    Delicious CHEDDAR CHEESE MUFFINS Recipe

    CHEDDAR CHEESE MUFFINS are a delightful blend of savory flavors that will elevate any meal or snack time. With their rich, cheesy goodness and fluffy texture, these muffins are perfect for breakfast, brunch, or as a side dish. Their simplicity makes them an appealing choice for both novice and experienced bakers alike.

    Why You’ll Love This Recipe

    • Quick & Easy: Ready in under 30 minutes, these muffins are perfect for busy mornings.
    • Savory Flavor: The combination of Cheddar cheese and simple ingredients creates a deliciously rich taste.
    • Versatile: Enjoy them warm, at room temperature, or even as a sandwich alternative.
    • Customizable: Add herbs or spices to tailor the flavor to your liking.
    • Kid-Friendly: A great way to introduce children to cooking with minimal fuss.

    Tools and Equipment

    Having the right tools can make the baking process smoother and more enjoyable.

    Essential Tools

    • Mixing bowls
    • Whisk
    • Muffin tin
    • Cooking spray or paper liners
    • Measuring cups and spoons

    Why These Tools Matter

    • Mixing bowls: Provide ample space for combining ingredients thoroughly.
    • Muffin tin: Ensures even baking and perfect muffin shapes.
    • Whisk: Helps to incorporate air into the mixture, resulting in fluffy muffins.

    Ingredients for CHEDDAR CHEESE MUFFINS

    Dry Ingredients

    • 2 cups all-purpose flour
    • ½ cup white sugar
    • 1 tablespoon baking powder
    • ½ teaspoon baking soda
    • 1 teaspoon salt

    Wet Ingredients

    • 1 cup plain yogurt
    • ¼ cup melted butter
    • 2 large eggs, beaten

    Add-ins

    • 1 ½ cups shredded Cheddar cheese

    How to Make CHEDDAR CHEESE MUFFINS Step-by-Step

    Step 1: Preheat and Prepare

    1. Preheat your oven to 400°F (200°C).
    2. Grease 12 large muffin cups with cooking spray or line them with paper liners.

    Step 2: Mix Dry Ingredients

    1. In a large mixing bowl, whisk together the flour, sugar, baking powder, baking soda, and salt until well combined.
    2. Stir in the shredded Cheddar cheese until evenly distributed.

    Step 3: Combine Wet Ingredients

    1. In another bowl, mix the beaten eggs, yogurt, and melted butter until well combined.

    Step 4: Combine Mixtures

    1. Pour the wet ingredients into the dry ingredients.
    2. Gently fold together until just combined and the mixture is moist.

    Step 5: Bake

    1. Scoop the batter evenly into the prepared muffin cups.
    2. Bake in the preheated oven for 18-20 minutes, or until the muffins are golden brown and a toothpick inserted into the center comes out clean.

    Step 6: Cool and Serve

    1. Remove the muffins from the oven and let them cool in the pan for a few minutes.
    2. Transfer them to a wire rack to cool completely.
    3. Serve warm or at room temperature. Enjoy!

    These CHEDDAR CHEESE MUFFINS are not only easy to make but also a delicious addition to any meal. With simple ingredients and straightforward steps, you can enjoy these fluffy treats in no time.

    How to Serve CHEDDAR CHEESE MUFFINS

    These Cheddar Cheese Muffins are versatile and can be enjoyed in various ways.

    As a Breakfast Delight

    Serve warm with a smear of butter or your favorite jam for a delightful breakfast option.

    Accompanying Soups

    Pair these muffins with a hearty bowl of soup, such as tomato basil or chicken noodle, for a comforting meal.

    Snack Time Treat

    Enjoy them as a savory snack throughout the day, perfect for an afternoon pick-me-up.

    Pro Tips for the Best CHEDDAR CHEESE MUFFINS

    To elevate your Cheddar Cheese Muffins, consider these helpful tips.

    • Use Fresh Ingredients: Ensure that your baking powder and baking soda are fresh for optimal rising.
    • Don’t Overmix: Gently fold the wet and dry ingredients together to maintain a tender texture.
    • Experiment with Cheese: Try using different types of cheese, such as Gruyère or Monterey Jack, for varied flavors.
    • Add Herbs or Spices: Incorporate fresh herbs like chives or spices like paprika for an extra flavor boost.
    • Cool Properly: Allow muffins to cool in the pan for a few minutes before transferring to a wire rack to prevent sogginess.

    Best Side Dishes and Pairings

    These muffins can be complemented with a variety of side dishes and drinks.

    1. Mixed Green Salad: A light salad with a tangy vinaigrette balances the savory muffins perfectly.
    2. Creamy Tomato Soup: The rich flavors of tomato soup enhance the cheesy goodness of the muffins.
    3. Classic Chili: A bowl of hearty chili pairs well, adding a spicy kick to the meal.
    4. Fruit Salad: The sweetness of fresh fruit provides a refreshing contrast to the savory muffins.
    5. Herbal Tea: A warm cup of herbal tea complements the muffins, making for a soothing afternoon snack.

    Common Mistakes to Avoid

    • Using Cold Ingredients: Make sure your eggs and yogurt are at room temperature for better mixing and texture.
    • Overmixing the Batter: Gently fold the ingredients to avoid tough muffins; a few lumps are perfectly fine.
    • Incorrect Oven Temperature: Always preheat your oven to ensure even baking; an oven thermometer can help with accuracy.
    • Not Testing for Doneness: Use a toothpick to check if the muffins are done; underbaking can result in a gooey center.

    Storage & Reheating Instructions

    Refrigerator Storage

    Store Cheddar Cheese Muffins in an airtight container in the refrigerator for up to 3 days. This helps maintain their moisture and flavor.

    Freezing Instructions

    To freeze, wrap each muffin tightly in plastic wrap or aluminum foil and place them in a freezer-safe bag. They can be stored in the freezer for up to 3 months. To thaw, simply leave them in the refrigerator overnight.

    Reheating Tips

    • Oven: Preheat to 350°F (175°C) and bake muffins for about 10 minutes or until heated through.
    • Microwave: Heat one muffin at a time on medium power for about 20-30 seconds, checking for warmth.
    • Stovetop: Place muffins in a skillet on low heat, cover, and warm for about 5 minutes, flipping halfway through.

    Frequently Asked Questions

    Can I use whole wheat flour for Cheddar Cheese Muffins?

    Yes, you can substitute whole wheat flour for all-purpose flour, but the muffins may be denser.

    How can I make my Cheddar Cheese Muffins spicier?

    Add some diced jalapeños or a pinch of cayenne pepper to the batter for an extra kick.

    Can I add other types of cheese to the Cheddar Cheese Muffins?

    Absolutely! Feel free to mix in cheeses like Monterey Jack or pepper jack for a different flavor profile.

    How long do Cheddar Cheese Muffins last?

    When stored properly, these muffins can last up to 3 days in the refrigerator or up to 3 months in the freezer.

    Final Thoughts

    These Cheddar Cheese Muffins are not only simple to make but also delicious and versatile. Whether enjoyed as a snack or a savory breakfast option, they are sure to please. Try this recipe and let us know how it turned out by leaving a comment below!


    Lunch

    CHEDDAR CHEESE MUFFINS


    5.0 from 24 reviews

    These Cheddar Cheese Muffins are a delightful savory treat, perfect for breakfast or as a snack. With a rich flavor from the cheddar cheese and a moist texture from the yogurt, they are easy to make and sure to please everyone.

    Author: Munch Twist
    Prep Time: 10 minutes
    Cook Time: 20 minutes
    Total Time: 30 minutes
    Yield: 12 servings
    Category: Lunch
    Method: No bake
    Cuisine: American

    CHEDDAR CHEESE MUFFINS

    SCALE:
    1x
    2x
    3x
    Cook Mode: Prevent your screen from going dark

    Ingredients

    • 1 cup plain yogurt
    • 2 cups all-purpose flour
    • ½ cup white sugar
    • ¼ cup melted butter
    • 1 tablespoon baking powder
    • ½ teaspoon baking soda
    • 1 teaspoon salt
    • 1 ½ cups shredded Cheddar cheese
    • 2 large eggs, beaten

    Instructions

    1. Preheat your oven to 400°F (200°C). Grease 12 large muffin cups with cooking spray or line them with paper liners.
    2. In a large mixing bowl, whisk together the flour, sugar, baking powder, baking soda, and salt until well combined.
    3. Stir in the shredded Cheddar cheese until evenly distributed.
    4. In another bowl, mix the beaten eggs, yogurt, and melted butter until well combined.
    5. Pour the wet ingredients into the dry ingredients and gently fold together until just combined and the mixture is moist.
    6. Scoop the batter evenly into the prepared muffin cups.
    7. Bake in the preheated oven for 18-20 minutes, or until the muffins are golden brown and a toothpick inserted into the center comes out clean.
    8. Remove the muffins from the oven and let them cool in the pan for a few minutes before transferring them to a wire rack to cool completely.
    9. Serve warm or at room temperature.

    Nutrition Facts

    Serving Size: 1 serving
    Calories: 180 kcal
    Sugar: 5g
    Sodium: 360mg
    Fat: 8g
    Saturated Fat: 5g
    Carbohydrates: 22g
    Fiber: 0g
    Protein: 6g
    Cholesterol: 40mg

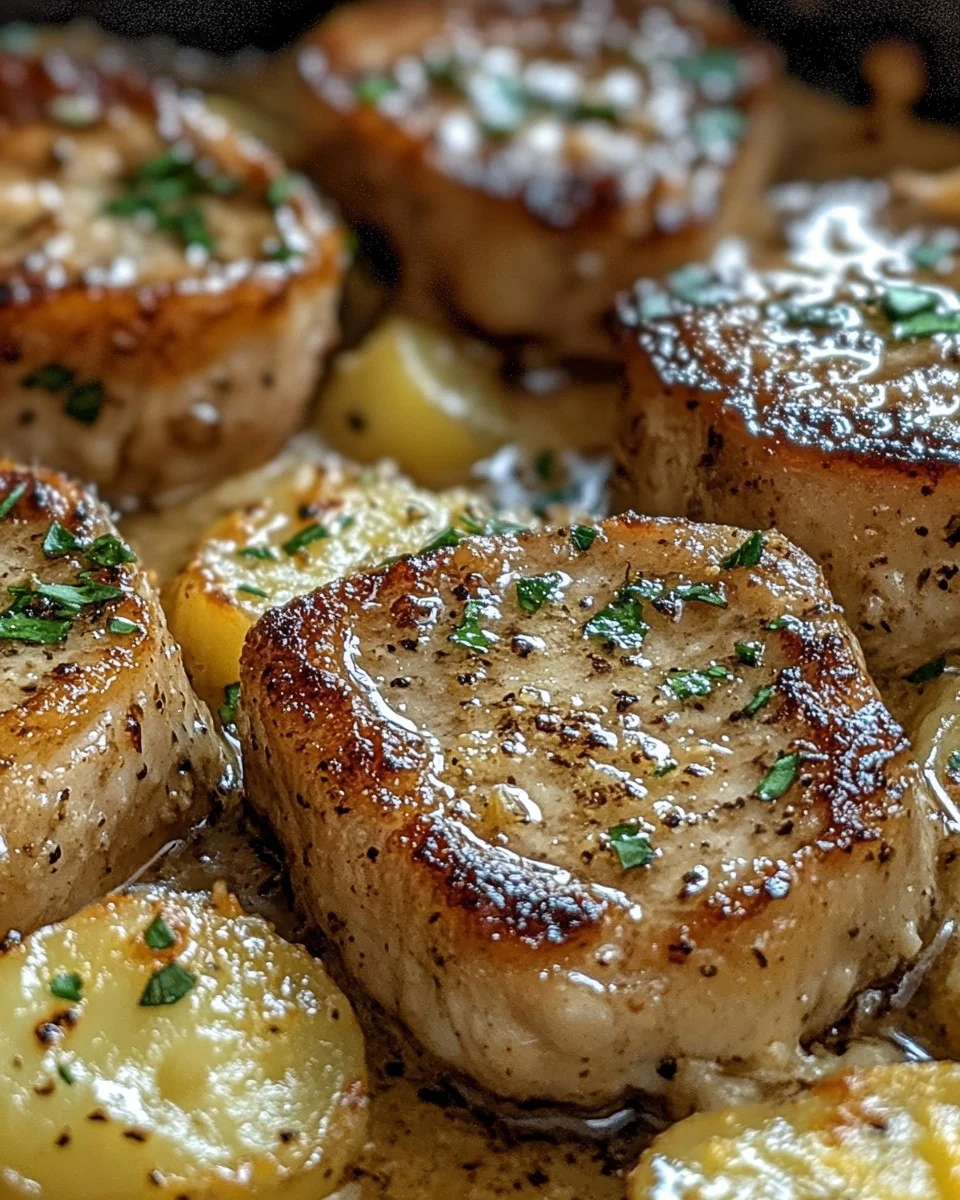
  • Garlic Butter Pork Chops with Cheesy Potato Bake Recipe

    Garlic Butter Pork Chops with Cheesy Potato Bake Recipe

    Garlic Butter Pork Chops with Cheesy Potato Bake is a delightful dish that combines tender pork chops with a creamy, cheesy potato bake. The rich garlic butter elevates the flavors, making this meal an instant family favorite. Perfect for a cozy dinner, this recipe is both satisfying and delicious.

    Why You’ll Love This Recipe

    • Flavorful Combination: The garlic butter pork chops pair perfectly with the cheesy potatoes for an unforgettable meal.
    • Comfort Food: This dish embodies the essence of comfort food, making it ideal for family gatherings.
    • One-Pan Wonder: Enjoy the convenience of cooking everything in one baking dish, reducing cleanup time.
    • Customizable: Feel free to add your favorite herbs or spices to personalize the dish to your taste.
    • Hearty Portions: Each serving is filling, ensuring everyone leaves the table satisfied.

    Tools and Equipment

    Having the right tools makes cooking efficient and enjoyable.

    Essential Tools

    • Large skillet
    • Baking dish (9×13 inch)
    • Medium saucepan
    • Cutting board
    • Sharp knife
    • Measuring cups and spoons

    Why These Tools Matter

    • Large skillet: Ideal for searing the pork chops and sautéing onions, ensuring even cooking.
    • Baking dish: Perfect size for layering the cheesy potato bake, allowing for even heat distribution.
    • Medium saucepan: Essential for warming the milk and sour cream, creating a creamy sauce for the potatoes.

    Ingredients for Garlic Butter Pork Chops with Cheesy Potato Bake

    For the Pork Chops:

    • 4 bone-in pork chops, about 1 inch thick
    • 4 cloves garlic, minced
    • 3 tbsp olive oil
    • 4 tbsp butter, divided
    • 2 sprigs fresh thyme
    • Salt and pepper to taste
    • Fresh parsley for garnish (optional)

    For the Cheesy Potato Bake:

    • 4-5 medium potatoes, thinly sliced
    • 1 medium onion, thinly sliced
    • 2 cups shredded cheddar cheese
    • 1 cup milk
    • ½ cup sour cream
    • 2 tbsp butter
    • 1 tsp garlic powder
    • Salt and pepper to taste

    How to Make Garlic Butter Pork Chops with Cheesy Potato Bake Step-by-Step

    Step 1: Prep the Base

    • Preheat your oven to 375°F (190°C). Lightly grease a 9×13 inch baking dish and set it aside.

    Step 2: Cook the Onions

    • In a large skillet, melt 2 tbsp of butter over medium heat.
    • Add the sliced onions and cook until translucent, about 5 minutes.
    • Stir in garlic powder, salt, and pepper.

    Step 3: Layer the Potatoes

    • Arrange half of the sliced potatoes in the prepared baking dish.
    • Top with half of the cooked onions and 1 cup of shredded cheddar cheese.
    • Repeat the layers with the remaining potatoes, onions, and cheese.

    Step 4: Prepare the Sauce

    • In a medium saucepan, combine milk and sour cream.
    • Warm over medium heat until heated through.
    • Pour this mixture evenly over the layered potatoes.
    • Cover with aluminum foil and bake for 30 minutes.

    Step 5: Cook the Pork Chops

    • Season the pork chops with salt and pepper.
    • Heat olive oil in a large skillet over medium-high heat.
    • Sear the pork chops until golden brown on both sides, about 3-4 minutes per side.
    • Remove from the skillet and set aside.

    Step 6: Make the Garlic Butter

    • In the same skillet, add 2 tbsp of butter and melt over medium heat.
    • Add minced garlic and thyme, cooking until fragrant.
    • Return the pork chops to the skillet, spooning the garlic butter over them.

    Step 7: Combine and Bake

    • Remove the foil from the baking dish.
    • Place the browned pork chops on top of the potatoes.
    • Pour the garlic butter sauce over the pork chops and potatoes.
    • Bake uncovered for an additional 30 minutes, or until the potatoes are tender and the pork chops are cooked through.

    Step 8: Serve

    • Allow the dish to rest for 5-10 minutes before serving.
    • Garnish with freshly chopped parsley if desired.

    This Garlic Butter Pork Chops with Cheesy Potato Bake is not just a meal; it’s a comforting experience that brings the family together. Enjoy the robust flavors and satisfying textures in every bite.

    How to Serve Garlic Butter Pork Chops with Cheesy Potato Bake

    This dish is not only hearty but also versatile when it comes to serving options.

    With a Side Salad

    A crisp green salad with a light vinaigrette complements the richness of the pork chops and cheesy potatoes, balancing the meal.

    With Roasted Vegetables

    Serve alongside a medley of roasted seasonal vegetables for a colorful and nutritious addition that enhances the overall flavor profile.

    With Garlic Bread

    Pairing with garlic bread adds an extra layer of flavor and provides a great way to soak up any remaining garlic butter sauce from the dish.

    Pro Tips for the Best Garlic Butter Pork Chops with Cheesy Potato Bake

    To ensure your dish turns out perfectly every time, consider these helpful tips.

    • Use Bone-In Pork Chops: Bone-in chops tend to be juicier and more flavorful compared to boneless options.

    • Let the Pork Chops Rest: After cooking, let the pork chops rest for 5-10 minutes to allow the juices to redistribute, resulting in a more tender bite.

    • Slice Potatoes Evenly: Ensure that the potatoes are sliced uniformly to promote even cooking and consistent texture throughout the dish.

    • Experiment with Cheese: While cheddar is a classic choice, feel free to mix in other cheeses like Gruyère or mozzarella for a unique flavor twist.

    • Add More Herbs: Consider incorporating additional herbs like rosemary or oregano for an extra layer of aromatic flavor in both the pork and the potato bake.

    Best Side Dishes and Pairings

    Enhance your dining experience with these complementary side dishes and drinks.

    1. Steamed Green Beans – Their crisp texture and mild flavor provide a refreshing contrast to the richness of the main dish.

    2. Coleslaw – A tangy coleslaw adds a crunchy texture and a bit of acidity that cuts through the creaminess of the cheesy potato bake.

    3. Mashed Cauliflower – This low-carb alternative to traditional mashed potatoes offers a creamy side that pairs well without overwhelming the palate.

    4. Crispy Brussels Sprouts – Roasted Brussels sprouts add a nutty flavor and crispy texture that pairs beautifully with the pork chops.

    5. Chardonnay – A glass of chilled Chardonnay enhances the meal with its buttery notes, complementing the garlic butter and cheese.

    6. Sparkling Water with Lemon – A refreshing non-alcoholic option that cleanses the palate and balances the hearty flavors of the dish.

    Common Mistakes to Avoid

    • Overcooking the Pork Chops: Ensure you monitor the cooking time closely to prevent dry pork.
    • Skipping the Resting Period: Allow the dish to rest before serving to enhance flavors and juiciness.
    • Not Layering Properly: Make sure to evenly distribute the potatoes and cheese for consistent cooking.
    • Ignoring Seasoning: Proper seasoning at each stage is crucial for maximizing flavor.

    Storage & Reheating Instructions

    Refrigerator Storage

    Store leftovers in airtight containers in the refrigerator for up to 3 days.

    Freezing Instructions

    For best results, freeze the unbaked cheesy potato bake and pork chops separately. Thaw overnight in the refrigerator before cooking.

    Reheating Tips

    • Oven: Preheat to 350°F (175°C) and heat covered for about 20-25 minutes.
    • Microwave: Heat in a microwave-safe dish on medium power, covered, for 2-3 minutes or until heated through.
    • Stovetop: Reheat in a skillet over medium heat, adding a splash of water to create steam, for about 5-7 minutes.

    Frequently Asked Questions

    How do I know when the pork chops are done?

    The pork chops are done when they reach an internal temperature of 145°F (63°C) and have a nice golden crust.

    Can I use boneless pork chops for this recipe?

    Yes, boneless pork chops can be used, but adjust the cooking time as they may cook faster than bone-in.

    What can I serve with Garlic Butter Pork Chops with Cheesy Potato Bake?

    Consider pairing this dish with a simple green salad or steamed vegetables for a balanced meal.

    How do I make this recipe low-carb?

    Replace the potatoes with cauliflower or zucchini slices for a low-carb alternative while maintaining flavor.

    Can I prepare this dish ahead of time?

    Yes, you can prepare the layers and the pork chops in advance, then bake them when you’re ready to serve.

    Final Thoughts

    Garlic Butter Pork Chops with Cheesy Potato Bake is a comforting dish that promises to delight your family and friends. We encourage you to try this recipe at home and share your thoughts in the comments below. Your feedback is invaluable!


    Dinner

    Garlic Butter Pork Chops with Cheesy Potato Bake


    5.0 from 24 reviews

    This comforting dish features succulent pork chops seared in garlic butter, paired with a creamy and cheesy potato bake. Perfect for a hearty family meal, it combines rich flavors and satisfying textures for a delightful dining experience.

    Author: Munch Twist
    Prep Time: 20 mins
    Cook Time: 60 mins
    Total Time: 80 mins
    Yield: 4 servings
    Category: Lunch
    Method: Baking
    Cuisine: American

    Garlic Butter Pork Chops with Cheesy Potato Bake

    SCALE:
    1x
    2x
    3x
    Cook Mode: Prevent your screen from going dark

    Ingredients

    • 4 bone-in pork chops, about 1 inch thick
    • 4 cloves garlic, minced
    • 3 tbsp olive oil
    • 4 tbsp butter, divided
    • 2 sprigs fresh thyme
    • Salt and pepper to taste
    • Fresh parsley for garnish (optional)
    • 4-5 medium potatoes, thinly sliced
    • 1 medium onion, thinly sliced
    • 2 cups shredded cheddar cheese
    • 1 cup milk
    • ½ cup sour cream
    • 2 tbsp butter
    • 1 tsp garlic powder

    Instructions

    1. Preheat your oven to 375°F (190°C). Lightly grease a 9×13 inch baking dish and set aside.
    2. In a large skillet, melt 2 tbsp of butter over medium heat. Add the sliced onions and cook until translucent, about 5 minutes. Stir in garlic powder, salt, and pepper.
    3. Arrange half of the sliced potatoes in the prepared baking dish. Top with half of the cooked onions and 1 cup of shredded cheddar cheese. Repeat the layers with the remaining potatoes, onions, and cheese.
    4. In a medium saucepan, combine milk and sour cream. Warm over medium heat until heated through. Pour this mixture evenly over the layered potatoes. Cover with aluminum foil and bake for 30 minutes.
    5. Season the pork chops with salt and pepper. Heat olive oil in a large skillet over medium-high heat. Sear the pork chops until golden brown on both sides, about 3-4 minutes per side. Remove from the skillet and set aside.
    6. In the same skillet, add 2 tbsp of butter and melt over medium heat. Add minced garlic and thyme, cooking until fragrant. Return the pork chops to the skillet, spooning the garlic butter over them.
    7. Remove the foil from the baking dish. Place the browned pork chops on top of the potatoes. Pour the garlic butter sauce over the pork chops and potatoes. Bake uncovered for an additional 30 minutes, or until the potatoes are tender and the pork chops are cooked through.
    8. Allow the dish to rest for 5-10 minutes before serving. Garnish with freshly chopped parsley if desired.

    Nutrition Facts

    Serving Size: 1 serving
    Calories: 500 kcal
    Sugar: 6g
    Sodium: 600mg
    Fat: 26g
    Saturated Fat: 12g
    Carbohydrates: 42g
    Fiber: 4g
    Protein: 28g
    Cholesterol: 90mg

  • Quick and Easy Sheet Pan Shrimp with Corn and Tomatoes

    Quick and Easy Sheet Pan Shrimp with Corn and Tomatoes

    Sheet Pan Shrimp with Corn and Tomatoes is a delightful dish that combines the sweetness of corn and tomatoes with succulent shrimp. This one-pan meal is not only vibrant but also incredibly simple to make, making it a perfect choice for busy weeknights.

    Why You’ll Love This Recipe

    • Quick & Easy: Ready in under 30 minutes, this recipe is perfect for busy evenings.
    • Flavorful & Fresh: The combination of shrimp, corn, and tomatoes creates a deliciously vibrant dish.
    • Minimal Cleanup: Cooking everything on one sheet pan means less mess and hassle.
    • Customizable: Feel free to add your favorite vegetables or spices for a personal touch.
    • Healthy & Nutritious: Packed with protein and fiber, this dish is both satisfying and nutritious.

    Tools and Equipment

    To prepare this recipe, you’ll need some essential kitchen tools.

    Essential Tools

    • Baking sheet
    • Aluminum foil
    • Mixing bowl
    • Measuring spoons
    • Chef’s knife

    Why These Tools Matter

    • Baking Sheet: A sturdy baking sheet allows for even cooking and easy handling of all ingredients.
    • Aluminum Foil: Lining the baking sheet with foil makes cleanup a breeze.
    • Mixing Bowl: A medium bowl is essential for seasoning the shrimp thoroughly.

    Ingredients for Sheet Pan Shrimp with Corn and Tomatoes

    Fresh Ingredients

    • 4 ears of corn (shucked and kernels removed)
    • 1 pint grape or cherry tomatoes
    • 1 1/2 pounds jumbo shrimp (peeled and deveined, tail-off)

    Seasonings and Oils

    • 2 tablespoons extra-virgin olive oil (plus 2 teaspoons, divided)
    • 3 garlic cloves, minced
    • 1 teaspoon Old Bay seasoning
    • 1 teaspoon kosher salt (plus ½ teaspoon, divided)
    • Zest of 1 lemon
    • 2 tablespoons chopped fresh chives
    • 1 lemon, cut into wedges for serving

    How to Make Sheet Pan Shrimp with Corn and Tomatoes Step-by-Step

    Step 1: Preheat and Prepare Pan

    Preheat the oven to broil. Position the oven rack 6 inches from the heating element and line a sheet pan with foil.

    Step 2: Prepare Corn

    Toss the corn kernels with 1 tablespoon of olive oil and ½ teaspoon of salt. Spread them in an even layer on the prepared sheet pan.

    Step 3: Broil Corn

    Broil the corn for about 6-7 minutes, tossing halfway through, until it begins to char. Remove from the oven and set aside.

    Step 4: Season Shrimp

    Pat the shrimp dry and place them in a medium bowl. Add 2 teaspoons of olive oil, minced garlic, Old Bay seasoning, lemon zest, and ½ teaspoon of salt. Toss gently to coat.

    Step 5: Assemble Dish

    Spread the seasoned shrimp over the partially cooked corn. Add the grape or cherry tomatoes. Drizzle with the remaining 1 tablespoon of olive oil.

    Step 6: Broil Shrimp and Tomatoes

    Return the sheet pan to the oven and broil for 7-8 minutes. The shrimp should be opaque and cooked through, and the tomatoes should start to burst.

    Step 7: Garnish and Serve

    Sprinkle the dish with chopped chives. Serve with lemon wedges on the side.

    This Sheet Pan Shrimp with Corn and Tomatoes is not only a feast for the taste buds but also an easy and nutritious meal option. Enjoy this vibrant and flavorful dish that highlights fresh ingredients in every bite.

    How to Serve Sheet Pan Shrimp with Corn and Tomatoes

    This dish is versatile and can be enjoyed in various ways to suit your taste.

    Serve Over Rice

    Ladle the shrimp, corn, and tomatoes over a bed of fluffy white or brown rice. The rice absorbs the flavorful juices, creating a satisfying meal.

    With Crusty Bread

    Serve the dish alongside warm, crusty bread. This allows you to soak up the delicious juices and adds a hearty element to your meal.

    As a Salad Topping

    Let the shrimp and vegetables cool slightly and use them as a topping for a fresh green salad. This adds protein and vibrant flavors, making for a refreshing dish.

    Pro Tips for the Best Sheet Pan Shrimp with Corn and Tomatoes

    To enhance your cooking experience, consider these helpful tips.

    • Use Fresh Ingredients: Fresh shrimp, corn, and tomatoes will yield the best flavor and texture in this dish.
    • Preheat the Broiler: Ensure your broiler is fully preheated to achieve that perfect char on the corn and shrimp.
    • Don’t Overcrowd the Pan: Make sure to spread the ingredients in a single layer for even cooking and browning.
    • Adjust Seasoning to Taste: Feel free to tweak the Old Bay seasoning and salt according to your preference for a personalized flavor.
    • Serve Immediately: For the best taste and texture, serve the dish right after cooking while the shrimp are still warm and juicy.

    Best Side Dishes and Pairings

    Complement your Sheet Pan Shrimp with Corn and Tomatoes with these delightful sides.

    1. Garlic Bread: The buttery, garlicky flavor of this bread pairs beautifully with the seafood and fresh veggies.
    2. Quinoa Salad: A light quinoa salad with cucumbers and herbs provides a healthy and refreshing contrast to the dish.
    3. Coleslaw: A crunchy coleslaw adds a nice texture and a tangy element that balances the richness of the shrimp.
    4. White Wine: A chilled glass of Sauvignon Blanc or Pinot Grigio enhances the flavors of the shrimp and tomatoes.
    5. Grilled Asparagus: The slight bitterness of grilled asparagus complements the sweetness of the corn and tomatoes.

    Common Mistakes to Avoid

    • Overcooking the Shrimp: Keep a close eye on the shrimp while broiling, as they can become tough if cooked too long.
    • Skipping the Corn Pre-Broil: Not broiling the corn beforehand can result in undercooked kernels that lack flavor and texture.
    • Using Frozen Shrimp: While convenient, using frozen shrimp can lead to excess moisture, affecting the dish’s overall texture.
    • Forgetting to Season: Failing to properly season the shrimp or vegetables can result in a bland dish.

    Storage & Reheating Instructions

    Refrigerator Storage

    Store leftovers in airtight containers in the refrigerator. They will remain fresh for up to 2 days.

    Freezing Instructions

    To freeze, place the cooled dish in an airtight container or freezer bag, removing as much air as possible. It can be frozen for up to 3 months. Thaw in the refrigerator overnight before reheating.

    Reheating Tips

    • Oven: Preheat to 350°F (175°C) and bake for 10-15 minutes until heated through.
    • Microwave: Heat on medium power in 30-second intervals until warm, stirring occasionally.
    • Stovetop: Add a splash of water or broth to a skillet over medium heat, cover, and heat for 5-7 minutes, stirring occasionally.

    Frequently Asked Questions

    Can I use frozen shrimp for Sheet Pan Shrimp with Corn and Tomatoes?

    Yes, you can use frozen shrimp, but make sure to thaw them completely and pat them dry to avoid excess moisture.

    What can I substitute for Old Bay seasoning?

    If you don’t have Old Bay seasoning, a mixture of paprika, cayenne pepper, and celery salt can be a good alternative.

    Can I add other vegetables to this recipe?

    Absolutely! Feel free to add bell peppers, zucchini, or any other vegetables you enjoy that can roast well.

    How do I know when the shrimp are done cooking?

    The shrimp are done when they turn opaque and form a “C” shape. Be careful not to overcook them.

    Is Sheet Pan Shrimp with Corn and Tomatoes a healthy meal?

    Yes, this dish is packed with protein, fiber, and fresh vegetables, making it a nutritious option for a balanced meal.

    Final Thoughts

    Sheet Pan Shrimp with Corn and Tomatoes is a delightful, easy-to-make dish that showcases fresh, vibrant ingredients. Whether you’re preparing it for a weeknight dinner or a gathering, it’s sure to impress. Don’t forget to leave a comment below with your thoughts and any variations you tried!


    Dinner

    Sheet Pan Shrimp with Corn and Tomatoes


    5.0 from 24 reviews

    This vibrant sheet pan dinner combines sweet corn, juicy tomatoes, and succulent shrimp, all broiled to perfection. It's a quick and easy meal that highlights fresh ingredients and bold flavors, making it a delightful choice for any night of the week.

    Author: Munch Twist
    Prep Time: 15 minutes
    Cook Time: 15 minutes
    Total Time: 30 minutes
    Yield: 4 servings
    Category: Lunch
    Method: No bake
    Cuisine: American

    Sheet Pan Shrimp with Corn and Tomatoes

    SCALE:
    1x
    2x
    3x
    Cook Mode: Prevent your screen from going dark

    Ingredients

    • 4 ears of corn (shucked and kernels removed)
    • 1 pint grape or cherry tomatoes
    • 1 1/2 pounds jumbo shrimp (peeled and deveined, tail-off)
    • 2 tablespoons extra-virgin olive oil (plus 2 teaspoons, divided)
    • 3 garlic cloves, minced
    • 1 teaspoon Old Bay seasoning
    • 1 teaspoon kosher salt (plus ½ teaspoon, divided)
    • Zest of 1 lemon
    • 2 tablespoons chopped fresh chives
    • 1 lemon, cut into wedges for serving

    Instructions

    1. Preheat the oven to broil and line a sheet pan with foil.
    2. Toss corn kernels with 1 tablespoon of olive oil and ½ teaspoon of salt, then spread them on the sheet pan.
    3. Broil the corn for 6-7 minutes, tossing halfway through, until it begins to char.
    4. Pat the shrimp dry, then mix with 2 teaspoons of olive oil, minced garlic, Old Bay seasoning, lemon zest, and ½ teaspoon of salt.
    5. Spread the seasoned shrimp over the corn and add the tomatoes. Drizzle with 1 tablespoon of olive oil.
    6. Broil for 7-8 minutes until shrimp are opaque and tomatoes start to burst.
    7. Garnish with chives and serve with lemon wedges.

    Nutrition Facts

    Serving Size: 1 serving
    Calories: 300 kcal
    Sugar: 5g
    Sodium: 800mg
    Fat: 10g
    Saturated Fat: 1.5g
    Carbohydrates: 30g
    Fiber: 4g
    Protein: 25g
    Cholesterol: 200mg

  • Delicious Lemon Chicken Pasta Recipe for Quick Meals

    Delicious Lemon Chicken Pasta Recipe for Quick Meals

    Lemon Chicken Pasta is a delightful dish that combines the bright flavors of lemon with tender chicken and creamy pasta. This recipe offers a perfect balance of tanginess and richness, making it a standout meal for any occasion.

    Why You’ll Love This Recipe

    • Quick & Easy: Ready in under 30 minutes, this dish is perfect for busy weeknights.
    • Flavorful & Satisfying: The combination of lemon, cream, and Parmesan creates a rich, satisfying flavor profile.
    • Versatile Ingredients: You can easily swap the pasta type or add vegetables, making this recipe adaptable to your preferences.
    • Crowd-Pleaser: This dish is sure to impress family and friends with its elegant presentation and delicious taste.

    Tools and Equipment

    Having the right tools makes cooking more enjoyable and efficient. Here are the essential tools for this recipe.

    Essential Tools

    • Large skillet
    • Pasta pot
    • Colander
    • Measuring cups and spoons
    • Knife and cutting board

    Why These Tools Matter

    • Large skillet: Provides ample space for cooking the chicken and sauce without overcrowding.
    • Pasta pot: Ensures even cooking of the pasta, allowing it to reach the perfect al dente texture.
    • Colander: Aids in draining the pasta quickly and efficiently, preventing water from diluting the sauce.

    Ingredients for Lemon Chicken Pasta

    Chicken and Pasta

    • 2 boneless, skinless chicken breasts
    • 300g spaghetti or your favorite pasta

    Sauce and Seasonings

    • 1/2 cup heavy cream
    • 1/4 cup grated Parmesan cheese
    • 2 tablespoons olive oil
    • 1/4 teaspoon red pepper flakes (optional)
    • Salt and pepper, to taste
    • 3 cloves garlic, minced
    • Zest and juice of 1 lemon
    • 1/2 cup chicken broth
    • Fresh parsley, chopped, for garnish

    How to Make Lemon Chicken Pasta Step-by-Step

    Step 1: Cook the Pasta

    Begin by cooking the pasta according to package instructions until al dente. Drain the pasta and set it aside.

    Step 2: Prepare the Chicken

    Season the chicken breasts with salt and pepper. Heat olive oil in a large skillet over medium-high heat. Cook the chicken for 6-7 minutes per side, or until golden and cooked through. Once done, remove the chicken from the skillet and slice it.

    Step 3: Make the Sauce

    In the same skillet, add the minced garlic and red pepper flakes (if using). Cook for 1 minute until fragrant. Then, stir in the lemon zest, lemon juice, chicken broth, and heavy cream. Mix everything well and bring it to a simmer.

    Step 4: Combine Ingredients

    Add the cooked pasta and sliced chicken to the skillet. Toss everything together, cooking for an additional 2-3 minutes. This allows the pasta to absorb the delicious flavors of the sauce.

    Step 5: Finish and Serve

    Remove the skillet from heat and stir in the grated Parmesan cheese. Garnish with chopped parsley before serving.

    Enjoy this tangy and creamy Lemon Chicken Pasta as a delightful meal that is both satisfying and easy to prepare.

    How to Serve Lemon Chicken Pasta

    Lemon Chicken Pasta is a versatile dish that can be enjoyed in various ways.

    In a Bowl

    Serve the Lemon Chicken Pasta in a bowl, garnished with extra parsley and a sprinkle of Parmesan. This presentation highlights the creamy sauce and fresh ingredients.

    With a Salad

    Pair the pasta with a light arugula or mixed greens salad tossed with a simple vinaigrette. The freshness of the salad complements the richness of the pasta beautifully.

    As a Cold Pasta Salad

    Let the dish cool and serve it as a cold pasta salad. Add cherry tomatoes and olives for a Mediterranean twist, making it perfect for potlucks or picnics.

    Pro Tips for the Best Lemon Chicken Pasta

    To elevate your Lemon Chicken Pasta, consider these practical tips.

    • Use Fresh Ingredients: Fresh lemons and herbs will enhance the flavor profile significantly compared to dried alternatives.
    • Don’t Overcook the Chicken: Ensure the chicken is cooked just right to maintain its juiciness and tenderness.
    • Reserve Pasta Water: Save a cup of pasta water before draining; it can be added to the sauce for a creamier texture.
    • Adjust Creaminess: Modify the amount of heavy cream based on your preference for a lighter or richer sauce.
    • Experiment with Herbs: Try adding fresh basil or thyme for an additional layer of flavor that complements the lemon.

    Best Side Dishes and Pairings

    To complement your Lemon Chicken Pasta, consider these ideal side dishes and drinks.

    1. Garlic Bread: The buttery, garlicky bread is perfect for soaking up the creamy sauce, making each bite more enjoyable.
    2. Roasted Asparagus: The slight bitterness of roasted asparagus balances the richness of the pasta, adding a nutritious element to the meal.
    3. Caesar Salad: A classic Caesar salad provides a crunchy texture and bold flavors that pair well with the creamy pasta.
    4. White Wine: A chilled glass of Sauvignon Blanc or Pinot Grigio enhances the lemony notes of the dish and elevates the dining experience.
    5. Steamed Broccoli: Lightly steamed broccoli adds a pop of color and a healthy side, complementing the flavors without overwhelming them.
    6. Lemonade: A refreshing glass of lemonade can brighten the meal and echo the citrus notes in the pasta.

    Common Mistakes to Avoid

    • Overcooking the Chicken: Ensure the chicken is cooked to a golden brown but remains juicy. Overcooking can lead to dryness.
    • Underseasoning the Pasta: Make sure to season the pasta water adequately. This enhances the flavor of the dish significantly.
    • Skipping the Pasta Water: Reserve a little pasta water before draining. It can help adjust the sauce’s consistency if needed.
    • Not Using Fresh Ingredients: Fresh garlic and parsley elevate the dish’s flavor. Opt for fresh over dried whenever possible.

    Storage & Reheating Instructions

    Refrigerator Storage

    Store leftover Lemon Chicken Pasta in airtight containers. It stays fresh for up to 3 days in the refrigerator.

    Freezing Instructions

    To freeze, place the cooled Lemon Chicken Pasta in freezer-safe containers. It can be frozen for up to 2 months. For best results, freeze in individual portions.

    Reheating Tips

    • Oven: Preheat to 350°F (175°C). Place the pasta in an oven-safe dish, cover with foil, and heat for about 15-20 minutes or until warmed through.
    • Microwave: Transfer a serving to a microwave-safe bowl. Cover loosely and heat in 1-minute intervals, stirring in between, until heated completely.
    • Stovetop: In a skillet, add the pasta along with a splash of chicken broth or water. Heat over medium-low, stirring occasionally, until warmed through.

    Frequently Asked Questions

    How can I make Lemon Chicken Pasta healthier?

    You can substitute heavy cream with Greek yogurt or a low-fat cream alternative. Additionally, using whole-grain pasta will increase fiber content.

    Can I use other types of pasta for Lemon Chicken Pasta?

    Absolutely! Feel free to use any pasta shape you prefer, such as penne, fettuccine, or even gluten-free options.

    How do I store leftover Lemon Chicken Pasta?

    Store in airtight containers in the refrigerator for up to 3 days or freeze for up to 2 months.

    Can I add vegetables to my Lemon Chicken Pasta?

    Yes, incorporating vegetables such as spinach, asparagus, or cherry tomatoes can add color and nutrition to the dish.

    What pairs well with Lemon Chicken Pasta?

    A light green salad or garlic bread complements Lemon Chicken Pasta wonderfully, enhancing your dining experience.

    Final Thoughts

    Lemon Chicken Pasta is a delightful dish that brings a burst of flavor to your table. It’s easy to make and perfect for any occasion. I encourage you to try this recipe and share your thoughts in the comments below. Your feedback helps us improve and inspire others in their cooking adventures.


    Dinner

    Lemon Chicken Pasta


    5.0 from 24 reviews

    This Lemon Chicken Pasta is a delightful dish that combines tender chicken breasts with al dente pasta, all enveloped in a creamy lemon sauce. The dish is enhanced with garlic, Parmesan cheese, and a hint of red pepper flakes for a touch of heat. Perfect for a quick weeknight dinner, it is both satisfying and refreshing.

    Author: Munch Twist
    Prep Time: 10 minutes
    Cook Time: 20 minutes
    Total Time: 30 minutes
    Yield: 4 servings
    Category: Lunch
    Method: No bake
    Cuisine: American

    Lemon Chicken Pasta

    SCALE:
    1x
    2x
    3x
    Cook Mode: Prevent your screen from going dark

    Ingredients

    • 2 boneless, skinless chicken breasts
    • 300g spaghetti or your favorite pasta
    • 1/2 cup heavy cream
    • 1/4 cup grated Parmesan cheese
    • 2 tablespoons olive oil
    • 1/4 teaspoon red pepper flakes (optional)
    • Salt and pepper, to taste
    • 3 cloves garlic, minced
    • Zest and juice of 1 lemon
    • 1/2 cup chicken broth
    • Fresh parsley, chopped, for garnish

    Instructions

    1. Cook the pasta according to package instructions until al dente. Drain and set aside.
    2. Season the chicken breasts with salt and pepper. Heat olive oil in a large skillet over medium-high heat. Cook the chicken for 6-7 minutes per side, or until golden and cooked through. Remove from the skillet and slice.
    3. In the same skillet, add minced garlic and red pepper flakes (if using). Cook for 1 minute until fragrant.
    4. Stir in lemon zest, lemon juice, chicken broth, and heavy cream. Mix well and bring the mixture to a simmer.
    5. Add the cooked pasta and sliced chicken to the skillet. Toss everything together and cook for 2-3 minutes, allowing the pasta to absorb the flavors.
    6. Remove from heat and stir in grated Parmesan cheese. Garnish with chopped parsley before serving.

    Nutrition Facts

    Serving Size: 1 serving
    Calories: 500 kcal
    Sugar: 5g
    Sodium: 600mg
    Fat: 20g
    Saturated Fat: 10g
    Carbohydrates: 60g
    Fiber: 2g
    Protein: 30g
    Cholesterol: 90mg