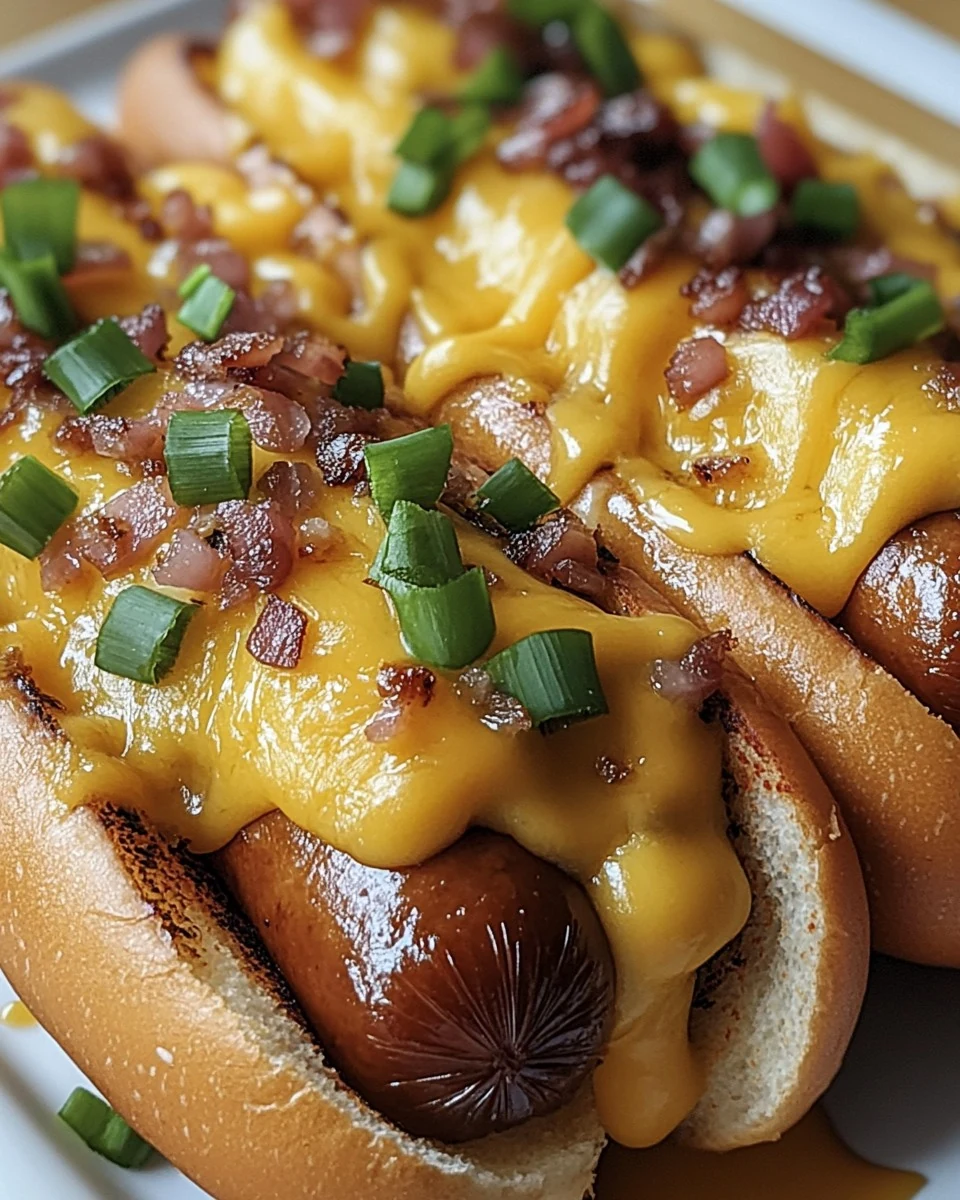
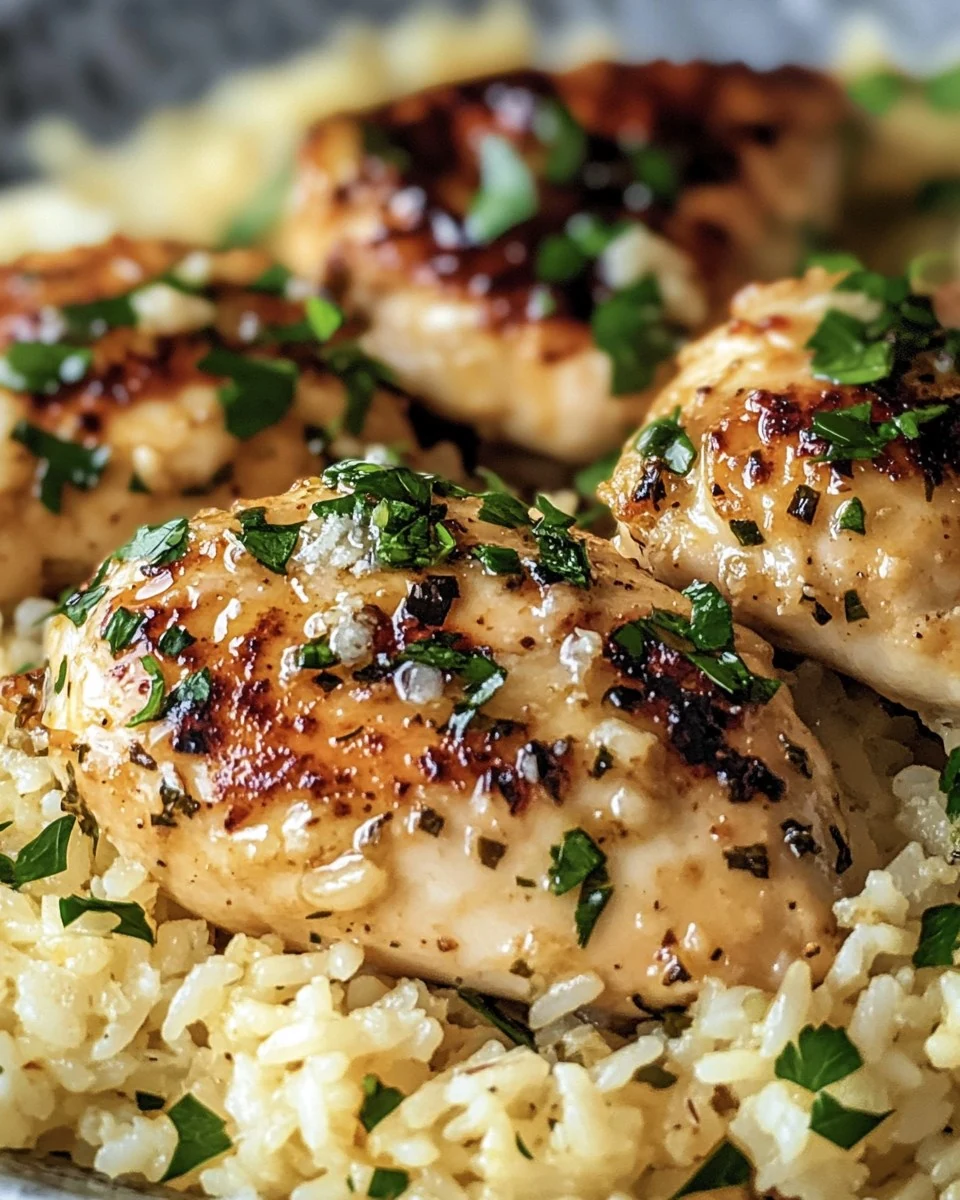
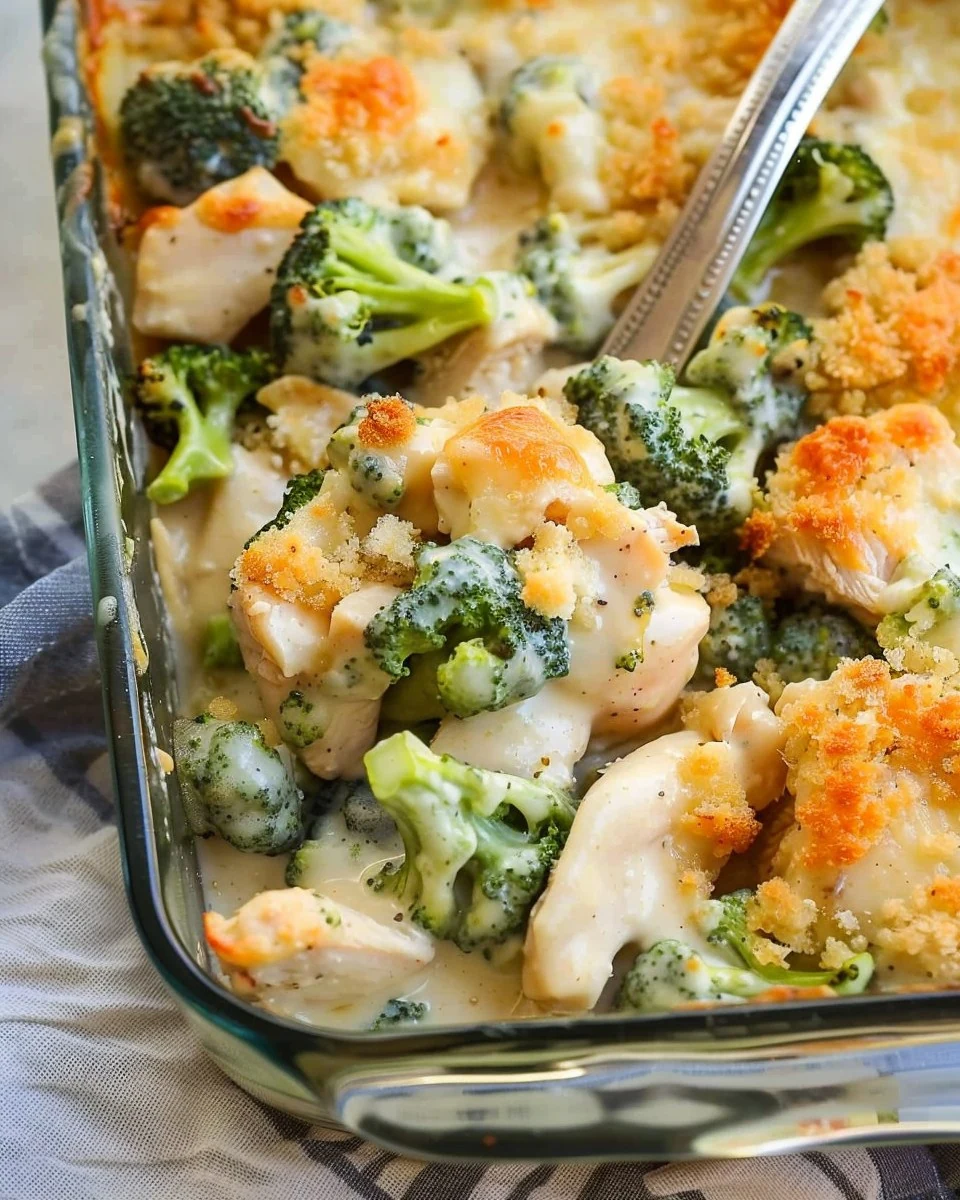
Category: Lunch

  • Easy and Delicious Reuben Bake Recipe

    Easy and Delicious Reuben Bake Recipe

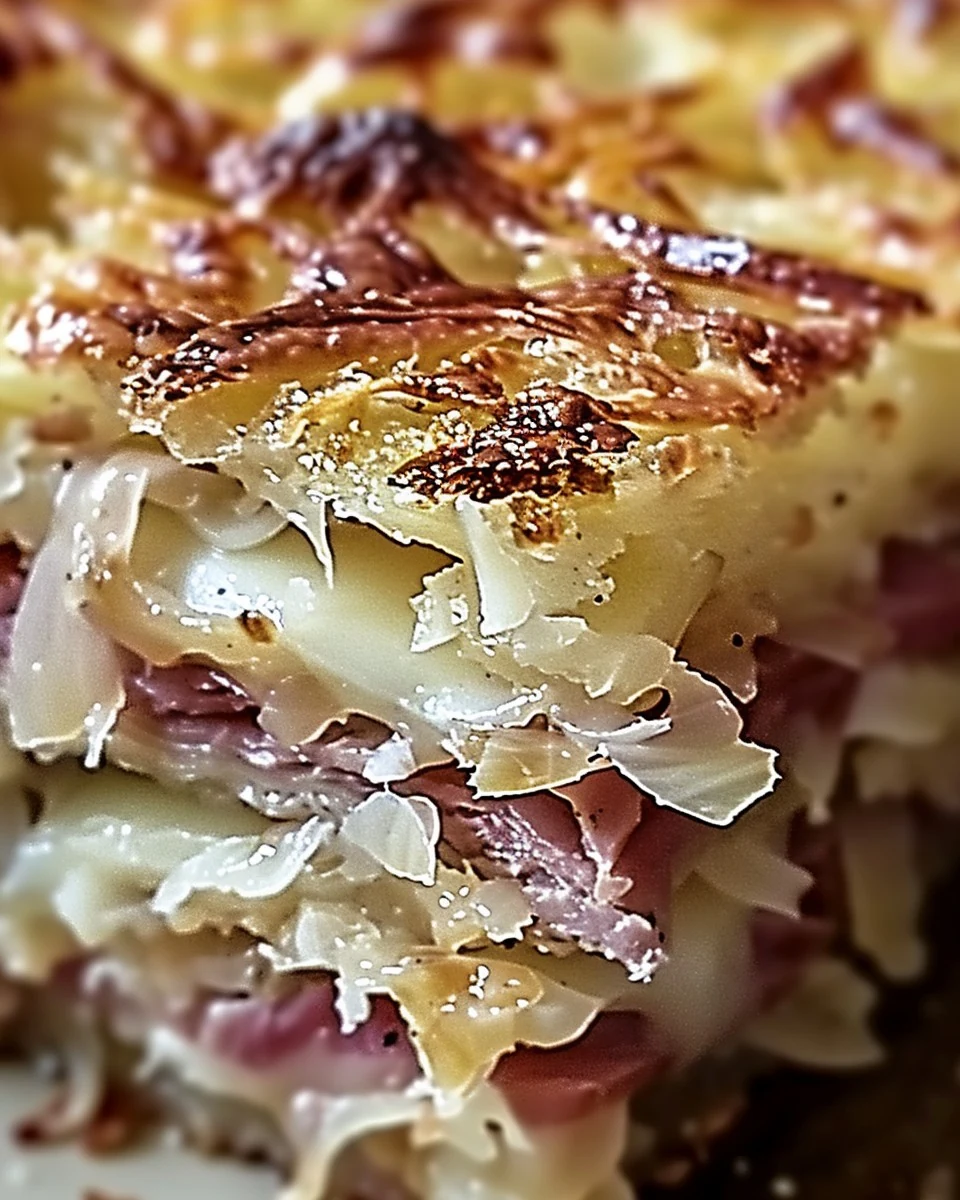
    Reuben Bake is a delicious twist on the classic Reuben sandwich, combining all your favorite flavors into a hearty casserole. This dish is perfect for gatherings or a cozy family dinner, offering layers of corned beef, Swiss cheese, and sauerkraut, all brought together with a rich Thousand Island dressing.

    Why You’ll Love This Recipe

    • Comforting & Hearty: This dish brings the warm, satisfying flavors of a traditional Reuben sandwich to your table.
    • Crowd-Pleaser: Perfect for family dinners or potlucks, everyone will love digging into this cheesy, meaty bake.
    • Quick & Easy: With just 15 minutes of prep time, you can have this dish ready to bake in no time.
    • Versatile: Customize with your favorite ingredients or add extra layers for a unique twist.
    • Great Leftovers: This Reuben Bake tastes even better the next day, making it perfect for meal prep.

    Tools and Equipment

    Having the right kitchen tools makes preparing your Reuben Bake a breeze.

    Essential Tools

    • A large baking dish
    • Mixing bowl
    • Measuring cups and spoons
    • Knife and cutting board
    • Aluminum foil

    Why These Tools Matter

    • Baking Dish: A sturdy baking dish ensures even cooking and easy serving.
    • Mixing Bowl: A large bowl helps in combining ingredients without making a mess.
    • Knife and Cutting Board: Essential for easily slicing the rye bread and corned beef.

    Ingredients for Reuben Bake

    Dressing and Meat

    • 1 cup Thousand Island dressing
    • 1 pound thinly sliced or shredded corned beef

    Bread and Cheese

    • 8 slices of rye bread, cubed
    • 2 cups grated Swiss cheese

    Vegetables

    • 1 can (14 ounces) sauerkraut, drained and rinsed

    How to Make Reuben Bake Step-by-Step

    Step 1: Prep the Base

    1. Preheat your oven to 350°F (175°C). Lightly grease a baking dish to prevent sticking.
    2. Cube the rye bread slices.
    3. Shred or thinly slice the corned beef.
    4. Drain and rinse the sauerkraut.

    Step 2: Assemble the Layers

    1. Place half of the cubed rye bread in the bottom of the greased baking dish.
    2. Top with half of the corned beef, followed by half of the sauerkraut.
    3. Sprinkle half of the grated Swiss cheese over the sauerkraut.
    4. Drizzle half of the Thousand Island dressing evenly over the cheese layer.

    Step 3: Complete the Layers

    1. Repeat with the remaining ingredients: rye bread, corned beef, sauerkraut, and Swiss cheese.
    2. Drizzle the remaining Thousand Island dressing over the top layer of cheese.

    Step 4: Bake and Serve

    1. Cover the dish with aluminum foil and bake for 25-30 minutes, or until the cheese is melted and bubbly.
    2. Remove the foil and let the Reuben Bake cool slightly before cutting into squares and serving hot.

    Preparation time: 15 minutes | Cooking time: 30 minutes

    Nutritional Information (per serving)

    • Calories: 400 kcal
    • Carbohydrates: 30g
    • Protein: 20g
    • Fat: 22g
    • Saturated Fat: 9g
    • Sugar: 6g

    Nutritional values are approximate and may vary based on specific ingredient brands and quantities used. Enjoy your homemade Reuben Bake, a delightful, comforting dish that will surely satisfy your cravings.

    How to Serve Reuben Bake

    Reuben Bake is a versatile dish that can be enjoyed in various ways. Here are some creative serving ideas:

    Serve with a Side Salad

    A crisp green salad with a tangy vinaigrette complements the richness of the Reuben Bake, adding freshness to each bite.

    Accompany with Pickles

    Serving dill pickles on the side enhances the flavors of the dish, providing a crunchy and tangy contrast to the savory ingredients.

    Pair with Potato Chips

    For a casual twist, serve Reuben Bake with a side of crunchy potato chips. Their salty crunch adds an extra layer of texture to the meal.

    Pro Tips for the Best Reuben Bake

    To ensure your Reuben Bake turns out perfectly every time, follow these expert tips:

    • Use Fresh Ingredients: Fresh rye bread and high-quality corned beef will enhance the overall flavor and texture of your dish.

    • Drain Sauerkraut Well: Properly draining the sauerkraut prevents excess moisture, which can make the dish soggy.

    • Experiment with Cheeses: While Swiss cheese is traditional, feel free to mix in other cheeses like Gruyère or Monterey Jack for added flavor.

    • Let It Rest: Allow the Reuben Bake to cool for a few minutes before cutting, which helps it hold its shape when serving.

    • Customize the Dressing: Adjust the amount of Thousand Island dressing to your taste, or try a homemade version for a personal touch.

    Best Side Dishes and Pairings

    Reuben Bake pairs excellently with a selection of sides and beverages. Consider these options:

    1. Coleslaw – A creamy coleslaw adds a crunchy texture and balances the richness of the dish.

    2. Sweet Potato Fries – The natural sweetness of sweet potato fries complements the savory flavors of the Reuben Bake.

    3. Beer – A light lager or a crisp pilsner pairs well, enhancing the flavors without overpowering the dish.

    4. Roasted Brussels Sprouts – The earthy taste of roasted Brussels sprouts provides a delicious contrast to the meal.

    5. Tomato Soup – A warm bowl of tomato soup serves as a comforting side, making for a delicious combination.

    Common Mistakes to Avoid

    • Using Stale Bread: Ensure your rye bread is fresh to achieve the best texture and flavor.
    • Overloading on Sauerkraut: Too much sauerkraut can make the dish soggy; balance it with the other ingredients.
    • Skipping the Foil: Covering the dish while baking helps the cheese melt evenly without burning.
    • Not Letting it Cool: Allow the Reuben Bake to cool slightly before serving to avoid messy cutting.

    Storage & Reheating Instructions

    Refrigerator Storage

    Store leftover Reuben Bake in an airtight container in the refrigerator for up to 3 days. Make sure to let it cool completely before sealing to maintain freshness.

    Freezing Instructions

    To freeze, wrap the Reuben Bake tightly in plastic wrap and then in aluminum foil to prevent freezer burn. It can be stored for up to 3 months. Thaw in the refrigerator overnight before reheating.

    Reheating Tips

    • Oven: Preheat to 350°F (175°C) and cover with foil, baking for about 15-20 minutes until heated through.
    • Microwave: Heat individual portions on medium power for 1-2 minutes, checking to avoid overheating.
    • Stovetop: Reheat in a skillet over low heat for about 5-10 minutes, covering to retain moisture.

    Frequently Asked Questions

    What is a Reuben Bake?

    A Reuben Bake is a layered casserole inspired by the classic Reuben sandwich, featuring corned beef, sauerkraut, Swiss cheese, and rye bread, all baked together.

    Can I use other types of cheese in my Reuben Bake?

    While Swiss cheese is traditional, you can experiment with other cheeses like Gruyere or provolone for a different flavor profile.

    How can I make my Reuben Bake healthier?

    Consider using whole grain rye bread, reduced-fat cheese, and a lighter version of Thousand Island dressing to cut down on calories.

    Can I prepare the Reuben Bake ahead of time?

    Yes, you can assemble the Reuben Bake a day in advance and store it in the refrigerator. Just add a few extra minutes to the cooking time if baking straight from the fridge.

    Final Thoughts

    This Reuben Bake is a comforting dish that combines rich flavors and textures. It’s perfect for any occasion, whether it’s a cozy family dinner or a potluck gathering. Try it out and let us know your thoughts in the comments below!


    Dinner

    Reuben Bake


    5.0 from 24 reviews

    Reuben Bake is a delicious and hearty casserole that combines layers of corned beef, sauerkraut, Swiss cheese, and rye bread, all brought together with Thousand Island dressing. This comforting dish is perfect for gatherings and is sure to please fans of the classic Reuben sandwich.
    Author: Munch Twist
    Prep Time: 15 minutes
    Cook Time: 30 minutes
    Total Time: 45 minutes
    Yield: 8 servings
    Category: Lunch
    Method: Baking
    Cuisine: American

    Reuben Bake

    SCALE:
    1x
    2x
    3x
    Cook Mode: Prevent your screen from going dark

    Ingredients

    • 1 cup Thousand Island dressing
    • 1 pound thinly sliced or shredded corned beef
    • 8 slices of rye bread, cubed
    • 2 cups grated Swiss cheese
    • 1 can (14 ounces) sauerkraut, drained and rinsed

    Instructions

    1. Preheat your oven to 350°F (175°C). Lightly grease a baking dish to prevent sticking.
    2. Cube the rye bread slices. Shred or thinly slice the corned beef. Drain and rinse the sauerkraut.
    3. Place half of the cubed rye bread in the bottom of the greased baking dish. Top with half of the corned beef, followed by half of the sauerkraut. Sprinkle half of the grated Swiss cheese over the sauerkraut.
    4. Drizzle half of the Thousand Island dressing evenly over the cheese layer.
    5. Repeat with the remaining ingredients: rye bread, corned beef, sauerkraut, and Swiss cheese.
    6. Drizzle the remaining Thousand Island dressing over the top layer of cheese.
    7. Cover the dish with aluminum foil and bake for 25-30 minutes, or until the cheese is melted and bubbly.
    8. Remove the foil and let the Reuben Bake cool slightly before cutting into squares and serving hot.
    Nutrition Facts

    Serving Size: 1 serving
    Calories: 400 kcal
    Sugar: 6g
    Sodium: 900mg
    Fat: 22g
    Saturated Fat: 9g
    Carbohydrates: 30g
    Fiber: 2g
    Protein: 20g
    Cholesterol: 70mg

  • Delicious Baked Chicken Chimichangas Recipe

    Delicious Baked Chicken Chimichangas Recipe

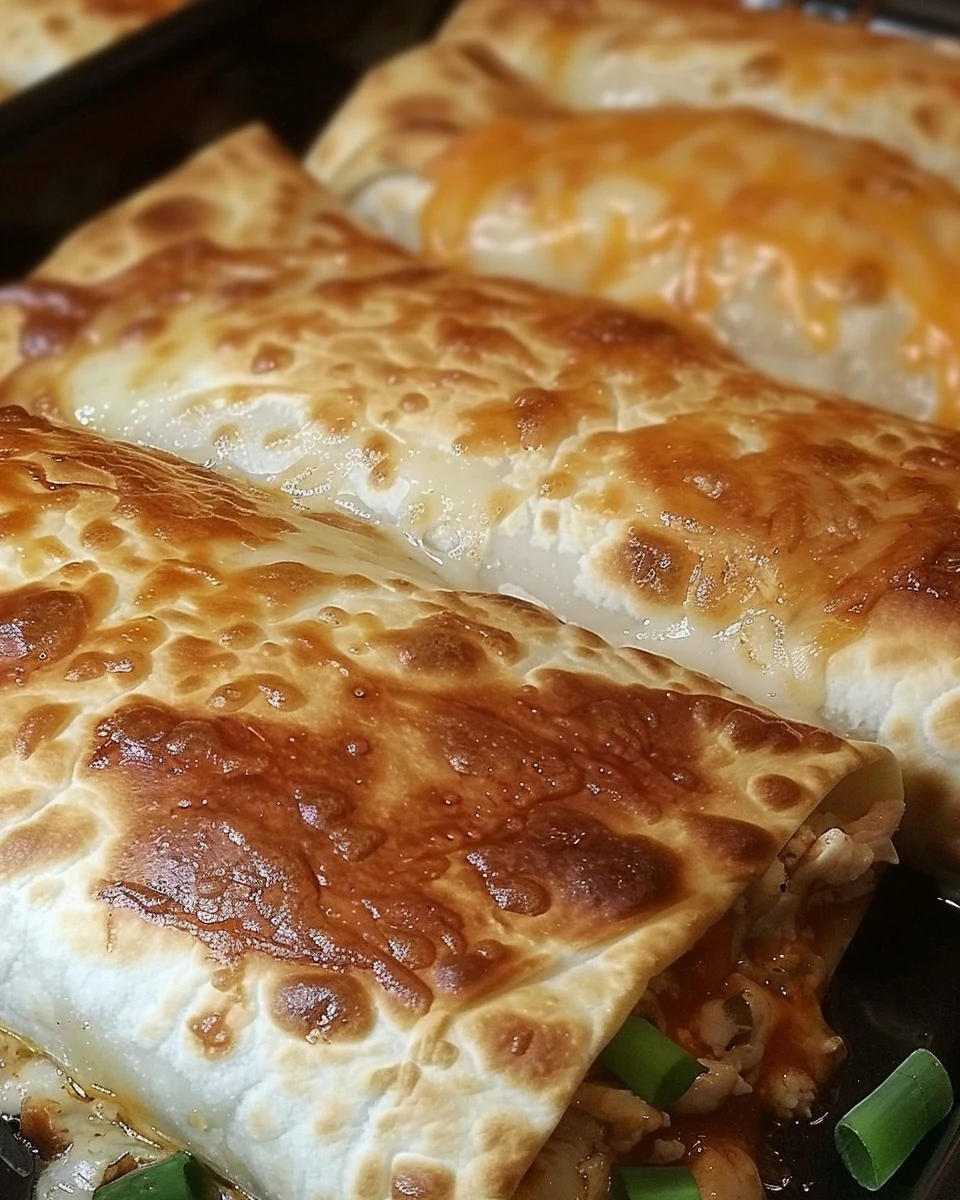
    Baked Chicken Chimichangas are a delightful twist on traditional Mexican cuisine. These golden, crispy tortillas filled with a savory blend of chicken and cheese are perfect for any occasion. With their rich flavors and satisfying crunch, these chimichangas promise to be a hit at your dinner table.

    Why You’ll Love This Recipe

    • Quick & Easy: Ready in under 45 minutes, making it perfect for busy weeknights.
    • Flavor-Packed: The combination of Pepperjack cheese and taco seasoning delivers a burst of flavor.
    • Customizable: You can easily adjust the filling to include your favorite ingredients.
    • Family-Friendly: This dish appeals to both kids and adults, ensuring a happy mealtime.
    • Perfect for Meal Prep: Make a batch ahead of time and enjoy throughout the week.

    Tools and Equipment

    Having the right tools makes cooking more enjoyable and efficient.

    Essential Tools

    • Mixing bowl
    • Baking dish (9×13″)
    • Cooking spray
    • Measuring spoons
    • Spatula

    Why These Tools Matter

    • Mixing bowl: Essential for combining the cheese and chicken mixture thoroughly.
    • Baking dish: A good quality dish ensures even cooking and browning of your chimichangas.
    • Spatula: A sturdy spatula helps in flipping the chimichangas without breaking them.

    Ingredients for Baked Chicken Chimichangas

    Main Ingredients

    • 8 flour tortillas
    • 8 oz Pepperjack cheese, shredded
    • 1 lb cooked chicken, shredded
    • 8 oz pkg. cream cheese
    • 1 1/2 Tbsp taco seasoning
    • Cooking spray

    Toppings

    • Shredded cheddar cheese, for serving
    • Green onions, for garnish
    • Sour cream, for serving
    • Salsa, for serving

    How to Make Baked Chicken Chimichangas Step-by-Step

    Step 1: Prep the Base

    1. Preheat your oven to 350°F (175°C).
    2. Lightly spray a 9×13″ baking dish with cooking spray.

    Step 2: Make the Filling

    1. In a medium mixing bowl, combine the cream cheese, shredded Pepperjack cheese, and taco seasoning.
    2. Stir until the mixture is well combined and creamy.
    3. Fold in the shredded cooked chicken, ensuring it is evenly coated in the cheese mixture.

    Step 3: Assemble the Chimichangas

    1. Divide the chicken and cheese mixture evenly among the flour tortillas.
    2. Tuck in the sides of each tortilla and roll them up tightly.
    3. Place the rolled chimichangas seam-side down in the prepared baking dish.

    Step 4: Bake to Perfection

    1. Lightly spray the tops of the rolled tortillas with cooking spray.
    2. Bake in the preheated oven for 15 minutes.
    3. Carefully turn the chimichangas over and bake for an additional 15 minutes until they are golden brown and crispy.

    Step 5: Serve and Enjoy

    1. Remove from the oven and serve hot.
    2. Top with shredded cheddar cheese, green onions, sour cream, and salsa as desired.

    In just 45 minutes, you will have a delicious dish of Baked Chicken Chimichangas that is sure to impress family and friends. Enjoy this flavorful creation and watch as it becomes a favorite in your home.

    How to Serve Baked Chicken Chimichangas

    Baked Chicken Chimichangas are versatile and can be served in various delightful ways.

    Serve with Fresh Salsas

    Pair your chimichangas with a variety of fresh salsas, such as pico de gallo or mango salsa, to add a burst of flavor and freshness.

    Create a Chimichanga Platter

    Arrange your chimichangas on a platter with bowls of sour cream, guacamole, and shredded lettuce, allowing guests to customize their own servings.

    Garnish with Fresh Herbs

    Top your chimichangas with freshly chopped cilantro or parsley for a vibrant touch that enhances both presentation and flavor.

    Pro Tips for the Best Baked Chicken Chimichangas

    For optimal results, consider these expert tips.

    • Use Warm Tortillas: Warm tortillas are more pliable, making them easier to roll without tearing.
    • Customize Your Fillings: Feel free to add other ingredients like black beans, corn, or diced bell peppers for added texture and flavor.
    • Adjust the Spice Level: Modify the amount of taco seasoning to suit your taste; add more for a spicier kick or reduce it for a milder flavor.
    • Ensure Even Cooking: Turn the chimichangas halfway through baking to achieve an evenly golden and crispy exterior.
    • Let Them Cool Slightly: Allow the chimichangas to cool for a few minutes before serving to help the filling set and make them easier to handle.

    Best Side Dishes and Pairings

    Complement your Baked Chicken Chimichangas with these delicious side dishes and drinks.

    1. Mexican Rice: The fluffy texture and subtle flavor of Mexican rice balance the richness of the chimichangas.
    2. Refried Beans: Creamy refried beans provide a hearty side that pairs well with the crispy tortillas.
    3. Grilled Corn on the Cob: Sweet and smoky grilled corn adds a delightful crunch and a touch of sweetness.
    4. Guacamole: This creamy avocado dip adds a rich and refreshing element that enhances the meal.
    5. Margaritas: A classic margarita, either frozen or on the rocks, brings a zesty and refreshing contrast to the chimichangas.

    Common Mistakes to Avoid

    • Not Shredding the Chicken Properly: Ensure the chicken is finely shredded for even distribution in the filling.
    • Overfilling the Tortillas: Avoid overstuffing to prevent tearing and ensure they roll up properly.
    • Skipping the Cooking Spray: Not spraying the tortillas can lead to a less crispy texture; make sure to coat them lightly.
    • Ignoring Cooking Times: Keep an eye on the chimichangas during baking; adjusting time may be necessary for your oven.

    Storage & Reheating Instructions

    Refrigerator Storage

    Store leftover Baked Chicken Chimichangas in airtight containers. They will stay fresh for up to 3 days in the refrigerator.

    Freezing Instructions

    For freezing, place the chimichangas in a single layer on a baking sheet until frozen solid. Then, transfer them to airtight freezer bags. They can be frozen for up to 2 months.

    Reheating Tips

    • Oven: Preheat to 350°F (175°C) and bake for 10-15 minutes until warm.
    • Microwave: Heat on medium power for 1-2 minutes, checking frequently to avoid sogginess.
    • Stovetop: Reheat in a skillet over medium heat, turning occasionally until heated through.

    Frequently Asked Questions

    Can I use other types of cheese for Baked Chicken Chimichangas?

    Yes, you can substitute with other cheeses like Monterey Jack or Cheddar, depending on your preference.

    How do I make Baked Chicken Chimichangas vegetarian?

    To make this dish vegetarian, replace the chicken with a mixture of sautéed vegetables or beans.

    What can I serve with Baked Chicken Chimichangas?

    These chimichangas pair well with sides like Mexican rice, refried beans, or a fresh salad.

    Can Baked Chicken Chimichangas be made ahead of time?

    Absolutely! You can assemble them in advance and bake just before serving for a quick dinner option.

    What is the best way to store leftovers of Baked Chicken Chimichangas?

    Store them in airtight containers in the refrigerator for up to 3 days or freeze them for longer storage.

    Final Thoughts

    Baked Chicken Chimichangas are a delightful and satisfying meal that’s easy to prepare. We encourage you to try this recipe and share your thoughts in the comments section. Your feedback helps us refine our dishes and inspire others to enjoy home cooking.


    Dinner

    Baked Chicken Chimichangas


    5.0 from 24 reviews

    Baked Chicken Chimichangas are a delicious and easy-to-make dish featuring shredded chicken and creamy Pepperjack cheese wrapped in flour tortillas. Baked to a golden brown, they are perfect for a family dinner or a gathering with friends, served with your favorite toppings.

    Author: Munch Twist
    Prep Time: 15 minutes
    Cook Time: 30 minutes
    Total Time: 45 minutes
    Yield: 8 servings
    Category: Lunch
    Method: Baking
    Cuisine: American

    Baked Chicken Chimichangas

    SCALE:
    1x
    2x
    3x
    Cook Mode: Prevent your screen from going dark

    Ingredients

    • 8 flour tortillas
    • 8 oz Pepperjack cheese, shredded
    • 1 lb cooked chicken, shredded
    • 8 oz cream cheese
    • 1 1/2 Tbsp taco seasoning
    • Cooking spray
    • Shredded cheddar cheese, for serving
    • Green onions, for garnish
    • Sour cream, for serving
    • Salsa, for serving

    Instructions

    1. Preheat your oven to 350°F (175°C) and lightly spray a 9×13" baking dish with cooking spray.
    2. In a medium mixing bowl, stir together the cream cheese, shredded Pepperjack cheese, and taco seasoning until well combined.
    3. Fold the shredded cooked chicken into the cheese mixture, ensuring the chicken is evenly coated.
    4. Divide the chicken and cheese mixture evenly among the flour tortillas.
    5. Tuck in the sides of each tortilla, then roll them up tightly, placing them seam-side down in the prepared baking dish.
    6. Lightly spray the tops of the rolled tortillas with cooking spray.
    7. Bake in the preheated oven for 15 minutes, then carefully turn the chimichangas over and bake for an additional 15 minutes until golden brown and crispy.
    8. Remove from the oven and serve hot, topped with shredded cheddar cheese, green onions, sour cream, and salsa.

    Nutrition Facts

    Serving Size: 1 serving
    Calories: 420 kcal
    Sugar: 2g
    Sodium: 700mg
    Fat: 22g
    Saturated Fat: 11g
    Carbohydrates: 34g
    Fiber: 2g
    Protein: 24g
    Cholesterol: 80mg

  • Easy and Delicious Angel Chicken Rice Recipe

    Easy and Delicious Angel Chicken Rice Recipe

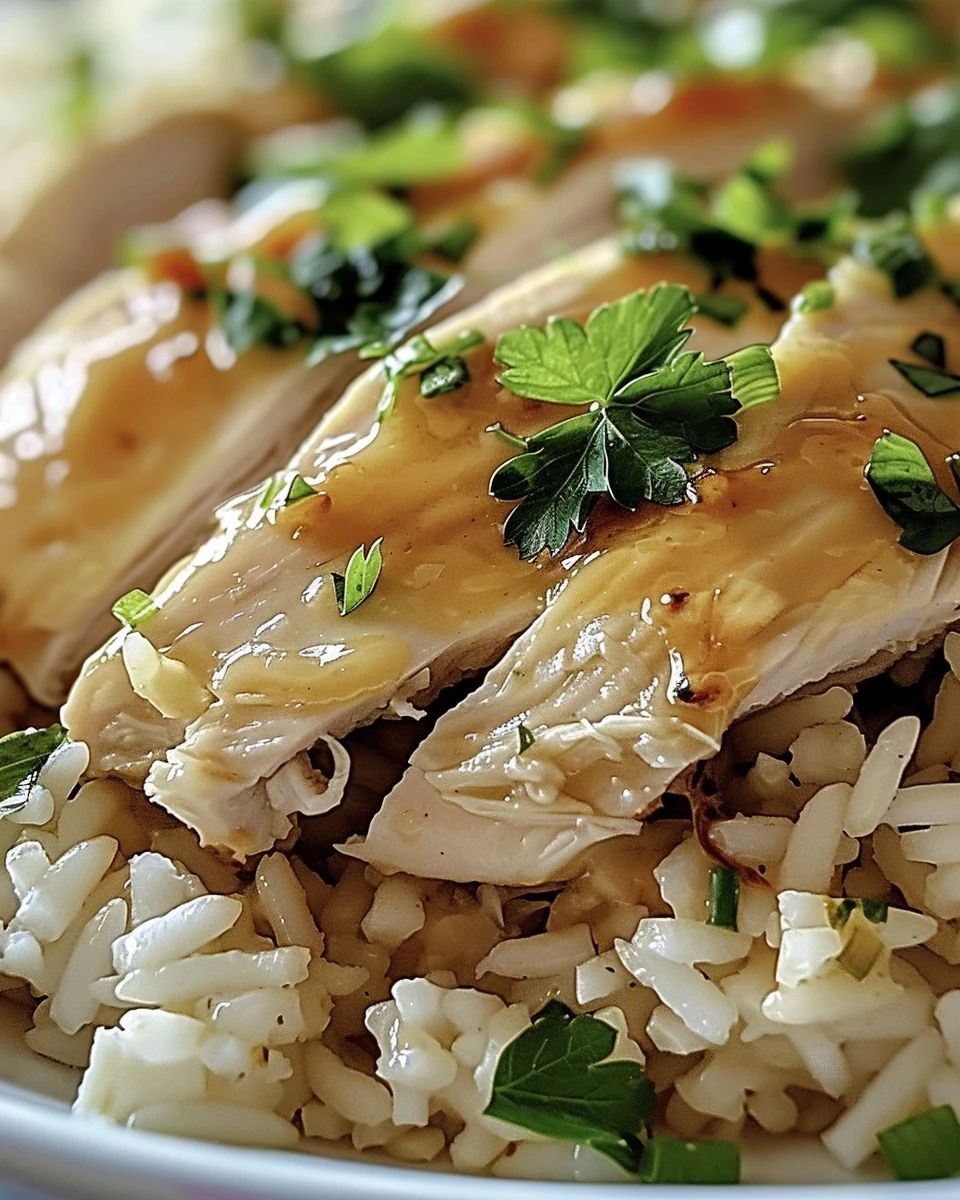
    Angel Chicken Rice is a comforting and delicious dish that embodies the perfect blend of flavors and textures. This casserole features tender chicken, creamy cheese, and hearty rice, making it a family favorite. The combination of ingredients creates a rich, savory meal that is both satisfying and easy to prepare.

    Why You’ll Love This Recipe

    • Quick & Easy: Ready in under 35 minutes, this dish is perfect for busy weeknights.
    • Creamy and Flavorful: The combination of cream cheese and Colby Jack cheese creates a rich, indulgent flavor.
    • Versatile Meal: This recipe can be customized with your favorite vegetables or spices.
    • Crowd-Pleaser: Ideal for family gatherings or potlucks, everyone will be asking for seconds.
    • One-Dish Wonder: Minimal cleanup required with everything baked in a single casserole dish.

    Tools and Equipment

    Having the right kitchen tools makes this recipe even more enjoyable to prepare.

    Essential Tools

    • 9×13” casserole dish
    • Microwave-safe bowl
    • Whisk
    • Large mixing bowl
    • Aluminum foil

    Why These Tools Matter

    • Casserole Dish: The size is perfect for even cooking and easy serving.
    • Microwave-Safe Bowl: Ideal for softening cream cheese and butter quickly.
    • Whisk: Ensures a smooth consistency in the creamy mixture, making it easy to combine all ingredients.

    Ingredients for Angel Chicken Rice

    Main Ingredients

    • 2 cups shredded Colby Jack cheese, divided use
    • 10.5 ounces cream of chicken soup
    • 3 cups cooked rice
    • ½ cup butter, room temperature and cubed
    • 1 cup chicken stock
    • 3 cloves garlic, minced
    • 3 cups cooked chicken, diced or shredded
    • 8 ounces cream cheese, room temperature and cubed
    • 0.7 ounce Italian dressing mix (I used Good Seasons)
    • Salt and pepper to taste
    • Fresh parsley for garnish

    How to Make Angel Chicken Rice Step-by-Step

    Step 1: Prep the Oven and Dish

    1. Preheat your oven to 350°F (175°C).
    2. Generously spray a 9×13” casserole dish with cooking spray to prevent sticking.

    Step 2: Soften the Cream Cheese and Butter

    1. In a microwave-safe bowl, combine the cream cheese and butter.
    2. Microwave for 20-30 seconds until softened.
    3. Whisk until the mixture is smooth and creamy.

    Step 3: Combine the Ingredients

    1. In a large mixing bowl, add the diced or shredded cooked chicken and cooked rice.
    2. Stir in the softened butter and cream cheese mixture, cream of chicken soup, minced garlic, Italian dressing mix, chicken stock, half of the shredded Colby Jack cheese, salt, and pepper.
    3. Mix thoroughly until all ingredients are well combined.

    Step 4: Assemble the Casserole

    1. Transfer the chicken and rice mixture into the prepared casserole dish.
    2. Spread it out evenly using a spatula.
    3. Sprinkle the remaining shredded Colby Jack cheese on top for a cheesy finish.

    Step 5: Bake the Casserole

    1. Cover the dish with aluminum foil to retain moisture.
    2. Bake in the preheated oven for 20-25 minutes or until the cheese is melted and the casserole is bubbling.

    Step 6: Serve and Garnish

    1. Remove the casserole from the oven and let it cool for 5 minutes.
    2. Carefully remove the foil and garnish with freshly chopped parsley.
    3. Serve warm and enjoy this delightful Angel Chicken Rice dish.

    Preparation time: 10 minutes | Cooking time: 25 minutes | Total time: 35 minutes

    Nutritional Information (per serving)

    • Calories: 548 kcal
    • Carbohydrates: 23g
    • Protein: 32g
    • Fat: 36g
    • Saturated Fat: 19g
    • Fiber: 1g
    • Sugar: 1g

    Nutritional values are approximate and based on one serving. Enjoy your Angel Chicken Rice as a delicious and fulfilling meal any night of the week.

    How to Serve Angel Chicken Rice

    Angel Chicken Rice is a versatile dish that can be enjoyed in various ways. Here are some creative serving ideas:

    Family-Style Serving

    Serve the casserole directly from the baking dish at the table. This allows everyone to help themselves, making it perfect for family gatherings or casual dinners.

    Individual Portions

    Scoop the Angel Chicken Rice into individual ramekins before baking. This not only makes for an attractive presentation but also allows for easy serving at parties or gatherings.

    With a Side Salad

    Pair the casserole with a fresh green salad tossed in a light vinaigrette. The crispness of the salad complements the creamy texture of the dish, creating a balanced meal.

    Pro Tips for the Best Angel Chicken Rice

    To elevate your Angel Chicken Rice, consider these practical tips:

    • Use Leftover Chicken: Utilizing leftover rotisserie or grilled chicken can save time and enhance flavor.
    • Customize the Cheese: Experiment with different cheese varieties such as Monterey Jack or cheddar for a unique twist.
    • Add Vegetables: Incorporate steamed broccoli or peas into the mixture for added nutrition and color.
    • Make Ahead: Assemble the dish a day in advance and refrigerate. Bake it fresh before serving for convenience.
    • Adjust Seasoning: Taste the mixture before baking and adjust the salt, pepper, or Italian dressing mix to suit your preferences.

    Best Side Dishes and Pairings

    To complement your Angel Chicken Rice, consider these delightful side dishes and drinks:

    1. Garlic Bread – The buttery, garlicky flavors of garlic bread pair nicely with the creamy casserole.
    2. Steamed Asparagus – This fresh and vibrant vegetable adds a healthy crunch and balances the richness of the dish.
    3. Caesar Salad – The crisp romaine and tangy dressing provide a refreshing contrast to the warm casserole.
    4. Roasted Brussels Sprouts – Their slight bitterness and caramelization enhance the savory notes of the Angel Chicken Rice.
    5. White Wine – A chilled glass of Sauvignon Blanc complements the dish’s creamy elements beautifully.

    Common Mistakes to Avoid

    • Not Softening Cheese: Ensure that the cream cheese and butter are softened adequately to achieve a smooth mixture.
    • Skipping the Garlic: Minced garlic adds essential flavor; omitting it can result in a bland dish.
    • Overcrowding the Casserole Dish: Spread the mixture evenly in the casserole dish to ensure even cooking and melting of cheese.
    • Neglecting to Let it Cool: Allow the casserole to cool for a few minutes before serving to enhance flavors and avoid burns.

    Storage & Reheating Instructions

    Refrigerator Storage

    Store leftover Angel Chicken Rice in airtight containers in the refrigerator. It will stay fresh for up to 3-4 days.

    Freezing Instructions

    To freeze, portion the Angel Chicken Rice into airtight containers or freezer bags. It can last up to 2-3 months in the freezer. For best results, thaw in the refrigerator overnight before reheating.

    Reheating Tips

    • Oven: Preheat to 350°F (175°C). Cover with foil and bake for 20-25 minutes, or until heated through.
    • Microwave: Place a serving in a microwave-safe dish, cover loosely, and heat for 2-3 minutes, stirring halfway through.
    • Stovetop: Heat in a skillet over medium heat, stirring occasionally until warmed through.

    Frequently Asked Questions

    What is Angel Chicken Rice?

    Angel Chicken Rice is a comforting casserole made with shredded chicken, rice, cream cheese, and Colby Jack cheese, perfect for family dinners.

    Can I use different types of cheese in Angel Chicken Rice?

    Yes, you can substitute Colby Jack cheese with other cheeses like cheddar or Monterey Jack for a different flavor profile.

    How can I make Angel Chicken Rice healthier?

    You can use brown rice instead of white rice and opt for reduced-fat cream cheese and soup to lower the calorie count.

    Can I prepare Angel Chicken Rice ahead of time?

    Absolutely! You can assemble the casserole a day in advance and store it in the refrigerator until you’re ready to bake.

    What can I serve with Angel Chicken Rice?

    This dish pairs well with a fresh salad, steamed vegetables, or garlic bread for a complete meal.

    Final Thoughts

    Angel Chicken Rice is an easy and delicious dish that makes for perfect comfort food any day of the week. We hope you try this recipe and enjoy it as much as we do. Please leave a comment below to share your thoughts or any variations you made!


    Dinner

    Angel Chicken Rice


    5.0 from 24 reviews

    Angel Chicken Rice is a comforting casserole that combines tender chicken, creamy cheese, and fluffy rice, all baked to perfection. This dish is easy to prepare and makes for a satisfying meal, perfect for family gatherings or weeknight dinners.

    Author: Munch Twist
    Prep Time: 10 minutes
    Cook Time: 25 minutes
    Total Time: 35 minutes
    Yield: 6 servings
    Category: Lunch
    Method: Baking
    Cuisine: American

    Angel Chicken Rice

    SCALE:
    1x
    2x
    3x
    Cook Mode: Prevent your screen from going dark

    Ingredients

    • 2 cups shredded Colby Jack cheese, divided use
    • 10.5 ounces cream of chicken soup
    • 3 cups cooked rice
    • ½ cup butter, room temperature and cubed
    • 1 cup chicken stock
    • 3 cloves garlic, minced
    • 3 cups cooked chicken, diced or shredded
    • 8 ounces cream cheese, room temperature and cubed
    • 0.7 ounce Italian dressing mix
    • Salt and pepper to taste
    • Fresh parsley for garnish

    Instructions

    1. Preheat your oven to 350°F (175°C) and generously spray a 9×13” casserole dish with cooking spray.
    2. In a microwave-safe bowl, soften the cream cheese and butter by microwaving for 20-30 seconds. Whisk until smooth and creamy.
    3. In a large mixing bowl, combine the diced or shredded cooked chicken, cooked rice, softened butter and cream cheese mixture, cream of chicken soup, minced garlic, Italian dressing mix, chicken stock, half of the shredded Colby Jack cheese, salt, and pepper. Stir until everything is evenly combined.
    4. Transfer the chicken and rice mixture into the prepared casserole dish, spreading it out evenly.
    5. Sprinkle the remaining shredded Colby Jack cheese on top.
    6. Cover the dish with aluminum foil and bake in the preheated oven for 20-25 minutes, or until the cheese is melted and the casserole is bubbling.
    7. Remove the casserole from the oven and let it cool for 5 minutes before removing the foil.
    8. Garnish with freshly chopped parsley, and enjoy!

    Nutrition Facts

    Serving Size: 1 serving
    Calories: 548 kcal
    Sugar: 1g
    Sodium: 800mg
    Fat: 36g
    Saturated Fat: 19g
    Carbohydrates: 23g
    Fiber: 1g
    Protein: 32g
    Cholesterol: 120mg

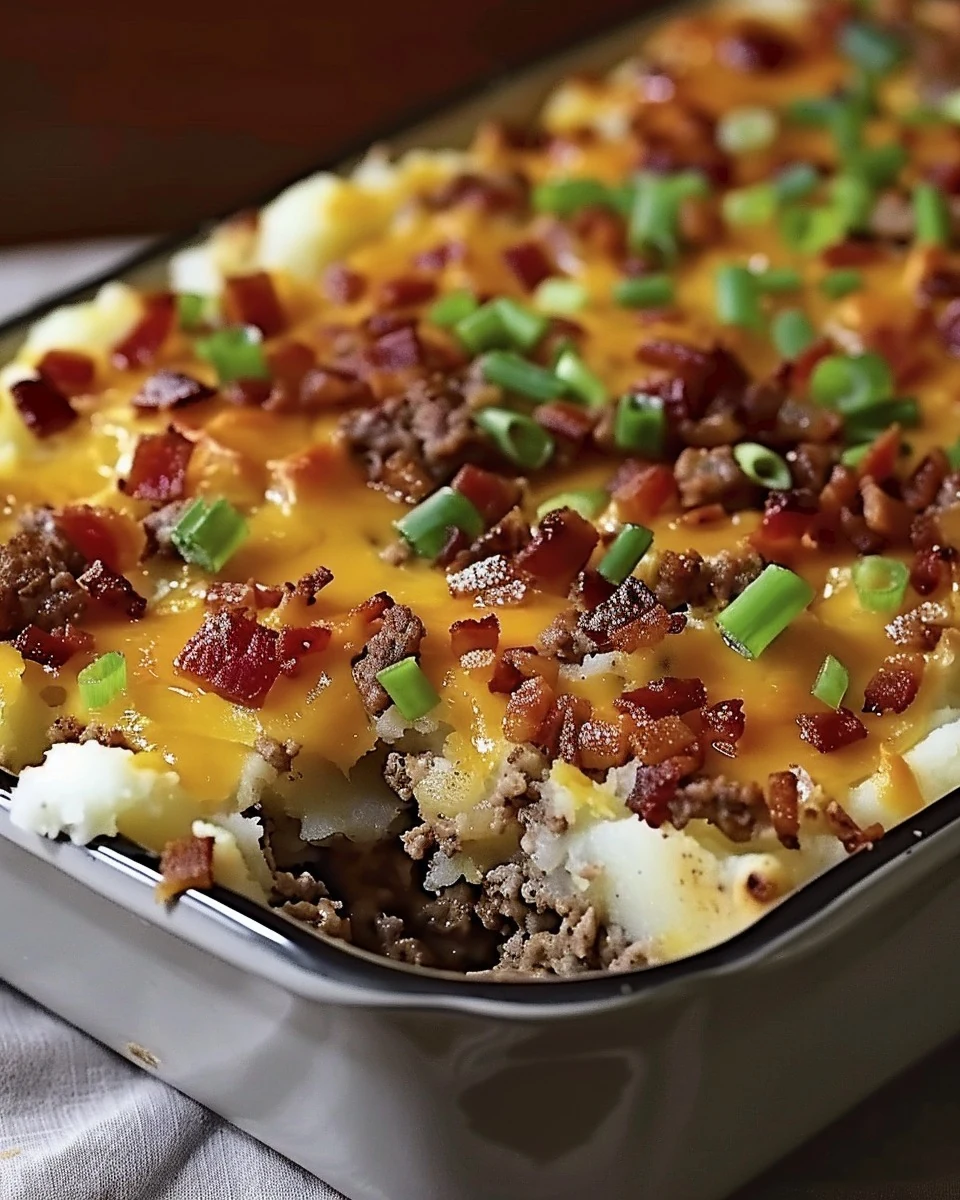
  • Delicious Loaded Potato Meatloaf Casserole Recipe

    Delicious Loaded Potato Meatloaf Casserole Recipe

    Loaded Potato Meatloaf Casserole is a delicious and hearty dish that combines the best of meatloaf and loaded baked potatoes. This comforting casserole features a savory meat layer topped with creamy mashed potatoes, melted cheese, and crispy bacon bits, making it a family favorite. Perfect for weeknight dinners, it’s a dish that will satisfy even the heartiest appetites.

    Why You’ll Love This Recipe

    • Flavor Explosion: The combination of seasoned beef, creamy potatoes, and melty cheese creates a rich and satisfying taste.
    • Comfort Food Classic: This casserole is a delightful twist on traditional meatloaf, bringing warmth and nostalgia to your table.
    • Crowd-Pleaser: Loaded Potato Meatloaf Casserole is sure to impress family and friends, making it ideal for gatherings.
    • One-Dish Wonder: Minimal cleanup is required since everything cooks in one baking dish.
    • Customizable: Feel free to add your favorite toppings or vegetables to make this dish your own.

    Tools and Equipment

    Having the right tools can streamline your cooking process and enhance your results.

    Essential Tools

    • Mixing bowl
    • Medium saucepan
    • Rubber spatula
    • 8-inch square baking dish
    • Aluminum foil

    Why These Tools Matter

    • Mixing Bowl: A large bowl allows for easy combining of ingredients without spills.
    • Medium Saucepan: Perfect for preparing the mashed potatoes, ensuring even heating and mixing.
    • Rubber Spatula: This tool helps spread the mashed potatoes smoothly over the meat layer.

    Ingredients for Loaded Potato Meatloaf Casserole

    Meat and Base Ingredients

    • 1 lb ground beef, extra lean
    • 1/2 cup onion, diced
    • 1 cup seasoned Italian bread crumbs
    • 2 tbsp brown sugar
    • 1 tbsp Worcestershire sauce
    • 1 egg

    Mashed Potato Ingredients

    • 1 (4 oz) package of garlic-flavored instant mashed potatoes
    • 1/2 cup milk
    • 1 1/2 cups water

    Topping Ingredients

    • 1 1/2 cups cheddar cheese blend, shredded
    • 1/4 cup real bacon bits

    How to Make Loaded Potato Meatloaf Casserole Step-by-Step

    Step 1: Prep the Base

    1. Preheat your oven to 400°F (200°C). Grease an 8-inch square baking dish thoroughly.
    2. In a medium saucepan, combine the water and milk. Bring to a boil, then remove from heat.
    3. Stir in the garlic-flavored instant mashed potato powder until smooth. Set aside to cool slightly.

    Step 2: Make the Meat Mixture

    1. In a large mixing bowl, combine the ground beef, diced onions, brown sugar, and Worcestershire sauce. Use your hands to mix until well incorporated.
    2. Add the seasoned Italian bread crumbs and egg. Continue mixing by hand until everything is thoroughly combined.

    Step 3: Assemble the Casserole

    1. Press the meat mixture evenly into the prepared baking dish, creating a flat layer.
    2. Using a rubber spatula, spread the prepared mashed potatoes over the meat layer, ensuring it’s evenly distributed.
    3. Sprinkle the shredded cheddar cheese blend on top, followed by an even layer of bacon bits.

    Step 4: Bake and Serve

    1. Cover the dish with aluminum foil and bake in the preheated oven for 30 minutes.
    2. After 30 minutes, remove the foil and bake for an additional 10 minutes to allow the cheese to melt and become golden.
    3. Once baked, remove the casserole from the oven and let it cool for a few minutes before slicing and serving.

    Preparation time: 20 minutes | Cooking time: 40 minutes

    Nutritional Information (per serving)

    • Calories: 370 kcal
    • Carbohydrates: 25g
    • Protein: 23g
    • Fat: 20g
    • Saturated Fat: 9g
    • Fiber: 2g
    • Sugar: 4g

    Nutritional values are approximate and based on one serving. Enjoy your Loaded Potato Meatloaf Casserole, a dish that brings comfort and satisfaction to every bite.

    How to Serve Loaded Potato Meatloaf Casserole

    Loaded Potato Meatloaf Casserole is a versatile dish that can be served in various ways to suit any occasion.

    Garnished with Fresh Herbs

    Top each serving with freshly chopped parsley or chives to add a burst of color and enhance the flavors.

    With a Side Salad

    Serve alongside a crisp garden salad dressed in a light vinaigrette to balance the richness of the casserole.

    Accompanied by Garlic Bread

    Pairing the casserole with warm garlic bread makes for a hearty meal, perfect for family gatherings or cold evenings.

    Pro Tips for the Best Loaded Potato Meatloaf Casserole

    For a perfect Loaded Potato Meatloaf Casserole, consider the following tips.

    • Quality Ingredients: Use high-quality ground beef and fresh ingredients for the best flavor and texture.
    • Even Layering: Ensure the meat mixture is evenly pressed into the baking dish for consistent cooking and serving.
    • Rest Before Serving: Allow the casserole to cool for a few minutes after baking; this helps the layers set and makes for easier slicing.
    • Customize the Toppings: Feel free to experiment with other toppings such as green onions or different cheese blends for a unique twist.
    • Leftover Storage: Store any leftovers in an airtight container in the refrigerator for up to three days, making for quick and easy reheats.

    Best Side Dishes and Pairings

    To enhance your meal experience, consider these side dishes and drinks that pair wonderfully with Loaded Potato Meatloaf Casserole.

    1. Steamed Broccoli – This nutrient-rich vegetable adds a pop of color and a healthy crunch to your meal.
    2. Coleslaw – The tangy and creamy texture of coleslaw provides a refreshing contrast to the richness of the casserole.
    3. Corn on the Cob – Sweet, juicy corn complements the savory flavors of the dish, creating a satisfying combination.
    4. Mashed Sweet Potatoes – The sweetness of mashed sweet potatoes adds a delightful balance to the savory meatloaf.
    5. Red Wine – A glass of medium-bodied red wine can enhance the flavors of the casserole, making for a sophisticated pairing.

    Common Mistakes to Avoid

    • Not Using Lean Meat: Opting for higher-fat ground beef can result in a greasy casserole.
    • Skipping the Egg: The egg is crucial for binding the meat mixture; omitting it may lead to a crumbly texture.
    • Overbaking the Cheese: Baking too long after removing the foil can lead to burnt cheese, so keep an eye on it.
    • Not Letting It Rest: Allowing the casserole to cool for a few minutes before slicing helps it hold its shape.

    Storage & Reheating Instructions

    Refrigerator Storage

    Store any leftovers in airtight containers in the refrigerator. The Loaded Potato Meatloaf Casserole will stay fresh for up to 3 days.

    Freezing Instructions

    For long-term storage, freeze individual portions or the entire casserole wrapped tightly in plastic wrap and aluminum foil. It can be frozen for up to 3 months. Thaw overnight in the refrigerator before reheating.

    Reheating Tips

    • Oven: Preheat to 350°F (175°C). Cover with foil and bake for 20-25 minutes until heated through.
    • Microwave: Use a microwave-safe dish, cover, and heat for 2-3 minutes or until warm, stirring halfway.
    • Stovetop: Heat in a skillet over medium heat, adding a splash of water to prevent sticking, and cover until warmed through.

    Frequently Asked Questions

    How can I make a healthier version of Loaded Potato Meatloaf Casserole?

    You can use ground turkey or chicken instead of beef, low-fat cheese, and whole grain breadcrumbs for a healthier twist.

    Can I make Loaded Potato Meatloaf Casserole ahead of time?

    Yes, you can prepare the casserole up to the baking step, cover it tightly, and refrigerate for up to 24 hours before baking.

    What can I serve with Loaded Potato Meatloaf Casserole?

    This dish pairs well with a simple green salad or steamed vegetables for a balanced meal.

    Can I use different types of cheese in the casserole?

    Absolutely! Feel free to substitute with your favorite cheese, such as mozzarella or pepper jack, for a unique flavor.

    Is Loaded Potato Meatloaf Casserole freezer-friendly?

    Yes, this casserole freezes well. Just follow the freezing instructions for best results.

    Final Thoughts

    The Loaded Potato Meatloaf Casserole is a comforting and satisfying dish that is sure to please the whole family. Its combination of flavors and textures makes it a perfect choice for dinner. Give it a try, and don’t forget to leave a comment sharing your experience and any variations you made!


    Dinner

    Loaded Potato Meatloaf Casserole


    5.0 from 24 reviews

    This Loaded Potato Meatloaf Casserole combines the comforting flavors of meatloaf and mashed potatoes, topped with melted cheese and crispy bacon bits. It's a hearty dish perfect for family dinners, offering a delightful blend of textures and tastes in every bite.

    Author: Munch Twist
    Prep Time: 20 minutes
    Cook Time: 40 minutes
    Total Time: 60 minutes
    Yield: 6 servings
    Category: Lunch
    Method: No bake
    Cuisine: American

    Loaded Potato Meatloaf Casserole

    SCALE:
    1x
    2x
    3x
    Cook Mode: Prevent your screen from going dark

    Ingredients

    • 1/2 cup milk
    • 1 1/2 cups water
    • 1 lb ground beef, extra lean
    • 1 cup seasoned Italian bread crumbs
    • 2 tbsp brown sugar
    • 1 (4 oz) package of garlic-flavored instant mashed potatoes
    • 1/2 cup onion, diced
    • 1/4 cup real bacon bits
    • 1 egg
    • 1 tbsp Worcestershire sauce
    • 1 1/2 cups cheddar cheese blend, shredded

    Instructions

    1. Preheat your oven to 400°F (200°C). Grease an 8-inch square baking dish.
    2. In a medium saucepan, bring the water and milk to a boil. Once boiling, remove from heat and stir in the garlic-flavored instant mashed potato powder until smooth. Set aside.
    3. In a large mixing bowl, combine the ground beef, diced onions, brown sugar, and Worcestershire sauce using your hands until well incorporated.
    4. Add the seasoned Italian bread crumbs and egg to the meat mixture, continuing to mix by hand until everything is thoroughly combined.
    5. Press the meat mixture evenly into the prepared baking dish, creating an even layer.
    6. Using a rubber spatula, spread the prepared mashed potatoes over the meat layer, ensuring it’s evenly distributed.
    7. Sprinkle the shredded cheddar cheese blend on top of the mashed potatoes, followed by an even layer of bacon bits.
    8. Cover the dish with aluminum foil and bake in the preheated oven for 30 minutes.
    9. After 30 minutes, remove the foil and bake for an additional 10 minutes to allow the cheese to melt and become golden.
    10. Remove the casserole from the oven and let it cool for a few minutes before slicing and serving.

    Nutrition Facts

    Serving Size: 1 serving
    Calories: 370 kcal
    Sugar: 4g
    Sodium: 600mg
    Fat: 20g
    Saturated Fat: 9g
    Carbohydrates: 25g
    Fiber: 2g
    Protein: 23g
    Cholesterol: 80mg

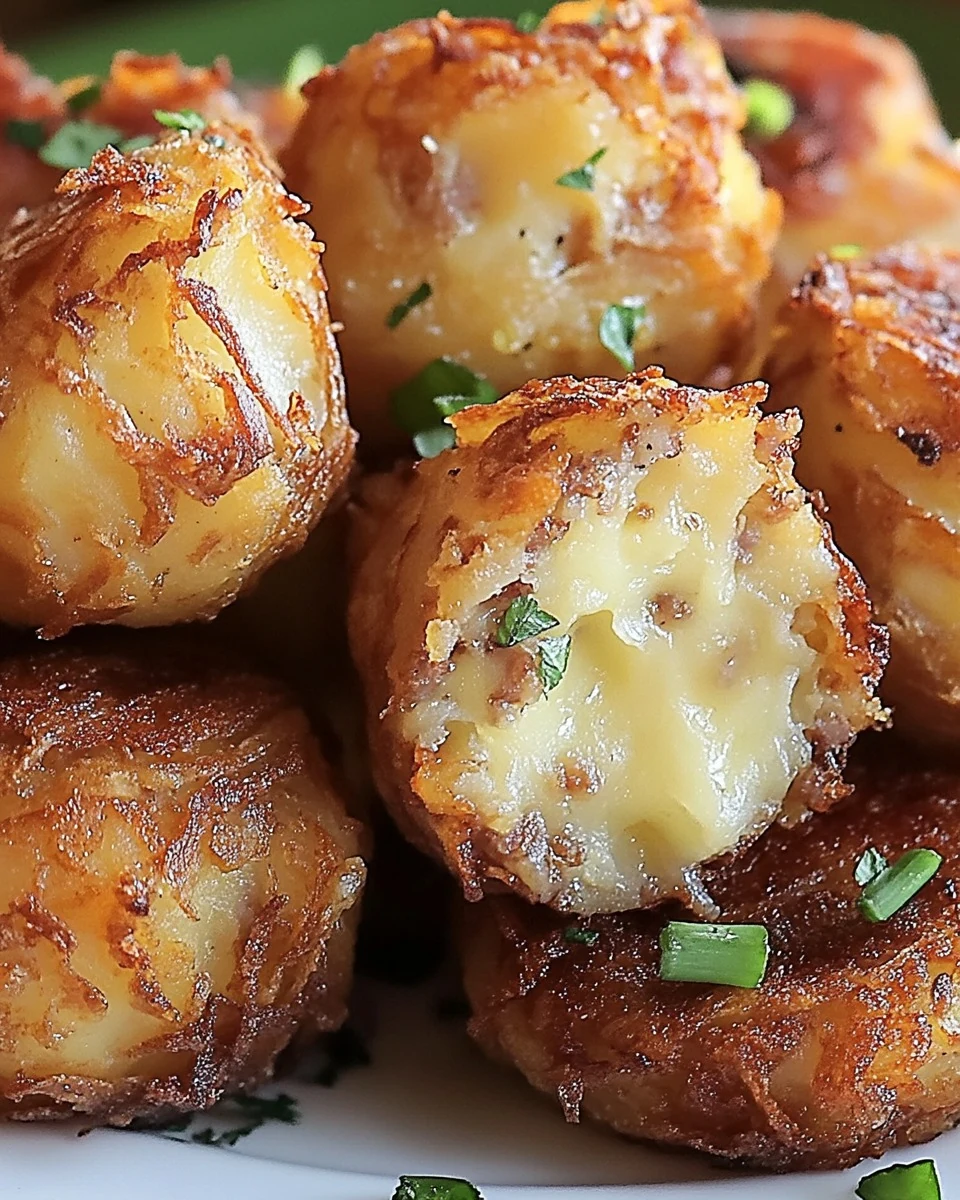
  • Delicious Sausage Hashbrown Bites Recipe

    Delicious Sausage Hashbrown Bites Recipe

    Sausage Hashbrown Bites are a delightful combination of savory sausage, creamy cheese, and crispy hash browns. These bites are perfect for parties, snacks, or a tasty breakfast treat. Their irresistible flavor and easy preparation make them a must-try for any occasion.

    Why You’ll Love This Recipe

    • Quick & Easy: Ready in under 30 minutes, making them perfect for busy mornings or last-minute gatherings.
    • Crowd-Pleaser: These bites are sure to impress guests and family alike with their delicious taste and texture.
    • Versatile Snack: Enjoy them as a breakfast option, party appetizer, or savory snack at any time of day.
    • Cheesy Goodness: The combination of cream cheese and cheddar creates a rich, creamy interior that pairs perfectly with crispy outsides.
    • Make Ahead: These bites can be prepared in advance and frozen, allowing you to enjoy them whenever you like.

    Tools and Equipment

    Having the right tools makes cooking enjoyable and efficient.

    Essential Tools

    • Mixing bowl
    • Baking sheet
    • Parchment paper
    • Cookie scoop or spoon

    Why These Tools Matter

    • Mixing bowl: A large bowl provides enough space to combine all ingredients without spilling.
    • Baking sheet: A sturdy sheet ensures even cooking and browning of the bites.
    • Parchment paper: This prevents sticking and makes cleanup effortless.

    Ingredients for Sausage Hashbrown Bites

    Main Ingredients

    • 1 lb ground breakfast sausage (uncooked)
    • 1 ½ cups shredded cheddar cheese
    • 8 oz softened cream cheese
    • 1 ½ cups Bisquick mix
    • 4 cups shredded frozen hash browns

    How to Make Sausage Hashbrown Bites Step-by-Step

    Step 1: Preheat the Oven

    Set your oven to 400°F (200°C). Preheating is essential for achieving that perfect golden brown color.

    Step 2: Combine Ingredients

    In a large mixing bowl, combine the following:
    * 8 oz softened cream cheese
    * 1 lb ground breakfast sausage
    * 1 ½ cups shredded cheddar cheese
    * 1 ½ cups Bisquick mix
    * 4 cups shredded frozen hash browns

    Mix until everything is well incorporated, ensuring an even distribution of flavors.

    Step 3: Form the Bites

    Shape the mixture into evenly sized balls. This helps them cook uniformly. Place them on a parchment-lined baking sheet to prevent sticking.

    Step 4: Bake

    Bake the bites in the preheated oven for 20-25 minutes. Keep an eye on them, and remove when they are golden brown and crispy on the outside.

    Step 5: Cool and Serve

    Allow the bites to cool slightly before serving. This helps them set and makes them easier to enjoy.

    With these simple steps, you’ll have delicious Sausage Hashbrown Bites ready to delight your taste buds. Enjoy them fresh from the oven or store them for later.

    How to Serve Sausage Hashbrown Bites

    Sausage Hashbrown Bites are versatile and can be enjoyed in various ways.

    For Breakfast or Brunch

    Serve these bites alongside scrambled eggs and fresh fruit for a hearty breakfast or brunch option. They add a savory element that complements the sweetness of the fruit.

    As Party Appetizers

    Present the bites on a platter with toothpicks at your next gathering. Their bite-sized nature makes them perfect for mingling and enjoying with friends.

    With Dipping Sauces

    Pair your Sausage Hashbrown Bites with a variety of dipping sauces such as ranch, sriracha mayo, or honey mustard. The sauces add an extra layer of flavor that elevates the dish.

    Pro Tips for the Best Sausage Hashbrown Bites

    To achieve maximum flavor and texture, consider these helpful tips.

    • Use Fresh Ingredients: Fresh ingredients will enhance the overall flavor of your bites. Opt for high-quality sausage and freshly shredded cheese.

    • Chill the Mixture: For easier handling, chill the mixture in the refrigerator for about 30 minutes before forming the bites. This helps them maintain their shape while baking.

    • Uniform Size: Ensure all bites are the same size for even cooking. Aim for about 1 to 1.5 inches in diameter.

    • Don’t Overbake: Keep an eye on your bites during the last few minutes of baking to avoid overcooking. They should be golden brown and firm to the touch.

    • Experiment with Cheese: While cheddar is a classic choice, feel free to experiment with other cheeses like pepper jack or mozzarella for different flavor profiles.

    Best Side Dishes and Pairings

    To complement your Sausage Hashbrown Bites, consider these delightful side dishes and drinks.

    1. Fresh Fruit Salad: A bright and refreshing fruit salad balances the richness of the bites, providing a burst of sweetness.

    2. Scrambled Eggs: Fluffy scrambled eggs add a soft texture and make for a complete breakfast spread when served together.

    3. Veggie Platter: A colorful assortment of fresh vegetables with a light dip offers a crunchy contrast to the soft hashbrown bites.

    4. Coffee or Tea: A warm beverage like coffee or herbal tea pairs well, enhancing the meal’s comfort factor.

    5. Crisp Green Salad: A simple green salad dressed with vinaigrette adds a refreshing element that cuts through the richness of the bites.

    Common Mistakes to Avoid

    • Skipping the Cream Cheese: Ensure the cream cheese is softened to allow for easy mixing.
    • Overcrowding the Baking Sheet: Leave enough space between bites for even cooking and crispiness.
    • Not Preheating the Oven: Always preheat your oven to ensure the bites cook evenly from the start.
    • Ignoring Storage Guidelines: Proper storage is key to maintaining freshness and flavor.

    Storage & Reheating Instructions

    Refrigerator Storage

    Store Sausage Hashbrown Bites in an airtight container in the refrigerator. They will stay fresh for up to 3 days.

    Freezing Instructions

    To freeze, place the bites in a single layer on a baking sheet and freeze until solid. Transfer them to an airtight container or freezer bag for up to 2 months. Thaw in the refrigerator before reheating.

    Reheating Tips

    • Oven: Preheat to 350°F (175°C) and bake for 10-15 minutes until heated through.
    • Microwave: Heat on medium power for 1-2 minutes, checking frequently to avoid overcooking.
    • Stovetop: Reheat in a skillet over medium heat for about 5 minutes, turning occasionally.

    Frequently Asked Questions

    Can I make Sausage Hashbrown Bites ahead of time?

    Yes, you can prepare the mixture and form the bites a day in advance. Store them in the refrigerator until ready to bake.

    What type of sausage works best for Sausage Hashbrown Bites?

    Ground breakfast sausage is ideal, but you can use any sausage of your choice, including turkey or plant-based options for a healthier alternative.

    Can I add vegetables to Sausage Hashbrown Bites?

    Absolutely! Chopped bell peppers, onions, or spinach can be mixed in for added flavor and nutrition.

    How do I know when the bites are done baking?

    Sausage Hashbrown Bites are done when they are golden brown and cooked through, typically after 20-25 minutes of baking.

    What can I serve with Sausage Hashbrown Bites?

    These bites pair well with a side of scrambled eggs or a light salad for a complete meal.

    Final Thoughts

    Sausage Hashbrown Bites are a delightful and easy recipe perfect for any gathering or a quick snack. We encourage you to try making them yourself and share your experience in the comments below.


    Dinner

    Sausage Hashbrown Bites


    5.0 from 24 reviews

    Sausage Hashbrown Bites are a delicious and easy-to-make appetizer that combines savory ground breakfast sausage, creamy cheese, and crispy hash browns. Perfect for parties or a tasty snack, these bite-sized treats are sure to please any crowd.

    Author: Munch Twist
    Prep Time: 10 minutes
    Cook Time: 25 minutes
    Total Time: 35 minutes
    Yield: 12 servings
    Category: Lunch
    Method: No bake
    Cuisine: American

    Sausage Hashbrown Bites

    SCALE:
    1x
    2x
    3x
    Cook Mode: Prevent your screen from going dark

    Ingredients

    • 1 lb ground breakfast sausage (uncooked)
    • 1 ½ cups shredded cheddar cheese
    • 8 oz softened cream cheese
    • 1 ½ cups Bisquick mix
    • 4 cups shredded frozen hash browns

    Instructions

    1. Preheat your oven to 400°F (200°C).
    2. In a large mixing bowl, combine the softened cream cheese, ground breakfast sausage, shredded cheddar cheese, Bisquick mix, and shredded frozen hash browns. Mix until everything is well incorporated.
    3. Shape the mixture into evenly sized balls and place them on a parchment-lined baking sheet.
    4. Bake the bites in the preheated oven for 20-25 minutes, or until golden brown.
    5. Allow the bites to cool slightly before serving.

    Nutrition Facts

    Serving Size: 1 serving
    Calories: 300 kcal
    Sugar: 1g
    Sodium: 500mg
    Fat: 20g
    Saturated Fat: 8g
    Carbohydrates: 15g
    Fiber: 1g
    Protein: 12g
    Cholesterol: 45mg

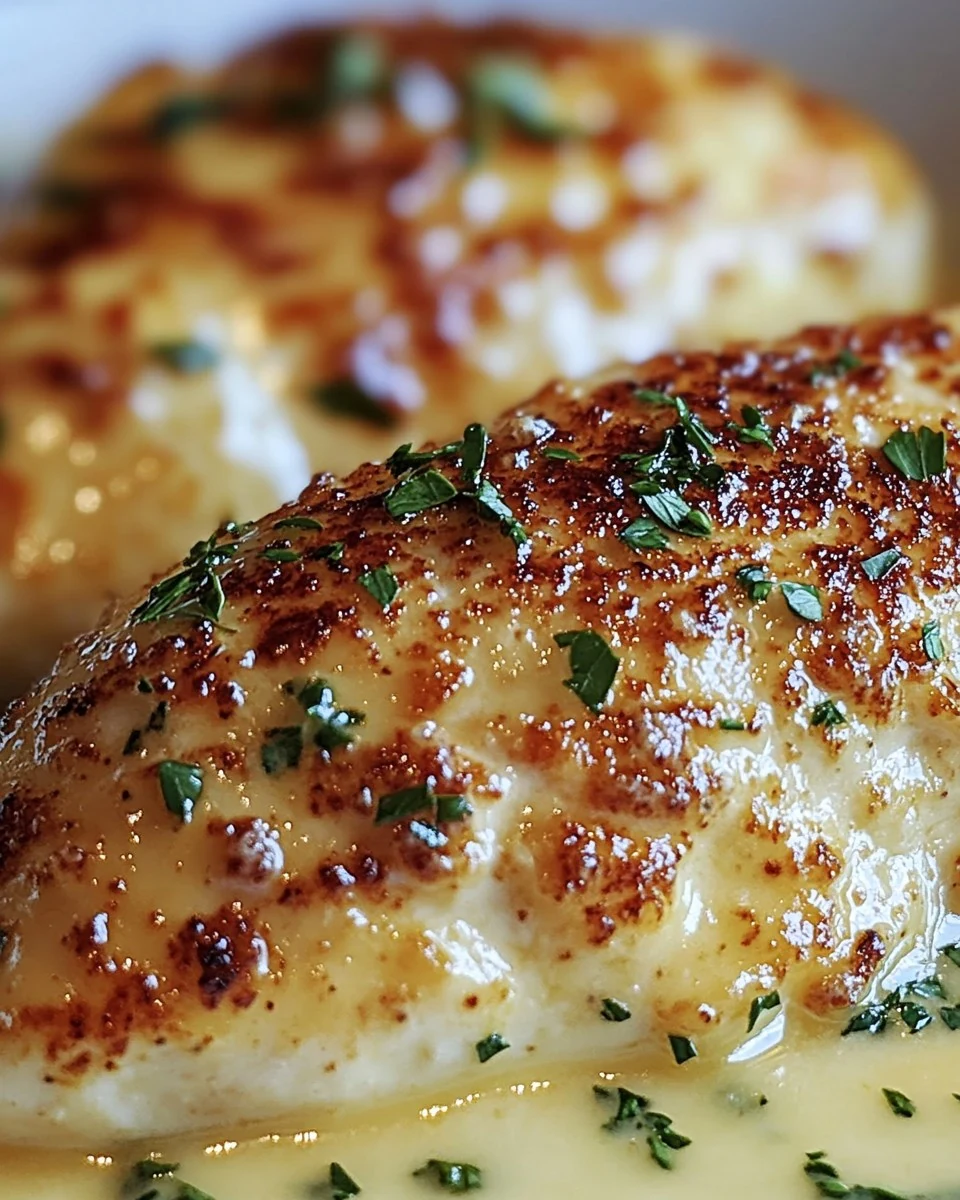
  • Delicious Mayo Parmesan Chicken Recipe in 30 Minutes

    Delicious Mayo Parmesan Chicken Recipe in 30 Minutes

    Mayo Parmesan Chicken Recipe is a delightful dish that combines creamy mayonnaise with rich Parmesan cheese to create a juicy, flavorful chicken experience. This recipe is perfect for anyone looking to elevate their weeknight dinners with minimal effort.

    Why You’ll Love This Recipe

    • Quick & Easy: Ready in under 30 minutes, making it perfect for busy weeknights.
    • Rich Flavor: The combination of mayonnaise and Parmesan creates a creamy, cheesy topping that enhances every bite.
    • Juicy Chicken: Baking locks in moisture, ensuring the chicken remains tender and succulent.
    • Minimal Cleanup: One baking dish is all you need, making cleanup a breeze.
    • Customizable: Feel free to add your favorite herbs or spices for a personal touch.

    Tools and Equipment

    Having the right tools makes cooking enjoyable and efficient.

    Essential Tools

    • Nonstick baking dish (9×13 inches)
    • Mixing bowl
    • Measuring spoons
    • Spatula
    • Meat thermometer

    Why These Tools Matter

    • Nonstick baking dish: Ensures the chicken doesn’t stick and makes for easier serving.
    • Measuring spoons: Accurate measurements guarantee the best flavor balance.
    • Spatula: Helps in evenly spreading the mayonnaise mixture over the chicken.

    Ingredients for Mayo Parmesan Chicken Recipe

    Chicken

    • 4 boneless, skinless chicken breasts (about 1 ½ pounds)

    Seasoning

    • ½ teaspoon salt
    • 1 teaspoon smoked paprika
    • 1 teaspoon garlic powder
    • 1 teaspoon onion powder
    • 1 teaspoon cracked pepper

    Topping

    • 1 cup shredded Parmesan cheese, divided
    • ½ cup mayonnaise

    Garnish

    • Fresh parsley for garnish

    How to Make Mayo Parmesan Chicken Recipe Step-by-Step

    Step 1: Preheat the Oven

    Preheat your oven to 425°F (220°C). Lightly coat a 9×13-inch baking dish with nonstick spray to prevent sticking.

    Step 2: Season the Chicken

    Sprinkle the chicken breasts evenly with salt, smoked paprika, and cracked pepper. Place the seasoned chicken in a single layer in the prepared baking dish.

    Step 3: Mix the Topping

    In a mixing bowl, combine the mayonnaise, ½ cup of Parmesan cheese, garlic powder, and onion powder. Stir until the mixture is smooth and well blended.

    Step 4: Coat the Chicken

    Spread the mayonnaise mixture generously over each chicken breast. Top with the remaining ½ cup of Parmesan cheese to add extra flavor and texture.

    Step 5: Bake

    Bake in the preheated oven for 25 minutes. Ensure the chicken reaches an internal temperature of 165°F (74°C) and the top is golden brown.

    Step 6: Garnish and Serve

    Before serving, sprinkle with fresh parsley for added color and flavor. Enjoy your Mayo Parmesan Chicken, a creamy and cheesy dish that impresses with its simplicity.

    Preparation time: 5 minutes | Cooking time: 25 minutes | Total Time: 30 minutes | Servings: 4

    Nutritional Information (per serving):
    – Calories: ~350 kcal
    – Carbohydrates: ~2g
    – Protein: ~34g
    – Fat: ~22g

    This Mayo Parmesan Chicken Recipe offers a gourmet touch to your dinner table, ensuring satisfaction with every bite.

    How to Serve Mayo Parmesan Chicken Recipe

    This dish is versatile and can be paired with a variety of sides or garnishes to enhance your dining experience.

    Serve with a Fresh Salad

    Pair the Mayo Parmesan Chicken with a crisp green salad topped with a light vinaigrette. The freshness of the salad complements the rich flavors of the chicken.

    Accompany with Roasted Vegetables

    Roasted seasonal vegetables, such as asparagus or Brussels sprouts, add a delicious contrast in texture and flavor. Their caramelized edges bring out the best in the chicken.

    Pair with Creamy Mashed Potatoes

    Creamy mashed potatoes make for a comforting side that balances the savory notes of the Mayo Parmesan Chicken. The potatoes can absorb the delicious juices of the chicken for an added flavor boost.

    Pro Tips for the Best Mayo Parmesan Chicken Recipe

    To elevate your dish, consider these expert tips.

    • Use Fresh Ingredients: Always opt for fresh chicken breasts and high-quality Parmesan cheese for the best flavor and texture.
    • Adjust Seasoning: Feel free to customize the seasoning blend according to your taste preferences. Adding herbs like thyme or oregano can enhance the dish’s flavor profile.
    • Avoid Overcooking: Use a meat thermometer to ensure the chicken reaches 165°F (74°C) without overcooking, which can lead to dryness.
    • Let it Rest: Allow the chicken to rest for a few minutes after baking. This helps retain the juices for a more tender bite.
    • Experiment with Toppings: Consider adding breadcrumbs or additional herbs to the topping for extra crunch and flavor.

    Best Side Dishes and Pairings

    Enhance your meal with these delightful side options that pair perfectly with your Mayo Parmesan Chicken.

    1. Garlic Bread: A warm, buttery garlic bread serves as a perfect accompaniment, ideal for soaking up the chicken’s savory juices.
    2. Steamed Green Beans: The crunch and freshness of steamed green beans provide a nice contrast to the creamy chicken.
    3. Cauliflower Rice: A low-carb alternative that absorbs flavors beautifully, making it a fantastic base for the Mayo Parmesan Chicken.
    4. Quinoa Salad: A light quinoa salad with lemon and herbs adds a nutritious and refreshing element to your meal.
    5. Chardonnay: A chilled glass of Chardonnay complements the creamy texture of the chicken and enhances the overall dining experience.

    Common Mistakes to Avoid

    • Using Low-Quality Chicken: Selecting chicken breasts that are not fresh can result in a dry and less flavorful dish.
    • Overcooking the Chicken: Baking the chicken for too long can lead to toughness; always check the internal temperature.
    • Skipping the Seasoning: Neglecting to season the chicken beforehand can result in a bland final dish.
    • Not Allowing Cheese to Brown: Baking at the correct temperature is essential to achieve that desired golden-brown crust on the cheese.

    Storage & Reheating Instructions

    Refrigerator Storage

    Store any leftover Mayo Parmesan Chicken in an airtight container in the refrigerator. It will stay fresh for up to 3 days.

    Freezing Instructions

    For best results, freeze the cooked Mayo Parmesan Chicken in a single layer on a baking sheet until solid, then transfer to a freezer-safe bag or container. It can be frozen for up to 2 months. Thaw in the refrigerator before reheating.

    Reheating Tips

    • Oven: Preheat to 350°F (175°C) and bake for about 15-20 minutes until heated through.
    • Microwave: Heat on medium power for 2-3 minutes, checking for even heating.
    • Stovetop: Sauté in a skillet over medium heat until warmed through, about 5-7 minutes.

    Frequently Asked Questions

    What is the Mayo Parmesan Chicken Recipe?

    The Mayo Parmesan Chicken Recipe features chicken breasts coated in a creamy mayonnaise and Parmesan cheese mixture, baked until golden and delicious.

    Can I use regular cheese instead of Parmesan?

    While Parmesan provides a unique flavor, you can substitute it with other cheeses like mozzarella or cheddar, but the taste will vary.

    How long does the Mayo Parmesan Chicken take to cook?

    The total time for this recipe is approximately 30 minutes, including 25 minutes of baking time.

    Is the Mayo Parmesan Chicken Recipe suitable for meal prep?

    Yes, this dish is perfect for meal prep. It stores well in the refrigerator and can be reheated for quick meals.

    What can I serve with Mayo Parmesan Chicken?

    Consider serving this dish with steamed vegetables, rice, or a fresh salad for a complete meal.

    Final Thoughts

    This Mayo Parmesan Chicken Recipe is an easy and flavorful dish that is sure to impress. We encourage you to try it and share your experiences in the comments below. Your feedback helps us create even more delicious recipes for you to enjoy.


    Dinner

    Mayo Parmesan Chicken Recipe


    5.0 from 24 reviews

    This creamy and cheesy Mayo Parmesan Chicken is a deliciously simple dish that elevates your weeknight dinners. With tender chicken breasts coated in a flavorful mayonnaise and Parmesan topping, it's both satisfying and easy to prepare.

    Author: Munch Twist
    Prep Time: 5 minutes
    Cook Time: 25 minutes
    Total Time: 30 minutes
    Yield: 4 servings
    Category: Lunch
    Method: No bake
    Cuisine: American

    Mayo Parmesan Chicken Recipe

    SCALE:
    1x
    2x
    3x
    Cook Mode: Prevent your screen from going dark

    Ingredients

    • 4 boneless, skinless chicken breasts (about 1 ½ pounds)
    • ½ teaspoon salt
    • 1 teaspoon smoked paprika
    • 1 teaspoon garlic powder
    • 1 teaspoon onion powder
    • 1 cup shredded Parmesan cheese, divided
    • ½ cup mayonnaise
    • 1 teaspoon cracked pepper
    • Fresh parsley for garnish

    Instructions

    1. Preheat the oven to 425°F (220°C) and lightly coat a 9×13-inch baking dish with nonstick spray.
    2. Sprinkle the chicken breasts evenly with salt, smoked paprika, and cracked pepper. Place the seasoned chicken in a single layer in the prepared baking dish.
    3. In a mixing bowl, combine the mayonnaise, ½ cup of Parmesan cheese, garlic powder, and onion powder. Stir until smooth and well blended.
    4. Spread the mayonnaise mixture generously over each chicken breast. Top with the remaining ½ cup of Parmesan cheese.
    5. Bake in the preheated oven for 25 minutes, or until the chicken reaches an internal temperature of 165°F (74°C) and the top is golden brown.
    6. Before serving, sprinkle with fresh parsley for garnish.

    Nutrition Facts

    Serving Size: 1 serving
    Calories: 350 kcal
    Sugar: 0g
    Sodium: 600mg
    Fat: 22g
    Saturated Fat: 6g
    Carbohydrates: 2g
    Fiber: 0g
    Protein: 34g
    Cholesterol: 100mg

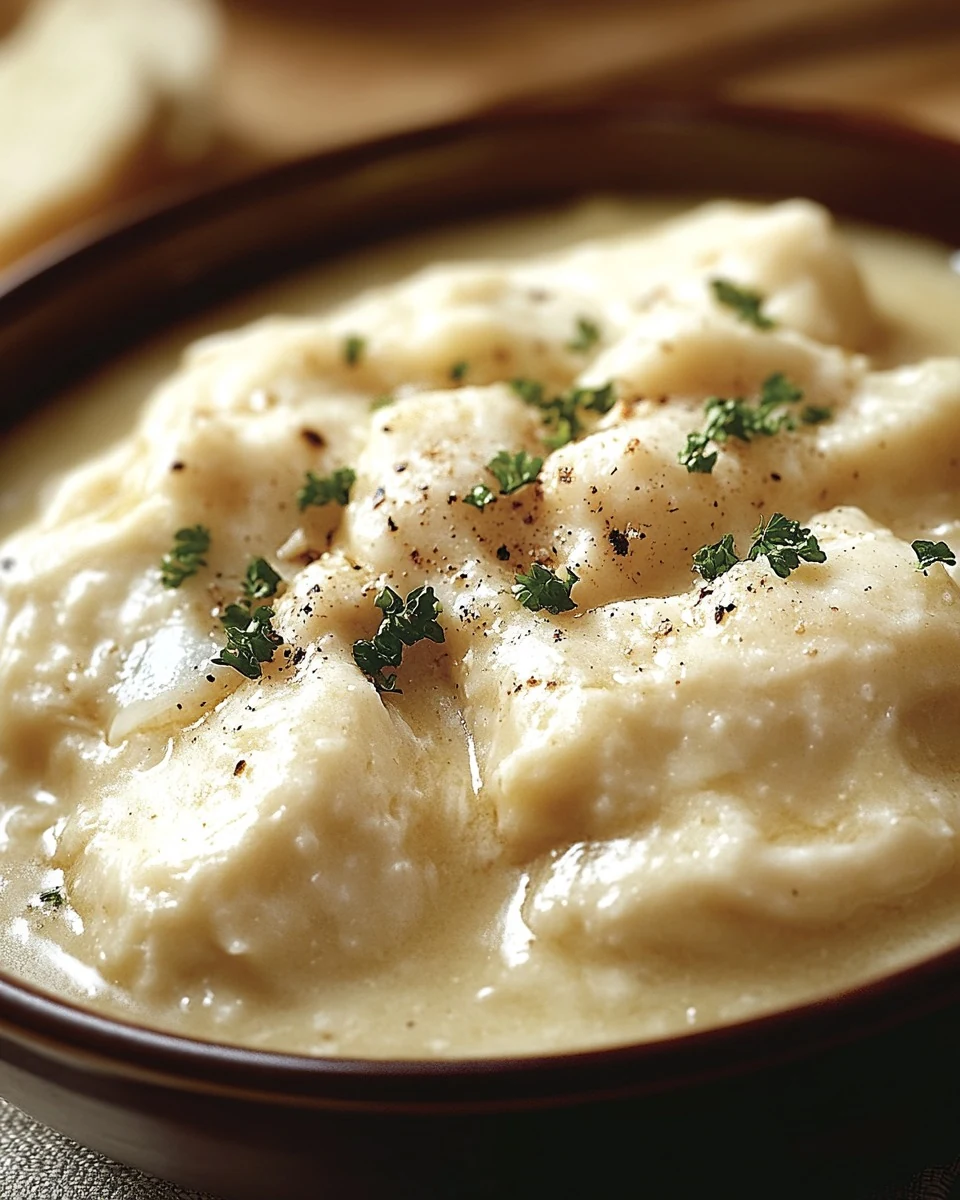
  • Cracker Barrel Homemade Chicken Dumplings Recipe

    Cracker Barrel Homemade Chicken Dumplings Recipe

    Cracker Barrel Homemade Chicken Dumplings offer a comforting taste of tradition. This dish combines tender chicken with fluffy dumplings in a rich broth, evoking warmth and nostalgia. Whether served on a chilly evening or as a family favorite, this recipe is sure to please.

    Why You’ll Love This Recipe

    • Comforting Flavor: The rich chicken broth and tender dumplings create a cozy meal that warms the heart.
    • Versatile Ingredients: Use leftover chicken or rotisserie chicken for a quick weeknight dinner.
    • Family-Friendly: This dish appeals to both kids and adults, making it a great choice for family gatherings.
    • Homemade Goodness: Enjoy the satisfaction of making dumplings from scratch, a skill that impresses.
    • Easy Preparation: With simple ingredients and steps, this recipe is accessible for cooks of all levels.

    Tools and Equipment

    Having the right tools makes the cooking process efficient and enjoyable.

    Essential Tools

    • Mixing bowl
    • Rolling pin
    • Pizza cutter or knife
    • Large pot
    • Whisk or fork

    Why These Tools Matter

    • Mixing bowl: Provides ample space for combining ingredients without mess.
    • Rolling pin: Ensures even dough thickness for perfectly cooked dumplings.
    • Large pot: Allows for sufficient space to boil the dumplings without overcrowding.

    Ingredients for Cracker Barrel Homemade Chicken Dumplings

    For the Dumplings

    • 2 cups flour
    • 1/2 teaspoon baking powder
    • A pinch of salt
    • 1 cup milk
    • 2 tablespoons butter

    For the Soup

    • 2 quarts chicken broth
    • 3 cups cooked chicken

    How to Make Cracker Barrel Homemade Chicken Dumplings Step-by-Step

    Step 1: Prepare the Dough

    In a mixing bowl, combine the flour, baking powder, and a pinch of salt. Cut the butter into the mixture until it resembles coarse crumbs. Gradually stir in the milk until a dough forms.

    Step 2: Roll and Cut the Dumplings

    On a heavily floured surface, roll the dough thinly with a rolling pin. Use a floured pizza cutter or knife to cut the dough into approximately 2×2-inch squares. Transfer the cut dumplings to a floured plate, layering them with additional flour to prevent sticking.

    Step 3: Cook the Dumplings

    Bring the chicken broth to a boil in a large pot. Gently drop the dumplings into the boiling broth one at a time, stirring gently as you add them. The extra flour on the dumplings will help thicken the broth.

    Step 4: Simmer and Serve

    Cook the dumplings in the boiling broth for 15 to 20 minutes, or until they are cooked through and no longer doughy. Add the cooked chicken to the pot and stir until well combined. Serve hot.

    Enjoy this comforting bowl of Cracker Barrel Homemade Chicken Dumplings, perfect for a cozy meal!

    How to Serve Cracker Barrel Homemade Chicken Dumplings

    Serving Cracker Barrel Homemade Chicken Dumplings can enhance the overall dining experience. Here are some creative ideas to elevate your meal.

    Garnished with Fresh Herbs

    Top each bowl with freshly chopped parsley or thyme for a burst of flavor and color that complements the rich broth.

    With a Side of Cornbread

    Serve the dumplings alongside warm, buttery cornbread to soak up the flavorful broth, adding a delightful contrast in texture.

    Accompanied by Steamed Vegetables

    Pair the dish with a medley of steamed vegetables such as green beans or carrots. This adds freshness and balances the hearty nature of the dumplings.

    Pro Tips for the Best Cracker Barrel Homemade Chicken Dumplings

    To achieve the best results with your Cracker Barrel Homemade Chicken Dumplings, consider these helpful tips.

    • Use Cold Ingredients: Start with cold butter and milk to create a flaky texture in the dumplings.
    • Don’t Overmix the Dough: Mix just until combined to keep the dumplings light and tender.
    • Adjust Broth Thickness: If you prefer a thicker broth, let the dumplings cook a little longer to absorb more liquid and thicken the soup.
    • Store Leftovers Properly: Refrigerate any leftovers in an airtight container for up to three days, but be aware that dumplings may become softer.
    • Reheat Gently: When reheating, do so on low heat to prevent the dumplings from breaking apart.

    Best Side Dishes and Pairings

    Pairing the right side dishes with Cracker Barrel Homemade Chicken Dumplings can create a well-rounded meal. Here are some excellent options.

    1. Classic Coleslaw
      A crunchy coleslaw adds a refreshing contrast to the rich dumplings and enhances the meal’s overall texture.

    2. Mashed Potatoes
      Creamy mashed potatoes offer additional comfort and can be enjoyed with the broth, making for a hearty combination.

    3. Side Salad
      A light side salad with vinaigrette provides a crisp, fresh element that balances the richness of the dumplings.

    4. Sweet Tea
      This Southern staple complements the savory flavors of the dish and adds a touch of sweetness to the meal.

    5. Roasted Brussels Sprouts
      The slightly caramelized flavor of roasted Brussels sprouts brings a delightful earthiness that pairs wonderfully with the dumplings.

    Common Mistakes to Avoid

    • Using Too Much Flour: Adding excessive flour can result in tough dumplings. Measure carefully to ensure the right consistency.
    • Not Rolling Dough Thin Enough: Dumplings should be rolled thin to achieve the right texture. Thicker dumplings may remain doughy after cooking.
    • Skipping the Flour Layer: Neglecting to coat the dumplings in flour may cause them to stick together. Always layer them with flour before cooking.
    • Boiling the Broth Too Rapidly: A rapid boil can break apart the dumplings. Maintain a gentle simmer for best results.

    Storage & Reheating Instructions

    Refrigerator Storage

    Store leftover Cracker Barrel Homemade Chicken Dumplings in airtight containers in the refrigerator. They will stay fresh for up to three days.

    Freezing Instructions

    To freeze, place the cooled dumplings and broth in freezer-safe containers. They can be frozen for up to three months. Thaw in the refrigerator before reheating.

    Reheating Tips

    • Oven: Preheat to 350°F (175°C), place in an oven-safe dish, cover with foil, and heat for 20-25 minutes.
    • Microwave: Place in a microwave-safe bowl, cover loosely, and heat on medium for 2-3 minutes, stirring halfway through.
    • Stovetop: Heat in a pot over low heat, stirring occasionally until warmed through.

    Frequently Asked Questions

    How do I make Cracker Barrel Homemade Chicken Dumplings from scratch?

    To make Cracker Barrel Homemade Chicken Dumplings from scratch, follow the provided recipe, ensuring to combine the ingredients properly and cook the dumplings in chicken broth.

    Can I use leftover chicken for this recipe?

    Yes, using leftover chicken is a great way to add flavor and save time. Ensure it is shredded or diced before adding to the broth.

    How long does it take to cook Cracker Barrel Homemade Chicken Dumplings?

    Cooking the dumplings takes about 15 to 20 minutes once they are added to the boiling broth.

    Can I make the dumplings ahead of time?

    Yes, you can prepare the dough and cut the dumplings ahead of time. Store them coated in flour in the refrigerator for up to a day before cooking.

    What can I serve with Cracker Barrel Homemade Chicken Dumplings?

    These dumplings pair well with a side salad, steamed vegetables, or crusty bread for a complete meal.

    Final Thoughts

    Cracker Barrel Homemade Chicken Dumplings are a delightful and comforting dish perfect for any occasion. We encourage you to try this recipe and share your thoughts in the comments below. Your feedback is always appreciated!


    Dinner

    Cracker Barrel Homemade Chicken Dumplings


    5.0 from 24 reviews

    This comforting bowl of homemade chicken and dumplings is perfect for a cozy meal. With tender dumplings and savory chicken in a rich broth, it's a classic dish that warms the heart and satisfies the appetite.

    Author: Munch Twist
    Prep Time: 20 minutes
    Cook Time: 25 minutes
    Total Time: 45 minutes
    Yield: 4 servings
    Category: Lunch
    Method: No bake
    Cuisine: American

    Cracker Barrel Homemade Chicken Dumplings

    SCALE:
    1x
    2x
    3x
    Cook Mode: Prevent your screen from going dark

    Ingredients

    • 2 cups flour
    • 2 quarts chicken broth
    • 3 cups cooked chicken
    • 1/2 teaspoon baking powder
    • 1 cup milk
    • 2 tablespoons butter
    • A pinch of salt

    Instructions

    1. In a mixing bowl, combine the flour, baking powder, and a pinch of salt. Cut the butter into the flour mixture until it resembles coarse crumbs. Stir in the milk gradually until a dough forms.
    2. On a heavily floured surface, roll out the dough thinly. Cut the dough into approximately 2×2-inch squares and transfer them to a floured plate, layering with additional flour.
    3. Bring the chicken broth to a boil in a large pot. Gently drop the dumplings into the boiling broth one at a time, stirring gently. The extra flour will help thicken the broth.
    4. Cook the dumplings for 15 to 20 minutes, or until they are cooked through. Add the cooked chicken to the pot and stir until well combined. Serve hot.

    Nutrition Facts

    Serving Size: 1 serving
    Calories: 400 kcal
    Sugar: 5g
    Sodium: 1200mg
    Fat: 15g
    Saturated Fat: 8g
    Carbohydrates: 40g
    Fiber: 2g
    Protein: 25g
    Cholesterol: 70mg

  • Delicious Grilled Cheese Dogs Recipe to Try Today

    Delicious Grilled Cheese Dogs Recipe to Try Today

    Grilled Cheese Dogs offer a delightful fusion of classic comfort food. This recipe combines the savory goodness of hot dogs with the melty richness of cheddar cheese, all enveloped in a crispy, buttery bun. Perfect for a quick weeknight dinner or a fun weekend treat, these grilled cheese dogs are sure to please everyone.

    Why You’ll Love This Recipe

    • Unique Twist: This recipe transforms traditional hot dogs into a cheesy delight.
    • Quick & Easy: Ready in under 30 minutes, making it perfect for busy nights.
    • Customizable: Add your favorite toppings or switch up the cheese for a personal touch.
    • Kid-Friendly: A fun meal that kids will love to help assemble.
    • Savory Satisfaction: The combination of flavors and textures offers a mouthwatering experience.

    Tools and Equipment

    Having the right tools makes preparing Grilled Cheese Dogs a breeze.

    Essential Tools

    • Non-stick skillet
    • Rolling pin
    • Small mixing bowl
    • Spatula
    • Knife

    Why These Tools Matter

    • Non-stick skillet: Prevents sticking and ensures even cooking for crispy buns.
    • Rolling pin: Easily flattens the hot dog buns, allowing for better cheese melting.
    • Spatula: Essential for flipping and combining ingredients without breaking the buns.

    Ingredients for Grilled Cheese Dogs

    Buns and Hot Dogs

    • 4 hot dog buns
    • 4 hot dogs, split lengthwise

    Cheese and Seasoning

    • 3 cups shredded cheddar cheese
    • 1/4 teaspoon garlic powder
    • 1/4 teaspoon onion powder

    Toppings

    • 4 scallions, sliced

    Butter

    • 2 tablespoons butter, softened

    How to Make Grilled Cheese Dogs Step-by-Step

    Step 1: Prep the Buns

    Flatten the hot dog buns with a rolling pin for an even surface. In a small bowl, combine the softened butter, garlic powder, and onion powder. Spread this mixture evenly on the outside of each bun to enhance flavor.

    Step 2: Sear the Hot Dogs

    Heat a large skillet over medium heat. Sear the hot dogs, turning occasionally, until they are nicely charred, which should take about 2 minutes per side. Once done, remove them from the skillet and set aside.

    Step 3: Assemble the Cheese Dogs

    In the same skillet, place a buttered bun, buttered side down. Add 1/2 cup of shredded cheddar cheese, then place one of the split hot dogs on top. Sprinkle with an additional amount of cheddar cheese and a quarter of the sliced scallions.

    Step 4: Grill the Cheese Dogs

    Cover the skillet and cook over medium heat until the cheese melts and the bun becomes crispy. Use a spatula to close the bun, forming a delicious grilled cheese dog. Repeat the process with the remaining buns and ingredients.

    Enjoy these delicious Grilled Cheese Dogs as a fun twist on a classic favorite!

    How to Serve Grilled Cheese Dogs

    Grilled Cheese Dogs are versatile and can be served in various fun ways. Here are a few creative serving ideas.

    Toppings Bar

    Set up a toppings bar with options such as diced tomatoes, jalapeños, pickles, and various sauces. This allows guests to customize their Grilled Cheese Dogs to their liking.

    Slaw Side

    Serve the Grilled Cheese Dogs alongside a refreshing coleslaw. The crunch and acidity of the slaw complement the rich flavors of the cheese and hot dogs.

    Mini Grilled Cheese Dog Sliders

    Cut the hot dogs into smaller pieces and serve them in mini buns for a slider version. This makes for great finger food at parties or gatherings.

    Pro Tips for the Best Grilled Cheese Dogs

    For a truly delightful experience, consider these practical tips.

    • Use Fresh Ingredients: Always opt for fresh hot dog buns and high-quality cheese for the best flavor and texture.

    • Don’t Overcrowd the Skillet: Sear the hot dogs in batches if necessary to ensure they cook evenly and achieve that perfect char.

    • Experiment with Cheese: While cheddar is classic, try mixing in other cheeses like mozzarella or pepper jack for a different flavor profile.

    • Adjust Cooking Heat: Keep an eye on the skillet temperature; if the buns are browning too quickly, reduce the heat to allow the cheese to melt properly.

    • Add Herbs and Spices: Enhance the flavor by including fresh herbs or additional spices in the butter mixture for a gourmet touch.

    Best Side Dishes and Pairings

    Grilled Cheese Dogs pair wonderfully with a variety of side dishes and drinks. Here are some excellent options to consider.

    1. Sweet Potato Fries – Their natural sweetness contrasts beautifully with the savory flavors of the Grilled Cheese Dogs.

    2. Classic Potato Chips – A crunchy side that adds texture and is the perfect accompaniment for this indulgent dish.

    3. Corn on the Cob – Grilled or boiled, this classic summer side brings a fresh sweetness that complements the richness of the cheese.

    4. Vegetable Medley – A light and colorful medley of sautéed or steamed vegetables adds a healthy balance to your meal.

    5. Crisp Salad – A simple green salad with a tangy vinaigrette can provide a refreshing contrast to the richness of the hot dogs.

    6. Iced Tea or Lemonade – These refreshing beverages cleanse the palate and enhance the overall dining experience.

    Common Mistakes to Avoid

    • Not Buttering the Buns Properly: Ensure an even layer of butter on the outside for optimal crispiness.
    • Overcooking the Hot Dogs: Sear just enough to get a nice char without drying them out.
    • Using Too Much Cheese: While cheese is essential, too much can overwhelm the bun and hot dog.
    • Ignoring Cooking Times: Keep an eye on the cooking time to prevent burnt buns or unmelted cheese.

    Storage & Reheating Instructions

    Refrigerator Storage

    Store leftover Grilled Cheese Dogs in airtight containers. They will stay fresh for up to 3 days in the refrigerator.

    Freezing Instructions

    To freeze, individually wrap each Grilled Cheese Dog in plastic wrap and then place them in a freezer bag. They can be frozen for up to 2 months. Thaw in the refrigerator before reheating.

    Reheating Tips

    • Oven: Preheat to 350°F (175°C). Place the Grilled Cheese Dogs on a baking sheet and heat for about 10-15 minutes until warmed through.
    • Microwave: Place on a microwave-safe plate and cover with a damp paper towel. Heat for 30-45 seconds or until warmed.
    • Stovetop: Heat in a skillet over medium heat, flipping occasionally, until heated through and the bun is crispy.

    Frequently Asked Questions

    Can I use different types of cheese for Grilled Cheese Dogs?

    Absolutely! Feel free to experiment with cheeses like mozzarella, pepper jack, or gouda to customize the flavor.

    How can I make Grilled Cheese Dogs healthier?

    You can use turkey or veggie hot dogs and whole-grain buns for a healthier option.

    What are the best toppings for Grilled Cheese Dogs?

    Try adding jalapeños, diced tomatoes, or even a drizzle of barbecue sauce for added flavor.

    Can I prepare Grilled Cheese Dogs in advance?

    Yes, you can prepare the components in advance and assemble them just before cooking for the best results.

    Final Thoughts

    Grilled Cheese Dogs are a delightful twist on a classic favorite that will surely impress your family and friends. We encourage you to try this recipe and share your feedback in the comments below!


    Dinner

    Grilled Cheese Dogs


    5.0 from 24 reviews

    Grilled Cheese Dogs are a delicious twist on the classic hot dog, featuring crispy buns filled with savory hot dogs, melted cheddar cheese, and fresh scallions. Perfect for a fun meal or snack, these cheesy delights are sure to please everyone.

    Author: Munch Twist
    Prep Time: 10 minutes
    Cook Time: 8 minutes
    Total Time: 18 minutes
    Yield: 4 servings
    Category: Lunch
    Method: No bake
    Cuisine: American

    Grilled Cheese Dogs

    SCALE:
    1x
    2x
    3x
    Cook Mode: Prevent your screen from going dark

    Ingredients

    • 4 hot dog buns
    • 1/4 teaspoon garlic powder
    • 4 hot dogs, split lengthwise
    • 3 cups shredded cheddar cheese
    • 4 scallions, sliced
    • 2 tablespoons butter, softened
    • 1/4 teaspoon onion powder

    Instructions

    1. Flatten the hot dog buns with a rolling pin. In a small bowl, mix the softened butter with garlic powder and onion powder. Spread the butter mixture evenly on the outside of each bun.
    2. Heat a large skillet over medium heat. Sear the hot dogs, turning occasionally, until they are nicely charred, about 2 minutes per side. Remove from the skillet and set aside.
    3. Place a buttered bun, buttered side down, into the skillet. Top with 1/2 cup of shredded cheddar cheese, one of the split hot dogs, an additional sprinkle of cheddar cheese, and a quarter of the sliced scallions.
    4. Cover the skillet and cook over medium heat until the cheese is melted and the bun is crispy. Use a spatula to close the bun, forming a grilled cheese dog. Repeat with the remaining buns and ingredients.

    Nutrition Facts

    Serving Size: 1 serving
    Calories: 450 kcal
    Sugar: 2g
    Sodium: 1200mg
    Fat: 25g
    Saturated Fat: 15g
    Carbohydrates: 30g
    Fiber: 1g
    Protein: 20g
    Cholesterol: 60mg

  • The Best Garlic Butter Chicken with Parmesan Rice Recipe

    The Best Garlic Butter Chicken with Parmesan Rice Recipe

    The Best Garlic Butter Chicken with Parmesan Rice is a dish that perfectly balances rich flavors and comforting textures. This recipe delivers tender chicken enveloped in a luscious garlic butter sauce, served over creamy Parmesan rice. It’s a meal that will impress your family and friends without demanding hours in the kitchen.

    Why You’ll Love This Recipe

    • Flavor Packed: The garlic butter sauce infuses the chicken and rice with an irresistible taste.
    • Comfort Food: This dish combines hearty ingredients, making it perfect for a cozy dinner.
    • Versatile Side Options: Pair it with vegetables or a fresh salad for a balanced meal.
    • Quick & Easy: Ready in under 30 minutes, it’s perfect for busy weeknights.
    • Crowd Pleaser: The combination of garlic, butter, and Parmesan appeals to everyone.

    Tools and Equipment

    Having the right tools makes cooking easier and more enjoyable.

    Essential Tools

    • Nonstick skillet
    • Wooden spoon or spatula
    • Measuring cups and spoons
    • Cutting board
    • Knife

    Why These Tools Matter

    • Nonstick skillet: Prevents sticking and ensures even cooking of chicken and rice.
    • Measuring cups and spoons: Guarantees accurate ingredient portions for perfect flavor balance.
    • Wooden spoon or spatula: Ideal for stirring without scratching your nonstick skillet.

    Ingredients for The Best Garlic Butter Chicken with Parmesan Rice

    Chicken and Seasoning

    • 1 stick butter, divided
    • 1/2 teaspoon garlic powder
    • 1 lb. chicken tenderloins
    • 2 tablespoons minced garlic
    • 1/4 teaspoon red pepper flakes
    • 1 1/2 teaspoons salt, divided

    Cooking Essentials

    • 2 tablespoons olive oil
    • 1/2 cup dry white wine

    Rice and Broth

    • 1 1/2 cups uncooked white rice
    • 3 cups chicken broth

    Finishing Touch

    • 1/2 cup fresh grated Parmesan cheese

    How to Make The Best Garlic Butter Chicken with Parmesan Rice Step-by-Step

    Step 1: Season the Chicken

    Sprinkle chicken tenderloins with garlic powder, salt, and pepper. Ensure all sides are evenly coated for maximum flavor.

    Step 2: Cook the Chicken

    Heat olive oil in a large nonstick skillet over medium heat. Add the chicken and cook until browned and fully cooked through, about 6-8 minutes per side. Remove from the skillet, cover, and set aside to keep warm.

    Step 3: Prepare the Garlic Butter

    In the same skillet, melt 4 tablespoons of butter. Add minced garlic, red pepper flakes, and 1/2 teaspoon salt. Sauté for 3 minutes, stirring gently to avoid burning the garlic.

    Step 4: Add the Wine

    Increase heat to medium-high. Pour in the white wine and stir vigorously to combine with the butter. Cook for about 5 minutes until the mixture reduces by half. Reserve 2 tablespoons of this sauce for later.

    Step 5: Cook the Rice

    Stir in the uncooked rice and cook for 3-4 minutes until lightly browned. Add the chicken broth and remaining 1 teaspoon salt. Bring to a low boil, then reduce heat to medium-low, cover, and simmer for 20 minutes, stirring occasionally during the first 15 minutes.

    Step 6: Finish the Dish

    Sprinkle Parmesan cheese over the rice. Place the cooked chicken tenderloins on top of the rice and drizzle with the reserved sauce. Cover, remove from heat, and let sit for 5 minutes to allow flavors to meld.

    Step 7: Serve

    Garnish with additional Parmesan and fresh parsley if desired. Serve warm and enjoy this delightful meal!

    This dish offers a satisfying blend of flavors and textures, making it a go-to recipe for any occasion.

    How to Serve The Best Garlic Butter Chicken with Parmesan Rice

    This dish can be enjoyed in various ways for a delightful dining experience.

    On a Bed of Greens

    Serve the garlic butter chicken and Parmesan rice over a bed of fresh mixed greens for a refreshing contrast. The greens add a crunch and balance to the rich flavors of the dish.

    With a Creamy Sauce

    Drizzle a homemade or store-bought creamy sauce, such as Alfredo or a garlic cream sauce, over the chicken and rice. This adds an extra layer of flavor and richness that complements the existing ingredients.

    Accompanied by Crusty Bread

    Pair the meal with slices of crusty artisan bread to soak up the delicious garlic butter sauce. This combination enhances the overall experience and provides a satisfying texture contrast.

    Pro Tips for the Best Garlic Butter Chicken with Parmesan Rice

    Achieving perfection with this dish requires a few helpful tips.

    • Use Fresh Ingredients: Always opt for fresh garlic and herbs to enhance the flavor profile of the dish.
    • Monitor Cooking Time: Ensure the chicken is cooked through but not overcooked; use a meat thermometer to check for an internal temperature of 165°F.
    • Customize the Spice Level: Adjust the amount of red pepper flakes according to your heat preference for a personalized touch.
    • Let the Dish Rest: Allow the dish to sit covered for a few minutes after cooking to let the flavors meld together.
    • Experiment with Rice Varieties: For a different texture, substitute white rice with jasmine or basmati rice, which offers unique flavors and aromas.

    Best Side Dishes and Pairings

    This dish pairs excellently with various sides and drinks to elevate your meal.

    1. Steamed Broccoli: The slight bitterness of steamed broccoli complements the richness of the garlic butter chicken, adding a nutritious element.
    2. Garlic Bread: A classic pairing that enhances the garlic flavor, making every bite more indulgent.
    3. Caesar Salad: The tangy dressing and crunchy croutons provide a refreshing contrast to the creamy rice and chicken.
    4. Roasted Asparagus: The earthy flavor of roasted asparagus adds sophistication and a touch of elegance to the meal.
    5. Chardonnay: A glass of chilled Chardonnay pairs well, enhancing the flavors of the garlic and butter in the dish.

    Common Mistakes to Avoid

    • Not Seasoning the Chicken Properly: Ensure you adequately season the chicken tenderloins with garlic powder, salt, and pepper for the best flavor.
    • Burning the Garlic: Be cautious when sautéing the garlic; cook it on medium heat to prevent burning, which can lead to bitterness.
    • Overcooking the Rice: Follow the recommended cooking time for the rice; overcooking can result in a mushy texture.
    • Skipping the Resting Time: Allow the dish to sit covered for 5 minutes after cooking. This helps the flavors meld and ensures the rice absorbs any remaining moisture.

    Storage & Reheating Instructions

    Refrigerator Storage

    Store any leftovers in airtight containers in the refrigerator. The dish will stay fresh for up to 3 days.

    Freezing Instructions

    To freeze, place the cooled chicken and rice in freezer-safe containers. This meal can be stored in the freezer for up to 3 months. Thaw in the refrigerator overnight before reheating.

    Reheating Tips

    • Oven: Preheat to 350°F (175°C), cover the dish with foil, and heat for about 20-25 minutes or until warmed through.
    • Microwave: Place a portion in a microwave-safe dish, cover, and heat on medium power for 2-3 minutes, stirring halfway through.
    • Stovetop: In a skillet, add a splash of chicken broth or water, and heat over medium-low until warmed, stirring occasionally.

    Frequently Asked Questions

    How can I make The Best Garlic Butter Chicken with Parmesan Rice spicier?

    You can add more red pepper flakes or even some diced jalapeños while cooking for an extra kick.

    Can I use brown rice instead of white rice?

    Yes, but you will need to adjust the cooking time and liquid. Brown rice usually requires about 40-45 minutes of simmering.

    What can I serve with The Best Garlic Butter Chicken with Parmesan Rice?

    This dish pairs well with steamed vegetables, a fresh salad, or crusty bread to soak up the garlic butter sauce.

    Can I use other types of cheese?

    Certainly! While Parmesan adds a nice flavor, you can experiment with other cheeses like mozzarella or cheddar for a different twist.

    How long does it take to prepare The Best Garlic Butter Chicken with Parmesan Rice?

    The entire recipe takes about 45 minutes from start to finish, making it a perfect weeknight dinner option.

    Final Thoughts

    This recipe for The Best Garlic Butter Chicken with Parmesan Rice is sure to become a favorite in your household. Its rich flavors and comforting textures make it a standout dish. We encourage you to try it out and share your thoughts in the comments below!


    Dinner

    The Best Garlic Butter Chicken with Parmesan Rice


    5.0 from 24 reviews

    This delicious Garlic Butter Chicken with Parmesan Rice is a comforting meal that combines tender chicken with rich garlic butter and creamy Parmesan rice. Perfect for a satisfying dinner, it pairs well with vegetables or a fresh salad.

    Author: Munch Twist
    Prep Time: 15 mins
    Cook Time: 40 mins
    Total Time: 55 mins
    Yield: 4 servings
    Category: Lunch
    Method: No bake
    Cuisine: American

    The Best Garlic Butter Chicken with Parmesan Rice

    SCALE:
    1x
    2x
    3x
    Cook Mode: Prevent your screen from going dark

    Ingredients

    • 1 stick butter, divided
    • 1/2 teaspoon garlic powder
    • 1 lb. chicken tenderloins
    • 2 tablespoons minced garlic
    • 1/2 cup dry white wine
    • 2 tablespoons olive oil
    • 1 1/2 cups uncooked white rice
    • 3 cups chicken broth
    • 1/4 teaspoon red pepper flakes
    • 1 1/2 teaspoons salt, divided
    • 1/2 cup fresh grated Parmesan cheese

    Instructions

    1. Sprinkle chicken tenderloins with garlic powder, salt, and pepper.
    2. Heat olive oil in a large nonstick skillet over medium heat. Add the chicken and cook until browned and fully cooked through, about 6-8 minutes per side. Remove from skillet, cover, and set aside.
    3. In the same skillet, melt 4 tablespoons of butter. Add minced garlic, red pepper flakes, and 1/2 teaspoon salt. Sauté for 3 minutes, being careful not to burn the garlic.
    4. Increase heat to medium-high. Pour in the white wine and stir vigorously to combine with the butter. Cook for about 5 minutes until the mixture reduces by half. Reserve 2 tablespoons of this sauce for later.
    5. Stir in the uncooked rice and cook for 3-4 minutes until lightly browned. Add the chicken broth and remaining 1 teaspoon salt. Bring to a low boil, then reduce heat to medium-low, cover, and simmer for 20 minutes, stirring occasionally during the first 15 minutes.
    6. Sprinkle Parmesan cheese over the rice. Place the cooked chicken tenderloins on top of the rice and drizzle with the reserved sauce. Cover, remove from heat, and let sit for 5 minutes.
    7. Garnish with additional Parmesan and fresh parsley if desired. Serve warm and enjoy!

    Nutrition Facts

    Serving Size: 1 serving
    Calories: 450 kcal
    Sugar: 2g
    Sodium: 1200mg
    Fat: 19g
    Saturated Fat: 10g
    Carbohydrates: 44g
    Fiber: 1g
    Protein: 28g
    Cholesterol: 90mg

  • Delicious Broccoli Chicken Divan Recipe to Try Now

    Delicious Broccoli Chicken Divan Recipe to Try Now

    Broccoli Chicken Divan is a comforting casserole that combines tender chicken, vibrant broccoli, and a rich cheese sauce. This dish is not only delicious but also simple to prepare, making it a perfect choice for weeknight dinners or potlucks.

    Why You’ll Love This Recipe

    • Quick & Easy: Ready in under 30 minutes, this dish is perfect for busy weeknights.
    • Family Favorite: Its creamy texture and cheesy flavor make it a hit with both kids and adults.
    • Nutritious Ingredients: Packed with broccoli and chicken, it offers a good balance of protein and veggies.
    • One-Dish Wonder: Enjoy the convenience of cooking everything in a single baking dish, minimizing cleanup.
    • Versatile Options: Customize with different vegetables or cheeses to suit your family’s preferences.

    Tools and Equipment

    Having the right tools can streamline your cooking process.

    Essential Tools

    • 9×13-inch baking dish
    • Medium saucepan
    • Whisk
    • Cooking spoon
    • Measuring cups and spoons

    Why These Tools Matter

    • Baking Dish: The size is perfect for even cooking and serving.
    • Medium Saucepan: Ideal for preparing the cheese sauce without risk of burning.
    • Whisk: Ensures a smooth and lump-free sauce by effectively blending ingredients.

    Ingredients for Broccoli Chicken Divan

    Vegetables

    • 2 cups broccoli florets
    • 1/2 teaspoon salt

    Protein

    • 2 cups cooked chicken, cubed

    Cheese

    • 1/2 cup shredded cheddar cheese
    • 1/4 teaspoon pepper

    Sauce

    • 2 tablespoons all-purpose flour
    • 2 tablespoons butter
    • 1 cup milk
    • 1 cup chicken broth

    Topping

    • 1/2 cup bread crumbs

    How to Make Broccoli Chicken Divan Step-by-Step

    Step 1: Prep the Base

    1. Preheat your oven to 350°F (175°C).
    2. Grease a 9×13-inch baking dish. Place the broccoli florets and cooked chicken cubes in the dish.

    Step 2: Make the Cheese Sauce

    1. In a medium saucepan, melt butter over medium heat.
    2. Stir in flour and cook for about 1 minute, ensuring the mixture is well combined.
    3. Gradually whisk in chicken broth and milk. Continue to cook, stirring frequently, until the sauce thickens and begins to boil.
    4. Remove from heat and mix in salt, pepper, and shredded cheddar cheese until melted and smooth.

    Step 3: Assemble and Bake

    1. Pour the cheese sauce evenly over the chicken and broccoli.
    2. Sprinkle bread crumbs over the top of the dish.
    3. Bake for 25 minutes, or until the top is golden brown and the sauce is bubbly.

    Step 4: Serve and Enjoy

    1. Remove from the oven and let it cool slightly before serving.
    2. Serve warm and enjoy the delightful flavors of Broccoli Chicken Divan.

    Nutritional Information (per serving):
    – Calories: Approximately 350
    – Carbohydrates: 18g
    – Protein: 28g
    – Fat: 20g
    – Saturated Fat: 10g
    – Sugar: 5g

    Preparation time: 15 minutes | Cooking time: 25 minutes

    How to Serve Broccoli Chicken Divan

    Broccoli Chicken Divan is a versatile dish that can be enjoyed in various ways.

    Serve with Rice

    Serving Broccoli Chicken Divan over a bed of fluffy rice absorbs the delicious cheese sauce, enhancing every bite.

    Top with Fresh Herbs

    Garnishing the dish with freshly chopped parsley or chives adds a pop of color and a fresh flavor that complements the richness of the cheese.

    Accompany with a Side Salad

    A light green salad drizzled with a tangy vinaigrette provides a refreshing contrast to the creamy, savory flavors of the Broccoli Chicken Divan.

    Pro Tips for the Best Broccoli Chicken Divan

    For optimal results, consider these expert tips.

    • Use Fresh Broccoli: Fresh broccoli florets retain better texture and flavor compared to frozen ones, enhancing the overall dish.
    • Cooked Chicken Quality: Use rotisserie chicken for convenience and added flavor, or ensure your chicken is well-seasoned when cooking it yourself.
    • Cheese Variations: Experiment with different cheeses, such as Gruyère or pepper jack, to customize the flavor profile of your dish.
    • Make Ahead: Prepare the dish up to the baking step, cover, and refrigerate for up to 24 hours for an easy meal preparation.
    • Crispy Topping: For extra crunch, mix grated parmesan with the bread crumbs before sprinkling on top.

    Best Side Dishes and Pairings

    Pairing your Broccoli Chicken Divan with complementary sides enhances the meal.

    1. Garlic Bread – The buttery, garlicky flavor of garlic bread is perfect for soaking up the delicious cheese sauce.
    2. Steamed Asparagus – Lightly steamed asparagus adds a bright, fresh element that balances the richness of the dish.
    3. Quinoa Salad – A refreshing quinoa salad with citrus dressing provides a healthy contrast to the creamy casserole.
    4. Coleslaw – A crunchy coleslaw adds texture and a tangy note that pairs well with the savory flavors.
    5. White Wine – A chilled glass of Chardonnay or Sauvignon Blanc can elevate your dining experience with its crisp acidity.

    Common Mistakes to Avoid

    • Using Raw Broccoli: Always use pre-cooked or blanched broccoli to ensure it cooks evenly and thoroughly.
    • Skipping the Cheese Sauce: The cheese sauce is essential for flavor and creaminess; do not omit it from the recipe.
    • Not Preheating the Oven: Ensure your oven is preheated to guarantee even cooking and a perfectly golden top.
    • Overbaking: Keep an eye on the dish as it bakes; overbaking can lead to a dry texture and burnt breadcrumbs.

    Storage & Reheating Instructions

    Refrigerator Storage

    Store your Broccoli Chicken Divan in airtight containers in the refrigerator. It will stay fresh for up to 3 days.

    Freezing Instructions

    To freeze, allow the dish to cool completely, then cover tightly with plastic wrap and aluminum foil. It can be frozen for up to 3 months. Thaw in the refrigerator overnight before reheating.

    Reheating Tips

    • Oven: Preheat to 350°F (175°C) and bake for about 20 minutes, or until heated through.
    • Microwave: Heat in a microwave-safe dish for 2-3 minutes on high, stirring halfway through for even heating.
    • Stovetop: Place in a skillet over medium heat, cover, and cook for 5-7 minutes, stirring occasionally until warmed thoroughly.

    Frequently Asked Questions

    Can I use frozen broccoli for Broccoli Chicken Divan?

    Yes, you can use frozen broccoli. Just make sure to thaw and drain it well before adding it to the dish to prevent excess moisture.

    How can I make Broccoli Chicken Divan healthier?

    Consider using low-fat cheese and milk, and substitute the all-purpose flour with whole wheat flour for a healthier option.

    What can I serve with Broccoli Chicken Divan?

    This dish pairs wonderfully with a simple green salad or steamed rice for a complete meal.

    Can I make Broccoli Chicken Divan ahead of time?

    Absolutely! You can prepare it ahead of time and store it in the refrigerator until you’re ready to bake. Just add a few extra minutes to the baking time if it’s cold from the fridge.

    How do I store leftovers of Broccoli Chicken Divan?

    Store any leftovers in an airtight container in the refrigerator for up to 3 days, or freeze for longer storage.

    Final Thoughts

    Broccoli Chicken Divan is a delightful dish that combines flavors and textures in a satisfying way. We encourage you to try this recipe at home and share your experience in the comments below. Your feedback is invaluable!


    Dinner

    Broccoli Chicken Divan


    5.0 from 24 reviews

    Broccoli Chicken Divan is a comforting casserole that combines tender chicken and fresh broccoli in a creamy cheese sauce, topped with crispy breadcrumbs. It's a delicious and hearty dish perfect for family dinners.

    Author: Munch Twist
    Prep Time: 15 minutes
    Cook Time: 25 minutes
    Total Time: 40 minutes
    Yield: 4 servings
    Category: Lunch
    Method: No bake
    Cuisine: American

    Broccoli Chicken Divan

    SCALE:
    1x
    2x
    3x
    Cook Mode: Prevent your screen from going dark

    Ingredients

    • 2 cups broccoli florets
    • 1/2 teaspoon salt
    • 2 cups cooked chicken, cubed
    • 1/2 cup shredded cheddar cheese
    • 1/4 teaspoon pepper
    • 2 tablespoons all-purpose flour
    • 2 tablespoons butter
    • 1 cup milk
    • 1 cup chicken broth
    • 1/2 cup bread crumbs

    Instructions

    1. Preheat your oven to 350°F (175°C).
    2. Grease a 9×13-inch baking dish. Place the broccoli florets and cooked chicken cubes in the dish.
    3. In a medium saucepan, melt butter over medium heat. Stir in flour and cook for about 1 minute, ensuring the mixture is well combined.
    4. Gradually whisk in chicken broth and milk. Continue to cook, stirring frequently, until the sauce thickens and begins to boil.
    5. Remove from heat and mix in salt, pepper, and shredded cheddar cheese until melted and smooth.
    6. Pour the cheese sauce evenly over the chicken and broccoli.
    7. Sprinkle bread crumbs over the top of the dish.
    8. Bake for 25 minutes, or until the top is golden brown and the sauce is bubbly.
    9. Serve warm and enjoy!

    Nutrition Facts

    Serving Size: 1 serving
    Calories: 350 kcal
    Sugar: 5g
    Sodium: 800mg
    Fat: 20g
    Saturated Fat: 10g
    Carbohydrates: 18g
    Fiber: 2g
    Protein: 28g
    Cholesterol: 80mg