Category: Desserts

  • Soft Pumpkin Snickerdoodles: The Ultimate Fall Treat

    Soft Pumpkin Snickerdoodles: The Ultimate Fall Treat

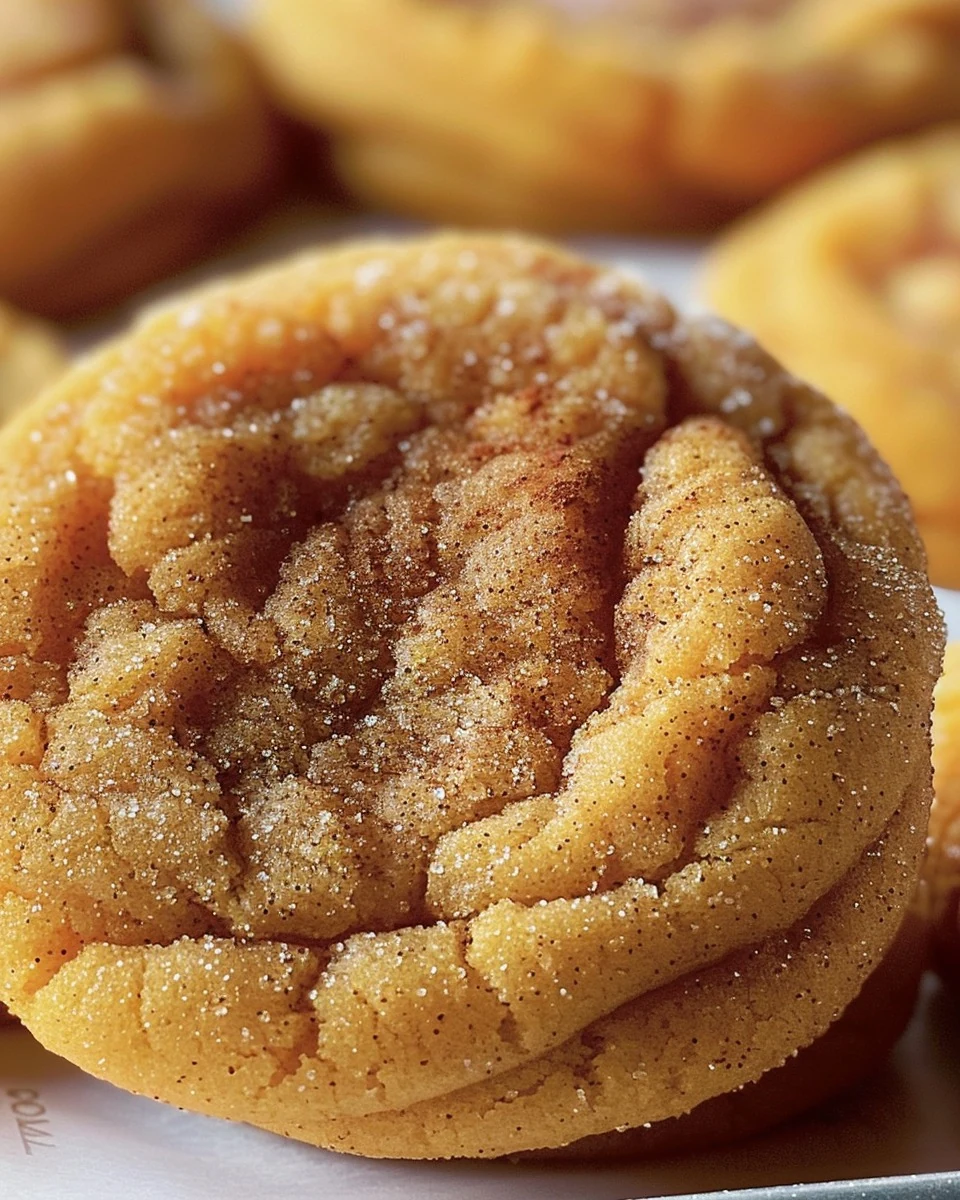
    Soft Pumpkin Snickerdoodles are a delightful twist on the classic cookie. These treats combine the warm spices of pumpkin pie with the soft, chewy texture of snickerdoodles, making them perfect for fall gatherings or cozy evenings at home.

    Why You’ll Love This Recipe

    • Irresistibly Soft: These cookies have a tender, chewy texture that melts in your mouth.
    • Flavorful Spice: The blend of pumpkin pie spice brings a warm and inviting flavor to each bite.
    • Quick to Prepare: With a total time of under 30 minutes, you can whip up a batch in no time.
    • Perfect for Sharing: These cookies make a great gift or dessert for gatherings with friends and family.
    • Seasonal Favorite: Embrace the flavors of fall with these delicious pumpkin-infused cookies.

    Tools and Equipment

    Having the right tools will make your baking experience smoother and more enjoyable.

    Essential Tools

    • Mixing bowls
    • Baking sheet
    • Parchment paper
    • Whisk
    • Measuring cups and spoons
    • Cookie scoop or spoon

    Why These Tools Matter

    • Mixing bowls: Essential for properly combining wet and dry ingredients.
    • Baking sheet: Provides a sturdy base for baking and ensures even heat distribution.
    • Parchment paper: Prevents sticking and makes cleanup a breeze.

    Ingredients for Soft Pumpkin Snickerdoodles

    Wet Ingredients

    • 1/2 cup pumpkin puree
    • 1 egg
    • 1/2 cup butter, softened

    Dry Ingredients

    • 3 cups all-purpose flour
    • 2 teaspoons baking soda
    • 1 teaspoon pumpkin pie spice or 1/2 teaspoon cinnamon, 1/4 teaspoon allspice, 1/4 teaspoon nutmeg, 1/4 teaspoon ginger
    • 1 teaspoon cream of tartar
    • 1/4 teaspoon salt
    • 1 1/2 cups sugar

    Cinnamon Sugar Mixture

    • 2 tablespoons sugar
    • 2 teaspoons cinnamon

    How to Make Soft Pumpkin Snickerdoodles Step-by-Step

    Step 1: Prep the Oven and Baking Sheet

    Preheat your oven to 350°F (175°C). Line a baking sheet with parchment paper to prevent sticking.

    Step 2: Mix the Wet Ingredients

    In a large mixing bowl, cream together the softened butter, 1 1/2 cups sugar, egg, and pumpkin puree. Mix until smooth and well combined.

    Step 3: Combine the Dry Ingredients

    In a separate bowl, whisk together the flour, cream of tartar, baking soda, salt, and pumpkin pie spice (or individual spices). Gradually add the dry ingredients to the wet mixture. Stir until a dough forms.

    Step 4: Make the Cinnamon Sugar

    In a small bowl, mix together the 2 tablespoons sugar and 2 teaspoons cinnamon. This will be used for coating the cookies.

    Step 5: Shape the Cookies

    Roll the dough into 1-inch balls. Coat each ball evenly in the cinnamon sugar mixture.

    Step 6: Prepare for Baking

    Place the coated dough balls onto the prepared baking sheet, spacing them about 2 inches apart. Gently press down on each ball with the back of a spoon or your fingers to slightly flatten them.

    Step 7: Bake the Cookies

    Bake in the preheated oven for 8-10 minutes. The edges should be set, and the tops may crack. Avoid overbaking to keep the cookies soft and chewy.

    Step 8: Cool and Enjoy

    Remove the cookies from the oven and let them cool on the baking sheet for a few minutes. Transfer them to a wire rack to cool completely.

    These soft Pumpkin Snickerdoodles are perfect for enjoying with a warm cup of your favorite fall beverage. Happy baking!

    Preparation time: 15 minutes | Cooking time: 8-10 minutes

    Nutritional Information (per serving)

    • Calories: 120 kcal
    • Carbohydrates: 19g
    • Protein: 1.5g
    • Fat: 4.5g
    • Saturated Fat: 2.5g
    • Fiber: 0.5g
    • Sugar: 10g

    Nutritional values are approximate and based on one cookie per serving.

    How to Serve Soft Pumpkin Snickerdoodles

    These Soft Pumpkin Snickerdoodles are not just delightful on their own; they can be creatively served to enhance your enjoyment. Here are a few serving ideas:

    With Spiced Hot Chocolate

    Serve these cookies alongside a rich spiced hot chocolate. The warm flavors of chocolate and pumpkin complement each other perfectly, creating a cozy treat.

    Pumpkin Spice Latte

    Pair your Soft Pumpkin Snickerdoodles with a classic pumpkin spice latte. The creamy, spiced coffee elevates the cookie experience, making it a perfect fall indulgence.

    Autumn Fruit Platter

    Accompany your cookies with an autumn fruit platter featuring apples and pears. The fresh, crisp fruit provides a refreshing contrast to the soft, spiced cookies.

    Pro Tips for the Best Soft Pumpkin Snickerdoodles

    To achieve the perfect Soft Pumpkin Snickerdoodles, consider these expert tips:

    • Use Fresh Pumpkin Puree: For the best flavor, opt for fresh pumpkin puree rather than canned. It enhances the overall taste and texture of your cookies.

    • Chill the Dough: If time permits, chill the dough for about 30 minutes before baking. This helps the cookies maintain their shape and enhances the flavors.

    • Do Not Overbake: Keep a close eye on your cookies as they bake. They should be soft and slightly underbaked in the center for that perfect chewy texture.

    • Store Properly: To keep your cookies soft, store them in an airtight container at room temperature. You can also add a slice of bread to help retain moisture.

    • Experiment with Spices: Feel free to adjust the spice blend according to your preference. Adding a touch more cinnamon or nutmeg can elevate the flavor profile.

    Best Side Dishes and Pairings

    These Soft Pumpkin Snickerdoodles can be enjoyed with various side dishes and beverages that enhance their flavor. Here are some excellent pairings:

    1. Chai Tea: The spices in chai tea harmonize beautifully with the flavors of the cookies, making for a comforting and aromatic experience.

    2. Vanilla Ice Cream: A scoop of vanilla ice cream provides a creamy contrast to the spiced cookies, creating a delightful dessert combination.

    3. Apple Cider: Warm apple cider complements the pumpkin flavor and adds a festive touch to your cookie experience.

    4. Cheese Platter: A selection of mild cheeses, like brie or goat cheese, can provide a savory balance to the sweetness of the cookies.

    5. Cranberry Sauce: The tartness of cranberry sauce offers a refreshing counterpoint to the rich flavors of the pumpkin snickerdoodles.

    Common Mistakes to Avoid

    • Overmixing the Dough: Mixing the dough too much can lead to tough cookies. Mix just until combined.
    • Not Measuring Flour Correctly: Use the spoon-and-level method for accurate flour measurement to prevent dry cookies.
    • Skipping the Chilling Step: Allowing the dough to chill can help the flavors meld and improve texture.
    • Overbaking: Keep a close eye on your cookies; they should be soft and slightly underbaked when removed from the oven.

    Storage & Reheating Instructions

    Refrigerator Storage

    Store your Soft Pumpkin Snickerdoodles in an airtight container in the refrigerator for up to one week. This will help maintain their softness and flavor.

    Freezing Instructions

    To freeze, place the baked cookies in a single layer on a baking sheet until frozen solid. Then transfer them to a freezer-safe bag or container. They can be frozen for up to three months.

    Reheating Tips

    • Oven: Preheat to 350°F (175°C), place cookies on a baking sheet, and warm for about 5 minutes.
    • Microwave: Heat for 10-15 seconds to warm one cookie at a time. Be cautious not to overheat.
    • Stovetop: Place a cookie in a skillet on low heat for 1-2 minutes, covering with a lid to retain moisture.

    Frequently Asked Questions

    Can I use fresh pumpkin instead of canned pumpkin puree for Soft Pumpkin Snickerdoodles?

    Yes, fresh pumpkin can be used, but make sure to puree it until smooth and remove excess moisture for the best results.

    What can I substitute for cream of tartar in this Soft Pumpkin Snickerdoodles recipe?

    You can substitute cream of tartar with an equal amount of baking powder, although it may slightly change the texture.

    How do I know when my Soft Pumpkin Snickerdoodles are done baking?

    They are done when the edges are set, and the tops have started to crack. They will continue to cook slightly after being removed from the oven.

    Can I add chocolate chips to the Soft Pumpkin Snickerdoodles?

    Absolutely! Adding chocolate chips can enhance the flavor and create a delightful twist.

    What is the best way to serve Soft Pumpkin Snickerdoodles?

    These cookies pair perfectly with a warm beverage, like coffee or chai tea, making them a great treat for fall gatherings.

    Final Thoughts

    These Soft Pumpkin Snickerdoodles are a delightful treat that brings the flavors of fall right into your kitchen. We encourage you to try this recipe and share your thoughts in the comments below. Your feedback is invaluable!


    Desserts

    Soft Pumpkin Snickerdoodles


    5.0 from 24 reviews

    These Soft Pumpkin Snickerdoodles are a delightful fall treat, combining the warm flavors of pumpkin and spices with a soft, chewy texture. Perfect for enjoying with a warm beverage, these cookies are easy to make and sure to please everyone.
    Author: Munch Twist
    Prep Time: 15 minutes
    Cook Time: 10 minutes
    Total Time: 25 minutes
    Yield: 24 servings
    Category: Desserts
    Method: No bake
    Cuisine: American

    Soft Pumpkin Snickerdoodles

    SCALE:
    1x
    2x
    3x
    Cook Mode: Prevent your screen from going dark

    Ingredients

    • 1/2 cup pumpkin puree
    • 3 cups all-purpose flour
    • 1 egg
    • 1 teaspoon pumpkin pie spice or 1/2 teaspoon cinnamon, 1/4 teaspoon allspice, 1/4 teaspoon nutmeg, 1/4 teaspoon ginger
    • 2 teaspoons baking soda
    • 1/2 cup butter, softened
    • 1 teaspoon cream of tartar
    • 1/4 teaspoon salt
    • 1 1/2 cups sugar
    • 2 tablespoons sugar (for cinnamon sugar)
    • 2 teaspoons cinnamon (for cinnamon sugar)

    Instructions

    1. Preheat your oven to 350°F (175°C). Line a baking sheet with parchment paper.
    2. In a large mixing bowl, cream together the softened butter, 1 1/2 cups sugar, egg, and pumpkin puree until smooth and well combined.
    3. In a separate bowl, whisk together the flour, cream of tartar, baking soda, salt, and pumpkin pie spice (or individual spices). Gradually add the dry ingredients to the wet mixture, stirring until a dough forms.
    4. In a small bowl, mix together the 2 tablespoons sugar and 2 teaspoons cinnamon for the cinnamon sugar coating.
    5. Roll the dough into 1-inch balls, then coat each ball evenly in the cinnamon sugar mixture.
    6. Place the coated dough balls onto the prepared baking sheet, spacing them about 2 inches apart. Gently press down on each dough ball with the back of a spoon or your fingers to slightly flatten them.
    7. Bake in the preheated oven for 8-10 minutes, or until the edges are set, and the tops begin to crack. Be careful not to overbake to keep them soft and chewy.
    8. Remove the cookies from the oven and let them cool on the baking sheet for a few minutes before transferring them to a wire rack to cool completely.
    Nutrition Facts

    Serving Size: 1 serving
    Calories: 120 kcal
    Sugar: 10g
    Sodium: 50mg
    Fat: 4.5g
    Saturated Fat: 2.5g
    Carbohydrates: 19g
    Fiber: 0.5g
    Protein: 1.5g
    Cholesterol: 20mg

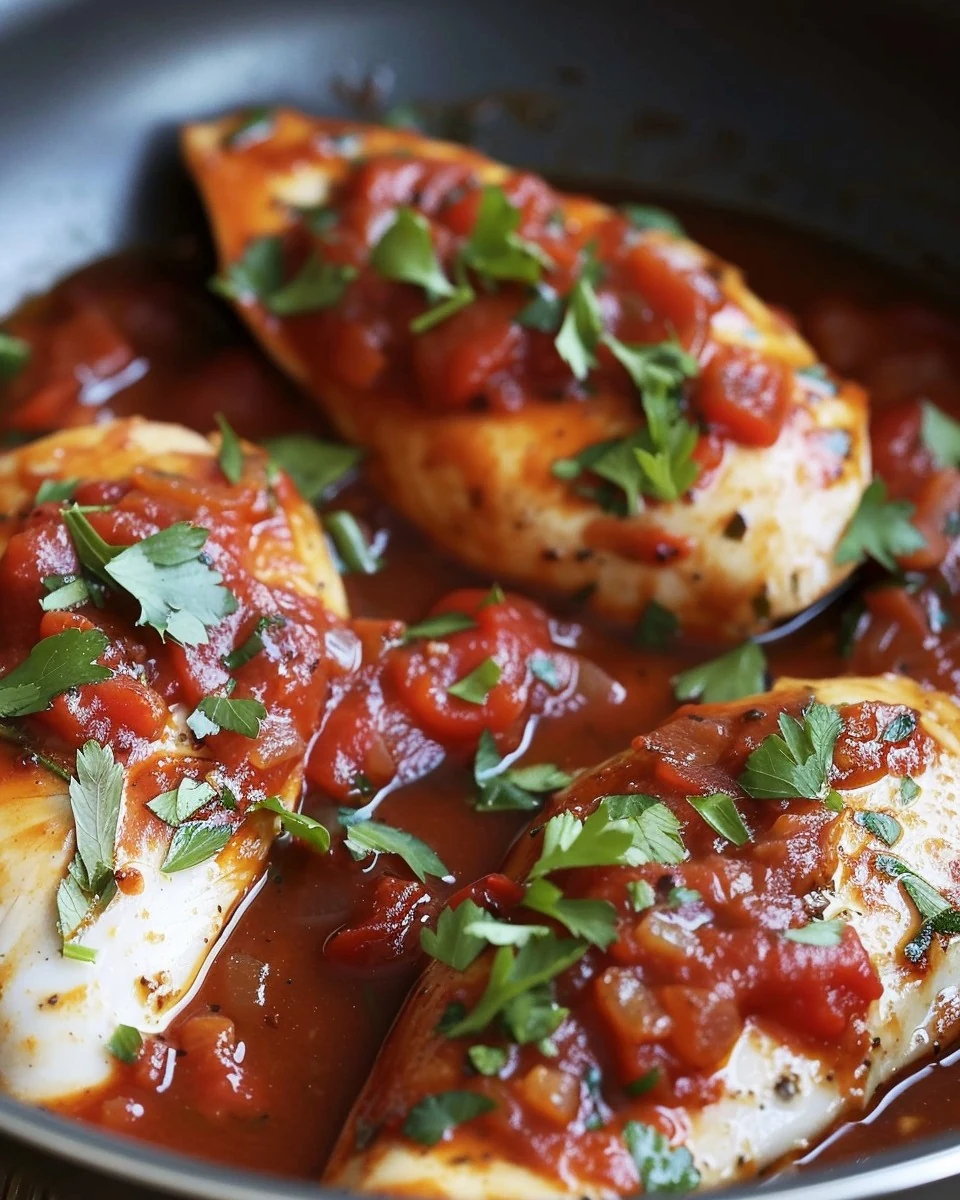
  • Easy and Flavorful Diet Cola Chicken Recipe

    Easy and Flavorful Diet Cola Chicken Recipe

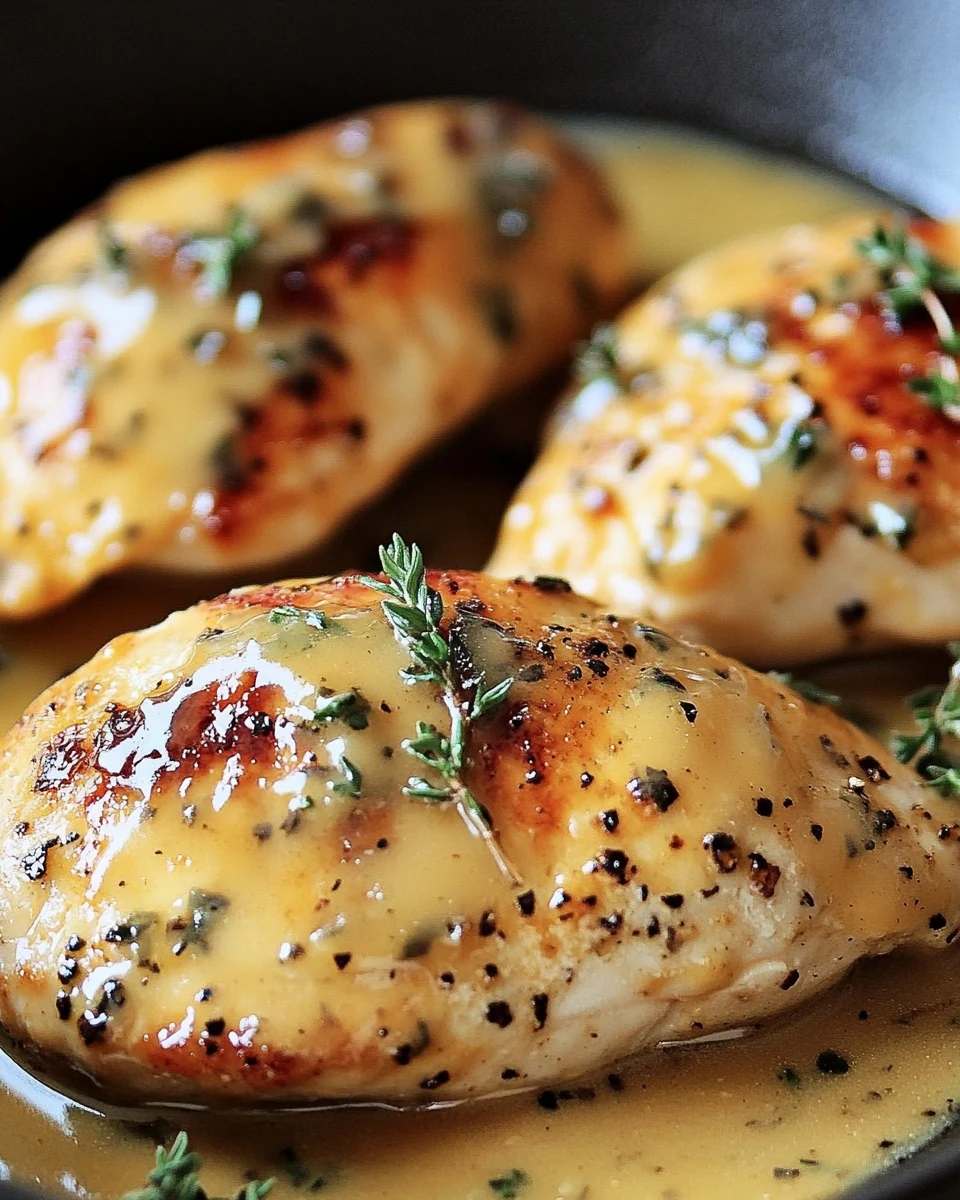
    Diet Cola Chicken is a unique dish that marries the sweetness of soda with savory chicken and vegetables. The result is a flavorful and tender meal that will surprise and delight your taste buds. This recipe is not only delicious but also simple to prepare, making it perfect for weeknight dinners.

    Why You’ll Love This Recipe

    • Quick & Easy: Ready in under 35 minutes, this dish is perfect for busy weeknights.
    • Healthy Ingredients: Packed with protein and low in fat, it fits well into many diets.
    • One-Pan Meal: Minimal cleanup is required, making it a convenient option for any home cook.
    • Flavorful Sauce: The combination of diet cola and sauces creates a sweet and savory glaze that enhances the chicken.
    • Customizable: Feel free to add your favorite vegetables or adjust the spices to suit your taste.

    Tools and Equipment

    Having the right tools will simplify the cooking process and yield the best results.

    Essential Tools

    • Non-stick pan
    • Sharp knife
    • Cutting board
    • Measuring spoons
    • Serving spoon

    Why These Tools Matter

    • Non-stick pan: Ensures the chicken and vegetables cook evenly without sticking.
    • Sharp knife: Makes cutting the chicken and vegetables effortless and safe.
    • Measuring spoons: Guarantees accurate measurements for sauces and spices, enhancing the dish’s flavor.

    Ingredients for Diet Cola Chicken

    Chicken and Vegetables

    • 4 boneless, skinless chicken breasts
    • 1 red pepper, chopped
    • 1 onion, chopped
    • 2 garlic cloves, minced

    Sauces and Seasonings

    • 330ml can of diet cola
    • 6 tbsp passata (tomato puree)
    • 1 tbsp Worcestershire sauce
    • 1 tbsp soy sauce
    • 1 tsp smoked paprika
    • Salt and pepper, to taste

    Garnish

    • Fresh parsley, for garnish

    How to Make Diet Cola Chicken Step-by-Step

    Step 1: Prepare the Chicken

    Cut the chicken breasts into bite-sized pieces. Season with salt and pepper to taste, ensuring every piece is well coated.

    Step 2: Cook the Vegetables

    In a large non-stick pan, cook the chopped onion, red pepper, and minced garlic over medium heat. Stir frequently until softened, which should take about 5 minutes.

    Step 3: Brown the Chicken

    Add the seasoned chicken pieces to the pan. Cook until browned on all sides, approximately 8 minutes. This step adds depth of flavor to the dish.

    Step 4: Add the Sauces and Cola

    Stir in the passata, Worcestershire sauce, soy sauce, and smoked paprika. Pour in the diet cola and mix until everything is well combined.

    Step 5: Simmer

    Bring the mixture to a boil. Then reduce the heat and let it simmer for 20-25 minutes. Stir occasionally until the sauce thickens and the chicken is cooked through.

    Step 6: Serve

    Once cooked, garnish with fresh parsley. Serve over rice or alongside your favorite vegetables for a complete meal. Enjoy your flavorful Diet Cola Chicken!

    Preparation time: 10 minutes | Cooking time: 35 minutes

    Nutritional Information (per serving)

    • Calories: Approx. 290 kcal
    • Carbohydrates: 18g
    • Protein: 30g
    • Fat: 6g

    This Diet Cola Chicken combines sweet and savory flavors with a touch of smoky paprika for a delightful meal!

    How to Serve Diet Cola Chicken

    Diet Cola Chicken is versatile and can be enjoyed in various ways to suit your meal preferences.

    Serve Over Rice

    A classic choice, serving Diet Cola Chicken over fluffy white or brown rice allows the flavorful sauce to soak in, enhancing each bite.

    With a Side of Vegetables

    Pair the chicken with steamed or roasted seasonal vegetables for a balanced meal. The freshness of the veggies complements the dish’s sweetness.

    In a Wrap

    For a quick lunch, consider wrapping the Diet Cola Chicken in a tortilla with fresh greens and a drizzle of your favorite dressing. It makes for a delicious and portable meal.

    Pro Tips for the Best Diet Cola Chicken

    To elevate your Diet Cola Chicken experience, consider these helpful tips.

    • Use Fresh Ingredients: Fresh garlic and vegetables will significantly enhance the flavor of your dish.
    • Adjust Sweetness: If you prefer a less sweet sauce, reduce the amount of diet cola slightly to balance the flavors.
    • Let It Rest: After cooking, allow the chicken to rest for a few minutes before serving. This helps the juices redistribute for a more succulent meal.
    • Experiment with Spices: Feel free to add your favorite spices or herbs to customize the flavor profile to your liking.
    • Store Leftovers Properly: Refrigerate any leftovers in an airtight container for up to 3 days. Reheat gently to maintain texture and flavor.

    Best Side Dishes and Pairings

    To complete your meal, consider these side dishes and drinks that pair wonderfully with Diet Cola Chicken.

    1. Steamed Broccoli: The slight bitterness of broccoli balances the sweetness of the chicken.
    2. Garlic Bread: A crunchy, buttery garlic bread is perfect for soaking up the savory sauce.
    3. Quinoa Salad: A light quinoa salad with lemon and herbs adds a refreshing contrast to the rich flavors of the chicken.
    4. Coleslaw: The crunchiness and tang of coleslaw bring a delightful texture and flavor to the meal.
    5. Iced Tea: A chilled glass of unsweetened iced tea offers a refreshing counterpoint to the sweetness of the dish.

    Common Mistakes to Avoid

    • Overcooking the Chicken: Ensure you monitor the cooking time to keep the chicken tender and juicy.
    • Skipping the Seasoning: Properly seasoning your chicken before cooking is essential for flavor.
    • Rushing the Simmering Process: Allow the sauce to thicken properly by not skipping the simmering step.
    • Using Regular Cola: Stick to diet cola for the best results in flavor and calorie control.

    Storage & Reheating Instructions

    Refrigerator Storage

    Store leftover Diet Cola Chicken in airtight containers. It will stay fresh for up to 3 days in the refrigerator.

    Freezing Instructions

    For best results, freeze the chicken in an airtight container or freezer bag. It can be frozen for up to 3 months. Thaw in the refrigerator overnight before reheating.

    Reheating Tips

    • Oven: Preheat the oven to 350°F (175°C). Place the chicken in an oven-safe dish, cover with foil, and heat for 20-25 minutes.
    • Microwave: Transfer a portion to a microwave-safe dish and cover. Heat on high for 2-3 minutes, stirring halfway through.
    • Stovetop: Heat in a skillet over medium-low heat, stirring occasionally, until warmed through.

    Frequently Asked Questions

    How can I make Diet Cola Chicken healthier?

    You can use skinless chicken thighs instead of breasts for more flavor and moisture, or opt for low-sodium soy sauce to reduce salt intake.

    Can I substitute diet cola with another soda?

    While diet cola is recommended for its unique flavor, you can experiment with other diet sodas, such as diet root beer, for a different taste.

    How do I adjust the spice level in Diet Cola Chicken?

    To increase the spice level, consider adding a pinch of cayenne pepper or red pepper flakes to the sauce.

    What should I serve with Diet Cola Chicken?

    This dish pairs well with rice, quinoa, or steamed vegetables, providing a balanced meal.

    Final Thoughts

    Diet Cola Chicken is a delicious and easy recipe that combines sweet and savory flavors in a satisfying dish. We encourage you to try making this recipe and share your thoughts in the comments. Your feedback is valuable to us!


    Dinner

    Diet Cola Chicken


    5.0 from 24 reviews

    This Diet Cola Chicken combines sweet and savory flavors with a touch of smoky paprika for a delightful meal. The chicken is tender and infused with the unique taste of diet cola, making it a flavorful and satisfying dish.

    Author: Munch Twist
    Prep Time: 10 minutes
    Cook Time: 35 minutes
    Total Time: 45 minutes
    Yield: 4 servings
    Category: Desserts
    Method: No bake
    Cuisine: American

    Diet Cola Chicken

    SCALE:
    1x
    2x
    3x
    Cook Mode: Prevent your screen from going dark

    Ingredients

    • 1 red pepper, chopped
    • 4 boneless, skinless chicken breasts
    • 2 garlic cloves, minced
    • 330ml can of diet cola
    • 6 tbsp passata (tomato puree)
    • 1 tbsp Worcestershire sauce
    • 1 tbsp soy sauce
    • 1 tsp smoked paprika
    • Salt and pepper, to taste
    • 1 onion, chopped
    • Fresh parsley, for garnish

    Instructions

    1. Cut the chicken breasts into bite-sized pieces. Season with salt and pepper.
    2. In a large non-stick pan, cook the chopped onion, red pepper, and minced garlic over medium heat until softened, about 5 minutes.
    3. Add the seasoned chicken pieces to the pan. Cook until browned on all sides, about 8 minutes.
    4. Stir in the passata, Worcestershire sauce, soy sauce, and smoked paprika. Pour in the diet cola and mix well.
    5. Bring the mixture to a boil, then reduce the heat. Simmer for 20-25 minutes, stirring occasionally, until the sauce thickens and the chicken is cooked through.
    6. Garnish with fresh parsley. Serve over rice or with a side of vegetables.

    Nutrition Facts

    Serving Size: 1 serving
    Calories: 290 kcal
    Sugar: 8g
    Sodium: 800mg
    Fat: 6g
    Saturated Fat: 1g
    Carbohydrates: 18g
    Fiber: 2g
    Protein: 30g
    Cholesterol: 90mg

  • Irresistible Peanut Butter Brownie Swirl Cookies Recipe

    Irresistible Peanut Butter Brownie Swirl Cookies Recipe

    Peanut Butter Brownie Swirl Cookies are a delightful treat that combines the rich flavors of brownie and creamy peanut butter in every bite. These cookies are not only visually appealing with their beautiful swirls but also offer a satisfying texture that is both chewy and soft. Perfect for any occasion, they will quickly become a favorite in your dessert repertoire.

    Why You’ll Love This Recipe

    • Irresistible Flavor: The combination of peanut butter and chocolate creates a harmonious taste that is hard to resist.
    • Fun to Make: This recipe is a great way to involve kids or friends in the kitchen.
    • Perfect for Sharing: Bake a batch for parties, gatherings, or as a thoughtful gift.
    • Customizable: Feel free to add chocolate chips or nuts for added texture and flavor.
    • Quick & Easy: Ready in under 30 minutes, these cookies are perfect for a last-minute treat.

    Tools and Equipment

    Gathering the right tools will streamline your baking experience.

    Essential Tools

    • Mixing bowls
    • Measuring cups
    • Measuring spoons
    • Whisk
    • Baking sheet
    • Parchment paper
    • Spoon or cookie scoop

    Why These Tools Matter

    • Mixing bowls: Essential for combining ingredients without mess.
    • Baking sheet: Provides even baking and easy transfer to and from the oven.
    • Parchment paper: Prevents sticking, ensuring your cookies come out perfectly every time.

    Ingredients for Peanut Butter Brownie Swirl Cookies

    For the Peanut Butter Cookie Dough:

    • 1/3 cup creamy peanut butter
    • 1/4 teaspoon baking soda
    • 1/4 cup granulated sugar
    • 1 large egg
    • 1/4 cup unsalted butter, softened
    • 1/8 teaspoon salt
    • 1/4 cup packed light brown sugar
    • 3/4 cup all-purpose flour
    • 1/2 teaspoon vanilla extract

    For the Brownie Cookie Dough:

    • 1 large egg
    • 1/8 teaspoon baking powder
    • 1/4 cup unsalted butter, melted
    • 1/8 teaspoon salt
    • 1/2 cup granulated sugar
    • 1/3 cup unsweetened cocoa powder
    • 1/2 teaspoon vanilla extract
    • 1/2 cup all-purpose flour

    How to Make Peanut Butter Brownie Swirl Cookies Step-by-Step

    Step 1: Prepare the Peanut Butter Cookie Dough

    1. In a large mixing bowl, cream together softened butter, creamy peanut butter, granulated sugar, and packed light brown sugar until light and fluffy, about 3-4 minutes.
    2. Add 1 large egg and vanilla extract, beating until fully combined.
    3. In a separate bowl, whisk together all-purpose flour, baking soda, and salt. Gradually add the dry ingredients to the wet mixture, stirring until just combined. Set aside.

    Step 2: Prepare the Brownie Cookie Dough

    1. In another large bowl, whisk together melted butter and granulated sugar until well-mixed.
    2. Add 1 large egg and vanilla extract, mixing thoroughly.
    3. Sift together cocoa powder, all-purpose flour, baking powder, and salt. Gradually stir these dry ingredients into the wet mixture until the dough is smooth and uniform.

    Step 3: Assemble the Cookies

    1. Preheat your oven to 350°F (175°C) and line a baking sheet with parchment paper.
    2. Take about 1 tablespoon of each dough (peanut butter and brownie) and gently roll them together into a ball.
    3. Twist the doughs lightly to create a marbled effect, ensuring you don’t overmix to maintain distinct swirls.
    4. Place the dough balls on the prepared baking sheet, spacing them about 2 inches apart.

    Step 4: Bake the Cookies

    1. Bake for 10-12 minutes, or until the edges are just set but the centers remain soft. This ensures a chewy center with a crisp edge.
    2. Let the cookies cool on the baking sheet for 5 minutes before transferring them to a wire rack to cool completely.
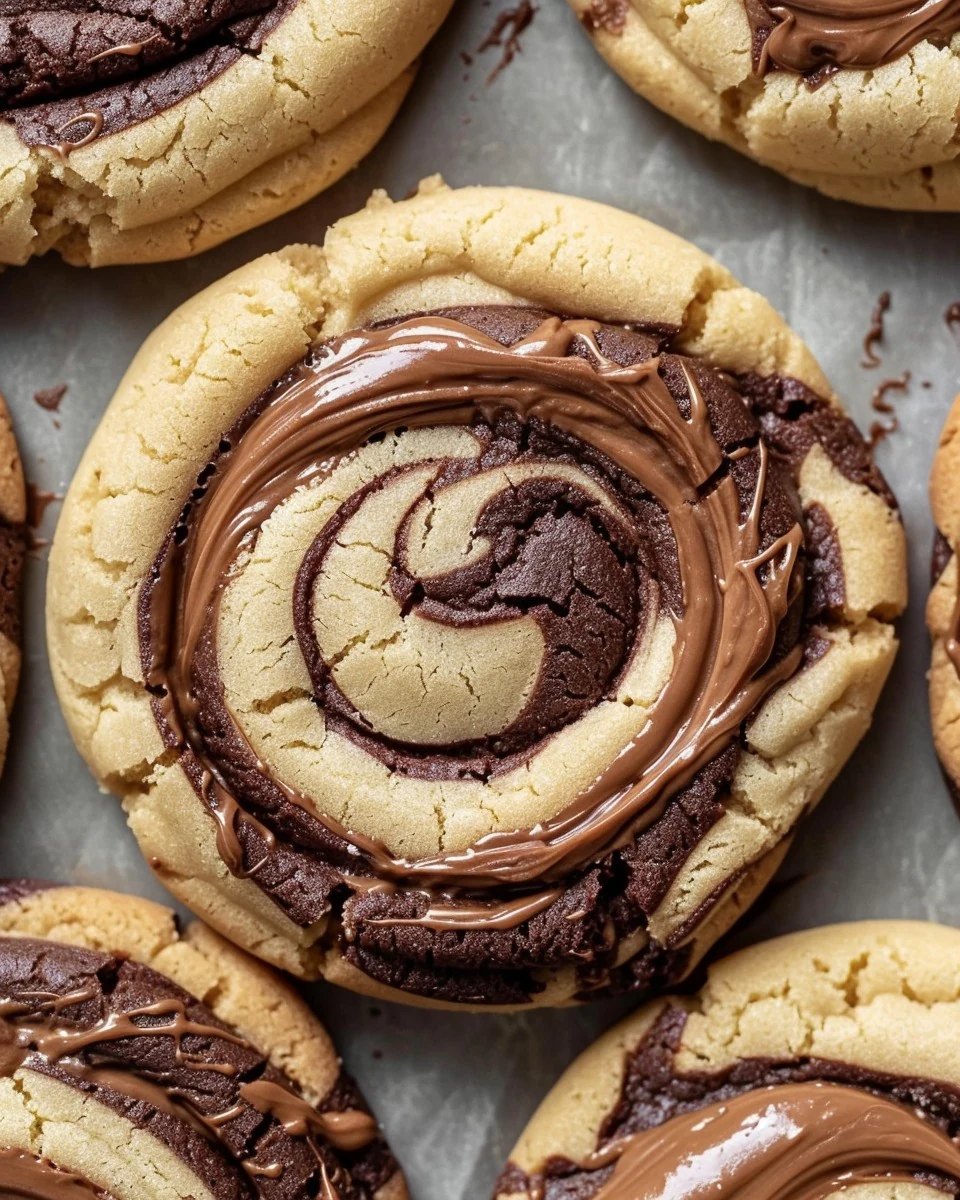
    Enjoy these delightful Peanut Butter Brownie Swirl Cookies, where each bite offers a perfect blend of flavors and textures.

    How to Serve Peanut Butter Brownie Swirl Cookies

    These cookies are versatile and can be enjoyed in various ways to enhance their delightful flavors.

    With a Glass of Milk

    A classic pairing, serving these cookies with a cold glass of milk complements the rich peanut butter and chocolate flavors beautifully.

    Ice Cream Sandwiches

    Transform your cookies into indulgent ice cream sandwiches by placing a scoop of vanilla or chocolate ice cream between two cookies for a decadent treat.

    Dessert Platter

    Arrange these cookies on a dessert platter alongside fresh fruit and other baked goods for a visually appealing and delicious spread at gatherings or parties.

    Pro Tips for the Best Peanut Butter Brownie Swirl Cookies

    To achieve perfect cookies every time, consider these helpful tips.

    • Use Creamy Peanut Butter: For the best texture and flavor, opt for creamy peanut butter instead of crunchy, which can disrupt the dough consistency.
    • Measure Flour Accurately: Ensure that you measure your flour using the spoon-and-level method to avoid dense cookies caused by too much flour.
    • Don’t Overmix the Dough: Mix the cookie dough just until combined to maintain a tender, chewy texture instead of a tough one.
    • Chill the Dough (Optional): If time allows, chill the dough for 30 minutes before baking to enhance flavor and prevent spreading.
    • Rotate the Baking Sheet: Halfway through baking, rotate the baking sheet for even cooking, ensuring all cookies are baked to perfection.

    Best Side Dishes and Pairings

    These cookies can be paired with various dishes and drinks for an enhanced experience.

    1. Coffee: The rich flavors of coffee perfectly complement the chocolate and peanut butter in the cookies, making for a delightful pairing.
    2. Chocolate Milkshake: A thick chocolate milkshake adds a creamy sweetness that balances the cookies’ flavors beautifully.
    3. Fresh Berries: The tartness of fresh berries, such as strawberries or raspberries, provides a refreshing contrast to the sweetness of the cookies.
    4. Whipped Cream: Topping the cookies with a dollop of whipped cream can elevate them to a new level of indulgence.
    5. Nutty Trail Mix: A side of nutty trail mix can enhance the nutty flavors of the peanut butter while adding crunch and texture to your dessert experience.

    Common Mistakes to Avoid

    • Overmixing the Dough: Mixing too much can lead to tough cookies. Stir until just combined.
    • Incorrect Oven Temperature: Ensure your oven is preheated to 350°F (175°C) for even baking.
    • Not Chilling the Dough: If the dough is too soft, chilling it for 15-30 minutes can help shape better cookies.
    • Skipping Parchment Paper: Baking without parchment can cause sticking. Always line your baking sheet.

    Storage & Reheating Instructions

    Refrigerator Storage

    Store the cookies in an airtight container at room temperature for up to 5 days. If you prefer, you can also refrigerate them for up to a week.

    Freezing Instructions

    To freeze, place the cookies in a single layer on a baking sheet until firm, then transfer them to a freezer-safe container or bag. They will stay fresh for up to 3 months.

    Reheating Tips

    • Oven: Preheat to 350°F (175°C) and warm cookies for 5-7 minutes.
    • Microwave: Heat for 10-15 seconds for a warm, gooey treat.
    • Stovetop: Use a skillet on low heat for 1-2 minutes, covered, to warm without drying out.

    Frequently Asked Questions

    How do I know when the Peanut Butter Brownie Swirl Cookies are done?

    The cookies are done when the edges are set and the centers are still slightly soft. They will continue to firm up as they cool.

    Can I use crunchy peanut butter for this recipe?

    Yes, crunchy peanut butter can be used for added texture, but it may change the consistency slightly.

    How do I store leftover Peanut Butter Brownie Swirl Cookies?

    Store them in an airtight container at room temperature for up to 5 days, or refrigerate them for up to a week.

    Can I make the dough ahead of time?

    Absolutely! You can prepare the dough a day in advance and store it in the refrigerator until you’re ready to bake.

    What can I substitute for all-purpose flour?

    For a gluten-free option, you can use a 1:1 gluten-free flour blend, which will work well in this recipe.

    Final Thoughts

    These Peanut Butter Brownie Swirl Cookies are a delightful treat that combines the best of both worlds. We encourage you to try this recipe and share your results in the comments. Your feedback is always appreciated!


    Desserts

    Peanut Butter Brownie Swirl Cookies


    5.0 from 24 reviews

    These Peanut Butter Brownie Swirl Cookies combine the rich flavors of peanut butter and chocolate brownie in a delightful treat. Each cookie features a chewy center and a crisp edge, making them perfect for any occasion.

    Author: Munch Twist
    Prep Time: 20 minutes
    Cook Time: 12 minutes
    Total Time: 32 minutes
    Yield: 12 servings
    Category: Desserts
    Method: No bake
    Cuisine: American

    Peanut Butter Brownie Swirl Cookies

    SCALE:
    1x
    2x
    3x
    Cook Mode: Prevent your screen from going dark

    Ingredients

    • 1/3 cup creamy peanut butter
    • 1/4 teaspoon baking soda
    • 1/4 cup granulated sugar
    • 1 large egg
    • 1/4 cup unsalted butter, softened
    • 1/8 teaspoon salt
    • 1/4 cup packed light brown sugar
    • 3/4 cup all-purpose flour
    • 1/2 teaspoon vanilla extract
    • 1 large egg (for brownie dough)
    • 1/8 teaspoon baking powder
    • 1/4 cup unsalted butter, melted
    • 1/8 teaspoon salt (for brownie dough)
    • 1/2 cup granulated sugar (for brownie dough)
    • 1/3 cup unsweetened cocoa powder
    • 1/2 teaspoon vanilla extract (for brownie dough)
    • 1/2 cup all-purpose flour (for brownie dough)

    Instructions

    1. In a large mixing bowl, cream together the softened butter, creamy peanut butter, granulated sugar, and packed light brown sugar until light and fluffy.
    2. Add the egg and vanilla extract, beating until fully combined. In a separate bowl, whisk together the all-purpose flour, baking soda, and salt. Gradually add the dry ingredients to the wet mixture, stirring until just combined.
    3. In another bowl, whisk together the melted butter and granulated sugar. Add the egg and vanilla extract, mixing thoroughly. Sift together the cocoa powder, all-purpose flour, baking powder, and salt, then gradually stir these dry ingredients into the wet mixture until smooth.
    4. Preheat your oven to 350°F (175°C) and line a baking sheet with parchment paper. Take about 1 tablespoon of each dough and gently roll them together into a ball, twisting lightly to create a marbled effect.
    5. Place the dough balls on the prepared baking sheet, spacing them about 2 inches apart. Bake for 10-12 minutes, or until the edges are just set but the centers remain soft. Let the cookies cool on the baking sheet for 5 minutes before transferring them to a wire rack.

    Nutrition Facts

    Serving Size: 1 serving
    Calories: 130 kcal
    Sugar: 10g
    Sodium: 80mg
    Fat: 7g
    Saturated Fat: 3g
    Carbohydrates: 17g
    Fiber: 1g
    Protein: 3g
    Cholesterol: 25mg

  • Irresistible Raspberry White Chocolate Crumble Muffins Recipe

    Irresistible Raspberry White Chocolate Crumble Muffins Recipe

    Raspberry White Chocolate Crumble Muffins are a delightful fusion of sweet, tart raspberries and creamy white chocolate, all enveloped in a soft, fluffy muffin. These muffins are perfect for breakfast or as a sweet snack, featuring a buttery crumble topping that adds a satisfying crunch. Their vibrant color and rich flavor will make them a standout treat in any kitchen.

    Why You’ll Love This Recipe

    • Delicious Flavor Combination: The pairing of tart raspberries and sweet white chocolate creates a perfect balance.
    • Easy to Make: This simple recipe requires minimal prep time and common ingredients.
    • Versatile Treat: Enjoy these muffins for breakfast, brunch, or as an afternoon snack.
    • Customizable: Feel free to substitute other fruits or chocolates to suit your taste.
    • Perfect for Sharing: These muffins are ideal for gatherings, making them a hit with family and friends.

    Tools and Equipment

    Before you start baking, gather your essential tools for a smooth experience.

    Essential Tools

    • Muffin tin
    • Mixing bowls
    • Whisk
    • Rubber spatula
    • Measuring cups and spoons

    Why These Tools Matter

    • Muffin tin: Ensures even baking and perfect muffin shapes.
    • Mixing bowls: Allows for easy mixing of wet and dry ingredients without spills.
    • Rubber spatula: Helps in folding ingredients gently without overmixing.

    Ingredients for Raspberry White Chocolate Crumble Muffins

    For the Muffins

    • 150g sugar
    • 200ml milk
    • 120g unsalted butter, melted
    • 250g all-purpose flour
    • 100g white chocolate, chopped
    • 2 large eggs
    • 150g fresh raspberries
    • 1 tbsp baking powder
    • 1/2 tsp salt

    For the Crumble Topping

    • 25g unsalted butter, cold and cubed
    • 50g all-purpose flour
    • 30g sugar

    How to Make Raspberry White Chocolate Crumble Muffins Step-by-Step

    Step 1: Preheat the Oven

    Preheat your oven to 180°C (350°F) and line a muffin tin with paper cases. This ensures even baking and prevents sticking.

    Step 2: Prepare Dry Ingredients

    In a large bowl, mix together the 250g all-purpose flour, 150g sugar, 1 tbsp baking powder, and 1/2 tsp salt. This creates a balanced base for the muffins.

    Step 3: Combine Wet Ingredients

    In another bowl, whisk together the 120g melted unsalted butter, 2 large eggs, and 200ml milk until well combined. This mixture adds moisture to the muffins.

    Step 4: Mix Muffin Batter

    Add the wet ingredients to the dry ingredients. Stir until just combined. Gently fold in the 100g chopped white chocolate and 150g fresh raspberries. Be careful not to overmix; a few lumps are fine.

    Step 5: Fill Muffin Cases

    Divide the muffin batter evenly among the prepared paper cases. This ensures each muffin bakes evenly.

    Step 6: Make Crumble Topping

    For the crumble topping, mix the 50g all-purpose flour, 30g sugar, and 25g cold butter cubes using your fingers or a pastry cutter. Continue until the mixture resembles coarse crumbs. Sprinkle this topping over the muffin batter.

    Step 7: Bake Muffins

    Bake in the preheated oven for 20-25 minutes. Muffins are done when a toothpick inserted into the center comes out clean.

    Step 8: Cool Muffins

    Allow the muffins to cool in the tin for 5 minutes. Then, transfer them to a wire rack to cool completely. This helps maintain their texture.
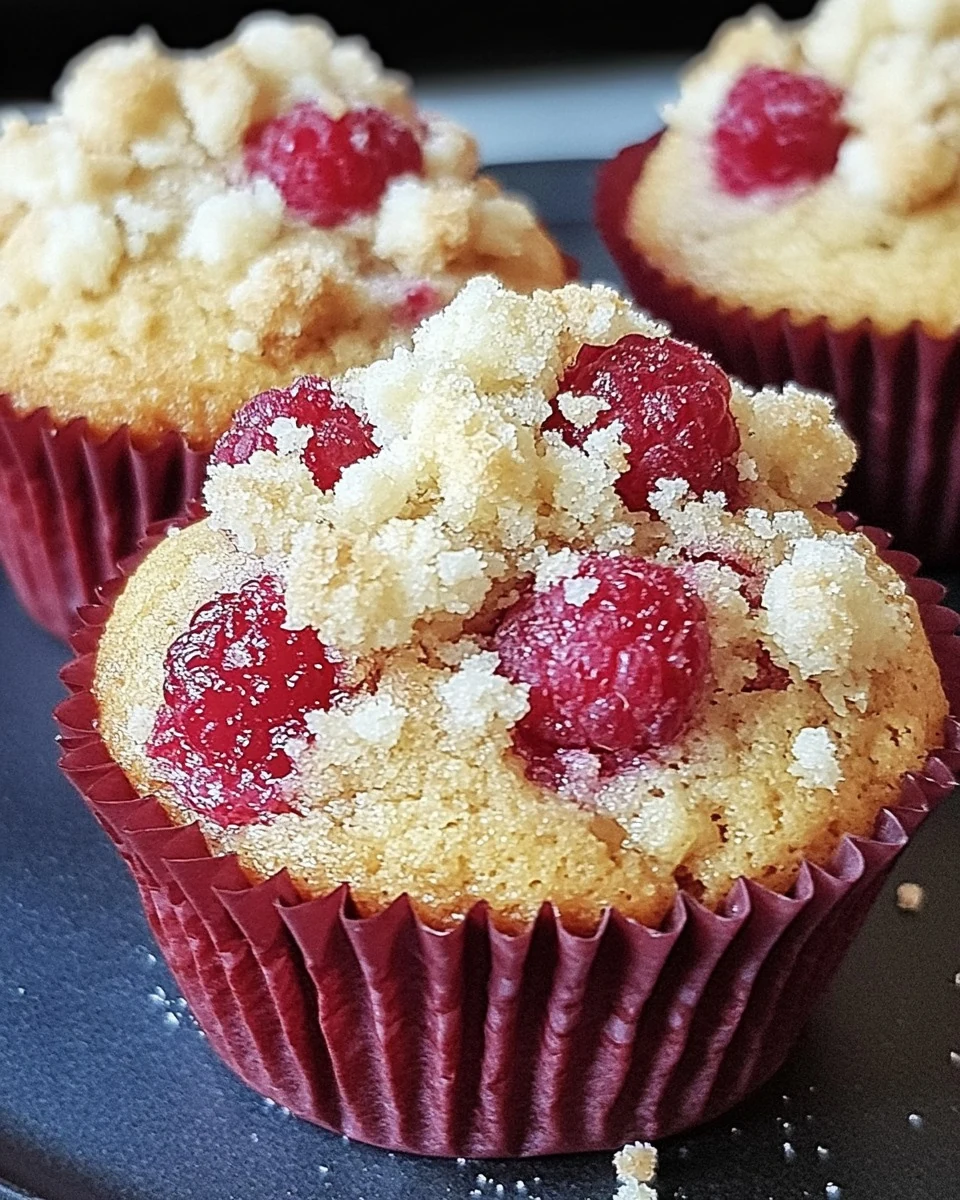
    These Raspberry White Chocolate Crumble Muffins are sure to impress with their delightful taste and texture. Perfect for any occasion, they are a must-try for any baking enthusiast.

    How to Serve Raspberry White Chocolate Crumble Muffins

    These Raspberry White Chocolate Crumble Muffins are versatile and can be enjoyed in various delightful ways.

    Muffins with a Twist

    Serve the muffins warm, drizzled with a bit of melted white chocolate for an indulgent treat that enhances the sweetness of the raspberries.

    Breakfast on the Go

    Pair the muffins with a smoothie or a cup of yogurt for a quick and nutritious breakfast option that is both satisfying and delicious.

    Afternoon Tea Delight

    Accompany the muffins with a pot of freshly brewed tea or coffee, creating a perfect afternoon snack that complements the rich flavors of the muffins.

    Pro Tips for the Best Raspberry White Chocolate Crumble Muffins

    To elevate your baking experience, consider these practical tips.

    • Use Fresh Raspberries: Fresh raspberries provide the best flavor and texture; frozen ones may make the muffins soggy.
    • Don’t Overmix the Batter: Stir the batter just until combined to ensure fluffy muffins; overmixing can lead to dense results.
    • Chill the Butter for the Crumble: Using cold butter for the crumble topping will create a better texture and crunch.
    • Check for Doneness: Insert a toothpick into the center; it should come out clean or with a few moist crumbs, not wet batter.
    • Store Properly: Keep leftover muffins in an airtight container to maintain their freshness and moisture.

    Best Side Dishes and Pairings

    These muffins pair beautifully with various side dishes and drinks.

    1. Greek Yogurt: The creaminess of Greek yogurt balances the sweetness of the muffins while adding protein.
    2. Fresh Fruit Salad: A light fruit salad provides a refreshing contrast to the rich flavors of the muffins.
    3. Herbal Tea: A soothing cup of herbal tea complements the sweetness and enhances the muffin experience.
    4. Cheese Platter: A selection of mild cheeses can create an interesting flavor contrast with the sweetness of the muffins.
    5. Chocolate Milk: The rich flavor of chocolate milk matches well with the white chocolate in the muffins for a delightful pairing.

    Common Mistakes to Avoid

    • Overmixing the Batter: Mixing too vigorously can lead to tough muffins. Stir until just combined.
    • Skipping the Crumble Topping: The crumble adds texture and flavor; don’t omit it for a complete experience.
    • Using Cold Ingredients: Make sure your eggs and milk are at room temperature for better mixing and rise.
    • Not Checking for Doneness: Always test with a toothpick; baking times can vary based on your oven.

    Storage & Reheating Instructions

    Refrigerator Storage

    Store the Raspberry White Chocolate Crumble Muffins in an airtight container in the refrigerator. They will stay fresh for up to 3 days.

    Freezing Instructions

    For longer storage, freeze the muffins individually wrapped in plastic wrap and then placed in a freezer-safe bag. They can be frozen for up to 3 months. Thaw in the refrigerator overnight before reheating.

    Reheating Tips

    • Oven: Preheat the oven to 180°C (350°F) and warm the muffins for about 10 minutes.
    • Microwave: Heat each muffin for about 15-20 seconds on medium power.
    • Stovetop: Place a muffin in a skillet over low heat, cover, and warm for about 5 minutes.

    Frequently Asked Questions

    Can I substitute the white chocolate in Raspberry White Chocolate Crumble Muffins?

    Yes, you can use dark chocolate or milk chocolate as an alternative, but it will alter the flavor profile.

    How can I make these Raspberry White Chocolate Crumble Muffins gluten-free?

    To make them gluten-free, substitute all-purpose flour with a gluten-free flour blend. Ensure that your baking powder is also gluten-free.

    Can I use frozen raspberries instead of fresh in this recipe?

    Yes, you can use frozen raspberries, but do not thaw them before adding to the batter. This helps prevent excess moisture.

    How do I know when my Raspberry White Chocolate Crumble Muffins are done baking?

    Insert a toothpick into the center of a muffin; if it comes out clean or with a few crumbs, they are done.

    Final Thoughts

    These Raspberry White Chocolate Crumble Muffins are a delightful treat that can brighten any day. We encourage you to try this recipe and share your thoughts in the comments. Your feedback is valuable and can help fellow bakers enjoy this delicious creation.


    Desserts

    Raspberry White Chocolate Crumble Muffins


    5.0 from 24 reviews

    These delicious raspberry white chocolate muffins, topped with a buttery crumble, are perfect for a sweet treat or a delightful breakfast.

    Author: Munch Twist
    Prep Time: 15 minutes
    Cook Time: 25 minutes
    Total Time: 40 minutes
    Yield: 12 servings
    Category: Desserts
    Method: No bake
    Cuisine: American

    Raspberry White Chocolate Crumble Muffins

    SCALE:
    1x
    2x
    3x
    Cook Mode: Prevent your screen from going dark

    Ingredients

    • 150g sugar
    • 200ml milk
    • 120g unsalted butter, melted
    • 250g all-purpose flour
    • 100g white chocolate, chopped
    • 2 large eggs
    • 150g fresh raspberries
    • 1 tbsp baking powder
    • 1/2 tsp salt
    • 25g unsalted butter, cold and cubed
    • 50g all-purpose flour (for crumble)
    • 30g sugar (for crumble)

    Instructions

    1. Preheat your oven to 180°C (350°F) and line a muffin tin with paper cases.
    2. In a large bowl, mix together the flour, sugar, baking powder, and salt.
    3. In another bowl, whisk the melted butter, eggs, and milk until well combined.
    4. Add the wet ingredients to the dry ingredients and stir until just combined. Gently fold in the chopped white chocolate and raspberries.
    5. Divide the muffin batter evenly among the paper cases.
    6. For the crumble topping, mix the flour, sugar, and cold butter cubes with your fingers or a pastry cutter until the mixture resembles coarse crumbs. Sprinkle the crumble topping over the muffins.
    7. Bake in the preheated oven for 20-25 minutes, or until a toothpick inserted into the center comes out clean.
    8. Allow the muffins to cool in the tin for 5 minutes before transferring to a wire rack to cool completely.
    Nutrition Facts

    Serving Size: 1 serving
    Calories: 350 kcal
    Sugar: 24g
    Sodium: 220mg
    Fat: 17g
    Saturated Fat: 10g
    Carbohydrates: 47g
    Fiber: 1g
    Protein: 4g
    Cholesterol: 80mg

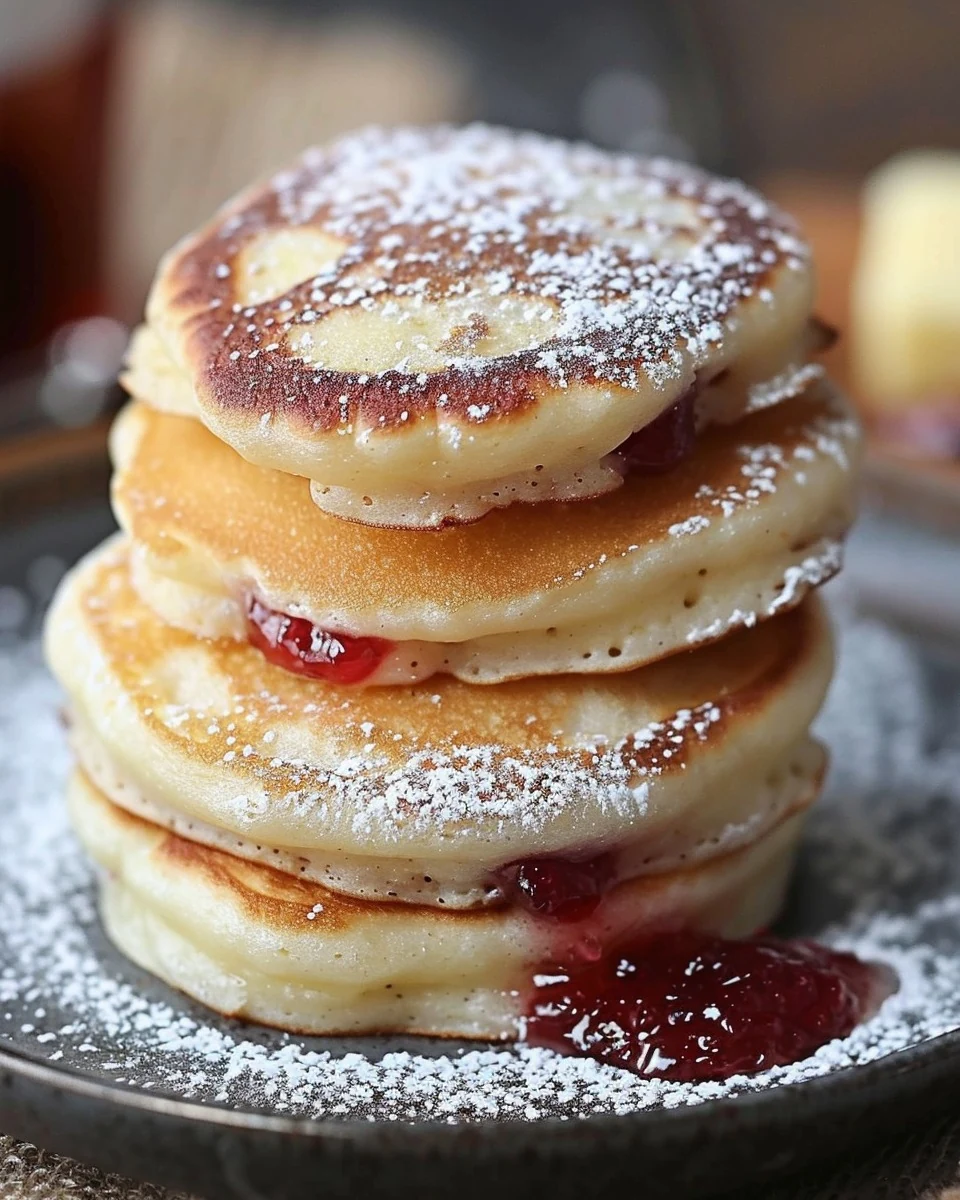
  • Delicious Jam Doughnut Pancakes Recipe

    Delicious Jam Doughnut Pancakes Recipe

    Jam Doughnut Pancakes are a delightful fusion of two beloved treats. These pancakes offer a soft, fluffy texture with a sweet, jam-filled surprise. Perfect for breakfast or brunch, they bring joy to your table with every bite.

    Why You’ll Love This Recipe

    • Irresistibly Flavorful: The combination of fluffy pancakes and sweet jam creates a taste sensation that is hard to resist.
    • Quick & Easy: Ready in under 30 minutes, making them perfect for busy mornings or spontaneous brunch gatherings.
    • Customizable Filling: Use your favorite jam, whether it’s raspberry, strawberry, or apricot, to suit your taste.
    • Fun for Everyone: Kids and adults alike will enjoy making and eating these delicious pancakes together.
    • Great for Meal Prep: Make a batch ahead of time and reheat them for a quick breakfast throughout the week.

    Tools and Equipment

    Having the right tools makes cooking a breeze.

    Essential Tools

    • Non-stick frying pan
    • Mixing bowls
    • Whisk
    • Ladle
    • Knife
    • Measuring spoons and cups

    Why These Tools Matter

    • Non-stick frying pan: Ensures easy flipping and prevents the pancakes from sticking.
    • Mixing bowls: Allows for easy mixing of dry and wet ingredients without mess.
    • Ladle: Helps in pouring consistent pancake portions for even cooking.

    Ingredients for Jam Doughnut Pancakes

    For the Pancake Batter

    • 150g self-raising flour
    • 1 tablespoon caster sugar
    • 1 teaspoon baking powder
    • 1 large egg
    • 200ml milk
    • 1 tablespoon melted butter

    For the Filling and Coating

    • 4 tablespoons raspberry jam (or your favorite jam)
    • Extra butter for frying
    • Caster sugar, for coating

    How to Make Jam Doughnut Pancakes Step-by-Step

    Step 1: Prepare the Batter

    In a large bowl, mix together the self-raising flour, caster sugar, and baking powder. In a separate bowl, whisk the egg, milk, and melted butter until well combined. Gradually pour the wet ingredients into the dry ingredients, stirring until you have a smooth batter.

    Step 2: Cook the Pancakes

    Heat a non-stick frying pan over medium heat and melt a small knob of butter. Pour a small ladleful of batter into the pan. Cook for 1-2 minutes until bubbles form on the surface. Flip the pancake and cook for another minute or until golden brown. Repeat with the remaining batter.

    Step 3: Add the Jam Filling

    Once the pancakes are cooked, carefully make a small slit in the side of each pancake and spoon in a little jam. This creates a delightful surprise when you take a bite.

    Step 4: Coat with Sugar

    Roll each jam-filled pancake in caster sugar until evenly coated. This adds a sweet finish that enhances the overall flavor.

    Step 5: Serve

    Serve the pancakes warm, with extra jam on the side if desired. Enjoy your delightful jam-filled pancakes!

    Preparation time: 10 minutes | Cooking time: 20 minutes

    Nutritional Information

    Nutritional values are approximate and may vary based on specific ingredient brands and quantities used. Each pancake contains:
    – Calories: 130 kcal
    – Carbohydrates: 22g
    – Protein: 3g
    – Fat: 4g
    – Saturated Fat: 2g
    – Sugar: 10g

    Enjoy making and savoring these scrumptious Jam Doughnut Pancakes!

    How to Serve Jam Doughnut Pancakes

    Elevate your breakfast or brunch experience with these delightful jam doughnut pancakes. Here are some creative serving ideas to inspire you.

    Fresh Berries and Cream

    Top your pancakes with a medley of fresh berries like strawberries, blueberries, and raspberries, accompanied by a dollop of whipped cream. This adds a refreshing contrast to the sweetness of the jam.

    Chocolate Drizzle

    For a decadent twist, drizzle melted chocolate over the pancakes. The rich chocolate complements the fruity jam perfectly, creating a luxurious treat.

    Ice Cream Sundae Style

    Transform your pancakes into a dessert by serving them with a scoop of vanilla ice cream. Add a sprinkle of crushed nuts and a drizzle of caramel sauce for an indulgent sundae experience.

    Pro Tips for the Best Jam Doughnut Pancakes

    To ensure your jam doughnut pancakes turn out perfectly every time, consider these helpful tips.

    • Sift the Dry Ingredients: Sifting the flour, sugar, and baking powder together helps incorporate air, resulting in lighter pancakes.

    • Use Fresh Ingredients: Always use fresh eggs and milk for the best flavor and texture in your pancakes.

    • Control the Heat: Cook the pancakes over medium heat to avoid burning the outside while leaving the inside undercooked.

    • Make Ahead of Time: Prepare the batter in advance and refrigerate it. This allows the flavors to meld and can save you time in the morning.

    • Experiment with Fillings: Don’t limit yourself to raspberry jam; try other flavors like strawberry, blueberry, or even lemon curd for a unique twist.

    Best Side Dishes and Pairings

    These jam doughnut pancakes can be enhanced with the right side dishes and drinks. Here are some perfect pairings to consider.

    1. Crispy Bacon
      The savory flavor of crispy bacon provides a delightful contrast to the sweetness of the pancakes.

    2. Greek Yogurt
      A side of creamy Greek yogurt adds a tangy flavor that balances the sweetness of the jam.

    3. Fruit Salad
      A refreshing fruit salad brings a burst of freshness and color to your plate, complementing the pancakes beautifully.

    4. Maple Syrup
      A drizzle of pure maple syrup enhances the overall sweetness, making each bite even more indulgent.

    5. Freshly Brewed Coffee
      Enjoy your pancakes with a cup of freshly brewed coffee to balance the sweetness and add a comforting warmth to your meal.

    Common Mistakes to Avoid

    • Overmixing the Batter: Stirring the batter too much can lead to tough pancakes. Mix until just combined for fluffy results.
    • Incorrect Heat Level: Cooking on too high heat can cause the pancakes to burn on the outside while remaining raw on the inside. Use medium heat for even cooking.
    • Skipping the Jam Filling: Omitting the filling diminishes the essence of jam doughnut pancakes. Be sure to include it for authentic flavor.
    • Not Using Fresh Ingredients: Outdated baking powder or stale flour can affect the rise and texture. Always use fresh ingredients for the best results.

    Storage & Reheating Instructions

    Refrigerator Storage

    Store leftover jam doughnut pancakes in an airtight container in the refrigerator for up to 3 days. Ensure they are completely cool before sealing to maintain texture.

    Freezing Instructions

    For long-term storage, freeze pancakes individually by placing parchment paper between them. Store in a freezer-safe bag or container for up to 2 months. Thaw in the refrigerator overnight before reheating.

    Reheating Tips

    • Oven: Preheat to 180°C (350°F) and heat pancakes for about 10 minutes, until warm throughout.
    • Microwave: Place on a microwave-safe plate and cover with a damp paper towel. Heat in 20-second intervals until warmed to your liking.
    • Stovetop: Reheat in a non-stick pan over low heat for a few minutes on each side until warmed through.

    Frequently Asked Questions

    Can I use different types of jam for the Jam Doughnut Pancakes?

    Yes, feel free to experiment with any fruit jam you prefer, such as strawberry or blueberry, to customize your pancakes.

    How do I make my Jam Doughnut Pancakes fluffier?

    To achieve fluffier pancakes, ensure you do not overmix the batter and let it rest for a few minutes before cooking.

    Can I make these pancakes gluten-free?

    Absolutely! Substitute the self-raising flour with a gluten-free flour blend, and ensure your baking powder is gluten-free as well.

    How can I serve Jam Doughnut Pancakes?

    Serve them warm with a dusting of caster sugar and a side of extra jam for dipping. They pair beautifully with whipped cream or fresh fruit.

    What is the nutritional information for Jam Doughnut Pancakes?

    Each pancake contains approximately 130 calories, 22g carbohydrates, 3g protein, and 10g sugar, making them a delightful treat in moderation.

    Final Thoughts

    These jam doughnut pancakes are a delightful twist on a classic favorite, perfect for breakfast or a sweet treat. We encourage you to try this recipe and share your experience in the comments below. Your feedback helps us create more delicious recipes!


    Desserts


    Title: Indulge in Irresistible Jam Doughnut Pancakes Today
    Meta: Try these delightful Jam Doughnut Pancakes for a sweet breakfast treat. Follow our easy recipe and indulge in a scrumptious experience!
    Synonyms: jam-filled pancakes, doughnut pancakes, sweet pancakes, fruit-filled pancakes, breakfast pancakes, fluffy pancakes, dessert pancakes, jammy pancakes, raspberry pancakes, sweet breakfast, fried pancakes, quick pancakes, pancake recipe, homemade pancakes, brunch pancakes, indulgent pancakes, fluffy breakfast, easy pancakes, delicious pancakes, pancake treat

    Jam Doughnut Pancakes


    5.0 from 24 reviews

    These Jam Doughnut Pancakes are a delightful twist on traditional pancakes, filled with sweet jam and coated in sugar. Perfect for breakfast or a sweet treat, they combine the fluffy texture of pancakes with the indulgence of doughnuts.

    Author: Munch Twist
    Prep Time: 10 minutes
    Cook Time: 20 minutes
    Total Time: 30 minutes
    Yield: 8 servings
    Category: Desserts
    Method: No bake
    Cuisine: American

    Jam Doughnut Pancakes

    SCALE:
    1x
    2x
    3x
    Cook Mode: Prevent your screen from going dark

    Ingredients

    • 150g self-raising flour
    • 1 tablespoon caster sugar
    • 1 teaspoon baking powder
    • 1 large egg
    • 200ml milk
    • 1 tablespoon melted butter
    • 4 tablespoons raspberry jam
    • Extra butter for frying
    • Caster sugar for coating

    Instructions

    1. In a large bowl, mix together the self-raising flour, caster sugar, and baking powder. In a separate bowl, whisk the egg, milk, and melted butter until well combined. Gradually pour the wet ingredients into the dry ingredients, stirring until you have a smooth batter.
    2. Heat a non-stick frying pan over medium heat and melt a small knob of butter. Pour a small ladleful of batter into the pan. Cook for 1-2 minutes until bubbles form on the surface. Flip the pancake and cook for another minute or until golden brown. Repeat with the remaining batter.
    3. Once the pancakes are cooked, carefully make a small slit in the side of each pancake and spoon in a little jam.
    4. Roll each jam-filled pancake in caster sugar until evenly coated.
    5. Serve the pancakes warm, with extra jam on the side if desired.

    Nutrition Facts

    Serving Size: 1 serving
    Calories: 130 kcal
    Sugar: 10g
    Sodium: 50mg
    Fat: 4g
    Saturated Fat: 2g
    Carbohydrates: 22g
    Fiber: 0g
    Protein: 3g
    Cholesterol: 40mg

  • Easy Outback Steakhouse Alice Springs Chicken Recipe

    Easy Outback Steakhouse Alice Springs Chicken Recipe

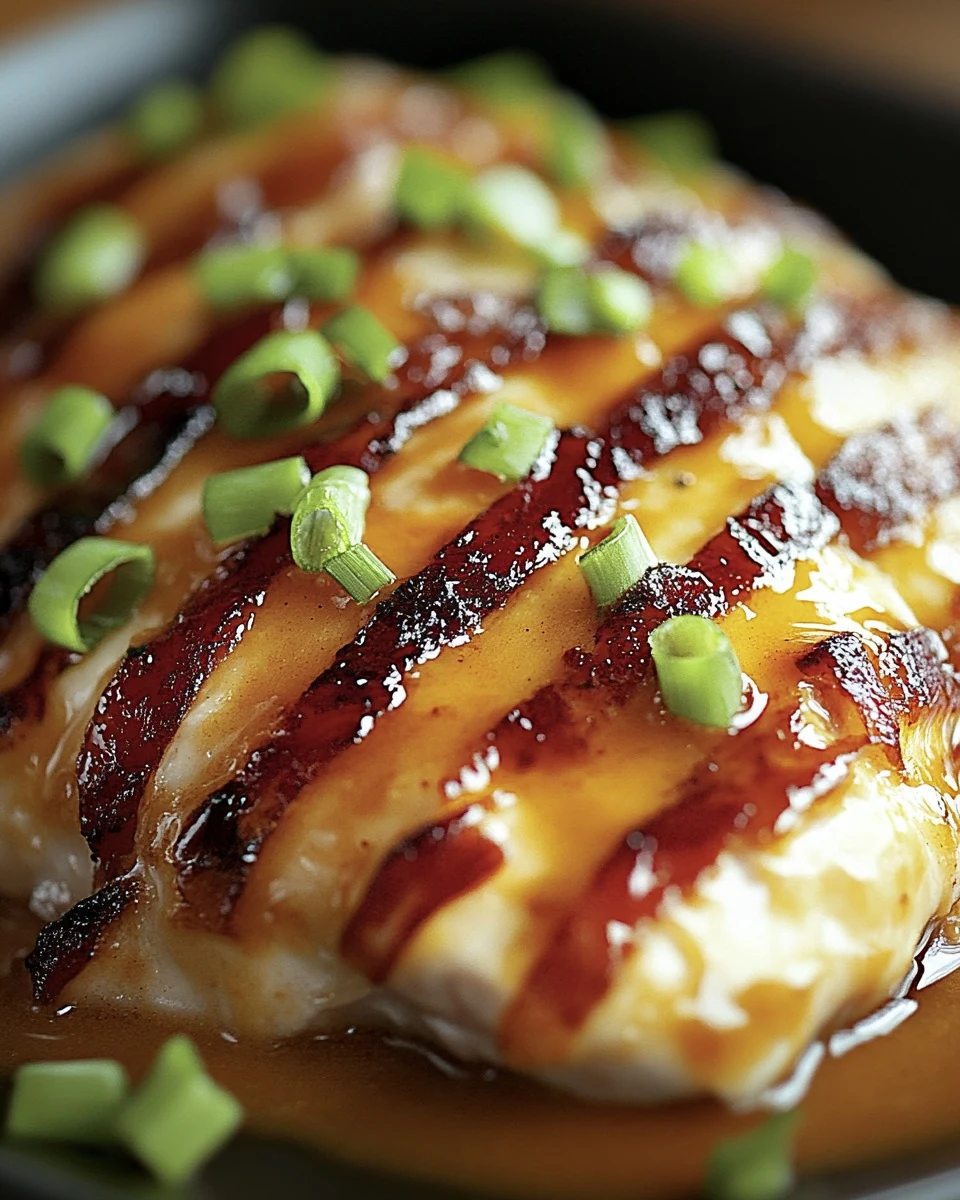
    Outback Steakhouse Alice Springs Chicken is a delightful dish that combines tender chicken, crispy bacon, and melty cheese. This savory recipe is sure to become a favorite in your home kitchen, offering a taste of the beloved restaurant classic with every bite.

    Why You’ll Love This Recipe

    • Delicious Flavor Combination: The union of chicken, bacon, and cheddar creates a rich and satisfying taste experience.
    • Family-Friendly Meal: This dish appeals to a wide range of palates, making it perfect for family dinners.
    • Simple Ingredients: You likely have most of these ingredients on hand, making it easy to whip up.
    • Customizable Option: Feel free to add your favorite herbs or spices to personalize the flavor.
    • Perfect for Meal Prep: This recipe is great for preparing in advance and reheating later for busy weeknights.

    Tools and Equipment

    Having the right tools can make cooking this dish a breeze.

    Essential Tools

    • Cast iron skillet
    • Baking sheet
    • Sharp knife
    • Cutting board
    • Measuring cups
    • Mixing bowl

    Why These Tools Matter

    • Cast iron skillet: Ideal for cooking bacon evenly while retaining heat.
    • Baking sheet: Perfect for baking chicken without the mess.
    • Sharp knife: Ensures precise slicing of chicken for even cooking.

    Ingredients for Outback Steakhouse Alice Springs Chicken

    Main Ingredients

    • 6 slices thick-cut bacon
    • 3 large boneless, skinless chicken breasts
    • 2 cups shredded cheddar cheese

    Seasoning and Garnish

    • Salt and pepper, to taste
    • ⅓ cup chopped green onions for garnish

    How to Make Outback Steakhouse Alice Springs Chicken Step-by-Step

    Step 1: Prep the Oven and Chicken

    Preheat your oven to 350°F (175°C). Slice each chicken breast in half lengthwise. Season both sides with salt and pepper to enhance the flavor.

    Step 2: Bake the Chicken

    Place the seasoned chicken breasts on a baking sheet and bake for 25 minutes. This initial baking helps to lock in moisture.

    Step 3: Cook the Bacon

    While the chicken bakes, heat a skillet over medium heat. Cook the bacon until the fat renders but it is not yet crispy. Remove the bacon and cut each slice in half.

    Step 4: Add Bacon to Chicken

    After 25 minutes, remove the chicken from the oven. Lay half a slice of bacon on top of each piece of chicken. Return the baking sheet to the oven and bake for another 10 minutes.

    Step 5: Cheese It Up

    Remove the chicken from the oven again. Sprinkle shredded cheddar cheese evenly over each chicken piece. Bake for an additional 5 minutes, or until the cheese is melted and bubbly.

    Step 6: Garnish and Serve

    Finish by sprinkling chopped green onions on top before serving. This adds a fresh flavor and a pop of color to the dish.

    Enjoy this savory and satisfying Outback Steakhouse Alice Springs Chicken that’s sure to please any palate!

    How to Serve Outback Steakhouse Alice Springs Chicken

    This dish can be enjoyed in various ways to complement its bold flavors.

    Serve with a Fresh Salad

    Pair the chicken with a crisp garden salad tossed in a light vinaigrette. The freshness of the greens balances the richness of the cheese and bacon.

    Accompany with Garlic Bread

    Serve the Alice Springs Chicken alongside warm, buttery garlic bread. The bread acts as a perfect vehicle for any melted cheese and juices from the chicken.

    Top with Barbecue Sauce

    Drizzle some tangy barbecue sauce over the chicken just before serving for an extra layer of flavor. This adds a smoky sweetness that enhances the overall taste profile.

    Pro Tips for the Best Outback Steakhouse Alice Springs Chicken

    To elevate your dish, consider these practical tips.

    • Use Quality Bacon: Opt for thick-cut bacon for a meatier texture and better flavor infusion into the chicken.
    • Don’t Overcook the Chicken: Ensure the chicken is cooked just until it reaches an internal temperature of 165°F (74°C) to keep it juicy.
    • Experiment with Cheese: While cheddar is a classic choice, try blending other cheeses like Monterey Jack or pepper jack for a twist.
    • Let it Rest: After baking, allow the chicken to rest for a few minutes before serving to retain juiciness.
    • Garnish Generously: Don’t skimp on the green onions; their freshness brightens the dish and adds a nice crunch.

    Best Side Dishes and Pairings

    To round out your meal, consider these delightful sides and drinks.

    1. Steamed Asparagus: This vegetable adds a vibrant color and a slight crunch that contrasts nicely with the richness of the chicken.
    2. Loaded Mashed Potatoes: Creamy, buttery mashed potatoes topped with cheese and chives make for a hearty side that complements the chicken perfectly.
    3. Coleslaw: A tangy coleslaw brings a refreshing crunch that balances the savory elements of the dish.
    4. Corn on the Cob: Sweet and tender corn adds a delightful seasonal element that pairs well with the smoky flavors of the chicken.
    5. Iced Tea: A classic drink choice, iced tea’s refreshing quality can cleanse the palate between bites.

    Common Mistakes to Avoid

    • Not Preheating the Oven: Always preheat your oven to ensure even cooking.
    • Overcooking the Chicken: Keep an eye on cooking times to prevent dry chicken.
    • Skipping the Seasoning: Properly season your chicken for maximum flavor.
    • Using Low-Quality Cheese: Opt for high-quality cheddar cheese for the best melt and taste.

    Storage & Reheating Instructions

    Refrigerator Storage

    Store any leftover Outback Steakhouse Alice Springs Chicken in an airtight container in the refrigerator. It will stay fresh for up to 3 days.

    Freezing Instructions

    For long-term storage, wrap individual pieces in plastic wrap and place them in a freezer-safe container. This will keep the chicken fresh for up to 3 months. To thaw, move the chicken to the refrigerator for several hours or overnight.

    Reheating Tips

    • Oven: Preheat to 350°F (175°C) and bake for 15-20 minutes until heated through.
    • Microwave: Place on a microwave-safe plate and cover. Heat in 30-second intervals until warm.
    • Stovetop: Heat in a skillet over low heat, covering to retain moisture.

    Frequently Asked Questions

    How can I make Outback Steakhouse Alice Springs Chicken healthier?

    To make this dish healthier, consider using turkey bacon and reducing the amount of cheese.

    Can I make Outback Steakhouse Alice Springs Chicken ahead of time?

    Yes, you can prepare the chicken and bacon in advance and assemble before baking for a quick meal.

    What should I serve with Outback Steakhouse Alice Springs Chicken?

    This dish pairs well with a fresh salad or steamed vegetables to balance the rich flavors.

    Can I substitute the chicken breasts in this recipe?

    Yes, you can use chicken thighs or even boneless pork chops as alternatives.

    Final Thoughts

    This Outback Steakhouse Alice Springs Chicken recipe is a delightful way to bring a taste of the restaurant home. We encourage you to try it out and share your thoughts in the comments below. Enjoy your cooking!


    Dinner

    Outback Steakhouse Alice Springs Chicken


    5.0 from 24 reviews

    This savory dish features tender chicken breasts topped with crispy bacon and melted cheddar cheese, garnished with fresh green onions. Perfect for a satisfying meal that will delight your taste buds.

    Author: Munch Twist
    Prep Time: 15 minutes
    Cook Time: 40 minutes
    Total Time: 55 minutes
    Yield: 4 servings
    Category: Desserts
    Method: No bake
    Cuisine: American

    Outback Steakhouse Alice Springs Chicken

    SCALE:
    1x
    2x
    3x
    Cook Mode: Prevent your screen from going dark

    Ingredients

    • 6 slices thick-cut bacon
    • 2 cups shredded cheddar cheese
    • 3 large boneless, skinless chicken breasts
    • Salt and pepper, to taste
    • ⅓ cup chopped green onions for garnish

    Instructions

    1. Preheat your oven to 350°F (175°C).
    2. Slice each chicken breast in half lengthwise and season both sides with salt and pepper.
    3. Place the seasoned chicken breasts on a baking sheet and bake for 25 minutes.
    4. Cook the bacon in a skillet over medium heat until the fat is rendered but not crispy. Remove from the skillet and cut each slice in half.
    5. After 25 minutes, take the chicken out of the oven, lay half a slice of bacon on top of each chicken piece, and return to the oven for an additional 10 minutes.
    6. Remove the chicken from the oven, sprinkle shredded cheddar cheese evenly over each piece, and bake for another 5 minutes until the cheese is melted and bubbly.
    7. Sprinkle chopped green onions on top before serving.

    Nutrition Facts

    Serving Size: 1 serving
    Calories: 309 kcal
    Sugar: 0g
    Sodium: 543mg
    Fat: 19g
    Saturated Fat: 9g
    Carbohydrates: 2g
    Fiber: 0g
    Protein: 31g
    Cholesterol: 100mg

  • Ultimate Barbecue Beef Burger Recipe for Grilling

    Ultimate Barbecue Beef Burger Recipe for Grilling

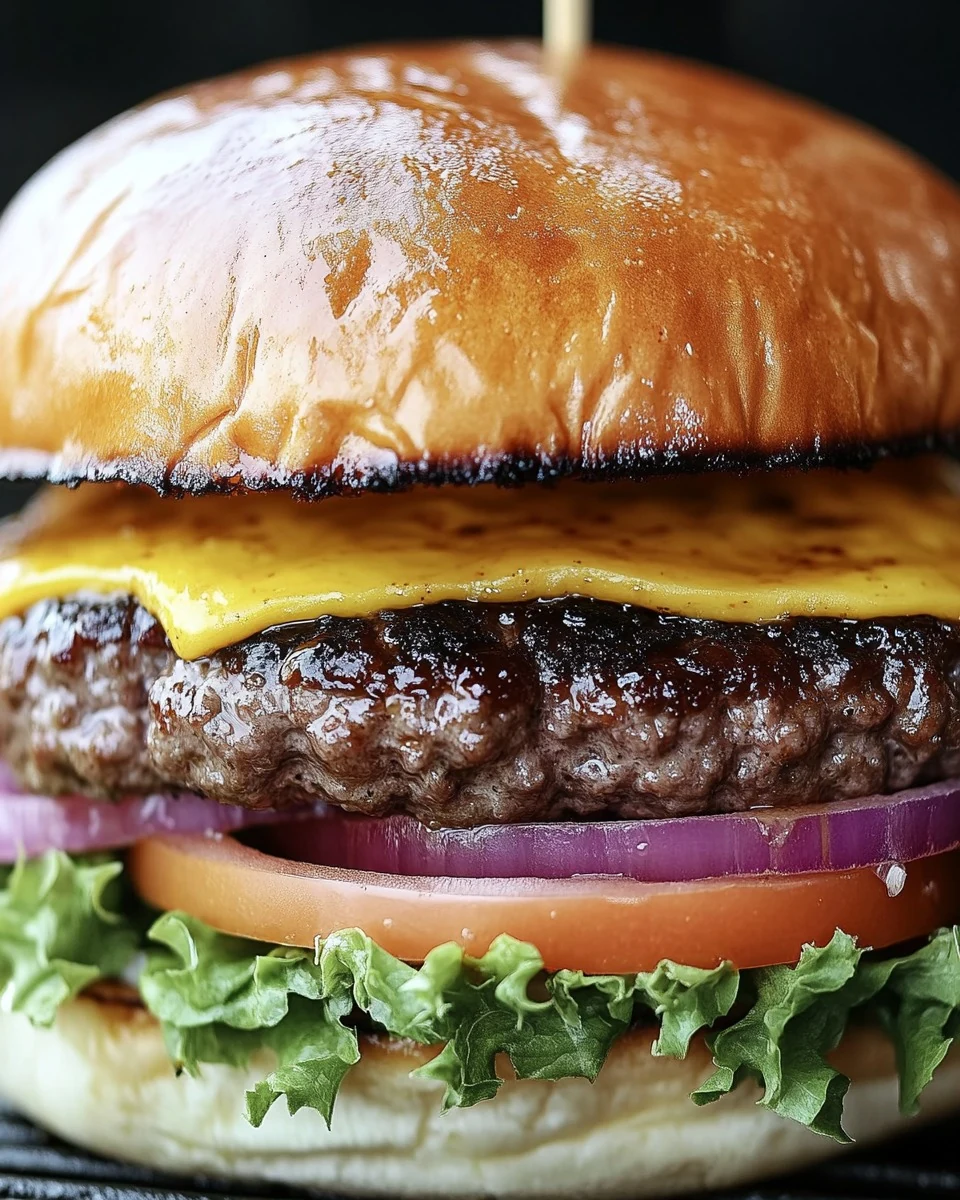
    Barbecue beef burgers are a delicious way to enjoy a classic meal with a smoky twist. These savory burgers are juicy, tender, and packed with flavor, making them perfect for any occasion. The rich combination of ground beef and zesty barbecue sauce makes these burgers a standout choice for grilling enthusiasts.

    Why You’ll Love This Recipe

    • Quick & Easy: Ready in under 30 minutes, perfect for busy weeknights or last-minute gatherings.
    • Flavor-Packed: The blend of Dijon mustard, Worcestershire sauce, and barbecue sauce creates an irresistible taste.
    • Customizable: Add your favorite toppings like cheese, lettuce, and tomatoes for a personalized touch.
    • Grill or Pan-Fry: Versatile cooking methods allow you to prepare these burgers just how you like them.
    • Family-Friendly: A sure hit with both kids and adults, making it ideal for family meals or barbecues.

    Tools and Equipment

    Having the right tools is essential for making the perfect barbecue beef burger.

    Essential Tools

    • Grill or grill pan
    • Mixing bowl
    • Spatula
    • Measuring spoons
    • Knife and cutting board

    Why These Tools Matter

    • Grill or grill pan: Provides even heat for perfectly cooked patties.
    • Mixing bowl: Ensures all ingredients are combined thoroughly for maximum flavor.
    • Spatula: Makes flipping the burgers easy without breaking them apart.

    Ingredients for Barbecue Beef Burger

    Burger Patties

    • 500g ground beef
    • 1 small onion, finely chopped
    • 1 egg
    • 2 garlic cloves, minced
    • 1 tsp Dijon mustard
    • 1 tbsp Worcestershire sauce
    • Salt and pepper to taste

    Toppings and Buns

    • 4 burger buns
    • 4 slices of cheddar cheese
    • Lettuce, tomato, and onion slices (for garnish)
    • Barbecue sauce (for topping)
    • Olive oil (for grilling)

    How to Make Barbecue Beef Burger Step-by-Step

    Step 1: Prepare Beef Mixture

    In a large bowl, combine the ground beef, finely chopped onion, minced garlic, egg, Dijon mustard, Worcestershire sauce, salt, and pepper. Mix until well blended.

    Step 2: Form Patties

    Divide the mixture into 4 equal portions. Shape each portion into a patty, ensuring they are uniform in size for even cooking.

    Step 3: Heat Grill

    Preheat a grill or grill pan over medium heat. Lightly brush the surface with olive oil to prevent sticking.

    Step 4: Grill Patties

    Carefully place the patties on the grill. Grill for about 5-7 minutes on each side, or until they reach your desired doneness.

    Step 5: Add Cheese

    During the last minute of cooking, place a slice of cheddar cheese on top of each patty. Allow the cheese to melt while the burgers finish cooking.

    Step 6: Toast Buns

    Toast the burger buns on the grill for about 1-2 minutes, or until they are lightly browned.

    Step 7: Assemble Burgers

    Place a patty on the bottom half of each bun. Top with lettuce, tomato, onion slices, and a drizzle of barbecue sauce. Cover with the top half of the bun.

    Step 8: Serve

    Serve the burgers hot with your favorite sides for a perfect meal.

    Preparation time: 15 minutes | Cooking time: 15 minutes | Total time: 30 minutes

    Nutritional Information (per serving):
    Calories: 600 kcal
    Carbohydrates: 45g
    Protein: 35g
    Fat: 30g
    Saturated Fat: 12g
    Sodium: 800mg
    Fiber: 3g

    Enjoy these juicy, flavorful barbecue beef burgers with all your favorite toppings!

    How to Serve Barbecue Beef Burger

    Serving barbecue beef burgers can be as creative as you desire. Here are a few ideas to elevate your meal.

    Classic American Style

    Serve your barbecue beef burger with a side of crispy French fries and a milkshake for a nostalgic diner experience. The combination of savory and sweet flavors will delight your taste buds.

    Southwest Twist

    Add a layer of guacamole and jalapeños to your burger for a spicy kick. Pair it with corn on the cob and a refreshing margarita to enhance the southwestern theme.

    Gourmet Touch

    Upgrade your barbecue beef burger with caramelized onions, blue cheese, and arugula. Serve it alongside a light salad and a glass of red wine for a more sophisticated dining experience.

    Pro Tips for the Best Barbecue Beef Burger

    To ensure your barbecue beef burgers turn out perfectly every time, follow these essential tips.

    • Quality Beef: Use high-quality ground beef with a fat content of around 80/20 for juicy burgers.
    • Don’t Overwork the Meat: Mix the ingredients just until combined to keep the patties tender and not tough.
    • Make a Dimple: Create a small dimple in the center of each patty to prevent bulging while grilling.
    • Let Rest Before Serving: Allow the patties to rest for a few minutes after grilling to keep them juicy.
    • Experiment with Toppings: Don’t be afraid to get creative with toppings like pickled jalapeños, fried eggs, or specialty sauces for a unique flavor profile.

    Best Side Dishes and Pairings

    Pairing your barbecue beef burger with the right sides can enhance the overall meal. Here are some excellent options.

    1. Coleslaw: The crunchy texture and tangy flavor of coleslaw provide a perfect contrast to the rich burger.
    2. Potato Salad: A creamy potato salad complements the smoky flavors of the barbecue beef burger while adding a filling element.
    3. Grilled Vegetables: Seasonal grilled vegetables offer a healthy and colorful side that balances the meal.
    4. Sweet Potato Fries: Their natural sweetness pairs well with the savory burger, making for a delightful combination.
    5. Craft Beer: A cold craft beer, especially an amber or IPA, enhances the flavors of the barbecue beef burger and adds a refreshing touch.

    Common Mistakes to Avoid

    • Not Using Enough Seasoning: Failing to season the beef mixture adequately can result in bland burgers.
    • Overworking the Meat: Mixing the ingredients too much can lead to tough patties. Aim for a gentle blend.
    • Skipping the Cheese: Forgetting to add cheese during the last minutes of grilling means missing out on a melty, rich flavor.
    • Neglecting the Grill Temperature: Cooking on too high or too low heat can affect the doneness and texture of your burgers.

    Storage & Reheating Instructions

    Refrigerator Storage

    Store leftover barbecue beef burgers in airtight containers. They will remain fresh for up to 3 days in the refrigerator.

    Freezing Instructions

    For best results, wrap each burger individually in plastic wrap, then place them in a freezer-safe bag. They can be frozen for up to 3 months. Thaw in the refrigerator overnight before reheating.

    Reheating Tips

    • Oven: Preheat the oven to 350°F (175°C). Place the burgers on a baking sheet and heat for about 10-15 minutes, or until warmed through.
    • Microwave: Place the burger on a microwave-safe plate, cover with a damp paper towel, and heat for 1-2 minutes, checking frequently.
    • Stovetop: Reheat in a skillet over medium heat for about 3-4 minutes on each side or until heated through.

    Frequently Asked Questions

    How can I make my Barbecue Beef Burger more flavorful?

    To enhance the flavor, try adding herbs like thyme or oregano to the beef mixture or incorporate spices such as smoked paprika.

    Can I use ground turkey instead of beef for the Barbecue Beef Burger?

    Yes, ground turkey can be used as a substitute, but keep in mind that it may require additional seasoning to achieve a similar flavor profile.

    What is the best barbecue sauce for my Barbecue Beef Burger?

    Choose a barbecue sauce that complements the flavors of the beef, such as a sweet and tangy or smoky variety, depending on your taste preferences.

    How do I know when my Barbecue Beef Burger is cooked to the right doneness?

    Use a meat thermometer to check for doneness; 160°F (71°C) is ideal for ground beef to ensure it is safely cooked.

    Can I make Barbecue Beef Burgers ahead of time?

    Yes, you can prepare the patties in advance and store them in the refrigerator or freezer until you are ready to grill.

    Final Thoughts

    These barbecue beef burgers are a delicious and satisfying meal that is perfect for any occasion. I encourage you to try this recipe and share your experience in the comments. Your feedback is always appreciated!


    Dinner

    Barbecue Beef Burger


    5.0 from 24 reviews

    These barbecue beef burgers are juicy and packed with flavor, perfect for grilling season. Made with ground beef, fresh ingredients, and topped with melted cheddar cheese and barbecue sauce, they are sure to satisfy your cravings.

    Author: Munch Twist
    Prep Time: 15 minutes
    Cook Time: 15 minutes
    Total Time: 30 minutes
    Yield: 4 servings
    Category: Desserts
    Method: No bake
    Cuisine: American

    Barbecue Beef Burger

    SCALE:
    1x
    2x
    3x
    Cook Mode: Prevent your screen from going dark

    Ingredients

    • 500g ground beef
    • 1 small onion, finely chopped
    • 1 egg
    • 2 garlic cloves, minced
    • 1 tsp Dijon mustard
    • 1 tbsp Worcestershire sauce
    • Salt and pepper to taste
    • 4 burger buns
    • 4 slices of cheddar cheese
    • Lettuce, tomato, and onion slices (for garnish)
    • Barbecue sauce (for topping)
    • Olive oil (for grilling)

    Instructions

    1. In a large bowl, combine the ground beef, finely chopped onion, minced garlic, egg, Dijon mustard, Worcestershire sauce, salt, and pepper. Mix until well blended.
    2. Divide the mixture into 4 equal portions and shape each portion into a patty.
    3. Preheat a grill or grill pan over medium heat and lightly brush with olive oil.
    4. Grill the patties for about 5-7 minutes on each side, or until they reach your desired doneness.
    5. During the last minute of cooking, place a slice of cheddar cheese on top of each patty and let it melt.
    6. Toast the burger buns on the grill for about 1-2 minutes until lightly browned.
    7. Place a patty on the bottom half of each bun. Top with lettuce, tomato, onion slices, and a drizzle of barbecue sauce. Cover with the top half of the bun.
    8. Serve the burgers hot with your favorite sides.

    Nutrition Facts

    Serving Size: 1 serving
    Calories: 600 kcal
    Sugar: 5g
    Sodium: 800mg
    Fat: 30g
    Saturated Fat: 12g
    Carbohydrates: 45g
    Fiber: 3g
    Protein: 35g
    Cholesterol: 100mg

  • Delicious Garlic Mushroom Grilled Cheese Recipe

    Delicious Garlic Mushroom Grilled Cheese Recipe

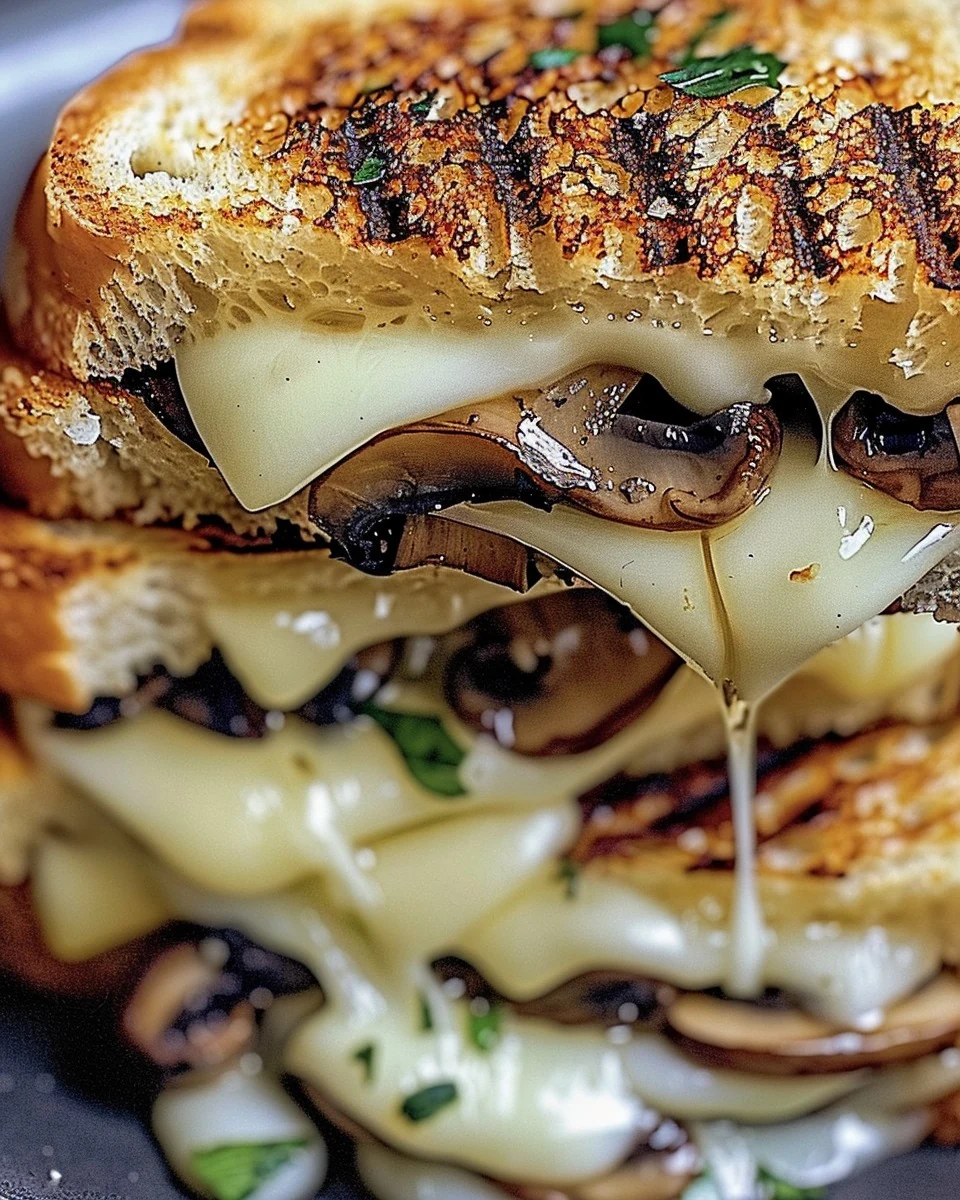
    Garlic Mushroom Grilled Cheese is a delightful twist on the classic sandwich. The combination of savory mushrooms, aromatic garlic, and melty cheese creates a comforting meal that is hard to resist. Perfect for a quick lunch or a cozy dinner, this recipe is sure to become a favorite.

    Why You’ll Love This Recipe

    • Rich Flavor: The garlic and mushrooms add depth, making your grilled cheese stand out.
    • Comfort Food: This dish combines familiar elements for a warm, satisfying meal.
    • Customizable: Use any type of cheese or bread you prefer for a personal touch.
    • Quick & Easy: Ready in under 30 minutes, it’s perfect for busy days.
    • Vegetarian Delight: A delicious option for vegetarians without sacrificing flavor.

    Tools and Equipment

    To make this Garlic Mushroom Grilled Cheese, you’ll need a few essential tools to streamline the cooking process.

    Essential Tools

    • Skillet
    • Spatula
    • Griddle (optional)
    • Knife
    • Cutting board

    Why These Tools Matter

    • Skillet: Ideal for cooking the mushroom filling evenly and quickly.
    • Spatula: Helps flip the sandwiches without damaging them, ensuring a perfect grill.
    • Knife and Cutting Board: Essential for slicing mushrooms and bread efficiently.

    Ingredients for Garlic Mushroom Grilled Cheese

    For the Filling

    • 8 ounces mushrooms, sliced
    • 2 cloves garlic, minced
    • Salt and pepper, to taste
    • 2 tablespoons butter

    For the Sandwich

    • 4 slices bread
    • 4 slices cheese (such as cheddar or Swiss)
    • Additional butter, for grilling

    How to Make Garlic Mushroom Grilled Cheese Step-by-Step

    Step 1: Prepare the Mushroom Filling

    1. Melt 2 tablespoons of butter in a skillet over medium heat.
    2. Add the minced garlic and sauté for about 1 minute, until fragrant.
    3. Add the sliced mushrooms to the skillet. Cook, stirring occasionally, until the mushrooms are tender and golden brown, about 5-7 minutes.
    4. Season with salt and pepper to taste. Remove from heat and set aside.

    Step 2: Assemble the Sandwiches

    1. Spread a thin layer of butter on one side of each slice of bread.
    2. Heat a separate skillet or griddle over medium heat.
    3. Place two slices of bread, buttered side down, onto the skillet. Top each slice with a slice of cheese.
    4. Evenly distribute the cooked mushrooms over the cheese. Place the remaining slices of bread on top, buttered side facing up.

    Step 3: Grill the Sandwiches

    1. Cook the sandwiches for 2-3 minutes on each side, or until the bread is golden brown and the cheese is melted.
    2. Press down gently with a spatula to ensure even grilling.

    Step 4: Serve

    1. Remove the sandwiches from the skillet and let them cool for a minute or two before slicing.

    Preparation time: 10 minutes | Cooking time: 10 minutes

    Nutritional Information

    Per serving (assuming 2 servings):
    * Calories: 450 kcal
    * Carbohydrates: 32g
    * Protein: 20g
    * Fat: 26g
    * Saturated Fat: 14g
    * Sugar: 4g

    Enjoy your Garlic Mushroom Grilled Cheese, a delightful blend of flavors that will satisfy your cravings!

    How to Serve Garlic Mushroom Grilled Cheese

    Garlic Mushroom Grilled Cheese is not only delicious on its own but can be enhanced with a few creative serving ideas.

    With a Side of Tomato Soup

    This classic pairing provides a comforting and nostalgic experience, as the creamy tomato soup complements the rich flavors of the grilled cheese.

    Topped with Fresh Herbs

    Sprinkle freshly chopped parsley or chives on top of the grilled cheese before serving to add a burst of color and fresh flavor that elevates the dish.

    Served with a Green Salad

    A light, crisp salad dressed with a tangy vinaigrette balances the richness of the sandwich, making for a well-rounded meal.

    Pro Tips for the Best Garlic Mushroom Grilled Cheese

    To achieve the perfect Garlic Mushroom Grilled Cheese, consider these helpful tips.

    • Use Fresh Ingredients: Fresh mushrooms and garlic will enhance the flavor profile significantly compared to their dried counterparts.

    • Choose Quality Bread: Opt for high-quality bread, such as sourdough or artisan varieties, to add texture and depth to your sandwich.

    • Don’t Rush the Grilling: Cooking the sandwiches slowly over medium heat ensures that the bread becomes golden and crispy while allowing the cheese to melt perfectly.

    • Experiment with Cheese: While cheddar and Swiss are great choices, try using a combination of cheeses like gouda or fontina for a unique flavor twist.

    • Add Extra Fillings: Consider incorporating sautéed spinach or caramelized onions for additional layers of flavor and nutrition.

    Best Side Dishes and Pairings

    To complement your Garlic Mushroom Grilled Cheese, here are some excellent side dishes and beverages.

    1. Crispy Potato Fries
      These fries add a satisfying crunch and can be seasoned with herbs or spices for an extra kick.

    2. Mixed Green Salad
      A fresh salad with a light vinaigrette provides a refreshing contrast to the richness of the grilled cheese.

    3. Pickles or Pickled Vegetables
      The acidity of pickles cuts through the richness of the sandwich, enhancing the overall flavor experience.

    4. Herbed Quinoa
      This nutritious side offers a nutty flavor and pairs well with the garlic and mushroom filling.

    5. Sparkling Water with Lemon
      The effervescence and acidity of sparkling water cleanse the palate, making it a perfect beverage choice alongside the sandwich.

    Common Mistakes to Avoid

    • Using Wet Mushrooms: Make sure mushrooms are dry before cooking to prevent sogginess.
    • Overcrowding the Skillet: Cook mushrooms in batches to allow for proper browning.
    • Not Preheating the Pan: Ensure your skillet is hot enough to achieve a crispy crust on the bread.
    • Skipping the Butter: Butter both sides of the bread for optimal flavor and texture.

    Storage & Reheating Instructions

    Refrigerator Storage

    Store leftover Garlic Mushroom Grilled Cheese in an airtight container in the refrigerator for up to 3 days.

    Freezing Instructions

    To freeze, wrap the sandwiches tightly in plastic wrap and then in aluminum foil. They can be stored in the freezer for up to 2 months. Thaw in the refrigerator before reheating.

    Reheating Tips

    • Oven: Preheat to 350°F (175°C) and place the sandwich on a baking sheet. Heat for about 10-15 minutes until warmed through.
    • Microwave: Place the sandwich on a microwave-safe plate and cover with a damp paper towel. Heat for 30-60 seconds, checking for warmth.
    • Stovetop: Reheat in a skillet over medium heat, pressing down gently with a spatula until heated through, about 3-4 minutes per side.

    Frequently Asked Questions

    Can I use different types of cheese for Garlic Mushroom Grilled Cheese?

    Absolutely! While cheddar or Swiss are great options, feel free to experiment with other cheeses like gouda or mozzarella for different flavors.

    How can I make the Garlic Mushroom Grilled Cheese vegan?

    To make this recipe vegan, substitute the butter with a plant-based alternative and use vegan cheese.

    What can I serve with Garlic Mushroom Grilled Cheese?

    This sandwich pairs well with a side of tomato soup, a fresh salad, or crispy sweet potato fries for a complete meal.

    Can I add other ingredients to the Garlic Mushroom Grilled Cheese?

    Yes, consider adding ingredients like spinach, caramelized onions, or even a slice of tomato for added flavor and nutrition.

    How do I keep my Garlic Mushroom Grilled Cheese from getting soggy?

    Ensure mushrooms are cooked until all moisture is evaporated, and use a thick slice of bread to maintain structure during grilling.

    Final Thoughts

    This Garlic Mushroom Grilled Cheese is not only simple to make but also packed with flavor. Perfect for lunch or a quick dinner, it’s a delightful twist on a classic favorite. We encourage you to try this recipe and share your thoughts in the comments section below.


    Lunch

    Garlic Mushroom Grilled Cheese


    5.0 from 24 reviews

    This Garlic Mushroom Grilled Cheese combines the earthy flavor of sautéed mushrooms and garlic with melty cheese, all sandwiched between crispy, buttery bread. It's a comforting and indulgent twist on a classic grilled cheese that is perfect for any meal.

    Author: Munch Twist
    Prep Time: 10 minutes
    Cook Time: 10 minutes
    Total Time: 20 minutes
    Yield: 2 servings
    Category: Desserts
    Method: No bake
    Cuisine: American

    Garlic Mushroom Grilled Cheese

    SCALE:
    1x
    2x
    3x
    Cook Mode: Prevent your screen from going dark

    Ingredients

    • 8 ounces mushrooms, sliced
    • 2 cloves garlic, minced
    • Salt and pepper, to taste
    • 2 tablespoons butter
    • 4 slices bread
    • 4 slices cheese (such as cheddar or Swiss)
    • Additional butter, for grilling

    Instructions

    1. Melt 2 tablespoons of butter in a skillet over medium heat. Add minced garlic and sauté for about 1 minute until fragrant. Add sliced mushrooms and cook until tender and golden brown, about 5-7 minutes. Season with salt and pepper, then remove from heat.
    2. Spread a thin layer of butter on one side of each slice of bread. Heat a skillet over medium heat. Place two slices of bread, buttered side down, onto the skillet. Top each with a slice of cheese and evenly distribute the cooked mushrooms over the cheese. Place the remaining slices of bread on top, buttered side facing up.
    3. Cook the sandwiches for 2-3 minutes on each side until the bread is golden brown and the cheese is melted. Press down gently with a spatula to ensure even grilling.
    4. Remove the sandwiches from the skillet and let them cool for a minute before slicing.

    Nutrition Facts

    Serving Size: 1 serving
    Calories: 450 kcal
    Sugar: 4g
    Sodium: 800mg
    Fat: 26g
    Saturated Fat: 14g
    Carbohydrates: 32g
    Fiber: 2g
    Protein: 20g
    Cholesterol: 60mg

  • Easy Honey Mustard Chicken Recipe for Flavorful Meals

    Easy Honey Mustard Chicken Recipe for Flavorful Meals

    Honey Mustard Chicken is a delightful dish that combines the sweetness of honey with the tanginess of mustard. This recipe results in juicy chicken breasts coated in a flavorful sauce that will impress your family and friends. It’s perfect for a weeknight dinner or a special occasion.

    Why You’ll Love This Recipe

    • Quick & Easy: Ready in under 40 minutes, making it a perfect weeknight meal.
    • Flavorful: The combination of honey and mustard creates a sweet and tangy sauce that elevates the chicken.
    • Versatile: Great for serving with a variety of sides, from rice to roasted vegetables.
    • Healthy Option: Packed with protein and low in carbs, this dish is a nutritious choice.
    • Crowd-Pleaser: Its delicious taste appeals to both adults and kids alike.

    Tools and Equipment

    Having the right tools can significantly streamline your cooking process. Here are the essentials:

    Essential Tools

    • Large ovenproof skillet
    • Whisk
    • Measuring cups and spoons
    • Cutting board
    • Knife

    Why These Tools Matter

    • Large ovenproof skillet: Allows for searing the chicken and transitioning directly to the oven.
    • Whisk: Ensures the honey mustard sauce is well-blended for even flavor.
    • Measuring cups and spoons: Guarantees accurate ingredient portions, essential for the perfect balance of flavors.

    Ingredients for Honey Mustard Chicken

    Chicken

    • 4 boneless, skinless chicken breasts

    Sauce

    • 2 cloves garlic, minced
    • 2 tbsp olive oil
    • 1/4 cup honey
    • 1/4 cup Dijon mustard
    • 1 tbsp wholegrain mustard
    • 1 tbsp fresh thyme leaves (or 1 tsp dried thyme)
    • Salt and pepper to taste

    Garnish

    • Fresh thyme sprigs, for garnish

    How to Make Honey Mustard Chicken Step-by-Step

    Step 1: Preheat the Oven

    Preheat your oven to 200°C (400°F). This ensures even cooking and helps the chicken develop a nice crust.

    Step 2: Prepare Honey Mustard Sauce

    In a mixing bowl, whisk together honey, Dijon mustard, wholegrain mustard, minced garlic, and thyme. Season the mixture with salt and pepper to taste.

    Step 3: Sear the Chicken

    Heat olive oil in a large ovenproof skillet over medium-high heat. Season the chicken breasts with salt and pepper. Sear each side for 2-3 minutes until golden brown.

    Step 4: Add Sauce

    Once the chicken is seared, pour the prepared honey mustard mixture over the chicken breasts, ensuring they are well coated.

    Step 5: Bake the Chicken

    Transfer the skillet to the preheated oven. Bake for 20-25 minutes, or until the chicken is cooked through and reaches an internal temperature of 75°C (165°F).

    Step 6: Garnish and Serve

    Remove the skillet from the oven and garnish with fresh thyme sprigs before serving. Enjoy your Honey Mustard Chicken with a side of your choice.

    This recipe offers a perfect balance of sweet and savory, making it a standout dish on any table. Enjoy this delicious Honey Mustard Chicken, packed with flavor in every bite!

    How to Serve Honey Mustard Chicken

    Honey Mustard Chicken is versatile and can be served in various ways to enhance its flavors.

    With Roasted Vegetables

    Serve the chicken alongside a medley of roasted seasonal vegetables for a colorful and nutritious meal.

    Over a Bed of Greens

    Slice the chicken and serve it on a bed of mixed greens with a light vinaigrette to create a refreshing salad.

    In a Sandwich

    Use the cooked chicken in a sandwich with crusty bread, lettuce, and a drizzle of extra honey mustard sauce for a delicious lunch option.

    Pro Tips for the Best Honey Mustard Chicken

    For optimal flavor and texture, consider the following tips:

    • Use Quality Ingredients: Choose high-quality honey and mustards to enhance the overall flavor of the dish.

    • Marinate for Extra Flavor: If time permits, marinate the chicken in the honey mustard mixture for up to an hour before cooking.

    • Monitor Cooking Temperature: Always use a meat thermometer to ensure the chicken reaches an internal temperature of 75°C (165°F) for safe consumption.

    • Rest Before Serving: Allow the chicken to rest for a few minutes after baking to retain its juices and improve tenderness.

    • Experiment with Herbs: Feel free to substitute or add herbs like rosemary or parsley for a different flavor profile.

    Best Side Dishes and Pairings

    To complement the sweet and tangy flavors of Honey Mustard Chicken, consider these side dishes and drinks:

    1. Garlic Mashed Potatoes – Creamy mashed potatoes with garlic provide a rich and comforting side that pairs perfectly with the chicken.

    2. Steamed Asparagus – The slight bitterness of asparagus balances the sweetness of the honey mustard sauce.

    3. Quinoa Salad – A light quinoa salad with fresh vegetables adds a healthy and refreshing element to the meal.

    4. Crispy Brussels Sprouts – Roasted Brussels sprouts with a touch of balsamic glaze offer a crunchy texture and depth of flavor.

    5. Chardonnay – A chilled glass of Chardonnay complements the honey mustard with its fruity notes and crisp acidity.

    6. Sparkling Water with Lemon – For a refreshing non-alcoholic option, sparkling water with a splash of lemon enhances the meal without overpowering the flavors.

    Common Mistakes to Avoid

    • Not Preheating the Oven: Always preheat your oven to ensure even cooking of the chicken.
    • Using Cold Chicken: Allow the chicken to come to room temperature for more even cooking.
    • Skipping the Searing Step: Searing the chicken adds flavor and a nice texture, so don’t skip this crucial step.
    • Overcooking the Chicken: Use a meat thermometer to check for doneness; overcooked chicken can become dry.

    Storage & Reheating Instructions

    Refrigerator Storage

    Store leftover Honey Mustard Chicken in airtight containers. It will stay fresh in the refrigerator for up to 3 days.

    Freezing Instructions

    To freeze, place the cooled chicken in airtight freezer bags. Label and date the bags; it can be stored for up to 3 months. Thaw in the refrigerator overnight before reheating.

    Reheating Tips

    • Oven: Preheat to 180°C (350°F), cover with foil, and heat for about 15-20 minutes until warmed through.
    • Microwave: Place on a microwave-safe plate, cover loosely, and heat for 2-3 minutes or until heated through.
    • Stovetop: Heat in a skillet over medium heat for about 5-7 minutes, adding a splash of water to keep it moist.

    Frequently Asked Questions

    How can I make Honey Mustard Chicken spicier?

    You can add a pinch of cayenne pepper or some hot sauce to the honey mustard sauce for an extra kick.

    Can I use other types of chicken?

    Yes, you can use bone-in chicken thighs or drumsticks, but adjust the cooking time accordingly.

    What can I serve with Honey Mustard Chicken?

    This dish pairs well with roasted vegetables, rice, or a fresh green salad to complement the flavors.

    How long does it take to make Honey Mustard Chicken?

    The total time for preparation and cooking is about 35-40 minutes, making it a quick and delicious meal option.

    Can I make the sauce ahead of time?

    Absolutely! You can prepare the honey mustard sauce a day in advance and store it in the refrigerator until ready to use.

    Final Thoughts

    Honey Mustard Chicken is a delightful dish that brings a perfect balance of sweet and savory flavors to your table. We encourage you to try this recipe and share your thoughts in the comments below. Your feedback helps us create even better content!


    Dinner

    Honey Mustard Chicken


    5.0 from 24 reviews

    This Honey Mustard Chicken recipe features tender chicken breasts coated in a sweet and tangy honey mustard sauce. It's a quick and easy dish that delivers a burst of flavor, perfect for a weeknight dinner.

    Author: Munch Twist
    Prep Time: 10 minutes
    Cook Time: 25 minutes
    Total Time: 35 minutes
    Yield: 4 servings
    Category: Desserts
    Method: No bake
    Cuisine: American

    Honey Mustard Chicken

    SCALE:
    1x
    2x
    3x
    Cook Mode: Prevent your screen from going dark

    Ingredients

    • 4 boneless, skinless chicken breasts
    • 2 cloves garlic, minced
    • 2 tbsp olive oil
    • 1/4 cup honey
    • 1/4 cup Dijon mustard
    • 1 tbsp wholegrain mustard
    • 1 tbsp fresh thyme leaves
    • Salt and pepper to taste
    • Fresh thyme sprigs, for garnish

    Instructions

    1. Preheat your oven to 200°C (400°F).
    2. In a bowl, whisk together honey, Dijon mustard, wholegrain mustard, minced garlic, and thyme. Season with salt and pepper.
    3. Heat olive oil in a large ovenproof skillet over medium-high heat. Season the chicken breasts with salt and pepper. Sear each side for 2-3 minutes until golden brown.
    4. Pour the honey mustard mixture over the seared chicken breasts.
    5. Transfer the skillet to the preheated oven. Bake for 20-25 minutes, or until the chicken is cooked through and reaches an internal temperature of 75°C (165°F).
    6. Garnish with fresh thyme sprigs before serving.

    Nutrition Facts

    Serving Size: 1 serving
    Calories: 290 kcal
    Sugar: 18g
    Sodium: 360mg
    Fat: 10g
    Saturated Fat: 2g
    Carbohydrates: 22g
    Fiber: 1g
    Protein: 30g
    Cholesterol: 90mg

  • Delicious Air Fryer Cherry Cheesecake Egg Rolls Recipe

    Delicious Air Fryer Cherry Cheesecake Egg Rolls Recipe

    Air Fryer Cherry Cheesecake Egg Rolls are a deliciously unique dessert that combines the rich, creamy taste of cheesecake with the sweet, tart flavor of cherries. These egg rolls are crispy on the outside and bursting with flavor on the inside, making them a perfect treat for any occasion.

    Why You’ll Love This Recipe

    • Quick & Easy: Ready in under 30 minutes, perfect for a last-minute dessert.
    • Deliciously Unique: Combines classic cheesecake flavors in a fun, shareable format.
    • Healthier Option: Air frying reduces the amount of oil used compared to traditional frying.
    • Customizable: Easily swap out cherry filling for your favorite fruit or jam.
    • Impressive Presentation: Perfect for parties and gatherings, these egg rolls look as good as they taste.

    Tools and Equipment

    Having the right tools makes the cooking process smooth and enjoyable.

    Essential Tools

    • Air fryer
    • Mixing bowl
    • Spoon
    • Cooking spray
    • Clean surface for assembly

    Why These Tools Matter

    • Air fryer: Provides a healthier cooking method while achieving a crispy texture.
    • Mixing bowl: Essential for combining the creamy filling ingredients thoroughly.
    • Cooking spray: Ensures the egg rolls crisp up nicely without sticking.

    Ingredients for Air Fryer Cherry Cheesecake Egg Rolls

    Filling

    • 1 can cherry pie filling
    • 8 oz cream cheese, softened
    • 1 teaspoon vanilla extract
    • 1/2 cup powdered sugar

    Wrappers

    • Egg roll wrappers

    Cooking

    • Cooking spray

    How to Make Air Fryer Cherry Cheesecake Egg Rolls Step-by-Step

    Step 1: Prepare the Filling

    In a mixing bowl, combine softened cream cheese, powdered sugar, and vanilla extract. Mix until smooth and creamy. This will be the base of your cheesecake filling.

    Step 2: Assemble the Egg Rolls

    Lay out the egg roll wrappers on a clean surface. Place a spoonful of the cream cheese mixture in the center of each wrapper. Top with a dollop of cherry pie filling. Fold the sides of the wrapper towards the center, then roll up from the bottom, creating a tight roll. Seal the edges with a bit of water to keep the filling inside.

    Step 3: Air Fry

    Preheat the air fryer to 375°F (190°C). Lightly coat the egg rolls with cooking spray and arrange them in the air fryer basket, ensuring they don’t touch. Cook for 8–10 minutes, flipping halfway through, until golden brown and crisp.

    Step 4: Serve

    Let the egg rolls cool for a few minutes before serving. Optionally, dust with powdered sugar or drizzle with chocolate sauce for added sweetness.

    Preparation time: 15 minutes | Cooking time: 10 minutes

    Nutritional Information

    Per serving (1 egg roll):
    – Calories: 180 kcal
    – Carbohydrates: 24g
    – Protein: 3g
    – Fat: 8g
    – Saturated Fat: 4g
    – Sugar: 14g

    Nutritional values are approximate and may vary based on specific ingredient brands and quantities used. Enjoy your delightful Air Fryer Cherry Cheesecake Egg Rolls!

    How to Serve Air Fryer Cherry Cheesecake Egg Rolls

    These delightful treats can be served in various ways to enhance their appeal.

    With Fresh Berries

    Serve the egg rolls alongside a mix of fresh berries such as strawberries, blueberries, or raspberries. The tartness of the berries complements the sweetness of the cherry filling beautifully.

    A La Mode

    Add a scoop of vanilla ice cream on the side. The creamy texture of the ice cream balances the crispy egg rolls and makes for a decadent dessert experience.

    Chocolate Drizzle

    For an extra touch of indulgence, drizzle melted chocolate over the egg rolls before serving. This adds a rich flavor that pairs perfectly with the cherry and cream cheese filling.

    Pro Tips for the Best Air Fryer Cherry Cheesecake Egg Rolls

    To ensure your egg rolls are perfectly crispy and delicious, consider these practical tips.

    • Use Fresh Ingredients: Fresh cream cheese and high-quality cherry pie filling enhance the overall flavor and texture of the egg rolls.

    • Do Not Overfill: Be cautious not to overfill the wrappers. This can lead to bursting during cooking. A spoonful of each filling is usually perfect.

    • Preheat Your Air Fryer: Always preheat your air fryer for even cooking and optimal crispiness. This step is crucial for achieving that golden brown exterior.

    • Flip Halfway: To ensure both sides cook evenly, flip the egg rolls halfway through the cooking process. This promotes consistent browning.

    • Experiment with Flavors: Feel free to experiment with different pie fillings or add spices like cinnamon to the cream cheese mixture for a unique twist.

    Best Side Dishes and Pairings

    These Air Fryer Cherry Cheesecake Egg Rolls pair wonderfully with a variety of side dishes and drinks.

    1. Vanilla Ice Cream: The classic pairing of vanilla ice cream adds a creamy contrast to the crispy egg rolls.

    2. Chocolate Milkshake: The richness of a chocolate milkshake complements the sweetness of the egg rolls, making for a delightful dessert combo.

    3. Fruit Salad: A light fruit salad adds freshness to the meal and balances the sweetness of the cheesecake filling.

    4. Coffee or Espresso: A cup of coffee or espresso serves as a perfect contrast to the sweetness, enhancing the flavors of the dessert.

    5. Whipped Cream: A dollop of freshly whipped cream on the side adds an airy texture and richness that pairs nicely with the egg rolls.

    Common Mistakes to Avoid

    • Using Cold Cream Cheese: Make sure your cream cheese is softened to room temperature for a smooth filling.
    • Overfilling the Wrappers: Avoid adding too much filling, as this can cause the egg rolls to burst during cooking.
    • Not Preheating the Air Fryer: Preheating ensures even cooking and helps achieve that golden brown color.
    • Skipping the Cooking Spray: A light coating of cooking spray is essential for achieving a crispy texture.

    Storage & Reheating Instructions

    Refrigerator Storage

    Store the Air Fryer Cherry Cheesecake Egg Rolls in an airtight container in the refrigerator. They will remain fresh for up to 3 days.

    Freezing Instructions

    For best results, freeze the egg rolls before cooking. Arrange them in a single layer on a baking sheet, freeze until solid, then transfer to a freezer-safe bag or container. They can be frozen for up to 2 months.

    Reheating Tips

    • Oven: Preheat the oven to 350°F (175°C). Place egg rolls on a baking sheet and heat for 10-12 minutes until warmed through and crispy.
    • Microwave: Heat on a microwave-safe plate for 30-60 seconds, but note that the texture may not be as crispy.
    • Stovetop: Heat a small amount of oil in a skillet over medium heat and cook for about 2-3 minutes on each side until warmed and crispy.

    Frequently Asked Questions

    Can I make Air Fryer Cherry Cheesecake Egg Rolls ahead of time?

    Yes, you can prepare the egg rolls in advance and store them in the refrigerator or freeze them for later use. Just remember to cook them from frozen without thawing.

    What can I use instead of cherry pie filling?

    You can substitute cherry pie filling with other fruit fillings like blueberry, strawberry, or even chocolate for a different flavor profile.

    How do I know when the egg rolls are done?

    The egg rolls will be golden brown and crispy on the outside when they are done. Cooking for 8-10 minutes at 375°F (190°C) should achieve the desired texture.

    Can I use a different type of cheese?

    While cream cheese is the traditional choice for this recipe, you can experiment with mascarpone or ricotta cheese for a different flavor and texture.

    What is the best way to serve Air Fryer Cherry Cheesecake Egg Rolls?

    These egg rolls are best served warm. You can dust them with powdered sugar or drizzle with chocolate or caramel sauce for an extra touch of sweetness.

    Final Thoughts

    Air Fryer Cherry Cheesecake Egg Rolls are a delightful treat that combines the flavors of cheesecake and cherries in a crispy package. They make for an excellent dessert or snack and are sure to impress your family and friends. Try making this recipe, and don’t forget to leave a comment with your feedback!


    Desserts

    Air Fryer Cherry Cheesecake Egg Rolls


    5.0 from 24 reviews

    These Air Fryer Cherry Cheesecake Egg Rolls are a delightful dessert that combines the creamy richness of cheesecake with the sweet-tart flavor of cherry pie filling, all wrapped in a crispy egg roll. Perfect for a quick treat, they are easy to prepare and cook in the air fryer for a healthier twist on a classic dessert.

    Author: Munch Twist
    Prep Time: 15 minutes
    Cook Time: 10 minutes
    Total Time: 25 minutes
    Yield: 8 servings
    Category: Desserts
    Method: No bake
    Cuisine: American

    Air Fryer Cherry Cheesecake Egg Rolls

    SCALE:
    1x
    2x
    3x
    Cook Mode: Prevent your screen from going dark

    Ingredients

    • 1 can cherry pie filling
    • Egg roll wrappers
    • 8 oz cream cheese, softened
    • 1 teaspoon vanilla extract
    • 1/2 cup powdered sugar
    • Cooking spray

    Instructions

    1. In a mixing bowl, combine softened cream cheese, powdered sugar, and vanilla extract. Mix until smooth and creamy.
    2. Lay out the egg roll wrappers on a clean surface. Place a spoonful of the cream cheese mixture in the center of each wrapper. Top with a dollop of cherry pie filling. Fold the sides of the wrapper towards the center, then roll up from the bottom, creating a tight roll. Seal the edges with a bit of water to keep the filling inside.
    3. Preheat the air fryer to 375°F (190°C). Lightly coat the egg rolls with cooking spray and arrange them in the air fryer basket, making sure they don’t touch. Cook for 8–10 minutes, flipping halfway through, until golden brown and crisp.
    4. Let the egg rolls cool for a few minutes before serving. Optionally, dust with powdered sugar or drizzle with chocolate sauce for added sweetness.

    Nutrition Facts

    Serving Size: 1 serving
    Calories: 180 kcal
    Sugar: 14g
    Sodium: 150mg
    Fat: 8g
    Saturated Fat: 4g
    Carbohydrates: 24g
    Fiber: 0g
    Protein: 3g
    Cholesterol: 25mg