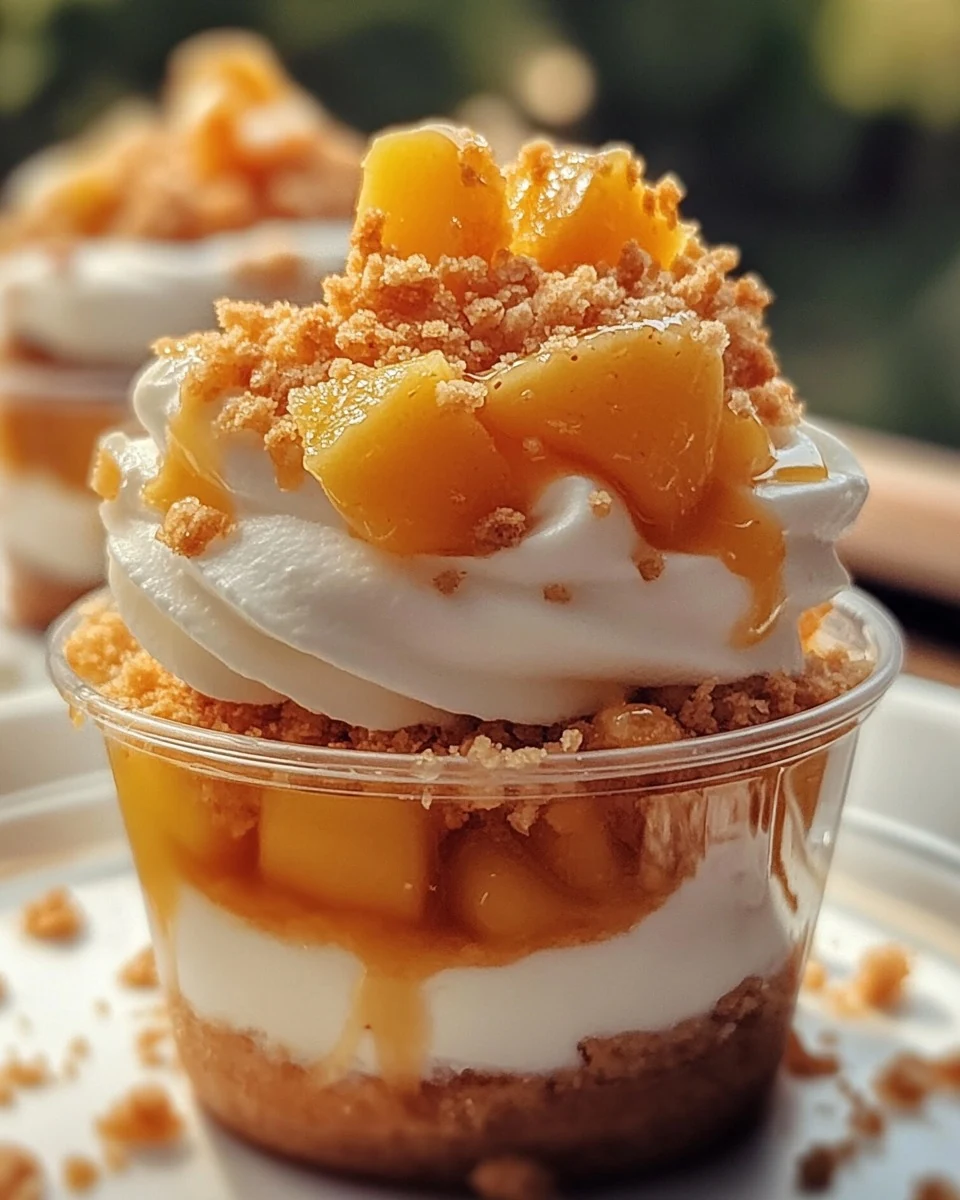
Category: Desserts

  • A LEMON CAKE TO DIE FOR: Irresistible Delight

    A LEMON CAKE TO DIE FOR: Irresistible Delight

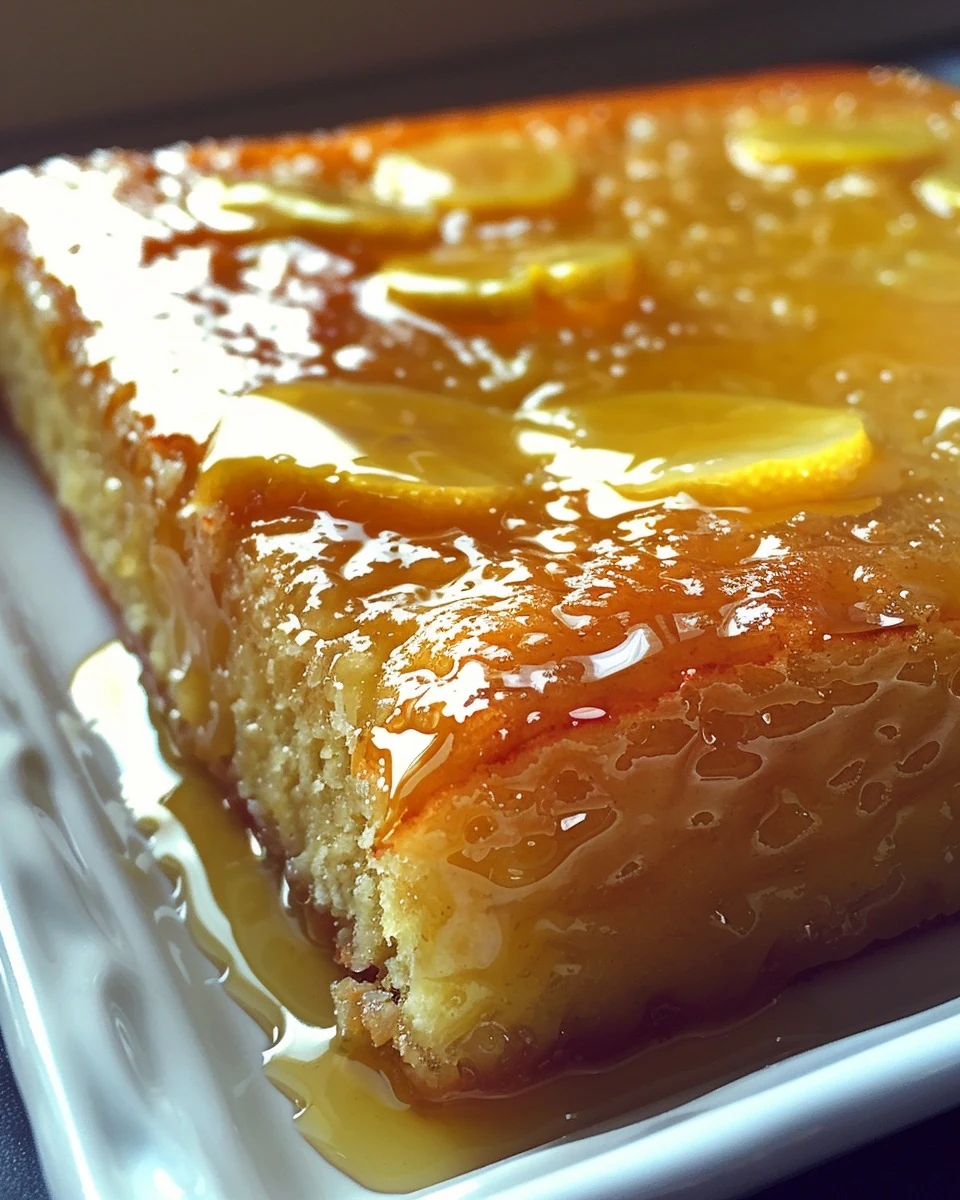
    A LEMON CAKE TO DIE FOR is a delightful dessert that perfectly balances sweetness and tanginess. This cake is moist, bursting with lemon flavor, and topped with a luscious glaze that makes it irresistible. Whether for a special occasion or a simple indulgence, this cake is sure to impress.

    Why You’ll Love This Recipe

    • Quick & Easy: This recipe comes together in under 10 minutes, making it perfect for busy days.
    • Moist and Flavorful: The combination of lemon pudding and glaze ensures every bite is bursting with lemony goodness.
    • Perfect for Any Occasion: Whether it’s a birthday or a casual gathering, this cake fits right in.
    • Minimal Ingredients: With just a few pantry staples, you can whip up this cake with ease.
    • Crowd-Pleaser: The delightful taste and beautiful presentation make it a hit at any gathering.

    Tools and Equipment

    Having the right tools will streamline your baking process.

    Essential Tools

    • Mixing bowl
    • Whisk
    • 9×13-inch baking pan
    • Wooden spoon
    • Measuring cups and spoons

    Why These Tools Matter

    • Mixing bowl: A large bowl is essential for combining all the ingredients smoothly.
    • 9×13-inch baking pan: The right size ensures even baking and easy serving.
    • Wooden spoon: Ideal for mixing and creating holes for the glaze to seep in.

    Ingredients for A LEMON CAKE TO DIE FOR

    For the Cake

    • ¾ cup of oil
    • 4 beaten eggs
    • 1 box of yellow cake mix
    • ¾ cup of water
    • 1 small box of instant lemon pudding mix

    For the Glaze

    • 2 cups of powdered sugar
    • ⅓ cup of lemon juice
    • 2 tablespoons of melted butter
    • 2 tablespoons of water

    How to Make A LEMON CAKE TO DIE FOR Step-by-Step

    Step 1: Prepare the Oven and Pan

    1. Preheat your oven to 350°F (175°C).
    2. Grease a 9×13-inch baking pan to prevent sticking.

    Step 2: Make the Cake Batter

    1. In a large bowl, beat the eggs until smooth.
    2. Add the yellow cake mix, instant lemon pudding mix, oil, and water to the eggs.
    3. Mix everything together until well combined and smooth.

    Step 3: Bake the Cake

    1. Pour the batter into the prepared baking pan.
    2. Bake for 30 to 35 minutes. Check for doneness by inserting a toothpick in the center; it should come out clean.

    Step 4: Prepare the Glaze

    1. While the cake is baking, whisk together the powdered sugar, lemon juice, melted butter, and water in a medium bowl.
    2. Ensure the glaze is smooth and well-mixed.

    Step 5: Glaze the Cake

    1. Once the cake is baked, remove it from the oven.
    2. Use the handle of a wooden spoon to poke holes evenly across the top of the cake.
    3. Pour the glaze over the warm cake, allowing it to seep into the holes.
    4. Let the cake cool slightly so the glaze sets.

    Enjoy this A LEMON CAKE TO DIE FOR with family and friends, and savor each delicious slice.

    How to Serve A LEMON CAKE TO DIE FOR

    Serving this delightful lemon cake can elevate any occasion. Here are a few creative ways to enjoy it.

    1. With Fresh Berries

    Top each slice of cake with a medley of fresh strawberries, blueberries, and raspberries. The tartness of the berries complements the sweetness of the glaze, creating a refreshing balance.

    2. A Scoop of Lemon Sorbet

    Serve a slice alongside a scoop of lemon sorbet. The cold, zesty sorbet enhances the lemon flavor of the cake and adds a delightful texture contrast.

    3. Drizzled with Cream

    Add a dollop of whipped cream or a drizzle of crème fraîche on top. This addition provides a rich creaminess that perfectly offsets the cake’s bright citrus notes.

    Pro Tips for the Best A LEMON CAKE TO DIE FOR

    For a flawless lemon cake experience, consider the following expert tips.

    • Use Fresh Ingredients: Fresh eggs and high-quality lemon juice will enhance the flavor and texture of your cake.

    • Don’t Overmix the Batter: Mix just until combined to ensure a light and fluffy cake. Overmixing can lead to a dense texture.

    • Cool Before Glazing: Allow the cake to cool slightly before adding the glaze, which helps it adhere better and prevents it from running off.

    • Store Properly: Keep any leftovers in an airtight container at room temperature for up to three days to maintain freshness.

    • Experiment with Zest: For an extra zing, consider adding lemon zest to the batter or glaze for an added burst of citrus flavor.

    Best Side Dishes and Pairings

    Pairing your lemon cake with the right accompaniments can enhance its flavors. Here are some excellent options.

    1. Iced Tea: A refreshing glass of iced tea complements the cake’s sweetness and provides a cooling contrast.

    2. Pistachio Ice Cream: The nutty flavor of pistachio ice cream balances the tartness of the lemon cake, making for a delightful combination.

    3. Almond Biscotti: The crunchy texture and subtle almond flavor of biscotti create a perfect contrast when served alongside a slice of cake.

    4. Sparkling Water with Citrus: The effervescence and citrus notes of sparkling water cleanse the palate and highlight the cake’s lemony goodness.

    5. Chocolate-Covered Strawberries: The richness of chocolate-covered strawberries provides a decadent pairing that contrasts beautifully with the lightness of the lemon cake.

    Common Mistakes to Avoid

    • Not Preheating the Oven: Ensure your oven is fully preheated to 350°F before baking for even cooking.
    • Overmixing the Batter: Mix just until combined to maintain a light and fluffy texture in the cake.
    • Using Cold Ingredients: Allow your eggs and other ingredients to reach room temperature for better mixing and rising.
    • Ignoring Glaze Application: Pour the glaze over the warm cake to ensure it seeps into the holes for maximum flavor.

    Storage & Reheating Instructions

    Refrigerator Storage

    Store the lemon cake in an airtight container in the refrigerator. It will stay fresh for up to 5 days.

    Freezing Instructions

    To freeze, wrap the cooled cake tightly in plastic wrap and then in aluminum foil. It can be frozen for up to 3 months. To thaw, place it in the refrigerator overnight before serving.

    Reheating Tips

    • Oven: Preheat to 350°F (175°C), place the cake in for about 10-15 minutes until warmed through.
    • Microwave: Heat individual slices on a microwave-safe plate for 15-30 seconds, checking to avoid overheating.
    • Stovetop: Use a skillet over low heat, cover with a lid, and warm for about 5-7 minutes.

    Frequently Asked Questions

    What makes this A LEMON CAKE TO DIE FOR so special?

    This cake’s unique flavor comes from the combination of lemon pudding mix and a tangy glaze, creating a moist texture and refreshing taste.

    Can I use a different cake mix for this lemon cake?

    Yes, you can experiment with other flavors, but keep in mind that it may alter the overall taste of the cake.

    How can I make this cake more lemony?

    For a stronger lemon flavor, add the zest of one lemon to the batter and consider increasing the lemon juice in the glaze.

    Is A LEMON CAKE TO DIE FOR suitable for special occasions?

    Absolutely! Its bright flavor and beautiful glaze make it a perfect dessert for birthdays, weddings, or any celebration.

    Can I make this cake in advance?

    Yes, you can bake the cake a day in advance. Just store it properly and apply the glaze right before serving for the best results.

    Final Thoughts

    This A LEMON CAKE TO DIE FOR is an irresistible treat that will brighten any occasion. We encourage you to try this recipe, and don’t forget to leave a comment with your feedback!


    Desserts

    A LEMON CAKE TO DIE FOR


    5.0 from 24 reviews

    This delightful lemon cake is a perfect balance of sweetness and tartness, making it an irresistible treat for any occasion. The moist cake, infused with lemon flavor, is topped with a smooth glaze that seeps into the cake, enhancing its flavor. Ideal for gatherings or a simple dessert at home, this cake is sure to impress.
    Author: Munch Twist
    Prep Time: 10 minutes
    Cook Time: 35 minutes
    Total Time: 45 minutes
    Yield: 12 servings
    Category: Desserts
    Method: No bake
    Cuisine: American

    A LEMON CAKE TO DIE FOR

    SCALE:
    1x
    2x
    3x
    Cook Mode: Prevent your screen from going dark

    Ingredients

    • ¾ cup of oil
    • 4 beaten eggs
    • 1 box of yellow cake mix
    • ¾ cup of water
    • 1 small box of instant lemon pudding mix
    • 2 cups of powdered sugar
    • ⅓ cup of lemon juice
    • 2 tablespoons of melted butter
    • 2 tablespoons of water

    Instructions

    1. Preheat your oven to 350°F (175°C). Grease a 9×13-inch baking pan.
    2. In a large bowl, beat the eggs, then add the cake mix, lemon pudding mix, oil, and water. Mix until everything is well combined and smooth.
    3. Pour the batter into the prepared pan and bake for 30 to 35 minutes, or until a toothpick inserted in the center comes out clean.
    4. While the cake is baking, prepare the glaze. In a medium bowl, whisk together the powdered sugar, lemon juice, melted butter, and water until the glaze is smooth and well-mixed.
    5. Once the cake is baked, remove it from the oven and use the handle of a wooden spoon to poke holes evenly across the top of the cake.
    6. Pour the glaze over the warm cake, making sure it seeps into the holes. Let the cake cool slightly, allowing the glaze to set.
    Nutrition Facts

    Serving Size: 1 serving
    Calories: 350 kcal
    Sugar: 40g
    Sodium: 320mg
    Fat: 15g
    Saturated Fat: 3g
    Carbohydrates: 52g
    Fiber: 0g
    Protein: 3g
    Cholesterol: 55mg

  • Irresistible Pineapple Cowboy Candy Recipe to Try

    Irresistible Pineapple Cowboy Candy Recipe to Try

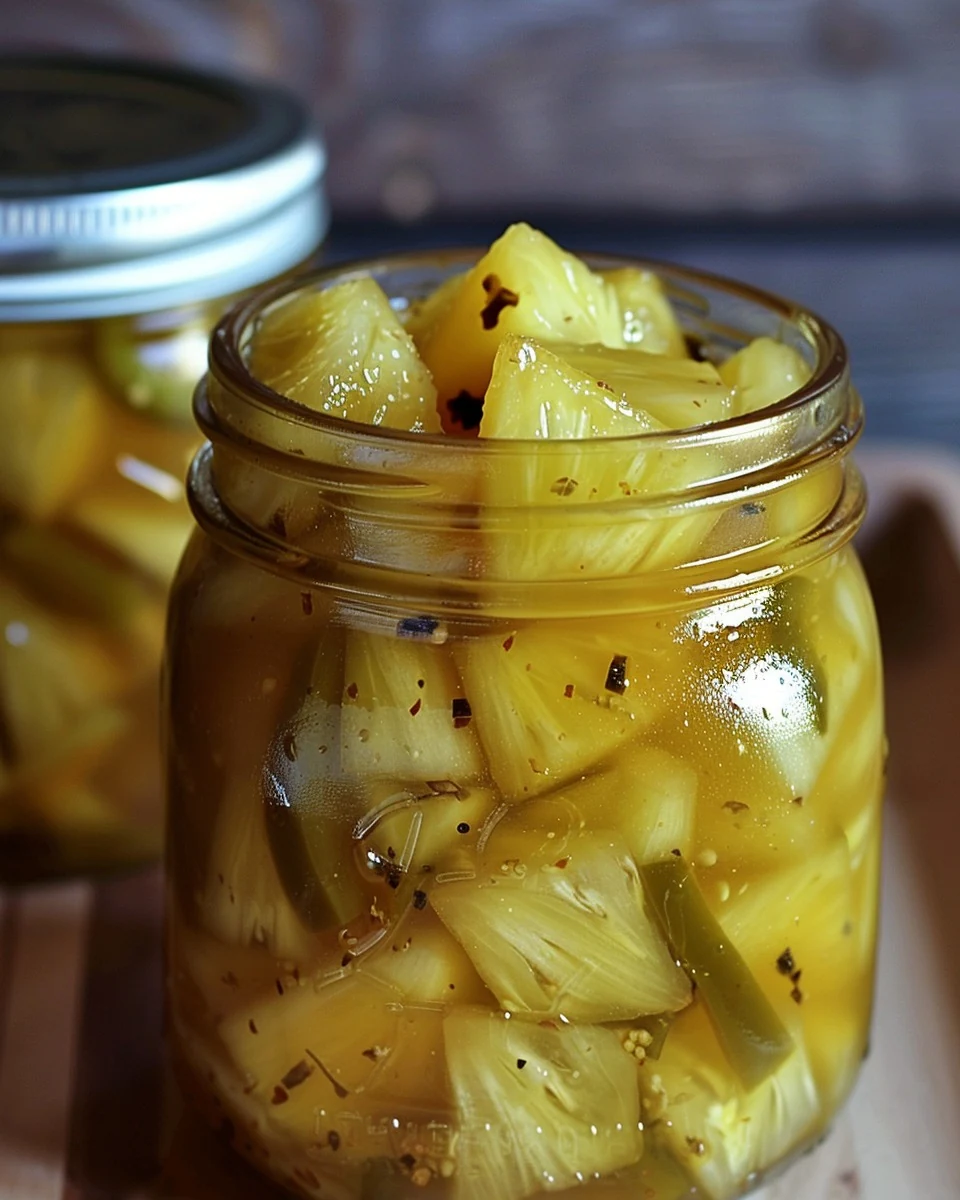
    Pineapple Cowboy Candy offers a delightful balance of sweet and spicy flavors. This unique treat transforms fresh pineapple into a zesty condiment that pairs beautifully with a variety of dishes. Whether you enjoy it on sandwiches or as a topping for grilled meats, this recipe is sure to impress.

    Why You’ll Love This Recipe

    • Sweet and Spicy: The combination of pineapple and jalapeños creates a deliciously addictive flavor profile.
    • Versatile Use: Perfect for adding a kick to burgers, tacos, or even cheese platters.
    • Homemade Goodness: Making this at home allows you to control the ingredients and adjust the heat to your liking.
    • Great for Gifting: Packaged in jars, this candy makes a thoughtful gift for food lovers.
    • Easy to Make: With straightforward steps, even beginners can create this tasty treat.

    Tools and Equipment

    To make Pineapple Cowboy Candy, you will need some essential kitchen tools.

    Essential Tools

    • Large saucepan
    • Measuring cups and spoons
    • Wooden spoon or spatula
    • Sterilized jars with lids
    • Hot water bath canner

    Why These Tools Matter

    • Large saucepan: Ideal for simmering the ingredients evenly.
    • Sterilized jars: Ensures your candy remains fresh and safe to eat.
    • Hot water bath canner: Helps preserve the candy, extending its shelf life.

    Ingredients for Pineapple Cowboy Candy

    For the Syrup

    • 1 teaspoon mustard seeds
    • 1 cup apple cider vinegar
    • 2 tablespoons lemon juice
    • 2 cups granulated sugar
    • 1/2 teaspoon turmeric powder
    • 2 cloves finely chopped garlic
    • 1 tablespoon grated ginger

    For the Fruit

    • 3 cups diced fresh pineapple
    • 1 cup thinly sliced jalapeño peppers

    How to Make Pineapple Cowboy Candy Step-by-Step

    Step 1: Prepare the Syrup

    In a large saucepan, combine the apple cider vinegar, granulated sugar, lemon juice, mustard seeds, turmeric powder, grated ginger, and chopped garlic. Bring the mixture to a boil. Once boiling, reduce the heat and let it simmer until the sugar dissolves completely.

    Step 2: Add Fruit and Simmer

    Add the diced pineapple and sliced jalapeños to the saucepan. Continue simmering over medium heat for about 20 minutes. The pineapple should soften, and the liquid will thicken into a syrup.

    Step 3: Sterilize Jars

    While the pineapple mixture cooks, sterilize your jars and lids. Immerse them in boiling water for at least 5 minutes to ensure they are safe for preserving.

    Step 4: Jar the Mixture

    Carefully spoon the hot pineapple mixture into the sterilized jars. Leave some headspace at the top. Wipe the rims clean and secure the lids. Process the jars in a hot water bath for about 10 minutes.

    Step 5: Cool and Store

    Remove the jars from the water bath and allow them to cool completely. Once cooled, check the seals to ensure they are airtight. Store the jars in a cool, dark place to enjoy your homemade Pineapple Cowboy Candy.

    With this recipe, you can relish the sweet and spicy flavors of Pineapple Cowboy Candy all year round.

    How to Serve Pineapple Cowboy Candy

    Pineapple Cowboy Candy is a versatile condiment that can elevate various dishes. Here are a few creative serving ideas.

    As a Topping for Grilled Meats

    Drizzle Pineapple Cowboy Candy over grilled chicken or pork for a sweet and spicy kick that complements the smoky flavors.

    On Charcuterie Boards

    Add Pineapple Cowboy Candy to your charcuterie board alongside cheeses and cured meats. Its unique taste will surprise and delight your guests.

    Mixed into Salads

    Incorporate Pineapple Cowboy Candy into salads for an unexpected burst of flavor. It pairs particularly well with leafy greens and creamy dressings.

    Pro Tips for the Best Pineapple Cowboy Candy

    To ensure your Pineapple Cowboy Candy turns out perfectly, consider these expert tips.

    • Fresh Ingredients: Use fresh pineapple and high-quality spices for the best flavor and texture.
    • Adjusting Heat Level: If you prefer more heat, add additional jalapeños or use spicier varieties.
    • Cooling Time: Allow the jars to cool completely before storing to ensure proper sealing.
    • Storage: Store in a cool, dark place to maintain freshness and extend shelf life.
    • Experiment with Flavors: Try adding other spices, such as cinnamon or allspice, for a unique twist on the traditional recipe.

    Best Side Dishes and Pairings

    Pineapple Cowboy Candy pairs well with a variety of dishes and drinks. Here are some suggestions.

    1. Grilled Shrimp Tacos
      The sweetness and spice of the candy complement the fresh, zesty flavors of grilled shrimp tacos.

    2. Coconut Rice
      Serve alongside coconut rice to balance the heat and enhance the tropical flavors of the dish.

    3. Coleslaw
      A crunchy, tangy coleslaw provides a refreshing contrast to the sweetness of the Pineapple Cowboy Candy.

    4. BBQ Ribs
      The sweet and spicy notes of the candy enhance the rich, smoky flavors of barbecue ribs.

    5. Margaritas
      Pair with a classic margarita for a refreshing drink that counteracts the heat while enhancing the tropical essence of the candy.

    Common Mistakes to Avoid

    • Not Sterilizing Jars Properly: Failing to sterilize jars can lead to spoilage.
    • Overcooking the Pineapple: Cooking the pineapple too long can result in a mushy texture.
    • Ignoring Headspace: Not leaving enough headspace in jars can cause overflow during processing.
    • Skipping the Water Bath: Neglecting the hot water bath can compromise the sealing of jars.

    Storage & Reheating Instructions

    Refrigerator Storage

    Store Pineapple Cowboy Candy in airtight containers in the refrigerator. It remains fresh for up to two weeks when properly sealed.

    Freezing Instructions

    To freeze, transfer the cooled Pineapple Cowboy Candy into freezer-safe containers, leaving some space for expansion. It can be frozen for up to six months. Thaw in the refrigerator overnight before using.

    Reheating Tips

    • Oven: Preheat to 350°F (175°C) and warm in an oven-safe dish for about 10-15 minutes.
    • Microwave: Place in a microwave-safe bowl and heat in 30-second intervals, stirring in between, until warmed through.
    • Stovetop: Heat gently in a saucepan over low heat, stirring frequently until hot.

    Frequently Asked Questions

    How long does Pineapple Cowboy Candy last?

    Pineapple Cowboy Candy can last up to two weeks in the refrigerator and up to six months in the freezer when stored properly.

    Can I adjust the spice level in Pineapple Cowboy Candy?

    Yes, you can adjust the amount of jalapeño peppers to suit your taste. For less heat, reduce the quantity or use milder peppers.

    What are some serving suggestions for Pineapple Cowboy Candy?

    Pineapple Cowboy Candy pairs well with cheese platters, grilled meats, or can be used as a topping for sandwiches and burgers.

    Is Pineapple Cowboy Candy suitable for canning?

    Yes, this recipe is suitable for canning. Ensure proper sterilization and sealing techniques are followed to ensure safety.

    Can I use canned pineapple instead of fresh?

    While fresh pineapple is recommended for the best texture and flavor, canned pineapple can be used in a pinch. Drain well before adding to the recipe.

    Final Thoughts

    Pineapple Cowboy Candy offers a delightful balance of sweetness and heat that can elevate any dish. We encourage you to try making this vibrant recipe at home and share your experience in the comments. Your feedback is invaluable!


    Desserts

    Pineapple Cowboy Candy


    5.0 from 24 reviews

    Pineapple Cowboy Candy is a sweet and spicy treat that combines fresh pineapple with jalapeños in a tangy syrup. This unique recipe offers a delightful balance of flavors, making it a perfect addition to sandwiches, cheese platters, or as a standalone snack. The combination of mustard seeds and turmeric adds a distinctive twist to the classic sweet preserves, ensuring a memorable taste experience.

    Author: Munch Twist
    Prep Time: 20 minutes
    Cook Time: 30 minutes
    Total Time: 50 minutes
    Yield: 8 servings
    Category: Desserts
    Method: No bake
    Cuisine: American

    Pineapple Cowboy Candy

    SCALE:
    1x
    2x
    3x
    Cook Mode: Prevent your screen from going dark

    Ingredients

    • 1 teaspoon mustard seeds
    • 1 cup apple cider vinegar
    • 2 tablespoons lemon juice
    • 3 cups diced fresh pineapple
    • 1/2 teaspoon turmeric powder
    • 1 cup thinly sliced jalapeño peppers
    • 1 tablespoon grated ginger
    • 2 cups granulated sugar
    • 2 cloves finely chopped garlic

    Instructions

    1. In a large saucepan, combine the apple cider vinegar, granulated sugar, lemon juice, mustard seeds, turmeric powder, grated ginger, and chopped garlic. Bring the mixture to a boil, then reduce the heat and let it simmer until the sugar dissolves completely.
    2. Add the diced pineapple and sliced jalapeños to the saucepan. Continue simmering over medium heat for about 20 minutes, or until the pineapple softens and the liquid thickens into a syrup.
    3. While the pineapple mixture is cooking, sterilize your jars and lids by immersing them in boiling water for at least 5 minutes.
    4. Carefully spoon the hot pineapple mixture into the sterilized jars, leaving a bit of headspace at the top. Wipe the rims clean, secure the lids, and process the jars in a hot water bath for about 10 minutes.
    5. Remove the jars from the water bath and allow them to cool completely. Once cooled, check the seals before storing the jars in a cool, dark place.

    Nutrition Facts

    Serving Size: 1 serving
    Calories: 70 kcal
    Sugar: 16g
    Sodium: 1mg
    Fat: 0g
    Saturated Fat: 0g
    Carbohydrates: 18g
    Fiber: 1g
    Protein: 0g
    Cholesterol: 0mg

  • Heavenly No-Bake Mini Key Lime Pies Recipe

    Heavenly No-Bake Mini Key Lime Pies Recipe

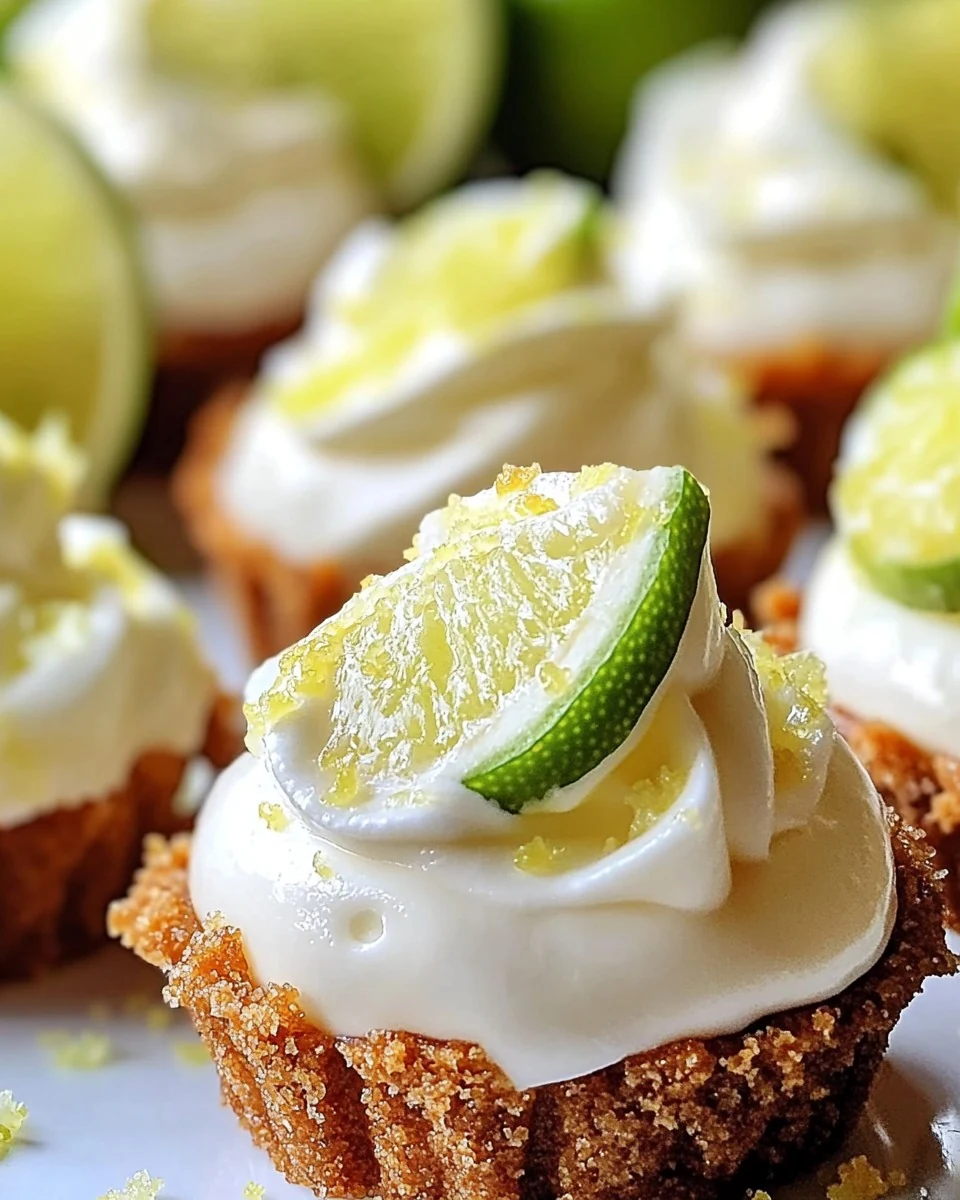
    Heavenly No-Bake Mini Key Lime Pies are a delightful treat that perfectly balances tartness and sweetness. These mini pies are creamy, refreshing, and incredibly easy to make, making them an ideal dessert for any occasion.

    Why You’ll Love This Recipe

    • No Baking Required: Enjoy the deliciousness of key lime pie without turning on the oven.
    • Quick & Easy: Ready in just 20 minutes, plus chill time, making it a perfect last-minute dessert.
    • Refreshing Flavor: The combination of key lime juice and zest delivers a zesty punch that brightens any meal.
    • Perfect Portion Control: Mini pies are easy to serve and ensure everyone gets their own treat.
    • Customizable Toppings: Feel free to get creative with toppings, from fresh fruit to chocolate shavings.

    Tools and Equipment

    To create these Heavenly No-Bake Mini Key Lime Pies, you will need a few essential tools.

    Essential Tools

    • Mixing bowls
    • Mini tart pan
    • Whisk
    • Rubber spatula
    • Electric mixer (or a whisk for manual whipping)

    Why These Tools Matter

    • Mixing Bowls: Having multiple sizes helps in organizing ingredients for easy preparation.
    • Mini Tart Pan: The right pan ensures even crust formation and perfect portion sizes.
    • Electric Mixer: A quick way to achieve stiff peaks in your whipped cream, saving you time and effort.

    Ingredients for Heavenly No-Bake Mini Key Lime Pies

    For the Crust

    • 2 tablespoons powdered sugar
    • 1 1/2 cups graham cracker crumbs
    • 1 teaspoon lime zest
    • 6 tablespoons unsalted butter, melted
    • 1/3 cup granulated sugar

    For the Filling

    • 1 can (14 ounces) sweetened condensed milk
    • 1/2 cup key lime juice (freshly squeezed)

    For Topping

    • 1 cup heavy cream
    • Lime zest for garnish

    How to Make Heavenly No-Bake Mini Key Lime Pies Step-by-Step

    Step 1: Prepare the Crust

    In a medium bowl, combine the graham cracker crumbs, granulated sugar, and melted butter. Mix until well incorporated. Press the crumb mixture firmly into the bottoms and up the sides of a mini tart pan. Refrigerate for at least 1 hour to allow the crusts to set.

    Step 2: Make the Filling

    In a large bowl, whisk together the sweetened condensed milk, key lime juice, and lime zest until the mixture is smooth and thick. This filling will provide the signature key lime flavor.

    Step 3: Assemble the Pies

    Spoon the key lime filling into the chilled crusts, smoothing the tops with a spatula. This step ensures a neat and attractive presentation.

    Step 4: Prepare the Whipped Cream

    In a separate bowl, whip the heavy cream with the powdered sugar until stiff peaks form. This will be the light and airy topping for your pies.

    Step 5: Top the Mini Pies

    Pipe or spoon the whipped cream onto each mini tart, adding a decorative touch. This will elevate the presentation and add a creamy texture.

    Step 6: Garnish and Chill

    Garnish with additional lime zest for a burst of color and flavor. Refrigerate the pies for at least 2 hours before serving to ensure they are fully set.

    Enjoy your Heavenly No-Bake Mini Key Lime Pies, a perfect blend of tangy and sweet flavors in a delightful mini format.

    How to Serve Heavenly No-Bake Mini Key Lime Pies

    These delightful mini pies are perfect for any occasion and can be served in various creative ways.

    Individual Dessert Cups

    Serve each mini pie in a decorative cup for a charming presentation. This allows guests to easily enjoy their dessert while adding a stylish touch to your table setting.

    Garnished with Fresh Berries

    Add a few fresh berries, such as strawberries or blueberries, on the side of each mini pie. The tartness of the berries complements the key lime flavor and adds a pop of color.

    Key Lime Pie Parfaits

    Layer the key lime filling and graham cracker crust in clear glasses to create a beautiful parfait. Top with whipped cream and lime zest for an elegant twist on the traditional pie.

    Pro Tips for the Best Heavenly No-Bake Mini Key Lime Pies

    To ensure your mini key lime pies turn out perfectly, consider these expert tips.

    • Use Fresh Lime Juice: Freshly squeezed key lime juice enhances the flavor significantly compared to bottled alternatives.
    • Chill the Bowls: Chill your mixing bowls and beaters for whipping cream. This helps achieve better peaks and a fluffier texture.
    • Firmly Pack the Crust: Make sure to press the graham cracker crust mixture firmly into the tart pan. A well-packed crust prevents it from crumbling when served.
    • Taste Before Setting: Before pouring the filling into the crust, taste it to adjust the sweetness or tartness to your preference.
    • Allow Proper Chilling Time: Ensure the pies are refrigerated for the recommended time to achieve the perfect set and texture.

    Best Side Dishes and Pairings

    These mini pies are delicious on their own, but they can be complemented beautifully with the right side dishes and drinks.

    1. Coconut Sorbet: This refreshing dessert adds a tropical flair that pairs well with the tartness of the key lime.
    2. Grilled Shrimp Skewers: Lightly seasoned shrimp skewers offer a savory contrast that balances the sweetness of the pies.
    3. Tropical Fruit Salad: A mix of pineapple, mango, and papaya enhances the citrus notes of the key lime pies while providing a vibrant color contrast.
    4. Iced Tea with Mint: A chilled mint-infused iced tea serves as a refreshing beverage that complements the tangy flavors of the pies.
    5. Chocolate-Covered Pretzels: The salty crunch of chocolate-covered pretzels provides a delightful textural contrast to the creamy pies.

    Common Mistakes to Avoid

    • Overmixing the Filling: This can lead to a less creamy texture. Mix until just combined.
    • Skipping the Chilling Time: Not refrigerating the pies long enough can result in a runny filling.
    • Using Bottled Lime Juice: Freshly squeezed key lime juice is essential for the best flavor.
    • Neglecting the Crust: Ensure the crust is compressed firmly to hold its shape when serving.

    Storage & Reheating Instructions

    Refrigerator Storage

    Store the mini key lime pies in airtight containers in the refrigerator. They will stay fresh for up to 3 days.

    Freezing Instructions

    For long-term storage, freeze the unfilled crusts in an airtight container for up to 2 months. Thaw in the refrigerator before filling.

    Reheating Tips

    • Oven: Preheat to 350°F (175°C) and place the pies for about 10 minutes to warm slightly.
    • Microwave: Heat on low power for 15-20 seconds until just warm, being careful not to overheat.
    • Stovetop: Place in a pan on low heat for a few minutes, covering to retain moisture.

    Frequently Asked Questions

    How do I make the crust for Heavenly No-Bake Mini Key Lime Pies?

    To make the crust, combine graham cracker crumbs, melted butter, and granulated sugar, then press it into the tart pan.

    Can I use regular limes instead of key limes for this recipe?

    Yes, you can use regular limes, but the flavor will differ slightly from the traditional key lime taste.

    How long do Heavenly No-Bake Mini Key Lime Pies need to chill?

    The pies should chill for at least 2 hours to ensure the filling is set properly before serving.

    Can I make these pies ahead of time?

    Absolutely! These mini key lime pies can be made a day in advance and stored in the refrigerator until ready to serve.

    What can I use as a substitute for heavy cream in this recipe?

    For a lighter option, you can use whipped coconut cream, but the texture and flavor will differ.

    Final Thoughts

    These Heavenly No-Bake Mini Key Lime Pies are a delightful treat perfect for any occasion. The combination of tangy key lime and creamy filling makes them irresistible. I encourage you to try this recipe and share your experience in the comments below; we would love to hear your feedback!

    Desserts

    Heavenly No-Bake Mini Key Lime Pies


    5.0 from 24 reviews

    These delightful mini key lime pies are a refreshing dessert that combines a buttery graham cracker crust with a creamy key lime filling, topped with fluffy whipped cream. Perfect for warm weather and easy to prepare without baking.

    Author: Munch Twist
    Prep Time: 20 minutes
    Cook Time: 0 minutes
    Total Time: 2 hours 20 minutes
    Yield: 6 servings
    Category: Desserts
    Method: No bake
    Cuisine: American

    Heavenly No-Bake Mini Key Lime Pies

    SCALE:
    1x
    2x
    3x
    Cook Mode: Prevent your screen from going dark

    Ingredients

    • 2 tablespoons powdered sugar
    • 1 1/2 cups graham cracker crumbs
    • 1 teaspoon lime zest
    • 1 can (14 ounces) sweetened condensed milk
    • 1/3 cup granulated sugar
    • 1 cup heavy cream
    • 1/2 cup key lime juice (freshly squeezed)
    • 6 tablespoons unsalted butter, melted

    Instructions

    1. In a medium bowl, combine the graham cracker crumbs, granulated sugar, and melted butter. Mix until well incorporated.
    2. Press the crumb mixture firmly into the bottoms and up the sides of a mini tart pan. Refrigerate for at least 1 hour to allow the crusts to set.
    3. In a large bowl, whisk together the sweetened condensed milk, key lime juice, and lime zest until the mixture is smooth and thick.
    4. Spoon the key lime filling into the chilled crusts, smoothing the tops with a spatula.
    5. In a separate bowl, whip the heavy cream with the powdered sugar until stiff peaks form.
    6. Pipe or spoon the whipped cream onto each mini tart, adding a decorative touch.
    7. Garnish with additional lime zest for a burst of color and flavor.
    8. Refrigerate the pies for at least 2 hours before serving to ensure they are fully set.

    Nutrition Facts

    Serving Size: 1 serving
    Calories: 320 kcal
    Sugar: 24g
    Sodium: 150mg
    Fat: 20g
    Saturated Fat: 12g
    Carbohydrates: 32g
    Fiber: 1g
    Protein: 4g
    Cholesterol: 40mg

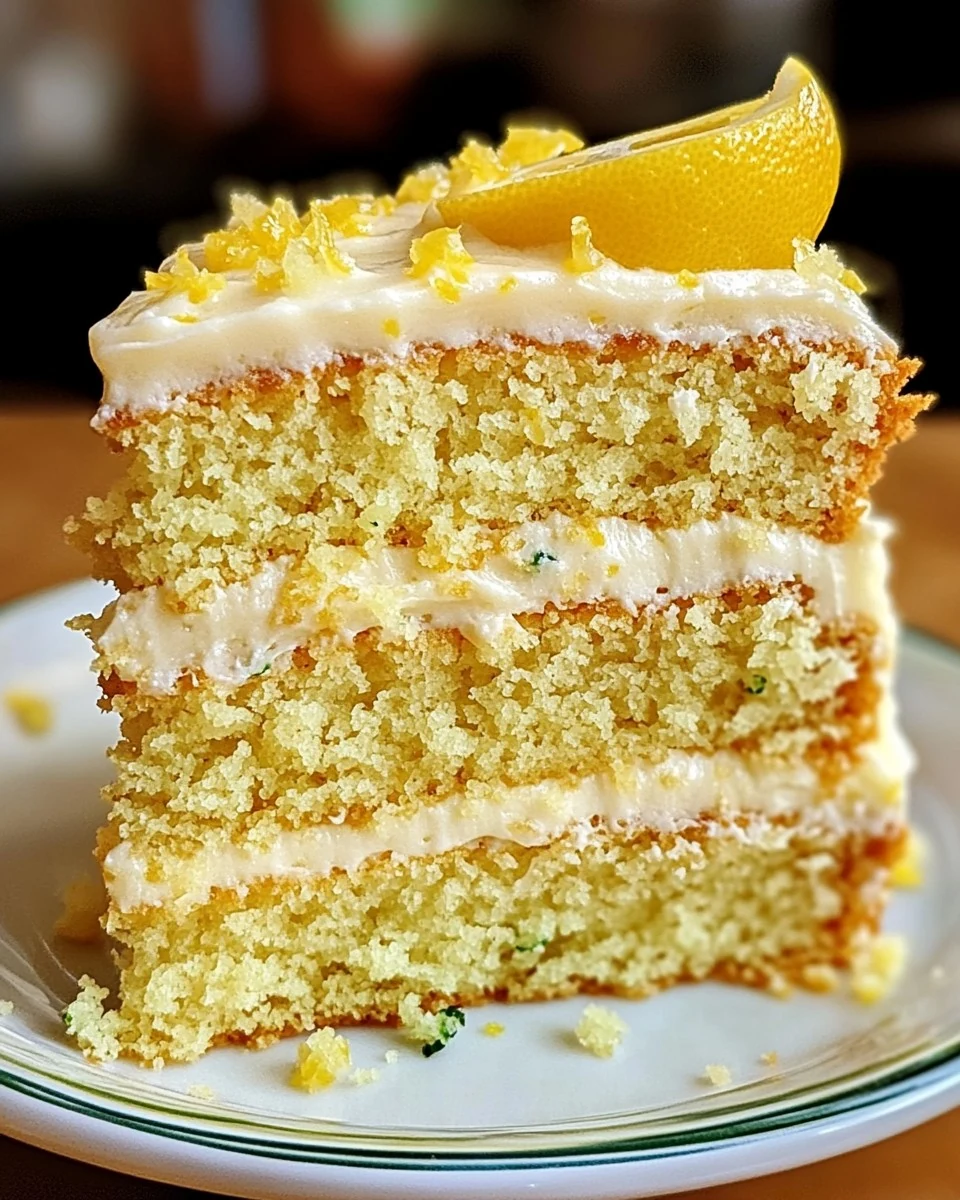
  • Delightful Moist Lemon Zucchini Cake with Creamy Frosting

    Delightful Moist Lemon Zucchini Cake with Creamy Frosting

    Moist Lemon Zucchini Cake with Creamy Lemon Frosting is a delightful dessert that combines the fresh flavors of lemon with the subtle earthiness of zucchini. This cake is not only moist and tender but also boasts a creamy lemon frosting that elevates its taste. Perfect for any occasion, this recipe will become a favorite in your baking repertoire.

    Why You’ll Love This Recipe

    • Unique Flavor Combination: The pairing of lemon and zucchini creates a refreshing taste that’s both sweet and tangy.
    • Moist Texture: The addition of zucchini ensures the cake remains incredibly moist, making each bite enjoyable.
    • Easy to Make: With straightforward steps, even novice bakers can master this recipe with ease.
    • Versatile Serving Options: This cake is perfect for celebrations, potlucks, or simply enjoying at home with a cup of tea.
    • Eye-Catching Presentation: Topped with creamy frosting and garnished with lemon slices, it looks as good as it tastes.

    Tools and Equipment

    Having the right tools is essential for successful baking. Here are the key items you’ll need.

    Essential Tools

    • Mixing bowls
    • Whisk
    • Rubber spatula
    • Measuring cups and spoons
    • Three 8-inch round cake pans
    • Cooling rack
    • Electric mixer

    Why These Tools Matter

    • Mixing bowls: Essential for combining dry and wet ingredients without mess.
    • Electric mixer: Makes blending the frosting smooth and fluffy, eliminating any lumps.
    • Cooling rack: Allows cakes to cool evenly, preventing sogginess.

    Ingredients for Moist Lemon Zucchini Cake with Creamy Lemon Frosting

    For the Cake

    • 2 1/2 cups all-purpose flour
    • 2 cups granulated sugar
    • 1 teaspoon baking powder
    • 1/2 teaspoon baking soda
    • 1/2 teaspoon salt
    • 1 tablespoon lemon zest
    • 1/4 cup lemon juice
    • 1/2 cup vegetable oil
    • 1/2 cup unsalted butter, melted
    • 3 large eggs
    • 1/2 cup sour cream
    • 2 cups grated zucchini
    • 1 teaspoon vanilla extract

    For the Frosting

    • 8 oz cream cheese, softened
    • 1/2 cup unsalted butter, softened
    • 1 cup powdered sugar
    • 1 tablespoon lemon juice
    • 1 tablespoon lemon zest
    • Lemon slices and extra zest for garnish

    How to Make Moist Lemon Zucchini Cake with Creamy Lemon Frosting Step-by-Step

    Step 1: Prep the Base

    1. Preheat your oven to 350°F (175°C). Grease and flour three 8-inch round cake pans to prevent sticking.
    2. In a large mixing bowl, whisk together the flour, sugar, baking powder, baking soda, and salt until well combined.

    Step 2: Combine Wet Ingredients

    1. In another bowl, mix together the grated zucchini, vegetable oil, melted butter, eggs, sour cream, lemon juice, lemon zest, and vanilla extract. Ensure everything is well incorporated for a smooth batter.

    Step 3: Mix Wet and Dry Ingredients

    1. Gradually add the wet mixture to the dry ingredients. Stir gently until just combined; do not overmix to keep the cake light and fluffy.

    Step 4: Bake the Cake

    1. Divide the batter evenly among the prepared cake pans. Bake for 25-30 minutes, or until a toothpick inserted into the center comes out clean.
    2. Once baked, allow the cakes to cool in the pans for 10 minutes. Then, transfer them to a wire rack to cool completely.

    Step 5: Prepare the Frosting

    1. In a mixing bowl, beat the softened cream cheese and butter together until creamy. Gradually add the powdered sugar, lemon juice, and lemon zest, beating until the mixture is smooth and fluffy.

    Step 6: Assemble the Cake

    1. Once the cakes are completely cool, place one layer on a serving plate. Spread a layer of frosting on top.
    2. Repeat with the second layer, adding frosting in between. Frost the top and sides of the cake with the remaining frosting.

    Step 7: Garnish and Serve

    1. Garnish the cake with lemon slices and extra lemon zest for a beautiful presentation. Slice, serve, and enjoy your Moist Lemon Zucchini Cake with Creamy Lemon Frosting.

    Preparation time: 20 minutes | Cooking time: 30 minutes

    Nutritional Information (per serving):
    – Calories: 460 kcal
    – Carbohydrates: 55g
    – Protein: 5g
    – Fat: 24g
    – Saturated Fat: 12g
    – Sugar: 39g
    – Fiber: 1g
    – Sodium: 230mg

    How to Serve Moist Lemon Zucchini Cake with Creamy Lemon Frosting

    This cake is versatile and can be served in various delightful ways to enhance its flavors.

    Layered Delight

    Serve the cake as a multi-layered dessert, with the creamy lemon frosting generously spread between each layer. This presentation not only looks stunning but also ensures each bite is filled with moist cake and luscious frosting.

    Afternoon Tea Treat

    Slice the cake into small squares and serve it alongside a pot of freshly brewed tea. The light citrus flavor complements the tea perfectly, making it an ideal afternoon pick-me-up.

    Celebration Centerpiece

    Decorate the top with additional lemon slices and zest for a festive touch. This makes it a perfect centerpiece for birthdays or other celebrations, inviting guests to indulge in a slice of this moist delight.

    Pro Tips for the Best Moist Lemon Zucchini Cake with Creamy Lemon Frosting

    To achieve the best results, consider these helpful tips.

    • Use Fresh Zucchini: Opt for fresh, firm zucchini to ensure maximum moisture and flavor in your cake.
    • Check Oven Temperature: Always verify your oven temperature with a thermometer for accurate baking, as variations can lead to uneven results.
    • Don’t Overmix: Mix the batter until just combined to maintain the cake’s moisture and fluffiness; overmixing can lead to a dense texture.
    • Cool Completely: Allow the cakes to cool completely before frosting to prevent the frosting from melting and sliding off.
    • Experiment with Zest: Feel free to adjust the amount of lemon zest in the cake and frosting for a more pronounced citrus flavor, depending on your preference.

    Best Side Dishes and Pairings

    Pairing your Moist Lemon Zucchini Cake with complementary dishes or drinks enhances the overall experience.

    1. Vanilla Ice Cream: A scoop of creamy vanilla ice cream balances the citrusy flavors and adds a refreshing contrast.
    2. Herbal Tea: A light herbal tea, such as chamomile or mint, complements the lemon notes and provides a soothing beverage option.
    3. Fresh Fruit Salad: A mix of seasonal fruits can add a refreshing and healthy side, enhancing the cake’s flavors while providing a colorful presentation.
    4. Sparkling Water with Lemon: The effervescence of sparkling water with a squeeze of fresh lemon creates a refreshing drink that pairs perfectly with the rich cake.
    5. Lemonade: A classic lemonade, either sweetened or tart, enhances the lemon flavor and makes for a delightful summer pairing.

    Common Mistakes to Avoid

    • Not Grating Zucchini Properly: Ensure the zucchini is grated finely for even moisture distribution.
    • Overmixing the Batter: Mix just until combined to maintain a light and fluffy texture.
    • Skipping the Cooling Step: Allow cakes to cool completely before frosting to prevent the frosting from melting.
    • Using Cold Ingredients: Ensure that eggs, butter, and cream cheese are at room temperature for better incorporation.

    Storage & Reheating Instructions

    Refrigerator Storage

    Store the cake in an airtight container in the refrigerator. It will remain fresh for up to 5 days.

    Freezing Instructions

    To freeze, wrap the cake layers tightly in plastic wrap and then in aluminum foil. Properly stored, they can last up to 3 months. Thaw in the refrigerator overnight before frosting or serving.

    Reheating Tips

    • Oven: Preheat to 350°F (175°C), wrap the cake in foil, and heat for about 10-15 minutes.
    • Microwave: Heat individual slices on a microwave-safe plate for 15-20 seconds or until warm.
    • Stovetop: Place a slice in a skillet over low heat, cover, and warm for about 5 minutes.

    Frequently Asked Questions

    Can I make this Moist Lemon Zucchini Cake with Creamy Lemon Frosting ahead of time?

    Yes, you can bake the cake layers in advance and store them in the refrigerator or freezer. Frost the cake just before serving for the best texture.

    Is it necessary to use fresh lemon juice and zest?

    Using fresh lemon juice and zest enhances the flavor of the cake. Bottled lemon juice may lack the brightness that fresh ingredients provide.

    Can I substitute other types of flour in this recipe?

    You can experiment with gluten-free flour blends, but the texture may vary. All-purpose flour is recommended for the best results.

    How can I make this cake even more lemony?

    To intensify the lemon flavor, you can increase the amount of lemon zest and juice in both the cake and the frosting.

    Final Thoughts

    This Moist Lemon Zucchini Cake with Creamy Lemon Frosting is a delightful treat that combines the freshness of lemon with the subtle sweetness of zucchini. Give this recipe a try, and don’t forget to leave a comment sharing your experience or any variations you made. Your feedback is always appreciated!


    Desserts

    Moist Lemon Zucchini Cake with Creamy Lemon Frosting


    5.0 from 24 reviews

    This Moist Lemon Zucchini Cake is a delightful blend of fresh zucchini and zesty lemon, creating a light and flavorful dessert. Topped with a creamy lemon frosting, it is perfect for any occasion and sure to impress your guests.

    Author: Munch Twist
    Prep Time: 20 minutes
    Cook Time: 30 minutes
    Total Time: 50 minutes
    Yield: 12 servings
    Category: Desserts
    Method: No bake
    Cuisine: American

    Moist Lemon Zucchini Cake with Creamy Lemon Frosting

    SCALE:
    1x
    2x
    3x
    Cook Mode: Prevent your screen from going dark

    Ingredients

    • 1 teaspoon baking powder
    • 1/2 teaspoon salt
    • 1 tablespoon lemon zest
    • 2 cups grated zucchini
    • 1/2 cup vegetable oil
    • 1 teaspoon vanilla extract
    • 1/2 teaspoon baking soda
    • 2 cups granulated sugar
    • 1/4 cup lemon juice
    • 1/2 cup unsalted butter, melted
    • 3 large eggs
    • 2 1/2 cups all-purpose flour
    • 1/2 cup sour cream
    • 1 tablespoon lemon juice (for frosting)
    • 8 oz cream cheese, softened
    • 1/2 cup unsalted butter, softened (for frosting)
    • 1 tablespoon lemon zest (for frosting)
    • 1 cup powdered sugar

    Instructions

    1. Preheat your oven to 350°F (175°C). Grease and flour three 8-inch round cake pans.
    2. In a large mixing bowl, whisk together the flour, sugar, baking powder, baking soda, and salt.
    3. In another bowl, combine the grated zucchini, vegetable oil, melted butter, eggs, sour cream, lemon juice, lemon zest, and vanilla extract. Mix well until fully incorporated.
    4. Gradually add the wet ingredients to the dry ingredients, stirring until just combined.
    5. Divide the batter evenly among the prepared cake pans. Bake for 25-30 minutes, or until a toothpick inserted into the center comes out clean.
    6. Allow the cakes to cool in the pans for 10 minutes, then transfer them to a wire rack to cool completely.
    7. To make the frosting, beat the softened cream cheese and butter together until creamy. Gradually add the powdered sugar, lemon juice, and lemon zest, beating until smooth and fluffy.
    8. Once the cakes are completely cool, spread a layer of frosting between each cake layer, then frost the top and sides of the cake.
    9. Garnish with lemon slices and extra lemon zest. Serve and enjoy!

    Nutrition Facts

    Serving Size: 1 serving
    Calories: 460 kcal
    Sugar: 39g
    Sodium: 230mg
    Fat: 24g
    Saturated Fat: 12g
    Carbohydrates: 55g
    Fiber: 1g
    Protein: 5g
    Cholesterol: 80mg

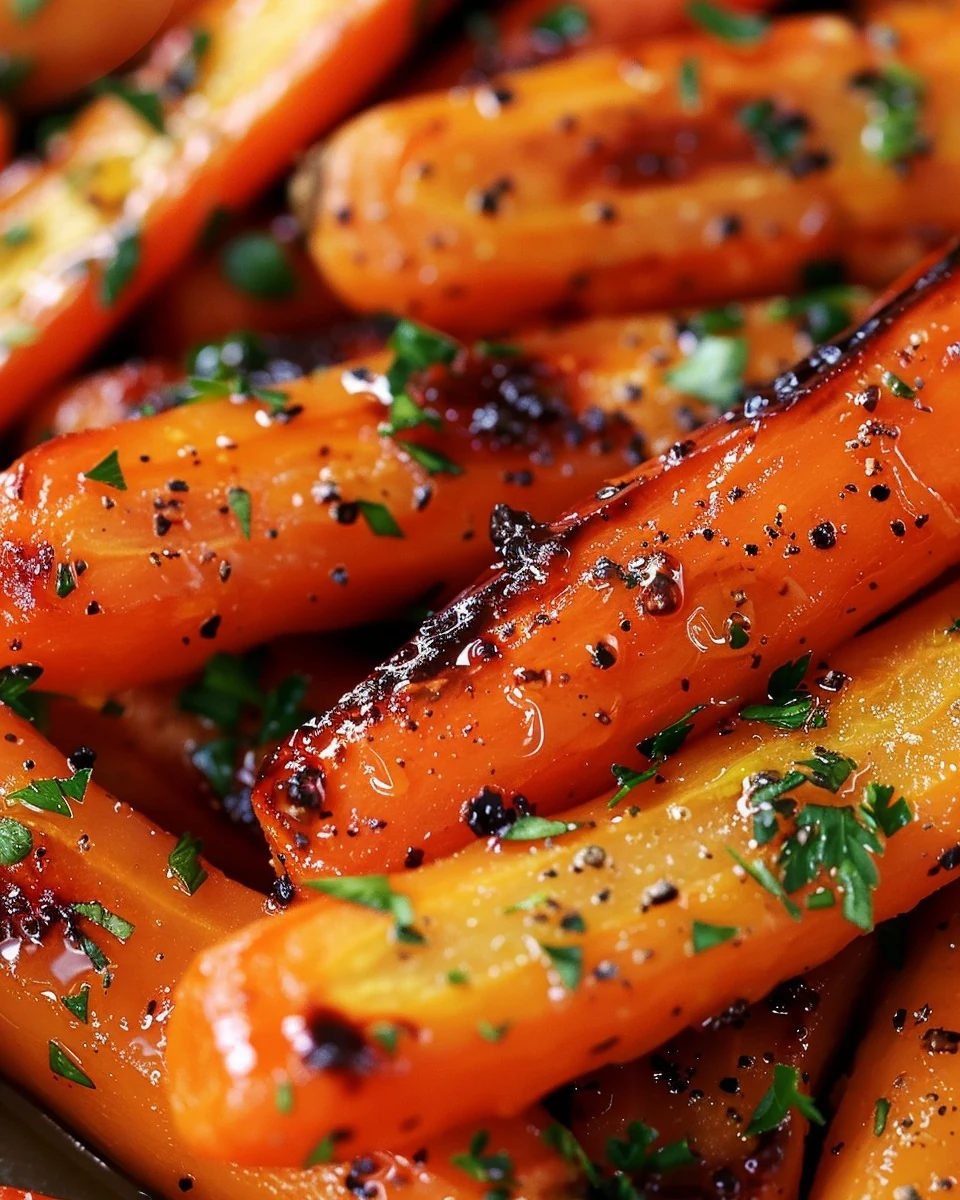
  • Delicious Honey Garlic Butter Roasted Carrots Recipe

    Delicious Honey Garlic Butter Roasted Carrots Recipe

    Honey Garlic Butter Roasted Carrots bring a delightful sweetness and a rich, buttery flavor to your table. This dish combines tender baby carrots with a honey-garlic glaze, creating a side that is both simple and elegant. Perfect for any occasion, these carrots will be a standout on your dinner plate.

    Why You’ll Love This Recipe

    • Flavorful Combination: The blend of honey, garlic, and butter creates a uniquely delicious taste.
    • Quick & Easy: Ready in under 30 minutes, making it perfect for busy weeknights.
    • Versatile Side Dish: Complements a variety of main courses, from roasted meats to plant-based dishes.
    • Healthy Choice: Packed with vitamins and fiber, these carrots offer a nutritious boost.
    • Crowd-Pleaser: The sweet and savory profile appeals to both kids and adults alike.

    Tools and Equipment

    To make Honey Garlic Butter Roasted Carrots, you will need a few essential kitchen tools.

    Essential Tools

    • Baking sheet
    • Skillet or pan
    • Mixing bowl
    • Knife and cutting board
    • Measuring cups and spoons

    Why These Tools Matter

    • Baking Sheet: Ensures even roasting and prevents overcrowding for perfect texture.
    • Skillet or Pan: Allows for easy melting and mixing of the butter and honey.
    • Knife and Cutting Board: Essential for preparing garlic and ensuring uniform carrot sizes.

    Ingredients for Honey Garlic Butter Roasted Carrots

    Carrot Ingredients

    • 2 pounds baby carrots
    • 1/2 teaspoon salt
    • Cracked black pepper, to taste
    • 2 tablespoons fresh chopped parsley

    Sauce Ingredients

    • 1/2 cup butter
    • 1/4 cup honey
    • 4 garlic cloves, minced (or 2 tsp garlic powder)

    How to Make Honey Garlic Butter Roasted Carrots Step-by-Step

    Step 1: Prep the Base

    1. Preheat your oven to 425°F (220°C) and lightly grease a large baking sheet.

    Step 2: Make the Honey-Garlic Butter

    1. In a skillet over medium heat, melt the butter.
    2. Once melted, pour in the honey and stir until fully combined.
    3. Add the minced garlic (or garlic powder) to the honey-butter mixture and cook for about 30 seconds until fragrant.

    Step 3: Coat the Carrots

    1. Toss the baby carrots in the honey-garlic butter sauce.
    2. Allow the sauce to thicken for about a minute.
    3. Season with salt and cracked black pepper.

    Step 4: Roast the Carrots

    1. Transfer the coated carrots to the prepared baking sheet.
    2. Arrange them in a single layer for even cooking.
    3. Roast the carrots in the preheated oven for 20 minutes or until fork-tender.

    Step 5: Crisp the Carrots

    1. For a crispier texture, broil the carrots on high for an additional 2-3 minutes to char the edges.

    Step 6: Serve

    1. Remove from the oven and sprinkle with fresh chopped parsley before serving.

    With this straightforward recipe, you can enjoy the delightful taste of Honey Garlic Butter Roasted Carrots. Perfect for any meal, these carrots are sure to impress your family and friends.

    How to Serve Honey Garlic Butter Roasted Carrots

    These Honey Garlic Butter Roasted Carrots can be enjoyed in various ways to elevate your meal.

    As a Side Dish for Grilled Meats

    Pair these sweet and savory carrots with grilled chicken or steak. The caramelized flavor complements the smoky notes of the meat.

    In a Grain Bowl

    Add roasted carrots to a grain bowl featuring quinoa or farro. Their sweetness adds depth to the dish, while the honey-garlic sauce enhances the overall flavor profile.

    Tossed in a Salad

    Incorporate the roasted carrots into a fresh salad with mixed greens and goat cheese. The warm carrots will slightly wilt the greens, creating a delightful contrast in textures.

    Pro Tips for the Best Honey Garlic Butter Roasted Carrots

    To achieve perfect Honey Garlic Butter Roasted Carrots, consider these expert tips.

    • Use Fresh Ingredients: Fresh garlic and high-quality butter will enhance the flavor profile of the dish significantly.

    • Cut Carrots Evenly: Ensure that the baby carrots are similar in size for uniform cooking, preventing some from being overcooked while others remain crunchy.

    • Experiment with Honey: Different types of honey, such as wildflower or clover, can impart unique flavors to the dish, allowing for customization.

    • Add a Dash of Spice: Consider adding a pinch of cayenne pepper or chili flakes to the honey-garlic mixture for a subtle kick that balances the sweetness.

    • Adjust Cooking Time: Depending on the size and thickness of the carrots, you may need to adjust the roasting time to achieve your desired tenderness.

    Best Side Dishes and Pairings

    These Honey Garlic Butter Roasted Carrots pair well with a variety of dishes and drinks.

    1. Grilled Lemon Herb Chicken – The zesty flavors of lemon and herbs in grilled chicken complement the sweetness of the carrots beautifully.

    2. Quinoa Salad with Feta – A light quinoa salad with tangy feta cheese provides a refreshing contrast to the rich honey-garlic sauce.

    3. Balsamic Glazed Brussels Sprouts – The tartness of balsamic vinegar in Brussels sprouts balances the sweetness of the carrots, creating a harmonious side dish.

    4. Creamy Mashed Potatoes – The creamy texture of mashed potatoes offers a comforting counterpoint to the crunchy roasted carrots.

    5. Chardonnay – A chilled glass of Chardonnay enhances the meal with its crisp acidity, which pairs well with the sweet and savory notes of the dish.

    Common Mistakes to Avoid

    • Using too much garlic: Overpowering the dish can mask the sweetness of the honey.
    • Not arranging carrots properly: Crowding the baking sheet can lead to uneven cooking.
    • Skipping the broiling step: This can prevent achieving that desirable crispy texture on the edges.
    • Not tasting before serving: Adjusting seasoning is crucial for balancing flavors.

    Storage & Reheating Instructions

    Refrigerator Storage

    Store leftovers in an airtight container in the refrigerator. They will stay fresh for up to 3 days.

    Freezing Instructions

    For freezing, place the cooled roasted carrots in a single layer on a baking sheet until frozen, then transfer to a freezer-safe bag. They can be frozen for up to 3 months.

    Reheating Tips

    • Oven: Preheat to 350°F (175°C), spread the carrots on a baking sheet, and heat for about 10-15 minutes until warmed through.
    • Microwave: Place carrots in a microwave-safe dish, cover, and heat for 1-2 minutes, stirring halfway through.
    • Stovetop: Heat a skillet over medium heat, add a splash of water or butter, and sauté the carrots until warmed.

    Frequently Asked Questions

    How do I make Honey Garlic Butter Roasted Carrots sweeter?

    To enhance the sweetness, you can increase the amount of honey in the recipe or use sweeter varieties of carrots.

    Can I use frozen carrots for Honey Garlic Butter Roasted Carrots?

    Yes, you can use frozen carrots, but they may require a longer cooking time to become tender.

    What can I serve with Honey Garlic Butter Roasted Carrots?

    These roasted carrots pair well with grilled meats, fish, or as part of a vegetable medley for a nutritious side dish.

    Can I substitute the butter in this recipe?

    Yes, you can use olive oil or a dairy-free butter alternative for a healthier or vegan option.

    How do I add more flavor to Honey Garlic Butter Roasted Carrots?

    Consider adding herbs like thyme or rosemary, or sprinkle with crushed red pepper for a bit of heat.

    Final Thoughts

    Give this Honey Garlic Butter Roasted Carrots recipe a try; it’s a delightful side dish that adds a burst of flavor to any meal. We would love to hear your thoughts, so please leave a comment with your feedback!


    Dinner

    Honey Garlic Butter Roasted Carrots


    5.0 from 24 reviews

    These Honey Garlic Butter Roasted Carrots are a delightful side dish that combines the sweetness of honey with the savory flavor of garlic and butter. Roasted to perfection, they are tender, flavorful, and topped with fresh parsley for a vibrant finish.

    Author: Munch Twist
    Prep Time: 10 minutes
    Cook Time: 25 minutes
    Total Time: 35 minutes
    Yield: 6 servings
    Category: Desserts
    Method: No bake
    Cuisine: American

    Honey Garlic Butter Roasted Carrots

    SCALE:
    1x
    2x
    3x
    Cook Mode: Prevent your screen from going dark

    Ingredients

    • 4 garlic cloves, minced (or 2 tsp garlic powder)
    • 2 pounds baby carrots
    • 1/2 teaspoon salt
    • 2 tablespoons fresh chopped parsley
    • 1/2 cup butter
    • Cracked black pepper, to taste
    • 1/4 cup honey

    Instructions

    1. Preheat your oven to 425°F (220°C) and lightly grease a large baking sheet.
    2. In a pan or skillet over medium heat, melt the butter. Once melted, pour in the honey and stir until fully combined.
    3. Add the minced garlic (or garlic powder) to the honey-butter mixture and cook for about 30 seconds until fragrant.
    4. Toss the baby carrots in the honey-garlic butter sauce, allowing the sauce to thicken for about a minute. Season with salt and cracked black pepper.
    5. Transfer the coated carrots to the prepared baking sheet, arranging them in a single layer to ensure even cooking.
    6. Roast the carrots in the preheated oven for 20 minutes or until they are fork-tender.
    7. For a crispier texture, broil the carrots on high for an additional 2-3 minutes to char the edges.
    8. Remove from the oven and sprinkle with fresh chopped parsley before serving.

    Nutrition Facts

    Serving Size: 1 serving
    Calories: 150 kcal
    Sugar: 15g
    Sodium: 220mg
    Fat: 9g
    Saturated Fat: 6g
    Carbohydrates: 19g
    Fiber: 3g
    Protein: 1g
    Cholesterol: 30mg

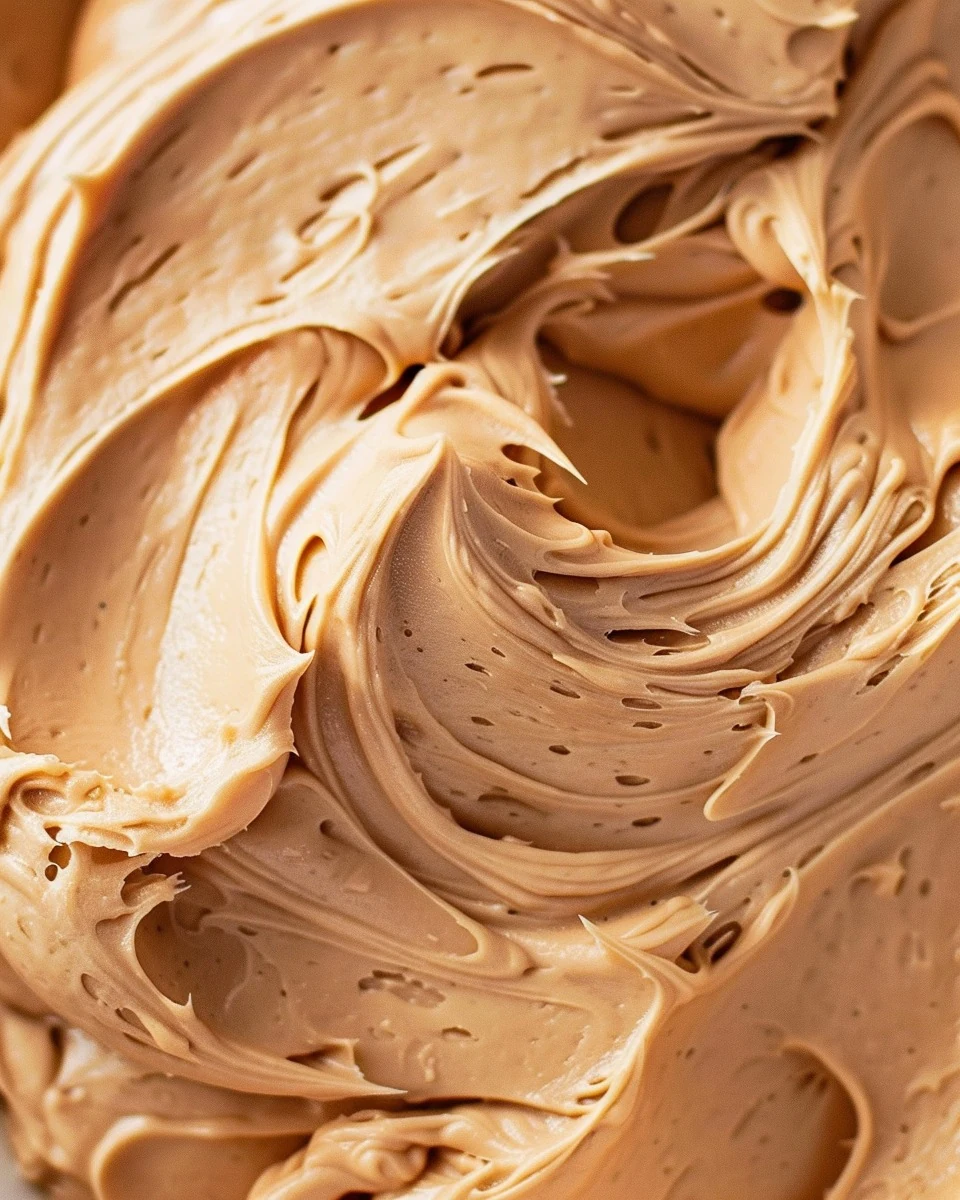
  • Easy Homemade Peanut Butter Frosting Recipe

    Easy Homemade Peanut Butter Frosting Recipe

    Homemade Peanut Butter Frosting is a delightful addition to any dessert. Its rich, creamy texture and nutty flavor make it the perfect topping for cakes, cupcakes, and brownies. This frosting not only elevates your baked goods but also satisfies any peanut butter lover’s cravings.

    Why You’ll Love This Recipe

    • Quick & Easy: Ready in just 5 minutes, this frosting is perfect for last-minute baking needs.
    • Decadent Flavor: The combination of creamy peanut butter and vanilla creates a rich taste that enhances any dessert.
    • Versatile: Use it on cakes, cupcakes, or brownies, making it suitable for various occasions.
    • Customizable: Adjust the thickness by adding milk or cream, allowing you to achieve your desired consistency.
    • Kid-Friendly: This frosting is a hit with children, making it ideal for birthday parties or family gatherings.

    Tools and Equipment

    Having the right tools makes preparing Homemade Peanut Butter Frosting straightforward.

    Essential Tools

    • Electric mixer
    • Mixing bowl
    • Measuring cups
    • Spatula
    • Rubber scraper

    Why These Tools Matter

    • Electric mixer: Ensures the ingredients blend smoothly and achieves a light, fluffy texture.
    • Mixing bowl: Provides ample space for mixing without spilling.
    • Rubber scraper: Helps incorporate all ingredients thoroughly by scraping down the sides of the bowl.

    Ingredients for Homemade Peanut Butter Frosting

    Base Ingredients

    • 2-3 cups powdered sugar
    • ¾ cup creamy peanut butter
    • 2 sticks (1 cup) unsalted butter, room temperature
    • 1 teaspoon vanilla extract

    Optional Ingredient

    • Dash of milk or heavy cream (if frosting becomes too thick)

    How to Make Homemade Peanut Butter Frosting Step-by-Step

    Step 1: Prep the Base

    In a mixing bowl, beat the room temperature unsalted butter and creamy peanut butter using an electric mixer on medium speed for about 1 minute. The mixture should become light and fluffy.

    Step 2: Combine the Ingredients

    Add the powdered sugar and vanilla extract to the bowl. Mix on low speed for 1-2 minutes. Scrape down the sides of the bowl to ensure everything is well combined.

    Step 3: Adjust the Consistency

    If the frosting seems too thick, add a dash of milk or heavy cream. Continue to beat until the frosting reaches a creamy, smooth consistency.

    Step 4: Frost Your Desserts

    Spread or pipe the peanut butter frosting onto your cakes, cupcakes, or brownies as desired. Enjoy the rich, nutty flavor that elevates your treats!

    With this easy recipe, you can create a delicious Homemade Peanut Butter Frosting that will impress your family and friends.

    How to Serve Homemade Peanut Butter Frosting

    This versatile frosting can elevate a variety of desserts with its creamy, nutty flavor.

    Frosted Chocolate Cupcakes

    A classic pairing, chocolate cupcakes topped with homemade peanut butter frosting create a delightful balance of flavors that is sure to impress.

    Peanut Butter Brownie Sandwiches

    Spread the frosting between two fudgy brownies for a decadent treat that combines rich chocolate with the creamy goodness of peanut butter.

    Banana Bread Topping

    Spread a generous layer of peanut butter frosting on slices of banana bread for a delicious breakfast or snack that enhances the natural sweetness of the bread.

    Pro Tips for the Best Homemade Peanut Butter Frosting

    Achieving the perfect consistency and flavor can elevate your frosting game.

    • Use Fresh Ingredients: Ensure your butter and peanut butter are fresh for the best taste and texture.
    • Adjust Consistency: If the frosting is too thick, gradually add milk or heavy cream until you reach the desired smoothness.
    • Experiment with Flavors: Try adding chocolate or coffee extract for a unique twist on the traditional peanut butter flavor.
    • Storage Tips: Store any leftover frosting in an airtight container in the refrigerator for up to a week. Rewhip before use.
    • Perfect for Piping: If you want to pipe your frosting, ensure it’s slightly thicker and chill it for a bit to maintain shape.

    Best Side Dishes and Pairings

    Complement your homemade peanut butter frosting with these delightful options.

    1. Classic Vanilla Cake: The light flavor of vanilla cake provides a perfect backdrop for the rich peanut butter frosting.
    2. Chocolate Chip Cookies: Pairing these cookies with a dollop of frosting adds an indulgent twist to a beloved treat.
    3. Ice Cream: A scoop of vanilla or chocolate ice cream drizzled with peanut butter frosting offers a delightful dessert experience.
    4. Fruit Salad: Fresh fruit, such as apples or bananas, with a side of peanut butter frosting makes for a nutritious and satisfying snack.
    5. Coffee: A cup of freshly brewed coffee pairs nicely, balancing the sweetness of the frosting with its rich flavor.

    Common Mistakes to Avoid

    • Using Cold Butter: Ensure the butter is at room temperature for easy blending.
    • Not Sifting Powdered Sugar: Sifting helps avoid clumps in your frosting.
    • Overmixing the Frosting: Mix just until combined to maintain a light texture.
    • Skipping the Milk or Cream: If the frosting is too thick, don’t hesitate to add a dash of liquid for the right consistency.

    Storage & Reheating Instructions

    Refrigerator Storage

    Store your Homemade Peanut Butter Frosting in an airtight container in the refrigerator. It will stay fresh for up to one week.

    Freezing Instructions

    To freeze, place the frosting in a freezer-safe container. It can be frozen for up to three months. When ready to use, transfer it to the refrigerator to thaw overnight.

    Reheating Tips

    • Oven: Place the frosting in an oven-safe dish, cover with foil, and warm at a low temperature until softened.
    • Microwave: Heat in short bursts of 10-15 seconds, stirring in between, until it reaches the desired consistency.
    • Stovetop: Use a double boiler to gently heat the frosting, stirring constantly until softened.

    Frequently Asked Questions

    How can I make my Homemade Peanut Butter Frosting fluffier?

    To achieve a fluffier texture, ensure your butter is fully softened and mix the frosting on medium speed for a longer time.

    Can I use crunchy peanut butter instead of creamy?

    Yes, you can use crunchy peanut butter for a different texture and added crunch in your frosting.

    How long does Homemade Peanut Butter Frosting last?

    When stored properly in the refrigerator, this frosting can last up to one week.

    What desserts pair well with Homemade Peanut Butter Frosting?

    This frosting is perfect for cakes, cupcakes, brownies, and even as a dip for fruits.

    Can I add chocolate to my Homemade Peanut Butter Frosting?

    Absolutely! You can mix in cocoa powder or melted chocolate for a delicious chocolate-peanut butter combination.

    Final Thoughts

    Making your own Homemade Peanut Butter Frosting is a simple and rewarding experience that elevates any dessert. I encourage you to try this recipe and share your thoughts in the comments below. Your feedback is always appreciated!


    Desserts

    Homemade Peanut Butter Frosting


    5.0 from 24 reviews

    This creamy and rich peanut butter frosting is perfect for cakes, cupcakes, and brownies. With its smooth texture and nutty flavor, it adds a delicious touch to any dessert. Quick to prepare, this frosting will elevate your baking experience.

    Author: Munch Twist
    Prep Time: 5 minutes
    Cook Time: 0 minutes
    Total Time: 5 minutes
    Yield: 12 servings
    Category: Desserts
    Method: No bake
    Cuisine: American

    Homemade Peanut Butter Frosting

    SCALE:
    1x
    2x
    3x
    Cook Mode: Prevent your screen from going dark

    Ingredients

    • 2-3 cups powdered sugar
    • ¾ cup creamy peanut butter
    • Dash of milk or heavy cream
    • 2 sticks (1 cup) unsalted butter, room temperature
    • 1 teaspoon vanilla extract

    Instructions

    1. In a mixing bowl, beat the room temperature unsalted butter with the creamy peanut butter using an electric mixer on medium speed for about 1 minute until it becomes light and fluffy.
    2. Add the powdered sugar and vanilla extract to the bowl. Mix on low speed for 1-2 minutes, making sure to scrape down the sides of the bowl, until everything is well combined.
    3. If the frosting appears too thick, add a dash of milk or heavy cream and continue to beat until the frosting reaches a creamy, smooth consistency.
    4. Spread or pipe the peanut butter frosting onto your cakes, cupcakes, or brownies as desired.

    Nutrition Facts

    Serving Size: 1 serving
    Calories: 120 kcal
    Sugar: 9g
    Sodium: 70mg
    Fat: 9g
    Saturated Fat: 5g
    Carbohydrates: 10g
    Fiber: 0g
    Protein: 1g
    Cholesterol: 30mg

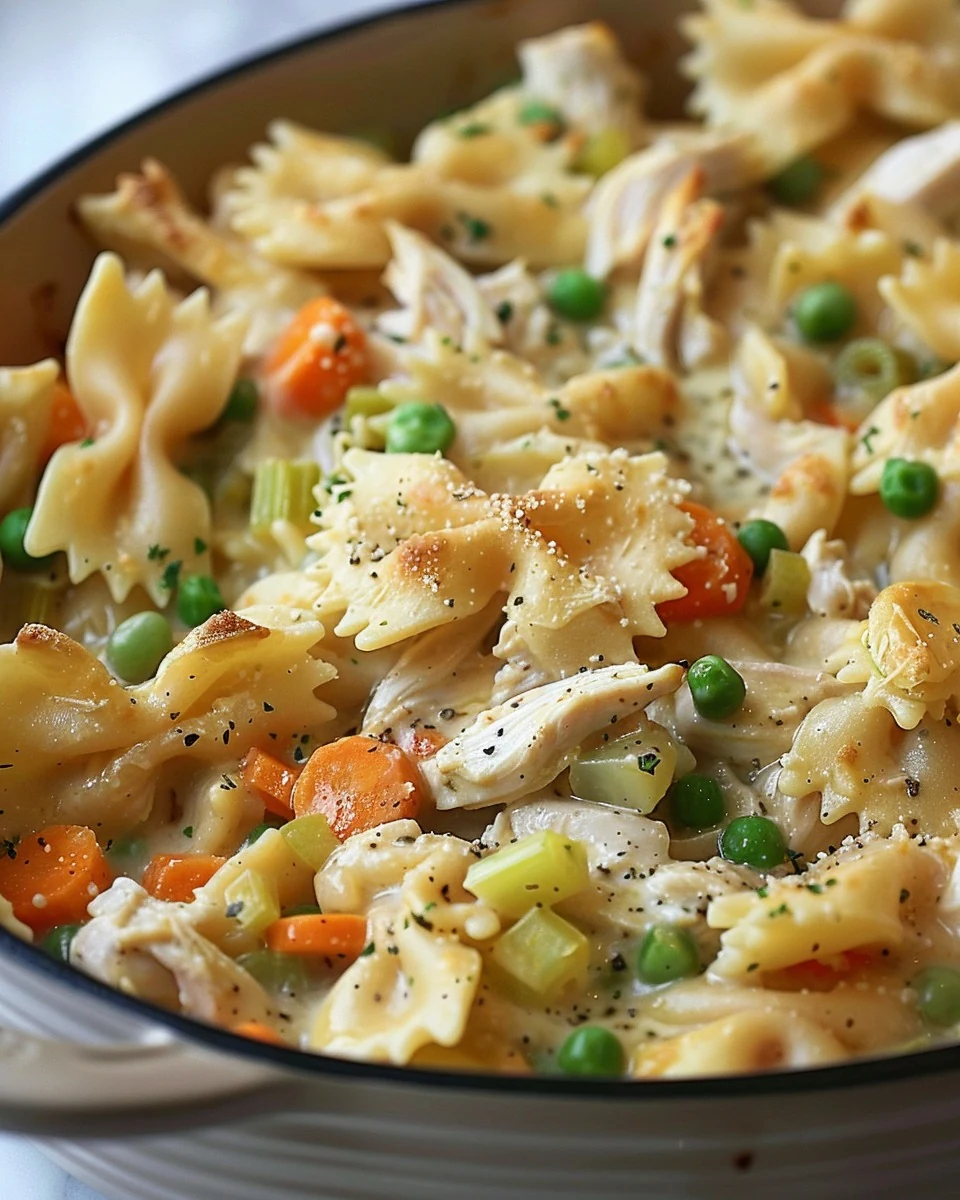
  • Delicious Chicken Pot Pie Pasta Recipe to Try Tonight

    Delicious Chicken Pot Pie Pasta Recipe to Try Tonight

    Chicken Pot Pie Pasta combines the comforting flavors of classic chicken pot pie with the ease of a pasta dish. This recipe offers a creamy, savory filling encased in golden puff pastry, making it an irresistible meal for any occasion.

    Why You’ll Love This Recipe

    • Comfort Food at Its Best: This dish brings all the heartiness of chicken pot pie in a pasta form, perfect for cozy dinners.
    • Creamy and Flavorful: The combination of chicken, vegetables, and a creamy sauce creates a rich flavor profile that satisfies.
    • Family-Friendly: Even picky eaters will enjoy this hearty pasta dish packed with nutritious ingredients.
    • Versatile Ingredients: Use leftover chicken and any seasonal vegetables to customize this recipe to your preference.
    • One-Pot Wonder: With minimal cleanup, you can enjoy a delicious meal without the hassle.

    Tools and Equipment

    Having the right tools makes cooking more efficient and enjoyable.

    Essential Tools

    • Large skillet
    • 9×13-inch baking dish
    • Pot for boiling pasta
    • Whisk
    • Rolling pin
    • Measuring cups and spoons

    Why These Tools Matter

    • Large skillet: Ideal for sautéing vegetables and making the creamy sauce.
    • 9×13-inch baking dish: Perfectly accommodates the chicken pot pie pasta for baking.
    • Whisk: Ensures a smooth consistency when combining liquids and flour.

    Ingredients for Chicken Pot Pie Pasta

    Main Ingredients

    • 1 sheet puff pastry, thawed
    • 1 small onion, diced
    • 2 cups cooked chicken, diced
    • 2 carrots, diced
    • 2 cloves garlic, minced
    • 1 cup milk
    • 1/4 cup all-purpose flour
    • 1 cup frozen peas
    • 2 stalks celery, diced
    • 1 egg, beaten (for egg wash)
    • 2 cups chicken broth
    • Salt and black pepper to taste
    • 1 teaspoon dried thyme
    • 8 oz penne pasta
    • 2 tablespoons unsalted butter

    How to Make Chicken Pot Pie Pasta Step-by-Step

    Step 1: Prep the Base

    1. Preheat your oven to 375°F (190°C) and grease a 9×13-inch baking dish.
    2. Cook the penne pasta according to package instructions until al dente. Drain and set aside.

    Step 2: Cook the Vegetables

    1. In a large skillet, melt the unsalted butter over medium heat.
    2. Add the diced onion, carrots, and celery. Cook for 5-7 minutes, or until the vegetables are softened.
    3. Stir in the minced garlic and cook for an additional 1-2 minutes until fragrant.

    Step 3: Make the Sauce

    1. Sprinkle the all-purpose flour over the vegetables and stir to combine.
    2. Cook for 1-2 minutes to eliminate the raw flour taste.
    3. Gradually whisk in the chicken broth and milk, ensuring a smooth consistency.
    4. Bring the mixture to a simmer, stirring frequently, until it thickens.

    Step 4: Combine Ingredients

    1. Add the diced chicken, frozen peas, dried thyme, salt, and black pepper to the skillet.
    2. Cook for 2-3 more minutes until everything is well combined.
    3. Stir in the cooked penne pasta, ensuring it’s evenly coated with the creamy mixture.

    Step 5: Assemble and Bake

    1. Transfer the chicken pot pie pasta mixture to the prepared baking dish, spreading it out evenly.
    2. Roll out the puff pastry sheet to fit the size of the baking dish.
    3. Carefully place the pastry over the pasta mixture.
    4. Brush the puff pastry with the beaten egg to achieve a golden finish.
    5. Bake in the preheated oven for 25-30 minutes, or until the puff pastry is golden brown and the filling is bubbly.

    Step 6: Serve

    1. Remove from the oven and let it cool for a few minutes before serving.

    Enjoy your Chicken Pot Pie Pasta as a delightful meal that combines the best of both worlds—comforting flavors and satisfying pasta.

    How to Serve Chicken Pot Pie Pasta

    This Chicken Pot Pie Pasta is versatile and can be enjoyed in several delightful ways.

    Individual Portions

    Serve the pasta in individual ramekins, topped with a smaller piece of puff pastry for a charming presentation. This makes it easy for guests to enjoy their portions while keeping the dish warm.

    With a Fresh Salad

    Pair your Chicken Pot Pie Pasta with a crisp mixed greens salad dressed in a light vinaigrette. The freshness of the salad complements the rich flavors of the pasta, balancing the meal.

    Garnished with Fresh Herbs

    Sprinkle fresh herbs, such as parsley or thyme, over the top before serving. This adds a pop of color and an extra layer of flavor, enhancing the dish’s overall appeal.

    Pro Tips for the Best Chicken Pot Pie Pasta

    Follow these tips to elevate your Chicken Pot Pie Pasta to perfection.

    • Use Rotisserie Chicken: For a quicker preparation, opt for store-bought rotisserie chicken. It saves time and adds robust flavor to your dish.
    • Customize Your Vegetables: Feel free to add or substitute vegetables like corn or green beans based on your preference or seasonal availability.
    • Thicken the Sauce: If you prefer a thicker filling, let the mixture simmer a bit longer after adding the broth and milk until it reaches your desired consistency.
    • Experiment with Spices: Don’t hesitate to experiment with different spices such as rosemary or sage to customize the flavor profile to your liking.
    • Store Leftovers Properly: Store any leftovers in an airtight container in the refrigerator for up to three days. Reheat in the oven for the best texture.

    Best Side Dishes and Pairings

    To enhance your meal, consider these great side dishes and drinks that pair wonderfully with Chicken Pot Pie Pasta.

    1. Garlic Bread
      The buttery, garlicky flavor of garlic bread complements the creamy pasta, making it a classic pairing.

    2. Roasted Brussels Sprouts
      The slight bitterness of roasted Brussels sprouts provides a nice contrast to the richness of the pasta.

    3. Caesar Salad
      A Caesar salad with its crisp romaine and tangy dressing offers a refreshing balance to the creamy dish.

    4. Crispy Potato Wedges
      The crunchiness of potato wedges adds texture and makes for a hearty side that complements the pasta.

    5. Chardonnay
      A chilled glass of Chardonnay pairs well due to its acidity and fruity notes, cutting through the richness of the Chicken Pot Pie Pasta.

    6. Herbal Tea
      A cup of herbal tea, such as chamomile or mint, provides a soothing finish to the meal, enhancing the dining experience.

    Common Mistakes to Avoid

    • Using Raw Vegetables: Ensure all vegetables are properly cooked before adding to the pasta mixture to enhance flavor and texture.
    • Overcooking the Pasta: Cook the penne until al dente, as it will continue to cook in the oven.
    • Skipping the Egg Wash: Don’t forget to brush the puff pastry with the beaten egg for a golden, flaky crust.
    • Not Letting It Cool: Allow the dish to cool for a few minutes after baking to prevent burns and to help the filling set.

    Storage & Reheating Instructions

    Refrigerator Storage

    Store any leftovers in airtight containers in the refrigerator. Chicken pot pie pasta will stay fresh for up to 3-4 days.

    Freezing Instructions

    To freeze, let the dish cool completely, then cover it tightly with plastic wrap and aluminum foil. It can be frozen for up to 2 months. Thaw in the refrigerator overnight before reheating.

    Reheating Tips

    • Oven: Preheat to 350°F (175°C) and bake for 20-25 minutes until heated through.
    • Microwave: Use a microwave-safe dish and cover. Heat in 1-minute intervals, stirring in between until hot.
    • Stovetop: Heat in a skillet over medium-low heat, adding a splash of chicken broth to prevent drying out.

    Frequently Asked Questions

    How can I make Chicken Pot Pie Pasta vegetarian?

    You can substitute the chicken with a mix of your favorite vegetables and use vegetable broth instead of chicken broth for a vegetarian version.

    Can I use a different type of pasta for Chicken Pot Pie Pasta?

    Yes, feel free to use other pasta shapes like rotini or fusilli, but keep in mind that cooking times may vary.

    How do I ensure my Chicken Pot Pie Pasta is creamy?

    Make sure to whisk the chicken broth and milk together thoroughly before adding them to the skillet, and allow the mixture to simmer until it thickens.

    Can I prepare Chicken Pot Pie Pasta ahead of time?

    Absolutely! You can assemble the dish and store it in the refrigerator for up to a day before baking.

    What can I serve with Chicken Pot Pie Pasta?

    A simple green salad or steamed vegetables pairs nicely with this hearty dish, balancing the richness of the pasta.

    Final Thoughts

    Chicken pot pie pasta is a comforting dish perfect for family dinners. Its creamy texture and flaky crust make it irresistible. We encourage you to give this recipe a try and share your thoughts in the comments below!


    Dinner

    Chicken Pot Pie Pasta


    5.0 from 24 reviews

    This Chicken Pot Pie Pasta combines the comforting flavors of traditional chicken pot pie with the ease of pasta. Creamy chicken, vegetables, and herbs are enveloped in a flaky puff pastry, making it a delightful dish perfect for family dinners or gatherings.

    Author: Munch Twist
    Prep Time: 20 minutes
    Cook Time: 40-45 minutes
    Total Time: 60-65 minutes
    Yield: 6 servings
    Category: Desserts
    Method: No bake
    Cuisine: American

    Chicken Pot Pie Pasta

    SCALE:
    1x
    2x
    3x
    Cook Mode: Prevent your screen from going dark

    Ingredients

    • 1 sheet puff pastry, thawed
    • 1 small onion, diced
    • 2 cups cooked chicken, diced
    • 2 carrots, diced
    • 2 cloves garlic, minced
    • 1 cup milk
    • 1/4 cup all-purpose flour
    • 1 cup frozen peas
    • 2 stalks celery, diced
    • 1 egg, beaten (for egg wash)
    • 2 cups chicken broth
    • Salt and black pepper to taste
    • 1 teaspoon dried thyme
    • 8 oz penne pasta
    • 2 tablespoons unsalted butter

    Instructions

    1. Preheat your oven to 375°F (190°C) and grease a 9×13-inch baking dish.
    2. Cook the penne pasta according to package instructions until al dente. Drain and set aside.
    3. In a large skillet, melt the unsalted butter over medium heat. Add the diced onion, carrots, and celery. Cook for 5-7 minutes, or until the vegetables are softened.
    4. Stir in the minced garlic and cook for an additional 1-2 minutes until fragrant.
    5. Sprinkle the all-purpose flour over the vegetables and stir to combine. Cook for 1-2 minutes to eliminate the raw flour taste.
    6. Gradually whisk in the chicken broth and milk, ensuring a smooth consistency. Bring the mixture to a simmer, stirring frequently, until it thickens.
    7. Add the diced chicken, frozen peas, dried thyme, salt, and black pepper to the skillet. Cook for 2-3 more minutes until everything is well combined.
    8. Stir in the cooked penne pasta, ensuring it's evenly coated with the creamy mixture.
    9. Transfer the chicken pot pie pasta mixture to the prepared baking dish, spreading it out evenly.
    10. Roll out the puff pastry sheet to fit the size of the baking dish and carefully place it over the pasta mixture.
    11. Brush the puff pastry with the beaten egg to achieve a golden finish.
    12. Bake in the preheated oven for 25-30 minutes, or until the puff pastry is golden brown and the filling is bubbly.
    13. Remove from the oven and let it cool for a few minutes before serving.

    Nutrition Facts

    Serving Size: 1 serving
    Calories: 450 kcal
    Sugar: 4g
    Sodium: 650mg
    Fat: 22g
    Saturated Fat: 10g
    Carbohydrates: 38g
    Fiber: 3g
    Protein: 22g
    Cholesterol: 100mg

  • Delicious Peach Cobbler Cheesecake Cups Recipe

    Delicious Peach Cobbler Cheesecake Cups Recipe

    Peach Cobbler Cheesecake Cups offer a delightful combination of creamy cheesecake and juicy peaches, all nestled in a buttery graham cracker crust. This dessert is not only visually appealing but also a crowd-pleaser with its rich flavors and textures. The addition of a crunchy streusel topping takes these cheesecake cups to the next level, making them a perfect treat for any occasion.

    Why You’ll Love This Recipe

    • Irresistible Flavor: The blend of creamy cheesecake, sweet peaches, and crunchy streusel creates a taste sensation.
    • Perfect for Parties: These individual servings are ideal for gatherings, making dessert easy to serve and enjoy.
    • Versatile Ingredients: You can use fresh or canned peaches, allowing you to make this dessert year-round.
    • Quick & Simple: With just 20 minutes of prep time, you’ll have a delicious dessert ready to bake.
    • Make Ahead: These cups can be chilled and stored, making them a convenient option for busy days.

    Tools and Equipment

    Having the right tools makes the cooking process smoother and more enjoyable.

    Essential Tools

    • Muffin tin
    • Cupcake liners
    • Mixing bowls
    • Electric mixer
    • Measuring cups and spoons
    • Pastry cutter (or fork)

    Why These Tools Matter

    • Muffin tin: Perfectly shapes the cheesecake cups and allows for even baking.
    • Electric mixer: Ensures the cheesecake filling is smooth and free of lumps.
    • Pastry cutter: Helps create a crumbly streusel topping with ease.

    Ingredients for Peach Cobbler Cheesecake Cups

    For the Crust:

    • 1/4 cup granulated sugar
    • 1/2 cup unsalted butter, melted
    • 1 cup graham cracker crumbs

    For the Cheesecake Filling:

    • 16 oz cream cheese, softened
    • 1/2 cup granulated sugar
    • 2 large eggs
    • 1 teaspoon vanilla extract

    For the Peach Cobbler Topping:

    • 1/4 teaspoon ground nutmeg
    • 1 tablespoon lemon juice
    • 1 tablespoon cornstarch
    • 1/4 cup granulated sugar
    • 3-4 peaches, peeled and sliced (or use canned peaches, drained)
    • 1/2 teaspoon ground cinnamon

    For the Streusel Topping:

    • 1/4 cup unsalted butter, cold and cubed
    • 1/2 cup old-fashioned rolled oats
    • 1/2 cup all-purpose flour
    • 1/2 teaspoon ground cinnamon
    • 1/4 cup packed brown sugar

    How to Make Peach Cobbler Cheesecake Cups Step-by-Step

    Step 1: Preheat the Oven

    Preheat your oven to 350°F (175°C). Line a muffin tin with cupcake liners to prepare for the crust.

    Step 2: Prepare the Crust

    In a medium bowl, mix the graham cracker crumbs, granulated sugar, and melted butter until combined. Press about a tablespoon of this mixture into the bottom of each cupcake liner, ensuring it is firmly packed.

    Step 3: Prepare the Cheesecake Filling

    In a large bowl, beat the softened cream cheese with an electric mixer until smooth. Gradually add the granulated sugar, mixing until well blended. Incorporate the eggs one at a time, beating well after each addition. Finally, mix in the vanilla extract. Spoon the cheesecake mixture over the crust in each cupcake liner, filling them about 3/4 full.

    Step 4: Prepare the Peach Cobbler Topping

    In a medium bowl, toss the sliced peaches with granulated sugar, cinnamon, nutmeg, cornstarch, and lemon juice until the peaches are well coated. Spoon this mixture over the cheesecake layer in each liner.

    Step 5: Prepare the Streusel Topping

    In a small bowl, combine the all-purpose flour, rolled oats, brown sugar, and cinnamon. Add the cold cubed butter and mix with a pastry cutter or your fingers until the mixture resembles crumbs. Sprinkle the streusel topping over the peach layer in each cupcake liner.

    Step 6: Bake

    Place the muffin tin in the preheated oven and bake for 20-25 minutes, or until the cheesecake is set and the topping turns golden brown. Remove from the oven and let the cheesecake cups cool in the muffin tin for about 10 minutes before transferring to a wire rack to cool completely.

    Step 7: Chill

    Once cooled, refrigerate the cheesecake cups for at least 2 hours before serving. This chilling time allows the flavors to meld beautifully.

    Step 8: Enjoy

    Serve chilled and savor the delightful combination of creamy cheesecake, juicy peaches, and crunchy streusel topping. These Peach Cobbler Cheesecake Cups are sure to impress your family and friends.

    How to Serve Peach Cobbler Cheesecake Cups

    These delightful Peach Cobbler Cheesecake Cups can be enjoyed in several creative ways that enhance their deliciousness.

    Individual Dessert Shooters

    Layer the cheesecake cups with additional peach puree or whipped cream in small glasses for an elegant presentation at parties or gatherings.

    À La Mode

    Serve each cheesecake cup warm with a scoop of vanilla ice cream on top for an irresistible dessert that combines creamy and fruity flavors.

    Breakfast Treat

    These cheesecake cups can double as a sweet breakfast option. Serve them alongside a fresh fruit salad and a cup of coffee for a delightful morning treat.

    Pro Tips for the Best Peach Cobbler Cheesecake Cups

    To ensure your Peach Cobbler Cheesecake Cups turn out perfectly, consider the following tips:

    • Use Fresh Peaches: Fresh, ripe peaches will give you the best flavor and texture. If peaches are out of season, opt for high-quality canned peaches.

    • Room Temperature Ingredients: Always ensure your cream cheese and eggs are at room temperature for a smoother cheesecake filling.

    • Don’t Overmix: When combining the cheesecake ingredients, mix just until blended to avoid incorporating too much air, which can cause cracks during baking.

    • Adjust Sweetness: Depending on the ripeness of your peaches, you may want to adjust the amount of sugar in the peach topping to suit your taste.

    • Cool Before Serving: Allow the Peach Cobbler Cheesecake Cups to cool completely and chill for a few hours. This enhances the flavors and improves the texture.

    Best Side Dishes and Pairings

    These Peach Cobbler Cheesecake Cups can be complemented beautifully by several side dishes and drinks.

    1. Coffee – A warm cup of coffee balances the sweetness of the cheesecake, making it an excellent pairing for dessert.

    2. Mint Tea – The refreshing notes of mint tea provide a light contrast to the rich flavors of the cheesecake cups.

    3. Fruit Salad – A light fruit salad can add a refreshing touch and bring out the peach flavors in the dessert.

    4. Scones – A buttery scone, especially with peach or almond flavor, pairs well with the creamy texture of the cheesecake.

    5. Sparkling Water – A glass of sparkling water with a slice of lemon can cleanse the palate and enhance the overall dining experience.

    Common Mistakes to Avoid

    • Not Softening Cream Cheese: Ensure that the cream cheese is at room temperature for a smooth cheesecake filling.
    • Overfilling the Cups: Fill each liner only 3/4 full to prevent overflow during baking.
    • Skipping the Cooling Step: Allow the cheesecake cups to cool completely before refrigerating to avoid a soggy crust.
    • Ignoring Refrigeration Time: Chilling the cups for at least 2 hours is crucial for the best texture and flavor.

    Storage & Reheating Instructions

    Refrigerator Storage

    Store the Peach Cobbler Cheesecake Cups in airtight containers in the refrigerator. They will stay fresh for up to 5 days.

    Freezing Instructions

    To freeze, wrap each cheesecake cup in plastic wrap and then place them in a freezer-safe container. They can be frozen for up to 2 months. To thaw, place them in the refrigerator overnight.

    Reheating Tips

    • Oven: Preheat to 350°F (175°C) and bake for about 10 minutes until warmed through.
    • Microwave: Warm for 30-45 seconds on medium power, checking frequently to avoid overheating.
    • Stovetop: Place in a covered skillet over low heat for a few minutes, until warmed.

    Frequently Asked Questions

    How can I make Peach Cobbler Cheesecake Cups gluten-free?

    You can substitute regular graham cracker crumbs with gluten-free graham cracker crumbs or use ground nuts for the crust.

    Can I use frozen peaches in the Peach Cobbler Cheesecake Cups?

    Yes, frozen peaches can be used. Just ensure they are thawed and drained of excess moisture before mixing with the topping ingredients.

    How long do Peach Cobbler Cheesecake Cups last in the fridge?

    These cheesecake cups will last up to 5 days in the refrigerator when stored in an airtight container.

    What can I substitute for the brown sugar in the streusel topping?

    You can use coconut sugar or white sugar as a substitute for brown sugar in the streusel topping.

    Can I make these Peach Cobbler Cheesecake Cups in advance?

    Yes, they can be made a day ahead. Just remember to chill them for at least 2 hours before serving.

    Final Thoughts

    Peach Cobbler Cheesecake Cups are a delightful treat that combines creamy cheesecake with the sweetness of peaches and a crunchy topping. This dessert is perfect for gatherings or a sweet finish to your meal. We encourage you to try this recipe and share your feedback in the comments below!

    Desserts

    Peach Cobbler Cheesecake Cups


    5.0 from 24 reviews

    These Peach Cobbler Cheesecake Cups combine the creamy richness of cheesecake with the sweet, juicy flavor of peaches and a crunchy streusel topping. Perfect for a delightful dessert, these individual cups are easy to make and sure to impress your guests.

    Author: Munch Twist
    Prep Time: 20 minutes
    Cook Time: 25 minutes
    Total Time: 2 hours 45 minutes
    Yield: 12 servings
    Category: Desserts
    Method: No bake
    Cuisine: American

    Peach Cobbler Cheesecake Cups

    SCALE:
    1x
    2x
    3x
    Cook Mode: Prevent your screen from going dark

    Ingredients

    • 1/4 cup granulated sugar (for crust)
    • 1/2 cup unsalted butter, melted (for crust)
    • 1 cup graham cracker crumbs (for crust)
    • 16 oz cream cheese, softened (for filling)
    • 1/2 cup granulated sugar (for filling)
    • 2 large eggs (for filling)
    • 1 teaspoon vanilla extract (for filling)
    • 1/4 teaspoon ground nutmeg (for topping)
    • 1 tablespoon lemon juice (for topping)
    • 1 tablespoon cornstarch (for topping)
    • 1/4 cup granulated sugar (for topping)
    • 3-4 peaches, peeled and sliced (or use canned peaches, drained) (for topping)
    • 1/2 teaspoon ground cinnamon (for topping)
    • 1/4 cup unsalted butter, cold and cubed (for streusel)
    • 1/2 cup old-fashioned rolled oats (for streusel)
    • 1/2 cup all-purpose flour (for streusel)
    • 1/2 teaspoon ground cinnamon (for streusel)
    • 1/4 cup packed brown sugar (for streusel)

    Instructions

    1. Preheat your oven to 350°F (175°C) and line a muffin tin with cupcake liners.
    2. Mix graham cracker crumbs, granulated sugar, and melted butter in a medium bowl. Press about a tablespoon of the mixture into the bottom of each cupcake liner.
    3. Beat softened cream cheese in a large bowl until smooth. Add granulated sugar and beat until well combined. Add eggs one at a time, beating well after each addition. Mix in vanilla extract. Spoon the cheesecake mixture over the crust in each cupcake liner, filling about 3/4 of the way.
    4. In a medium bowl, toss sliced peaches with granulated sugar, cinnamon, nutmeg, cornstarch, and lemon juice until well coated. Spoon the peach mixture over the cheesecake layer in each cupcake liner.
    5. In a small bowl, mix flour, rolled oats, brown sugar, and cinnamon. Add cold cubed butter and use a pastry cutter or your fingers to mix until crumbly. Sprinkle the streusel topping over the peach layer in each cupcake liner.
    6. Bake in the preheated oven for 20-25 minutes, or until the cheesecake is set and the topping is golden brown. Allow to cool in the muffin tin for about 10 minutes before transferring to a wire rack to cool completely.
    7. Once completely cool, refrigerate the cheesecake cups for at least 2 hours before serving.

    Nutrition Facts

    Serving Size: 1 serving
    Calories: 250 kcal
    Sugar: 12g
    Sodium: 180mg
    Fat: 14g
    Saturated Fat: 8g
    Carbohydrates: 28g
    Fiber: 1g
    Protein: 4g
    Cholesterol: 50mg

  • Delicious Sausage Egg and Cheese Breakfast Roll-Ups

    Delicious Sausage Egg and Cheese Breakfast Roll-Ups

    Sausage Egg and Cheese Breakfast Roll-Ups are a delightful way to elevate your morning routine. These roll-ups combine savory sausage, fluffy eggs, and melty cheese wrapped in a golden crescent roll. They are not only delicious but also incredibly easy to make.

    Why You’ll Love This Recipe

    • Quick & Easy: Ready in under 30 minutes, perfect for busy mornings.
    • Crowd-Pleaser: Great for family breakfasts or brunch gatherings.
    • Versatile: Customize with your favorite cheeses or add veggies.
    • Make Ahead: Prepare in advance and reheat for a quick meal.
    • Satisfying Flavor: The combination of sausage and eggs offers a hearty start to your day.

    Tools and Equipment

    Gathering the right tools makes preparation a breeze.

    Essential Tools

    • Skillet
    • Mixing bowl
    • Whisk
    • Cookie sheet
    • Measuring cups and spoons

    Why These Tools Matter

    • Skillet: Ideal for scrambling eggs evenly and quickly.
    • Mixing bowl: Keeps your workspace organized while you prepare ingredients.
    • Cookie sheet: Ensures even baking and easy cleanup.

    Ingredients for Sausage Egg and Cheese Breakfast Roll-Ups

    • 1 can (8 oz) Pillsbury™ refrigerated crescent dinner rolls
    • 4 slices Cheddar cheese
    • 8 sausage links
    • 5 eggs
    • Salt and pepper to taste

    How to Make Sausage Egg and Cheese Breakfast Roll-Ups Step-by-Step

    Step 1: Preheat the Oven

    Preheat your oven to 350°F (175°C). This ensures your roll-ups bake evenly and become golden brown.

    Step 2: Prepare the Eggs

    In a mixing bowl, beat the 5 eggs. Reserve 2 tablespoons of the beaten eggs for brushing later. Scramble the remaining eggs in a skillet over medium heat until fully cooked.

    Step 3: Prepare the Crescent Dough

    Unroll the crescent dough on a clean work surface. Separate it into 8 triangles to form the base of your roll-ups.

    Step 4: Assemble the Roll-Ups

    Take each slice of Cheddar cheese and cut it in half. Place one half-slice on each triangle of dough. Spoon a portion of scrambled eggs onto the cheese, then add a sausage link on top.

    Step 5: Roll and Season

    Loosely roll up each triangle, starting from the wide end and rolling towards the tip. Arrange the roll-ups on an ungreased cookie sheet. Brush the tops with the reserved beaten eggs and sprinkle with salt and pepper to taste.

    Step 6: Bake

    Place the cookie sheet in the preheated oven. Bake for 15 to 18 minutes, or until the roll-ups are golden brown and cooked through.

    Enjoy these Sausage Egg and Cheese Breakfast Roll-Ups as a delightful and satisfying breakfast option. With their combination of flavors and ease of preparation, they are sure to become a morning favorite.

    How to Serve Sausage Egg and Cheese Breakfast Roll-Ups

    These Sausage Egg and Cheese Breakfast Roll-Ups are incredibly versatile and can be served in a variety of ways.

    With Fresh Fruit

    Adding a side of fresh fruit not only brightens the plate but also provides a refreshing contrast to the savory flavors of the roll-ups.

    With Hot Sauce or Ketchup

    Serve with a side of your favorite hot sauce or ketchup for an added kick. The tanginess of the sauce complements the richness of the cheese and sausage.

    On a Breakfast Platter

    Create a breakfast platter by serving the roll-ups alongside other breakfast favorites like pancakes or fresh yogurt. This makes for a hearty and visually appealing meal.

    Pro Tips for the Best Sausage Egg and Cheese Breakfast Roll-Ups

    To ensure your Sausage Egg and Cheese Breakfast Roll-Ups turn out perfectly, consider these helpful tips.

    • Use Fresh Ingredients: Fresh sausage and eggs will enhance the flavor of your roll-ups, making them more delicious.

    • Don’t Overfill: Be careful not to overstuff the roll-ups. A little filling goes a long way, ensuring they bake evenly and maintain their shape.

    • Experiment with Cheese: Feel free to substitute Cheddar cheese with other varieties such as Monterey Jack or Pepper Jack for a different flavor profile.

    • Bake in Batches: If you’re making a large quantity, bake them in batches to prevent overcrowding on the cookie sheet, ensuring even cooking.

    • Let Cool Slightly Before Serving: Allow the roll-ups to cool for a minute or two after baking. This helps the cheese set slightly, making them easier to eat.

    Best Side Dishes and Pairings

    To complete your breakfast experience, consider these delightful side dishes and drinks that pair wonderfully with Sausage Egg and Cheese Breakfast Roll-Ups.

    1. Fresh Orange Juice: The bright acidity of fresh orange juice balances the richness of the roll-ups, making it a refreshing addition.

    2. Greek Yogurt with Honey: A small bowl of Greek yogurt drizzled with honey provides a creamy and sweet contrast that complements the savory flavors.

    3. Hash Browns: Crispy hash browns add a satisfying crunch and are a classic breakfast staple that pairs well with the roll-ups.

    4. Coffee or Tea: A warm cup of coffee or tea enhances the overall breakfast experience, providing a comforting beverage to sip alongside.

    5. Sliced Avocado: The creaminess of sliced avocado adds a nutritious element and works well with the flavors of the roll-ups.

    Common Mistakes to Avoid

    • Using Cold Ingredients: Make sure all ingredients, especially the eggs, are at room temperature for better blending and cooking.
    • Overfilling the Roll-Ups: Avoid adding too much filling, as this can cause them to burst open while baking.
    • Not Preheating the Oven: Always preheat the oven before baking to ensure even cooking and a golden finish.
    • Skipping the Egg Wash: Brushing the roll-ups with the reserved beaten eggs enhances browning and adds a beautiful sheen.

    Storage & Reheating Instructions

    Refrigerator Storage

    Store any leftover Sausage Egg and Cheese Breakfast Roll-Ups in airtight containers. They will stay fresh for up to 3 days in the refrigerator.

    Freezing Instructions

    To freeze the roll-ups, allow them to cool completely. Place them in a single layer on a baking sheet to freeze, then transfer to a freezer-safe bag or container. They can be frozen for up to 2 months.

    Reheating Tips

    • Oven: Preheat to 350°F (175°C) and bake for about 10 minutes until heated through.
    • Microwave: Heat on high for 30-45 seconds per roll-up, checking frequently to avoid overcooking.
    • Stovetop: Place in a skillet over low heat, cover, and heat for about 5 minutes, flipping occasionally.

    Frequently Asked Questions

    How can I customize the Sausage Egg and Cheese Breakfast Roll-Ups?

    You can customize these roll-ups by using different cheeses, adding vegetables like spinach or bell peppers, or trying different types of sausage.

    Can I make the Sausage Egg and Cheese Breakfast Roll-Ups ahead of time?

    Yes, you can prepare the roll-ups in advance and store them in the refrigerator or freezer. Just bake them when you’re ready to serve.

    What is the best way to reheat Sausage Egg and Cheese Breakfast Roll-Ups?

    The oven is the best method for reheating, as it maintains the crispiness of the crescent dough. The microwave is quicker but may make them a bit soggy.

    Are these roll-ups suitable for meal prep?

    Absolutely! Sausage Egg and Cheese Breakfast Roll-Ups are perfect for meal prepping. Make a batch at the beginning of the week for quick breakfasts.

    How many servings does this recipe yield?

    This recipe makes approximately 8 servings, making it ideal for a family breakfast or brunch gathering.

    Final Thoughts

    These Sausage Egg and Cheese Breakfast Roll-Ups are not only easy to make but also incredibly delicious. Perfect for busy mornings or a weekend treat, they are sure to become a breakfast favorite. Try making them today, and feel free to leave a comment with your feedback!


    Lunch

    Sausage Egg and Cheese Breakfast Roll-Ups


    5.0 from 24 reviews

    These Sausage, Egg, and Cheese Breakfast Roll-Ups are a quick and satisfying start to your day. Enjoy the melty cheese, savory sausage, and fluffy eggs wrapped in a golden crescent roll. Perfect for busy mornings or a weekend treat!

    Author: Munch Twist
    Prep Time: 10 minutes
    Cook Time: 15 minutes
    Total Time: 25 minutes
    Yield: 8 servings
    Category: Desserts
    Method: No bake
    Cuisine: American

    Sausage Egg and Cheese Breakfast Roll-Ups

    SCALE:
    1x
    2x
    3x
    Cook Mode: Prevent your screen from going dark

    Ingredients

    • 1 can (8 oz) Pillsbury™ refrigerated crescent dinner rolls
    • 4 slices Cheddar cheese
    • 8 sausage links
    • 5 eggs
    • Salt and pepper to taste

    Instructions

    1. Preheat the oven to 350°F (175°C).
    2. In a small bowl, beat the 5 eggs, reserving 2 tablespoons for brushing. Scramble the remaining eggs in a skillet over medium heat.
    3. Unroll the crescent dough and separate it into 8 triangles.
    4. Cut each slice of Cheddar cheese in half. Place one half-slice on each triangle of dough. Top with a spoonful of scrambled eggs and a sausage link.
    5. Loosely roll up each triangle from the wide end to the tip. Place on an ungreased cookie sheet. Brush with reserved beaten eggs, then sprinkle with salt and pepper.
    6. Bake for 15 to 18 minutes, or until golden brown.

    Nutrition Facts

    Serving Size: 1 serving
    Calories: 135 kcal
    Sugar: 2g
    Sodium: 350mg
    Fat: 8g
    Saturated Fat: 3g
    Carbohydrates: 10g
    Fiber: 0g
    Protein: 6g
    Cholesterol: 130mg

  • Easy Cherry Pie Bombs Recipe for a Sweet Treat

    Easy Cherry Pie Bombs Recipe for a Sweet Treat

    Cherry Pie Bombs are a delightful fusion of crispy pastry and sweet cherry filling. These bite-sized treats are perfect for satisfying your sweet tooth and impressing your guests. With a simple glaze drizzled on top, they offer a burst of flavor in every bite.

    Why You’ll Love This Recipe

    • Quick & Easy: Ready in under 30 minutes, making it perfect for last-minute desserts.
    • Crowd-Pleaser: These cherry pie bombs are sure to impress family and friends at gatherings.
    • Customizable: Feel free to experiment with different fillings, such as apple or blueberry.
    • Fun to Make: Involve kids or friends in creating these delightful treats.
    • Decadent Flavor: The combination of crispy dough and sweet cherry filling creates a heavenly taste experience.

    Tools and Equipment

    Having the right tools can streamline your cooking process and improve your results.

    Essential Tools

    • Deep fryer or large saucepan
    • Slotted spoon
    • Mixing bowl
    • Whisk
    • Measuring cups and spoons

    Why These Tools Matter

    • Deep fryer or large saucepan: Ideal for achieving the perfect frying temperature for crispy cherry pie bombs.
    • Slotted spoon: Essential for safely removing the bombs from hot oil without excess grease.
    • Mixing bowl and whisk: Necessary for easily preparing the smooth glaze that elevates the flavor.

    Ingredients for Cherry Pie Bombs

    For the Cherry Pie Bombs:

    • Oil for frying
    • 1 cup cherry pie filling
    • 1 package (8 oz) refrigerated crescent roll dough

    For the Glaze:

    • 1 cup powdered sugar
    • 2 tablespoons milk
    • ½ teaspoon vanilla extract

    How to Make Cherry Pie Bombs Step-by-Step

    Step 1: Prepare the Dough

    Unroll the crescent roll dough on a clean surface. Cut it into 16 squares, ensuring they are even for uniform baking. Place a small spoonful of cherry pie filling in the center of each square, leaving enough space around the edges.

    Step 2: Form the Bombs

    Carefully fold each dough square over the cherry filling. Pinch the edges tightly to seal, ensuring that the filling is completely enclosed. This step is crucial to prevent any leakage during frying.

    Step 3: Fry the Bombs

    In a deep fryer or large saucepan, heat oil to 350°F (175°C). Fry the cherry pie bombs in batches, turning them once for even cooking. Fry until they are golden brown, approximately 2-3 minutes. Use a slotted spoon to remove the bombs from the oil and let them drain on paper towels.

    Step 4: Make the Glaze

    In a small mixing bowl, whisk together the powdered sugar, milk, and vanilla extract until the mixture is smooth. If the glaze is too thick, add more milk, one teaspoon at a time, until you achieve the desired consistency.

    Step 5: Glaze and Serve

    While the cherry pie bombs are still warm, drizzle the glaze over them or dip them in the glaze for a more indulgent coating. Allow the glaze to set for a few minutes before serving.

    These Cherry Pie Bombs are a delightful treat, perfect for any occasion. Enjoy the crispy exterior with a burst of sweet cherry filling inside, all topped with a simple glaze.

    How to Serve Cherry Pie Bombs

    Cherry Pie Bombs can be enjoyed in various creative ways that enhance their delightful flavor.

    A La Mode

    Serve the cherry pie bombs warm with a scoop of vanilla ice cream on the side. The cold ice cream contrasts perfectly with the warm, gooey filling.

    With Whipped Cream

    Top the bombs with a generous dollop of whipped cream. This adds a light and airy texture that complements the richness of the fried dough and sweet cherry filling.

    Drizzled with Chocolate

    For a decadent twist, drizzle melted chocolate over the glazed cherry pie bombs. The chocolate adds a rich layer of flavor that elevates the overall dessert experience.

    Pro Tips for the Best Cherry Pie Bombs

    To ensure your Cherry Pie Bombs are a hit, consider these helpful tips.

    • Proper Sealing: Make sure to pinch the edges of the dough firmly to prevent any filling from leaking out during frying.
    • Oil Temperature: Use a cooking thermometer to maintain the oil at 350°F (175°C) for optimal frying. If the temperature is too low, the bombs will absorb excess oil.
    • Batch Frying: Fry the cherry pie bombs in small batches to avoid overcrowding the pan, which can lower the oil temperature and result in soggy bombs.
    • Cooling Time: Let the cherry pie bombs cool for a few minutes after frying before glazing. This ensures the glaze adheres better and doesn’t melt away.
    • Storage: Store any leftovers in an airtight container at room temperature. Reheat in the oven for a few minutes to restore their crispiness.

    Best Side Dishes and Pairings

    Cherry Pie Bombs can be complemented by a variety of sides and beverages for a well-rounded treat.

    1. Vanilla Ice Cream: The creamy texture of vanilla ice cream balances the sweetness and adds a refreshing element.
    2. Cold Milk: A classic pairing, cold milk enhances the cherry flavor and provides a satisfying drink alongside the dessert.
    3. Coffee: A warm cup of coffee pairs beautifully, as the bitterness contrasts nicely with the sweetness of the bombs.
    4. Fruit Salad: A light fruit salad provides a fresh and healthy counterpoint to the richness of the cherry pie bombs.
    5. Chocolate Milkshake: For a fun twist, serve with a chocolate milkshake for those who love a chocolate-cherry combination.

    Common Mistakes to Avoid

    • Using Too Much Filling: Overfilling can cause the bombs to burst during frying, leading to a messy result.
    • Not Sealing Properly: Ensure the edges of the dough are tightly sealed to prevent leakage while frying.
    • Inconsistent Oil Temperature: Make sure the oil is at the right temperature to achieve a crispy exterior without burning.
    • Skipping the Glaze: The glaze adds a delightful sweetness; don’t skip this step for the best flavor.

    Storage & Reheating Instructions

    Refrigerator Storage

    Store leftover Cherry Pie Bombs in an airtight container in the refrigerator for up to 3 days.

    Freezing Instructions

    To freeze, place the cooled Cherry Pie Bombs in a single layer on a baking sheet until frozen solid. Then transfer them to an airtight container or freezer bag for up to 2 months.

    Reheating Tips

    • Oven: Preheat to 350°F (175°C), place the bombs on a baking sheet, and heat for about 10 minutes until warmed through.
    • Microwave: Heat on medium power for 20-30 seconds; check and add more time if necessary.
    • Stovetop: Reheat in a skillet over low heat, turning occasionally until warmed.

    Frequently Asked Questions

    How can I make Cherry Pie Bombs ahead of time?

    You can prepare the Cherry Pie Bombs and freeze them before frying. When you’re ready to serve, simply fry them directly from the freezer, adjusting the cooking time as needed.

    Can I use other pie fillings for Cherry Pie Bombs?

    Absolutely! Feel free to experiment with other fillings such as apple, blueberry, or even chocolate for a delicious twist on this recipe.

    What is the best oil to use for frying Cherry Pie Bombs?

    A neutral oil with a high smoke point, such as vegetable or canola oil, is ideal for frying Cherry Pie Bombs to achieve a golden-brown finish.

    How do I ensure my Cherry Pie Bombs are crispy?

    Ensure the oil is hot enough before adding the bombs, and do not overcrowd the pan, as this can lower the oil temperature and result in soggy bombs.

    Final Thoughts

    These Cherry Pie Bombs are a fun and delicious treat that are sure to impress your family and friends. Give this recipe a try, and don’t forget to leave a comment sharing your experience!

    Desserts

    Cherry Pie Bombs


    5.0 from 24 reviews

    These Cherry Pie Bombs are a delightful treat, perfect for any occasion. Enjoy the crispy exterior with a burst of sweet cherry filling inside, all topped with a simple glaze.

    Author: Munch Twist
    Prep Time: 15 minutes
    Cook Time: 3 minutes
    Total Time: 18 minutes
    Yield: 16 servings
    Category: Desserts
    Method: No bake
    Cuisine: American

    Cherry Pie Bombs

    SCALE:
    1x
    2x
    3x
    Cook Mode: Prevent your screen from going dark

    Ingredients

    • Oil for frying
    • 1 cup cherry pie filling
    • 1 package (8 oz) refrigerated crescent roll dough
    • 1 cup powdered sugar
    • 2 tablespoons milk
    • ½ teaspoon vanilla extract

    Instructions

    1. Unroll the crescent roll dough and cut it into 16 squares. Place a small spoonful of cherry pie filling in the center of each square.
    2. Fold each dough square over the filling, pinching the edges tightly to seal.
    3. Heat oil in a deep fryer or large saucepan to 350°F (175°C). Fry the cherry pie bombs in batches, turning once, until golden brown, about 2-3 minutes.
    4. In a small bowl, whisk together powdered sugar, milk, and vanilla extract until smooth.
    5. While the cherry pie bombs are still warm, drizzle them with the glaze or dip them in the glaze to coat.

    Nutrition Facts

    Serving Size: 1 serving
    Calories: 100 kcal
    Sugar: 8g
    Sodium: 150mg
    Fat: 5g
    Saturated Fat: 1g
    Carbohydrates: 14g
    Fiber: 0g
    Protein: 1g
    Cholesterol: 0mg