Category: Desserts

  • Easy Air Fryer Peanut Butter Cookies Recipe

    Easy Air Fryer Peanut Butter Cookies Recipe

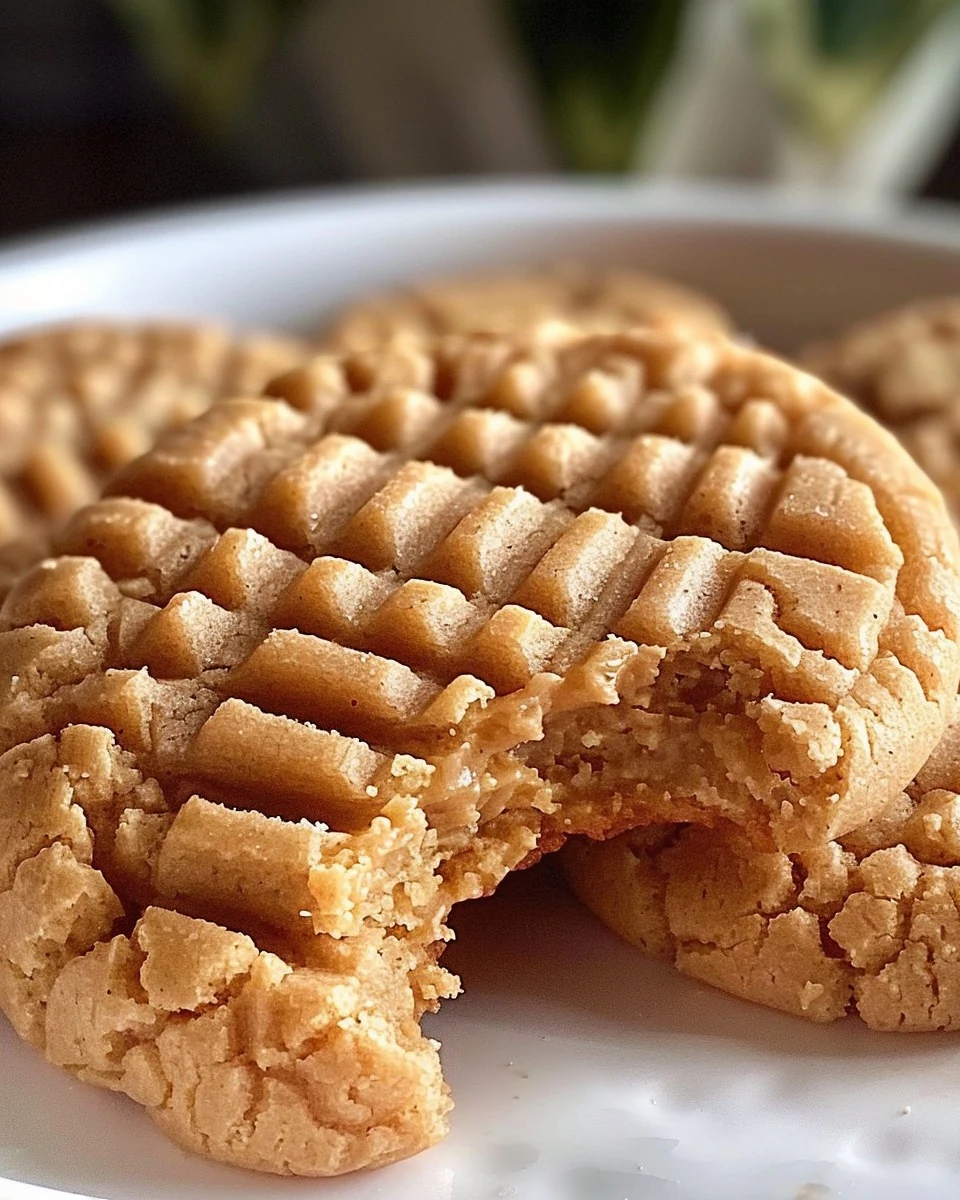
    Indulge in the delightful taste of Air Fryer Peanut Butter Cookies. These cookies are perfectly crispy on the outside and chewy on the inside, making them an irresistible treat for any peanut butter lover. With simple ingredients and an easy cooking process, you can enjoy warm cookies in no time.

    Why You’ll Love This Recipe

    • Quick & Easy: Ready in under 30 minutes, this recipe is perfect for spontaneous cravings.
    • Fewer Calories: Enjoy all the flavor of traditional cookies with fewer calories, thanks to air frying.
    • Customizable: Feel free to experiment with different types of peanut butter or add chocolate chips.
    • No Oven Needed: Save energy and time by using your air fryer for baking instead of a conventional oven.
    • Kid-Friendly: A fun activity for kids to help with, making it a great family recipe.

    Tools and Equipment

    To make these Air Fryer Peanut Butter Cookies, you will need a few essential tools.

    Essential Tools

    • Mixing bowl
    • Fork
    • Air fryer
    • Wire rack

    Why These Tools Matter

    • Mixing bowl: Ensures easy combining of ingredients without spills.
    • Fork: Perfect for creating the signature crisscross pattern on the cookies.
    • Air fryer: Cooks the cookies evenly while keeping them crispy and chewy.

    Ingredients for Air Fryer Peanut Butter Cookies

    Gather the following ingredients to create your delicious cookies:

    Wet Ingredients

    • 1 teaspoon vanilla extract
    • 1 cup peanut butter (smooth or crunchy)
    • 1 large egg

    Dry Ingredients

    • 1/2 cup sugar
    • 1/2 cup brown sugar, packed
    • 1 teaspoon baking soda
    • Pinch of salt

    How to Make Air Fryer Peanut Butter Cookies Step-by-Step

    Step 1: Mix the Wet Ingredients

    In a mixing bowl, combine the peanut butter, sugar, brown sugar, and egg. Stir until the mixture is smooth and well blended.

    Step 2: Add the Dry Ingredients

    Stir in the baking soda, vanilla extract, and a pinch of salt. Continue mixing until all ingredients are fully incorporated.

    Step 3: Shape the Cookies

    Roll the dough into 1-inch balls and place them in the air fryer basket. Make sure to space them apart to allow for spreading.

    Step 4: Pattern and Cook

    Gently flatten each dough ball with a fork, creating a crisscross pattern on top. Cook in the air fryer at 350°F for 8-10 minutes, or until the edges turn golden brown.

    Step 5: Cool

    Carefully remove the cookies from the air fryer and place them on a wire rack to cool. Allow them to set properly before serving.

    These Air Fryer Peanut Butter Cookies are a delightful blend of textures and flavors. Perfect for satisfying your sweet tooth, they are sure to become a favorite in your dessert repertoire. Enjoy the convenience of making cookies without the hassle of baking in an oven.

    How to Serve Air Fryer Peanut Butter Cookies

    These Air Fryer Peanut Butter Cookies are versatile and can be enjoyed in various delightful ways.

    With a Glass of Milk

    Pair these cookies with a cold glass of milk. The creaminess of the milk complements the rich peanut butter flavor, creating a classic combination.

    Ice Cream Sandwiches

    Transform your cookies into ice cream sandwiches by adding a scoop of your favorite ice cream between two cookies. This adds a delightful creaminess and makes for an indulgent treat.

    Warm and Topped

    Serve the cookies warm, topped with a drizzle of chocolate or a sprinkle of sea salt. This enhances the flavor profile and adds an extra layer of decadence.

    Pro Tips for the Best Air Fryer Peanut Butter Cookies

    To ensure your cookies turn out perfectly every time, consider these helpful tips.

    • Use Fresh Ingredients: Always use fresh peanut butter and eggs to enhance the flavor and texture of your cookies.

    • Don’t Overmix: Mix the dough just until combined to avoid tough cookies. Overmixing can lead to a denser texture.

    • Adjust Cooking Time: Depending on your air fryer model, cooking times may vary. Keep an eye on the cookies to prevent overcooking.

    • Space Cookies Properly: Ensure the cookies are spaced apart in the air fryer basket to allow for proper spreading and even cooking.

    • Experiment with Add-Ins: Consider adding chocolate chips or chopped nuts for added texture and flavor variations.

    Best Side Dishes and Pairings

    These cookies pair wonderfully with various side dishes and beverages, enhancing your overall experience.

    1. Coffee: The rich flavor of coffee balances the sweetness of the cookies, making for a perfect afternoon snack.

    2. Fruit Salad: A refreshing fruit salad adds a burst of freshness and contrasts nicely with the chewy texture of the cookies.

    3. Yogurt Parfait: Layer yogurt with granola and fresh fruit for a balanced and nutritious pairing that complements the cookies.

    4. Hot Chocolate: Enjoy these cookies with a warm cup of hot chocolate for a cozy and indulgent treat, especially during colder months.

    5. Tea: A soothing cup of tea, such as chai or earl grey, provides a lovely contrast to the sweetness of the cookies, making it a delightful pairing.

    Common Mistakes to Avoid

    • Using the Wrong Peanut Butter: Ensure you use a good quality peanut butter; natural or creamy varieties work best.
    • Not Measuring Ingredients Accurately: Precision is key in baking. Use proper measuring tools for accuracy.
    • Overcrowding the Air Fryer Basket: Leave enough space between cookie dough balls to allow for proper spreading during cooking.
    • Skipping the Cooling Time: Allow cookies to cool completely on a wire rack for the best texture and flavor.

    Storage & Reheating Instructions

    Refrigerator Storage

    Store the cookies in an airtight container at room temperature for up to one week. For longer freshness, you can refrigerate them, where they will last for about two weeks.

    Freezing Instructions

    To freeze, place the cookies in a single layer on a baking sheet until firm, then transfer them to an airtight container or freezer bag. They can be stored in the freezer for up to three months.

    Reheating Tips

    • Oven: Preheat to 350°F and reheat cookies for 5-7 minutes until warm.
    • Microwave: Heat each cookie for about 10-15 seconds for a quick warm-up.
    • Stovetop: Place cookies in a skillet over low heat for a few minutes, flipping occasionally until warmed through.

    Frequently Asked Questions

    Can I use natural peanut butter for Air Fryer Peanut Butter Cookies?

    Yes, natural peanut butter can be used, but ensure it is well mixed before measuring to maintain consistency in your dough.

    How long do Air Fryer Peanut Butter Cookies last?

    When stored properly in an airtight container, these cookies can last up to one week at room temperature or up to two weeks in the refrigerator.

    Can I make Air Fryer Peanut Butter Cookies vegan?

    Yes, you can substitute the egg with a flax egg or applesauce to make a vegan version of this recipe.

    What can I add to Air Fryer Peanut Butter Cookies?

    You can enhance the flavor by adding chocolate chips, chopped nuts, or even a pinch of cinnamon to the dough.

    Final Thoughts

    These Air Fryer Peanut Butter Cookies are an easy and delicious treat that anyone can make. We encourage you to try this recipe and share your feedback in the comments. Your thoughts and experiences can help others enjoy this delightful dessert!

    Desserts

    Air Fryer Peanut Butter Cookies


    5.0 from 24 reviews

    Indulge in these crispy, chewy Air Fryer Peanut Butter Cookies—perfect for any time you crave a sweet treat. With a delightful blend of peanut butter and sugars, these cookies are quick to prepare and cook, making them an ideal snack for any occasion.
    Author: Munch Twist
    Prep Time: 10 minutes
    Cook Time: 10 minutes
    Total Time: 20 minutes
    Yield: 12 servings
    Category: Desserts
    Method: No bake
    Cuisine: American

    Air Fryer Peanut Butter Cookies

    SCALE:
    1x
    2x
    3x
    Cook Mode: Prevent your screen from going dark

    Ingredients

    • 1 teaspoon vanilla extract
    • 1/2 cup sugar
    • 1/2 cup brown sugar, packed
    • 1 large egg
    • 1 teaspoon baking soda
    • 1 cup peanut butter (smooth or crunchy)
    • Pinch of salt

    Instructions

    1. In a mixing bowl, combine the peanut butter, sugar, brown sugar, and egg. Stir until the mixture is smooth and well blended.
    2. Stir in the baking soda, vanilla extract, and a pinch of salt. Continue mixing until all ingredients are fully incorporated.
    3. Roll the dough into 1-inch balls and place them in the air fryer basket, making sure to space them apart to allow for spreading.
    4. Gently flatten each dough ball with a fork, creating a crisscross pattern on top. Cook in the air fryer at 350°F for 8-10 minutes, or until the edges turn golden brown.
    5. Carefully remove the cookies from the air fryer and place them on a wire rack to cool. Allow them to set properly before serving.
    Nutrition Facts

    Serving Size: 1 serving
    Calories: 150 kcal
    Sugar: 10g
    Sodium: 70mg
    Fat: 9g
    Saturated Fat: 2g
    Carbohydrates: 15g
    Fiber: 1g
    Protein: 4g
    Cholesterol: 20mg

  • Indulge in Chocolate Ooey Gooey Cake Today

    Indulge in Chocolate Ooey Gooey Cake Today

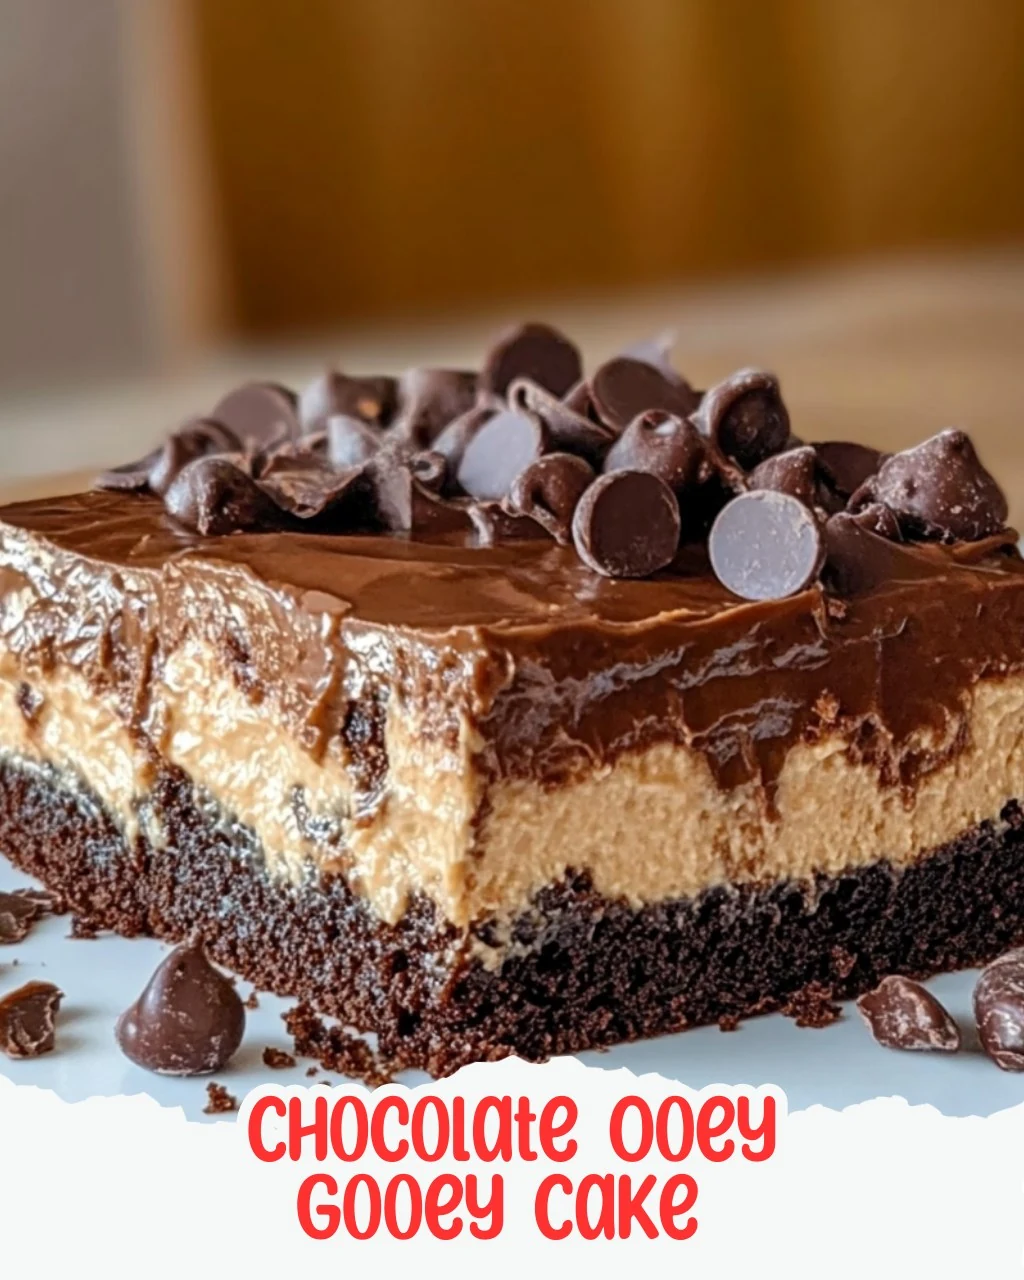
    Get ready to indulge in a chocolate lover’s dream with this Chocolate Ooey Gooey Cake. This dessert is more than just a cake; it’s a delightful combination of rich chocolate flavor and a creamy filling that will satisfy your sweet cravings. Perfect for celebrations or a simple treat, this cake will leave you wanting more.

    Why You’ll Love This Recipe

    • Decadent Flavor: The rich chocolate and creamy filling create a perfect harmony of taste.
    • Irresistibly Gooey: The center remains wonderfully gooey, providing a unique texture experience.
    • Easy to Make: With just a few simple steps, anyone can whip up this dessert.
    • Versatile Dessert: Ideal for parties, potlucks, or a cozy night in.
    • Crowd-Pleaser: This cake will impress friends and family alike, making it a go-to recipe.

    Tools and Equipment

    Before you start baking, gather your tools for a seamless experience.

    Essential Tools

    • Mixing bowls
    • Electric mixer
    • 9×13 inch baking pan
    • Spatula
    • Measuring cups and spoons

    Why These Tools Matter

    • Electric mixer: Makes combining ingredients quicker and ensures a smooth batter.
    • Spatula: Perfect for spreading the filling evenly and scraping down the sides of bowls.
    • 9×13 inch baking pan: The ideal size for this recipe, ensuring even baking and easy serving.

    Ingredients for Chocolate Ooey Gooey Cake

    For the Cake Base

    • 1 box chocolate cake mix
    • 1 egg
    • 1/2 cup butter, melted

    For the Creamy Filling

    • 8 oz cream cheese, softened
    • 2 eggs
    • 1/2 cup butter, melted
    • 1 tsp vanilla extract
    • 16 oz powdered sugar
    • 1/4 cup cocoa powder

    How to Make Chocolate Ooey Gooey Cake Step-by-Step

    Step 1: Prep the Base

    1. Preheat your oven to 350°F (175°C).
    2. Grease a 9×13 inch baking pan to prevent sticking.

    Step 2: Make the Cake Layer

    1. In a mixing bowl, combine the chocolate cake mix, one egg, and 1/2 cup melted butter.
    2. Stir until the mixture becomes a smooth batter.
    3. Press the chocolate cake mixture evenly into the bottom of the greased pan to form a solid crust.

    Step 3: Prepare the Creamy Filling

    1. In another bowl, beat together the softened cream cheese, 2 eggs, and vanilla extract until well combined.
    2. Pour in the remaining 1/2 cup of melted butter, 16 oz of powdered sugar, and 1/4 cup of cocoa powder.
    3. Mix until the filling is smooth and creamy.

    Step 4: Assemble and Bake

    1. Pour the creamy filling over the cake layer in the pan.
    2. Use a spatula to smooth the filling evenly.
    3. Bake in the preheated oven for 40 to 50 minutes. The center should remain slightly gooey.

    Step 5: Cool and Serve

    1. Once baked, allow the cake to cool before slicing into squares.
    2. Enjoy every decadent bite of this Chocolate Ooey Gooey Cake!

    Nutritional Information: Each serving contains approximately 350 calories, with 20g of fat, 45g of carbohydrates, and 5g of protein.

    Preparation time: 15 minutes | Cooking time: 40-50 minutes

    How to Serve Chocolate Ooey Gooey Cake

    There are countless ways to enjoy Chocolate Ooey Gooey Cake, elevating your dessert experience to new heights.

    A La Mode

    Serve slices of the cake warm with a scoop of vanilla ice cream on top. The melting ice cream enhances the rich chocolate flavor, creating a delightful contrast in temperature and texture.

    With Fresh Berries

    Top your Chocolate Ooey Gooey Cake with a handful of fresh raspberries or strawberries. The tartness of the berries cuts through the sweetness, adding a refreshing element to each bite.

    Drizzled with Chocolate Sauce

    For an indulgent twist, drizzle warm chocolate sauce over each slice. This extra layer of chocolate intensifies the dessert’s flavor and makes it even more decadent.

    Pro Tips for the Best Chocolate Ooey Gooey Cake

    To achieve the ultimate Chocolate Ooey Gooey Cake, keep these expert tips in mind.

    • Use High-Quality Ingredients: Choose a premium chocolate cake mix and real butter to enhance the flavor and texture of your cake.

    • Check Oven Temperature: Always verify your oven’s accuracy with an oven thermometer, as baking times can vary based on actual temperature.

    • Don’t Overmix the Batter: When combining the cake mix, eggs, and butter, mix just until combined to maintain a tender crumb.

    • Let It Cool: Allow the cake to cool in the pan for at least 15 minutes before slicing. This helps the gooey filling set slightly for cleaner cuts.

    • Store Properly: Keep any leftovers in an airtight container in the refrigerator for up to five days. Reheat individual portions in the microwave for a few seconds before serving.

    Best Side Dishes and Pairings

    Pairing your Chocolate Ooey Gooey Cake with complementary dishes elevates the overall dessert experience.

    1. Coffee: A hot cup of coffee balances the sweetness of the cake and enhances the chocolate flavor, making it a perfect pairing.

    2. Milk: A classic choice, cold milk provides a refreshing contrast and is a nostalgic accompaniment to any chocolate dessert.

    3. Whipped Cream: Light and airy, whipped cream adds a delightful texture and richness that complements the gooey cake.

    4. Chocolate Milkshake: For an indulgent treat, serve with a chocolate milkshake that echoes the cake’s flavors while adding a creamy element.

    5. Vanilla Pudding: The smooth and silky texture of vanilla pudding pairs beautifully, providing a different flavor profile that complements the chocolate.

    6. Fruit Salad: A light, refreshing fruit salad offers a healthy contrast and helps balance the rich flavors of the cake.

    Common Mistakes to Avoid

    • Using Cold Ingredients: Ensure that your cream cheese is softened to prevent lumps in the filling.
    • Overmixing the Batter: Mix just until combined to maintain the cake’s texture.
    • Not Greasing the Pan: Grease the baking pan thoroughly to avoid sticking.
    • Ignoring Baking Time: Check for doneness; it should be gooey but not completely liquid in the center.

    Storage & Reheating Instructions

    Refrigerator Storage

    Store leftover Chocolate Ooey Gooey Cake in an airtight container in the refrigerator. It will remain fresh for up to 5 days.

    Freezing Instructions

    To freeze, wrap individual squares of the cake in plastic wrap, then place them in a freezer bag. It can be frozen for up to 3 months. Thaw in the refrigerator overnight before enjoying.

    Reheating Tips

    • Oven: Preheat to 350°F (175°C) and warm for about 10-15 minutes until heated through.
    • Microwave: Heat for 15-30 seconds on medium power until warm, being careful not to overheat.
    • Stovetop: Place a slice in a skillet over low heat, covering it to warm through for about 5 minutes.

    Frequently Asked Questions

    How do I know when my Chocolate Ooey Gooey Cake is done?

    The cake should be set around the edges and slightly gooey in the center. A toothpick inserted should come out with some moist crumbs.

    Can I make Chocolate Ooey Gooey Cake ahead of time?

    Yes, you can prepare it a day in advance. Just store it in the refrigerator and allow it to come to room temperature before serving.

    What should I serve with Chocolate Ooey Gooey Cake?

    This cake pairs wonderfully with whipped cream, vanilla ice cream, or a drizzle of chocolate sauce for an extra indulgent treat.

    Can I use a different flavor of cake mix for this recipe?

    While chocolate cake mix enhances the flavor, you can experiment with other flavors, like vanilla or red velvet, but it will change the overall taste.

    Final Thoughts

    This Chocolate Ooey Gooey Cake is a must-try for any chocolate lover. It’s rich, decadent, and perfect for any occasion. We’d love to hear your thoughts on this recipe, so please leave a comment with your feedback!


    Desserts

    Chocolate Ooey Gooey Cake


    5.0 from 24 reviews

    Get ready to experience a chocolate lover's dream! This Chocolate Ooey Gooey Cake is a heavenly layer of rich cake topped with a luscious, creamy filling that will leave you weak in the knees. Perfect for any occasion or just because you deserve it.

    Author: Munch Twist
    Prep Time: 15 minutes
    Cook Time: 45 minutes
    Total Time: 60 minutes
    Yield: 12 servings
    Category: Desserts
    Method: No bake
    Cuisine: American

    Chocolate Ooey Gooey Cake

    SCALE:
    1x
    2x
    3x
    Cook Mode: Prevent your screen from going dark

    Ingredients

    • 1 box chocolate cake mix
    • 2 eggs (for the filling)
    • 8 oz cream cheese, softened
    • 1/2 cup butter, melted (for the filling)
    • 1/2 cup butter, melted (for the cake)
    • 1 tsp vanilla extract
    • 16 oz powdered sugar
    • 1/4 cup cocoa powder
    • 1 egg (for the cake)

    Instructions

    1. Preheat your oven to 350°F (175°C). Grease a 9×13 inch baking pan.
    2. In a mixing bowl, combine the chocolate cake mix, one egg, and 1/2 cup melted butter. Stir until smooth.
    3. Press the chocolate cake mixture evenly into the bottom of the greased pan.
    4. In another bowl, beat together the softened cream cheese, 2 eggs, and vanilla extract until well combined.
    5. Add the remaining 1/2 cup melted butter, 16 oz powdered sugar, and 1/4 cup cocoa powder to the cream cheese mixture. Mix until smooth.
    6. Pour the filling over the cake layer in the pan, smoothing it out evenly.
    7. Bake in the preheated oven for 40 to 50 minutes.
    8. Let the cake cool before slicing into squares.

    Nutrition Facts

    Serving Size: 1 serving
    Calories: 350 kcal
    Sugar: 30g
    Sodium: 300mg
    Fat: 20g
    Saturated Fat: 10g
    Carbohydrates: 45g
    Fiber: 1g
    Protein: 5g
    Cholesterol: 70mg

  • Discover the Funnel Cake Bites Recipe – OMG DONT LOSE THIS

    Discover the Funnel Cake Bites Recipe – OMG DONT LOSE THIS

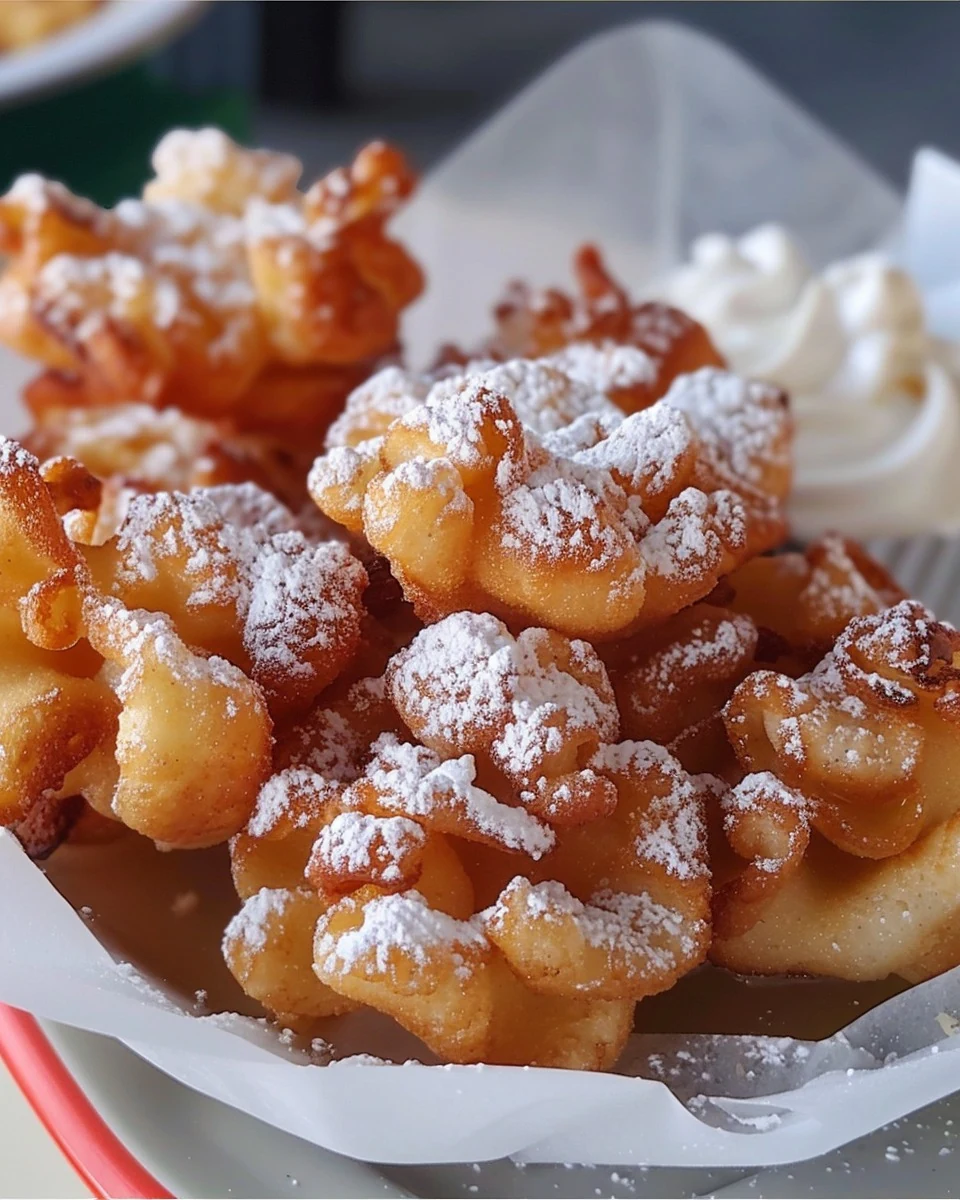
    Funnel Cake Bites Recipe – OMG DON’T LOSE THIS offers a delightful twist on the classic carnival treat. These bite-sized wonders are crispy on the outside and tender on the inside, making them the perfect sweet indulgence for any occasion. With a simple process and familiar ingredients, you can enjoy this nostalgic flavor right at home.

    Why You’ll Love This Recipe

    • Quick & Easy: Ready in under 30 minutes, this recipe is perfect for last-minute cravings.
    • Kid-Friendly: Fun to make and even more fun to eat, kids will love these sweet bites.
    • Customizable Toppings: Top with powdered sugar, chocolate sauce, or fresh fruit for a personal touch.
    • Perfect for Sharing: Ideal for parties or family gatherings, everyone can enjoy a taste.
    • Crispy and Delicious: The unique frying method ensures a crispy exterior with a soft, fluffy center.

    Tools and Equipment

    To create your Funnel Cake Bites, you’ll need a few essential tools.

    Essential Tools

    • A medium-sized mixing bowl
    • Whisk
    • Gallon-sized Ziplock bag
    • Frying pan
    • Slotted metal spatula
    • Paper towels

    Why These Tools Matter

    • Mixing Bowl: A sturdy bowl ensures thorough mixing of wet and dry ingredients.
    • Ziplock Bag: This makes piping the batter easy and mess-free.
    • Slotted Spatula: Allows for safe flipping and draining of the bites from hot oil.

    Ingredients for Funnel Cake Bites Recipe – OMG DONT LOSE THIS

    Wet Ingredients

    • 2 cups of flour
    • 2 teaspoons of vanilla
    • 6 tablespoons of butter, melted
    • 1 egg
    • 2 cups of milk

    Dry Ingredients

    • Pinch of salt
    • 1 teaspoon of baking soda
    • 2 tablespoons of sugar

    How to Make Funnel Cake Bites Recipe – OMG DONT LOSE THIS Step-by-Step

    Step 1: Mix Wet Ingredients

    In a medium-sized bowl, whisk together the milk, egg, vanilla, and melted butter until fully combined.

    Step 2: Add Dry Ingredients

    Stir in the sugar, baking soda, and salt. Slowly fold in the flour, mixing until the batter is smooth and free of lumps.

    Step 3: Prepare Batter Bag

    Pour the batter mixture into a gallon-sized Ziplock bag. Set it aside for a few minutes to rest.

    Step 4: Heat the Oil

    Pour vegetable oil into a frying pan until it’s about half an inch deep. Heat the oil over high heat for about 2 minutes, then reduce to medium heat.

    Step 5: Test Oil Temperature

    Drop a small bit of batter into the oil. If bubbles form around the edges, the oil is ready. If not, increase the heat slightly until the oil is sufficiently hot.

    Step 6: Fry the Bites

    Cut a small hole in one corner of the batter-filled Ziplock bag. Slowly drizzle the batter into the hot oil in 1 to 2-inch circles. Cook until the bottom is golden brown, then gently flip with a slotted metal spatula to cook the other side until golden brown.

    Step 7: Drain and Serve

    Remove the funnel cake bites from the oil and place them on paper towels to absorb excess grease. Sprinkle with powdered sugar and serve with whipped cream or fruit if desired.

    Enjoy these delightful Funnel Cake Bites as a sweet treat for any occasion!

    How to Serve Funnel Cake Bites Recipe – OMG DONT LOSE THIS

    These Funnel Cake Bites are versatile and can be enjoyed in various delightful ways.

    Classic Powdered Sugar

    Dust the warm funnel cake bites generously with powdered sugar for a simple yet classic treat that highlights their delicious flavor.

    Fruit Topping

    Top the bites with fresh berries or sliced bananas, drizzling them with chocolate or caramel sauce for a fruity and indulgent twist.

    Whipped Cream Delight

    Serve with a dollop of whipped cream on the side, allowing guests to dip or drizzle for a decadent dessert experience.

    Pro Tips for the Best Funnel Cake Bites Recipe – OMG DONT LOSE THIS

    Follow these tips to elevate your funnel cake bites to perfection.

    • Consistent Batter Texture: Make sure your batter is smooth and free of lumps for even cooking and a delightful texture.
    • Oil Temperature Check: Always test the oil temperature with a small bit of batter to ensure perfect frying and avoid greasy bites.
    • Cut Hole Size: Adjust the hole size in the Ziplock bag based on desired bite sizes; a smaller hole creates mini bites, while a larger one makes bigger ones.
    • Avoid Crowding the Pan: Fry in small batches to maintain oil temperature and achieve golden, crispy bites without steaming them.
    • Experiment with Toppings: Don’t hesitate to get creative with toppings like chocolate syrup, nuts, or seasonal fruits to customize your funnel cake bites.

    Best Side Dishes and Pairings

    Enhance your funnel cake bites experience with these delicious sides and drinks.

    1. Vanilla Ice Cream – The creamy texture and classic flavor of vanilla ice cream complement the sweetness of the bites perfectly.
    2. Hot Chocolate – A warm cup of rich hot chocolate pairs wonderfully, creating a comforting dessert combination.
    3. Fruit Salad – A refreshing fruit salad balances the sweetness of the funnel cake bites, adding a light and healthy touch.
    4. Caramel Sauce – Drizzling warm caramel sauce enhances the flavor profile, adding a rich sweetness that makes each bite irresistible.
    5. Lemonade – A refreshing glass of lemonade cuts through the sweetness, providing a zesty contrast that is perfect for warm weather.

    Common Mistakes to Avoid

    • Incorrect Oil Temperature: Not ensuring the oil is hot enough can lead to soggy bites instead of crispy ones.
    • Overmixing the Batter: Mixing too much can develop gluten, resulting in tough bites rather than light and airy ones.
    • Inadequate Drainage: Failing to let the funnel cake bites drain on paper towels can make them overly greasy.
    • Skipping the Sugar: Omitting sugar from the batter will result in bland bites lacking that signature sweetness.

    Storage & Reheating Instructions

    Refrigerator Storage

    Store any leftover funnel cake bites in an airtight container in the refrigerator. They will stay fresh for up to 2 days.

    Freezing Instructions

    To freeze, place the cooled funnel cake bites in a single layer on a baking sheet. Once frozen solid, transfer them to a freezer-safe bag or container. They can be frozen for up to 3 months.

    Reheating Tips

    • Oven: Preheat the oven to 350°F (175°C). Place the bites on a baking sheet and reheat for about 10 minutes or until warm.
    • Microwave: Place a few bites on a microwave-safe plate and heat for 15-20 seconds, or until warmed through.
    • Stovetop: Heat a small amount of oil in a skillet over medium heat. Add the bites and warm for a few minutes, turning occasionally until heated.

    Frequently Asked Questions

    How can I ensure my Funnel Cake Bites turn out crispy?

    To achieve a crispy texture, make sure your oil is hot enough before frying. This quick cooking method creates a crispy exterior while keeping the inside soft.

    Can I make a Funnel Cake Bites Recipe – OMG DONT LOSE THIS ahead of time?

    Yes, you can prepare the batter in advance and store it in the refrigerator for up to 24 hours. Just give it a good stir before frying.

    What toppings pair well with Funnel Cake Bites?

    Popular toppings include powdered sugar, whipped cream, fruit, or chocolate sauce. Feel free to get creative with your favorite sweet toppings!

    Can I use non-dairy milk for this recipe?

    Absolutely! You can substitute regular milk with your favorite non-dairy milk, such as almond or oat milk, without affecting the taste significantly.

    Is this Funnel Cake Bites Recipe suitable for kids?

    Yes, this recipe is perfect for kids! They can help with the mixing and decorating, making it a fun family activity.

    Final Thoughts

    Funnel Cake Bites are a delightful treat that brings joy to any occasion. Their sweet, crispy exterior paired with your favorite toppings makes them irresistible. Don’t hesitate to try this recipe, and please leave a comment sharing your experience and any variations you tried!


    Desserts

    Funnel Cake Bites Recipe – OMG DONT LOSE THIS


    5.0 from 24 reviews

    Funnel Cake Bites are a delightful treat that combines the classic flavors of funnel cake in bite-sized pieces. Perfect for parties or a fun dessert, these bites are crispy on the outside and soft on the inside, making them an irresistible snack.

    Author: Munch Twist
    Prep Time: 10 minutes
    Cook Time: 15 minutes
    Total Time: 25 minutes
    Yield: 4 servings
    Category: Desserts
    Method: No bake
    Cuisine: American

    Funnel Cake Bites Recipe - OMG DONT LOSE THIS

    SCALE:
    1x
    2x
    3x
    Cook Mode: Prevent your screen from going dark

    Ingredients

    • 2 cups of flour
    • 2 teaspoons of vanilla
    • 6 tablespoons of butter, melted
    • 1 egg
    • Pinch of salt
    • 2 cups of milk
    • 1 teaspoon of baking soda
    • 2 tablespoons of sugar

    Instructions

    1. In a medium-sized bowl, whisk together the milk, egg, vanilla, and melted butter until fully combined.
    2. Stir in the sugar, baking soda, and salt. Slowly fold in the flour, mixing until the batter is smooth and free of lumps.
    3. Pour the batter mixture into a gallon-sized Ziplock bag, then set it aside for a few minutes to rest.
    4. Pour vegetable oil into a frying pan until it's about half an inch deep. Heat the oil over high heat for about 2 minutes, then reduce to medium heat.
    5. Drop a small bit of batter into the oil. If bubbles form around the edges, the oil is ready. If not, increase the heat slightly until the oil is sufficiently hot.
    6. Cut a small hole in one corner of the batter-filled Ziplock bag. Slowly drizzle the batter into the hot oil in 1 to 2-inch circles. Cook until the bottom is golden brown, then gently flip with a slotted metal spatula to cook the other side until golden brown.
    7. Remove the funnel cake bites from the oil and place them on paper towels to absorb excess grease. Sprinkle with powdered sugar and serve with whipped cream or fruit if desired.

    Nutrition Facts

    Serving Size: 1 serving
    Calories: 250 kcal
    Sugar: 6g
    Sodium: 200mg
    Fat: 13g
    Saturated Fat: 8g
    Carbohydrates: 30g
    Fiber: 1g
    Protein: 4g
    Cholesterol: 40mg

  • Delightful Christmas Cherry Fluff Recipe for the Holidays

    Delightful Christmas Cherry Fluff Recipe for the Holidays

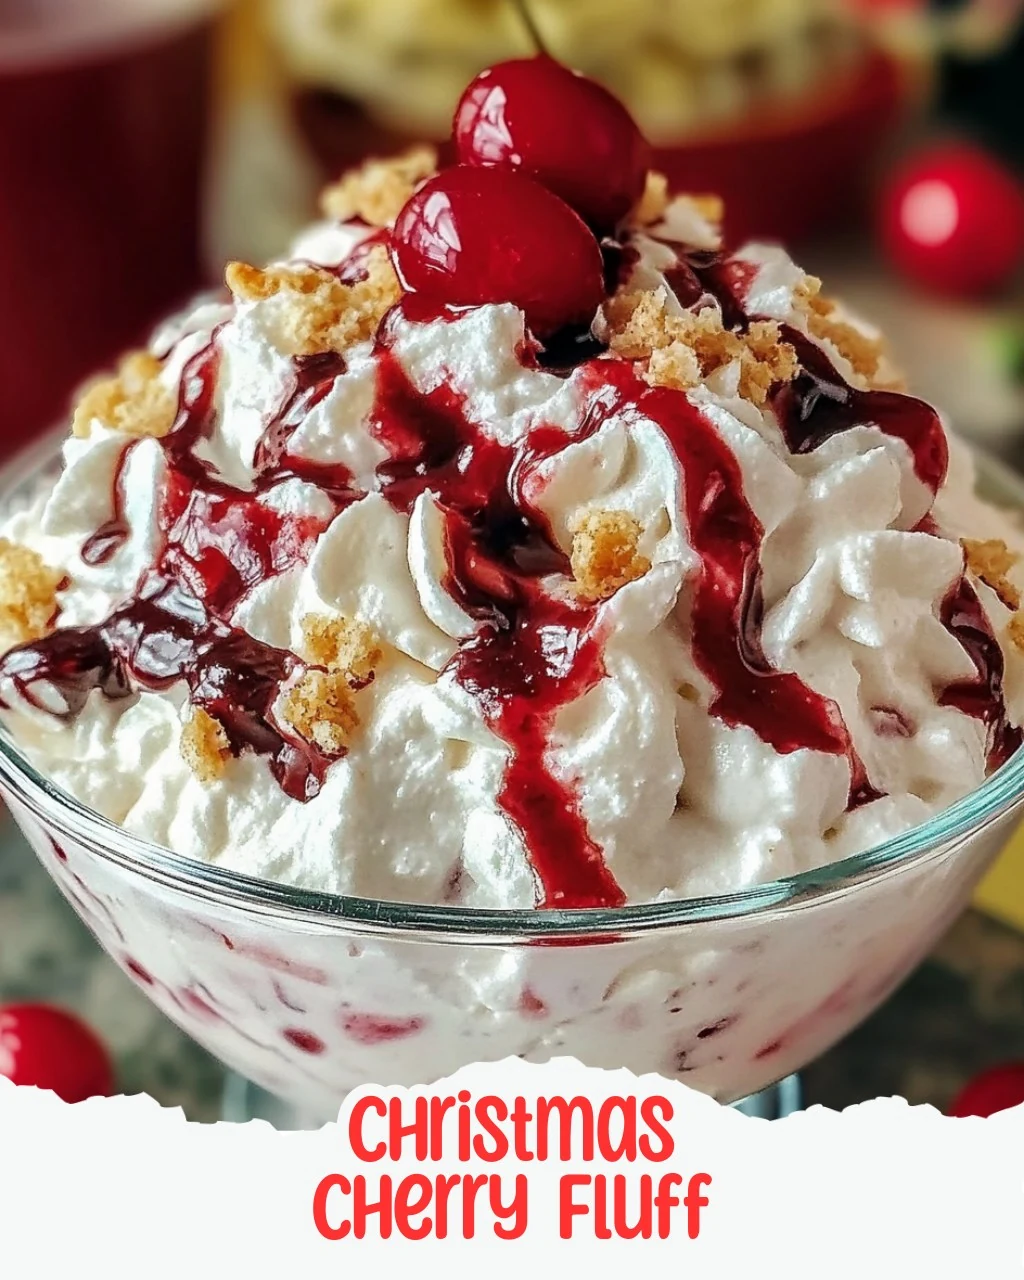
    Get ready to whip up a delightful holiday treat that’s as festive as it is delicious! This Christmas Cherry Fluff is a creamy, dreamy dessert that will make your holiday gatherings sparkle with joy and sweetness.

    Why You’ll Love This Recipe

    • Festively Delicious: The combination of cherry pie filling and whipped topping creates a rich, sweet flavor that embodies holiday cheer.
    • Quick & Easy: Ready in under 10 minutes, this recipe allows you to spend less time in the kitchen and more time celebrating.
    • Make-Ahead Friendly: Chilling the fluff for at least 2 hours means you can prepare it ahead of your gathering, reducing last-minute stress.
    • Customizable Ingredients: Feel free to adjust the nuts or coconut based on your preferences, making it perfect for everyone.
    • Family Favorite: This dessert is sure to be a hit with both kids and adults, making it a staple for holiday celebrations.

    Tools and Equipment

    Having the right tools can streamline your cooking process and ensure success.

    Essential Tools

    • Mixing bowl
    • Rubber spatula
    • Plastic wrap or lid
    • Measuring cups
    • Whisk

    Why These Tools Matter

    • Mixing bowl: A large bowl allows enough space for mixing ingredients without spills.
    • Rubber spatula: Ideal for folding in whipped topping gently, maintaining the fluffiness.
    • Plastic wrap or lid: Keeps the dessert covered while it chills, allowing flavors to meld.

    Ingredients for Christmas Cherry Fluff

    Base Ingredients

    • 1 cup mini marshmallows
    • 1/2 cup chopped pecans (optional)
    • 1/2 cup shredded sweetened coconut
    • 1 21 oz can cherry pie filling
    • 1 14 oz can sweetened condensed milk
    • 1/2 cup red and green maraschino cherries, halved for garnish
    • 1 8 oz container whipped topping (like Cool Whip), thawed

    How to Make Christmas Cherry Fluff Step-by-Step

    Step 1: Prep the Base

    In a large mixing bowl, combine the cherry pie filling and sweetened condensed milk. Stir well until the mixture is smooth and fully combined.

    Step 2: Fold in the Whipped Topping

    Next, gently fold in the thawed whipped topping. Be careful to keep it light and airy for that perfect fluffiness.

    Step 3: Add the Mix-Ins

    Add in the mini marshmallows, chopped pecans if you fancy a nutty crunch, and shredded coconut. Mix until everything is evenly distributed.

    Step 4: Chill and Set

    Cover the bowl with plastic wrap or a lid, and pop it in the refrigerator for at least 2 hours. This chilling time allows all the flavors to meld beautifully and gives the fluff a chance to set slightly.

    Step 5: Garnish and Serve

    Just before serving, take it out of the fridge and garnish with halved red and green maraschino cherries for that extra festive flair.

    Enjoy making this Christmas Cherry Fluff as part of your holiday festivities. Its delightful taste and simple preparation make it a go-to dessert for any celebration.

    How to Serve Christmas Cherry Fluff

    This festive treat can be presented in various delightful ways to impress your holiday guests.

    Individual Cups

    Serve the Christmas Cherry Fluff in small, clear cups for a charming presentation. This allows guests to enjoy their own portion while showcasing the vibrant colors of the dessert.

    Parfait Style

    Layer the Christmas Cherry Fluff with crushed graham crackers or additional whipped topping in a tall glass. This adds texture and elevates the visual appeal, making it perfect for a holiday buffet.

    Festive Platter

    For a larger gathering, serve the Christmas Cherry Fluff on a decorative platter. Use a large spoon to create a generous mound in the center, surrounding it with additional maraschino cherries and a sprinkle of coconut for an eye-catching display.

    Pro Tips for the Best Christmas Cherry Fluff

    To achieve the perfect texture and flavor, consider the following expert tips:

    • Use Fresh Ingredients: Always opt for fresh cherries or high-quality cherry pie filling for the best flavor.
    • Chill Properly: Ensure the fluff is properly chilled for at least 2 hours to allow the flavors to meld and the dessert to set.
    • Fold Gently: When mixing in the whipped topping, fold gently to maintain the airy texture that makes this fluff so delightful.
    • Experiment with Add-Ins: Feel free to customize the recipe with additional fruits like pineapple or mandarin oranges for a unique twist.
    • Serve Cold: This dessert is best served chilled, so keep it in the refrigerator until you’re ready to serve.

    Best Side Dishes and Pairings

    Pair your Christmas Cherry Fluff with these complementary dishes and drinks for a well-rounded holiday feast.

    1. Roasted Turkey: A classic holiday centerpiece, the savory flavors of roasted turkey balance the sweetness of the fluff.
    2. Green Bean Almondine: This light and crunchy side dish provides a refreshing contrast to the creamy texture of the fluff.
    3. Sweet Potato Casserole: The rich, sweet flavors of this casserole harmonize beautifully with the cherry notes in the fluff.
    4. Cranberry Sauce: A tangy cranberry sauce adds a zesty kick that enhances the overall flavor profile of your holiday meal.
    5. Sparkling Water: Serve with flavored sparkling water to cleanse the palate and complement the dessert’s sweetness.

    Common Mistakes to Avoid

    • Skipping the Chilling Time: Not allowing the dessert to chill for the recommended time can result in a runny texture.
    • Overmixing the Whipped Topping: Stirring too vigorously can deflate the whipped topping, leading to a less fluffy consistency.
    • Neglecting to Taste: Failing to taste the mixture before serving may lead to a lack of sweetness or balance in flavor.
    • Using Non-Seasonal Ingredients: Substituting key ingredients with off-season alternatives can alter the traditional festive flavor of Christmas Cherry Fluff.

    Storage & Reheating Instructions

    Refrigerator Storage

    Store the Christmas Cherry Fluff in an airtight container in the refrigerator. It will stay fresh for up to 3 days.

    Freezing Instructions

    For best results, avoid freezing this dessert as the texture can change. If necessary, freeze in an airtight container for up to 1 month. Thaw in the refrigerator overnight before serving.

    Reheating Tips

    • Oven: Not recommended for this dessert, as it is best served cold.
    • Microwave: If you must, microwave in short bursts of 10 seconds on low power, but be cautious to avoid melting the fluffiness.
    • Stovetop: Not applicable for this dessert. Serve chilled.

    Frequently Asked Questions

    How can I make my Christmas Cherry Fluff more festive?

    To enhance the festive appeal, consider adding more colorful fruits or using holiday-themed sprinkles as a topping.

    Can I use fresh cherries instead of cherry pie filling for Christmas Cherry Fluff?

    While fresh cherries can be used, the flavor and consistency will differ. Cherry pie filling provides a sweeter, thicker base.

    What can I substitute for whipped topping in Christmas Cherry Fluff?

    You can use homemade whipped cream, but keep in mind the texture may not be as stable.

    Is Christmas Cherry Fluff suitable for a gluten-free diet?

    Yes, this recipe is naturally gluten-free, making it a great dessert option for gluten-sensitive guests.

    How long does Christmas Cherry Fluff last?

    When stored properly in the refrigerator, it lasts for up to 3 days.

    Final Thoughts

    This Christmas Cherry Fluff is a delightful addition to your holiday festivities, blending sweetness and nostalgia in every bite. We encourage you to try making this festive treat and share your thoughts in the comments below!


    Desserts

    Christmas Cherry Fluff


    5.0 from 24 reviews

    This Christmas Cherry Fluff is a creamy, dreamy dessert perfect for holiday gatherings. With a delightful blend of cherry pie filling, sweetened condensed milk, and whipped topping, it's a festive treat that combines sweetness and texture, making it a must-have for your celebrations.

    Author: Munch Twist
    Prep Time: 10 minutes
    Cook Time: 0 minutes
    Total Time: 2 hours 10 minutes
    Yield: 8 servings
    Category: Desserts
    Method: No bake
    Cuisine: American

    Christmas Cherry Fluff

    SCALE:
    1x
    2x
    3x
    Cook Mode: Prevent your screen from going dark

    Ingredients

    • 1 cup mini marshmallows
    • 1/2 cup chopped pecans (optional)
    • 1/2 cup shredded sweetened coconut
    • 1 21 oz can cherry pie filling
    • 1 14 oz can sweetened condensed milk
    • 1/2 cup red and green maraschino cherries, halved for garnish
    • 1 8 oz container whipped topping (like Cool Whip), thawed

    Instructions

    1. In a large mixing bowl, combine the cherry pie filling and sweetened condensed milk. Stir well until the mixture is smooth and fully combined.
    2. Gently fold in the thawed whipped topping, keeping it light and airy.
    3. Add in the mini marshmallows, chopped pecans if desired, and shredded coconut. Mix until evenly distributed.
    4. Cover the bowl with plastic wrap or a lid, and refrigerate for at least 2 hours.
    5. Just before serving, garnish with halved red and green maraschino cherries.

    Nutrition Facts

    Serving Size: 1 serving
    Calories: 220 kcal
    Sugar: 24g
    Sodium: 150mg
    Fat: 8g
    Saturated Fat: 4g
    Carbohydrates: 34g
    Fiber: 1g
    Protein: 2g
    Cholesterol: 10mg

  • Fluffy Banana Split Dessert You’ll Love

    Fluffy Banana Split Dessert You’ll Love

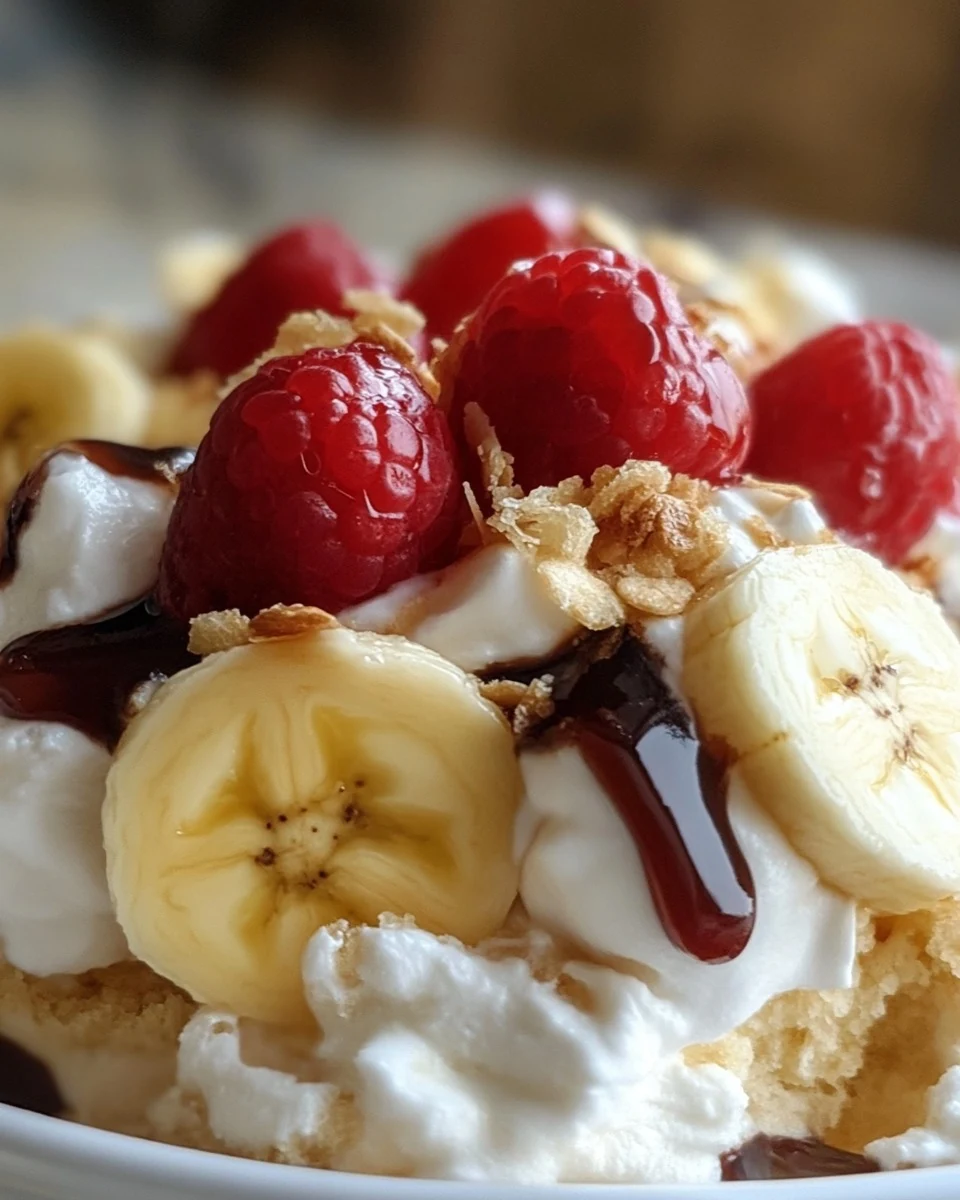
    Fluffy Banana Split Dessert is a delightful treat that combines the classic flavors of a banana split into a light and creamy dessert. This dish is perfect for warm days and celebrations, offering a refreshing taste that delights the senses. The combination of fluffy whipped topping, fresh bananas, and a variety of textures makes this dessert a standout choice for any occasion.

    Why You’ll Love This Recipe

    • Quick & Easy: Ready in just 15 minutes, with a chilling time that allows for easy prep.
    • Light & Refreshing: A perfect dessert that feels indulgent without being heavy.
    • Versatile Ingredients: Customize with your favorite toppings or nuts for a personal touch.
    • Crowd-Pleaser: Ideal for gatherings, this dessert is sure to impress guests of all ages.
    • No Baking Required: Skip the oven and still enjoy a delicious treat.

    Tools and Equipment

    Having the right tools makes preparation a breeze. Here are the essentials you’ll need.

    Essential Tools

    • Large mixing bowl
    • Rubber spatula
    • Measuring cups and spoons
    • Plastic wrap or airtight container

    Why These Tools Matter

    • Large mixing bowl: Provides ample space for combining all ingredients without spills.
    • Rubber spatula: Ensures gentle folding of ingredients, preserving the fluffy texture.
    • Airtight container: Keeps the dessert fresh and allows it to chill effectively.

    Ingredients for Fluffy Banana Split Dessert

    Dessert Ingredients

    • 8 oz tub of whipped topping, thawed
    • 2 bananas, sliced
    • ¼ cup miniature chocolate chips, plus 1 tbsp for topping
    • 1 cup miniature marshmallows
    • ½ cup crushed walnuts
    • 1-20 oz can of crushed pineapple (do not drain)
    • 1 box instant banana pudding mix
    • 2-10 oz jars of maraschino cherries, drained, patted dry, and sliced in half

    How to Make Fluffy Banana Split Dessert Step-by-Step

    Step 1: Mix the Pineapple and Pudding

    In a large bowl, combine the crushed pineapple (with juice) and the instant banana pudding mix. Stir until the mixture begins to thicken.

    Step 2: Fold in the Whipped Topping

    Gently fold the thawed whipped topping into the pudding mixture. Ensure it is smooth and fully incorporated.

    Step 3: Add the Goodies

    Carefully stir in the miniature marshmallows, crushed walnuts, miniature chocolate chips, banana slices, and halved maraschino cherries. Be gentle to avoid mashing the bananas.

    Step 4: Chill and Serve

    Cover the dessert with plastic wrap or transfer it to a tightly sealed container. Refrigerate for at least 1 hour before serving to allow the flavors to meld together.

    Step 5: Optional Garnish

    Before serving, sprinkle the top with the reserved 1 tablespoon of miniature chocolate chips for a final touch.

    With its light and fruity flavors, Fluffy Banana Split Dessert is perfect for any occasion. Enjoy this delightful treat that brings a classic twist to the table.

    How to Serve Fluffy Banana Split Dessert

    Serving Fluffy Banana Split Dessert can be a delightful experience. Here are some creative ideas to make your presentation stand out.

    Serve in Individual Cups

    Portion the dessert into small cups or mason jars for a fun, individual serving option. This not only makes it easy for guests to enjoy but also adds a charming touch to your gathering.

    Layered Parfait Style

    Create a layered parfait by alternating the Fluffy Banana Split Dessert with additional layers of crushed graham crackers or chocolate syrup. This adds texture and visual appeal, making it a showstopper on your dessert table.

    Add a Banana Boat Twist

    For a whimsical touch, serve the dessert in halved banana skins. Simply scoop out some of the banana and fill the skins with the Fluffy Banana Split Dessert mixture for a unique serving presentation that echoes the traditional banana split.

    Pro Tips for the Best Fluffy Banana Split Dessert

    To ensure your Fluffy Banana Split Dessert is as delightful as possible, consider these practical tips.

    • Use Fresh Bananas: For the best flavor and texture, select ripe but firm bananas to prevent them from turning mushy in the dessert.
    • Chill Before Serving: Allow the dessert to chill for a minimum of one hour. This helps the flavors meld together and enhances the overall taste.
    • Experiment with Toppings: Feel free to add or substitute toppings such as crushed graham crackers, shredded coconut, or even a drizzle of caramel sauce to elevate your dessert.
    • Store Properly: If you have leftovers, store them in an airtight container in the refrigerator. This will keep the dessert fresh for up to 2-3 days.
    • Adjust Sweetness to Taste: Depending on your preference, you can adjust the amount of marshmallows or chocolate chips to customize the sweetness of the dessert.

    Best Side Dishes and Pairings

    Pairing your Fluffy Banana Split Dessert with complementary sides can enhance the overall dining experience. Here are some excellent options:

    1. Fresh Fruit Salad: A light fruit salad adds a refreshing contrast to the rich dessert and balances the sweetness.
    2. Vanilla Ice Cream: Classic vanilla ice cream provides a creamy counterpart that echoes the traditional banana split experience.
    3. Chocolate Chip Cookies: The chewy texture of chocolate chip cookies creates a delightful contrast when enjoyed alongside the Fluffy Banana Split Dessert.
    4. Pineapple Upside-Down Cake: This cake’s caramelized pineapple flavor complements the tropical notes of the dessert beautifully.
    5. Iced Tea: A refreshing glass of iced tea, whether sweetened or unsweetened, can cleanse the palate and enhance the enjoyment of the dessert.

    Common Mistakes to Avoid

    • Using Unsweetened Whipped Topping: Always use sweetened whipped topping for the best flavor and texture.
    • Not Chilling Long Enough: Allow the dessert to chill for at least one hour to ensure the flavors meld properly.
    • Overmixing Ingredients: Gently fold the ingredients to prevent mashing the bananas and losing the fluffy texture.
    • Skipping the Pineapple Juice: Do not drain the pineapple juice; it adds moisture and flavor to the dessert.

    Storage & Reheating Instructions

    Refrigerator Storage

    Store the Fluffy Banana Split Dessert in an airtight container in the refrigerator. It will remain fresh for up to 3 days.

    Freezing Instructions

    This dessert is best enjoyed fresh, but if you need to freeze it, place it in an airtight container. To thaw, transfer it to the refrigerator for several hours or overnight.

    Reheating Tips

    • Oven: This dessert is not suitable for baking. Enjoy it cold.
    • Microwave: Do not microwave; the texture will be affected.
    • Stovetop: Not applicable, as this dessert is served chilled.

    Frequently Asked Questions

    How can I make a healthier version of Fluffy Banana Split Dessert?

    You can reduce the sugar by using sugar-free pudding mix and opting for a lower-fat whipped topping.

    Can I substitute other fruits in the Fluffy Banana Split Dessert?

    Yes, feel free to experiment with fruits like strawberries or blueberries for a different flavor twist.

    How long does the Fluffy Banana Split Dessert last?

    When stored properly in the refrigerator, it lasts for up to 3 days.

    Is it possible to make this dessert in advance?

    Absolutely! You can prepare it a day ahead and let it chill overnight for enhanced flavor.

    Can I add more toppings to the Fluffy Banana Split Dessert?

    Certainly! Consider adding crushed graham crackers, coconut flakes, or additional fresh fruits as delightful toppings.

    Final Thoughts

    The Fluffy Banana Split Dessert is a delightful treat that combines creamy textures with fruity flavors. It’s perfect for gatherings or a simple family dessert. We encourage you to try this easy recipe and share your feedback in the comments!


    Desserts

    Fluffy Banana Split Dessert


    5.0 from 24 reviews

    This Fluffy Banana Split Dessert is a delightful and light twist on the classic banana split. With layers of whipped topping, fresh bananas, and a mix of chocolate chips, marshmallows, and cherries, it offers a refreshing treat perfect for any occasion. Chill it for an hour to let the flavors meld together for a deliciously sweet experience.

    Author: Munch Twist
    Prep Time: 15 minutes
    Cook Time: 0 minutes
    Total Time: 75 minutes
    Yield: 10 servings
    Category: Desserts
    Method: No bake
    Cuisine: American

    Fluffy Banana Split Dessert

    SCALE:
    1x
    2x
    3x
    Cook Mode: Prevent your screen from going dark

    Ingredients

    • 8 oz tub of whipped topping, thawed
    • 2 bananas, sliced
    • ¼ cup miniature chocolate chips, plus 1 tbsp for topping
    • 1 cup miniature marshmallows
    • ½ cup crushed walnuts
    • 1-20 oz can of crushed pineapple (do not drain)
    • 1 box instant banana pudding mix
    • 2-10 oz jars of maraschino cherries, drained, patted dry, and sliced in half

    Instructions

    1. In a large bowl, combine the crushed pineapple (with juice) and the instant banana pudding mix. Stir until the mixture begins to thicken.
    2. Gently fold the thawed whipped topping into the pudding mixture until smooth and fully incorporated.
    3. Carefully stir in the miniature marshmallows, crushed walnuts, miniature chocolate chips, banana slices, and halved maraschino cherries. Be gentle to avoid mashing the bananas.
    4. Cover the dessert with plastic wrap or transfer it to a tightly sealed container. Refrigerate for at least 1 hour before serving to allow the flavors to meld together.
    5. Before serving, sprinkle the top with the reserved 1 tablespoon of miniature chocolate chips for a final touch.

    Nutrition Facts

    Serving Size: 1 serving
    Calories: 220 kcal
    Sugar: 18g
    Sodium: 150mg
    Fat: 8g
    Saturated Fat: 4g
    Carbohydrates: 38g
    Fiber: 1g
    Protein: 2g
    Cholesterol: 5mg

  • Melt-In-Your-Mouth Georgia Toffee Recipe

    Melt-In-Your-Mouth Georgia Toffee Recipe

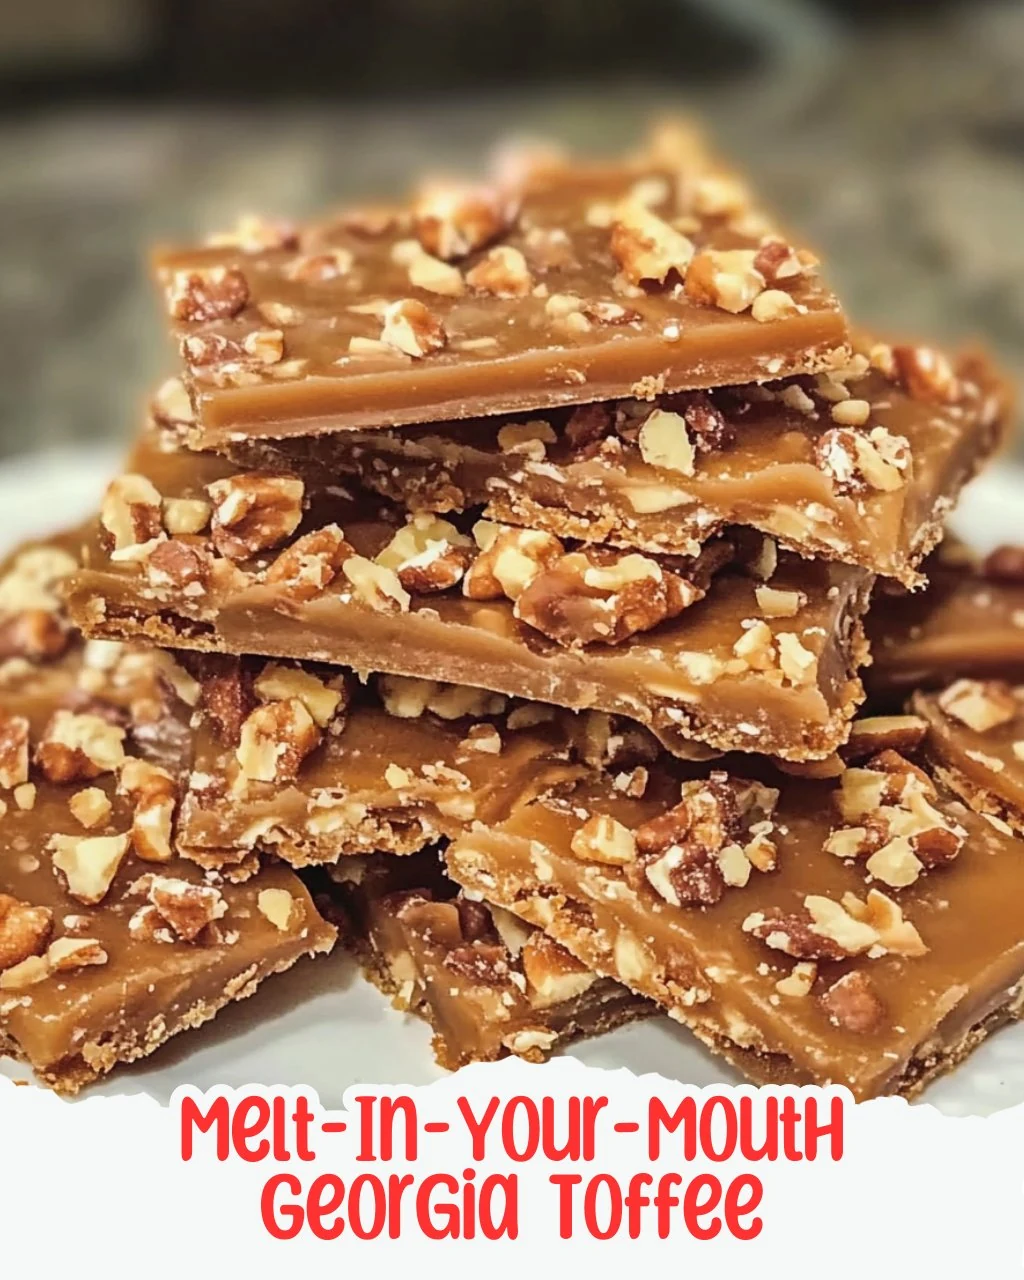
    Melt-In-Your-Mouth Georgia Toffee is an irresistible treat that combines buttery richness with chocolate and crunchy pecans. Each bite offers a delightful experience that melts in your mouth, making it the perfect indulgence for special occasions or just because.

    Why You’ll Love This Recipe

    • Irresistible Flavor: The combination of buttery toffee, chocolate, and pecans creates a taste sensation that is hard to resist.
    • Quick & Easy: This recipe can be prepared in just 25 minutes, making it a perfect last-minute treat.
    • Perfect for Sharing: With about 20 pieces, this toffee is great for sharing at gatherings or gifting to friends.
    • Versatile Treat: Enjoy it during holidays, as an afternoon snack, or as a sweet finish to your meals.
    • Simple Ingredients: Made with common pantry staples, you’ll find it easy to whip up anytime a craving strikes.

    Tools and Equipment

    Gathering the right tools will streamline your cooking process and enhance your experience.

    Essential Tools

    • Heavy-bottomed saucepan
    • Baking sheet or 9×13-inch pan
    • Parchment paper or silicone baking mat
    • Spatula
    • Candy thermometer

    Why These Tools Matter

    • Heavy-bottomed saucepan: Provides even heat distribution, reducing the risk of burning the toffee.
    • Candy thermometer: Ensures accurate temperature readings, crucial for achieving the perfect hard crack stage.
    • Spatula: Helps in spreading the toffee and chocolate evenly, ensuring a beautiful finish.

    Ingredients for Melt-In-Your-Mouth Georgia Toffee

    Toffee Base

    • 1 cup semi-sweet chocolate chips
    • 1/2 cup finely chopped pecans
    • 1 cup unsalted butter
    • 1 cup granulated sugar
    • 1/4 teaspoon salt
    • 1 teaspoon vanilla extract

    How to Make Melt-In-Your-Mouth Georgia Toffee Step-by-Step

    Step 1: Prepare the Baking Sheet

    Preheat by lining a baking sheet or a 9×13-inch pan with parchment paper or a silicone baking mat. Setting this up first will allow for a smoother pouring process later.

    Step 2: Create the Toffee Base

    In a heavy-bottomed saucepan, melt the unsalted butter over medium heat. Once melted, add the granulated sugar and salt, stirring continuously until well combined.

    Step 3: Boil the Mixture

    Bring the mixture to a boil, stirring frequently. Use a candy thermometer to monitor the temperature. You want it to reach 300°F (149°C), the hard crack stage. Look for a deep amber color to confirm readiness.

    Step 4: Add Vanilla and Pour

    Remove the saucepan from the heat. Quickly stir in the vanilla extract to infuse flavor. Immediately pour the hot toffee mixture onto the prepared baking sheet, using a spatula to spread it evenly.

    Step 5: Melt the Chocolate

    While the toffee is still hot, sprinkle the semi-sweet chocolate chips on top. Let them sit for about 2 minutes to allow the heat to melt the chocolate. Once melted, use an offset spatula to smooth it over the toffee layer.

    Step 6: Add Pecans

    Sprinkle the finely chopped pecans over the melted chocolate. Press them gently into the surface to ensure they stick well and add a delightful crunch.

    Step 7: Cool and Break

    Allow the toffee to cool completely at room temperature. For faster results, place it in the refrigerator. Once hardened, break it into pieces for serving.

    Step 8: Store Your Toffee

    Store your melt-in-your-mouth Georgia toffee in an airtight container at room temperature. It will remain fresh for up to 2 weeks, perfect for satisfying sweet cravings.

    How to Serve Melt-In-Your-Mouth Georgia Toffee

    Elevate your dessert experience with these creative serving suggestions.

    Toffee Sundae

    Layer chunks of Melt-In-Your-Mouth Georgia Toffee over a scoop of vanilla ice cream, drizzling with warm caramel sauce for a decadent sundae.

    Cheese and Toffee Board

    Combine your toffee with a selection of cheeses, such as creamy brie and sharp cheddar, for a sweet-and-savory cheese board that will impress your guests.

    Coffee Companion

    Serve pieces of toffee alongside a rich cup of coffee or espresso. The combination of the toffee’s sweetness and the coffee’s bitterness creates a delightful contrast.

    Pro Tips for the Best Melt-In-Your-Mouth Georgia Toffee

    To ensure your toffee turns out perfectly every time, consider these helpful tips.

    • Use a Candy Thermometer: A reliable candy thermometer is essential for achieving the correct temperature and consistency of toffee.

    • Stir Constantly: Keep stirring the mixture as it cooks to prevent burning and ensure even heating throughout.

    • Quality Chocolate: Opt for high-quality chocolate chips to enhance the flavor of your toffee; it makes a noticeable difference.

    • Cool Completely: Allow the toffee to cool completely before breaking it apart to ensure clean, beautiful pieces.

    • Airtight Storage: Store your toffee in an airtight container to keep it fresh for longer and prevent it from becoming sticky.

    Best Side Dishes and Pairings

    Pair your Melt-In-Your-Mouth Georgia Toffee with these delightful options for an enhanced tasting experience.

    1. Espresso: The bold flavors of espresso complement the sweetness of the toffee perfectly, creating a balanced dessert experience.

    2. Vanilla Ice Cream: The creamy texture of vanilla ice cream pairs beautifully with the crunchy toffee, offering a satisfying contrast.

    3. Red Wine: A glass of fruity red wine can enhance the toffee’s rich flavors, making for a sophisticated pairing.

    4. Chai Tea: The warm spices in chai tea make it a comforting companion to the sweet and buttery toffee.

    5. Fresh Berries: Serve with a side of fresh berries to add a tart contrast that offsets the sweetness of the toffee.

    Common Mistakes to Avoid

    • Not Using a Candy Thermometer: Relying solely on visual cues can lead to undercooked or burnt toffee. A candy thermometer ensures you reach the perfect hard crack stage.
    • Skipping the Parchment Paper: Pouring the hot toffee directly onto the pan without parchment can lead to a sticky mess that’s hard to remove.
    • Overcrowding the Chocolate Chips: Adding too many chocolate chips at once can result in uneven melting. Allow them to sit before spreading for a smooth finish.
    • Not Pressing the Pecans: Failing to press the pecans into the melted chocolate means they may fall off once the toffee hardens.

    Storage & Reheating Instructions

    Refrigerator Storage

    Store the melted-in-your-mouth Georgia toffee in an airtight container at room temperature. It will remain fresh for up to 2 weeks, allowing you to enjoy it over time.

    Freezing Instructions

    For long-term storage, wrap the toffee pieces in plastic wrap and place them in a freezer-safe container. This method preserves the flavor and texture for up to 3 months.

    Reheating Tips

    • Oven: Preheat your oven to 300°F (150°C), place the toffee on a baking sheet, and warm for 5-10 minutes until slightly softened.
    • Microwave: Heat on low power in 10-15 second intervals, checking frequently to avoid melting completely.
    • Stovetop: Place in a non-stick skillet over low heat, stirring gently until softened.

    Frequently Asked Questions

    How can I ensure my Melt-In-Your-Mouth Georgia Toffee is perfectly crunchy?

    To achieve the right crunch, monitor the temperature closely with a candy thermometer, ensuring it reaches 300°F (149°C) for the hard crack stage.

    Can I substitute pecans in this Melt-In-Your-Mouth Georgia Toffee recipe?

    Yes, you can substitute pecans with other nuts like walnuts or almonds, or even omit the nuts for a nut-free version.

    Is it possible to make Melt-In-Your-Mouth Georgia Toffee ahead of time?

    Absolutely! This toffee can be made in advance and stored in an airtight container for freshness, making it perfect for holiday gifting or special occasions.

    What should I do if my toffee is too sticky?

    If your toffee is sticky, it may not have reached the hard crack stage. Consider re-melting it gently, adding a bit more heat until it reaches the proper temperature.

    Final Thoughts

    Melt-In-Your-Mouth Georgia Toffee is a delightful treat that combines simplicity with indulgence. I encourage you to try making this recipe and share your experience in the comments. Your feedback helps others embark on their sweet journey!


    Desserts

    Melt-In-Your-Mouth Georgia Toffee


    5.0 from 24 reviews

    This Georgia toffee is a delightful blend of buttery richness, silky chocolate, and crunchy pecans that will melt in your mouth with every bite. Perfect for holidays or anytime cravings!

    Author: Munch Twist
    Prep Time: 10 minutes
    Cook Time: 15 minutes
    Total Time: 25 minutes
    Yield: 20 servings
    Category: Desserts
    Method: No bake
    Cuisine: American

    Melt-In-Your-Mouth Georgia Toffee

    SCALE:
    1x
    2x
    3x
    Cook Mode: Prevent your screen from going dark

    Ingredients

    • 1 cup semi-sweet chocolate chips
    • 1/2 cup finely chopped pecans
    • 1 cup unsalted butter
    • 1 cup granulated sugar
    • 1/4 teaspoon salt
    • 1 teaspoon vanilla extract

    Instructions

    1. Preheat your adventure by lining a baking sheet or a 9×13-inch pan with parchment paper or a silicone baking mat. Set it aside.
    2. In a heavy-bottomed saucepan, add the unsalted butter and melt it over medium heat. Sprinkle in the granulated sugar and salt, stirring continuously.
    3. Bring the mixture to a boil, stirring frequently until the candy thermometer reads 300°F (149°C) and it turns a deep amber color.
    4. Remove the saucepan from heat, pour in the vanilla extract, and stir quickly. Pour the toffee mixture onto the prepared baking sheet and spread it evenly.
    5. While the toffee is still hot, sprinkle the chocolate chips on top and let them sit for about 2 minutes to melt. Spread the melted chocolate evenly over the toffee.
    6. Sprinkle the finely chopped pecans over the melted chocolate and gently press them into the surface.
    7. Let the toffee cool completely at room temperature or refrigerate to speed up the process. Once hardened, break into pieces.
    8. Store the toffee in an airtight container at room temperature for up to 2 weeks.

    Nutrition Facts

    Serving Size: 1 serving
    Calories: 180 kcal
    Sugar: 12g
    Sodium: 50mg
    Fat: 10g
    Saturated Fat: 5g
    Carbohydrates: 22g
    Fiber: 1g
    Protein: 2g
    Cholesterol: 30mg

  • Irresistible Lemon Curd Thumbprint Cookies A Tangy Sweet Delight

    Irresistible Lemon Curd Thumbprint Cookies A Tangy Sweet Delight

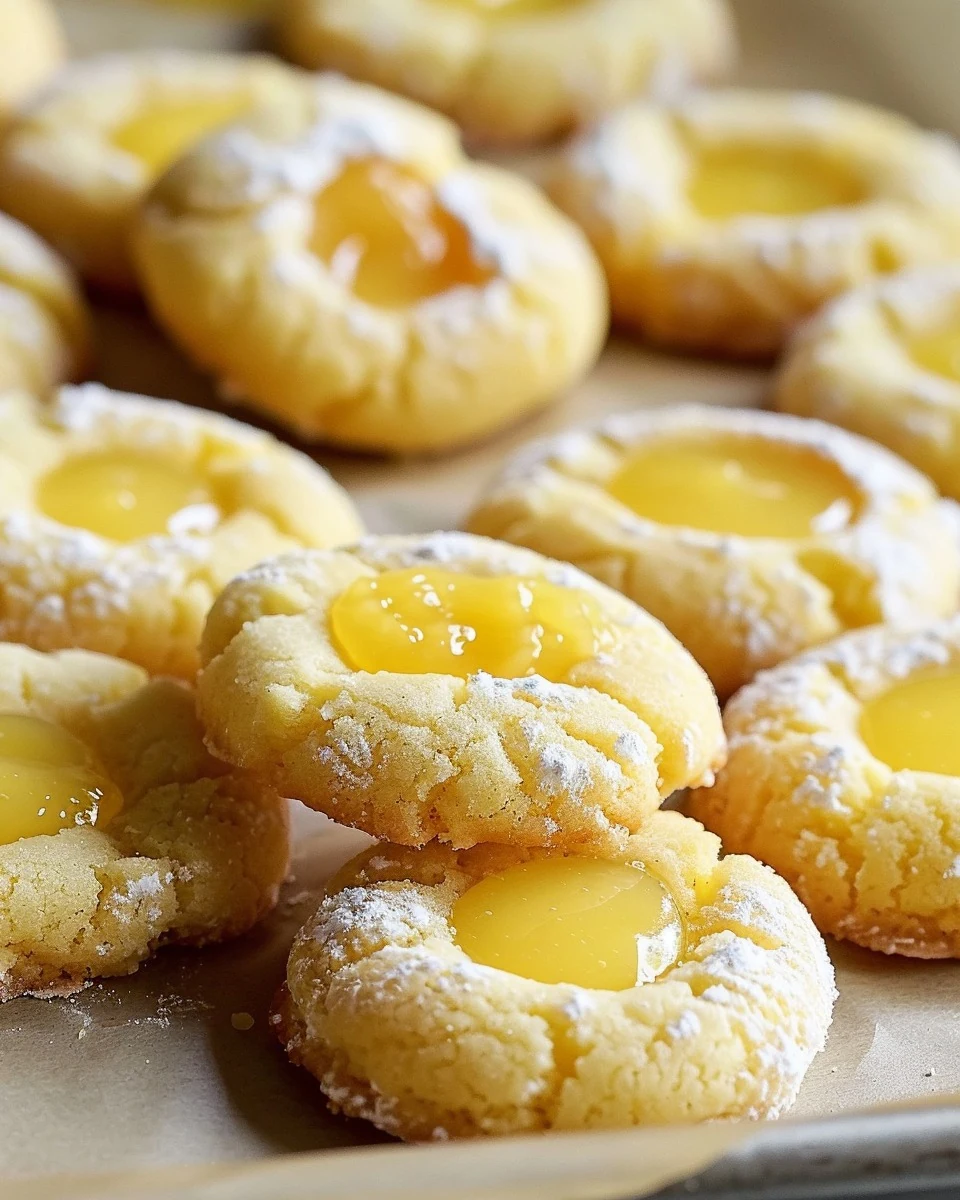
    Lemon Curd Thumbprint Cookies are a tangy sweet delight that perfectly balances zesty lemon with a buttery cookie base. These cookies not only look beautiful but also offer a burst of flavor in every bite. Their unique combination of textures makes them an irresistible treat for any occasion.

    Why You’ll Love This Recipe

    • Irresistibly Tangy: The lemon curd adds a refreshing zing that brightens your taste buds.
    • Perfect for Any Occasion: These cookies are ideal for tea parties, holiday gatherings, or as a delightful everyday snack.
    • Easy to Make: With simple ingredients and straightforward steps, even beginner bakers can create these delicious cookies.
    • Customizable: Feel free to add lemon zest for an extra layer of citrus flavor.
    • Great for Sharing: These cookies make an excellent gift or dessert to bring to gatherings.

    Tools and Equipment

    To make Lemon Curd Thumbprint Cookies, you will need a few essential kitchen tools.

    Essential Tools

    • Mixing bowl
    • Baking sheet
    • Parchment paper
    • Whisk
    • Measuring cups and spoons
    • Wire rack

    Why These Tools Matter

    • Mixing Bowl: A large bowl allows for easy blending of ingredients, ensuring a smooth dough.
    • Baking Sheet: A sturdy baking sheet provides even heat distribution for perfectly baked cookies.
    • Wire Rack: Using a wire rack helps cool the cookies evenly, preventing them from becoming soggy.

    Ingredients for Lemon Curd Thumbprint Cookies A Tangy Sweet Delight

    • 2 large egg yolks
    • 1 cup unsalted butter, softened
    • 1/2 cup lemon curd
    • 2 cups all-purpose flour
    • 2/3 cup granulated sugar
    • 1/2 tsp salt
    • 1 tsp vanilla extract

    How to Make Lemon Curd Thumbprint Cookies A Tangy Sweet Delight Step-by-Step

    Step 1: Prepare the Oven and Baking Sheet

    Preheat your oven to 350°F (175°C). Line a baking sheet with parchment paper to prevent sticking.

    Step 2: Cream the Butter and Sugar

    In a large mixing bowl, cream together the softened butter and granulated sugar. Beat until the mixture is light and fluffy, which should take about 2-3 minutes.

    Step 3: Incorporate Egg Yolks and Vanilla

    Add the egg yolks and vanilla extract to the butter-sugar mixture. Mix thoroughly until well combined.

    Step 4: Combine Dry Ingredients

    In a separate bowl, whisk together the all-purpose flour and salt. Gradually add this dry mixture to the wet ingredients, stirring until a soft dough forms.

    Step 5: Shape the Cookies

    Roll the dough into 1-inch balls and place them on the prepared baking sheet, ensuring they are spaced about 2 inches apart.

    Step 6: Create Indentations

    Use your thumb or the back of a spoon to create an indentation in the center of each cookie. This will hold the lemon curd.

    Step 7: Add Lemon Curd

    Spoon approximately 1/2 teaspoon of lemon curd into each indentation. Fill them just to the top without overflowing.

    Step 8: Bake the Cookies

    Place the baking sheet in the preheated oven and bake for 10-12 minutes. The cookies should be lightly golden around the edges.

    Step 9: Cool the Cookies

    Once baked, allow the cookies to cool on the baking sheet for a few minutes. Then, transfer them to a wire rack to cool completely.

    Step 10: Serve and Enjoy

    Serve your Lemon Curd Thumbprint Cookies with a cup of tea or coffee, and savor the delightful tangy sweetness.

    Enjoy these zesty and sweet Lemon Curd Thumbprint Cookies!

    How to Serve Lemon Curd Thumbprint Cookies A Tangy Sweet Delight

    These delightful cookies can be enjoyed in various creative ways to enhance your tasting experience.

    With a Dusting of Powdered Sugar

    A light sprinkle of powdered sugar adds a touch of sweetness and elegance, making these cookies perfect for special occasions or afternoon tea.

    Pair with Fresh Berries

    Serving Lemon Curd Thumbprint Cookies alongside fresh raspberries or blueberries creates a refreshing contrast, balancing the tanginess of the lemon curd with the natural sweetness of the berries.

    On a Dessert Platter

    Arrange these cookies on a dessert platter with other treats such as mini cheesecakes or chocolate truffles for a visually appealing dessert spread that is sure to impress guests.

    Pro Tips for the Best Lemon Curd Thumbprint Cookies A Tangy Sweet Delight

    To achieve the perfect texture and flavor in your cookies, consider these essential tips.

    • Use Room Temperature Ingredients: Always ensure that your butter and eggs are at room temperature for optimal mixing and texture.
    • Chill the Dough: If the dough becomes too soft to handle, chill it in the refrigerator for 15-20 minutes before shaping the cookies.
    • Measure Flour Accurately: Use a spoon to scoop the flour into your measuring cup and level it off with a knife to prevent dense cookies.
    • Don’t Overbake: Keep an eye on the cookies while baking; they should be lightly golden around the edges but still soft in the center.
    • Experiment with Flavors: Consider adding a splash of almond extract or a hint of lavender for a unique twist on the classic lemon flavor.

    Best Side Dishes and Pairings

    These Lemon Curd Thumbprint Cookies are versatile and can be paired with a variety of delicious accompaniments.

    1. Earl Grey Tea – The bergamot notes in Earl Grey complement the lemon curd, enhancing the overall citrus experience.
    2. Lemonade – A refreshing glass of lemonade echoes the cookies’ flavor, making for a harmonious pairing.
    3. Vanilla Ice Cream – The creaminess of vanilla ice cream contrasts beautifully with the tangy lemon curd, creating a delightful dessert duo.
    4. Cheese Platter – A selection of creamy cheeses like brie or goat cheese can provide a savory balance to the sweet cookies.
    5. Fruit Salad – A light fruit salad with citrus fruits can brighten up the palate and offer a refreshing side to the cookies.

    Common Mistakes to Avoid

    • Using Melted Butter: Ensure the butter is softened but not melted to achieve the right cookie texture.
    • Overfilling with Lemon Curd: Fill the indentations with just enough lemon curd; too much can overflow while baking.
    • Skipping the Cooling Step: Allow cookies to cool on the baking sheet before transferring; this helps them firm up.
    • Incorrect Oven Temperature: Always preheat the oven to avoid uneven baking.

    Storage & Reheating Instructions

    Refrigerator Storage

    Store the Lemon Curd Thumbprint Cookies in an airtight container at room temperature. They will remain fresh for up to 3 days.

    Freezing Instructions

    For longer storage, freeze the cookies by placing them in a single layer on a baking sheet. Once frozen, transfer them to an airtight container. They can be frozen for up to 2 months.

    Reheating Tips

    • Oven: Preheat to 350°F (175°C) and warm cookies for about 5-7 minutes.
    • Microwave: Heat individually for about 10-15 seconds on high for a soft texture.
    • Stovetop: Place cookies in a covered skillet over low heat for a few minutes until warmed through.

    Frequently Asked Questions

    What are Lemon Curd Thumbprint Cookies?

    Lemon Curd Thumbprint Cookies are buttery cookies with a tangy lemon curd filling, characterized by their thumbprint shape.

    Can I use homemade lemon curd for this recipe?

    Absolutely! Homemade lemon curd enhances the flavor, making your Lemon Curd Thumbprint Cookies a tangy sweet delight.

    How long do these cookies last?

    When stored properly in an airtight container, these cookies stay fresh for up to 3 days at room temperature or 2 months in the freezer.

    Can I substitute lemon curd with another filling?

    Yes, you can try other fruit curds or jams, but the flavor profile will change from the original Lemon Curd Thumbprint Cookies.

    What can I serve with Lemon Curd Thumbprint Cookies?

    These cookies pair wonderfully with tea or coffee, making them an excellent choice for an afternoon snack.

    Final Thoughts

    These Lemon Curd Thumbprint Cookies are a delightful treat that combines tangy and sweet flavors perfectly. I encourage you to try this recipe in your kitchen and share your experiences in the comments section below.


    Desserts

    Lemon Curd Thumbprint Cookies A Tangy Sweet Delight


    5.0 from 24 reviews

    These Lemon Curd Thumbprint Cookies are a delightful combination of tangy lemon curd and sweet buttery dough. Perfect for tea time or as a sweet snack, these cookies are easy to make and sure to impress with their zesty flavor.

    Author: Munch Twist
    Prep Time: 15 minutes
    Cook Time: 12 minutes
    Total Time: 27 minutes
    Yield: 24 cookies
    Category: Desserts
    Method: No bake
    Cuisine: American

    Lemon Curd Thumbprint Cookies A Tangy Sweet Delight

    SCALE:
    1x
    2x
    3x
    Cook Mode: Prevent your screen from going dark

    Ingredients

    • 2 large egg yolks
    • 1 cup unsalted butter, softened
    • 1/2 cup lemon curd
    • 2 cups all-purpose flour
    • 2/3 cup granulated sugar
    • 1/2 tsp salt
    • 1 tsp vanilla extract

    Instructions

    1. Preheat your oven to 350°F (175°C) and line a baking sheet with parchment paper.
    2. In a large bowl, cream together the softened butter and granulated sugar until light and fluffy.
    3. Beat in the egg yolks and vanilla extract until fully combined.
    4. In a separate bowl, whisk together the flour and salt. Gradually mix these dry ingredients into the butter mixture until a soft dough forms.
    5. Roll the dough into 1-inch balls and place them on the prepared baking sheet, spacing them about 2 inches apart.
    6. Use your thumb or the back of a spoon to make an indentation in the center of each cookie.
    7. Spoon approximately 1/2 teaspoon of lemon curd into each indentation, filling them just to the top.
    8. Bake the cookies for 10-12 minutes, or until the edges are lightly golden.
    9. Allow the cookies to cool on the baking sheet for a few minutes, then transfer them to a wire rack to cool completely.

    Nutrition Facts

    Serving Size: 1 serving
    Calories: 130 kcal
    Sugar: 5g
    Sodium: 75mg
    Fat: 7g
    Saturated Fat: 4g
    Carbohydrates: 17g
    Fiber: 0g
    Protein: 1g
    Cholesterol: 30mg

  • Delightful No-Bake Banana Split Cake Recipe

    Delightful No-Bake Banana Split Cake Recipe

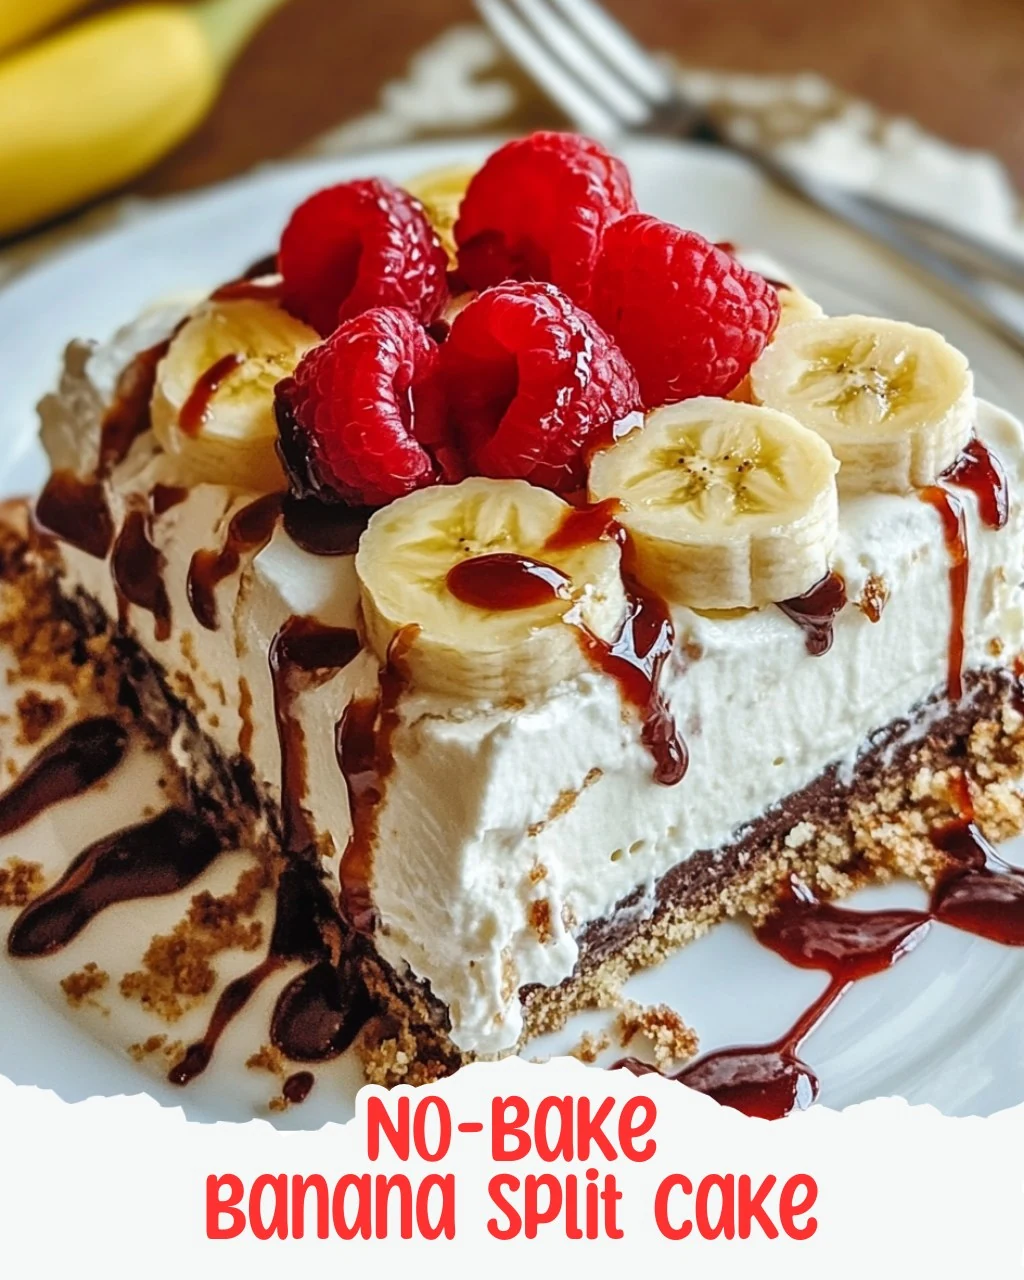
    Get ready for a taste of summer with this refreshing and delicious No-Bake Banana Split Cake! This dessert combines creamy goodness, fruity sweetness, and crunchy toppings, making it the perfect choice for gatherings or a sweet family treat.

    Why You’ll Love This Recipe

    • No Baking Required: This recipe saves you time and keeps your kitchen cool during hot months.
    • Layered Delight: The combination of creamy, fruity, and crunchy textures makes each bite irresistible.
    • Customizable: You can easily switch up the fruits or toppings based on your preferences.
    • Perfect for Sharing: With 12 servings, it’s ideal for parties, potlucks, or family gatherings.
    • Make Ahead: You can prepare it the night before, allowing the flavors to meld beautifully.

    Tools and Equipment

    Having the right tools makes this recipe a breeze.

    Essential Tools

    • Mixing bowls
    • 9×13-inch pan
    • Electric mixer
    • Measuring cups and spoons
    • Spatula

    Why These Tools Matter

    • Electric Mixer: It simplifies the process of beating cream cheese and powdered sugar to a smooth consistency.
    • 9×13-inch Pan: This size is perfect for layering and serving a crowd.
    • Spatula: A good spatula helps in spreading the cream cheese layer evenly and smoothing the whipped topping.

    Ingredients for No-Bake Banana Split Cake

    Crust

    • 2 cups graham cracker crumbs
    • 1/2 cup unsalted butter, melted
    • 1/4 cup granulated sugar

    Cream Cheese Layer

    • 1 (8 oz) container whipped topping like Cool Whip, thawed
    • 1 (8 oz) package cream cheese, softened
    • 1 cup powdered sugar
    • 1 teaspoon vanilla extract

    Fruit Layer

    • 2 large bananas, sliced
    • 1 (20 oz) can crushed pineapple, drained
    • 1 1/2 cups strawberries, hulled and sliced

    Topping

    • 1 cup whipped topping (for the topping)
    • 1/2 cup chopped nuts (optional)
    • Chocolate syrup (for drizzle)
    • Maraschino cherries (for garnish)

    How to Make No-Bake Banana Split Cake Step-by-Step

    Step 1: Prep the Base

    1. In a medium bowl, combine the graham cracker crumbs, melted butter, and granulated sugar. Mix well until everything is fully incorporated.
    2. Press this mixture firmly into the bottom of a 9×13-inch pan to form a crust.
    3. Place the pan in the refrigerator for about 10 minutes to set.

    Step 2: Make the Cream Cheese Layer

    1. In a large mixing bowl, beat the softened cream cheese, powdered sugar, and vanilla extract together until smooth and creamy.
    2. Gently fold the whipped topping into the cream cheese mixture until fully blended.
    3. Spread the cream cheese layer evenly over the chilled crust, creating a smooth, even layer.

    Step 3: Layer the Fruit

    1. Layer the banana slices directly on top of the cream cheese layer, ensuring they are evenly distributed.
    2. Spoon the drained crushed pineapple over the bananas, spreading it evenly.
    3. Add the fresh strawberries on top of the pineapple for a colorful layer.

    Step 4: Final Touches

    1. Cover the fruit with a final layer of whipped topping, smoothing it out nicely.
    2. If desired, sprinkle chopped nuts on top for an extra crunch.
    3. Finish by drizzling chocolate syrup over the top and garnishing with maraschino cherries.

    Step 5: Chill and Serve

    1. Cover the pan and refrigerate for at least 4 hours, or preferably overnight, to allow the flavors to meld and the cake to set.
    2. Once set, slice and serve chilled for a delightful treat!

    This No-Bake Banana Split Cake is sure to impress your family and friends. Enjoy every delicious bite!

    How to Serve No-Bake Banana Split Cake

    Serving your No-Bake Banana Split Cake creatively enhances the experience. Here are some ideas to elevate your dessert presentation.

    Individual Servings

    Scoop portions of the cake into small dessert cups or bowls. Top each serving with additional sliced fruit and a dollop of whipped topping for an elegant touch.

    Layered Parfaits

    Create parfaits by layering pieces of the cake with fresh fruit and whipped topping in clear glasses. This not only looks appealing but also allows for easy serving at parties.

    Ice Cream Sundae Style

    Serve slices of the cake alongside a scoop of vanilla ice cream. Drizzle with extra chocolate syrup and add a cherry on top for a fun twist reminiscent of classic banana splits.

    Pro Tips for the Best No-Bake Banana Split Cake

    To ensure your No-Bake Banana Split Cake turns out perfectly, keep these tips in mind.

    • Use Fresh Ingredients: Select ripe bananas and fresh strawberries to enhance the flavor and texture of your cake.
    • Chill the Cream Cheese: Make sure your cream cheese is at room temperature for easier mixing and a smoother filling.
    • Let It Set: Allow the cake to chill for a minimum of 4 hours, or overnight if possible, to achieve the best flavor and texture.
    • Customize Your Toppings: Feel free to experiment with different fruits or toppings, such as crushed Oreos or coconut flakes, to personalize your dessert.
    • Store Properly: Keep any leftovers covered in the refrigerator to maintain freshness for up to 3 days.

    Best Side Dishes and Pairings

    Pairing your No-Bake Banana Split Cake with complementary dishes enhances your meal. Consider these options:

    1. Fruit Salad: A light and refreshing fruit salad balances the richness of the cake and adds more fresh flavors.
    2. Iced Tea: A tall glass of iced tea, either sweetened or unsweetened, provides a refreshing contrast to the sweetness of the dessert.
    3. Chocolate Milkshake: The creamy texture and chocolate flavor of a milkshake complement the cake’s ingredients beautifully.
    4. Vanilla Ice Cream: Serving with vanilla ice cream creates a classic combination that elevates the dessert experience.
    5. Coffee: A cup of coffee offers a nice contrast to the sweetness of the cake, making it a perfect after-dinner pairing.

    Common Mistakes to Avoid

    • Not Chilling the Cake Long Enough: Ensure the cake is refrigerated for at least 4 hours, or overnight for best results.
    • Using Warm Ingredients: Make sure the cream cheese is softened, but not warm, as it can affect the texture of the cake.
    • Skipping the Drainage of Pineapple: Always drain the crushed pineapple well to avoid a soggy dessert.
    • Overmixing the Whipped Topping: Gently fold the whipped topping into the cream cheese mixture to maintain a light and airy texture.

    Storage & Reheating Instructions

    Refrigerator Storage

    Store any leftover No-Bake Banana Split Cake in an airtight container in the refrigerator. It will stay fresh for up to 3 days.

    Freezing Instructions

    For best results, freeze the cake before adding the whipped topping and garnishes. Wrap it tightly in plastic wrap and foil, and it can be frozen for up to 2 months. Thaw overnight in the refrigerator before adding toppings.

    Reheating Tips

    • Oven: Preheat to 350°F, wrap the cake in foil, and warm for about 10 minutes.
    • Microwave: Place a slice on a microwave-safe plate and heat for 20-30 seconds.
    • Stovetop: Warm a slice in a non-stick skillet over low heat for about 3-4 minutes, turning occasionally.

    Frequently Asked Questions

    Can I make No-Bake Banana Split Cake ahead of time?

    Yes, this cake is perfect for making ahead. It’s best to prepare it the day before serving to allow the flavors to meld.

    What can I substitute for the cream cheese in No-Bake Banana Split Cake?

    You can use mascarpone cheese or Greek yogurt for a lighter alternative, but the texture and flavor will differ slightly.

    How can I make No-Bake Banana Split Cake gluten-free?

    Use gluten-free graham cracker crumbs or a gluten-free cookie alternative for the crust.

    How long does No-Bake Banana Split Cake last in the fridge?

    The cake will stay fresh in the refrigerator for up to 3 days when stored in an airtight container.

    Can I add other fruits to No-Bake Banana Split Cake?

    Absolutely! Feel free to experiment with other fruits like blueberries, raspberries, or kiwi for added flavor and color.

    Final Thoughts

    This No-Bake Banana Split Cake is a delightful treat that captures the essence of summer in every bite. Its layers of flavor and texture make it a crowd-pleaser at any gathering. We encourage you to try this recipe and share your experience in the comments below.


    Desserts

    No-Bake Banana Split Cake


    5.0 from 24 reviews

    Get ready for a taste of summer with this refreshing and delicious no-bake banana split cake! Perfect for gatherings or a sweet family treat, this dessert layers creamy goodness, fruit sweetness, and crunchy toppings that will have everyone coming back for seconds.

    Author: Munch Twist
    Prep Time: 20 minutes
    Cook Time: 0 minutes
    Total Time: 240 minutes
    Yield: 12 servings
    Category: Desserts
    Method: Baking
    Cuisine: American

    No-Bake Banana Split Cake

    SCALE:
    1x
    2x
    3x
    Cook Mode: Prevent your screen from going dark

    Ingredients

    • 2 cups graham cracker crumbs
    • 1/2 cup unsalted butter, melted
    • 1/4 cup granulated sugar
    • 1 8 oz container whipped topping, thawed
    • 1 8 oz package cream cheese, softened
    • 1 cup powdered sugar
    • 1 teaspoon vanilla extract
    • 2 large bananas, sliced
    • 1 20 oz can crushed pineapple, drained
    • 1 1/2 cups strawberries, hulled and sliced
    • 1 cup whipped topping (for the topping)
    • 1/2 cup chopped nuts (optional)
    • Chocolate syrup (for drizzle)
    • Maraschino cherries (for garnish)

    Instructions

    1. In a medium bowl, combine the graham cracker crumbs, melted butter, and granulated sugar. Mix well until everything is well incorporated.
    2. Press this mixture firmly into the bottom of a 9×13-inch pan to form a crust. Place the pan in the refrigerator for about 10 minutes to set.
    3. In a large mixing bowl, beat the softened cream cheese, powdered sugar, and vanilla extract together until you achieve a smooth and creamy texture.
    4. Gently fold the whipped topping into the cream cheese mixture until completely blended.
    5. Spread the cream cheese layer evenly over the chilled crust, creating a smooth, even layer.
    6. Layer the banana slices directly on top of the cream cheese layer, making sure they are evenly distributed.
    7. Spoon the drained crushed pineapple over the bananas, spreading it out evenly.
    8. Add the fresh strawberries on top of the pineapple, creating a colorful layer.
    9. Cover the fruit with a final layer of whipped topping, smoothing it out nicely.
    10. If desired, sprinkle chopped nuts on top for an extra crunch.
    11. Finish by drizzling chocolate syrup over the top and garnishing with maraschino cherries.
    12. Cover the pan and refrigerate for at least 4 hours, or preferably overnight, to allow the flavors to meld and the cake to set.
    13. Once set, slice and serve chilled for a delightful treat!

    Nutrition Facts

    Serving Size: 1 serving
    Calories: 320 kcal
    Sugar: 20g
    Sodium: 250mg
    Fat: 18g
    Saturated Fat: 10g
    Carbohydrates: 38g
    Fiber: 2g
    Protein: 3g
    Cholesterol: 30mg

  • Creamy Dulce de Leche Ice Cream with Chocolate Shavings

    Creamy Dulce de Leche Ice Cream with Chocolate Shavings

    Dulce de Leche Ice Cream with Chocolate Shavings is a delightful treat that combines rich, creamy flavors with a hint of chocolate. This indulgent ice cream is perfect for any occasion, offering a luxurious texture and a sweet, caramel-like taste that will leave you craving more.

    Why You’ll Love This Recipe

    • Decadent Flavor: The combination of dulce de leche and chocolate creates a rich, satisfying taste experience.
    • Creamy Texture: Made with heavy cream and egg yolks, this ice cream is incredibly smooth and creamy.
    • Customizable: Feel free to adjust the amount of chocolate shavings to suit your personal taste preferences.
    • Perfect for Any Occasion: Whether it’s a special celebration or a quiet night in, this ice cream fits every moment.
    • Easy to Make: With simple ingredients and straightforward steps, you can make this gourmet dessert at home.

    Tools and Equipment

    To create the perfect Dulce de Leche Ice Cream with Chocolate Shavings, you will need a few essential kitchen tools.

    Essential Tools

    • Ice cream maker
    • Medium saucepan
    • Mixing bowls
    • Whisk
    • Fine-mesh sieve
    • Airtight container

    Why These Tools Matter

    • Ice cream maker: Ensures a smooth and creamy texture by churning the mixture as it freezes.
    • Fine-mesh sieve: Helps to remove any lumps, resulting in a velvety custard.
    • Mixing bowls: Allow for easy preparation and mixing of ingredients without spills.

    Ingredients for Dulce de Leche Ice Cream with Chocolate Shavings

    Dairy Ingredients

    • 1 cup whole milk
    • 2 cups heavy cream

    Egg Mixture

    • 4 large egg yolks
    • 1/2 cup granulated sugar

    Flavoring Ingredients

    • 1 teaspoon pure vanilla extract
    • 1 cup dulce de leche (store-bought or homemade)

    Additions

    • Chocolate shavings or grated chocolate (to taste)

    How to Make Dulce de Leche Ice Cream with Chocolate Shavings Step-by-Step

    Step 1: Heat the Base

    In a medium saucepan, combine the heavy cream, whole milk, and 1/2 cup of dulce de leche. Heat over medium heat, stirring occasionally until the mixture is hot but not boiling.

    Step 2: Prepare the Egg Mixture

    In a separate bowl, whisk the egg yolks with granulated sugar until the mixture becomes pale and thick. Gradually whisk in about 1/2 cup of the hot cream mixture into the egg yolks to temper them.

    Step 3: Thicken the Custard

    Return the tempered egg yolks to the saucepan with the remaining cream mixture. Cook over low heat, stirring constantly until the custard thickens.

    Step 4: Finish the Custard

    Remove the saucepan from heat. Stir in the vanilla extract and the remaining 1/2 cup of dulce de leche until well combined. Strain the mixture through a fine-mesh sieve into a clean bowl to remove any lumps.

    Step 5: Chill

    Allow the custard to cool to room temperature before refrigerating it for at least 4 hours. This step is crucial for the best texture.

    Step 6: Churn the Ice Cream

    Pour the chilled custard into an ice cream maker and churn according to the manufacturer’s instructions. Near the end of churning, add the chocolate shavings or grated chocolate to incorporate them evenly.

    Step 7: Freeze

    Transfer the churned ice cream to an airtight container. Cover it and freeze for at least 4 hours until firm.

    Step 8: Serve

    Serve the ice cream in bowls or cones, topped with additional chocolate shavings if desired.

    Preparation time: 20 minutes | Cooking time: 10 minutes | Total Time: 5 hours 30 minutes

    Nutritional Information (per serving):
    – Calories: 320 kcal
    – Carbohydrates: 30g
    – Protein: 5g
    – Fat: 22g

    Enjoy this creamy, dreamy dulce de leche ice cream with a touch of chocolate bliss!

    How to Serve Dulce de Leche Ice Cream with Chocolate Shavings

    Dulce de Leche Ice Cream with Chocolate Shavings is not only delicious on its own but can also be presented in various delightful ways.

    Sundae Style

    Create a decadent sundae by layering the ice cream in a tall glass with whipped cream, chopped nuts, and a drizzle of additional dulce de leche for a rich flavor combination.

    Ice Cream Sandwiches

    Scoop the ice cream between two cookies, such as chocolate chip or oatmeal raisin, for a delicious twist on the classic ice cream sandwich. The contrasting textures enhance the indulgence.

    Affogato Delight

    Pour a shot of hot espresso over a scoop of the ice cream for an Italian-inspired treat. The warmth of the coffee melts the ice cream slightly, creating a delightful blend of flavors.

    Pro Tips for the Best Dulce de Leche Ice Cream with Chocolate Shavings

    For an exceptional dessert experience, consider these helpful tips.

    • Quality Ingredients: Use high-quality dulce de leche and chocolate to enhance the overall flavor of your ice cream.

    • Chill Your Equipment: Before churning, place the ice cream maker bowl in the freezer overnight for optimal texture.

    • Don’t Rush the Chilling Process: Allow the custard to chill thoroughly in the refrigerator for at least 4 hours to ensure a creamy consistency.

    • Experiment with Add-Ins: Feel free to add other mix-ins, such as crushed cookies or nuts, during the churning process for added texture and flavor.

    • Store Properly: Keep the ice cream in an airtight container to prevent freezer burn and maintain freshness.

    Best Side Dishes and Pairings

    Enhance your dessert experience with these delightful pairings.

    1. Chocolate Chip Cookies
      The classic cookie complements the creamy texture of the ice cream while echoing the chocolate shavings.

    2. Fresh Berries
      A mix of strawberries, raspberries, or blueberries adds a refreshing tartness that balances the sweetness of the ice cream.

    3. Caramel Sauce
      Drizzling additional caramel sauce enhances the dulce de leche flavor and adds a rich, sweet touch.

    4. Espresso or Coffee
      The bitterness of coffee contrasts beautifully with the sweetness of the ice cream, creating a harmonious flavor profile.

    5. Pecan Pie
      The nutty flavor of pecans and the sweetness of the pie provide a delightful texture contrast and enhance the overall dessert experience.

    Common Mistakes to Avoid

    • Using Cold Ingredients: Make sure all ingredients are at room temperature to ensure proper emulsification.
    • Overcooking the Custard: Stir constantly and monitor the heat to prevent the custard from curdling.
    • Skipping the Chilling Step: Chilling the custard is essential for achieving the right texture in your ice cream.
    • Not Adding Chocolate Shavings at the Right Time: Incorporate the chocolate shavings just before the ice cream is finished churning for even distribution.

    Storage & Reheating Instructions

    Refrigerator Storage

    Store any leftover Dulce de Leche Ice Cream with Chocolate Shavings in an airtight container in the refrigerator for up to 3 days. However, this ice cream is best enjoyed fresh and is not recommended for refrigeration as it will lose its creamy texture.

    Freezing Instructions

    For optimal storage, transfer the ice cream to an airtight container and freeze it for up to 2 months. To thaw, place the container in the refrigerator for about 30 minutes before serving.

    Reheating Tips

    • Oven: Preheat to 350°F (175°C) and place the ice cream in a baking dish. Heat for 10-15 minutes until softened.
    • Microwave: Place a scoop of ice cream in a microwave-safe bowl and heat in 10-second intervals until desired softness is reached.
    • Stovetop: This method is not recommended for ice cream, as it can melt too quickly and unevenly.

    Frequently Asked Questions

    How can I make Dulce de Leche Ice Cream with Chocolate Shavings without an ice cream maker?

    You can pour the custard into a shallow dish and freeze it. Stir every 30 minutes for about 3 hours until it reaches a creamy consistency.

    Can I use homemade dulce de leche for this recipe?

    Absolutely! Homemade dulce de leche can enhance the flavor of your ice cream and can be used in the same quantity as store-bought.

    What type of chocolate is best for shavings?

    Dark chocolate is ideal for adding a rich contrast to the sweetness of the dulce de leche. However, milk or white chocolate can also be used based on your preference.

    How long does it take to make Dulce de Leche Ice Cream with Chocolate Shavings?

    The total time for this recipe is approximately 5 hours and 30 minutes, which includes chilling and freezing times.

    Final Thoughts

    Dulce de Leche Ice Cream with Chocolate Shavings is a delightful treat that combines creamy sweetness with rich chocolate. I encourage you to try this recipe and share your thoughts in the comments below. Your feedback and variations are always welcome!


    Desserts

    Dulce de Leche Ice Cream with Chocolate Shavings


    5.0 from 24 reviews

    This creamy dulce de leche ice cream is a delightful treat, combining rich caramel flavors with the smoothness of heavy cream. Topped with chocolate shavings, it offers a perfect balance of sweetness and indulgence, making it an ideal dessert for any occasion.

    Author: Munch Twist
    Prep Time: 20 minutes
    Cook Time: 10 minutes
    Total Time: 330 minutes
    Yield: 6 servings
    Category: Desserts
    Method: No bake
    Cuisine: American

    Dulce de Leche Ice Cream with Chocolate Shavings

    SCALE:
    1x
    2x
    3x
    Cook Mode: Prevent your screen from going dark

    Ingredients

    • 1 cup whole milk
    • 2 cups heavy cream
    • 4 large egg yolks
    • 1 teaspoon pure vanilla extract
    • 1 cup dulce de leche
    • 1/2 cup granulated sugar
    • Chocolate shavings or grated chocolate (to taste)

    Instructions

    1. In a medium saucepan, combine the heavy cream, whole milk, and 1/2 cup of dulce de leche. Heat over medium, stirring occasionally until the mixture is hot but not boiling.
    2. In a separate bowl, whisk the egg yolks with granulated sugar until pale and thick. Gradually whisk in about 1/2 cup of the hot cream mixture into the egg yolks to temper them.
    3. Return the tempered egg yolks to the saucepan with the remaining cream mixture. Cook over low heat, stirring constantly until the custard thickens.
    4. Remove from heat and stir in the vanilla extract and the remaining 1/2 cup of dulce de leche until well combined. Strain through a fine-mesh sieve into a clean bowl.
    5. Cool the custard to room temperature, then refrigerate for at least 4 hours.
    6. Pour the chilled custard into an ice cream maker and churn according to the manufacturer’s instructions. Near the end of churning, add chocolate shavings or grated chocolate.
    7. Transfer the ice cream to an airtight container, cover, and freeze for at least 4 hours until firm.
    8. Serve with additional chocolate shavings if desired.

    Nutrition Facts

    Serving Size: 1 serving
    Calories: 320 kcal
    Sugar: 23g
    Sodium: 70mg
    Fat: 22g
    Saturated Fat: 14g
    Carbohydrates: 30g
    Fiber: 0g
    Protein: 5g
    Cholesterol: 210mg

  • Irresistible Churro Cheesecake Donut Cookies Recipe

    Irresistible Churro Cheesecake Donut Cookies Recipe

    Churro Cheesecake Donut Cookies combine the irresistible flavors of churros and cheesecake into a delightful cookie. These cookies are soft, chewy, and filled with creamy cheesecake, making them an indulgent treat for any occasion.

    Why You’ll Love This Recipe

    • Decadent Flavor: The fusion of churro and cheesecake flavors creates a unique dessert experience.
    • Irresistibly Soft: Each cookie is soft and chewy with a delightful cream cheese filling.
    • Cinnamon Sugar Coating: The warm cinnamon sugar adds a sweet crunch that elevates every bite.
    • Perfect for Sharing: These cookies make an excellent treat for gatherings, parties, or family events.
    • Beginner Friendly: The straightforward recipe makes it easy for bakers of any skill level to enjoy.

    Tools and Equipment

    Having the right tools can make the cooking process smoother and more enjoyable.

    Essential Tools

    • Mixing bowls
    • Electric mixer or whisk
    • Measuring cups and spoons
    • Parchment paper
    • Baking sheets
    • Freezer-safe plate

    Why These Tools Matter

    • Electric mixer or whisk: Makes creaming butter and sugar quick and effortless.
    • Parchment paper: Ensures easy cookie removal and prevents sticking.
    • Baking sheets: Provides even heat distribution for perfectly baked cookies.

    Ingredients for Churro Cheesecake Donut Cookies

    For the Cheesecake Filling

    • 4 oz cream cheese, softened
    • 1/4 cup powdered sugar
    • 1/2 teaspoon vanilla extract

    For the Cookie Dough

    • 1/2 cup unsalted butter, softened
    • 1/4 cup light brown sugar, packed
    • 1 large egg, room temperature
    • 1 1/2 cups all-purpose flour
    • 1/2 teaspoon baking powder
    • 1/4 teaspoon baking soda
    • 1/4 teaspoon salt
    • 1/3 cup granulated sugar
    • 1 teaspoon ground cinnamon
    • 1/2 teaspoon vanilla extract

    For the Cinnamon Sugar Coating

    • 1/3 cup granulated sugar
    • 1 teaspoon ground cinnamon

    How to Make Churro Cheesecake Donut Cookies Step-by-Step

    Step 1: Prep the Cheesecake Filling

    Start by preparing the cheesecake filling. In a small bowl, combine the softened cream cheese, powdered sugar, and 1/2 teaspoon of vanilla extract. Mix thoroughly until smooth. Scoop the mixture into teaspoon-sized portions and place them on a parchment-lined plate. Freeze for 20-30 minutes until firm.

    Step 2: Make the Cookie Dough

    While the cheesecake filling is chilling, make the cookie dough. In a large mixing bowl, cream together 1/2 cup of softened unsalted butter, 1/3 cup of granulated sugar, and 1/4 cup of packed light brown sugar. Beat this mixture until it becomes light and fluffy. Add in the large egg and the remaining 1/2 teaspoon of vanilla extract. Mix until well-blended.

    Step 3: Combine Dry Ingredients

    In a separate bowl, whisk together 1 1/2 cups of all-purpose flour, 1/2 teaspoon of baking powder, 1/4 teaspoon of baking soda, 1/4 teaspoon of salt, and 1 teaspoon of ground cinnamon. Gradually add the dry ingredients to the butter mixture, mixing until just combined. Avoid over mixing.

    Step 4: Shape the Cookies

    Preheat your oven to 350°F (175°C) and prepare baking sheets by lining them with parchment paper. Take tablespoon-sized portions of cookie dough and flatten them into discs. Place a frozen cheesecake filling ball in the center of each disc. Carefully wrap the dough around the filling, sealing it, and roll it into a ball. Repeat this process until all dough and filling are used.

    Step 5: Bake the Cookies

    Arrange the cookie dough balls on the prepared baking sheets, leaving about 2 inches of space between each. Bake in your preheated oven for 10-12 minutes, until the edges are set and the tops start to puff slightly.

    Step 6: Coat the Cookies

    While the cookies are still warm, prepare the cinnamon sugar coating by mixing 1/3 cup of granulated sugar with 1 teaspoon of ground cinnamon in a small bowl. Roll each warm cookie in this cinnamon sugar mixture to coat it evenly.

    Step 7: Cool and Enjoy

    Allow the cookies to cool on a wire rack before devouring.

    Nutritional Information: Approximately 180 calories per cookie.

    Time: Preparation time: 20 minutes | Chilling time: 30 minutes | Cooking time: 12 minutes | Total time: 1 hour.

    How to Serve Churro Cheesecake Donut Cookies

    Churro Cheesecake Donut Cookies are versatile and can be enjoyed in various delightful ways.

    As a Dessert Platter

    Arrange the cookies on a decorative platter alongside fresh fruit and a drizzle of chocolate or caramel sauce. This presentation elevates their appeal and provides a variety of flavors.

    With Coffee or Hot Chocolate

    Serve the cookies warm with a steaming cup of coffee or hot chocolate. The rich flavors of the cookies complement the warmth of the beverages, creating a comforting experience.

    As Party Favors

    Wrap individual cookies in clear cellophane bags and tie them with a ribbon for a charming party favor. These treats are perfect for celebrations and will delight your guests.

    Pro Tips for the Best Churro Cheesecake Donut Cookies

    To achieve the perfect Churro Cheesecake Donut Cookies, keep these tips in mind.

    • Use Softened Ingredients: Ensure your butter and cream cheese are softened to room temperature for easy mixing and a smooth texture.
    • Don’t Overmix: Mix the dough just until combined to maintain a tender cookie texture.
    • Chill the Filling: Freezing the cheesecake filling balls helps them hold their shape during baking, preventing them from melting into the cookie.
    • Adjust Baking Time: Keep an eye on your cookies, as oven temperatures may vary. Look for a slight puff and set edges.
    • Store Properly: To keep the cookies fresh, store them in an airtight container at room temperature for up to five days.

    Best Side Dishes and Pairings

    Churro Cheesecake Donut Cookies can be complemented by a variety of side dishes and drinks.

    1. Vanilla Ice Cream: The creamy texture and flavor enhance the cookie’s richness, making it a perfect pairing.
    2. Fresh Berries: Strawberries, raspberries, or blueberries add a refreshing contrast to the sweetness of the cookies.
    3. Chocolate Dipping Sauce: A warm chocolate sauce provides a decadent option for dipping, elevating the cookie experience.
    4. Milk: A classic pairing that balances the sweetness of the cookies and complements their flavor.
    5. Chai Tea: The spices in chai tea harmonize beautifully with the cinnamon in the cookies, creating a delightful flavor combination.

    Common Mistakes to Avoid

    • Using Warm Ingredients: Ensure your butter and cream cheese are softened, but not melted. Warm ingredients can alter the cookie texture.
    • Overmixing the Dough: Mix until just combined to maintain a soft and tender cookie. Overmixing can lead to tough cookies.
    • Incorrect Oven Temperature: Make sure your oven is preheated to 350°F (175°C). An incorrect temperature can result in uneven baking.
    • Skipping the Freezing Step: Freezing the cheesecake filling is crucial for achieving the right texture and preventing it from leaking during baking.

    Storage & Reheating Instructions

    Refrigerator Storage

    Store your Churro Cheesecake Donut Cookies in an airtight container in the refrigerator. They remain fresh for up to 5 days.

    Freezing Instructions

    For longer storage, freeze the cookies in a single layer on a baking sheet until solid. Then, transfer them to an airtight container or a freezer bag. They can be frozen for up to 3 months.

    Reheating Tips

    • Oven: Preheat to 350°F (175°C) and bake for 5-7 minutes until warmed through.
    • Microwave: Heat on medium power for 15-20 seconds or until warm. Be cautious not to overheat, as this can alter the texture.
    • Stovetop: Place cookies in a skillet over low heat, covered, for about 3-5 minutes until warmed.

    Frequently Asked Questions

    Can I make Churro Cheesecake Donut Cookies ahead of time?

    Yes, you can prepare the dough and filling in advance. Store them separately in the refrigerator or freezer until you are ready to bake.

    How do I know when the cookies are done baking?

    The cookies are done when the edges are set and the tops slightly puff. They will continue to firm up as they cool.

    Can I substitute the cream cheese in the filling?

    While cream cheese provides a unique flavor and texture, you can use mascarpone or a dairy-free cream cheese alternative for a different twist.

    What is the best way to serve Churro Cheesecake Donut Cookies?

    These cookies are delightful served warm. Consider pairing them with a scoop of vanilla ice cream or a drizzle of chocolate sauce for an indulgent treat.

    How should I store leftover cookies?

    Store leftover Churro Cheesecake Donut Cookies in an airtight container at room temperature for up to 5 days, or refrigerate for extended freshness.

    Final Thoughts

    Churro Cheesecake Donut Cookies are a delightful twist on classic treats, combining the best flavors into one indulgent dessert. I encourage you to try this recipe and experience the joy of these cookies yourself. If you do, please leave a comment with your feedback and any tips you discovered along the way.


    Desserts

    Churro Cheesecake Donut Cookies

    SCALE:
    1x
    2x
    3x
    Cook Mode: Prevent your screen from going dark

    Ingredients

    • 1/2 cup unsalted butter, softened
    • 1/4 cup light brown sugar, packed
    • 1 large egg, room temperature
    • 4 oz cream cheese, softened
    • 1 1/2 cups all-purpose flour
    • 1/2 teaspoon baking powder
    • 1/3 cup granulated sugar
    • 1 teaspoon ground cinnamon
    • 1/4 teaspoon baking soda
    • 1/4 teaspoon salt
    • 1/2 teaspoon vanilla extract
    • 1/4 cup powdered sugar

    Instructions

    1. Prepare the cheesecake filling by mixing cream cheese, powdered sugar, and vanilla extract until smooth. Freeze in teaspoon-sized portions for 20-30 minutes.
    2. Cream together butter, granulated sugar, and brown sugar until light and fluffy. Add egg and remaining vanilla extract, mixing well.
    3. In a separate bowl, whisk together flour, baking powder, baking soda, salt, and ground cinnamon.
    4. Gradually add dry ingredients to the butter mixture, mixing until just combined.
    5. Preheat oven to 350°F (175°C) and line baking sheets with parchment paper.
    6. Flatten tablespoon-sized portions of dough, place a frozen cheesecake filling ball in the center, wrap the dough around it, and roll into a ball.
    7. Arrange cookie dough balls on baking sheets, leaving space between each.
    8. Bake for 10-12 minutes until edges are set and tops puff slightly.
    9. Mix granulated sugar and cinnamon in a bowl. Roll warm cookies in this mixture to coat.
    10. Cool cookies on a wire rack before serving.

    Nutrition Facts

    Serving Size: 1 serving
    Calories: 180 kcal
    Sugar: 10g
    Sodium: 100mg
    Fat: 8g
    Saturated Fat: 4g
    Carbohydrates: 25g
    Fiber: 0g
    Protein: 2g
    Cholesterol: 30mg

Print

Irresistible Churro Cheesecake Donut Cookies

5 Stars 4 Stars 3 Stars 2 Stars 1 Star

No reviews

Delicious homemade churro cheesecake donut cookies.

  • Author: Munch Twist
  • Prep Time: 20 minutes
  • Cook Time: 12 minutes
  • Total Time: 1 hour
  • Yield: 24 servings 1x
  • Category: Desserts
  • Cuisine: American

Ingredients

Scale
  • 1 cup sugar
  • 2 cups flour
  • 8 oz cream cheese

Instructions

  1. Prepare dough
  2. Fill with cheesecake
  3. Bake until golden

Did you make this recipe?

Share a photo and tag us — we can’t wait to see what you’ve made!