Category: Desserts

  • Fun and Easy Smores Sushi Recipe to Try Today

    Fun and Easy Smores Sushi Recipe to Try Today

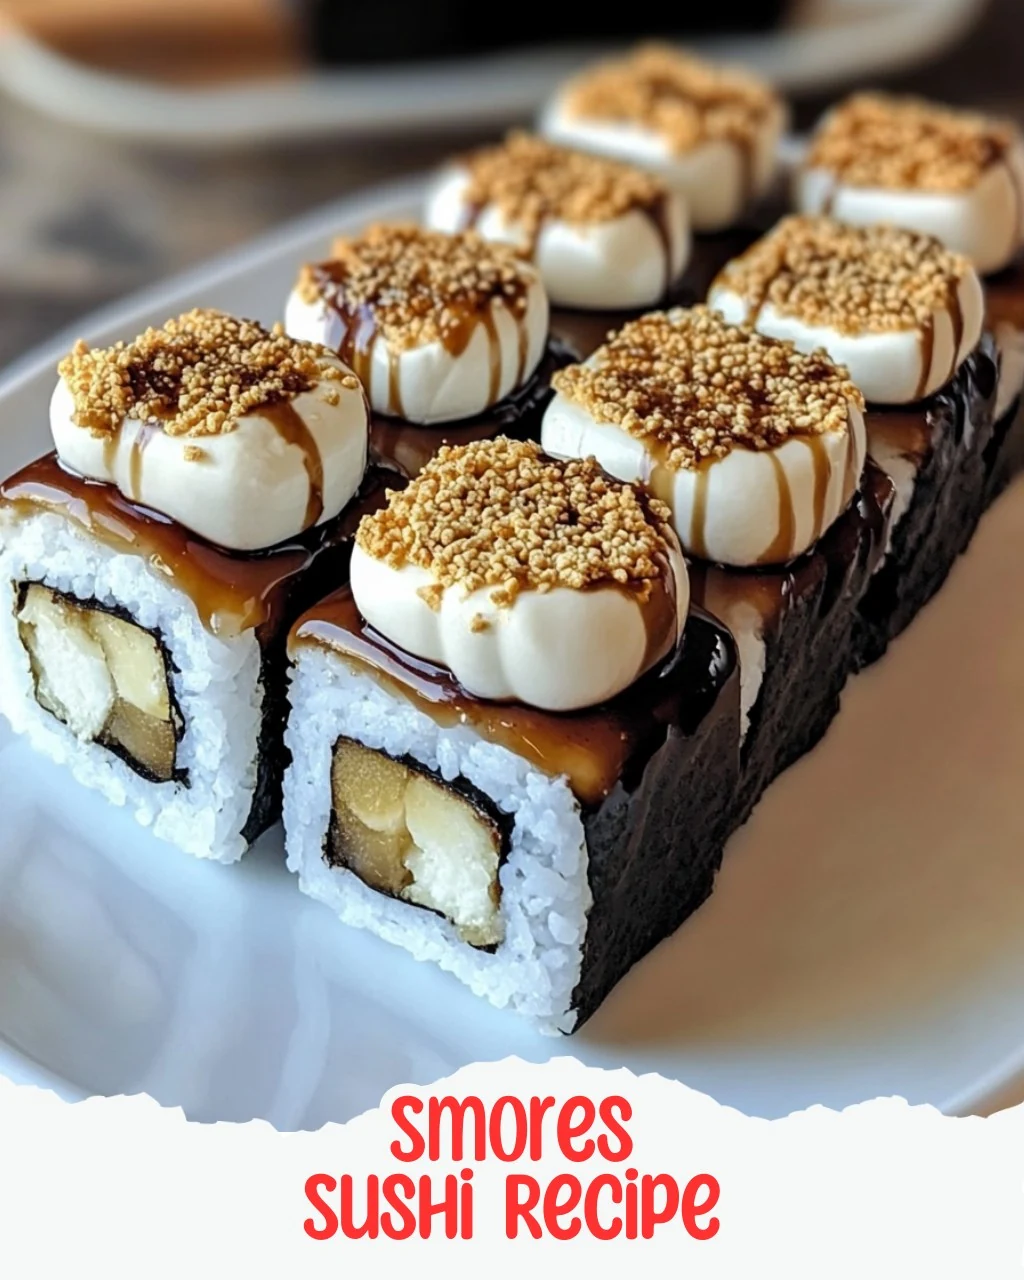
    Looking for a fun twist on a classic favorite? This Smores Sushi Recipe is a creative dessert that combines the gooey goodness of traditional s’mores into a sushi roll. It’s perfect for parties, gatherings, or satisfying your sweet tooth.

    Why You’ll Love This Recipe

    • Creative Twist: This recipe transforms a classic treat into a playful sushi-inspired dessert.
    • Gooey Goodness: Enjoy the delightful combination of marshmallows, chocolate, and graham crackers in every bite.
    • Fun for All Ages: Kids and adults alike will love making and eating this unique dessert.
    • Easy to Customize: Add your favorite toppings or swap ingredients for a personalized version.
    • Perfect for Any Occasion: Whether it’s a birthday party or a cozy night in, this treat is sure to impress.

    Tools and Equipment

    Having the right tools will make preparing this Smores Sushi Recipe a breeze.

    Essential Tools

    • Non-stick cooking spray
    • Baking sheet
    • Wax paper
    • Large pot
    • Sharp knife
    • Plastic wrap
    • Spatula

    Why These Tools Matter

    • Non-stick cooking spray: Prevents the cereal mixture from sticking to the baking sheet for easy removal.
    • Sharp knife: Ensures clean cuts when slicing the sushi rolls for a polished presentation.
    • Plastic wrap: Helps the rolls maintain their shape while chilling in the refrigerator.

    Ingredients for Smores Sushi Recipe

    Main Ingredients

    • 10 oz. mini marshmallows
    • 2 cups marshmallow fluff
    • 1/4 cup butter
    • 5 cups Rice Krispies cereal
    • 1 cup semisweet chocolate chips, melted (plus more for serving)
    • 1 cup crushed graham crackers

    How to Make Smores Sushi Recipe Step-by-Step

    Step 1: Prepare the Base

    1. Start by lining a baking sheet with wax paper. Lightly spray it with cooking spray for easy removal.
    2. In a pot over low heat, melt the butter. Once melted, add the mini marshmallows and stir continuously until they dissolve into a creamy mixture.
    3. Turn off the heat and fold in the Rice Krispies cereal until each piece is coated in the marshmallow mixture.
    4. Spread the mixture onto the prepared baking sheet, pressing down firmly to create a thin, even rectangle.

    Step 2: Add Toppings

    1. Carefully spread marshmallow fluff over the cereal base, ensuring it’s evenly distributed in a single layer.
    2. Sprinkle the crushed graham crackers over the fluff, gently pressing them in to ensure they stick.
    3. Drizzle the melted chocolate over the graham cracker layer, using a spatula to smooth it into a uniform layer.

    Step 3: Roll and Chill

    1. With a sharp knife, slice the layered sheet in half lengthwise for easier rolling.
    2. Starting from the long side, roll up each half tightly like a sushi roll, taking care to keep the fillings intact.
    3. Once both rolls are formed, wrap them in plastic wrap and place them in the refrigerator to chill and firm up for about 1 hour.

    Step 4: Serve

    1. Once chilled, remove from the refrigerator and slice into sushi roll pieces using a sharp knife.
    2. Serve with additional melted chocolate on the side for dipping. Enjoy your delicious treat!

    Nutritional Information:
    – Calories: Approximately 250 calories per slice
    – Total Fat: 10g
    – Carbohydrates: 35g
    – Sugars: 20g
    – Protein: 2g

    Preparation time: 15 minutes | Cooking time: 10 minutes

    How to Serve Smores Sushi Recipe

    Serving Smores Sushi can be a delightful experience that adds a fun touch to any gathering. Here are some creative ideas to elevate your presentation.

    Individual Sushi Rolls

    Cut the sushi into bite-sized pieces and present them on a colorful platter. This makes it easy for guests to grab and enjoy, adding a touch of whimsy to your dessert table.

    S’mores Bar

    Set up a DIY s’mores bar alongside your Smores Sushi. Include various toppings such as sliced strawberries, banana, or even flavored chocolate for guests to customize their dessert experience.

    Dessert Sushi Platter

    Combine your Smores Sushi with other dessert sushi variations, such as fruit sushi or chocolate sushi, for a visually appealing and diverse dessert spread that will impress your guests.

    Pro Tips for the Best Smores Sushi Recipe

    Follow these handy tips to ensure your Smores Sushi turns out perfectly every time.

    • Use Fresh Ingredients: Ensure your mini marshmallows and marshmallow fluff are fresh for the best flavor and texture.
    • Press Firmly: When spreading the Rice Krispies mixture, press down firmly to create a solid base, which will hold the roll together better.
    • Chill Properly: Allow the rolled sushi to chill for at least 1 hour; this helps the ingredients set and makes slicing easier.
    • Slicing Technique: Use a sharp knife and wipe it clean between cuts to maintain neat and clean edges on each sushi piece.
    • Experiment with Flavors: Feel free to add in toppings like peanut butter or Nutella for a different twist on the classic Smores flavor.

    Best Side Dishes and Pairings

    To complement your Smores Sushi, consider these delightful side dishes and drinks.

    1. Chocolate Milkshake: A rich, creamy shake that enhances the chocolate flavors in the Smores Sushi.
    2. Fresh Fruit Salad: The freshness of fruits like berries or melons provides a refreshing contrast to the sweetness of the sushi.
    3. Iced Coffee: A chilled coffee drink balances the sweetness and adds a caffeine kick for a delightful pairing.
    4. Vanilla Ice Cream: A scoop of vanilla ice cream brings a creamy texture that pairs wonderfully with the chewy elements of the sushi.
    5. Sparkling Water: Offering a bubbly option can cleanse the palate between bites, enhancing the overall experience.

    Common Mistakes to Avoid

    • Not Greasing the Baking Sheet: Failing to spray the baking sheet can lead to difficulty in removing the base.
    • Overheating the Marshmallows: Cooking the marshmallows too long can cause them to harden rather than remain gooey.
    • Skipping the Chilling Step: Not allowing the rolls to chill can result in a messy cut and loss of shape.
    • Using Warm Ingredients: Ensure that all layers are at room temperature before rolling to maintain the integrity of the sushi.

    Storage & Reheating Instructions

    Refrigerator Storage

    Store your Smores Sushi in an airtight container in the refrigerator. It will stay fresh for up to 3 days.

    Freezing Instructions

    For long-term storage, wrap individual slices in plastic wrap and place them in a freezer-safe container. They can be frozen for up to 2 months. Thaw in the refrigerator overnight before serving.

    Reheating Tips

    • Oven: Preheat to 350°F (175°C), place the sushi on a baking sheet, and heat for about 5-10 minutes until warmed through.
    • Microwave: Heat individual slices for 10-15 seconds on a microwave-safe plate until just warm.
    • Stovetop: Place in a non-stick skillet over low heat, covering with a lid. Heat for 2-3 minutes, checking frequently.

    Frequently Asked Questions

    How can I make this Smores Sushi Recipe gluten-free?

    You can use gluten-free Rice Krispies and ensure that the graham crackers are certified gluten-free to accommodate gluten sensitivity.

    Can I customize the fillings in the Smores Sushi Recipe?

    Absolutely! Feel free to add other ingredients like peanut butter, fruit, or different types of chocolate to create your unique version.

    How long does the Smores Sushi Recipe take to prepare?

    The total time for preparation and chilling is about 1 hour and 25 minutes, with 15 minutes for prep and 1 hour for chilling.

    What can I serve with this Smores Sushi Recipe?

    Consider serving with additional melted chocolate, whipped cream, or even fresh fruit for an extra touch.

    Can I make the Smores Sushi Recipe ahead of time?

    Yes, you can prepare it a day in advance. Just store it in the refrigerator to keep it fresh until you’re ready to serve.

    Final Thoughts

    This Smores Sushi Recipe is a delightful twist on a classic treat that is sure to impress your friends and family. Whether for a party or a sweet indulgence, it’s easy to make and even easier to enjoy. We’d love to hear how yours turned out, so please leave a comment with your thoughts and any variations you tried.


    Desserts

    Smores Sushi Recipe


    5.0 from 24 reviews

    This Smores Sushi is a creative dessert that combines all the gooey goodness of your beloved s'mores in a sushi roll. Perfect for parties, gatherings, or simply satisfying your sweet tooth.
    Author: Munch Twist
    Prep Time: 15 minutes
    Cook Time: 10 minutes
    Total Time: 25 minutes
    Yield: 12 servings
    Category: Desserts
    Method: No bake
    Cuisine: American

    Smores Sushi Recipe

    SCALE:
    1x
    2x
    3x
    Cook Mode: Prevent your screen from going dark

    Ingredients

    • 10 oz. mini marshmallows
    • 2 cups marshmallow fluff
    • 1/4 cup butter
    • 5 cups Rice Krispies cereal
    • 1 cup semisweet chocolate chips, melted
    • 1 cup crushed graham crackers

    Instructions

    1. Line a baking sheet with wax paper and spray with cooking spray.
    2. Melt the butter in a pot over low heat, then add mini marshmallows and stir until dissolved.
    3. Fold in Rice Krispies cereal until coated, then spread onto the baking sheet to form a rectangle.
    4. Spread marshmallow fluff over the cereal base, then sprinkle crushed graham crackers and drizzle melted chocolate on top.
    5. Slice the layered sheet in half lengthwise and roll each half tightly.
    6. Wrap rolls in plastic wrap and refrigerate for 1 hour.
    7. Slice into sushi roll pieces and serve with additional melted chocolate.

    Nutrition Facts

    Serving Size: 1 serving
    Calories: 250 kcal
    Sugar: 20g
    Sodium: 50mg
    Fat: 10g
    Saturated Fat: 5g
    Carbohydrates: 35g
    Fiber: 0g
    Protein: 2g
    Cholesterol: 15mg

  • Sweet and Spicy Honey Pepper Chicken with Creamy Macaroni Cheese

    Sweet and Spicy Honey Pepper Chicken with Creamy Macaroni Cheese

    Get ready to tantalize your taste buds! This Sweet and Spicy Honey Pepper Chicken with Creamy Macaroni Cheese is the perfect combination of flavors that will leave you craving more. It’s a delightful dish that brings comfort food to a whole new level.

    Why You’ll Love This Recipe

    • Flavor Explosion: The sweet and spicy sauce perfectly complements the creamy macaroni cheese.
    • Crowd-Pleaser: This dish is sure to impress family and friends at any gathering.
    • Comfort Food Upgrade: Enjoy a classic meal with a delicious twist that elevates your dining experience.
    • Satisfying & Filling: With hearty chicken and rich cheese, this recipe is both satisfying and indulgent.
    • Customizable: Easily adjust the spice levels and cheese types to suit your preferences.

    Tools and Equipment

    Gathering the right tools will make your cooking experience smoother.

    Essential Tools

    • Skillet
    • Pot
    • Whisk
    • Measuring cups and spoons
    • Cooking spoon
    • Colander

    Why These Tools Matter

    • Skillet: Ideal for cooking chicken and simmering the sauce, ensuring even heat distribution.
    • Pot: Perfect for boiling pasta and making the creamy cheese sauce without burning.
    • Whisk: Helps create a lump-free cheese sauce, ensuring a smooth and creamy texture.

    Ingredients for Sweet and Spicy Honey Pepper Chicken with Creamy Macaroni Cheese

    For the Chicken

    • 2 boneless, skinless chicken breasts
    • 1/2 cup honey
    • Salt and pepper to taste
    • 1 tablespoon olive oil
    • 1/4 cup soy sauce
    • 1 tablespoon apple cider vinegar
    • 1 teaspoon ground black pepper
    • 1/2 teaspoon garlic powder
    • 1/2 teaspoon onion powder
    • 1/4 teaspoon ground cayenne pepper

    For the Macaroni Cheese

    • 8 ounces macaroni pasta
    • 2 cups shredded sharp cheddar cheese
    • 1 cup shredded mozzarella cheese
    • 2 tablespoons butter
    • 2 tablespoons all-purpose flour
    • 2 cups milk

    Garnish

    • Chopped parsley for garnish

    How to Make Sweet and Spicy Honey Pepper Chicken with Creamy Macaroni Cheese Step-by-Step

    Step 1: Prepare the Chicken

    1. Begin by seasoning both chicken breasts generously with salt and pepper.
    2. Heat the olive oil in a skillet over medium heat. Add the chicken and cook until golden brown and cooked through, about 6-7 minutes per side. Transfer the chicken to a plate and set aside.

    Step 2: Make the Honey Pepper Sauce

    1. In the same skillet, add the honey, soy sauce, apple cider vinegar, and spices (black pepper, garlic powder, onion powder, cayenne pepper). Stir and let it simmer for about 2-3 minutes to thicken the sauce.
    2. Slice the cooked chicken into strips and return it to the skillet. Toss well to coat the chicken evenly with the sauce, keeping it warm.

    Step 3: Prepare the Macaroni Cheese

    1. Boil the macaroni pasta according to package instructions, then drain and set aside.
    2. In a separate pot, melt the butter over medium heat. Stir in the flour and cook for 1 minute to form a roux.
    3. Gradually whisk in the milk, ensuring no lumps remain. Continue stirring until thickened, about 2-3 minutes.
    4. Remove from heat and stir in the shredded cheddar and mozzarella cheese until melted and smooth. Season with salt and pepper.

    Step 4: Combine and Serve

    1. Fold the cooked macaroni into the cheese sauce, coating each piece of pasta well.
    2. To serve, place a generous scoop of creamy macaroni cheese on a plate, top with the honey pepper chicken, and garnish with chopped parsley for a fresh touch.

    Enjoy your delicious Sweet and Spicy Honey Pepper Chicken with Creamy Macaroni Cheese! This recipe serves 4 people and is approximately 780 kcal per serving. Prepare time is 15 minutes, with a cooking time of 45 minutes.

    How to Serve Sweet and Spicy Honey Pepper Chicken with Creamy Macaroni Cheese

    This dish is not only delicious but also versatile in presentation. Here are some creative serving ideas:

    On a Platter

    Serve the Sweet and Spicy Honey Pepper Chicken and Creamy Macaroni Cheese on a large platter for a family-style meal. This allows everyone to help themselves and creates a warm, inviting atmosphere at the dining table.

    With a Side Salad

    Complement this hearty dish with a fresh garden salad. The crispness and acidity of greens like arugula or mixed lettuce balance the richness of the macaroni cheese and the sweetness of the chicken.

    In Individual Bowls

    For a more refined presentation, serve each portion in individual bowls. Layer the creamy macaroni cheese at the bottom and top it with the honey pepper chicken, garnished with chopped parsley for a pop of color.

    Pro Tips for the Best Sweet and Spicy Honey Pepper Chicken with Creamy Macaroni Cheese

    To elevate your cooking experience, consider these practical tips:

    • Use Fresh Ingredients: Fresh herbs and spices will enhance the flavor of your dish significantly, making it more aromatic and appealing.

    • Adjust Spice Levels: If you prefer a milder dish, reduce the amount of cayenne pepper. For those who enjoy heat, feel free to add extra spices to elevate the flavor.

    • Cook Chicken Evenly: Ensure the chicken breasts are of similar thickness for even cooking. You can pound them to an even thickness if needed.

    • Let Cheese Sauce Cool Slightly: Allowing the cheese sauce to cool for just a minute before adding the macaroni can help prevent the sauce from becoming too thick.

    • Garnish for Presentation: Always finish with a sprinkle of fresh parsley or chives to add color and a touch of freshness to the dish.

    Best Side Dishes and Pairings

    To create a complete meal, consider these excellent side dishes and drink pairings:

    1. Garlic Bread: This classic side is perfect for soaking up any leftover sauce and adds a delightful crunch.

    2. Coleslaw: The tangy crunch of coleslaw provides a refreshing contrast to the rich, creamy macaroni.

    3. Grilled Vegetables: Seasonal grilled vegetables like zucchini, bell peppers, and asparagus add color and a healthy element to your plate.

    4. Roasted Brussels Sprouts: The slight bitterness of Brussels sprouts complements the sweetness of the honey pepper chicken beautifully.

    5. Iced Tea: A glass of unsweetened iced tea offers a refreshing counterbalance to the rich flavors of the meal.

    6. Sparkling Water with Lime: This bubbly drink is a light and refreshing option that cleanses the palate between bites.

    Common Mistakes to Avoid

    • Overcooking the Chicken: Ensure the chicken breasts are cooked just until golden brown to prevent dryness.
    • Under-seasoning the Sauce: Taste the honey pepper sauce and adjust the seasoning as needed for a balanced flavor.
    • Not Stirring the Cheese Sauce: Stir continuously when adding milk to avoid lumps in your cheese sauce.
    • Skipping the Pasta Drain: Make sure to drain the macaroni well before mixing it with the cheese sauce for the best texture.

    Storage & Reheating Instructions

    Refrigerator Storage

    Store any leftovers in airtight containers in the refrigerator. This dish will stay fresh for up to 3 days.

    Freezing Instructions

    To freeze, place the cooled chicken and macaroni cheese in separate airtight containers. This dish can be frozen for up to 2 months. Thaw in the refrigerator overnight before reheating.

    Reheating Tips

    • Oven: Preheat to 350°F (175°C), place in a baking dish, and cover with foil. Heat for 20-25 minutes or until warmed through.
    • Microwave: Place in a microwave-safe dish, cover, and heat on medium power for 2-3 minutes, stirring occasionally.
    • Stovetop: Reheat in a skillet over medium heat, stirring frequently until warmed through. Add a splash of milk to revive the cheese sauce if needed.

    Frequently Asked Questions

    How can I adjust the spiciness of the Sweet and Spicy Honey Pepper Chicken with Creamy Macaroni Cheese?

    You can reduce the amount of cayenne pepper or omit it entirely for a milder flavor. Alternatively, add more for extra heat.

    Can I use different types of cheese in the macaroni cheese?

    Absolutely! Feel free to experiment with cheeses like gouda, fontina, or pepper jack for varied flavors in your creamy macaroni cheese.

    How long does it take to prepare Sweet and Spicy Honey Pepper Chicken with Creamy Macaroni Cheese?

    The total time for this recipe is approximately 60 minutes, including preparation and cooking.

    What should I serve with Sweet and Spicy Honey Pepper Chicken?

    This dish pairs well with a fresh salad or steamed vegetables for a complete meal.

    Is Sweet and Spicy Honey Pepper Chicken suitable for meal prep?

    Yes, this recipe is perfect for meal prep! Store portions in airtight containers for easy lunches or dinners throughout the week.

    Final Thoughts

    Sweet and Spicy Honey Pepper Chicken with Creamy Macaroni Cheese is an unforgettable dish that combines comfort and flavor. We encourage you to try this recipe and share your experience in the comments below. Your feedback helps us create even more delicious recipes!


    Dinner

    Sweet and Spicy Honey Pepper Chicken with Creamy Macaroni Cheese


    5.0 from 24 reviews

    Get ready to tantalize your taste buds! This Sweet and Spicy Honey Pepper Chicken paired with creamy macaroni cheese is the perfect combination of flavors that will leave you craving more. It's a delightful dish that brings comfort food to a whole new level!

    Author: Munch Twist
    Prep Time: 15 minutes
    Cook Time: 45 minutes
    Total Time: 60 minutes
    Yield: 4 servings
    Category: Desserts
    Method: No bake
    Cuisine: American

    Sweet and Spicy Honey Pepper Chicken with Creamy Macaroni Cheese

    SCALE:
    1x
    2x
    3x
    Cook Mode: Prevent your screen from going dark

    Ingredients

    • 2 boneless, skinless chicken breasts
    • 1/2 cup honey
    • Salt and pepper to taste
    • 1 tablespoon olive oil
    • 1/4 cup soy sauce
    • 8 ounces macaroni pasta
    • 2 cups shredded sharp cheddar cheese
    • 1 cup shredded mozzarella cheese
    • 2 tablespoons butter
    • 2 tablespoons all-purpose flour
    • 2 cups milk
    • 1 tablespoon apple cider vinegar
    • 1 teaspoon ground black pepper
    • 1/2 teaspoon garlic powder
    • 1/2 teaspoon onion powder
    • 1/4 teaspoon ground cayenne pepper
    • Chopped parsley for garnish

    Instructions

    1. Begin by seasoning both chicken breasts generously with salt and pepper.
    2. Heat the olive oil in a skillet over medium heat. Once hot, add the seasoned chicken and cook until golden brown and cooked through, about 6-7 minutes on each side. Once done, transfer the chicken to a plate and set it aside.
    3. In the same skillet, pour in the honey, soy sauce, apple cider vinegar, and the spices (black pepper, garlic powder, onion powder, and cayenne pepper). Stir and let it simmer for about 2-3 minutes, allowing the flavors to meld and the sauce to thicken slightly.
    4. Slice the cooked chicken into strips and return it to the skillet with the honey pepper sauce. Toss well to coat the chicken evenly with the sauce and keep it warm while you prepare the macaroni cheese.
    5. Boil the macaroni pasta according to package instructions, then drain and set aside.
    6. In a separate pot, melt the butter over medium heat. Stir in the flour and cook for 1 minute while stirring continuously to form a roux.
    7. Gradually whisk in the milk, ensuring there are no lumps. Continue stirring until the mixture thickens up nicely, about 2-3 minutes.
    8. Remove the pot from heat and stir in the shredded cheddar and mozzarella cheese. Mix until the cheese is melted and the sauce is smooth. Season with salt and pepper to taste.
    9. Fold the cooked macaroni into the cheese sauce, ensuring each piece of pasta is well coated.
    10. To serve, place a generous scoop of creamy macaroni cheese on a plate, top it with the honey pepper chicken, and finish with a sprinkle of chopped parsley for a fresh touch.

    Nutrition Facts

    Serving Size: 1 serving
    Calories: 780 kcal
    Sugar: 24g
    Sodium: 1300mg
    Fat: 34g
    Saturated Fat: 18g
    Carbohydrates: 77g
    Fiber: 3g
    Protein: 45g
    Cholesterol: 150mg

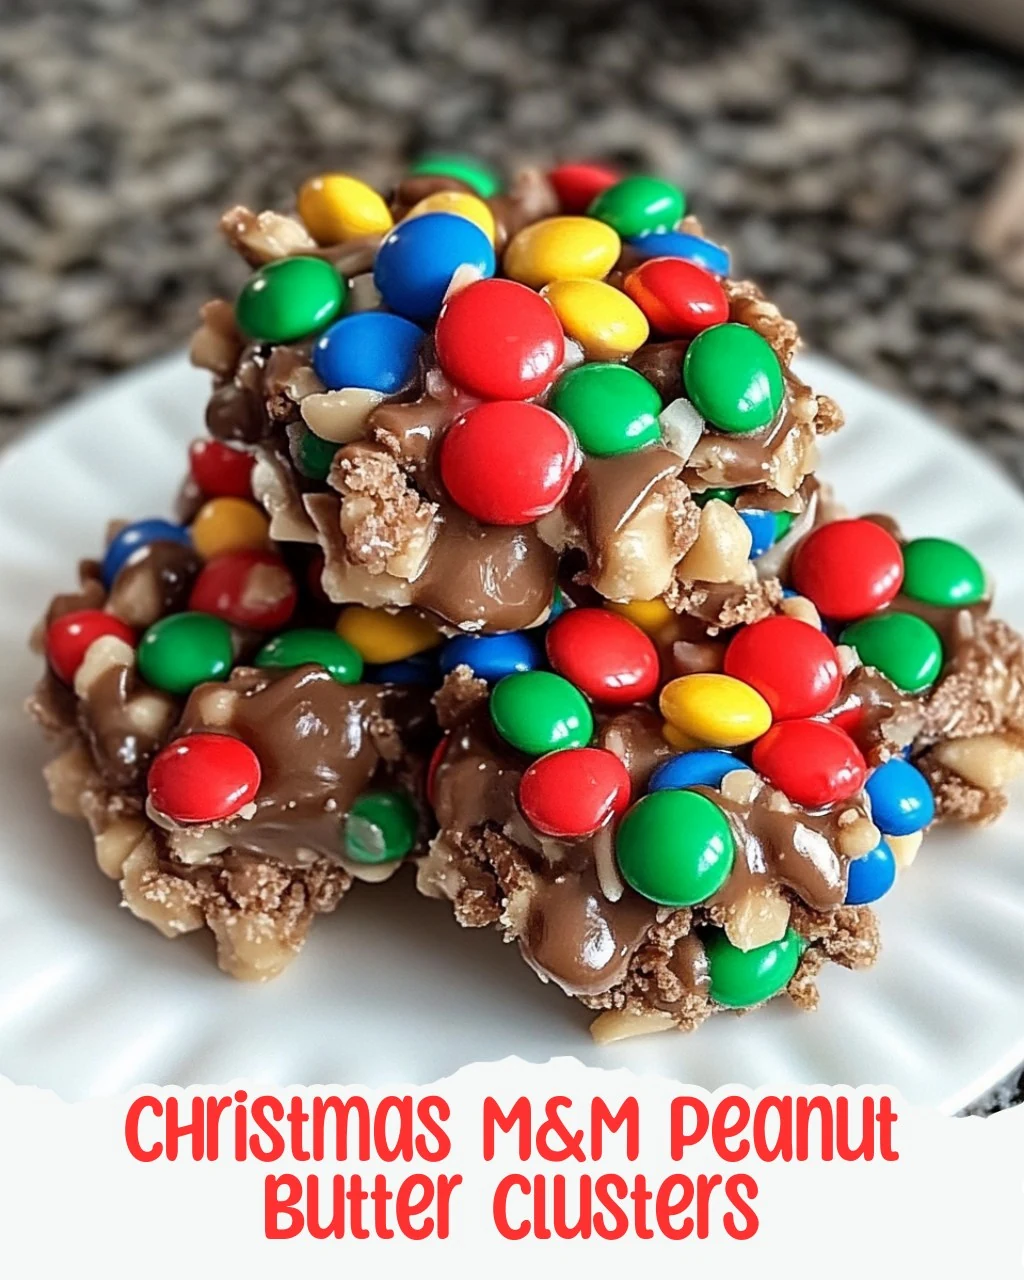
  • Irresistible Christmas MM Peanut Butter Clusters Recipe

    Irresistible Christmas MM Peanut Butter Clusters Recipe

    Christmas M&M Peanut Butter Clusters are a delightful treat that perfectly encapsulates the festive spirit. These clusters are easy to make, deliciously creamy, and loaded with textures and flavors that everyone will love. Share them with family and friends for a sweet holiday celebration.

    Why You’ll Love This Recipe

    • Quick & Easy: Ready in under 30 minutes, making them perfect for last-minute holiday treats.
    • Irresistibly Delicious: The combination of peanut butter, chocolate, and M&Ms creates a flavor explosion.
    • Customizable: Add your favorite nuts or swap out M&Ms for different seasonal candies.
    • Great for Gifting: Package them in festive boxes for a thoughtful homemade gift.
    • Family Fun: Involve kids in the process for a fun holiday activity.

    Tools and Equipment

    Gathering the right tools makes the process smoother and more enjoyable.

    Essential Tools

    • Microwave-safe bowl
    • Baking sheet
    • Parchment paper
    • Spoon or cookie scoop
    • Refrigerator

    Why These Tools Matter

    • Microwave-safe bowl: Ensures safe melting of chocolate and peanut butter without any spills.
    • Baking sheet: Provides a sturdy surface for your clusters to set and cool evenly.
    • Parchment paper: Prevents sticking, making it easy to remove clusters once they are set.

    Ingredients for Christmas M&M Peanut Butter Clusters

    Main Ingredients

    • 1 cup creamy peanut butter
    • 2 cups semi-sweet chocolate chips
    • 1 1/2 cups salted peanuts
    • 1 cup holiday M&Ms (red and green)

    Optional Drizzle

    • 1/2 cup white chocolate chips (optional, for drizzling)

    How to Make Christmas M&M Peanut Butter Clusters Step-by-Step

    Step 1: Prep the Base

    Begin by melting the semi-sweet chocolate chips and creamy peanut butter together. Place them in a microwave-safe bowl. Microwave in 30-second bursts, stirring well after each interval. Continue until the mixture is completely smooth and velvety.

    Step 2: Mix in the Goodies

    Once melted, remove the bowl from the microwave. Fold in the salted peanuts and 3/4 cup of holiday M&Ms. Ensure everything is thoroughly coated with the chocolate-peanut butter blend for maximum flavor.

    Step 3: Form the Clusters

    On a baking sheet lined with parchment paper, spoon out dollops of the mixture. Allow some space between each cluster, as they will expand during the setting process.

    Step 4: Add Festive Touches

    For an extra pop of color, place a few of the remaining holiday M&Ms onto each cluster. This will enhance their festive appeal and make them even more inviting.

    Step 5: Chill to Set

    Place the baking sheet in the refrigerator. Chill for about 30-45 minutes, or until the clusters are firm and ready to enjoy.

    Step 6: Drizzle (Optional)

    For an additional festive touch, melt the white chocolate chips in the microwave. Drizzle it over the chilled clusters to create a beautiful finish.

    Step 7: Serve and Store

    Enjoy your Christmas M&M Peanut Butter Clusters immediately, or store them in an airtight container in the refrigerator for up to a week. They make a delightful treat for any holiday gathering.

    How to Serve Christmas MM Peanut Butter Clusters

    These clusters are not only delicious but also versatile in how you can present them.

    Festive Gift Bags

    Package individual clusters in small cellophane bags tied with festive ribbons. They make excellent homemade gifts for friends and family during the holiday season.

    Dessert Platter

    Arrange the clusters on a decorative platter alongside other holiday treats. Their vibrant colors will add a cheerful touch to your dessert table.

    Ice Cream Topping

    Crush the clusters and use them as a topping for ice cream sundaes. The combination of chocolate, peanut butter, and candy will elevate any ice cream experience.

    Pro Tips for the Best Christmas MM Peanut Butter Clusters

    For the ultimate holiday treat, keep these tips in mind.

    • Use Quality Ingredients: Opt for high-quality chocolate chips and peanut butter for a richer flavor.

    • Be Patient with Melting: Melt the chocolate and peanut butter slowly to avoid burning. Stir frequently for a smooth consistency.

    • Chill Thoroughly: Ensure the clusters are completely chilled before serving for the best texture and flavor.

    • Customize Your Clusters: Experiment with different types of nuts or add dried fruits for a unique twist on the classic recipe.

    • Store Properly: Keep the clusters in an airtight container in the fridge to maintain freshness for longer.

    Best Side Dishes and Pairings

    Enhance your enjoyment of Christmas M&M Peanut Butter Clusters with these delightful pairings.

    1. Hot Cocoa: The rich, chocolatey flavor of hot cocoa complements the clusters perfectly, making for a cozy treat.

    2. Coffee: A warm cup of coffee balances the sweetness of the clusters, providing a delightful contrast.

    3. Milk: Classic and simple, a glass of milk pairs beautifully with the clusters, enhancing their creamy texture.

    4. Fruit Salad: The freshness of a fruit salad adds a refreshing contrast to the richness of the clusters.

    5. Cheese Board: A selection of cheeses can provide a savory balance to the sweet and salty flavors of the clusters.

    Common Mistakes to Avoid

    • Skipping the Melting Step: Ensure the chocolate chips and peanut butter are fully melted for a smooth mixture.
    • Not Folding Ingredients Gently: Stir too vigorously can break the M&Ms and peanuts, affecting the final look and texture.
    • Crowding the Baking Sheet: Leave enough space between clusters to allow for spreading as they set.
    • Ignoring the Chill Time: Skipping the refrigeration step can result in clusters that are too soft and difficult to handle.

    Storage & Reheating Instructions

    Refrigerator Storage

    Store the Christmas M&M Peanut Butter Clusters in an airtight container in the refrigerator. They will remain fresh for up to a week.

    Freezing Instructions

    To freeze, place the clusters in a single layer on a baking sheet until firm. Then transfer them to a freezer-safe container or bag, separating layers with parchment paper. They can be frozen for up to three months. To thaw, simply leave them in the refrigerator overnight.

    Reheating Tips

    • Oven: Preheat to 350°F (175°C) and warm clusters for 5-10 minutes until slightly softened.
    • Microwave: Heat on low power in 10-second intervals until warm, being cautious not to melt them completely.
    • Stovetop: Use a double boiler method on low heat, stirring gently until just warmed.

    Frequently Asked Questions

    How can I make Christmas M&M Peanut Butter Clusters dairy-free?

    You can substitute semi-sweet chocolate chips with dairy-free chocolate chips and ensure that the peanut butter used is also dairy-free.

    Can I use different types of nuts in this recipe?

    Absolutely! Feel free to replace salted peanuts with your favorite nuts such as almonds, cashews, or even sunflower seeds for a different flavor profile.

    How do I store Christmas M&M Peanut Butter Clusters?

    Store them in an airtight container in the refrigerator to maintain freshness for up to a week, or freeze them for longer storage.

    What can I do if my chocolate mixture is too thick?

    If the mixture becomes too thick, you can add a small amount of coconut oil or additional peanut butter to help thin it out while stirring gently.

    Can I add other festive toppings to these clusters?

    Yes, consider adding sprinkles, crushed candy canes, or even a drizzle of caramel for a unique twist on the classic recipe.

    Final Thoughts

    These Christmas M&M Peanut Butter Clusters are the perfect festive treat to share with loved ones during the holiday season. They are simple to prepare and sure to be a crowd-pleaser. Give this recipe a try, and don’t forget to leave a comment with your thoughts!

    Desserts

    Christmas MM Peanut Butter Clusters


    5.0 from 24 reviews

    Get ready to celebrate the holiday season with these delightful clusters! They’re quick to whip up, utterly irresistible, and a festive treat you can share with family and friends.

    Author: Munch Twist
    Prep Time: 10 minutes
    Cook Time: 25 mins
    Total Time: 55 minutes
    Yield: 20 servings
    Category: Desserts
    Method: No bake
    Cuisine: American

    Christmas MM Peanut Butter Clusters

    SCALE:
    1x
    2x
    3x
    Cook Mode: Prevent your screen from going dark

    Ingredients

    • 1 cup creamy peanut butter
    • 2 cups semi-sweet chocolate chips
    • 1 1/2 cups salted peanuts
    • 1 cup holiday M&Ms (red and green)
    • 1/2 cup white chocolate chips (optional, for drizzling)

    Instructions

    1. Begin by melting your semi-sweet chocolate chips and peanut butter together. Place them in a microwave-safe bowl, then microwave in 30-second bursts, stirring well after each interval until the mixture is completely smooth and velvety.
    2. Once melted, take the bowl out of the microwave and fold in the salted peanuts and 3/4 cup of the holiday M&Ms until they are thoroughly coated with the chocolate-peanut butter blend.
    3. On a baking sheet lined with parchment paper, spoon out dollops of the mixture. Give them some space between each cluster for expansion during setting.
    4. To top it off, place a few of the remaining holiday M&Ms onto each cluster for that pop of color and extra cheer!
    5. Place the baking sheet in the refrigerator to chill for about 30-45 minutes, or until the clusters are firm and ready to devour.
    6. For an extra festive touch, melt the white chocolate chips in the microwave and drizzle it over the chilled clusters.
    7. Enjoy your clusters right away, or store them in an airtight container in the refrigerator for up to a week.

    Nutrition Facts

    Serving Size: 1 serving
    Calories: 180 kcal
    Sugar: 10g
    Sodium: 150mg
    Fat: 10g
    Saturated Fat: 3g
    Carbohydrates: 20g
    Fiber: 2g
    Protein: 4g
    Cholesterol: 0mg

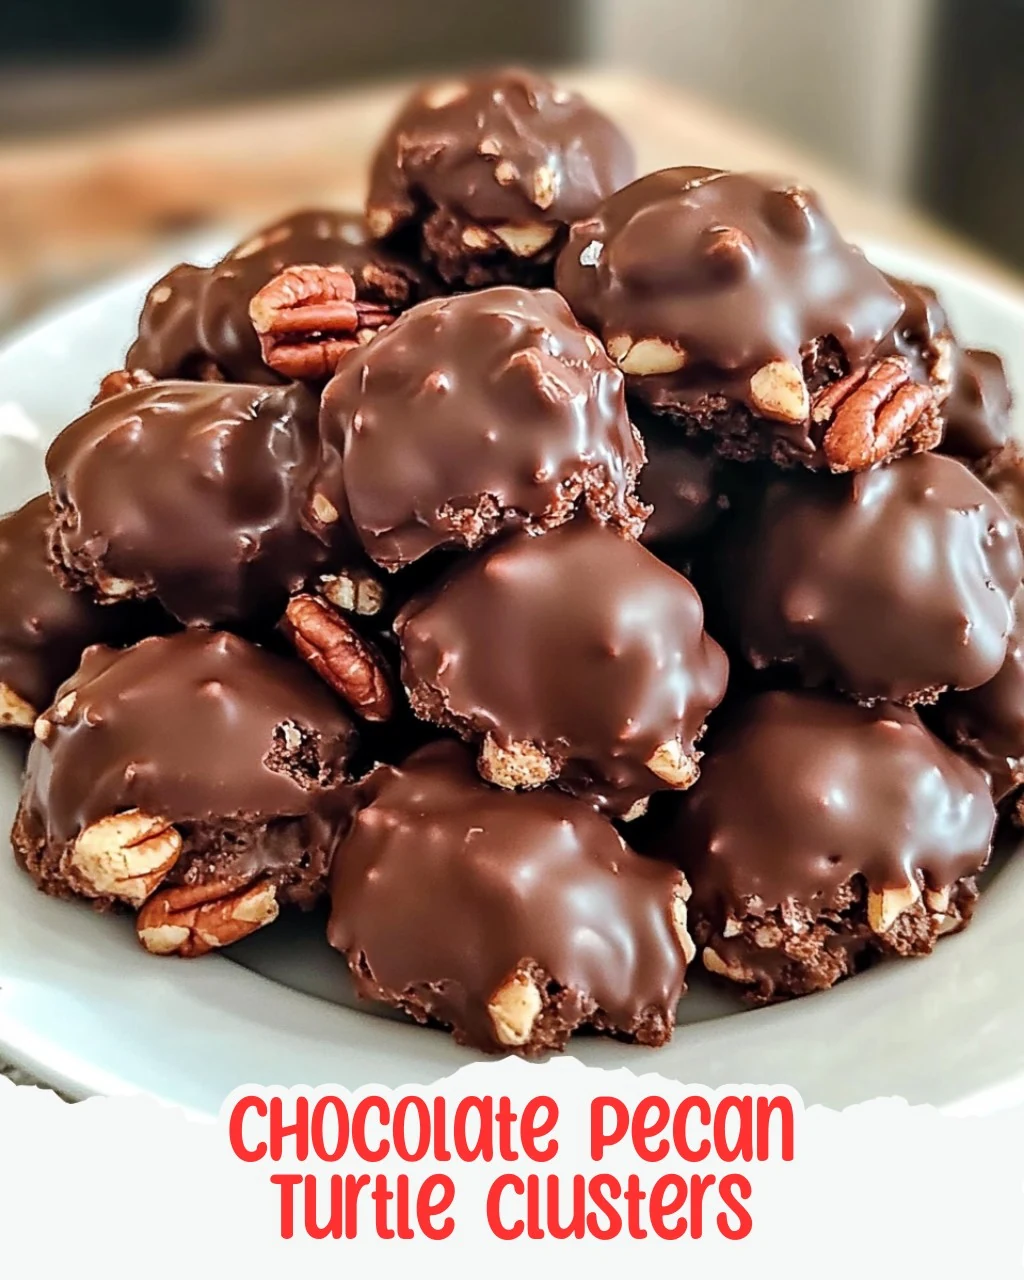
  • Delicious Chocolate Pecan Turtle Clusters Recipe

    Delicious Chocolate Pecan Turtle Clusters Recipe

    Prepare to dive into gourmet goodness with these Chocolate Pecan Turtle Clusters! Rich, sweet, and salty, they’re the perfect treat for any occasion. Who can resist the combination of crunchy pecans, gooey caramel, and silky chocolate? Let’s create some magic!

    Why You’ll Love This Recipe

    • Irresistible Flavor Combination: The blend of sweet caramel, crunchy pecans, and smooth chocolate creates a delightful taste experience.
    • Quick & Easy: Ready in under 30 minutes, these clusters are perfect for last-minute cravings or gatherings.
    • Perfect for Any Occasion: Whether it’s a holiday or a casual get-together, these treats impress every time.
    • Customizable Treats: You can easily adjust the chocolate type or add other nuts, making them your own.
    • Great for Gifting: Package them beautifully, and they make a thoughtful homemade gift.

    Tools and Equipment

    Having the right tools makes the process smoother and more enjoyable.

    Essential Tools

    • Baking sheet
    • Parchment paper or silicone baking mat
    • Microwave-safe bowls
    • Spoon or spatula
    • Measuring cups and spoons

    Why These Tools Matter

    • Baking sheet: Provides a sturdy base for the clusters and ensures even spacing.
    • Parchment paper or silicone baking mat: Creates a non-stick surface, making it easy to lift the clusters off after they set.
    • Microwave-safe bowls: Allow for quick melting of caramel and chocolate without the risk of overheating.

    Ingredients for Chocolate Pecan Turtle Clusters

    For the Clusters

    • 1 cup caramel bits or soft caramels, unwrapped
    • 1 1/2 cups pecan halves, toasted
    • 1 tablespoon coconut oil or vegetable shortening (optional, for smooth melting)
    • 1 1/2 cups semi-sweet or milk chocolate chips
    • 2 tablespoons heavy cream
    • Sea salt (optional, for garnish)

    How to Make Chocolate Pecan Turtle Clusters Step-by-Step

    Step 1: Prepare the Baking Sheet

    Line a baking sheet with parchment paper or a silicone baking mat. This non-stick surface is essential for easy removal of the clusters.

    Step 2: Form the Pecan Clusters

    Arrange 3-4 toasted pecan halves together on the baking sheet to form small clusters. Leave about an inch of space between each cluster for easy handling.

    Step 3: Melt the Caramel

    In a microwave-safe bowl, combine the caramel bits and heavy cream. Microwave in 20-second intervals, stirring in between until the mixture is smooth and fully melted.

    Step 4: Add Caramel to Clusters

    Take about 1 teaspoon of the melted caramel and generously spoon it over each pecan cluster. Allow the caramel to cascade over the nuts. Let it set for approximately 10 minutes.

    Step 5: Melt the Chocolate

    In another microwave-safe bowl, melt the chocolate chips using 20-30 second bursts. Stir well after each interval until the chocolate is fully smooth. If desired, add coconut oil or shortening for a silkier texture.

    Step 6: Drizzle Chocolate Over Clusters

    Using a spoon, carefully pour the melted chocolate over each cluster, ensuring the caramel is covered while allowing some pecans to remain visible for texture.

    Step 7: Garnish with Sea Salt

    For a finishing touch, sprinkle a pinch of sea salt on each cluster. This enhances the flavor and balances the sweetness.

    Step 8: Set the Clusters

    Allow the clusters to cool at room temperature. Alternatively, place them in the refrigerator for 15-20 minutes until the chocolate sets completely.

    Step 9: Enjoy Your Creation

    Once set, gently lift the clusters off the parchment paper. Your homemade Chocolate Pecan Turtle Clusters are ready to enjoy!

    Nutritional Information: Approximately 160 kcal per cluster, serves 20 clusters.

    Time: Preparation time: 15 minutes | Cooling time: 20 minutes.

    How to Serve Chocolate Pecan Turtle Clusters

    These delicious treats are versatile and can be served in various ways.

    Gift-Worthy Treats

    Wrap the clusters in clear cellophane bags tied with a ribbon for a thoughtful homemade gift that is perfect for holidays or special occasions.

    Dessert Platter

    Arrange the Chocolate Pecan Turtle Clusters on a decorative serving platter alongside other desserts like brownies or cookies for an impressive dessert spread.

    Ice Cream Topping

    Crush the clusters and sprinkle them over vanilla or chocolate ice cream for a delightful crunch and added flavor.

    Pro Tips for the Best Chocolate Pecan Turtle Clusters

    Enhance your chocolate pecan turtle clusters with these helpful tips.

    • Use Fresh Ingredients: Ensure that your pecans are fresh and toasted to bring out their nutty flavor.

    • Control Chocolate Thickness: Adjust the amount of coconut oil or shortening to achieve your desired chocolate consistency.

    • Temperature Matters: Let the caramel cool slightly before adding it to the clusters to prevent it from running off.

    • Experiment with Flavors: Try adding a splash of vanilla extract to the caramel for an added depth of flavor.

    • Storage Tips: Keep the clusters in an airtight container at room temperature for up to a week to maintain their freshness.

    Best Side Dishes and Pairings

    Pair your Chocolate Pecan Turtle Clusters with these delightful options.

    1. Coffee: A rich cup of coffee complements the sweetness of the clusters, enhancing their flavor profile.

    2. Milk: Classic and comforting, a glass of milk balances the richness of the chocolate and caramel.

    3. Hot Chocolate: For chocolate lovers, pairing these clusters with hot chocolate creates a decadent experience.

    4. Cheesecake: The creamy texture of cheesecake provides a contrasting flavor and texture that works well with the clusters.

    5. Fruit Platter: Fresh fruits like strawberries or apples add a refreshing contrast to the sweet and salty flavors of the clusters.

    6. Sparkling Water: A light and bubbly drink can cleanse the palate and enhance the overall dessert experience.

    Common Mistakes to Avoid

    • Not Toasting the Pecans: Skipping this step can result in a less flavorful cluster. Toasting enhances the nutty flavor.
    • Overheating the Caramel: Microwaving the caramel for too long can result in a hard texture. Heat in short intervals to maintain smoothness.
    • Using Cold Ingredients: Ensure that your chocolate and caramel are at room temperature before mixing, or they may not melt properly.
    • Skipping the Parchment Paper: Not lining your baking sheet can lead to sticking, making it difficult to remove the clusters.

    Storage & Reheating Instructions

    Refrigerator Storage

    Store the Chocolate Pecan Turtle Clusters in an airtight container in the refrigerator. They will stay fresh for up to two weeks.

    Freezing Instructions

    To freeze, place the clusters in a single layer on a baking sheet until solid, then transfer them to an airtight container or freezer bag. They can be frozen for up to three months. Thaw in the refrigerator before enjoying.

    Reheating Tips

    • Oven: Preheat to 300°F (150°C), place clusters on a baking sheet, and heat for 5-10 minutes until slightly warm.
    • Microwave: Heat in 10-second intervals on a microwave-safe plate until just warm, being careful not to melt the chocolate.
    • Stovetop: Use a double boiler to gently warm the clusters until desired warmth is reached, ensuring they don’t melt.

    Frequently Asked Questions

    How do I make Chocolate Pecan Turtle Clusters gluten-free?

    This recipe is naturally gluten-free, as it contains no flour or gluten-containing ingredients. Always check your chocolate and caramel brands for gluten-free certification.

    Can I use different nuts for the clusters?

    Yes, you can substitute pecans with other nuts such as walnuts or almonds. However, the flavor and texture may vary slightly.

    What can I do if my chocolate gets too thick while melting?

    If the chocolate becomes too thick, stir in a small amount of coconut oil or vegetable shortening to restore its smooth consistency.

    How can I make these Chocolate Pecan Turtle Clusters vegan?

    To make this recipe vegan, use dairy-free chocolate chips and coconut cream instead of heavy cream.

    What is the best way to serve Chocolate Pecan Turtle Clusters?

    These clusters are perfect for serving at parties, gifting, or enjoying as a sweet treat after dinner. Pair with coffee or tea for a delightful experience.

    Final Thoughts

    These Chocolate Pecan Turtle Clusters are a delightful combination of flavors and textures that are sure to impress. I encourage you to try making them and share your experience in the comments below. Your feedback is invaluable!


    Desserts

    Chocolate Pecan Turtle Clusters


    5.0 from 24 reviews

    Dive into gourmet goodness with these Chocolate Pecan Turtle Clusters! Rich, sweet, and salty, they combine crunchy pecans, gooey caramel, and silky chocolate for the perfect treat.

    Author: Munch Twist
    Prep Time: 15 minutes
    Cook Time: 5 minutes
    Total Time: 20 minutes
    Yield: 20 clusters
    Category: Desserts
    Method: No bake
    Cuisine: American

    Chocolate Pecan Turtle Clusters

    SCALE:
    1x
    2x
    3x
    Cook Mode: Prevent your screen from going dark

    Ingredients

    • 1 cup caramel bits or soft caramels, unwrapped
    • 1 1/2 cups pecan halves, toasted
    • 1 tablespoon coconut oil or vegetable shortening (optional)
    • 1 1/2 cups semi-sweet or milk chocolate chips
    • 2 tablespoons heavy cream
    • Sea salt (optional, for garnish)

    Instructions

    1. Line a baking sheet with parchment paper or a silicone baking mat.
    2. Form small clusters on the baking sheet by arranging 3-4 toasted pecan halves together.
    3. In a microwave-safe bowl, combine the caramel bits with the heavy cream and microwave until smooth.
    4. Spoon melted caramel over each pecan cluster and let it set for approximately 10 minutes.
    5. Melt the chocolate chips in another bowl, adding coconut oil if desired.
    6. Pour melted chocolate over each caramel and pecan cluster, leaving some pecans peeking through.
    7. Sprinkle a pinch of sea salt on each cluster.
    8. Allow the clusters to cool at room temperature or refrigerate until chocolate sets.

    Nutrition Facts

    Serving Size: 1 serving
    Calories: 160 kcal
    Sugar: 12g
    Sodium: 50mg
    Fat: 10g
    Saturated Fat: 4g
    Carbohydrates: 17g
    Fiber: 1g
    Protein: 2g
    Cholesterol: 5mg

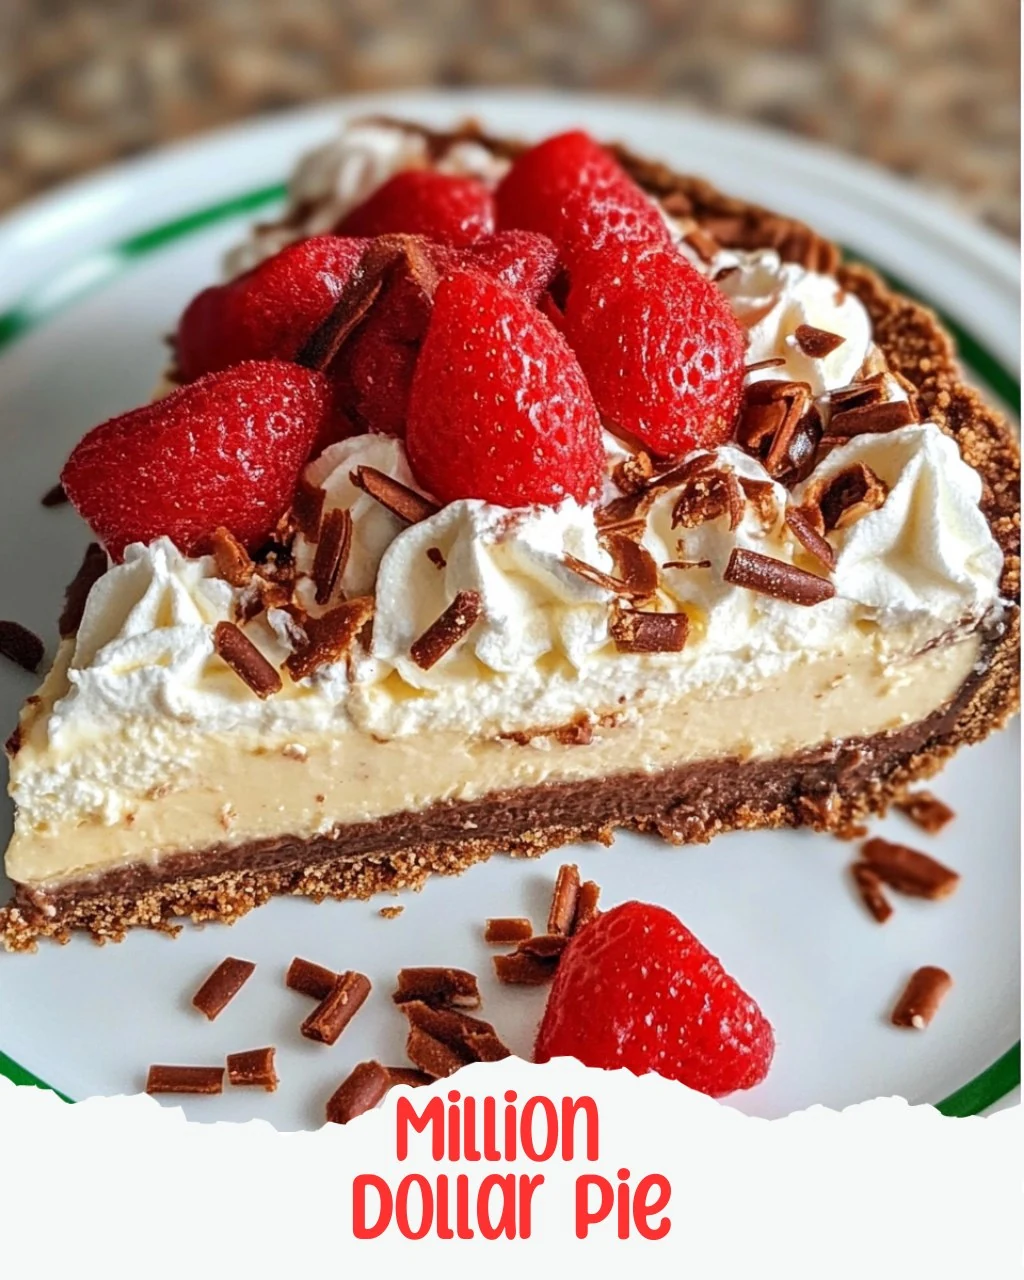
  • Discover Million Dollar Pie – Don’t LOSE this Recipe

    Discover Million Dollar Pie – Don’t LOSE this Recipe

    Million Dollar Pie – Don’t LOSE this Recipe is a tropical delight that combines creamy textures with a refreshing citrus kick. This pie is not only visually appealing but also incredibly simple to make, making it a perfect dessert for any occasion.

    Why You’ll Love This Recipe

    • Irresistibly Creamy: The combination of sweetened condensed milk and whipped topping creates a rich and velvety filling.
    • Tropical Flavor Explosion: With hints of lime, pineapple, and coconut, each bite transports you to a sunny paradise.
    • No Baking Required: This recipe requires no oven time, making it perfect for warm days and busy schedules.
    • Customizable Toppings: You can easily modify toppings to suit your preferences, adding a personal touch each time.
    • Feeds a Crowd: This recipe serves 8-10 slices, making it a great choice for gatherings and celebrations.

    Tools and Equipment

    To create this delicious pie, you’ll need a few essential kitchen tools.

    Essential Tools

    • Mixing bowl
    • Pie pan (9-inch)
    • Whisk
    • Spatula
    • Measuring cups and spoons

    Why These Tools Matter

    • Mixing bowl: A large bowl allows for easy mixing of the filling without spills.
    • Pie pan: A 9-inch pie pan ensures the right crust-to-filling ratio for perfect slices.
    • Spatula: A spatula helps in smoothing the filling and ensures even distribution.

    Ingredients for Million Dollar Pie – Don’t LOSE this Recipe

    For the filling:

    • 1 can (14 oz) sweetened condensed milk
    • 1/4 cup freshly squeezed lime juice (about 2 limes)
    • 1 can (8 oz) crushed pineapple, well-drained
    • 1/3 cup toasted sweetened coconut flakes
    • 1/2 cup chopped toasted walnuts or pecans
    • 1 tub (8 oz) whipped topping, thawed
    • 1/2 teaspoon pure coconut extract (optional)

    For the crust:

    • 1 1/2 cups crushed vanilla wafer cookies or graham crackers
    • 2 tablespoons brown sugar
    • 6 tablespoons salted butter, melted

    For the toppings:

    • Extra whipped topping or homemade whipped cream
    • Toasted coconut flakes
    • Chopped walnuts or pecans
    • Fresh pineapple slices or maraschino cherries

    How to Make Million Dollar Pie – Don’t LOSE this Recipe Step-by-Step

    Step 1: Prep the Crust

    1. In a medium bowl, combine the crushed vanilla wafer cookies and brown sugar.
    2. Pour in the melted butter and mix until it resembles moist sand.
    3. Press this mixture firmly into the base and up the sides of a 9-inch pie pan.
    4. Place the crust in the refrigerator to chill for 15-20 minutes, allowing it to set.

    Step 2: Prepare the Filling

    1. In a large mixing bowl, whisk together the sweetened condensed milk and lime juice until slightly thickened.
    2. Gently fold in the drained crushed pineapple, toasted coconut flakes, and your choice of chopped nuts. Mix until well combined.
    3. Carefully incorporate the thawed whipped topping, mixing until the filling is smooth and fluffy. If desired, add the coconut extract for additional flavor.

    Step 3: Assemble the Pie

    1. Pour the filling into the chilled crust, smoothing the top with a spatula for an elegant finish.
    2. Cover the pie with plastic wrap and refrigerate for a minimum of 4 hours, or ideally overnight, to allow the filling to set.

    Step 4: Serve and Enjoy

    1. Just before serving, garnish the pie with extra whipped topping, a sprinkle of toasted coconut flakes, and chopped nuts.
    2. Optionally, add fresh pineapple slices or maraschino cherries for a vibrant look.
    3. Slice, serve chilled, and revel in this delightful tropical treat!

    With its creamy filling and tropical flair, Million Dollar Pie – Don’t LOSE this Recipe is sure to become a favorite in your dessert repertoire. Enjoy this easy and delicious treat at your next gathering!

    How to Serve Million Dollar Pie – Dont LOSE this Recipe

    Serving Million Dollar Pie can be as delightful as making it. Here are some creative ideas to enhance your presentation.

    Tropical Fruit Platter

    Serve slices of Million Dollar Pie alongside a colorful platter of tropical fruits such as mango, kiwi, and papaya. This adds freshness and contrasts beautifully with the pie’s creamy texture.

    Whipped Cream Clouds

    Top each slice of pie with a generous dollop of homemade whipped cream. For an added touch, sprinkle with toasted coconut flakes to echo the flavors in the pie, creating a delightful visual appeal.

    Chocolate Drizzle

    For a luxurious twist, drizzle melted chocolate over the pie before serving. The rich chocolate complements the tropical flavors and adds an indulgent finish.

    Pro Tips for the Best Million Dollar Pie – Dont LOSE this Recipe

    To ensure your Million Dollar Pie is a hit, keep these expert tips in mind.

    • Use Fresh Ingredients: Whenever possible, use fresh lime juice and ripe fruit for the best flavor.
    • Chill Your Bowl: Before whipping the topping, chill your mixing bowl and beaters. This helps achieve a fluffier texture.
    • Don’t Skip the Chilling Time: Allow the pie to set in the refrigerator for at least 4 hours. Overnight chilling yields the best results.
    • Customize the Nuts: Feel free to experiment with different nuts. Macadamia nuts add a delightful buttery flavor that pairs beautifully with the tropical elements.
    • Presentation Matters: Consider garnishing the pie with edible flowers or mint leaves for an elegant touch that enhances its visual appeal.

    Best Side Dishes and Pairings

    Complement your Million Dollar Pie with these delightful pairings.

    1. Grilled Pineapple: The caramelized sweetness of grilled pineapple enhances the tropical theme and adds a smoky flavor contrast.
    2. Coconut Rice: Fluffy coconut-infused rice pairs well, echoing the coconut flavor in the pie and providing a satisfying side.
    3. Fruit Salad: A refreshing fruit salad with citrus and berries adds brightness and balances the richness of the pie.
    4. Iced Tea: A glass of sweetened iced tea or a tropical fruit-infused version refreshes the palate and complements the pie’s sweetness.
    5. Sparkling Water: Serve with a slice of lime for a refreshing, fizzy drink that cleanses the palate between bites.

    Common Mistakes to Avoid

    • Not Chilling the Crust: Skipping the chilling time can result in a crust that crumbles when sliced.
    • Overmixing the Filling: Whipping the filling too much can deflate the whipped topping, leading to a dense texture.
    • Using Undrained Pineapple: Failing to properly drain the crushed pineapple can make the filling watery.
    • Skipping Garnishes: Ignoring the toppings can lead to a less appealing presentation and missing flavor enhancements.

    Storage & Reheating Instructions

    Refrigerator Storage

    Store the Million Dollar Pie in an airtight container in the refrigerator. It will stay fresh for up to 3-4 days.

    Freezing Instructions

    To freeze, wrap the pie tightly in plastic wrap and then in aluminum foil. It can be frozen for up to 2 months. Thaw in the refrigerator overnight before serving.

    Reheating Tips

    • Oven: This pie is best served chilled and does not require reheating.
    • Microwave: Avoid microwaving as it can alter the texture of the filling.
    • Stovetop: Not applicable for this dessert.

    Frequently Asked Questions

    How can I make the Million Dollar Pie – Don’t LOSE this Recipe more tropical?

    You can add more tropical fruits like mango or banana into the filling for an extra burst of flavor.

    Can I use a different type of nut in the Million Dollar Pie – Don’t LOSE this Recipe?

    Absolutely! You can substitute walnuts or pecans with almonds or pistachios for a unique twist.

    Is it possible to make this recipe without coconut?

    Yes, you can omit the coconut flakes and extract for a different flavor profile while still enjoying the creamy filling.

    How long does the Million Dollar Pie – Don’t LOSE this Recipe last?

    When stored properly in the refrigerator, the pie will last for about 3-4 days.

    Can I use homemade whipped cream instead of store-bought?

    Yes, homemade whipped cream can be used for a fresher taste, just ensure it’s whipped to soft peaks before folding it into the filling.

    Final Thoughts

    This Million Dollar Pie – Don’t LOSE this Recipe is a delightful addition to any dessert table. Its tropical flavors and creamy texture are sure to impress. We encourage you to try making this pie and share your thoughts in the comments below!


    Desserts

    Million Dollar Pie – Dont LOSE this Recipe


    5.0 from 24 reviews

    This Million Dollar Pie is a delightful tropical treat that combines sweetened condensed milk, tangy lime juice, and crushed pineapple, all nestled in a buttery crust. Topped with whipped cream and toasted coconut, it's a refreshing dessert perfect for any occasion.

    Author: Munch Twist
    Prep Time: 20 minutes
    Cook Time: 0 minutes
    Total Time: 4 hours 20 minutes
    Yield: 8 servings
    Category: Desserts
    Method: No bake
    Cuisine: American

    Million Dollar Pie - Dont LOSE this Recipe

    SCALE:
    1x
    2x
    3x
    Cook Mode: Prevent your screen from going dark

    Ingredients

    • 1 can (14 oz) sweetened condensed milk
    • 1/4 cup freshly squeezed lime juice
    • 1 can (8 oz) crushed pineapple, well-drained
    • 1/3 cup toasted sweetened coconut flakes
    • 1/2 cup chopped toasted walnuts or pecans
    • 1 tub (8 oz) whipped topping, thawed
    • 1/2 teaspoon pure coconut extract (optional)
    • 1 1/2 cups crushed vanilla wafer cookies or graham crackers
    • 2 tablespoons brown sugar
    • 6 tablespoons salted butter, melted

    Instructions

    1. Combine the crushed vanilla wafer cookies and brown sugar in a medium bowl. Pour in the melted butter and mix until it resembles moist sand.
    2. Press this mixture firmly into the base and up the sides of a 9-inch pie pan. Place the crust in the refrigerator to chill for 15-20 minutes.
    3. In a large mixing bowl, whisk together the sweetened condensed milk and lime juice until the mixture slightly thickens.
    4. Gently fold in the drained crushed pineapple, toasted coconut flakes, and your choice of chopped nuts. Ensure it's well combined.
    5. Carefully incorporate the thawed whipped topping. Mix until the filling is smooth and fluffy. Optionally, add in the coconut extract.
    6. Pour the filling into your chilled crust, smoothing the top with a spatula.
    7. Cover the pie with plastic wrap and refrigerate for a minimum of 4 hours, or ideally overnight.
    8. Just before serving, garnish your pie with extra whipped topping, toasted coconut flakes, chopped nuts, and fresh pineapple slices or maraschino cherries.
    9. Slice, serve chilled, and enjoy!

    Nutrition Facts

    Serving Size: 1 serving
    Calories: 360 kcal
    Sugar: 24g
    Sodium: 260mg
    Fat: 22g
    Saturated Fat: 10g
    Carbohydrates: 42g
    Fiber: 2g
    Protein: 4g
    Cholesterol: 30mg

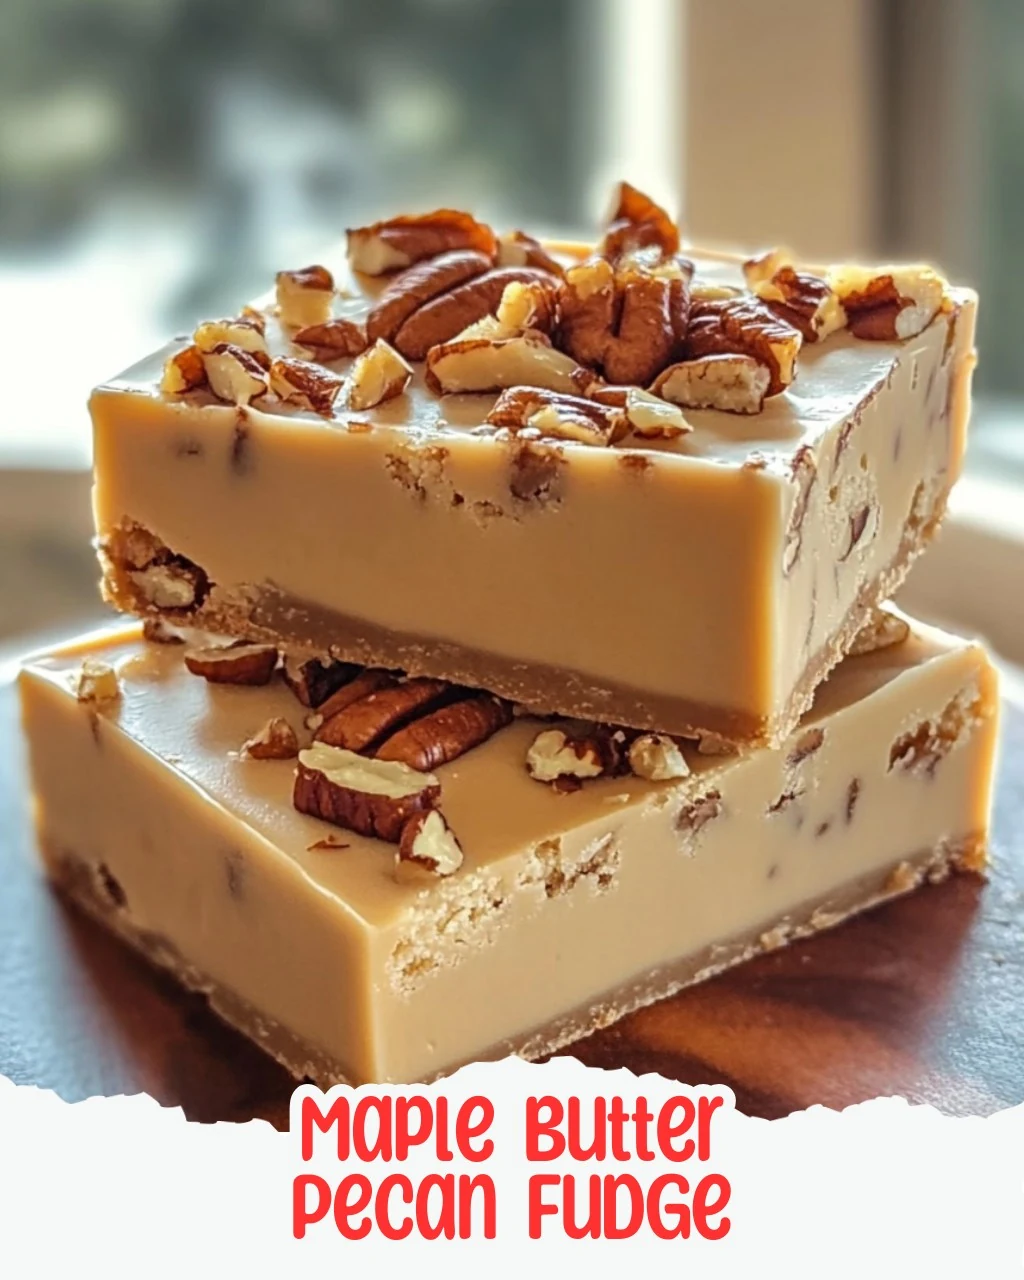
  • Irresistible Maple Butter Pecan Fudge Recipe

    Irresistible Maple Butter Pecan Fudge Recipe

    Treat yourself to a luscious blend of sweet maple and crunchy pecans in this decadent Maple Butter Pecan Fudge. This delightful treat is perfect for sharing, gifting, or simply indulging yourself. With its rich flavors, it brings a taste of autumn straight to your palate.

    Why You’ll Love This Recipe

    • Irresistible Flavor: The combination of maple and pecans creates a unique and satisfying taste experience.
    • Perfect for Gifting: Packaged nicely, this fudge makes a thoughtful gift for friends and family.
    • Easy to Make: With straightforward steps, even novice cooks can master this recipe.
    • Versatile Treat: Enjoy it as a dessert, snack, or during festive occasions.
    • Customizable: Feel free to add other nuts or spices for a personal touch.

    Tools and Equipment

    Gathering the right tools will simplify your fudge-making process.

    Essential Tools

    • Medium saucepan
    • Candy thermometer
    • Spatula
    • Parchment paper
    • Mixing bowl

    Why These Tools Matter

    • Candy Thermometer: This ensures that you cook the fudge to the perfect temperature for optimal texture.
    • Spatula: A sturdy spatula helps you mix ingredients thoroughly and scrape every bit from the saucepan.
    • Parchment Paper: This makes for easy clean-up and helps shape the fudge without sticking.

    Ingredients for Maple Butter Pecan Fudge

    Base Ingredients

    • 1 cup heavy whipping cream
    • 1 cup granulated sugar
    • 1 cup butter
    • 1 teaspoon maple extract
    • 1 cup brown sugar
    • 1 teaspoon salt
    • 1 teaspoon cinnamon

    Additions

    • 1 cup toasted pecans, chopped
    • 2 cups powdered sugar

    How to Make Maple Butter Pecan Fudge Step-by-Step

    Step 1: Prepare the Base

    1. In a medium saucepan, melt the butter over medium heat until fully liquid.
    2. Pour in the heavy whipping cream and add the brown sugar, granulated sugar, salt, and cinnamon. Stir gently to combine.

    Step 2: Cook the Mixture

    1. Bring the mixture to a boil, stirring occasionally.
    2. Use a candy thermometer to monitor the temperature. Boil until it reaches 235°F.

    Step 3: Cool the Mixture

    1. Carefully remove the saucepan from heat when the desired temperature is reached.
    2. Add the maple extract but avoid stirring. Let the mixture cool until it reaches 105°F, about 30 minutes.

    Step 4: Mix and Thicken

    1. Once cooled, use a spatula to stir the mixture vigorously. This step thickens the fudge.
    2. Gradually add the powdered sugar and chopped pecans, stirring until everything is smooth and well combined.

    Step 5: Shape the Fudge

    1. Spoon the mixture onto a sheet of parchment paper.
    2. Shape it into a log and wrap it carefully in the paper.

    Step 6: Chill and Serve

    1. Refrigerate the fudge for 12 hours to set completely.
    2. After chilling, slice the fudge into your desired thickness. Enjoy this delightful Maple Butter Pecan Fudge with friends and family!

    This Maple Butter Pecan Fudge recipe is not only delicious but also a wonderful way to embrace the flavors of the season. Indulge in this treat and share the joy with others!

    How to Serve Maple Butter Pecan Fudge

    Serving Maple Butter Pecan Fudge can elevate any occasion with its rich flavors and delightful textures.

    Gift-Worthy Treats

    Wrap individual pieces of fudge in decorative boxes or cellophane bags for a charming homemade gift. Perfect for holidays or special occasions, this fudge makes a thoughtful present.

    Decadent Dessert Platter

    Arrange sliced fudge on a platter alongside fresh fruit, chocolate-covered strawberries, or whipped cream. This combination creates a visually appealing and indulgent dessert spread.

    Coffee Companion

    Serve Maple Butter Pecan Fudge with a hot cup of coffee or espresso. The rich flavors of the fudge complement the boldness of coffee, enhancing the overall tasting experience.

    Pro Tips for the Best Maple Butter Pecan Fudge

    For the perfect Maple Butter Pecan Fudge, consider these expert tips.

    • Use Fresh Ingredients: Always opt for fresh heavy cream and butter to enhance the flavor and texture of the fudge.
    • Monitor Temperature Carefully: Use a reliable candy thermometer to ensure accuracy when reaching the boiling point, as this is crucial for achieving the right consistency.
    • Cool Before Stirring: Allow the fudge mixture to cool to 105°F before stirring to achieve the ideal texture and prevent graininess.
    • Toast Pecans for Extra Flavor: Toasting the pecans before adding them to the fudge enhances their flavor, adding a delightful crunch.
    • Store Properly: Keep the fudge in an airtight container in the refrigerator to maintain its freshness and texture for longer.

    Best Side Dishes and Pairings

    Pairing Maple Butter Pecan Fudge with complementary dishes can enhance its indulgent flavors.

    1. Vanilla Ice Cream: The creamy texture of vanilla ice cream balances the richness of the fudge, creating a heavenly dessert combination.
    2. Chai Latte: The spiced flavors of a chai latte pair beautifully with the maple and pecan notes, making for a cozy treat.
    3. Apple Slices: Fresh apple slices provide a crisp contrast to the sweetness of the fudge, offering a refreshing bite.
    4. Dark Chocolate: The bitterness of dark chocolate enhances the sweetness of the fudge, creating a delightful contrast.
    5. Hot Cocoa: A warm cup of hot cocoa complements the fudge’s texture and sweetness, perfect for a chilly day.

    Common Mistakes to Avoid

    • Not Measuring Ingredients Accurately: Precision is key in fudge-making. Use a kitchen scale for best results.
    • Skipping the Candy Thermometer: Avoid the guesswork; a thermometer ensures you reach the perfect temperature for a smooth texture.
    • Not Allowing the Mixture to Cool Properly: Cooling down to 105°F is essential for achieving the right consistency. Patience pays off.
    • Overmixing After Adding Powdered Sugar: Stir just until combined to prevent the fudge from becoming too dense or grainy.

    Storage & Reheating Instructions

    Refrigerator Storage

    Store the Maple Butter Pecan Fudge in an airtight container in the refrigerator. It will stay fresh for up to two weeks, allowing you to enjoy its rich flavors.

    Freezing Instructions

    For longer storage, you can freeze the fudge. Wrap it tightly in plastic wrap and place it in an airtight container. It can be frozen for up to three months. To thaw, simply place it in the refrigerator overnight.

    Reheating Tips

    • Oven: Preheat to 200°F and place the fudge in a baking dish, covering it with foil to prevent drying out. Heat for about 10-15 minutes.
    • Microwave: Heat in short intervals of 10-15 seconds, checking frequently to avoid melting too much. Stir between intervals for even heating.
    • Stovetop: Place the fudge in a saucepan over low heat, stirring constantly until softened.

    Frequently Asked Questions

    How can I make Maple Butter Pecan Fudge without maple extract?

    You can substitute vanilla extract for maple extract if desired. However, the flavor will differ slightly from traditional Maple Butter Pecan Fudge.

    Can I use different nuts in this fudge?

    Absolutely! While pecans add a delightful crunch, you can use walnuts, almonds, or even a mix of your favorite nuts for a unique twist.

    How long does Maple Butter Pecan Fudge last?

    When stored properly in an airtight container, it will remain fresh in the refrigerator for up to two weeks.

    Can I use light brown sugar instead of dark brown sugar?

    Yes, using light brown sugar will result in a slightly less rich flavor, but the fudge will still be delicious.

    What is the best way to cut Maple Butter Pecan Fudge?

    Using a sharp knife coated with a little cooking spray will help you cut clean, even pieces without sticking.

    Final Thoughts

    This Maple Butter Pecan Fudge recipe is a delightful treat that embodies the flavors of fall. We encourage you to make this indulgent confection and share it with friends and family. If you try the recipe, please leave a comment below to let us know how it turned out!


    Desserts

    Maple Butter Pecan Fudge


    5.0 from 24 reviews

    Treat yourself to a luscious blend of sweet maple and crunchy pecans in this decadent fudge! Perfect for sharing, gifting, or just indulging yourself, it brings a taste of autumn straight to your palate.

    Author: Munch Twist
    Prep Time: 15 minutes
    Cook Time: 30 minutes
    Total Time: 12 hours 45 minutes
    Yield: 24 servings
    Category: Desserts
    Method: No bake
    Cuisine: American

    Maple Butter Pecan Fudge

    SCALE:
    1x
    2x
    3x
    Cook Mode: Prevent your screen from going dark

    Ingredients

    • 1 cup heavy whipping cream
    • 1 cup granulated sugar
    • 1 cup butter
    • 1 teaspoon maple extract
    • 1 cup brown sugar
    • 1 teaspoon salt
    • 1 cup toasted pecans, chopped
    • 2 cups powdered sugar
    • 1 teaspoon cinnamon

    Instructions

    1. In a medium saucepan, melt the butter over medium heat until fully liquid.
    2. Pour in the heavy whipping cream and add the brown sugar, granulated sugar, salt, and cinnamon. Stir the mixture gently to combine all the ingredients.
    3. Bring the mixture to a boil while continuing to stir occasionally. Use a candy thermometer to monitor the temperature, and let it boil until it reaches 235°F.
    4. Once it reaches the desired temperature, carefully remove the saucepan from the heat. Add the maple extract, but avoid stirring at this point. Allow the mixture to cool down untouched until it reaches 105°F, which should take about 30 minutes.
    5. When cooled, take a spatula and stir the mixture vigorously. This will help it thicken beautifully.
    6. Gradually add the powdered sugar and chopped pecans into the mixture, stirring until everything is well combined and smooth.
    7. Spoon the mixture onto a sheet of parchment paper. Shape it into a log, carefully wrapping it in the paper.
    8. Refrigerate the fudge for 12 hours to set fully.
    9. After chilling, slice the fudge into your desired thickness.

    Nutrition Facts

    Serving Size: 1 serving
    Calories: 120 kcal
    Sugar: 8g
    Sodium: 50mg
    Fat: 7g
    Saturated Fat: 4g
    Carbohydrates: 15g
    Fiber: 0g
    Protein: 1g
    Cholesterol: 30mg

  • Festive Grinch Oreo Balls for Holiday Celebrations

    Festive Grinch Oreo Balls for Holiday Celebrations

    Get ready to put a festive twist on your sweet treats! These Grinch Oreo Balls are a fun and delicious way to celebrate the holiday season. With a vibrant green coating and a touch of red, they will surely bring a grin to your face.

    Why You’ll Love This Recipe

    • Delicious Flavor: The combination of creamy cream cheese and rich Red Velvet Oreos creates a delightful taste experience.
    • Festive Presentation: The bright green coating and red candy hearts make these treats visually appealing for holiday gatherings.
    • Simple to Make: This recipe is beginner-friendly, requiring just a few steps to create impressive results.
    • Perfect for Gifting: These Grinch Oreo Balls make a charming gift for friends and family during the holiday season.
    • Customizable: Feel free to experiment with different types of Oreos or toppings to make them uniquely yours.

    Tools and Equipment

    Having the right tools makes preparation smoother and more enjoyable.

    Essential Tools

    • Food processor
    • Large mixing bowl
    • Electric hand mixer
    • Cookie scoop (1.5-inch)
    • Baking sheet
    • Parchment paper
    • Double boiler
    • Fork or toothpick
    • Microwave-safe piping bag

    Why These Tools Matter

    • Food processor: Quickly transforms cookies into fine crumbs, saving time and effort.
    • Double boiler: Allows for gentle melting of candy melts, preventing burning.
    • Electric hand mixer: Ensures a smooth cream cheese mixture, making it easier to combine with cookie crumbs.

    Ingredients for Grinch Oreo Balls

    Base Ingredients

    • 15 ounces light green candy melts
    • 8 ounces cream cheese, softened to room temperature
    • 24.4 ounces Red Velvet Oreos (2 packages, 44 cookies total)

    Topping Ingredients

    • Red candy hearts

    How to Make Grinch Oreo Balls Step-by-Step

    Step 1: Prep the Base

    1. Start by lining a large baking sheet with parchment paper. This will prevent the Oreo balls from sticking and make for easy clean-up.

    2. In a food processor, add the 24.4 ounces of Red Velvet Oreos and pulse until they transform into fine crumbs. If you don’t have a food processor, crush the cookies by placing them in a zip closure plastic bag and rolling over them with a rolling pin.

    3. In a large mixing bowl, combine the 8 ounces of softened cream cheese. Using an electric hand mixer on high speed, blend until the mixture is smooth and creamy.

    4. Pour in the Oreo crumbs and mix well. You should have a thick and doughy consistency.

    Step 2: Form the Balls

    1. Using a 1.5 cookie scoop, scoop out portions of the mixture and roll them into smooth balls with your hands. Place each ball onto the lined baking sheet.

    2. Refrigerate the cookie balls for at least 2 hours to help them firm up and hold their shape during the dipping process.

    Step 3: Melt the Candy Coating

    1. While they chill, set aside a small cup of the 15 ounces of light green candy melts for drizzling later if desired.

    2. In a double boiler, melt the remaining candy melts over low heat, stirring frequently to ensure a smooth consistency. Be careful to avoid overheating or letting any water come into contact with the candy.

    Step 4: Coat the Oreo Balls

    1. Once melted, use a fork or toothpick to dip each chilled ball into the green candy melts. Let excess candy drip off by tapping the fork on the edge of the pot before placing it back onto the baking sheet.

    2. If you want to add some extra flair, drizzle any leftover melted candy over the coated balls using a spoon or knife. Alternatively, you can place the reserved melts in a microwave-safe piping bag, twist it tight, and heat in the microwave on a low setting (defrost setting) for 30 seconds. Massage the bag until fully melted, repeating for another 30 seconds if needed. Just be cautious not to overheat.

    3. Snip a small tip off the piping bag and drizzle it over the coated balls. Immediately top each one with a red candy heart before the drizzle sets.

    Step 5: Chill and Serve

    1. Return the finished Grinch Oreo Balls to the refrigerator to let them set completely. Once firm, serve and enjoy these festive treats!

    Nutritional Information: Approx. 130 calories per ball, with a balance of carbs, fats, and proteins depending on exact ingredient brands.

    Time: Preparation time: 30 minutes | Chilling time: 2 hours

    How to Serve Grinch Oreo Balls

    These festive treats can be enjoyed in several delightful ways.

    Festive Dessert Platter

    Arrange the Grinch Oreo Balls on a decorative platter alongside other holiday sweets. This colorful display will brighten up your dessert table and impress your guests.

    Holiday Gift Treats

    Package the Grinch Oreo Balls in clear cellophane bags tied with a red ribbon. They make perfect homemade gifts for friends, family, or coworkers during the holiday season.

    Themed Party Favors

    If you’re hosting a holiday gathering, serve each guest a Grinch Oreo Ball on a themed plate. This fun touch adds a whimsical element to your party and ensures everyone leaves with a smile.

    Pro Tips for the Best Grinch Oreo Balls

    For the most delicious and visually appealing Grinch Oreo Balls, follow these expert tips.

    • Use High-Quality Candy Melts: Opt for good-quality candy melts for smoother coating and better flavor.

    • Ensure Proper Chilling: Always refrigerate the Oreo balls for the full two hours to ensure they hold their shape when dipped.

    • Experiment with Coatings: Feel free to try different colors of candy melts for various occasions, or use white chocolate for a different flavor profile.

    • Keep Your Tools Dry: Ensure that all utensils and bowls are completely dry before melting candy to prevent clumping.

    • Mix Well: When combining the cream cheese and Oreo crumbs, make sure to mix thoroughly for an even texture throughout.

    Best Side Dishes and Pairings

    Complement your Grinch Oreo Balls with these delightful options.

    1. Hot Cocoa: A warm cup of hot cocoa pairs perfectly with the sweetness of the Oreo balls, creating a cozy dessert experience.

    2. Peppermint Bark: This classic holiday treat offers a refreshing minty contrast to the rich flavors of the Grinch Oreo Balls.

    3. Christmas Sugar Cookies: The buttery sweetness of sugar cookies enhances the festive spirit, making it a great addition to your dessert spread.

    4. Fruit Platter: A colorful assortment of fresh fruits provides a refreshing balance to the richness of the Oreo balls.

    5. Spiced Apple Cider: This warm beverage adds a seasonal touch and pairs wonderfully with the creamy texture of the treats.

    Common Mistakes to Avoid

    • Overheating Candy Melts: Be cautious while melting the candy melts, as overheating can cause them to seize up and become unusable.
    • Skipping Chilling Time: Allowing the Oreo balls to chill for at least two hours is crucial for maintaining their shape during dipping.
    • Not Using Parchment Paper: Failing to line your baking sheet with parchment paper can result in the balls sticking, making them difficult to remove.
    • Ignoring Consistency: If the mixture is too dry, add more cream cheese. If too wet, incorporate more Oreo crumbs for a better rolling consistency.

    Storage & Reheating Instructions

    Refrigerator Storage

    Store the Grinch Oreo Balls in an airtight container in the refrigerator. They will remain fresh for up to one week.

    Freezing Instructions

    To freeze, place the Oreo balls on a baking sheet and freeze until solid. Then transfer them to a freezer-safe container or bag. They can be frozen for up to three months. To thaw, simply place them in the refrigerator overnight.

    Reheating Tips

    • Oven: Preheat to 350°F (175°C), place the balls on a baking sheet, and warm for 5-10 minutes.
    • Microwave: Heat on low power in 15-second intervals until warmed through.
    • Stovetop: Use a non-stick skillet on low heat, turning the balls gently until warmed.

    Frequently Asked Questions

    How do I make Grinch Oreo Balls without a food processor?

    You can crush the cookies by placing them in a zip closure plastic bag and rolling over them with a rolling pin until they are fine crumbs.

    Can I use different flavors of Oreos for Grinch Oreo Balls?

    Yes, you can experiment with different Oreo flavors, but keep in mind that it may alter the overall taste and color.

    How should I store Grinch Oreo Balls?

    Store them in an airtight container in the refrigerator for up to one week, or freeze them for longer storage.

    Can I decorate Grinch Oreo Balls differently?

    Absolutely! Feel free to use different toppings or drizzles to customize your Grinch Oreo Balls for various occasions.

    What is the best way to serve Grinch Oreo Balls?

    Serve them chilled as a festive treat at holiday gatherings, or package them as gifts for friends and family.

    Final Thoughts

    These Grinch Oreo Balls are a delightful addition to your holiday dessert lineup. Their festive appearance and rich flavor are sure to impress your guests. We encourage you to try this recipe and share your thoughts in the comments below!


    Desserts

    Grinch Oreo Balls


    5.0 from 24 reviews

    Get ready to put a festive twist on your sweet treats! These Grinch Oreo Balls are a fun and delicious way to celebrate the holiday season. With a vibrant green coating and a touch of red, they’ll surely bring a grin to your face.

    Author: Munch Twist
    Prep Time: 30 minutes
    Cook Time: 25 mins
    Total Time: 150 minutes
    Yield: 24 servings
    Category: Desserts
    Method: No bake
    Cuisine: American

    Grinch Oreo Balls

    SCALE:
    1x
    2x
    3x
    Cook Mode: Prevent your screen from going dark

    Ingredients

    • 15 ounces light green candy melts
    • 8 ounces cream cheese, softened to room temperature
    • 24.4 ounces Red Velvet Oreos (2 packages, 44 cookies total)
    • Red candy hearts

    Instructions

    1. Line a large baking sheet with parchment paper.
    2. In a food processor, pulse the Red Velvet Oreos until they become fine crumbs.
    3. In a large mixing bowl, combine the softened cream cheese and blend until smooth.
    4. Add the Oreo crumbs and mix until you achieve a thick and doughy consistency.
    5. Scoop out portions of the mixture and roll them into smooth balls, placing them on the lined baking sheet.
    6. Refrigerate the cookie balls for at least 2 hours.
    7. Melt the light green candy melts in a double boiler over low heat.
    8. Dip each chilled ball into the melted green candy melts and let excess drip off.
    9. Drizzle any leftover melted candy over the coated balls and top with a red candy heart.
    10. Return the finished Grinch Oreo Balls to the refrigerator to set completely.

    Nutrition Facts

    Serving Size: 1 serving
    Calories: 130 kcal
    Sugar: 10g
    Sodium: 70mg
    Fat: 7g
    Saturated Fat: 4g
    Carbohydrates: 16g
    Fiber: 0g
    Protein: 1g
    Cholesterol: 20mg

  • Irresistible Butterfinger Balls Recipe in 45 Minutes

    Irresistible Butterfinger Balls Recipe in 45 Minutes

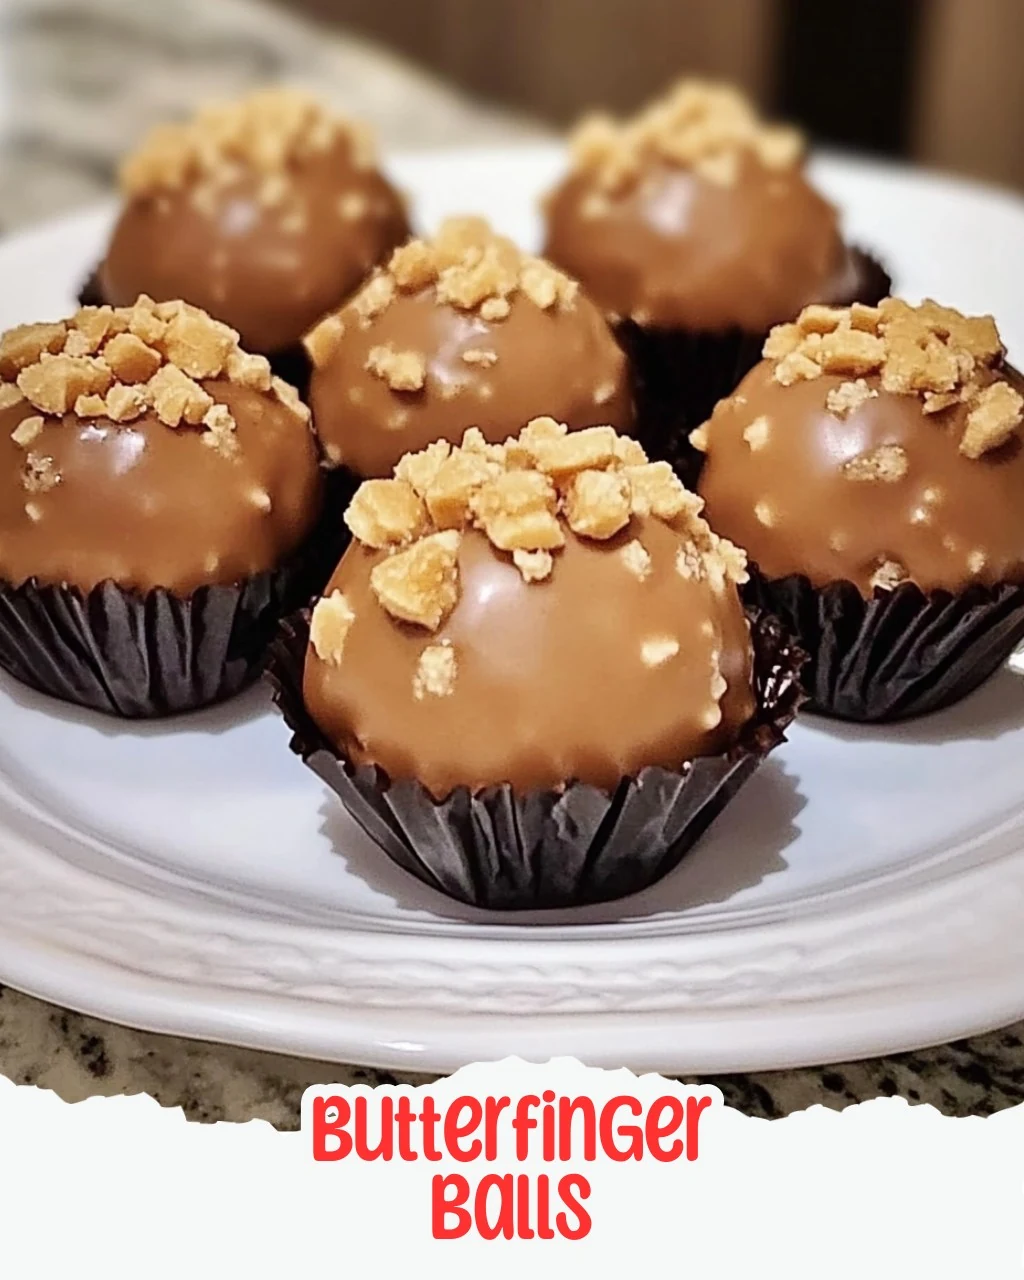
    Get ready to satisfy your sweet tooth with these irresistible Butterfinger Balls! This delightful treat combines creamy, crunchy, and chocolaty goodness in every bite. They are incredibly easy to make and will have your friends and family coming back for more.

    Why You’ll Love This Recipe

    • Quick & Easy: Ready in under 45 minutes, these treats are perfect for last-minute cravings or gatherings.
    • No Baking Required: Enjoy a hassle-free cooking experience with no need for an oven.
    • Customizable Toppings: Elevate your Butterfinger Balls with sprinkles or additional crushed candy for a personal touch.
    • Crowd-Pleaser: Their rich flavor and fun texture make them a hit at parties and family events.
    • Kid-Friendly: A fun recipe that kids can help with, making it a great activity for family bonding.

    Tools and Equipment

    To make Butterfinger Balls, you will need some essential kitchen tools for a smooth process.

    Essential Tools

    • Mixing bowl
    • Baking sheet
    • Parchment paper
    • Microwave-safe bowl
    • Fork or dipping tool

    Why These Tools Matter

    • Mixing bowl: Essential for combining the cream cheese and crushed candy smoothly.
    • Baking sheet: Provides a stable surface for chilling and setting the Butterfinger Balls.
    • Microwave-safe bowl: Ensures safe melting of chocolate without the risk of burns or spills.

    Ingredients for Butterfinger Balls

    Gather these ingredients for the perfect Butterfinger Balls:

    Base Ingredients

    • 8 oz. cream cheese, softened
    • 2 cups crushed Butterfinger candy bars (about 16 fun-sized bars)

    Coating Ingredients

    • 2 cups semi-sweet chocolate chips
    • 1 tbsp optional vegetable shortening (for smoother dipping)

    Optional Toppings

    • Butterfinger or chocolate sprinkles for decoration

    How to Make Butterfinger Balls Step-by-Step

    Step 1: Mix Ingredients

    In a large mixing bowl, combine the softened cream cheese with the crushed Butterfinger pieces. Use a sturdy spoon or mixer to blend the mixture until it is smooth and well combined.

    Step 2: Form Balls

    Once the mixture is well combined, scoop out portions and roll them into 1-inch balls. Arrange the balls on a baking sheet lined with parchment paper. Chill them in the refrigerator for 30 minutes to firm up.

    Step 3: Melt Chocolate

    While the balls are chilling, melt the semi-sweet chocolate chips in a microwave-safe bowl. Heat them in 30-second intervals, stirring in between until completely melted. For a smoother finish, stir in the optional vegetable shortening.

    Step 4: Dip Balls

    After the chilling time, remove the balls from the refrigerator. Dip each ball into the melted chocolate, ensuring they are fully coated. Use a fork or your fingers to help remove any excess chocolate.

    Step 5: Set and Enjoy

    Return the chocolate-coated balls to the parchment-lined baking sheet. For a decorative touch, sprinkle some additional crushed Butterfinger or chocolate sprinkles on top before the chocolate sets. Allow the chocolate to harden completely before serving.

    Enjoy making and sharing these delightful Butterfinger Balls with your loved ones!

    How to Serve Butterfinger Balls

    These Butterfinger Balls are versatile treats that can be enjoyed in various ways.

    Dessert Platter

    Arrange Butterfinger Balls on a decorative platter alongside other bite-sized desserts for a visually appealing dessert table.

    Movie Night Treat

    Serve these delicious treats during a movie night as a sweet snack that everyone will love. They are easy to pop in your mouth without interrupting the film.

    Festive Gift

    Package Butterfinger Balls in a decorative box or jar to give as a thoughtful homemade gift for birthdays or holidays.

    Pro Tips for the Best Butterfinger Balls

    To ensure your Butterfinger Balls are irresistible, consider these expert tips.

    • Use Softened Cream Cheese: Make sure your cream cheese is softened to room temperature for easier mixing and a smoother texture.

    • Chill Thoroughly: Don’t skip the chilling step; it helps the balls maintain their shape while being dipped in chocolate.

    • Choose Quality Chocolate: Opt for high-quality semi-sweet chocolate chips for a richer flavor and better melting consistency.

    • Experiment with Toppings: Get creative with toppings by using crushed nuts or colorful sprinkles to add visual appeal and texture.

    • Store Properly: Keep leftover Butterfinger Balls in an airtight container in the refrigerator for up to a week to maintain freshness.

    Best Side Dishes and Pairings

    To enhance your experience with Butterfinger Balls, consider these delightful pairings.

    1. Vanilla Ice Cream – The creamy texture of vanilla ice cream complements the crunchy and chocolaty flavors of the Butterfinger Balls.

    2. Coffee – A cup of freshly brewed coffee balances the sweetness of the Butterfinger Balls, making for a perfect afternoon treat.

    3. Milk – A classic pairing, cold milk enhances the rich taste of the Butterfinger Balls and provides a satisfying contrast.

    4. Fruit Platter – Fresh fruits like strawberries or bananas offer a refreshing contrast to the rich, sweet flavor of the Butterfinger Balls.

    5. Chocolate Milkshake – For a decadent treat, serve Butterfinger Balls with a chocolate milkshake that echoes their flavors.

    Common Mistakes to Avoid

    • Using Cold Cream Cheese: Make sure your cream cheese is softened to ensure a smooth mixture.
    • Skipping the Chilling Step: Chilling the balls is crucial for proper coating and to maintain their shape.
    • Not Coating Evenly: Ensure each ball is fully coated in chocolate to enhance the flavor and presentation.
    • Overheating the Chocolate: Melt chocolate in short intervals to prevent burning, which can affect the texture.

    Storage & Reheating Instructions

    Refrigerator Storage

    Store your Butterfinger Balls in an airtight container in the refrigerator. They will stay fresh for up to one week, making them a great make-ahead treat.

    Freezing Instructions

    For longer storage, you can freeze the Butterfinger Balls. Place them in a single layer on a baking sheet until solid, then transfer them to a freezer-safe container. They will maintain their quality for up to three months.

    Reheating Tips

    • Oven: Preheat to 350°F (175°C) and warm Butterfinger Balls on a baking sheet for about 5-10 minutes until slightly softened.
    • Microwave: Heat in 10-15 second intervals until just warm; be careful not to melt the chocolate coating.
    • Stovetop: Use a double boiler to gently warm the balls, stirring occasionally to prevent melting.

    Frequently Asked Questions

    How do I make Butterfinger Balls without cream cheese?

    You can use a vegan cream cheese alternative or a blend of nut butter and powdered sugar for a different flavor profile.

    Can I use milk chocolate instead of semi-sweet chocolate?

    Yes, you can substitute milk chocolate for a sweeter taste, but it may alter the overall flavor balance of the Butterfinger Balls.

    How long do Butterfinger Balls take to make?

    The total time to prepare Butterfinger Balls is about 45 minutes, including preparation and chilling time.

    Can I decorate my Butterfinger Balls?

    Absolutely! Feel free to use crushed Butterfinger or chocolate sprinkles to add a decorative touch before the chocolate sets.

    What is the best way to serve Butterfinger Balls?

    Serve them chilled on a platter for parties or gatherings, or store them in individual wrappers for a fun gift option.

    Final Thoughts

    Butterfinger Balls are an easy and delicious treat that everyone will love. Give this recipe a try, and don’t forget to leave a comment sharing your experience!


    Desserts

    Butterfinger Balls


    5.0 from 24 reviews

    Get ready to satisfy your sweet tooth with these irresistible Butterfinger Balls! The perfect blend of creamy, crunchy, and chocolaty goodness, they’re a delightful treat that’s super easy to make. Your friends and family will be begging for seconds!

    Author: Munch Twist
    Prep Time: 15 minutes
    Cook Time: 25 mins
    Total Time: 45 minutes
    Yield: 16 servings
    Category: Desserts
    Method: No bake
    Cuisine: American

    Butterfinger Balls

    SCALE:
    1x
    2x
    3x
    Cook Mode: Prevent your screen from going dark

    Ingredients

    • 8 oz. cream cheese, softened
    • 2 cups crushed Butterfinger candy bars (about 16 fun-sized bars)
    • 2 cups semi-sweet chocolate chips
    • 1 tbsp optional vegetable shortening

    Instructions

    1. In a large mixing bowl, combine the softened cream cheese with the crushed Butterfinger pieces. Blend the mixture until smooth and well combined.
    2. Scoop out the mixture and roll it into 1-inch balls. Place the formed balls on a baking sheet lined with parchment paper. Chill them in the refrigerator for 30 minutes to firm up.
    3. Melt the semi-sweet chocolate chips in a microwave-safe bowl. Heat in 30-second intervals, stirring in between until completely melted. Stir in the optional vegetable shortening for a smoother finish.
    4. Dip each ball into the melted chocolate, ensuring they are completely coated. Use a fork or your fingers to help remove excess chocolate.
    5. Place the chocolate-coated balls back on the parchment-lined baking sheet. Sprinkle some additional crushed Butterfinger or chocolate sprinkles on top before the chocolate sets. Allow the chocolate to harden completely before serving.

    Nutrition Facts

    Serving Size: 1 serving
    Calories: 150 kcal
    Sugar: 12g
    Sodium: 100mg
    Fat: 8g
    Saturated Fat: 4g
    Carbohydrates: 15g
    Fiber: 0g
    Protein: 2g
    Cholesterol: 25mg

  • Easy and Festive Christmas Fudge Recipe

    Easy and Festive Christmas Fudge Recipe

    Get ready for a festive treat that will make your holiday season extra sweet! This colorful Christmas fudge is delightful, easy to make, and perfect for sharing with friends and family. Let’s dive into this delicious holiday confection!

    Why You’ll Love This Recipe

    • Festive Appearance: The vibrant red and green colors make this fudge a beautiful addition to any holiday spread.
    • Customizable Flavors: You can easily modify the flavors or colors to suit your taste or theme.
    • Perfect for Gifting: This fudge makes an excellent gift when packaged in festive boxes or jars.
    • Family-Friendly Activity: Making this fudge is a fun activity for the whole family to enjoy together.
    • Simple Ingredients: You probably already have most of the ingredients in your kitchen.

    Tools and Equipment

    To create this delightful Christmas fudge, you will need some essential kitchen tools.

    Essential Tools

    • 8×8-inch baking dish
    • Parchment paper
    • Medium saucepan
    • Mixing bowls (3)
    • Rubber spatula
    • Knife

    Why These Tools Matter

    • Baking Dish: The 8×8-inch dish is perfect for setting the fudge to achieve the right thickness.
    • Parchment Paper: Lining the dish with parchment makes it easy to lift the fudge out for cutting.
    • Rubber Spatula: This tool helps in mixing the fudge smoothly and scraping down the sides of the bowl.

    Ingredients for Christmas Fudge

    Main Ingredients

    • 1/2 teaspoon vanilla extract
    • 3 cups white chocolate chips
    • 1 14-ounce can sweetened condensed milk

    Coloring and Decoration

    • Red and green food coloring
    • 1/4 cup holiday sprinkles (optional, for decoration)

    How to Make Christmas Fudge Step-by-Step

    Step 1: Prepare the Pan

    Start by lining an 8×8-inch baking dish with parchment paper. Leave some excess hanging over the sides to make it easier to lift out the fudge later.

    Step 2: Melt the Chocolate

    In a medium saucepan, combine the white chocolate chips and sweetened condensed milk. Heat over low while stirring continuously until everything has melted into a smooth, creamy mixture. Remove it from the heat and stir in the vanilla extract for that extra flavor.

    Step 3: Color the Fudge

    Next, divide this luscious mixture evenly into three separate bowls. Add red food coloring to one bowl and green food coloring to another, mixing until you reach your desired shades. Leave the third bowl untouched for a classic white layer.

    Step 4: Layer the Fudge

    Pour the red fudge into your prepared pan, spreading it out evenly. Carefully layer the plain fudge on top of the red, followed by the green mixture. Use a knife to gently swirl through the layers, creating a marbled appearance for a festive touch.

    Step 5: Add Sprinkles

    While the mixture is still warm, sprinkle the holiday sprinkles generously over the top for some added holiday cheer.

    Step 6: Chill

    Place the pan in the refrigerator and let it chill for at least two hours, or until the fudge is firm enough to cut. Once hardened, lift the fudge out using the parchment paper and cut it into small squares for perfect little bites!

    Nutritional Information

    This recipe yields approximately 24 pieces. Each piece has about 100 calories, 5g of fat, 15g of carbs, and 1g of protein, making it a delightful treat to indulge in during the holiday festivities.

    Time

    Preparation time: 10 minutes | Chilling time: 2 hours

    Indulge in this festive Christmas fudge and share it with loved ones. It’s sure to become a holiday favorite in your home!

    How to Serve Christmas Fudge

    Christmas fudge is not only delicious but also versatile. Here are some creative ways to serve it.

    Festive Gift Boxes

    Package the cut fudge pieces in decorative boxes or tins. Add a festive ribbon for a thoughtful homemade gift that friends and family will appreciate during the holiday season.

    Dessert Platter

    Arrange the fudge squares on a beautiful platter alongside other holiday treats, such as cookies and candies. This colorful presentation makes for an inviting centerpiece at any holiday gathering.

    Hot Chocolate Topping

    Crush the fudge into smaller pieces and use it as a topping for hot chocolate. The creamy sweetness of the fudge elevates your drink, making it a perfect accompaniment for cozy winter evenings.

    Pro Tips for the Best Christmas Fudge

    To achieve the ultimate Christmas fudge, consider these expert tips.

    • Use High-Quality Chocolate: Opt for premium white chocolate chips for a richer flavor and smoother texture in your fudge.

    • Avoid Overheating: When melting the chocolate, keep the heat low and stir constantly to prevent burning, ensuring a silky mixture.

    • Customize Colors: Feel free to experiment with different shades of red and green or even add other colors to match your holiday theme.

    • Add Flavor Variations: Enhance the fudge with other extracts, such as almond or peppermint, for a unique twist on the classic recipe.

    • Store Properly: Keep your Christmas fudge in an airtight container at room temperature for up to two weeks to maintain its freshness.

    Best Side Dishes and Pairings

    Pair your Christmas fudge with these delightful options for a complete holiday experience.

    1. Peppermint Hot Chocolate – The rich flavors of peppermint-infused hot chocolate complement the sweetness of the fudge perfectly.

    2. Spiced Mulled Wine – This warm, spiced drink offers a comforting contrast to the creamy texture of the fudge, creating a delightful balance.

    3. Cheese Platter – A selection of cheeses, particularly creamy brie or sharp cheddar, can provide a savory counterpoint to the sweet fudge.

    4. Gingerbread Cookies – The spiced flavors of gingerbread cookies harmonize beautifully with the sweetness of the fudge, making them a festive duo.

    5. Tea or Coffee – A warm cup of spiced tea or coffee serves as a lovely beverage pairing, enhancing the overall holiday indulgence.

    Common Mistakes to Avoid

    • Not Measuring Ingredients Accurately: Precision is key in making fudge. Use measuring cups and spoons to ensure the right amounts.
    • Using High Heat: Melting chocolate over too high a heat can cause it to seize. Always melt on low and stir continuously.
    • Skipping the Chilling Step: Allowing the fudge to chill is crucial for it to set properly. Don’t rush this step for the best texture.
    • Neglecting to Line the Pan: Failing to line the baking dish can make it difficult to remove the fudge once it’s set. Always use parchment paper for easy removal.

    Storage & Reheating Instructions

    Refrigerator Storage

    Store your Christmas Fudge in an airtight container in the refrigerator. It will stay fresh for up to two weeks, making it a perfect treat for holiday gatherings.

    Freezing Instructions

    To freeze, cut the fudge into squares and place them in a single layer in an airtight container. Separate layers with parchment paper. It can be frozen for up to three months. To thaw, simply transfer the container to the refrigerator for a few hours before serving.

    Reheating Tips

    • Oven: Preheat the oven to 200°F (93°C). Place the fudge in an oven-safe dish and warm for 5-10 minutes until just soft.
    • Microwave: Heat on low power in 10-second intervals, checking frequently to avoid overheating.
    • Stovetop: Place fudge in a heatproof bowl over a pot of simmering water, stirring until soft.

    Frequently Asked Questions

    How can I make my Christmas Fudge more festive?

    You can add more colorful holiday sprinkles or even chopped nuts for added texture and flavor.

    Can I use dark chocolate instead of white chocolate in Christmas Fudge?

    Yes, you can substitute dark chocolate chips for white chocolate to create a different flavor profile.

    How long does Christmas Fudge last?

    When stored properly in the refrigerator, Christmas Fudge can last up to two weeks, and if frozen, it can stay fresh for about three months.

    Is Christmas Fudge suitable for gift-giving?

    Absolutely! Christmas Fudge makes a wonderful homemade gift. Just package it in a decorative box or tin for a thoughtful treat.

    Can I customize the colors of my Christmas Fudge?

    Definitely! Feel free to use any food coloring to match your holiday theme or personal preference.

    Final Thoughts

    This Christmas Fudge recipe is a delightful addition to your holiday festivities. Easy to make and perfect for sharing, it is sure to impress your family and friends. Try it out and let us know how it turns out by leaving a comment!


    Desserts

    Christmas Fudge


    5.0 from 24 reviews

    Get ready for a festive treat that will make your holiday season extra sweet! This colorful Christmas fudge is delightful, easy to make, and perfect for sharing with friends and family.

    Author: Munch Twist
    Prep Time: 10 minutes
    Cook Time: 25 mins
    Total Time: 130 minutes
    Yield: 24 servings
    Category: Desserts
    Method: No bake
    Cuisine: American

    Christmas Fudge

    SCALE:
    1x
    2x
    3x
    Cook Mode: Prevent your screen from going dark

    Ingredients

    • 1/2 teaspoon vanilla extract
    • 3 cups white chocolate chips
    • 1 14-ounce can sweetened condensed milk
    • Red and green food coloring
    • 1/4 cup holiday sprinkles (optional, for decoration)

    Instructions

    1. Prepare the Pan: Line an 8×8-inch baking dish with parchment paper.
    2. Melt the Chocolate: Combine white chocolate chips and sweetened condensed milk in a saucepan over low heat, stirring until melted. Stir in vanilla extract.
    3. Color the Fudge: Divide the mixture into three bowls. Add red food coloring to one bowl, green to another, and leave the third bowl plain.
    4. Layer the Fudge: Pour red fudge into the pan, followed by the plain fudge, and then the green mixture. Swirl with a knife.
    5. Add Sprinkles: Sprinkle holiday sprinkles over the top while the mixture is warm.
    6. Chill: Refrigerate for at least 2 hours until firm. Lift out and cut into squares.

    Nutrition Facts

    Serving Size: 1 serving
    Calories: 100 kcal
    Sugar: 14g
    Sodium: 30mg
    Fat: 5g
    Saturated Fat: 3g
    Carbohydrates: 15g
    Fiber: 0g
    Protein: 1g
    Cholesterol: 5mg

  • Easy Cinnamon-Sugar Pizza made with Crescent Rolls Recipe

    Easy Cinnamon-Sugar Pizza made with Crescent Rolls Recipe

    Cinnamon-Sugar Pizza made with Crescent Rolls is a delightful treat that combines a buttery crust with gooey sweetness. This easy-to-make dessert is perfect for any occasion, whether you’re hosting friends or enjoying a quiet night in. The enticing aroma and irresistible flavors will have everyone reaching for a slice.

    Why You’ll Love This Recipe

    • Quick & Easy: Ready in under 30 minutes, this dessert is perfect for last-minute cravings.
    • Deliciously Sweet: The combination of cinnamon and sugar creates a mouthwatering flavor that’s hard to resist.
    • Versatile Serving Options: Enjoy it warm, or serve it at room temperature for a delightful picnic treat.
    • Customizable Toppings: Add nuts, fruits, or extra spices to tailor it to your taste.
    • Fun to Make: Get the whole family involved in rolling and sprinkling for a memorable kitchen experience.

    Tools and Equipment

    Having the right tools can make the cooking process smoother and more enjoyable.

    Essential Tools

    • Pizza pan
    • Mixing bowls
    • Whisk
    • Baking brush
    • Measuring cups and spoons

    Why These Tools Matter

    • Pizza pan: Ensures even baking and easy handling of your cinnamon-sugar pizza.
    • Mixing bowls: Essential for combining ingredients without mess.
    • Baking brush: Helps achieve an even layer of melted butter over the dough.

    Ingredients for Cinnamon-Sugar Pizza made with Crescent Rolls

    Dough and Base

    • 1 8 oz can refrigerated crescent roll dough
    • 2 tablespoons unsalted butter, melted

    Cinnamon-Sugar Mixture

    • 1/4 cup granulated sugar
    • 1 teaspoon ground cinnamon

    Glaze

    • 1/2 cup powdered sugar
    • 2-3 teaspoons milk (adjust for consistency)
    • 1/2 teaspoon vanilla extract

    Optional Garnishes

    • Chopped pecans
    • Cinnamon sugar

    How to Make Cinnamon-Sugar Pizza made with Crescent Rolls Step-by-Step

    Step 1: Prep the Base

    1. Preheat your oven to 375°F (190°C). Prepare your pizza pan by lightly greasing it or lining it with parchment paper for easy cleanup.
    2. Unroll the crescent roll dough and spread it out onto the prepared pizza pan. Gently press the seams together to create a cohesive dough sheet. Shape it into a circle or rectangle based on your preference.

    Step 2: Assemble the Pizza

    1. Brush the melted butter generously over the entire surface of the dough, ensuring even coverage.
    2. In a small bowl, combine the granulated sugar and ground cinnamon. Sprinkle this mixture evenly over the buttered dough to ensure every bite is flavorful.

    Step 3: Bake the Pizza

    1. Place the pizza in the preheated oven and bake for 10-12 minutes, or until it is puffed and golden brown.

    Step 4: Prepare the Glaze

    1. While the pizza bakes, whisk together the powdered sugar, milk, and vanilla extract in a separate bowl. Adjust the milk quantity to achieve your desired drizzling consistency.

    Step 5: Finish and Serve

    1. Once the pizza is done, remove it from the oven and let it cool for a few minutes. Drizzle the glaze over the warm pizza, allowing it to melt slightly for that perfect sticky finish.
    2. For extra crunch and flavor, sprinkle some chopped pecans and an additional pinch of cinnamon sugar over the glaze.
    3. Slice your cinnamon-sugar pizza into wedges or squares, and serve it warm for a deliciously sweet treat!

    This Cinnamon-Sugar Pizza made with Crescent Rolls is an easy and satisfying dessert that will quickly become a favorite in your home.

    How to Serve Cinnamon-Sugar Pizza made with Crescent Rolls

    This delightful dessert can be enjoyed in various creative ways.

    Casual Dessert Night

    Serve the cinnamon-sugar pizza warm, straight from the oven, alongside a scoop of vanilla ice cream for an indulgent treat that contrasts the warm, gooey pizza.

    Breakfast Twist

    Slice the pizza into smaller pieces and serve it with fresh fruit, like strawberries or blueberries, for a sweet breakfast option that feels a bit special.

    Game Day Snack

    Cut the pizza into bite-sized pieces and serve it as a sweet snack during game day gatherings. Pair it with coffee or hot chocolate for a cozy touch.

    Pro Tips for the Best Cinnamon-Sugar Pizza made with Crescent Rolls

    For optimal results, consider these helpful tips.

    • Preheat the Oven: Always preheat your oven to ensure even baking and a perfectly golden crust.

    • Use Room Temperature Ingredients: Let your butter and milk come to room temperature before mixing for a smoother glaze.

    • Don’t Rush the Cooling: Allow the pizza to cool for a few minutes before drizzling the glaze to prevent it from melting away completely.

    • Experiment with Flavors: Try adding a dash of nutmeg or using brown sugar in place of granulated sugar for a unique twist.

    • Storage Tips: Store any leftovers in an airtight container at room temperature for up to two days to maintain freshness.

    Best Side Dishes and Pairings

    Pair your cinnamon-sugar pizza with these delightful side dishes and drinks.

    1. Vanilla Ice Cream – The creamy texture and cool temperature complement the warm, sweet pizza perfectly.

    2. Fresh Berries – Strawberries, blueberries, or raspberries add a refreshing contrast and a pop of color to your dessert presentation.

    3. Coffee – A rich cup of coffee balances the sweetness of the pizza, making it an ideal pairing for breakfast or dessert.

    4. Hot Chocolate – Warm, chocolatey beverages create a cozy atmosphere, perfect for enjoying this sweet treat on chilly evenings.

    5. Whipped Cream – A dollop of whipped cream adds a light and airy contrast to the dense sweetness of the pizza.

    6. Chai Tea – The spiced flavors of chai tea harmonize beautifully with the cinnamon-sugar notes of the pizza for a comforting experience.

    Common Mistakes to Avoid

    • Not Preheating the Oven: Always preheat your oven to ensure even baking.
    • Skipping the Butter: Brushing melted butter on the dough enhances flavor and helps the cinnamon sugar adhere.
    • Overbaking: Keep a close eye on the pizza to avoid burning; it should be golden brown, not dark brown.
    • Inconsistent Glaze: Adjust the milk in your glaze for the perfect drizzling consistency; too thick or too runny can affect presentation.

    Storage & Reheating Instructions

    Refrigerator Storage

    Store leftover cinnamon-sugar pizza in an airtight container in the refrigerator. It will stay fresh for up to 3 days.

    Freezing Instructions

    To freeze, wrap individual slices in plastic wrap and then place them in a freezer-safe container. This method helps prevent freezer burn. The pizza can be frozen for up to 2 months.

    Reheating Tips

    • Oven: Preheat to 350°F (175°C) and bake for about 5-7 minutes until warmed through.
    • Microwave: Heat a slice on a microwave-safe plate for about 15-20 seconds, or until warm.
    • Stovetop: Heat in a non-stick skillet over low heat for about 2-3 minutes, covering with a lid to retain moisture.

    Frequently Asked Questions

    How can I adjust the sweetness of the Cinnamon-Sugar Pizza made with Crescent Rolls?

    You can reduce the amount of granulated sugar and powdered sugar in the recipe to make it less sweet. Alternatively, you can add more cinnamon for a spicier flavor without increasing sweetness.

    Can I use other types of dough for this recipe?

    Yes, you can substitute crescent roll dough with puff pastry or even homemade pizza dough, although the texture and taste may vary.

    How do I make the glaze for my Cinnamon-Sugar Pizza made with Crescent Rolls?

    To make the glaze, whisk together powdered sugar, milk, and vanilla extract until smooth. Adjust the milk for desired consistency.

    Can I add toppings to my Cinnamon-Sugar Pizza?

    Absolutely! Feel free to experiment with toppings like chocolate chips, fruit, or nuts for added flavor and texture.

    What should I serve with my Cinnamon-Sugar Pizza made with Crescent Rolls?

    This sweet treat pairs wonderfully with a scoop of vanilla ice cream or a dollop of whipped cream for an indulgent dessert.

    Final Thoughts

    This Cinnamon-Sugar Pizza made with Crescent Rolls is a delightful and easy dessert perfect for any occasion. We encourage you to try this recipe and share your thoughts in the comments below. Your feedback is invaluable and helps us create more delicious content!


    Desserts

    Cinnamon-Sugar Pizza made with Crescent Rolls


    5.0 from 24 reviews

    This cinnamon-sugar pizza combines gooey sweetness with a buttery crust for a delightful dessert that’s easy to whip up anytime. Perfect for sharing or enjoying on your own.

    Author: Munch Twist
    Prep Time: 5 minutes
    Cook Time: 12 minutes
    Total Time: 17 minutes
    Yield: 8 servings
    Category: Desserts
    Method: No bake
    Cuisine: American

    Cinnamon-Sugar Pizza made with Crescent Rolls

    SCALE:
    1x
    2x
    3x
    Cook Mode: Prevent your screen from going dark

    Ingredients

    • 1/4 cup granulated sugar
    • 2-3 teaspoons milk
    • 1 8 oz can refrigerated crescent roll dough
    • 1/2 cup powdered sugar
    • 1 teaspoon ground cinnamon
    • 1/2 teaspoon vanilla extract
    • 2 tablespoons unsalted butter, melted
    • Optional: chopped pecans, cinnamon sugar for garnish

    Instructions

    1. Preheat your oven to 375°F (190°C) and prepare your pizza pan by lightly greasing it or lining it with parchment paper.
    2. Unroll the crescent roll dough and spread it out onto the prepared pizza pan, pressing the seams together to create one cohesive dough sheet.
    3. Brush the melted butter generously over the entire surface of the dough.
    4. In a small bowl, combine the granulated sugar and ground cinnamon, then sprinkle this mixture evenly over the buttered dough.
    5. Bake the pizza in the preheated oven for 10-12 minutes, or until puffed and golden brown.
    6. While the pizza is baking, whisk together the powdered sugar, milk, and vanilla extract until smooth, adjusting the milk for drizzling consistency.
    7. Once the pizza is done, let it cool for a few minutes and drizzle the glaze over the warm pizza.
    8. For extra crunch and flavor, sprinkle chopped pecans and additional cinnamon sugar over the glaze.
    9. Slice the cinnamon-sugar pizza into wedges or squares and serve warm.

    Nutrition Facts

    Serving Size: 1 serving
    Calories: 190 kcal
    Sugar: 12g
    Sodium: 150mg
    Fat: 8g
    Saturated Fat: 5g
    Carbohydrates: 28g
    Fiber: 0g
    Protein: 2g
    Cholesterol: 15mg