
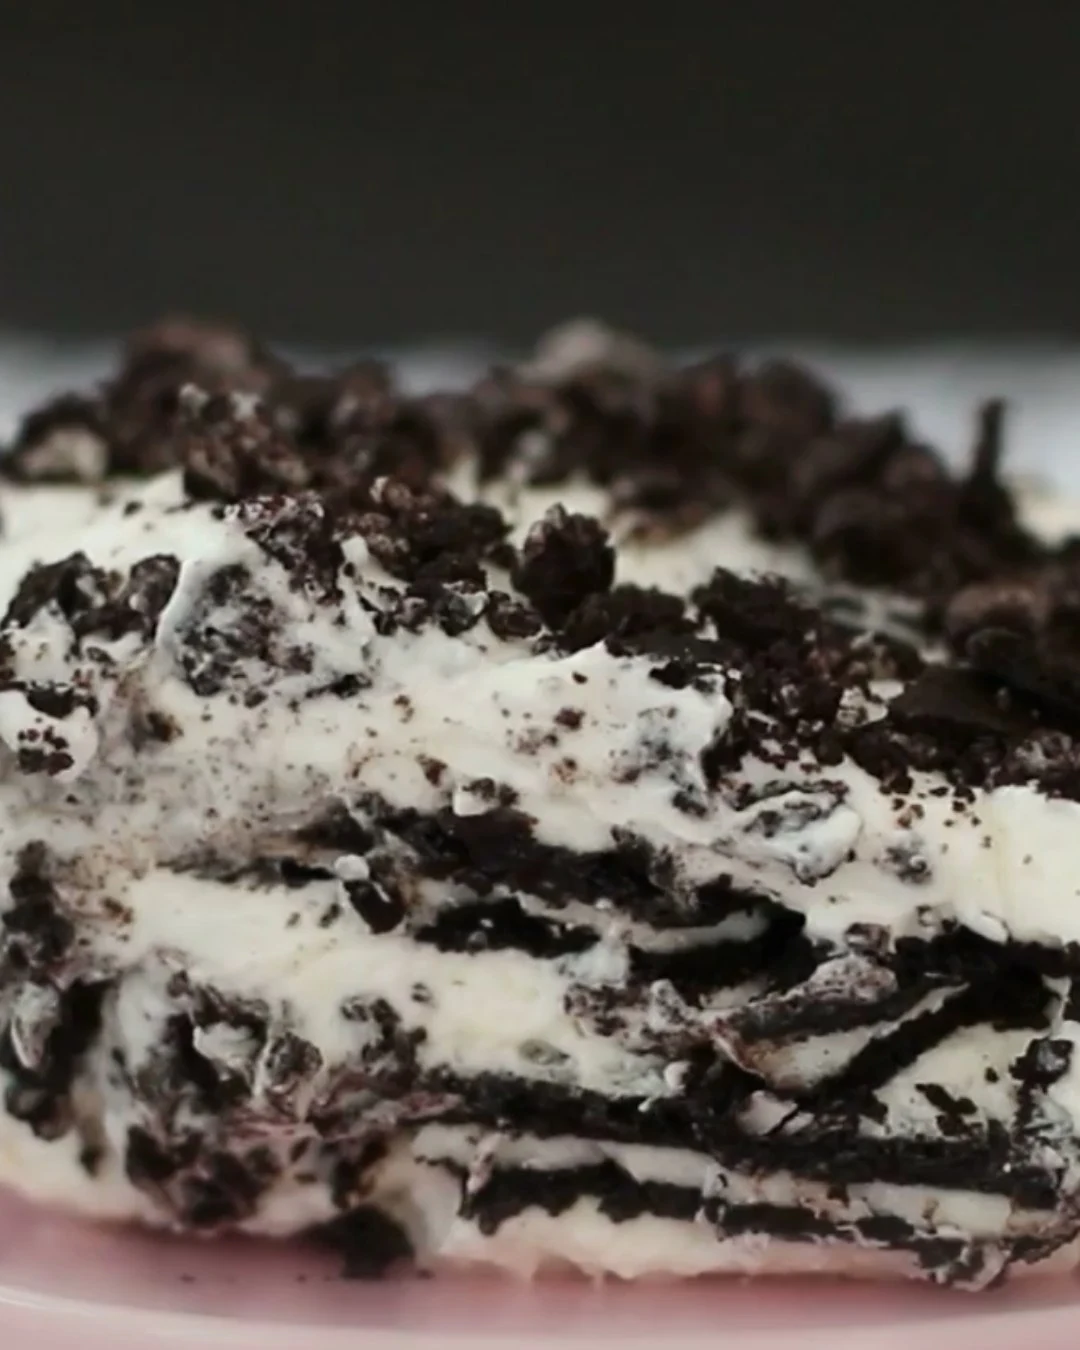
Funfetti Oreo Icebox Cake – No-Bake Required is a delightful dessert that captures the essence of childhood celebrations. This creamy, colorful treat combines the rich flavors of Oreo cookies with the sweetness of funfetti sprinkles, making it an irresistible choice for any occasion.
Why You’ll Love This Recipe
- No Baking Required: This recipe saves time and energy, letting you enjoy a delicious dessert without the hassle of an oven.
- Layered Delight: Each bite features a perfect balance of creamy pudding, whipped cream, and crunchy Oreo layers.
- Customizable: Feel free to switch up the sprinkles or use different cookies to make this cake your own.
- Perfect for Parties: This cake serves a crowd and is sure to impress guests with its vibrant colors and flavors.
- Quick Prep: With just a few simple steps, you can create a stunning dessert in no time.
Tools and Equipment
To make this Funfetti Oreo Icebox Cake, you’ll need a few essential kitchen tools.
Essential Tools
- Mixing bowls
- Electric mixer
- Whisk
- Rectangular dish
- Spatula
Why These Tools Matter
- Mixing bowls: Multiple bowls are necessary for preparing the whipped cream and pudding mixture separately.
- Electric mixer: This tool makes it easy to achieve the perfect consistency for whipped cream and cream cheese.
- Spatula: A spatula helps in folding ingredients gently for a light and airy texture.
Ingredients for Funfetti Oreo Icebox Cake – No-Bake Required
Cream and Filling
- 2 cups heavy cream
- 1/2 cup powdered sugar
- 1 package instant vanilla pudding mix (3.4 oz)
- 1 1/2 cups cold milk
- 8 oz cream cheese, softened
- 1 teaspoon vanilla extract
Cookies and Toppings
- 24 Oreo cookies
- 1/2 cup rainbow sprinkles
How to Make Funfetti Oreo Icebox Cake – No-Bake Required Step-by-Step
Step 1: Prepare the Whipped Cream
In a large bowl, beat heavy cream until soft peaks form. Gradually add powdered sugar and vanilla extract, continuing to beat until stiff peaks form. Set this aside to use later.
Step 2: Make the Pudding Mixture
In another bowl, whisk together the instant vanilla pudding mix and cold milk until smooth. Add the softened cream cheese and beat until no lumps remain, ensuring a creamy filling.
Step 3: Combine Whipped Cream and Pudding
Fold half of the prepared whipped cream into the pudding mixture. This step is crucial for achieving a light and airy texture in your cake.
Step 4: Assemble the Cake
Line a rectangular dish with a single layer of Oreo cookies. Spread half of the pudding mixture over the cookies. Sprinkle a generous layer of rainbow sprinkles for a pop of color.
Step 5: Add More Layers
Place another layer of Oreo cookies on top, followed by the remaining pudding mixture. Finish by topping with the rest of the whipped cream and a final sprinkle of rainbow sprinkles.
Step 6: Chill and Serve
Refrigerate the cake for at least 4 hours, or overnight if possible, to allow it to set. This chilling time helps the flavors meld beautifully.
Enjoy this creamy, dreamy Funfetti Oreo Icebox Cake – No-Bake Required that is perfect for any celebration or just a sweet treat at home!
How to Serve Funfetti Oreo Icebox Cake – No-Bake Required
This delightful dessert is perfect for various occasions. Here are some creative serving ideas to elevate your Funfetti Oreo Icebox Cake experience.
Individual Parfaits
Layer small portions of the icebox cake in clear cups for a fun and portable dessert. This presentation allows guests to see the colorful layers and makes for an eye-catching treat at parties.
Birthday Party Delight
Serve slices of the Funfetti Oreo Icebox Cake on festive plates at birthday celebrations. Add a scoop of ice cream on the side for an extra special touch that complements the cake’s flavors.
Picnic Treat
Pack individual servings of the cake in mason jars for a perfect picnic dessert. The no-bake nature of the cake ensures it travels well, and the sprinkles add a cheerful touch to any outdoor gathering.
Pro Tips for the Best Funfetti Oreo Icebox Cake – No-Bake Required
Maximize the flavor and texture of your icebox cake with these helpful tips.
- Use Cold Ingredients: Ensure your heavy cream and milk are chilled for the best whipping results.
- Select Quality Oreos: Choose fresh Oreo cookies for optimal flavor and texture in the base of your cake.
- Experiment with Flavors: Try different instant pudding flavors, such as chocolate or butterscotch, to add variety to your cake.
- Don’t Rush the Refrigeration: Allow the cake to set for a full 24 hours if possible; this enhances the flavor and texture.
- Decorate with Fresh Fruits: Add fresh strawberries or raspberries on top for a burst of freshness that complements the sweet flavors.
Best Side Dishes and Pairings
Pair your Funfetti Oreo Icebox Cake with these delightful options for a complete meal experience.
- Fresh Fruit Salad: A light and refreshing fruit salad balances the richness of the cake while adding a healthy component to your dessert spread.
- Chocolate Milkshakes: Creamy chocolate milkshakes provide a nostalgic pairing that enhances the dessert’s indulgence.
- Vanilla Ice Cream: Classic vanilla ice cream complements the flavors of the cake and adds a delightful creaminess.
- Coffee: A cup of coffee acts as a perfect counterbalance to the sweetness, making it an ideal after-dinner choice.
- Lemonade: The tartness of lemonade contrasts beautifully with the rich, sweet layers of the cake, making for a refreshing drink option.
Common Mistakes to Avoid
- Not Allowing Enough Time to Set: Ensure you refrigerate the cake for at least 4 hours to achieve the right consistency.
- Overmixing the Whipped Cream: Be careful not to overbeat the whipped cream, as it can turn grainy.
- Skipping the Rainbow Sprinkles: For the full funfetti experience, don’t forget to add the sprinkles; they elevate the cake’s appearance and flavor.
- Using Warm Ingredients: Make sure your cream cheese is softened but not warm, as it can affect the texture of the pudding mixture.
Storage & Reheating Instructions
Refrigerator Storage
Store the Funfetti Oreo Icebox Cake in an airtight container in the refrigerator. It will stay fresh for up to 5 days.
Freezing Instructions
To freeze, cut the cake into portions and wrap each piece tightly in plastic wrap. Store in a freezer-safe container for up to 2 months. To thaw, transfer to the refrigerator overnight.
Reheating Tips
- Oven: Preheat to 350°F (175°C) and warm individual slices for about 10 minutes.
- Microwave: Heat a slice on medium power for 15-20 seconds until just warmed.
- Stovetop: Use a skillet on low heat, cover, and warm for about 5 minutes.
Frequently Asked Questions
How long does the Funfetti Oreo Icebox Cake – No-Bake Required need to set?
The cake should be refrigerated for at least 4 hours, but overnight is recommended for the best results.
Can I use different types of cookies for this recipe?
Yes, you can substitute Oreo cookies with other sandwich cookies like chocolate or vanilla, but the flavor will vary.
Is the Funfetti Oreo Icebox Cake – No-Bake Required suitable for special diets?
This recipe includes dairy and gluten; however, you can modify it by using dairy-free and gluten-free alternatives.
Can I make this recipe in advance?
Absolutely! This cake can be made a day or two ahead of serving, making it perfect for parties.
What toppings can I use for the Funfetti Oreo Icebox Cake – No-Bake Required?
You can add whipped cream, additional sprinkles, or chocolate shavings to enhance the cake’s visual appeal and flavor.
Final Thoughts
This Funfetti Oreo Icebox Cake – No-Bake Required is a delightful treat that’s perfect for any occasion. With its creamy layers and festive sprinkles, it’s bound to impress. I encourage you to try this recipe and share your thoughts in the comments below!
Desserts
PrintFunfetti Oreo Icebox Cake – No-Bake Required

This Funfetti Oreo Icebox Cake is a delightful no-bake dessert that combines creamy layers of vanilla pudding, whipped cream, and Oreo cookies, all topped with colorful rainbow sprinkles. It’s perfect for any celebration or just a sweet treat to enjoy at home.
- Prep Time: 20 mins
- Cook Time: 0 mins
- Total Time: 4 hours 20 mins
- Yield: 8 servings 1x
- Category: Desserts
- Method: Baking
- Cuisine: American
Ingredients
- 2 cups heavy cream
- 1/2 cup powdered sugar
- 24 Oreo cookies
- 1 package instant vanilla pudding mix (3.4 oz)
- 1 1/2 cups cold milk
- 8 oz cream cheese, softened
- 1/2 cup rainbow sprinkles
- 1 teaspoon vanilla extract
Instructions
- In a large bowl, beat heavy cream until soft peaks form. Gradually add powdered sugar and vanilla, and continue beating until stiff peaks form. Set aside.
- In another bowl, whisk together the pudding mix and cold milk until smooth. Add softened cream cheese and beat until no lumps remain.
- Fold half of the whipped cream into the pudding mixture until well combined.
- Line a rectangular dish with a single layer of Oreo cookies. Spread half of the pudding mixture over the cookies.
- Sprinkle a generous layer of rainbow sprinkles.
- Add another layer of cookies and the remaining pudding mixture. Top with the remaining whipped cream and more sprinkles.
- Refrigerate for at least 4 hours, or overnight, to allow the cake to set.
Nutrition
- Calories: 350
- Sugar: 18g
- Sodium: 200mg
- Fat: 21g
- Saturated Fat: 12g
- Carbohydrates: 35g
- Fiber: 1g
- Protein: 5g
- Cholesterol: 70mg