
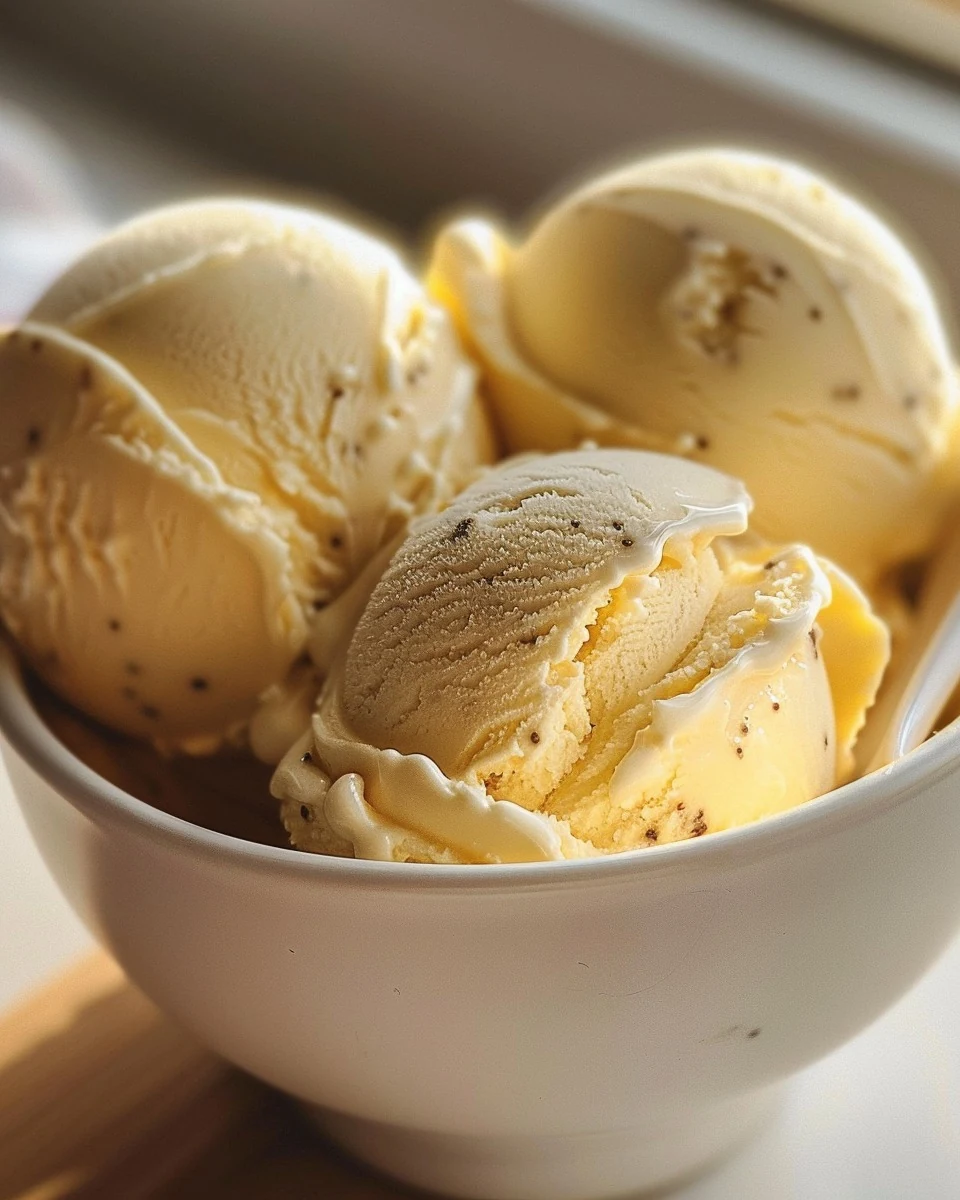
Indulging in the creamy delight of homemade vanilla ice cream is a treat that elevates any occasion. This recipe offers a rich flavor and smooth texture that store-bought varieties simply cannot match. With just a few ingredients, you can create a dessert that will impress family and friends alike.
Why You’ll Love This Recipe
- Rich Flavor: The combination of whole milk, heavy cream, and pure vanilla extract creates a depth of flavor that is simply irresistible.
- Simple Ingredients: Made with just five common ingredients, this recipe is approachable for all skill levels.
- Customizable: You can easily modify this recipe by adding mix-ins like chocolate chips or fruit.
- Perfect for Any Occasion: Whether it’s a summer barbecue or a cozy winter night, this ice cream is a delightful addition.
- Family Fun: Making ice cream at home is a fun activity that everyone can enjoy together.
Tools and Equipment
Having the right tools makes the process smoother and more enjoyable.
Essential Tools
- Ice cream maker
- Medium saucepan
- Whisk or wooden spoon
- Airtight container
- Measuring cups and spoons
Why These Tools Matter
- Ice cream maker: This essential tool churns the mixture to create a creamy texture.
- Medium saucepan: Ideal for heating the mixture evenly without the risk of burning.
- Airtight container: Keeps your homemade vanilla ice cream fresh and prevents ice crystals from forming.
Ingredients for Homemade Vanilla Ice Cream
Base Ingredients
- 1 cup whole milk
- 2 cups heavy cream
- 3/4 cup granulated sugar
- Pinch of salt
- 1 tablespoon pure vanilla extract
How to Make Homemade Vanilla Ice Cream Step-by-Step
Step 1: Prepare the Base
In a medium saucepan, combine the whole milk, heavy cream, and granulated sugar. Heat the mixture over medium heat, stirring occasionally, until the sugar is completely dissolved (about 5 minutes). Be careful not to let the mixture boil.
Step 2: Add Vanilla
Remove the saucepan from heat. Stir in the pure vanilla extract and a pinch of salt. Allow the mixture to cool to room temperature.
Step 3: Chill the Mixture
Once cooled, cover the mixture and refrigerate for at least 2 hours, preferably overnight. This chilling time enhances the flavor and texture of the ice cream.
Step 4: Churn the Ice Cream
Pour the chilled mixture into an ice cream maker. Churn according to the manufacturer’s instructions, typically for about 20-25 minutes, until the ice cream is thick and creamy.
Step 5: Freeze
Transfer the churned ice cream to an airtight container. Freeze for at least 4 hours or until firm.
Step 6: Serve
Scoop the ice cream into bowls or cones. Enjoy your delightful homemade vanilla ice cream!
With this straightforward recipe, you can create a nostalgic dessert that brings joy to any gathering or quiet night in. Enjoy the process and savor every delicious bite of your homemade vanilla ice cream.
How to Serve Homemade Vanilla Ice Cream
Homemade vanilla ice cream is a versatile treat that can be enjoyed in various delightful ways.
Classic Sundae
Top your homemade vanilla ice cream with chocolate syrup, whipped cream, and a cherry for a timeless classic that never goes out of style.
Ice Cream Sandwich
Use two soft cookies, such as chocolate chip or oatmeal raisin, to create a delicious ice cream sandwich. This fun treat is perfect for gatherings or a casual dessert.
Affogato
Pour a shot of hot espresso over a scoop of vanilla ice cream for a simple yet elegant dessert. The warm coffee melts the ice cream slightly, creating a rich and creamy treat.
Pro Tips for the Best Homemade Vanilla Ice Cream
To elevate your homemade vanilla ice cream, consider these practical tips.
-
Use Fresh Ingredients: Opt for high-quality vanilla extract and fresh cream for the best flavor and texture.
-
Chill Everything: Ensure that your mixing bowl and ice cream maker bowl are well-chilled before use to help the ice cream freeze faster and achieve a better consistency.
-
Don’t Rush the Chilling Process: Allow the base to chill for at least 2 hours or overnight to enhance the flavors and improve the final texture.
-
Adjust Sweetness to Taste: Depending on your preference, you can modify the amount of sugar in the recipe. Taste the mixture before churning for the perfect balance.
-
Experiment with Add-ins: Feel free to fold in mix-ins like chocolate chips, crushed cookies, or fresh fruit during the last few minutes of churning for added flavor and texture.
Best Side Dishes and Pairings
Pair your homemade vanilla ice cream with these delicious side dishes and drinks for a complete dessert experience.
-
Fruit Salad: A light and refreshing fruit salad provides a perfect contrast to the richness of the ice cream.
-
Chocolate Lava Cake: The warm, gooey center of a chocolate lava cake complements the creamy texture of vanilla ice cream beautifully.
-
Pecan Pie: The nutty, caramel flavors of pecan pie pair wonderfully with the smoothness of homemade vanilla ice cream.
-
Brownies: Rich and fudgy brownies create a decadent dessert when enjoyed alongside a scoop of vanilla ice cream.
-
Coffee: A hot cup of coffee serves as a delightful beverage pairing, balancing the sweetness of the ice cream with its robust flavor.
Common Mistakes to Avoid
- Not Chilling the Base Enough: Skipping the refrigeration step can lead to a less creamy texture.
- Overchurning the Ice Cream: Churning for too long can cause the ice cream to become too hard and icy.
- Using Imitation Vanilla Extract: Always opt for pure vanilla extract to achieve the best flavor.
- Inadequate Freezing Time: Failing to freeze the ice cream long enough will result in a soft texture that isn’t ideal for serving.
Storage & Reheating Instructions
Refrigerator Storage
Store your homemade vanilla ice cream in airtight containers to keep it fresh. When stored properly in the refrigerator, it can last for about 2-3 days, although it’s best enjoyed fresh.
Freezing Instructions
For optimal taste and texture, store the ice cream in a tightly sealed container in the freezer. It can last up to 2 months. To ensure it remains smooth, press a piece of plastic wrap directly onto the surface of the ice cream before sealing the container.
Reheating Tips
- Oven: Preheat to 350°F (175°C). Place the ice cream in an oven-safe dish and warm for 5-10 minutes until slightly softened.
- Microwave: Use a microwave-safe bowl. Heat in 10-second intervals, stirring in between until desired softness is reached.
- Stovetop: Place the ice cream in a saucepan over low heat, stirring constantly until it begins to soften.
Frequently Asked Questions
How do I make homemade vanilla ice cream without an ice cream maker?
You can make ice cream without a machine by whisking together the ingredients, placing the mixture in a freezer-safe container, and stirring every 30 minutes for the first few hours.
What can I add to homemade vanilla ice cream to enhance the flavor?
Consider adding mix-ins such as chocolate chips, crushed cookies, or fruit purees during the last few minutes of churning.
How long does homemade vanilla ice cream last?
When stored properly in an airtight container in the freezer, homemade vanilla ice cream can last up to 2 months.
Can I adjust the sweetness of the homemade vanilla ice cream?
Yes, you can modify the amount of sugar in the recipe to suit your taste preferences. Just keep in mind that it may affect the texture.
What is the best way to serve homemade vanilla ice cream?
Serve it in bowls or cones, and consider pairing it with toppings such as fresh fruit, chocolate sauce, or sprinkles.
Final Thoughts
Making homemade vanilla ice cream is a rewarding experience that brings joy to any occasion. We encourage you to try this recipe and share your thoughts in the comments. Your feedback helps us improve and inspire others to create delicious desserts.
Desserts
PrintHomemade Vanilla Ice Cream
Indulge in the timeless pleasure of homemade vanilla ice cream, perfect for creating sweet memories with every scoop.
- Prep Time: 10 minutes
- Cook Time: 25 mins
- Total Time: 395 minutes
- Yield: 6 servings 1x
- Category: Desserts
- Method: No bake
- Cuisine: American
Ingredients
- 1 cup whole milk
- 2 cups heavy cream
- 3/4 cup granulated sugar
- 1 tablespoon pure vanilla extract
- Pinch of salt
Instructions
- In a medium saucepan, combine the whole milk, heavy cream, and granulated sugar. Heat over medium heat, stirring occasionally, until the sugar is completely dissolved (about 5 minutes). Ensure the mixture does not boil.
- Remove the saucepan from heat. Stir in the pure vanilla extract and a pinch of salt. Let the mixture cool to room temperature.
- Once cooled, cover the mixture and refrigerate for at least 2 hours, preferably overnight.
- Pour the chilled mixture into an ice cream maker. Churn according to the manufacturer's instructions, usually about 20-25 minutes, until the ice cream is thick and creamy.
- Transfer the churned ice cream to an airtight container. Freeze for at least 4 hours or until firm.
- Scoop the ice cream into bowls or cones.
Nutrition
- Calories: 300
- Sugar: 24g
- Sodium: 50mg
- Fat: 22g
- Saturated Fat: 14g
- Carbohydrates: 25g
- Fiber: 0g
- Protein: 3g
- Cholesterol: 90mg