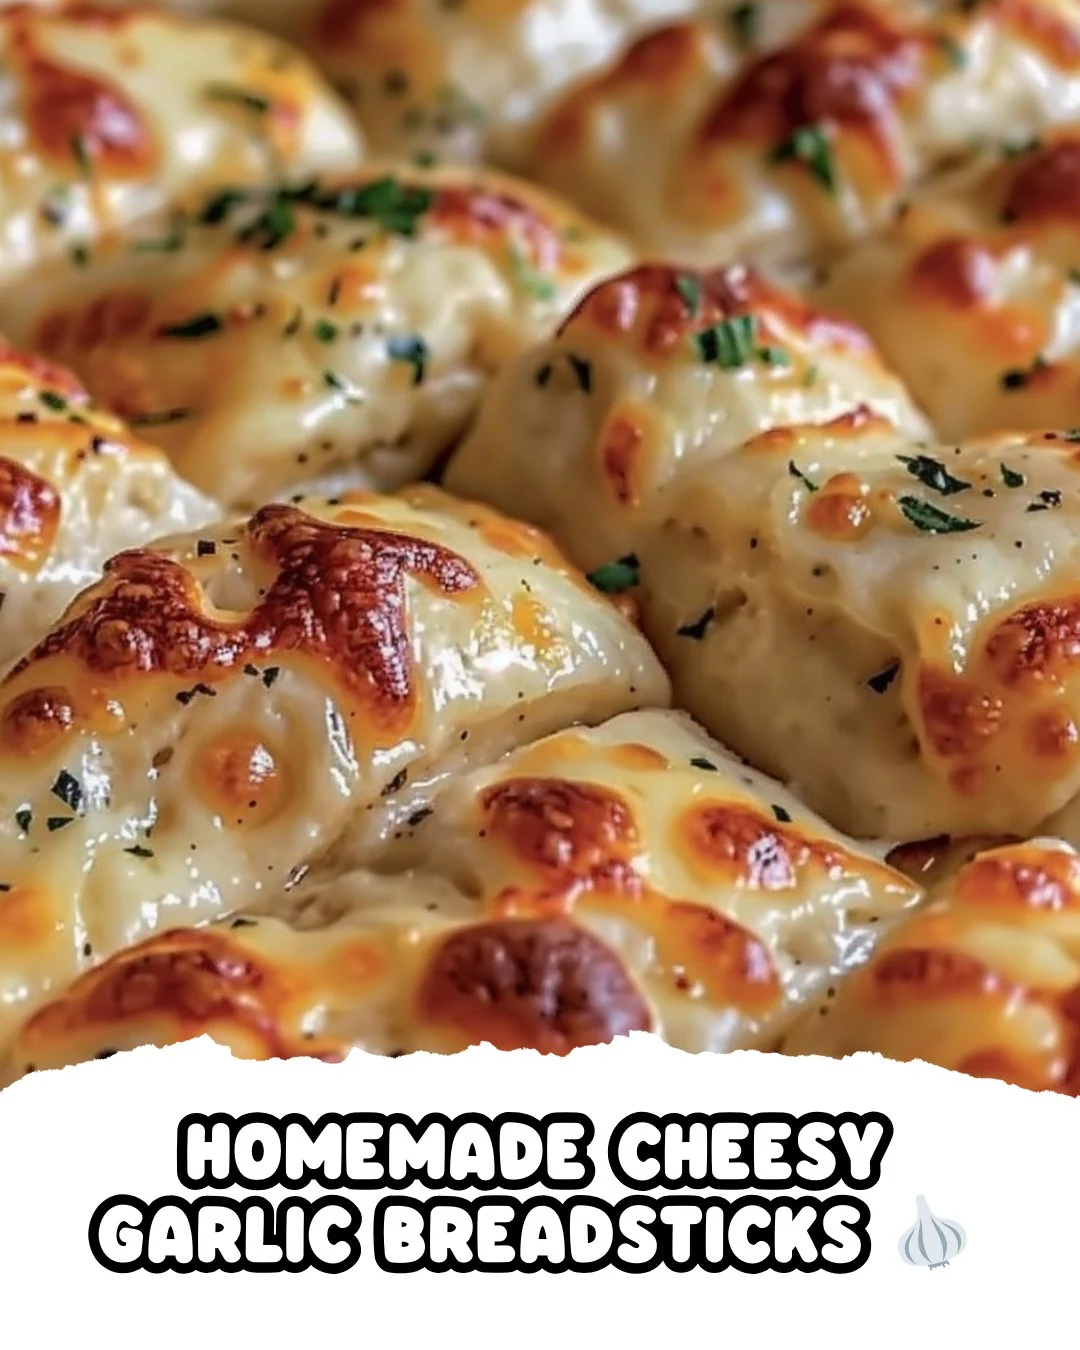
Homemade Cheesy Garlic Breadsticks are the perfect combination of gooey cheese, aromatic garlic, and soft, warm bread. These breadsticks are a delightful addition to any meal or a tasty snack on their own. Their irresistible flavor and easy preparation make them a must-try for any garlic bread lover.
Why You’ll Love This Recipe
- Flavorful Delight: Each bite bursts with the rich taste of garlic and two types of cheese.
- Quick & Easy: Ready in under 45 minutes, making them perfect for a last-minute treat.
- Versatile Snack: Great as an appetizer, side dish, or even a standalone snack.
- Customizable Toppings: Add your favorite herbs or spices for a personalized touch.
- Kid-Friendly: Fun to make with kids, who will love the cheesy goodness.
Tools and Equipment
Having the right tools can streamline your cooking process. Here are the essentials.
Essential Tools
- Mixing bowl
- Rolling pin
- Baking sheet
- Pastry brush
- Measuring cups and spoons
Why These Tools Matter
- Mixing Bowl: A large bowl allows ample space to combine and knead the dough easily.
- Rolling Pin: Ensures an even thickness for the breadsticks, promoting uniform cooking.
- Pastry Brush: Perfect for applying the garlic butter mixture evenly over the dough.
Ingredients for Homemade Cheesy Garlic Breadsticks
Dough Ingredients
- 1 cup warm water (110°F)
- 1 tablespoon sugar
- 2 1/4 teaspoons active dry yeast
- 2 1/2 cups all-purpose flour
- 1 teaspoon salt
- 2 tablespoons olive oil
Topping Ingredients
- 3 tablespoons unsalted butter, melted
- 2 garlic cloves, minced
- 1 cup shredded mozzarella cheese
- 1/2 cup grated Parmesan cheese
- 1 teaspoon dried oregano
- 1 teaspoon dried parsley
How to Make Homemade Cheesy Garlic Breadsticks Step-by-Step
Step 1: Activate the Yeast
In a large bowl, combine 1 cup warm water and 1 tablespoon sugar. Sprinkle 2 1/4 teaspoons active dry yeast over the mixture. Let it sit for about 5 minutes until it becomes foamy.
Step 2: Prepare the Dough
Add 2 1/2 cups all-purpose flour, 1 teaspoon salt, and 2 tablespoons olive oil to the yeast mixture. Stir until a dough begins to form.
Step 3: Knead the Dough
Transfer the dough to a lightly floured surface. Knead it for about 5-7 minutes until it is smooth and elastic.
Step 4: Let the Dough Rise
Place the kneaded dough in a greased bowl. Cover it and allow it to rise in a warm place for about 1 hour or until it has doubled in size.
Step 5: Preheat and Prepare
Preheat your oven to 375°F (190°C) and grease a baking sheet to prevent sticking.
Step 6: Shape the Dough
Roll out the risen dough on a floured surface until it is about 1/2-inch thick. Cut it into strips that are approximately 1 inch wide.
Step 7: Arrange on Baking Sheet
Place the dough strips on the prepared baking sheet, ensuring they have some space in between.
Step 8: Add Garlic Butter
In a small bowl, mix 3 tablespoons melted butter with 2 minced garlic cloves. Use a pastry brush to spread this mixture over the dough strips.
Step 9: Top with Cheese
Sprinkle 1 cup shredded mozzarella cheese and 1/2 cup grated Parmesan cheese evenly over the dough strips.
Step 10: Season and Bake
Sprinkle 1 teaspoon each of dried oregano and dried parsley over the top. Bake in the preheated oven for 15-20 minutes, or until the breadsticks are golden brown and the cheese is bubbly.
Step 11: Cool and Serve
Once baked, let the breadsticks cool slightly before serving. Enjoy them warm for the best experience!
With this recipe for Homemade Cheesy Garlic Breadsticks, you can create a delicious treat that will impress family and friends. Enjoy the delightful combination of flavors and textures with every bite.
How to Serve Homemade Cheesy Garlic Breadsticks
These breadsticks are versatile and can complement various meals or stand alone as a delightful snack.
With Marinara Sauce
Serve your Homemade Cheesy Garlic Breadsticks with a side of warm marinara sauce for dipping. The tangy tomato flavor perfectly contrasts the buttery, cheesy breadsticks.
As a Side to Pasta Dishes
Pair these breadsticks with your favorite pasta dishes, such as spaghetti or fettuccine alfredo. They add a delicious, cheesy element that enhances the overall dining experience.
Topped with Fresh Herbs
For a fresh twist, sprinkle chopped fresh herbs, like basil or cilantro, over the warm breadsticks just before serving. This adds a pop of color and flavor that elevates the dish.
Pro Tips for the Best Homemade Cheesy Garlic Breadsticks
To ensure your Homemade Cheesy Garlic Breadsticks turn out perfectly, consider these expert tips.
-
Use Fresh Yeast: Always check the expiration date on your yeast to ensure it is active and will create a fluffy texture in your breadsticks.
-
Knead Thoroughly: Kneading the dough for the full 5-7 minutes will help develop gluten, resulting in a chewy and elastic breadstick.
-
Don’t Rush the Rising: Allow the dough to rise until it doubles in size for the best texture. A warm, draft-free environment will help speed up the process.
-
Experiment with Cheese: Feel free to mix different cheeses like cheddar or gouda for a unique flavor profile that can elevate your breadsticks.
-
Serve Immediately: These breadsticks are best enjoyed fresh from the oven while the cheese is still gooey and the bread is warm.
Best Side Dishes and Pairings
Homemade Cheesy Garlic Breadsticks can be paired with a variety of side dishes and drinks for a complete meal experience.
-
Caesar Salad: A crisp Caesar salad complements the richness of the breadsticks, balancing flavors with its tangy dressing.
-
Tomato Basil Soup: This classic pairing creates a comforting meal, with the breadsticks serving as the perfect dipping tool for the creamy soup.
-
Grilled Vegetables: A side of grilled vegetables adds a smoky flavor and healthy contrast to the cheesy richness of the breadsticks.
-
Stuffed Peppers: Serve the breadsticks alongside stuffed peppers for a hearty meal, as the flavors meld beautifully.
-
Red Wine: A glass of red wine, such as Chianti, enhances the savory notes of the cheese and garlic, creating an enjoyable dining experience.
Common Mistakes to Avoid
- Wrong Water Temperature: Using water that is too hot can kill the yeast, preventing the dough from rising properly.
- Over-Kneading: Kneading the dough for too long can lead to dense breadsticks instead of light and fluffy ones.
- Insufficient Rising Time: Not allowing the dough to rise long enough can result in flat breadsticks that lack texture.
- Skipping the Garlic Butter: Omitting the garlic butter mixture will diminish the flavor, making the breadsticks less enjoyable.
Storage & Reheating Instructions
Refrigerator Storage
Store your Homemade Cheesy Garlic Breadsticks in an airtight container in the refrigerator. They will stay fresh for up to 3 days.
Freezing Instructions
For longer storage, freeze the baked breadsticks in a single layer on a baking sheet. Once frozen, transfer them to an airtight freezer bag, where they can be stored for up to 2 months.
Reheating Tips
- Oven: Preheat the oven to 350°F (175°C) and bake for about 10 minutes until warmed through.
- Microwave: Heat on medium power in 30-second intervals until warm, but be cautious as this may make them chewy.
- Stovetop: Place in a skillet over low heat, covering it to retain moisture, and heat for a few minutes until warmed through.
Frequently Asked Questions
How can I make my Homemade Cheesy Garlic Breadsticks more flavorful?
Adding extra herbs, such as basil or thyme, can enhance the flavor. You can also mix in some crushed red pepper flakes for a spicy kick.
Can I use different types of cheese for the Homemade Cheesy Garlic Breadsticks?
Absolutely! Feel free to substitute mozzarella with provolone or cheddar, and experiment with different cheeses to find your preferred flavor combination.
How do I ensure my Homemade Cheesy Garlic Breadsticks are fluffy?
Make sure to let the dough rise in a warm environment until it has doubled in size, and avoid over-kneading.
Can I prepare the dough ahead of time for my Homemade Cheesy Garlic Breadsticks?
Yes, you can prepare the dough and store it in the refrigerator for up to 24 hours before shaping and baking. Just let it come to room temperature before proceeding with the recipe.
Final Thoughts
These Homemade Cheesy Garlic Breadsticks are a delightful addition to any meal or a perfect snack on their own. We encourage you to try this recipe and share your experience in the comments below. Your feedback helps us create even more delicious content!
Dinner
Homemade Cheesy Garlic Breadsticks
5.0 from 24 reviews
These Homemade Cheesy Garlic Breadsticks are a delightful combination of soft, warm bread infused with garlic and topped with gooey mozzarella and Parmesan cheese. Perfect as an appetizer or a side dish, they are easy to make and sure to please any crowd.
1x
2x
3x
Ingredients
- 1 cup warm water (110°F)
- 1 tablespoon sugar
- 2 1/4 teaspoons active dry yeast
- 2 1/2 cups all-purpose flour
- 1 teaspoon salt
- 2 tablespoons olive oil
- 3 tablespoons unsalted butter, melted
- 2 garlic cloves, minced
- 1 cup shredded mozzarella cheese
- 1/2 cup grated Parmesan cheese
- 1 teaspoon dried oregano
- 1 teaspoon dried parsley
Instructions
- In a large bowl, combine warm water and sugar. Sprinkle yeast over the top and let sit for about 5 minutes until foamy.
- Add flour, salt, and olive oil to the yeast mixture. Mix until a dough forms.
- On a lightly floured surface, knead the dough for 5-7 minutes until smooth and elastic.
- Place the dough in a greased bowl, cover it, and let it rise in a warm place for about 1 hour or until doubled in size.
- Preheat your oven to 375°F (190°C) and grease a baking sheet.
- Roll out the dough on a floured surface to about 1/2-inch thickness. Cut into strips approximately 1 inch wide.
- Arrange the dough strips on the prepared baking sheet.
- In a small bowl, mix melted butter with minced garlic. Brush this mixture over the dough strips.
- Evenly sprinkle mozzarella and Parmesan cheese over the dough strips.
- Sprinkle dried oregano and parsley over the top. Bake for 15-20 minutes, or until golden brown and cheese is bubbly.
- Let the breadsticks cool slightly before serving.
Leave a Reply