
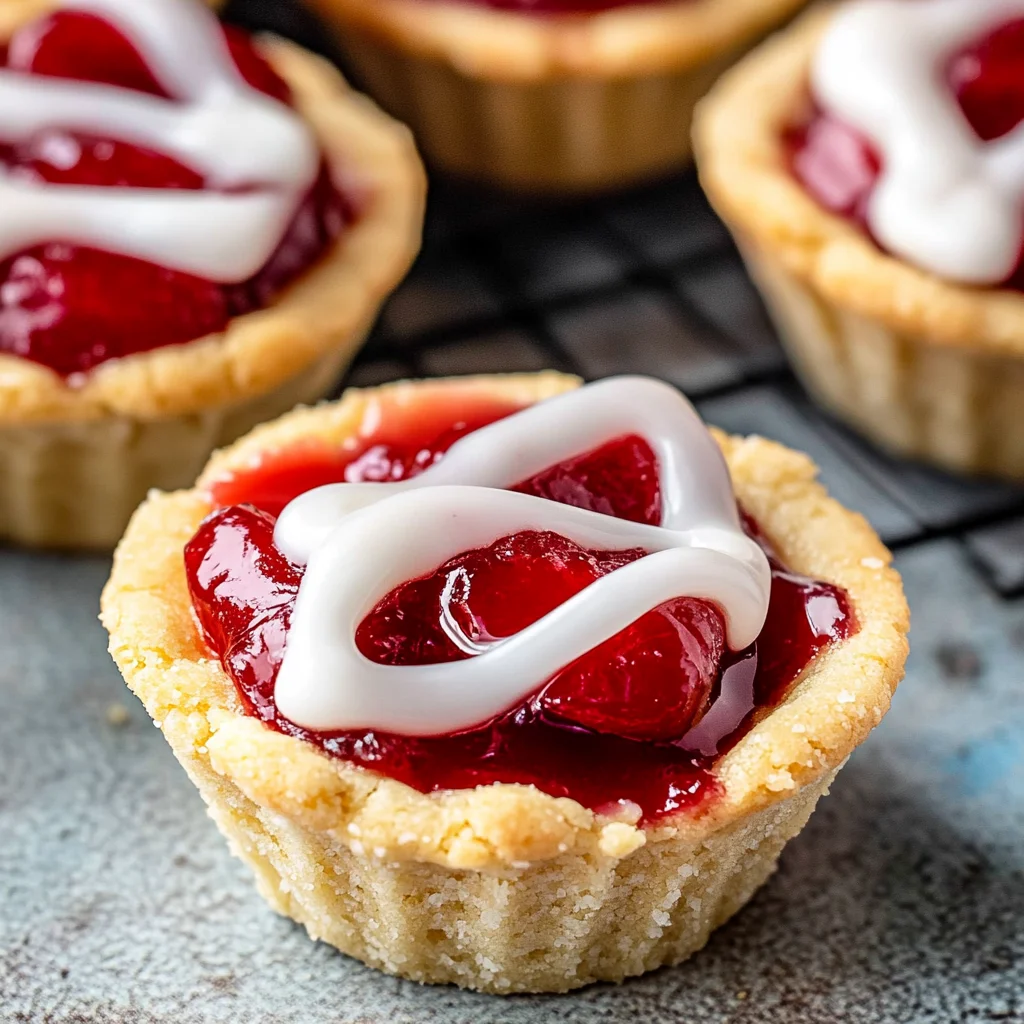
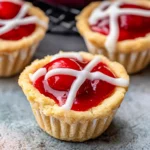
Cherry Pie Cookie Cups Recipe are delightful mini desserts that capture the essence of cherry pie in a fun, bite-sized format. This easy recipe requires just four ingredients, making it perfect for any occasion—from family gatherings to casual get-togethers. The sugar cookie crust combined with luscious cherry pie filling creates a sweet treat everyone will love!
Why You’ll Love This Recipe
- Quick and Easy: With only four ingredients, you can whip these up in no time.
- Versatile Dessert: Perfect for parties, potlucks, or simply satisfying your sweet tooth.
- Kid-Friendly: A fun baking activity for kids that results in delicious treats they can enjoy.
- Customizable: Feel free to experiment with different fillings or toppings based on your preferences.
- Impressive Presentation: These cookie cups look beautiful on any dessert table.
Tools and Preparation
Having the right tools can make your baking experience smoother and more enjoyable. Here’s what you’ll need to create these Cherry Pie Cookie Cups.
Essential Tools and Equipment
- Mini muffin pans
- Nonstick baking spray
- Wooden spoon or ½ teaspoon
- Butter knife
- Mixing bowl
Importance of Each Tool
- Mini muffin pans: These ensure your cookie cups hold their shape while baking.
- Nonstick baking spray: Prevents your cookie cups from sticking, making removal easy.
- Butter knife: Helps gently loosen the cookie cups without breaking them.
Ingredients
To make Cherry Pie Cookie Cups, you’ll need the following ingredients:
- 1 package ready to bake sugar cookie dough (24 count)
- 1 21 ounces/595g can cherry pie filling
- ¼ cup (26g) powdered sugar
- 1-2 tablespoons (15-30ml) heavy whipping cream
How to Make Cherry Pie Cookie Cups Recipe
Step 1: Preheat the Oven
Preheat your oven to 350°F. Spray mini muffin pans with nonstick baking spray or grease and flour the pans. This step is essential; otherwise, your cookies may stick.
Step 2: Bake the Cookie Cups
Place one cookie dough ball in each muffin pan cavity. Bake for 18-22 minutes or until the cookies are fully baked. Keep an eye on them towards the end!
Step 3: Create the Cup Shape
Cool the cookies for 5-10 minutes. Use the back of a wooden spoon handle or a rounded teaspoon to press down gently in the center of each cookie to form a cup.
Step 4: Remove from Pan
Allow them to cool completely before attempting to remove them. Use a butter knife to carefully loosen each cookie cup and pop them out of the muffin pan.
Step 5: Fill with Cherry Pie Filling
Fill each cookie cup generously with cherry pie filling. The amount is up to you—go wild!
Step 6: Prepare the Glaze
In a mixing bowl, whisk together powdered sugar and 1 tablespoon of heavy whipping cream. Add more cream until you reach your desired glaze consistency. Drizzle this over your filled cherry pies for an extra touch!
Step 7: Store Your Treats
Store any leftover pie cookie cups in an airtight container in the refrigerator for up to three days. It’s best not to freeze these treats as they may lose their texture.
Enjoy making your Cherry Pie Cookie Cups Recipe! Each bite is sure to bring joy and sweetness into your day!
How to Serve Cherry Pie Cookie Cups Recipe
Cherry Pie Cookie Cups are delightful mini desserts that bring a taste of summer to your table. They can be enjoyed in various ways, making them perfect for any occasion.
Casual Gatherings
- Serve with Ice Cream: A scoop of vanilla ice cream pairs beautifully, adding creaminess to the tart cherry filling.
- Top with Whipped Cream: A dollop of whipped cream enhances their sweetness and adds a light texture.
Holiday Celebrations
- Garnish with Fresh Cherries: Decorate each cookie cup with fresh cherries for a fresh touch and vibrant color.
- Drizzle with Chocolate: A drizzle of melted chocolate over the top elevates these treats into an elegant dessert.
Picnics and Potlucks
- Pack in Containers: Easy to transport, these cookie cups make a great addition to picnics or potluck gatherings.
- Pair with Lemonade: Serve alongside refreshing lemonade for a sweet and tangy contrast.
How to Perfect Cherry Pie Cookie Cups Recipe
To ensure your Cherry Pie Cookie Cups turn out perfectly every time, follow these helpful tips.
- Use Nonstick Spray: Make sure to spray the muffin pans well; this prevents sticking and helps maintain the cookie shape.
- Don’t Overbake: Keep an eye on them while baking; overbaking can lead to dry cookie cups. Aim for a golden color.
- Press Firmly but Gently: When creating the cup shape, press firmly enough to mold but gently enough not to break the cookie.
- Cool Completely Before Removing: Allowing the cups to cool fully prevents them from crumbling when you pop them out of the pan.
Best Side Dishes for Cherry Pie Cookie Cups Recipe
While Cherry Pie Cookie Cups are delicious on their own, pairing them with complementary side dishes can enhance your dessert experience. Here are some great options:
- Vanilla Ice Cream: The creamy texture balances the tartness of the cherry filling.
- Lemon Sorbet: A refreshing contrast that cleanses the palate between bites.
- Fruit Salad: A mix of seasonal fruits adds freshness and color to your dessert spread.
- Chocolate Mousse: Rich and creamy, this indulgent treat pairs well with lighter desserts like cookie cups.
- Cheese Platter: A selection of cheeses offers a savory option that contrasts sweet flavors nicely.
- Mini Cheesecakes: Another dessert option that complements the cherry flavor without overpowering it.
Common Mistakes to Avoid
Avoiding common pitfalls can make your Cherry Pie Cookie Cups Recipe turn out perfectly. Here are some mistakes to watch for:
- Skipping the greasing step: Always grease your muffin pans. This prevents the cookie cups from sticking and makes removal easier.
- Overbaking the cookies: Keep an eye on your cookie cups while baking. Overbaked cookies can become hard and lose their delightful texture.
- Not cooling properly: Allow the cookie cups to cool before removing them from the pan. This ensures they hold their shape and don’t break apart.
- Ignoring glaze consistency: When making the glaze, adjust the heavy whipping cream slowly. A good consistency is key for a beautiful drizzle over your cherry pie filling.
- Filling too early: Fill your cookie cups only after they have cooled completely. This keeps the crust from becoming soggy.
Storage & Reheating Instructions
Refrigerator Storage
- Store in an airtight container.
- Keep in the refrigerator for up to 3 days.
Freezing Cherry Pie Cookie Cups Recipe
- These cookie cups do not freeze well due to the cherry filling. It’s best to consume them fresh.
Reheating Cherry Pie Cookie Cups Recipe
- Oven: Preheat to 350°F and reheat for about 5-7 minutes until warmed through.
- Microwave: Heat on medium power for 10-15 seconds per cup, checking frequently.
- Stovetop: Place in a skillet over low heat, covering with a lid to warm gently without drying out.
Frequently Asked Questions
Here are some common questions about the Cherry Pie Cookie Cups Recipe:
Can I use other fruit fillings?
Yes, feel free to experiment with different fruit fillings such as blueberry or apple for variety.
How do I make these gluten-free?
You can use gluten-free sugar cookie dough instead of regular dough to make this recipe gluten-free.
How long do these cookie cups last?
These Cherry Pie Cookie Cups will last up to 3 days when stored properly in the refrigerator.
What can I substitute for heavy whipping cream?
You can substitute milk or a dairy-free alternative if you don’t have heavy whipping cream on hand.
Final Thoughts
The Cherry Pie Cookie Cups Recipe is a delightful treat that combines the flavors of classic cherry pie with a fun twist. These mini desserts are perfect for gatherings or simply satisfying a sweet craving at home. Feel free to customize them by using different fillings or toppings based on your preference.
Cherry Pie Cookie Cups
- Prep Time: 10 minutes
- Cook Time: 22 minutes
- Total Time: 32 minutes
- Yield: Makes approximately 24 cookie cups 1x
- Category: Dessert
- Method: Baking
- Cuisine: American
Description
Indulge in the delightful world of Cherry Pie Cookie Cups, a fun and delicious twist on the classic cherry pie. These mini desserts are made with just four simple ingredients, making them an effortless treat for any occasion—be it family gatherings or festive celebrations. Each cookie cup features a buttery sugar cookie crust filled with luscious cherry pie filling and finished with a sweet glaze, creating the perfect harmony of flavors in every bite. Easy to prepare and visually appealing, these cookie cups are sure to impress your guests and satisfy your sweet cravings.
Ingredients
- 1 package ready-to-bake sugar cookie dough (24 count)
- 1 can (21 ounces) cherry pie filling
- ¼ cup powdered sugar
- 1–2 tablespoons heavy whipping cream
Instructions
- Preheat your oven to 350°F. Grease mini muffin pans with nonstick baking spray.
- Place one cookie dough ball in each muffin pan cavity and bake for 18-22 minutes until golden.
- Cool for 5-10 minutes, then press down gently in the center of each cookie to form a cup shape.
- Allow to cool completely before removing from the pan using a butter knife.
- Fill each cookie cup generously with cherry pie filling.
- Whisk powdered sugar with heavy cream to create a glaze and drizzle over the filled cups.
Nutrition
- Serving Size: 1 cookie cup (30g)
- Calories: 120
- Sugar: 8g
- Sodium: 60mg
- Fat: 6g
- Saturated Fat: 3g
- Unsaturated Fat: 2g
- Trans Fat: 0g
- Carbohydrates: 16g
- Fiber: <1g
- Protein: 1g
- Cholesterol: 15mg
Keywords: Experiment with different fruit fillings like blueberry or apple for variety. Make these gluten-free by using gluten-free sugar cookie dough.