Author: munch twist

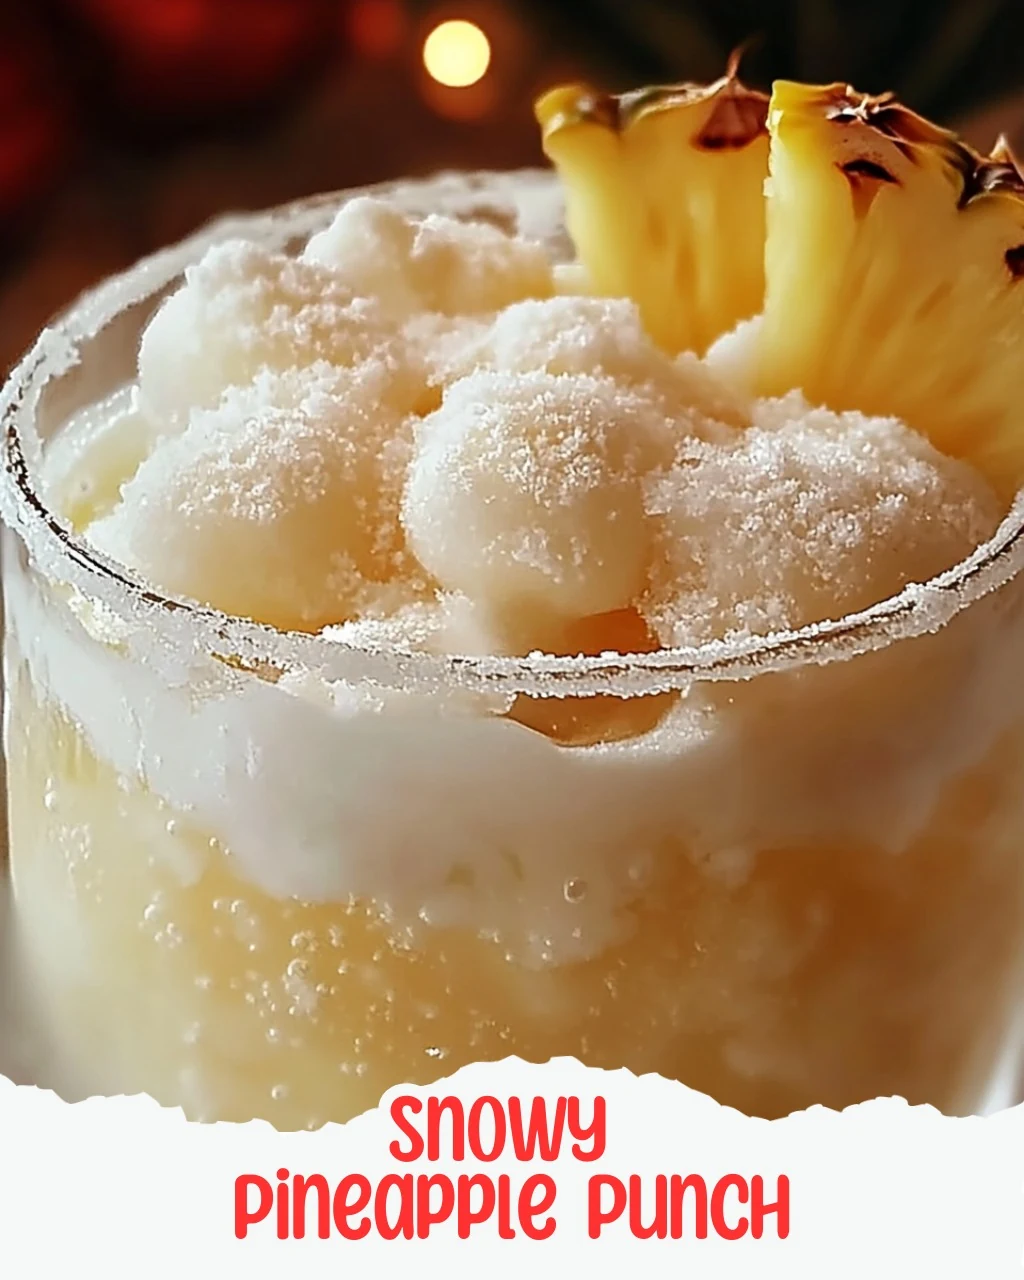
  • Snowy Pineapple Punch: A Festive Delight

    Snowy Pineapple Punch: A Festive Delight

    Get ready to transport your taste buds to a tropical paradise with this delightful Snowy Pineapple Punch! This refreshing drink is perfect for any festive gathering or cozy winter night, making it a wonderful way to spread holiday cheer.

    Why You’ll Love This Recipe

    • Exotic Flavor: The combination of pineapple juice and coconut cream creates a tropical taste that brightens any occasion.
    • Festive Presentation: The floating ice cream and coconut garnish give this punch a beautiful snowy effect, perfect for holiday gatherings.
    • Quick & Easy: Ready in under 10 minutes, this drink is simple to whip up, leaving you more time to enjoy with friends and family.
    • Customizable: Feel free to adjust the ingredients or add your favorite fruit garnishes to make it your own.
    • Family-Friendly: This punch is a hit with both kids and adults, making it an ideal choice for any celebration.

    Tools and Equipment

    Gathering the right tools makes the preparation smooth and enjoyable.

    Essential Tools

    • Large punch bowl
    • Whisk
    • Ladle
    • Measuring cups
    • Serving glasses

    Why These Tools Matter

    • Large punch bowl: Provides ample space for mixing and serving the punch.
    • Whisk: Ensures that the coconut cream concentrate is blended smoothly with the pineapple juice.
    • Ladle: Makes serving easy and mess-free, allowing you to pour the punch into glasses without spills.

    Ingredients for Snowy Pineapple Punch

    Main Ingredients

    • 1 liter lemon-lime soda (e.g., Sprite or 7-Up), chilled
    • 1 cup shredded sweetened coconut (optional, for garnish)
    • 1/2 gallon vanilla ice cream, slightly softened
    • 1 46 oz can pineapple juice, chilled
    • 1 12 oz can frozen coconut cream concentrate (e.g., Coco López), thawed
    • Maraschino cherries and fresh pineapple wedges (for garnish)

    How to Make Snowy Pineapple Punch Step-by-Step

    Step 1: Prep the Base

    1. Start by taking a large punch bowl and pour in the chilled pineapple juice.
    2. Add the thawed coconut cream concentrate to the bowl and whisk together until completely smooth.

    Step 2: Add the Fizz

    1. Gently pour in the chilled lemon-lime soda, stirring slowly to avoid excessive fizzing.

    Step 3: Create the Snowy Effect

    1. Scoop generous dollops of the softened vanilla ice cream and drop them into the punch bowl, letting them float on top.

    Step 4: Garnish

    1. For a snowy touch, sprinkle shredded coconut over the top of the punch.
    2. Adorn each glass with a maraschino cherry and a fresh pineapple wedge for a festive flair.

    Step 5: Serve and Enjoy

    1. Use a ladle to serve the punch into glasses or cups, and enjoy the refreshing, frosty goodness!

    With its tropical flavors and festive appearance, Snowy Pineapple Punch is sure to be a highlight at your next gathering. Enjoy every sip of this delightful drink!

    How to Serve Snowy Pineapple Punch

    Serving Snowy Pineapple Punch can elevate your gathering and create an inviting atmosphere. Here are some creative serving ideas to enhance your punch presentation.

    Festive Punch Glasses

    Use clear, decorative punch glasses to showcase the beautiful layers of your Snowy Pineapple Punch. This will highlight the frothy vanilla ice cream and colorful garnishes, making each serving visually appealing.

    Tropical Drink Dispensers

    For larger gatherings, consider using a drink dispenser filled with Snowy Pineapple Punch. Guests can help themselves, and the dispenser can be decorated with tropical or winter-themed accents to complement the punch’s flavor profile.

    Garnished Ice Cubes

    Create ice cubes using pineapple juice or coconut cream, and add them to your punch for an extra touch. These ice cubes will slowly melt and infuse additional flavor while keeping your punch cool and refreshing.

    Pro Tips for the Best Snowy Pineapple Punch

    To ensure your Snowy Pineapple Punch is a hit, follow these practical tips for optimal results.

    • Chill Your Ingredients: Always chill your pineapple juice and lemon-lime soda ahead of time to keep the punch cold without diluting it.
    • Use Quality Ice Cream: Opt for high-quality vanilla ice cream for a creamier texture and richer flavor.
    • Taste and Adjust: Feel free to adjust the sweetness by adding more coconut cream or pineapple juice according to your taste preference.
    • Garnish Generously: Don’t hold back on the garnishes. Extra coconut and fresh fruit not only enhance flavor but also make the punch visually stunning.
    • Make it Ahead: Prepare the punch a few hours in advance, but add the soda and ice cream just before serving to maintain its texture.

    Best Side Dishes and Pairings

    Pairing delicious side dishes with your Snowy Pineapple Punch will enhance the overall dining experience. Here are some excellent options.

    1. Coconut Shrimp: The crispy, sweet flavors of coconut shrimp complement the tropical notes of the punch perfectly.
    2. Fruit Skewers: Fresh fruit skewers with tropical fruits like mango, kiwi, and strawberries provide a refreshing contrast and add to the festive theme.
    3. Cheese Platter: A selection of soft cheeses, like brie and goat cheese, paired with crackers brings a savory element that balances the sweetness of the punch.
    4. Mini Tacos: Bite-sized tacos filled with shrimp or chicken offer a fun, flavorful option that pairs well with the punch’s tropical vibe.
    5. Caprese Salad Bites: The combination of fresh mozzarella, basil, and tomatoes adds a light, savory touch that pairs nicely with the sweetness of the Snowy Pineapple Punch.

    Common Mistakes to Avoid

    • Using Warm Ingredients: Ensure all ingredients are chilled to maintain the punch’s refreshing quality.
    • Skipping the Whisking Step: Neglecting to whisk the coconut cream concentrate can lead to an uneven texture.
    • Pouring Too Quickly: Adding the lemon-lime soda too fast can create excessive fizz, making it difficult to mix.
    • Ignoring Garnishes: Skipping the garnishes can make your punch less visually appealing and festive.

    Storage & Reheating Instructions

    Refrigerator Storage

    Store any leftover Snowy Pineapple Punch in an airtight container in the refrigerator. It will stay fresh for up to 2 days, but be aware that the carbonation may diminish over time.

    Freezing Instructions

    It is not recommended to freeze Snowy Pineapple Punch due to the presence of soda and ice cream, which may not retain their texture once thawed.

    Reheating Tips

    • Oven: Not applicable for this recipe as it is served cold.
    • Microwave: Not applicable for this recipe; do not heat.
    • Stovetop: Not applicable for this recipe; serve chilled.

    Frequently Asked Questions

    How can I make a non-alcoholic version of Snowy Pineapple Punch?

    To create a non-alcoholic version, simply follow the recipe as is. It’s already a delightful mocktail that everyone can enjoy.

    Can I use fresh pineapple juice instead of canned?

    Yes, you can use fresh pineapple juice. Just ensure it is well strained to avoid pulp, which can affect the texture of your punch.

    How long does Snowy Pineapple Punch last?

    Snowy Pineapple Punch will last in the refrigerator for up to 2 days, though it is best enjoyed fresh to retain its fizz.

    Can I make Snowy Pineapple Punch in advance?

    You can prepare the punch mixture ahead of time without the soda and ice cream. Add them just before serving for optimal freshness.

    Final Thoughts

    Snowy Pineapple Punch is a delightful and festive beverage perfect for any occasion. Give this recipe a try, and don’t forget to leave a comment with your thoughts and any variations you might have tried!


    Desserts

    Snowy Pineapple Punch


    5.0 from 24 reviews

    Get ready to transport your taste buds to a tropical paradise with this delightful Snowy Pineapple Punch! Perfect for any festive gathering or cozy winter night, this punch is a great way to spread the holiday cheer.
    Author: Munch Twist
    Prep Time: 10 minutes
    Cook Time: 0 minutes
    Total Time: 10 minutes
    Yield: 12 servings
    Category: Desserts
    Method: No bake
    Cuisine: American

    Snowy Pineapple Punch

    SCALE:
    1x
    2x
    3x
    Cook Mode: Prevent your screen from going dark

    Ingredients

    • 1 liter lemon-lime soda (e.g., Sprite or 7-Up), chilled
    • 1 cup shredded sweetened coconut (optional, for garnish)
    • 1/2 gallon vanilla ice cream, slightly softened
    • 1 46 oz can pineapple juice, chilled
    • 1 12 oz can frozen coconut cream concentrate (e.g., Coco López), thawed
    • Maraschino cherries and fresh pineapple wedges (for garnish)

    Instructions

    1. Start by taking a large punch bowl and pour in the chilled pineapple juice.
    2. Add the thawed coconut cream concentrate to the bowl and whisk together until the mixture is completely smooth and well incorporated.
    3. Gently pour in the chilled lemon-lime soda, stirring slowly to avoid excessive fizzing.
    4. Scoop generous dollops of the softened vanilla ice cream and drop them into the punch bowl. Let them float on top to create that gorgeous frothy look!
    5. For a snowy touch, sprinkle shredded coconut over the top of the punch.
    6. To finish, adorn each glass with a maraschino cherry and a fresh pineapple wedge for a festive flair.
    7. Use a ladle to serve into glasses or cups, and enjoy the refreshing, frosty goodness!

    Nutrition Facts

    Serving Size: 1 serving
    Calories: 180 kcal
    Sugar: 24g
    Sodium: 60mg
    Fat: 7g
    Saturated Fat: 4g
    Carbohydrates: 28g
    Fiber: 0g
    Protein: 2g
    Cholesterol: 30mg

  • Festive Grinch Punch Recipe for Holiday Cheer

    Festive Grinch Punch Recipe for Holiday Cheer

    Get ready to celebrate with a festive drink that captures the spirit of the season! This Grinch Punch is a whimsical, bubbly delight guaranteed to bring smiles to kids and adults alike. With its vibrant colors and refreshing taste, it’s the perfect beverage for your holiday gatherings.

    Why You’ll Love This Recipe

    • Festive and Fun: The bright green color and playful presentation make it a holiday favorite.
    • Kid-Friendly: This punch is a hit with children, making it ideal for family gatherings.
    • Easy to Make: With just a few simple ingredients, you can whip this up in no time.
    • Customizable: Adjust the sweetness or add your favorite garnishes for a personal touch.
    • Perfect for Any Occasion: Serve it at parties, school events, or holiday dinners to spread cheer.

    Tools and Equipment

    To create this delightful Grinch Punch, you’ll need a few essential tools.

    Essential Tools

    • Large punch bowl
    • Ladle
    • Measuring cups
    • Serving glasses
    • Spoon for stirring

    Why These Tools Matter

    • Large punch bowl: Allows for easy mixing and serving of your Grinch Punch.
    • Ladle: Makes it simple to serve individual portions without spills.
    • Serving glasses: Enhance the presentation and festive spirit of the drink.

    Ingredients for Grinch Punch

    Gather the following ingredients to make your Grinch Punch:

    Main Ingredients

    • 1/2 gallon lime sherbet, slightly softened
    • 1 12 oz can frozen limeade concentrate, thawed
    • 1 2-liter bottle lemon-lime soda (such as Sprite or 7-Up), chilled

    Optional Ingredients

    • Green food coloring (for an extra pop)
    • Maraschino cherries for garnish
    • Red sanding sugar for rim garnish

    How to Make Grinch Punch Step-by-Step

    Step 1: Prep the Base

    In a large punch bowl, start by combining the thawed limeade concentrate with the chilled lemon-lime soda. Stir gently until the limeade is fully dissolved into the soda, creating a refreshing base.

    Step 2: Add the Sherbet

    Scoop generous portions of lime sherbet into the punch bowl. As the sherbet floats on top, it will create an eye-catching frothy look that’s sure to impress.

    Step 3: Enhance the Color

    If you’re feeling extra festive, add a few drops of green food coloring. Stir it lightly, ensuring to mix just enough to enhance the color without fully dissolving the sherbet.

    Step 4: Prepare the Glasses

    For a delightful garnish, prepare your glasses by rimming them with red sanding sugar. To do this, simply dip the rims in water or lime juice before rolling them in the red sugar for a beautiful finish.

    Step 5: Serve and Enjoy

    Ladle your vibrant Grinch Punch into the prepared glasses and, for the final touch, top each drink with a maraschino cherry. Cheers to a wonderful holiday celebration!

    Nutritional information indicates approximately 150 calories per serving, making this festive drink a delightful treat that won’t derail your holiday plans. Enjoy the cheerful atmosphere and delicious flavors that this Grinch Punch brings to your celebrations!

    How to Serve Grinch Punch

    Grinch Punch is not only delightful to drink but also visually stunning. Here are some creative serving ideas to enhance your festive gathering.

    Festive Glassware

    Use clear glass mugs or colorful cups to showcase the vibrant green of the punch. This not only adds to the visual appeal but also makes it more fun for guests of all ages.

    Punch Station

    Set up a punch station where guests can serve themselves. Include fun garnishes like extra maraschino cherries and green sprinkles for personalization, allowing guests to create their own unique drink.

    Themed Ice Cubes

    Create themed ice cubes by freezing limeade or adding small pieces of fruit into the ice. These will not only keep the punch chilled but also add an extra pop of color and flavor as they melt.

    Pro Tips for the Best Grinch Punch

    To ensure your Grinch Punch is the highlight of the party, consider these expert tips.

    • Use High-Quality Soda: Opt for a quality lemon-lime soda to enhance the flavor and fizziness of your punch, creating a more enjoyable drinking experience.

    • Chill Ingredients: Make sure both the soda and limeade concentrate are well-chilled before mixing. This will keep your punch refreshing and enjoyable for longer.

    • Experiment with Flavors: Feel free to incorporate other citrus juices, like lemon or grapefruit, for an added layer of flavor that complements the limeade.

    • Adjust Sweetness: If you prefer a less sweet punch, reduce the amount of lime sherbet or opt for a diet version of the soda.

    • Make It Ahead of Time: Prepare the punch a few hours in advance, but add the sherbet just before serving to keep it frothy and prevent it from melting too quickly.

    Best Side Dishes and Pairings

    Grinch Punch pairs perfectly with a variety of festive dishes. Here are some recommendations to complement your drink.

    1. Mini Tacos: These bite-sized treats are easy to make and allow guests to enjoy a savory dish alongside the sweet punch.

    2. Cheese Platter: A selection of cheeses, crackers, and fruits balances the sweetness of the punch, providing a savory contrast.

    3. Holiday Cookies: Festive cookies, such as sugar cookies or gingerbread, add a delightful sweetness that pairs well with the punch’s flavors.

    4. Fruit Skewers: Fresh fruit skewers offer a refreshing and healthy option that complements the citrus notes in the Grinch Punch.

    5. Caprese Salad Bites: The fresh basil, mozzarella, and tomato provide a savory and refreshing flavor that contrasts beautifully with the sweet punch.

    6. Popcorn Bar: Offer a variety of popcorn flavors, from sweet to savory, to give guests a fun snack option that pairs well with the festive drink.

    Common Mistakes to Avoid

    • Not Thawing Limeade Properly: Ensure the limeade concentrate is completely thawed for a smooth mix with the soda.
    • Overmixing the Punch: Stir gently to preserve the fizzy texture; vigorous mixing can deflate the bubbles.
    • Skipping the Garnish: Don’t overlook the fun of garnishes; they elevate the presentation and flavor.
    • Using Warm Ingredients: Always chill your soda before mixing to keep the punch refreshing and cool.

    Storage & Reheating Instructions

    Refrigerator Storage

    Store any leftover Grinch Punch in an airtight container in the refrigerator. It will remain fresh for up to 2 days. Be aware that the carbonation may diminish over time.

    Freezing Instructions

    Freezing Grinch Punch is not recommended due to the sherbet and carbonation. However, if you choose to freeze it, pour the punch into freezer-safe containers, leaving space for expansion. Thaw in the refrigerator and reintroduce some carbonation with fresh soda before serving.

    Reheating Tips

    • Oven: This recipe is best served cold; reheating is not recommended.
    • Microwave: Not applicable for this punch as it should be served chilled.
    • Stovetop: Not applicable; serve as is for optimal taste and experience.

    Frequently Asked Questions

    Can I make Grinch Punch ahead of time?

    Yes, you can prepare the base of the punch (limeade and soda) in advance. Add the sherbet and garnishes just before serving for the best presentation.

    How can I adjust the sweetness of Grinch Punch?

    If you prefer a less sweet punch, reduce the amount of limeade concentrate or use a diet soda alternative.

    Is Grinch Punch suitable for adults?

    Absolutely! You can easily turn Grinch Punch into a festive cocktail by adding a splash of vodka or rum, making it a fun choice for holiday gatherings.

    Can I use different flavors of sherbet?

    Yes, feel free to experiment with different flavors of sherbet to create unique variations of Grinch Punch. Just keep in mind that it may alter the color and flavor profile.

    Final Thoughts

    This Grinch Punch is a delightful addition to any holiday celebration, promising joy and cheer in every sip. We encourage you to try this festive recipe and share your thoughts in the comments below. Your feedback is invaluable!


    Desserts

    Grinch Punch


    5.0 from 24 reviews

    Get ready to celebrate with a festive drink that captures the spirit of the season! This Grinch Punch is a whimsical, bubbly delight guaranteed to bring smiles to kids and adults alike. Let the fun begin with this easy-to-make holiday favorite!

    Author: Munch Twist
    Prep Time: 10 minutes
    Cook Time: 0 minutes
    Total Time: 10 minutes
    Yield: 10 servings
    Category: Desserts
    Method: No bake
    Cuisine: American

    Grinch Punch

    SCALE:
    1x
    2x
    3x
    Cook Mode: Prevent your screen from going dark

    Ingredients

    • 1/2 gallon lime sherbet, slightly softened
    • 1 12 oz can frozen limeade concentrate, thawed
    • 1 2-liter bottle lemon-lime soda, chilled
    • Green food coloring (optional, for an extra pop)
    • Maraschino cherries for garnish (optional)
    • Red sanding sugar for rim garnish (optional)

    Instructions

    1. In a large punch bowl, combine the thawed limeade concentrate with the chilled lemon-lime soda. Stir gently until fully dissolved.
    2. Scoop generous portions of lime sherbet into the punch bowl.
    3. Add a few drops of green food coloring if desired, stirring lightly.
    4. Prepare glasses by rimming them with red sanding sugar.
    5. Ladle the Grinch Punch into the prepared glasses and top each drink with a maraschino cherry.

    Nutrition Facts

    Serving Size: 1 serving
    Calories: 150 kcal
    Sugar: 28g
    Sodium: 50mg
    Fat: 4g
    Saturated Fat: 2g
    Carbohydrates: 30g
    Fiber: 0g
    Protein: 1g
    Cholesterol: 10mg

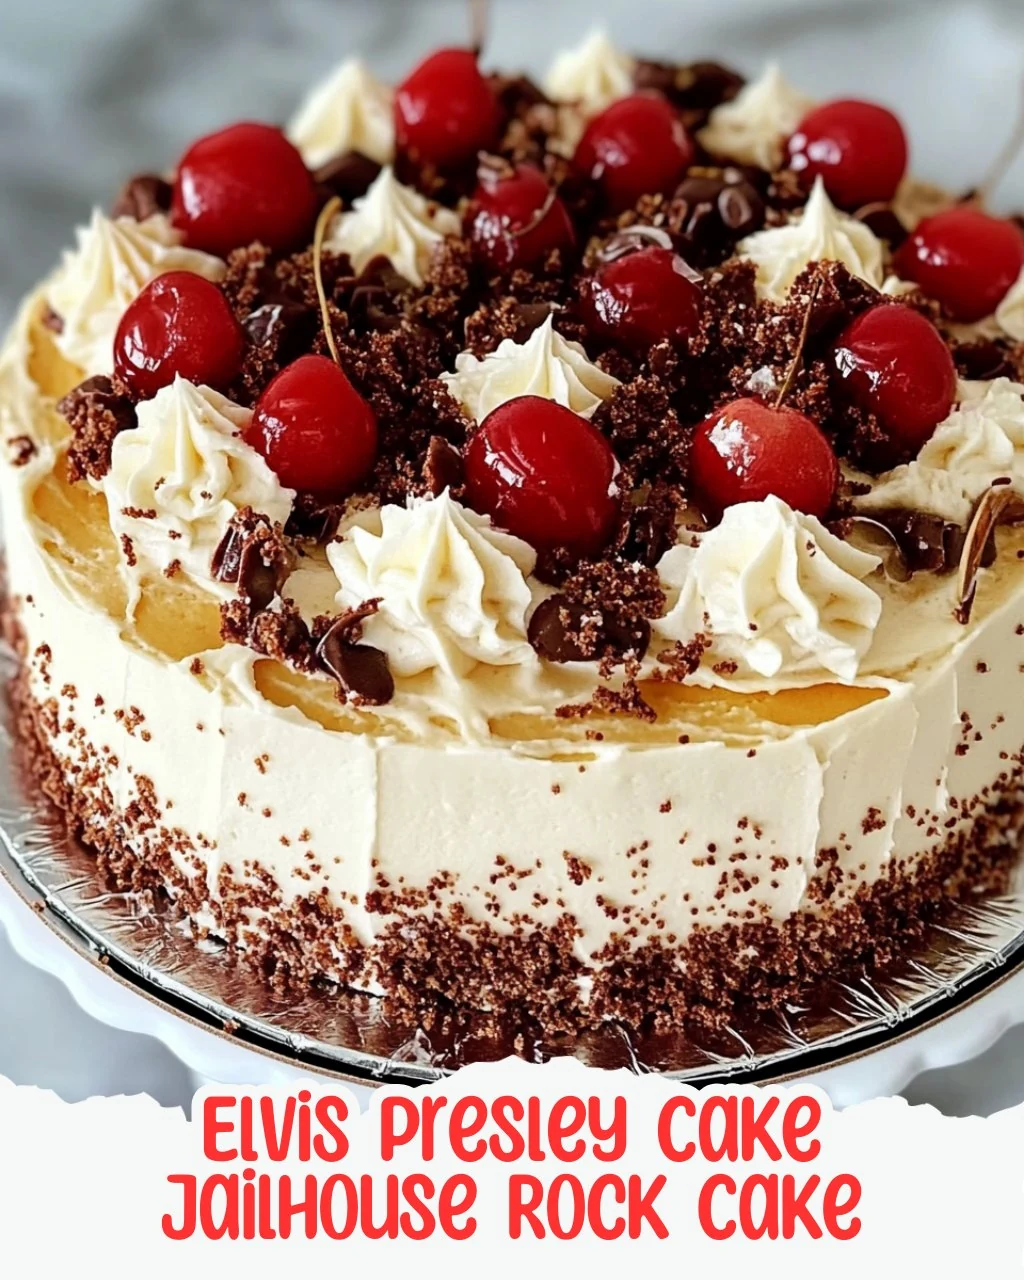
  • Elvis Presley Cake Jailhouse Rock Cake Recipe

    Elvis Presley Cake Jailhouse Rock Cake Recipe

    Get ready to rock your taste buds with this delightful Elvis Presley Cake Jailhouse Rock Cake. This cake combines the tropical flavor of pineapple with creamy frosting and crunchy pecans, creating a dessert worthy of the King himself.

    Why You’ll Love This Recipe

    • Deliciously Unique: The combination of pineapple and cream cheese frosting sets this cake apart from typical desserts.
    • Perfect for Gatherings: This cake serves 12, making it ideal for parties, picnics, or family gatherings.
    • Easy to Make: Using a boxed cake mix simplifies preparation while still delivering a homemade taste.
    • Moist and Flavorful: The soaking pineapple mixture ensures every bite is bursting with flavor.
    • Flexible Serving Options: Enjoy it chilled or at room temperature, so you can serve it however you prefer.

    Tools and Equipment

    Gathering the right tools makes baking this cake a breeze.

    Essential Tools

    • 9×13-inch baking dish
    • Medium saucepan
    • Large mixing bowl
    • Electric mixer
    • Fork or skewer

    Why These Tools Matter

    • Baking Dish: A 9×13-inch dish ensures even baking and is the perfect size for serving.
    • Electric Mixer: This tool saves time and effort when beating the frosting ingredients together.
    • Fork or Skewer: Poking holes in the cake allows the pineapple mixture to soak in, enhancing flavor and moisture.

    Ingredients for Elvis Presley Cake Jailhouse Rock Cake

    Cake Base

    • 1 box white cake mix (plus ingredients listed on the box: eggs, oil, water)
    • 1/2 teaspoon vanilla extract (for pineapple mixture)

    Pineapple Mixture

    • 1 can (8 oz) crushed pineapple (with juice)
    • 1 cup granulated sugar
    • 1/2 teaspoon vanilla extract (for frosting)

    Cream Cheese Frosting

    • 8 oz cream cheese (softened)
    • 1/2 cup unsalted butter (softened)
    • 3 cups powdered sugar

    Topping

    • 3 cups crushed pecans

    How to Make Elvis Presley Cake Jailhouse Rock Cake Step-by-Step

    Step 1: Prep the Base

    1. Preheat your oven as instructed on the cake mix box. Grease and flour a 9×13-inch baking dish to ensure your cake releases easily.
    2. Prepare the white cake mix according to package instructions, mixing in the eggs, oil, and water until smooth. Pour the batter into the prepared baking dish and bake as directed. Allow the cake to cool slightly in the pan.

    Step 2: Prepare the Pineapple Mixture

    1. In a medium saucepan, combine the crushed pineapple (with juice), granulated sugar, and 1/2 teaspoon of vanilla extract. Stir over medium heat until boiling.
    2. Once boiling, reduce the heat and let it simmer for about 5 minutes, stirring occasionally. Remove from heat and set aside.

    Step 3: Soak the Cake

    1. While the cake is still warm, use a fork or skewer to poke holes all over the surface. This allows the pineapple mixture to soak in beautifully.
    2. Carefully pour the warm pineapple mixture over the cake, spreading it evenly to ensure it seeps into all the holes. Allow the cake to cool completely.

    Step 4: Make the Frosting

    1. In a large mixing bowl, combine the softened cream cheese and unsalted butter. Beat until smooth and creamy.
    2. Gradually add the powdered sugar, one cup at a time, mixing well after each addition. Stir in the remaining 1/2 teaspoon of vanilla extract.

    Step 5: Frost the Cake

    1. Once the cake is completely cooled, spread the cream cheese frosting generously over the top.
    2. Sprinkle the crushed pecans over the frosting, pressing them down slightly to help them stick.

    Step 6: Serve

    1. Slice into squares and serve chilled or at room temperature. Any leftovers can be stored in the refrigerator for up to 5 days.

    Enjoy the delightful flavors and textures of your Elvis Presley Cake Jailhouse Rock Cake!

    How to Serve Elvis Presley Cake Jailhouse Rock Cake

    This cake is not just a dessert; it’s an experience that can be enjoyed in various delightful ways.

    A La Mode

    Serve slices of the Elvis Presley Cake Jailhouse Rock Cake with a scoop of vanilla or caramel ice cream. The creaminess of the ice cream beautifully complements the rich frosting and adds a refreshing contrast to the cake’s texture.

    With Fresh Fruit

    Pair your cake with fresh slices of banana or pineapple. The fruit adds an extra layer of flavor, enhancing the tropical notes of the cake while providing a light, refreshing element.

    Drizzled with Caramel Sauce

    For an indulgent twist, drizzle caramel sauce over the top of each slice before serving. The sweet, buttery flavor of the caramel elevates the cake, making it an irresistible treat for any occasion.

    Pro Tips for the Best Elvis Presley Cake Jailhouse Rock Cake

    To ensure your Elvis Presley Cake Jailhouse Rock Cake turns out perfectly, consider the following tips:

    • Use Fresh Ingredients: Always opt for the freshest eggs and dairy products to enhance flavor and texture.

    • Poke Holes Generously: Don’t be afraid to poke plenty of holes in the cake. This allows the pineapple mixture to soak in more effectively, ensuring maximum flavor.

    • Let Cake Cool Completely: Allow the cake to cool completely before adding the frosting. This prevents the frosting from melting and ensures a beautiful presentation.

    • Adjust Sweetness to Taste: If you prefer a less sweet frosting, start with less powdered sugar and adjust according to your preference while mixing.

    • Store Properly: Keep the cake covered in the refrigerator to maintain its freshness, as cream cheese frosting can spoil quickly if left out.

    Best Side Dishes and Pairings

    Complement your Elvis Presley Cake Jailhouse Rock Cake with these delightful side dishes and drinks:

    1. Sweet Tea – A classic Southern beverage that balances the cake’s sweetness with its refreshing flavor.

    2. Pineapple Salad – A light salad featuring fresh pineapple, which enhances the tropical taste of the cake.

    3. Chocolate Milkshake – The rich, creamy texture of a chocolate milkshake contrasts beautifully with the cake’s flavors.

    4. Whipped Cream – A dollop of whipped cream on the side adds a light and airy element, perfect for cutting through the richness of the cake.

    5. Fruit Punch – This fruity beverage pairs well with the cake, providing a sweet and tangy contrast that highlights the tropical notes of the dessert.

    Common Mistakes to Avoid

    • Overmixing the Batter: Mixing the cake batter too much can lead to a dense cake. Mix just until combined for a lighter texture.
    • Skipping the Poking Step: Not poking holes in the cake means the pineapple mixture won’t soak in properly, resulting in a drier cake.
    • Using Cold Ingredients: Ensure your cream cheese and butter are at room temperature for a smoother frosting. Cold ingredients can lead to lumps.
    • Not Letting the Cake Cool: Applying frosting to a warm cake can cause it to melt and slide off. Always let the cake cool completely before frosting.

    Storage & Reheating Instructions

    Refrigerator Storage

    Store leftover Elvis Presley Cake Jailhouse Rock Cake in airtight containers in the refrigerator. It will stay fresh for up to 5 days.

    Freezing Instructions

    To freeze, wrap individual pieces of cake tightly in plastic wrap and then place them in a freezer-safe container. The cake can be frozen for up to 2 months. To thaw, move it to the refrigerator overnight.

    Reheating Tips

    • Oven: Preheat the oven to 350°F (175°C) and reheat the cake for about 10-15 minutes until warmed through.
    • Microwave: Heat individual slices in the microwave for 15-20 seconds or until warmed to your preference.
    • Stovetop: Place a slice in a skillet over low heat for 5-7 minutes, covered, until warmed.

    Frequently Asked Questions

    Can I use a different frosting for the Elvis Presley Cake Jailhouse Rock Cake?

    Yes, while the cream cheese frosting complements the cake beautifully, you can use whipped cream or a buttercream frosting if you prefer.

    How should I serve Elvis Presley Cake Jailhouse Rock Cake?

    This cake is delicious served chilled or at room temperature. It pairs well with a scoop of vanilla ice cream or a dollop of whipped cream.

    Can I make the Elvis Presley Cake Jailhouse Rock Cake ahead of time?

    Absolutely! The cake can be made a day in advance, and its flavors will deepen overnight. Just make sure to store it properly in the fridge.

    What if I don’t have pecans for the topping?

    If you don’t have pecans, you can substitute them with walnuts or omit the nuts altogether for a nut-free version.

    How do I know when the cake is done baking?

    Follow the baking time on the cake mix box and perform the toothpick test. Insert a toothpick into the center of the cake—if it comes out clean, the cake is ready.

    Final Thoughts

    This Elvis Presley Cake Jailhouse Rock Cake is a delightful tribute to the King himself, bursting with flavor and texture. We encourage you to try this recipe and share your experience in the comments below. Your feedback is invaluable!


    Desserts

    Elvis Presley Cake Jailhouse Rock Cake


    5.0 from 24 reviews

    Get ready to rock your taste buds with this delightful Elvis-inspired cake! Combining the tropical flavor of pineapple with a creamy frosting and a satisfying crunch of pecans, this dessert is a slice of heaven worthy of the King himself.

    Author: Munch Twist
    Prep Time: 20 minutes
    Cook Time: 30 minutes
    Total Time: 50 minutes
    Yield: 12 servings
    Category: Desserts
    Method: No bake
    Cuisine: American

    Elvis Presley Cake Jailhouse Rock Cake

    SCALE:
    1x
    2x
    3x
    Cook Mode: Prevent your screen from going dark

    Ingredients

    • 1 box white cake mix (plus ingredients listed on the box: eggs, oil, water)
    • 1/2 teaspoon vanilla extract (for frosting)
    • 3 cups crushed pecans
    • 8 oz cream cheese (softened)
    • 1 8 oz can crushed pineapple (with juice)
    • 3 cups powdered sugar
    • 1 cup granulated sugar
    • 1/2 teaspoon vanilla extract (for pineapple mixture)
    • 1/2 cup unsalted butter (softened)

    Instructions

    1. Preheat your oven as instructed on the cake mix box. Grease and flour a 9×13-inch baking dish.
    2. Prepare the white cake mix according to the package instructions, mixing in eggs, oil, and water until smooth. Pour the batter into the prepared baking dish and bake as directed. Allow the cake to cool slightly in the pan.
    3. In a medium saucepan, combine the crushed pineapple (with juice), granulated sugar, and 1/2 teaspoon of vanilla extract. Stir over medium heat until it begins to boil, then reduce heat and simmer for about 5 minutes. Remove from heat and set aside.
    4. While the cake is still warm, poke holes all over the surface. Pour the warm pineapple mixture over the cake, spreading it evenly. Allow the cake to cool completely.
    5. In a large mixing bowl, combine softened cream cheese and unsalted butter. Beat until smooth, then gradually add powdered sugar, mixing well after each addition. Stir in the remaining 1/2 teaspoon of vanilla extract.
    6. Once the cake is completely cooled, spread the cream cheese frosting generously over the top.
    7. Sprinkle crushed pecans over the frosting, pressing them down slightly to help them stick.
    8. Slice into squares and serve chilled or at room temperature. Store leftovers in the refrigerator for up to 5 days.

    Nutrition Facts

    Serving Size: 1 serving
    Calories: 380 kcal
    Sugar: 38g
    Sodium: 300mg
    Fat: 20g
    Saturated Fat: 8g
    Carbohydrates: 52g
    Fiber: 1g
    Protein: 5g
    Cholesterol: 40mg

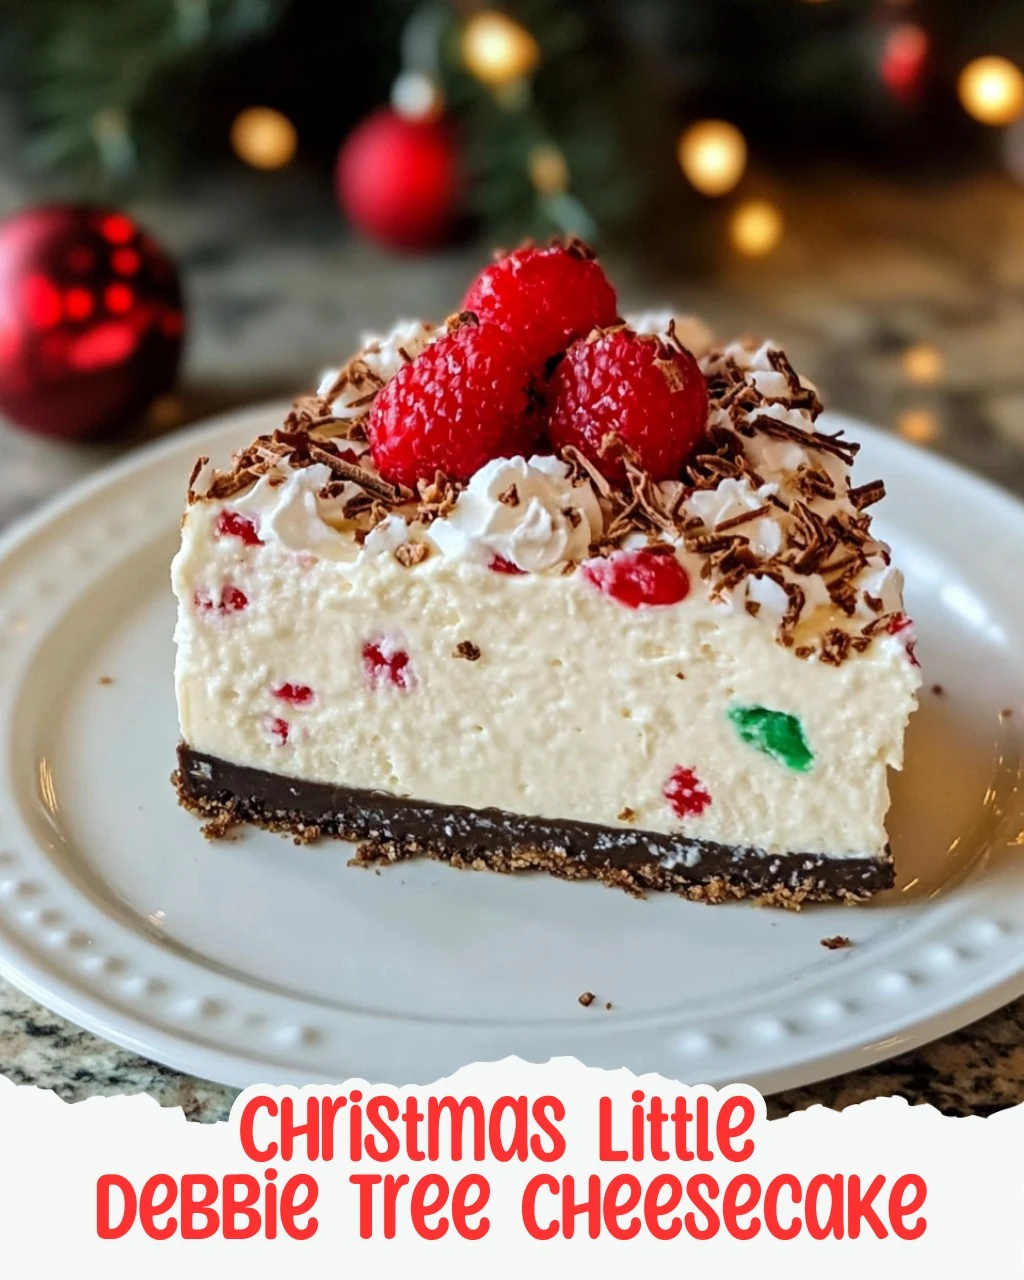
  • Indulge in Christmas Little Debbie Tree Cheesecake

    Indulge in Christmas Little Debbie Tree Cheesecake

    Get ready for a festive treat that captures the spirit of the season! This delightful Christmas Little Debbie Tree Cheesecake brings together creamy goodness and the nostalgic joy of Christmas trees in every bite. Perfect for holiday gatherings or a cozy night in.

    Why You’ll Love This Recipe

    • Nostalgic Flavor: Enjoy the classic taste of Little Debbie treats in a cheesecake form.
    • Creamy Texture: The combination of cream cheese, sour cream, and heavy cream creates a rich and velvety filling.
    • Perfect for Celebrations: This cheesecake is ideal for holiday parties, impressing guests with its festive appearance.
    • Customizable Toppings: Decorate with whipped cream, sprinkles, or chocolate to suit your holiday theme.
    • Easy to Make: With simple steps, even beginner bakers can create this delicious dessert.

    Tools and Equipment

    To prepare the Christmas Little Debbie Tree Cheesecake, you’ll need a few essential tools.

    Essential Tools

    • 9-inch springform pan
    • Mixing bowls
    • Electric mixer
    • Rubber spatula
    • Measuring cups and spoons

    Why These Tools Matter

    • 9-inch springform pan: Allows for easy removal of the cheesecake without damaging its shape.
    • Electric mixer: Ensures the cream cheese is beaten to a smooth consistency, essential for a creamy texture.
    • Rubber spatula: Helps to scrape down the sides of the bowl, ensuring all ingredients are well mixed.

    Ingredients for Christmas Little Debbie Tree Cheesecake

    Crust

    • 1/4 cup granulated sugar
    • 2 cups graham cracker crumbs
    • 1/2 cup unsalted butter, melted

    Filling

    • 4 (8 oz) packages cream cheese, softened
    • 1 cup powdered sugar
    • 1 teaspoon vanilla extract
    • 4 large eggs
    • 1 cup sour cream
    • 1/2 cup heavy cream

    How to Make Christmas Little Debbie Tree Cheesecake Step-by-Step

    Step 1: Prepare the Crust

    1. Preheat your oven to 325°F (160°C). This will ensure your cheesecake bakes evenly and sets perfectly.
    2. In a mixing bowl, combine the graham cracker crumbs and granulated sugar. Pour in the melted butter and mix until the crumbs are thoroughly coated; the mixture should resemble wet sand.
    3. Press the crumb mixture firmly into the bottom of a 9-inch springform pan to form your crust. Bake for 10 minutes, then set it aside to cool while you prepare the filling.

    Step 2: Make the Filling

    1. In a large mixing bowl, beat the softened cream cheese until smooth and creamy. Gradually add in the powdered sugar and vanilla extract, mixing well after each addition for that luscious texture.
    2. Add the eggs, one at a time, making sure to blend thoroughly after each addition. This will keep your cheesecake light and airy.
    3. Gently mix in the sour cream and heavy cream until just combined. Be careful not to overmix; this helps prevent cracks in your cheesecake.

    Step 3: Assemble and Bake

    1. Pour the cheesecake batter over the cooled crust, smoothing the top with a spatula.
    2. Place the springform pan in the oven and bake for 55 to 60 minutes, or until the edges are set but the center still has a slight jiggle.

    Step 4: Cool and Set

    1. Once baked, turn off the oven and crack the door open, allowing the cheesecake to cool slowly in the oven for about 1 hour. This will help prevent cracks as it cools.
    2. Remove from the oven and let it sit at room temperature for another hour before refrigerating for at least 4 hours (or overnight) to set completely.

    Step 5: Decorate and Serve

    1. Before serving, decorate your cheesecake as desired – whipped cream, festive sprinkles, or a drizzle of chocolate could all be great options.

    Enjoy your delicious Christmas Little Debbie Tree Cheesecake, a treat that embodies the joy of the holiday season!

    How to Serve Christmas Little Debbie Tree Cheesecake

    This cheesecake is as delightful to present as it is to eat. Here are some creative serving ideas to elevate your dessert experience.

    Festive Whipped Cream Topping

    Dress up your cheesecake with a generous layer of whipped cream. Use a piping bag to create elegant swirls for a more polished look.

    Chocolate Drizzle

    For a rich touch, drizzle melted chocolate over the top just before serving. This adds a luxurious flavor that complements the creamy cheesecake.

    Fruit Garnish

    Fresh berries, such as raspberries or strawberries, not only add a pop of color but also provide a refreshing contrast to the rich cheesecake. Scatter them over the top or serve them on the side.

    Pro Tips for the Best Christmas Little Debbie Tree Cheesecake

    Achieving the perfect cheesecake requires attention to detail. Here are some expert tips to ensure your Christmas Little Debbie Tree Cheesecake is a resounding success.

    • Room Temperature Ingredients: Always ensure your cream cheese and eggs are at room temperature for a smoother batter that blends well.

    • Don’t Overmix: When adding the sour cream and heavy cream, mix just until combined to prevent introducing too much air, which can lead to cracks.

    • Use a Water Bath: For an extra creamy texture, consider baking your cheesecake in a water bath. Wrap the springform pan in foil and place it in a larger pan filled with hot water.

    • Cool Gradually: Allow your cheesecake to cool slowly in the oven with the door ajar. This helps prevent sudden temperature changes that can cause cracks.

    • Chill Overnight: For the best flavor and texture, refrigerate the cheesecake overnight. This allows the flavors to meld and the cheesecake to set properly.

    Best Side Dishes and Pairings

    Pairing the Christmas Little Debbie Tree Cheesecake with complementary dishes and drinks will enhance your dessert experience. Here are some great options.

    1. Hot Cocoa: A warm cup of hot cocoa, topped with marshmallows, pairs perfectly with the creamy cheesecake for a comforting winter treat.

    2. Peppermint Bark: This festive candy offers a crisp, minty contrast that balances the richness of the cheesecake.

    3. Spiced Apple Cider: A cup of warm spiced apple cider brings a seasonal flair, enhancing the flavors of the cheesecake.

    4. Gingerbread Cookies: The spicy notes of gingerbread cookies create a delightful pairing, echoing the holiday spirit.

    5. Vanilla Ice Cream: A scoop of vanilla ice cream adds a creamy, cool element that complements the cheesecake beautifully.

    6. Coffee: A robust cup of coffee provides a nice contrast to the sweetness of the cheesecake, making it a perfect after-dinner pairing.

    Common Mistakes to Avoid

    • Skipping the Cooling Step: Allowing the cheesecake to cool slowly in the oven is crucial for preventing cracks.
    • Overmixing the Batter: Be careful not to overmix after adding the sour cream and heavy cream; this can lead to a dense texture.
    • Not Using Room Temperature Ingredients: Make sure your cream cheese and eggs are at room temperature for a smooth batter.
    • Ignoring the Baking Time: Keep an eye on the cheesecake towards the end of the baking time; it should still have a slight jiggle in the center.

    Storage & Reheating Instructions

    Refrigerator Storage

    Store the Christmas Little Debbie Tree Cheesecake in an airtight container in the refrigerator. It will stay fresh for up to 5 days.

    Freezing Instructions

    To freeze, wrap the cheesecake tightly in plastic wrap and then in aluminum foil. It can be frozen for up to 3 months. For best results, thaw in the refrigerator overnight before serving.

    Reheating Tips

    • Oven: Preheat to 300°F (150°C) and warm the cheesecake for about 15 minutes until slightly warm.
    • Microwave: Heat individual slices on a microwave-safe plate for 20-30 seconds, checking to avoid overheating.
    • Stovetop: Place a slice in a covered skillet over low heat for about 5 minutes, allowing it to warm gently.

    Frequently Asked Questions

    How can I make my Christmas Little Debbie Tree Cheesecake more festive?

    You can decorate your cheesecake with whipped cream, colorful sprinkles, or a drizzle of chocolate sauce to enhance its festive appeal.

    Can I substitute any ingredients in the Christmas Little Debbie Tree Cheesecake?

    Yes, you can use low-fat cream cheese and sour cream for a lighter version, although it may slightly alter the texture and taste.

    How long does the Christmas Little Debbie Tree Cheesecake need to set?

    After baking, it should chill in the refrigerator for at least 4 hours or overnight for the best results.

    What can I serve with the Christmas Little Debbie Tree Cheesecake?

    This cheesecake pairs well with fresh fruits, a scoop of vanilla ice cream, or a dollop of whipped cream.

    Is the Christmas Little Debbie Tree Cheesecake suitable for freezing?

    Yes, you can freeze this cheesecake. Just be sure to wrap it well to maintain its quality.

    Final Thoughts

    The Christmas Little Debbie Tree Cheesecake is a delightful and nostalgic treat perfect for the holiday season. Its creamy texture and festive flavors are sure to impress your guests. We encourage you to try this recipe and share your feedback in the comments below!


    Desserts

    Christmas Little Debbie Tree Cheesecake


    5.0 from 24 reviews

    Get ready for a festive treat that captures the spirit of the season! This delightful Little Debbie-inspired cheesecake brings together creamy goodness and the nostalgic joy of Christmas trees in every bite. Perfect for holiday gatherings or a cozy night in!

    Author: Munch Twist
    Prep Time: 30 minutes
    Cook Time: 60 minutes
    Total Time: 300 minutes
    Yield: 12 servings
    Category: Desserts
    Method: No bake
    Cuisine: American

    Christmas Little Debbie Tree Cheesecake

    SCALE:
    1x
    2x
    3x
    Cook Mode: Prevent your screen from going dark

    Ingredients

    • 1/4 cup granulated sugar
    • 2 cups graham cracker crumbs
    • 1/2 cup unsalted butter, melted
    • 4 (8 oz) packages cream cheese, softened
    • 1 cup powdered sugar
    • 1 teaspoon vanilla extract
    • 4 large eggs
    • 1 cup sour cream
    • 1/2 cup heavy cream

    Instructions

    1. Preheat your oven to 325°F (160°C).
    2. In a mixing bowl, combine the graham cracker crumbs and granulated sugar. Pour in the melted butter and mix until the crumbs are thoroughly coated.
    3. Press the crumb mixture firmly into the bottom of a 9-inch springform pan to form your crust. Bake for 10 minutes, then set it aside to cool.
    4. In a large mixing bowl, beat the softened cream cheese until smooth and creamy. Gradually add in the powdered sugar and vanilla extract, mixing well after each addition.
    5. Add the eggs, one at a time, blending thoroughly after each addition.
    6. Gently mix in the sour cream and heavy cream until just combined.
    7. Pour the cheesecake batter over the cooled crust, smoothing the top with a spatula.
    8. Place the springform pan in the oven and bake for 55 to 60 minutes, or until the edges are set but the center still has a slight jiggle.
    9. Once baked, turn off the oven and crack the door open, allowing the cheesecake to cool slowly in the oven for about 1 hour.
    10. Remove from the oven and let it sit at room temperature for another hour before refrigerating for at least 4 hours (or overnight) to set completely.
    11. Before serving, decorate your cheesecake as desired.

    Nutrition Facts

    Serving Size: 1 serving
    Calories: 350 kcal
    Sugar: 15g
    Sodium: 210mg
    Fat: 25g
    Saturated Fat: 15g
    Carbohydrates: 32g
    Fiber: 1g
    Protein: 6g
    Cholesterol: 80mg

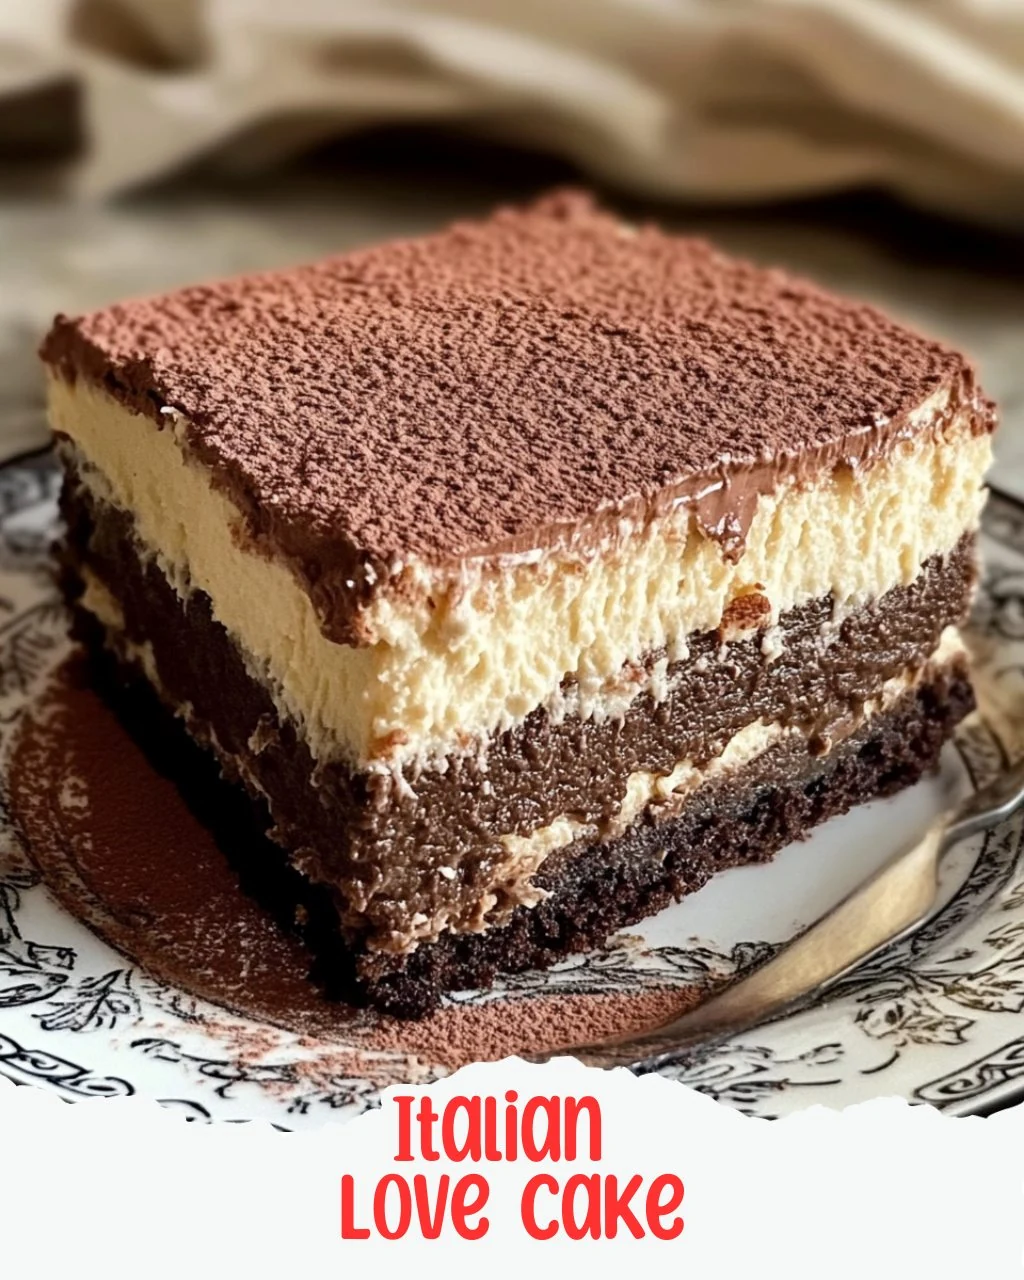
  • Indulge in Italian Love Cake: A Decadent Delight

    Indulge in Italian Love Cake: A Decadent Delight

    Dive into a romantic affair with flavors in this Italian Love Cake! This irresistible dessert layers rich chocolate cake with creamy ricotta and a luscious chocolate pudding frosting. It is perfect for special occasions or a sweet indulgence any day.

    Why You’ll Love This Recipe

    • Decadent Flavor: The combination of chocolate, ricotta, and pudding creates a unique taste experience.
    • Visually Stunning: Layered presentation makes it an impressive centerpiece for any gathering.
    • Make-Ahead Friendly: Prepare it in advance and refrigerate for a hassle-free dessert.
    • Crowd-Pleaser: This cake appeals to chocolate lovers and those who appreciate creamy desserts alike.
    • Simple Ingredients: Made with common pantry staples, this recipe is easy to follow.

    Tools and Equipment

    Having the right tools makes the process smoother and more enjoyable.

    Essential Tools

    • Mixing bowls
    • Electric mixer
    • Whisk
    • 9×13-inch baking dish
    • Rubber spatula

    Why These Tools Matter

    • Electric mixer: Ensures a smooth ricotta mixture with minimal effort.
    • Mixing bowls: Allows for efficient preparation and easy mixing of ingredients.
    • Rubber spatula: Helps in spreading the batter and frosting evenly without waste.

    Ingredients for Italian Love Cake

    Ricotta Layer

    • 2 15-ounce containers of ricotta cheese
    • 1 cup of granulated sugar
    • 1 teaspoon of vanilla extract
    • 4 large eggs (room temperature)

    Chocolate Cake Layer

    • 1 15.25 ounce box of chocolate or devil’s food cake mix
    • 3 large eggs
    • 1/2 cup canola or vegetable oil
    • 1 cup of water

    Chocolate Pudding Frosting

    • 1 5-ounce box of instant chocolate pudding
    • 3 cups of cold milk
    • 1 8-ounce container of whipped topping (thawed)

    How to Make Italian Love Cake Step-by-Step

    Step 1: Prep the Base

    1. Preheat your oven to 350 degrees F. Grease a 9×13-inch baking dish with cooking spray and set it aside.

    Step 2: Make the Ricotta Layer

    1. In a large mixing bowl, combine the ricotta cheese, granulated sugar, and vanilla extract.
    2. Using an electric mixer, blend until smooth.
    3. Gradually add the 4 large eggs, mixing until fully incorporated.

    Step 3: Prepare the Chocolate Cake Layer

    1. In another bowl, prepare the chocolate cake mixture by combining the chocolate cake mix, 3 large eggs, canola or vegetable oil, and water.
    2. Whisk until the batter is smooth and free of lumps.

    Step 4: Assemble the Cake

    1. Pour the chocolate cake batter into the prepared baking dish, spreading it evenly.
    2. Carefully layer the ricotta mixture over the chocolate cake batter, pouring gently to cover the entire surface.

    Step 5: Bake

    1. Bake in the preheated oven for about 1 hour to 1 hour and 10 minutes.
    2. The cake may jiggle slightly in the center but should appear set when done.

    Step 6: Cool and Frost

    1. Once baked, allow the cake to cool to room temperature.
    2. For the chocolate pudding frosting, whisk together the instant chocolate pudding and cold milk until well blended.
    3. Let it rest for 2-3 minutes, then fold in the thawed whipped topping until smooth.

    Step 7: Final Assembly

    1. Once the cake is completely cooled, spread the chocolate pudding frosting evenly over the top.
    2. Cover and refrigerate for at least 4 hours or until ready to serve.

    Enjoy your delightful Italian Love Cake, a true treat for any chocolate lover!

    How to Serve Italian Love Cake

    Italian Love Cake is perfect for any occasion, and how you serve it can elevate the experience.

    Elegant Dessert Platter

    Arrange slices of Italian Love Cake on a beautiful platter alongside fresh berries and mint leaves. This adds a pop of color and freshness that complements the rich flavors of the cake.

    Individual Servings

    For a more personal touch, serve individual slices of Italian Love Cake in dessert cups, topped with extra whipped topping and a sprinkle of chocolate shavings. This makes for an elegant presentation at parties or gatherings.

    With a Scoop of Ice Cream

    Pair each slice with a scoop of vanilla or coffee-flavored ice cream. The creaminess of the ice cream enhances the cake’s texture and creates a delightful contrast with the rich chocolate layers.

    Pro Tips for the Best Italian Love Cake

    To ensure your Italian Love Cake turns out perfectly every time, consider these essential tips.

    • Use Room Temperature Ingredients: Always ensure that your eggs and ricotta cheese are at room temperature for better mixing and a smoother batter.

    • Grease the Baking Dish Generously: A well-greased baking dish prevents sticking and ensures that each slice comes out cleanly.

    • Check for Doneness Carefully: The cake may jiggle slightly in the center when done; use a toothpick to check for doneness. It should come out clean without any wet batter.

    • Chill Before Serving: Allowing the cake to chill in the refrigerator for several hours enhances the flavors and makes it easier to slice.

    • Customize the Topping: Feel free to add chocolate chips or crushed nuts to the pudding frosting for an extra layer of texture and flavor.

    Best Side Dishes and Pairings

    Italian Love Cake pairs beautifully with a variety of dishes and beverages to enhance your dessert experience.

    1. Espresso: A shot of rich espresso balances the sweetness of the cake and provides a delightful contrast.

    2. Fresh Fruit Salad: A light and refreshing fruit salad complements the richness of the cake, adding a burst of flavor.

    3. Chocolate Covered Strawberries: These decadent treats echo the chocolate flavors in the cake, making for a perfect pairing.

    4. Vanilla Bean Gelato: The creamy texture and subtle vanilla flavor of gelato are a perfect match for the cake’s richness.

    5. Mint Tea: A warm cup of mint tea offers a refreshing palate cleanser that pairs well with the dessert’s sweetness.

    Common Mistakes to Avoid

    • Using Cold Ingredients: Always ensure that your eggs are at room temperature for better mixing and texture.
    • Not Greasing the Baking Dish: Failing to properly grease your baking dish can lead to sticking and difficulty serving the cake.
    • Overmixing Batter: Mix the cake batter just until combined to avoid a dense texture.
    • Skipping Cooling Time: Allow the cake to cool completely before adding the frosting to prevent it from melting.

    Storage & Reheating Instructions

    Refrigerator Storage

    Store leftover Italian Love Cake in an airtight container in the refrigerator. It will stay fresh for up to 5 days.

    Freezing Instructions

    For best results, wrap the cake tightly in plastic wrap and foil before freezing. It can be frozen for up to 3 months. Thaw in the refrigerator overnight before serving.

    Reheating Tips

    • Oven: Preheat your oven to 350 degrees F. Place the cake in the oven for about 10-15 minutes, covered with foil to prevent drying out.
    • Microwave: Heat individual slices in the microwave for 20-30 seconds, checking for warmth.
    • Stovetop: Use a skillet on low heat, covering it with a lid, and warm the cake for about 5-10 minutes.

    Frequently Asked Questions

    Can I make Italian Love Cake ahead of time?

    Yes, you can prepare this cake a day in advance. Just make sure to refrigerate it after adding the frosting.

    What can I substitute for ricotta cheese in Italian Love Cake?

    You can use mascarpone cheese or cottage cheese blended until smooth as an alternative to ricotta.

    How should I serve Italian Love Cake?

    This cake is best served chilled, allowing the flavors to meld together. A dusting of cocoa powder or chocolate shavings makes for an elegant presentation.

    Can I use a different flavor of cake mix?

    Absolutely! You can experiment with vanilla or red velvet cake mixes for a unique twist on the classic Italian Love Cake.

    How long does Italian Love Cake last in the refrigerator?

    When stored properly in an airtight container, Italian Love Cake can last up to 5 days in the refrigerator.

    Final Thoughts

    Italian Love Cake is not just a dessert; it’s a delightful experience that brings a touch of romance to any occasion. I encourage you to try making this recipe and share your thoughts in the comments below. Your feedback is invaluable!


    Desserts

    Italian Love Cake


    5.0 from 24 reviews

    Dive into a romantic affair with flavors in this Italian Love Cake! This irresistible dessert layers rich chocolate cake with creamy ricotta and a luscious chocolate pudding frosting. Perfect for special occasions or a sweet indulgence any day!

    Author: Munch Twist
    Prep Time: 20 minutes
    Cook Time: 70 minutes
    Total Time: 90 minutes
    Yield: 12 servings
    Category: Desserts
    Method: No bake
    Cuisine: American

    Italian Love Cake

    SCALE:
    1x
    2x
    3x
    Cook Mode: Prevent your screen from going dark

    Ingredients

    • 2 15-ounce containers of ricotta cheese
    • 1 cup of granulated sugar
    • 1 teaspoon of vanilla extract
    • 4 large eggs (room temperature)
    • 1 15.25 ounce box of chocolate or devil's food cake mix
    • 3 large eggs
    • 1/2 cup canola or vegetable oil
    • 1 cup of water
    • 1 5-ounce box of instant chocolate pudding
    • 3 cups of cold milk
    • 1 8-ounce container of whipped topping (thawed)

    Instructions

    1. Preheat your oven to 350 degrees F. Grease a 9×13-inch baking dish with cooking spray and set it aside.
    2. For the Ricotta Layer, in a large mixing bowl, combine the ricotta cheese, granulated sugar, and vanilla extract. Using an electric mixer, blend until smooth. Gradually add the 4 large eggs, mixing until fully incorporated.
    3. In another bowl, prepare the Chocolate Cake mixture by combining the cake mix, 3 large eggs, canola or vegetable oil, and water. Whisk until the batter is smooth and free of lumps.
    4. Pour the chocolate cake batter into the prepared baking dish, spreading it evenly.
    5. Carefully layer the ricotta mixture over the chocolate cake batter, pouring it gently to cover the entire surface.
    6. Bake in the preheated oven for about 1 hour to 1 hour and 10 minutes. The cake may jiggle slightly in the center but should appear set when done.
    7. Once baked, allow the cake to cool to room temperature.
    8. For the Chocolate Pudding Frosting, in a bowl, whisk together the instant chocolate pudding and cold milk until well blended. Let it rest for 2-3 minutes, then fold in the thawed whipped topping until smooth.
    9. Once the cake is completely cooled, spread the chocolate pudding frosting evenly over the top. Cover and refrigerate for at least 4 hours or until ready to serve.

    Nutrition Facts

    Serving Size: 1 serving
    Calories: 300 kcal
    Sugar: 20g
    Sodium: 300mg
    Fat: 17g
    Saturated Fat: 8g
    Carbohydrates: 35g
    Fiber: 1g
    Protein: 5g
    Cholesterol: 80mg

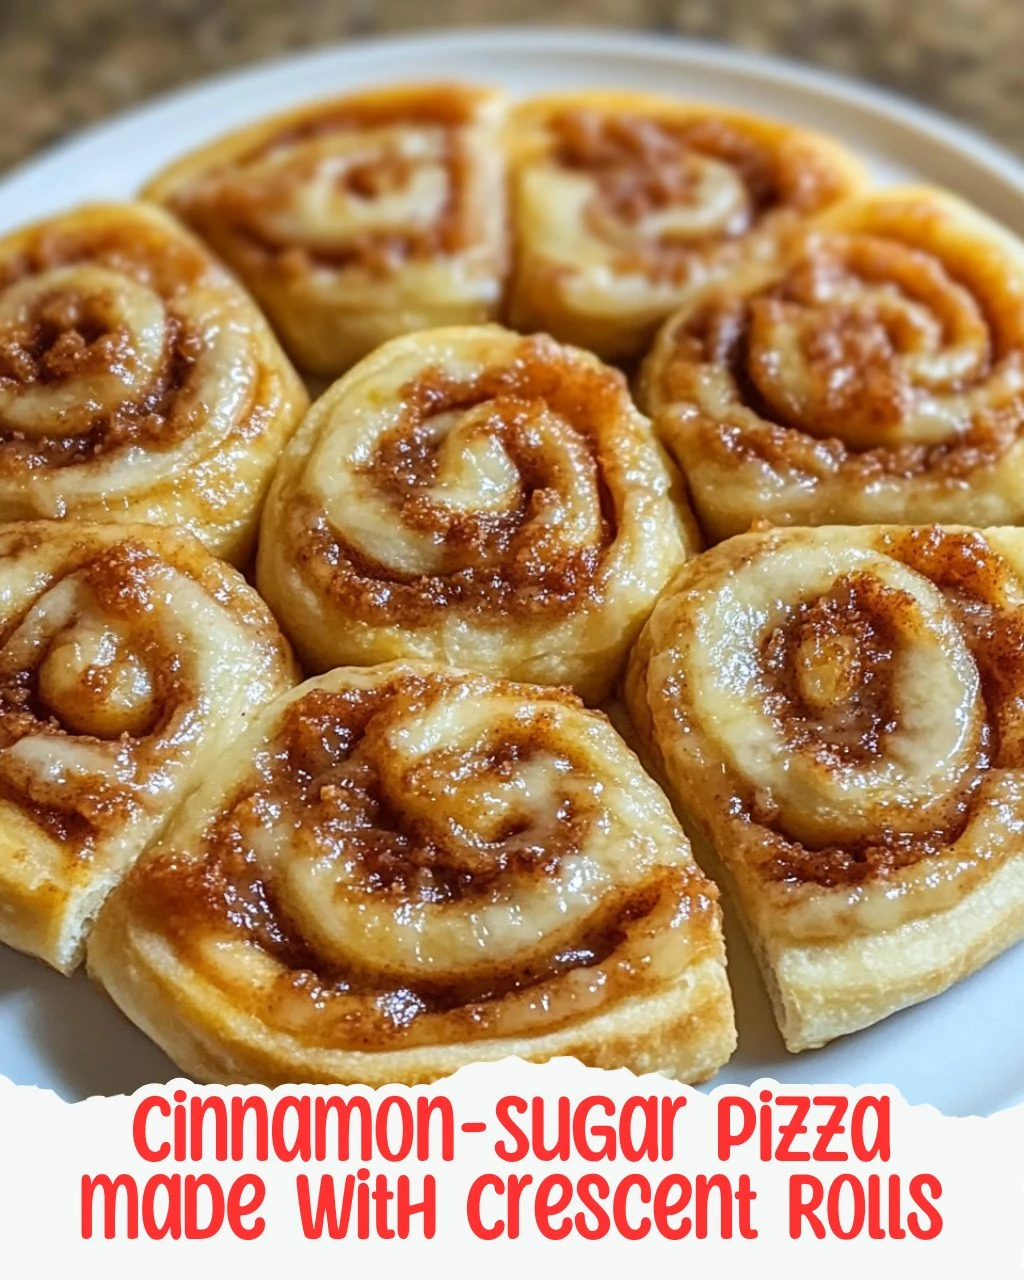
  • Easy Cinnamon-Sugar Pizza made with Crescent Rolls Recipe

    Easy Cinnamon-Sugar Pizza made with Crescent Rolls Recipe

    Cinnamon-Sugar Pizza made with Crescent Rolls is a delightful treat that combines a buttery crust with gooey sweetness. This easy-to-make dessert is perfect for any occasion, whether you’re hosting friends or enjoying a quiet night in. The enticing aroma and irresistible flavors will have everyone reaching for a slice.

    Why You’ll Love This Recipe

    • Quick & Easy: Ready in under 30 minutes, this dessert is perfect for last-minute cravings.
    • Deliciously Sweet: The combination of cinnamon and sugar creates a mouthwatering flavor that’s hard to resist.
    • Versatile Serving Options: Enjoy it warm, or serve it at room temperature for a delightful picnic treat.
    • Customizable Toppings: Add nuts, fruits, or extra spices to tailor it to your taste.
    • Fun to Make: Get the whole family involved in rolling and sprinkling for a memorable kitchen experience.

    Tools and Equipment

    Having the right tools can make the cooking process smoother and more enjoyable.

    Essential Tools

    • Pizza pan
    • Mixing bowls
    • Whisk
    • Baking brush
    • Measuring cups and spoons

    Why These Tools Matter

    • Pizza pan: Ensures even baking and easy handling of your cinnamon-sugar pizza.
    • Mixing bowls: Essential for combining ingredients without mess.
    • Baking brush: Helps achieve an even layer of melted butter over the dough.

    Ingredients for Cinnamon-Sugar Pizza made with Crescent Rolls

    Dough and Base

    • 1 8 oz can refrigerated crescent roll dough
    • 2 tablespoons unsalted butter, melted

    Cinnamon-Sugar Mixture

    • 1/4 cup granulated sugar
    • 1 teaspoon ground cinnamon

    Glaze

    • 1/2 cup powdered sugar
    • 2-3 teaspoons milk (adjust for consistency)
    • 1/2 teaspoon vanilla extract

    Optional Garnishes

    • Chopped pecans
    • Cinnamon sugar

    How to Make Cinnamon-Sugar Pizza made with Crescent Rolls Step-by-Step

    Step 1: Prep the Base

    1. Preheat your oven to 375°F (190°C). Prepare your pizza pan by lightly greasing it or lining it with parchment paper for easy cleanup.
    2. Unroll the crescent roll dough and spread it out onto the prepared pizza pan. Gently press the seams together to create a cohesive dough sheet. Shape it into a circle or rectangle based on your preference.

    Step 2: Assemble the Pizza

    1. Brush the melted butter generously over the entire surface of the dough, ensuring even coverage.
    2. In a small bowl, combine the granulated sugar and ground cinnamon. Sprinkle this mixture evenly over the buttered dough to ensure every bite is flavorful.

    Step 3: Bake the Pizza

    1. Place the pizza in the preheated oven and bake for 10-12 minutes, or until it is puffed and golden brown.

    Step 4: Prepare the Glaze

    1. While the pizza bakes, whisk together the powdered sugar, milk, and vanilla extract in a separate bowl. Adjust the milk quantity to achieve your desired drizzling consistency.

    Step 5: Finish and Serve

    1. Once the pizza is done, remove it from the oven and let it cool for a few minutes. Drizzle the glaze over the warm pizza, allowing it to melt slightly for that perfect sticky finish.
    2. For extra crunch and flavor, sprinkle some chopped pecans and an additional pinch of cinnamon sugar over the glaze.
    3. Slice your cinnamon-sugar pizza into wedges or squares, and serve it warm for a deliciously sweet treat!

    This Cinnamon-Sugar Pizza made with Crescent Rolls is an easy and satisfying dessert that will quickly become a favorite in your home.

    How to Serve Cinnamon-Sugar Pizza made with Crescent Rolls

    This delightful dessert can be enjoyed in various creative ways.

    Casual Dessert Night

    Serve the cinnamon-sugar pizza warm, straight from the oven, alongside a scoop of vanilla ice cream for an indulgent treat that contrasts the warm, gooey pizza.

    Breakfast Twist

    Slice the pizza into smaller pieces and serve it with fresh fruit, like strawberries or blueberries, for a sweet breakfast option that feels a bit special.

    Game Day Snack

    Cut the pizza into bite-sized pieces and serve it as a sweet snack during game day gatherings. Pair it with coffee or hot chocolate for a cozy touch.

    Pro Tips for the Best Cinnamon-Sugar Pizza made with Crescent Rolls

    For optimal results, consider these helpful tips.

    • Preheat the Oven: Always preheat your oven to ensure even baking and a perfectly golden crust.

    • Use Room Temperature Ingredients: Let your butter and milk come to room temperature before mixing for a smoother glaze.

    • Don’t Rush the Cooling: Allow the pizza to cool for a few minutes before drizzling the glaze to prevent it from melting away completely.

    • Experiment with Flavors: Try adding a dash of nutmeg or using brown sugar in place of granulated sugar for a unique twist.

    • Storage Tips: Store any leftovers in an airtight container at room temperature for up to two days to maintain freshness.

    Best Side Dishes and Pairings

    Pair your cinnamon-sugar pizza with these delightful side dishes and drinks.

    1. Vanilla Ice Cream – The creamy texture and cool temperature complement the warm, sweet pizza perfectly.

    2. Fresh Berries – Strawberries, blueberries, or raspberries add a refreshing contrast and a pop of color to your dessert presentation.

    3. Coffee – A rich cup of coffee balances the sweetness of the pizza, making it an ideal pairing for breakfast or dessert.

    4. Hot Chocolate – Warm, chocolatey beverages create a cozy atmosphere, perfect for enjoying this sweet treat on chilly evenings.

    5. Whipped Cream – A dollop of whipped cream adds a light and airy contrast to the dense sweetness of the pizza.

    6. Chai Tea – The spiced flavors of chai tea harmonize beautifully with the cinnamon-sugar notes of the pizza for a comforting experience.

    Common Mistakes to Avoid

    • Not Preheating the Oven: Always preheat your oven to ensure even baking.
    • Skipping the Butter: Brushing melted butter on the dough enhances flavor and helps the cinnamon sugar adhere.
    • Overbaking: Keep a close eye on the pizza to avoid burning; it should be golden brown, not dark brown.
    • Inconsistent Glaze: Adjust the milk in your glaze for the perfect drizzling consistency; too thick or too runny can affect presentation.

    Storage & Reheating Instructions

    Refrigerator Storage

    Store leftover cinnamon-sugar pizza in an airtight container in the refrigerator. It will stay fresh for up to 3 days.

    Freezing Instructions

    To freeze, wrap individual slices in plastic wrap and then place them in a freezer-safe container. This method helps prevent freezer burn. The pizza can be frozen for up to 2 months.

    Reheating Tips

    • Oven: Preheat to 350°F (175°C) and bake for about 5-7 minutes until warmed through.
    • Microwave: Heat a slice on a microwave-safe plate for about 15-20 seconds, or until warm.
    • Stovetop: Heat in a non-stick skillet over low heat for about 2-3 minutes, covering with a lid to retain moisture.

    Frequently Asked Questions

    How can I adjust the sweetness of the Cinnamon-Sugar Pizza made with Crescent Rolls?

    You can reduce the amount of granulated sugar and powdered sugar in the recipe to make it less sweet. Alternatively, you can add more cinnamon for a spicier flavor without increasing sweetness.

    Can I use other types of dough for this recipe?

    Yes, you can substitute crescent roll dough with puff pastry or even homemade pizza dough, although the texture and taste may vary.

    How do I make the glaze for my Cinnamon-Sugar Pizza made with Crescent Rolls?

    To make the glaze, whisk together powdered sugar, milk, and vanilla extract until smooth. Adjust the milk for desired consistency.

    Can I add toppings to my Cinnamon-Sugar Pizza?

    Absolutely! Feel free to experiment with toppings like chocolate chips, fruit, or nuts for added flavor and texture.

    What should I serve with my Cinnamon-Sugar Pizza made with Crescent Rolls?

    This sweet treat pairs wonderfully with a scoop of vanilla ice cream or a dollop of whipped cream for an indulgent dessert.

    Final Thoughts

    This Cinnamon-Sugar Pizza made with Crescent Rolls is a delightful and easy dessert perfect for any occasion. We encourage you to try this recipe and share your thoughts in the comments below. Your feedback is invaluable and helps us create more delicious content!


    Desserts

    Cinnamon-Sugar Pizza made with Crescent Rolls


    5.0 from 24 reviews

    This cinnamon-sugar pizza combines gooey sweetness with a buttery crust for a delightful dessert that’s easy to whip up anytime. Perfect for sharing or enjoying on your own.

    Author: Munch Twist
    Prep Time: 5 minutes
    Cook Time: 12 minutes
    Total Time: 17 minutes
    Yield: 8 servings
    Category: Desserts
    Method: No bake
    Cuisine: American

    Cinnamon-Sugar Pizza made with Crescent Rolls

    SCALE:
    1x
    2x
    3x
    Cook Mode: Prevent your screen from going dark

    Ingredients

    • 1/4 cup granulated sugar
    • 2-3 teaspoons milk
    • 1 8 oz can refrigerated crescent roll dough
    • 1/2 cup powdered sugar
    • 1 teaspoon ground cinnamon
    • 1/2 teaspoon vanilla extract
    • 2 tablespoons unsalted butter, melted
    • Optional: chopped pecans, cinnamon sugar for garnish

    Instructions

    1. Preheat your oven to 375°F (190°C) and prepare your pizza pan by lightly greasing it or lining it with parchment paper.
    2. Unroll the crescent roll dough and spread it out onto the prepared pizza pan, pressing the seams together to create one cohesive dough sheet.
    3. Brush the melted butter generously over the entire surface of the dough.
    4. In a small bowl, combine the granulated sugar and ground cinnamon, then sprinkle this mixture evenly over the buttered dough.
    5. Bake the pizza in the preheated oven for 10-12 minutes, or until puffed and golden brown.
    6. While the pizza is baking, whisk together the powdered sugar, milk, and vanilla extract until smooth, adjusting the milk for drizzling consistency.
    7. Once the pizza is done, let it cool for a few minutes and drizzle the glaze over the warm pizza.
    8. For extra crunch and flavor, sprinkle chopped pecans and additional cinnamon sugar over the glaze.
    9. Slice the cinnamon-sugar pizza into wedges or squares and serve warm.

    Nutrition Facts

    Serving Size: 1 serving
    Calories: 190 kcal
    Sugar: 12g
    Sodium: 150mg
    Fat: 8g
    Saturated Fat: 5g
    Carbohydrates: 28g
    Fiber: 0g
    Protein: 2g
    Cholesterol: 15mg

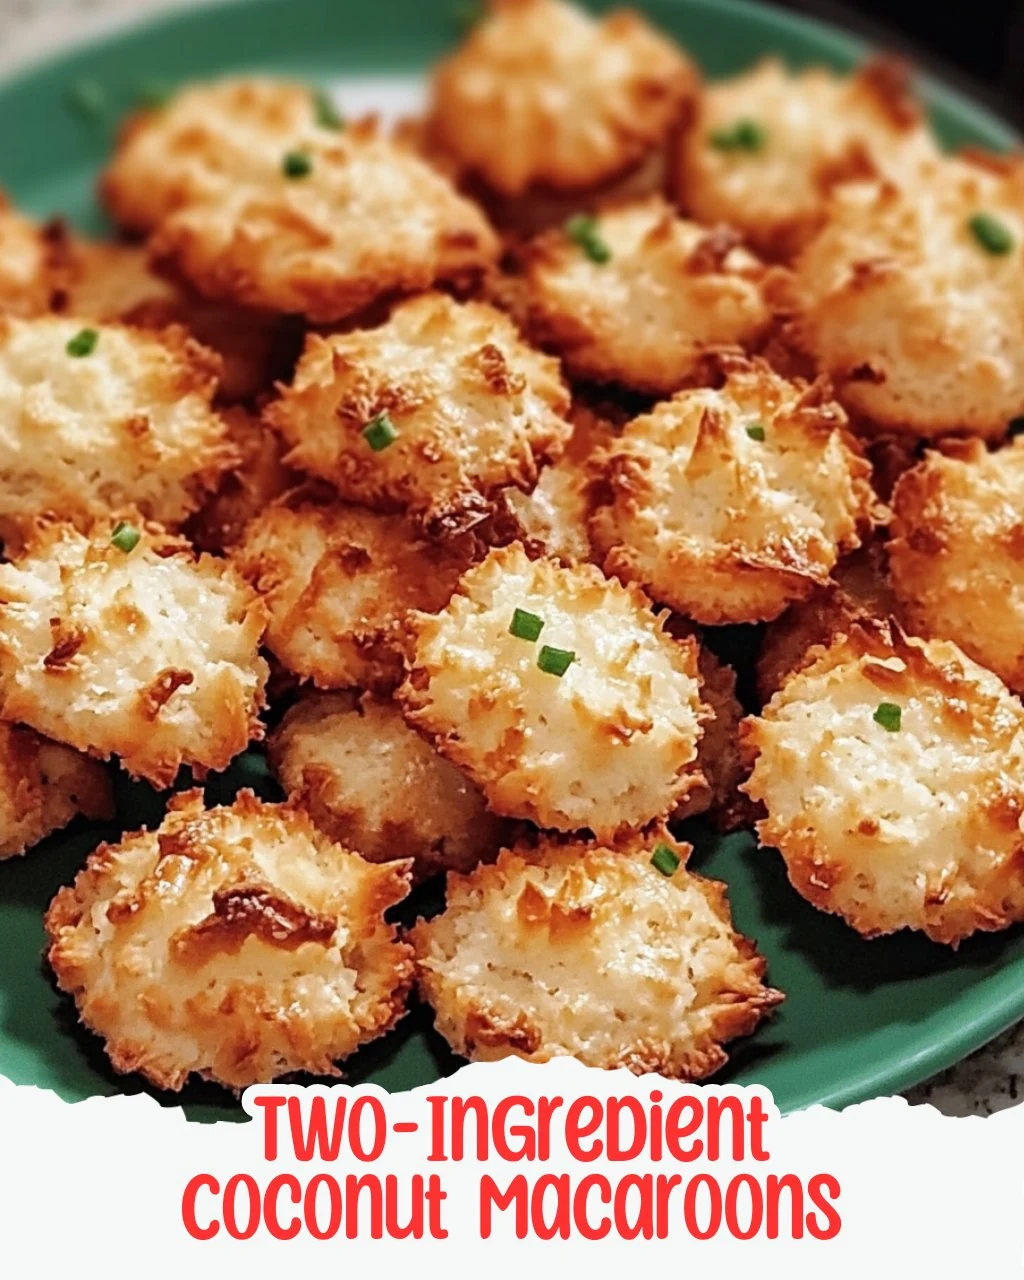
  • Easy Two-Ingredient Coconut Macaroons Recipe

    Easy Two-Ingredient Coconut Macaroons Recipe

    Two-Ingredient Coconut Macaroons are a delightful treat that combines the sweetness of coconut with the creaminess of condensed milk. These macaroons are chewy, satisfying, and incredibly easy to make, making them a perfect dessert for any occasion.

    Why You’ll Love This Recipe

    • Quick & Easy: Ready in under 30 minutes, these macaroons are perfect for last-minute cravings.
    • Minimal Ingredients: With just two simple ingredients, you can whip up a delicious dessert without fuss.
    • Versatile: Serve them as a snack, dessert, or even as a sweet gift for friends and family.
    • Naturally Gluten-Free: This recipe is friendly for those with gluten sensitivities, allowing everyone to enjoy.
    • Crowd-Pleaser: These macaroons are sure to impress with their rich flavor and delightful texture.

    Tools and Equipment

    To create these delicious macaroons, you will need some essential kitchen tools.

    Essential Tools

    • Baking sheet
    • Parchment paper or silicone baking mat
    • Mixing bowl
    • Measuring cups
    • Spoon or cookie scoop
    • Wire rack

    Why These Tools Matter

    • Baking sheet: Provides a stable base for even baking.
    • Parchment paper or silicone baking mat: Ensures easy release and cleanup after baking.
    • Mixing bowl: Allows for easy combining of ingredients without mess.

    Ingredients for Two-Ingredient Coconut Macaroons

    Base Ingredients

    • 1/2 cup sweetened condensed milk
    • 2 cups sweetened shredded coconut

    How to Make Two-Ingredient Coconut Macaroons Step-by-Step

    Step 1: Prep the Oven and Baking Sheet

    Preheat your oven to 350F (175C). Line a baking sheet with parchment paper or use a silicone baking mat for easy cleanup.

    Step 2: Mix the Ingredients

    In a medium-sized mixing bowl, combine the sweetened shredded coconut with the sweetened condensed milk. Stir well until the coconut is thoroughly coated and the mixture holds together like a thick batter.

    Step 3: Form the Macaroons

    Using a tablespoon or a cookie scoop, form small mounds of the coconut mixture. Place them on your prepared baking sheet, leaving about 1 inch of space between each mound. Gently shape each mound with your fingers to achieve a rounded appearance.

    Step 4: Bake the Macaroons

    Place the baking sheet in your preheated oven and bake for about 12-15 minutes. Keep a close eye on them, looking for a lovely golden brown color on the tops and edges.

    Step 5: Cool and Enjoy

    Once baked, remove the macaroons from the oven and let them cool on the baking sheet for about 5 minutes. Carefully transfer them to a wire rack to cool completely before serving.

    Enjoy your homemade Two-Ingredient Coconut Macaroons! These treats are not just easy to make but also provide a delightful burst of coconut flavor that is sure to satisfy.

    How to Serve Two-Ingredient Coconut Macaroons

    These delightful macaroons can be enjoyed in various ways, enhancing their flavor and presentation.

    Chocolate Drizzle

    Drizzle melted dark or white chocolate over the cooled macaroons for an added touch of sweetness and visual appeal. This combination elevates the dessert, making it even more indulgent.

    Coconut Whipped Cream

    Serve your macaroons with a side of coconut whipped cream. The light and fluffy texture complements the chewiness of the macaroons, adding a refreshing contrast.

    Tropical Fruit Platter

    Pair your macaroons with a platter of tropical fruits such as mango, pineapple, and kiwi. The bright flavors of the fruits balance the sweetness of the macaroons, creating a vibrant dessert experience.

    Pro Tips for the Best Two-Ingredient Coconut Macaroons

    To ensure that your macaroons turn out perfectly every time, consider these helpful tips.

    • Use Fresh Coconut: Opt for fresh, sweetened shredded coconut for the best texture and flavor. Stale coconut can lead to dry macaroons.

    • Adjust Baking Time: Keep an eye on your macaroons during baking. Ovens can vary, so remove them when they are golden brown to avoid burning.

    • Shape Consistently: For even baking and presentation, make sure each mound of coconut mixture is roughly the same size. Use a cookie scoop for uniformity.

    • Cool Completely: Allow the macaroons to cool completely on a wire rack. This prevents them from becoming soggy and helps them maintain their shape.

    • Store Properly: Store any leftovers in an airtight container at room temperature for up to a week. For longer storage, consider freezing them.

    Best Side Dishes and Pairings

    These macaroons pair wonderfully with various side dishes and beverages to create a delightful culinary experience.

    1. Coffee: A rich cup of coffee balances the sweetness of the macaroons, making for a satisfying afternoon treat.

    2. Herbal Tea: A soothing herbal tea, such as chamomile or mint, complements the coconut flavor without overpowering it.

    3. Tropical Smoothie: A refreshing smoothie made with coconut milk, banana, and pineapple enhances the tropical flavor profile of the macaroons.

    4. Vanilla Ice Cream: Serve macaroons alongside a scoop of vanilla ice cream for a classic dessert pairing that adds creaminess.

    5. Cheese Platter: A selection of mild cheeses, such as brie or goat cheese, provides a savory contrast to the sweet macaroons, creating a balanced dessert spread.

    Common Mistakes to Avoid

    • Not Measuring Ingredients Accurately: Ensure you measure both the shredded coconut and sweetened condensed milk precisely for the right texture.
    • Overbaking: Keep a watchful eye on the macaroons; baking them too long can lead to burnt edges.
    • Inadequate Cooling Time: Allow the macaroons to cool on the baking sheet before transferring to a wire rack, as they need to firm up a bit.
    • Skipping the Parchment Paper: Lining your baking sheet helps prevent sticking and makes cleanup easier.

    Storage & Reheating Instructions

    Refrigerator Storage

    Store your Two-Ingredient Coconut Macaroons in an airtight container in the refrigerator. They will remain fresh for about 4-5 days.

    Freezing Instructions

    To freeze, place the macaroons in a single layer on a baking sheet and freeze until solid. Once frozen, transfer them to a freezer-safe container or zip-top bag. They can be frozen for up to 3 months.

    Reheating Tips

    • Oven: Preheat to 300°F (150°C) and warm the macaroons for about 5-7 minutes to retain their texture.
    • Microwave: Heat on a microwave-safe plate for 10-15 seconds, just until warm.
    • Stovetop: Place in a covered skillet over low heat for a few minutes to warm them gently.

    Frequently Asked Questions

    How can I customize my Two-Ingredient Coconut Macaroons?

    You can add vanilla extract, almond extract, or chocolate chips to the coconut mixture for extra flavor.

    What can I substitute for sweetened condensed milk in Two-Ingredient Coconut Macaroons?

    You can use homemade condensed milk or a dairy-free alternative if you’re looking for a vegan option.

    Can I use unsweetened coconut for the Two-Ingredient Coconut Macaroons?

    While you can use unsweetened coconut, you will need to adjust the sugar levels by adding sweetener to achieve the desired sweetness.

    How do I know when the Two-Ingredient Coconut Macaroons are done baking?

    Look for a golden brown color on the tops and edges. They should be firm to the touch and slightly crisp on the outside.

    Can I double the recipe for Two-Ingredient Coconut Macaroons?

    Yes, you can easily double the ingredients to make a larger batch. Just ensure your baking sheet has enough space for all the mounds.

    Final Thoughts

    These Two-Ingredient Coconut Macaroons are a delightful treat that showcases simplicity and flavor. Give this recipe a try and enjoy the sweet satisfaction of homemade macaroons. We would love to hear your feedback, so please leave a comment sharing your experience!

    Desserts

    Two-Ingredient Coconut Macaroons


    5.0 from 24 reviews

    These simple Two-Ingredient Coconut Macaroons are a delightful treat made with just sweetened condensed milk and shredded coconut. They are easy to prepare and bake to a perfect golden brown, making them a great dessert for any occasion.

    Author: Munch Twist
    Prep Time: 5 minutes
    Cook Time: 15 minutes
    Total Time: 20 minutes
    Yield: 12 servings
    Category: Desserts
    Method: Baking
    Cuisine: American

    Two-Ingredient Coconut Macaroons

    SCALE:
    1x
    2x
    3x
    Cook Mode: Prevent your screen from going dark

    Ingredients

    • 1/2 cup sweetened condensed milk
    • 2 cups sweetened shredded coconut

    Instructions

    1. Preheat your oven to 350F (175C) and line a baking sheet with parchment paper or a silicone baking mat.
    2. In a medium-sized mixing bowl, combine the sweetened shredded coconut with the sweetened condensed milk and stir until well mixed.
    3. Form small mounds of the mixture using a tablespoon or cookie scoop and place them on the prepared baking sheet, leaving space between each mound.
    4. Bake in the preheated oven for 12-15 minutes until golden brown on top and edges.
    5. Remove from the oven and let cool on the baking sheet for 5 minutes before transferring to a wire rack to cool completely.

    Nutrition Facts

    Serving Size: 1 serving
    Calories: 120 kcal
    Sugar: 12g
    Sodium: 50mg
    Fat: 5g
    Saturated Fat: 4g
    Carbohydrates: 18g
    Fiber: 1g
    Protein: 1g
    Cholesterol: 5mg

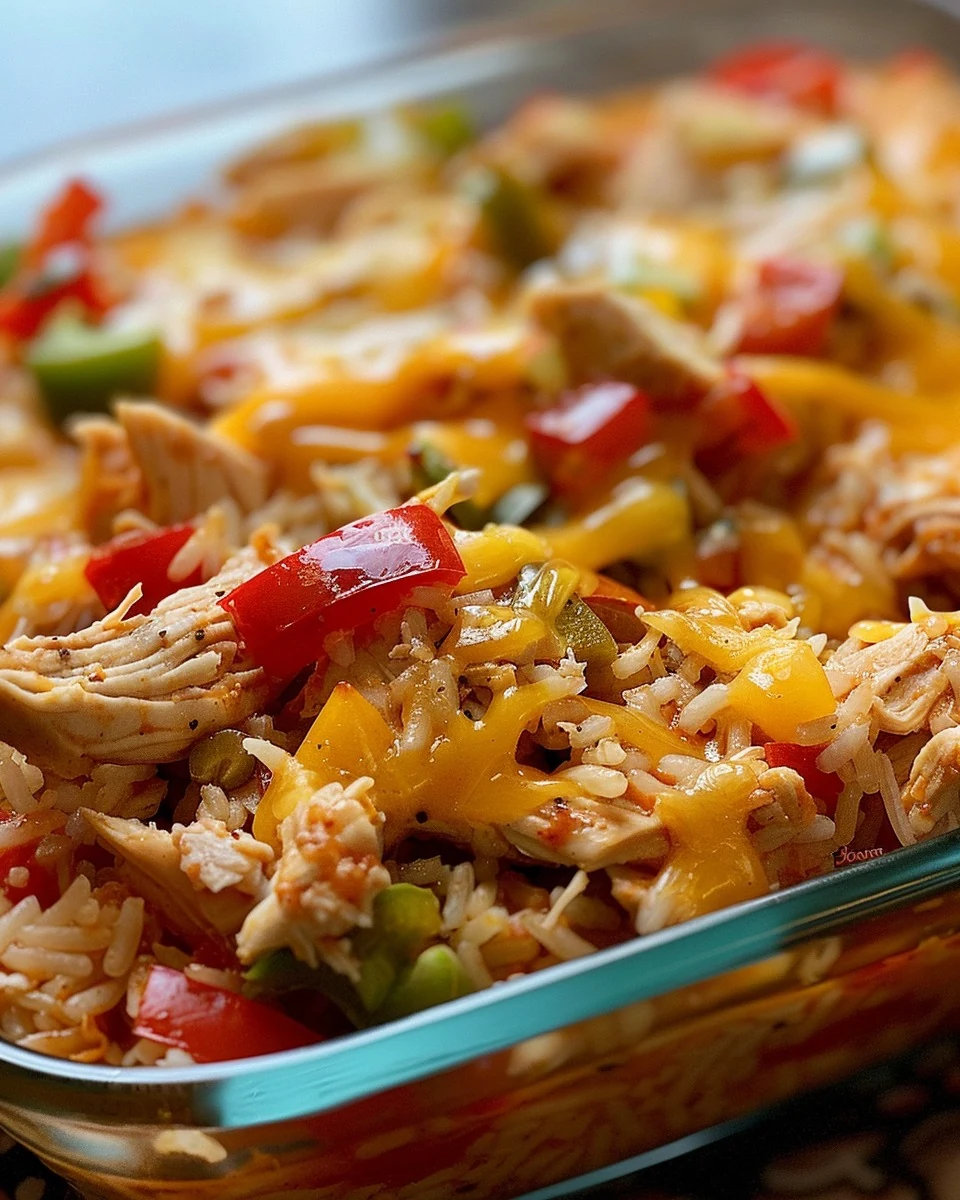
  • Delicious Fajita Chicken Casserole – Standard Oven Directions Recipe

    Delicious Fajita Chicken Casserole – Standard Oven Directions Recipe

    Fajita Chicken Casserole – Standard Oven Directions

    This Fajita Chicken Casserole is a delightful dish that combines creamy textures with bold flavors, making it a favorite for family dinners. With its perfect balance of spices and cheesy goodness, this casserole is sure to become a staple in your recipe collection.

    Why You’ll Love This Recipe

    • Quick & Easy: Ready in under 30 minutes, this dish is perfect for busy weeknights.
    • Flavor Packed: The fajita seasoning adds a burst of flavor that elevates the dish.
    • Versatile: Customize with your favorite vegetables or spices for a personal touch.
    • Satisfying: Packed with protein from chicken and cheese, it’s a hearty meal.
    • One-Dish Wonder: Minimal cleanup with everything cooked in a single baking dish.

    Tools and Equipment

    To make this casserole, you’ll need a few essential kitchen tools.

    Essential Tools

    • A 9×13-inch baking dish
    • Large mixing bowl
    • Measuring cups and spoons
    • Spoon or spatula for mixing
    • Nonstick cooking spray

    Why These Tools Matter

    • 9×13-inch baking dish: Perfect size for even cooking and easy serving.
    • Large mixing bowl: Provides ample space for combining all ingredients without spilling.
    • Nonstick cooking spray: Ensures easy release of the casserole for perfect presentation.

    Ingredients for Fajita Chicken Casserole – Standard Oven Directions

    Casserole Base

    • 1 (10.5-ounce) can cream of chicken soup
    • 1 1/2 cups chicken broth
    • 4 cups shredded cooked chicken (about 3 large breasts)
    • 2 cups instant rice
    • 1 (1.12-ounce) packet fajita seasoning (I prefer McCormick)
    • 1 cup frozen diced onion and bell pepper blend
    • 1 (10-ounce) can diced tomatoes with chilies (like Ro Tel), undrained

    Toppings

    • 1 (8-ounce) shredded Mexican blend cheese (about 2 cups)
    • 1 cup sour cream

    How to Make Fajita Chicken Casserole – Standard Oven Directions Step-by-Step

    Step 1: Preheat the Oven

    Preheat your oven to 350°F. Lightly spray a 9×13-inch baking dish with nonstick cooking spray to prevent sticking.

    Step 2: Combine Ingredients

    In a large mixing bowl, combine the shredded chicken, instant rice, cream of chicken soup, sour cream, frozen onion and bell pepper blend, diced tomatoes with chilies (undrained), chicken broth, fajita seasoning, and half of the shredded cheese. Mix everything together until well combined.

    Step 3: Transfer to Dish

    Pour the mixture into the prepared baking dish, spreading it out evenly to cover the entire dish.

    Step 4: Bake

    Place the dish in the preheated oven and bake for about 25 minutes until heated through.

    Step 5: Add Cheese

    Remove the casserole from the oven and top it with the remaining shredded cheese. Return the dish to the oven and bake until the cheese is melted and bubbly, about 5 minutes.

    Step 6: Serve

    Allow the casserole to cool slightly before serving. Enjoy this hearty Fajita Chicken Casserole with your favorite sides.

    This tasty dish is perfect for gatherings or a comforting family meal.

    How to Serve Fajita Chicken Casserole – Standard Oven Directions

    Serving this Fajita Chicken Casserole can be as creative as it is delicious. Here are some ideas to elevate your meal.

    Garnish with Fresh Herbs

    Sprinkle chopped cilantro or parsley over the casserole just before serving for a fresh pop of color and flavor.

    Serve with Avocado Slices

    Creamy avocado slices on the side provide a rich contrast to the spicy flavors of the casserole, enhancing the overall taste experience.

    Pair with a Side Salad

    A crisp, refreshing side salad with a light vinaigrette balances the richness of the casserole and adds a nutritious element to your meal.

    Pro Tips for the Best Fajita Chicken Casserole – Standard Oven Directions

    To ensure your Fajita Chicken Casserole turns out perfectly every time, consider the following tips.

    • Use Rotisserie Chicken: For a quicker option, using rotisserie chicken can save time and enhance the flavor of your dish.

    • Customize Your Veggies: Feel free to add your favorite vegetables, such as zucchini or corn, to the casserole for added nutrition and texture.

    • Adjust Spice Level: If you prefer a milder dish, use less fajita seasoning or choose a mild version to suit your taste.

    • Cover While Baking: Cover the casserole with foil for the first half of the baking time to prevent the cheese from over-browning.

    • Make Ahead: Assemble the casserole in advance and refrigerate it overnight. Just add a few extra minutes to the baking time if baking from cold.

    Best Side Dishes and Pairings

    Enhance your meal with these delightful side dishes and beverages that pair wonderfully with Fajita Chicken Casserole.

    1. Mexican Street Corn: This creamy, cheesy corn dish complements the flavors of the casserole and adds a delightful crunch.

    2. Refried Beans: Smooth and savory, refried beans add a hearty element that pairs well with the casserole’s flavors.

    3. Guacamole: The creamy texture of guacamole provides a refreshing contrast to the spicy casserole, making it a perfect accompaniment.

    4. Cilantro Lime Rice: This zesty rice dish adds a fresh, citrusy flavor that brightens the meal and pairs beautifully with the casserole.

    5. Chips and Salsa: The crunch of tortilla chips and the tangy salsa create a fun, interactive side that enhances the overall dining experience.

    6. Chilled Margaritas: A refreshing margarita can be the perfect drink to accompany the rich flavors of the casserole, providing a festive touch to your meal.

    Common Mistakes to Avoid

    • Using Regular Rice: Instant rice is key for this recipe; regular rice may not cook properly in the casserole.
    • Skipping the Drainage: Do not drain the diced tomatoes with chilies; the liquid is essential for the casserole’s texture.
    • Overbaking the Casserole: Keep an eye on the baking time; overbaking can dry out the dish.
    • Not Mixing Thoroughly: Ensure all ingredients are well combined to avoid uneven flavors and textures.

    Storage & Reheating Instructions

    Refrigerator Storage

    Store leftover Fajita Chicken Casserole in airtight containers. It will stay fresh for up to 3-4 days in the refrigerator.

    Freezing Instructions

    To freeze, cool the casserole completely, then transfer it to an airtight freezer-safe container. It can be frozen for up to 2-3 months. Thaw in the refrigerator overnight before reheating.

    Reheating Tips

    • Oven: Preheat to 350°F and cover the casserole with foil. Heat for about 20-25 minutes until warmed through.
    • Microwave: Place a portion in a microwave-safe dish and cover. Heat on high for 2-3 minutes, stirring halfway through.
    • Stovetop: Heat in a skillet over medium heat, stirring occasionally until heated through.

    Frequently Asked Questions

    What is Fajita Chicken Casserole – Standard Oven Directions?

    This is a one-dish meal that combines chicken, rice, cheese, and fajita seasoning, baked to perfection in a standard oven.

    Can I use rotisserie chicken for this recipe?

    Yes, rotisserie chicken is a great option as it saves time and adds flavor.

    How can I spice up the Fajita Chicken Casserole?

    Consider adding jalapeños, extra chili powder, or hot sauce to enhance the dish’s heat.

    Can I make this casserole ahead of time?

    Absolutely! You can prepare the casserole a day in advance and bake it just before serving.

    What sides pair well with Fajita Chicken Casserole?

    This dish pairs well with a simple green salad, corn on the cob, or tortilla chips with salsa.

    Final Thoughts

    This Fajita Chicken Casserole is an easy and delicious meal that brings comfort and flavor to your table. I encourage you to try this recipe and share your experience in the comments below. Your feedback is always appreciated!

    Dinner

    Fajita Chicken Casserole – Standard Oven Directions


    5.0 from 24 reviews

    This Fajita Chicken Casserole is a perfect blend of creamy, cheesy, and spicy goodness that will satisfy your cravings for a hearty meal.

    Author: Munch Twist
    Prep Time: 10 minutes
    Cook Time: 30 minutes
    Total Time: 40 minutes
    Yield: 6 servings
    Category: Lunch
    Method: No bake
    Cuisine: American

    Fajita Chicken Casserole - Standard Oven Directions

    SCALE:
    1x
    2x
    3x
    Cook Mode: Prevent your screen from going dark

    Ingredients

    • 1 (10.5-ounce) can cream of chicken soup
    • 1 (8-ounce) shredded Mexican blend cheese (about 2 cups)
    • 1 1/2 cups chicken broth
    • 4 cups shredded cooked chicken (about 3 large breasts)
    • 2 cups instant rice
    • 1 (1.12-ounce) packet fajita seasoning
    • 1 cup sour cream
    • 1 cup frozen diced onion and bell pepper blend
    • 1 (10-ounce) can diced tomatoes with chilies (undrained)

    Instructions

    1. Preheat your oven to 350°F. Lightly spray a 9×13-inch baking dish with nonstick cooking spray.
    2. In a large mixing bowl, combine the shredded chicken, instant rice, cream of chicken soup, sour cream, frozen onion and bell pepper blend, diced tomatoes with chilies (undrained), chicken broth, fajita seasoning, and half of the shredded cheese. Mix everything together until well combined.
    3. Pour the mixture into the prepared baking dish, spreading it out evenly to cover the entire dish.
    4. Place the dish in the preheated oven and bake for about 25 minutes.
    5. Remove the casserole from the oven and top it with the remaining shredded cheese. Return the dish to the oven and bake until the cheese is melted and bubbly, about 5 minutes.
    6. Allow the casserole to cool slightly before serving.

    Nutrition Facts

    Serving Size: 1 serving
    Calories: 380 kcal
    Sugar: 3g
    Sodium: 800mg
    Fat: 18g
    Saturated Fat: 10g
    Carbohydrates: 25g
    Fiber: 2g
    Protein: 28g
    Cholesterol: 90mg

  • The Ultimate CARAMEL APPLE PECAN COBBLER Best Recipe Ever

    The Ultimate CARAMEL APPLE PECAN COBBLER Best Recipe Ever

    CARAMEL APPLE PECAN COBBLER Best Recipe Ever brings together the delightful flavors of sweet apples, crunchy pecans, and rich caramel in a warm, comforting dish. This cobbler is perfect for gatherings, showcasing a beautifully baked topping that contrasts the gooey apple filling. It’s a dessert that satisfies the sweet tooth while offering a homemade touch.

    Why You’ll Love This Recipe

    • Irresistible Flavor: The combination of caramel, apples, and pecans creates a deliciously rich taste.
    • Perfect for Any Occasion: Ideal for family gatherings, holidays, or cozy nights in.
    • Simple Preparation: Easy-to-follow steps make this dessert accessible for any home cook.
    • Versatile Serving Options: Serve warm with ice cream, whipped cream, or on its own.
    • Make-Ahead Friendly: Prepare in advance and bake when ready, making hosting stress-free.

    Tools and Equipment

    Having the right tools can make the preparation of CARAMEL APPLE PECAN COBBLER Best Recipe Ever a breeze.

    Essential Tools

    • Mixing bowls
    • Pastry blender
    • Measuring cups and spoons
    • Heavy-bottomed pan
    • 13×9-inch baking dish

    Why These Tools Matter

    • Mixing bowls: Essential for combining ingredients thoroughly, ensuring even flavor distribution.
    • Pastry blender: Helps achieve the perfect crumbly texture in the topping quickly.
    • Heavy-bottomed pan: Prevents scorching of the caramel sauce by distributing heat evenly.

    Ingredients for CARAMEL APPLE PECAN COBBLER Best Recipe Ever

    For the Apple Filling

    • ⅓ cup sugar
    • 1 cup pecans, chopped
    • ¼ tsp nutmeg
    • 9 apples, peeled, cored, and sliced (Granny Smith recommended)
    • ⅓ cup brown sugar
    • 1 tsp cinnamon
    • 2 tsp lemon juice
    • 2 tsp corn starch

    For the Caramel Sauce

    • 1 cup light brown sugar
    • ¾ cup butter (1½ sticks)
    • ¼ cup milk
    • 1 tsp vanilla

    For the Topping

    • ⅔ cup boiling water
    • 3 cups all-purpose flour
    • 3 tsp baking powder
    • ⅔ cup sugar
    • ⅔ cup brown sugar
    • 2 sticks butter, cut into small pieces
    • 1 tsp salt

    Additional Topping

    • 1 tsp cinnamon
    • 3 tbsp sugar

    How to Make CARAMEL APPLE PECAN COBBLER Best Recipe Ever Step-by-Step

    Step 1: Preheat the Oven

    Preheat your oven to 375°F (190°C) to ensure even baking.

    Step 2: Prepare the Apple Filling

    In a large mixing bowl, combine the sliced apples, brown sugar, sugar, cinnamon, corn starch, lemon juice, and nutmeg. Stir until the apples are well coated, then mix in the chopped pecans.

    Step 3: Make the Caramel Sauce

    In a small heavy-bottomed pan, melt the butter over low heat. Stir in the brown sugar and milk, bringing the mixture to a boil while stirring constantly for 12 minutes. Remove from heat, add the vanilla, and stir until combined. Let the sauce cool for 10 minutes. Pour the caramel sauce over the apple mixture, reserving a small amount to drizzle on top later. Stir to coat the apples.

    Step 4: Prepare the Topping

    In a medium mixing bowl, whisk together the flour, sugar, brown sugar, baking powder, and salt. Using a pastry blender, cut the butter into the flour mixture until it becomes crumbly. Pour in the boiling water and stir until fully combined.

    Step 5: Assemble the Cobbler

    Pour the apple mixture into an ungreased 13×9-inch baking dish. Spoon the topping mixture over the apples, spreading it gently to cover all the apples. In a small bowl, mix together the sugar and cinnamon, then sprinkle this over the top of the cobbler.

    Step 6: Bake

    Place the cobbler in the preheated oven and bake for approximately 35 minutes, or until the topping is golden brown.

    Step 7: Finish and Serve

    If the reserved caramel sauce has thickened, warm it up slightly and drizzle it over the top of the cobbler before serving.

    Preparation time: 25 minutes | Cooking time: 35 minutes. Enjoy this CARAMEL APPLE PECAN COBBLER Best Recipe Ever warm for the ultimate experience.

    How to Serve CARAMEL APPLE PECAN COBBLER Best Recipe Ever

    Serving this dish can elevate the dining experience and highlight its delicious flavors. Here are some creative ideas to enjoy your cobbler.

    A La Mode

    Serve warm slices of the cobbler topped with a generous scoop of vanilla ice cream. The creaminess of the ice cream complements the warm, caramelized apples and adds a delightful contrast to the texture.

    Drizzled with Extra Caramel

    For an indulgent treat, drizzle additional homemade caramel sauce over the top before serving. This enhances the sweetness and adds a rich, gooey texture that guests will love.

    With Whipped Cream

    Top each serving with freshly whipped cream for a light and airy finish. The whipped cream balances the richness of the cobbler, making it an ideal accompaniment.

    Pro Tips for the Best CARAMEL APPLE PECAN COBBLER Best Recipe Ever

    To ensure your cobbler is a hit, consider these helpful tips.

    • Use Fresh Apples: Opt for crisp, tart apples like Granny Smith for the best flavor and texture in the filling.
    • Chill the Butter: Keeping the butter cold while mixing will create a flakier topping that contrasts beautifully with the soft apple filling.
    • Adjust Sweetness: Taste the apple mixture before baking and adjust the sugar to your liking, especially if you prefer a less sweet dessert.
    • Check for Doneness: Keep an eye on the cobbler as it bakes; if the topping is golden brown but the apples are still bubbling, it’s ready to come out of the oven.
    • Let It Rest: Allow the cobbler to cool for about 10 minutes before serving. This helps the filling set up a bit, making it easier to serve.

    Best Side Dishes and Pairings

    To complement the flavors of the CARAMEL APPLE PECAN COBBLER, consider these delightful pairings.

    1. Vanilla Ice Cream: A classic pairing that adds creaminess and a cool contrast to the warm cobbler.
    2. Coffee: A rich, dark roast coffee enhances the sweetness of the cobbler and adds a comforting warmth to the meal.
    3. Spiced Tea: A cup of spiced chai or cinnamon tea can beautifully echo the flavors in the cobbler while providing a cozy beverage option.
    4. Cheese Platter: A selection of sharp cheeses can balance the sweetness and add a savory component to the dessert experience.
    5. Chardonnay: A chilled glass of Chardonnay offers a crisp, fruity complement that enhances the apple notes in the cobbler.

    Common Mistakes to Avoid

    • Using the Wrong Apples: Selecting apples that are too soft can result in a mushy filling. Stick with firmer varieties like Granny Smith for the best texture.
    • Skipping the Caramel Sauce: Neglecting to prepare the caramel sauce can diminish the flavor depth of the cobbler. It adds essential sweetness and richness.
    • Overmixing the Topping: Mixing the topping too much can lead to a dense, tough texture. Combine ingredients just until they come together.
    • Not Letting the Cobbler Cool: Serving the cobbler immediately can lead to a messy presentation. Allow it to cool slightly for easier slicing.

    Storage & Reheating Instructions

    Refrigerator Storage

    Store the cobbler in an airtight container in the refrigerator. It will stay fresh for up to 3 to 4 days.

    Freezing Instructions

    For freezing, wrap the cooled cobbler tightly in plastic wrap and then in aluminum foil. It can be frozen for up to 3 months. Thaw it in the refrigerator overnight before reheating.

    Reheating Tips

    • Oven: Preheat to 350°F (175°C) and bake for 15-20 minutes, or until heated through.
    • Microwave: Heat individual portions on high for 30-60 seconds, or until warmed to your liking.
    • Stovetop: Place in a skillet over low heat, cover, and warm for about 5-10 minutes, stirring occasionally.

    Frequently Asked Questions

    What is the best apple variety for CARAMEL APPLE PECAN COBBLER Best Recipe Ever?

    The best apple variety to use is Granny Smith, as their tartness balances the sweetness of the caramel and complements the pecans.

    Can I make CARAMEL APPLE PECAN COBBLER Best Recipe Ever ahead of time?

    Yes, you can prepare the filling and caramel sauce in advance. Store them separately in the refrigerator and assemble the cobbler just before baking.

    How do I know when the cobbler is done baking?

    The cobbler is done when the topping is golden brown and a toothpick inserted in the center comes out clean.

    Can I substitute the pecans in this recipe?

    Yes, you can substitute pecans with walnuts or omit nuts entirely if you have nut allergies.

    Final Thoughts

    This CARAMEL APPLE PECAN COBBLER Best Recipe Ever is sure to impress at any gathering or family dinner. The combination of flavors and textures makes it a must-try dessert. We encourage you to try this recipe and share your thoughts in the comments below!


    Desserts

    CARAMEL APPLE PECAN COBBLER Best Recipe Ever


    5.0 from 24 reviews

    This Caramel Apple Pecan Cobbler combines the tartness of Granny Smith apples with the richness of caramel and the crunch of pecans, all topped with a buttery, crumbly topping. It's a delightful dessert perfect for any occasion.

    Author: Munch Twist
    Prep Time: 25 minutes
    Cook Time: 35 minutes
    Total Time: 60 minutes
    Yield: 12 servings
    Category: Desserts
    Method: No bake
    Cuisine: American

    CARAMEL APPLE PECAN COBBLER Best Recipe Ever

    SCALE:
    1x
    2x
    3x
    Cook Mode: Prevent your screen from going dark

    Ingredients

    • ⅓ cup sugar
    • 1 cup pecans, chopped
    • ¼ tsp nutmeg
    • 9 apples, peeled, cored, and sliced
    • ⅓ cup brown sugar
    • 1 tsp cinnamon
    • 2 tsp lemon juice
    • 2 tsp corn starch
    • 1 cup light brown sugar
    • ¾ cup butter
    • ¼ cup milk
    • 1 tsp vanilla
    • ⅔ cup boiling water
    • 3 cups all-purpose flour
    • 3 tsp baking powder
    • ⅔ cup sugar
    • ⅔ cup brown sugar
    • 2 sticks butter, cut into small pieces
    • 1 tsp salt
    • 1 tsp cinnamon
    • 3 tbsp sugar

    Instructions

    1. Preheat your oven to 375°F (190°C).
    2. In a large mixing bowl, combine the sliced apples, brown sugar, sugar, cinnamon, corn starch, lemon juice, and nutmeg. Stir until the apples are well coated, then mix in the chopped pecans.
    3. In a small heavy-bottomed pan, melt the butter over low heat. Stir in the brown sugar and milk, bringing the mixture to a boil while stirring constantly for 12 minutes. Remove from heat, add the vanilla, and stir until combined. Let the sauce cool for 10 minutes. Pour the caramel sauce over the apple mixture, reserving a small amount to drizzle on top later. Stir to coat the apples.
    4. In a medium mixing bowl, whisk together the flour, sugar, brown sugar, baking powder, and salt. Using a pastry blender, cut the butter into the flour mixture until it becomes crumbly. Pour in the boiling water and stir until fully combined.
    5. Pour the apple mixture into an ungreased 13×9-inch baking dish. Spoon the topping mixture over the apples, spreading it gently to cover all the apples. In a small bowl, mix together the sugar and cinnamon, then sprinkle this over the top of the cobbler.
    6. Place the cobbler in the preheated oven and bake for approximately 35 minutes, or until the topping is golden brown.
    7. If the reserved caramel sauce has thickened, warm it up slightly and drizzle it over the top of the cobbler before serving.

    Nutrition Facts

    Serving Size: 1 serving
    Calories: 450 kcal
    Sugar: 35g
    Sodium: 300mg
    Fat: 22g
    Saturated Fat: 12g
    Carbohydrates: 63g
    Fiber: 3g
    Protein: 5g
    Cholesterol: 60mg

  • Delicious Bacon Jalapeño Popper Cheese Balls Recipe

    Delicious Bacon Jalapeño Popper Cheese Balls Recipe

    Bacon Jalapeño Popper Cheese Balls are the ultimate appetizer, combining creamy cheese with a spicy kick and crispy bacon. These bite-sized treats are sure to be a hit at any gathering, delivering an irresistible flavor that will leave everyone wanting more.

    Why You’ll Love This Recipe

    • Flavor Explosion: The combination of cream cheese, jalapeños, and bacon creates a mouthwatering taste experience.
    • Crowd-Pleaser: Perfect for parties, game days, or family gatherings, these cheese balls are always a favorite.
    • Customizable: Adjust the spice level by adding more or fewer jalapeños to suit your taste.
    • Make Ahead: Prepare them in advance and refrigerate, making entertaining effortless.
    • Simple Ingredients: With just a few common ingredients, you can whip up these cheese balls in no time.

    Tools and Equipment

    To make the preparation process smooth, having the right tools is essential.

    Essential Tools

    • Mixing bowl
    • Cookie scoop or spoon
    • Shallow plate
    • Refrigerator

    Why These Tools Matter

    • Mixing bowl: Allows for easy combining of ingredients without spills.
    • Cookie scoop or spoon: Ensures uniform size for each cheese ball, promoting even cooking.
    • Refrigerator: Helps the cheese balls firm up, enhancing their texture and flavor.

    Ingredients for Bacon Jalapeño Popper Cheese Balls

    • 1 teaspoon black pepper
    • 16 oz cream cheese, softened
    • 1 tablespoon mayonnaise
    • 1 cup jalapeño, deseeded and diced
    • ½ cup minced fresh chives
    • 1 teaspoon cayenne pepper
    • ½ cup sharp cheddar, shredded
    • 2 cups finely crumbled bacon (or more)

    How to Make Bacon Jalapeño Popper Cheese Balls Step-by-Step

    Step 1: Prepare the Cheese Mixture

    In a large bowl, combine the cream cheese, mayonnaise, shredded cheddar, diced jalapeño, minced chives, black pepper, and cayenne pepper. Mix everything thoroughly until the mixture is fluffy and well-blended.

    Step 2: Form the Cheese Balls

    Place the remaining 1½ cups of crumbled bacon on a shallow plate. Using a cookie scoop or your hands, form the cheese mixture into balls, each about 1 inch in diameter.

    Step 3: Coat with Bacon

    Roll each cheese ball in the crumbled bacon, ensuring they are fully coated. Place them on a plate or tray.

    Step 4: Chill and Serve

    Refrigerate the cheese balls for at least 30 minutes, or until ready to serve. This helps them firm up and enhances the flavors, making them even more delicious.

    Enjoy your Bacon Jalapeño Popper Cheese Balls as a delightful appetizer that combines creamy, spicy, and crispy elements in every bite.

    How to Serve Bacon Jalapeño Popper Cheese Balls

    Bacon Jalapeño Popper Cheese Balls can be served in a variety of delightful ways that enhance their flavor and presentation.

    Garnished with Fresh Herbs

    Sprinkle chopped fresh herbs such as parsley or cilantro over the cheese balls before serving. This adds a pop of color and freshness that complements the rich and spicy flavors.

    Accompanied by Dipping Sauces

    Serve these cheese balls with an array of dipping sauces like ranch, blue cheese, or a spicy sriracha mayo. This allows guests to customize their experience and adds an extra layer of flavor.

    On a Charcuterie Board

    Incorporate Bacon Jalapeño Popper Cheese Balls into a charcuterie board with cured meats, cheeses, and crackers. This makes for an impressive presentation and a wonderful mix of flavors for guests to enjoy.

    Pro Tips for the Best Bacon Jalapeño Popper Cheese Balls

    To achieve the best results with your Bacon Jalapeño Popper Cheese Balls, consider the following tips:

    • Use Fresh Ingredients: Opt for fresh jalapeños and high-quality bacon for the best flavor and texture.

    • Customize Spice Levels: Adjust the amount of jalapeño and cayenne pepper to suit your spice tolerance. You can even add diced poblano peppers for a milder option.

    • Chill Thoroughly: Make sure to refrigerate the cheese balls for the full 30 minutes. This helps them hold their shape and enhances the flavors.

    • Experiment with Cheeses: For different flavor profiles, try mixing in other cheeses like pepper jack or gouda.

    • Serve at Room Temperature: Allow the cheese balls to sit out for a few minutes before serving. This makes them more flavorful and easier to enjoy.

    Best Side Dishes and Pairings

    Bacon Jalapeño Popper Cheese Balls pair wonderfully with a variety of dishes and beverages. Here are some great options:

    1. Classic Buffalo Wings – The spicy and tangy flavor of buffalo wings complements the creamy and cheesy goodness of the cheese balls.

    2. Crispy Potato Wedges – Seasoned and baked potato wedges provide a crunchy contrast that enhances the overall snacking experience.

    3. Fresh Veggie Platter – A selection of crunchy vegetables like carrots, celery, and bell peppers adds a refreshing balance to the richness of the cheese balls.

    4. Guacamole and Tortilla Chips – The creamy texture of guacamole pairs perfectly with the crunchy cheese balls, making for a delightful combination.

    5. Light Beer or Hard Seltzer – These beverages offer a refreshing contrast to the richness of the cheese balls, making them ideal for casual gatherings.

    Common Mistakes to Avoid

    • Not Softening the Cream Cheese: Always ensure the cream cheese is softened for easier mixing.
    • Skipping the Chilling Time: Refrigerating the cheese balls helps them firm up and enhances the flavors, so don’t skip this step.
    • Overloading on Jalapeños: While jalapeños add great flavor, too many can overwhelm the dish. Stick to the recommended amount for balance.
    • Inconsistent Sizing: If the cheese balls are not uniform in size, they may not cook evenly or may vary in flavor. Use a scoop for consistency.

    Storage & Reheating Instructions

    Refrigerator Storage

    Store any leftover Bacon Jalapeño Popper Cheese Balls in an airtight container in the refrigerator. They will stay fresh for up to 5 days.

    Freezing Instructions

    To freeze, arrange the cheese balls on a baking sheet and freeze until solid. Once frozen, transfer them to an airtight container or freezer bag. They can be stored for up to 3 months.

    Reheating Tips

    • Oven: Preheat the oven to 350°F (175°C) and bake the cheese balls for about 10-15 minutes until heated through.
    • Microwave: Place the cheese balls on a microwave-safe plate and heat in 20-second intervals until warm, being careful not to overheat.
    • Stovetop: Heat a skillet over medium heat and warm the cheese balls for a few minutes, turning occasionally until heated through.

    Frequently Asked Questions

    How can I make Bacon Jalapeño Popper Cheese Balls spicier?

    To increase the heat, consider using spicy jalapeños or adding a dash of hot sauce to the cheese mixture.

    Can I use turkey bacon instead of regular bacon?

    Yes, turkey bacon can be used as a lighter alternative, though it may not provide the same level of crispiness or flavor.

    What can I serve with Bacon Jalapeño Popper Cheese Balls?

    These cheese balls pair well with dipping sauces such as ranch, blue cheese, or spicy aioli, and they are perfect for parties or game day.

    How long do Bacon Jalapeño Popper Cheese Balls last in the freezer?

    When properly stored, they can last up to 3 months in the freezer without losing flavor or texture.

    Can I make these cheese balls ahead of time?

    Absolutely! You can prepare and chill them a day in advance, making them a convenient option for entertaining.

    Final Thoughts

    Bacon Jalapeño Popper Cheese Balls are an irresistible treat that combines creamy, spicy, and crispy flavors, making them ideal for any occasion. We encourage you to try this recipe and share your experience in the comments below!


    Lunch

    Bacon Jalapeño Popper Cheese Balls


    5.0 from 24 reviews

    These Bacon Jalapeño Popper Cheese Balls are a delightful combination of creamy cheese, spicy jalapeños, and crispy bacon. Perfect for parties or gatherings, they offer a flavorful bite that is sure to impress your guests.

    Author: Munch Twist
    Prep Time: 15 minutes
    Cook Time: 25 mins
    Total Time: 45 minutes
    Yield: 24 servings
    Category: Lunch
    Method: No bake
    Cuisine: American

    Bacon Jalapeño Popper Cheese Balls

    SCALE:
    1x
    2x
    3x
    Cook Mode: Prevent your screen from going dark

    Ingredients

    • 1 teaspoon black pepper
    • 16 oz cream cheese, softened
    • 1 tablespoon mayonnaise
    • 1 cup jalapeño, deseeded and diced
    • ½ cup minced fresh chives
    • 1 teaspoon cayenne pepper
    • ½ cup sharp cheddar, shredded
    • 2 cups finely crumbled bacon

    Instructions

    1. In a large bowl, combine the cream cheese, mayonnaise, shredded cheddar, diced jalapeño, minced chives, black pepper, cayenne pepper, and ½ cup of the crumbled bacon. Mix everything thoroughly until the mixture is fluffy and well-blended.
    2. Place the remaining 1½ cups of crumbled bacon on a shallow plate. Using a cookie scoop or your hands, form the cheese mixture into balls, each about 1 inch in diameter.
    3. Roll each cheese ball in the crumbled bacon, ensuring they’re fully coated. Place them on a plate or tray.
    4. Refrigerate the cheese balls for at least 30 minutes, or until ready to serve, to help them firm up and enhance the flavors.

    Nutrition Facts

    Serving Size: 1 serving
    Calories: 110 kcal
    Sugar: 0g
    Sodium: 250mg
    Fat: 10g
    Saturated Fat: 4g
    Carbohydrates: 1g
    Fiber: 0g
    Protein: 3g
    Cholesterol: 30mg