Author: munch twist

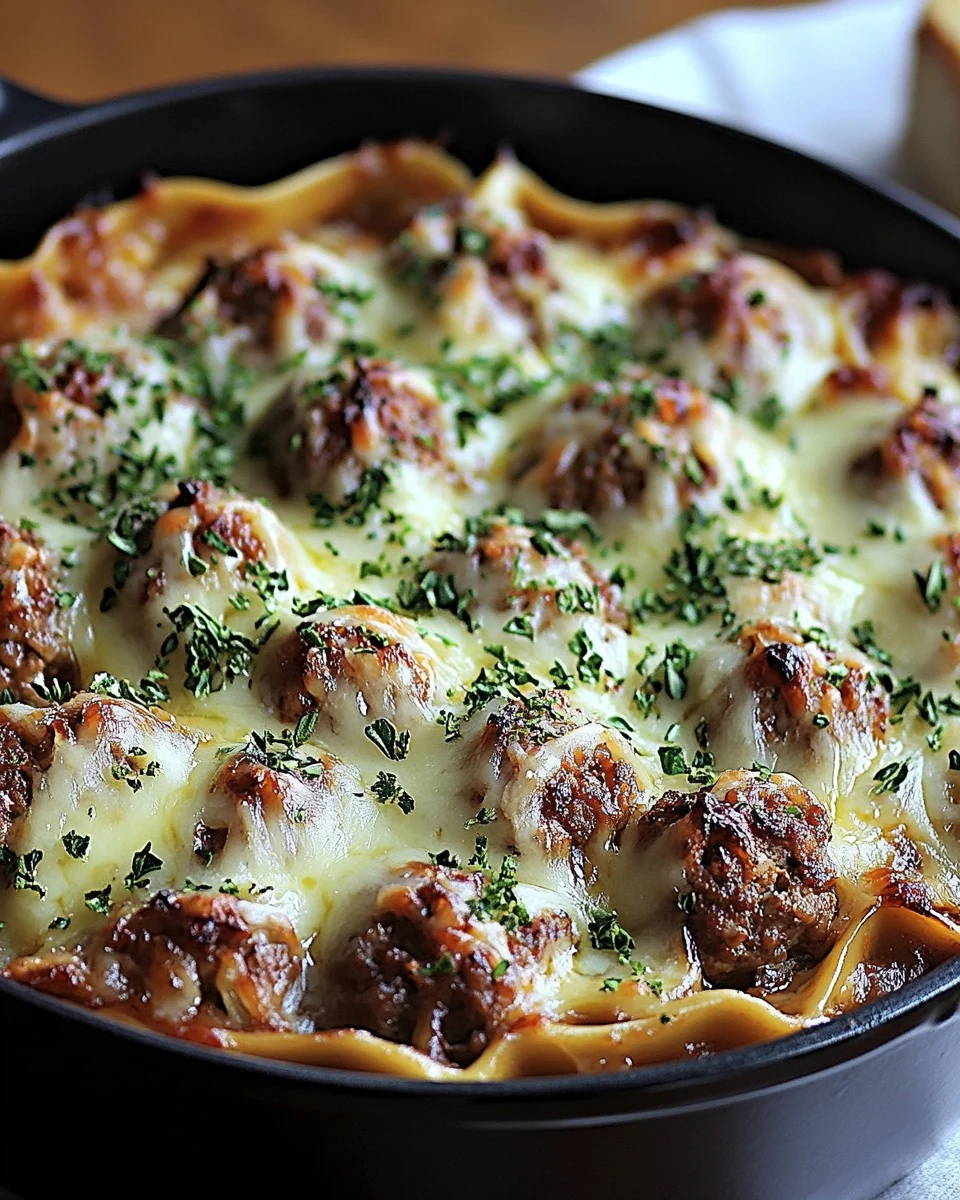
  • Delicious Slow Cooker French Onion Meatballs Recipe

    Delicious Slow Cooker French Onion Meatballs Recipe

    Slow Cooker French Onion Meatballs combine rich flavors and comfort in every bite. This dish features tender meatballs infused with savory French onion soup mix and caramelized onions, creating a truly delightful meal. Perfect for busy weeknights, this recipe is sure to impress your family and friends.

    Why You’ll Love This Recipe

    • Flavor Explosion: The combination of beef, onions, and savory broth creates an irresistible taste.
    • Hands-Off Cooking: Simply set the slow cooker and let it do the work while you relax.
    • Perfect Meal for Any Occasion: Suitable for weeknight dinners or special gatherings, this dish fits all scenarios.
    • Easy Cleanup: Cooking in a slow cooker means fewer pots and pans to wash afterward.
    • Customizable: Feel free to add your favorite herbs or spices to make it your own.

    Tools and Equipment

    Having the right tools makes cooking easier and more enjoyable.

    Essential Tools

    • Slow cooker
    • Large mixing bowl
    • Skillet
    • Cooking spoon
    • Measuring cups and spoons

    Why These Tools Matter

    • Slow cooker: Perfect for long cooking times, ensuring tender meatballs without constant monitoring.
    • Skillet: Ideal for browning meatballs and caramelizing onions, enhancing flavor through the Maillard reaction.
    • Large mixing bowl: Provides ample space for mixing ingredients without mess.

    Ingredients for Slow Cooker French Onion Meatballs

    Meatball Ingredients

    • 1 lb ground beef
    • 1 packet French onion soup mix
    • 1/2 cup breadcrumbs
    • 1/4 cup milk
    • 1 egg
    • 1/2 cup grated Parmesan cheese

    Sauce and Onion Ingredients

    • 2 tablespoons olive oil
    • 2 large onions, thinly sliced
    • 2 cups beef broth
    • 1 tablespoon Worcestershire sauce
    • Salt and pepper, to taste
    • Fresh thyme, for garnish

    How to Make Slow Cooker French Onion Meatballs Step-by-Step

    Step 1: Prepare Meatball Mixture

    In a large mixing bowl, combine the ground beef, French onion soup mix, breadcrumbs, milk, egg, and Parmesan cheese. Mix everything until well incorporated. Form the mixture into meatballs, making them about 1-2 inches in diameter.

    Step 2: Brown Meatballs

    Heat olive oil in a skillet over medium heat. Add the meatballs and cook, turning occasionally, until browned on all sides. Once browned, transfer the meatballs to the slow cooker.

    Step 3: Caramelize Onions

    In the same skillet, add the sliced onions. Cook them until they turn golden brown and caramelized, which should take about 10-15 minutes. Layer the caramelized onions over the meatballs in the slow cooker.

    Step 4: Prepare Gravy

    In a separate bowl, mix the beef broth and Worcestershire sauce. Pour this mixture over the meatballs and onions in the slow cooker, ensuring everything is well covered.

    Step 5: Cook

    Cover the slow cooker and cook on low for 6-8 hours or on high for 3-4 hours. Before serving, adjust the seasoning with salt and pepper to taste.

    Step 6: Garnish and Serve

    Before serving, garnish the dish with fresh thyme. Serve hot and enjoy this delightful Slow Cooker French Onion Meatballs dish.

    Preparation time: 15 minutes | Cooking time: 6-8 hours (slow cooker on low) or 3-4 hours (slow cooker on high)

    This hearty and flavorful dish is perfect for a comforting meal. Enjoy!

    How to Serve Slow Cooker French Onion Meatballs

    These Slow Cooker French Onion Meatballs are versatile and can be served in various delightful ways.

    Meatball Sandwiches

    Serve the meatballs on a crusty sub roll topped with melted cheese for a delicious meatball sandwich. This makes for a hearty lunch or casual dinner option.

    Over Rice or Mashed Potatoes

    Serve the meatballs and gravy over a bed of fluffy rice or creamy mashed potatoes. This dish is perfect for soaking up the rich flavors of the gravy.

    As an Appetizer

    Skewer the meatballs on toothpicks and serve them as a tasty appetizer at your next gathering. They are sure to be a hit with your guests.

    Pro Tips for the Best Slow Cooker French Onion Meatballs

    For optimal flavor and texture, consider these helpful tips.

    • Use Fresh Ingredients: Fresh onions and high-quality ground beef enhance the overall taste of the dish.
    • Sear for Flavor: Browning the meatballs before adding them to the slow cooker adds depth and richness to the final dish.
    • Don’t Skip the Caramelization: Take the time to properly caramelize the onions; this step develops a sweet, rich flavor that elevates the meatballs.
    • Adjust Consistency: If the sauce is too thick after cooking, stir in a little extra beef broth to reach your desired consistency.
    • Make Ahead: Prepare the meatballs in advance and store them in the refrigerator overnight before slow cooking for convenient meal prep.

    Best Side Dishes and Pairings

    To complement your Slow Cooker French Onion Meatballs, consider these delightful pairings.

    1. Garlic Bread – The perfect vehicle for sopping up the delicious gravy from the meatballs.
    2. Green Salad – A light and refreshing salad balances the richness of the meatballs and adds a healthy touch.
    3. Roasted Vegetables – Seasonal roasted vegetables provide a colorful and nutritious contrast to the hearty meatballs.
    4. Polenta – Creamy polenta offers a satisfying base that pairs wonderfully with the savory gravy.
    5. Red Wine – A robust red wine enhances the flavors of the meatballs and makes for a delightful dining experience.
    6. Steamed Broccoli – This simple side adds both color and nutrition, making your meal more well-rounded.

    Common Mistakes to Avoid

    • Not Browning the Meatballs: Skipping the browning step can lead to a less flavorful dish. Browning adds depth to the meatballs.
    • Overcrowding the Slow Cooker: Packing too many meatballs can prevent even cooking. Ensure there’s enough space for steam to circulate.
    • Ignoring Seasoning: Skipping the adjustment of salt and pepper at the end can result in a bland dish. Always taste and adjust before serving.
    • Using Low-Quality Beef Broth: The broth significantly impacts the flavor. Choose a high-quality or homemade beef broth for the best results.

    Storage & Reheating Instructions

    Refrigerator Storage

    Store the Slow Cooker French Onion Meatballs in airtight containers in the refrigerator. They will remain fresh for up to 3-4 days.

    Freezing Instructions

    For freezing, place the cooled meatballs in an airtight container or freezer bag. They can be frozen for up to 3 months. Thaw in the refrigerator overnight before reheating.

    Reheating Tips

    • Oven: Preheat to 350°F (175°C) and place meatballs in a baking dish. Cover with foil and heat for about 20-25 minutes.
    • Microwave: Place meatballs in a microwave-safe dish, cover, and heat on medium power for 2-3 minutes, or until warmed through.
    • Stovetop: Heat in a skillet over medium heat, stirring occasionally, until heated through, about 5-7 minutes.

    Frequently Asked Questions

    How can I make Slow Cooker French Onion Meatballs gluten-free?

    To make this recipe gluten-free, substitute the breadcrumbs with gluten-free breadcrumbs or crushed gluten-free crackers.

    Can I use a different type of meat for the meatballs?

    Yes, ground turkey, chicken, or pork can be used as alternatives to beef. Adjust cooking times as needed based on the type of meat chosen.

    How long will Slow Cooker French Onion Meatballs last in the freezer?

    When stored properly in an airtight container or freezer bag, they can last for up to 3 months in the freezer.

    What can I serve with Slow Cooker French Onion Meatballs?

    These meatballs pair well with mashed potatoes, rice, or a crusty bread to soak up the delicious gravy.

    Can I make this recipe ahead of time?

    Yes, you can prepare the meatball mixture and caramelize the onions a day in advance. Store them separately in the refrigerator and combine them in the slow cooker on the day of cooking.

    Final Thoughts

    Slow Cooker French Onion Meatballs are a delightful dish that combines rich flavors and comforting textures. I encourage you to try this recipe and share your experience in the comments below. Your feedback is always appreciated!


    Dinner

    Slow Cooker French Onion Meatballs


    5.0 from 24 reviews

    This hearty and flavorful dish features tender meatballs infused with the rich taste of French onion soup, served in a savory gravy with caramelized onions. Perfect for a comforting meal.
    Author: Munch Twist
    Prep Time: 15 minutes
    Cook Time: 360 minutes
    Total Time: 375 minutes
    Yield: 6 servings
    Category: Dinner
    Method: No bake
    Cuisine: American

    Slow Cooker French Onion Meatballs

    SCALE:
    1x
    2x
    3x
    Cook Mode: Prevent your screen from going dark

    Ingredients

    • 1 lb ground beef
    • 1 packet French onion soup mix
    • 1/2 cup breadcrumbs
    • 1/4 cup milk
    • 1 egg
    • 1/2 cup grated Parmesan cheese
    • 2 tablespoons olive oil
    • 2 large onions, thinly sliced
    • 2 cups beef broth
    • 1 tablespoon Worcestershire sauce
    • Salt and pepper, to taste
    • Fresh thyme, for garnish

    Instructions

    1. In a large bowl, combine the ground beef, French onion soup mix, breadcrumbs, milk, egg, and Parmesan cheese. Mix until well incorporated and form into meatballs.
    2. Heat olive oil in a skillet over medium heat. Add the meatballs and cook until browned on all sides. Transfer to the slow cooker.
    3. In the same skillet, add the sliced onions and cook until caramelized, about 10-15 minutes. Layer over the meatballs in the slow cooker.
    4. Mix the beef broth and Worcestershire sauce in a bowl and pour over the meatballs and onions in the slow cooker.
    5. Cover and cook on low for 6-8 hours or on high for 3-4 hours. Adjust seasoning with salt and pepper to taste.
    6. Garnish with fresh thyme before serving. Serve hot.
    Nutrition Facts

    Serving Size: 1 serving
    Calories: 320 kcal
    Sugar: 2g
    Sodium: 800mg
    Fat: 18g
    Saturated Fat: 7g
    Carbohydrates: 15g
    Fiber: 1g
    Protein: 25g
    Cholesterol: 80mg

  • Easy Outback Steakhouse Alice Springs Chicken Recipe

    Easy Outback Steakhouse Alice Springs Chicken Recipe

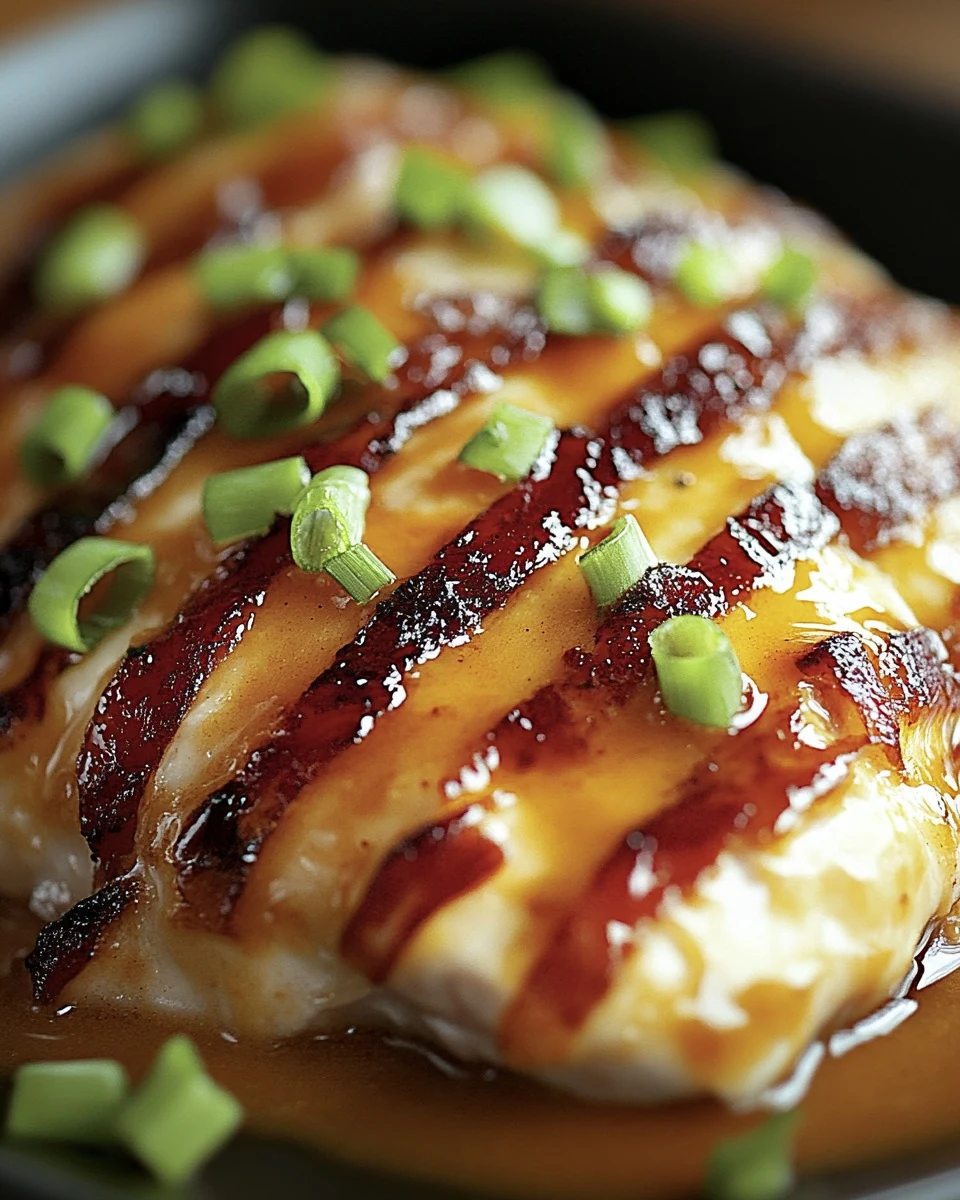
    Outback Steakhouse Alice Springs Chicken is a delightful dish that combines tender chicken, crispy bacon, and melty cheese. This savory recipe is sure to become a favorite in your home kitchen, offering a taste of the beloved restaurant classic with every bite.

    Why You’ll Love This Recipe

    • Delicious Flavor Combination: The union of chicken, bacon, and cheddar creates a rich and satisfying taste experience.
    • Family-Friendly Meal: This dish appeals to a wide range of palates, making it perfect for family dinners.
    • Simple Ingredients: You likely have most of these ingredients on hand, making it easy to whip up.
    • Customizable Option: Feel free to add your favorite herbs or spices to personalize the flavor.
    • Perfect for Meal Prep: This recipe is great for preparing in advance and reheating later for busy weeknights.

    Tools and Equipment

    Having the right tools can make cooking this dish a breeze.

    Essential Tools

    • Cast iron skillet
    • Baking sheet
    • Sharp knife
    • Cutting board
    • Measuring cups
    • Mixing bowl

    Why These Tools Matter

    • Cast iron skillet: Ideal for cooking bacon evenly while retaining heat.
    • Baking sheet: Perfect for baking chicken without the mess.
    • Sharp knife: Ensures precise slicing of chicken for even cooking.

    Ingredients for Outback Steakhouse Alice Springs Chicken

    Main Ingredients

    • 6 slices thick-cut bacon
    • 3 large boneless, skinless chicken breasts
    • 2 cups shredded cheddar cheese

    Seasoning and Garnish

    • Salt and pepper, to taste
    • ⅓ cup chopped green onions for garnish

    How to Make Outback Steakhouse Alice Springs Chicken Step-by-Step

    Step 1: Prep the Oven and Chicken

    Preheat your oven to 350°F (175°C). Slice each chicken breast in half lengthwise. Season both sides with salt and pepper to enhance the flavor.

    Step 2: Bake the Chicken

    Place the seasoned chicken breasts on a baking sheet and bake for 25 minutes. This initial baking helps to lock in moisture.

    Step 3: Cook the Bacon

    While the chicken bakes, heat a skillet over medium heat. Cook the bacon until the fat renders but it is not yet crispy. Remove the bacon and cut each slice in half.

    Step 4: Add Bacon to Chicken

    After 25 minutes, remove the chicken from the oven. Lay half a slice of bacon on top of each piece of chicken. Return the baking sheet to the oven and bake for another 10 minutes.

    Step 5: Cheese It Up

    Remove the chicken from the oven again. Sprinkle shredded cheddar cheese evenly over each chicken piece. Bake for an additional 5 minutes, or until the cheese is melted and bubbly.

    Step 6: Garnish and Serve

    Finish by sprinkling chopped green onions on top before serving. This adds a fresh flavor and a pop of color to the dish.

    Enjoy this savory and satisfying Outback Steakhouse Alice Springs Chicken that’s sure to please any palate!

    How to Serve Outback Steakhouse Alice Springs Chicken

    This dish can be enjoyed in various ways to complement its bold flavors.

    Serve with a Fresh Salad

    Pair the chicken with a crisp garden salad tossed in a light vinaigrette. The freshness of the greens balances the richness of the cheese and bacon.

    Accompany with Garlic Bread

    Serve the Alice Springs Chicken alongside warm, buttery garlic bread. The bread acts as a perfect vehicle for any melted cheese and juices from the chicken.

    Top with Barbecue Sauce

    Drizzle some tangy barbecue sauce over the chicken just before serving for an extra layer of flavor. This adds a smoky sweetness that enhances the overall taste profile.

    Pro Tips for the Best Outback Steakhouse Alice Springs Chicken

    To elevate your dish, consider these practical tips.

    • Use Quality Bacon: Opt for thick-cut bacon for a meatier texture and better flavor infusion into the chicken.
    • Don’t Overcook the Chicken: Ensure the chicken is cooked just until it reaches an internal temperature of 165°F (74°C) to keep it juicy.
    • Experiment with Cheese: While cheddar is a classic choice, try blending other cheeses like Monterey Jack or pepper jack for a twist.
    • Let it Rest: After baking, allow the chicken to rest for a few minutes before serving to retain juiciness.
    • Garnish Generously: Don’t skimp on the green onions; their freshness brightens the dish and adds a nice crunch.

    Best Side Dishes and Pairings

    To round out your meal, consider these delightful sides and drinks.

    1. Steamed Asparagus: This vegetable adds a vibrant color and a slight crunch that contrasts nicely with the richness of the chicken.
    2. Loaded Mashed Potatoes: Creamy, buttery mashed potatoes topped with cheese and chives make for a hearty side that complements the chicken perfectly.
    3. Coleslaw: A tangy coleslaw brings a refreshing crunch that balances the savory elements of the dish.
    4. Corn on the Cob: Sweet and tender corn adds a delightful seasonal element that pairs well with the smoky flavors of the chicken.
    5. Iced Tea: A classic drink choice, iced tea’s refreshing quality can cleanse the palate between bites.

    Common Mistakes to Avoid

    • Not Preheating the Oven: Always preheat your oven to ensure even cooking.
    • Overcooking the Chicken: Keep an eye on cooking times to prevent dry chicken.
    • Skipping the Seasoning: Properly season your chicken for maximum flavor.
    • Using Low-Quality Cheese: Opt for high-quality cheddar cheese for the best melt and taste.

    Storage & Reheating Instructions

    Refrigerator Storage

    Store any leftover Outback Steakhouse Alice Springs Chicken in an airtight container in the refrigerator. It will stay fresh for up to 3 days.

    Freezing Instructions

    For long-term storage, wrap individual pieces in plastic wrap and place them in a freezer-safe container. This will keep the chicken fresh for up to 3 months. To thaw, move the chicken to the refrigerator for several hours or overnight.

    Reheating Tips

    • Oven: Preheat to 350°F (175°C) and bake for 15-20 minutes until heated through.
    • Microwave: Place on a microwave-safe plate and cover. Heat in 30-second intervals until warm.
    • Stovetop: Heat in a skillet over low heat, covering to retain moisture.

    Frequently Asked Questions

    How can I make Outback Steakhouse Alice Springs Chicken healthier?

    To make this dish healthier, consider using turkey bacon and reducing the amount of cheese.

    Can I make Outback Steakhouse Alice Springs Chicken ahead of time?

    Yes, you can prepare the chicken and bacon in advance and assemble before baking for a quick meal.

    What should I serve with Outback Steakhouse Alice Springs Chicken?

    This dish pairs well with a fresh salad or steamed vegetables to balance the rich flavors.

    Can I substitute the chicken breasts in this recipe?

    Yes, you can use chicken thighs or even boneless pork chops as alternatives.

    Final Thoughts

    This Outback Steakhouse Alice Springs Chicken recipe is a delightful way to bring a taste of the restaurant home. We encourage you to try it out and share your thoughts in the comments below. Enjoy your cooking!


    Dinner

    Outback Steakhouse Alice Springs Chicken


    5.0 from 24 reviews

    This savory dish features tender chicken breasts topped with crispy bacon and melted cheddar cheese, garnished with fresh green onions. Perfect for a satisfying meal that will delight your taste buds.

    Author: Munch Twist
    Prep Time: 15 minutes
    Cook Time: 40 minutes
    Total Time: 55 minutes
    Yield: 4 servings
    Category: Desserts
    Method: No bake
    Cuisine: American

    Outback Steakhouse Alice Springs Chicken

    SCALE:
    1x
    2x
    3x
    Cook Mode: Prevent your screen from going dark

    Ingredients

    • 6 slices thick-cut bacon
    • 2 cups shredded cheddar cheese
    • 3 large boneless, skinless chicken breasts
    • Salt and pepper, to taste
    • ⅓ cup chopped green onions for garnish

    Instructions

    1. Preheat your oven to 350°F (175°C).
    2. Slice each chicken breast in half lengthwise and season both sides with salt and pepper.
    3. Place the seasoned chicken breasts on a baking sheet and bake for 25 minutes.
    4. Cook the bacon in a skillet over medium heat until the fat is rendered but not crispy. Remove from the skillet and cut each slice in half.
    5. After 25 minutes, take the chicken out of the oven, lay half a slice of bacon on top of each chicken piece, and return to the oven for an additional 10 minutes.
    6. Remove the chicken from the oven, sprinkle shredded cheddar cheese evenly over each piece, and bake for another 5 minutes until the cheese is melted and bubbly.
    7. Sprinkle chopped green onions on top before serving.

    Nutrition Facts

    Serving Size: 1 serving
    Calories: 309 kcal
    Sugar: 0g
    Sodium: 543mg
    Fat: 19g
    Saturated Fat: 9g
    Carbohydrates: 2g
    Fiber: 0g
    Protein: 31g
    Cholesterol: 100mg

  • Delicious Sausage Hashbrown Bites Recipe

    Delicious Sausage Hashbrown Bites Recipe

    Sausage Hashbrown Bites are a delightful combination of savory sausage, creamy cheese, and crispy hash browns. These bites are perfect for parties, snacks, or a tasty breakfast treat. Their irresistible flavor and easy preparation make them a must-try for any occasion.

    Why You’ll Love This Recipe

    • Quick & Easy: Ready in under 30 minutes, making them perfect for busy mornings or last-minute gatherings.
    • Crowd-Pleaser: These bites are sure to impress guests and family alike with their delicious taste and texture.
    • Versatile Snack: Enjoy them as a breakfast option, party appetizer, or savory snack at any time of day.
    • Cheesy Goodness: The combination of cream cheese and cheddar creates a rich, creamy interior that pairs perfectly with crispy outsides.
    • Make Ahead: These bites can be prepared in advance and frozen, allowing you to enjoy them whenever you like.

    Tools and Equipment

    Having the right tools makes cooking enjoyable and efficient.

    Essential Tools

    • Mixing bowl
    • Baking sheet
    • Parchment paper
    • Cookie scoop or spoon

    Why These Tools Matter

    • Mixing bowl: A large bowl provides enough space to combine all ingredients without spilling.
    • Baking sheet: A sturdy sheet ensures even cooking and browning of the bites.
    • Parchment paper: This prevents sticking and makes cleanup effortless.

    Ingredients for Sausage Hashbrown Bites

    Main Ingredients

    • 1 lb ground breakfast sausage (uncooked)
    • 1 ½ cups shredded cheddar cheese
    • 8 oz softened cream cheese
    • 1 ½ cups Bisquick mix
    • 4 cups shredded frozen hash browns

    How to Make Sausage Hashbrown Bites Step-by-Step

    Step 1: Preheat the Oven

    Set your oven to 400°F (200°C). Preheating is essential for achieving that perfect golden brown color.

    Step 2: Combine Ingredients

    In a large mixing bowl, combine the following:
    * 8 oz softened cream cheese
    * 1 lb ground breakfast sausage
    * 1 ½ cups shredded cheddar cheese
    * 1 ½ cups Bisquick mix
    * 4 cups shredded frozen hash browns

    Mix until everything is well incorporated, ensuring an even distribution of flavors.

    Step 3: Form the Bites

    Shape the mixture into evenly sized balls. This helps them cook uniformly. Place them on a parchment-lined baking sheet to prevent sticking.

    Step 4: Bake

    Bake the bites in the preheated oven for 20-25 minutes. Keep an eye on them, and remove when they are golden brown and crispy on the outside.

    Step 5: Cool and Serve

    Allow the bites to cool slightly before serving. This helps them set and makes them easier to enjoy.

    With these simple steps, you’ll have delicious Sausage Hashbrown Bites ready to delight your taste buds. Enjoy them fresh from the oven or store them for later.

    How to Serve Sausage Hashbrown Bites

    Sausage Hashbrown Bites are versatile and can be enjoyed in various ways.

    For Breakfast or Brunch

    Serve these bites alongside scrambled eggs and fresh fruit for a hearty breakfast or brunch option. They add a savory element that complements the sweetness of the fruit.

    As Party Appetizers

    Present the bites on a platter with toothpicks at your next gathering. Their bite-sized nature makes them perfect for mingling and enjoying with friends.

    With Dipping Sauces

    Pair your Sausage Hashbrown Bites with a variety of dipping sauces such as ranch, sriracha mayo, or honey mustard. The sauces add an extra layer of flavor that elevates the dish.

    Pro Tips for the Best Sausage Hashbrown Bites

    To achieve maximum flavor and texture, consider these helpful tips.

    • Use Fresh Ingredients: Fresh ingredients will enhance the overall flavor of your bites. Opt for high-quality sausage and freshly shredded cheese.

    • Chill the Mixture: For easier handling, chill the mixture in the refrigerator for about 30 minutes before forming the bites. This helps them maintain their shape while baking.

    • Uniform Size: Ensure all bites are the same size for even cooking. Aim for about 1 to 1.5 inches in diameter.

    • Don’t Overbake: Keep an eye on your bites during the last few minutes of baking to avoid overcooking. They should be golden brown and firm to the touch.

    • Experiment with Cheese: While cheddar is a classic choice, feel free to experiment with other cheeses like pepper jack or mozzarella for different flavor profiles.

    Best Side Dishes and Pairings

    To complement your Sausage Hashbrown Bites, consider these delightful side dishes and drinks.

    1. Fresh Fruit Salad: A bright and refreshing fruit salad balances the richness of the bites, providing a burst of sweetness.

    2. Scrambled Eggs: Fluffy scrambled eggs add a soft texture and make for a complete breakfast spread when served together.

    3. Veggie Platter: A colorful assortment of fresh vegetables with a light dip offers a crunchy contrast to the soft hashbrown bites.

    4. Coffee or Tea: A warm beverage like coffee or herbal tea pairs well, enhancing the meal’s comfort factor.

    5. Crisp Green Salad: A simple green salad dressed with vinaigrette adds a refreshing element that cuts through the richness of the bites.

    Common Mistakes to Avoid

    • Skipping the Cream Cheese: Ensure the cream cheese is softened to allow for easy mixing.
    • Overcrowding the Baking Sheet: Leave enough space between bites for even cooking and crispiness.
    • Not Preheating the Oven: Always preheat your oven to ensure the bites cook evenly from the start.
    • Ignoring Storage Guidelines: Proper storage is key to maintaining freshness and flavor.

    Storage & Reheating Instructions

    Refrigerator Storage

    Store Sausage Hashbrown Bites in an airtight container in the refrigerator. They will stay fresh for up to 3 days.

    Freezing Instructions

    To freeze, place the bites in a single layer on a baking sheet and freeze until solid. Transfer them to an airtight container or freezer bag for up to 2 months. Thaw in the refrigerator before reheating.

    Reheating Tips

    • Oven: Preheat to 350°F (175°C) and bake for 10-15 minutes until heated through.
    • Microwave: Heat on medium power for 1-2 minutes, checking frequently to avoid overcooking.
    • Stovetop: Reheat in a skillet over medium heat for about 5 minutes, turning occasionally.

    Frequently Asked Questions

    Can I make Sausage Hashbrown Bites ahead of time?

    Yes, you can prepare the mixture and form the bites a day in advance. Store them in the refrigerator until ready to bake.

    What type of sausage works best for Sausage Hashbrown Bites?

    Ground breakfast sausage is ideal, but you can use any sausage of your choice, including turkey or plant-based options for a healthier alternative.

    Can I add vegetables to Sausage Hashbrown Bites?

    Absolutely! Chopped bell peppers, onions, or spinach can be mixed in for added flavor and nutrition.

    How do I know when the bites are done baking?

    Sausage Hashbrown Bites are done when they are golden brown and cooked through, typically after 20-25 minutes of baking.

    What can I serve with Sausage Hashbrown Bites?

    These bites pair well with a side of scrambled eggs or a light salad for a complete meal.

    Final Thoughts

    Sausage Hashbrown Bites are a delightful and easy recipe perfect for any gathering or a quick snack. We encourage you to try making them yourself and share your experience in the comments below.


    Dinner

    Sausage Hashbrown Bites


    5.0 from 24 reviews

    Sausage Hashbrown Bites are a delicious and easy-to-make appetizer that combines savory ground breakfast sausage, creamy cheese, and crispy hash browns. Perfect for parties or a tasty snack, these bite-sized treats are sure to please any crowd.

    Author: Munch Twist
    Prep Time: 10 minutes
    Cook Time: 25 minutes
    Total Time: 35 minutes
    Yield: 12 servings
    Category: Lunch
    Method: No bake
    Cuisine: American

    Sausage Hashbrown Bites

    SCALE:
    1x
    2x
    3x
    Cook Mode: Prevent your screen from going dark

    Ingredients

    • 1 lb ground breakfast sausage (uncooked)
    • 1 ½ cups shredded cheddar cheese
    • 8 oz softened cream cheese
    • 1 ½ cups Bisquick mix
    • 4 cups shredded frozen hash browns

    Instructions

    1. Preheat your oven to 400°F (200°C).
    2. In a large mixing bowl, combine the softened cream cheese, ground breakfast sausage, shredded cheddar cheese, Bisquick mix, and shredded frozen hash browns. Mix until everything is well incorporated.
    3. Shape the mixture into evenly sized balls and place them on a parchment-lined baking sheet.
    4. Bake the bites in the preheated oven for 20-25 minutes, or until golden brown.
    5. Allow the bites to cool slightly before serving.

    Nutrition Facts

    Serving Size: 1 serving
    Calories: 300 kcal
    Sugar: 1g
    Sodium: 500mg
    Fat: 20g
    Saturated Fat: 8g
    Carbohydrates: 15g
    Fiber: 1g
    Protein: 12g
    Cholesterol: 45mg

  • Delicious Sour Cream Noodle Bake Recipe Made Easy

    Delicious Sour Cream Noodle Bake Recipe Made Easy

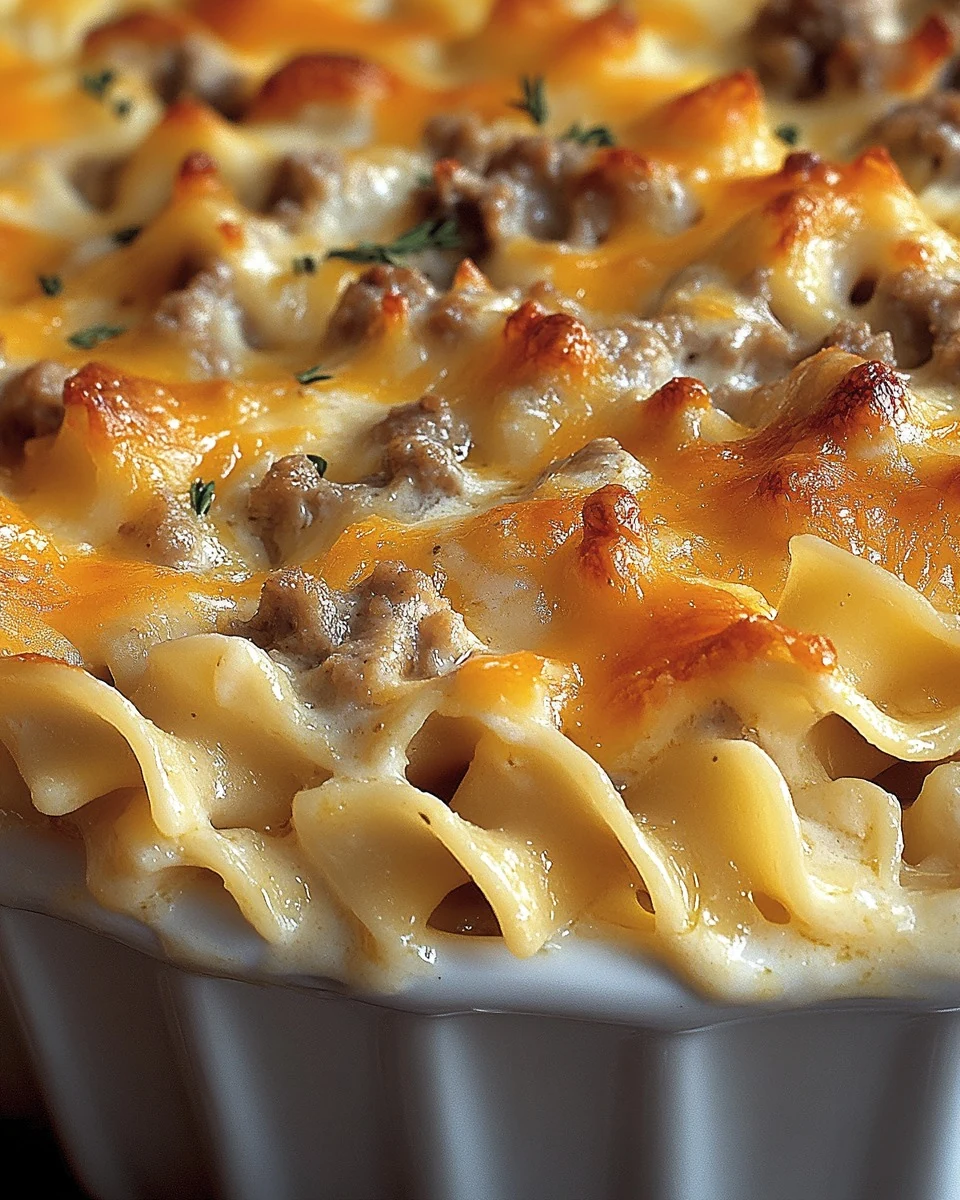
    Sour Cream Noodle Bake is a comforting dish that combines layers of creamy noodles, savory beef, and melted cheese. This hearty casserole offers a delightful blend of flavors that appeal to both kids and adults alike. It’s an ideal choice for a family dinner or a potluck gathering.

    Why You’ll Love This Recipe

    • Quick & Easy: Ready in under an hour, making it perfect for busy weeknights.
    • Crowd-Pleaser: The combination of beef, cheese, and noodles is sure to satisfy everyone at the table.
    • Make-Ahead Friendly: Prepare it in advance and store it in the refrigerator until you’re ready to bake.
    • Versatile: Customize with your favorite vegetables or substitute proteins to suit your taste.
    • Comfort Food: The creamy texture and savory flavors create a cozy and satisfying meal.

    Tools and Equipment

    Having the right tools can make the cooking process smoother and more enjoyable.

    Essential Tools

    • Large skillet
    • 9×13-inch baking dish
    • Mixing bowls
    • Cooking pot
    • Colander
    • Wooden spoon

    Why These Tools Matter

    • Large skillet: Essential for browning the beef and sautéing onions, ensuring even cooking.
    • Mixing bowls: Help combine ingredients efficiently, keeping your workspace organized.
    • Colander: Makes draining the noodles quick and easy, preventing overcooking.

    Ingredients for Sour Cream Noodle Bake

    For the Sauce Mixture:

    • 1 pound ground beef
    • 1 small sweet onion, diced
    • 2 cloves garlic, minced
    • 15-ounce can tomato sauce
    • ½ teaspoon salt
    • ½ teaspoon black pepper

    For the Noodle Mixture:

    • 12 ounces egg noodles
    • 1 ½ cups small curd cottage cheese
    • ¾ cup sour cream
    • ½ teaspoon salt
    • ½ teaspoon black pepper
    • ½ teaspoon garlic powder
    • ½ teaspoon onion powder
    • 8 ounces shredded Colby Jack cheese

    How to Make Sour Cream Noodle Bake Step-by-Step

    Step 1: Preheat the Oven

    Preheat your oven to 350°F (175°C). Lightly spray a 9×13-inch baking dish with cooking spray and set it aside.

    Step 2: Prepare the Sauce

    In a large skillet over medium-high heat, cook the ground beef and diced onion until the beef is browned and the onion is softened, about 8-10 minutes. Break the beef into crumbles as it cooks. Add the minced garlic and cook for an additional 30 seconds, until fragrant. Stir in the tomato sauce, salt, and black pepper. Bring to a simmer, then reduce the heat to low. Simmer uncovered for 15 minutes, stirring occasionally.

    Step 3: Cook the Noodles

    While the sauce is simmering, cook the egg noodles according to package directions. Drain and set aside.

    Step 4: Mix the Noodles

    In a large bowl, combine the cottage cheese, sour cream, salt, black pepper, garlic powder, and onion powder. Stir until well combined. Add the cooked noodles to the bowl and mix until the noodles are well coated.

    Step 5: Assemble the Bake

    Spread half of the noodle mixture evenly in the bottom of the prepared baking dish. Top with half of the sauce mixture and then half of the shredded Colby Jack cheese. Repeat the layers with the remaining noodles, sauce, and cheese.

    Step 6: Bake

    Place the baking dish in the preheated oven and bake for 20 minutes, or until heated through and the cheese is melted and bubbly.

    Step 7: Serve

    Remove from the oven and let cool slightly before serving. Enjoy your delicious Sour Cream Noodle Bake!

    How to Serve Sour Cream Noodle Bake

    Sour Cream Noodle Bake is a versatile dish that can be enjoyed in various ways. Here are a few creative serving suggestions:

    Garnished with Fresh Herbs

    Top each serving with freshly chopped parsley or chives for a burst of color and flavor that complements the richness of the dish.

    Accompanied by a Side Salad

    Serve with a crisp green salad dressed with a light vinaigrette to balance the creaminess of the bake and add a refreshing crunch.

    Paired with Garlic Bread

    Offer slices of warm garlic bread on the side to soak up the delicious sauce and provide a satisfying crunch.

    Pro Tips for the Best Sour Cream Noodle Bake

    To enhance your Sour Cream Noodle Bake, consider these expert tips:

    • Use Quality Ingredients: Opt for high-quality ground beef and fresh dairy products for the best flavor and texture.
    • Don’t Overcook the Noodles: Cook the egg noodles just until al dente, as they will continue to soften while baking.
    • Add Vegetables: Incorporate sautéed bell peppers or spinach into the sauce for added nutrition and flavor.
    • Experiment with Cheeses: Try mixing different cheeses, such as mozzarella or cheddar, to create a unique flavor profile.
    • Make Ahead: Prepare the dish in advance and refrigerate it before baking. This allows the flavors to meld beautifully.

    Best Side Dishes and Pairings

    To complement your Sour Cream Noodle Bake, consider these delightful pairings:

    1. Garlic Bread: The buttery, garlicky goodness enhances the flavors of the bake while providing a satisfying crunch.
    2. Caesar Salad: The crisp romaine and tangy dressing add a refreshing contrast to the creamy dish.
    3. Steamed Broccoli: This nutrient-rich vegetable offers a vibrant color and a mild flavor that balances the richness of the bake.
    4. Roasted Asparagus: Roasting brings out the natural sweetness of asparagus, making it a perfect side to cut through the creaminess.
    5. Red Wine: A glass of medium-bodied red wine, such as Merlot or Pinot Noir, pairs beautifully with the savory flavors of the dish.

    Common Mistakes to Avoid

    • Overcooking the Noodles: Make sure to cook the egg noodles al dente, as they will continue to soften while baking.
    • Skipping the Sauce Simmer: Allowing the sauce to simmer enhances the flavors and prevents a watery dish.
    • Not Letting It Cool: Allow the Sour Cream Noodle Bake to cool slightly before serving to help the layers set.
    • Using Low-Quality Ingredients: Choose fresh ingredients, especially cheeses, to achieve the best flavor and texture.

    Storage & Reheating Instructions

    Refrigerator Storage

    Store the Sour Cream Noodle Bake in airtight containers in the refrigerator. It will stay fresh for up to 3-4 days.

    Freezing Instructions

    To freeze, wrap the assembled (but unbaked) Sour Cream Noodle Bake tightly in plastic wrap and then in aluminum foil. It can be frozen for up to 2 months. Thaw it in the refrigerator overnight before baking.

    Reheating Tips

    • Oven: Preheat to 350°F (175°C) and cover the dish with foil. Bake for 25-30 minutes until heated through.
    • Microwave: Place a serving on a microwave-safe plate and cover. Heat on high for 2-3 minutes or until hot.
    • Stovetop: Heat in a skillet over medium heat, stirring occasionally, until warmed through.

    Frequently Asked Questions

    Can I make Sour Cream Noodle Bake ahead of time?

    Yes, you can prepare the dish, cover it tightly, and refrigerate it for up to 24 hours before baking.

    What can I use instead of Colby Jack cheese in Sour Cream Noodle Bake?

    You can substitute with cheddar, mozzarella, or a blend of your favorite cheeses for a different flavor profile.

    Can I use a different type of meat in this recipe?

    Absolutely! Ground turkey, chicken, or even a meat substitute for a vegetarian option work well in Sour Cream Noodle Bake.

    How do I ensure my Sour Cream Noodle Bake is creamy?

    Make sure to use full-fat sour cream and cottage cheese for the best creamy texture.

    Can I add vegetables to my Sour Cream Noodle Bake?

    Yes, incorporating vegetables like spinach, bell peppers, or mushrooms can add flavor and nutrition to your dish.

    Final Thoughts

    This Sour Cream Noodle Bake is a comforting dish that is sure to please the whole family. It’s easy to prepare and perfect for weeknight dinners. I encourage you to try this recipe and share your thoughts in the comments section below.


    Dinner

    Sour Cream Noodle Bake


    5.0 from 24 reviews

    Sour Cream Noodle Bake is a comforting and hearty dish that combines layers of egg noodles, a savory beef and tomato sauce, and creamy cheese. Perfect for family dinners, this casserole is easy to prepare and sure to please everyone at the table.

    Author: Munch Twist
    Prep Time: 15 minutes
    Cook Time: 35 minutes
    Total Time: 50 minutes
    Yield: 6 servings
    Category: Dinner
    Method: Baking
    Cuisine: American

    Sour Cream Noodle Bake

    SCALE:
    1x
    2x
    3x
    Cook Mode: Prevent your screen from going dark

    Ingredients

    • 1 pound ground beef
    • 1 small sweet onion, diced
    • 2 cloves garlic, minced
    • 15-ounce can tomato sauce
    • ½ teaspoon salt
    • ½ teaspoon black pepper
    • 12 ounces egg noodles
    • 1 ½ cups small curd cottage cheese
    • ¾ cup sour cream
    • ½ teaspoon garlic powder
    • ½ teaspoon onion powder
    • 8 ounces shredded Colby Jack cheese

    Instructions

    1. Preheat your oven to 350°F (175°C). Lightly spray a 9×13-inch baking dish with cooking spray and set aside.
    2. In a large skillet over medium-high heat, cook the ground beef and diced onion until the beef is browned and the onion is softened, about 8-10 minutes. Add minced garlic and cook for an additional 30 seconds.
    3. Stir in the tomato sauce, salt, and black pepper. Bring to a simmer, then reduce heat to low and simmer uncovered for 15 minutes.
    4. While the sauce is simmering, cook the egg noodles according to package directions. Drain and set aside.
    5. In a large bowl, combine the cottage cheese, sour cream, salt, black pepper, garlic powder, and onion powder. Stir until well combined. Add the cooked noodles and mix until well coated.
    6. Spread half of the noodle mixture in the bottom of the prepared baking dish. Top with half of the sauce mixture and half of the shredded Colby Jack cheese. Repeat the layers with the remaining noodles, sauce, and cheese.
    7. Place the baking dish in the preheated oven and bake for 20 minutes, or until heated through and the cheese is melted and bubbly.
    8. Remove from the oven and let cool slightly before serving.

    Nutrition Facts

    Serving Size: 1 serving
    Calories: 350 kcal
    Sugar: 3g
    Sodium: 750mg
    Fat: 16g
    Saturated Fat: 8g
    Carbohydrates: 32g
    Fiber: 1g
    Protein: 21g
    Cholesterol: 85mg

  • Irresistible Peanut Butter Brownie Swirl Cookies Recipe

    Irresistible Peanut Butter Brownie Swirl Cookies Recipe

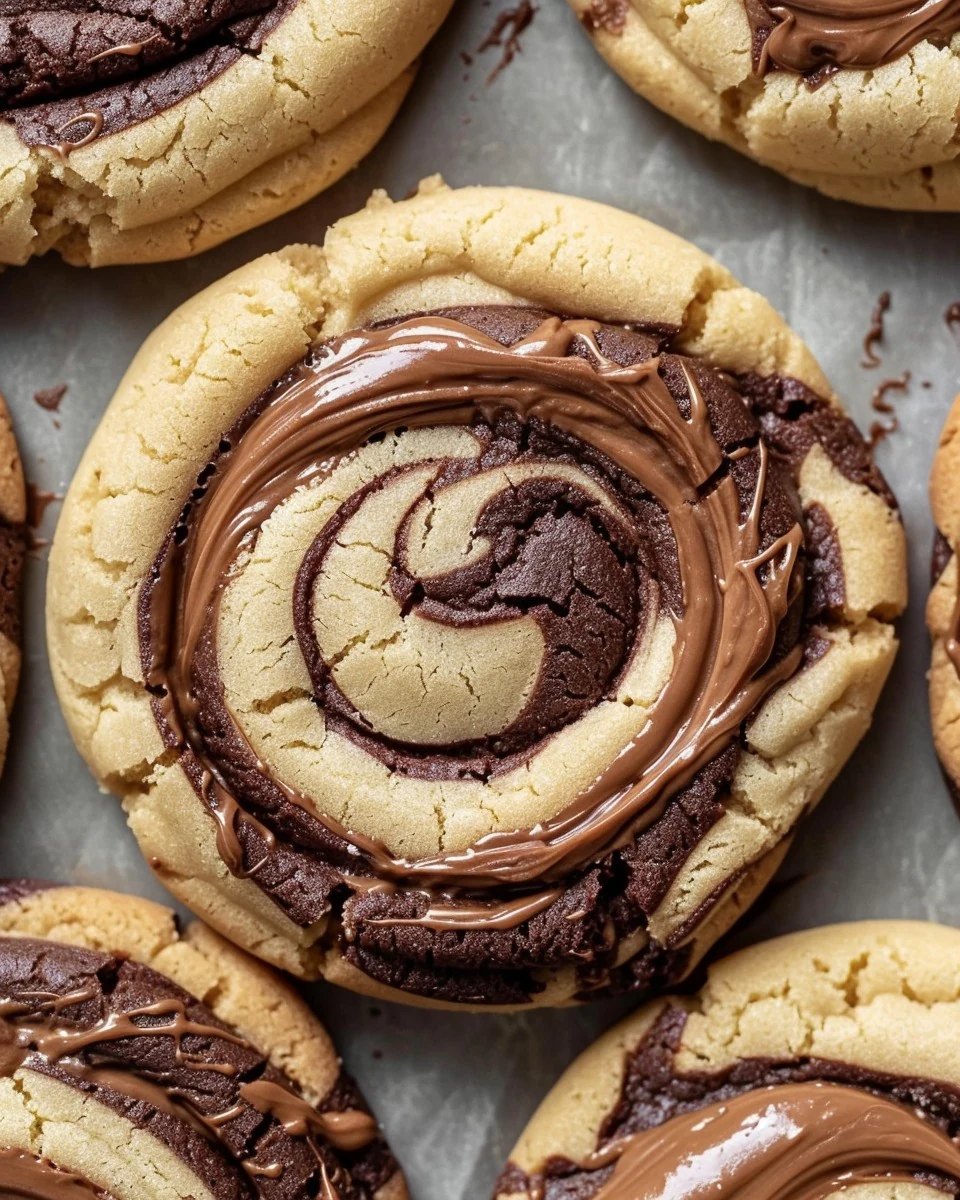
    Peanut Butter Brownie Swirl Cookies are a delightful treat that combines the rich flavors of brownie and creamy peanut butter in every bite. These cookies are not only visually appealing with their beautiful swirls but also offer a satisfying texture that is both chewy and soft. Perfect for any occasion, they will quickly become a favorite in your dessert repertoire.

    Why You’ll Love This Recipe

    • Irresistible Flavor: The combination of peanut butter and chocolate creates a harmonious taste that is hard to resist.
    • Fun to Make: This recipe is a great way to involve kids or friends in the kitchen.
    • Perfect for Sharing: Bake a batch for parties, gatherings, or as a thoughtful gift.
    • Customizable: Feel free to add chocolate chips or nuts for added texture and flavor.
    • Quick & Easy: Ready in under 30 minutes, these cookies are perfect for a last-minute treat.

    Tools and Equipment

    Gathering the right tools will streamline your baking experience.

    Essential Tools

    • Mixing bowls
    • Measuring cups
    • Measuring spoons
    • Whisk
    • Baking sheet
    • Parchment paper
    • Spoon or cookie scoop

    Why These Tools Matter

    • Mixing bowls: Essential for combining ingredients without mess.
    • Baking sheet: Provides even baking and easy transfer to and from the oven.
    • Parchment paper: Prevents sticking, ensuring your cookies come out perfectly every time.

    Ingredients for Peanut Butter Brownie Swirl Cookies

    For the Peanut Butter Cookie Dough:

    • 1/3 cup creamy peanut butter
    • 1/4 teaspoon baking soda
    • 1/4 cup granulated sugar
    • 1 large egg
    • 1/4 cup unsalted butter, softened
    • 1/8 teaspoon salt
    • 1/4 cup packed light brown sugar
    • 3/4 cup all-purpose flour
    • 1/2 teaspoon vanilla extract

    For the Brownie Cookie Dough:

    • 1 large egg
    • 1/8 teaspoon baking powder
    • 1/4 cup unsalted butter, melted
    • 1/8 teaspoon salt
    • 1/2 cup granulated sugar
    • 1/3 cup unsweetened cocoa powder
    • 1/2 teaspoon vanilla extract
    • 1/2 cup all-purpose flour

    How to Make Peanut Butter Brownie Swirl Cookies Step-by-Step

    Step 1: Prepare the Peanut Butter Cookie Dough

    1. In a large mixing bowl, cream together softened butter, creamy peanut butter, granulated sugar, and packed light brown sugar until light and fluffy, about 3-4 minutes.
    2. Add 1 large egg and vanilla extract, beating until fully combined.
    3. In a separate bowl, whisk together all-purpose flour, baking soda, and salt. Gradually add the dry ingredients to the wet mixture, stirring until just combined. Set aside.

    Step 2: Prepare the Brownie Cookie Dough

    1. In another large bowl, whisk together melted butter and granulated sugar until well-mixed.
    2. Add 1 large egg and vanilla extract, mixing thoroughly.
    3. Sift together cocoa powder, all-purpose flour, baking powder, and salt. Gradually stir these dry ingredients into the wet mixture until the dough is smooth and uniform.

    Step 3: Assemble the Cookies

    1. Preheat your oven to 350°F (175°C) and line a baking sheet with parchment paper.
    2. Take about 1 tablespoon of each dough (peanut butter and brownie) and gently roll them together into a ball.
    3. Twist the doughs lightly to create a marbled effect, ensuring you don’t overmix to maintain distinct swirls.
    4. Place the dough balls on the prepared baking sheet, spacing them about 2 inches apart.

    Step 4: Bake the Cookies

    1. Bake for 10-12 minutes, or until the edges are just set but the centers remain soft. This ensures a chewy center with a crisp edge.
    2. Let the cookies cool on the baking sheet for 5 minutes before transferring them to a wire rack to cool completely.

    Enjoy these delightful Peanut Butter Brownie Swirl Cookies, where each bite offers a perfect blend of flavors and textures.

    How to Serve Peanut Butter Brownie Swirl Cookies

    These cookies are versatile and can be enjoyed in various ways to enhance their delightful flavors.

    With a Glass of Milk

    A classic pairing, serving these cookies with a cold glass of milk complements the rich peanut butter and chocolate flavors beautifully.

    Ice Cream Sandwiches

    Transform your cookies into indulgent ice cream sandwiches by placing a scoop of vanilla or chocolate ice cream between two cookies for a decadent treat.

    Dessert Platter

    Arrange these cookies on a dessert platter alongside fresh fruit and other baked goods for a visually appealing and delicious spread at gatherings or parties.

    Pro Tips for the Best Peanut Butter Brownie Swirl Cookies

    To achieve perfect cookies every time, consider these helpful tips.

    • Use Creamy Peanut Butter: For the best texture and flavor, opt for creamy peanut butter instead of crunchy, which can disrupt the dough consistency.
    • Measure Flour Accurately: Ensure that you measure your flour using the spoon-and-level method to avoid dense cookies caused by too much flour.
    • Don’t Overmix the Dough: Mix the cookie dough just until combined to maintain a tender, chewy texture instead of a tough one.
    • Chill the Dough (Optional): If time allows, chill the dough for 30 minutes before baking to enhance flavor and prevent spreading.
    • Rotate the Baking Sheet: Halfway through baking, rotate the baking sheet for even cooking, ensuring all cookies are baked to perfection.

    Best Side Dishes and Pairings

    These cookies can be paired with various dishes and drinks for an enhanced experience.

    1. Coffee: The rich flavors of coffee perfectly complement the chocolate and peanut butter in the cookies, making for a delightful pairing.
    2. Chocolate Milkshake: A thick chocolate milkshake adds a creamy sweetness that balances the cookies’ flavors beautifully.
    3. Fresh Berries: The tartness of fresh berries, such as strawberries or raspberries, provides a refreshing contrast to the sweetness of the cookies.
    4. Whipped Cream: Topping the cookies with a dollop of whipped cream can elevate them to a new level of indulgence.
    5. Nutty Trail Mix: A side of nutty trail mix can enhance the nutty flavors of the peanut butter while adding crunch and texture to your dessert experience.

    Common Mistakes to Avoid

    • Overmixing the Dough: Mixing too much can lead to tough cookies. Stir until just combined.
    • Incorrect Oven Temperature: Ensure your oven is preheated to 350°F (175°C) for even baking.
    • Not Chilling the Dough: If the dough is too soft, chilling it for 15-30 minutes can help shape better cookies.
    • Skipping Parchment Paper: Baking without parchment can cause sticking. Always line your baking sheet.

    Storage & Reheating Instructions

    Refrigerator Storage

    Store the cookies in an airtight container at room temperature for up to 5 days. If you prefer, you can also refrigerate them for up to a week.

    Freezing Instructions

    To freeze, place the cookies in a single layer on a baking sheet until firm, then transfer them to a freezer-safe container or bag. They will stay fresh for up to 3 months.

    Reheating Tips

    • Oven: Preheat to 350°F (175°C) and warm cookies for 5-7 minutes.
    • Microwave: Heat for 10-15 seconds for a warm, gooey treat.
    • Stovetop: Use a skillet on low heat for 1-2 minutes, covered, to warm without drying out.

    Frequently Asked Questions

    How do I know when the Peanut Butter Brownie Swirl Cookies are done?

    The cookies are done when the edges are set and the centers are still slightly soft. They will continue to firm up as they cool.

    Can I use crunchy peanut butter for this recipe?

    Yes, crunchy peanut butter can be used for added texture, but it may change the consistency slightly.

    How do I store leftover Peanut Butter Brownie Swirl Cookies?

    Store them in an airtight container at room temperature for up to 5 days, or refrigerate them for up to a week.

    Can I make the dough ahead of time?

    Absolutely! You can prepare the dough a day in advance and store it in the refrigerator until you’re ready to bake.

    What can I substitute for all-purpose flour?

    For a gluten-free option, you can use a 1:1 gluten-free flour blend, which will work well in this recipe.

    Final Thoughts

    These Peanut Butter Brownie Swirl Cookies are a delightful treat that combines the best of both worlds. We encourage you to try this recipe and share your results in the comments. Your feedback is always appreciated!


    Desserts

    Peanut Butter Brownie Swirl Cookies


    5.0 from 24 reviews

    These Peanut Butter Brownie Swirl Cookies combine the rich flavors of peanut butter and chocolate brownie in a delightful treat. Each cookie features a chewy center and a crisp edge, making them perfect for any occasion.

    Author: Munch Twist
    Prep Time: 20 minutes
    Cook Time: 12 minutes
    Total Time: 32 minutes
    Yield: 12 servings
    Category: Desserts
    Method: No bake
    Cuisine: American

    Peanut Butter Brownie Swirl Cookies

    SCALE:
    1x
    2x
    3x
    Cook Mode: Prevent your screen from going dark

    Ingredients

    • 1/3 cup creamy peanut butter
    • 1/4 teaspoon baking soda
    • 1/4 cup granulated sugar
    • 1 large egg
    • 1/4 cup unsalted butter, softened
    • 1/8 teaspoon salt
    • 1/4 cup packed light brown sugar
    • 3/4 cup all-purpose flour
    • 1/2 teaspoon vanilla extract
    • 1 large egg (for brownie dough)
    • 1/8 teaspoon baking powder
    • 1/4 cup unsalted butter, melted
    • 1/8 teaspoon salt (for brownie dough)
    • 1/2 cup granulated sugar (for brownie dough)
    • 1/3 cup unsweetened cocoa powder
    • 1/2 teaspoon vanilla extract (for brownie dough)
    • 1/2 cup all-purpose flour (for brownie dough)

    Instructions

    1. In a large mixing bowl, cream together the softened butter, creamy peanut butter, granulated sugar, and packed light brown sugar until light and fluffy.
    2. Add the egg and vanilla extract, beating until fully combined. In a separate bowl, whisk together the all-purpose flour, baking soda, and salt. Gradually add the dry ingredients to the wet mixture, stirring until just combined.
    3. In another bowl, whisk together the melted butter and granulated sugar. Add the egg and vanilla extract, mixing thoroughly. Sift together the cocoa powder, all-purpose flour, baking powder, and salt, then gradually stir these dry ingredients into the wet mixture until smooth.
    4. Preheat your oven to 350°F (175°C) and line a baking sheet with parchment paper. Take about 1 tablespoon of each dough and gently roll them together into a ball, twisting lightly to create a marbled effect.
    5. Place the dough balls on the prepared baking sheet, spacing them about 2 inches apart. Bake for 10-12 minutes, or until the edges are just set but the centers remain soft. Let the cookies cool on the baking sheet for 5 minutes before transferring them to a wire rack.

    Nutrition Facts

    Serving Size: 1 serving
    Calories: 130 kcal
    Sugar: 10g
    Sodium: 80mg
    Fat: 7g
    Saturated Fat: 3g
    Carbohydrates: 17g
    Fiber: 1g
    Protein: 3g
    Cholesterol: 25mg

  • Soft Pumpkin Snickerdoodles: The Ultimate Fall Treat

    Soft Pumpkin Snickerdoodles: The Ultimate Fall Treat

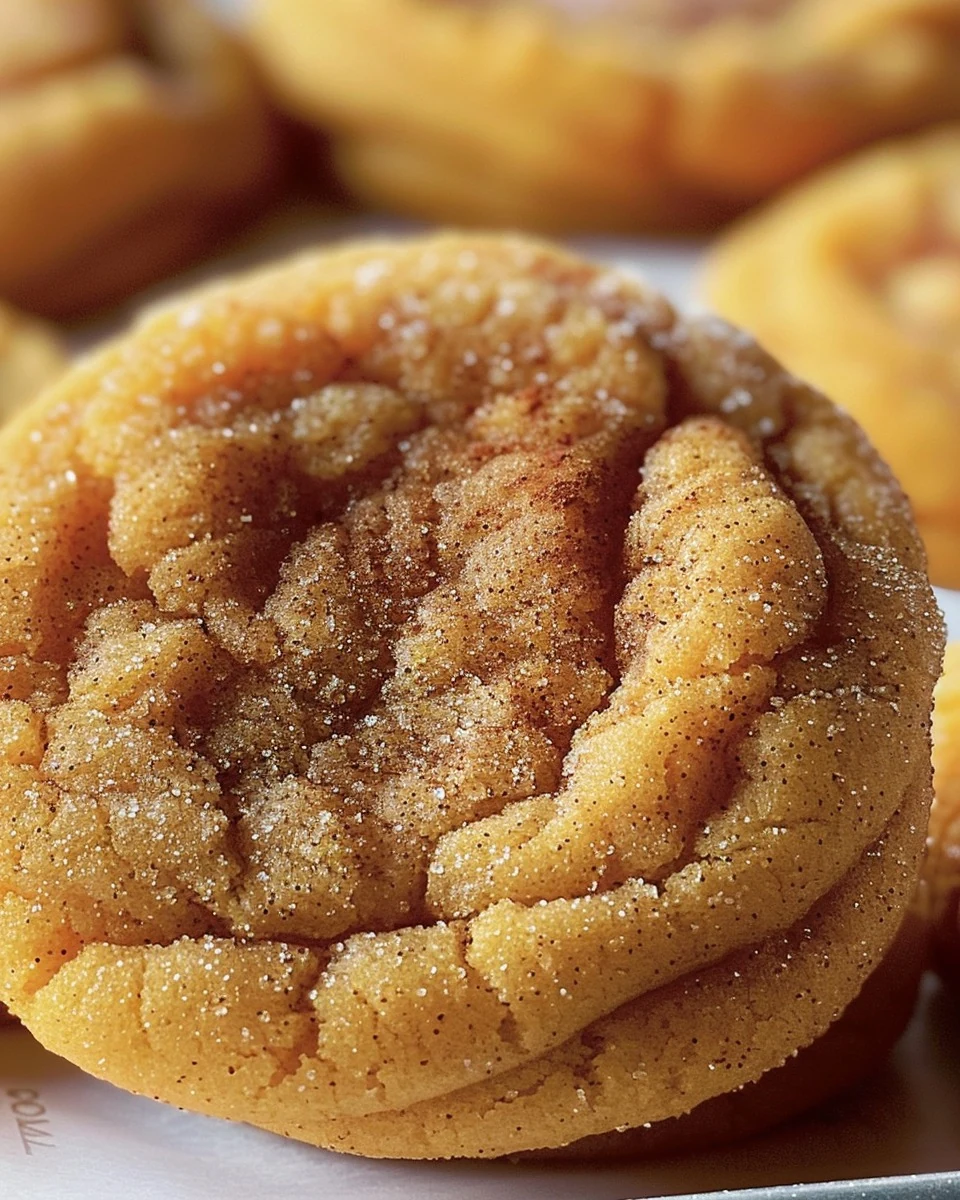
    Soft Pumpkin Snickerdoodles are a delightful twist on the classic cookie. These treats combine the warm spices of pumpkin pie with the soft, chewy texture of snickerdoodles, making them perfect for fall gatherings or cozy evenings at home.

    Why You’ll Love This Recipe

    • Irresistibly Soft: These cookies have a tender, chewy texture that melts in your mouth.
    • Flavorful Spice: The blend of pumpkin pie spice brings a warm and inviting flavor to each bite.
    • Quick to Prepare: With a total time of under 30 minutes, you can whip up a batch in no time.
    • Perfect for Sharing: These cookies make a great gift or dessert for gatherings with friends and family.
    • Seasonal Favorite: Embrace the flavors of fall with these delicious pumpkin-infused cookies.

    Tools and Equipment

    Having the right tools will make your baking experience smoother and more enjoyable.

    Essential Tools

    • Mixing bowls
    • Baking sheet
    • Parchment paper
    • Whisk
    • Measuring cups and spoons
    • Cookie scoop or spoon

    Why These Tools Matter

    • Mixing bowls: Essential for properly combining wet and dry ingredients.
    • Baking sheet: Provides a sturdy base for baking and ensures even heat distribution.
    • Parchment paper: Prevents sticking and makes cleanup a breeze.

    Ingredients for Soft Pumpkin Snickerdoodles

    Wet Ingredients

    • 1/2 cup pumpkin puree
    • 1 egg
    • 1/2 cup butter, softened

    Dry Ingredients

    • 3 cups all-purpose flour
    • 2 teaspoons baking soda
    • 1 teaspoon pumpkin pie spice or 1/2 teaspoon cinnamon, 1/4 teaspoon allspice, 1/4 teaspoon nutmeg, 1/4 teaspoon ginger
    • 1 teaspoon cream of tartar
    • 1/4 teaspoon salt
    • 1 1/2 cups sugar

    Cinnamon Sugar Mixture

    • 2 tablespoons sugar
    • 2 teaspoons cinnamon

    How to Make Soft Pumpkin Snickerdoodles Step-by-Step

    Step 1: Prep the Oven and Baking Sheet

    Preheat your oven to 350°F (175°C). Line a baking sheet with parchment paper to prevent sticking.

    Step 2: Mix the Wet Ingredients

    In a large mixing bowl, cream together the softened butter, 1 1/2 cups sugar, egg, and pumpkin puree. Mix until smooth and well combined.

    Step 3: Combine the Dry Ingredients

    In a separate bowl, whisk together the flour, cream of tartar, baking soda, salt, and pumpkin pie spice (or individual spices). Gradually add the dry ingredients to the wet mixture. Stir until a dough forms.

    Step 4: Make the Cinnamon Sugar

    In a small bowl, mix together the 2 tablespoons sugar and 2 teaspoons cinnamon. This will be used for coating the cookies.

    Step 5: Shape the Cookies

    Roll the dough into 1-inch balls. Coat each ball evenly in the cinnamon sugar mixture.

    Step 6: Prepare for Baking

    Place the coated dough balls onto the prepared baking sheet, spacing them about 2 inches apart. Gently press down on each ball with the back of a spoon or your fingers to slightly flatten them.

    Step 7: Bake the Cookies

    Bake in the preheated oven for 8-10 minutes. The edges should be set, and the tops may crack. Avoid overbaking to keep the cookies soft and chewy.

    Step 8: Cool and Enjoy

    Remove the cookies from the oven and let them cool on the baking sheet for a few minutes. Transfer them to a wire rack to cool completely.

    These soft Pumpkin Snickerdoodles are perfect for enjoying with a warm cup of your favorite fall beverage. Happy baking!

    Preparation time: 15 minutes | Cooking time: 8-10 minutes

    Nutritional Information (per serving)

    • Calories: 120 kcal
    • Carbohydrates: 19g
    • Protein: 1.5g
    • Fat: 4.5g
    • Saturated Fat: 2.5g
    • Fiber: 0.5g
    • Sugar: 10g

    Nutritional values are approximate and based on one cookie per serving.

    How to Serve Soft Pumpkin Snickerdoodles

    These Soft Pumpkin Snickerdoodles are not just delightful on their own; they can be creatively served to enhance your enjoyment. Here are a few serving ideas:

    With Spiced Hot Chocolate

    Serve these cookies alongside a rich spiced hot chocolate. The warm flavors of chocolate and pumpkin complement each other perfectly, creating a cozy treat.

    Pumpkin Spice Latte

    Pair your Soft Pumpkin Snickerdoodles with a classic pumpkin spice latte. The creamy, spiced coffee elevates the cookie experience, making it a perfect fall indulgence.

    Autumn Fruit Platter

    Accompany your cookies with an autumn fruit platter featuring apples and pears. The fresh, crisp fruit provides a refreshing contrast to the soft, spiced cookies.

    Pro Tips for the Best Soft Pumpkin Snickerdoodles

    To achieve the perfect Soft Pumpkin Snickerdoodles, consider these expert tips:

    • Use Fresh Pumpkin Puree: For the best flavor, opt for fresh pumpkin puree rather than canned. It enhances the overall taste and texture of your cookies.

    • Chill the Dough: If time permits, chill the dough for about 30 minutes before baking. This helps the cookies maintain their shape and enhances the flavors.

    • Do Not Overbake: Keep a close eye on your cookies as they bake. They should be soft and slightly underbaked in the center for that perfect chewy texture.

    • Store Properly: To keep your cookies soft, store them in an airtight container at room temperature. You can also add a slice of bread to help retain moisture.

    • Experiment with Spices: Feel free to adjust the spice blend according to your preference. Adding a touch more cinnamon or nutmeg can elevate the flavor profile.

    Best Side Dishes and Pairings

    These Soft Pumpkin Snickerdoodles can be enjoyed with various side dishes and beverages that enhance their flavor. Here are some excellent pairings:

    1. Chai Tea: The spices in chai tea harmonize beautifully with the flavors of the cookies, making for a comforting and aromatic experience.

    2. Vanilla Ice Cream: A scoop of vanilla ice cream provides a creamy contrast to the spiced cookies, creating a delightful dessert combination.

    3. Apple Cider: Warm apple cider complements the pumpkin flavor and adds a festive touch to your cookie experience.

    4. Cheese Platter: A selection of mild cheeses, like brie or goat cheese, can provide a savory balance to the sweetness of the cookies.

    5. Cranberry Sauce: The tartness of cranberry sauce offers a refreshing counterpoint to the rich flavors of the pumpkin snickerdoodles.

    Common Mistakes to Avoid

    • Overmixing the Dough: Mixing the dough too much can lead to tough cookies. Mix just until combined.
    • Not Measuring Flour Correctly: Use the spoon-and-level method for accurate flour measurement to prevent dry cookies.
    • Skipping the Chilling Step: Allowing the dough to chill can help the flavors meld and improve texture.
    • Overbaking: Keep a close eye on your cookies; they should be soft and slightly underbaked when removed from the oven.

    Storage & Reheating Instructions

    Refrigerator Storage

    Store your Soft Pumpkin Snickerdoodles in an airtight container in the refrigerator for up to one week. This will help maintain their softness and flavor.

    Freezing Instructions

    To freeze, place the baked cookies in a single layer on a baking sheet until frozen solid. Then transfer them to a freezer-safe bag or container. They can be frozen for up to three months.

    Reheating Tips

    • Oven: Preheat to 350°F (175°C), place cookies on a baking sheet, and warm for about 5 minutes.
    • Microwave: Heat for 10-15 seconds to warm one cookie at a time. Be cautious not to overheat.
    • Stovetop: Place a cookie in a skillet on low heat for 1-2 minutes, covering with a lid to retain moisture.

    Frequently Asked Questions

    Can I use fresh pumpkin instead of canned pumpkin puree for Soft Pumpkin Snickerdoodles?

    Yes, fresh pumpkin can be used, but make sure to puree it until smooth and remove excess moisture for the best results.

    What can I substitute for cream of tartar in this Soft Pumpkin Snickerdoodles recipe?

    You can substitute cream of tartar with an equal amount of baking powder, although it may slightly change the texture.

    How do I know when my Soft Pumpkin Snickerdoodles are done baking?

    They are done when the edges are set, and the tops have started to crack. They will continue to cook slightly after being removed from the oven.

    Can I add chocolate chips to the Soft Pumpkin Snickerdoodles?

    Absolutely! Adding chocolate chips can enhance the flavor and create a delightful twist.

    What is the best way to serve Soft Pumpkin Snickerdoodles?

    These cookies pair perfectly with a warm beverage, like coffee or chai tea, making them a great treat for fall gatherings.

    Final Thoughts

    These Soft Pumpkin Snickerdoodles are a delightful treat that brings the flavors of fall right into your kitchen. We encourage you to try this recipe and share your thoughts in the comments below. Your feedback is invaluable!


    Desserts

    Soft Pumpkin Snickerdoodles


    5.0 from 24 reviews

    These Soft Pumpkin Snickerdoodles are a delightful fall treat, combining the warm flavors of pumpkin and spices with a soft, chewy texture. Perfect for enjoying with a warm beverage, these cookies are easy to make and sure to please everyone.

    Author: Munch Twist
    Prep Time: 15 minutes
    Cook Time: 10 minutes
    Total Time: 25 minutes
    Yield: 24 servings
    Category: Desserts
    Method: No bake
    Cuisine: American

    Soft Pumpkin Snickerdoodles

    SCALE:
    1x
    2x
    3x
    Cook Mode: Prevent your screen from going dark

    Ingredients

    • 1/2 cup pumpkin puree
    • 3 cups all-purpose flour
    • 1 egg
    • 1 teaspoon pumpkin pie spice or 1/2 teaspoon cinnamon, 1/4 teaspoon allspice, 1/4 teaspoon nutmeg, 1/4 teaspoon ginger
    • 2 teaspoons baking soda
    • 1/2 cup butter, softened
    • 1 teaspoon cream of tartar
    • 1/4 teaspoon salt
    • 1 1/2 cups sugar
    • 2 tablespoons sugar (for cinnamon sugar)
    • 2 teaspoons cinnamon (for cinnamon sugar)

    Instructions

    1. Preheat your oven to 350°F (175°C). Line a baking sheet with parchment paper.
    2. In a large mixing bowl, cream together the softened butter, 1 1/2 cups sugar, egg, and pumpkin puree until smooth and well combined.
    3. In a separate bowl, whisk together the flour, cream of tartar, baking soda, salt, and pumpkin pie spice (or individual spices). Gradually add the dry ingredients to the wet mixture, stirring until a dough forms.
    4. In a small bowl, mix together the 2 tablespoons sugar and 2 teaspoons cinnamon for the cinnamon sugar coating.
    5. Roll the dough into 1-inch balls, then coat each ball evenly in the cinnamon sugar mixture.
    6. Place the coated dough balls onto the prepared baking sheet, spacing them about 2 inches apart. Gently press down on each dough ball with the back of a spoon or your fingers to slightly flatten them.
    7. Bake in the preheated oven for 8-10 minutes, or until the edges are set, and the tops begin to crack. Be careful not to overbake to keep them soft and chewy.
    8. Remove the cookies from the oven and let them cool on the baking sheet for a few minutes before transferring them to a wire rack to cool completely.

    Nutrition Facts

    Serving Size: 1 serving
    Calories: 120 kcal
    Sugar: 10g
    Sodium: 50mg
    Fat: 4.5g
    Saturated Fat: 2.5g
    Carbohydrates: 19g
    Fiber: 0.5g
    Protein: 1.5g
    Cholesterol: 20mg

  • Delicious Loaded Potato Meatloaf Casserole Recipe

    Delicious Loaded Potato Meatloaf Casserole Recipe

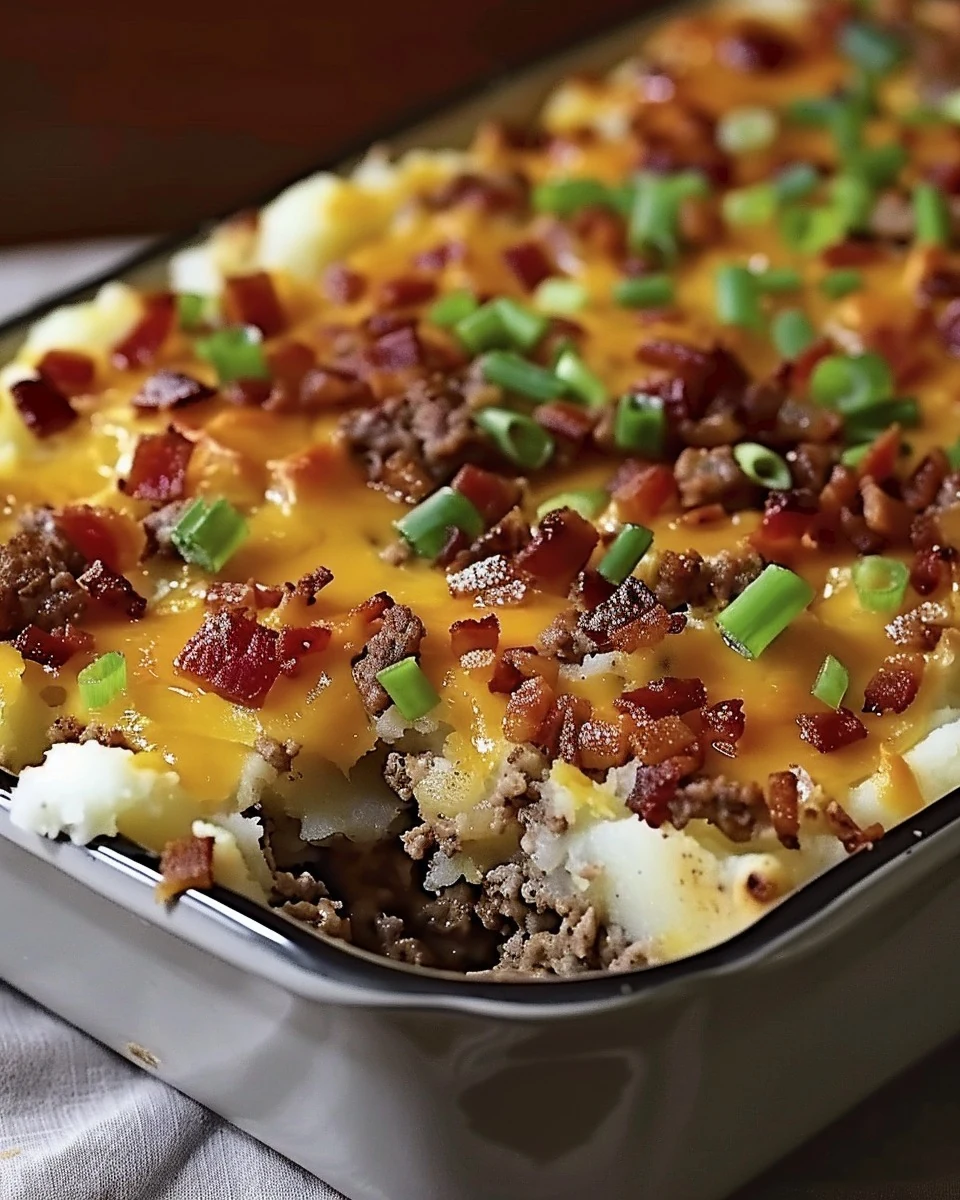
    Loaded Potato Meatloaf Casserole is a delicious and hearty dish that combines the best of meatloaf and loaded baked potatoes. This comforting casserole features a savory meat layer topped with creamy mashed potatoes, melted cheese, and crispy bacon bits, making it a family favorite. Perfect for weeknight dinners, it’s a dish that will satisfy even the heartiest appetites.

    Why You’ll Love This Recipe

    • Flavor Explosion: The combination of seasoned beef, creamy potatoes, and melty cheese creates a rich and satisfying taste.
    • Comfort Food Classic: This casserole is a delightful twist on traditional meatloaf, bringing warmth and nostalgia to your table.
    • Crowd-Pleaser: Loaded Potato Meatloaf Casserole is sure to impress family and friends, making it ideal for gatherings.
    • One-Dish Wonder: Minimal cleanup is required since everything cooks in one baking dish.
    • Customizable: Feel free to add your favorite toppings or vegetables to make this dish your own.

    Tools and Equipment

    Having the right tools can streamline your cooking process and enhance your results.

    Essential Tools

    • Mixing bowl
    • Medium saucepan
    • Rubber spatula
    • 8-inch square baking dish
    • Aluminum foil

    Why These Tools Matter

    • Mixing Bowl: A large bowl allows for easy combining of ingredients without spills.
    • Medium Saucepan: Perfect for preparing the mashed potatoes, ensuring even heating and mixing.
    • Rubber Spatula: This tool helps spread the mashed potatoes smoothly over the meat layer.

    Ingredients for Loaded Potato Meatloaf Casserole

    Meat and Base Ingredients

    • 1 lb ground beef, extra lean
    • 1/2 cup onion, diced
    • 1 cup seasoned Italian bread crumbs
    • 2 tbsp brown sugar
    • 1 tbsp Worcestershire sauce
    • 1 egg

    Mashed Potato Ingredients

    • 1 (4 oz) package of garlic-flavored instant mashed potatoes
    • 1/2 cup milk
    • 1 1/2 cups water

    Topping Ingredients

    • 1 1/2 cups cheddar cheese blend, shredded
    • 1/4 cup real bacon bits

    How to Make Loaded Potato Meatloaf Casserole Step-by-Step

    Step 1: Prep the Base

    1. Preheat your oven to 400°F (200°C). Grease an 8-inch square baking dish thoroughly.
    2. In a medium saucepan, combine the water and milk. Bring to a boil, then remove from heat.
    3. Stir in the garlic-flavored instant mashed potato powder until smooth. Set aside to cool slightly.

    Step 2: Make the Meat Mixture

    1. In a large mixing bowl, combine the ground beef, diced onions, brown sugar, and Worcestershire sauce. Use your hands to mix until well incorporated.
    2. Add the seasoned Italian bread crumbs and egg. Continue mixing by hand until everything is thoroughly combined.

    Step 3: Assemble the Casserole

    1. Press the meat mixture evenly into the prepared baking dish, creating a flat layer.
    2. Using a rubber spatula, spread the prepared mashed potatoes over the meat layer, ensuring it’s evenly distributed.
    3. Sprinkle the shredded cheddar cheese blend on top, followed by an even layer of bacon bits.

    Step 4: Bake and Serve

    1. Cover the dish with aluminum foil and bake in the preheated oven for 30 minutes.
    2. After 30 minutes, remove the foil and bake for an additional 10 minutes to allow the cheese to melt and become golden.
    3. Once baked, remove the casserole from the oven and let it cool for a few minutes before slicing and serving.

    Preparation time: 20 minutes | Cooking time: 40 minutes

    Nutritional Information (per serving)

    • Calories: 370 kcal
    • Carbohydrates: 25g
    • Protein: 23g
    • Fat: 20g
    • Saturated Fat: 9g
    • Fiber: 2g
    • Sugar: 4g

    Nutritional values are approximate and based on one serving. Enjoy your Loaded Potato Meatloaf Casserole, a dish that brings comfort and satisfaction to every bite.

    How to Serve Loaded Potato Meatloaf Casserole

    Loaded Potato Meatloaf Casserole is a versatile dish that can be served in various ways to suit any occasion.

    Garnished with Fresh Herbs

    Top each serving with freshly chopped parsley or chives to add a burst of color and enhance the flavors.

    With a Side Salad

    Serve alongside a crisp garden salad dressed in a light vinaigrette to balance the richness of the casserole.

    Accompanied by Garlic Bread

    Pairing the casserole with warm garlic bread makes for a hearty meal, perfect for family gatherings or cold evenings.

    Pro Tips for the Best Loaded Potato Meatloaf Casserole

    For a perfect Loaded Potato Meatloaf Casserole, consider the following tips.

    • Quality Ingredients: Use high-quality ground beef and fresh ingredients for the best flavor and texture.
    • Even Layering: Ensure the meat mixture is evenly pressed into the baking dish for consistent cooking and serving.
    • Rest Before Serving: Allow the casserole to cool for a few minutes after baking; this helps the layers set and makes for easier slicing.
    • Customize the Toppings: Feel free to experiment with other toppings such as green onions or different cheese blends for a unique twist.
    • Leftover Storage: Store any leftovers in an airtight container in the refrigerator for up to three days, making for quick and easy reheats.

    Best Side Dishes and Pairings

    To enhance your meal experience, consider these side dishes and drinks that pair wonderfully with Loaded Potato Meatloaf Casserole.

    1. Steamed Broccoli – This nutrient-rich vegetable adds a pop of color and a healthy crunch to your meal.
    2. Coleslaw – The tangy and creamy texture of coleslaw provides a refreshing contrast to the richness of the casserole.
    3. Corn on the Cob – Sweet, juicy corn complements the savory flavors of the dish, creating a satisfying combination.
    4. Mashed Sweet Potatoes – The sweetness of mashed sweet potatoes adds a delightful balance to the savory meatloaf.
    5. Red Wine – A glass of medium-bodied red wine can enhance the flavors of the casserole, making for a sophisticated pairing.

    Common Mistakes to Avoid

    • Not Using Lean Meat: Opting for higher-fat ground beef can result in a greasy casserole.
    • Skipping the Egg: The egg is crucial for binding the meat mixture; omitting it may lead to a crumbly texture.
    • Overbaking the Cheese: Baking too long after removing the foil can lead to burnt cheese, so keep an eye on it.
    • Not Letting It Rest: Allowing the casserole to cool for a few minutes before slicing helps it hold its shape.

    Storage & Reheating Instructions

    Refrigerator Storage

    Store any leftovers in airtight containers in the refrigerator. The Loaded Potato Meatloaf Casserole will stay fresh for up to 3 days.

    Freezing Instructions

    For long-term storage, freeze individual portions or the entire casserole wrapped tightly in plastic wrap and aluminum foil. It can be frozen for up to 3 months. Thaw overnight in the refrigerator before reheating.

    Reheating Tips

    • Oven: Preheat to 350°F (175°C). Cover with foil and bake for 20-25 minutes until heated through.
    • Microwave: Use a microwave-safe dish, cover, and heat for 2-3 minutes or until warm, stirring halfway.
    • Stovetop: Heat in a skillet over medium heat, adding a splash of water to prevent sticking, and cover until warmed through.

    Frequently Asked Questions

    How can I make a healthier version of Loaded Potato Meatloaf Casserole?

    You can use ground turkey or chicken instead of beef, low-fat cheese, and whole grain breadcrumbs for a healthier twist.

    Can I make Loaded Potato Meatloaf Casserole ahead of time?

    Yes, you can prepare the casserole up to the baking step, cover it tightly, and refrigerate for up to 24 hours before baking.

    What can I serve with Loaded Potato Meatloaf Casserole?

    This dish pairs well with a simple green salad or steamed vegetables for a balanced meal.

    Can I use different types of cheese in the casserole?

    Absolutely! Feel free to substitute with your favorite cheese, such as mozzarella or pepper jack, for a unique flavor.

    Is Loaded Potato Meatloaf Casserole freezer-friendly?

    Yes, this casserole freezes well. Just follow the freezing instructions for best results.

    Final Thoughts

    The Loaded Potato Meatloaf Casserole is a comforting and satisfying dish that is sure to please the whole family. Its combination of flavors and textures makes it a perfect choice for dinner. Give it a try, and don’t forget to leave a comment sharing your experience and any variations you made!


    Dinner

    Loaded Potato Meatloaf Casserole


    5.0 from 24 reviews

    This Loaded Potato Meatloaf Casserole combines the comforting flavors of meatloaf and mashed potatoes, topped with melted cheese and crispy bacon bits. It's a hearty dish perfect for family dinners, offering a delightful blend of textures and tastes in every bite.

    Author: Munch Twist
    Prep Time: 20 minutes
    Cook Time: 40 minutes
    Total Time: 60 minutes
    Yield: 6 servings
    Category: Lunch
    Method: No bake
    Cuisine: American

    Loaded Potato Meatloaf Casserole

    SCALE:
    1x
    2x
    3x
    Cook Mode: Prevent your screen from going dark

    Ingredients

    • 1/2 cup milk
    • 1 1/2 cups water
    • 1 lb ground beef, extra lean
    • 1 cup seasoned Italian bread crumbs
    • 2 tbsp brown sugar
    • 1 (4 oz) package of garlic-flavored instant mashed potatoes
    • 1/2 cup onion, diced
    • 1/4 cup real bacon bits
    • 1 egg
    • 1 tbsp Worcestershire sauce
    • 1 1/2 cups cheddar cheese blend, shredded

    Instructions

    1. Preheat your oven to 400°F (200°C). Grease an 8-inch square baking dish.
    2. In a medium saucepan, bring the water and milk to a boil. Once boiling, remove from heat and stir in the garlic-flavored instant mashed potato powder until smooth. Set aside.
    3. In a large mixing bowl, combine the ground beef, diced onions, brown sugar, and Worcestershire sauce using your hands until well incorporated.
    4. Add the seasoned Italian bread crumbs and egg to the meat mixture, continuing to mix by hand until everything is thoroughly combined.
    5. Press the meat mixture evenly into the prepared baking dish, creating an even layer.
    6. Using a rubber spatula, spread the prepared mashed potatoes over the meat layer, ensuring it’s evenly distributed.
    7. Sprinkle the shredded cheddar cheese blend on top of the mashed potatoes, followed by an even layer of bacon bits.
    8. Cover the dish with aluminum foil and bake in the preheated oven for 30 minutes.
    9. After 30 minutes, remove the foil and bake for an additional 10 minutes to allow the cheese to melt and become golden.
    10. Remove the casserole from the oven and let it cool for a few minutes before slicing and serving.

    Nutrition Facts

    Serving Size: 1 serving
    Calories: 370 kcal
    Sugar: 4g
    Sodium: 600mg
    Fat: 20g
    Saturated Fat: 9g
    Carbohydrates: 25g
    Fiber: 2g
    Protein: 23g
    Cholesterol: 80mg

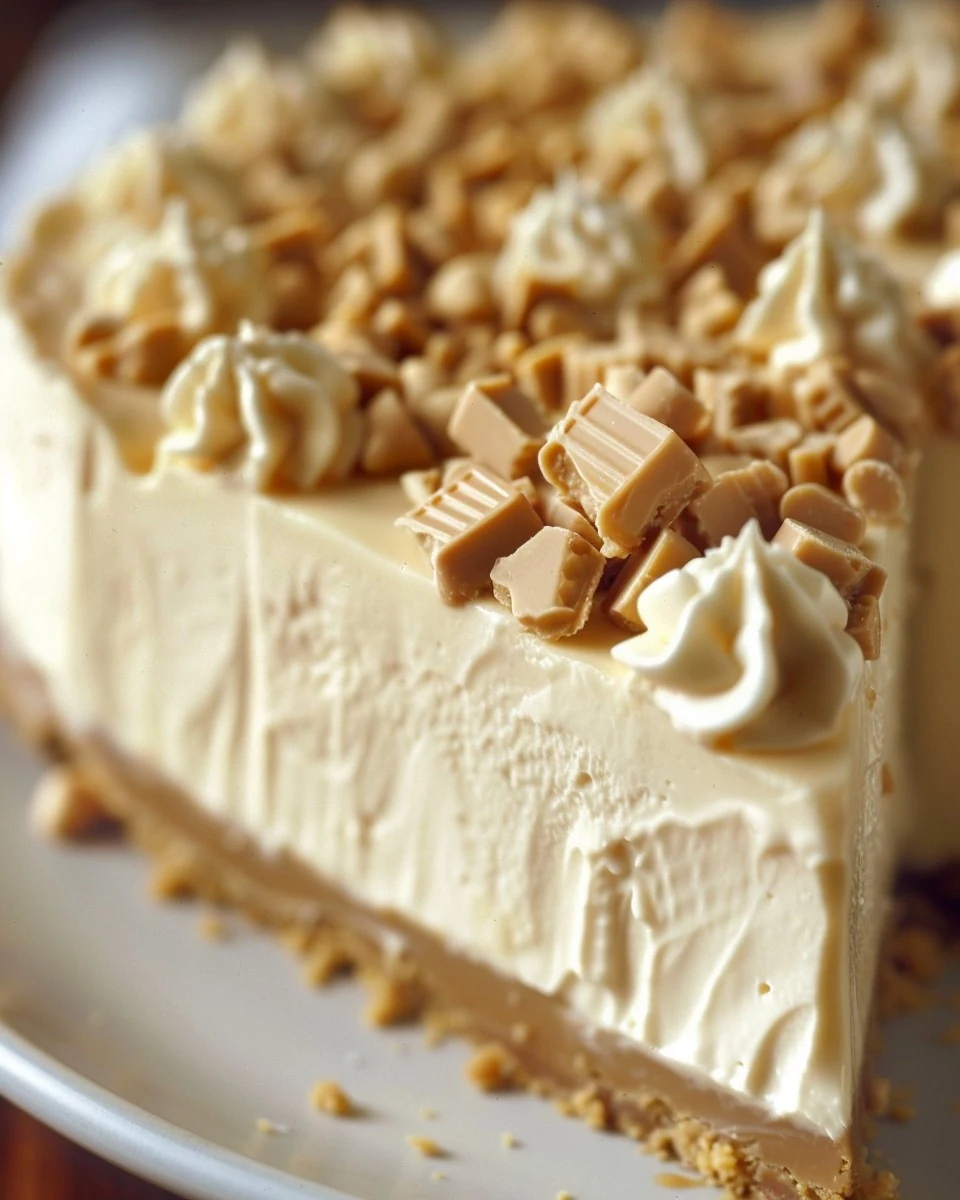
  • Indulge in White Chocolate Peanut Butter Cheesecake

    Indulge in White Chocolate Peanut Butter Cheesecake

    White Chocolate Peanut Butter Cheesecake is a luscious dessert that combines the rich flavors of creamy peanut butter and sweet white chocolate. This cheesecake offers a delightful balance of textures, with a chewy blondie crust and a smooth, decadent filling. It’s an indulgent treat that will impress your guests and satisfy your sweet cravings.

    Why You’ll Love This Recipe

    • Decadent Flavor: The combination of white chocolate and peanut butter creates an irresistible taste that chocolate lovers will adore.
    • Perfect for Celebrations: This cheesecake is a showstopper, making it ideal for birthdays, holidays, or special gatherings.
    • Easy to Prepare: With straightforward steps, anyone can master this recipe, even novice bakers.
    • Rich and Satisfying: Each slice is packed with flavor, ensuring that a little goes a long way in satisfying your sweet tooth.
    • Customizable Toppings: Feel free to add your favorite toppings or adjust the sweetness to suit your palate.

    Tools and Equipment

    Having the right tools makes the preparation of White Chocolate Peanut Butter Cheesecake effortless and enjoyable.

    Essential Tools

    • 8-inch springform pan
    • Mixing bowls
    • Electric mixer
    • Rubber spatula
    • Wire rack
    • Baking sheet

    Why These Tools Matter

    • Springform Pan: This allows for easy removal of the cheesecake, ensuring a perfect presentation.
    • Electric Mixer: A powerful mixer helps achieve a smooth and fluffy cheesecake filling without much effort.
    • Rubber Spatula: Great for folding ingredients together and scraping the bowl clean, ensuring nothing goes to waste.

    Ingredients for White Chocolate Peanut Butter Cheesecake

    For Peanut Butter Blondie Crust:

    • 2 eggs
    • 2 cups granulated sugar
    • 2 cups creamy peanut butter

    For White Chocolate Peanut Butter Cheesecake:

    • 12 oz reduced-fat cream cheese, softened
    • 2 4-ounce packages white baking chocolate, melted and cooled
    • 2 1/2 cups powdered sugar
    • 12 oz bag miniature Reese’s white chocolate peanut butter cups, unwrapped, whole
    • 1 1/2 cups creamy peanut butter
    • 8-ounce container whipped topping, thawed

    For Topping:

    • 12 oz bag miniature Reese’s white chocolate peanut butter cups, unwrapped, coarsely chopped
    • 2 ounces white baking chocolate, melted
    • 1/4 cup creamy peanut butter

    How to Make White Chocolate Peanut Butter Cheesecake Step-by-Step

    Step 1: Prep the Base

    Preheat your oven to 325°F (165°C). Grease an 8-inch springform pan thoroughly. In a large mixing bowl, combine the creamy peanut butter, granulated sugar, and eggs until smooth. Spread this mixture evenly into the bottom of the greased pan. Bake for 30-35 minutes, or until the edges are golden brown and a toothpick inserted near the center comes out clean. Cool completely on a wire rack before releasing the sides of the pan.

    Step 2: Make the Cheesecake Filling

    In a large bowl, beat the softened cream cheese until smooth. Add the creamy peanut butter, powdered sugar, and whipped topping. Beat until fully incorporated. Gradually mix in the melted white chocolate until smooth. Spread about 1/2 cup of the cheesecake mixture in a thin layer over the cooled blondie crust. Arrange the whole miniature Reese’s cups in a single layer on top of the crust. Place both the crust and the remaining cheesecake mixture in the refrigerator for 20 minutes to firm.

    Step 3: Assemble the Cheesecake

    After chilling, remove the crust and cheesecake mixture from the refrigerator. Pile the remaining cheesecake mixture on top of the Reese’s cups, spreading evenly. Use a knife to smooth around the edges.

    Step 4: Add the Topping

    Scatter the chopped miniature Reese’s cups over the top of the cheesecake. Drizzle the melted creamy peanut butter over the Reese’s, followed by the melted white chocolate. Chill the cheesecake for at least 2 hours before serving.

    Preparation time: 45 minutes | Cooking time: 35 minutes | Total time: 4 hours (including chilling)

    Nutritional Information (per serving)

    • Calories: 980 kcal
    • Carbohydrates: 85g
    • Protein: 16g
    • Fat: 64g
    • Saturated Fat: 23g
    • Sugar: 71g

    Nutritional values are approximate and based on one serving. Enjoy this delicious White Chocolate Peanut Butter Cheesecake at your next gathering!

    How to Serve White Chocolate Peanut Butter Cheesecake

    This indulgent dessert is perfect for special occasions or a delightful treat any time. Here are some creative serving ideas to elevate your White Chocolate Peanut Butter Cheesecake experience.

    Garnished with Fresh Berries

    Top each slice with a handful of fresh raspberries or strawberries. The tartness of the berries contrasts beautifully with the rich, creamy flavors of the cheesecake.

    Drizzled with Caramel Sauce

    Add an extra layer of sweetness by drizzling caramel sauce over each slice before serving. This enhances the dessert’s flavor profile and adds an appealing visual element.

    Paired with Vanilla Ice Cream

    Serve the cheesecake with a scoop of vanilla ice cream on the side. The creamy texture of the ice cream complements the richness of the cheesecake, making for a delightful combination.

    Pro Tips for the Best White Chocolate Peanut Butter Cheesecake

    For an exceptional cheesecake experience, consider these expert tips.

    • Use Room Temperature Ingredients: Always ensure that your cream cheese and eggs are at room temperature for a smoother batter and better incorporation.

    • Don’t Overmix the Batter: Mix the cheesecake ingredients just until combined to avoid incorporating too much air, which can lead to cracks in the cheesecake.

    • Chill Thoroughly: Allow the cheesecake to chill for at least 2 hours before serving. This helps the flavors meld and the texture to set properly.

    • Use a Water Bath: For a creamier texture, consider baking the cheesecake in a water bath. Wrap the springform pan in aluminum foil and place it in a larger pan filled with water while baking.

    • Store Properly: Keep any leftovers covered in the refrigerator for up to 5 days to maintain freshness.

    Best Side Dishes and Pairings

    Complement your White Chocolate Peanut Butter Cheesecake with these delightful side dishes and beverages.

    1. Coffee: The rich and bold flavors of coffee provide a perfect balance to the sweetness of the cheesecake.

    2. Chocolate Mousse: A light and airy chocolate mousse adds a decadent touch and enhances the chocolate flavor profile.

    3. Fruit Salad: A fresh fruit salad with a variety of seasonal fruits offers a refreshing contrast to the richness of the cheesecake.

    4. Chai Tea: The warm spices of chai tea create a comforting pairing that works wonderfully with the flavors of the cheesecake.

    5. Milkshake: A creamy milkshake, particularly one flavored with chocolate or vanilla, can make for a fun and indulgent pairing.

    Common Mistakes to Avoid

    • Using Cold Ingredients: Make sure that your cream cheese is at room temperature to ensure a smooth texture.
    • Overmixing the Batter: Be careful not to overbeat the cheesecake mixture, as this can introduce too much air and cause cracks.
    • Skipping the Chilling Time: Allow the cheesecake to chill adequately; this helps it set properly and enhances the flavors.
    • Not Greasing the Pan: Always grease your springform pan well to avoid sticking and ensure easy removal of the cheesecake.

    Storage & Reheating Instructions

    Refrigerator Storage

    Store the White Chocolate Peanut Butter Cheesecake in an airtight container in the refrigerator. It will stay fresh for up to 5 days.

    Freezing Instructions

    To freeze, wrap the cheesecake tightly in plastic wrap and then in aluminum foil. It can be frozen for up to 3 months. Thaw it in the refrigerator overnight before serving.

    Reheating Tips

    • Oven: Preheat to 350°F (175°C), cover with foil, and warm for about 10-15 minutes until slightly softened.
    • Microwave: Heat individual slices in 10-15 second intervals until warmed through.
    • Stovetop: Place a slice in a pan over low heat, covering it to retain moisture. Heat for about 5 minutes.

    Frequently Asked Questions

    Can I use regular cream cheese instead of reduced-fat?

    Yes, you can use regular cream cheese for a richer flavor, but the texture may be slightly different.

    How can I make this White Chocolate Peanut Butter Cheesecake gluten-free?

    Substitute the peanut butter blondie crust with a gluten-free crust made from gluten-free cookies or almond flour.

    What can I use instead of white baking chocolate?

    If you don’t have white baking chocolate, you can use white chocolate chips, but ensure they are melted properly for a smooth mixture.

    How long does it take to set the cheesecake?

    The cheesecake should chill for at least 2 hours, but for best results, letting it set overnight is recommended.

    Can I add more toppings to the cheesecake?

    Absolutely! Feel free to add crushed nuts, additional chocolate, or even a drizzle of caramel sauce for extra flavor.

    Final Thoughts

    This White Chocolate Peanut Butter Cheesecake is a delightful treat that combines rich flavors with a creamy texture. I encourage you to try making this recipe and share your experience by leaving a comment below. Happy baking!


    Desserts

    White Chocolate Peanut Butter Cheesecake


    5.0 from 24 reviews

    This decadent White Chocolate Peanut Butter Cheesecake features a rich peanut butter blondie crust topped with a creamy white chocolate peanut butter filling and garnished with Reese's cups. Perfect for special occasions or a sweet indulgence.

    Author: Munch Twist
    Prep Time: 45 minutes
    Cook Time: 35 minutes
    Total Time: 240 minutes
    Yield: 12 servings
    Category: Desserts
    Method: No bake
    Cuisine: American

    White Chocolate Peanut Butter Cheesecake

    SCALE:
    1x
    2x
    3x
    Cook Mode: Prevent your screen from going dark

    Ingredients

    • 2 eggs
    • 2 cups granulated sugar
    • 2 cups creamy peanut butter
    • 12 oz reduced-fat cream cheese, softened
    • 8 oz white baking chocolate, melted and cooled
    • 2 1/2 cups powdered sugar
    • 12 oz miniature Reese's white chocolate peanut butter cups, unwrapped, whole
    • 1 1/2 cups creamy peanut butter
    • 8 oz whipped topping, thawed
    • 12 oz miniature Reese's white chocolate peanut butter cups, unwrapped, coarsely chopped
    • 2 oz white baking chocolate, melted
    • 1/4 cup creamy peanut butter

    Instructions

    1. Preheat the oven to 325°F (165°C). Grease an 8-inch springform pan. In a bowl, combine peanut butter, sugar, and eggs until smooth. Spread into the pan and bake for 30-35 minutes. Cool completely.
    2. In a bowl, beat cream cheese until smooth. Add peanut butter, powdered sugar, and whipped topping, mixing until combined. Slowly add melted white chocolate. Spread 1/2 cup of the mixture over the cooled crust and arrange whole Reese's cups on top. Refrigerate for 20 minutes.
    3. Remove crust and cheesecake mixture from the refrigerator. Spread remaining cheesecake mixture over the Reese's cups evenly.
    4. Top with chopped Reese's cups, drizzle melted peanut butter and white chocolate. Chill for at least 2 hours before serving.

    Nutrition Facts

    Serving Size: 1 serving
    Calories: 980 kcal
    Sugar: 71g
    Sodium: 350mg
    Fat: 64g
    Saturated Fat: 23g
    Carbohydrates: 85g
    Fiber: 3g
    Protein: 16g
    Cholesterol: 80mg

  • Easy and Delicious Angel Chicken Rice Recipe

    Easy and Delicious Angel Chicken Rice Recipe

    Angel Chicken Rice is a comforting and delicious dish that embodies the perfect blend of flavors and textures. This casserole features tender chicken, creamy cheese, and hearty rice, making it a family favorite. The combination of ingredients creates a rich, savory meal that is both satisfying and easy to prepare.

    Why You’ll Love This Recipe

    • Quick & Easy: Ready in under 35 minutes, this dish is perfect for busy weeknights.
    • Creamy and Flavorful: The combination of cream cheese and Colby Jack cheese creates a rich, indulgent flavor.
    • Versatile Meal: This recipe can be customized with your favorite vegetables or spices.
    • Crowd-Pleaser: Ideal for family gatherings or potlucks, everyone will be asking for seconds.
    • One-Dish Wonder: Minimal cleanup required with everything baked in a single casserole dish.

    Tools and Equipment

    Having the right kitchen tools makes this recipe even more enjoyable to prepare.

    Essential Tools

    • 9×13” casserole dish
    • Microwave-safe bowl
    • Whisk
    • Large mixing bowl
    • Aluminum foil

    Why These Tools Matter

    • Casserole Dish: The size is perfect for even cooking and easy serving.
    • Microwave-Safe Bowl: Ideal for softening cream cheese and butter quickly.
    • Whisk: Ensures a smooth consistency in the creamy mixture, making it easy to combine all ingredients.

    Ingredients for Angel Chicken Rice

    Main Ingredients

    • 2 cups shredded Colby Jack cheese, divided use
    • 10.5 ounces cream of chicken soup
    • 3 cups cooked rice
    • ½ cup butter, room temperature and cubed
    • 1 cup chicken stock
    • 3 cloves garlic, minced
    • 3 cups cooked chicken, diced or shredded
    • 8 ounces cream cheese, room temperature and cubed
    • 0.7 ounce Italian dressing mix (I used Good Seasons)
    • Salt and pepper to taste
    • Fresh parsley for garnish

    How to Make Angel Chicken Rice Step-by-Step

    Step 1: Prep the Oven and Dish

    1. Preheat your oven to 350°F (175°C).
    2. Generously spray a 9×13” casserole dish with cooking spray to prevent sticking.

    Step 2: Soften the Cream Cheese and Butter

    1. In a microwave-safe bowl, combine the cream cheese and butter.
    2. Microwave for 20-30 seconds until softened.
    3. Whisk until the mixture is smooth and creamy.

    Step 3: Combine the Ingredients

    1. In a large mixing bowl, add the diced or shredded cooked chicken and cooked rice.
    2. Stir in the softened butter and cream cheese mixture, cream of chicken soup, minced garlic, Italian dressing mix, chicken stock, half of the shredded Colby Jack cheese, salt, and pepper.
    3. Mix thoroughly until all ingredients are well combined.

    Step 4: Assemble the Casserole

    1. Transfer the chicken and rice mixture into the prepared casserole dish.
    2. Spread it out evenly using a spatula.
    3. Sprinkle the remaining shredded Colby Jack cheese on top for a cheesy finish.

    Step 5: Bake the Casserole

    1. Cover the dish with aluminum foil to retain moisture.
    2. Bake in the preheated oven for 20-25 minutes or until the cheese is melted and the casserole is bubbling.

    Step 6: Serve and Garnish

    1. Remove the casserole from the oven and let it cool for 5 minutes.
    2. Carefully remove the foil and garnish with freshly chopped parsley.
    3. Serve warm and enjoy this delightful Angel Chicken Rice dish.

    Preparation time: 10 minutes | Cooking time: 25 minutes | Total time: 35 minutes

    Nutritional Information (per serving)

    • Calories: 548 kcal
    • Carbohydrates: 23g
    • Protein: 32g
    • Fat: 36g
    • Saturated Fat: 19g
    • Fiber: 1g
    • Sugar: 1g

    Nutritional values are approximate and based on one serving. Enjoy your Angel Chicken Rice as a delicious and fulfilling meal any night of the week.

    How to Serve Angel Chicken Rice

    Angel Chicken Rice is a versatile dish that can be enjoyed in various ways. Here are some creative serving ideas:

    Family-Style Serving

    Serve the casserole directly from the baking dish at the table. This allows everyone to help themselves, making it perfect for family gatherings or casual dinners.

    Individual Portions

    Scoop the Angel Chicken Rice into individual ramekins before baking. This not only makes for an attractive presentation but also allows for easy serving at parties or gatherings.

    With a Side Salad

    Pair the casserole with a fresh green salad tossed in a light vinaigrette. The crispness of the salad complements the creamy texture of the dish, creating a balanced meal.

    Pro Tips for the Best Angel Chicken Rice

    To elevate your Angel Chicken Rice, consider these practical tips:

    • Use Leftover Chicken: Utilizing leftover rotisserie or grilled chicken can save time and enhance flavor.
    • Customize the Cheese: Experiment with different cheese varieties such as Monterey Jack or cheddar for a unique twist.
    • Add Vegetables: Incorporate steamed broccoli or peas into the mixture for added nutrition and color.
    • Make Ahead: Assemble the dish a day in advance and refrigerate. Bake it fresh before serving for convenience.
    • Adjust Seasoning: Taste the mixture before baking and adjust the salt, pepper, or Italian dressing mix to suit your preferences.

    Best Side Dishes and Pairings

    To complement your Angel Chicken Rice, consider these delightful side dishes and drinks:

    1. Garlic Bread – The buttery, garlicky flavors of garlic bread pair nicely with the creamy casserole.
    2. Steamed Asparagus – This fresh and vibrant vegetable adds a healthy crunch and balances the richness of the dish.
    3. Caesar Salad – The crisp romaine and tangy dressing provide a refreshing contrast to the warm casserole.
    4. Roasted Brussels Sprouts – Their slight bitterness and caramelization enhance the savory notes of the Angel Chicken Rice.
    5. White Wine – A chilled glass of Sauvignon Blanc complements the dish’s creamy elements beautifully.

    Common Mistakes to Avoid

    • Not Softening Cheese: Ensure that the cream cheese and butter are softened adequately to achieve a smooth mixture.
    • Skipping the Garlic: Minced garlic adds essential flavor; omitting it can result in a bland dish.
    • Overcrowding the Casserole Dish: Spread the mixture evenly in the casserole dish to ensure even cooking and melting of cheese.
    • Neglecting to Let it Cool: Allow the casserole to cool for a few minutes before serving to enhance flavors and avoid burns.

    Storage & Reheating Instructions

    Refrigerator Storage

    Store leftover Angel Chicken Rice in airtight containers in the refrigerator. It will stay fresh for up to 3-4 days.

    Freezing Instructions

    To freeze, portion the Angel Chicken Rice into airtight containers or freezer bags. It can last up to 2-3 months in the freezer. For best results, thaw in the refrigerator overnight before reheating.

    Reheating Tips

    • Oven: Preheat to 350°F (175°C). Cover with foil and bake for 20-25 minutes, or until heated through.
    • Microwave: Place a serving in a microwave-safe dish, cover loosely, and heat for 2-3 minutes, stirring halfway through.
    • Stovetop: Heat in a skillet over medium heat, stirring occasionally until warmed through.

    Frequently Asked Questions

    What is Angel Chicken Rice?

    Angel Chicken Rice is a comforting casserole made with shredded chicken, rice, cream cheese, and Colby Jack cheese, perfect for family dinners.

    Can I use different types of cheese in Angel Chicken Rice?

    Yes, you can substitute Colby Jack cheese with other cheeses like cheddar or Monterey Jack for a different flavor profile.

    How can I make Angel Chicken Rice healthier?

    You can use brown rice instead of white rice and opt for reduced-fat cream cheese and soup to lower the calorie count.

    Can I prepare Angel Chicken Rice ahead of time?

    Absolutely! You can assemble the casserole a day in advance and store it in the refrigerator until you’re ready to bake.

    What can I serve with Angel Chicken Rice?

    This dish pairs well with a fresh salad, steamed vegetables, or garlic bread for a complete meal.

    Final Thoughts

    Angel Chicken Rice is an easy and delicious dish that makes for perfect comfort food any day of the week. We hope you try this recipe and enjoy it as much as we do. Please leave a comment below to share your thoughts or any variations you made!


    Dinner

    Angel Chicken Rice


    5.0 from 24 reviews

    Angel Chicken Rice is a comforting casserole that combines tender chicken, creamy cheese, and fluffy rice, all baked to perfection. This dish is easy to prepare and makes for a satisfying meal, perfect for family gatherings or weeknight dinners.

    Author: Munch Twist
    Prep Time: 10 minutes
    Cook Time: 25 minutes
    Total Time: 35 minutes
    Yield: 6 servings
    Category: Lunch
    Method: Baking
    Cuisine: American

    Angel Chicken Rice

    SCALE:
    1x
    2x
    3x
    Cook Mode: Prevent your screen from going dark

    Ingredients

    • 2 cups shredded Colby Jack cheese, divided use
    • 10.5 ounces cream of chicken soup
    • 3 cups cooked rice
    • ½ cup butter, room temperature and cubed
    • 1 cup chicken stock
    • 3 cloves garlic, minced
    • 3 cups cooked chicken, diced or shredded
    • 8 ounces cream cheese, room temperature and cubed
    • 0.7 ounce Italian dressing mix
    • Salt and pepper to taste
    • Fresh parsley for garnish

    Instructions

    1. Preheat your oven to 350°F (175°C) and generously spray a 9×13” casserole dish with cooking spray.
    2. In a microwave-safe bowl, soften the cream cheese and butter by microwaving for 20-30 seconds. Whisk until smooth and creamy.
    3. In a large mixing bowl, combine the diced or shredded cooked chicken, cooked rice, softened butter and cream cheese mixture, cream of chicken soup, minced garlic, Italian dressing mix, chicken stock, half of the shredded Colby Jack cheese, salt, and pepper. Stir until everything is evenly combined.
    4. Transfer the chicken and rice mixture into the prepared casserole dish, spreading it out evenly.
    5. Sprinkle the remaining shredded Colby Jack cheese on top.
    6. Cover the dish with aluminum foil and bake in the preheated oven for 20-25 minutes, or until the cheese is melted and the casserole is bubbling.
    7. Remove the casserole from the oven and let it cool for 5 minutes before removing the foil.
    8. Garnish with freshly chopped parsley, and enjoy!

    Nutrition Facts

    Serving Size: 1 serving
    Calories: 548 kcal
    Sugar: 1g
    Sodium: 800mg
    Fat: 36g
    Saturated Fat: 19g
    Carbohydrates: 23g
    Fiber: 1g
    Protein: 32g
    Cholesterol: 120mg

  • Delicious Baked Chicken Chimichangas Recipe

    Delicious Baked Chicken Chimichangas Recipe

    Baked Chicken Chimichangas are a delightful twist on traditional Mexican cuisine. These golden, crispy tortillas filled with a savory blend of chicken and cheese are perfect for any occasion. With their rich flavors and satisfying crunch, these chimichangas promise to be a hit at your dinner table.

    Why You’ll Love This Recipe

    • Quick & Easy: Ready in under 45 minutes, making it perfect for busy weeknights.
    • Flavor-Packed: The combination of Pepperjack cheese and taco seasoning delivers a burst of flavor.
    • Customizable: You can easily adjust the filling to include your favorite ingredients.
    • Family-Friendly: This dish appeals to both kids and adults, ensuring a happy mealtime.
    • Perfect for Meal Prep: Make a batch ahead of time and enjoy throughout the week.

    Tools and Equipment

    Having the right tools makes cooking more enjoyable and efficient.

    Essential Tools

    • Mixing bowl
    • Baking dish (9×13″)
    • Cooking spray
    • Measuring spoons
    • Spatula

    Why These Tools Matter

    • Mixing bowl: Essential for combining the cheese and chicken mixture thoroughly.
    • Baking dish: A good quality dish ensures even cooking and browning of your chimichangas.
    • Spatula: A sturdy spatula helps in flipping the chimichangas without breaking them.

    Ingredients for Baked Chicken Chimichangas

    Main Ingredients

    • 8 flour tortillas
    • 8 oz Pepperjack cheese, shredded
    • 1 lb cooked chicken, shredded
    • 8 oz pkg. cream cheese
    • 1 1/2 Tbsp taco seasoning
    • Cooking spray

    Toppings

    • Shredded cheddar cheese, for serving
    • Green onions, for garnish
    • Sour cream, for serving
    • Salsa, for serving

    How to Make Baked Chicken Chimichangas Step-by-Step

    Step 1: Prep the Base

    1. Preheat your oven to 350°F (175°C).
    2. Lightly spray a 9×13″ baking dish with cooking spray.

    Step 2: Make the Filling

    1. In a medium mixing bowl, combine the cream cheese, shredded Pepperjack cheese, and taco seasoning.
    2. Stir until the mixture is well combined and creamy.
    3. Fold in the shredded cooked chicken, ensuring it is evenly coated in the cheese mixture.

    Step 3: Assemble the Chimichangas

    1. Divide the chicken and cheese mixture evenly among the flour tortillas.
    2. Tuck in the sides of each tortilla and roll them up tightly.
    3. Place the rolled chimichangas seam-side down in the prepared baking dish.

    Step 4: Bake to Perfection

    1. Lightly spray the tops of the rolled tortillas with cooking spray.
    2. Bake in the preheated oven for 15 minutes.
    3. Carefully turn the chimichangas over and bake for an additional 15 minutes until they are golden brown and crispy.

    Step 5: Serve and Enjoy

    1. Remove from the oven and serve hot.
    2. Top with shredded cheddar cheese, green onions, sour cream, and salsa as desired.

    In just 45 minutes, you will have a delicious dish of Baked Chicken Chimichangas that is sure to impress family and friends. Enjoy this flavorful creation and watch as it becomes a favorite in your home.

    How to Serve Baked Chicken Chimichangas

    Baked Chicken Chimichangas are versatile and can be served in various delightful ways.

    Serve with Fresh Salsas

    Pair your chimichangas with a variety of fresh salsas, such as pico de gallo or mango salsa, to add a burst of flavor and freshness.

    Create a Chimichanga Platter

    Arrange your chimichangas on a platter with bowls of sour cream, guacamole, and shredded lettuce, allowing guests to customize their own servings.

    Garnish with Fresh Herbs

    Top your chimichangas with freshly chopped cilantro or parsley for a vibrant touch that enhances both presentation and flavor.

    Pro Tips for the Best Baked Chicken Chimichangas

    For optimal results, consider these expert tips.

    • Use Warm Tortillas: Warm tortillas are more pliable, making them easier to roll without tearing.
    • Customize Your Fillings: Feel free to add other ingredients like black beans, corn, or diced bell peppers for added texture and flavor.
    • Adjust the Spice Level: Modify the amount of taco seasoning to suit your taste; add more for a spicier kick or reduce it for a milder flavor.
    • Ensure Even Cooking: Turn the chimichangas halfway through baking to achieve an evenly golden and crispy exterior.
    • Let Them Cool Slightly: Allow the chimichangas to cool for a few minutes before serving to help the filling set and make them easier to handle.

    Best Side Dishes and Pairings

    Complement your Baked Chicken Chimichangas with these delicious side dishes and drinks.

    1. Mexican Rice: The fluffy texture and subtle flavor of Mexican rice balance the richness of the chimichangas.
    2. Refried Beans: Creamy refried beans provide a hearty side that pairs well with the crispy tortillas.
    3. Grilled Corn on the Cob: Sweet and smoky grilled corn adds a delightful crunch and a touch of sweetness.
    4. Guacamole: This creamy avocado dip adds a rich and refreshing element that enhances the meal.
    5. Margaritas: A classic margarita, either frozen or on the rocks, brings a zesty and refreshing contrast to the chimichangas.

    Common Mistakes to Avoid

    • Not Shredding the Chicken Properly: Ensure the chicken is finely shredded for even distribution in the filling.
    • Overfilling the Tortillas: Avoid overstuffing to prevent tearing and ensure they roll up properly.
    • Skipping the Cooking Spray: Not spraying the tortillas can lead to a less crispy texture; make sure to coat them lightly.
    • Ignoring Cooking Times: Keep an eye on the chimichangas during baking; adjusting time may be necessary for your oven.

    Storage & Reheating Instructions

    Refrigerator Storage

    Store leftover Baked Chicken Chimichangas in airtight containers. They will stay fresh for up to 3 days in the refrigerator.

    Freezing Instructions

    For freezing, place the chimichangas in a single layer on a baking sheet until frozen solid. Then, transfer them to airtight freezer bags. They can be frozen for up to 2 months.

    Reheating Tips

    • Oven: Preheat to 350°F (175°C) and bake for 10-15 minutes until warm.
    • Microwave: Heat on medium power for 1-2 minutes, checking frequently to avoid sogginess.
    • Stovetop: Reheat in a skillet over medium heat, turning occasionally until heated through.

    Frequently Asked Questions

    Can I use other types of cheese for Baked Chicken Chimichangas?

    Yes, you can substitute with other cheeses like Monterey Jack or Cheddar, depending on your preference.

    How do I make Baked Chicken Chimichangas vegetarian?

    To make this dish vegetarian, replace the chicken with a mixture of sautéed vegetables or beans.

    What can I serve with Baked Chicken Chimichangas?

    These chimichangas pair well with sides like Mexican rice, refried beans, or a fresh salad.

    Can Baked Chicken Chimichangas be made ahead of time?

    Absolutely! You can assemble them in advance and bake just before serving for a quick dinner option.

    What is the best way to store leftovers of Baked Chicken Chimichangas?

    Store them in airtight containers in the refrigerator for up to 3 days or freeze them for longer storage.

    Final Thoughts

    Baked Chicken Chimichangas are a delightful and satisfying meal that’s easy to prepare. We encourage you to try this recipe and share your thoughts in the comments section. Your feedback helps us refine our dishes and inspire others to enjoy home cooking.


    Dinner

    Baked Chicken Chimichangas


    5.0 from 24 reviews

    Baked Chicken Chimichangas are a delicious and easy-to-make dish featuring shredded chicken and creamy Pepperjack cheese wrapped in flour tortillas. Baked to a golden brown, they are perfect for a family dinner or a gathering with friends, served with your favorite toppings.

    Author: Munch Twist
    Prep Time: 15 minutes
    Cook Time: 30 minutes
    Total Time: 45 minutes
    Yield: 8 servings
    Category: Lunch
    Method: Baking
    Cuisine: American

    Baked Chicken Chimichangas

    SCALE:
    1x
    2x
    3x
    Cook Mode: Prevent your screen from going dark

    Ingredients

    • 8 flour tortillas
    • 8 oz Pepperjack cheese, shredded
    • 1 lb cooked chicken, shredded
    • 8 oz cream cheese
    • 1 1/2 Tbsp taco seasoning
    • Cooking spray
    • Shredded cheddar cheese, for serving
    • Green onions, for garnish
    • Sour cream, for serving
    • Salsa, for serving

    Instructions

    1. Preheat your oven to 350°F (175°C) and lightly spray a 9×13" baking dish with cooking spray.
    2. In a medium mixing bowl, stir together the cream cheese, shredded Pepperjack cheese, and taco seasoning until well combined.
    3. Fold the shredded cooked chicken into the cheese mixture, ensuring the chicken is evenly coated.
    4. Divide the chicken and cheese mixture evenly among the flour tortillas.
    5. Tuck in the sides of each tortilla, then roll them up tightly, placing them seam-side down in the prepared baking dish.
    6. Lightly spray the tops of the rolled tortillas with cooking spray.
    7. Bake in the preheated oven for 15 minutes, then carefully turn the chimichangas over and bake for an additional 15 minutes until golden brown and crispy.
    8. Remove from the oven and serve hot, topped with shredded cheddar cheese, green onions, sour cream, and salsa.

    Nutrition Facts

    Serving Size: 1 serving
    Calories: 420 kcal
    Sugar: 2g
    Sodium: 700mg
    Fat: 22g
    Saturated Fat: 11g
    Carbohydrates: 34g
    Fiber: 2g
    Protein: 24g
    Cholesterol: 80mg