Author: munch twist

  • Delicious Irresistible Lemon Poppy Seed Cupcakes Recipe

    Delicious Irresistible Lemon Poppy Seed Cupcakes Recipe

    Irresistible Lemon Poppy Seed Cupcakes are a delightful treat that combines bright lemon flavor with a satisfying crunch from poppy seeds. Perfectly fluffy and topped with creamy frosting, these cupcakes are a must-try for any lemon lover.

    Why You’ll Love This Recipe

    • Bright Flavor: The fresh lemon juice and zest create a refreshing taste that’s perfect for any occasion.
    • Moist Texture: The buttermilk ensures each cupcake is tender and moist, making them hard to resist.
    • Easy to Make: This recipe is straightforward, perfect for both beginners and experienced bakers.
    • Versatile: Ideal for parties, celebrations, or a sweet treat at home, these cupcakes fit any occasion.
    • Stunning Presentation: Topped with creamy frosting and garnished with lemon slices, they look as good as they taste.

    Tools and Equipment

    To create these delightful cupcakes, you’ll need a few essential kitchen tools.

    Essential Tools

    • Muffin tin
    • Cupcake liners
    • Mixing bowls
    • Electric mixer
    • Measuring cups and spoons
    • Wire rack

    Why These Tools Matter

    • Muffin tin: Ensures even baking and uniform cupcake shapes.
    • Electric mixer: Saves time and effort, making it easy to achieve a smooth batter and frosting.
    • Wire rack: Allows proper cooling, preventing soggy bottoms on your cupcakes.

    Ingredients for Irresistible Lemon Poppy Seed Cupcakes

    For the Cupcakes

    • 1 1/2 cups all-purpose flour
    • 1 cup granulated sugar
    • 1/2 cup unsalted butter, softened
    • 2 large eggs
    • 1/2 cup buttermilk
    • 1/4 cup fresh lemon juice
    • 2 tablespoons lemon zest
    • 2 tablespoons poppy seeds
    • 1 teaspoon baking powder
    • 1/2 teaspoon baking soda
    • 1/4 teaspoon salt

    For the Lemon Cream Cheese Frosting

    • 8 oz cream cheese, softened
    • 1/4 cup unsalted butter, softened
    • 1/4 cup powdered sugar
    • 2 tablespoons lemon juice
    • 1 teaspoon lemon zest

    For Garnish

    • Lemon slices
    • Poppy seeds

    How to Make Irresistible Lemon Poppy Seed Cupcakes Step-by-Step

    Step 1: Preheat Oven and Prepare Pan

    Preheat the oven to 350°F (175°C). Line a muffin tin with cupcake liners to prepare for the batter.

    Step 2: Prepare Cupcake Batter

    In a large bowl, cream together unsalted butter and granulated sugar until light and fluffy. Beat in the eggs one at a time, then stir in lemon zest and lemon juice. In another bowl, combine all-purpose flour, baking powder, baking soda, salt, and poppy seeds. Gradually add the dry ingredients to the wet mixture, alternating with buttermilk, starting and ending with the flour mixture.

    Step 3: Bake Cupcakes

    Divide the batter evenly among the cupcake liners, filling each about two-thirds full. Bake for 18-20 minutes, or until a toothpick inserted into the center comes out clean. Let the cupcakes cool in the pan for 5 minutes, then transfer them to a wire rack to cool completely.

    Step 4: Make Lemon Cream Cheese Frosting

    In a bowl, beat together cream cheese and unsalted butter until smooth. Gradually add powdered sugar, lemon juice, and lemon zest, beating until creamy and well combined.

    Step 5: Frost and Garnish

    Once the cupcakes are completely cool, frost them with the lemon cream cheese frosting. Garnish with lemon slices and a sprinkle of poppy seeds for a beautiful presentation.

    Enjoy your Irresistible Lemon Poppy Seed Cupcakes at any gathering or as a delightful weekday treat.

    How to Serve Irresistible Lemon Poppy Seed Cupcakes

    These delightful cupcakes are perfect for various occasions.

    Brunch Delight

    Serve Irresistible Lemon Poppy Seed Cupcakes at brunch alongside fresh fruit and yogurt. Their bright flavor complements a light meal beautifully.

    Afternoon Tea

    Pair these cupcakes with a pot of Earl Grey or chamomile tea. The citrus notes in the cupcakes enhance the floral flavors of the tea, making for a sophisticated snack.

    Celebration Treats

    Use these cupcakes as a sweet centerpiece for birthdays or special celebrations. Decorate with colorful sprinkles or edible flowers to elevate their appearance.

    Pro Tips for the Best Irresistible Lemon Poppy Seed Cupcakes

    To ensure your cupcakes turn out perfectly, consider these expert tips.

    • Room Temperature Ingredients: Always ensure your butter, eggs, and cream cheese are at room temperature for a smoother batter and frosting.

    • Fresh Lemon Juice and Zest: Use fresh lemons rather than bottled juice for the best flavor. The zest adds a vibrant aroma that enhances the cupcakes.

    • Don’t Overmix: Mix the batter just until combined to keep your cupcakes light and fluffy. Overmixing can lead to dense cupcakes.

    • Check for Doneness: Use a toothpick to check if the cupcakes are done. They should spring back when lightly touched, and the toothpick should come out clean.

    • Cool Completely Before Frosting: Allow your cupcakes to cool completely before adding frosting. This prevents the frosting from melting and ensures a beautiful finish.

    Best Side Dishes and Pairings

    These cupcakes can be complemented with a variety of dishes and beverages.

    1. Fruit Salad – A mix of seasonal fruits adds freshness and balances the sweetness of the cupcakes.

    2. Iced Tea – A refreshing glass of iced tea, especially lemon or mint flavor, pairs well with the citrus notes in the cupcakes.

    3. Cheese Platter – A selection of mild cheeses can provide a savory contrast to the sweet flavors of the cupcakes.

    4. Sparkling Water – The effervescence of sparkling water is a refreshing accompaniment that cleanses the palate.

    5. Vanilla Ice Cream – A scoop of vanilla ice cream served alongside warm cupcakes creates a delightful dessert experience.

    Common Mistakes to Avoid

    • Using Cold Ingredients: Ensure all ingredients, especially butter and eggs, are at room temperature for better mixing.
    • Overmixing the Batter: Mix just until combined to prevent dense cupcakes; overmixing can lead to tough texture.
    • Incorrect Oven Temperature: Always preheat your oven; an incorrect temperature can affect the baking time and texture.
    • Not Allowing Cupcakes to Cool: Frosting warm cupcakes can cause the frosting to melt; always cool them completely.

    Storage & Reheating Instructions

    Refrigerator Storage

    Store your cupcakes in an airtight container in the refrigerator. They will stay fresh for up to 5 days.

    Freezing Instructions

    To freeze, wrap each cupcake tightly in plastic wrap and place them in a freezer-safe container. They can be frozen for up to 3 months. Thaw in the refrigerator overnight before enjoying.

    Reheating Tips

    • Oven: Preheat to 350°F (175°C), place cupcakes on a baking sheet, and heat for about 5–7 minutes.
    • Microwave: Heat on a microwave-safe plate for about 10-15 seconds, checking to avoid overheating.
    • Stovetop: Place a cupcake in a covered skillet over low heat for 2-3 minutes until warmed through.

    Frequently Asked Questions

    How can I make Irresistible Lemon Poppy Seed Cupcakes gluten-free?

    You can substitute all-purpose flour with a gluten-free flour blend. Ensure that the blend is suitable for baking to maintain texture.

    Can I use lemon extract instead of fresh lemon juice?

    Yes, you can use lemon extract. However, fresh lemon juice and zest provide a brighter flavor and aroma that enhances the overall taste.

    How can I adjust the sweetness of the frosting?

    If you prefer less sweetness, reduce the amount of powdered sugar. You can also add more lemon juice to balance the flavor.

    What can I use instead of buttermilk in this recipe?

    If you don’t have buttermilk, you can create a substitute by mixing 1/2 cup of milk with 1/2 tablespoon of vinegar or lemon juice. Let it sit for 5 minutes before using.

    Final Thoughts

    These Irresistible Lemon Poppy Seed Cupcakes are sure to impress anyone who tries them. Their light, zesty flavor and delightful texture make them perfect for any occasion. We encourage you to make this recipe and share your experience in the comments below.


    Desserts

    Irresistible Lemon Poppy Seed Cupcakes


    5.0 from 24 reviews

    These delightful lemon poppy seed cupcakes are light, fluffy, and bursting with fresh lemon flavor. Topped with a creamy lemon cream cheese frosting, they make a perfect treat for any occasion.

    Author: Munch Twist
    Prep Time: 20 mins
    Cook Time: 20 mins
    Total Time: 40 mins
    Yield: 12 servings
    Category: Desserts
    Method: No bake
    Cuisine: American

    Irresistible Lemon Poppy Seed Cupcakes

    SCALE:
    1x
    2x
    3x
    Cook Mode: Prevent your screen from going dark

    Ingredients

    • 1 1/2 cups all-purpose flour
    • 1 cup granulated sugar
    • 1/2 cup unsalted butter, softened
    • 2 large eggs
    • 1/2 cup buttermilk
    • 1/4 cup fresh lemon juice
    • 2 tablespoons lemon zest
    • 2 tablespoons poppy seeds
    • 1 teaspoon baking powder
    • 1/2 teaspoon baking soda
    • 1/4 teaspoon salt
    • 8 oz cream cheese, softened
    • 1/4 cup unsalted butter, softened
    • 1/4 cup powdered sugar
    • 2 tablespoons lemon juice
    • 1 teaspoon lemon zest

    Instructions

    1. Preheat oven to 350°F (175°C) and line a muffin tin with cupcake liners.
    2. In a large bowl, cream together softened butter and granulated sugar until light and fluffy. Beat in eggs one at a time, then stir in lemon zest and juice. In a separate bowl, combine flour, baking powder, baking soda, salt, and poppy seeds. Gradually add dry ingredients to wet mixture, alternating with buttermilk, starting and ending with flour mixture.
    3. Divide batter evenly among cupcake liners, filling each about 2/3 full. Bake for 18-20 minutes until a toothpick inserted into the center comes out clean. Let cupcakes cool in the pan for 5 minutes, then transfer to a wire rack to cool completely.
    4. In a bowl, beat cream cheese and softened butter until smooth. Gradually add powdered sugar, lemon juice, and zest, beating until creamy.
    5. Frost cooled cupcakes with lemon cream cheese frosting and garnish with lemon slices and poppy seeds.

    Nutrition Facts

    Serving Size: 1 serving
    Calories: 250 kcal
    Sugar: 15g
    Sodium: 200mg
    Fat: 12g
    Saturated Fat: 6g
    Carbohydrates: 32g
    Fiber: 1g
    Protein: 3g
    Cholesterol: 40mg

  • Easy Slow Cooker Taco Chicken and Rice Recipe

    Easy Slow Cooker Taco Chicken and Rice Recipe

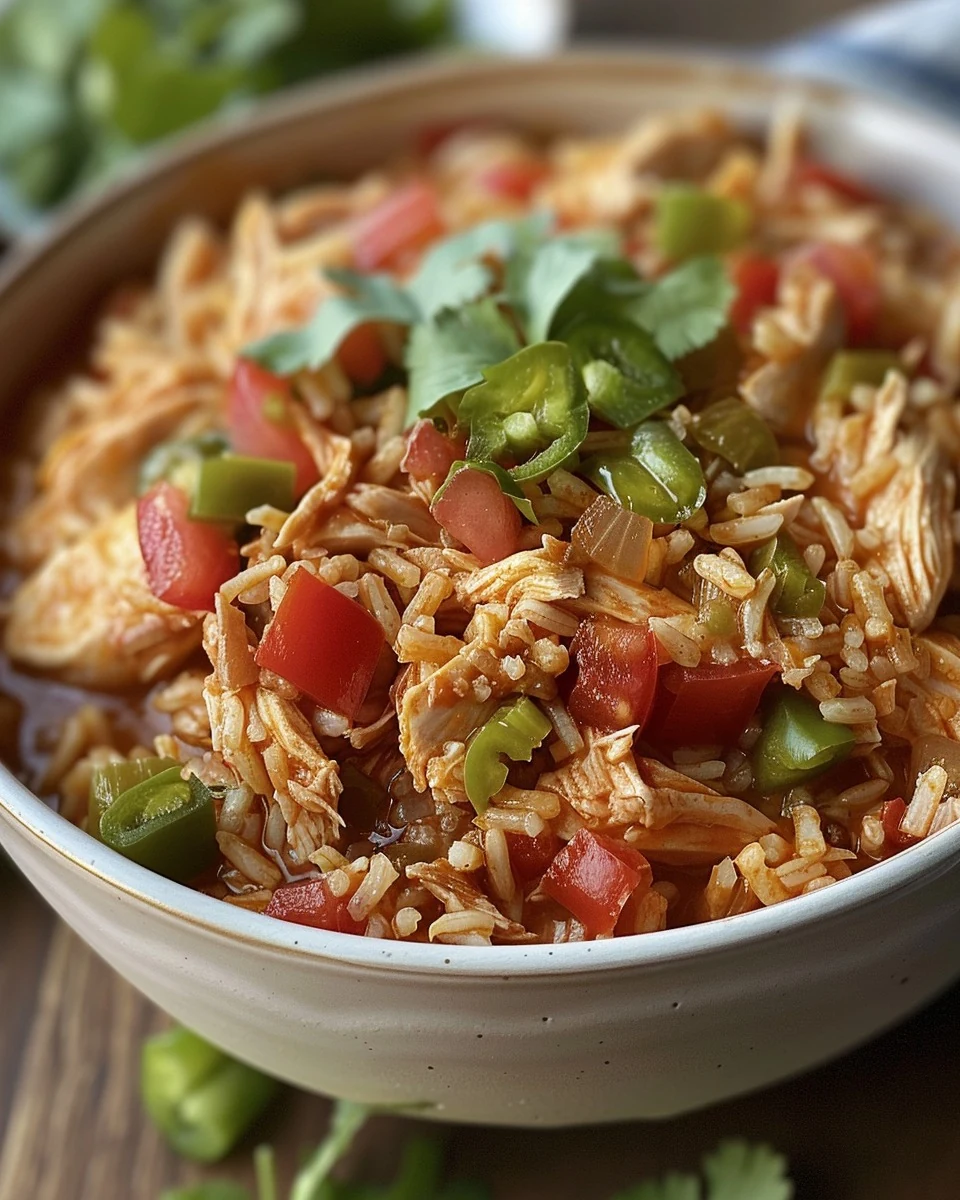
    Slow Cooker Taco Chicken and Rice is a flavorful dish that brings the lively taste of tacos to your table with minimal effort. This recipe combines tender chicken with zesty seasonings and cheesy rice, making it a crowd-pleaser for any family dinner.

    Why You’ll Love This Recipe

    • Flavorful & Zesty: The combination of taco seasoning, cream of chicken soup, and tomatoes delivers a deliciously rich taste.
    • Effortless Preparation: With just a few simple steps and the slow cooker, you can set it and forget it.
    • Family-Friendly Meal: This dish is not only easy to make but also appeals to both kids and adults alike.
    • Versatile Serving Options: Enjoy it as is, or serve it with tortillas, chips, or a side salad for a complete meal.
    • Great for Meal Prep: Make a large batch and have leftovers for lunches throughout the week.

    Tools and Equipment

    To prepare this dish efficiently, having the right tools on hand can make all the difference.

    Essential Tools

    • Slow cooker
    • Mixing bowl
    • Measuring spoons
    • Forks (for shredding)
    • Pot (for preparing rice)

    Why These Tools Matter

    • Slow cooker: Ensures even cooking and tender chicken throughout the process.
    • Mixing bowl: Helps you easily combine ingredients without making a mess.
    • Forks: Perfect for shredding chicken quickly and easily right in the slow cooker.

    Ingredients for Slow Cooker Taco Chicken and Rice

    Chicken and Seasoning

    • 1 (1-oz) package taco seasoning
    • 3 or 4 boneless skinless chicken breasts (2 pounds)

    Creamy Base

    • 1 (10.5-oz) can unsalted cream of chicken soup
    • 1 (10-oz) can diced tomatoes and green chiles (undrained)

    Rice Component

    • 1 (7.6-oz) box Old El Paso Cheesy Mexican Rice

    How to Make Slow Cooker Taco Chicken and Rice Step-by-Step

    Step 1: Prepare the Chicken

    Place the chicken breasts in the slow cooker. In a mixing bowl, combine the taco seasoning, cream of chicken soup, and undrained diced tomatoes and green chiles. Pour this creamy mixture over the chicken breasts, ensuring they are well coated.

    Step 2: Slow Cook

    Cover the slow cooker and set it to cook on LOW for 6 to 8 hours or on HIGH for 3 to 4 hours. The chicken is ready when it is cooked through and tender.

    Step 3: Shred the Chicken

    Once the chicken is fully cooked, use two forks to shred the chicken breasts directly in the slow cooker. This allows the chicken to soak up the flavorful sauce.

    Step 4: Prepare the Rice

    While the chicken is cooking, prepare the Old El Paso Cheesy Mexican Rice according to the package directions. This usually involves boiling water and mixing in the rice.

    Step 5: Combine and Serve

    Stir the cooked rice into the shredded chicken mixture in the slow cooker until well combined. Serve hot and enjoy this delicious and easy Slow Cooker Taco Chicken and Rice!

    Preparation time: 5 minutes | Cooking time: 6 hours on LOW or 3 hours on HIGH | Total time: 6 hours 5 minutes | Servings: 6

    How to Serve Slow Cooker Taco Chicken and Rice

    This dish is versatile and can be served in various creative ways.

    Tacos

    Use the shredded taco chicken and rice as a filling for soft or hard taco shells. Top with fresh cilantro, diced onions, and avocado for a vibrant meal.

    Burrito Bowls

    Layer the shredded chicken and rice in a bowl and add black beans, corn, and your favorite toppings like salsa and sour cream for a satisfying burrito bowl.

    Stuffed Peppers

    Spoon the mixture into halved bell peppers, sprinkle with cheese, and bake until the peppers are tender for a delicious and colorful dish.

    Pro Tips for the Best Slow Cooker Taco Chicken and Rice

    Enhance your cooking experience with these helpful tips.

    • Use Quality Chicken: Opt for fresh, high-quality chicken breasts for the best flavor and texture.
    • Customize the Spice Level: Adjust the taco seasoning according to your taste preference; add extra spices for more heat if desired.
    • Let It Rest: Allow the dish to sit for a few minutes after cooking to let the flavors meld before serving.
    • Use Leftovers Wisely: Store any leftovers in an airtight container in the refrigerator for easy meals throughout the week.
    • Experiment with Toppings: Don’t hesitate to add different toppings like jalapeños, shredded lettuce, or lime wedges for extra flavor.

    Best Side Dishes and Pairings

    Complement your Slow Cooker Taco Chicken and Rice with these delightful options.

    1. Guacamole – Creamy and rich, guacamole adds a fresh taste that balances the spices in the chicken.
    2. Mexican Street Corn – The sweetness of corn, combined with lime and cheese, creates a perfect contrast to the savory chicken.
    3. Refried Beans – A classic side that adds protein and a creamy texture, enhancing the overall meal experience.
    4. Chips and Salsa – Crunchy tortilla chips paired with zesty salsa provide a fun and flavorful appetizer before the main dish.
    5. Cilantro Lime Rice – This refreshing side complements the taco flavors and adds an extra layer of zest to the meal.

    Common Mistakes to Avoid

    • Ignoring the Cooking Time: Cooking for too long or too short can affect the tenderness of the chicken.
    • Not Shredding the Chicken Properly: Ensure the chicken is adequately shredded to mix well with the rice and flavors.
    • Using Excessive Liquid: Adding too much liquid can make the dish soupy instead of creamy.
    • Skipping the Rice Preparation: Don’t forget to prepare the rice separately, as it complements the dish’s flavors.

    Storage & Reheating Instructions

    Refrigerator Storage

    Store the Slow Cooker Taco Chicken and Rice in airtight containers in the refrigerator. It will stay fresh for up to 3-4 days.

    Freezing Instructions

    To freeze, let the dish cool completely and transfer it to freezer-safe containers. It can be frozen for up to 3 months. Thaw in the refrigerator overnight before reheating.

    Reheating Tips

    • Oven: Preheat to 350°F (175°C) and heat in an oven-safe dish for 20-25 minutes until warmed through.
    • Microwave: Use a microwave-safe container and heat in intervals of 1-2 minutes, stirring in between until hot.
    • Stovetop: Heat in a skillet over medium heat, stirring occasionally until warmed through.

    Frequently Asked Questions

    How can I customize the Slow Cooker Taco Chicken and Rice recipe?

    You can add black beans, corn, or bell peppers for extra flavor and nutrition. Adjust the taco seasoning to your taste preference.

    Can I use frozen chicken breasts for this recipe?

    Yes, you can use frozen chicken breasts, but increase the cooking time by about an hour on LOW or 30 minutes on HIGH.

    What can I serve with Slow Cooker Taco Chicken and Rice?

    This dish pairs well with tortilla chips, guacamole, or a fresh salad. You can also top it with cheese, sour cream, or cilantro.

    Can I make this recipe ahead of time?

    Absolutely! You can prepare the chicken and sauce the night before, refrigerate, and then cook it the next day for convenience.

    How do I ensure the chicken is tender in Slow Cooker Taco Chicken and Rice?

    Ensure you follow the recommended cooking times and avoid opening the lid frequently during cooking to maintain the heat.

    Final Thoughts

    This Slow Cooker Taco Chicken and Rice is not only simple to prepare but also delivers a comforting and flavorful meal. I encourage you to try this recipe and share your experience in the comments below.


    Dinner

    Slow Cooker Taco Chicken and Rice


    5.0 from 24 reviews

    This Slow Cooker Taco Chicken and Rice is a flavorful and easy meal that combines tender shredded chicken with zesty taco seasoning, creamy chicken soup, and cheesy Mexican rice. Perfect for busy weeknights, this dish is sure to please the whole family.

    Author: Munch Twist
    Prep Time: 5 minutes
    Cook Time: 360 minutes
    Total Time: 365 minutes
    Yield: 6 servings
    Category: Lunch
    Method: No bake
    Cuisine: American

    Slow Cooker Taco Chicken and Rice

    SCALE:
    1x
    2x
    3x
    Cook Mode: Prevent your screen from going dark

    Ingredients

    • 1 (1-oz) package taco seasoning
    • 1 (10.5-oz) can unsalted cream of chicken soup
    • 3 or 4 boneless skinless chicken breasts (2 pounds)
    • 1 (10-oz) can diced tomatoes and green chiles (undrained)
    • 1 (7.6-oz) box Old El Paso Cheesy Mexican Rice

    Instructions

    1. Place the chicken breasts in the slow cooker. In a bowl, combine the taco seasoning, cream of chicken soup, and undrained tomatoes and chiles. Pour this mixture over the chicken breasts.
    2. Cover the slow cooker and cook on LOW for 6 to 8 hours, or on HIGH for 3 to 4 hours, until the chicken is cooked through and tender.
    3. Once the chicken is cooked, use two forks to shred the chicken breasts directly in the slow cooker.
    4. Prepare the Old El Paso Cheesy Mexican Rice according to the package directions.
    5. Stir the cooked rice into the shredded chicken mixture in the slow cooker. Serve hot.

    Nutrition Facts

    Serving Size: 1 serving
    Calories: 450 kcal
    Sugar: 3g
    Sodium: 1200mg
    Fat: 18g
    Saturated Fat: 6g
    Carbohydrates: 50g
    Fiber: 2g
    Protein: 30g
    Cholesterol: 80mg

  • Easy and Delicious Stuffed Potatoes Recipe

    Easy and Delicious Stuffed Potatoes Recipe

    Stuffed potatoes are a delicious way to combine creamy, cheesy flavors with crispy bacon and chives. This recipe is perfect for a comforting meal or a hearty side dish that will impress your guests.

    Why You’ll Love This Recipe

    • Flavorful Filling: The combination of cheese, bacon, and chives creates a rich and satisfying taste.
    • Customizable: You can easily adapt the filling to include your favorite ingredients, such as vegetables or different cheeses.
    • Perfect for Meal Prep: These stuffed potatoes can be made ahead of time and reheated for busy weeknights.
    • Crowd-Pleaser: This dish is sure to be a hit at gatherings, making it a great addition to your recipe collection.

    Tools and Equipment

    Having the right tools makes cooking easier and more enjoyable.

    Essential Tools

    • Baking sheet
    • Frying pan
    • Mixing bowl
    • Fork
    • Knife
    • Measuring cups and spoons

    Why These Tools Matter

    • Baking sheet: Provides a stable surface for the stuffed potatoes, ensuring even cooking.
    • Frying pan: Allows for proper cooking of the bacon and vegetables, enhancing flavor.
    • Mixing bowl: Helps to combine ingredients effectively, making the filling preparation easier.

    Ingredients for Stuffed Potatoes

    For the Potatoes

    • 4 large potatoes
    • 1 tbsp olive oil

    For the Filling

    • 200g bacon, diced
    • 1 onion, finely chopped
    • 2 cloves garlic, crushed
    • 1 cup grated cheese (cheddar or your choice)
    • 2 tbsp chives, finely chopped
    • 1/2 cup sour cream
    • Salt and pepper, to taste

    How to Make Stuffed Potatoes Step-by-Step

    Step 1: Prep the Potatoes

    • Preheat your oven to 200°C (390°F).
    • Wash and scrub the potatoes thoroughly. Pat them dry, then prick each potato several times with a fork.
    • Place the potatoes directly on the oven rack and bake for about 1 hour, or until tender when pierced with a fork.

    Step 2: Cook the Filling

    • While the potatoes are baking, heat the olive oil in a frying pan over medium heat.
    • Add the finely chopped onion and crushed garlic, and cook until the onion is soft and translucent.
    • Add the diced bacon to the pan and cook until crispy. Remove from heat and set aside.

    Step 3: Prepare the Potatoes

    • Once the potatoes are done, remove them from the oven and let them cool slightly. Cut each potato in half lengthwise.
    • Carefully scoop out the flesh from each potato half into a bowl, leaving a small border of potato around the skin to maintain its shape.

    Step 4: Make the Filling

    • Mash the scooped-out potato flesh and mix in the cooked onion, garlic, and bacon.
    • Add the grated cheese, sour cream, and chopped chives. Season with salt and pepper to taste.

    Step 5: Stuff and Bake

    • Spoon the filling back into the potato skins, mounding it slightly.
    • Place the stuffed potatoes on a baking sheet and return to the oven for 15-20 minutes, or until the tops are golden and the filling is heated through.

    Step 6: Serve

    • Serve immediately and enjoy!

    Preparation time: 15 minutes | Cooking time: 1 hour 20 minutes

    Nutritional Information (per serving)

    • Calories: Approximately 350
    • Carbohydrates: 40g
    • Proteins: 15g
    • Fats: 18g
    • Fiber: 5g

    Enjoy these savory stuffed potatoes as a main dish or a delicious side!

    How to Serve Stuffed Potatoes

    Stuffed potatoes are versatile and can be served in several creative ways.

    As a Main Dish

    Stuffed potatoes can stand on their own as a hearty main course. Serve them with a side salad to balance the richness of the filling.

    With a Fresh Salad

    Pair your stuffed potatoes with a light, crisp salad. A simple vinaigrette complements the flavors and adds a refreshing touch.

    Topped with Additional Ingredients

    For an extra burst of flavor, consider adding toppings such as jalapeños, avocado, or a dollop of salsa. These additions can elevate your stuffed potatoes and provide contrasting textures.

    Pro Tips for the Best Stuffed Potatoes

    To achieve the perfect stuffed potatoes, keep these tips in mind.

    • Choose the Right Potatoes: Opt for starchy potatoes like Russets or Idaho for a fluffy texture that holds up well when stuffed.
    • Bake Thoroughly: Ensure that the potatoes are fully cooked and tender to create a smooth filling that blends well with other ingredients.
    • Season Generously: Don’t skimp on seasoning in both the potato filling and the skin. It enhances the overall flavor profile of the dish.
    • Experiment with Fillings: Feel free to customize the filling with different cheeses, proteins, or vegetables to suit your taste preferences.
    • Allow to Cool Slightly: Let the baked potatoes cool for a few minutes before handling them to avoid burns and make scooping easier.

    Best Side Dishes and Pairings

    Stuffed potatoes can be complemented beautifully with the right side dishes and beverages.

    1. Garlic Bread: The buttery, garlicky flavors of garlic bread are a perfect match for the savory stuffed potatoes.
    2. Roasted Vegetables: Seasonal roasted vegetables add color and a healthy crunch that balances the richness of the potatoes.
    3. Coleslaw: A tangy coleslaw provides a refreshing contrast to the warm, creamy stuffed potatoes.
    4. Grilled Chicken: Lightly seasoned grilled chicken makes for a protein-packed pairing that enhances the meal’s heartiness.
    5. Red Wine: A glass of red wine, such as a Merlot or Cabernet Sauvignon, complements the flavors of the stuffed potatoes while adding a touch of elegance.

    Common Mistakes to Avoid

    • Overcooking the Potatoes: Ensure you do not leave the potatoes in the oven for too long. They should be tender but not mushy.
    • Skipping the Seasoning: Always season your filling generously. A little salt and pepper can make a big difference in flavor.
    • Not Mounding the Filling: When stuffing, don’t be afraid to mound the filling above the potato skin for a hearty presentation.
    • Using Cold Ingredients: Make sure your sour cream and cheese are at room temperature before mixing. This helps with better blending into the filling.

    Storage & Reheating Instructions

    Refrigerator Storage

    Store leftover stuffed potatoes in airtight containers in the refrigerator. They will stay fresh for up to 3 days.

    Freezing Instructions

    To freeze, wrap each stuffed potato tightly in plastic wrap and then place them in a freezer-safe bag. They can be frozen for up to 3 months. For best results, thaw in the refrigerator overnight before reheating.

    Reheating Tips

    • Oven: Preheat the oven to 180°C (350°F) and bake for 20-25 minutes until heated through.
    • Microwave: Heat on medium power for 3-5 minutes, checking to ensure they are heated evenly.
    • Stovetop: Place in a skillet over medium heat, covering, for about 10 minutes until warmed through.

    Frequently Asked Questions

    How do I know when the potatoes are done?

    The potatoes are done when they are tender and can be easily pierced with a fork. You should also be able to see the skin slightly wrinkling.

    Can I customize the filling for my stuffed potatoes?

    Absolutely! Feel free to add vegetables like bell peppers or spinach, or substitute the bacon with chicken or turkey for a different flavor profile.

    How can I make stuffed potatoes vegetarian?

    To make vegetarian stuffed potatoes, simply omit the bacon and add more vegetables or use plant-based cheese alternatives.

    What can I serve with stuffed potatoes?

    Stuffed potatoes can be served as a main dish or alongside a fresh salad, steamed vegetables, or grilled meats for a complete meal.

    Final Thoughts

    Stuffed potatoes are not only delicious but also versatile and easy to prepare. Give this recipe a try and experience the comfort of this classic dish. If you enjoyed making them, please leave a comment below with your feedback!


    Dinner

    Stuffed Potatoes


    5.0 from 24 reviews

    Stuffed potatoes are a delicious and hearty dish, perfect as a main course or a side. These potatoes are baked until tender and then filled with a savory mixture of bacon, cheese, and chives, creating a comforting meal that is sure to please everyone.

    Author: Munch Twist
    Prep Time: 15 minutes
    Cook Time: 65 minutes
    Total Time: 80 minutes
    Yield: 4 servings
    Category: Desserts
    Method: Baking
    Cuisine: American

    Stuffed Potatoes

    SCALE:
    1x
    2x
    3x
    Cook Mode: Prevent your screen from going dark

    Ingredients

    • 1 tbsp olive oil
    • 1 cup grated cheese (cheddar or your choice)
    • 4 large potatoes
    • 200g bacon, diced
    • 1 onion, finely chopped
    • 2 tbsp chives, finely chopped
    • 2 cloves garlic, crushed
    • 1/2 cup sour cream
    • Salt and pepper, to taste

    Instructions

    1. Preheat your oven to 200°C (390°F). Wash and scrub the potatoes thoroughly. Pat them dry, then prick each potato several times with a fork. Place the potatoes directly on the oven rack and bake for about 1 hour, or until tender when pierced with a fork.
    2. While the potatoes are baking, heat the olive oil in a frying pan over medium heat. Add the finely chopped onion and crushed garlic, and cook until the onion is soft and translucent. Add the diced bacon to the pan and cook until crispy. Remove from heat and set aside.
    3. Once the potatoes are done, remove them from the oven and let them cool slightly. Cut each potato in half lengthwise. Carefully scoop out the flesh from each potato half into a bowl, leaving a small border of potato around the skin to maintain its shape.
    4. Mash the scooped-out potato flesh and mix in the cooked onion, garlic, and bacon. Add the grated cheese, sour cream, and chopped chives. Season with salt and pepper to taste.
    5. Spoon the filling back into the potato skins, mounding it slightly. Place the stuffed potatoes on a baking sheet and return to the oven for 15-20 minutes, or until the tops are golden and the filling is heated through.
    6. Serve immediately and enjoy!

    Nutrition Facts

    Serving Size: 1 serving
    Calories: 350 kcal
    Sugar: 2g
    Sodium: 800mg
    Fat: 18g
    Saturated Fat: 8g
    Carbohydrates: 40g
    Fiber: 5g
    Protein: 15g
    Cholesterol: 40mg

  • Delicious Mongolian Ground Beef Noodles Recipe

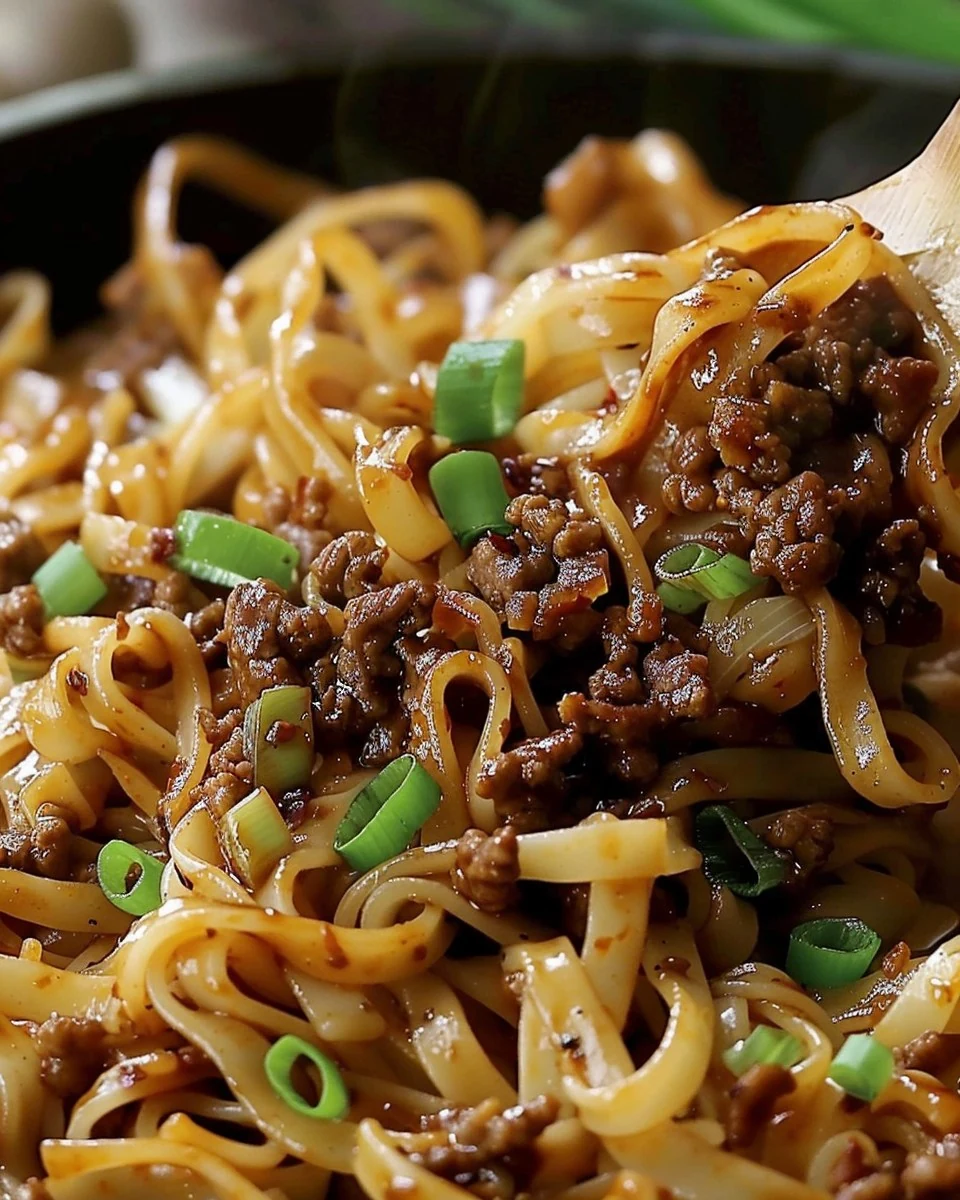
    Delicious Mongolian Ground Beef Noodles Recipe

    Mongolian Ground Beef Noodles offer a delightful fusion of savory flavors and comforting textures. This dish combines tender beef and perfectly cooked noodles in a rich sauce, making it a standout choice for any meal. With its quick preparation time and robust taste, this recipe is sure to become a family favorite.

    Why You’ll Love This Recipe

    • Quick & Easy: Ready in under 30 minutes, making it perfect for busy weeknights.
    • Flavorful & Savory: The combination of soy sauce, hoisin, and garlic creates a mouthwatering sauce.
    • Customizable: Adjust the spice level by adding or omitting red pepper flakes to suit your taste.
    • One-Pan Meal: Minimal cleanup required, as everything is cooked in one skillet.
    • Kid-Friendly: The mild flavors appeal to children while still satisfying adult palates.

    Tools and Equipment

    Gathering the right tools will streamline your cooking process.

    Essential Tools

    • Large pot
    • Large skillet
    • Cooking spoon
    • Measuring cups and spoons
    • Colander

    Why These Tools Matter

    • Large pot: Essential for cooking the linguine evenly and efficiently.
    • Large skillet: Provides ample space to brown ground beef and combine all ingredients without overcrowding.
    • Colander: Makes draining pasta quick and easy, ensuring no excess water affects the final dish.

    Ingredients for Mongolian Ground Beef Noodles

    Sauce Ingredients

    • 1/3 cup soy sauce
    • 1/4 cup beef broth
    • 3 tablespoons hoisin sauce
    • 1/3 cup brown sugar
    • 1 tablespoon cornstarch
    • 2 tablespoons water
    • 1/2 teaspoon ground ginger
    • 1/2 teaspoon ground black pepper
    • Pinch of red pepper flakes (optional for a spicy kick)

    Meat and Noodles

    • 1 lb ground beef
    • 10 oz linguine

    Aromatics

    • 5 cloves garlic, minced
    • 4 green onions, sliced for garnish

    How to Make Mongolian Ground Beef Noodles Step-by-Step

    Step 1: Cook the Pasta

    Begin by cooking the linguine according to the package instructions in a large pot of boiling water. Once cooked, drain and set aside.

    Step 2: Brown the Ground Beef

    In a large skillet over medium-high heat, add the ground beef. Cook until it is no longer pink, breaking it apart with a spoon. Drain any excess fat if necessary.

    Step 3: Add Aromatics and Sauces

    Add the minced garlic to the browned beef. Cook for about 1 minute until fragrant. Then, stir in the soy sauce, beef broth, brown sugar, hoisin sauce, ground ginger, black pepper, and red pepper flakes. Mix everything well.

    Step 4: Thicken the Sauce

    In a small bowl, mix the cornstarch with water until smooth. Stir this mixture into the skillet. Bring the sauce to a gentle boil, allowing it to thicken for a few minutes.

    Step 5: Combine with Noodles

    Add the cooked linguine to the skillet. Toss the noodles in the sauce, ensuring they are fully coated. Allow everything to simmer together for 2-3 minutes to meld the flavors.

    Step 6: Garnish and Serve

    Remove the skillet from heat and sprinkle sliced green onions over the noodles. Serve hot and enjoy this savory and comforting meal!

    Nutritional Information (per serving):

    • Calories: 650 kcal
    • Carbohydrates: 85g
    • Proteins: 28g
    • Fats: 23g
    • Saturated Fat: 8g
    • Cholesterol: 90mg
    • Sodium: 1200mg
    • Sugar: 16g

    Preparation time: 10 minutes | Cooking time: 20 minutes | Total time: 30 minutes

    How to Serve Mongolian Ground Beef Noodles

    Mongolian Ground Beef Noodles can be enjoyed in various creative ways to enhance your dining experience.

    Serve with a Fresh Salad

    A crisp side salad with mixed greens, cucumbers, and a light vinaigrette can provide a refreshing contrast to the savory noodles.

    Top with Additional Vegetables

    Consider adding sautéed bell peppers, snap peas, or broccoli on top of the noodles for an extra crunch and nutritional boost.

    Pair with Garlic Bread

    Serve alongside garlic bread to soak up the delicious sauce, making for a hearty and satisfying meal.

    Pro Tips for the Best Mongolian Ground Beef Noodles

    For optimal flavor and texture, keep these expert tips in mind.

    • Use High-Quality Ingredients: Opt for fresh ground beef and low-sodium soy sauce to control the saltiness of the dish.
    • Adjust Spice Levels: If you prefer a milder dish, reduce or omit the red pepper flakes; conversely, add more for extra heat.
    • Let the Sauce Thicken: Ensure that the sauce reaches a gentle boil after adding the cornstarch for the best consistency.
    • Cook Noodles Al Dente: Aim for al dente linguine to prevent it from becoming mushy when combined with the sauce.
    • Garnish Generously: Don’t skip the green onions; they add a burst of freshness and color to the final dish.

    Best Side Dishes and Pairings

    To elevate your meal, consider these excellent side dishes and drink pairings.

    1. Steamed Broccoli – The bright green flavor complements the savory noodles and adds essential nutrients.
    2. Cucumber Salad – A light cucumber salad with sesame dressing provides a refreshing contrast to the richness of the beef.
    3. Egg Rolls – Crispy egg rolls filled with vegetables or meat make a delightful appetizer to start your meal.
    4. Fried Rice – A side of fried rice can enhance the Asian flavors and make the meal more filling.
    5. Iced Green Tea – This refreshing drink balances the savory flavors of the dish and offers a soothing finish.

    Common Mistakes to Avoid

    • Not Draining Excess Fat: Make sure to drain any excess fat after browning the ground beef to avoid a greasy dish.
    • Overcooking the Noodles: Follow package instructions closely to prevent mushy noodles that won’t hold up in the sauce.
    • Skipping the Cornstarch Mixture: This step is crucial for achieving the right sauce consistency; don’t skip it.
    • Ignoring the Garnish: Garnishing with green onions enhances both flavor and presentation; don’t skip this step for a complete meal.

    Storage & Reheating Instructions

    Refrigerator Storage

    Store any leftovers in airtight containers in the refrigerator. The Mongolian Ground Beef Noodles will stay fresh for up to 3 days.

    Freezing Instructions

    For best results, freeze the finished dish in airtight containers or freezer bags. It can be stored for up to 3 months. Thaw in the refrigerator overnight before reheating.

    Reheating Tips

    • Oven: Preheat to 350°F (175°C), place noodles in an oven-safe dish, cover with foil, and heat for about 15-20 minutes, or until warmed through.
    • Microwave: Place a portion in a microwave-safe bowl, cover, and heat for 2-3 minutes, stirring halfway through for even heating.
    • Stovetop: Heat in a skillet over medium heat, adding a splash of water or broth to help rehydrate the noodles, stirring occasionally until heated through.

    Frequently Asked Questions

    How do I make Mongolian Ground Beef Noodles spicier?

    To add heat, include extra red pepper flakes or a dash of hot sauce when mixing in the sauces.

    Can I use other types of noodles for Mongolian Ground Beef Noodles?

    Yes, you can substitute linguine with other noodles like rice noodles or spaghetti, but cooking times may vary.

    How can I make Mongolian Ground Beef Noodles healthier?

    Consider using leaner ground beef or substituting with ground turkey or chicken. You can also increase the amount of vegetables added to the dish.

    Can I prepare Mongolian Ground Beef Noodles ahead of time?

    Absolutely! You can prepare the sauce and cook the beef a day in advance, then combine with noodles right before serving.

    What can I serve with Mongolian Ground Beef Noodles?

    This dish pairs well with a simple side salad, steamed vegetables, or egg rolls for a complete meal.

    Final Thoughts

    Mongolian Ground Beef Noodles are a delightful dish that brings bold flavors and comforting textures to your table. We encourage you to try this recipe and leave a comment with your feedback or any variations you made. Enjoy your cooking experience!


    Dinner


    Title: Quick and Easy Mongolian Ground Beef Noodles Recipe
    Meta: Discover a flavorful Mongolian Ground Beef Noodles recipe that’s quick to make. Try it tonight and share your experience!
    Synonyms: Mongolian beef noodles, beef noodles recipe, ground beef noodles, savory beef noodles, Asian beef noodles, quick beef noodles, easy ground beef dish, noodle stir fry, Mongolian beef stir fry, hearty beef noodles, flavorful beef dish, comforting noodles, noodle meal, beef noodle bowl, spicy beef noodles, quick Asian meal, one-pot noodles, ground beef stir fry, Asian comfort food, savory noodle dish.

    Mongolian Ground Beef Noodles


    5.0 from 24 reviews

    Mongolian Ground Beef Noodles is a savory and comforting dish featuring tender ground beef, flavorful sauces, and linguine noodles. This easy-to-make recipe combines the richness of soy sauce, hoisin, and brown sugar, creating a deliciously thick sauce that coats the noodles perfectly. Garnished with fresh green onions, this meal is sure to satisfy your cravings.

    Author: Munch Twist
    Prep Time: 10 minutes
    Cook Time: 20 minutes
    Total Time: 30 minutes
    Yield: 4 servings
    Category: Lunch
    Method: No bake
    Cuisine: American

    Mongolian Ground Beef Noodles

    SCALE:
    1x
    2x
    3x
    Cook Mode: Prevent your screen from going dark

    Ingredients

    • 1/3 cup soy sauce
    • 1/4 cup beef broth
    • 1 lb ground beef
    • 1/2 teaspoon ground ginger
    • 3 tablespoons hoisin sauce
    • 1 tablespoon cornstarch
    • 1/2 teaspoon ground black pepper
    • 2 tablespoons water
    • 5 cloves garlic, minced
    • Pinch of red pepper flakes
    • 10 oz linguine
    • 1/3 cup brown sugar
    • 4 green onions, sliced for garnish

    Instructions

    1. Cook the linguine according to package instructions in a large pot of boiling water. Once cooked, drain and set aside.
    2. In a large skillet over medium-high heat, brown the ground beef until no longer pink. Drain any excess fat if needed.
    3. Add the minced garlic to the browned beef and cook until fragrant, about 1 minute. Stir in soy sauce, beef broth, brown sugar, hoisin sauce, ground ginger, black pepper, and red pepper flakes. Combine well.
    4. Mix the cornstarch with water until smooth and stir into the skillet. Bring to a gentle boil, allowing the sauce to thicken.
    5. Toss the cooked noodles in the skillet, ensuring they are fully coated with the sauce. Simmer together for 2-3 minutes to meld the flavors.
    6. Sprinkle sliced green onions over the noodles and serve hot.

    Nutrition Facts

    Serving Size: 1 serving
    Calories: 650 kcal
    Sugar: 16g
    Sodium: 1200mg
    Fat: 23g
    Saturated Fat: 8g
    Carbohydrates: 85g
    Fiber: 3g
    Protein: 28g
    Cholesterol: 90mg

  • Savor Juicy Steak Bites with Garlic Bread and Tangy Horseradish Cream

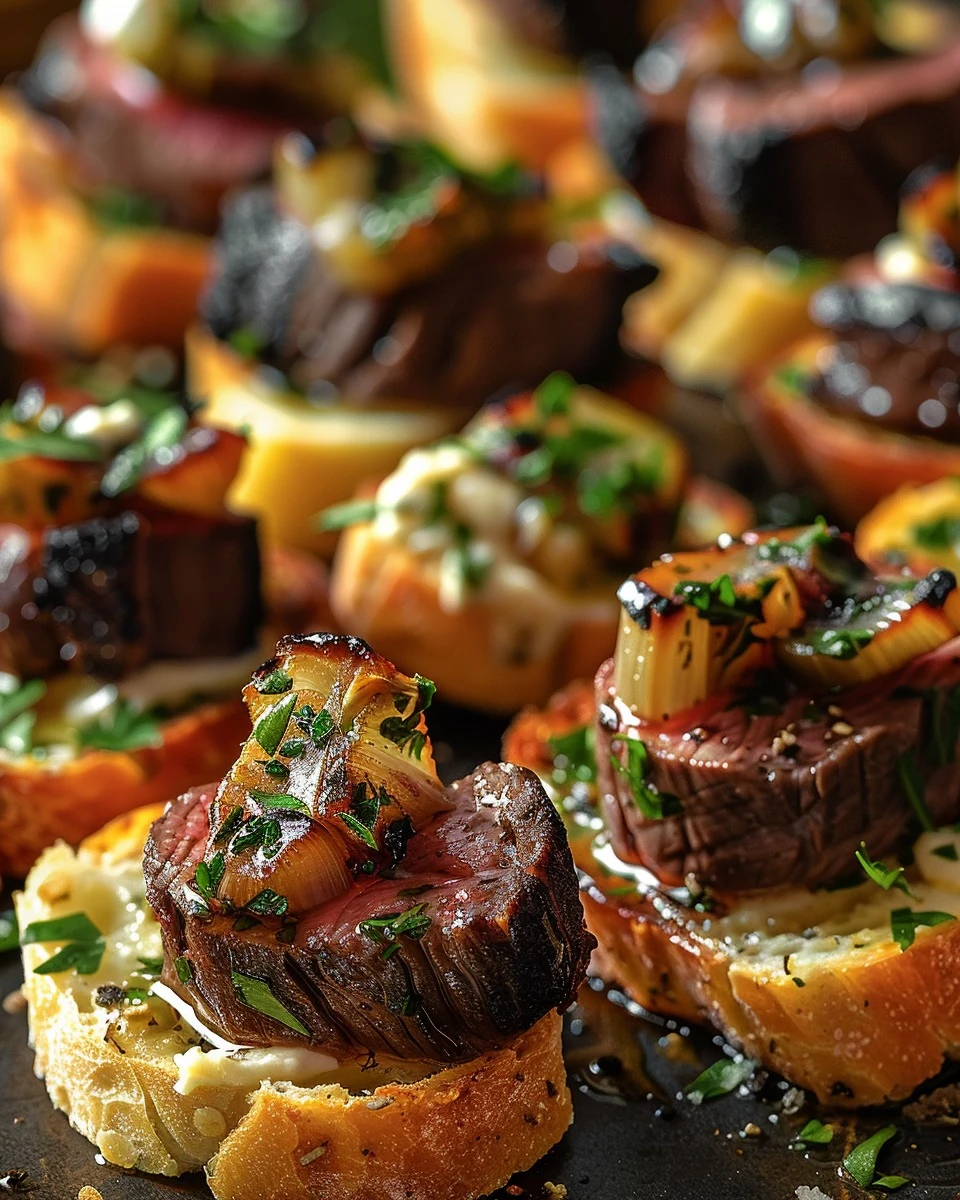
    Savor Juicy Steak Bites with Garlic Bread and Tangy Horseradish Cream

    Juicy Steak Bites with Garlic Bread and Tangy Horseradish Cream is a delightful dish that combines tender steak bites with crispy garlic bread, all topped off with a zesty horseradish cream. This recipe perfectly balances flavors, making it an irresistible choice for any meal or gathering.

    Why You’ll Love This Recipe

    • Quick & Easy: Ready in just 35 minutes, this recipe is perfect for busy weeknights.
    • Flavor Explosion: The combination of juicy steak, garlic bread, and tangy horseradish cream creates an unforgettable taste experience.
    • Crowd-Pleaser: Ideal for parties or casual gatherings, these bites will impress your guests.
    • Customizable: Adjust the seasoning and toppings to match your personal taste.
    • Satisfying & Filling: Packed with protein and flavor, this dish will leave you feeling satisfied.

    Tools and Equipment

    To create Juicy Steak Bites with Garlic Bread and Tangy Horseradish Cream, you will need a few essential kitchen tools.

    Essential Tools

    • Skillet
    • Baking sheet
    • Mixing bowls
    • Knife
    • Cutting board
    • Spatula

    Why These Tools Matter

    • Skillet: Ensures even cooking and browning of the steak bites.
    • Baking sheet: Provides a flat surface for toasting the garlic bread evenly.
    • Mixing bowls: Essential for combining ingredients and sauces without mess.

    Ingredients for Juicy Steak Bites with Garlic Bread and Tangy Horseradish Cream

    For the Garlic Bread

    • 2 cloves garlic, minced
    • 4 tablespoons unsalted butter, softened
    • 1 loaf of French bread, cut into slices
    • Salt and pepper, to taste

    For the Steak Bites

    • 1 pound steak, cut into bite-sized pieces
    • 2 tablespoons olive oil

    For the Horseradish Cream Sauce

    • 1 cup sour cream
    • 2 tablespoons prepared horseradish
    • 1 tablespoon Dijon mustard
    • 1 tablespoon chopped fresh chives

    How to Make Juicy Steak Bites with Garlic Bread and Tangy Horseradish Cream Step-by-Step

    Step 1: Preheat the Oven

    Preheat your oven to 375°F (190°C) to prepare for toasting the garlic bread.

    Step 2: Prepare the Garlic Bread

    In a small bowl, mix the softened butter with the minced garlic. Spread this mixture generously onto the slices of French bread. Place the bread slices on a baking sheet and bake for 10 minutes or until golden brown.

    Step 3: Cook the Steak Bites

    Season the bite-sized steak pieces with salt and pepper. Heat olive oil in a large skillet over medium-high heat. Once hot, add the steak bites and cook for 3-4 minutes on each side until browned and cooked to your desired level of doneness. Remove the steak from the skillet and set it aside.

    Step 4: Make the Horseradish Cream Sauce

    In a separate bowl, combine the sour cream, prepared horseradish, Dijon mustard, and chopped chives. Mix well until fully combined for a flavorful sauce.

    Step 5: Serve

    To serve, place the juicy steak bites on top of the crispy garlic bread slices. Drizzle generously with the tangy horseradish cream sauce for a perfect finish.

    Enjoy this delectable combination of juicy steak bites, crispy garlic bread, and a tangy horseradish cream sauce that will leave your taste buds wanting more!

    How to Serve Juicy Steak Bites with Garlic Bread and Tangy Horseradish Cream

    Serving these juicy steak bites can elevate your dining experience. Here are a few creative ideas:

    Steak Bite Sliders

    Transform the steak bites into sliders by placing them between small toasted buns. Add a dollop of horseradish cream and some fresh greens for a delightful handheld treat.

    Steak and Garlic Bread Platter

    Arrange the steak bites and garlic bread on a large platter. Serve with a bowl of horseradish cream for dipping, making it an ideal appetizer for gatherings or game nights.

    Salad Topper

    Slice the steak bites and serve them over a bed of mixed greens. Drizzle with horseradish cream as a dressing for a hearty salad that combines flavors and textures beautifully.

    Pro Tips for the Best Juicy Steak Bites with Garlic Bread and Tangy Horseradish Cream

    To ensure your steak bites are truly delectable, follow these expert tips:

    • Use Quality Steak: Opt for cuts like sirloin or ribeye for the best flavor and tenderness in your steak bites.
    • Rest the Meat: Allow the cooked steak to rest for a few minutes before serving to ensure juiciness remains locked in.
    • Adjust Horseradish to Taste: Start with less horseradish in your cream sauce and gradually add more to suit your preferred level of tanginess.
    • Experiment with Herbs: Try adding different herbs like parsley or dill to the horseradish cream for an additional layer of flavor.
    • Serve Immediately: For optimal taste and texture, serve the steak bites and garlic bread right after cooking.

    Best Side Dishes and Pairings

    To complement your juicy steak bites, consider these fantastic side dishes and beverages:

    1. Roasted Vegetables: A medley of seasonal vegetables adds color and balance to the meal, enhancing the overall flavor profile.
    2. Caesar Salad: The crisp romaine and tangy Caesar dressing pair well with the richness of the steak and horseradish cream.
    3. French Fries: Classic and beloved, crispy French fries provide a satisfying crunch that pairs perfectly with the steak bites.
    4. Red Wine: A full-bodied red wine, such as Cabernet Sauvignon, enhances the flavors of the steak and provides a luxurious dining experience.
    5. Grilled Asparagus: The slight char and freshness of asparagus complement the savory elements of the dish beautifully.

    Common Mistakes to Avoid

    • Not Preheating the Oven: Failing to preheat your oven can lead to unevenly cooked garlic bread.
    • Overcrowding the Skillet: Cooking too many steak bites at once can prevent them from browning properly.
    • Skipping the Seasoning: Not seasoning the steak bites adequately can result in bland flavors.
    • Not Letting the Steak Rest: Cutting into the steak bites immediately after cooking can cause them to lose their juices.

    Storage & Reheating Instructions

    Refrigerator Storage

    Store leftover Juicy Steak Bites with Garlic Bread and Tangy Horseradish Cream in airtight containers. When stored properly, they will remain fresh for up to three days in the refrigerator.

    Freezing Instructions

    For longer storage, freeze the steak bites separately from the garlic bread and horseradish cream. Use freezer-safe containers or bags and ensure they are tightly sealed. They can be stored for up to three months.

    Reheating Tips

    • Oven: Preheat the oven to 350°F (175°C), place the steak bites and garlic bread on a baking sheet, and heat for about 10-15 minutes until warmed through.
    • Microwave: Place the steak bites and garlic bread on a microwave-safe plate. Heat in 30-second intervals until hot.
    • Stovetop: Heat a skillet over medium heat and add the steak bites for 2-3 minutes, turning occasionally until warmed through.

    Frequently Asked Questions

    How do I make Juicy Steak Bites with Garlic Bread and Tangy Horseradish Cream more flavorful?

    To enhance the flavor, consider marinating the steak bites in your favorite marinade for a few hours before cooking. Additionally, using fresh herbs can elevate the dish.

    Can I substitute the horseradish?

    Yes, you can substitute the horseradish with a spicy mustard or a hot sauce for a different flavor profile, although it will alter the taste of the cream sauce.

    What is the best steak to use for juicy steak bites?

    For the best results, use tender cuts such as sirloin, ribeye, or tenderloin. These cuts provide excellent flavor and tenderness when cooked.

    How should I serve Juicy Steak Bites with Garlic Bread and Tangy Horseradish Cream?

    These steak bites are best served immediately after cooking, placed on top of the garlic bread slices and drizzled with the horseradish cream sauce for a delicious appetizer or main dish.

    Can I make the garlic bread ahead of time?

    Yes, you can prepare the garlic bread ahead of time and store it in the fridge. Reheat it in the oven before serving for the best texture.

    Final Thoughts

    This recipe for Juicy Steak Bites with Garlic Bread and Tangy Horseradish Cream is sure to impress your family and friends. The combination of flavors and textures creates a delightful dining experience. Give it a try and share your feedback in the comments!


    Dinner

    Juicy Steak Bites with Garlic Bread and Tangy Horseradish Cream


    5.0 from 24 reviews

    This recipe features tender steak bites cooked to perfection, served on crispy garlic bread and topped with a zesty horseradish cream sauce. It's a delightful combination of flavors that will satisfy your cravings.

    Author: Munch Twist
    Prep Time: 15 minutes
    Cook Time: 20 minutes
    Total Time: 35 minutes
    Yield: 4 servings
    Category: Dinner
    Method: No bake
    Cuisine: American

    Juicy Steak Bites with Garlic Bread and Tangy Horseradish Cream

    SCALE:
    1x
    2x
    3x
    Cook Mode: Prevent your screen from going dark

    Ingredients

    • 2 cloves garlic, minced
    • 4 tablespoons unsalted butter, softened
    • 1 loaf of French bread, cut into slices
    • Salt and pepper, to taste
    • 1 pound steak, cut into bite-sized pieces
    • 2 tablespoons olive oil
    • 1 cup sour cream
    • 2 tablespoons prepared horseradish
    • 1 tablespoon Dijon mustard
    • 1 tablespoon chopped fresh chives

    Instructions

    1. Preheat your oven to 375°F (190°C).
    2. In a small bowl, mix the softened butter with minced garlic. Spread this mixture onto the slices of French bread. Place the bread slices on a baking sheet and bake for 10 minutes, or until golden brown.
    3. Season the steak bites with salt and pepper. Heat olive oil in a large skillet over medium-high heat. Add the steak bites and cook for 3-4 minutes on each side, until browned and cooked to your desired level of doneness. Remove from skillet and set aside.
    4. In another bowl, combine the sour cream, prepared horseradish, Dijon mustard, and chopped chives. Mix well.
    5. Place the steak bites on top of the garlic bread slices and drizzle with the horseradish cream sauce.

    Nutrition Facts

    Serving Size: 1 serving
    Calories: 450 kcal
    Sugar: 1g
    Sodium: 600mg
    Fat: 26g
    Saturated Fat: 12g
    Carbohydrates: 28g
    Fiber: 1g
    Protein: 25g
    Cholesterol: 80mg

  • Perfect Classic Fish & Chips Recipe for Home Cooking

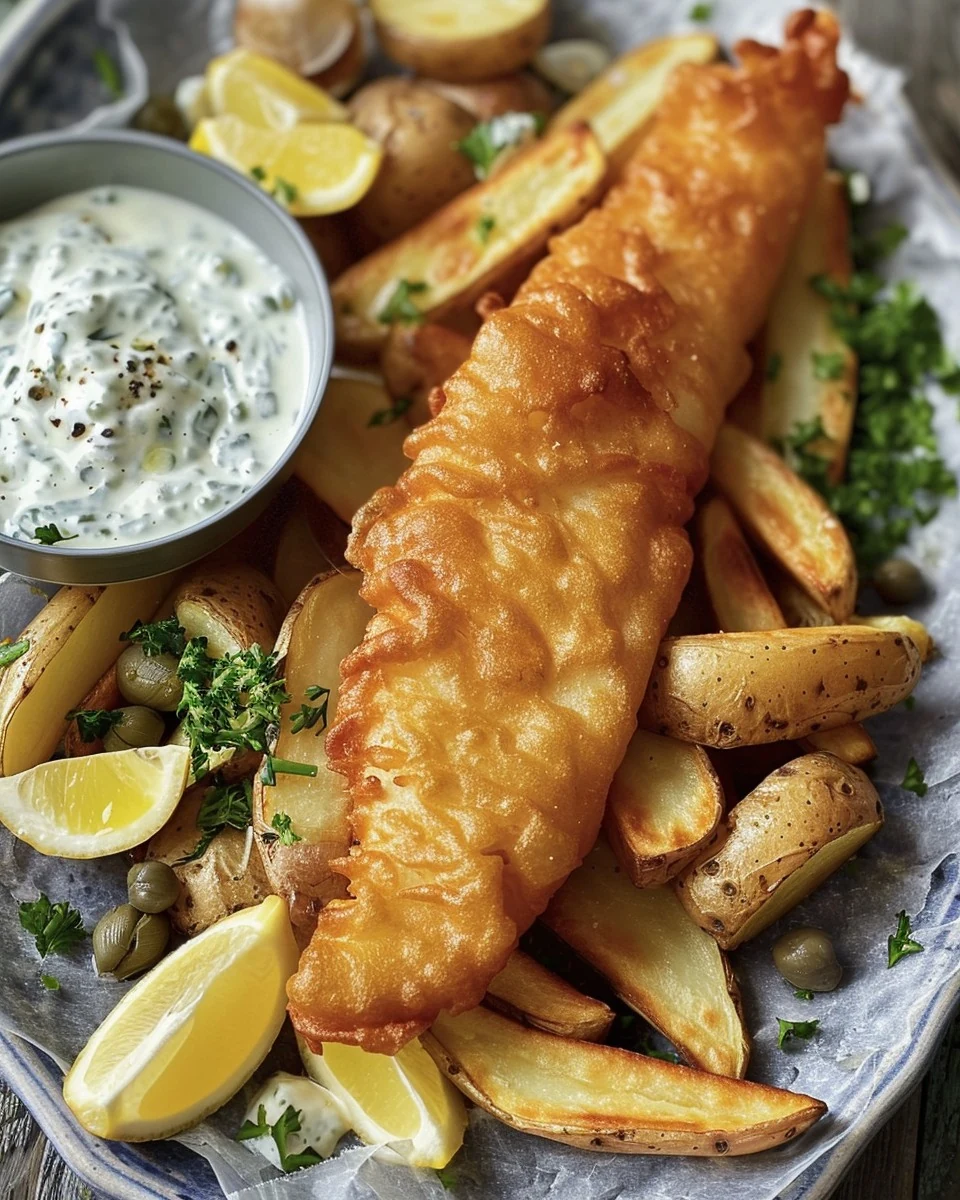
    Perfect Classic Fish & Chips Recipe for Home Cooking

    Classic Fish & Chips is a timeless dish that perfectly balances crispy batter and fluffy chips. This recipe captures the essence of traditional British fare while ensuring a delightful taste experience. The combination of fresh fish and homemade tartare sauce elevates this dish to new heights.

    Why You’ll Love This Recipe

    • Crispy Texture: The double-frying method ensures each chip and fish fillet is perfectly crispy.
    • Homemade Tartare Sauce: Elevate your meal with a fresh, zesty sauce made from pantry staples.
    • Customizable Fish: Use your favorite white fish like cod or haddock for a personal touch.
    • Perfect for Sharing: This classic dish is ideal for gatherings, making it a crowd-pleaser.
    • Nostalgic Flavors: Enjoy the comforting, familiar taste that brings back memories of seaside adventures.

    Tools and Equipment

    To prepare Classic Fish & Chips successfully, you will need some essential kitchen tools.

    Essential Tools

    • Deep pan
    • Knife
    • Chopping board
    • Mixing bowls
    • Whisk
    • Slotted spoon
    • Kitchen paper

    Why These Tools Matter

    • Deep pan: Allows for even frying, ensuring perfect texture for both fish and chips.
    • Mixing bowls: Essential for combining ingredients and making the batter effortlessly.
    • Slotted spoon: Helps remove fried items without excess oil, keeping your dish crispy.

    Ingredients for Classic Fish & Chips

    For the Chips

    • 75g self-raising flour, plus extra for dusting
    • 2 large Maris Piper potatoes
    • 1 litre sunflower oil, for frying
    • 1 tsp malt vinegar, plus extra to serve

    For the Fish

    • 2 thick skinless fillets of whiting, ling, pollock, haddock, or cod (about 150g each)
    • 25g cornflour
    • Small pinch of ground turmeric
    • 125g cold lager or fizzy water

    For the Tartare Sauce

    • 4 cornichons
    • 1 shallot
    • 1 tsp capers
    • Handful of parsley leaves, chopped
    • 5 tbsp mayonnaise

    How to Make Classic Fish & Chips Step-by-Step

    Step 1: Prepare the Chips

    1. Cut and Soak: Slice the Maris Piper potatoes into chips and soak them in cold water for 5 minutes. Rinse until the water runs clear.
    2. Cook: Place the chips in a pan of cold water with a pinch of salt and 1 tsp of malt vinegar. Bring to a simmer, then reduce the heat and simmer gently for 10-12 minutes until cooked through but not falling apart.
    3. Chill: Drain gently and lay the chips on a tray in a single layer. Chill until needed. This step can be done a day ahead for convenience.

    Step 2: Prepare the Fish

    1. Mix the Batter: In a bowl, combine self-raising flour, cornflour, and a small pinch of ground turmeric. Whisk in the cold lager or fizzy water until smooth.

    Step 3: Prepare the Tartare Sauce

    1. Chop and Mix: Finely chop the cornichons, capers, and shallot. Mix these with mayonnaise and chopped parsley leaves, then set aside.

    Step 4: Fry the Chips (First Fry)

    1. Heat Oil: Heat sunflower oil in a deep pan to 130°C.
    2. First Fry: Fry the chips for 7-8 minutes until soft but still pale. Remove and drain on kitchen paper. Increase the oil temperature to 180°C.

    Step 5: Fry the Fish

    1. Batter the Fish: Dust the fish fillets lightly with flour, then dip them into the batter, allowing excess to drip off.
    2. Cook: Fry the fish for 6-8 minutes until golden and crisp. Remove and drain on kitchen paper.

    Step 6: Finish the Chips (Second Fry)

    1. Second Fry: Return the chips to the hot oil and fry for 3-4 minutes until golden and crisp. Drain on kitchen paper and season with salt.

    Step 7: Serve

    1. Plate Up: Serve the fish and chips immediately with homemade tartare sauce and extra malt vinegar on the side.

    Enjoy this crispy, golden, and utterly delicious Classic Fish & Chips recipe that’s perfect for any meal!

    How to Serve Classic Fish Chips

    Serving Classic Fish & Chips is an opportunity to enhance your meal with delightful accompaniments and presentation.

    Serve with a Tangy Twist

    Drizzle additional malt vinegar over the fish and chips for an extra layer of flavor. This classic British touch elevates the dish, enhancing the crispy batter and soft chips.

    Accompany with Peas

    Serve alongside mushy peas or garden peas for a traditional pairing. The sweetness and texture of the peas complement the savory elements of the fish and chips.

    Add a Fresh Salad

    A simple green salad with a light vinaigrette can provide a refreshing contrast to the richness of the fried fish and chips, balancing the meal perfectly.

    Pro Tips for the Best Classic Fish Chips

    To ensure your Classic Fish & Chips turns out perfectly every time, consider these expert tips.

    • Use the Right Potatoes: Choose starchy potatoes like Maris Piper for the best texture in your chips.
    • Chill the Chips: Allowing the pre-cooked chips to chill helps achieve a crispier finish during the second fry.
    • Maintain Oil Temperature: Use a thermometer to keep the oil at the correct frying temperatures for optimal crispiness.
    • Dust the Fish Properly: Lightly dusting the fish with flour before dipping in batter helps the coating adhere better while frying.
    • Serve Immediately: For the best experience, serve your fish and chips right after frying to enjoy the maximum crispiness.

    Best Side Dishes and Pairings

    Enhance your Classic Fish & Chips with these complementary side dishes and beverages.

    1. Mushy Peas: A classic side that adds a creamy texture and sweetness to balance the savory flavors of the dish.
    2. Pickled Onions: Their tangy crunch provides a zesty contrast to the richness of the fish and chips.
    3. Coleslaw: A crunchy, refreshing coleslaw can lighten the meal while adding a delightful crunch.
    4. Lemon Wedges: Fresh lemon juice adds brightness and acidity that complements the fish beautifully.
    5. Cold Lager: Pair with the same lager used in the batter for a cohesive flavor experience that enhances the dish.

    Common Mistakes to Avoid

    • Using the Wrong Potatoes: Always opt for starchy potatoes like Maris Piper for the best texture.
    • Skipping the Soaking Step: Soaking the chips helps remove excess starch, leading to crispier results.
    • Not Preheating the Oil: Ensure the oil reaches the proper temperature before frying to achieve that perfect golden color.
    • Overcrowding the Pan: Fry in batches to avoid lowering the oil temperature, which can result in soggy fish and chips.

    Storage & Reheating Instructions

    Refrigerator Storage

    Store leftover fish and chips in airtight containers in the refrigerator. They will stay fresh for up to 2 days.

    Freezing Instructions

    For best results, freeze the cooked chips and fish separately. Wrap them tightly in plastic wrap and place them in freezer bags. They can be frozen for up to 3 months.

    Reheating Tips

    • Oven: Preheat the oven to 200°C (400°F). Spread the fish and chips on a baking sheet and heat for 10-15 minutes until crispy.
    • Microwave: Place on a microwave-safe plate and cover with a damp paper towel. Heat in short intervals until warmed through, but be aware this may not retain crispiness.
    • Stovetop: Reheat in a skillet over medium heat, adding a little oil for crispiness. Cook until heated through.

    Frequently Asked Questions

    How can I ensure my fish is crispy when making Classic Fish & Chips?

    To achieve a crispy texture, ensure your batter is cold and the oil is at the right temperature before frying.

    Can I make Classic Fish & Chips in advance?

    Yes, you can prepare the chips a day ahead and store them in the refrigerator. However, frying is best done just before serving for optimal freshness.

    What types of fish work best for Classic Fish & Chips?

    White fish fillets like cod, haddock, or pollock are ideal for this recipe due to their firm texture and mild flavor.

    Is it possible to make a healthier version of Classic Fish & Chips?

    You can bake the fish and chips instead of frying them, but they may not achieve the same crispy texture.

    What can I serve with Classic Fish & Chips besides tartare sauce?

    Consider serving with mushy peas, lemon wedges, or a simple green salad for a refreshing contrast.

    Final Thoughts

    This Classic Fish & Chips recipe is a delightful dish that promises crispy fish and perfectly cooked chips. I encourage you to try it out and share your thoughts in the comments below. Your feedback is invaluable!


    Dinner

    Classic Fish Chips


    5.0 from 24 reviews

    This Classic Fish & Chips recipe features crispy battered fish paired with perfectly fried chips, served with a homemade tartare sauce. It's a delightful dish that brings the taste of the seaside to your table, making it perfect for any meal or occasion.

    Author: Munch Twist
    Prep Time: 20 minutes
    Cook Time: 40 minutes
    Total Time: 60 minutes
    Yield: 2 servings
    Category: Desserts
    Method: No bake
    Cuisine: American

    Classic Fish Chips

    SCALE:
    1x
    2x
    3x
    Cook Mode: Prevent your screen from going dark

    Ingredients

    • 75g self-raising flour, plus extra for dusting
    • 2 large Maris Piper potatoes
    • 4 cornichons
    • 1 litre sunflower oil, for frying
    • 1 tsp malt vinegar, plus extra to serve
    • 1 shallot
    • 2 thick skinless fillets of whiting, ling, pollock, haddock, or cod (about 150g each)
    • 25g cornflour
    • Small pinch of ground turmeric
    • 125g cold lager or fizzy water
    • 1 tsp capers
    • Handful of parsley leaves, chopped
    • 5 tbsp mayonnaise

    Instructions

    1. Slice the potatoes into chips and soak in cold water for 5 minutes. Rinse until the water runs clear.
    2. Place the chips in a pan of cold water with a pinch of salt and 1 tsp vinegar. Bring to a simmer, then reduce the heat and simmer gently for 10-12 minutes until cooked through but not falling apart.
    3. Drain gently and lay the chips on a tray in a single layer. Chill until needed.
    4. In a bowl, combine self-raising flour, cornflour, and a small pinch of ground turmeric. Whisk in the cold lager or fizzy water until smooth.
    5. Finely chop the cornichons, capers, and shallot. Mix with mayonnaise and chopped parsley leaves. Set aside.
    6. Heat sunflower oil in a deep pan to 130°C.
    7. Fry the chips for 7-8 minutes until soft but still pale. Remove and drain on kitchen paper. Increase the oil temperature to 180°C.
    8. Dust the fish fillets lightly with flour, then dip into the batter, letting excess drip off.
    9. Fry the fish for 6-8 minutes until golden and crisp. Remove and drain on kitchen paper.
    10. Return the chips to the hot oil and fry for 3-4 minutes until golden and crisp. Drain on kitchen paper and season with salt.
    11. Serve the fish and chips immediately with homemade tartare sauce and extra malt vinegar on the side.

    Nutrition Facts

    Serving Size: 1 serving
    Calories: 600 kcal
    Sugar: 2g
    Sodium: 500mg
    Fat: 30g
    Saturated Fat: 6g
    Carbohydrates: 60g
    Fiber: 5g
    Protein: 25g
    Cholesterol: 75mg

  • Indulge in This Irresistible Purple Velvet Cake Recipe

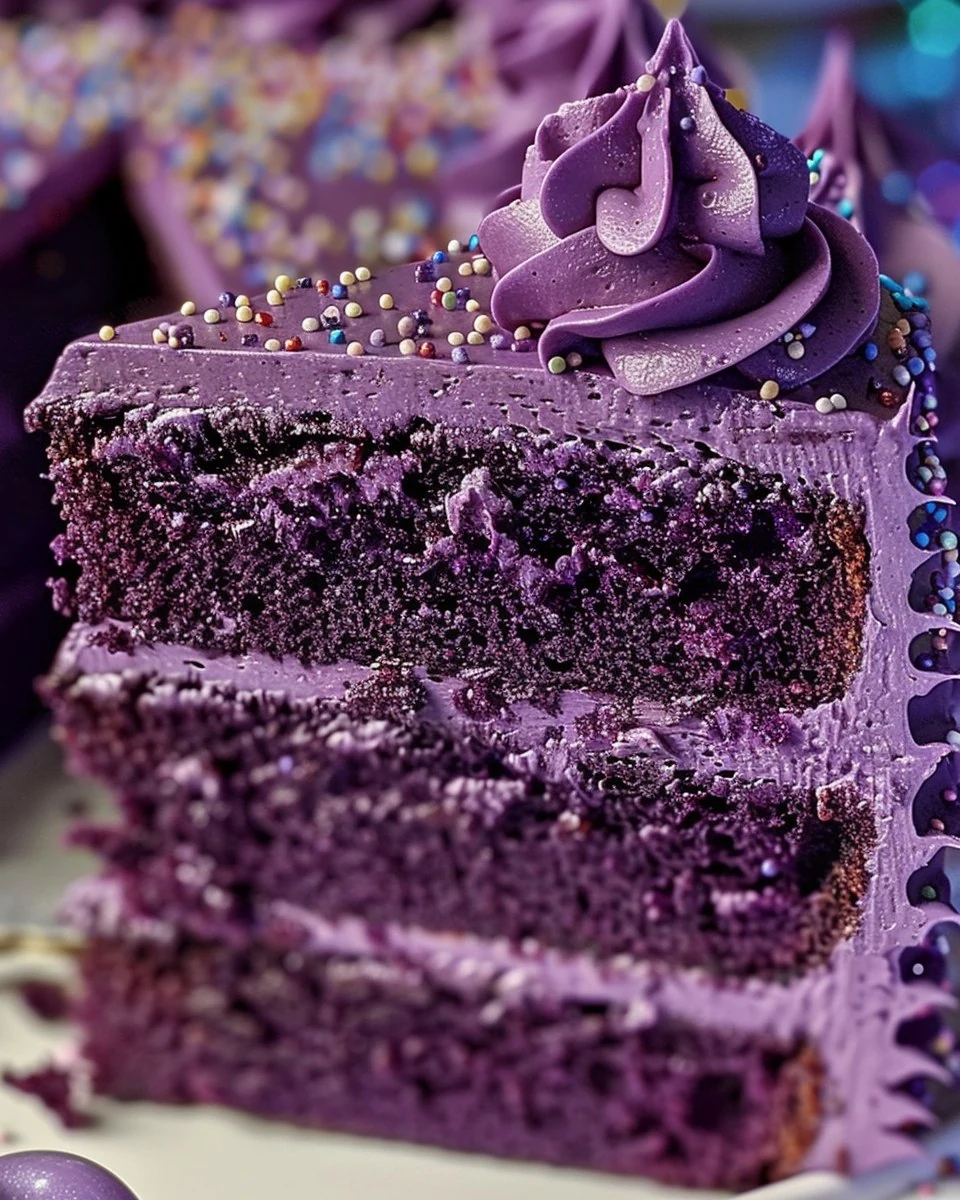
    Indulge in This Irresistible Purple Velvet Cake Recipe

    Purple Velvet Cake Recipe is a delightful dessert that combines a rich, velvety texture with a stunning purple hue. This cake is not only visually appealing but also boasts a moist and flavorful profile that makes it perfect for any occasion.

    Why You’ll Love This Recipe

    • Unique Flavor: The combination of buttermilk and cocoa powder adds a subtle richness that complements the sweetness.
    • Stunning Presentation: Its vibrant purple color makes it an eye-catching centerpiece for any dessert table.
    • Cream Cheese Frosting: The tangy cream cheese frosting perfectly balances the sweetness of the cake.
    • Versatile Occasion: This cake is ideal for birthdays, celebrations, or simply as a sweet treat.
    • Easy to Follow: With straightforward steps, even novice bakers can create this impressive dessert.

    Tools and Equipment

    Having the right tools will make your baking experience smoother and more enjoyable.

    Essential Tools

    • Electric mixer
    • Measuring cups and spoons
    • Mixing bowls
    • Sifter
    • Rubber spatula
    • Cake pans (9-inch)
    • Wire rack

    Why These Tools Matter

    • Electric mixer: Simplifies mixing and ensures a smooth batter without much effort.
    • Sifter: Helps combine dry ingredients evenly, resulting in a lighter cake.
    • Wire rack: Allows for proper cooling, preventing sogginess and maintaining texture.

    Ingredients for Purple Velvet Cake Recipe

    For the Cake

    • 1 1/2 cups sugar
    • 2 1/2 cups all-purpose flour
    • 1 teaspoon baking soda
    • 1 1/2 cups vegetable oil
    • 1 teaspoon salt
    • 1 cup buttermilk, room temperature
    • 1 teaspoon cocoa powder
    • 2 large eggs, room temperature
    • 1 teaspoon white distilled vinegar
    • 2 tablespoons red food coloring
    • 1 teaspoon vanilla extract
    • 1 teaspoon purple food coloring (or enough to achieve desired color)

    For the Cream Cheese Frosting

    • 1 pound cream cheese, softened
    • 2 sticks unsalted butter, room temperature
    • 1 teaspoon vanilla extract
    • 4 cups sifted confectioners’ sugar

    How to Make Purple Velvet Cake Recipe Step-by-Step

    Step 1: Preheat and Prepare

    Preheat your oven to 350°F (175°C). Grease and flour two 9-inch round cake pans to prevent sticking.

    Step 2: Prepare Dry Ingredients

    In a medium bowl, sift together 2 1/2 cups all-purpose flour, 1 1/2 cups sugar, 1 teaspoon baking soda, 1 teaspoon salt, and 1 teaspoon cocoa powder. This step ensures even mixing and a light cake texture.

    Step 3: Mix Wet Ingredients

    In a large bowl, use a handheld electric mixer to gently beat together 1 1/2 cups vegetable oil, 1 cup buttermilk, 2 large eggs, 2 tablespoons red food coloring, 1 teaspoon purple food coloring, 1 teaspoon white distilled vinegar, and 1 teaspoon vanilla extract. Mix until well combined.

    Step 4: Combine Ingredients

    Gradually add the dry mixture to the wet ingredients. Mix on low speed until the batter is smooth and thoroughly combined.

    Step 5: Divide and Bake

    Evenly divide the batter between the prepared cake pans. Bake in the preheated oven for 25 to 30 minutes, or until a toothpick inserted into the center comes out clean.

    Step 6: Cool Cakes

    Remove the cakes from the oven and cool on a wire rack for 10 minutes. Then, carefully remove the cakes from the pans and let them cool completely.

    Step 7: Prepare Frosting

    In a large bowl, beat together 1 pound cream cheese, 2 sticks unsalted butter, and 1 teaspoon vanilla extract until smooth. Gradually add 4 cups sifted confectioners’ sugar, mixing on low speed until incorporated. Increase the speed to high and mix until the frosting is very light and fluffy.

    Step 8: Frost Cake

    Once the cakes are completely cooled, use the cream cheese frosting to frost the layers. Decorate as desired and serve.

    Enjoy this Purple Velvet Cake Recipe at your next gathering. It promises to impress with its flavor and beautiful presentation.

    How to Serve Purple Velvet Cake Recipe

    This delightful Purple Velvet Cake can be served in various creative ways to impress your guests.

    Classic Slice

    Serve a generous slice of cake topped with a dollop of cream cheese frosting. Garnish with edible flowers or fresh berries for an elegant touch.

    Layered Parfait

    Crush leftover cake into pieces and layer them with whipped cream and fresh fruit in a glass. This makes for a beautiful dessert that showcases the cake’s vibrant color.

    Mini Cupcakes

    Turn the cake batter into mini cupcakes for a fun twist. Frost with cream cheese icing and add colorful sprinkles for a festive look, perfect for parties.

    Pro Tips for the Best Purple Velvet Cake Recipe

    To truly elevate your Purple Velvet Cake, consider these expert tips.

    • Use High-Quality Food Colorings: Invest in good-quality food coloring for a vibrant hue that stands out.

    • Measure Ingredients Accurately: Ensuring precise measurements will enhance the cake’s texture and flavor.

    • Don’t Overmix the Batter: Mix until just combined to keep the cake light and fluffy.

    • Cool Cakes Completely: Allow the cakes to cool entirely before frosting to prevent the icing from melting.

    • Experiment with Flavors: Try adding a hint of almond extract for a unique flavor profile that complements the cream cheese frosting.

    Best Side Dishes and Pairings

    Pairing your Purple Velvet Cake with complementary dishes can enhance the overall experience.

    1. Coffee: A rich brew balances the sweetness of the cake and adds depth to the dessert.

    2. Vanilla Ice Cream: The creaminess of vanilla ice cream contrasts beautifully with the cake’s texture and flavor.

    3. Fruit Salad: A light and refreshing fruit salad provides a sweet and tangy contrast to the rich cake.

    4. Sparkling Water: The fizz of sparkling water cleanses the palate and refreshes between bites.

    5. Herbal Tea: A warm cup of herbal tea, like chamomile or lavender, can provide a soothing complement to the cake’s sweetness.

    Common Mistakes to Avoid

    • Overmixing the Batter: Be careful not to overmix after adding the dry ingredients, as this can lead to a dense cake.
    • Incorrect Oven Temperature: Always preheat your oven to the correct temperature; an oven that’s too hot or too cold can affect baking time and texture.
    • Using Cold Ingredients: Make sure all your wet ingredients are at room temperature for better emulsification.
    • Not Measuring Ingredients Accurately: Use proper measuring cups and spoons for precision, especially with flour and sugar.

    Storage & Reheating Instructions

    Refrigerator Storage

    Store your Purple Velvet Cake in an airtight container in the refrigerator. It will stay fresh for up to 5 days.

    Freezing Instructions

    For best results, wrap individual slices of the cake in plastic wrap, then place them in a freezer-safe container. The cake can be frozen for up to 3 months. To thaw, place the container in the refrigerator overnight.

    Reheating Tips

    • Oven: Preheat the oven to 350°F (175°C) and heat the cake for about 10-15 minutes or until warmed through.
    • Microwave: Heat individual slices in the microwave for 15-20 seconds, checking to avoid overheating.
    • Stovetop: Use a pan over low heat, covering it with a lid to warm the cake gently for about 5 minutes.

    Frequently Asked Questions

    How can I achieve the perfect color for my Purple Velvet Cake Recipe?

    To achieve the desired color, adjust the amount of purple food coloring gradually. Start with a small amount and add more until you reach your preferred shade.

    Can I substitute ingredients in the Purple Velvet Cake Recipe?

    Yes, you can use almond milk or oat milk instead of buttermilk, but keep in mind that it may alter the cake’s flavor slightly.

    How do I know when my Purple Velvet Cake is done baking?

    Insert a toothpick into the center of the cake; if it comes out clean or with a few crumbs, your cake is ready.

    What can I serve with Purple Velvet Cake?

    Consider serving it with fresh berries, a scoop of vanilla ice cream, or a drizzle of chocolate sauce for added flavor.

    Is this recipe suitable for special occasions?

    Absolutely! The vibrant color and rich flavor of the Purple Velvet Cake make it a perfect choice for birthdays, weddings, and other celebrations.

    Final Thoughts

    The Purple Velvet Cake Recipe is a delightful treat that is sure to impress your friends and family. Its unique color and rich flavor make it a standout dessert for any occasion. We encourage you to try this recipe and share your experiences in the comments below. Your feedback is always appreciated!


    Desserts

    Purple Velvet Cake Recipe


    5.0 from 24 reviews

    This Purple Velvet Cake is a delightful twist on the classic red velvet, featuring a rich purple hue and a moist texture. Topped with a creamy and fluffy cream cheese frosting, it's perfect for celebrations or a sweet treat any day.

    Author: Munch Twist
    Prep Time: 20 mins
    Cook Time: 30 mins
    Total Time: 50 mins
    Yield: 12 servings
    Category: Desserts
    Method: No bake
    Cuisine: American

    Purple Velvet Cake Recipe

    SCALE:
    1x
    2x
    3x
    Cook Mode: Prevent your screen from going dark

    Ingredients

    • 1 1/2 cups sugar
    • 2 1/2 cups all-purpose flour
    • 1 teaspoon baking soda
    • 1 1/2 cups vegetable oil
    • 1 teaspoon salt
    • 1 cup buttermilk, room temperature
    • 1 teaspoon cocoa powder
    • 2 large eggs, room temperature
    • 1 teaspoon white distilled vinegar
    • 2 tablespoons red food coloring
    • 1 teaspoon vanilla extract
    • 1 teaspoon purple food coloring
    • 1 pound cream cheese, softened
    • 2 sticks unsalted butter, room temperature
    • 4 cups sifted confectioners' sugar

    Instructions

    1. Preheat your oven to 350°F (175°C). Grease and flour two 9-inch round cake pans.
    2. In a medium bowl, sift together the flour, sugar, baking soda, salt, and cocoa powder.
    3. In a large bowl, use a handheld electric mixer to gently beat together the vegetable oil, buttermilk, eggs, red and purple food coloring, vinegar, and vanilla extract.
    4. Gradually add the sifted dry ingredients to the wet mixture, mixing until smooth and thoroughly combined.
    5. Evenly divide the batter between the prepared cake pans. Bake in the preheated oven for 25 to 30 minutes, or until a toothpick inserted into the center comes out clean.
    6. Remove the cakes from the oven and cool on a wire rack for 10 minutes. Then, remove the cakes from the pans and let them cool completely.
    7. In a large bowl, beat the cream cheese, butter, and vanilla extract together until smooth. Gradually add the confectioners' sugar, beating on low speed until incorporated. Increase the speed to high and mix until the frosting is very light and fluffy.
    8. Once the cakes are completely cooled, frost them with the cream cheese frosting.

    Nutrition Facts

    Serving Size: 1 serving
    Calories: 590 kcal
    Sugar: 53g
    Sodium: 330mg
    Fat: 30g
    Saturated Fat: 13g
    Carbohydrates: 74g
    Fiber: 1g
    Protein: 5g
    Cholesterol: 70mg

  • Exquisite Seared Filet Mignon in Shallot Peppercorn Sauce

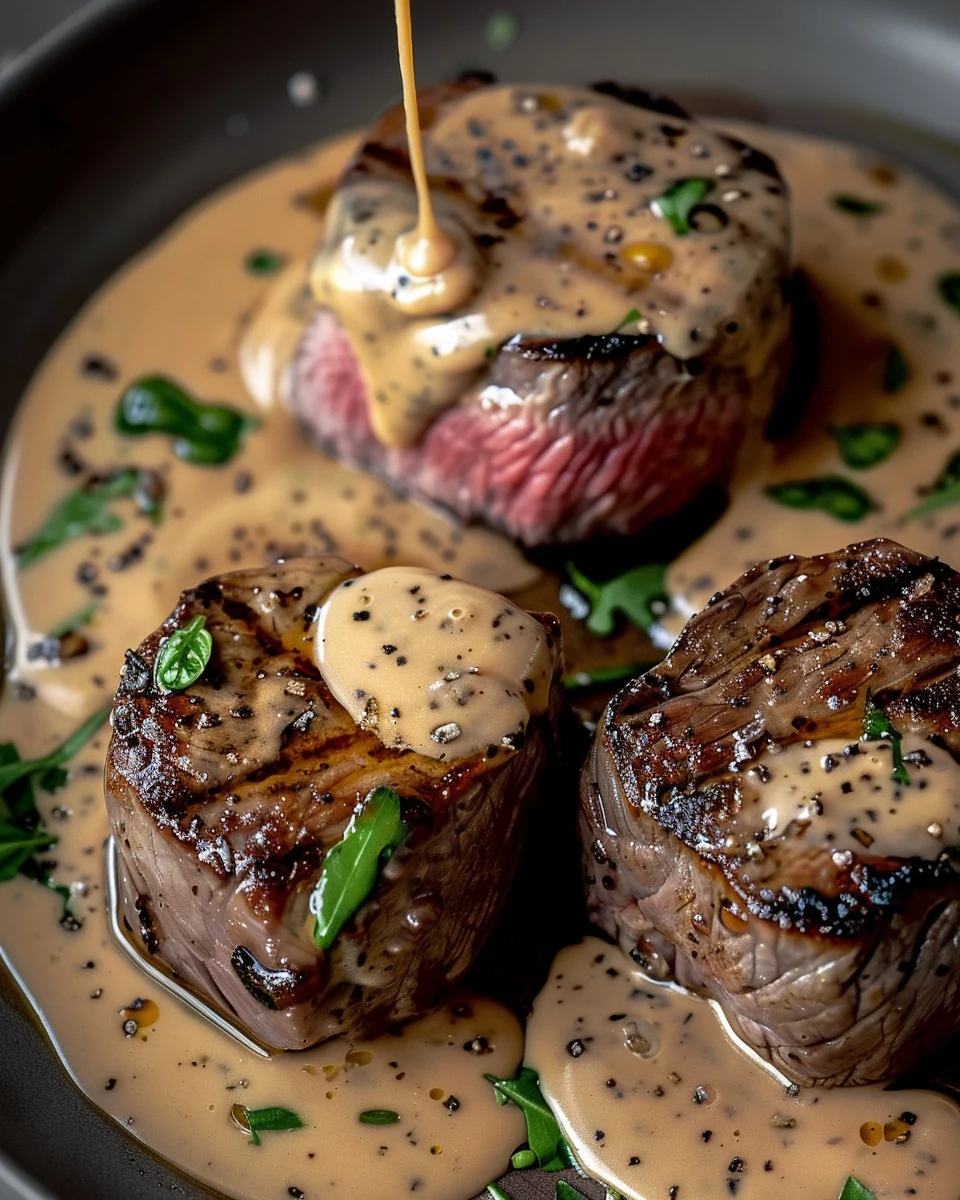
    Exquisite Seared Filet Mignon in Shallot Peppercorn Sauce

    Exquisite Seared Filet Mignon in Shallot Peppercorn Cream Sauce is a culinary masterpiece that combines tender beef with a rich, creamy sauce. The succulent flavors and elegant presentation make this dish perfect for special occasions or a romantic dinner at home.

    Why You’ll Love This Recipe

    • Decadent Flavor: The combination of filet mignon and shallot peppercorn cream sauce creates a rich, savory experience.
    • Impressive Presentation: This dish is visually stunning, making it a showstopper at any dinner table.
    • Quick & Easy: Ready in just 30 minutes, this recipe fits perfectly into a busy schedule.
    • Customizable: Pair it with your favorite sides, such as roasted vegetables or a fresh salad, to suit your taste.
    • Restaurant-Quality: Enjoy a gourmet meal at home without the need for culinary school training.

    Tools and Equipment

    Having the right tools makes cooking more efficient and enjoyable.

    Essential Tools

    • Heavy skillet
    • Cooking utensils (spatula, tongs)
    • Knife and cutting board
    • Measuring cups and spoons
    • Whisk

    Why These Tools Matter

    • Heavy Skillet: Provides even heat distribution for perfect searing of the filet mignon.
    • Cooking Utensils: Ensure safe handling of hot ingredients and precise stirring of sauces.
    • Whisk: Helps in achieving a smooth and creamy sauce by thoroughly blending ingredients.

    Ingredients for Exquisite Seared Filet Mignon in Shallot Peppercorn Cream Sauce

    For the Filet Mignon:

    • 4 filet mignon steaks (each about 6 oz and 1.5 inches thick)
    • Salt and freshly ground black pepper to taste
    • 2 tablespoons olive oil

    For the Shallot Peppercorn Cream Sauce:

    • 1/4 cup finely chopped shallots
    • 1 tablespoon cracked black peppercorns
    • 1/2 cup beef broth
    • 1 tablespoon butter
    • 1 cup heavy cream
    • Salt to taste

    How to Make Exquisite Seared Filet Mignon in Shallot Peppercorn Cream Sauce Step-by-Step

    Step 1: Prepare the Filet Mignon

    1. Start by seasoning the filet mignon steaks generously with salt and freshly ground black pepper on both sides.
    2. Heat olive oil in a heavy skillet over medium-high heat until hot.
    3. Add the steaks to the skillet and sear for about 4-5 minutes per side, until they develop a golden-brown crust.
    4. Remove the steaks from the skillet and let them rest for a few minutes.

    Step 2: Make the Shallot Peppercorn Cream Sauce

    1. In the same skillet, reduce the heat to medium and melt butter.
    2. Add the finely chopped shallots and sauté until they are soft and translucent, about 2-3 minutes.
    3. Stir in the cracked black peppercorns and sauté for another minute to release their flavor.
    4. Deglaze the skillet by adding beef broth, scraping up any browned bits from the bottom to enhance the sauce’s flavor.
    5. Pour in the heavy cream and bring the mixture to a simmer. Cook for 5-7 minutes until the sauce thickens slightly.
    6. Season with salt to taste.

    Step 3: Serve

    1. Plate each filet mignon steak and generously spoon the shallot peppercorn cream sauce over the top.
    2. If desired, garnish with fresh herbs such as thyme or parsley for an added touch of elegance.

    This luxurious filet mignon pairs beautifully with a side of roasted vegetables or a fresh green salad. Enjoy a memorable meal that will impress your guests and delight your taste buds.

    How to Serve Exquisite Seared Filet Mignon in Shallot Peppercorn Cream Sauce

    Serving this delectable dish can elevate your dining experience. Here are a few creative serving ideas:

    With Garlic Mashed Potatoes

    Creamy garlic mashed potatoes provide a rich and comforting base that perfectly complements the savory flavors of the filet mignon and shallot peppercorn cream sauce.

    Accompanied by Asparagus Bundles

    Roasted asparagus bundles wrapped in prosciutto add a touch of elegance and a burst of freshness, enhancing the overall presentation and flavor profile of the meal.

    Over a Bed of Spinach

    Serving the filet mignon over lightly sautéed spinach brings a nutritious element to the dish, while the earthy greens balance the richness of the cream sauce.

    Pro Tips for the Best Exquisite Seared Filet Mignon in Shallot Peppercorn Cream Sauce

    To achieve the perfect filet mignon, consider these expert tips:

    • Rest the Meat: Allow the filet mignon to rest at room temperature for about 30 minutes before cooking to ensure even cooking throughout.
    • Use a Meat Thermometer: For precision, check the internal temperature of the steak; aim for 130°F for medium-rare.
    • Don’t Overcrowd the Pan: Sear the steaks in batches if necessary to avoid steaming, which will prevent that beautiful crust from forming.
    • Quality Ingredients Matter: Use high-quality beef and fresh shallots, as the flavors will significantly impact the overall taste of the sauce.
    • Adjust the Sauce Consistency: If the cream sauce is too thick, you can thin it out with a splash of additional beef broth or cream to achieve your desired consistency.

    Best Side Dishes and Pairings

    To create a complete meal, consider these complementary sides and drinks:

    1. Roasted Root Vegetables: The sweetness of roasted carrots and parsnips enhances the savory notes of the filet mignon.
    2. Red Wine: A full-bodied red wine, such as Cabernet Sauvignon, pairs beautifully with the richness of the filet and the peppercorn sauce.
    3. Creamed Spinach: This classic side adds a creamy texture that matches well with the sauce and balances the meal.
    4. Garlic Bread: Crispy garlic bread is perfect for soaking up any leftover cream sauce, making every bite enjoyable.
    5. Caesar Salad: The crispness of a Caesar salad provides a refreshing contrast to the rich flavors of the main dish.

    Common Mistakes to Avoid

    • Overcooking the Steak: Always use a meat thermometer to ensure the filet mignon reaches the desired doneness.
    • Skipping the Resting Period: Allow the steaks to rest after cooking to retain their juices for a tender bite.
    • Not Deglazing the Skillet: Skipping this step means losing out on rich flavors that add depth to the sauce.
    • Using Low-Quality Ingredients: Choose high-quality beef and fresh shallots for the best flavor in your dish.

    Storage & Reheating Instructions

    Refrigerator Storage

    Store leftovers in airtight containers in the refrigerator. The filet mignon and shallot peppercorn cream sauce will remain fresh for up to three days.

    Freezing Instructions

    For freezing, wrap the filet mignon tightly in plastic wrap and then in aluminum foil. The cream sauce can be stored separately in an airtight container. Both can be frozen for up to three months. Thaw in the refrigerator overnight before reheating.

    Reheating Tips

    • Oven: Preheat to 350°F (175°C). Place the filet mignon on a baking sheet, covered with foil, and heat for about 10-15 minutes. Warm the sauce in a saucepan over low heat.
    • Microwave: Place the filet mignon on a microwave-safe plate. Heat in 30-second intervals until warmed through, and heat the sauce separately in a microwave-safe container.
    • Stovetop: Reheat the filet mignon in a skillet over low heat, flipping occasionally. Warm the sauce in a separate saucepan over low heat.

    Frequently Asked Questions

    How do I achieve the perfect sear on the filet mignon?

    To achieve the perfect sear, ensure your skillet is hot before adding the steaks. Avoid overcrowding the pan, as this can lower the temperature and prevent proper browning.

    Can I use a different type of steak for this recipe?

    While filet mignon is recommended for its tenderness, you can substitute with ribeye or sirloin. Adjust cooking times accordingly based on thickness.

    What can I serve with Exquisite Seared Filet Mignon in Shallot Peppercorn Cream Sauce?

    This dish pairs wonderfully with roasted vegetables, mashed potatoes, or a fresh green salad to complement the rich flavors.

    How do I know when the filet mignon is cooked to medium-rare?

    Use a meat thermometer to check for an internal temperature of 130-135°F (54-57°C). Alternatively, the steak should feel warm and slightly springy to the touch.

    Can I make the shallot peppercorn cream sauce ahead of time?

    Yes, you can prepare the sauce in advance and store it in the refrigerator. Reheat gently on the stovetop before serving.

    Final Thoughts

    This Exquisite Seared Filet Mignon in Shallot Peppercorn Cream Sauce is a perfect choice for a special occasion or an impressive dinner at home. I encourage you to try this recipe and share your experiences in the comments below.


    Dinner

    Exquisite Seared Filet Mignon in Shallot Peppercorn Cream Sauce


    5.0 from 24 reviews

    This luxurious filet mignon is seared to perfection and served with a rich shallot peppercorn cream sauce. The combination of tender steak and creamy sauce creates an unforgettable dining experience, perfect for special occasions or a delightful dinner at home.

    Author: Munch Twist
    Prep Time: 10 minutes
    Cook Time: 20 minutes
    Total Time: 30 minutes
    Yield: 4 servings
    Category: Lunch
    Method: No bake
    Cuisine: American

    Exquisite Seared Filet Mignon in Shallot Peppercorn Cream Sauce

    SCALE:
    1x
    2x
    3x
    Cook Mode: Prevent your screen from going dark

    Ingredients

    • 4 filet mignon steaks (each about 6 oz and 1.5 inches thick)
    • Salt to taste
    • Freshly ground black pepper to taste
    • 2 tablespoons olive oil
    • 1/4 cup finely chopped shallots
    • 1 tablespoon cracked black peppercorns
    • 1/2 cup beef broth
    • 1 tablespoon butter
    • 1 cup heavy cream

    Instructions

    1. Season the filet mignon steaks generously with salt and freshly ground black pepper.
    2. Heat olive oil in a heavy skillet over medium-high heat. Once hot, add the steaks and sear until they develop a golden-brown crust on each side, cooking for about 4-5 minutes per side for medium-rare. Remove the steaks from the skillet and let them rest.
    3. In the same skillet, reduce the heat to medium and melt the butter. Add the finely chopped shallots and sauté until soft and translucent.
    4. Add the cracked black peppercorns and sauté for another minute.
    5. Deglaze the skillet with the beef broth, scraping up any browned bits from the bottom of the skillet.
    6. Stir in the heavy cream and bring to a simmer. Cook until the sauce thickens slightly, about 5-7 minutes. Season with salt to taste.
    7. Plate each filet mignon steak and spoon over the shallot peppercorn cream sauce.

    Nutrition Facts

    Serving Size: 1 serving
    Calories: 640 kcal
    Sugar: 1g
    Sodium: 450mg
    Fat: 55g
    Saturated Fat: 25g
    Carbohydrates: 4g
    Fiber: 0g
    Protein: 32g
    Cholesterol: 180mg

  • Quick and Easy Healthy Chicken Chow Mein Recipe

    Quick and Easy Healthy Chicken Chow Mein Recipe

    Healthy Chicken Chow Mein is a vibrant and flavorful dish that combines tender chicken with crisp vegetables and savory sauces. This recipe is not only delicious but also packed with nutrients, making it an ideal choice for a quick weeknight meal.

    Why You’ll Love This Recipe

    • Nutritious Ingredients: Packed with vegetables, including bell peppers and snow peas, for added vitamins and minerals.
    • Quick & Easy: Ready in under 30 minutes, perfect for busy weeknights.
    • Customizable: Easily adjust the vegetables and sauces to suit your taste preferences.
    • Balanced Meal: Offers a great balance of protein, carbohydrates, and healthy fats.
    • Family-Friendly: A dish that appeals to both kids and adults, ensuring everyone enjoys mealtime.

    Tools and Equipment

    Having the right tools can make preparing Healthy Chicken Chow Mein a breeze.

    Essential Tools

    • Wok or large pan
    • Knife
    • Cutting board
    • Measuring spoons
    • Cooking spoon
    • Colander

    Why These Tools Matter

    • Wok or large pan: Provides ample space for stir-frying, ensuring even cooking.
    • Knife: A sharp knife allows for precise slicing of vegetables and chicken.
    • Colander: Perfect for draining the chow mein noodles after cooking.

    Ingredients for Healthy Chicken Chow Mein

    Protein

    • 2 chicken breasts, sliced

    Noodles

    • 200g chow mein noodles

    Vegetables

    • 1 bell pepper, sliced
    • 1 onion, sliced
    • 1 cup snow peas
    • 1 carrot, julienned
    • 2 cloves garlic, minced

    Oils and Sauces

    • 2 tbsp olive oil
    • 1 tbsp sesame oil
    • 3 tbsp soy sauce
    • 2 tbsp oyster sauce
    • Salt and pepper, to taste

    How to Make Healthy Chicken Chow Mein Step-by-Step

    Step 1: Cook Noodles

    Begin by preparing the chow mein noodles according to the package instructions. Drain them well and set aside for later use.

    Step 2: Cook Chicken

    In a large pan or wok, heat the olive oil over medium-high heat. Add the sliced chicken breasts. Cook until they are fully cooked through and lightly browned. Remove the chicken from the pan and set it aside.

    Step 3: Stir-Fry Vegetables

    In the same pan, add a little more olive oil if needed. Sauté the onion and garlic for about a minute. Then, add the bell pepper, carrot, and snow peas. Stir-fry these vegetables until they are tender-crisp.

    Step 4: Add Sauce

    Pour in the soy sauce, oyster sauce, and sesame oil. Stir well to coat all the vegetables evenly with the sauce.

    Step 5: Combine Noodles and Chicken

    Return the cooked chicken to the pan. Add the cooked noodles and toss everything together until well combined and heated through.

    Step 6: Season

    Taste the dish and adjust the seasoning with salt and pepper as needed.

    Step 7: Serve

    Serve the Healthy Chicken Chow Mein hot, straight from the pan. Enjoy this nutritious meal with family or friends.

    Preparation time: 15 minutes | Cooking time: 15 minutes
    Total time: 30 minutes
    Servings: 4

    This Healthy Chicken Chow Mein is a delightful, nutritious choice for a quick weeknight meal. With vibrant vegetables and tender chicken in a savory sauce, it’s sure to satisfy!

    How to Serve Healthy Chicken Chow Mein

    Healthy Chicken Chow Mein is versatile and can be enjoyed in various ways. Here are some creative serving ideas to elevate your meal.

    Serve with a Side Salad

    A fresh side salad with mixed greens, cucumbers, and a light vinaigrette can add a refreshing contrast to the savory flavors of the chow mein.

    Wrap in Lettuce Leaves

    For a low-carb option, serve the chow mein wrapped in crisp lettuce leaves. This adds a delightful crunch while keeping the meal light and healthy.

    Garnish with Fresh Herbs

    Top your Healthy Chicken Chow Mein with fresh cilantro or green onions for an aromatic finish. This not only enhances the presentation but also adds an extra layer of flavor.

    Pro Tips for the Best Healthy Chicken Chow Mein

    To achieve the best results with your Healthy Chicken Chow Mein, consider these expert tips.

    • Use Fresh Ingredients: Fresh vegetables will enhance the flavor and texture of your chow mein, making it more enjoyable.

    • Don’t Overcook the Chicken: Cook the chicken just until it’s no longer pink to keep it juicy and tender.

    • Customize Your Veggies: Feel free to substitute or add your favorite vegetables, such as mushrooms or broccoli, to make the dish your own.

    • Control the Heat: Adjust the cooking temperature as needed to avoid burning the garlic, which can turn bitter if overcooked.

    • Let It Rest: Allow the chow mein to sit for a minute off the heat before serving to let the flavors meld together.

    Best Side Dishes and Pairings

    Pairing your Healthy Chicken Chow Mein with the right side dishes can enhance your dining experience. Here are some excellent options.

    1. Steamed Broccoli: This nutrient-rich vegetable adds a distinct crunch and pairs well with the flavors of chow mein.

    2. Spring Rolls: Light and crispy, spring rolls make for a perfect appetizer that complements the main dish.

    3. Miso Soup: A warm bowl of miso soup offers a comforting contrast and balances the savory flavors of chow mein.

    4. Rice: A side of jasmine or brown rice can soak up any extra sauce and add heartiness to the meal.

    5. Chili Oil: Drizzling a bit of chili oil on top provides a spicy kick that enhances the overall flavor profile.

    Common Mistakes to Avoid

    • Not Cooking Noodles Properly: Ensure you follow package instructions precisely. Under-cooked noodles may be chewy, while overcooked ones can become mushy.
    • Overcrowding the Pan: Avoid adding too many ingredients at once, as this can lead to steaming instead of stir-frying, affecting the texture.
    • Neglecting Seasoning: Taste as you go and adjust seasoning. Insufficient seasoning can make your dish bland.
    • Using Low-Quality Ingredients: Quality ingredients make a significant difference in flavor. Opt for fresh vegetables and good-quality sauces.

    Storage & Reheating Instructions

    Refrigerator Storage

    Store any leftovers in airtight containers. This Healthy Chicken Chow Mein will stay fresh for up to 3 days when refrigerated.

    Freezing Instructions

    For freezing, place the cooled chow mein in freezer-safe containers. It can be frozen for up to 2 months. Thaw in the refrigerator overnight before reheating.

    Reheating Tips

    • Oven: Preheat to 350°F (175°C). Spread chow mein on a baking sheet and cover with foil. Heat for about 15-20 minutes, or until warmed through.
    • Microwave: Place in a microwave-safe dish, cover loosely, and heat in 1-minute intervals until hot, stirring in between.
    • Stovetop: Heat a bit of olive oil in a pan over medium heat. Add chow mein and stir frequently until heated through.

    Frequently Asked Questions

    What makes this Chicken Chow Mein healthy?

    This Healthy Chicken Chow Mein is lower in calories and packed with fresh vegetables, providing essential nutrients without compromising flavor.

    Can I customize the vegetables in this recipe?

    Absolutely! Feel free to substitute with your favorite vegetables like broccoli, bok choy, or zucchini, based on personal preference.

    How can I make this Healthy Chicken Chow Mein gluten-free?

    Use gluten-free chow mein noodles and ensure that the soy sauce is gluten-free. This way, you can enjoy a gluten-free version without sacrificing taste.

    How do I make this dish spicy?

    To add some heat, include sliced chili peppers or a dash of chili sauce when stir-frying the vegetables for a spicy kick.

    Can I use leftover chicken for this recipe?

    Yes, leftover cooked chicken works perfectly. Just skip the cooking step and add it directly to the pan with the vegetables.

    Final Thoughts

    This Healthy Chicken Chow Mein is not only quick and easy to prepare, but it also offers a delicious way to incorporate more vegetables into your meals. I encourage you to try this recipe and share your experiences in the comments below.


    Dinner

    Healthy Chicken Chow Mein


    5.0 from 24 reviews

    This Healthy Chicken Chow Mein is a delightful, nutritious choice for a quick weeknight meal. With vibrant vegetables and tender chicken in a savory sauce, it’s sure to satisfy!

    Author: Munch Twist
    Prep Time: 15 minutes
    Cook Time: 15 minutes
    Total Time: 30 minutes
    Yield: 4 servings
    Category: Dinner
    Method: No bake
    Cuisine: American

    Healthy Chicken Chow Mein

    SCALE:
    1x
    2x
    3x
    Cook Mode: Prevent your screen from going dark

    Ingredients

    • 2 chicken breasts, sliced
    • 200g chow mein noodles
    • 1 bell pepper, sliced
    • 1 onion, sliced
    • 1 cup snow peas
    • 1 carrot, julienned
    • 2 cloves garlic, minced
    • 2 tbsp olive oil
    • 1 tbsp sesame oil
    • 3 tbsp soy sauce
    • 2 tbsp oyster sauce
    • Salt and pepper, to taste

    Instructions

    1. Prepare the chow mein noodles according to the package instructions. Drain and set aside.
    2. Heat olive oil in a large pan or wok over medium-high heat. Add the sliced chicken breasts and cook until fully cooked through and lightly browned. Remove from the pan and set aside.
    3. In the same pan, add a bit more olive oil if needed. Sauté the onion, garlic, bell pepper, carrot, and snow peas until they are tender-crisp.
    4. Mix in the soy sauce, oyster sauce, and sesame oil. Stir well to coat the vegetables evenly.
    5. Return the cooked chicken to the pan. Add the cooked noodles and toss everything together until well combined and heated through.
    6. Adjust seasoning with salt and pepper to taste.
    7. Serve the Chicken Chow Mein hot, straight from the pan.

    Nutrition Facts

    Serving Size: 1 serving
    Calories: 300 kcal
    Sugar: 5g
    Sodium: 700mg
    Fat: 8g
    Saturated Fat: 1g
    Carbohydrates: 35g
    Fiber: 3g
    Protein: 25g
    Cholesterol: 70mg

  • Ultimate STEAKHOUSE POTATO GRATIN Recipe to Try Tonight

    Ultimate STEAKHOUSE POTATO GRATIN Recipe to Try Tonight

    STEAKHOUSE POTATO GRATIN is a decadent side dish that elevates any meal. With layers of tender potatoes enveloped in a rich cheese sauce, this dish is comfort food at its finest. It’s perfect for family dinners or special occasions when you want to impress your guests.

    Why You’ll Love This Recipe

    • Indulgent Flavor: The combination of cheddar and Parmesan creates a creamy, savory sauce that complements the potatoes perfectly.
    • Impressive Presentation: This gratin looks stunning when served, making it ideal for gatherings or holiday dinners.
    • Versatile Side Dish: Pair it with steak, chicken, or a fresh salad for a well-rounded meal.
    • Make-Ahead Friendly: Prepare it in advance and bake it just before serving for a stress-free dining experience.
    • Comfort Food Classic: Rich and satisfying, this dish brings warmth and nostalgia to any table.

    Tools and Equipment

    To create the perfect STEAKHOUSE POTATO GRATIN, you’ll need some essential kitchen tools.

    Essential Tools

    • A sharp knife for slicing potatoes
    • A large saucepan for the cheese sauce
    • A baking dish (9×13 inches recommended)
    • Measuring cups and spoons
    • Aluminum foil

    Why These Tools Matter

    • Sharp Knife: Ensures even, thin slices of potatoes for consistent cooking.
    • Large Saucepan: Allows for easy mixing and heating of the cheese sauce without splatter.
    • Baking Dish: The right size ensures proper cooking and browning of the gratin.

    Ingredients for STEAKHOUSE POTATO GRATIN

    Potatoes

    • 2 lbs russet potatoes, peeled and thinly sliced

    Cheese Sauce

    • 1 cup heavy cream
    • 1 cup shredded cheddar cheese (plus extra for topping)
    • 1/2 cup grated Parmesan cheese
    • 2 cloves garlic, minced

    Other Ingredients

    • 1 tablespoon butter (for greasing the dish)
    • Salt and pepper to taste
    • Fresh parsley, chopped (optional for garnish)

    How to Make STEAKHOUSE POTATO GRATIN Step-by-Step

    Step 1: Prepare and Preheat

    Preheat your oven to 375°F (190°C). Grease a baking dish with butter to prevent sticking.

    Step 2: Make the Cheese Sauce

    In a large saucepan, heat the heavy cream and minced garlic over medium heat. Stir frequently until the mixture simmers. Add 1 cup of shredded cheddar cheese and 1/2 cup of Parmesan cheese. Stir until the cheeses are fully melted and the sauce is smooth.

    Step 3: Layer and Bake

    Layer half of the sliced potatoes in the prepared baking dish. Season with salt and pepper for added flavor. Pour half of the cheese sauce over the potatoes. Add the remaining potato slices on top, followed by the rest of the cheese sauce. Cover the dish with aluminum foil and bake for 45 minutes.

    Step 4: Finish and Serve

    After 45 minutes, remove the foil and sprinkle additional cheddar cheese on top. Bake for another 15-20 minutes until the top is golden brown and bubbly. Let the gratin cool for a few minutes before serving. Garnish with chopped parsley if desired.

    Enjoy this delicious STEAKHOUSE POTATO GRATIN as a luxurious addition to your next meal.

    How to Serve STEAKHOUSE POTATO GRATIN

    Serving this dish can elevate any meal, making it perfect for both casual dinners and special occasions.

    Pair with Grilled Steak

    Steakhouse potato gratin is a classic side for grilled steak. The creamy, cheesy layers complement the savory flavor of a perfectly cooked steak, enhancing the overall dining experience.

    Accompany with Roasted Vegetables

    Serve the gratin alongside roasted vegetables for a balanced meal. The earthy flavors of root vegetables like carrots and Brussels sprouts provide a delightful contrast to the rich, creamy gratin.

    Top with Crispy Bacon

    For an added crunch and smoky flavor, sprinkle crispy bacon bits on top of the gratin before serving. This creates a delicious textural contrast and makes the dish even more indulgent.

    Pro Tips for the Best STEAKHOUSE POTATO GRATIN

    To ensure your gratin turns out perfectly every time, follow these expert tips.

    • Use High-Quality Cheese: Selecting fresh, high-quality cheeses will enhance the flavor and creaminess of your gratin.

    • Slice Potatoes Evenly: For uniform cooking, ensure your potato slices are of equal thickness. A mandoline slicer can help achieve consistent results.

    • Let It Rest: Allow the gratin to sit for a few minutes after baking. This helps it set and makes it easier to serve.

    • Experiment with Herbs: Adding fresh herbs like thyme or rosemary can elevate the flavor profile of your gratin, making it even more delicious.

    • Adjust Cream to Taste: If you prefer a lighter dish, you can substitute some of the heavy cream with half-and-half or whole milk without compromising too much on flavor.

    Best Side Dishes and Pairings

    Pairing the right side dishes with steakhouse potato gratin can enhance your meal significantly.

    1. Grilled Asparagus: The slight bitterness of grilled asparagus balances the richness of the gratin, providing a fresh contrast.

    2. Caesar Salad: The crispness of a Caesar salad adds a refreshing element to the meal, complementing the creamy potatoes.

    3. Garlic Bread: A side of garlic bread can be perfect for soaking up the cheese sauce, creating a truly indulgent experience.

    4. Red Wine: A full-bodied red wine, like Cabernet Sauvignon, pairs beautifully with the richness of the gratin and steak.

    5. Coleslaw: The crunch and tang of coleslaw provide a nice contrast to the creamy texture of the gratin, making for a well-rounded plate.

    Common Mistakes to Avoid

    • Skipping the Cheese Sauce: Not making the cheese sauce properly can lead to a dry gratin.
    • Overcrowding the Baking Dish: Layering too many potatoes can result in uneven cooking.
    • Not Preheating the Oven: Baking in a cold oven can affect the texture and cooking time.
    • Ignoring the Resting Time: Cutting into the gratin immediately can cause it to fall apart.

    Storage & Reheating Instructions

    Refrigerator Storage

    Store leftover STEAKHOUSE POTATO GRATIN in airtight containers. It will stay fresh for up to 3 days in the refrigerator.

    Freezing Instructions

    For freezing, allow the gratin to cool completely, then wrap it tightly in plastic wrap and aluminum foil. It can be frozen for up to 2 months. To thaw, transfer it to the refrigerator for 24 hours before reheating.

    Reheating Tips

    • Oven: Preheat to 350°F (175°C) and bake for about 20-25 minutes until heated through.
    • Microwave: Heat in a microwave-safe dish for 2-3 minutes, stirring halfway through.
    • Stovetop: Place in a skillet over low heat, stirring occasionally until warmed.

    Frequently Asked Questions

    Can I use other types of potatoes for STEAKHOUSE POTATO GRATIN?

    Yes, while russet potatoes are recommended for their starch content, Yukon Gold or red potatoes can also work well.

    How can I make STEAKHOUSE POTATO GRATIN healthier?

    You can reduce the amount of cheese or use low-fat alternatives, and add more vegetables like spinach or broccoli for added nutrition.

    Can I prepare STEAKHOUSE POTATO GRATIN ahead of time?

    Absolutely! You can assemble the gratin a day in advance and store it in the refrigerator. Just bake it when you’re ready to serve.

    What can I serve with STEAKHOUSE POTATO GRATIN?

    This dish pairs well with grilled meats, such as steak or chicken, and a fresh green salad.

    Final Thoughts

    STEAKHOUSE POTATO GRATIN is a rich and comforting dish that can elevate any meal. We encourage you to try this recipe, and please leave a comment with your feedback or any variations you make.


    Dinner

    STEAKHOUSE POTATO GRATIN


    5.0 from 24 reviews

    This Steakhouse Potato Gratin is a creamy and cheesy dish featuring layers of thinly sliced russet potatoes, heavy cream, and a blend of cheddar and Parmesan cheeses. Baked to perfection, it offers a golden brown top and a rich flavor that makes it a perfect side dish for any meat entrée.

    Author: Munch Twist
    Prep Time: 15 minutes
    Cook Time: 60 minutes
    Total Time: 75 minutes
    Yield: 6 servings
    Category: Lunch
    Method: Baking
    Cuisine: American

    STEAKHOUSE POTATO GRATIN

    SCALE:
    1x
    2x
    3x
    Cook Mode: Prevent your screen from going dark

    Ingredients

    • 2 lbs russet potatoes, peeled and thinly sliced
    • 1 cup heavy cream
    • 1 cup shredded cheddar cheese (plus extra for topping)
    • 1/2 cup grated Parmesan cheese
    • 2 cloves garlic, minced
    • 1 tablespoon butter (for greasing the dish)
    • Salt and pepper to taste
    • Fresh parsley, chopped (optional for garnish)

    Instructions

    1. Preheat your oven to 375°F (190°C). Grease a baking dish with butter.
    2. In a large saucepan, heat the heavy cream and minced garlic over medium heat. Stir frequently and bring to a simmer. Add 1 cup of shredded cheddar cheese and 1/2 cup of Parmesan cheese to the saucepan. Stir until the cheeses are fully melted and the sauce is smooth.
    3. Layer half of the sliced potatoes in the prepared baking dish. Season with salt and pepper. Pour half of the cheese sauce over the potatoes. Add the remaining potato slices on top and pour the rest of the cheese sauce over them. Cover the dish with aluminum foil and bake for 45 minutes.
    4. Remove the foil, sprinkle additional cheddar cheese on top, and bake for another 15-20 minutes until the top is golden brown and bubbly. Let the gratin cool for a few minutes before serving. Garnish with chopped parsley if desired.

    Nutrition Facts

    Serving Size: 1 serving
    Calories: 400 kcal
    Sugar: 2g
    Sodium: 442mg
    Fat: 23g
    Saturated Fat: 14g
    Carbohydrates: 34g
    Fiber: 3g
    Protein: 15g
    Cholesterol: 74mg