Author: munch twist

  • Creamy Orange Dreamsicle Salad Recipe to Try Today

    Creamy Orange Dreamsicle Salad Recipe to Try Today

    Orange Dreamsicle Salad is a delightful treat that combines creamy textures with a refreshing citrus flavor. This easy-to-make salad is perfect for gatherings, picnics, or as a sweet addition to any meal. Its vibrant color and creamy consistency make it a standout dish that everyone will love.

    Why You’ll Love This Recipe

    • Quick & Easy: Ready in under 30 minutes, making it perfect for last-minute gatherings.
    • Refreshing Flavor: The combination of orange and vanilla creates a dreamy taste that is both nostalgic and satisfying.
    • Crowd-Pleaser: This salad is a hit with both kids and adults, making it ideal for family events.
    • Versatile Dish: Perfect as a side salad or a dessert, it fits seamlessly into any meal.
    • Make Ahead: Prepare it a day in advance for busy days or special occasions.

    Tools and Equipment

    Making Orange Dreamsicle Salad is simple with the right tools. Here’s what you need:

    Essential Tools

    • Large mixing bowl
    • Whisk
    • Measuring cups
    • Rubber spatula
    • Refrigerator-safe serving bowl

    Why These Tools Matter

    • Large mixing bowl: Provides ample space for mixing all ingredients without spills.
    • Whisk: Ensures thorough mixing, helping to dissolve the Jell-O and blend the pudding smoothly.
    • Rubber spatula: Perfect for folding in the Cool Whip and other ingredients without deflating them.

    Ingredients for Orange Dreamsicle Salad

    Main Ingredients

    • 1 cup mini marshmallows
    • 1 box orange Jell-O
    • 1 cup boiling water
    • 1/2 cup cold water
    • 1 can mandarin oranges (14 oz.), drained
    • 1 box instant vanilla pudding
    • 1 Cool Whip (8 oz.)

    How to Make Orange Dreamsicle Salad Step-by-Step

    Step 1: Dissolve Jell-O

    In a large bowl, combine the orange Jell-O with the boiling water. Whisk until the Jell-O is completely dissolved.

    Step 2: Cool and Thicken

    Add the cold water to the mixture. Refrigerate for 15 minutes to cool it down.

    Step 3: Add Pudding

    Gradually whisk in the instant vanilla pudding mix until smooth. Chill for another 15-20 minutes or until the mixture begins to thicken slightly.

    Step 4: Fold in Ingredients

    Gently fold in the Cool Whip, drained mandarin oranges, and mini marshmallows until everything is evenly mixed.

    Step 5: Serve

    Chill further if needed, then serve and enjoy this refreshing, creamy Orange Dreamsicle Salad!

    This delightful Orange Dreamsicle Salad is not just a treat; it’s a nostalgic reminder of sunny days and sweet moments. Perfect for any occasion, this creamy salad is sure to become a favorite.

    How to Serve Orange Dreamsicle Salad

    This delightful salad can be enjoyed in various creative ways.

    Individual Cups

    Serve the Orange Dreamsicle Salad in individual dessert cups for a fun and personal touch. This presentation makes it perfect for parties or gatherings.

    Garnished with Fresh Fruit

    Top each serving with fresh slices of orange or a sprinkle of shredded coconut. This not only enhances the visual appeal but also adds a burst of flavor.

    As a Dessert Parfait

    Layer the Orange Dreamsicle Salad with granola and additional fruit in a parfait glass. This creates a deliciously textured dessert that is as pleasing to the eye as it is to the palate.

    Pro Tips for the Best Orange Dreamsicle Salad

    To elevate your Orange Dreamsicle Salad, consider these practical tips.

    • Use Fresh Ingredients: Opt for fresh mandarin oranges instead of canned for a more vibrant flavor and texture.
    • Chill Thoroughly: Ensure that the salad is well-chilled before serving to enhance its refreshing nature.
    • Adjust Sweetness: Taste the mixture before adding all the marshmallows; you can adjust the sweetness according to your preference.
    • Add Zest: Incorporate a teaspoon of orange zest for an extra citrusy kick that complements the Jell-O and pudding.
    • Make Ahead: Prepare the salad a day in advance to allow the flavors to meld and intensify overnight.

    Best Side Dishes and Pairings

    Pair your Orange Dreamsicle Salad with these complementary dishes and drinks.

    1. Grilled Chicken Skewers – The smoky flavor of grilled chicken balances the sweetness of the salad.
    2. Tropical Fruit Salad – A light fruit salad with a mix of pineapple, kiwi, and berries enhances the citrus theme.
    3. Cheesy Garlic Bread – The savory notes of cheesy garlic bread provide a delicious contrast to the creamy sweetness.
    4. Crisp Garden Salad – A fresh garden salad with a tangy vinaigrette offers a refreshing counterpoint.
    5. Sparkling Lemonade – The zesty bubbles of sparkling lemonade complement the creamy texture of the salad perfectly.

    Common Mistakes to Avoid

    • Not Allowing Jell-O to Cool Properly: Skipping the cooling step can lead to a runny mixture.
    • Overmixing the Pudding: Overwhipping can cause the mixture to become grainy instead of creamy.
    • Using Warm Ingredients: Ensure all ingredients, especially Cool Whip, are chilled for the best texture.
    • Skipping the Chilling Time: Not letting the salad chill long enough can affect the overall consistency and flavor.

    Storage & Reheating Instructions

    Refrigerator Storage

    Store the Orange Dreamsicle Salad in airtight containers in the refrigerator. It will stay fresh for up to 3 days.

    Freezing Instructions

    For best results, avoid freezing this salad as it can alter the texture of the ingredients. If you do freeze it, ensure it is in a well-sealed container and thaw it overnight in the refrigerator before serving.

    Reheating Tips

    • Oven: Not recommended, as this salad is best served cold.
    • Microwave: Not applicable; this dish should not be heated.
    • Stovetop: Not applicable; this dish should be enjoyed chilled.

    Frequently Asked Questions

    What is Orange Dreamsicle Salad?

    Orange Dreamsicle Salad is a creamy, fruity dish made with orange Jell-O, vanilla pudding, mandarin oranges, mini marshmallows, and Cool Whip, creating a delightful and refreshing treat.

    Can I prepare Orange Dreamsicle Salad in advance?

    Yes, you can prepare this salad a day ahead of time. Simply store it in the refrigerator until you’re ready to serve.

    What can I serve with Orange Dreamsicle Salad?

    This salad pairs wonderfully with grilled meats, barbecues, or as a dessert at potlucks and gatherings.

    How many servings does this recipe yield?

    This recipe serves approximately 6 people.

    Can I customize the fruits in Orange Dreamsicle Salad?

    Absolutely! Feel free to mix in other fruits such as pineapple or berries to suit your taste preferences.

    Final Thoughts

    Orange Dreamsicle Salad is a delightful addition to any gathering or meal. Its creamy texture and refreshing flavors are sure to impress. I encourage you to try making this recipe and share your thoughts in the comments below!


    Desserts

    Orange Dreamsicle Salad


    5.0 from 24 reviews

    This Orange Dreamsicle Salad is a delightful combination of creamy vanilla pudding, refreshing mandarin oranges, and fluffy mini marshmallows, all brought together with a vibrant orange Jell-O base. It's a perfect sweet treat for any occasion, offering a refreshing and nostalgic flavor reminiscent of childhood dreamsicles.

    Author: Munch Twist
    Prep Time: 10 minutes
    Cook Time: 25 mins
    Total Time: 40-50 minutes
    Yield: 6 servings
    Category: Desserts
    Method: No bake
    Cuisine: American

    Orange Dreamsicle Salad

    SCALE:
    1x
    2x
    3x
    Cook Mode: Prevent your screen from going dark

    Ingredients

    • 1 cup mini marshmallows
    • 1 box orange Jell-O
    • 1 cup boiling water
    • 1/2 cup cold water
    • 1 can mandarin oranges (14 oz.), drained
    • 1 box instant vanilla pudding
    • 1 Cool Whip (8 oz.)

    Instructions

    1. In a large bowl, combine the orange Jell-O with boiling water. Whisk until the Jell-O is completely dissolved.
    2. Add the cold water to the mixture. Refrigerate for 15 minutes to cool.
    3. Gradually whisk in the instant vanilla pudding mix until smooth. Chill for another 15-20 minutes or until the mixture begins to thicken slightly.
    4. Gently fold in the Cool Whip, drained mandarin oranges, and mini marshmallows until evenly mixed.
    5. Chill further if needed, then serve and enjoy this refreshing, creamy salad!
    Nutrition Facts

    Serving Size: 1 serving
    Calories: 240 kcal
    Sugar: 24g
    Sodium: 180mg
    Fat: 10g
    Saturated Fat: 5g
    Carbohydrates: 34g
    Fiber: 0g
    Protein: 2g
    Cholesterol: 10mg

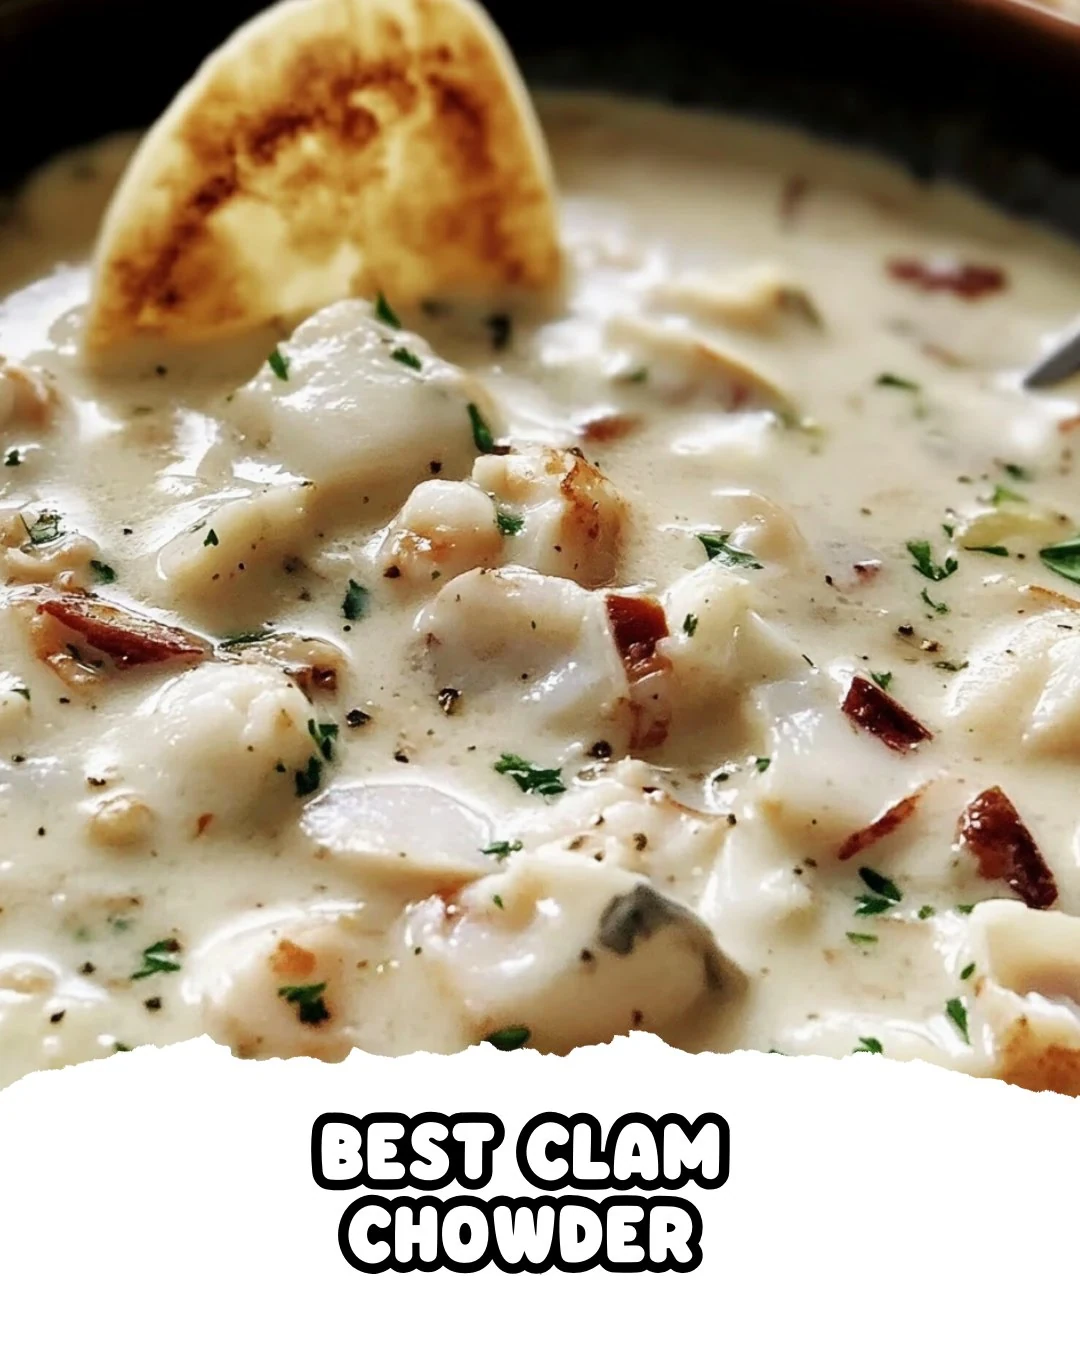
  • Indulge in the BEST CLAM CHOWDER Recipe Today

    Indulge in the BEST CLAM CHOWDER Recipe Today

    BEST CLAM CHOWDER is a classic dish that embodies the comfort of home cooking. Creamy, hearty, and packed with flavor, this chowder is sure to warm your heart and satisfy your taste buds. It combines fresh clams, tender potatoes, and savory bacon, creating a delightful experience in every spoonful.

    Why You’ll Love This Recipe

    • Rich Flavor: The combination of bacon, clams, and aromatic vegetables creates a depth of flavor that is irresistible.
    • Creamy Texture: The use of fat-free half-and-half results in a luscious, creamy consistency without being overly heavy.
    • Customizable: You can easily adjust the ingredients to suit your taste or dietary preferences.
    • Perfect for Any Occasion: Whether it’s a family dinner or a gathering with friends, this chowder is always a hit.
    • Easy to Make: With straightforward steps, even novice cooks can master this dish.

    Tools and Equipment

    To make the BEST CLAM CHOWDER, you will need a few essential kitchen tools.

    Essential Tools

    • Dutch oven
    • Wooden spoon
    • Measuring cups and spoons
    • Chopping knife
    • Cutting board

    Why These Tools Matter

    • Dutch oven: Ideal for even heat distribution, ensuring your chowder cooks perfectly.
    • Wooden spoon: Gentle on your cookware and great for stirring without scratching.
    • Chopping knife and cutting board: Essential for efficiently preparing your vegetables and clams.

    Ingredients for BEST CLAM CHOWDER

    Base Ingredients

    • 2 Tbsp. butter
    • 2 celery stalks, chopped
    • 1 leek, finely chopped
    • 1 large onion, chopped
    • 8-10 bacon strips, divided

    Chowder Ingredients

    • 3-4 small potatoes, peeled and cubed
    • 1 cup broth
    • 1 bottle (8 ounces) clam juice
    • 1/3 cup all-purpose flour
    • 2 cups fat-free half-and-half, divided

    Seasonings and Clams

    • 1/2 teaspoon white pepper
    • 1/2 teaspoon salt
    • 1/2 teaspoon dried thyme
    • 3 cans (6-1/2 ounces each) whole clams, undrained, chopped into chunky pieces
    • 2-3 garlic cloves, minced
    • Bay leaf
    • Chopped fresh chives or green onions, for garnish

    How to Make BEST CLAM CHOWDER Step-by-Step

    Step 1: Cook the Bacon

    In a Dutch oven, cook the bacon strips over medium heat until crisp. Remove the bacon and place it on paper towels to drain. Set it aside for later.

    Step 2: Sauté the Vegetables

    Add the butter to the bacon drippings in the Dutch oven. Sauté the chopped celery, leek, and onion until they are tender. Add the minced garlic and cook for an additional minute to release its aroma.

    Step 3: Simmer the Soup

    Stir in the cubed potatoes, broth, clam juice, salt, white pepper, and thyme. Bring the mixture to a boil, then reduce the heat and let it simmer uncovered for 15-20 minutes, or until the potatoes are tender.

    Step 4: Thicken the Chowder

    In a small bowl, mix the flour with 1 cup of half-and-half until smooth. Gradually stir this mixture into the soup. Bring it back to a boil and cook, stirring for 1-2 minutes, until the chowder thickens.

    Step 5: Finish the Chowder

    Stir in the chopped clams and the remaining half-and-half. Heat through on low heat, ensuring that the chowder does not boil. Add the bay leaf and four strips of crumbled bacon for added flavor.

    Step 6: Garnish and Serve

    Crumble the reserved two strips of bacon and sprinkle them over the chowder. Garnish with fresh chives or green onions. Serve hot and enjoy this comforting BEST CLAM CHOWDER!

    This creamy, hearty clam chowder is perfect for a cozy meal or gathering. Enjoy every spoonful of this classic favorite!

    How to Serve BEST CLAM CHOWDER

    This clam chowder can be enjoyed in various delightful ways.

    Serve in Bread Bowls

    Hollow out fresh sourdough or rustic bread loaves to create edible bowls that enhance the experience and add a complementary flavor.

    Top with Croutons

    For added crunch, sprinkle homemade or store-bought croutons on top just before serving, giving your clam chowder an appealing texture contrast.

    Pair with Fresh Herbs

    Enhance the flavor by garnishing with fresh herbs like parsley or dill, providing a bright finish that elevates the dish.

    Pro Tips for the Best BEST CLAM CHOWDER

    To ensure your clam chowder reaches its full potential, consider these helpful tips.

    • Use Fresh Clams: Whenever possible, opt for fresh clams instead of canned for a richer flavor and better texture.
    • Adjust Thickness: If you prefer a thicker chowder, allow it to simmer longer after adding the flour mixture until it reaches your desired consistency.
    • Flavor Deepening: Let the chowder sit for a while before serving; the flavors meld beautifully when given time to rest.
    • Experiment with Spices: Feel free to add a pinch of cayenne pepper or Old Bay seasoning for an extra kick and complexity.
    • Garnish Generously: Don’t skimp on garnishes like bacon and chives; they add both flavor and visual appeal.

    Best Side Dishes and Pairings

    Complement your clam chowder with these delicious side dishes and drinks.

    1. Garlic Bread: The buttery, garlicky flavors of garlic bread make it a perfect match, ideal for dipping in the chowder.
    2. Green Salad: A light, crisp salad with vinaigrette provides a refreshing contrast to the creamy soup.
    3. Coleslaw: The crunch and acidity of coleslaw balance the richness of the chowder, adding a vibrant texture.
    4. Cornbread: Sweet cornbread pairs wonderfully, providing a comforting, hearty side that enhances the meal.
    5. Chardonnay: A chilled glass of Chardonnay complements the seafood flavors beautifully, enhancing the overall dining experience.

    Common Mistakes to Avoid

    • Overcooking the Clams: Adding clams too early can lead to a rubbery texture; they should be heated just until warmed through.
    • Skipping the Bay Leaf: This simple ingredient adds depth to the flavor; omitting it can result in a less complex chowder.
    • Not Using Enough Seasoning: Ensure you measure out the salt and pepper; under-seasoning can leave your chowder bland.
    • Rushing the Simmering Process: Allowing the chowder to simmer for the full time ensures the flavors meld properly and the potatoes soften.

    Storage & Reheating Instructions

    Refrigerator Storage

    Store leftover clam chowder in airtight containers. It will stay fresh for up to 3 days in the refrigerator.

    Freezing Instructions

    To freeze, let the chowder cool completely, then transfer to freezer-safe containers. It can be frozen for up to 3 months. Thaw overnight in the refrigerator before reheating.

    Reheating Tips

    • Oven: Preheat to 350°F (175°C), transfer chowder to an oven-safe dish, cover with foil, and heat for about 20-25 minutes, stirring halfway.
    • Microwave: Place chowder in a microwave-safe bowl, cover loosely, and heat in 1-minute intervals, stirring in between, until hot.
    • Stovetop: Pour chowder into a saucepan over low heat, stirring occasionally, until heated through.

    Frequently Asked Questions

    Can I use fresh clams for the BEST CLAM CHOWDER?

    Yes, you can use fresh clams, but ensure they are cleaned and cooked properly before adding them to the chowder.

    What can I serve with the BEST CLAM CHOWDER?

    This chowder pairs wonderfully with crusty bread, crackers, or a fresh salad for a complete meal.

    Can I make the BEST CLAM CHOWDER dairy-free?

    To make it dairy-free, substitute the half-and-half with a dairy-free alternative like coconut milk or almond milk, and adjust the seasoning accordingly.

    How long does the BEST CLAM CHOWDER last in the fridge?

    When stored properly in an airtight container, the chowder will last up to 3 days in the refrigerator.

    Is the BEST CLAM CHOWDER suitable for freezing?

    Yes, this chowder freezes well. Just make sure to cool it completely before transferring it to freezer-safe containers.

    Final Thoughts

    This BEST CLAM CHOWDER recipe offers a hearty and comforting dish that is sure to please any crowd. We encourage you to try making it at home and share your feedback in the comments section below. Your opinions and variations are always welcome!


    Dinner

    BEST CLAM CHOWDER


    5.0 from 24 reviews

    This creamy, hearty clam chowder is perfect for a cozy meal or gathering. Enjoy every spoonful of this classic favorite!

    Author: Munch Twist
    Prep Time: 15 minutes
    Cook Time: 30 minutes
    Total Time: 45 minutes
    Yield: 6 servings
    Category: Lunch
    Method: No bake
    Cuisine: American

    BEST CLAM CHOWDER

    SCALE:
    1x
    2x
    3x
    Cook Mode: Prevent your screen from going dark

    Ingredients

    • 2 Tbsp. butter
    • 2 celery stalks, chopped
    • 1 leek, finely chopped
    • 1 large onion, chopped
    • 8-10 bacon strips, divided
    • 3-4 small potatoes, peeled and cubed
    • 1 cup broth
    • 1 bottle (8 ounces) clam juice
    • 1/3 cup all-purpose flour
    • 2 cups fat-free half-and-half, divided
    • 1/2 teaspoon white pepper
    • 1/2 teaspoon salt
    • 1/2 teaspoon dried thyme
    • 3 cans (6-1/2 ounces each) whole clams, undrained, chopped into chunky pieces
    • 2-3 garlic cloves, minced
    • Bay leaf
    • Chopped fresh chives or green onions, for garnish

    Instructions

    1. In a Dutch oven, cook bacon strips over medium heat until crisp. Remove bacon to paper towels to drain. Set aside.
    2. Add butter to the bacon drippings. Sauté celery, leek, and onion until tender. Add garlic and cook for an additional minute.
    3. Stir in potatoes, broth, clam juice, salt, pepper, and thyme. Bring to a boil, then reduce heat and simmer uncovered for 15-20 minutes until potatoes are tender.
    4. In a small bowl, mix flour with 1 cup half-and-half until smooth. Gradually stir this mixture into the soup. Bring to a boil, then cook and stir for 1-2 minutes until thickened.
    5. Stir in clams and the remaining half-and-half. Heat through on low heat (do not boil). Add bay leaf and 4 strips of crumbled bacon.
    6. Crumble the reserved 2 strips of bacon and sprinkle over the chowder. Garnish with fresh chives or green onions. Serve hot and enjoy!

    Nutrition Facts

    Serving Size: 1 serving
    Calories: 280 kcal
    Sugar: 2g
    Sodium: 850mg
    Fat: 16g
    Saturated Fat: 6g
    Carbohydrates: 20g
    Fiber: 2g
    Protein: 15g
    Cholesterol: 40mg

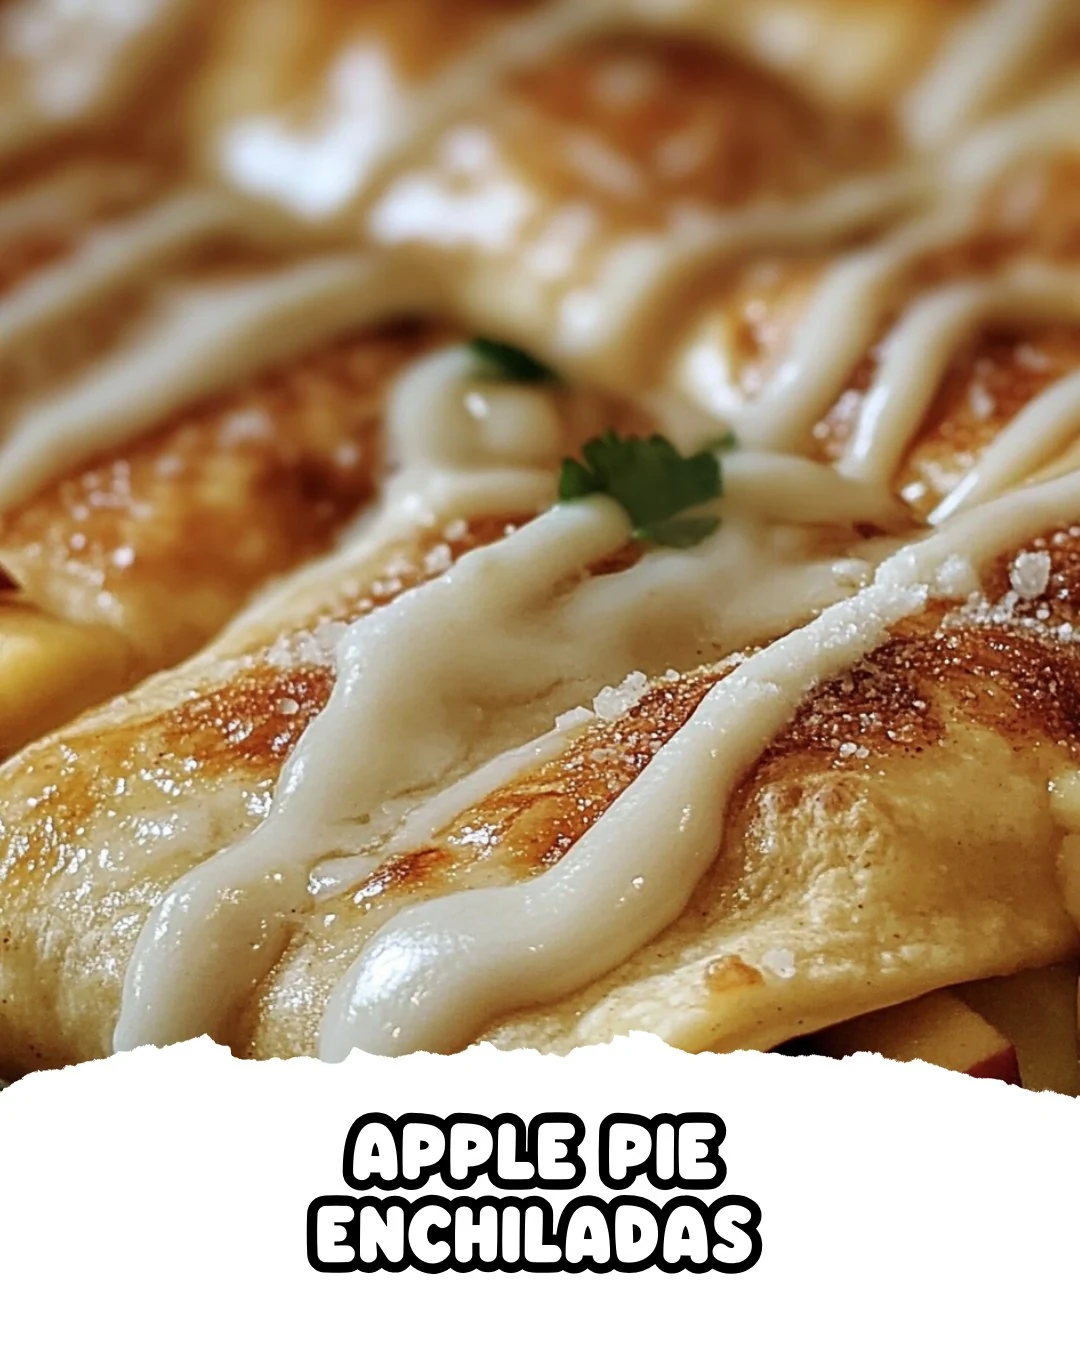
  • Delicious Apple Pie Enchiladas Recipe to Try Today

    Delicious Apple Pie Enchiladas Recipe to Try Today

    Apple Pie Enchiladas combine the warm, comforting flavors of apple pie with the fun twist of enchiladas. This delightful dessert is both simple to prepare and incredibly satisfying, making it a perfect choice for any occasion. With just a few ingredients, you can create a dish that’s sure to impress family and friends.

    Why You’ll Love This Recipe

    • Deliciously Unique: Apple pie enchiladas offer a fresh take on classic flavors, combining sweet apples with a soft tortilla.
    • Quick & Easy: Ready in under 30 minutes, these enchiladas are a perfect last-minute dessert option.
    • Family-Friendly: Kids and adults alike will love this fun twist on a traditional dessert.
    • Versatile: Enjoy them warm with ice cream or at room temperature for a delightful treat anytime.
    • Make Ahead: The enchiladas can be prepared in advance and baked just before serving.

    Tools and Equipment

    Having the right kitchen tools makes the cooking process smoother and more enjoyable.

    Essential Tools

    • Baking dish
    • Medium saucepan
    • Mixing spoon
    • Measuring cups
    • Measuring spoons

    Why These Tools Matter

    • Baking dish: Ensures even cooking and browning of the enchiladas.
    • Medium saucepan: Perfect for making the sauce without risk of burning.
    • Measuring cups and spoons: Accurate measurements guarantee the best flavor balance.

    Ingredients for Apple Pie Enchiladas

    Filling

    • 1 (21-ounce) can apple pie filling
    • 6 (8-inch) flour tortillas

    Sauce

    • 1/2 cup butter
    • 1 teaspoon vanilla extract
    • 1/2 cup white sugar
    • 1/2 cup brown sugar
    • 1/2 cup water
    • 1 teaspoon ground cinnamon

    How to Make Apple Pie Enchiladas Step-by-Step

    Step 1: Prepare the Tortillas

    Start by placing about a heaping 1/4 cup of apple pie filling down the center of each flour tortilla. Sprinkle with ground cinnamon. Carefully roll up the tortillas, tucking in the edges, and place them seam side down in a prepared baking dish.

    Step 2: Make the Sauce

    In a medium saucepan, combine butter, white sugar, brown sugar, and water. Heat over medium heat, stirring constantly, until the mixture reaches a boil. Reduce the heat and simmer for 3 minutes. Remove from heat and stir in vanilla extract.

    Step 3: Assemble and Rest

    Pour the sauce evenly over the rolled tortillas. Allow the enchiladas to stand for 45 minutes. This resting period lets the sauce soak in, enhancing the flavor and texture.

    Step 4: Bake

    Preheat the oven to 350°F (175°C). Bake the enchiladas for 30 minutes or until they are golden brown. The aroma will fill your kitchen and entice everyone to gather around the table.

    Enjoy these delightful apple pie enchiladas, perfect for a sweet treat or a fun dessert twist!

    How to Serve Apple Pie Enchiladas

    Apple pie enchiladas can be enjoyed in various delightful ways. Here are some creative serving ideas:

    À La Mode

    Serve the enchiladas warm with a scoop of vanilla ice cream on top. The cold ice cream contrasts beautifully with the warm, spiced apple filling.

    Drizzled with Caramel Sauce

    Add a generous drizzle of caramel sauce over the enchiladas before serving. This adds an extra layer of sweetness and richness to the dish.

    Topped with Whipped Cream

    Finish with a dollop of freshly whipped cream for a light and airy touch. The cream complements the spices and enhances the dessert experience.

    Pro Tips for the Best Apple Pie Enchiladas

    For optimal flavor and texture, consider these practical tips:

    • Use Fresh Ingredients: Opt for high-quality apple pie filling or make your own with fresh apples for enhanced flavor.
    • Adjust Spice Levels: Feel free to increase the amount of cinnamon or add nutmeg for a more robust flavor profile.
    • Don’t Overfill Tortillas: A heaping 1/4 cup of filling is ideal; overfilling can make rolling difficult and lead to spills during baking.
    • Let Them Rest: Allowing the enchiladas to sit for 45 minutes is crucial for proper sauce absorption and flavor melding.
    • Experiment with Tortillas: Try using whole wheat or corn tortillas for a different texture and taste.

    Best Side Dishes and Pairings

    These side dishes and drinks complement apple pie enchiladas perfectly:

    1. Cinnamon Sugar Tortilla Chips: These crispy snacks enhance the cinnamon flavor and provide a textural contrast.
    2. Vanilla Ice Cream: A classic pairing, the creaminess of vanilla ice cream balances the sweetness of the enchiladas.
    3. Caramel Flan: The smooth texture and rich caramel flavor of flan create a harmonious dessert experience.
    4. Coffee or Espresso: The bold flavors of coffee contrast nicely with the sweetness, making it a great beverage choice.
    5. Chai Tea: The spiced notes of chai tea pair beautifully with apple pie enchiladas, enhancing the overall warmth of the meal.
    6. Fresh Fruit Salad: A light and refreshing fruit salad can cleanse the palate and provide a healthy balance to the dessert.

    Common Mistakes to Avoid

    • Not Soaking the Tortillas: Skipping the resting time prevents the flavors from melding.
    • Overstuffing the Tortillas: Adding too much filling can lead to messy enchiladas that are difficult to roll.
    • Ignoring the Sauce: Neglecting to pour the sauce evenly can result in dry enchiladas.
    • Underbaking: Failing to bake long enough may leave the tortillas chewy instead of golden and crisp.

    Storage & Reheating Instructions

    Refrigerator Storage

    Store apple pie enchiladas in an airtight container in the refrigerator. They will remain fresh for up to 3 days.

    Freezing Instructions

    To freeze, wrap individual enchiladas tightly in plastic wrap and place them in a freezer-safe container. They can be frozen for up to 2 months. Thaw in the refrigerator overnight before reheating.

    Reheating Tips

    • Oven: Preheat to 350°F (175°C) and bake for 15-20 minutes, covered with foil to retain moisture.
    • Microwave: Heat on medium power for 1-2 minutes, checking periodically until warmed through.
    • Stovetop: Heat in a skillet over medium heat for 5-7 minutes, flipping occasionally for even warming.

    Frequently Asked Questions

    Can I use homemade apple pie filling for Apple Pie Enchiladas?

    Yes, homemade apple pie filling works wonderfully! Just ensure it’s well-seasoned and not too watery.

    How can I make Apple Pie Enchiladas healthier?

    Consider using whole wheat tortillas and reducing the amount of sugar in the sauce. You can also add nuts for added texture and nutrition.

    Can I prepare Apple Pie Enchiladas ahead of time?

    Absolutely! You can assemble the enchiladas and store them in the refrigerator before baking. Just add a few extra minutes to the baking time if they are cold.

    What toppings go well with Apple Pie Enchiladas?

    Serve with whipped cream, vanilla ice cream, or a drizzle of caramel sauce for an extra special touch.

    How do I know when the enchiladas are done baking?

    The enchiladas should be golden brown on top and the sauce should be bubbling around the edges when they are fully baked.

    Final Thoughts

    Apple pie enchiladas offer a delightful twist on a classic dessert that is sure to impress your family and friends. We encourage you to try this recipe and share your thoughts in the comments below. Your feedback helps us create more delicious recipes to share!


    Desserts

    Apple Pie Enchiladas


    5.0 from 24 reviews

    These Apple Pie Enchiladas are a delightful twist on a classic dessert, combining the flavors of apple pie with the convenience of enchiladas. Filled with sweet apple pie filling and topped with a rich buttery sauce, they are perfect for a sweet treat or a fun dessert.

    Author: Munch Twist
    Prep Time: 10 minutes
    Cook Time: 30 minutes
    Total Time: 85 minutes
    Yield: 6 servings
    Category: Desserts
    Method: No bake
    Cuisine: American

    Apple Pie Enchiladas

    SCALE:
    1x
    2x
    3x
    Cook Mode: Prevent your screen from going dark

    Ingredients

    • 1 (21-ounce) can apple pie filling
    • 6 (8-inch) flour tortillas
    • 1/2 cup butter
    • 1 teaspoon vanilla extract
    • 1/2 cup white sugar
    • 1/2 cup brown sugar
    • 1/2 cup water
    • 1 teaspoon ground cinnamon

    Instructions

    1. Prepare Tortillas: Place about a heaping 1/4 cup of apple pie filling down the center of each tortilla. Sprinkle with ground cinnamon. Roll up the tortillas, tucking in the edges, and place them seam side down in a prepared baking dish.
    2. Make the Sauce: In a medium saucepan, combine the butter, white sugar, brown sugar, and water. Heat over medium heat, stirring constantly, until the mixture reaches a boil. Reduce heat and simmer for 3 minutes. Remove from heat and stir in the vanilla extract.
    3. Assemble and Rest: Pour the sauce evenly over the rolled tortillas. Allow the enchiladas to stand for 45 minutes to let the sauce soak in and transform the tortillas.
    4. Bake: Preheat the oven to 350°F (175°C). Bake the enchiladas for 30 minutes or until they are golden brown.

    Nutrition Facts

    Serving Size: 1 serving
    Calories: 340 kcal
    Sugar: 43g
    Sodium: 200mg
    Fat: 14g
    Saturated Fat: 9g
    Carbohydrates: 58g
    Fiber: 1g
    Protein: 3g
    Cholesterol: 30mg

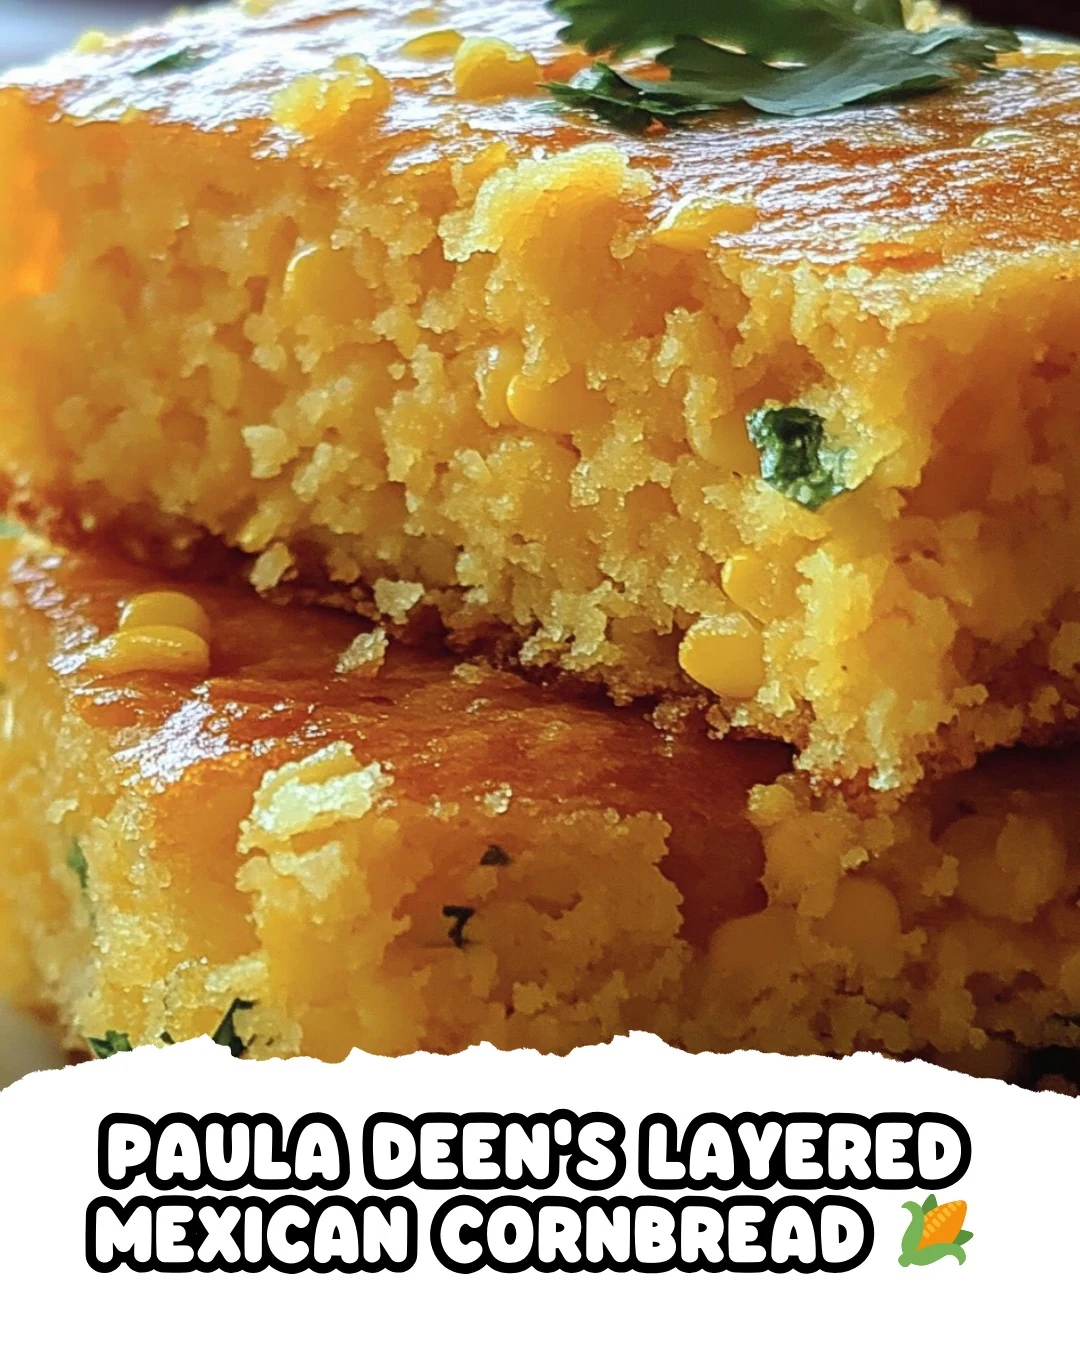
  • Delicious Paula Deens Layered Mexican Cornbread Recipe

    Delicious Paula Deens Layered Mexican Cornbread Recipe

    Paula Deen’s Layered Mexican Cornbread is a delicious fusion of flavors that brings together savory corn, cheese, and a hint of spice. This dish is perfect for gatherings or a cozy night in, making it a crowd-pleaser at any table.

    Why You’ll Love This Recipe

    • Savory Flavor: The combination of corn, cheese, and jalapenos creates a rich and satisfying taste experience.
    • Versatile Dish: Serve it as a hearty side or a standalone snack that complements various meals.
    • Cheesy Goodness: With layers of melted cheddar cheese, every bite is indulgent and flavorful.
    • Easy to Prepare: This recipe is straightforward, making it perfect for cooks of all skill levels.
    • Customizable: Adjust the heat with jalapenos or add your favorite ingredients to make it your own.

    Tools and Equipment

    Having the right tools can significantly simplify the cooking process for Paula Deen’s Layered Mexican Cornbread.

    Essential Tools

    • Mixing bowls
    • Measuring cups and spoons
    • Whisk
    • Baking dish (8 x 8-inch or 9 x 9-inch)
    • Spatula

    Why These Tools Matter

    • Mixing bowls: Allow for easy combining of dry and wet ingredients without mess.
    • Baking dish: The right size ensures even baking and proper texture.
    • Spatula: Helps in layering and serving the cornbread without breaking it apart.

    Ingredients for Paula Deens Layered Mexican Cornbread

    Dry Ingredients

    • 1 cup yellow cornmeal
    • 1/2 cup flour
    • 2 tablespoons baking powder
    • 2 tablespoons white sugar
    • 1/2 teaspoon garlic powder (optional)

    Wet Ingredients

    • 2/3 cup half-and-half cream (or milk)
    • 2 large eggs
    • 1/3 cup melted butter (or vegetable oil)

    Add-ins

    • 1 small onion, finely chopped (or 1 small green onion)
    • 1 cup frozen corn, thawed (or 1 cup canned corn niblets, drained)
    • 1 (14-ounce) can creamed corn
    • 1 1/2 cups grated cheddar cheese
    • 2 jalapeno peppers, seeded and finely chopped (adjust to taste)
    • 1 1/2 teaspoons seasoning salt (or 1/2 teaspoon regular salt)

    How to Make Paula Deens Layered Mexican Cornbread Step-by-Step

    Step 1: Preheat the Oven

    Set your oven to 350°F (175°C). Butter an 8 x 8-inch or 9 x 9-inch square baking dish to ensure easy removal after baking.

    Step 2: Prepare the Batter

    In a large bowl, mix the cornmeal, flour, baking powder, sugar, and optional garlic powder. Stir in the half-and-half, eggs, and melted butter or oil until well combined. Add the seasoning salt for flavor.

    Step 3: Combine Ingredients

    Gently fold in the finely chopped onion, creamed corn, and thawed (or canned) corn. This will create a flavorful base for your cornbread.

    Step 4: Layer the Dish

    Pour half of the batter into the prepared baking dish. Sprinkle with the grated cheddar cheese and chopped jalapenos. Finally, top with the remaining batter for a delicious layered effect.

    Step 5: Bake

    Bake for 35-45 minutes or until the top is golden and a toothpick inserted into the center comes out clean. Keep an eye on it, as baking time may vary slightly depending on the pan size.

    Step 6: Cool

    Allow the cornbread to cool slightly before slicing. This helps it firm up, making for easier servings.

    Enjoy this savory and cheesy layered cornbread as a perfect side dish or a hearty snack!

    How to Serve Paula Deens Layered Mexican Cornbread

    This flavorful cornbread is versatile and can be enjoyed in several creative ways.

    As a Main Dish

    Serve Paula Deen’s Layered Mexican Cornbread as a hearty main course. Pair it with a fresh green salad topped with avocado slices for a balanced meal.

    Taco Night Companion

    Cut the cornbread into squares and use it as a base for taco toppings. Add seasoned ground beef, lettuce, tomatoes, and salsa for a fun twist on taco night.

    Breakfast Delight

    Transform leftover cornbread into a delicious breakfast option. Top it with a fried egg and a sprinkle of hot sauce for a flavorful morning boost.

    Pro Tips for the Best Paula Deens Layered Mexican Cornbread

    To make your cornbread as delicious as possible, consider these practical tips.

    • Use Fresh Ingredients: Fresh corn and high-quality cheese will enhance the flavor and texture of your cornbread.
    • Adjust Spice Level: Customize the heat by varying the number of jalapenos or by adding diced green chiles.
    • Let It Rest: Allow the cornbread to cool slightly before slicing to improve the texture and make serving easier.
    • Storage Tips: Store leftovers in an airtight container in the refrigerator for up to three days; reheat in the oven for best results.
    • Experiment with Add-Ins: Feel free to add cooked bacon, bell peppers, or different types of cheese for added flavor complexity.

    Best Side Dishes and Pairings

    Pairing side dishes with Paula Deen’s Layered Mexican Cornbread can enhance your meal experience.

    1. Black Bean Salad: A refreshing mix of black beans, corn, and lime juice complements the cornbread’s flavors and adds protein.
    2. Guacamole: The creamy texture of guacamole provides a rich contrast to the cornbread, making it a perfect dip.
    3. Pico de Gallo: This fresh salsa adds a burst of flavor and acidity, balancing the richness of the cornbread.
    4. Grilled Chicken: Seasoned grilled chicken can serve as a protein-packed main that pairs well with the cornbread.
    5. Mexican Street Corn: The sweetness of street corn drizzled with lime and cotija cheese harmonizes beautifully with the cornbread’s flavors.

    Common Mistakes to Avoid

    • Using the Wrong Cornmeal: Always opt for yellow cornmeal for the best texture.
    • Skipping the Cooling Period: Allowing the cornbread to cool slightly helps it set and makes slicing easier.
    • Not Measuring Ingredients Accurately: Precision is key in baking, especially with dry ingredients.
    • Overbaking: Keep an eye on your cornbread to prevent it from drying out; a toothpick should come out clean, but moist.

    Storage & Reheating Instructions

    Refrigerator Storage

    Store leftovers in airtight containers in the refrigerator. Paula Deen’s Layered Mexican Cornbread will stay fresh for up to 3-4 days.

    Freezing Instructions

    For longer storage, freeze the cornbread by wrapping it tightly in plastic wrap and then in aluminum foil. It can be frozen for up to 3 months. Thaw in the refrigerator before reheating.

    Reheating Tips

    • Oven: Preheat to 350°F (175°C), cover with foil, and heat for about 15-20 minutes.
    • Microwave: Heat on medium power for 1-2 minutes, checking frequently to avoid overheating.
    • Stovetop: Reheat in a skillet over medium-low heat for about 5 minutes, flipping halfway through for even warming.

    Frequently Asked Questions

    How can I adjust the spice level in Paula Deen’s Layered Mexican Cornbread?

    You can control the heat by adjusting the number of jalapeno peppers or substituting them with milder peppers if preferred.

    Can I use whole wheat flour instead of all-purpose flour for Paula Deen’s Layered Mexican Cornbread?

    Yes, whole wheat flour can be used, but it may change the texture and flavor slightly. Consider using a mix of whole wheat and all-purpose flour for a balanced result.

    What can I serve with Paula Deen’s Layered Mexican Cornbread?

    This cornbread pairs well with chili, soups, or as a side dish to grilled meats.

    Can I make Paula Deen’s Layered Mexican Cornbread ahead of time?

    Absolutely! You can prepare it a day in advance and reheat before serving for convenience.

    How do I know when Paula Deen’s Layered Mexican Cornbread is done baking?

    The cornbread is ready when the top is golden brown and a toothpick inserted in the center comes out clean.

    Final Thoughts

    Paula Deen’s Layered Mexican Cornbread is a delightful dish that is sure to impress family and friends. Its layers of flavor and texture make it an ideal side or snack. Give this recipe a try, and don’t forget to leave a comment with your feedback!


    Dinner

    Paula Deens Layered Mexican Cornbread


    5.0 from 24 reviews

    This savory and cheesy layered cornbread combines the sweetness of corn with the richness of cheddar cheese and a hint of spice from jalapenos. Perfect as a side dish or a hearty snack, it offers a delightful blend of textures and flavors.

    Author: Munch Twist
    Prep Time: 15 minutes
    Cook Time: 40 minutes
    Total Time: 55 minutes
    Yield: 9 servings
    Category: Dinner
    Method: No bake
    Cuisine: American

    Paula Deens Layered Mexican Cornbread

    SCALE:
    1x
    2x
    3x
    Cook Mode: Prevent your screen from going dark

    Ingredients

    • 1 cup yellow cornmeal
    • 1/2 cup flour
    • 2 tablespoons baking powder
    • 2 tablespoons white sugar
    • 1/2 teaspoon garlic powder (optional)
    • 1 cup frozen corn, thawed
    • 2/3 cup half-and-half cream
    • 2 large eggs
    • 1 1/2 teaspoons seasoning salt
    • 1/3 cup melted butter
    • 1 small onion, finely chopped
    • 1 (14-ounce) can creamed corn
    • 1 1/2 cups grated cheddar cheese
    • 2 jalapeno peppers, seeded and finely chopped

    Instructions

    1. Preheat your oven to 350°F (175°C) and butter an 8 x 8-inch or 9 x 9-inch square baking dish.
    2. In a large bowl, mix the cornmeal, flour, baking powder, sugar, and optional garlic powder. Stir in the half-and-half, eggs, and melted butter until well combined. Add the seasoning salt.
    3. Fold in the finely chopped onion, creamed corn, and thawed corn.
    4. Pour half of the batter into the prepared baking dish. Sprinkle with the grated cheddar cheese and chopped jalapenos. Top with the remaining batter.
    5. Bake for 35-45 minutes or until the top is golden and a toothpick inserted into the center comes out clean.
    6. Allow to cool slightly before slicing.

    Nutrition Facts

    Serving Size: 1 serving
    Calories: 290 kcal
    Sugar: 5g
    Sodium: 510mg
    Fat: 15g
    Saturated Fat: 8g
    Carbohydrates: 31g
    Fiber: 2g
    Protein: 8g
    Cholesterol: 90mg

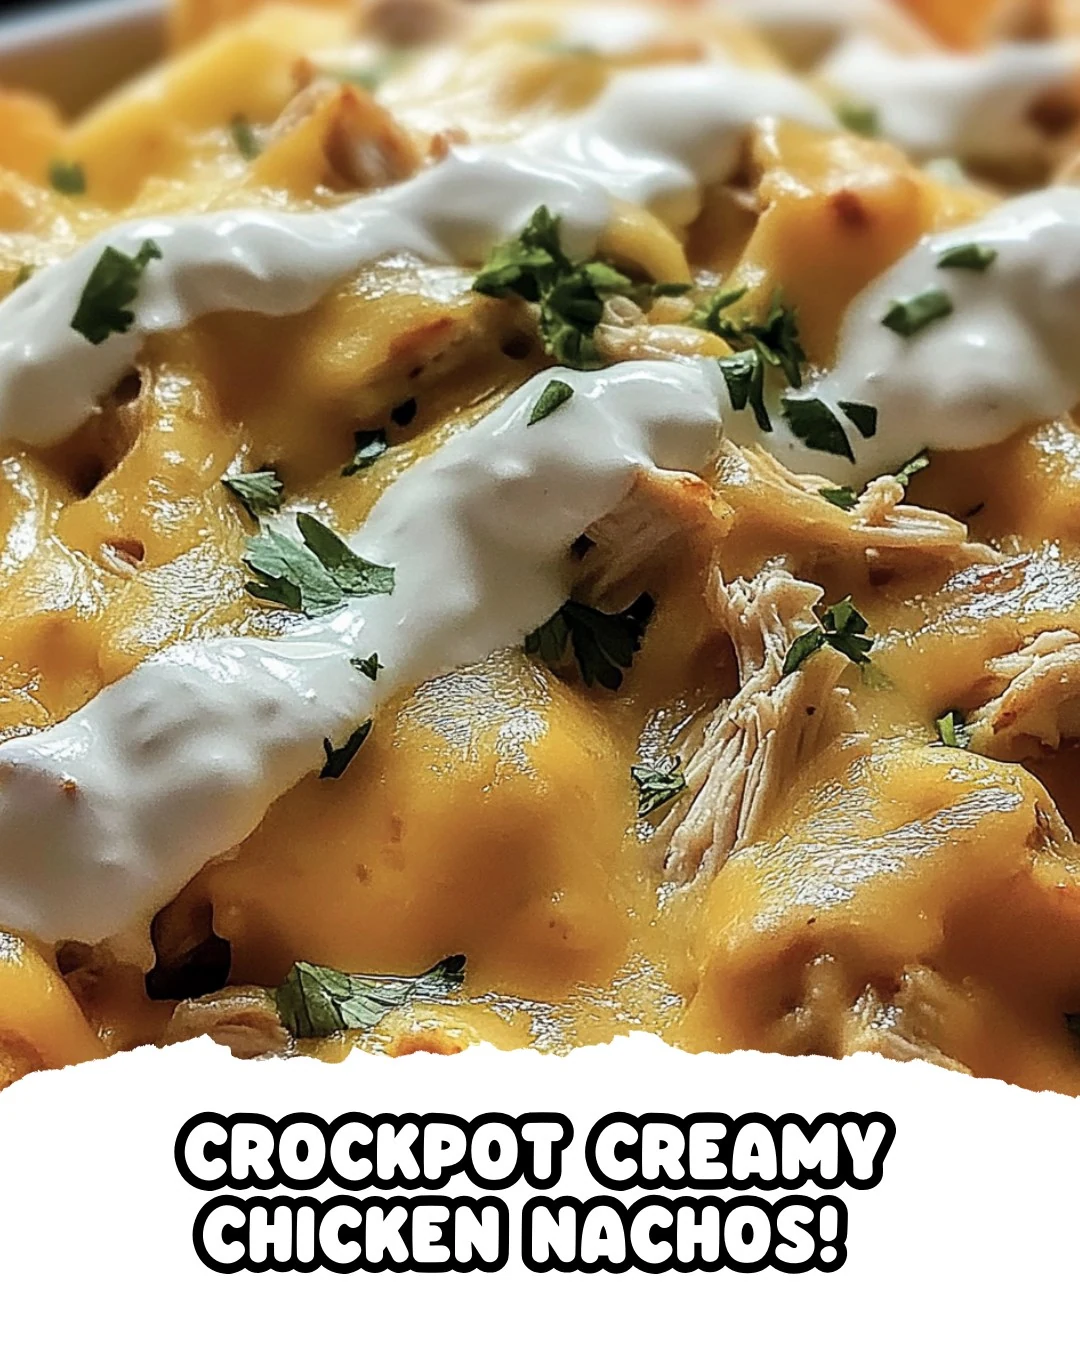
  • Delicious Crockpot Creamy Chicken Nachos Recipe

    Delicious Crockpot Creamy Chicken Nachos Recipe

    Crockpot Creamy Chicken Nachos are a delightful combination of flavors and textures, making them an irresistible snack or meal. With tender chicken, creamy cheese, and zesty spices, this dish is perfect for gatherings or cozy nights in.

    Why You’ll Love This Recipe

    • Quick & Easy: This recipe comes together in just a few simple steps, allowing you to enjoy delicious nachos without the fuss.
    • Versatile Toppings: Customize your nachos with your favorite toppings like avocado, sour cream, or cilantro for a personal touch.
    • Crowd-Pleaser: Perfect for parties or family dinners, these nachos will impress your guests and keep everyone coming back for more.
    • Comfort Food: Creamy, cheesy, and hearty, this dish satisfies cravings and warms the soul.
    • Slow Cooker Convenience: Let your crockpot do the work while you relax or prepare other dishes.

    Tools and Equipment

    Having the right tools in your kitchen makes cooking easier and more enjoyable. Here are the essentials for this recipe.

    Essential Tools

    • Slow cooker
    • Cutting board
    • Sharp knife
    • Measuring cups
    • Mixing spoon

    Why These Tools Matter

    • Slow cooker: This tool allows for hands-off cooking, making it easy to prepare meals while you attend to other tasks.
    • Sharp knife: A good knife ensures quick and safe chopping of ingredients, reducing preparation time.
    • Mixing spoon: A sturdy spoon helps you combine ingredients thoroughly, ensuring even flavor throughout the dish.

    Ingredients for Crockpot Creamy Chicken Nachos

    Main Ingredients

    • 1 cup shredded Cheddar Cheese
    • 1 can Black Beans, drained (optional)
    • 2 cans Cream of Chicken Soup (10 oz each)
    • 1 can Rotel (14 oz; choose your spice level)
    • 2 large Chicken Breasts, diced
    • Salt & pepper to taste

    How to Make Crockpot Creamy Chicken Nachos Step-by-Step

    Step 1: Prepare Ingredients

    Begin by dicing the chicken breasts into bite-sized pieces. If you are using black beans, drain them thoroughly.

    Step 2: Combine in Crockpot

    In your slow cooker, add the cream of chicken soup, Rotel, shredded Cheddar Cheese, and the diced chicken. If using, incorporate the drained black beans. Season the mixture with salt and pepper to taste.

    Step 3: Cook

    Cover the crockpot and set it to cook on Low for 4-6 hours or on High for 2-3 hours. Ensure the chicken is fully cooked and the cheese has melted beautifully.

    Step 4: Serve

    Once cooked, spoon the creamy chicken mixture over a plate of tortilla chips. Garnish with your favorite toppings, such as minced cilantro, sour cream, sliced avocado, or black olives.

    Enjoy your delicious, creamy chicken nachos! Perfect for a cozy night in or a fun party snack.

    How to Serve Crockpot Creamy Chicken Nachos

    Crockpot Creamy Chicken Nachos are versatile and can be served in a variety of ways to delight your guests.

    Individual Nacho Cups

    Serve the creamy chicken mixture in small cups with a layer of tortilla chips at the bottom. This allows for easy serving and makes for a fun, customizable appetizer.

    Nacho Platter

    Create a large nacho platter by spreading the tortilla chips on a baking sheet and adding generous portions of the creamy chicken mixture on top. Provide a variety of toppings on the side for guests to personalize their nachos.

    Family Style Serving

    Place the crockpot directly on the table and let everyone serve themselves. Accompany with an array of toppings like jalapeños, diced tomatoes, and cheese for a communal dining experience.

    Pro Tips for the Best Crockpot Creamy Chicken Nachos

    For optimal flavor and texture, consider these expert tips.

    • Use Fresh Ingredients: Fresh chicken and high-quality cheese enhance the overall taste and texture of the dish.
    • Adjust Spice Level: Customize the heat by choosing a spicier Rotel or adding fresh jalapeños to the crockpot.
    • Don’t Skip the Seasoning: Season the chicken and cheese mixture with salt and pepper for a more flavorful dish.
    • Let it Rest: Allow the mixture to sit for a few minutes after cooking to thicken up slightly before serving.
    • Experiment with Toppings: Try different toppings such as diced red onions, fresh cilantro, or even crushed tortilla chips on top for added crunch.

    Best Side Dishes and Pairings

    To complement your Crockpot Creamy Chicken Nachos, consider these delightful pairings.

    1. Guacamole: The creamy texture and fresh flavors of guacamole balance the richness of the nachos.
    2. Mexican Street Corn Salad: This tangy, sweet corn salad adds a refreshing contrast to the savory nachos.
    3. Pico de Gallo: A fresh tomato salsa provides a bright and zesty note that enhances the overall flavor profile.
    4. Refried Beans: Creamy refried beans add a hearty element, making the meal more filling.
    5. Margaritas: A classic margarita, whether frozen or on the rocks, pairs perfectly with the bold flavors of the nachos.

    Common Mistakes to Avoid

    • Skipping the Seasoning: Always remember to season your dish with salt and pepper for enhanced flavor.
    • Overcooking the Chicken: Monitor cooking times to prevent dry chicken; it should be tender and juicy.
    • Using Low-Quality Cheese: Opt for good quality shredded cheese to ensure a creamy texture and rich flavor.
    • Neglecting Toppings: Don’t forget to add garnishes like sour cream or avocado; they elevate the dish.

    Storage & Reheating Instructions

    Refrigerator Storage

    Store leftover Crockpot Creamy Chicken Nachos in an airtight container in the refrigerator. They will stay fresh for up to 3 days.

    Freezing Instructions

    For best results, freeze the creamy chicken mixture in a freezer-safe container. It can be stored for up to 2 months. Thaw overnight in the refrigerator before reheating.

    Reheating Tips

    • Oven: Preheat to 350°F (175°C) and bake in a covered dish for 20 minutes or until heated through.
    • Microwave: Heat in a microwave-safe bowl for 1-2 minutes, stirring halfway through.
    • Stovetop: Warm in a saucepan over medium heat, stirring occasionally until heated through.

    Frequently Asked Questions

    What can I serve with Crockpot Creamy Chicken Nachos?

    You can pair these nachos with salsa, guacamole, or a fresh salad to complement the flavors.

    Can I make Crockpot Creamy Chicken Nachos ahead of time?

    Yes, you can prepare the chicken mixture a day in advance and store it in the refrigerator until you’re ready to cook.

    How spicy are Crockpot Creamy Chicken Nachos?

    The spice level depends on the Rotel you choose; opt for mild for less heat or hot for a spicier kick.

    Can I use other types of cheese?

    Absolutely! Feel free to substitute with Monterey Jack, Pepper Jack, or a blend of your favorite cheeses for different flavor profiles.

    Is this recipe suitable for meal prep?

    Yes, this recipe is great for meal prep. You can portion it out and enjoy it throughout the week.

    Final Thoughts

    Crockpot Creamy Chicken Nachos are a delightful and easy dish that everyone will love. We encourage you to try this recipe and share your experience in the comments below!


    Dinner

    Crockpot Creamy Chicken Nachos


    5.0 from 24 reviews

    Crockpot Creamy Chicken Nachos are a delicious and easy-to-make dish perfect for gatherings or a cozy night in. This creamy, cheesy chicken mixture served over crispy tortilla chips is sure to please everyone. With simple ingredients and minimal prep time, you can enjoy a flavorful meal with little effort.

    Author: Munch Twist
    Prep Time: 10 minutes
    Cook Time: 240-360 minutes
    Total Time: 250-370 minutes
    Yield: 6 servings
    Category: Lunch
    Method: No bake
    Cuisine: American

    Crockpot Creamy Chicken Nachos

    SCALE:
    1x
    2x
    3x
    Cook Mode: Prevent your screen from going dark

    Ingredients

    • 1 cup shredded Cheddar Cheese
    • 1 can Black Beans, drained (optional)
    • 2 cans Cream of Chicken Soup (10 oz each)
    • 1 can Rotel (14 oz)
    • 2 large Chicken Breasts, diced
    • Salt & pepper to taste

    Instructions

    1. Dice the chicken breasts and drain the black beans if using.
    2. Add the cream of chicken soup, Rotel, shredded Cheddar Cheese, and diced chicken to the crockpot. If using black beans, add them as well. Season with salt and pepper to taste.
    3. Cover and cook on Low for 4-6 hours, or on High for 2-3 hours, until the chicken is fully cooked and the cheese is melted.
    4. Spoon the creamy chicken mixture over tortilla chips. Garnish with your favorite toppings like minced cilantro, sour cream, sliced avocado, or black olives.

    Nutrition Facts

    Serving Size: 1 serving
    Calories: 400 kcal
    Sugar: 1g
    Sodium: 1100mg
    Fat: 23g
    Saturated Fat: 12g
    Carbohydrates: 20g
    Fiber: 5g
    Protein: 28g
    Cholesterol: 90mg

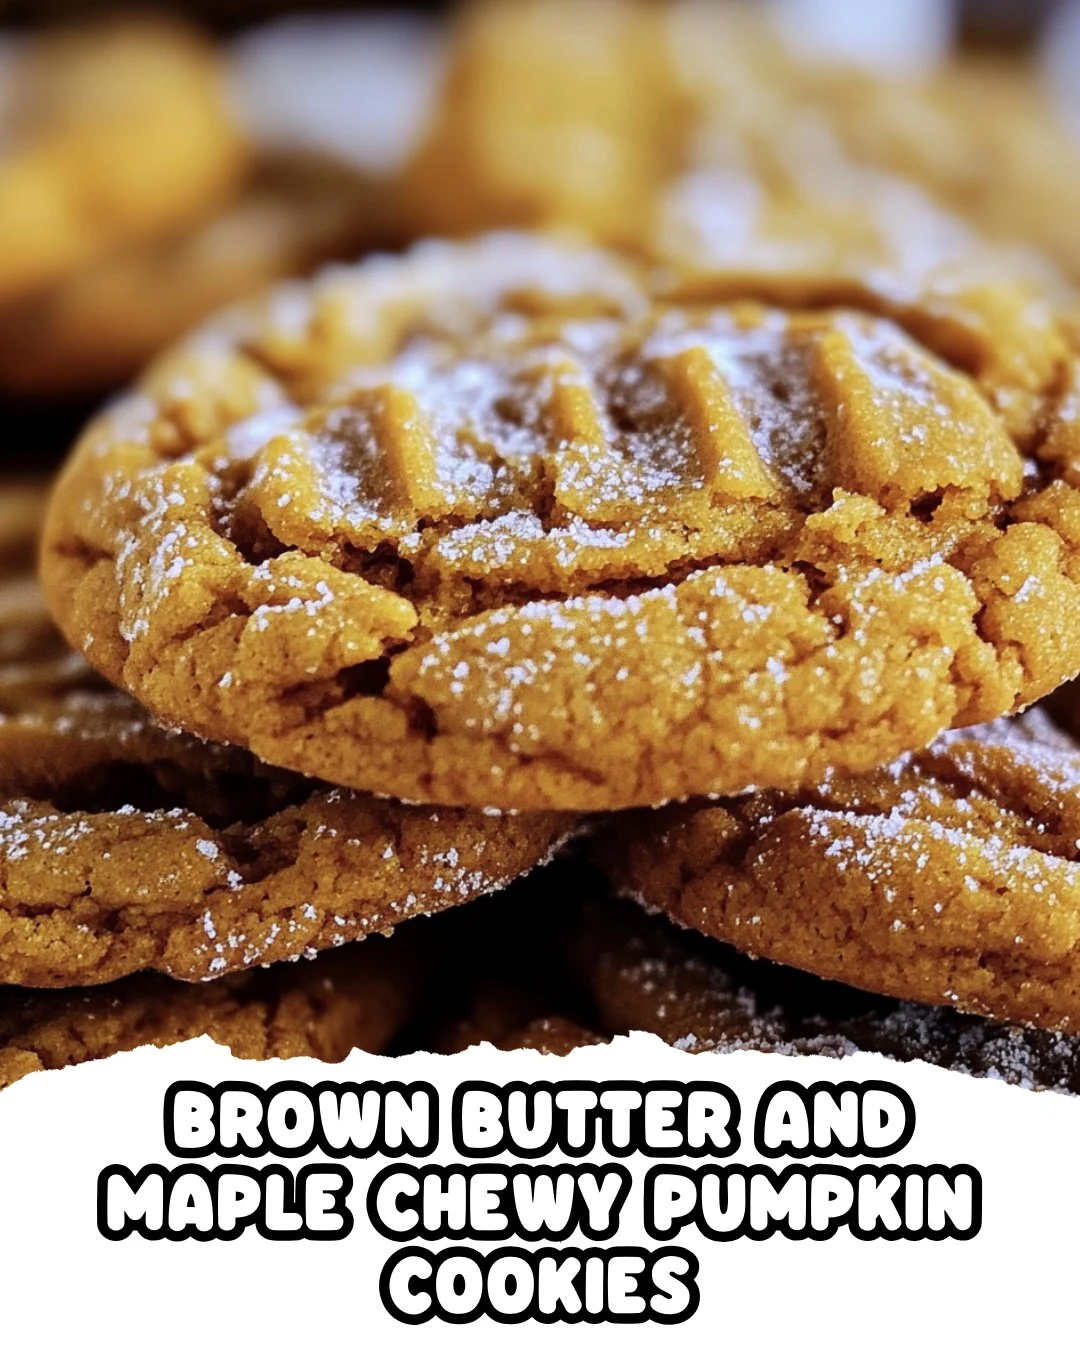
  • Indulge in Brown Butter and Maple Chewy Pumpkin Cookies

    Indulge in Brown Butter and Maple Chewy Pumpkin Cookies

    Brown Butter and Maple Chewy Pumpkin Cookies are a delightful fall treat that perfectly combine the rich flavors of brown butter, maple syrup, and pumpkin. These cookies are soft, chewy, and bursting with warm spices, making them the perfect addition to any autumn gathering or cozy night in.

    Why You’ll Love This Recipe

    • Irresistibly Chewy: The combination of brown butter and pumpkin ensures a soft, chewy texture that is simply addictive.
    • Flavor Explosion: The addition of maple syrup and pumpkin pie spice creates a unique flavor profile that stands out.
    • Perfect for Fall: Capture the essence of autumn with every bite, making these cookies a seasonal favorite.
    • Easy to Make: With straightforward steps, even novice bakers can whip these up with confidence.
    • Great for Sharing: Bake a batch to share at gatherings, or enjoy them all to yourself—they’re that good!

    Tools and Equipment

    Having the right tools can simplify your baking process. Here’s what you’ll need.

    Essential Tools

    • Medium bowl
    • Large bowl
    • Rubber spatula
    • Whisk
    • Measuring cups and spoons
    • Saucepan
    • Baking sheet
    • Parchment paper
    • Wire rack

    Why These Tools Matter

    • Rubber Spatula: Ideal for folding ingredients together without overmixing, ensuring perfect cookie texture.
    • Parchment Paper: Prevents cookies from sticking to the baking sheet, making cleanup a breeze.

    Ingredients for Brown Butter and Maple Chewy Pumpkin Cookies

    Cookies:

    • 1 cup (220g) unsalted butter
    • 1 1/2 cups (280g) dark brown sugar, packed
    • 1 large egg yolk
    • 1/3 cup (80g) pumpkin puree
    • 3 tbsp pure maple syrup
    • 1 tsp vanilla extract
    • 2 1/4 cups (280g) all-purpose flour
    • 1 tsp baking soda
    • 1/2 tsp baking powder
    • 1/2 tsp salt
    • 1 1/2 tsp pumpkin pie spice
    • 1/2 tsp cinnamon

    Coating:

    • 2 tbsp brown sugar
    • 2 tbsp granulated sugar
    • 1 tsp cinnamon

    How to Make Brown Butter and Maple Chewy Pumpkin Cookies Step-by-Step

    Step 1: Brown the Butter

    Melt 1 cup of unsalted butter in a saucepan over medium heat. Stir continuously until it turns a rich amber color and emits a nutty aroma. Be cautious not to burn it. Transfer the browned butter to a measuring glass and scrape the browned bits from the saucepan. Chill in the refrigerator for about 20 minutes until slightly thickened but not solidified.

    Step 2: Preheat the Oven

    Preheat your oven to 350°F (175°C) and line a large baking sheet with parchment paper.

    Step 3: Prepare Dry Ingredients

    In a medium bowl, whisk together all-purpose flour, baking soda, baking powder, salt, pumpkin pie spice, and cinnamon. Set aside.

    Step 4: Mix Wet Ingredients

    In a large bowl, whisk together the cooled dark brown sugar and browned butter until it resembles clumpy wet sand. Mix in the egg yolk, maple syrup, vanilla extract, and pumpkin puree until smooth and well combined.

    Step 5: Combine and Chill Dough

    Fold the dry ingredients into the wet ingredients using a rubber spatula until just combined. If the dough is too thin, chill for 15-20 minutes until it firms up.

    Step 6: Prepare Coating

    In a small bowl, combine brown sugar, granulated sugar, and cinnamon for the coating.

    Step 7: Shape and Coat Cookies

    Use a large cookie scoop (about 2 ounces) or a 1/4 cup measuring cup to scoop the dough. Drop each portion into the cinnamon sugar mixture and gently toss to coat. The dough will be soft but manageable.

    Step 8: Bake the Cookies

    Place the coated cookie dough balls on the prepared baking sheet, spacing them about 3 inches apart. Bake for 12-15 minutes, or until the edges are darkened and the centers are puffed and slightly underdone.

    Step 9: Cool and Serve

    Let the cookies cool on the baking sheet for a few minutes before transferring them to a wire rack to cool completely.

    Enjoy your Brown Butter and Maple Chewy Pumpkin Cookies, perfect for sharing or savoring on your own!

    How to Serve Brown Butter and Maple Chewy Pumpkin Cookies

    These cookies are versatile and can be enjoyed in various delightful ways.

    With a Glass of Milk

    Pair your Brown Butter and Maple Chewy Pumpkin Cookies with a cold glass of milk for a classic combination that enhances their rich flavors.

    As a Dessert Sandwich

    Consider making dessert sandwiches by placing a scoop of vanilla ice cream between two cookies. The warm cookies will slightly melt the ice cream, creating a deliciously gooey treat.

    Crumbled Over Yogurt

    Crumbling cookies over a bowl of yogurt, particularly pumpkin or vanilla, adds texture and flavor, making for a delicious breakfast or snack option.

    Pro Tips for the Best Brown Butter and Maple Chewy Pumpkin Cookies

    For optimal results, follow these practical tips.

    • Use Fresh Pumpkin Puree: Fresh pumpkin puree yields a more vibrant flavor compared to canned options.

    • Don’t Skip Browning the Butter: The browning process adds depth and complexity to the flavor profile, making your cookies truly special.

    • Chill the Dough: If your dough feels too soft, chilling it for a short time helps maintain the cookie shape during baking.

    • Monitor Baking Time: Keep an eye on the cookies as they bake; removing them while slightly underdone will ensure they stay chewy and soft.

    • Experiment with Mix-Ins: Consider adding chocolate chips or nuts for an extra layer of flavor and texture.

    Best Side Dishes and Pairings

    These cookies can be complemented by various sides and drinks.

    1. Chai Latte: The spiced notes of chai enhance the pumpkin flavors in the cookies for a perfect pairing.

    2. Apple Cider: A warm cup of apple cider brings out the autumn essence of the cookies, making it a seasonal favorite.

    3. Cream Cheese Frosting: A dollop of cream cheese frosting on top adds tangy sweetness that balances the cookies’ richness.

    4. Roasted Pecans: The nutty flavor and crunch of roasted pecans complement the cookies’ chewiness and enhance their overall taste.

    5. Dark Chocolate: Rich dark chocolate squares served alongside provide a decadent contrast to the sweetness of the cookies.

    Common Mistakes to Avoid

    • Using Cold Ingredients: Ensure your ingredients, especially the butter, are at room temperature for even mixing.
    • Overmixing the Dough: Mix until just combined to keep the cookies soft and chewy.
    • Not Chilling the Dough: Allow the dough to chill if it feels too soft; this helps maintain the cookie shape during baking.
    • Underbaking: For the perfect chewy texture, remove the cookies from the oven while they are still slightly underdone.

    Storage & Reheating Instructions

    Refrigerator Storage

    Store the cookies in an airtight container in the refrigerator. They will stay fresh for up to one week.

    Freezing Instructions

    For best practices, freeze the cookie dough before baking. Scoop the dough onto a baking sheet and freeze until solid. Transfer the dough balls to a freezer-safe bag and store for up to three months. To bake, no need to thaw; just add a couple of extra minutes to the baking time.

    Reheating Tips

    • Oven: Preheat to 350°F (175°C). Place cookies on a baking sheet and warm for 5-7 minutes.
    • Microwave: Heat a cookie on a microwave-safe plate for about 10-15 seconds for a soft, warm treat.
    • Stovetop: Place cookies in a skillet over low heat for 1-2 minutes, flipping once to warm evenly.

    Frequently Asked Questions

    How do I ensure my Brown Butter and Maple Chewy Pumpkin Cookies turn out perfectly?

    To achieve perfect cookies, follow the recipe closely, avoid overmixing, and ensure your butter is browned correctly for that nutty flavor.

    Can I substitute pumpkin puree with something else?

    Yes, you can substitute pumpkin puree with applesauce or mashed bananas, but this will alter the flavor and texture slightly.

    What’s the best way to serve Brown Butter and Maple Chewy Pumpkin Cookies?

    These cookies are delightful on their own or served with a glass of milk or a warm beverage like tea or coffee.

    Can I add chocolate chips to the recipe?

    Absolutely! Feel free to add semi-sweet or dark chocolate chips for an extra indulgent treat.

    How long do Brown Butter and Maple Chewy Pumpkin Cookies last?

    When stored properly, they can last up to one week in the refrigerator or three months in the freezer.

    Final Thoughts

    These Brown Butter and Maple Chewy Pumpkin Cookies are a delightful treat to enjoy any time of the year. Their rich flavors and chewy texture make them irresistible. Give this recipe a try and share your experience in the comments below!


    Desserts

    Brown Butter and Maple Chewy Pumpkin Cookies


    5.0 from 24 reviews

    These Brown Butter and Maple Chewy Pumpkin Cookies are a delightful treat that combines the rich flavors of brown butter and maple syrup with the warmth of pumpkin spice. Soft, chewy, and perfectly spiced, they are ideal for fall gatherings or a cozy night in.

    Author: Munch Twist
    Prep Time: 20 minutes
    Cook Time: 15 minutes
    Total Time: 35 minutes
    Yield: 24 servings
    Category: Desserts
    Method: No bake
    Cuisine: American

    Brown Butter and Maple Chewy Pumpkin Cookies

    SCALE:
    1x
    2x
    3x
    Cook Mode: Prevent your screen from going dark

    Ingredients

    • 1 cup (220g) unsalted butter
    • 1 1/2 cups (280g) dark brown sugar, packed
    • 1 large egg yolk
    • 1/3 cup (80g) pumpkin puree
    • 3 tbsp pure maple syrup
    • 1 tsp vanilla extract
    • 2 1/4 cups (280g) all-purpose flour
    • 1 tsp baking soda
    • 1/2 tsp baking powder
    • 1/2 tsp salt
    • 1 1/2 tsp pumpkin pie spice
    • 1/2 tsp cinnamon
    • 2 tbsp brown sugar (for coating)
    • 2 tbsp granulated sugar (for coating)
    • 1 tsp cinnamon (for coating)

    Instructions

    1. Melt 1 cup of unsalted butter in a saucepan over medium heat until it turns a rich amber color and emits a nutty aroma. Transfer to a measuring glass and chill for 20 minutes.
    2. Preheat your oven to 350°F (175°C) and line a large baking sheet with parchment paper.
    3. In a medium bowl, whisk together the all-purpose flour, baking soda, baking powder, salt, pumpkin pie spice, and cinnamon. Set aside.
    4. In a large bowl, whisk together the cooled dark brown sugar and browned butter until it resembles clumpy wet sand. Mix in the egg yolk, maple syrup, vanilla extract, and pumpkin puree until smooth.
    5. Fold the dry ingredients into the wet ingredients until just combined. If the dough is too thin, chill for 15-20 minutes.
    6. In a small bowl, combine brown sugar, granulated sugar, and cinnamon for the coating.
    7. Use a large cookie scoop to scoop the dough, drop each portion into the cinnamon sugar mixture, and gently toss to coat.
    8. Place the coated cookie dough balls on the prepared baking sheet, spacing them about 3 inches apart. Bake for 12-15 minutes, or until the edges are darkened and the centers are puffed.
    9. Let the cookies cool on the baking sheet for a few minutes before transferring to a wire rack to cool completely.

    Nutrition Facts

    Serving Size: 1 serving
    Calories: 180 kcal
    Sugar: 12g
    Sodium: 150mg
    Fat: 9g
    Saturated Fat: 5g
    Carbohydrates: 23g
    Fiber: 0g
    Protein: 2g
    Cholesterol: 30mg

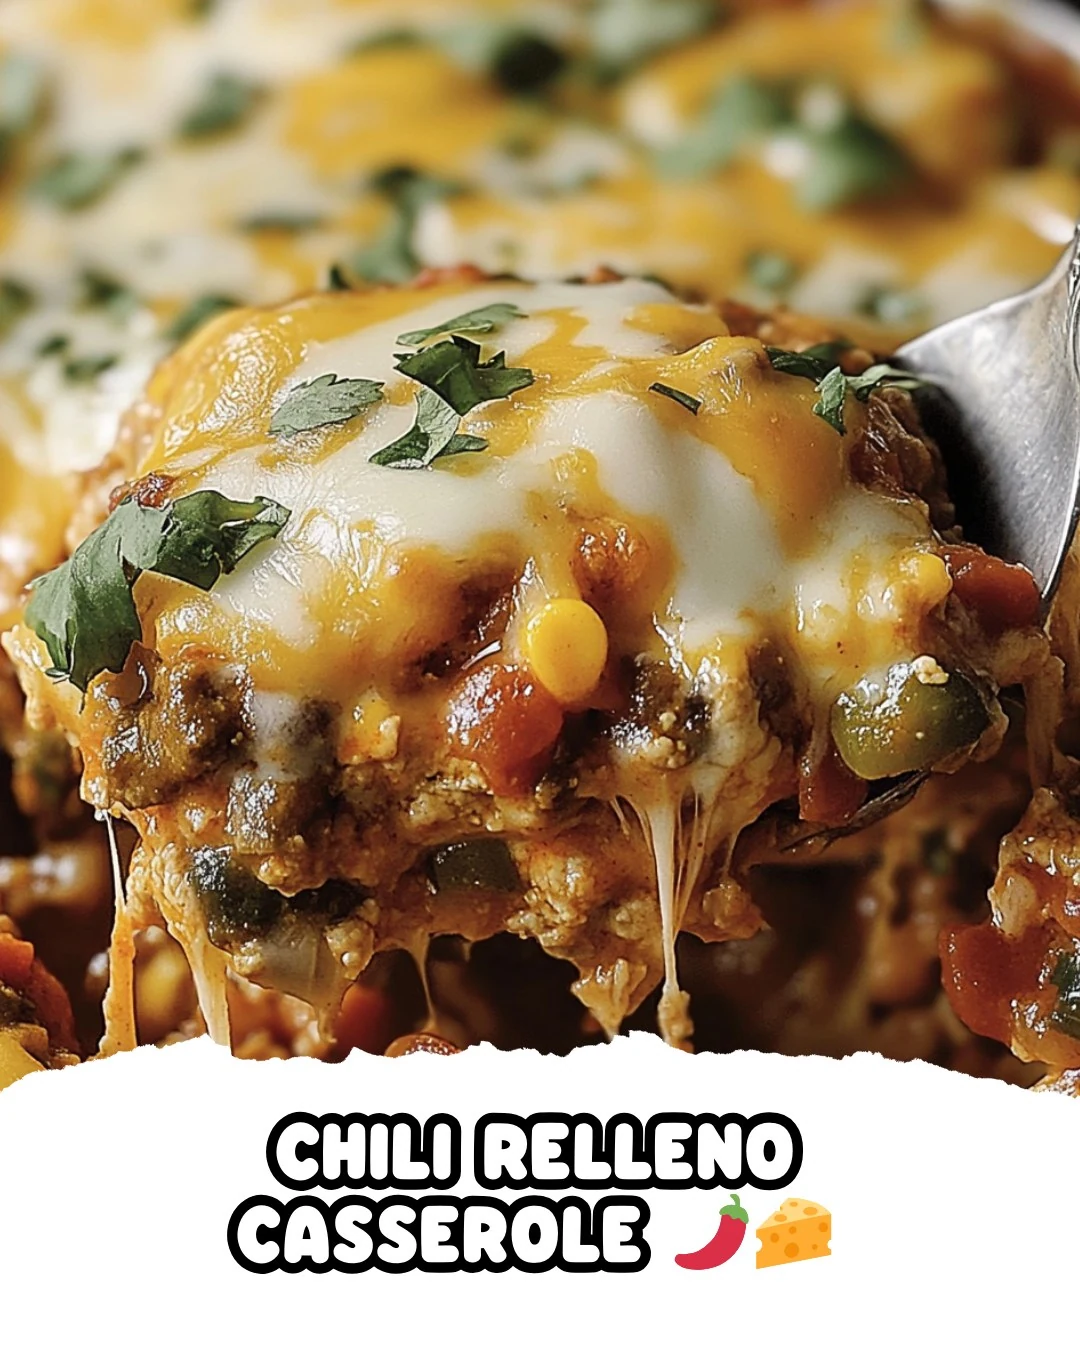
  • Delicious Chili Relleno Casserole Recipe to Try

    Delicious Chili Relleno Casserole Recipe to Try

    Chili Relleno Casserole is a delightful dish that brings together the vibrant flavors of green chilies, savory ground beef, and gooey cheese. This hearty casserole is perfect for family gatherings or a comforting weeknight meal. Its layered texture and rich taste make it a standout choice for any occasion.

    Why You’ll Love This Recipe

    • Flavorful Layers: Each bite is packed with the bold taste of green chilies and melted cheese.
    • Crowd-Pleaser: This dish is sure to satisfy both spice lovers and those who prefer milder flavors.
    • Versatile Meal: Enjoy it for breakfast, lunch, or dinner, making it a flexible addition to your meal plan.
    • One-Dish Wonder: Minimal cleanup is required, as everything cooks in a single baking pan.
    • Great for Meal Prep: Easily make ahead and reheat, saving you time during busy weeks.

    Tools and Equipment

    Having the right tools makes the cooking process seamless and enjoyable.

    Essential Tools

    • Large skillet
    • 9 x 13-inch baking pan
    • Whisk
    • Mixing bowls
    • Cooking spray

    Why These Tools Matter

    • Large skillet: Ideal for cooking the beef and onion evenly, ensuring flavors meld perfectly.
    • Baking pan: The size is perfect for layering ingredients, allowing for even cooking and serving.
    • Whisk: Essential for creating a smooth egg mixture, ensuring a well-combined topping.

    Ingredients for Chili Relleno Casserole

    For the Casserole

    • 1 pound grated cheese (Monterey Jack or white cheddar)
    • 27 ounces green chilies (1 can), whole chilies, preferably Hatch brand
    • 12 corn tortillas
    • 16 ounces refried beans
    • 1 1/2 pounds ground beef
    • 1 onion, finely chopped

    For the Topping

    • 4 eggs, beaten well
    • 1/4 cup flour
    • 1/2 cup evaporated milk (small can)
    • 2 teaspoons hot sauce
    • 1/4 teaspoon paprika
    • 1/4 teaspoon onion powder
    • 1 teaspoon salt

    How to Make Chili Relleno Casserole Step-by-Step

    Step 1: Preheat Oven

    Preheat your oven to 375°F (190°C). Grease a 9 x 13-inch baking pan with cooking spray and set aside.

    Step 2: Prepare Topping

    In a large bowl, whisk together the beaten eggs, flour, evaporated milk, hot sauce, paprika, onion powder, and salt until smooth. Set aside for later use.

    Step 3: Cook Beef Mixture

    In a large skillet, cook the ground beef and chopped onion over medium heat. Cook until the meat is browned and the onion is soft, about 5-7 minutes. Stir in the refried beans until well combined. Set aside.

    Step 4: Prepare Tortillas and Chilies

    Cut the corn tortillas into 1-inch wide strips. Arrange half of the tortilla strips in a single layer on the bottom of the prepared baking pan. Layer half of the green chilies evenly over the tortillas, then sprinkle with half of the grated cheese. Repeat this process with the remaining tortilla strips, green chilies, and cheese.

    Step 5: Assemble Casserole

    Pour the egg mixture evenly over the layered tortillas and chilies. Spoon the beef and bean mixture over the egg layer, spreading it out evenly. Finally, sprinkle the remaining cheese over the top.

    Step 6: Bake

    Cover the casserole with foil and bake in the preheated oven for 45 minutes. Remove the foil during the last 5 minutes to allow the top to brown.

    Step 7: Cool and Serve

    Once bubbly and cooked through, remove the casserole from the oven. Let it cool slightly before serving to enhance the flavors.

    This Chili Relleno Casserole is sure to become a favorite in your household, combining ease of preparation with unbeatable taste. Enjoy it warm and watch it disappear!

    How to Serve Chili Relleno Casserole

    Chili Relleno Casserole is versatile and can be enjoyed in various ways.

    Garnished with Fresh Cilantro

    Top each serving with freshly chopped cilantro for a burst of flavor and color that complements the dish beautifully.

    Served with Avocado Slices

    Add creamy avocado slices alongside the casserole to enhance the richness and provide a refreshing contrast to the spicy flavors.

    Accompanied by Sour Cream

    A dollop of sour cream can add a tangy creaminess, balancing the heat from the chilies and enhancing the overall taste experience.

    Pro Tips for the Best Chili Relleno Casserole

    To ensure your Chili Relleno Casserole turns out perfectly every time, consider these helpful tips.

    • Quality Ingredients: Use high-quality cheese and fresh green chilies for the best flavor and texture in your casserole.
    • Layering Evenly: Make sure to layer the tortillas, chilies, and cheese evenly to ensure a balanced bite in every serving.
    • Let It Rest: Allow the casserole to cool for about 10 minutes before serving; this helps the layers set and makes it easier to cut.
    • Customize Your Heat Level: Adjust the hot sauce in the topping to suit your preferences or substitute with a milder sauce if desired.
    • Make Ahead: Prepare the casserole in advance and refrigerate it overnight; just add an extra 10 minutes to the baking time when cooking.

    Best Side Dishes and Pairings

    Chili Relleno Casserole pairs wonderfully with a variety of side dishes and drinks.

    1. Mexican Rice: Fluffy and flavorful, this side complements the casserole’s richness while adding a satisfying texture.
    2. Refried Beans: A classic pairing that enhances the Mexican theme and provides additional protein and fiber.
    3. Corn Salad: A refreshing corn salad with lime dressing contrasts well with the spiciness of the casserole.
    4. Pico de Gallo: Fresh salsa adds a zesty kick and balances the hearty casserole with its bright flavors.
    5. Margaritas: A chilled margarita pairs perfectly with the casserole, enhancing the overall dining experience with its citrus notes.

    Common Mistakes to Avoid

    • Using Wrong Cheese: Opt for Monterey Jack or white cheddar for the best flavor and melting properties.
    • Overcooking the Beef: Brown the ground beef just until it’s cooked through to prevent it from becoming tough.
    • Skipping the Cooling Step: Allow the casserole to cool slightly before serving to ensure it holds its shape when sliced.
    • Not Layering Evenly: Make sure to distribute the tortillas, chilies, and cheese evenly for a balanced flavor in every bite.

    Storage & Reheating Instructions

    Refrigerator Storage

    Store leftover Chili Relleno Casserole in airtight containers in the refrigerator. It will stay fresh for up to 3 days.

    Freezing Instructions

    For best results, freeze the casserole before baking. Wrap it tightly in plastic wrap and foil. It can be frozen for up to 2 months. Thaw in the refrigerator overnight before baking.

    Reheating Tips

    • Oven: Preheat to 350°F (175°C) and reheat covered for about 20-25 minutes or until heated through.
    • Microwave: Heat individual portions on medium power for 2-3 minutes, checking for even heating.
    • Stovetop: Reheat in a skillet over medium heat, covered, for about 5-7 minutes until warmed through.

    Frequently Asked Questions

    Can I make Chili Relleno Casserole ahead of time?

    Yes, you can prepare the casserole a day in advance and refrigerate it before baking. Just add a few extra minutes to the baking time if it’s chilled.

    Can I use fresh chilies instead of canned?

    Absolutely! Fresh roasted green chilies can provide a more robust flavor. Just ensure they are peeled and seeded before using.

    Is Chili Relleno Casserole suitable for gluten-free diets?

    To make the casserole gluten-free, substitute the flour in the topping with a gluten-free flour blend or cornstarch.

    How do I make Chili Relleno Casserole vegetarian?

    You can replace the ground beef with a mix of sautéed vegetables or beans to create a delicious vegetarian version.

    What sides pair well with Chili Relleno Casserole?

    Consider serving it with a simple green salad, Mexican rice, or guacamole for a complete meal.

    Final Thoughts

    Chili Relleno Casserole is a flavorful and satisfying dish that’s perfect for any meal. Its comforting layers of cheese, chilies, and savory beef combine to create a delightful experience. I encourage you to try making this recipe and share your thoughts in the comments below.


    Dinner

    Chili Relleno Casserole


    5.0 from 24 reviews

    Chili Relleno Casserole is a hearty and flavorful dish that combines layers of corn tortillas, green chilies, seasoned ground beef, and a rich cheese topping. Perfect for family gatherings or a comforting weeknight dinner, this casserole is sure to satisfy your cravings with its delicious blend of ingredients.

    Author: Munch Twist
    Prep Time: 20 minutes
    Cook Time: 50 minutes
    Total Time: 70 minutes
    Yield: 8 servings
    Category: Lunch
    Method: No bake
    Cuisine: American

    Chili Relleno Casserole

    SCALE:
    1x
    2x
    3x
    Cook Mode: Prevent your screen from going dark

    Ingredients

    • 1 pound grated cheese (Monterey Jack or white cheddar)
    • 27 ounces green chilies (1 can), whole chilies, preferably Hatch brand
    • 12 corn tortillas
    • 16 ounces refried beans
    • 1 1/2 pounds ground beef
    • 1 onion, finely chopped
    • 4 eggs, beaten well
    • 1/4 cup flour
    • 1/2 cup evaporated milk
    • 2 teaspoons hot sauce
    • 1/4 teaspoon paprika
    • 1/4 teaspoon onion powder
    • 1 teaspoon salt

    Instructions

    1. Preheat your oven to 375°F (190°C). Grease a 9 x 13-inch baking pan with cooking spray and set aside.
    2. In a large bowl, whisk together the beaten eggs, flour, evaporated milk, hot sauce, paprika, onion powder, and salt until smooth. Set aside.
    3. In a large skillet, cook the ground beef and chopped onion over medium heat until the meat is browned and the onion is soft, about 5-7 minutes. Stir in the refried beans until well combined with the meat and onion mixture. Set aside.
    4. Cut the corn tortillas into 1-inch wide strips. Arrange half of the tortilla strips in a single layer on the bottom of the prepared baking pan. Layer half of the green chilies evenly over the tortillas, then sprinkle with half of the grated cheese. Repeat with the remaining tortilla strips, green chilies, and cheese.
    5. Pour the egg mixture evenly over the layered tortillas and chilies. Spoon the beef and bean mixture over the egg layer, spreading it out evenly. Sprinkle the remaining cheese over the top.
    6. Cover the casserole with foil and bake in the preheated oven for 45 minutes. Remove the foil during the last 5 minutes to allow the top to brown.
    7. Once bubbly and cooked through, remove from the oven and let cool slightly before serving.

    Nutrition Facts

    Serving Size: 1 serving
    Calories: 450 kcal
    Sugar: 2g
    Sodium: 900mg
    Fat: 22g
    Saturated Fat: 10g
    Carbohydrates: 34g
    Fiber: 3g
    Protein: 27g
    Cholesterol: 300mg

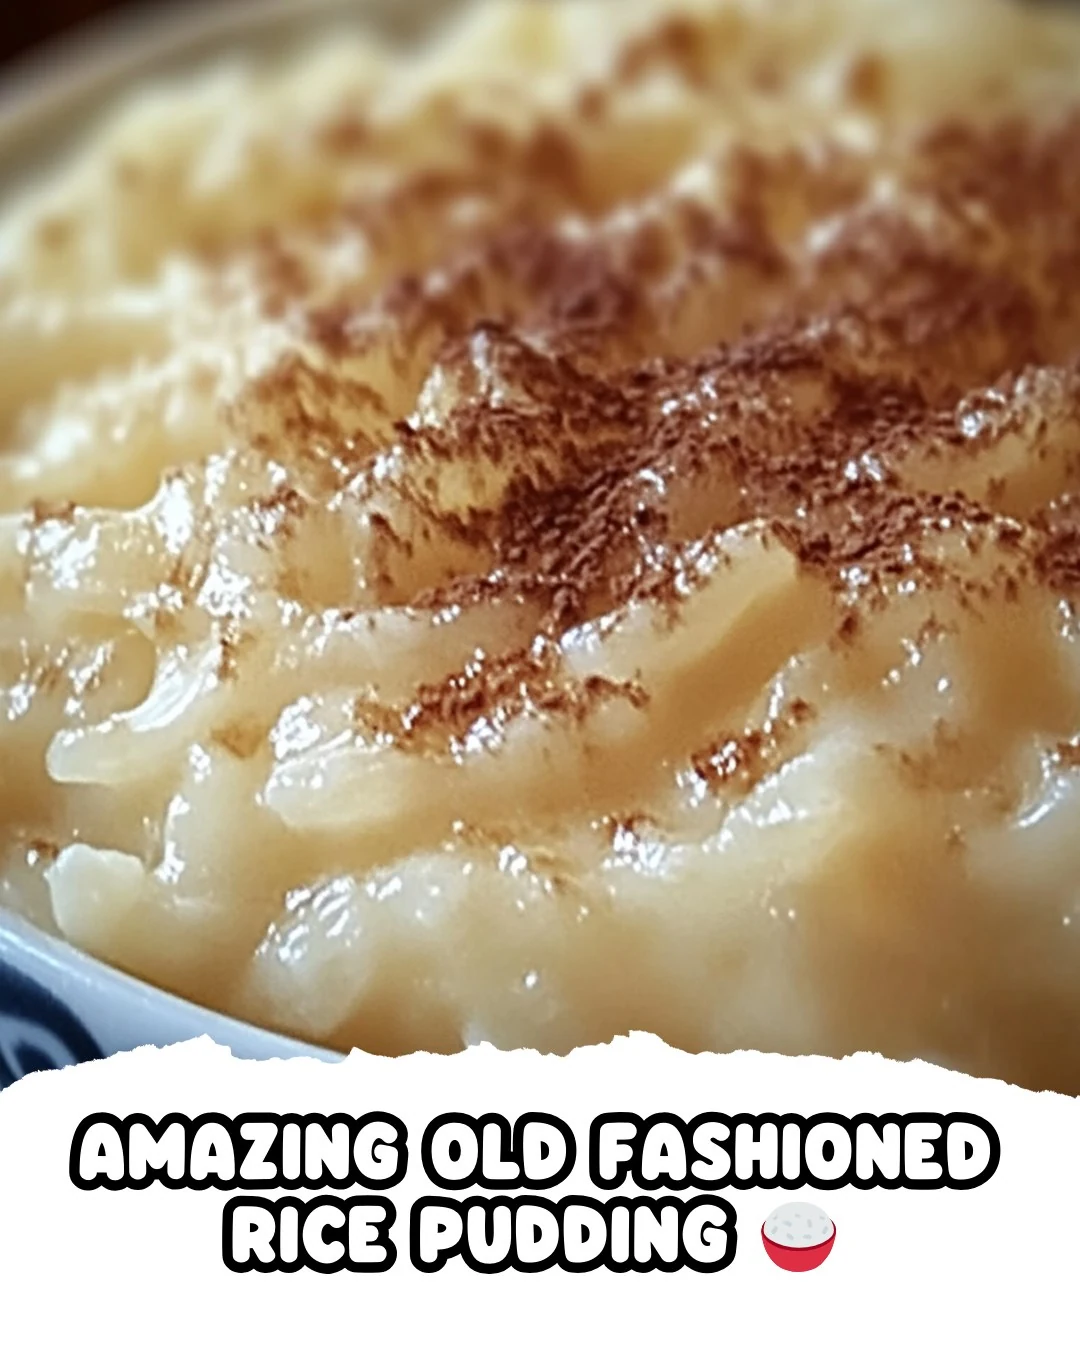
  • Discover the AMAZING OLD FASHIONED RICE PUDDING Recipe

    Discover the AMAZING OLD FASHIONED RICE PUDDING Recipe

    AMAZING OLD FASHIONED RICE PUDDING is a delightful dessert that evokes nostalgia with every creamy bite. This classic recipe combines simple ingredients to create a warm, comforting dish that is perfect for any occasion. Enjoy the rich flavors and satisfying texture that make this pudding a favorite for families everywhere.

    Why You’ll Love This Recipe

    • Comforting Flavor: This pudding delivers a warm, creamy taste that feels like a hug in a bowl.
    • Nostalgic Appeal: Reminiscent of childhood desserts, it brings back fond memories for many.
    • Versatile Serving Options: Enjoy it warm or chilled, making it perfect for any season.
    • Simple Ingredients: Made with pantry staples, this recipe is both accessible and budget-friendly.
    • Easy to Prepare: With straightforward steps, even beginners can master this delightful dish.

    Tools and Equipment

    To make the AMAZING OLD FASHIONED RICE PUDDING, you will need some essential kitchen tools.

    Essential Tools

    • 1-quart baking dish
    • Mixing spoon
    • Measuring cups and spoons
    • Oven

    Why These Tools Matter

    • Baking Dish: A proper baking dish ensures even cooking and provides the right size for this recipe.
    • Mixing Spoon: A sturdy spoon helps combine ingredients thoroughly, ensuring a smooth pudding texture.

    Ingredients for AMAZING OLD FASHIONED RICE PUDDING

    Staple Ingredients

    • 1/2 cup raisins
    • 2/3 cup Minute Rice
    • 2 3/4 cups milk
    • 1/3 cup sugar
    • 1 tablespoon butter
    • 1/2 teaspoon vanilla
    • 1/2 teaspoon salt
    • 1/4 teaspoon nutmeg

    For Serving

    • Cinnamon, for sprinkling

    How to Make AMAZING OLD FASHIONED RICE PUDDING Step-by-Step

    Step 1: Preheat the Oven

    Preheat your oven to 350°F (175°C). This ensures the pudding cooks evenly.

    Step 2: Combine Ingredients

    In a buttered 1-quart baking dish, combine the Minute Rice, milk, raisins, sugar, butter, salt, vanilla, and nutmeg. Stir until well mixed.

    Step 3: Bake and Stir

    Bake in the preheated oven for 1 hour. Stir the mixture after 15 minutes. Stir again when the pudding is done to ensure even consistency.

    Step 4: Sprinkle and Serve

    Sprinkle the pudding with cinnamon before serving. Enjoy it warm or chilled. The pudding will thicken further as it stands.

    Nutritional Information

    Each serving (based on 6 servings) provides approximately:
    – Calories: 220 kcal
    – Carbohydrates: 35g
    – Protein: 5g
    – Fat: 6g
    – Sodium: 220mg

    Preparation time is about 10 minutes, with a cooking time of 1 hour. Enjoy your AMAZING OLD FASHIONED RICE PUDDING!

    How to Serve AMAZING OLD FASHIONED RICE PUDDING

    There are numerous delightful ways to enjoy your rice pudding. Here are a few creative serving ideas.

    Warm with Fresh Fruit

    Serve the rice pudding warm and top it with fresh fruit such as sliced strawberries, bananas, or peaches. The natural sweetness of the fruit complements the creamy texture of the pudding beautifully.

    Drizzled with Honey or Maple Syrup

    Add a touch of sweetness by drizzling honey or maple syrup over the rice pudding before serving. This enhances the flavor profile and adds a delightful sticky texture.

    Topped with Whipped Cream

    For an indulgent treat, top the rice pudding with a dollop of whipped cream. This creates a rich contrast with the pudding’s creamy base, making each bite even more enjoyable.

    Pro Tips for the Best AMAZING OLD FASHIONED RICE PUDDING

    To ensure your rice pudding turns out perfectly, consider the following tips.

    • Use Quality Ingredients: Opt for high-quality milk and pure vanilla extract to enhance the flavor of your pudding.
    • Adjust Sweetness: Taste the mixture before baking and adjust the sugar according to your preference for sweetness.
    • Choose the Right Rice: Minute Rice works well, but for a creamier texture, you can use Arborio or short-grain rice.
    • Stir Occasionally: Stirring the pudding a few times during baking helps to prevent clumping and ensures even cooking.
    • Let it Rest: Allow the pudding to rest for a few minutes after baking. This will help it to thicken and improve the texture.

    Best Side Dishes and Pairings

    Pairing the AMAZING OLD FASHIONED RICE PUDDING with the right dishes can elevate your meal. Here are some excellent options.

    1. Fresh Berries: A mixed berry medley provides a refreshing contrast to the creamy pudding.
    2. Coffee or Espresso: A robust cup of coffee complements the sweetness of the rice pudding, making it a perfect dessert pairing.
    3. Cinnamon Sugar Toast: Serve slices of buttered toast sprinkled with cinnamon sugar for a crunchy side that adds texture.
    4. Sliced Almonds: Lightly toasted almonds can add a crunchy element and nutty flavor that pairs well with the softness of the pudding.
    5. Herbal Tea: A soothing herbal tea, such as chamomile or mint, balances the richness of the rice pudding with its lightness.

    Common Mistakes to Avoid

    • Skipping the Stirring: Failing to stir the pudding at the recommended intervals can lead to uneven cooking and texture.
    • Using Different Rice: Not using Minute Rice may affect the cooking time and overall consistency of the pudding.
    • Not Preheating the Oven: Baking in an unheated oven can alter cooking times and lead to unsatisfactory results.
    • Overbaking: Leaving the pudding in the oven for too long can result in a dry texture; it’s best to check for doneness at the 1-hour mark.

    Storage & Reheating Instructions

    Refrigerator Storage

    Store your AMAZING OLD FASHIONED RICE PUDDING in an airtight container in the refrigerator. It will stay fresh for up to 5 days.

    Freezing Instructions

    To freeze, place the cooled pudding in a freezer-safe container. It can be frozen for up to 2 months. For best results, consider dividing it into individual portions before freezing.

    Reheating Tips

    • Oven: Preheat your oven to 350°F (175°C) and warm the pudding for about 20 minutes, covered with foil to retain moisture.
    • Microwave: Heat in 30-second intervals, stirring in between, until warmed through.
    • Stovetop: Place the pudding in a saucepan over low heat, stirring frequently until heated to your liking.

    Frequently Asked Questions

    How can I make AMAZING OLD FASHIONED RICE PUDDING dairy-free?

    You can substitute the milk with almond milk, coconut milk, or any other plant-based milk of your choice for a delicious dairy-free version.

    Can I add different spices to my AMAZING OLD FASHIONED RICE PUDDING?

    Absolutely! Feel free to experiment with cinnamon, cardamom, or even a hint of cloves for a unique twist on the classic flavor.

    Is there a way to reduce the sugar in the AMAZING OLD FASHIONED RICE PUDDING?

    Yes, you can reduce the sugar by half or substitute it with a natural sweetener like maple syrup or honey, keeping in mind that it may alter the taste slightly.

    How do I know when my AMAZING OLD FASHIONED RICE PUDDING is done?

    The pudding is done when it has thickened and set. It should be creamy but not runny. Stir it at the 15-minute mark and again at the end to check the consistency.

    Final Thoughts

    This AMAZING OLD FASHIONED RICE PUDDING is a comforting dessert that brings nostalgia with every bite. I encourage you to try making it yourself and share your thoughts in the comments. Your feedback is always appreciated!


    Desserts

    AMAZING OLD FASHIONED RICE PUDDING


    5.0 from 24 reviews

    This classic rice pudding recipe combines simple ingredients like rice, milk, and raisins to create a creamy, comforting dessert. Perfectly spiced with nutmeg and cinnamon, it can be enjoyed warm or chilled, making it a versatile treat for any occasion.

    Author: Munch Twist
    Prep Time: 10 minutes
    Cook Time: 60 minutes
    Total Time: 70 minutes
    Yield: 6 servings
    Category: Desserts
    Method: No bake
    Cuisine: American

    AMAZING OLD FASHIONED RICE PUDDING

    SCALE:
    1x
    2x
    3x
    Cook Mode: Prevent your screen from going dark

    Ingredients

    • 1/2 cup raisins
    • 1/4 teaspoon nutmeg
    • 1 tablespoon butter
    • 2/3 cup Minute Rice
    • 1/2 teaspoon vanilla
    • 1/3 cup sugar
    • 2 3/4 cups milk
    • 1/2 teaspoon salt
    • Cinnamon, for sprinkling

    Instructions

    1. Preheat your oven to 350°F (175°C).
    2. In a buttered 1-quart baking dish, combine the Minute Rice, milk, raisins, sugar, butter, salt, vanilla, and nutmeg.
    3. Bake in the preheated oven for 1 hour. Stir the mixture after 15 minutes and again when the pudding is done.
    4. Sprinkle with cinnamon. Serve warm or chilled. The pudding will thicken as it stands.

    Nutrition Facts

    Serving Size: 1 serving
    Calories: 220 kcal
    Sugar: 12g
    Sodium: 220mg
    Fat: 6g
    Saturated Fat: 4g
    Carbohydrates: 35g
    Fiber: 1g
    Protein: 5g
    Cholesterol: 15mg

  • Perfect Crumbl Cookie Recipe Copycat You Can Make at Home

    Perfect Crumbl Cookie Recipe Copycat You Can Make at Home

    Crumbl Cookie Recipe Copycat is a delightful indulgence that perfectly captures the essence of those famous bakery-style cookies. With a rich, buttery flavor and gooey chocolate chips, this recipe will satisfy your sweet tooth and impress your friends and family.

    Why You’ll Love This Recipe

    • Decadent Flavor: Each cookie is loaded with semi-sweet chocolate chips, creating a rich taste.
    • Soft and Chewy Texture: These cookies have a perfect balance of softness and chewiness, making them irresistible.
    • Quick & Easy: Ready in under 30 minutes, this recipe is perfect for a last-minute dessert.
    • Customizable: Feel free to add nuts or swap in different types of chocolate for variety.
    • Impressive Presentation: Large cookie size makes them visually appealing for sharing or gifting.

    Tools and Equipment

    Having the right tools makes the baking process smoother and more enjoyable.

    Essential Tools

    • Stand or hand mixer
    • Mixing bowls
    • Measuring cups and spoons
    • Baking sheet
    • Parchment paper
    • Cookie scoop

    Why These Tools Matter

    • Stand or hand mixer: Ensures the butter and sugars are creamed to the perfect texture.
    • Parchment paper: Prevents sticking and makes cleanup a breeze.
    • Cookie scoop: Helps create uniform cookie sizes for even baking.

    Ingredients for Crumbl Cookie Recipe Copycat

    Wet Ingredients

    • 1 cup cold butter, cubed
    • 2 large eggs
    • 1 tablespoon vanilla extract

    Dry Ingredients

    • 3 cups all-purpose flour
    • 1 teaspoon baking soda
    • 3/4 teaspoon kosher salt

    Sugars

    • 1 1/4 cups light brown sugar, packed
    • 1/2 cup granulated sugar

    Mix-ins

    • 2 cups semi-sweet chocolate chips

    How to Make Crumbl Cookie Recipe Copycat Step-by-Step

    Step 1: Prep the Oven

    • Preheat your oven to 410°F (210°C).
    • Line a baking sheet with parchment paper to ensure easy removal of the cookies.

    Step 2: Cream Butter and Sugars

    • In a large bowl, use a hand mixer to cream together the cold cubed butter, brown sugar, and granulated sugar.
    • Beat until the mixture is light and fluffy, which should take about 2-3 minutes.

    Step 3: Add Eggs and Vanilla

    • Add the eggs one at a time, making sure each is fully mixed before adding the next.
    • Stir in the vanilla extract until incorporated.

    Step 4: Combine Dry Ingredients

    • In a separate bowl, whisk together the all-purpose flour, baking soda, and kosher salt.
    • Gradually add the dry mixture to the creamed butter mixture, mixing until just combined. Do not overmix.

    Step 5: Fold in Chocolate Chips

    • Gently fold in the semi-sweet chocolate chips until they are evenly distributed throughout the dough.

    Step 6: Form Cookie Dough Balls

    • Scoop the dough into large balls, about 1/4 cup each.
    • Place them on the prepared baking sheet, ensuring there is ample space between each cookie.

    Step 7: Bake Cookies

    • Bake the cookies for 9-11 minutes, or until the edges are golden and the centers are just set.
    • Allow the cookies to cool on the baking sheet for 5 minutes before transferring them to a wire rack to cool completely.

    Enjoy your homemade Crumbl Cookie Recipe Copycat, a treat that brings the bakery experience right to your kitchen!

    How to Serve Crumbl Cookie Recipe Copycat

    These cookies are delicious on their own but can be elevated with a few creative serving ideas.

    Cookie Sandwiches

    Transform your Crumbl cookies into delightful sandwiches by adding a scoop of your favorite ice cream between two cookies. This creates a rich, dessert experience perfect for warm weather.

    Drizzle of Chocolate

    For an extra touch of indulgence, melt some chocolate and drizzle it over the cooled cookies. This adds a gourmet flair and enhances the chocolate flavor.

    Cookie Crumble Topping

    Crush some of the baked cookies and use them as a topping for a variety of desserts, such as ice cream sundaes or yogurt parfaits. This adds a crunchy texture and rich flavor to your dishes.

    Pro Tips for the Best Crumbl Cookie Recipe Copycat

    To achieve the perfect Crumbl cookie, consider the following expert tips.

    • Use Cold Butter: Starting with cold butter helps create a thick and chewy cookie texture, preventing the dough from spreading too much during baking.

    • Don’t Overmix: When combining the dry ingredients with the wet mixture, mix until just combined to avoid tough cookies.

    • Chill the Dough: For even thicker cookies, chill the dough for at least 30 minutes before baking. This allows the flavors to meld and improves the texture.

    • Check Oven Temperature: Always use an oven thermometer to ensure your oven is at the correct temperature, as ovens can vary significantly.

    • Experiment with Mix-Ins: Feel free to substitute or add in different types of chocolate chips, nuts, or even caramel bits for a unique twist on the classic recipe.

    Best Side Dishes and Pairings

    These cookies pair excellently with a variety of dishes and beverages, enhancing your dessert experience.

    1. Milk: A classic pairing, milk complements the sweetness of the cookies and balances their richness.

    2. Coffee: The bold flavors of coffee provide a perfect contrast to the sweetness of the cookies, making for an enjoyable afternoon treat.

    3. Ice Cream: Pairing with vanilla or chocolate ice cream adds creaminess and elevates the dessert to a new level of indulgence.

    4. Fruit Salad: A light fruit salad can provide a refreshing contrast to the rich cookies, balancing flavors without overwhelming the palate.

    5. Hot Chocolate: For a cozy treat, serve your cookies alongside a warm cup of hot chocolate, enhancing the chocolate experience.

    Common Mistakes to Avoid

    • Using Warm Butter: Ensure your butter is cold and cubed for the right texture.
    • Overmixing the Dough: Mix until just combined to maintain a tender cookie.
    • Incorrect Baking Time: Keep an eye on the cookies; they should be golden around the edges and soft in the center.
    • Skipping the Cooling Time: Allow cookies to cool on the baking sheet for a few minutes to set properly.

    Storage & Reheating Instructions

    Refrigerator Storage

    Store cookies in an airtight container in the refrigerator. They will stay fresh for up to one week.

    Freezing Instructions

    For best results, freeze cookie dough balls before baking. Place them in a single layer on a baking sheet until frozen, then transfer to an airtight container or freezer bag. They can be stored for up to three months. Thaw in the refrigerator before baking.

    Reheating Tips

    • Oven: Preheat to 350°F (175°C) and bake for 5-7 minutes for warm cookies.
    • Microwave: Heat cookies for 10-15 seconds to enjoy a soft texture.
    • Stovetop: Warm cookies in a skillet over low heat for a couple of minutes.

    Frequently Asked Questions

    How can I make this Crumbl Cookie Recipe Copycat gluten-free?

    You can substitute all-purpose flour with a gluten-free flour blend to make this recipe gluten-free. Ensure that the blend includes xanthan gum for better texture.

    Can I customize the chocolate chips in this recipe?

    Absolutely! Feel free to substitute semi-sweet chocolate chips with milk chocolate, dark chocolate, or even white chocolate for a different flavor profile.

    What is the best way to prevent cookies from spreading too much?

    Chill the cookie dough for at least 30 minutes before baking. This helps maintain the shape while baking.

    How can I make smaller cookies instead of large ones?

    If you prefer smaller cookies, scoop the dough into tablespoons instead of 1/4 cup portions and adjust the baking time accordingly.

    Final Thoughts

    This Crumbl Cookie Recipe Copycat is sure to become a favorite in your household. Its rich flavor and delightful texture make it a must-try for cookie lovers. We encourage you to make this delicious recipe and leave a comment with your feedback!


    Desserts

    Crumbl Cookie Recipe Copycat


    5.0 from 24 reviews

    This Crumbl Cookie Recipe Copycat brings the deliciousness of bakery-style cookies right to your kitchen. With a perfect balance of semi-sweet chocolate chips and a soft, chewy texture, these cookies are sure to satisfy your sweet tooth. Ideal for sharing or enjoying on your own, they are easy to make and perfect for any occasion.

    Author: Munch Twist
    Prep Time: 15 minutes
    Cook Time: 11 minutes
    Total Time: 26 minutes
    Yield: 12 servings
    Category: Desserts
    Method: Baking
    Cuisine: American

    Crumbl Cookie Recipe Copycat

    SCALE:
    1x
    2x
    3x
    Cook Mode: Prevent your screen from going dark

    Ingredients

    • 2 cups semi-sweet chocolate chips
    • 3 cups all-purpose flour
    • 1 teaspoon baking soda
    • 1 tablespoon vanilla extract
    • 1 cup cold butter, cubed
    • 2 large eggs
    • 1 1/4 cups light brown sugar, packed
    • 1/2 cup granulated sugar
    • 3/4 teaspoon kosher salt

    Instructions

    1. Preheat your oven to 410°F (210°C) and line a baking sheet with parchment paper.
    2. In a large bowl, cream together the cold cubed butter, brown sugar, and granulated sugar until light and fluffy.
    3. Add the eggs one at a time, ensuring each is fully incorporated before adding the next, then stir in the vanilla extract.
    4. In a separate bowl, whisk together the flour, baking soda, and salt. Gradually add the dry ingredients to the creamed mixture, mixing until just combined.
    5. Gently fold in the chocolate chips until evenly distributed.
    6. Scoop the dough into large balls (about 1/4 cup each) and place them on the prepared baking sheet, leaving ample space between each cookie.
    7. Bake for 9-11 minutes, or until the edges are golden and the centers are just set. Let the cookies cool on the baking sheet for 5 minutes before transferring them to a wire rack to cool completely.

    Nutrition Facts

    Serving Size: 1 serving
    Calories: 320 kcal
    Sugar: 24g
    Sodium: 160mg
    Fat: 15g
    Saturated Fat: 9g
    Carbohydrates: 45g
    Fiber: 1g
    Protein: 4g
    Cholesterol: 40mg

  • Ultimate Cheddar Ranch Chicken Burger Recipe

    Ultimate Cheddar Ranch Chicken Burger Recipe

    Ultimate Cheddar Ranch Chicken Burger is a delightful dish that combines the rich flavors of cheddar cheese and ranch seasoning with juicy chicken patties. This recipe is perfect for summer barbecues or a cozy family dinner, making it an instant crowd-pleaser.

    Why You’ll Love This Recipe

    • Flavorful Combination: The blend of cheddar cheese and ranch seasoning elevates the chicken patties to a new level.
    • Quick & Easy: Ready in under 30 minutes, this burger is perfect for a weeknight meal.
    • Customizable Toppings: Add your favorite veggies and condiments to make it your own.
    • Healthy Option: Ground chicken is a lean protein, making this a healthier burger choice.
    • Family-Friendly: Even picky eaters will love the delicious flavors packed into each bite.

    Tools and Equipment

    These essential tools will help you create the Ultimate Cheddar Ranch Chicken Burger with ease.

    Essential Tools

    • Large mixing bowl
    • Baking sheet
    • Parchment paper
    • Non-stick skillet
    • Spatula

    Why These Tools Matter

    • Large mixing bowl: Provides ample space for mixing ingredients without making a mess.
    • Parchment paper: Prevents sticking and makes for easy clean-up when shaping patties.
    • Non-stick skillet: Ensures even cooking without the hassle of sticking patties.

    Ingredients for Ultimate Cheddar Ranch Chicken Burger

    Chicken Burger Patties

    • 3 garlic cloves, smashed and minced
    • ½ cup finely shredded cheddar cheese
    • ½ cup plain bread crumbs
    • 2 lbs ground chicken
    • ½ cup finely diced onion
    • 1 egg
    • 1 oz ranch seasoning mix

    For Assembling the Burgers

    • Lettuce
    • Buns
    • Tomatoes
    • Ranch dressing
    • Bacon
    • Additional veggies (optional)

    How to Make Ultimate Cheddar Ranch Chicken Burger Step-by-Step

    Step 1: Prepare the Chicken Burger Patties

    In a mixing bowl, combine the ground chicken, egg, bread crumbs, ranch seasoning mix, minced garlic, diced onion, and shredded cheddar cheese. Mix until all ingredients are evenly incorporated. Line a baking sheet or large cutting board with parchment paper. Shape the mixture into burger patties, ensuring all patties are shaped before cooking for even results.

    Step 2: Cook the Patties

    Preheat a large pan over medium heat and add a small amount of oil. Cook the patties for 6-8 minutes on each side, depending on their size, until fully cooked through.

    Step 3: Assemble the Burgers

    Prepare the buns, bacon, lettuce, tomatoes, and ranch dressing. Feel free to add any additional veggies you like. Place the cooked chicken patties on the buns and top with bacon, lettuce, tomatoes, and a drizzle of ranch dressing. Add any additional veggies as desired.

    Step 4: Serve

    Serve immediately and enjoy your flavorful Cheddar Ranch Chicken Burgers!

    Nutritional Information (per serving)

    • Calories: 450 kcal
    • Carbohydrates: 30g
    • Protein: 35g
    • Fat: 20g

    Preparation time: 10 minutes | Cooking time: 15 minutes | Total time: 25 minutes | Servings: 6

    This Ultimate Cheddar Ranch Chicken Burger recipe provides a delicious meal that is easy to make and sure to satisfy your cravings.

    How to Serve Ultimate Cheddar Ranch Chicken Burger

    Enhance your dining experience with these creative serving ideas.

    Gourmet Toppings

    Elevate your Ultimate Cheddar Ranch Chicken Burger by adding gourmet toppings such as avocado slices, jalapeños, or even a fried egg for a unique twist.

    Sliders for Gatherings

    Transform the burgers into sliders for your next gathering. Simply make smaller patties and serve them on mini buns, perfect for parties and entertaining.

    Salad Bowl Version

    For a lighter option, serve the chicken burger patties on a bed of mixed greens with your favorite ranch dressing, tomatoes, and cucumbers for a delicious salad bowl.

    Pro Tips for the Best Ultimate Cheddar Ranch Chicken Burger

    To ensure your burgers are nothing short of amazing, consider these expert tips.

    • Use Fresh Ingredients: Fresh garlic and onions will enhance the flavor profile of your chicken patties significantly.
    • Chill Before Cooking: Allow the shaped patties to chill in the refrigerator for about 30 minutes before cooking to help them hold their shape.
    • Cook on Medium Heat: This ensures the patties cook through without burning on the outside, achieving a perfect golden crust.
    • Toast the Buns: Lightly toasting your burger buns adds texture and prevents them from becoming soggy when layered with toppings.
    • Experiment with Seasonings: Feel free to add your favorite herbs or spices to the chicken mixture for added flavor.

    Best Side Dishes and Pairings

    Complement your Ultimate Cheddar Ranch Chicken Burger with these delightful sides.

    1. Sweet Potato Fries: Their natural sweetness balances the savory flavors of the burger, making them an excellent choice.
    2. Coleslaw: A crunchy, tangy coleslaw adds a refreshing contrast to the rich flavors of the burger and ranch dressing.
    3. Grilled Corn on the Cob: The smoky sweetness of grilled corn pairs perfectly with the savory chicken patties.
    4. Potato Salad: A creamy potato salad offers a comforting side that enhances the overall meal experience.
    5. Iced Tea or Lemonade: A refreshing drink like iced tea or lemonade can cleanse the palate and complement the meal.

    Common Mistakes to Avoid

    • Not Mixing Ingredients Thoroughly: Ensure all components are well combined to avoid uneven flavor and texture.
    • Overcooking the Patties: Monitor cooking time closely to prevent dry burgers. Use a meat thermometer for accuracy.
    • Skipping the Parchment Paper: Always line the baking sheet to prevent sticking and make cleanup easier.
    • Neglecting to Let Patties Rest: Allow the burgers to rest for a few minutes after cooking for juicier results.

    Storage & Reheating Instructions

    Refrigerator Storage

    Store leftover Ultimate Cheddar Ranch Chicken Burgers in airtight containers. They will stay fresh for up to 3 days in the refrigerator.

    Freezing Instructions

    To freeze, place the uncooked patties between layers of parchment paper and store them in an airtight container or freezer bag. They can be frozen for up to 3 months. Thaw in the refrigerator before cooking.

    Reheating Tips

    • Oven: Preheat to 350°F (175°C) and bake for 10-15 minutes until heated through.
    • Microwave: Heat on medium power for 1-2 minutes, checking for warmth.
    • Stovetop: Reheat in a skillet over medium heat for 5-7 minutes, turning occasionally.

    Frequently Asked Questions

    Can I use ground turkey instead of chicken for the Ultimate Cheddar Ranch Chicken Burger?

    Yes, ground turkey can be used as a substitute, but the flavor and texture may slightly differ.

    What toppings go well with the Ultimate Cheddar Ranch Chicken Burger?

    Toppings like crispy bacon, lettuce, tomatoes, and ranch dressing complement the flavors beautifully. Feel free to add your favorite veggies.

    How can I make the Ultimate Cheddar Ranch Chicken Burger spicier?

    To add heat, mix in some diced jalapeños or a dash of hot sauce into the patty mixture.

    Can I prepare the patties in advance?

    Absolutely! You can prepare the patties a day ahead and store them in the refrigerator until you’re ready to cook.

    What can I serve with the Ultimate Cheddar Ranch Chicken Burger?

    These burgers pair well with sweet potato fries, a fresh salad, or grilled vegetables for a complete meal.

    Final Thoughts

    The Ultimate Cheddar Ranch Chicken Burger is a delicious and satisfying meal that is sure to please family and friends alike. We encourage you to try this recipe and share your experience in the comments below. Your feedback helps others discover this flavorful dish!


    Dinner

    Ultimate Cheddar Ranch Chicken Burger


    5.0 from 24 reviews

    These Ultimate Cheddar Ranch Chicken Burgers are a delicious twist on a classic favorite. Juicy ground chicken patties are mixed with savory ranch seasoning, cheddar cheese, and garlic, then grilled to perfection. Topped with crispy bacon, fresh lettuce, and ripe tomatoes, these burgers are sure to please any crowd.

    Author: Munch Twist
    Prep Time: 10 minutes
    Cook Time: 15 minutes
    Total Time: 25 minutes
    Yield: 6 servings
    Category: Desserts
    Method: No bake
    Cuisine: American

    Ultimate Cheddar Ranch Chicken Burger

    SCALE:
    1x
    2x
    3x
    Cook Mode: Prevent your screen from going dark

    Ingredients

    • 3 garlic cloves, smashed and minced
    • ½ cup finely shredded cheddar cheese
    • ½ cup plain bread crumbs
    • 2 lbs ground chicken
    • ½ cup finely diced onion
    • 1 egg
    • 1 oz ranch seasoning mix
    • Lettuce
    • Buns
    • Tomatoes
    • Ranch dressing
    • Bacon
    • Additional veggies (optional)

    Instructions

    1. In a mixing bowl, combine the ground chicken, egg, bread crumbs, ranch seasoning mix, minced garlic, diced onion, and shredded cheddar cheese. Mix until all ingredients are evenly incorporated.
    2. Line a baking sheet or large cutting board with parchment paper. Shape the mixture into burger patties, ensuring all patties are shaped before cooking for even results.
    3. Preheat a large pan over medium heat and add a small amount of oil. Cook the patties for 6-8 minutes on each side, depending on their size, until fully cooked through.
    4. Prepare buns, bacon, lettuce, tomatoes, and ranch dressing. Place the cooked chicken patties on the buns and top with bacon, lettuce, tomatoes, and a drizzle of ranch dressing. Add any additional veggies as desired.
    5. Serve immediately and enjoy your flavorful Cheddar Ranch Chicken Burgers!

    Nutrition Facts

    Serving Size: 1 serving
    Calories: 450 kcal
    Sugar: 3g
    Sodium: 800mg
    Fat: 20g
    Saturated Fat: 8g
    Carbohydrates: 30g
    Fiber: 1g
    Protein: 35g
    Cholesterol: 120mg